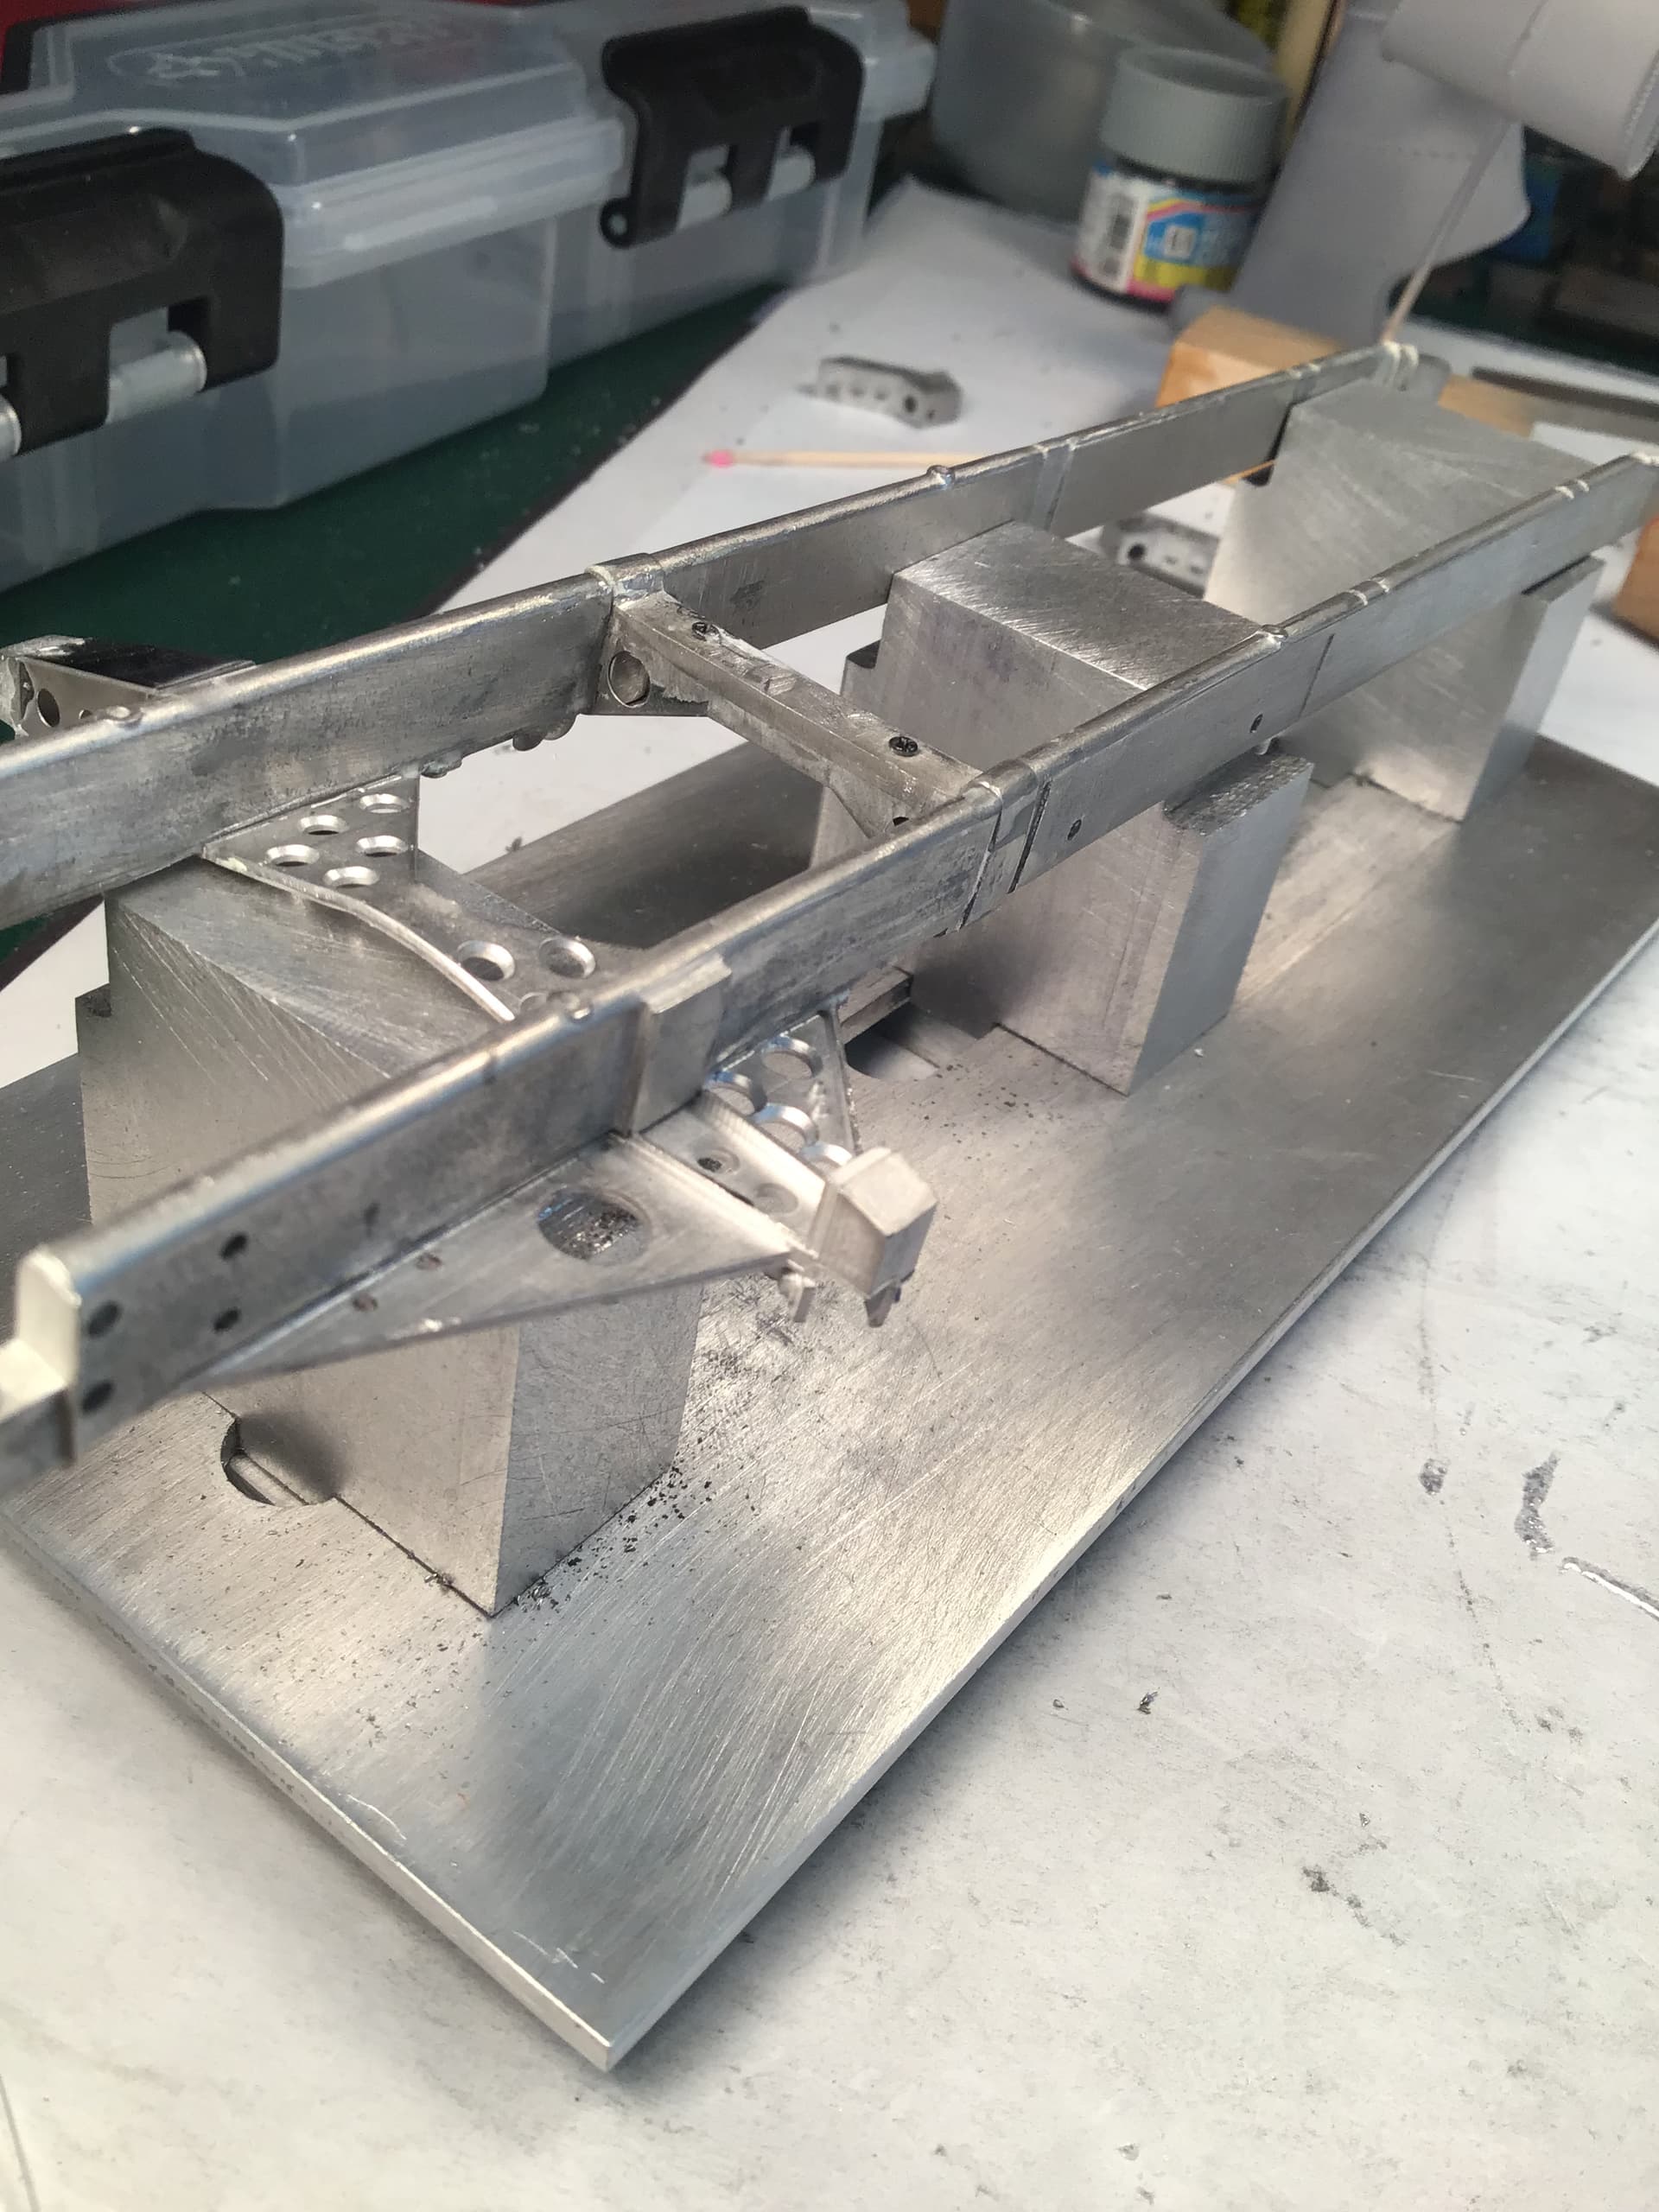
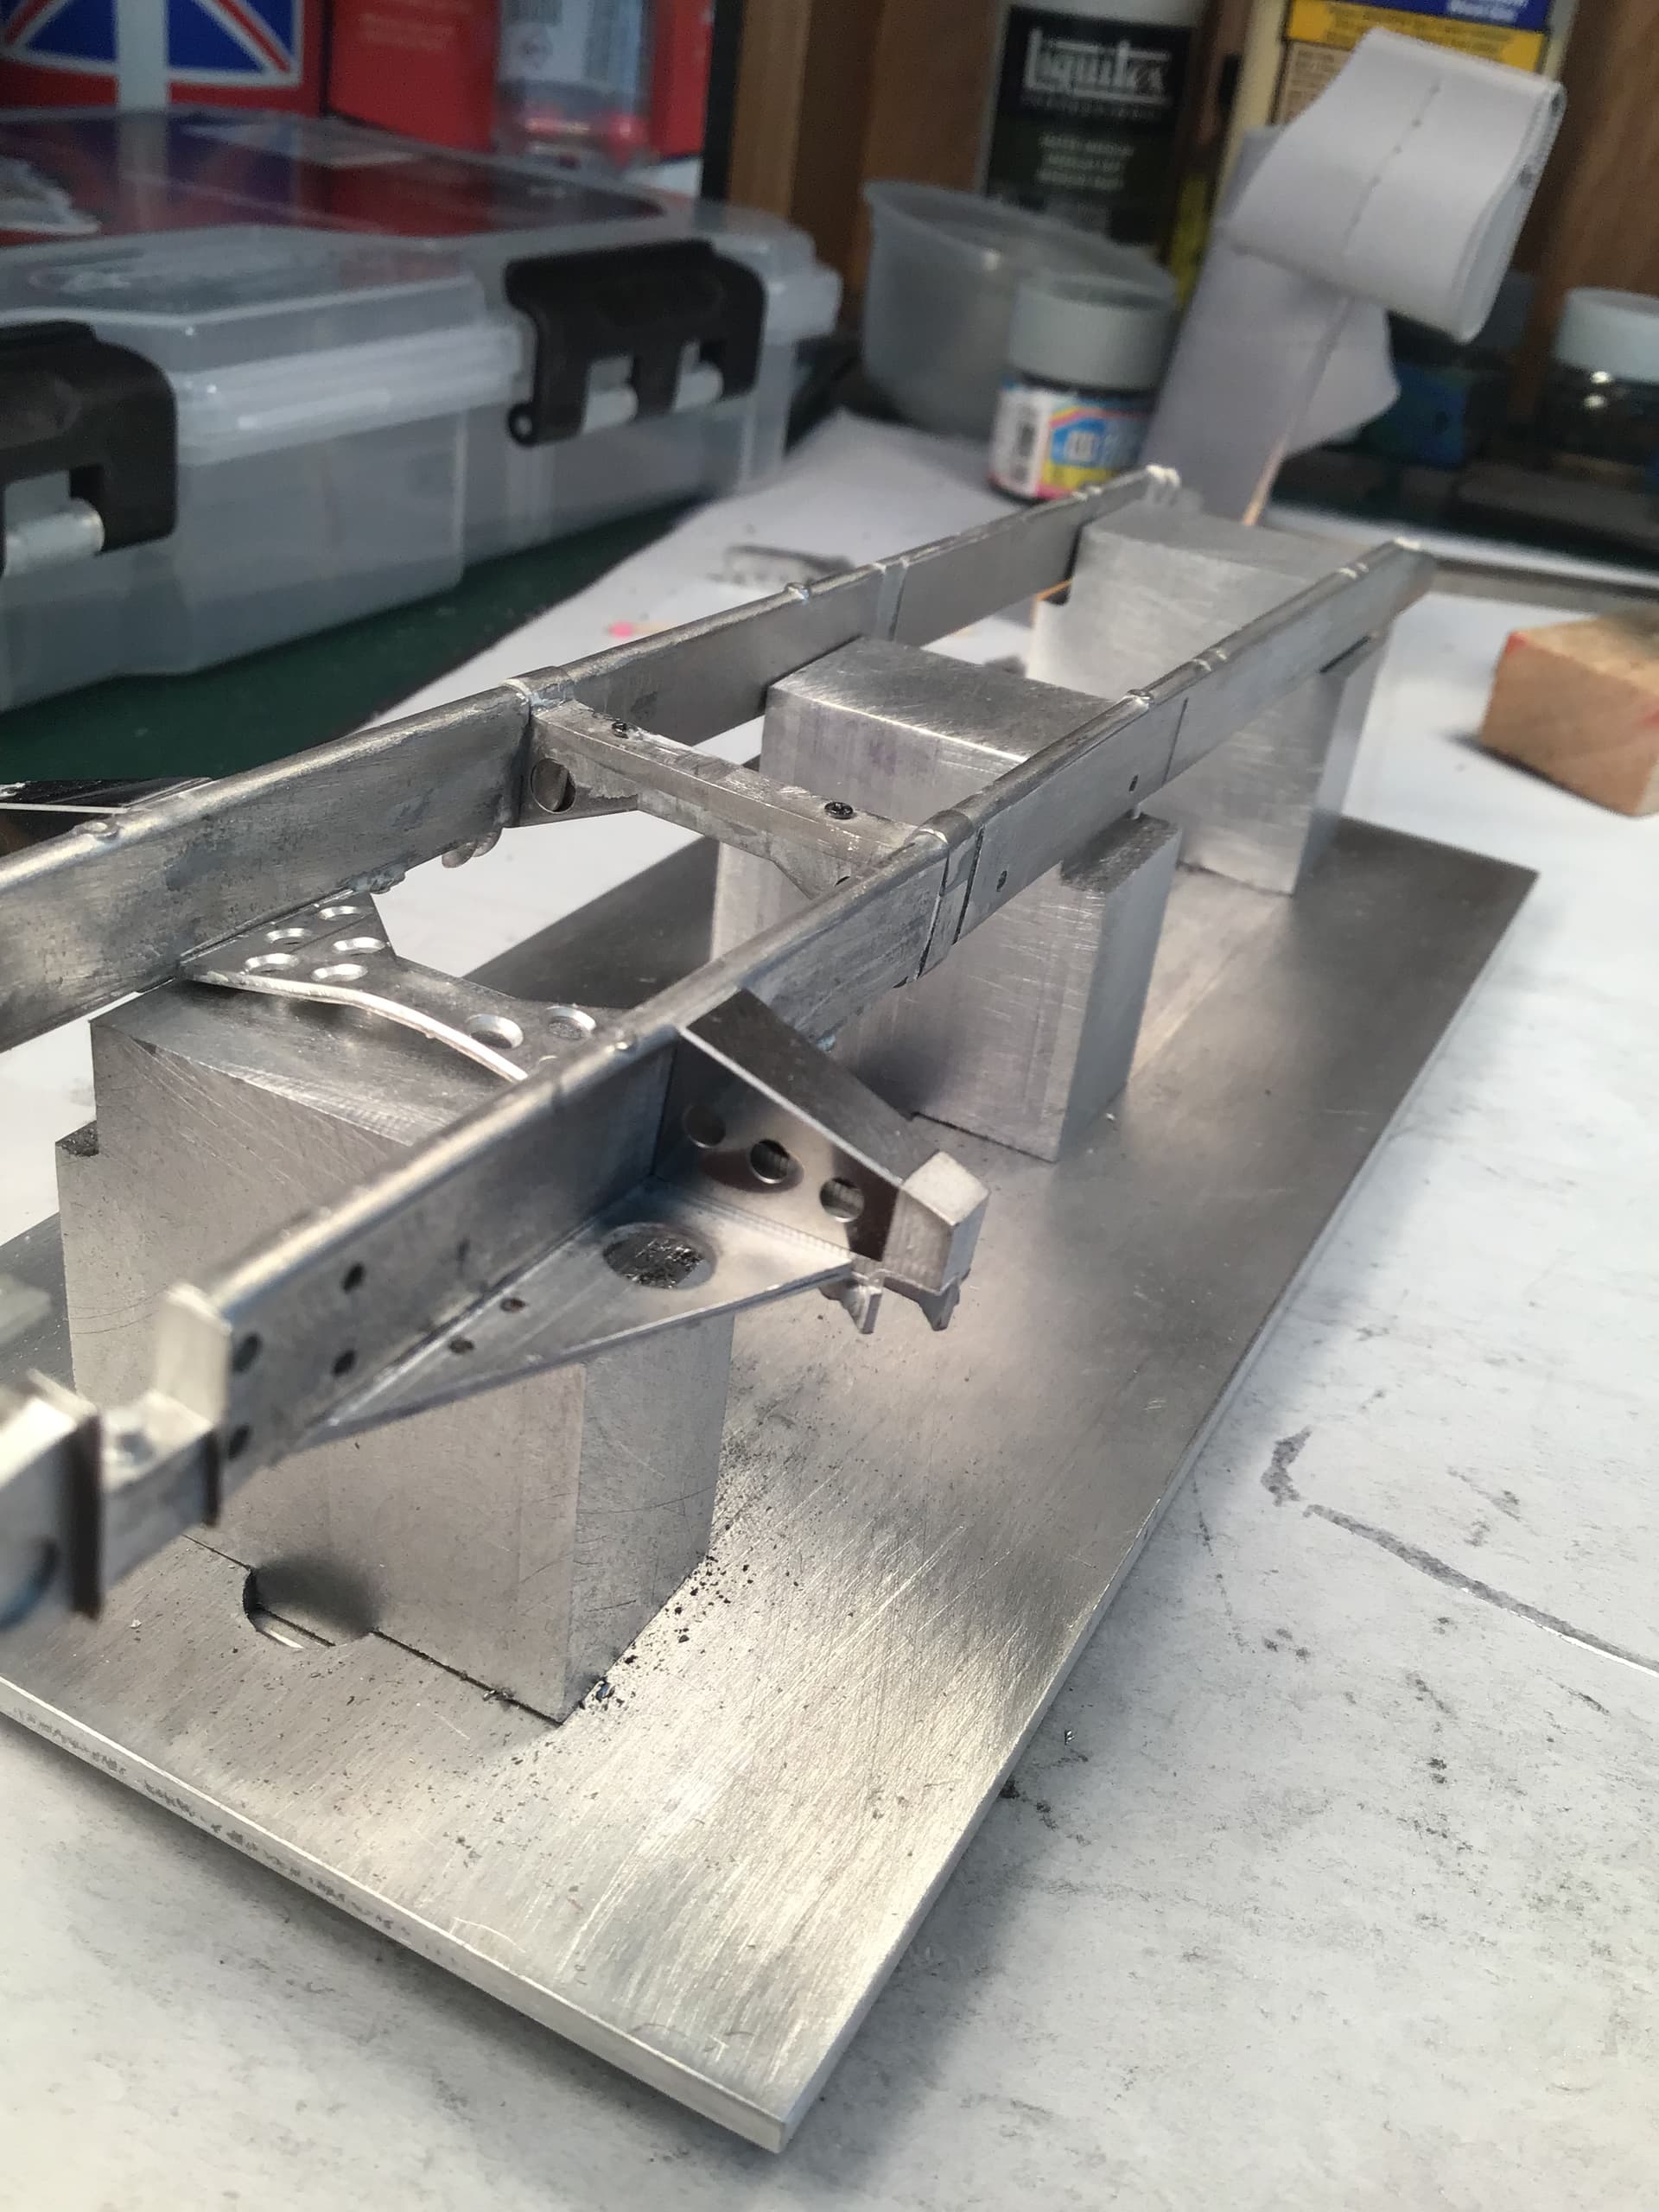
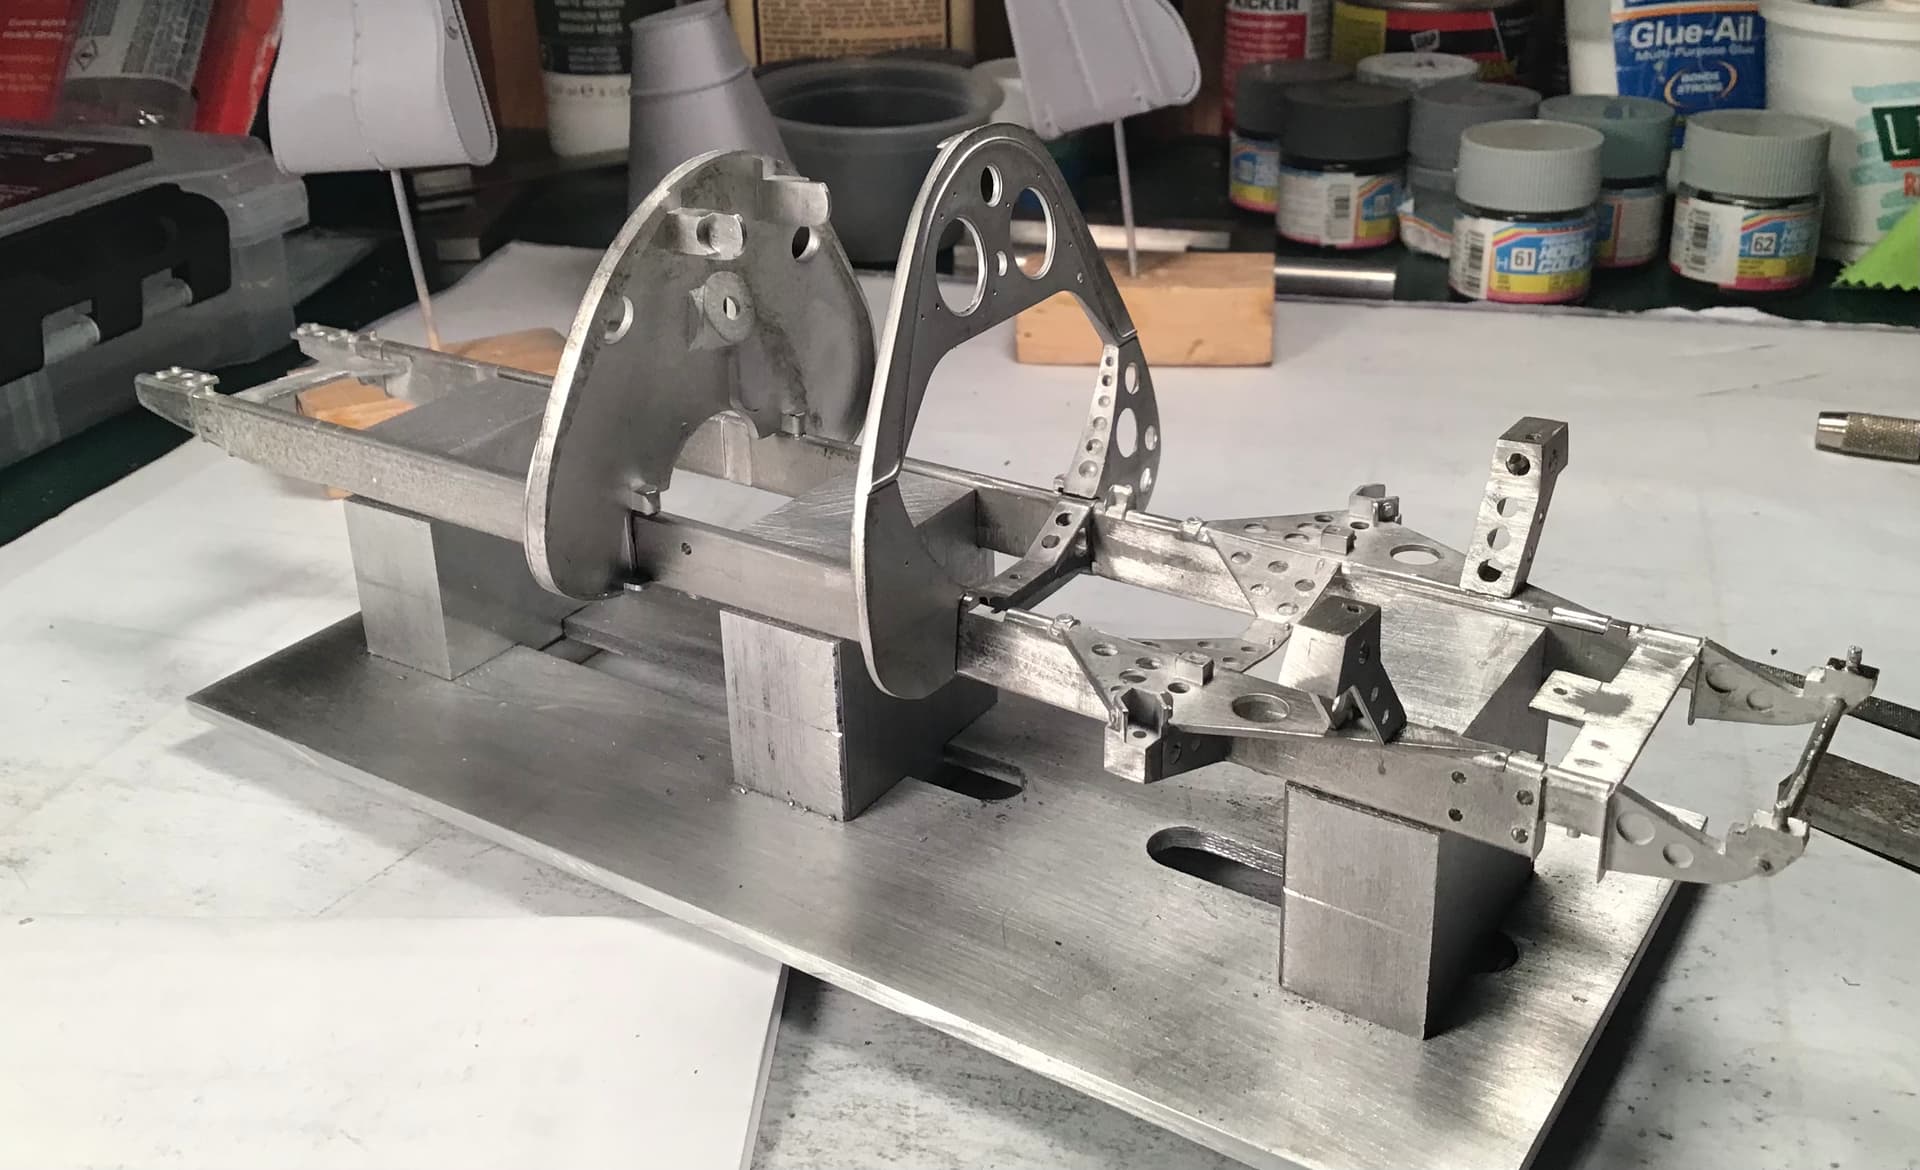
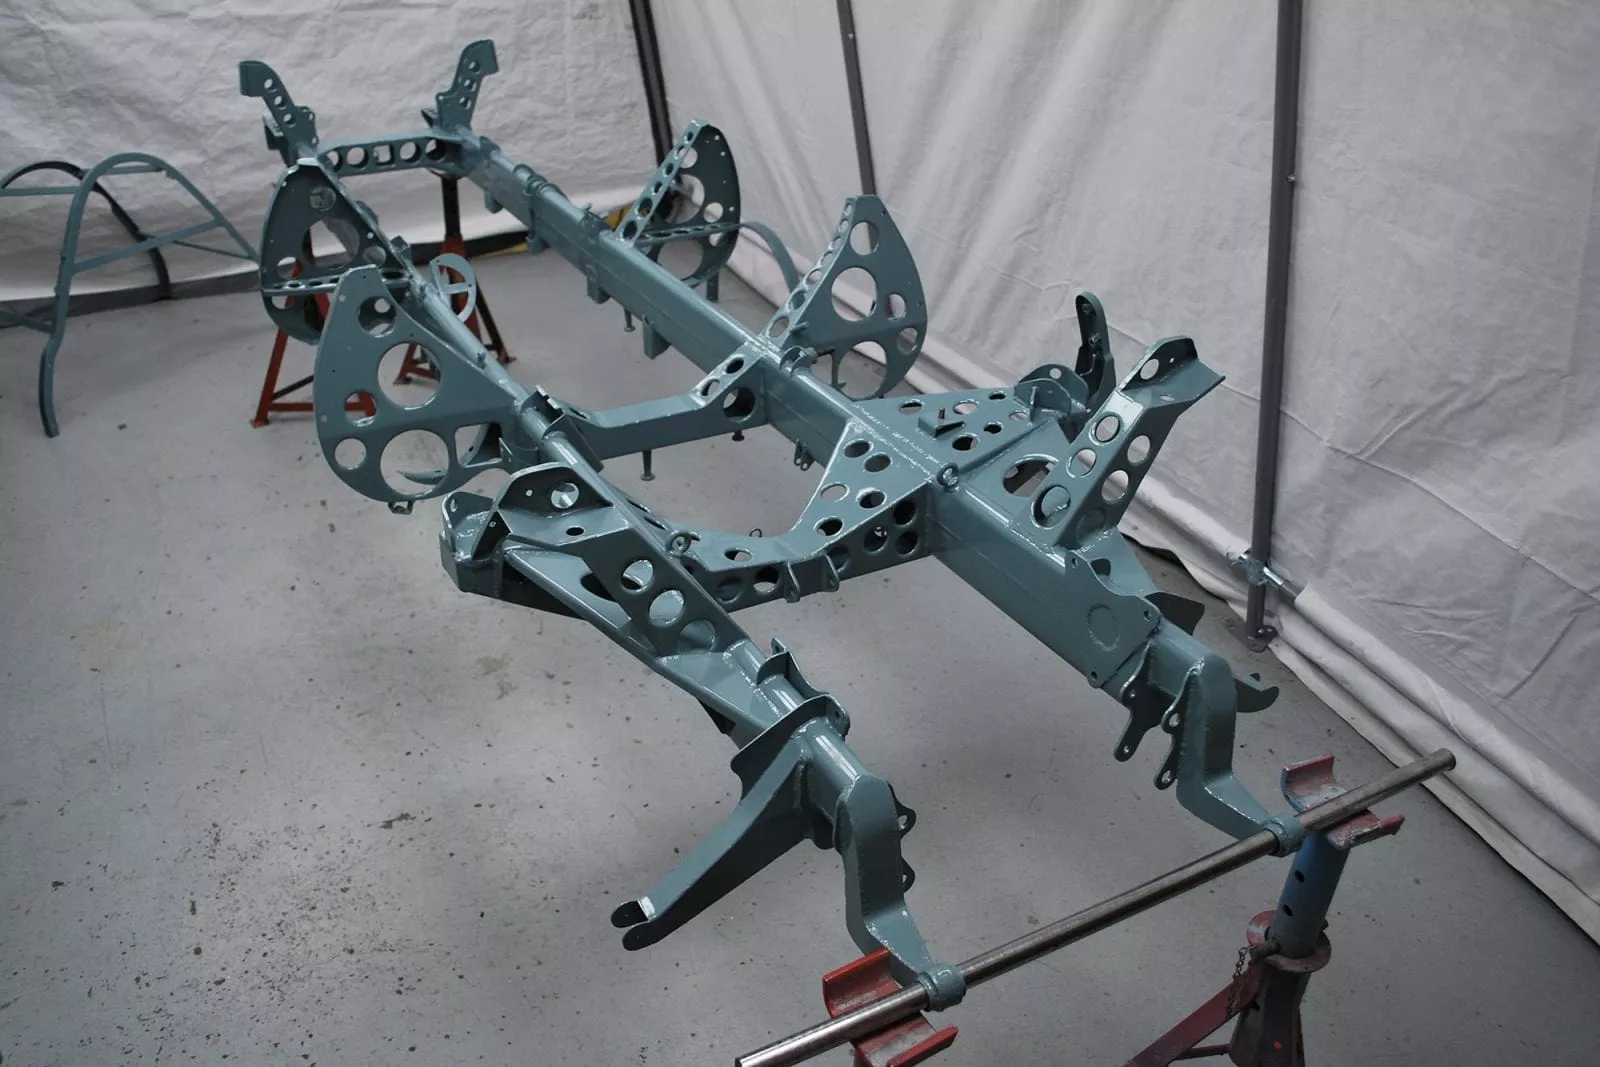
Some progress on the chassis.
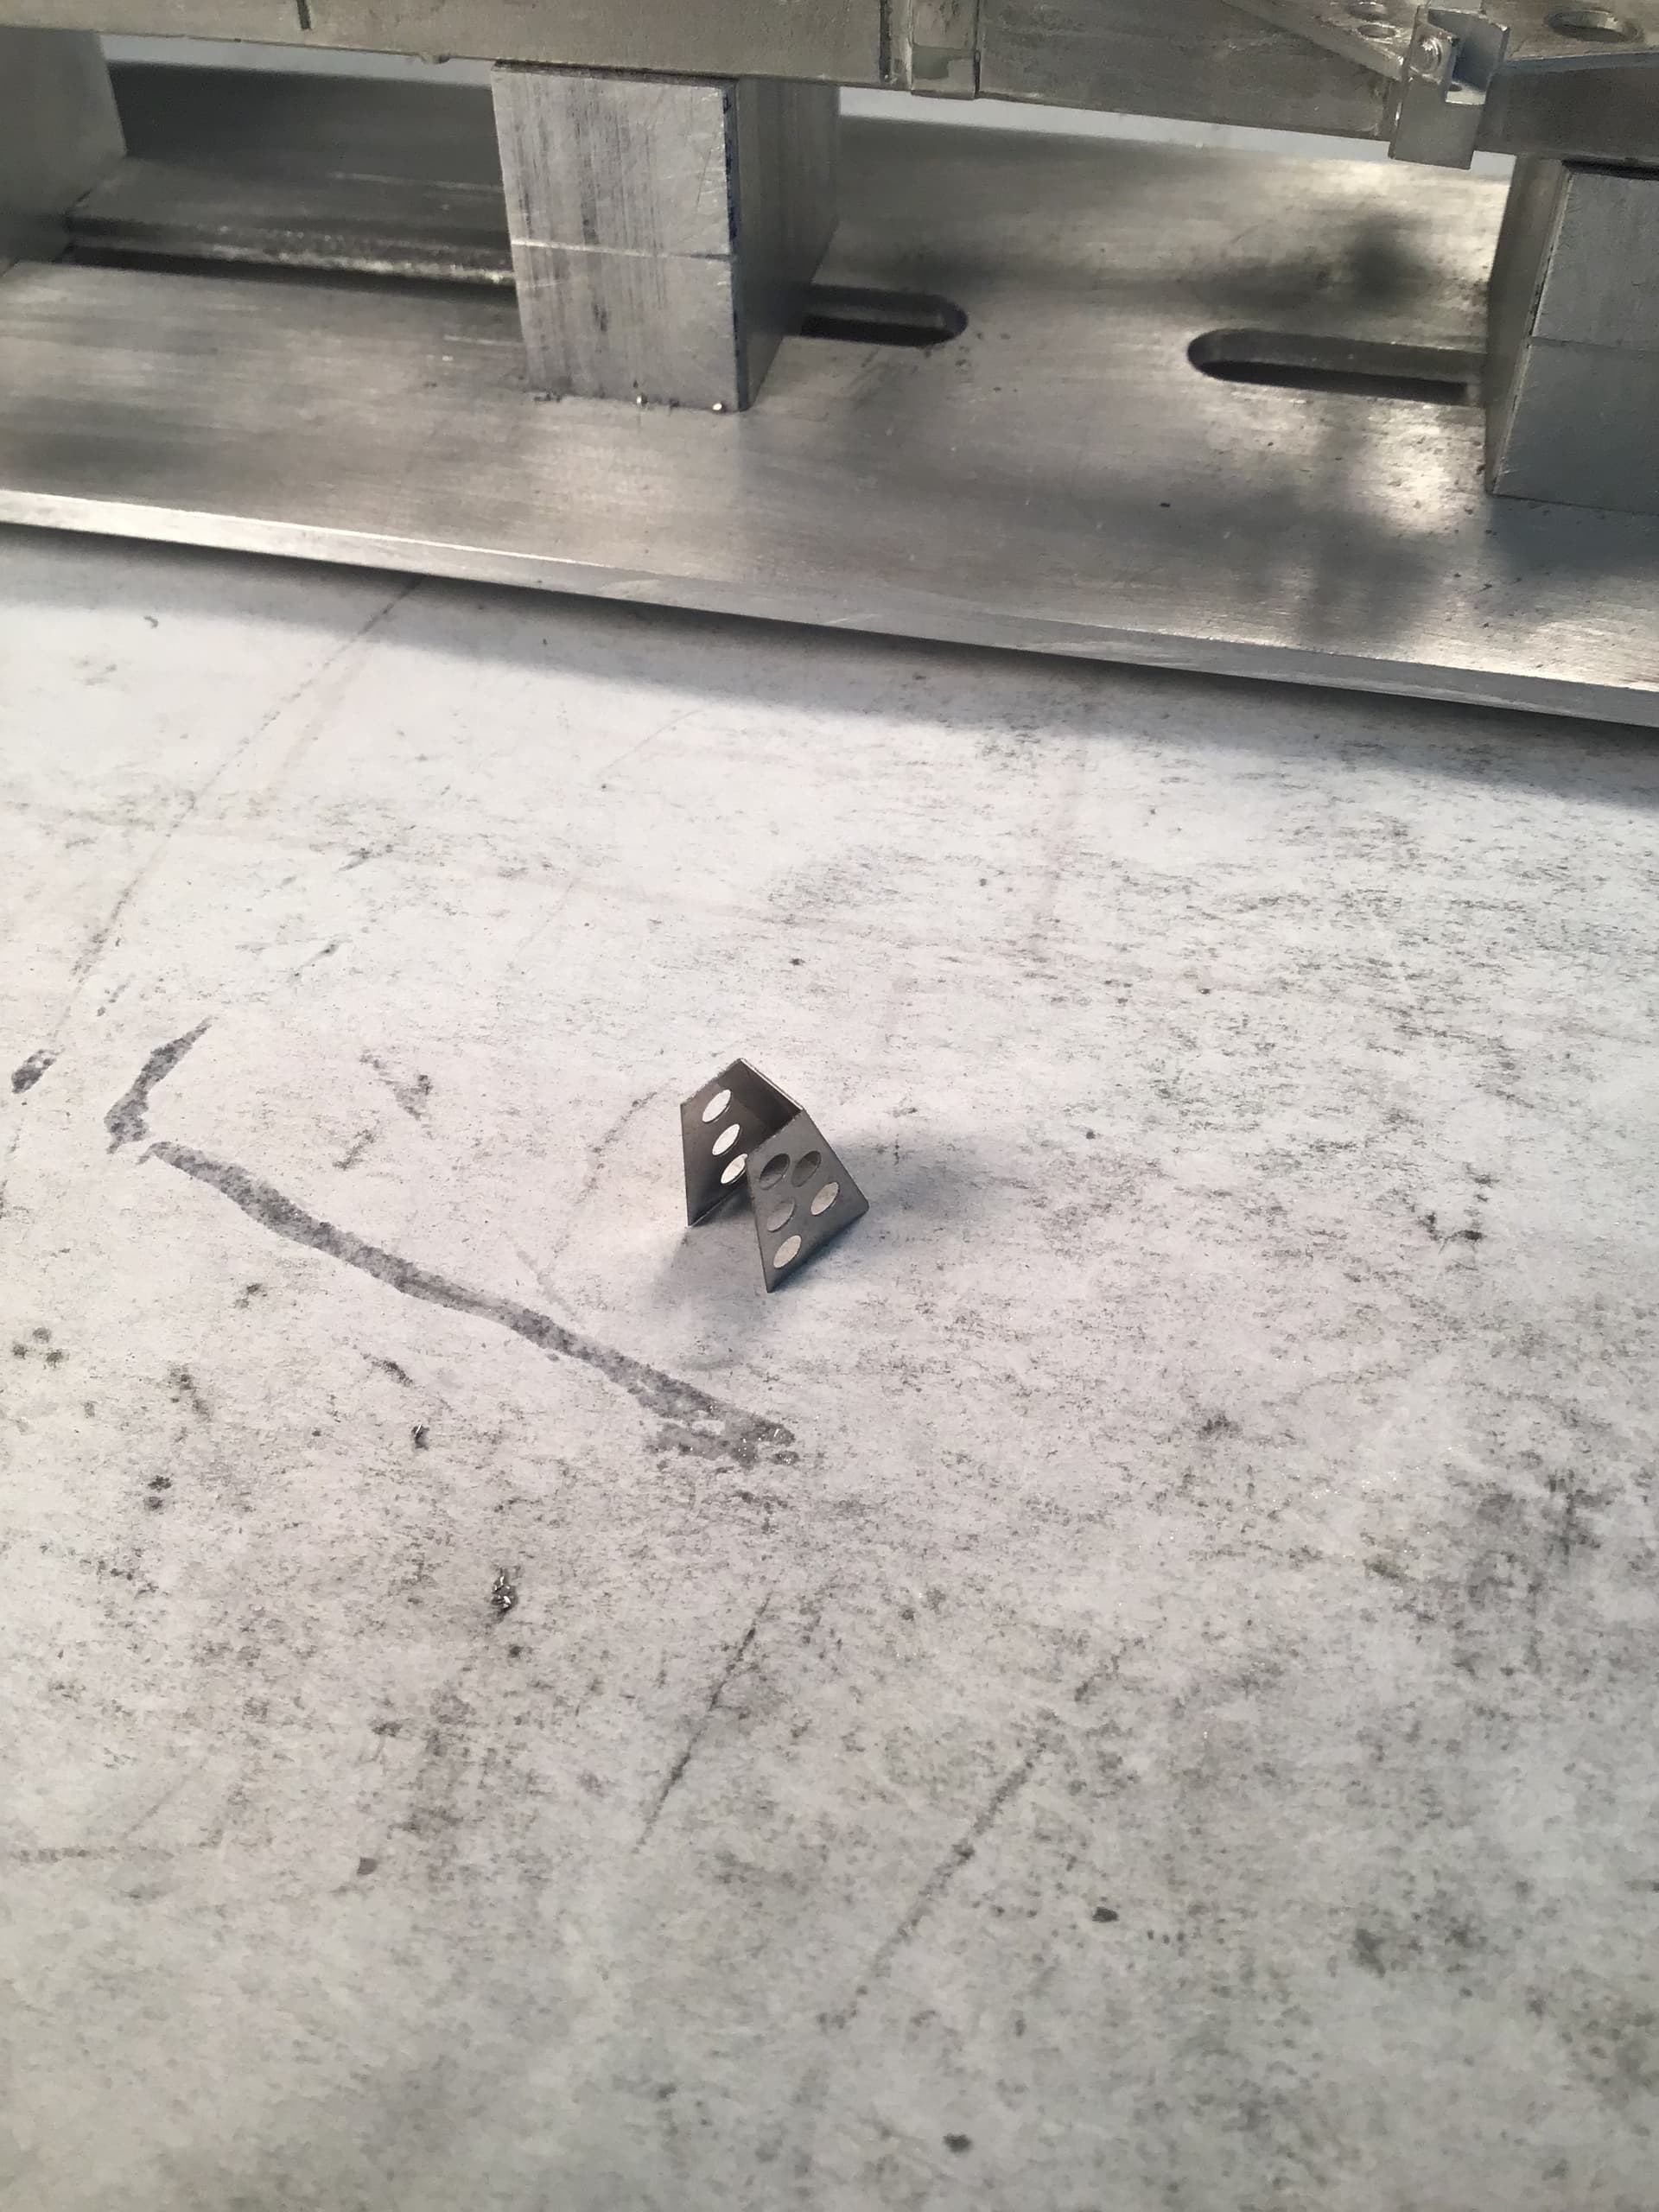
The “ multi “ part of “ multi media “ has begun . The photo etch chassis gussets folded and installed. These fit into rabbets in the white metal castings and the fit is very good indeed - they mostly click into place . A little filler here and there - fastened with medium CA.
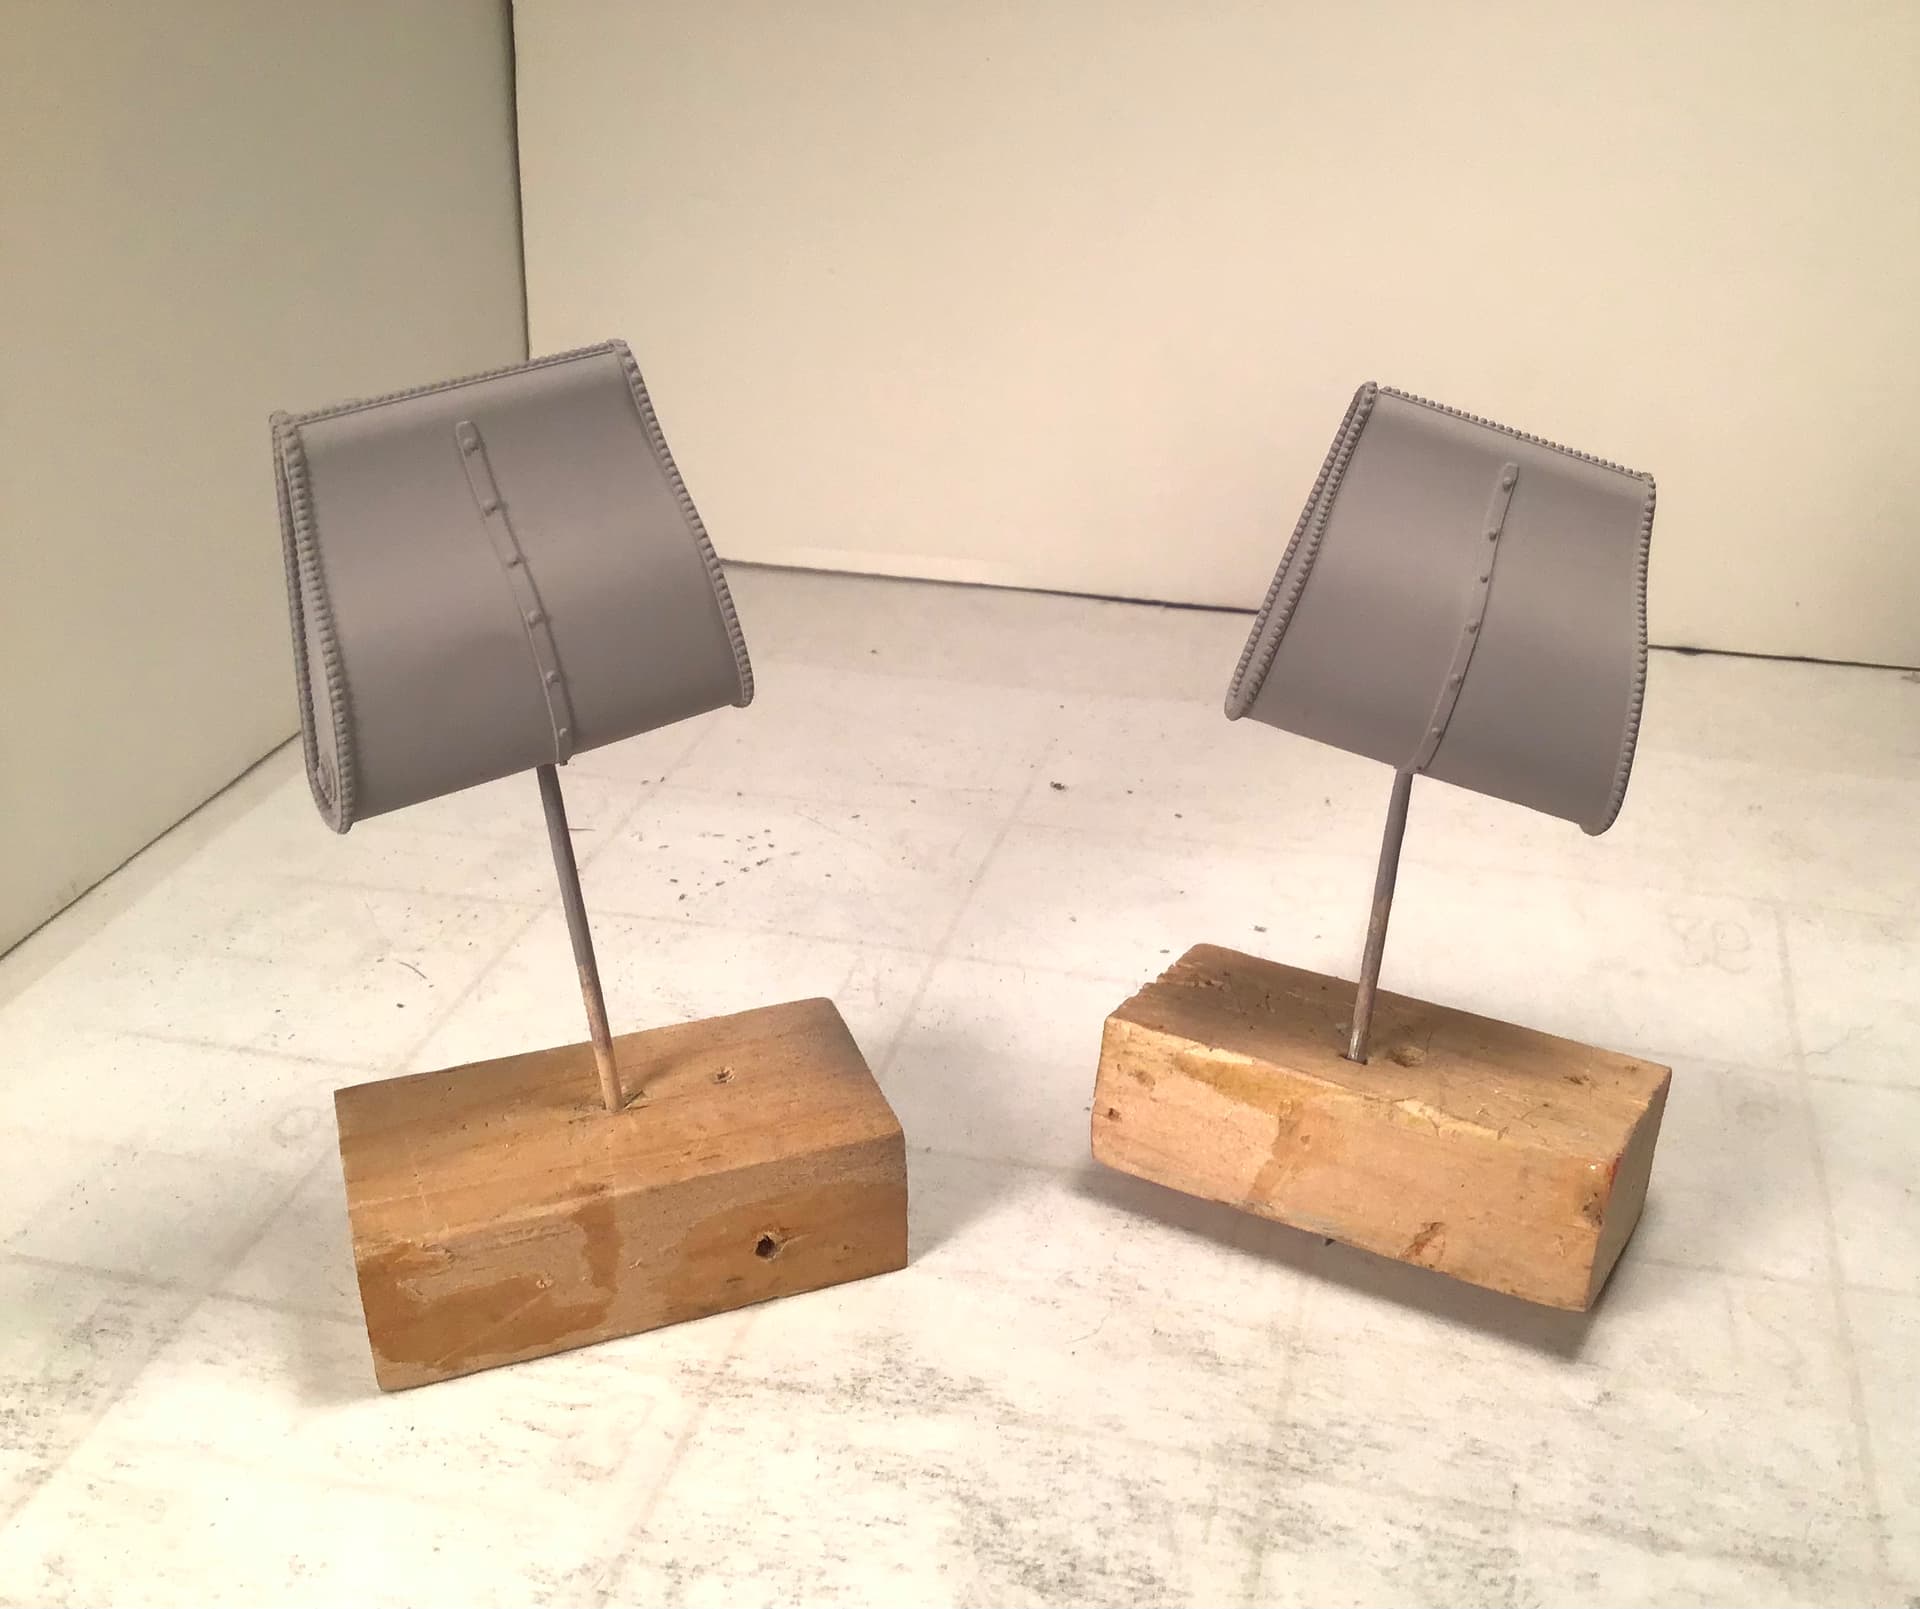
Main fuel tank and saddle tanks done and in primer .
Replacing the rivets lost to finishing the joints with Archer Resin Rivet Decals didn’t work as they appeared too small so I wound up doing them with dots of epoxy .
Great to see this progress and you seem to be over your initial shock on the chassis. The tanks look very good and looking forward to seeing your metallic paintwork on them.
Richard,
Absolutely impressive work to date as you’re making it all look so easy, when we know it’s the exact opposite.
The epoxy rivets look darn good. I would think that MFH would make AM replacement rivets as sanding their metal parts removes them.
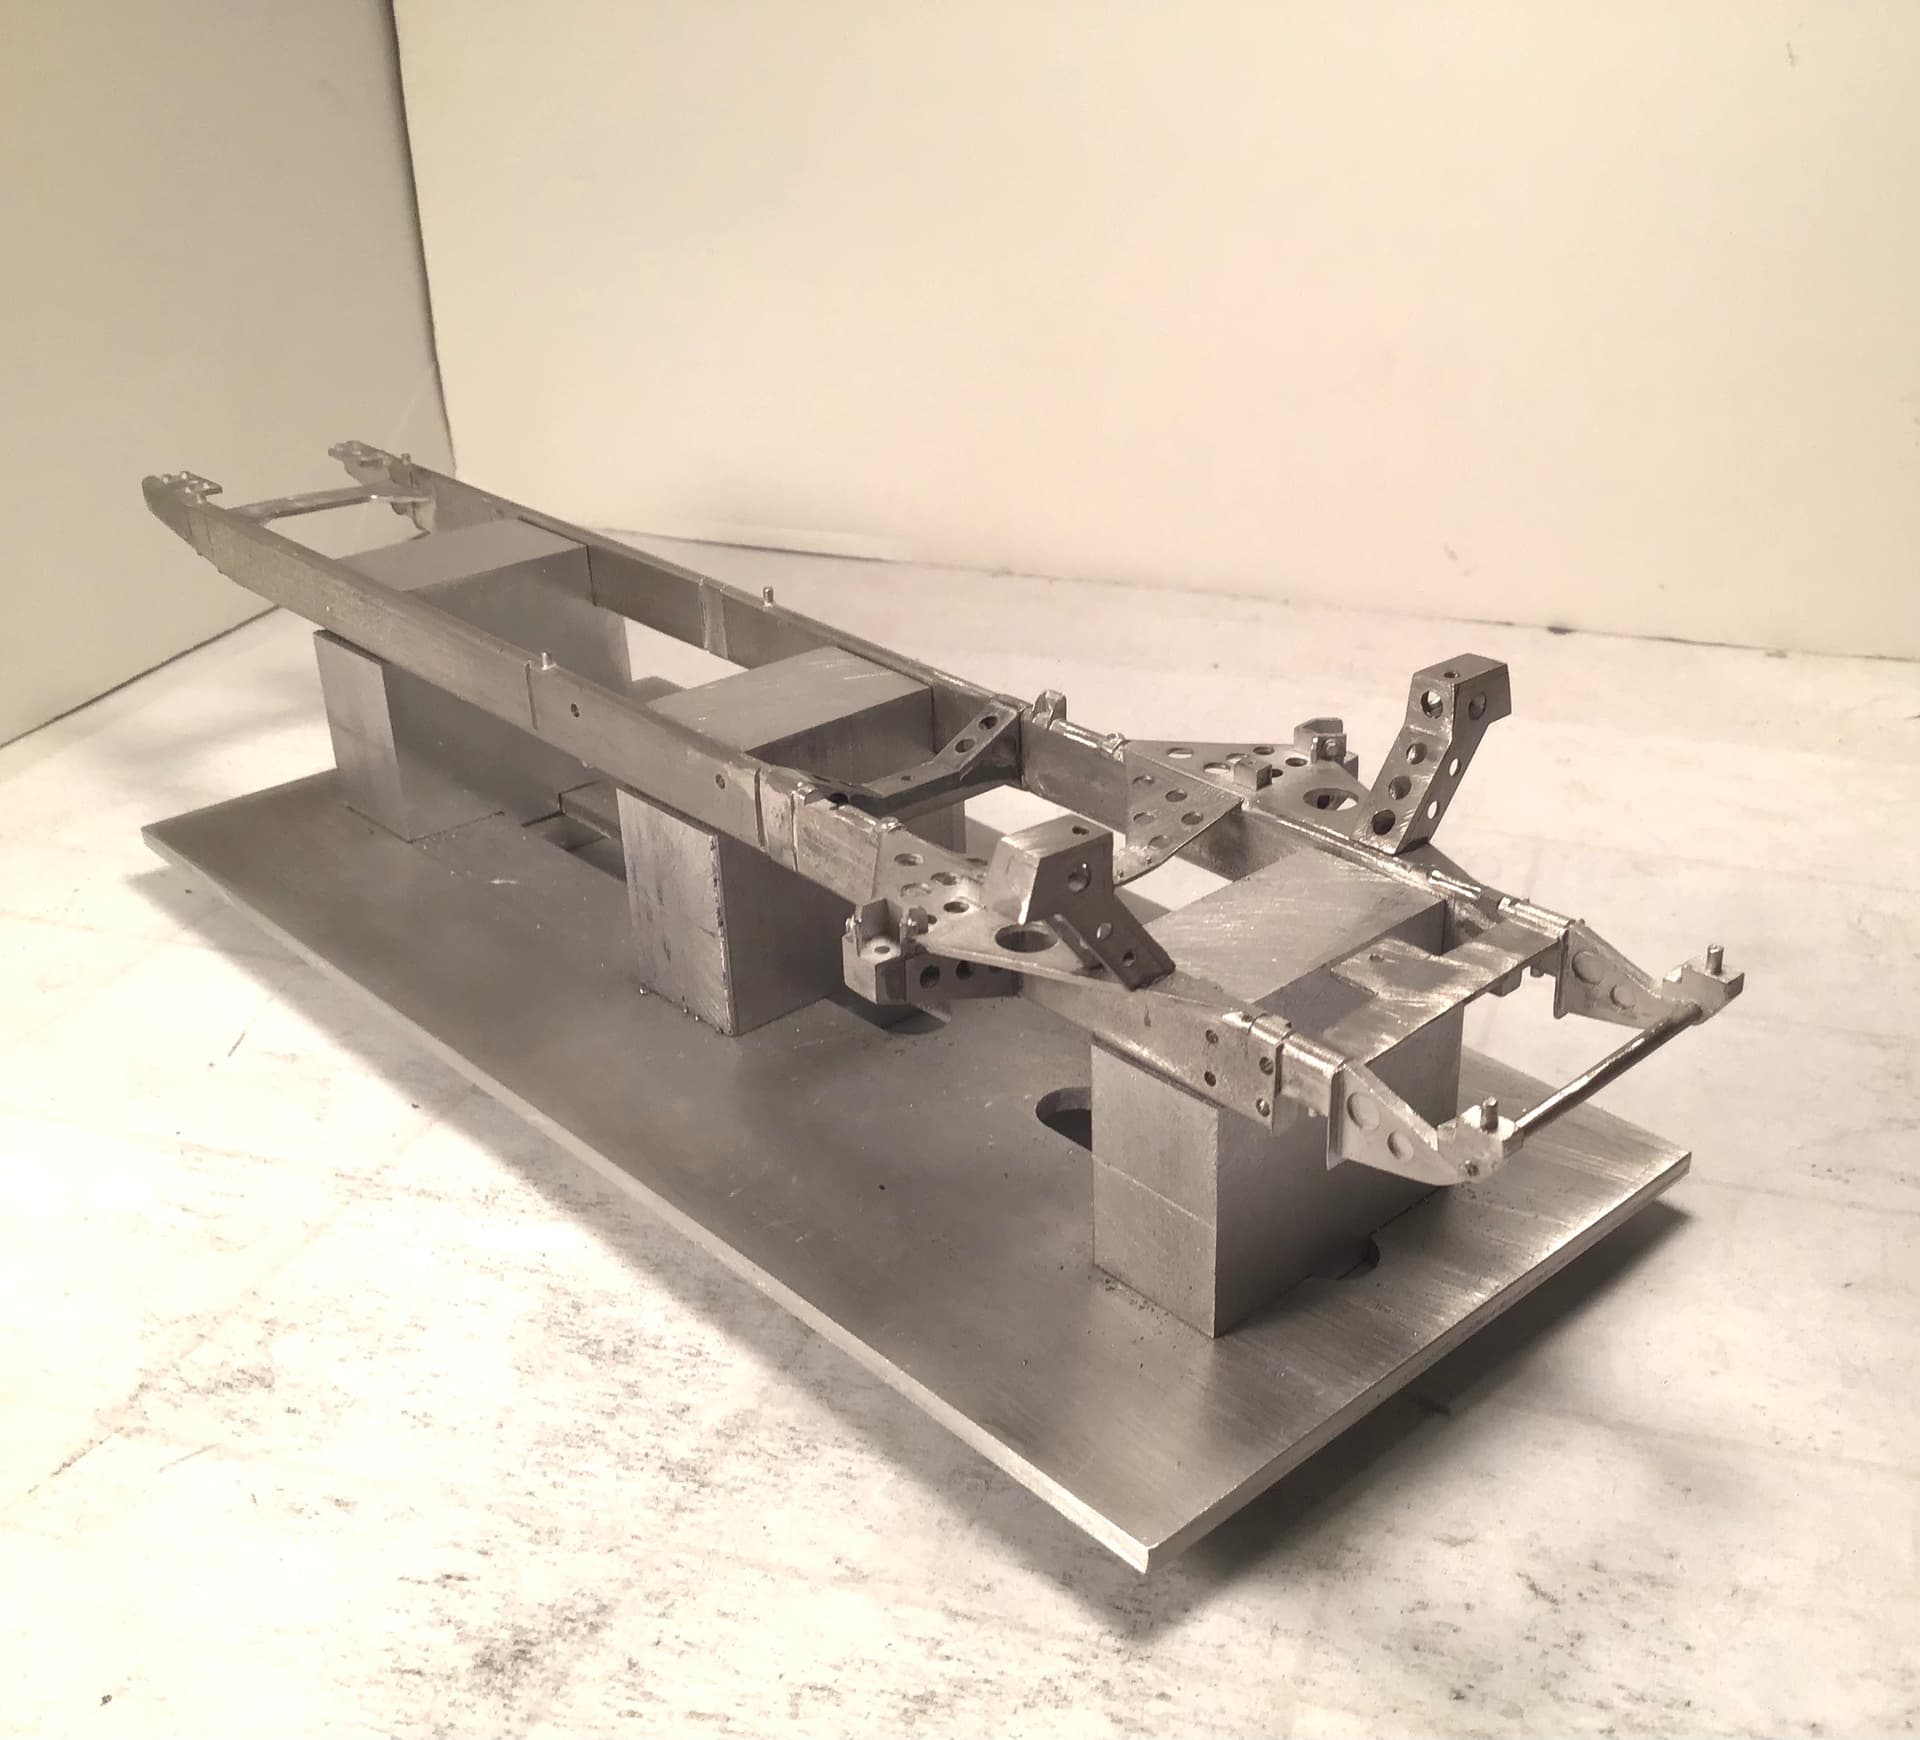
The chassis jig is already paying you back in Spades. As you added all those gussets added, does the chassis start to stiffen up where you won’t need the jig much longer?
Thanks Joel - Each added component seem to help stiffness. I think the engine block will make a real difference as it is anchored in four spots but that is a ways off yet - after paint and once I paint I can’t use the jig as it scuffs everything up . I am working on fitting these bulkheads now and they will help as well.
Richard I like it with bulkheads in place. As for painting the metal it is pretty unforgiving when trying to fit other parts. I find I am often touching up the paintwork.
Joel, MFH do indeed make rivets in many shapes and sizes and it not a bad idea to buy some for the very reasons you outline and the ones you lose along the way during assembley.
@Joel_W@cosimodo Thanks gents .
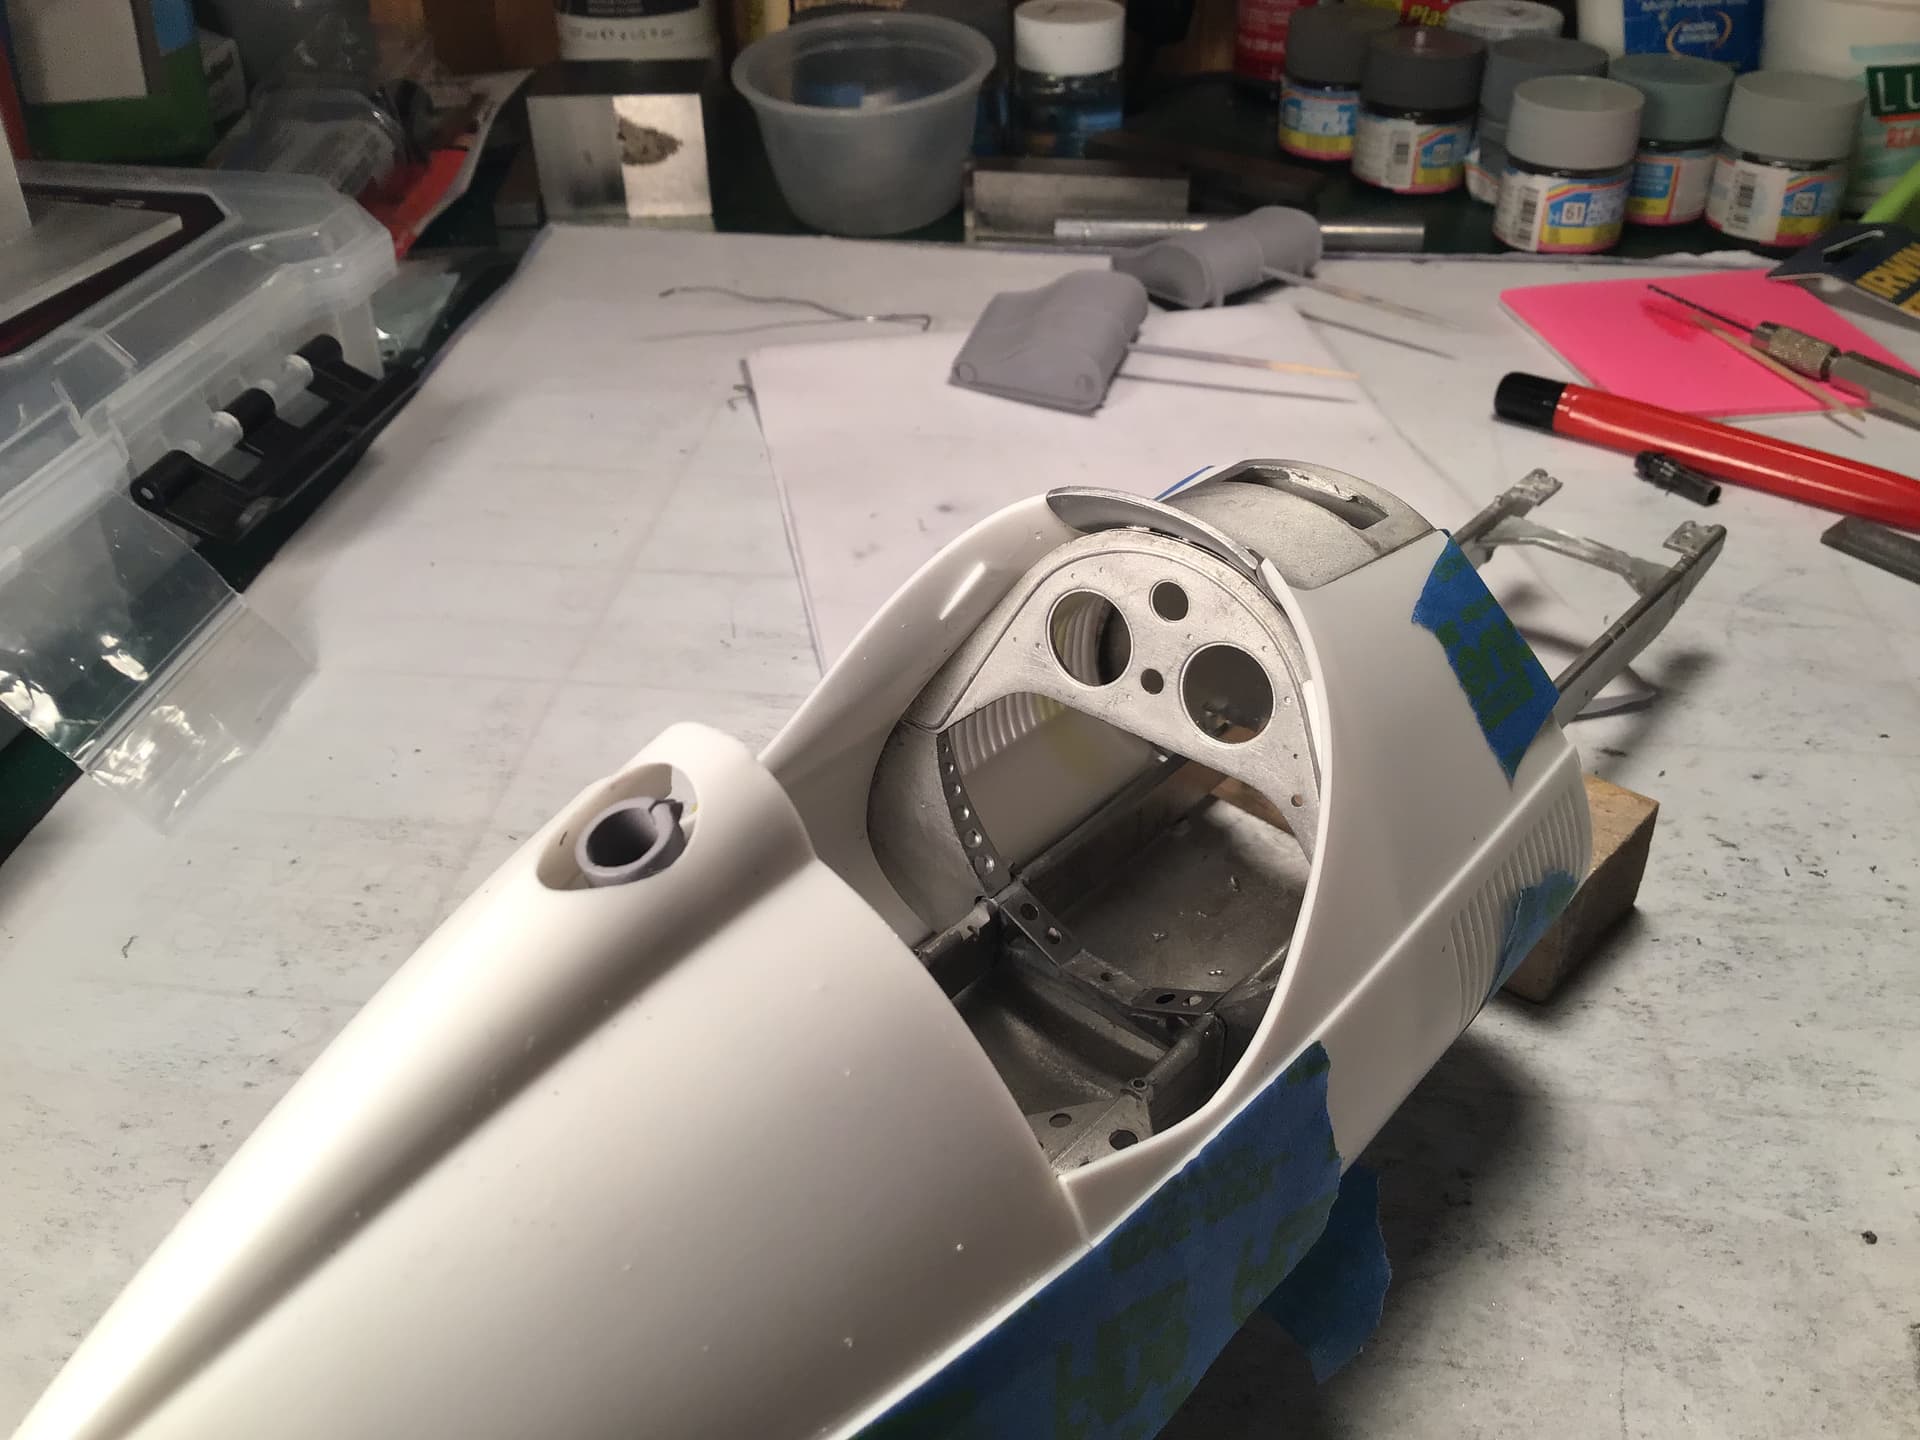
I am starting to plan the painting sequence and have to consider gluing as well so I think major connections like these bulkheads will have to have their contact surfaces masked before primer.
MFH calls out Gunze Colors which is great because I love their paint . They say IJN grey for the chassis - I know the color well as it is the color of the early Zero .
However a wealthy collector bought up a cache of Tipo 158 parts languishing in storage at Alfa Romeo and had a replica built around the parts . On some of the parts the original chassis color remained and it looks more blue than IJN Grey . Luftwaffe Helleblau ( Light Blue ) looks a lot closer so I will play with that and see.
Richard,
I fully concur that masking prior to any painting of metal parts is the way to go. I either do that with PE or glue the parts in place before priming/painting.
As for the correct chassis color, the original faded and oxidized paint looks more like British Sky to me. But the newly painted chassis is a gloss neutral medium Gray, and I do wonder just how that color was chosen.
I’ve run into this issue with my Brabham BT18 F2 and Lotus 25. The honest truth of the matter is that both cars were painted with paints purchased locally, which was a very common practice for quite some time. So don’t drive yourself nuts over the exact color unless the source of the color has been fully documented.
joel
Michael,
I’d love to see that picture just for comparison.
Years past in my Aeroscale days we often had these kind of discussions as to the actual color, not necessarily what the paint guys had come up with based on who knows what. And often restorations were questionable as well. A true crap shoot.
Of course there’s still another side of the puzzle, and that’s both the computer/graphics card that scans in a image, and then the computer/graphics card/monitor that we view that image on. The 3 of us can literally view the same exact scan and all see a slightly different color tone to the same exact picture.
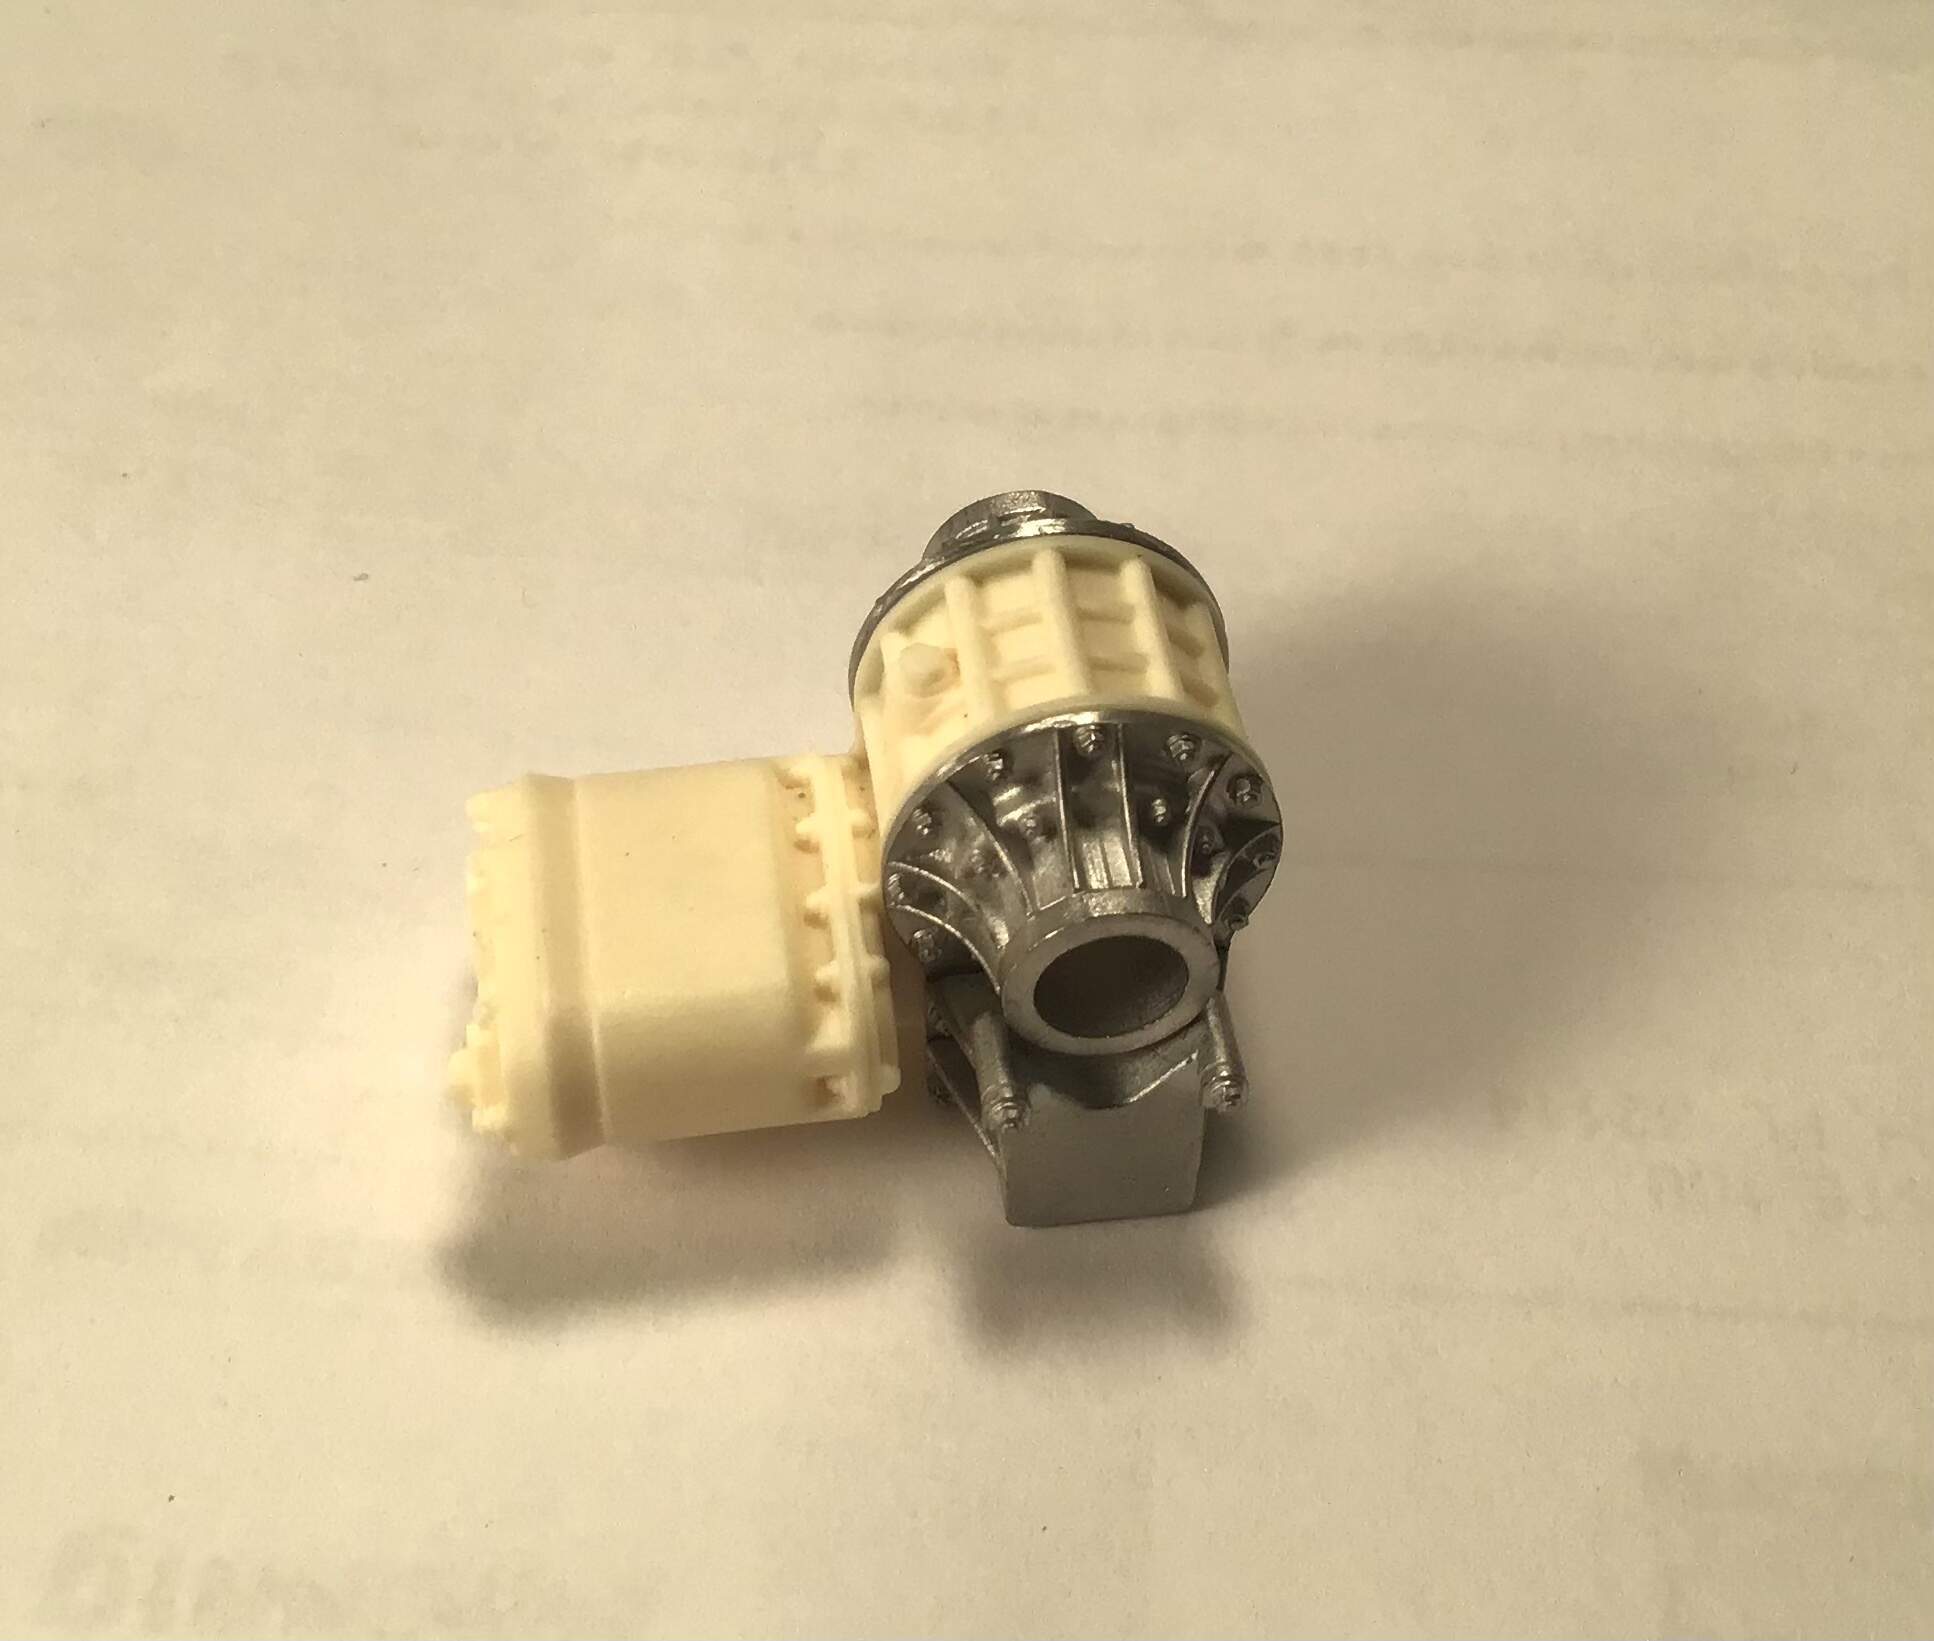
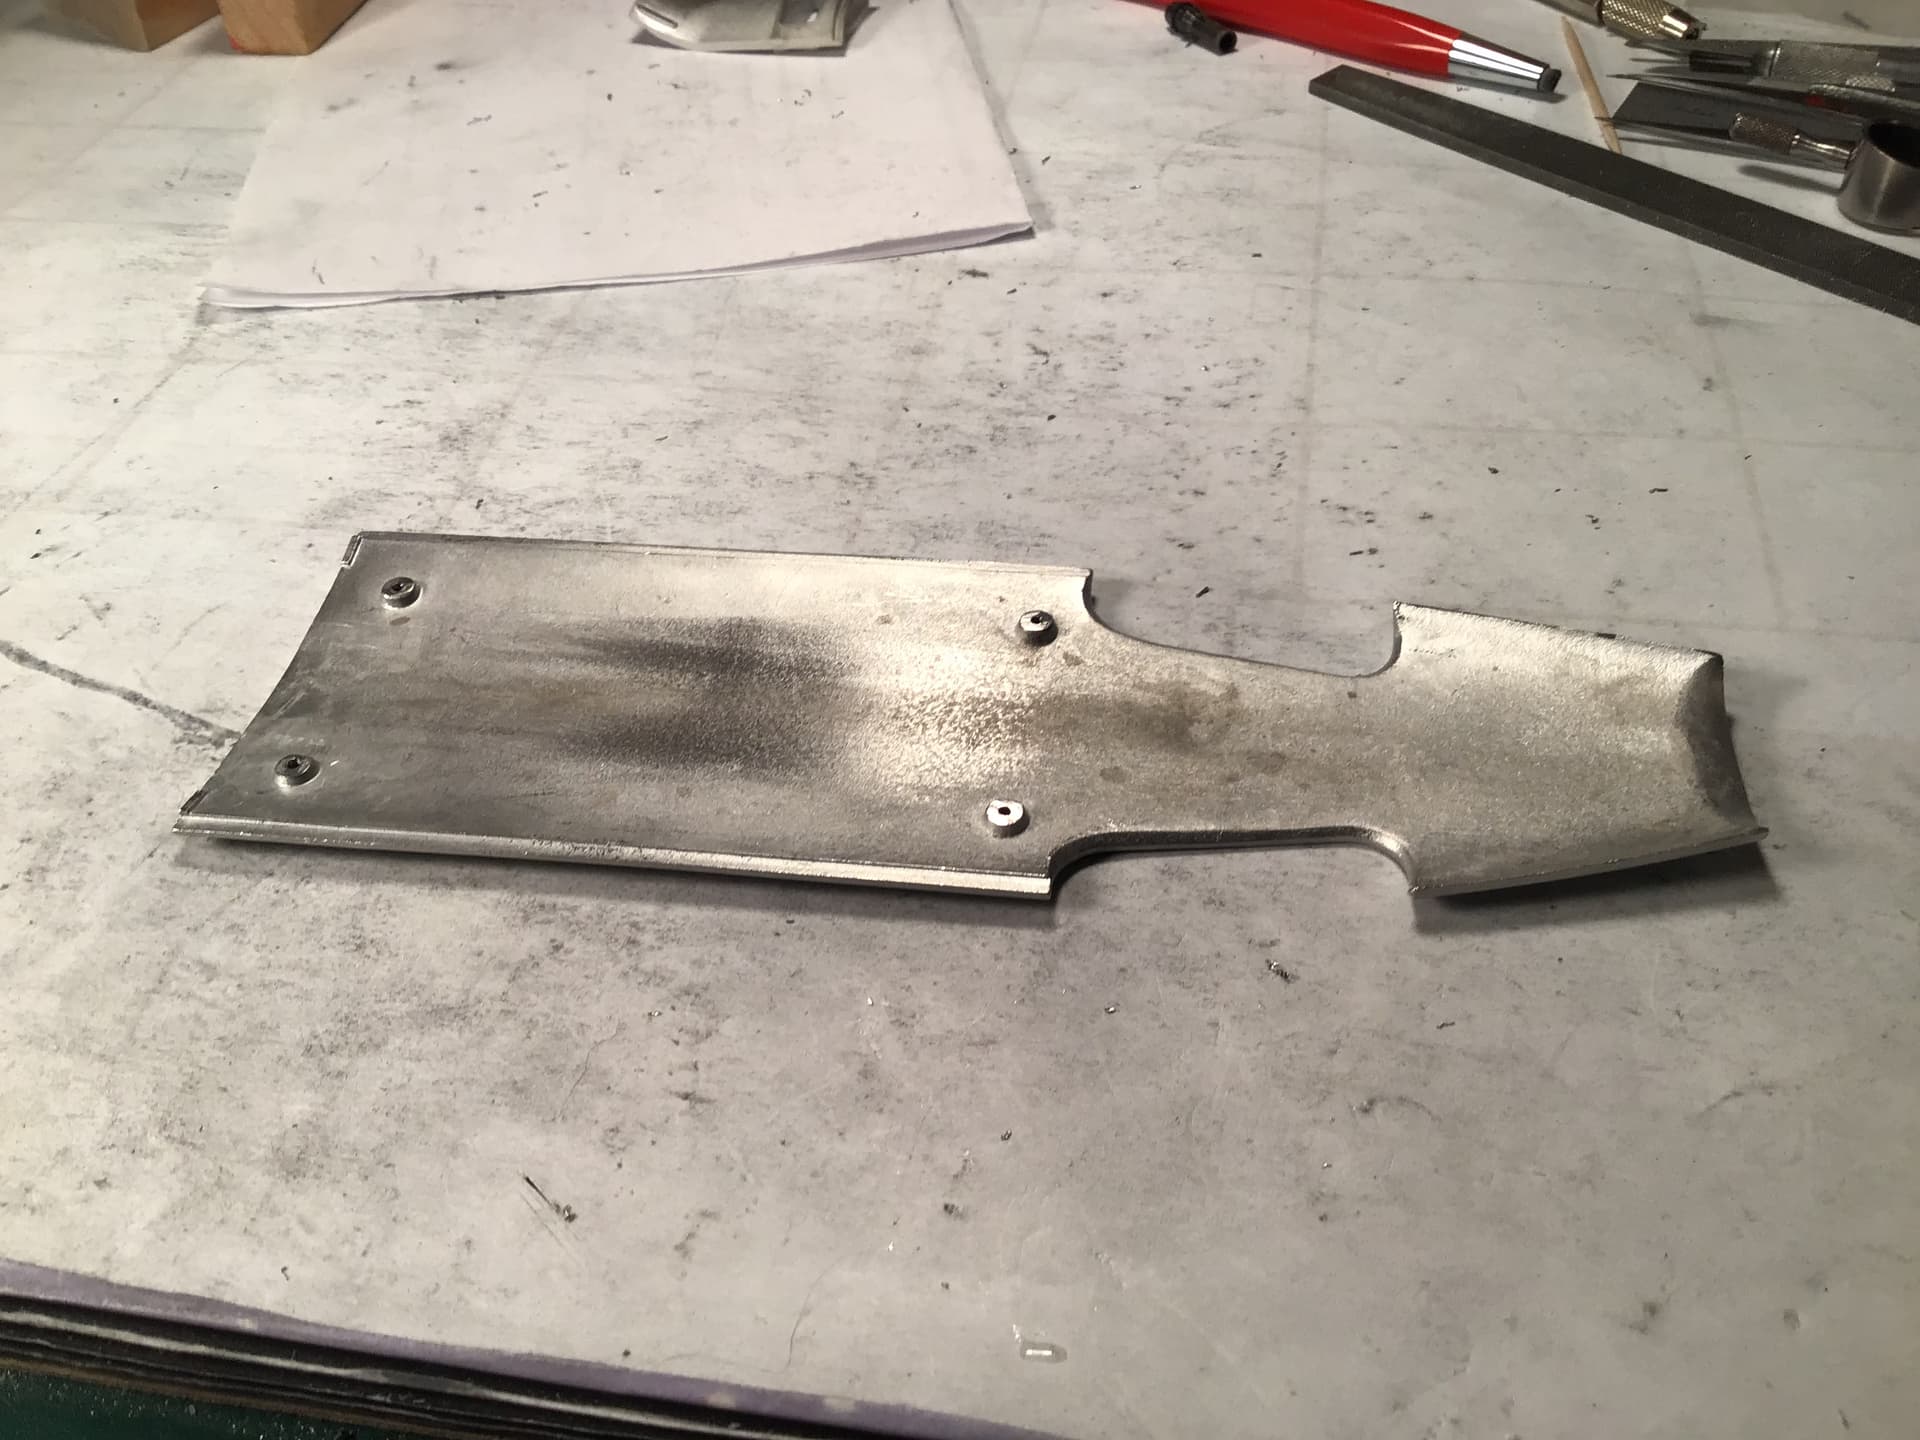
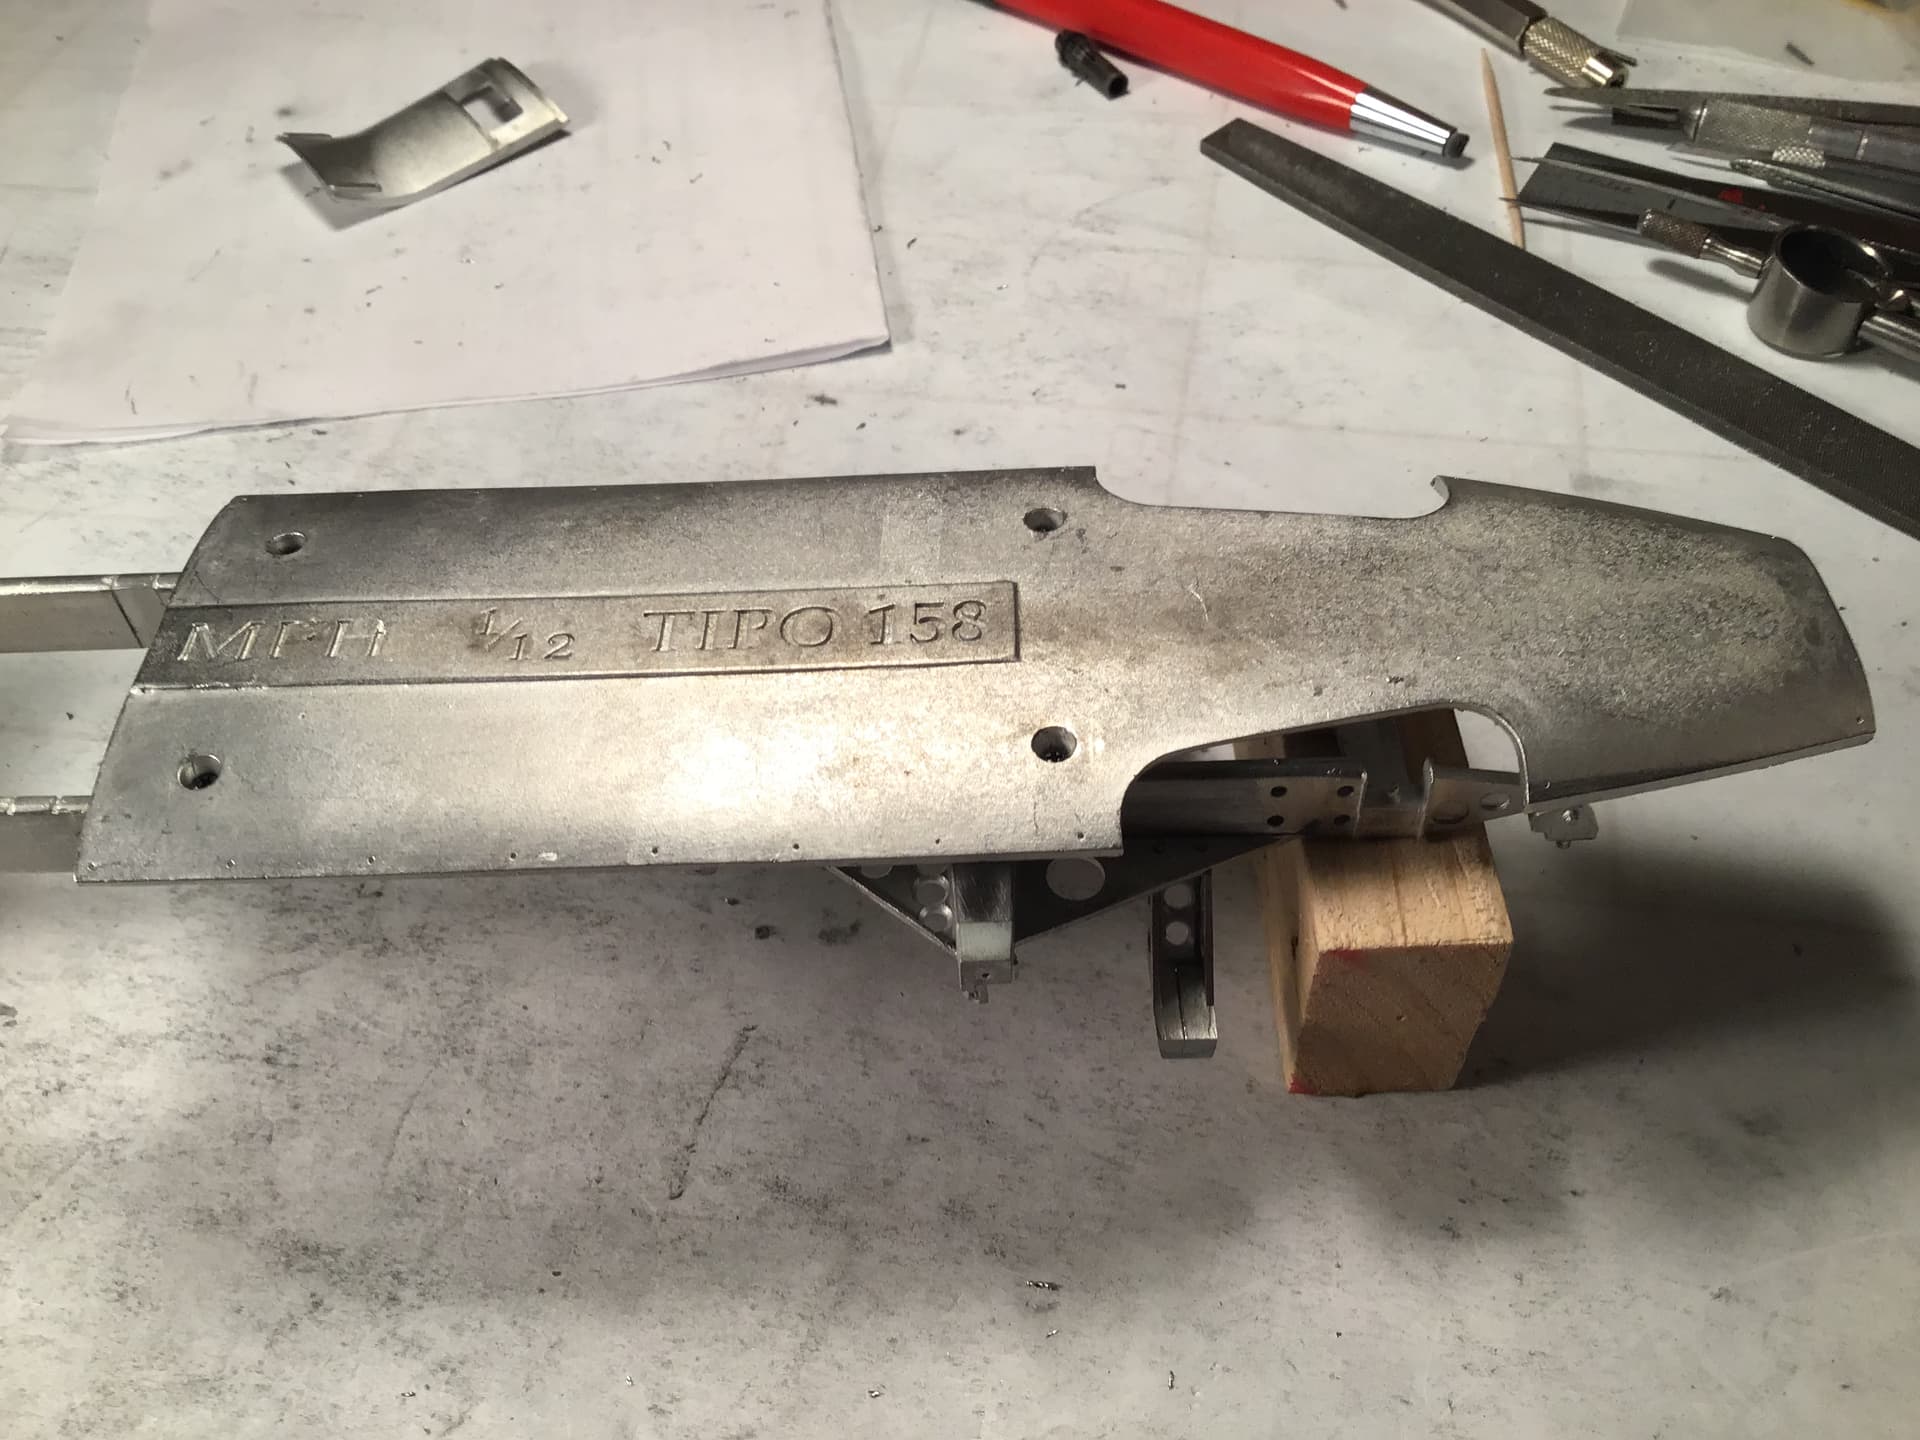
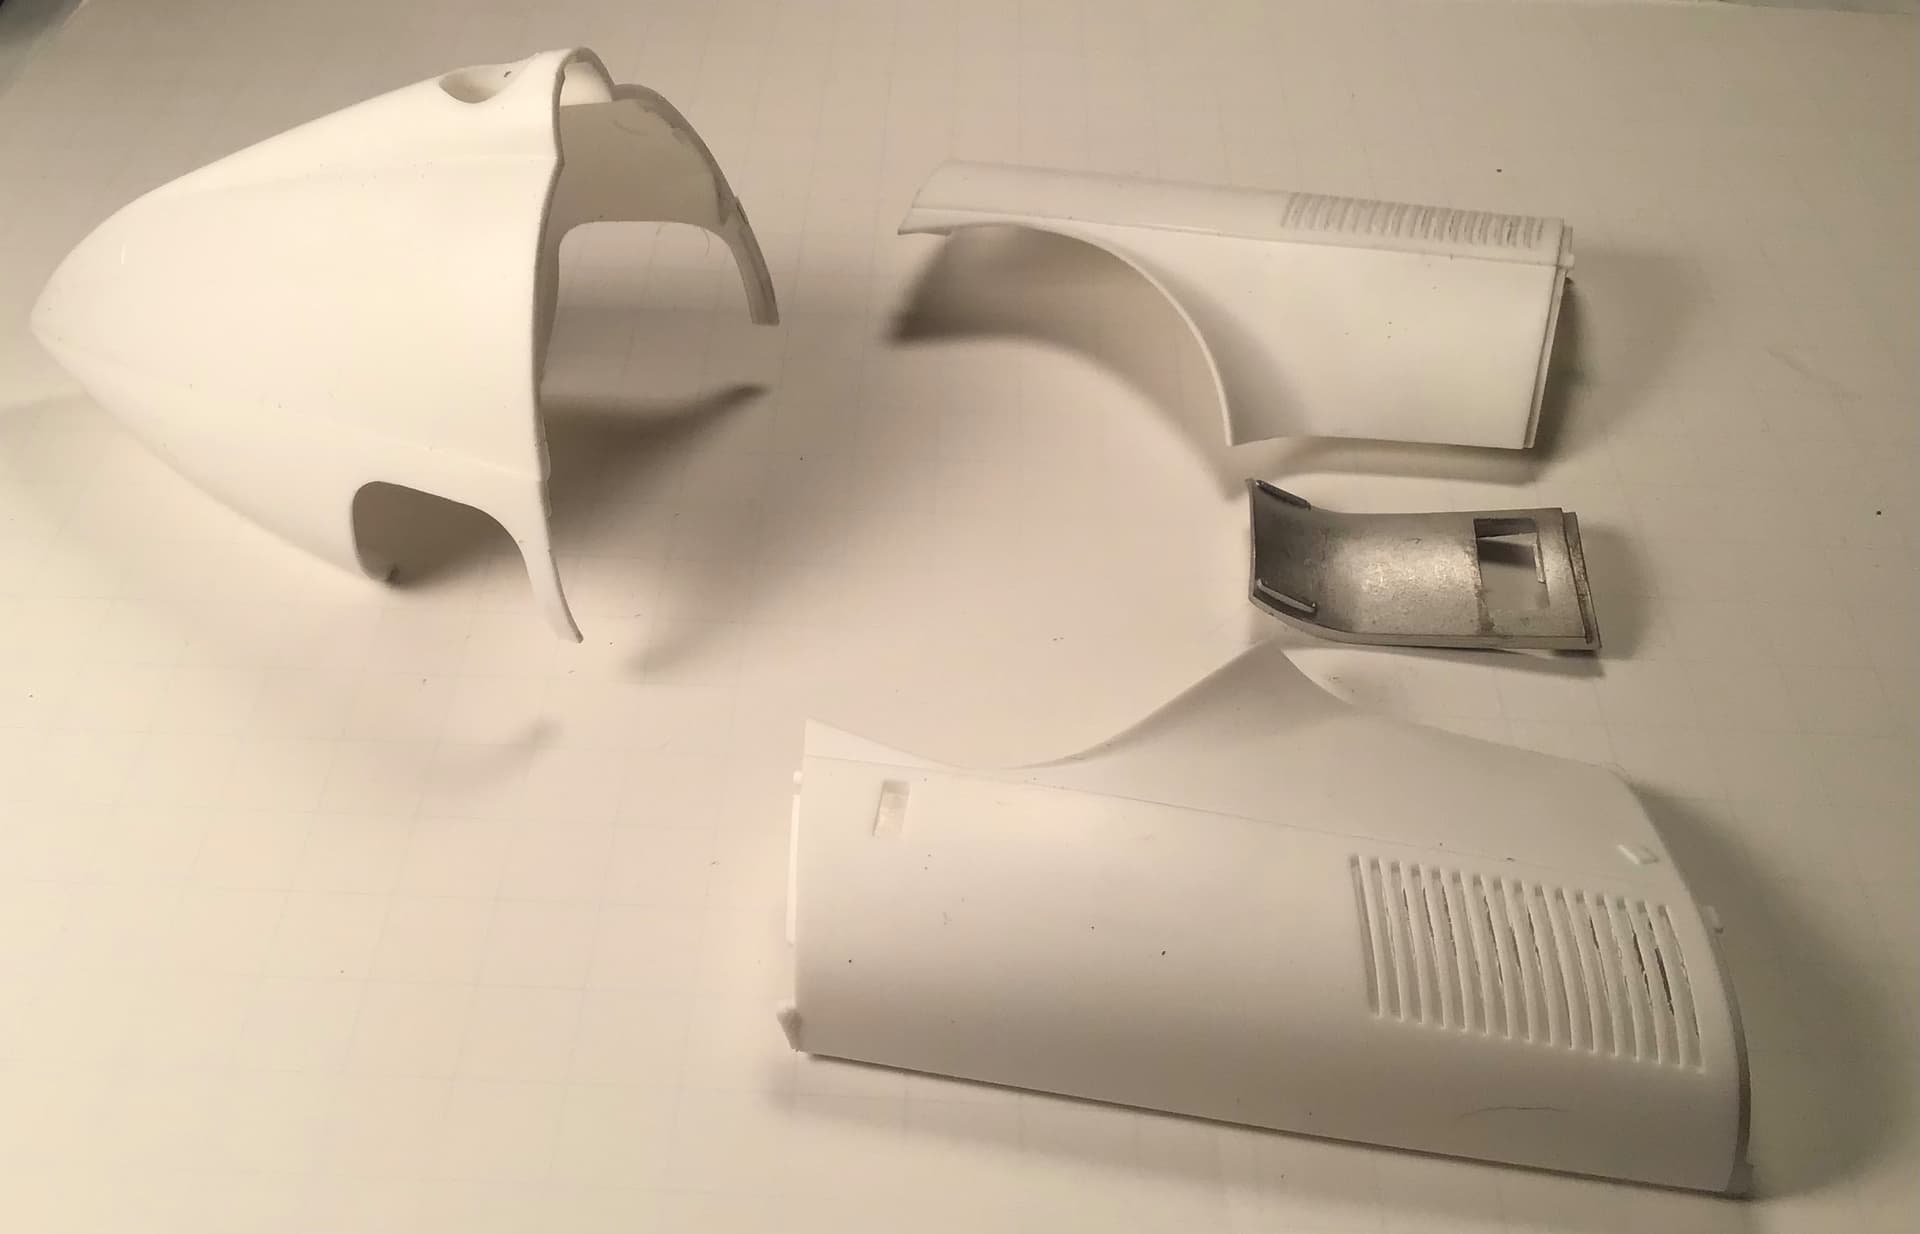
Before proceeding any further with chassis details I thought it best to start dry fitting the bodywork. Some of the bodywork is beautifully cast in white resin and it really is well done . All of the louvers are open through to the inside - a bit of thin flash here and there but I think it will largely just knock away. The belly pan is cast in white metal as is the top of the bodywork in front of the cockpit.
I don’t know why MFH did it this way but they must have a reason.
Like other components the belly pan needed considerable straightening - the two long edges that meet the resin bodywork were bowed . As this is a very thick piece it took some work to tune it up . Checking with a straight edge , finding high and low spots, pushing here and there . The pan fastens to the chassis rails with four small screws . Holes are cast through the pan but need enlargement and the rails have tiny bosses with dimples that must be drilled out smaller than the screws so that they can thread themselves in. The white metal is soft enough so that tapping isn’t needed.
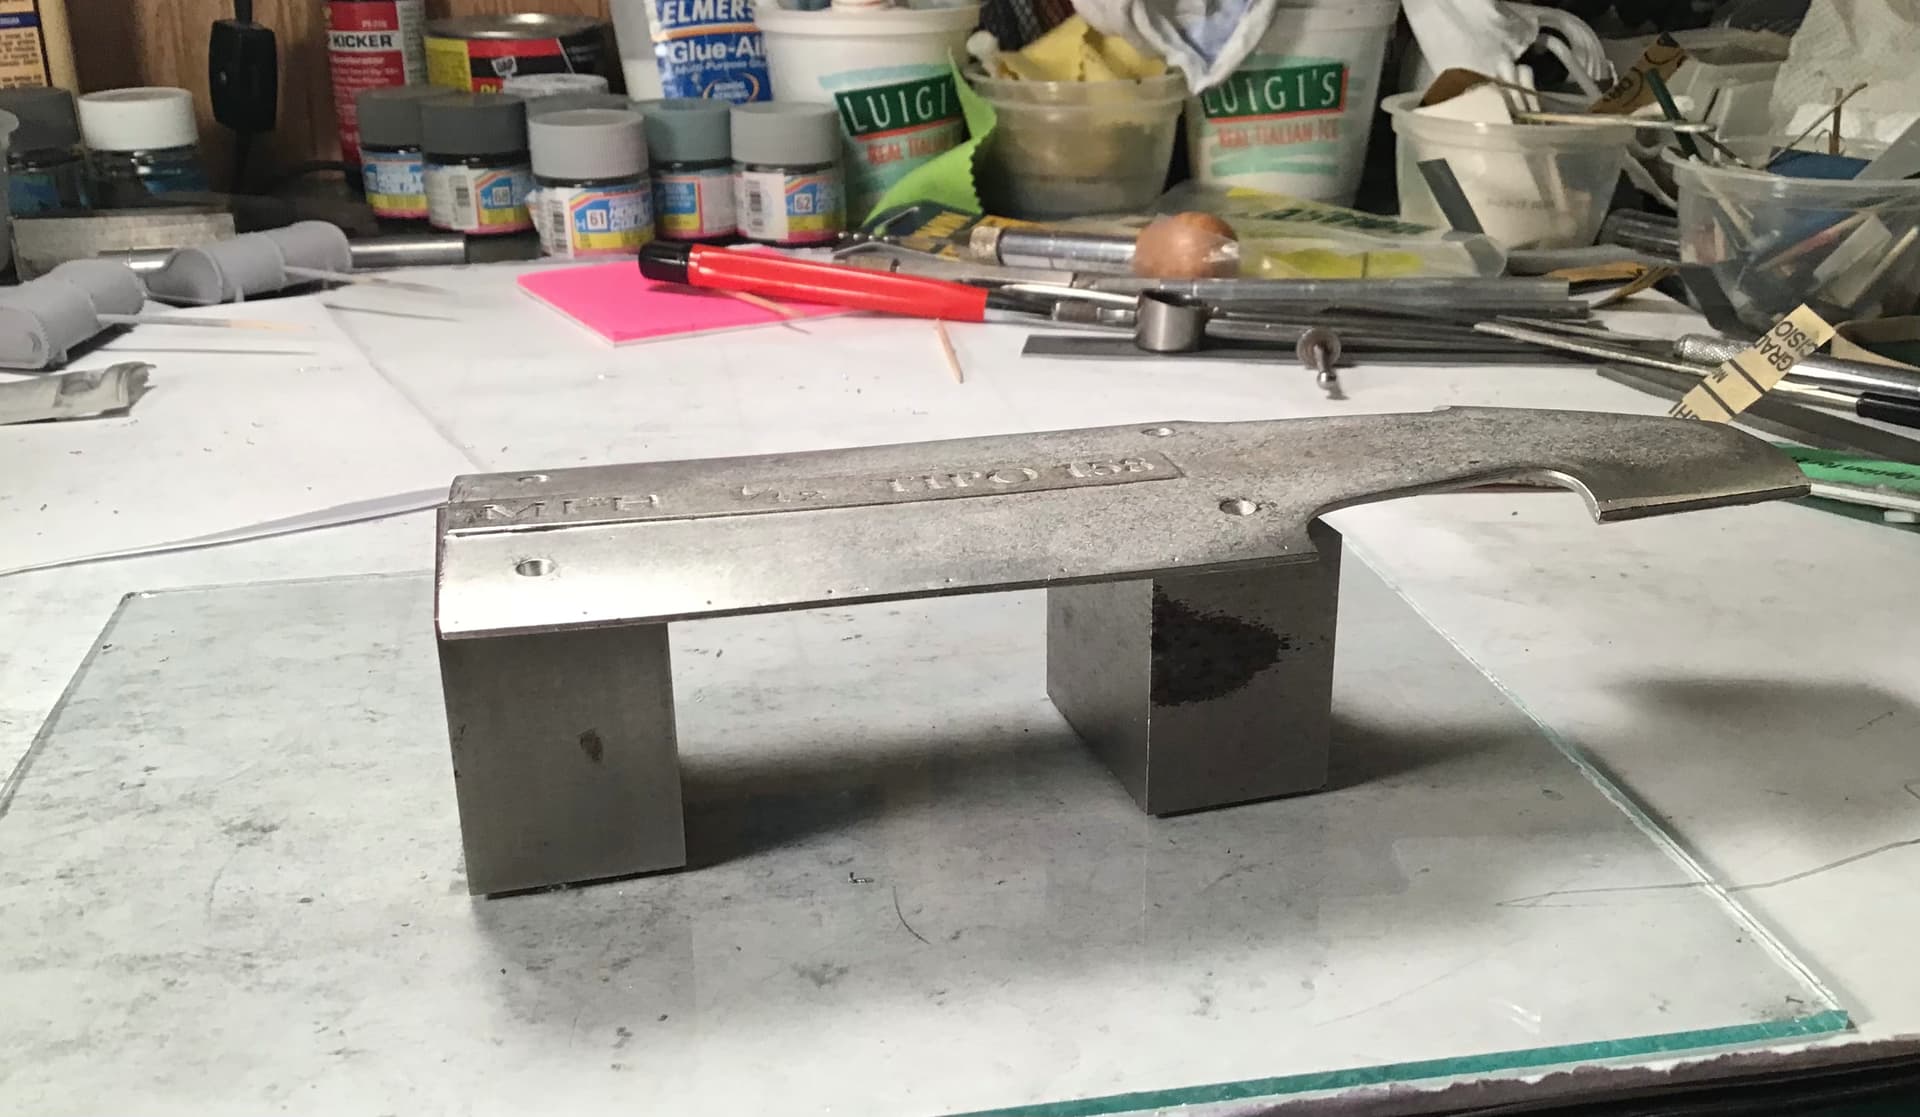
The interior surface of the pan has four raised bosses where it meets the underside of the chassis rails . These need to lie in one plane so tweaking of the pan by twisting and trying against machinist blocks on the glass plate is necessary.
One of the downsides of straightening this soft metal is that , like all metals , it stretches from being bent and consequently the distance between holes , pins and other locating devices changes . Elongating or enlarging holes ,
bending or filing down pins , etc. all becomes necessary to assemble parts . Lots of patient trial and error .
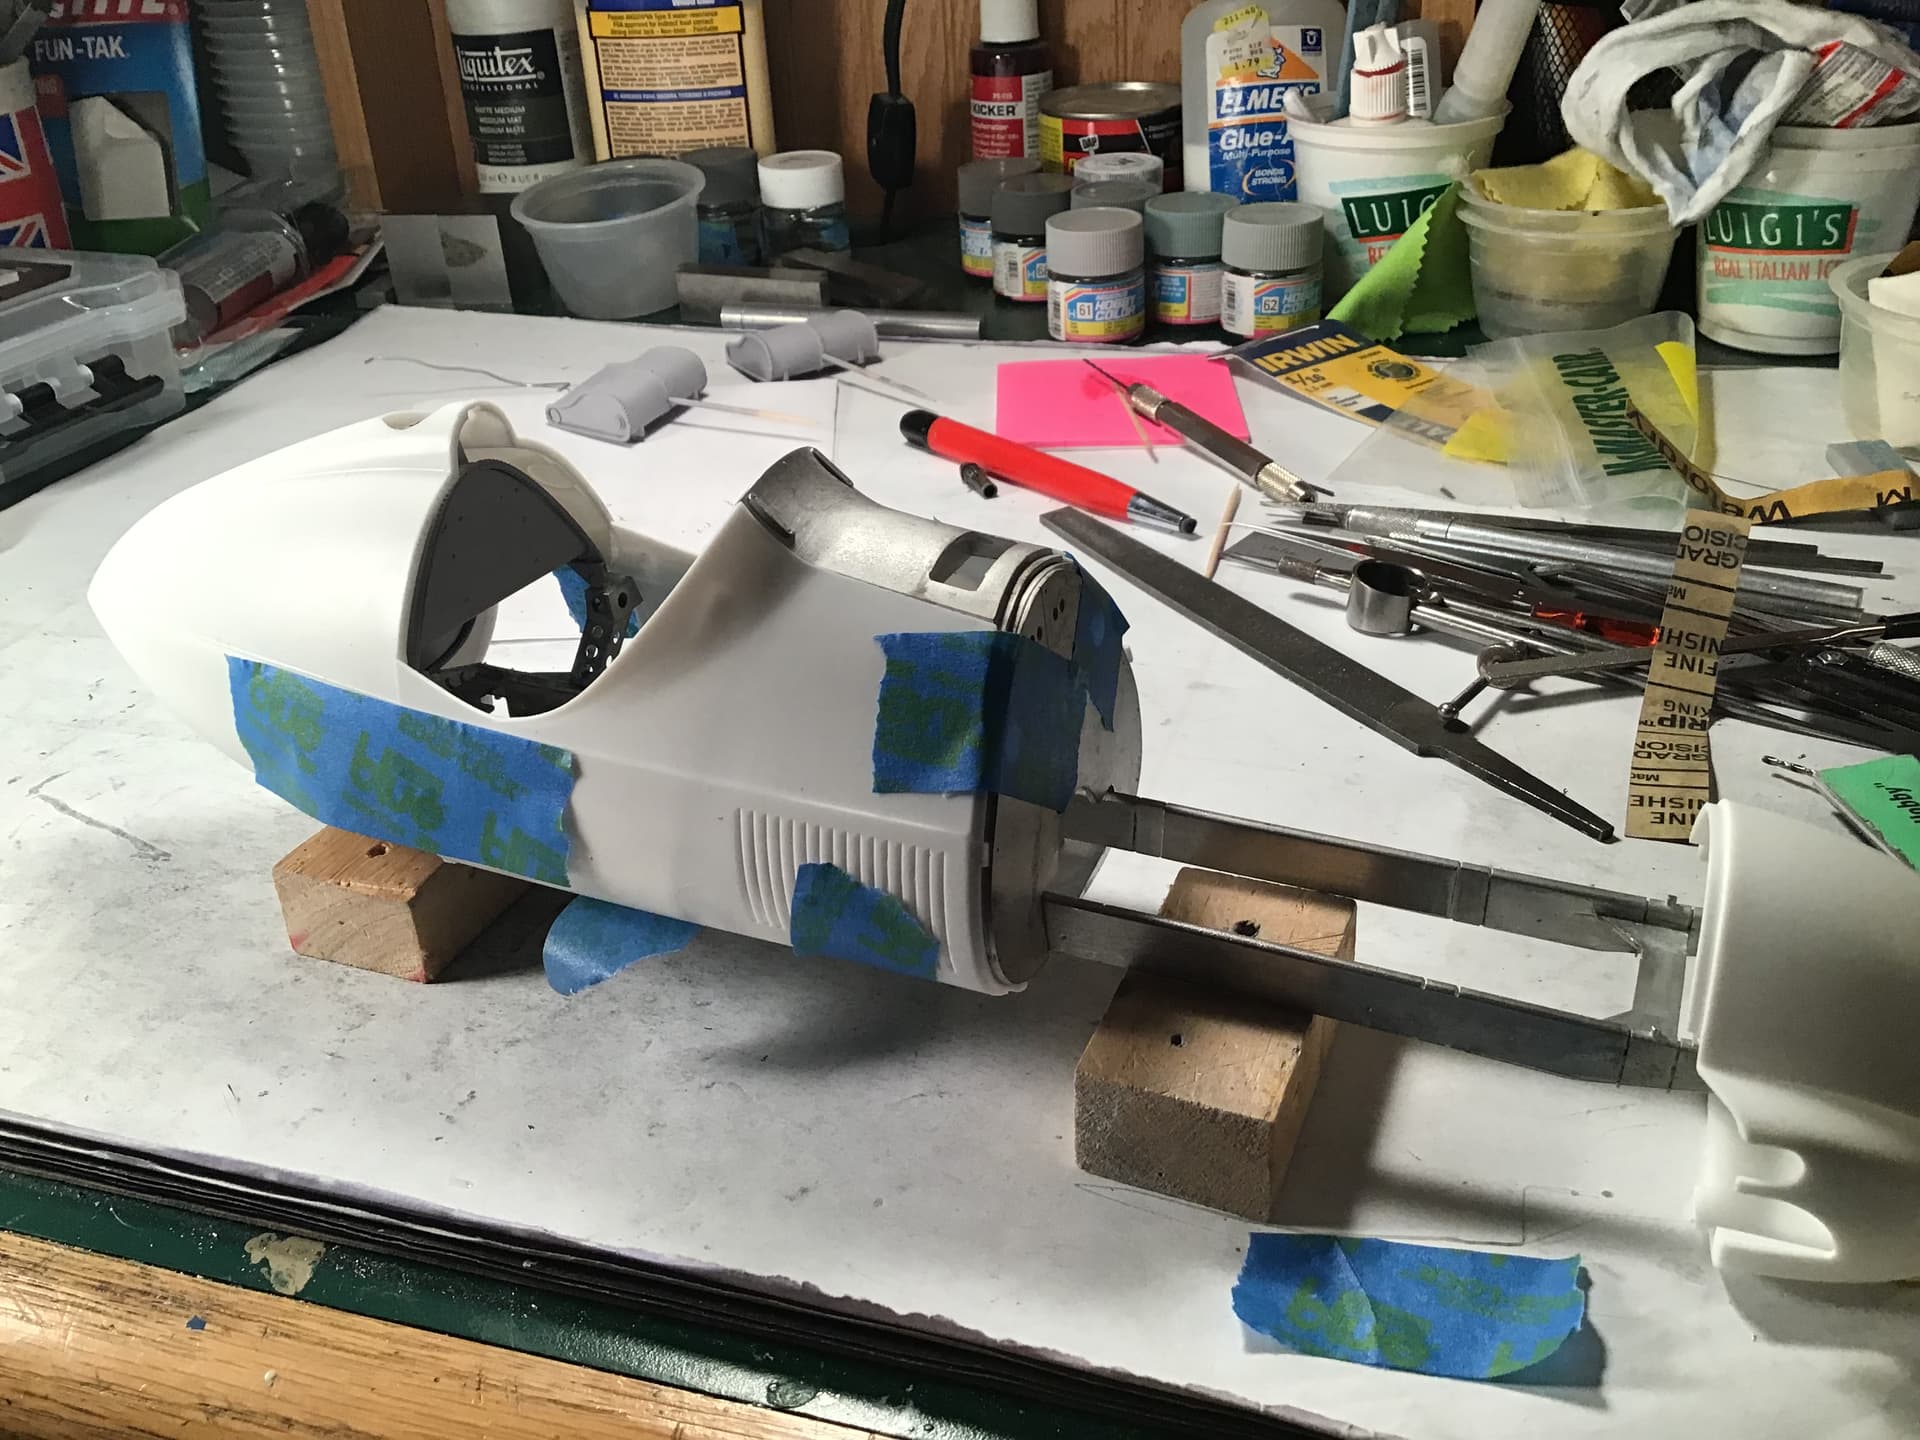
The fit of the bodywork is all tied in with the location and shape of the belly pan, the fit ,shape and location of the two bulkheads and the fit of the body parts themselves to each other - change one thing and you shift all to a greater or lesser degree. Again , patient trial and error .
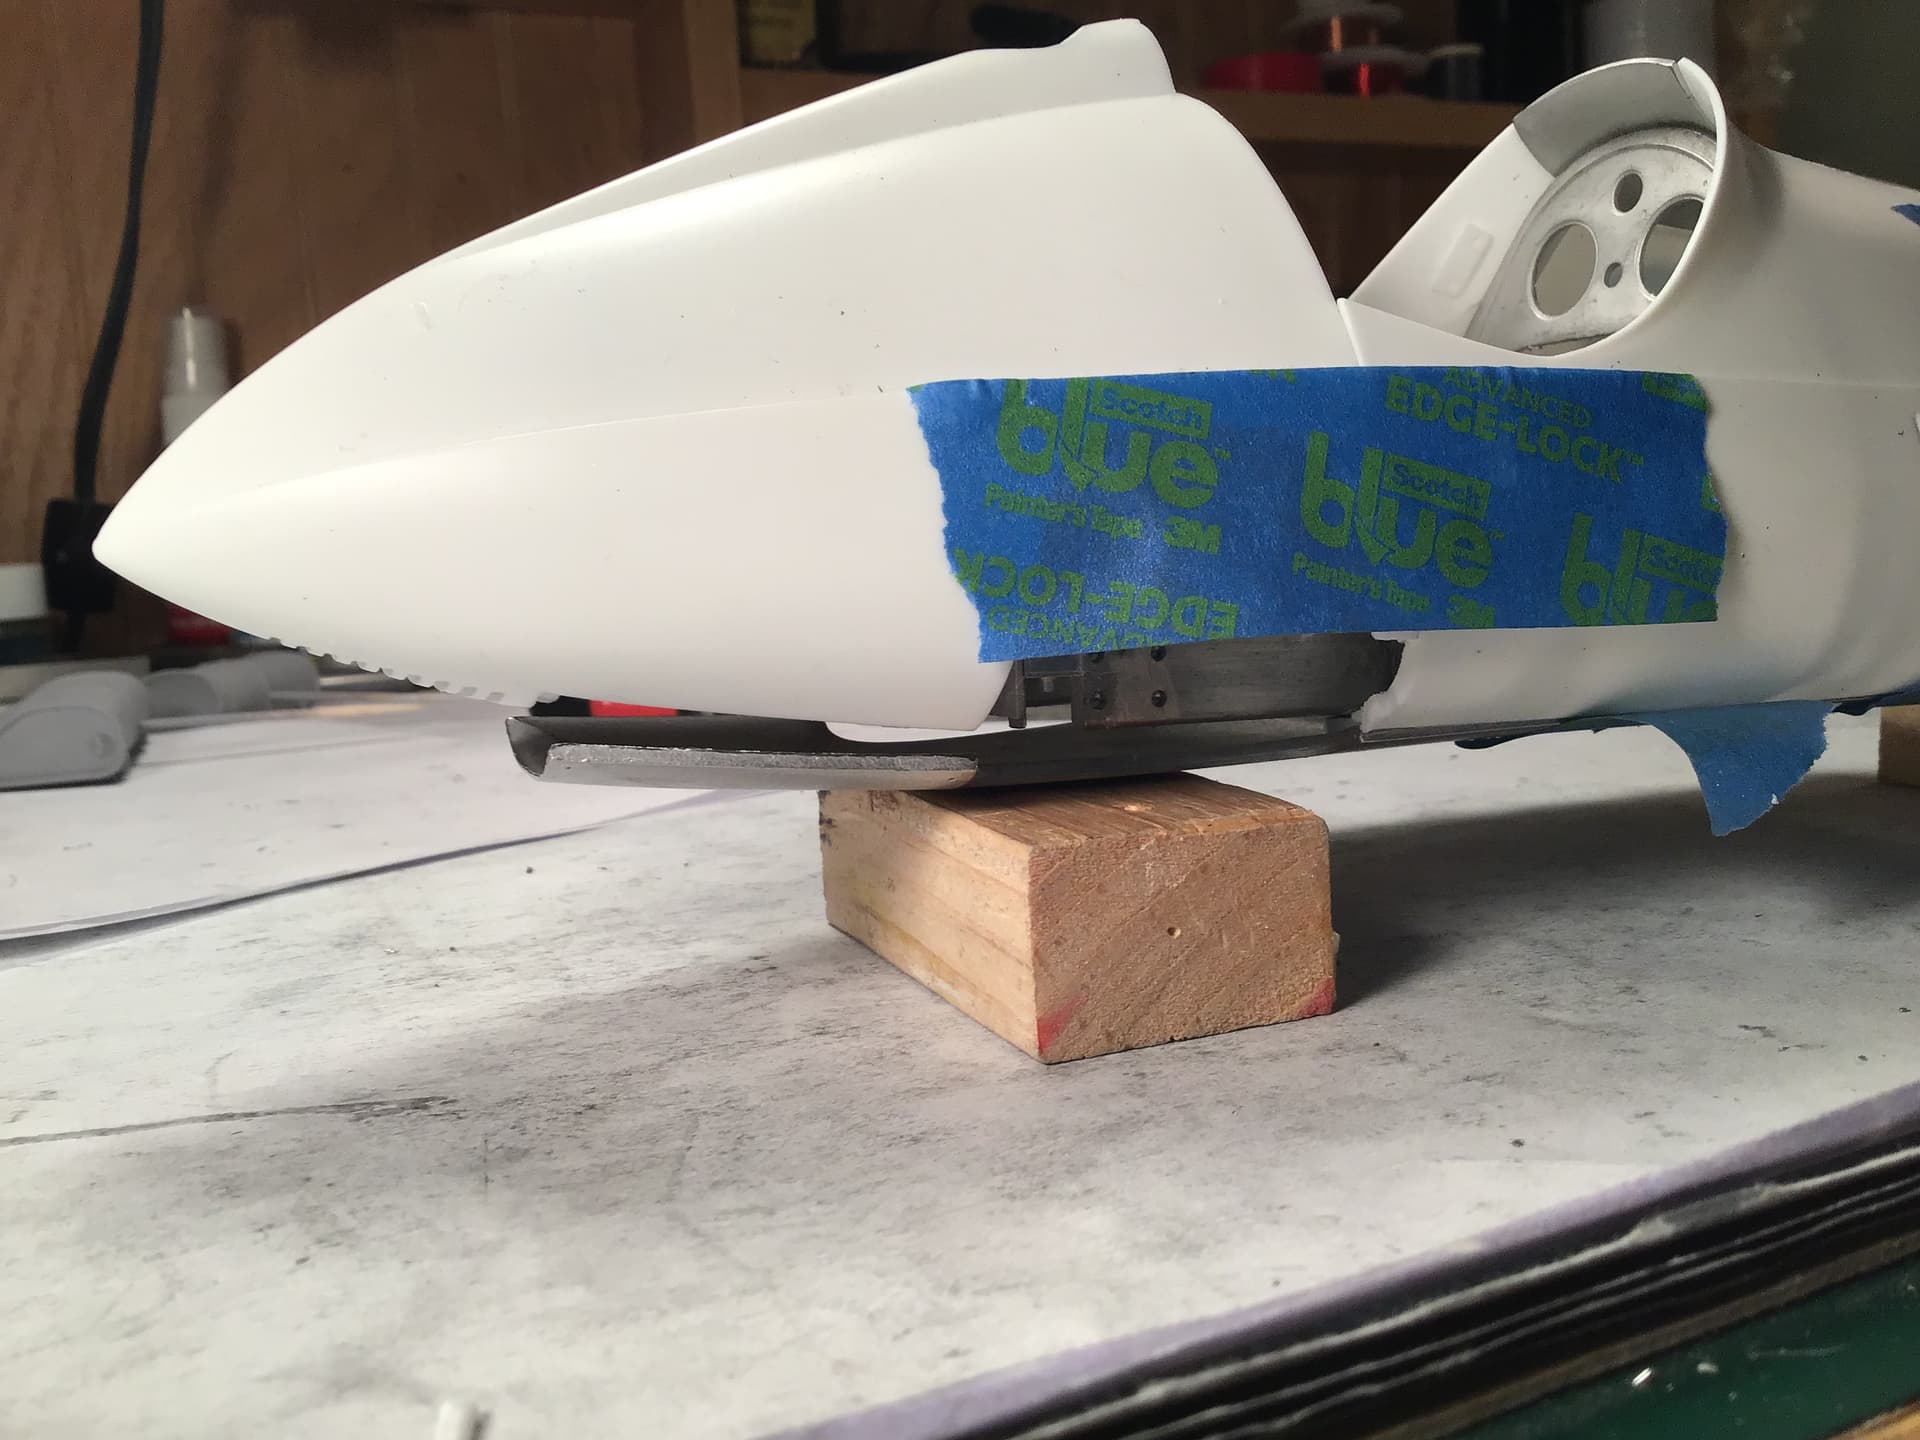
In trying to tape the resin bodywork together I realized that I hadn’t washed the parts of release agent as the masking tape literally slid right of ! Duh !
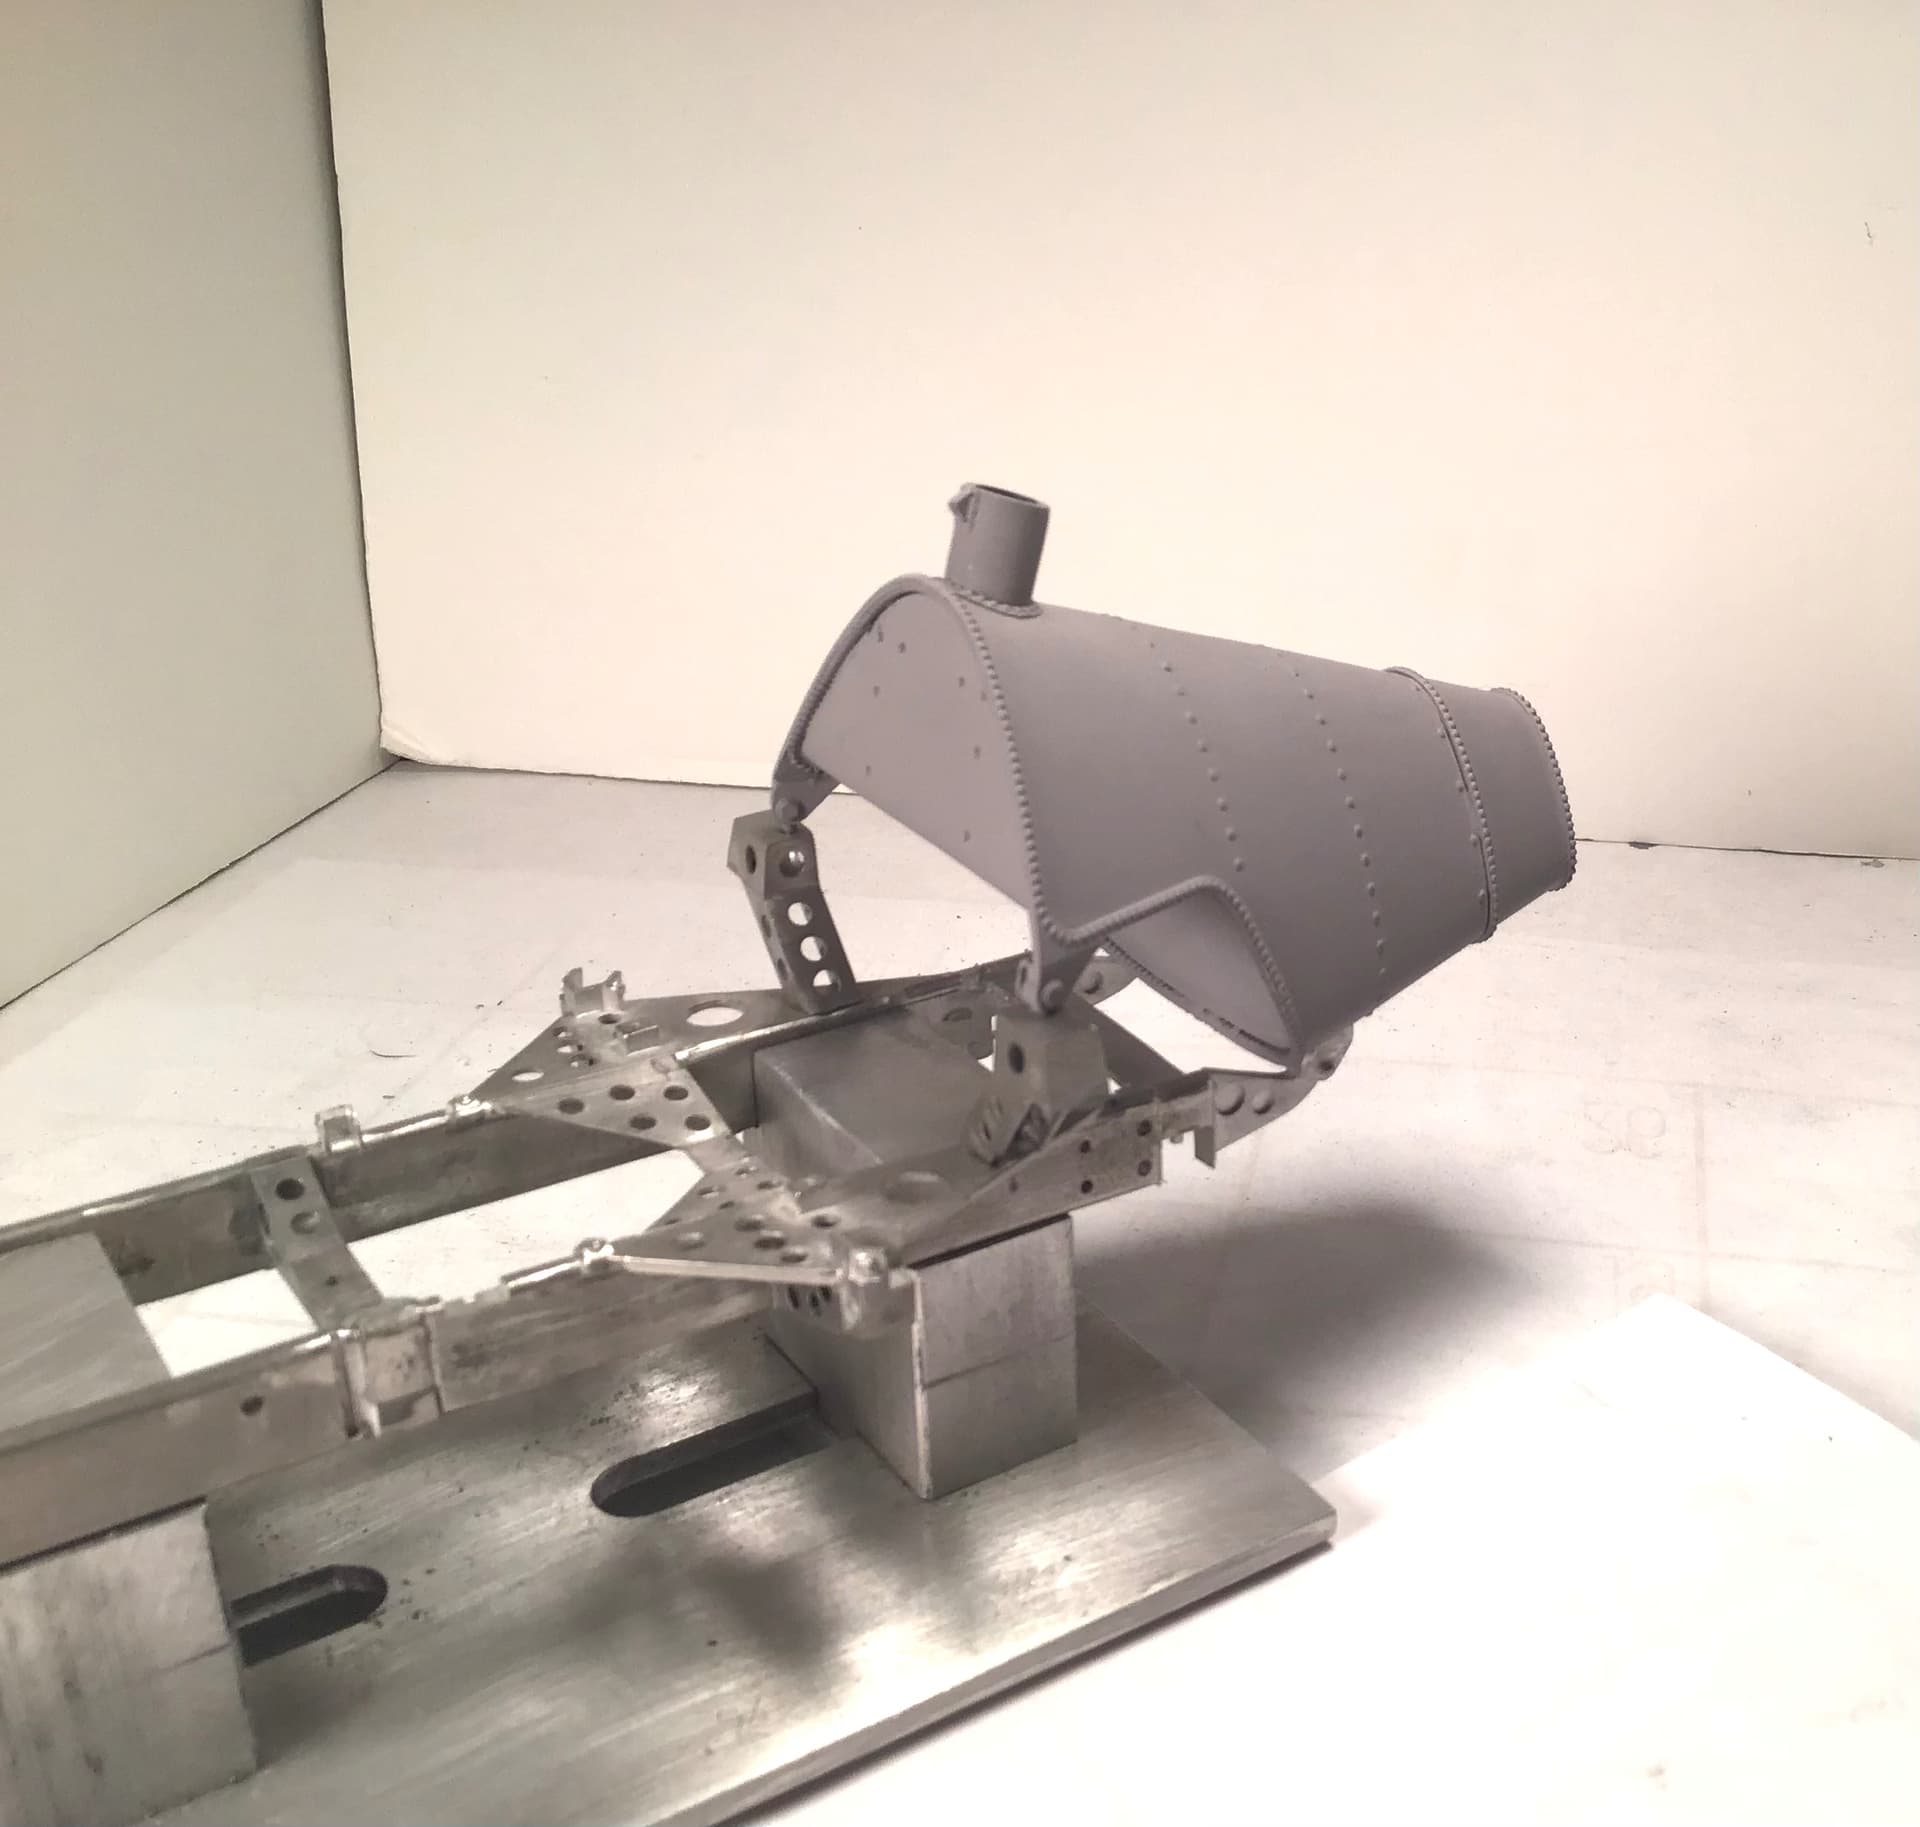
I believe I have all of the components from the firewall back close enough to now tape all together off the chassis to fit the tail of the belly pan as it needs upward bending.
Great work Richard, but are you enjoying it? What you described here it why I enjoy building these kits, the patient trial and error, the satisfaction of bringing it all together as you have above. Lots of pre-planning, ensuring future sections will fit, you’ll know you have built something when you have finished.
As for the white metal body parts MFH have reduced the use of these over time. I think they originally made all metal kits in smaller scales 1/24 and 1/43 and as they scaled up they have switched to more resin. The Alfetta is one of the older kits, like the Ferrari I built earlier which only had the nose cone as resin while the later Porsche 917 had the whole body in resin except the doors and a piece of the air dam over the radiator. They certainly don’t stamp the bodies anymore with MFH 1/12 etc.
Thanks Michael - I am enjoying this immensely. The modeling mojo is back in force - to the point where I am blowing off other things I should be doing to work on the Alfetta. What have you gotten me into…. LOL.
I have been building models of all genres and mediums since I was 5 - I am now 68 - and this is rapidly becoming one of my favorites.
I am already eyeing up another . The Barchetta is currently top of the list but I see they have other new kits coming as well . Do you have any idea what they might be ? My all time favorite Lotus 25 with Dunlop wobble web wheels and skinny tires would be nice . How about a Porsche Spider or 356 coupe ? I got some $$ for Christmas that will nearly cover the Barchetta but I am going to hold out a bit until I get further along on the Alfetta and see if the fire still burns - maybe in that time we will know what future releases there may be. I’d hate to spend that money only to find there is one I may want more.
Cheers - Richard
Richard,
Just extraordinary skills especially in the metal working areas. You and Michael make one great MFH team for sure.
As Michael said, MFH use to create the smaller scale kits just in white metal. Much of their past and current 1/43 line is molded that way. Then again, many of the top manufactures of that scale make their kits in metal for the most part as well.
I have noticed in my following a few online retail resources that the newer multi media kits led by MFH are moving more towards resin and less metal. That would in a sense make the model more geared to the average modeler who can afford their kits, yet at the same time not require all the skills presently needed to build one of their kits. For what it’s worth, I think that the current mix is pretty good.
Richard,
Earlier in the thread the question came up about the color of paint that the chassis was painted with. After a little more digging, the answer at least for the British built race cars was a basically universal color in GB: Machinery Gloss Gray. Not sure how that would translate to the Alfetta other then the posted restored painted frame certainly has that same look.
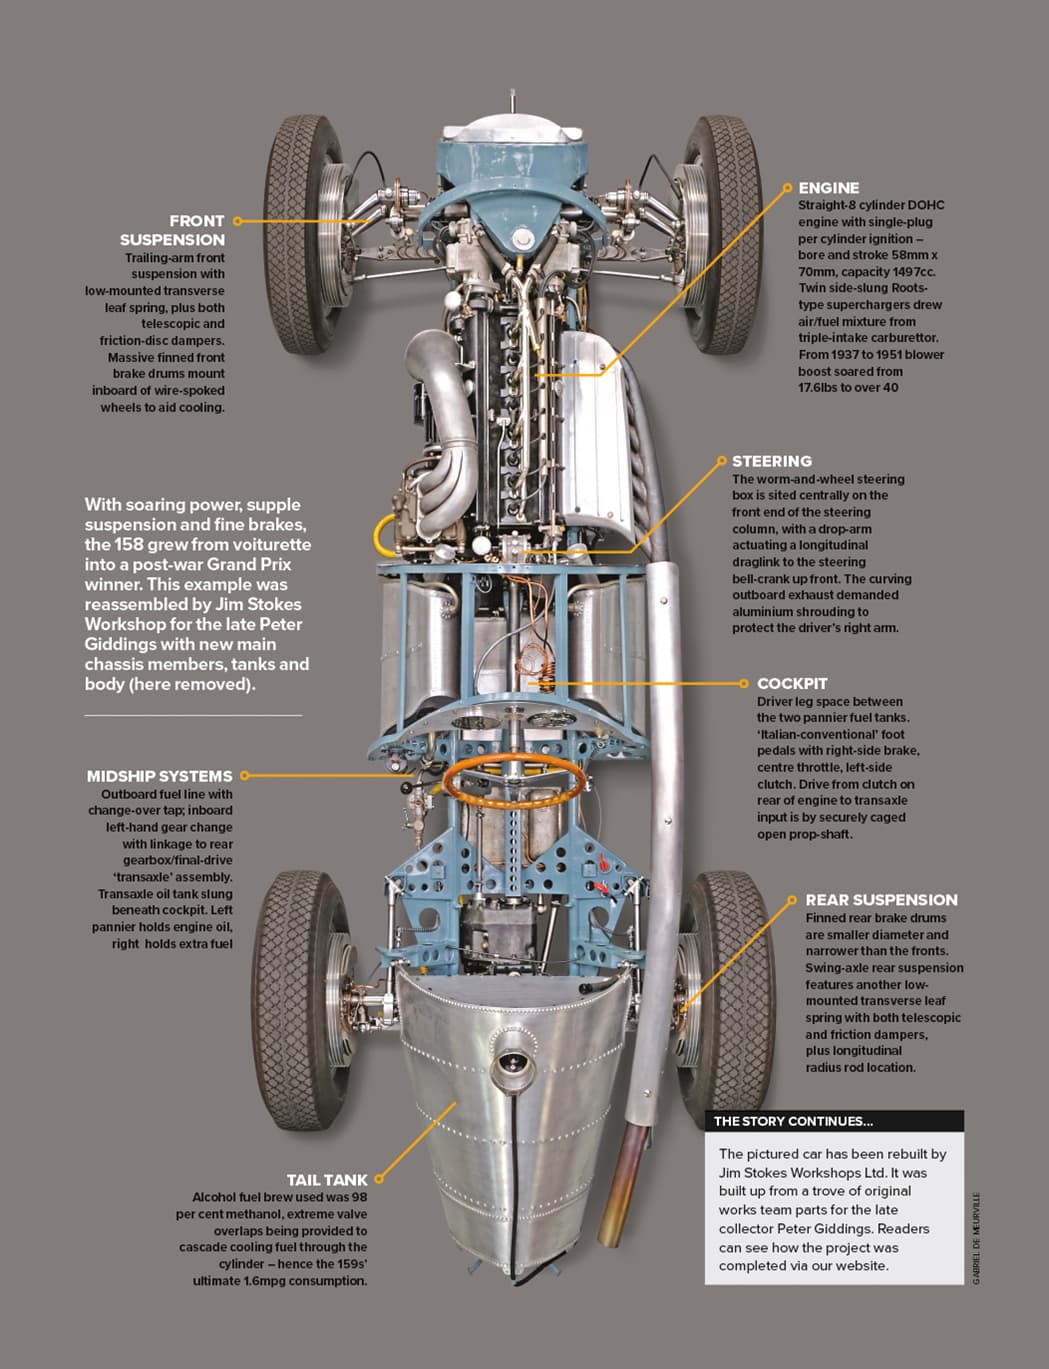
Courtesy of Motorsport magazine
This shows the chassis colour. I would call it a blue, but maybe there is an Italian name for it.
The article is worth reading if you haven’t seen it.
On MFH upcoming models I don’t know what they have planned. What I can say is they have a strong relationship with Ferrari, Porsche and McLaren having done several of their cars so a racing Porsche Spider or 356 maybe a possibility. They have also done several Lotus F1 cars, so again a Lotus 25 could happen. I don’t know how they determine what’s next but it often something unexpected. Personally I wish they would do a McLaren CanAm car, a M6 or M8 would be amazing in 1/12 scale.
They do re-release cars that are sold out from time to time and they have 6 lined up for early 2022 including a Ferrari 335S which I quite fancy.
Thanks Michael - very helpful. This is the same car that I posted the chassis picture of . It was largely built from scratch from original drawings around the original parts by Jim Stokes for collector Peter Giddings.
Michael,
I’ve enlarged that picture to full screen and really studied it. The chassis color is certainly a lighter shade then the picture that Richard posted. What has caused me to take a 2nd look is that the chassis seems to be painted with the same exact paint as the body panel right behind the radiator. Never seen that before.
Also, since we’re trying to push the envelope of what one can actually ascertain from a single picture, the Kelvin temp of the lighting in the picture would play a part for sure. But since all three of us are using a different graphics card in our computers, and different monitors, we actually would see the same exact digital image some what differently. What’s more in the world of photography and graphics, monitor/graphic card calibration is important so that those variables are negated to a greater degree. the problem is that while I have a digital calibrator, I don’t use it very often since I stopped doing photography as a 2nd hobby, and my current setup is geared more towards gaming with FPS and max refresh rates as the most important issues i’m concerned with.
So I would say that close is good enough to either picture, and the real focus should be on the body color.
Interesting observations on MFH. I’ve been hoping that they would reissue the 1/12 or the even the 1/20 scale Gurney Weslake 1967 Spa winning car of Dan Gurney as I’d buy one or the other for sure with my preference being the 1/20 scale one both for size and greater odds of me actually getting it across the finish line.
But when you mentioned either or both the Mclaren M6 or M8 (any version) I’d buy one of each. These are my two all time favorite Can Am cars from my all time favorite series, and I was fortunate to actually meet both Bruce McLaren and Denny Hulme at Watkins Glen, but only got to touch and walk around the M8 when Penske owned it.
Just shows how lighting and other factors can influence our perception of color because the chassis picture I posted ( looks like it’s still in the paint booth) and the overhead shot Michael posted are the same car . Here is quote from the article on creating this masterpiece:
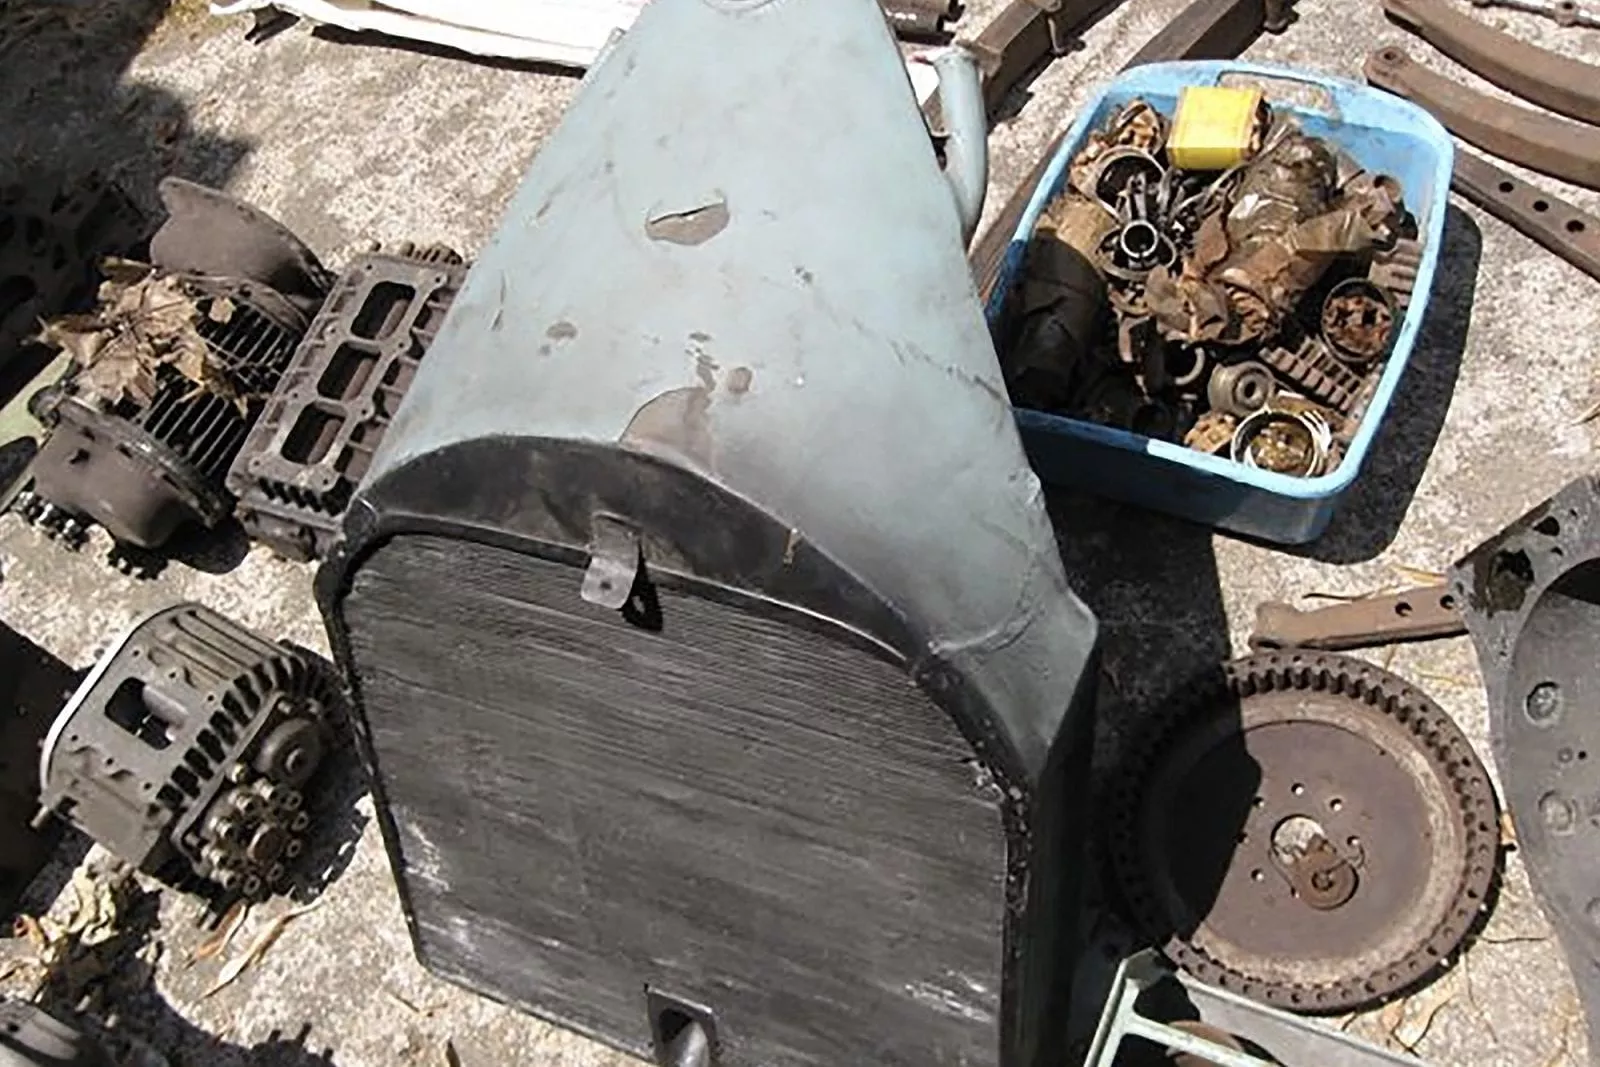
“Bits, bits and more bits as cleared from Alfa’s former Portello factory upon its closure – cylinder head, carburettor, blowers, gearchange, suspension parts, chassis bracketry, brake shoes, clutch casing – and that radiator retaining the original underbody pale blue paint…”
Note it says pale blue paint - not grey .
I have received my Gunze lacquers and over the next few days I’m going to play with them a bit .
Cheers-Richard
Richard,
that quote does indeed clear up the issue somewhat. Still, the same painted chassis in two pictures looks completely different. Of course if your posted picture is still indeed in the paint booth, and the paint is enamel, then the darker gloss color could very well be just how wet paint looks.
joel