That’s great news and a pretty quick turnaround. I think I got a very similar note for my handle bar grip on the Ducati. I am envious I don’t have a black and gold origami crane in my collection!
cheers
Michael
That’s great news and a pretty quick turnaround. I think I got a very similar note for my handle bar grip on the Ducati. I am envious I don’t have a black and gold origami crane in my collection!
cheers
Michael
Richard,
Like Michael said, that’s a really fast turn around. I’m more then pleasantly surprised. I also liked the fact that you got a personal letter of apology and that little gift to go along with it.
joel
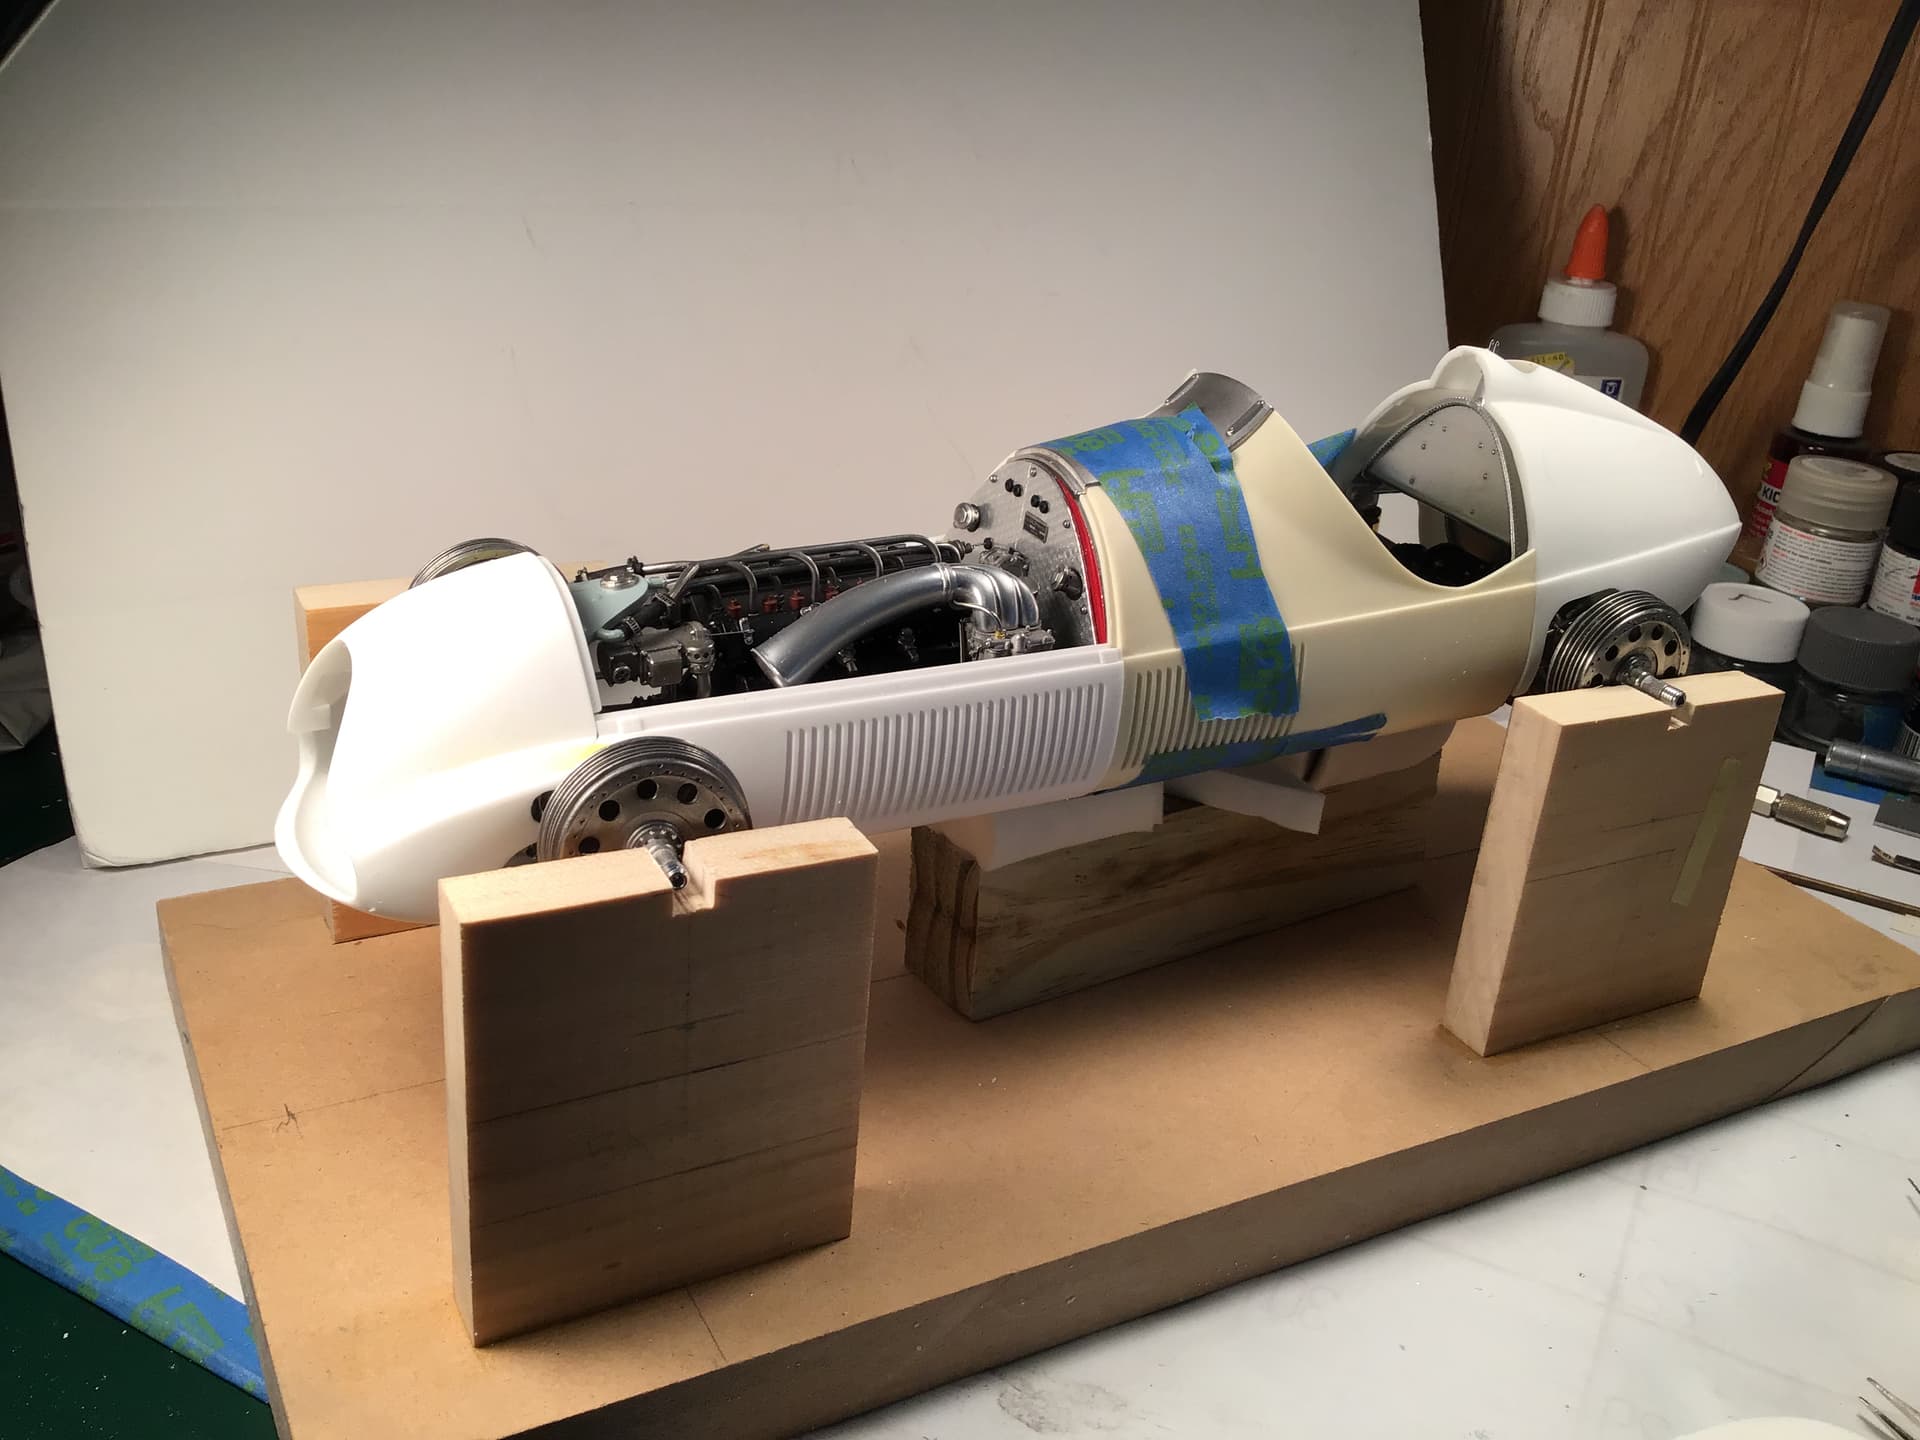
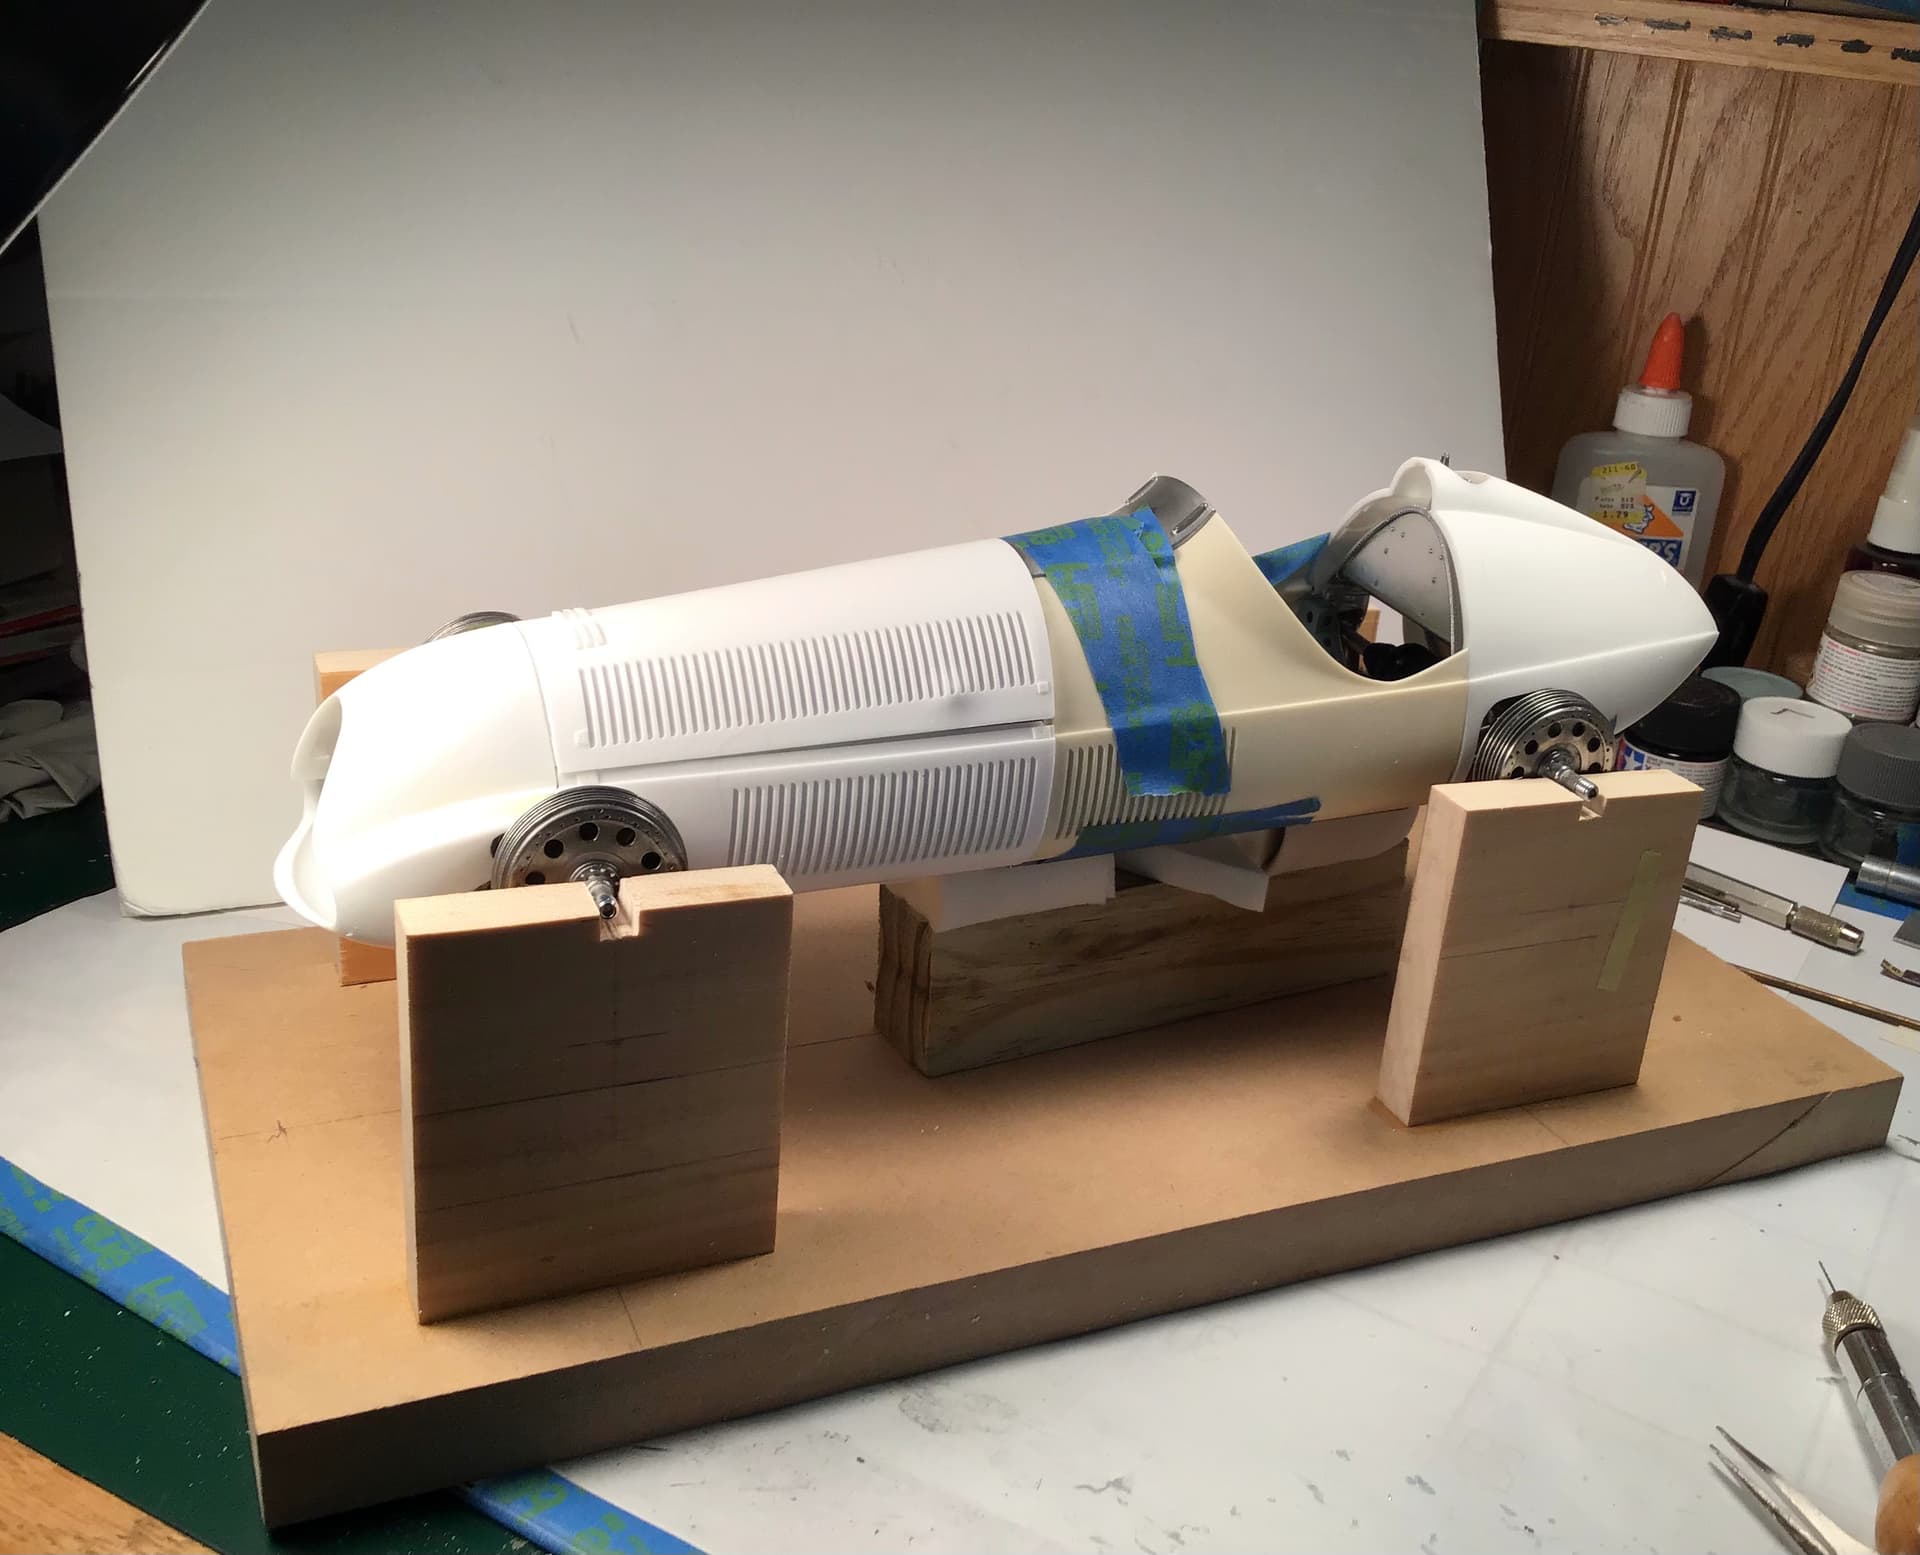
With the arrival of the replacement body sides I’ve begun the final fitting of the body shell . Lots of tweaking here as well . I had a step or two backwards as I carelessly bore down on the model in the cradle while try to bring panels in line and broke the rear suspension. All repaired now - just some paint to touch up but it has left me wondering about the wisdom of suspending the model by the axles . I have now got to come up with yet another way to hold it . As a stopgap measure I I have blocked under the belly pan .
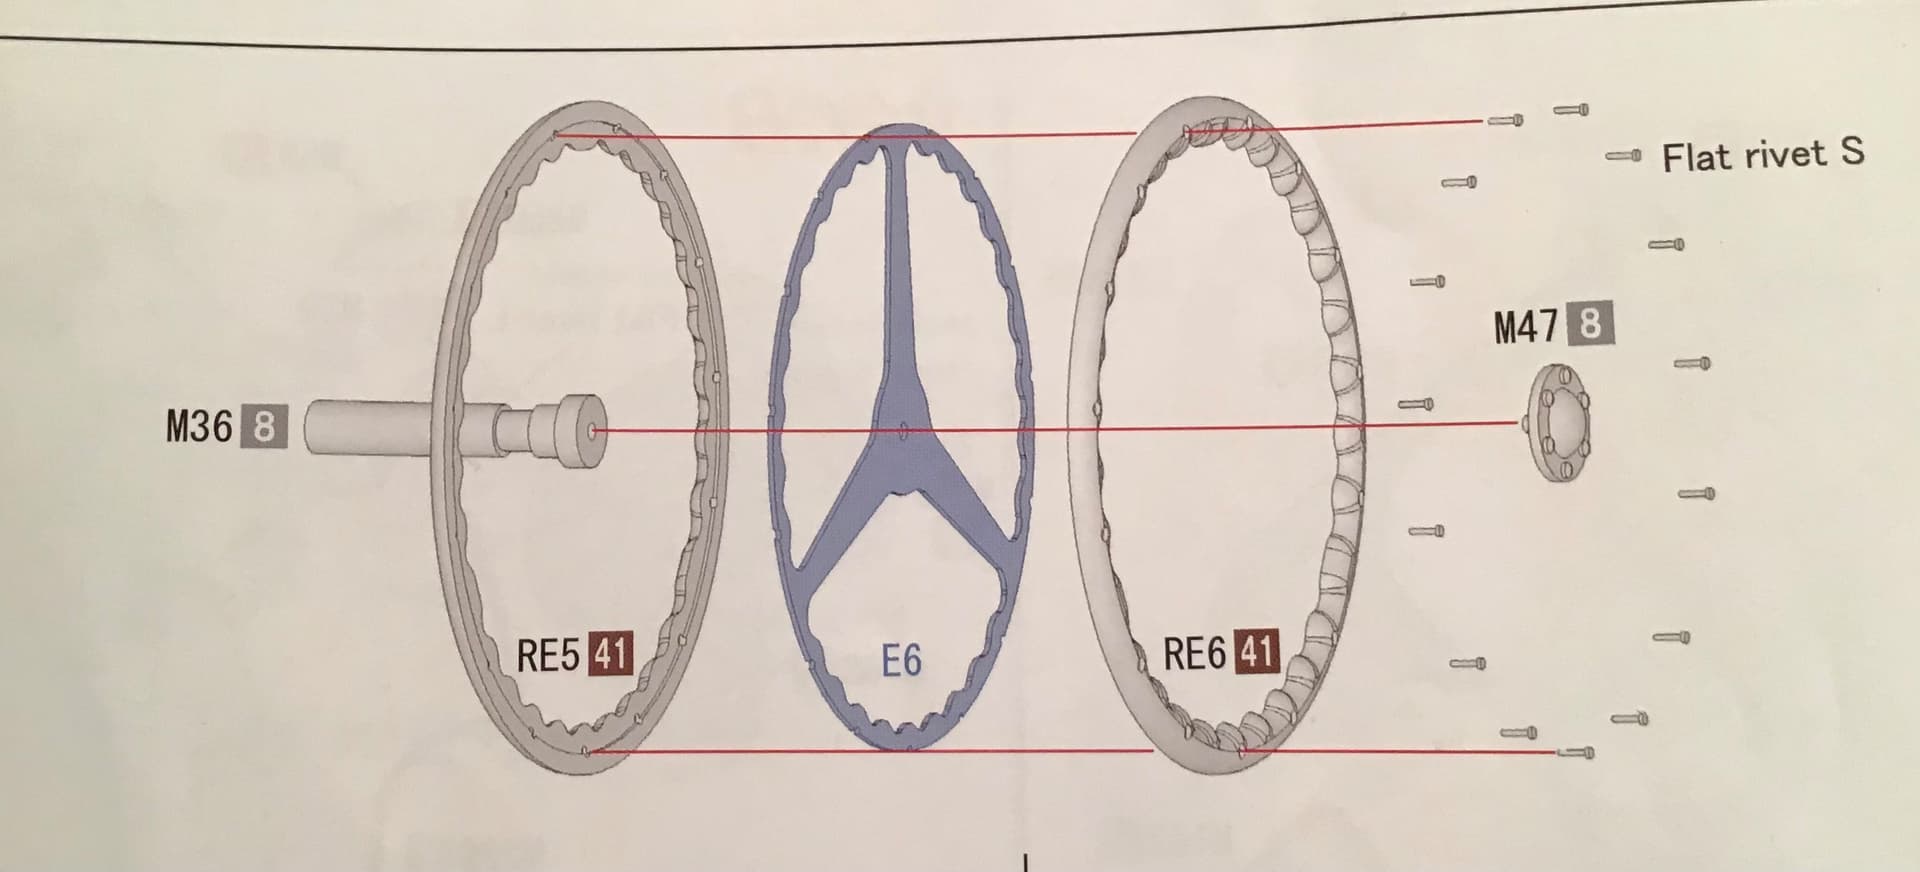
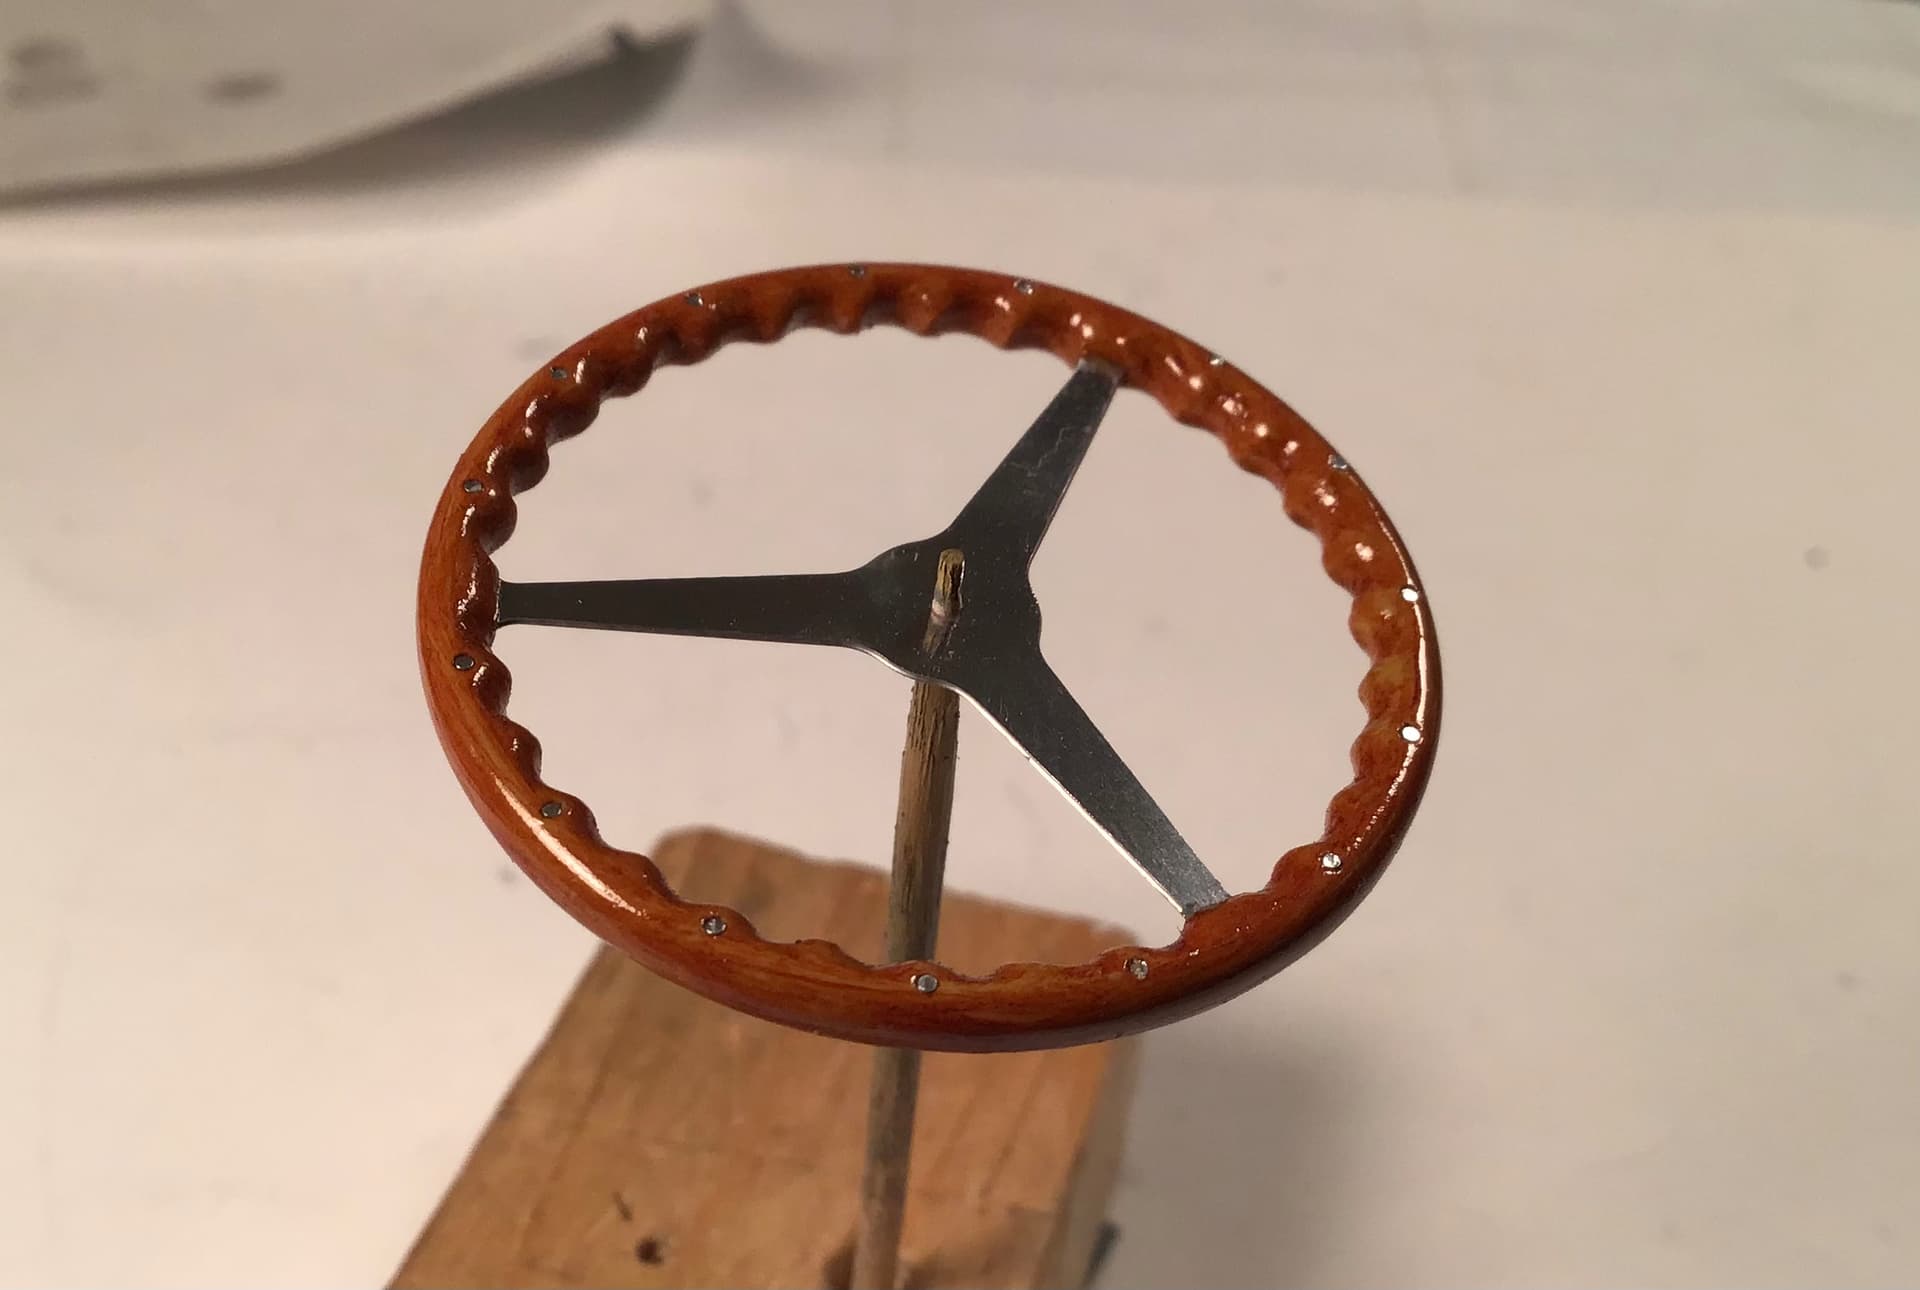
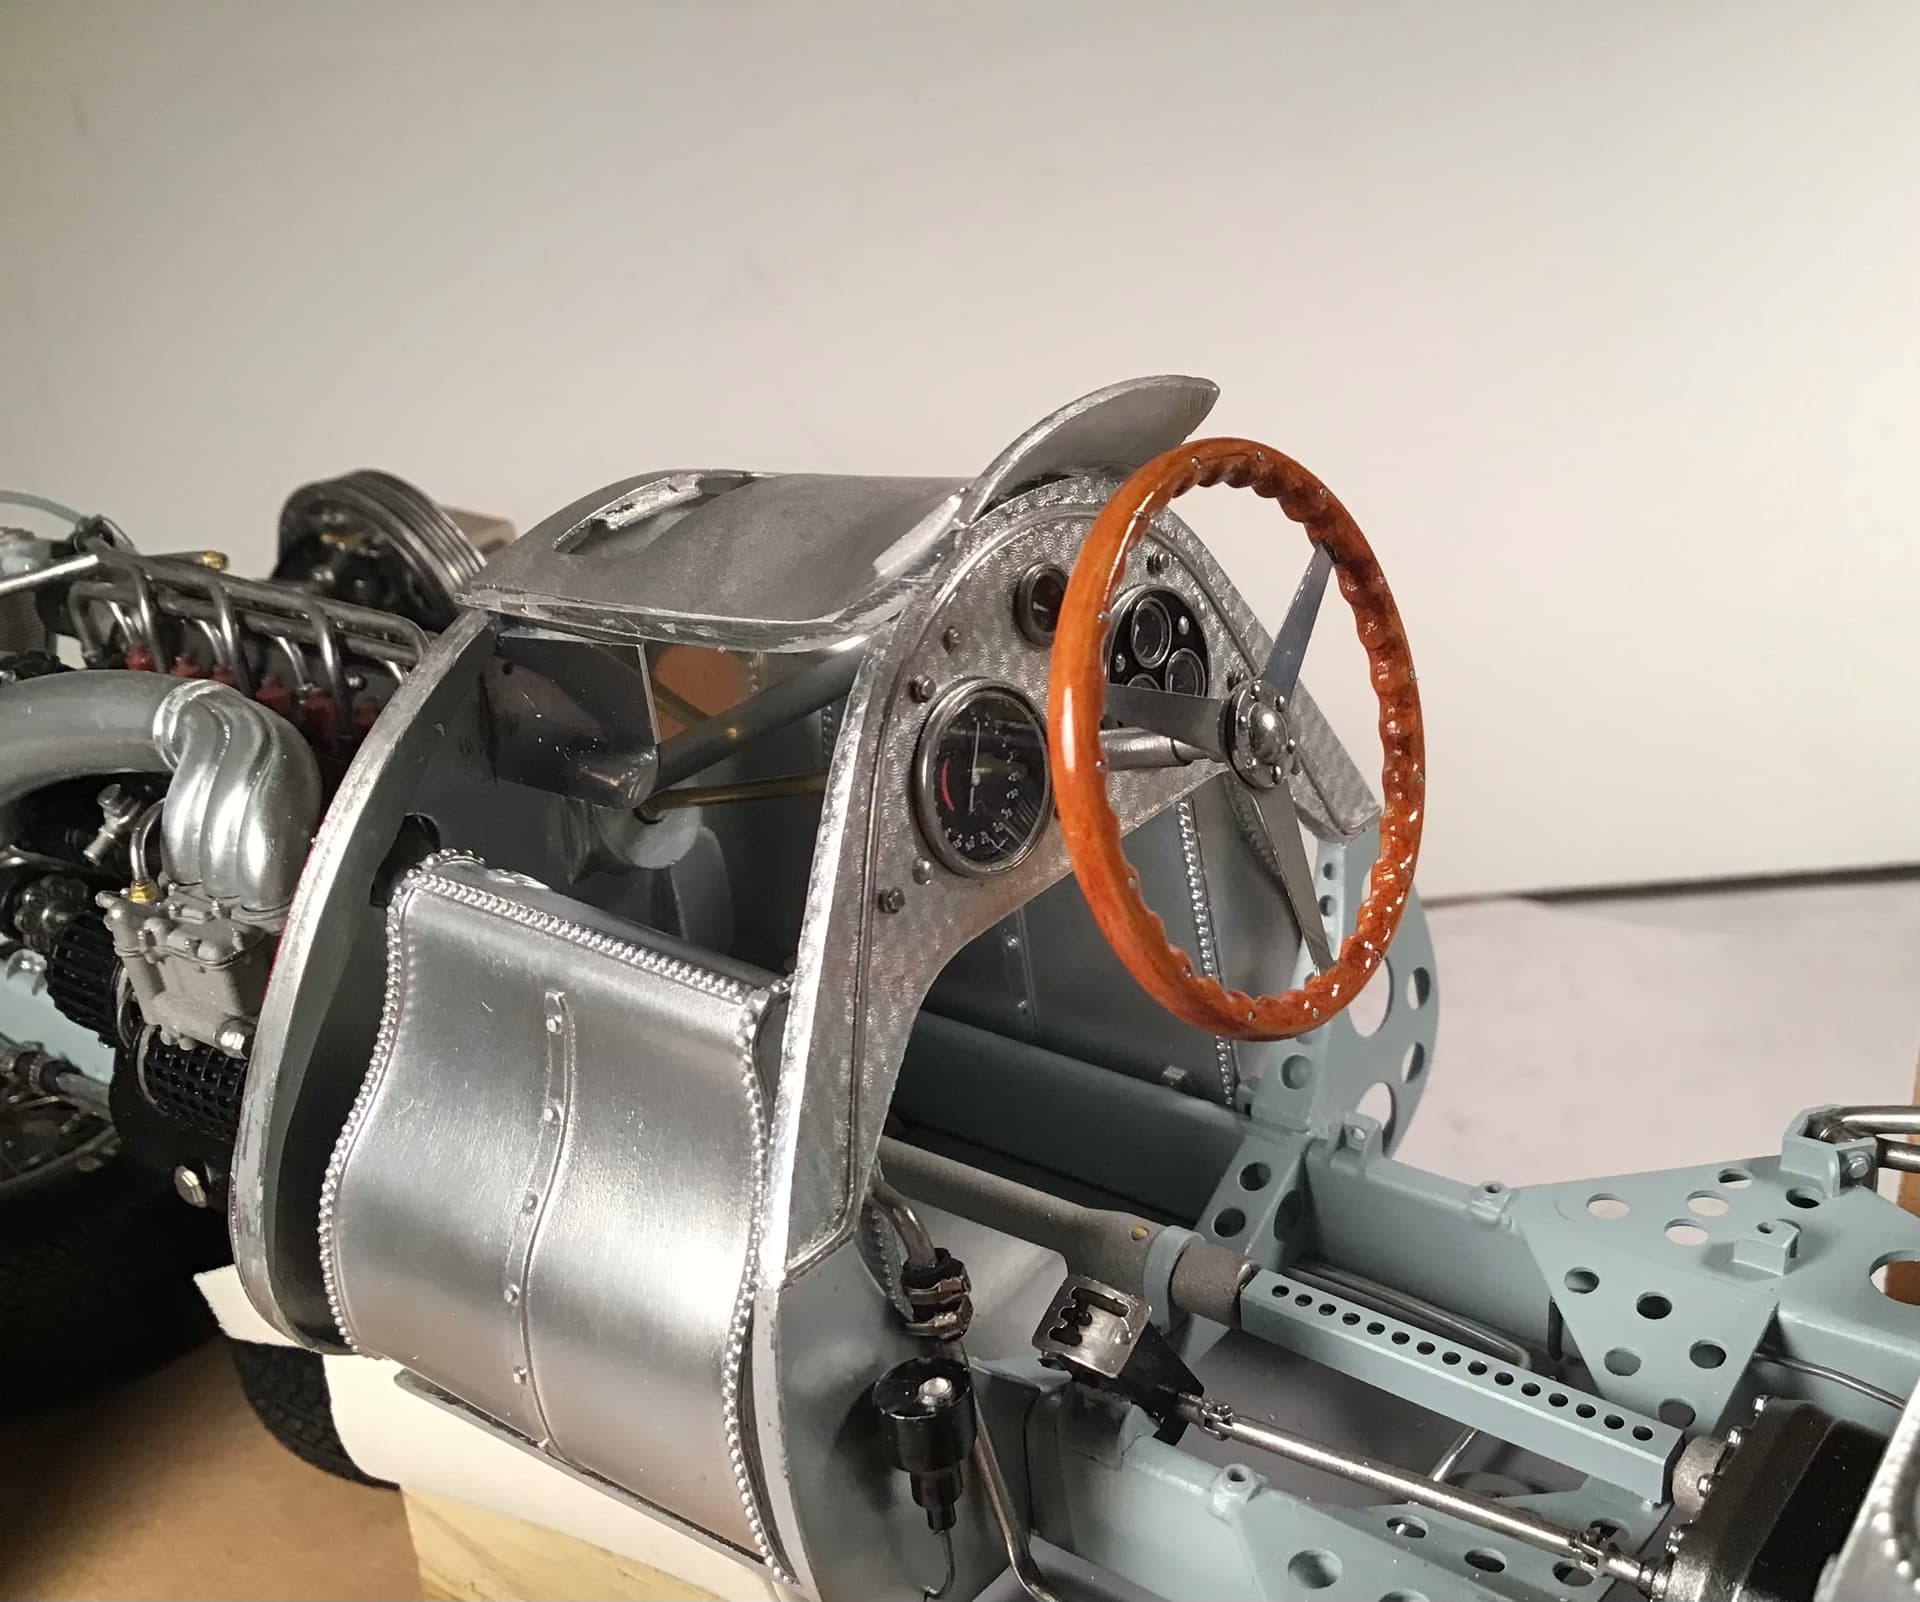
I have also assembled the steering wheel rim . The wheel is built of photo etch center sandwiched between two resin castings that represent the wood rim . For whatever reason they are cast in transparent resin . They were misshapen a bit and needed dipping in boiling water for a moment then put between two blocks to flatten. There are fifteen tiny rivets that are supposed to go all the way through but the resin rims did not fit the etch piece very well . I epoxied the resin pieces to the etched center and had to do a bit of filler work . After priming with Stynylrez I shot the rim with earth yellow acrylic then woodgrained it with burnt sienna artist oils . After it dried I cut the rivets short and inserted them in the rim , fastening with PVA . Lastly shot with gloss clear acrylic.
That is one of the tricky parts of these kits. As they grow in assembly they become harder, and heavier, to handle. Suspension is always somewhat fragile I have found. The new panel looks great in place. The three part steering wheel is interesting. If the rivets are decorative I do what you have done and just use short parts. I bet you never thought it would take 18 parts to build a steering wheel! 
cheers
Michael
“I hope you will finish building model”
Gosh. I like they know their own kits…
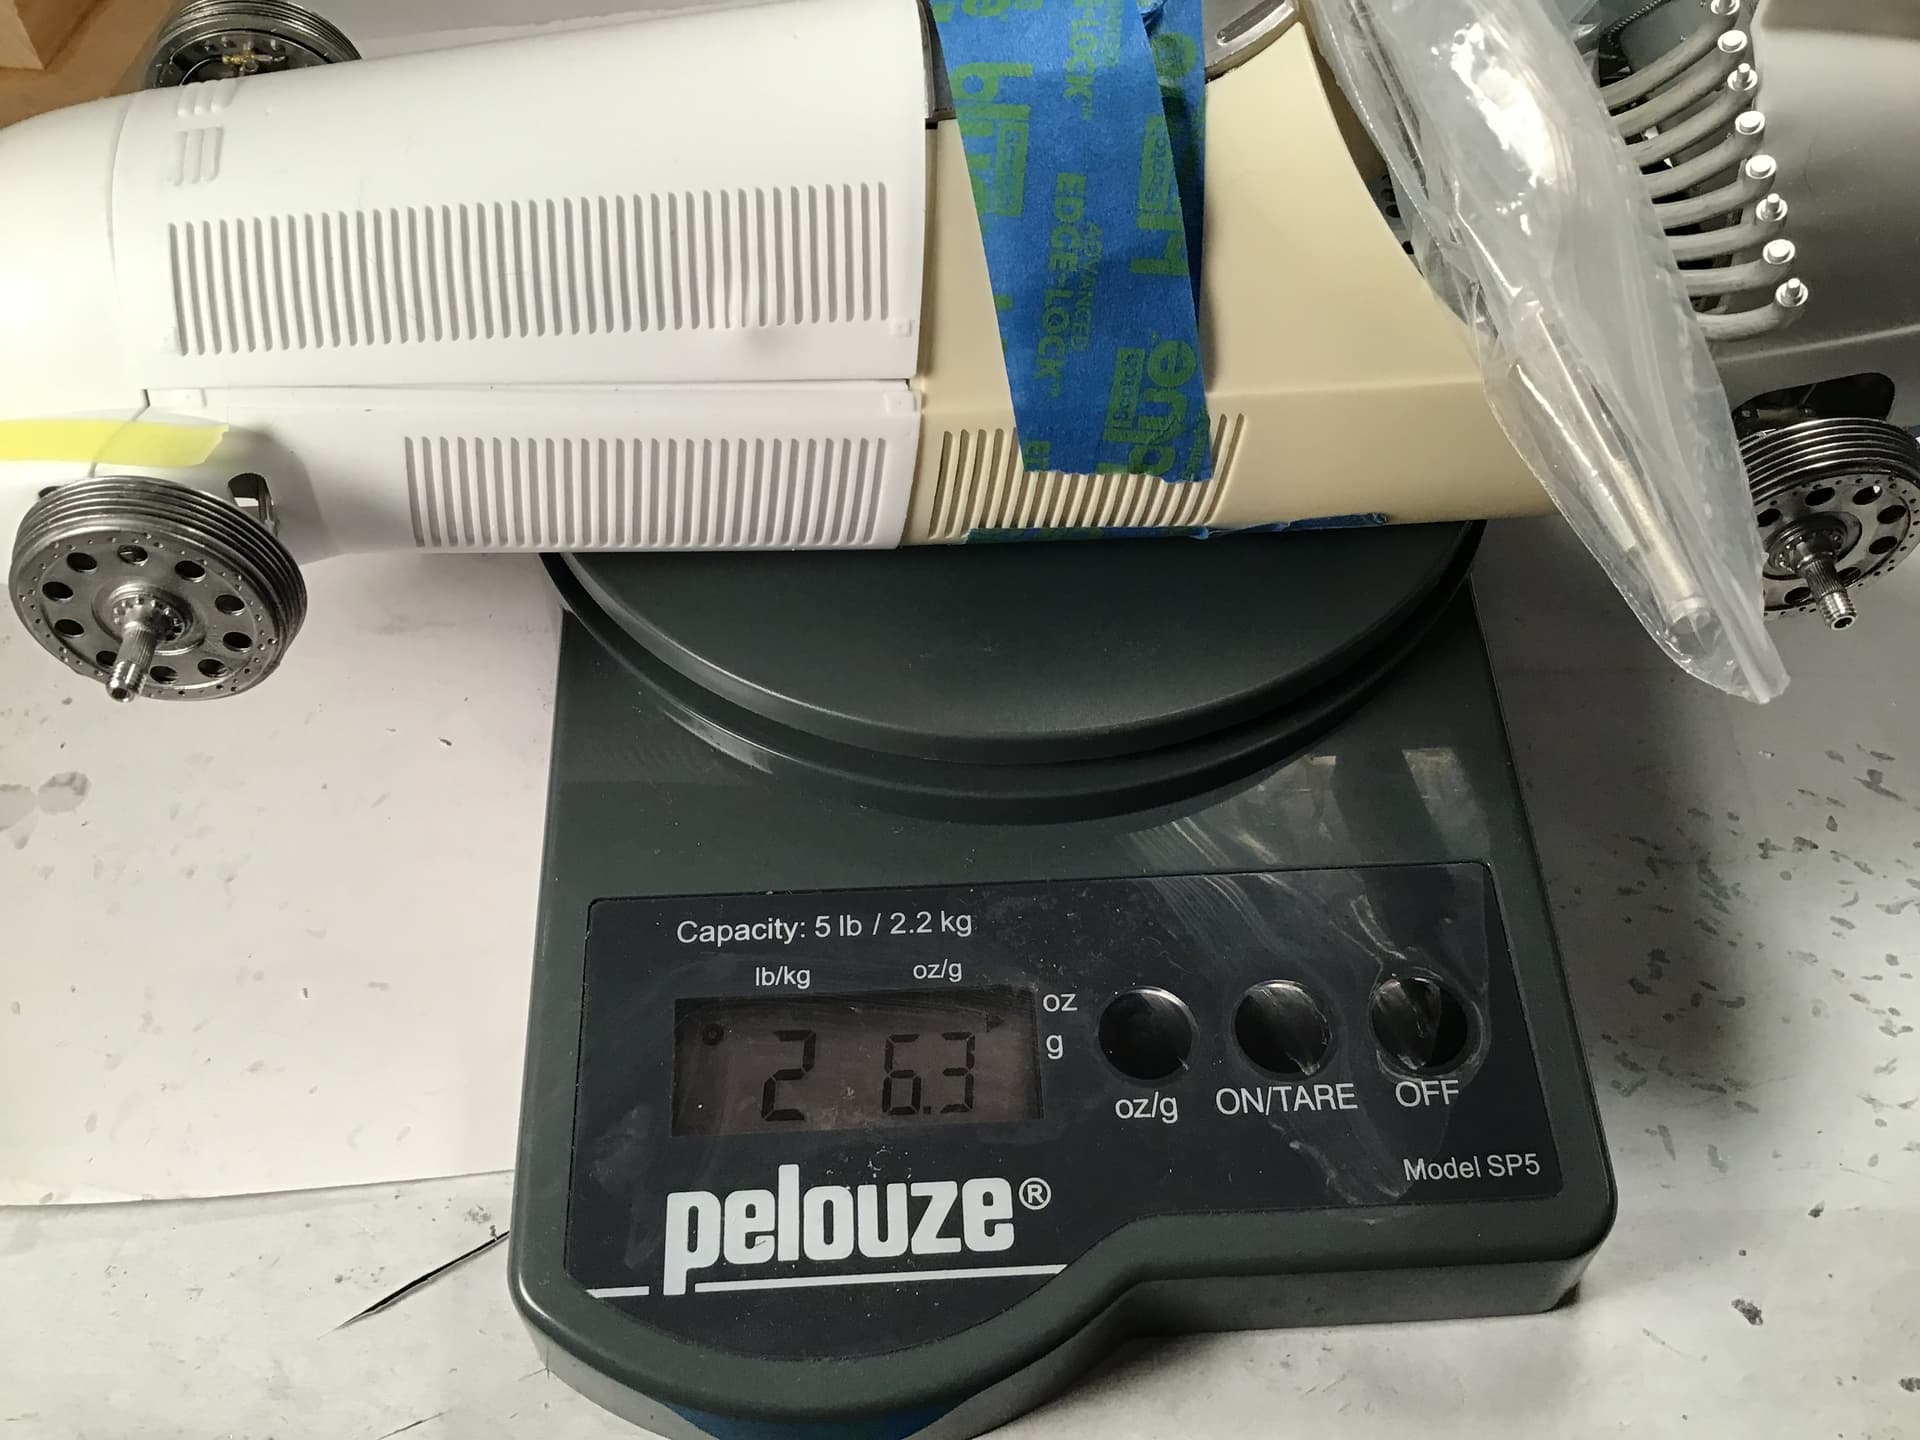
How much do you reckon it weighs, at this point?
Steering wheel looks great. Oils over acrylics is the way to go, for wood grain.
Richard,
Outstanding finishing on the wheel. Looks like a proper wood wheel shout.
I didn’t realize that these kits were that heavy once built up, but then again a 1/12 plastic is way heavier then a 1/24 scale kit. While a new cradle will work during construction, I wonder how the model will fair over the long haul in your display case. Any thought to one or two small clear acrylic rods or blocks hidden under the chassis between the axils to carry the load?
joel
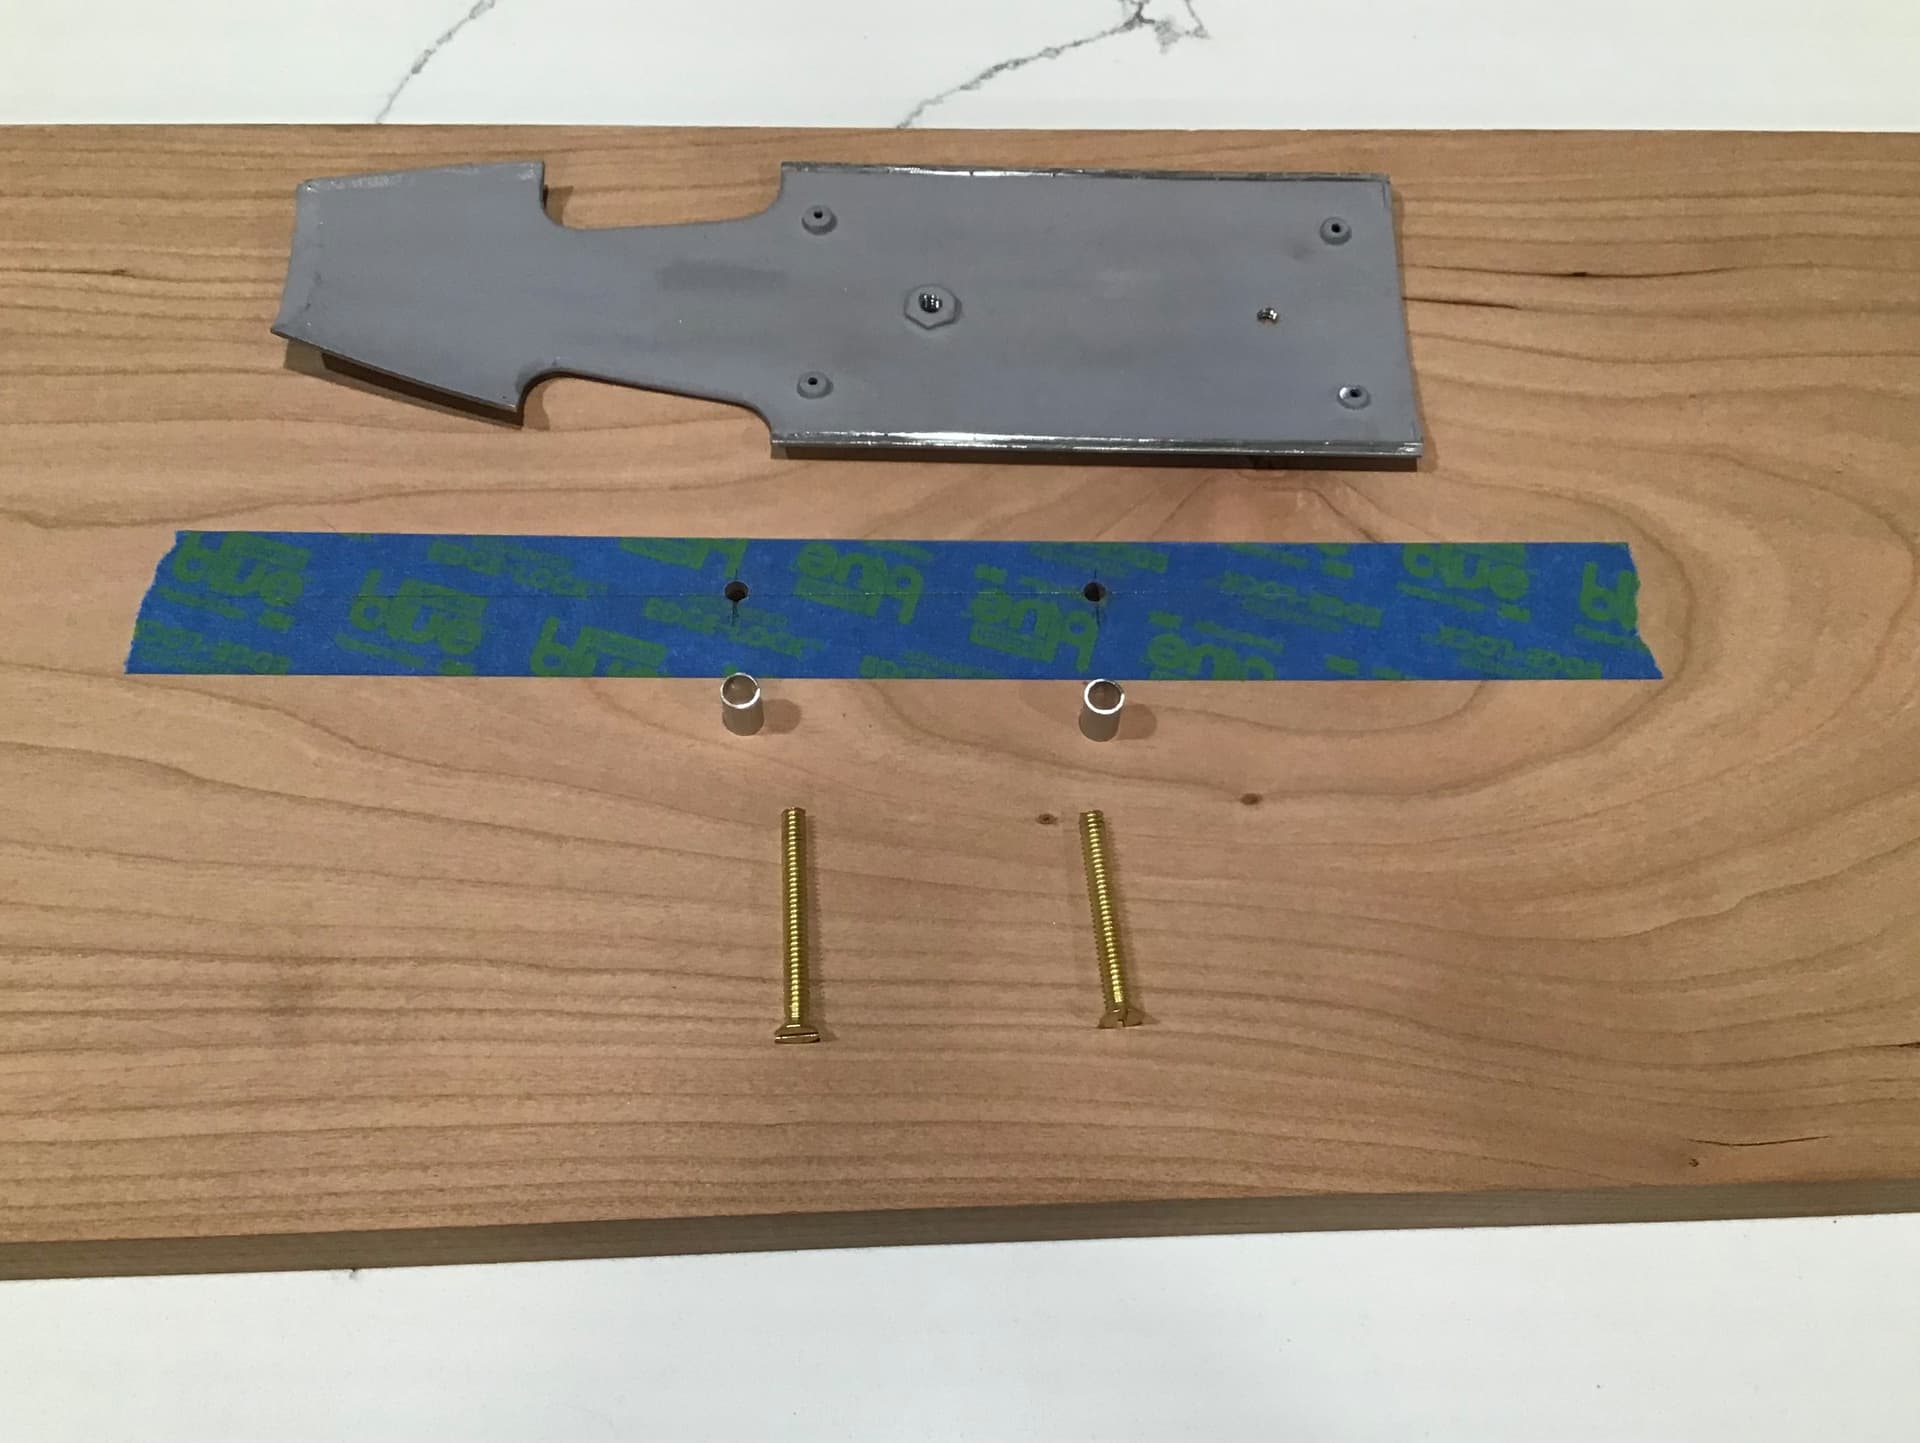
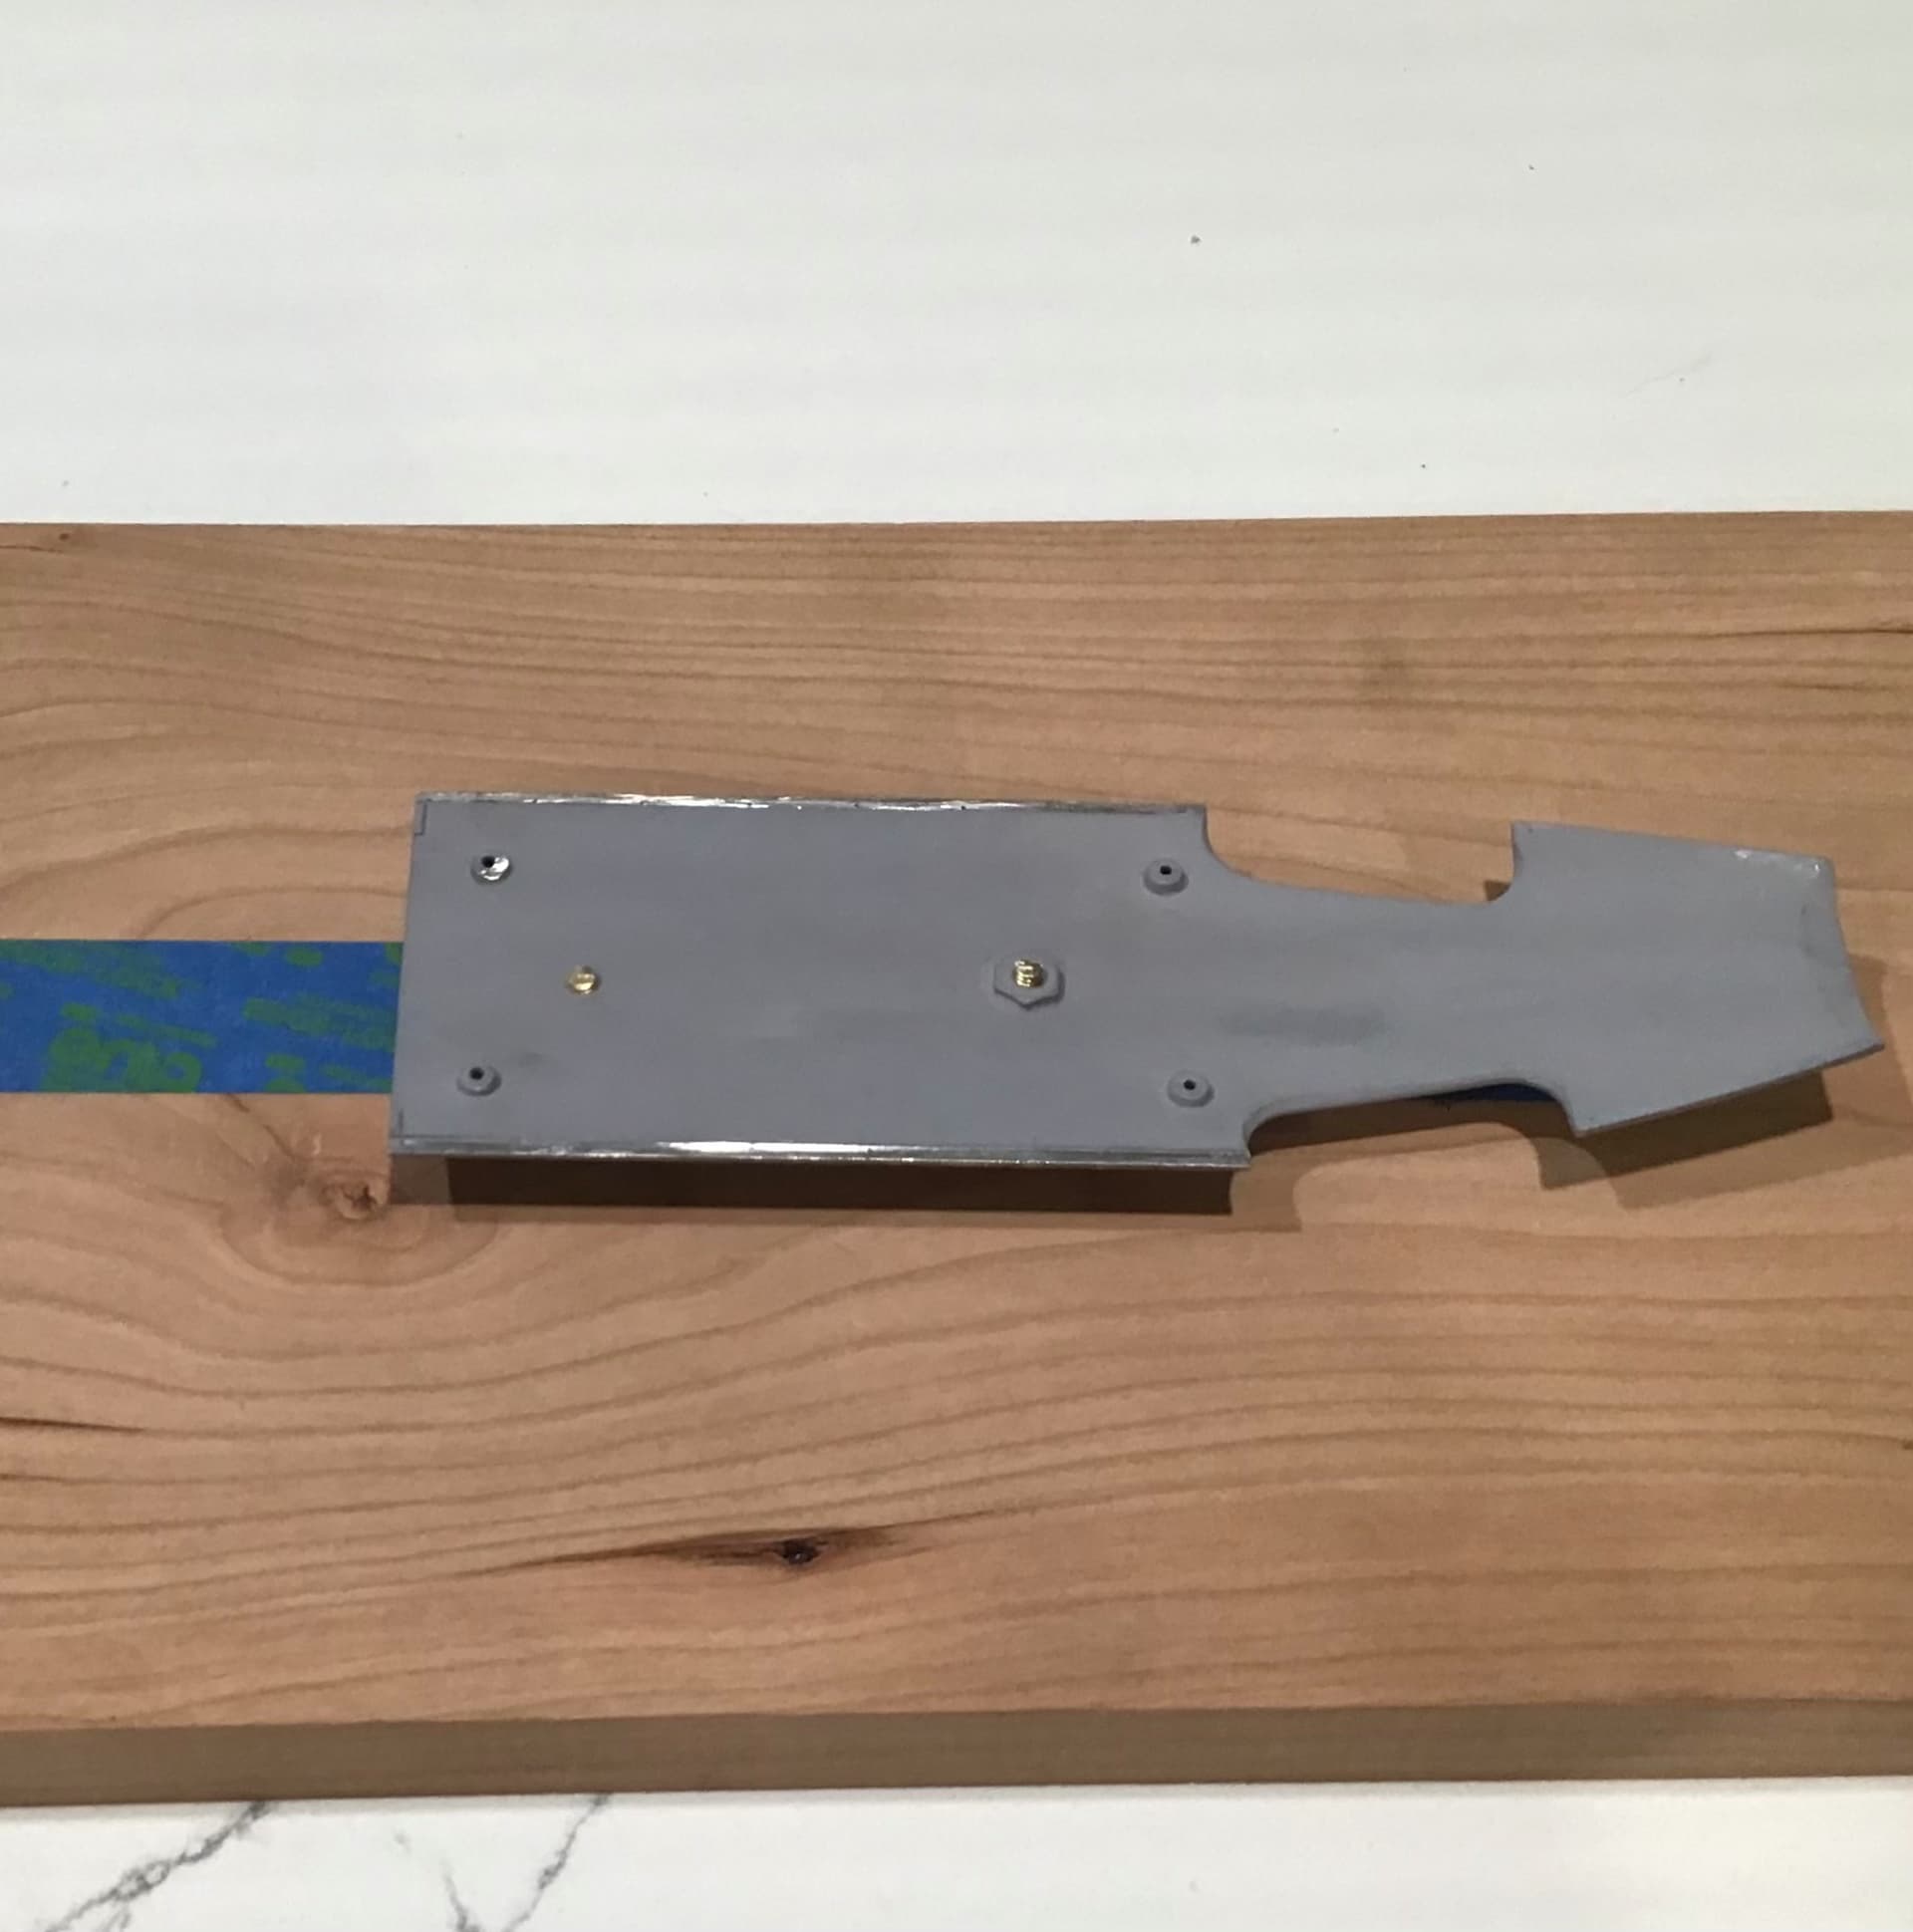
Already planned - metal belly pan drilled , tapped and backed up with a nut for 6/32 screw . I am adding another towards the front after my mishap . Both are in spots where they won’t be seen from the cockpit. MFH actually supply a white metal pedestal for this but I plan on using brass or aluminum tube around the screws to support the model . I am making a base out of cherry and once I get the body parts in paint I will mount the model on it and then finish it up .
Cheers - Richard
Richard,
As usual, you’re way ahead of me.
joel
@Hwa-rang
Thanks Jesper - looks like at this point the sprung weight is 2 lbs 6.3oz.
Steering wheel done - instruments dry fitted.
Nearly ready to start the body paint process.
MFH has you hold the tail and two main sides on with a magnet arrangement but I can’t see that happening for me and still get a nice fit at the cowl . I think I am going to have to paint all panels and then epoxy the the main cockpit sides in place then do some tune up of the joins at the top of the cowl where the resin sides meet the white metal cowl top , then likely repaint all down to the cheat line that runs down the sides .
Open to suggestions here from all - this one is difficult 
Thanks for looking - Richard
Richard,
Now that’s one really chunky baby you’ve got there.
I’m with you that the magnets really don’t sound like a great idea to hold the tail and two main sides on and actually over time stay in proper place. I’d paint each one separately and completely polish and finish them, then epoxy or thick super glue.
joel
Not a build update but certainly related -
Model Factory Hiro has announced their next subject .
Still in the design phase .
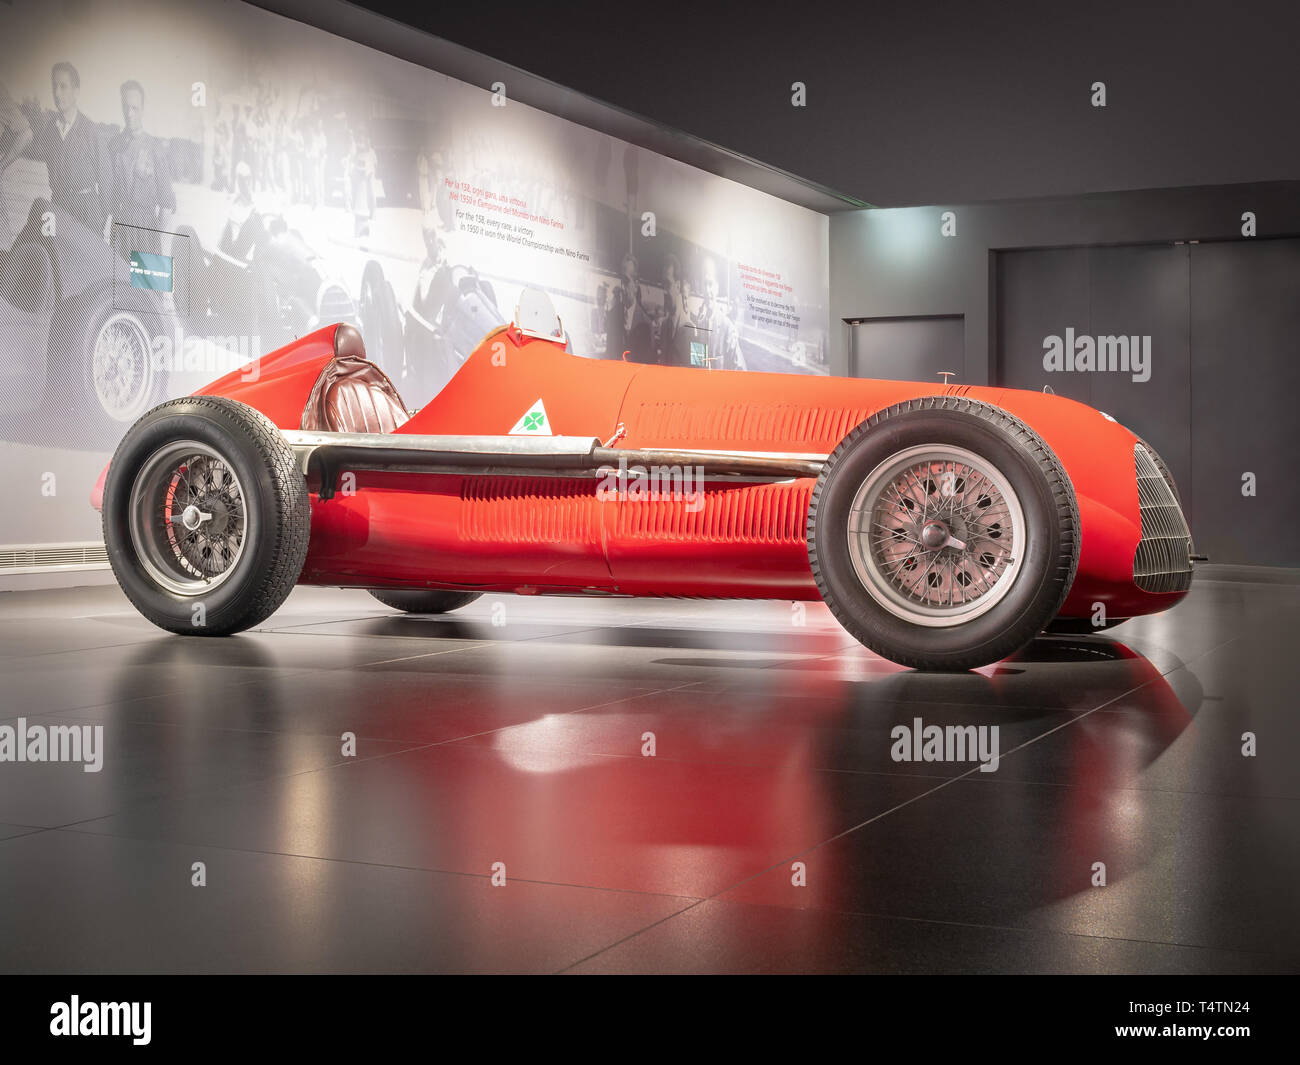
Alfa Romeo 8C 2900 B MM
Oh boy - there goes my bank account… $$
Richard,
Have you considered a 2nd job?
joel
@Joel_W - regarding the second job bit - one of life’s conundrums is if you are earning enough money for lots of toys then you don’t have time to play with them .
This is where the lottery ticket thing comes in play .
So far that hasn’t worked out in the way I had hoped.
I’ve been working on the base . Belly pan drilled and tapped for 6/32 screws . I set the model up on it’s wheels and measured the space underneath with inside calipers and cut two aluminum tubes to go around the screws . These will support the weight of the model rather than the suspension. Interesting to see how low these cars were . Ground clearance scales out to something a little over 4” .
Cheers- RT
Richard,
But in my case I wasn’t earning enough money to afford the toys I wanted to play with. We’ve been married for more then 40 years and she’s always telling me that I have too many hobbies; just two. Modeling and Auto Sim Racing. Of course neither are cheap nor any more expensive then hanging with the guys on bowling night.
I tried the Lottery route too, but never had a decent win till one day I just stopped, so each week I was $20 ahead. For the year I was always up $1040.
You’ve definitely solved the weight issue.
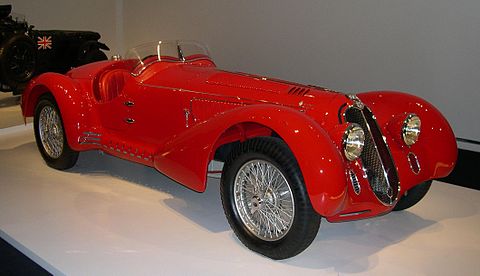
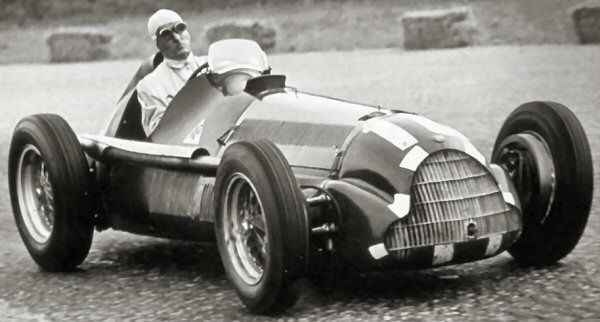
As for the ride height, I’m also surprised, but I think that MFH actually lowered the ride height so it looked much better in scale. Here’s two pictures: one actual race shot and one on display. Both have ride heights way higher the 4 inches.
Saw that. MFH always have something along almost every month to tempt you!
The ground clearance is hard to tell. Certainly it looks like the back rides slightly higher than the front but from the top photo I would say it rides about the width of the tire looking at the vertical. So 4" / 10cm could be about right.
cheers
Michael
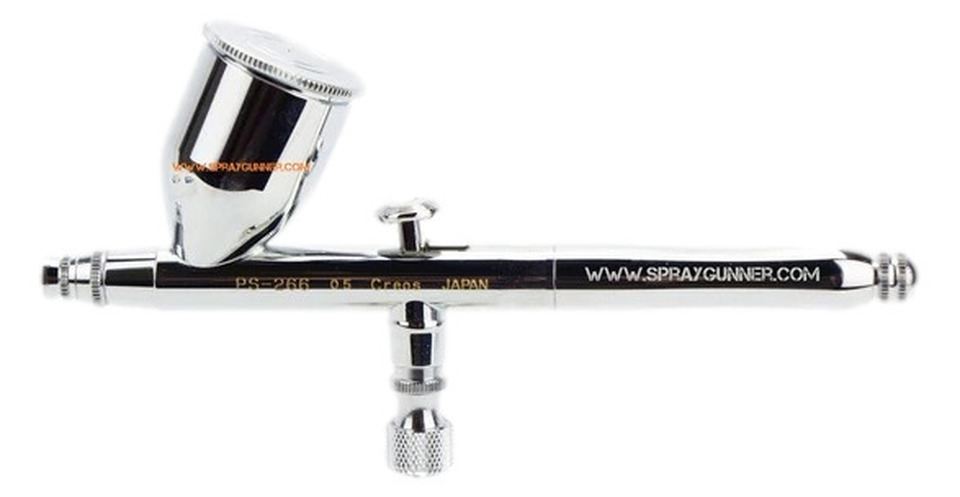
I’ve been busy with prep , prime and paint of the body panels . Battling airbrush clogs with Stynylrez- old bottle and getting on the thick side . My needle is a little on the small side for this at .3 I’ve ordered a new brush with a 5 needle for future use . I also screwed up when drilling some holes for the tiny screws that hold the panels together. I first drilled the pilot hole through both pieces as they were held together. When I came back to the bench I promptly drilled the clearance hole in the wrong piece . My new MFH kit has an abundance of resin sprue so I cut a piece of it and turned tiny plug stock in the lathe and plugged the offending holes and redrilled the pilot hole the drilled the clearance hole in the correct pieces.
In the meantime here is a link to a YouTube video tour of Model Factory Hiro - it is in two parts so be sure to watch part two after part one is over . Fascinating stuff .

Richard,
Thanks for the link to the 2 part vid about MFH kits. The entire process is simply amazing. I did love the part when he was asked how they decide which cars to build and if customer requests ever are used in the process. Hiro’s response was simply NO. The decision is solely based on his interests.
My ears perked right up when he was asked about future expansion, and one of his answers was to get into injected molded kits. Now wouldn’t that be something. Basically, a super detailed model, and since it’s made in steel molds, greater quantity, and hopefully lower prices. Of course at my age I’ll be long gone by then.
Sorry to read that you had alignment issues while drilling holes in the body panels. But the good news is that you easily made plugs on your lath.
I’ve only used Stynylrez once and had the same issues that you did with an old bottle. I’ve long ago gone back to Tamiya and Mr. Color lacquer primers for consistency and ease of use.
One can never have enough air brushes. I’ve got 3 Grex ABs now. two .3mm setups and one .5mm setup, I’m ordering a .5mm needle, nozzle, and cap to convert one of the .3mm setups so I can have a dedicated Clear coat AB with no chance of contamination. If you don’t mind me asking, what brand did you get?
joel
I bought a Gunze or Mr Color or whatever name they use these days . I would have been ok with a single action but couldn’t find one with a 5 needle and big cup so I bought a double action . I am told they are made by the same manufacturer as Iwata and I love my Iwatas.
All in at just over 100 bucks with free 2 day shipping so a good deal I think .