Model photography questions

I received a lightbox recently, and have taken some pictures with it. However, I’ve noticed that my phone will blur out half of the subject, especially when taking a shot from the front:


Back half is blurred out


The barrel is blurred out

I am using a Google Pixel 4a. Is there a way to bring the whole model into focus on a phone?

On a small side note, is there a way to prevent a visible crease/bend in the backdrop, or will it just go away with time?

The issue you have with the back half of the subject being out of focus is because of “depth of field.” You can search the ol’ inter-web for information on this issue. Basically, at any given F-stop, the camera can only focus on a certain amount of the subject from front to rear. Digital cameras function a bit differently, but the idea is the same.

If your phone has a “macro” setting or a setting for “close-up” (maybe an icon that looks like a flower or something) that should help. The lenses on phone cameras are generally very small and should be pretty well suited for closeup photography if the phone has the proper setting. There may be options for “closeup” and “extreme closeup” photography. The “extreme” setting will probably offer less usable depth of field.

Alternatively, you can take the photo from farther away (using the maximum pixel resolution or file size setting) and then enlarge and crop the image later on your computer. I use this method quite regularly.

Using a tripod to support the camera will allow you to use longer exposure times and “larger” F-stop settings (which actually make the aperture physically smaller), but to understand this is really a matter for more study on photography, in general. The “larger” the F-stop, the less light is admitted through the lens and the longer the exposure time is required for any given amount of light on the subject. The longer exposure time requires a support for the camera to prevent blur from camera movement. However, the “larger” the F-stop and the smaller the aperture the greater the usable depth of field.

Naturally, a proper camera will likely be more versatile and capable of better macro photography, but you should be able to get fair results with the digital camera in your phone.

Your issue with the backdrop just depends on what sort of material it’s made from. You might need to manually adjust the bend to mitigate or eliminate the visible crease. Some experimentation with the lighting could also help with this.

1 Like

What type of phone are you using? If you have an iPhone, I have learned a few pointers.

1 Like

Here it is, I’d still like your input anyway.

If that’s a curved paper backdrop with a tight corner bend, try un-rolling it a bit, i.e. increase the radius. Try to keep the surface as smooth and wrinkle-free as possible. HTH.

1 Like

Well, I have no idea of the features of that phone camera. But with the iPhone if you tap the screen on your subject, the camera will focus on that particular area. Draw back your phone a bit further from the subject and you get the deeper field of view. Also on the iPhone camera when you tap the screen on whatever area, a sliding scale appears on the right of the box area designated, slide that scale up or down to adjust your exposure.
Once you’re photos are done, go to your photo editing software to crop out excess and adjust exposure, color, contrast, etc to your preference.

1 Like

Sorry but no…Macro lenses have the smallest depth of field and they are suited for details, not for general views, so it will make the problem worse. And the size of a lens has nothing to do with its function, it is the shape. Size is important to get more (physical) resolution and light.

On the other hand, your advice about distance to the subject and using larger F-stop is totally correct. I would just add to avoid zoom-in.

1 Like

I have to disagree. The OP is using a camera with the fixed lens, so he has no option to switch to a specialized macro lens, so that’s not really in play here. However, the smaller lens on his phone camera should be capable of giving him pretty good results.

The smaller the lens the theoretically better depth of field it can achieve. For many years (before the prevalence of digital cameras), I used two different “pin hole” camera lenses that were, because of their very small size, capable of almost unlimited depth of field. The tradeoff was the very (very!) long exposure times.

One of them I used was the “classic” pinhole which actually had NO lens, and the other was similar but with a very small lens added over the pinhole. These were… aggravating and “experimental” to use since it was impossible to use “through the lens” view finder to frame the subjects. With regular film developing and print costs it could get expensive to even get just a few nice shots. Professional camera studio tripods and lighting were really what was needed so that the shots could be composed using a normal macro lens and then - without disturbing the camera - changed out with the pinhole lens. However, all of that was just going too far for a few model snaps.

Even today, I use a digital “pocket” camera that has a relatively small lens with the programable macro settings and am able to achieve relatively good depth of field. Admittedly, it’s not perfect, but still not bad and generally better and easier to achieve then doing the same photography with a “full-sized” digital camera, manually setting the F-stop to its largest size. The smaller lens and programable macro setting produces better results than a full-size camera with a larger lens set to its smallest aperture (even when switching out with a macro lens).

However, none of these combinations (except the specialized pinhole lens) give the best depth of field. For those shots, I’ve found that pulling the camera back and using manual settings for normal photography, then framing the subject using the digital zoom, while allowing the auto setting for exposure (while using a tripod) to do its thing will give me the best depth of field. I then use PhotoShop to digitally zoom and crop the photo.

There is, of course, a downside to the smaller lenses (which was not a problem with the pinhole lens) in that they do create more curved distortion towards the edges of the image than larger lenses. Again, my work-around for this is the same as above. Digitally zooming and cropping the subject during post-processing usually crops off any distorted areas on the edges of the original image.

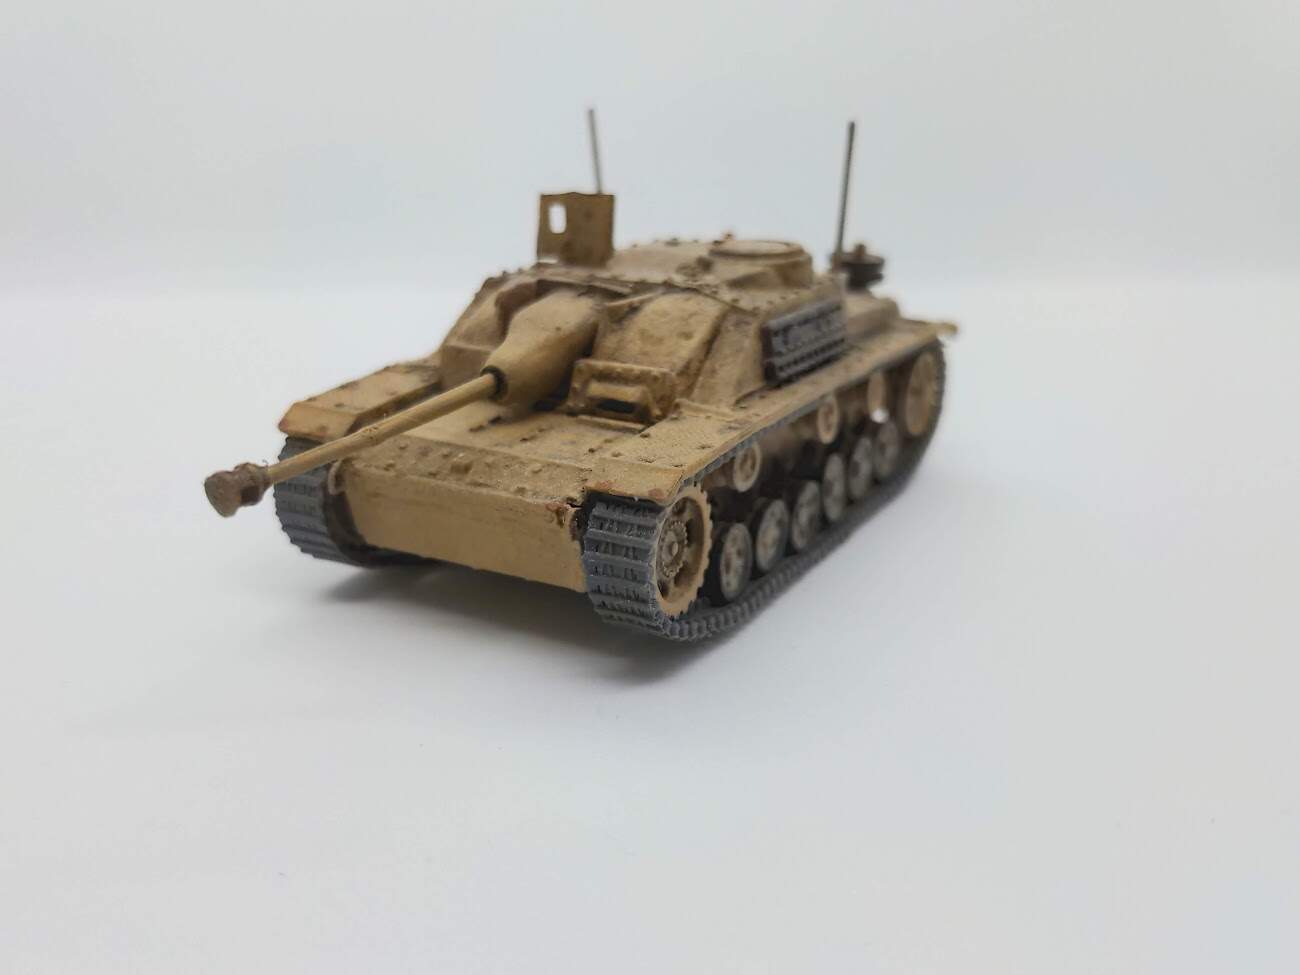
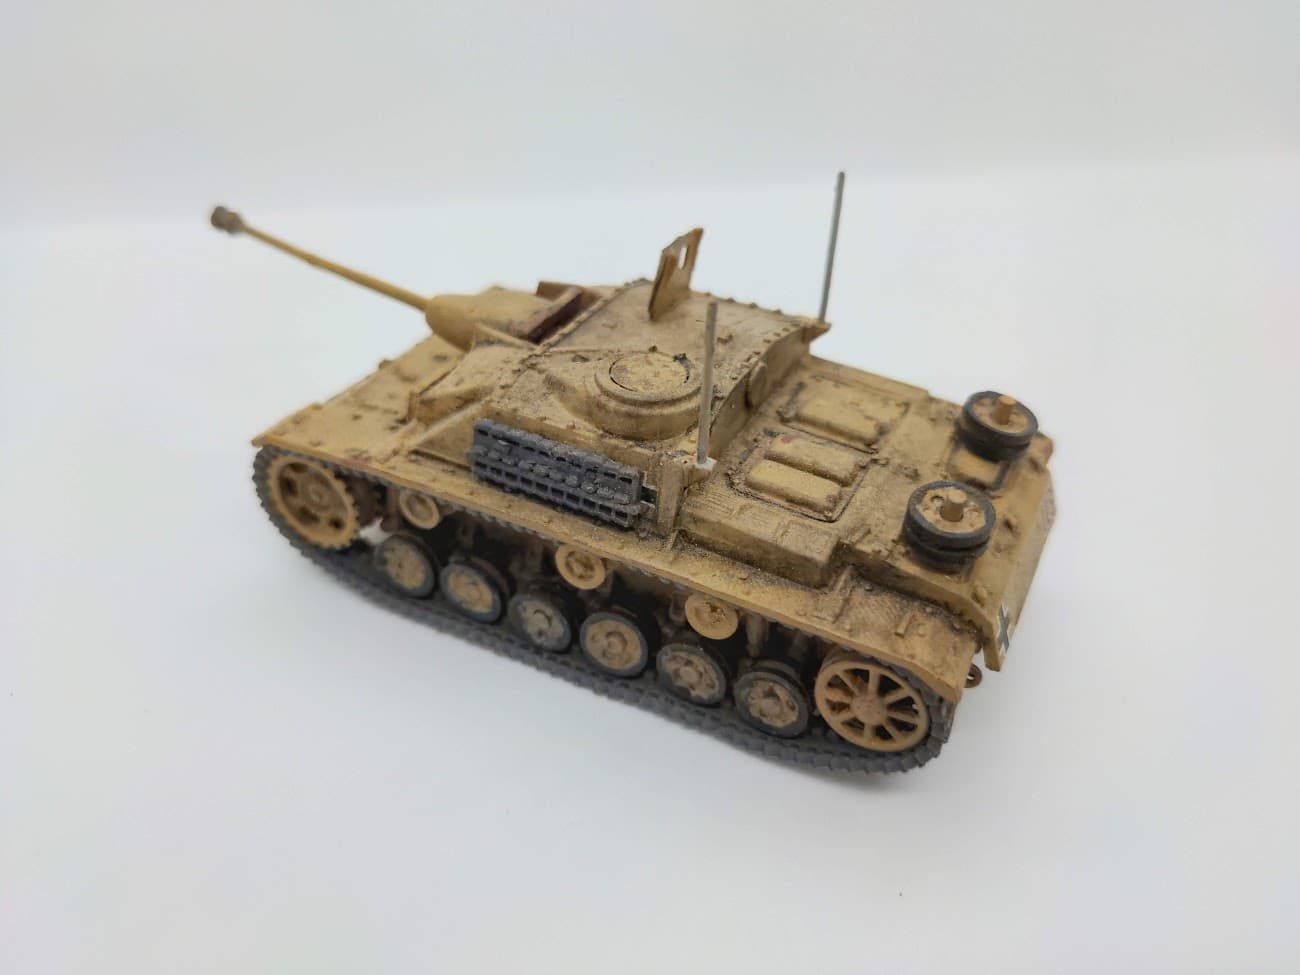
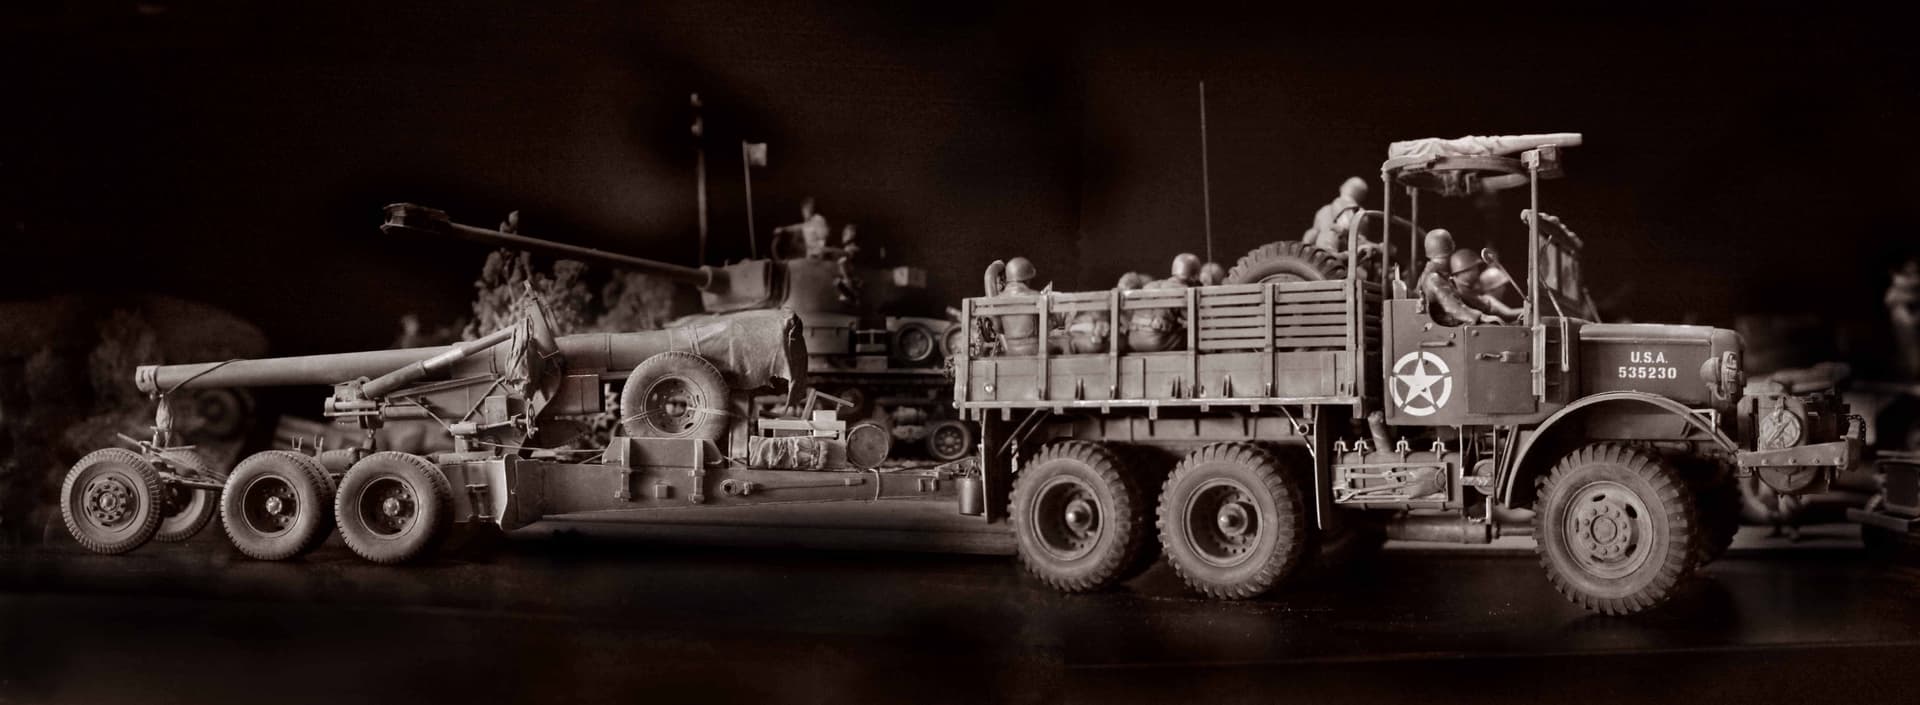
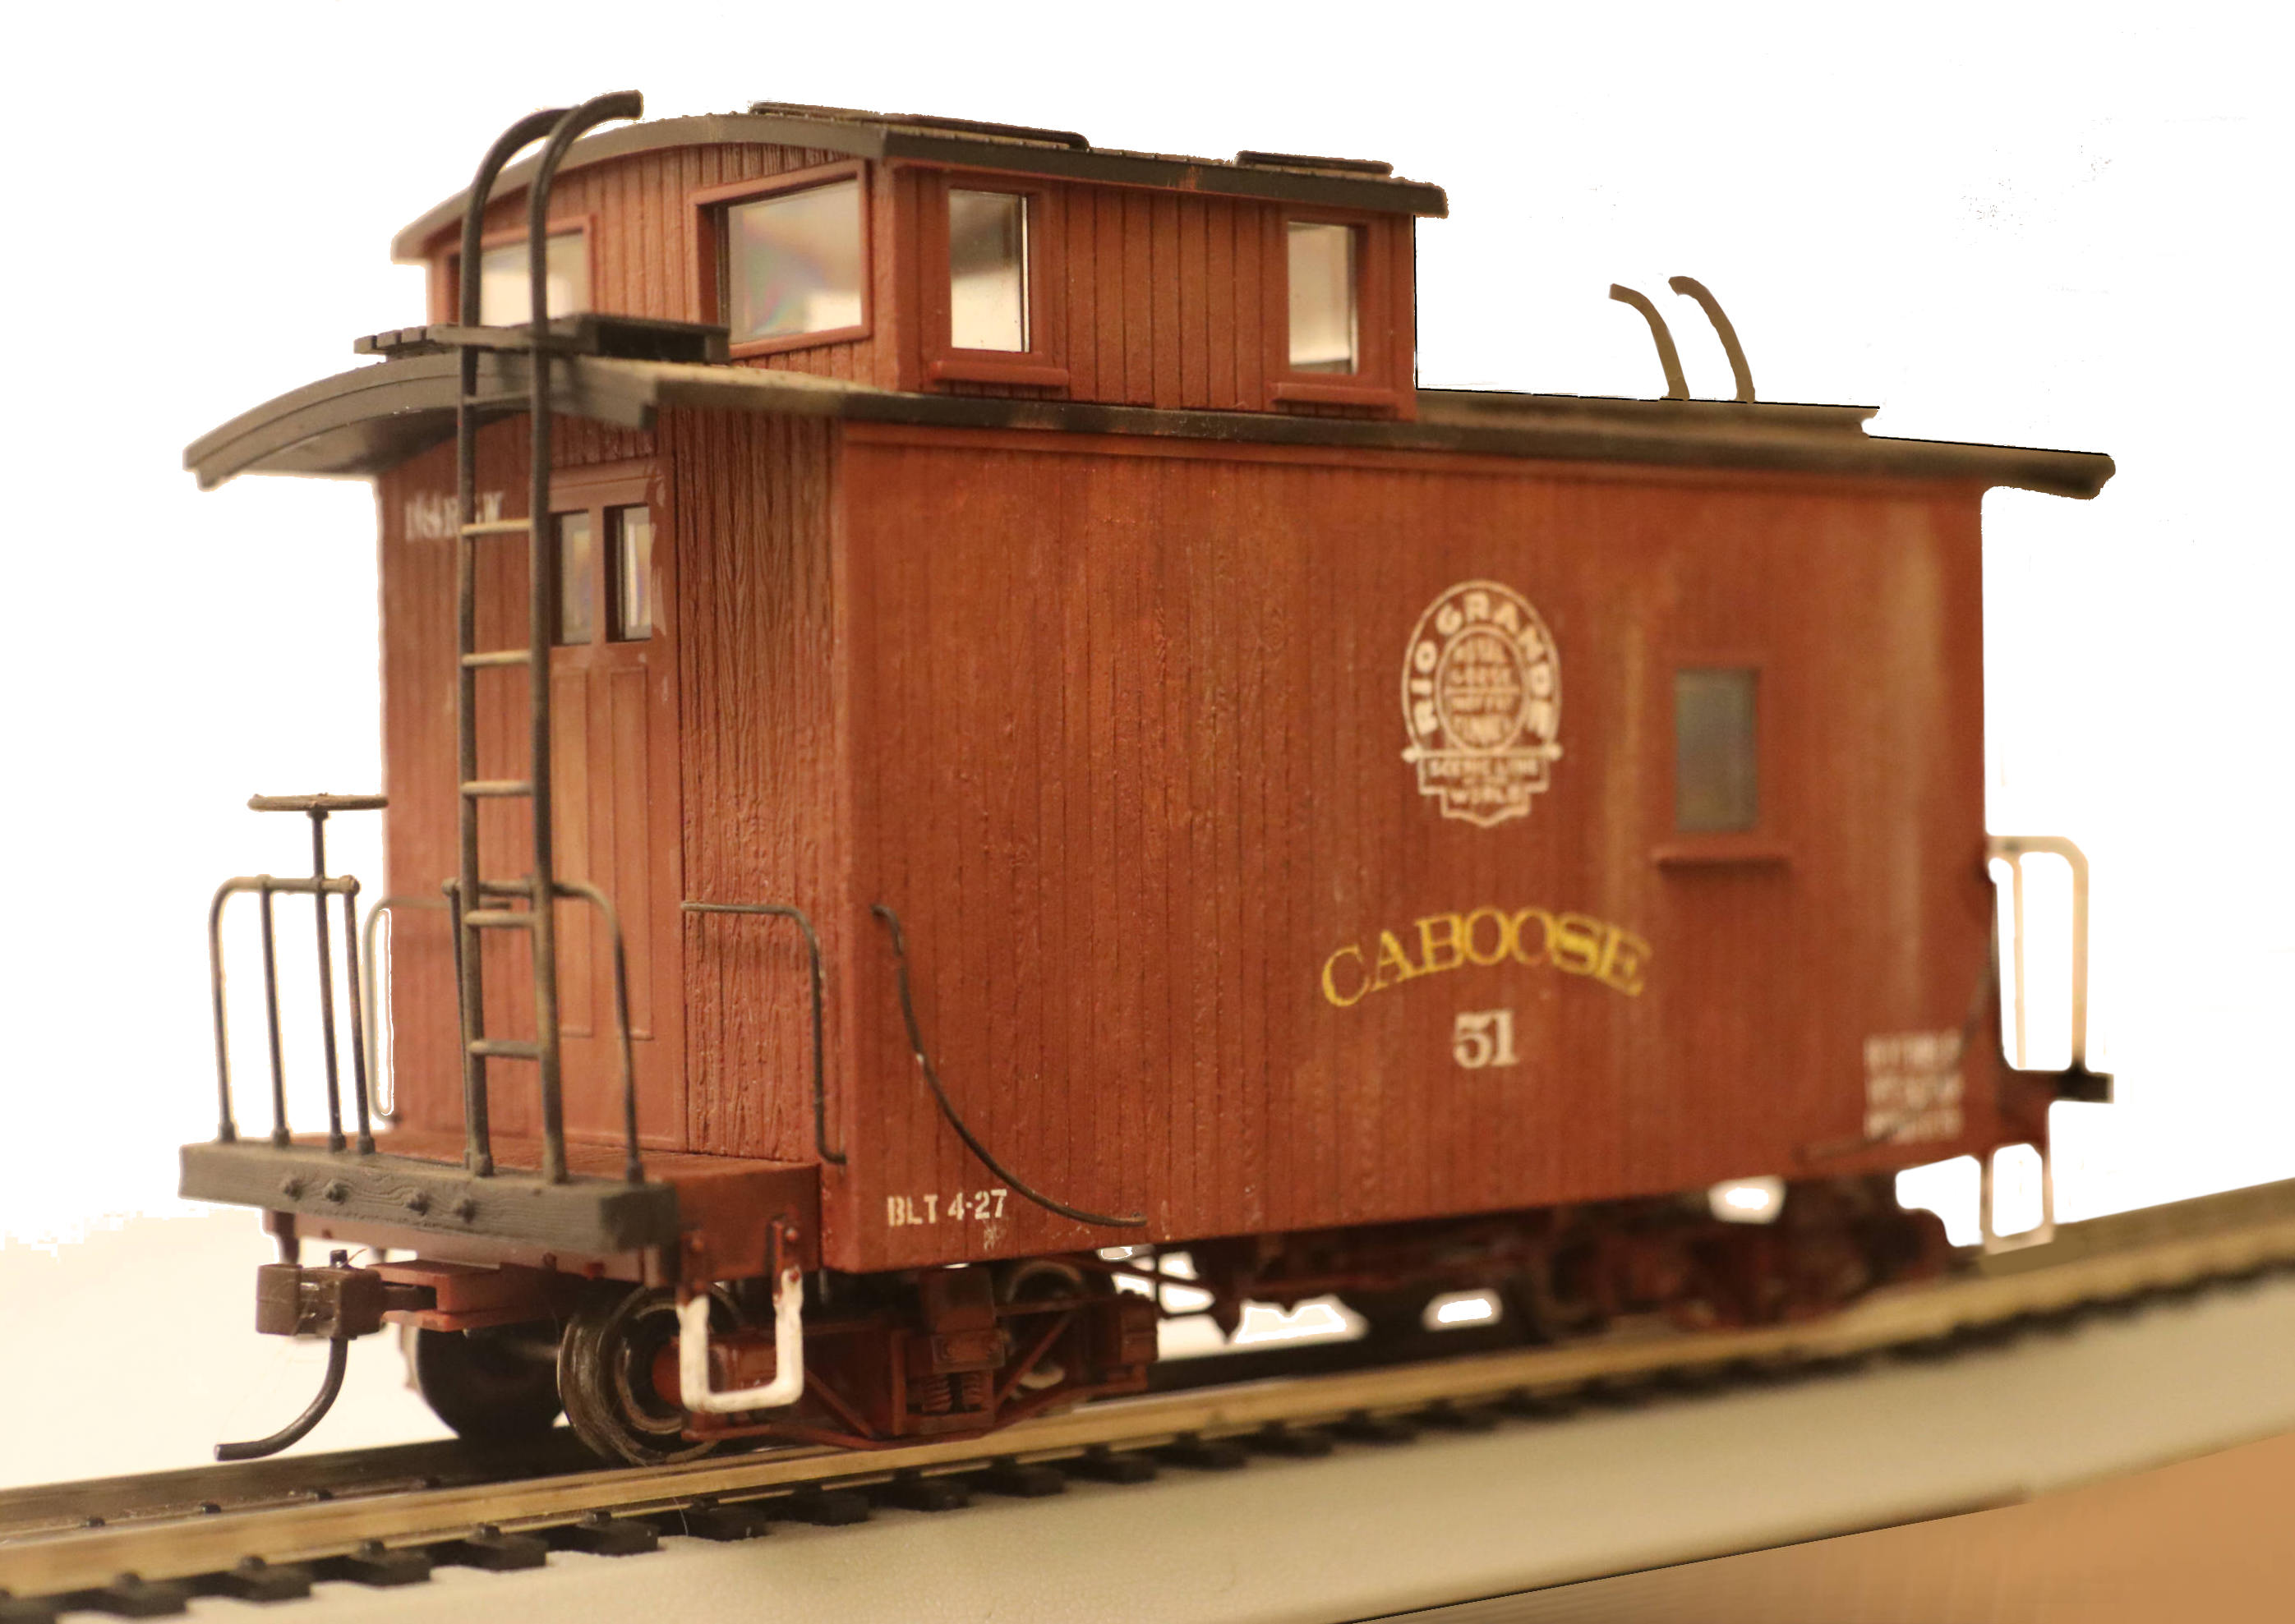
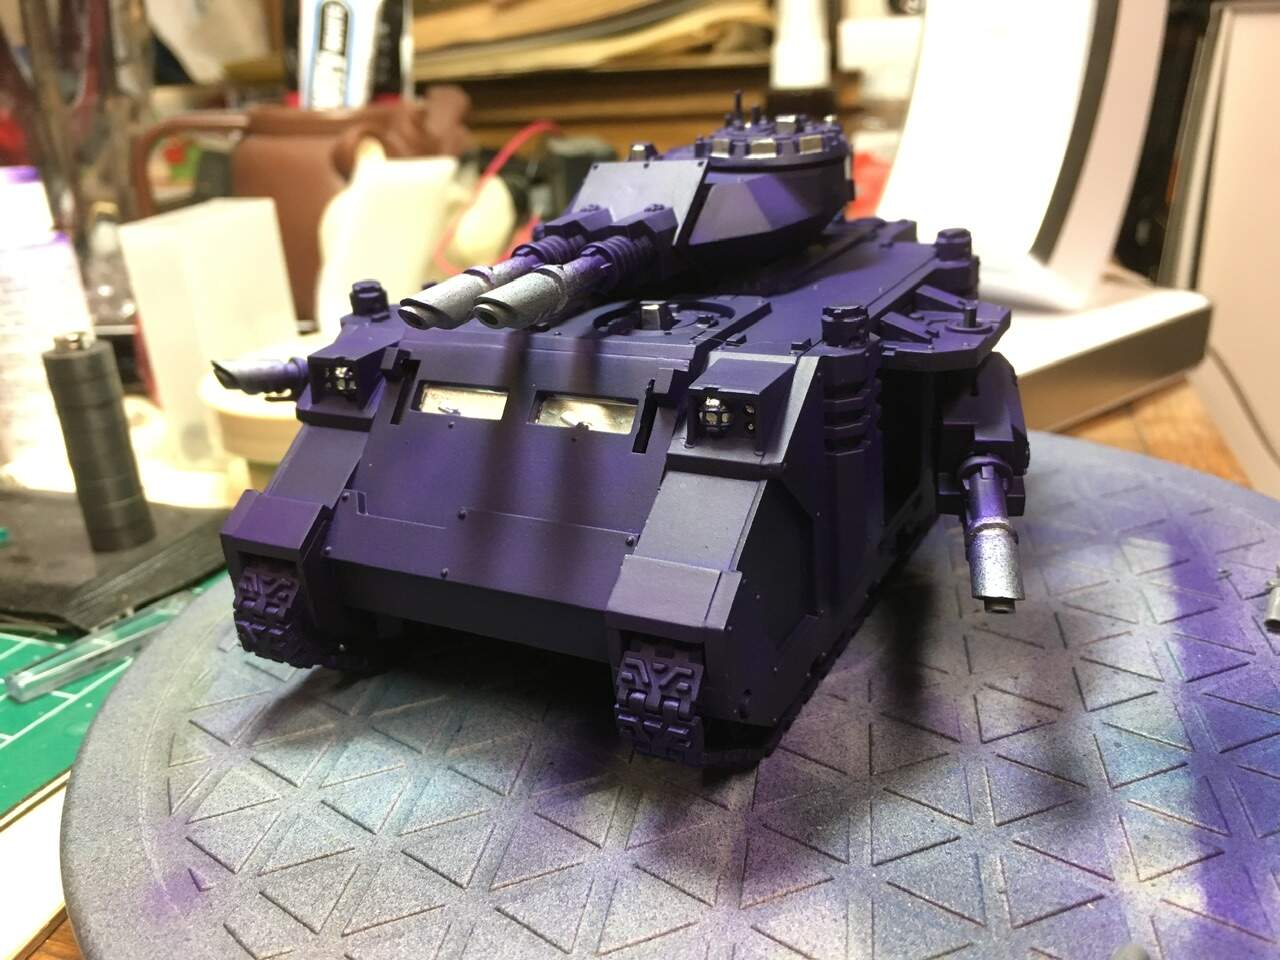
This photo was taken using a Sony digital pocket camera (DSC T100 Cyber Shot) on a tripod using the macro setting and digital zoom. Lighting is nothing special - just a pair of floor lamps with daylight balanced florescent bulbs. This is the original image with no post processing or cropping.

You can see the usable depth of field achievable with a small size fixed lens. The end of the main gun barrel is just starting to blur, but the roadside shrine in the background is still in focus.

This is my photography setup. Quite simple. The only change made to it before the photo above was taken was that I used a couple of colors of rattle can spray paint to add the “sky” and “clouds” to the inside of the light box. The box is made of a couple of sheets of foam core poster board held together with masking tape. The tripod is an inexpensive “big box store” purchase. The floor lamps are OTT lights, but I move them around my workroom to wherever I need more light for a job.

3 Likes

I think it makes sense now, at least partly, because I was using the macro setting on the camera app.

The macro setting will give you a more shallow depth of field. (The back will be fuzzy.)

Try raising the overall lighting level. This will cause the lens to select a higher f number giving you greater depth of field.

Also if the camera/phone shows you a focusing spot try focusing on a spot half way into the subject and not just on the front edge of the model.

1 Like

What type of computer are you using to ‘polish’ and ‘clean’ your photo’s up?
I’m imagining you must be having a expensive really powerful computer to do this.
Do you know if a tablet is well suited if it is a high end model to edit photo’s with?

I’m using a Windows based conventional laptop, specifically an HP Envy. Nothing particularly special about it. I currently using Windows, ver. 10, but the laptop is so old that it originally came with Windows 7. Like I said, nothing special - pretty average.

As for software, I do use Adobe Photoshop Elements, but pretty much just the “quick” editing tools - mostly sharpen and adjust lighting and contrast. (Note that I also use Adobe for a number of other picture and graphics editing jobs, but I am far from an expert with it.)

My camera is a nearly 15-year-old inexpensive Sony Cybershot. With that I also pretty much just use the auto features for macro, focus and exposure. I do mount the camera on a tripod and use the autotimer because of the fairly long exposure times. This eliminates any blur from trying to hand-hold the camera.

As for lighting, I use a pair of floor lamps with daylight balanced CFL bulbs, one placed to either side of the camera. My light box is a shown above. I have since used a couple of different colors of common rattle can spray paint to lightly paint the inside to mimic the sky, so a light pale gray blue on the bottom and sides fading up the back and side allowing a bit of the white board to show through as “clouds.” The second color is a medium gray painted lightly down from the top edges of the back and sides to add some “darker clouds” to my “sky.”

The sky colored background has really helped with some color balance issues I was experiencing. Now, with the daylight balanced light bulbs and the sky-colored background, I use the camera’s auto “daytime, outdoors” picture settings.

Finally, I shoot my photos using the largest file size on my camera and then use the computer to crop the photo size and save in a more modest 640 x 480 for posting up on the internet.

I must confess that I can’t answer your question about using a tablet-computer vice a normal laptop or desktop. I’ve never owned or used one, myself. I suspect that a tablet could be used to edit photos, that it would have the necessary processor speed and memory (for both the photos and the software / app). However, that’s as far as I can go with that topic. Sorry.

I’m quite sure, however, that someone here is likely a no-kidding expert on the subject and can offer you some detailed advice on the tablet-photo editing question.

I am totally with Mike Roof in his comments above:

No “special” or expensive laptop computer is necessary. I use an old, OLD Apple Powerbook that is just about on it’s last leg. (Apple has stopped issuing updates for this model and that is usually the kiss of death.) But still it chugs along doing just fine.

I also recommend you look into a photo manipulation software called GIMP. Just as good as Photoshop but in this case it is a FREE online download. (don’t ask me how they make their money.) And it is available for both Mac and PC.

Best Regards
Mike
165thspc

p.s. Also know nothing of using tablets for photo editing but i do know there are some out there that can do it!

The Studio Guy

1 Like

I’m fairly familiar with GIMP, but don’t really know much in the realm of photo editing. I use it for drawing and crude photoshop art.

From The Studio Guy

GIMP will do 99% of everything Photoshop will do and maybe about 1% of things Photoshop will NOT do.

I do all the expected photo manipulation: cropping, retouching, brightness, color and contrast adjustments but then I also use it for drawing as well.


A recent series of drawings showing how to form deep inverted U-Channel saddle hangers for Mack NO gas tanks out of Evergreen channel.

SaddleHangers1SaddleHangers2SaddleHangers3


But then I also used GIMP to carefully join two separate photos (gun + tractor) to make one high res image:

Also joined two photos from the TM with a photo of my model (trailer + trailer + tractor) to illustrate a WWII “Ammo Train”


NOT trying to show off here, just trying to show the versatility of GIMP even when used on a much older laptop.


Also great for enhancing, color adjusting, retouching and cleaning up backgrounds on “regular” photos.


FYI ~ There was a paper seam right down the center of the background and also when first taken the front wheel hub was incorrect, which I have now corrected on the model. I did not want to chance not being able to recreate this very nice photo so instead I shot just the front wheelhub under similar lighting conditions and laid it into this photo using GIMP.

________________________

In Gimp check out under the pull down “Colors” go to “Curves” and try giving that a whirl. Then the pencil and brush tools are extremely nice. Try also the “Clone Tool” (icon looks like a rubber stamp) for fixing flaws in backgrounds and creating more background where none exists.

Here is a before and after:
(Not exactly the same image but it was the only “before” photo I had left in the file.)


Note background clean-up, crop and color/brightness adjustment.

The Studio Guy

2 Likes

I use an app called Pixelmator on a six year old iPad exclusively when I doctor Jerry Rutman’s excellent combat style photography. The depth of field is initially up to him. I can blur whatever part of the picture I want but it’s harder if not near impossible to clear things up after the shot.

2 Likes

Ah, I use RawTherapee for my photo editing. I use it for crop, color, temperature, and other minor adjustments.

One simple comment to think about.
No software can fix a bad capture. Do whatever you can to get a good image to start with. The rest is ‘easier’.
Lots of YouTube videos out there about capturing model images.

3 Likes

I’ll definitely do that. I expect to be doing lots of photography midway through May after exams are over, so that will be nice.

Hint: Using pages of newspaper for a backdrop is a bad idea. Just sayin.’

—mike

1 Like