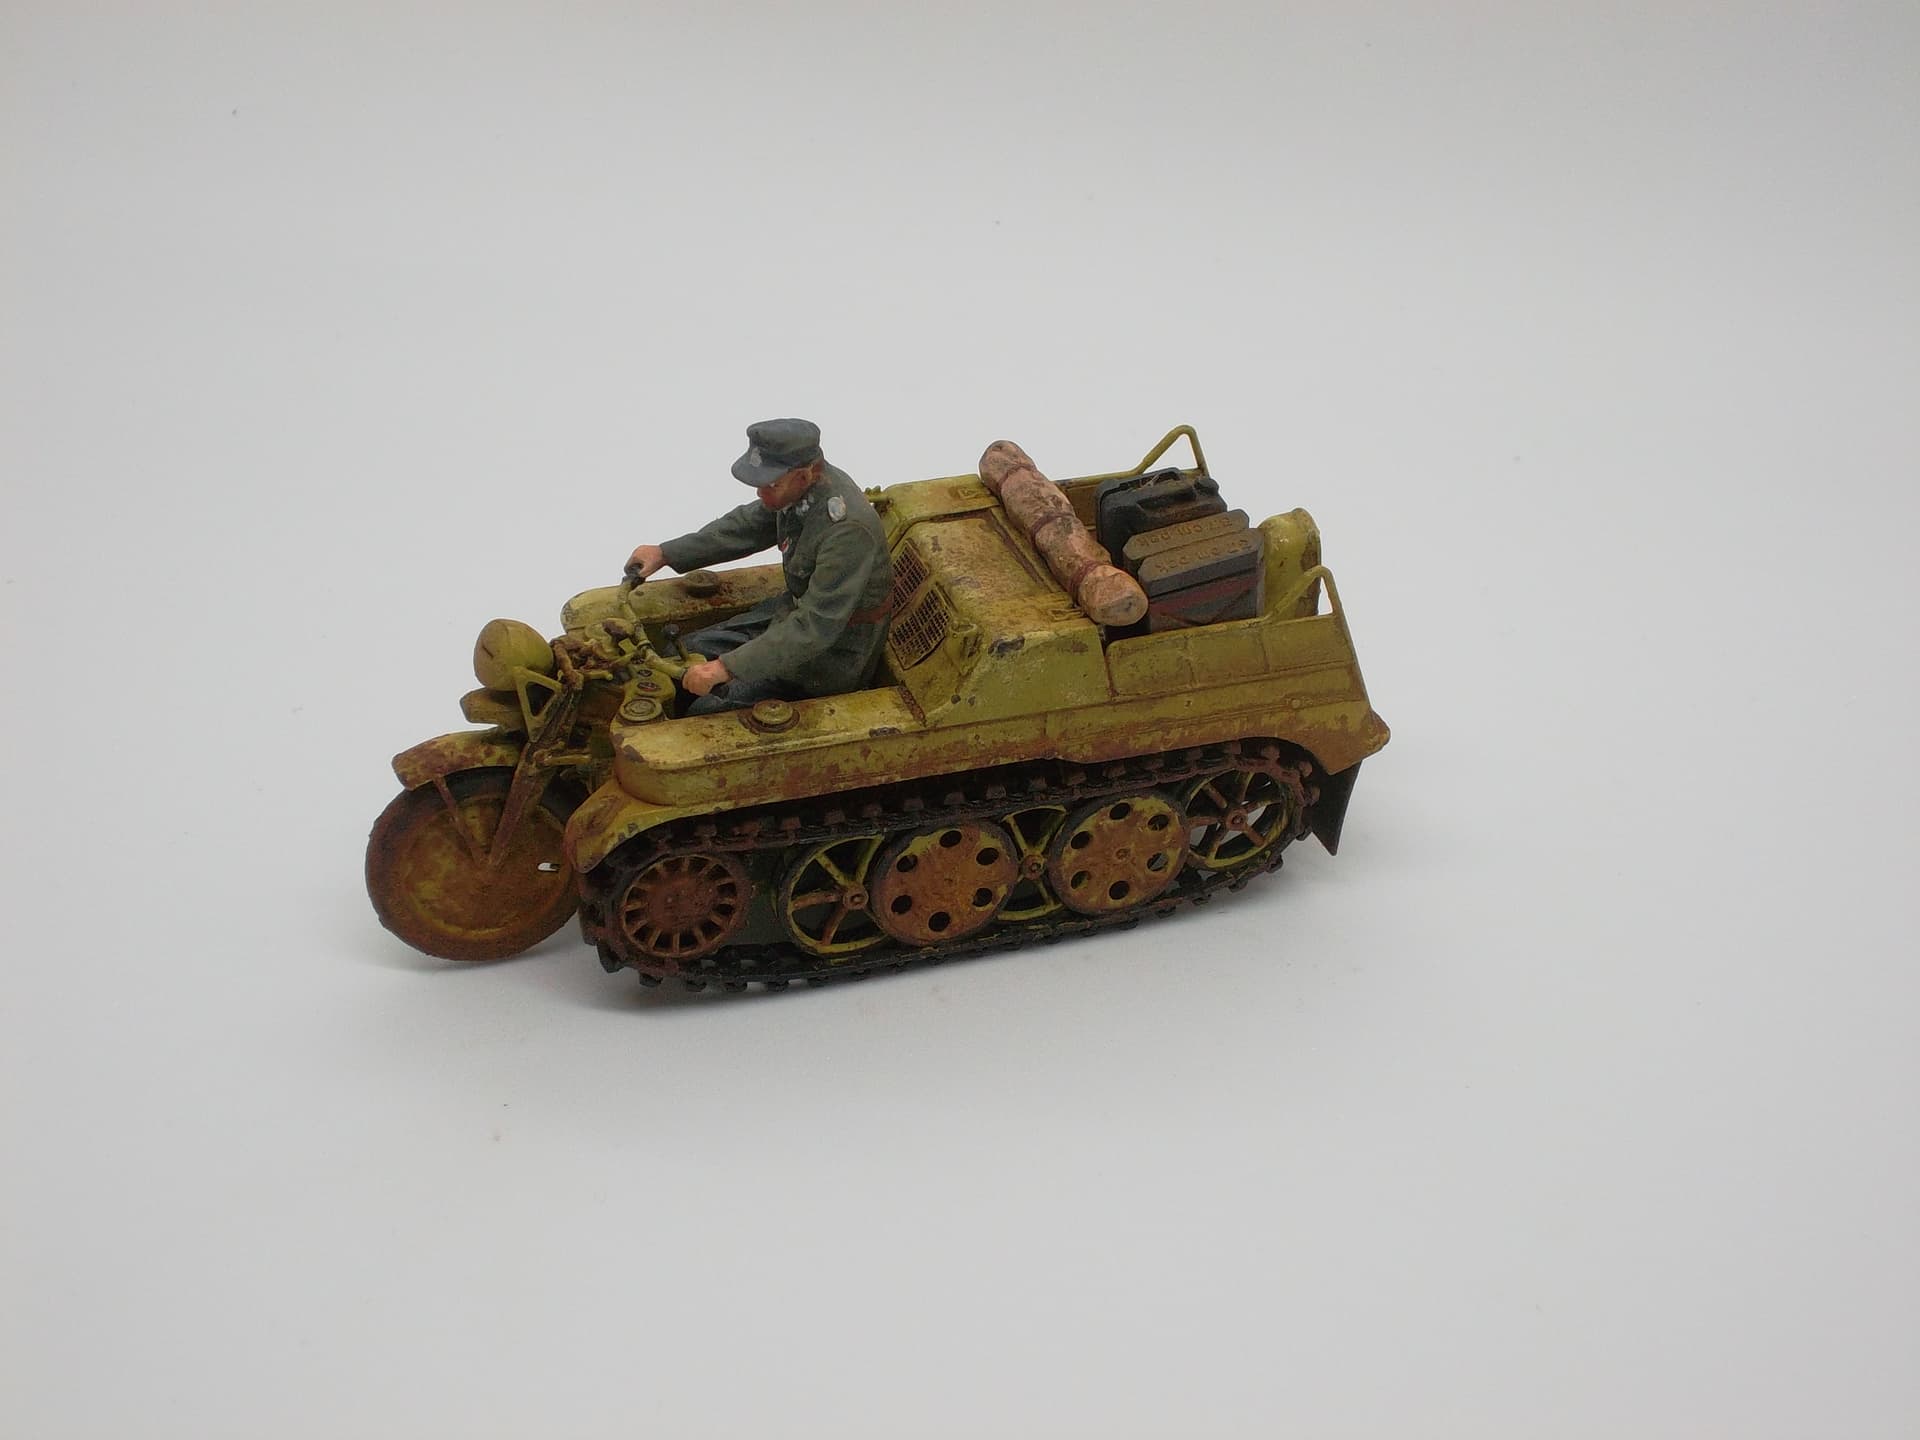
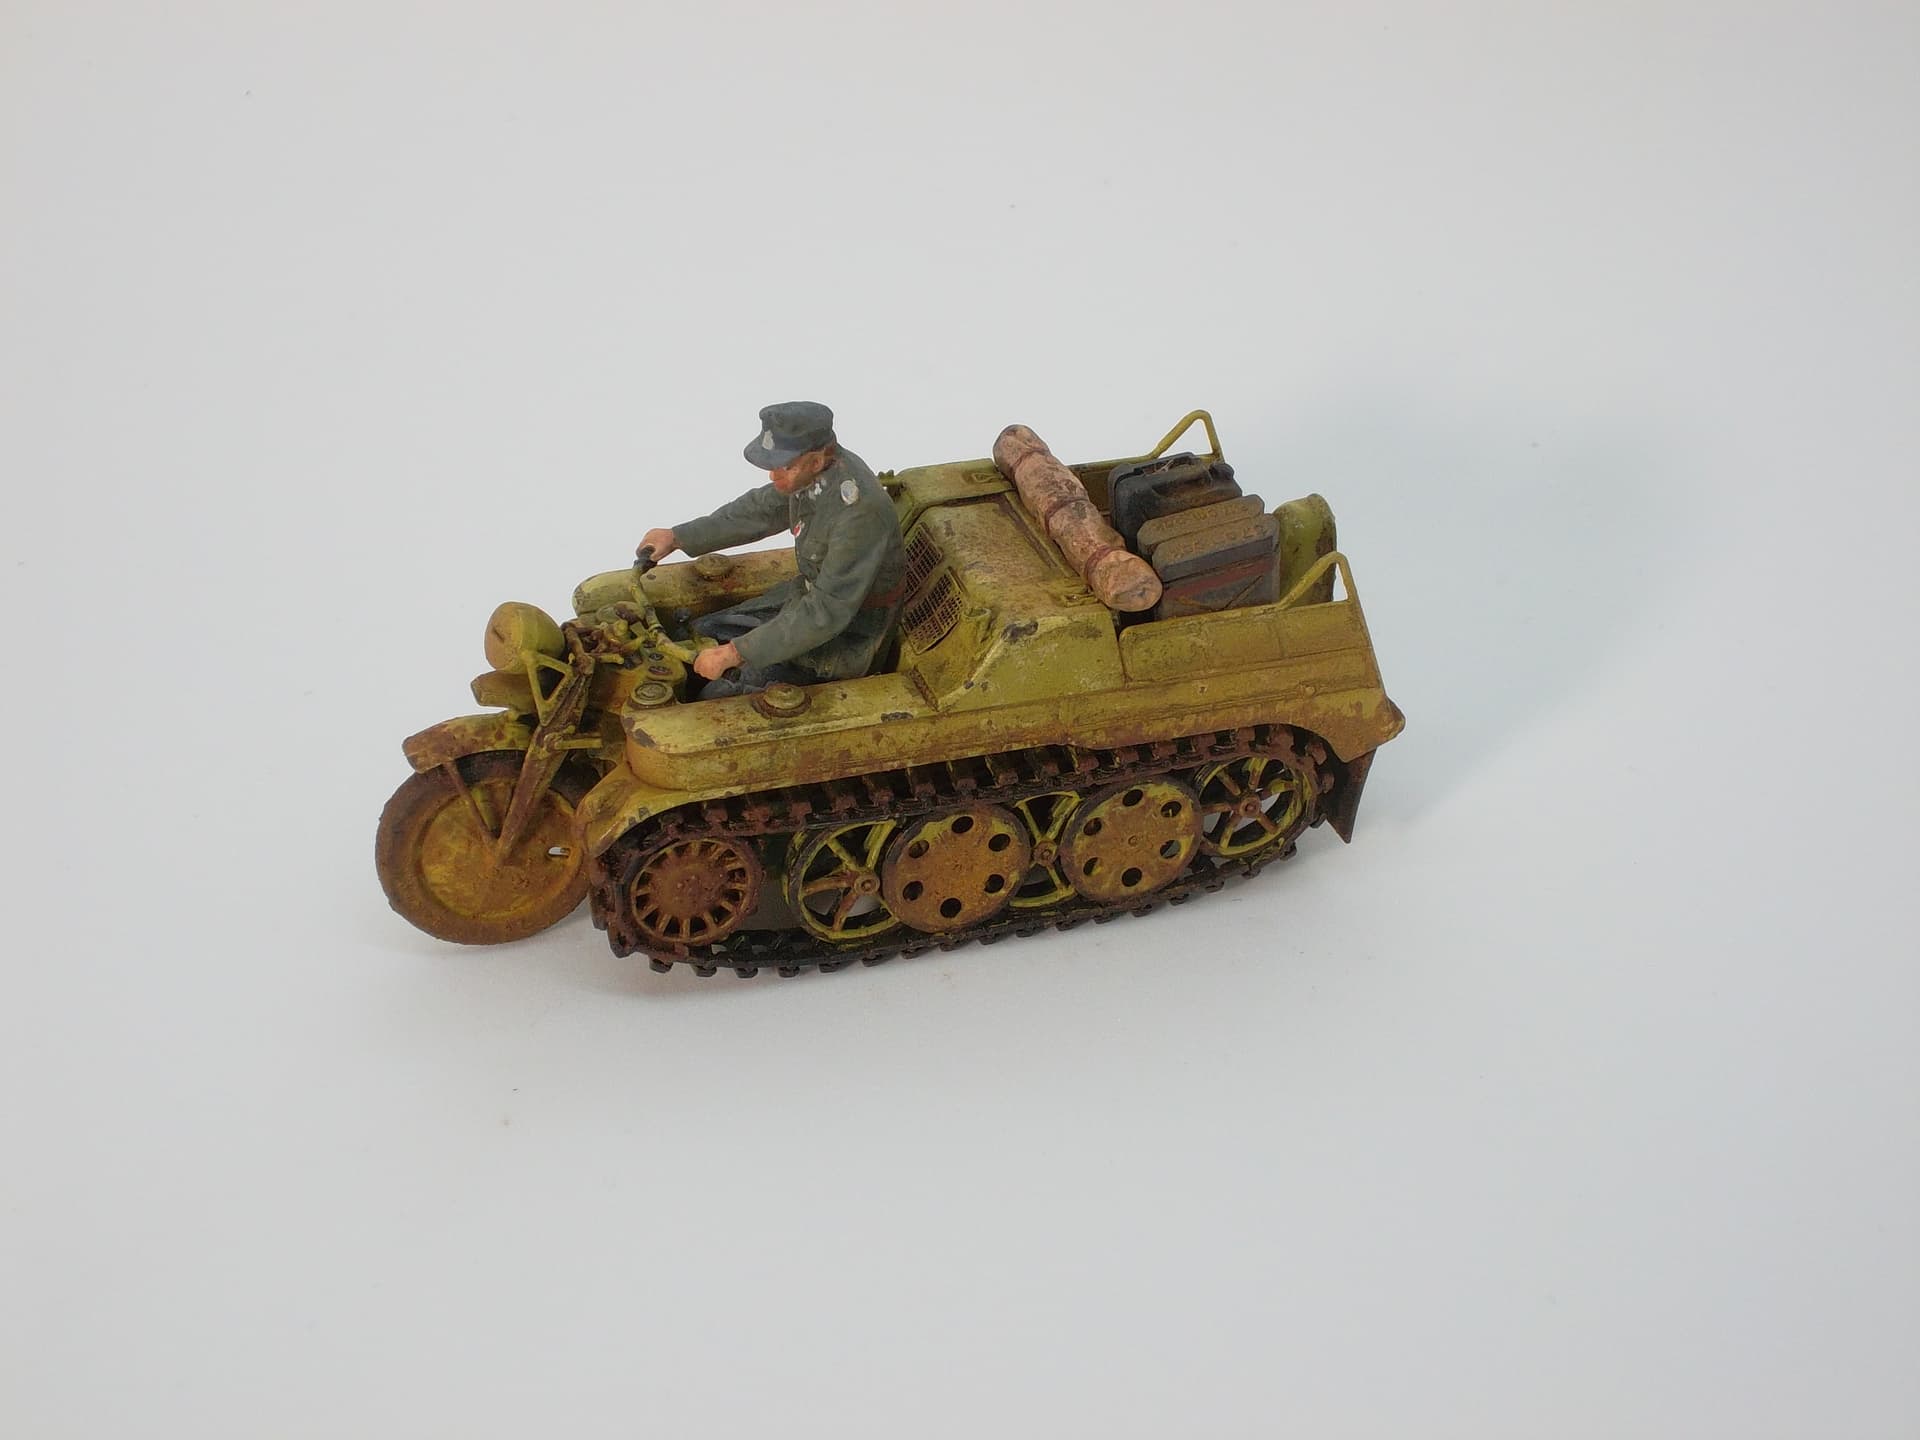
Here are my two test photos that I can’t decide between. One I used just the overhead LEDs from the lightbox, and the other is with my desk lamp.
Why not use both? I vote for the bottom photo because there is more fill light coming in from the left hitting the driver’s chest to better show the detail in those areas.
Also look at all that extra detail seen in the road wheels!
1 Like
Again on the subject of Depth-of-Field:
What follows in not the greatest model photo for a number of reasons but this image does illustrate the concept of depth-of-field rather well!
If you enlarge the photo you may immediately notice that while I did focus halfway into the subject. (somewhere around the front of the cab.) That both the very front and the very back of the locomotive are both out of focus. This is called having a "very shallow depth-of-field.
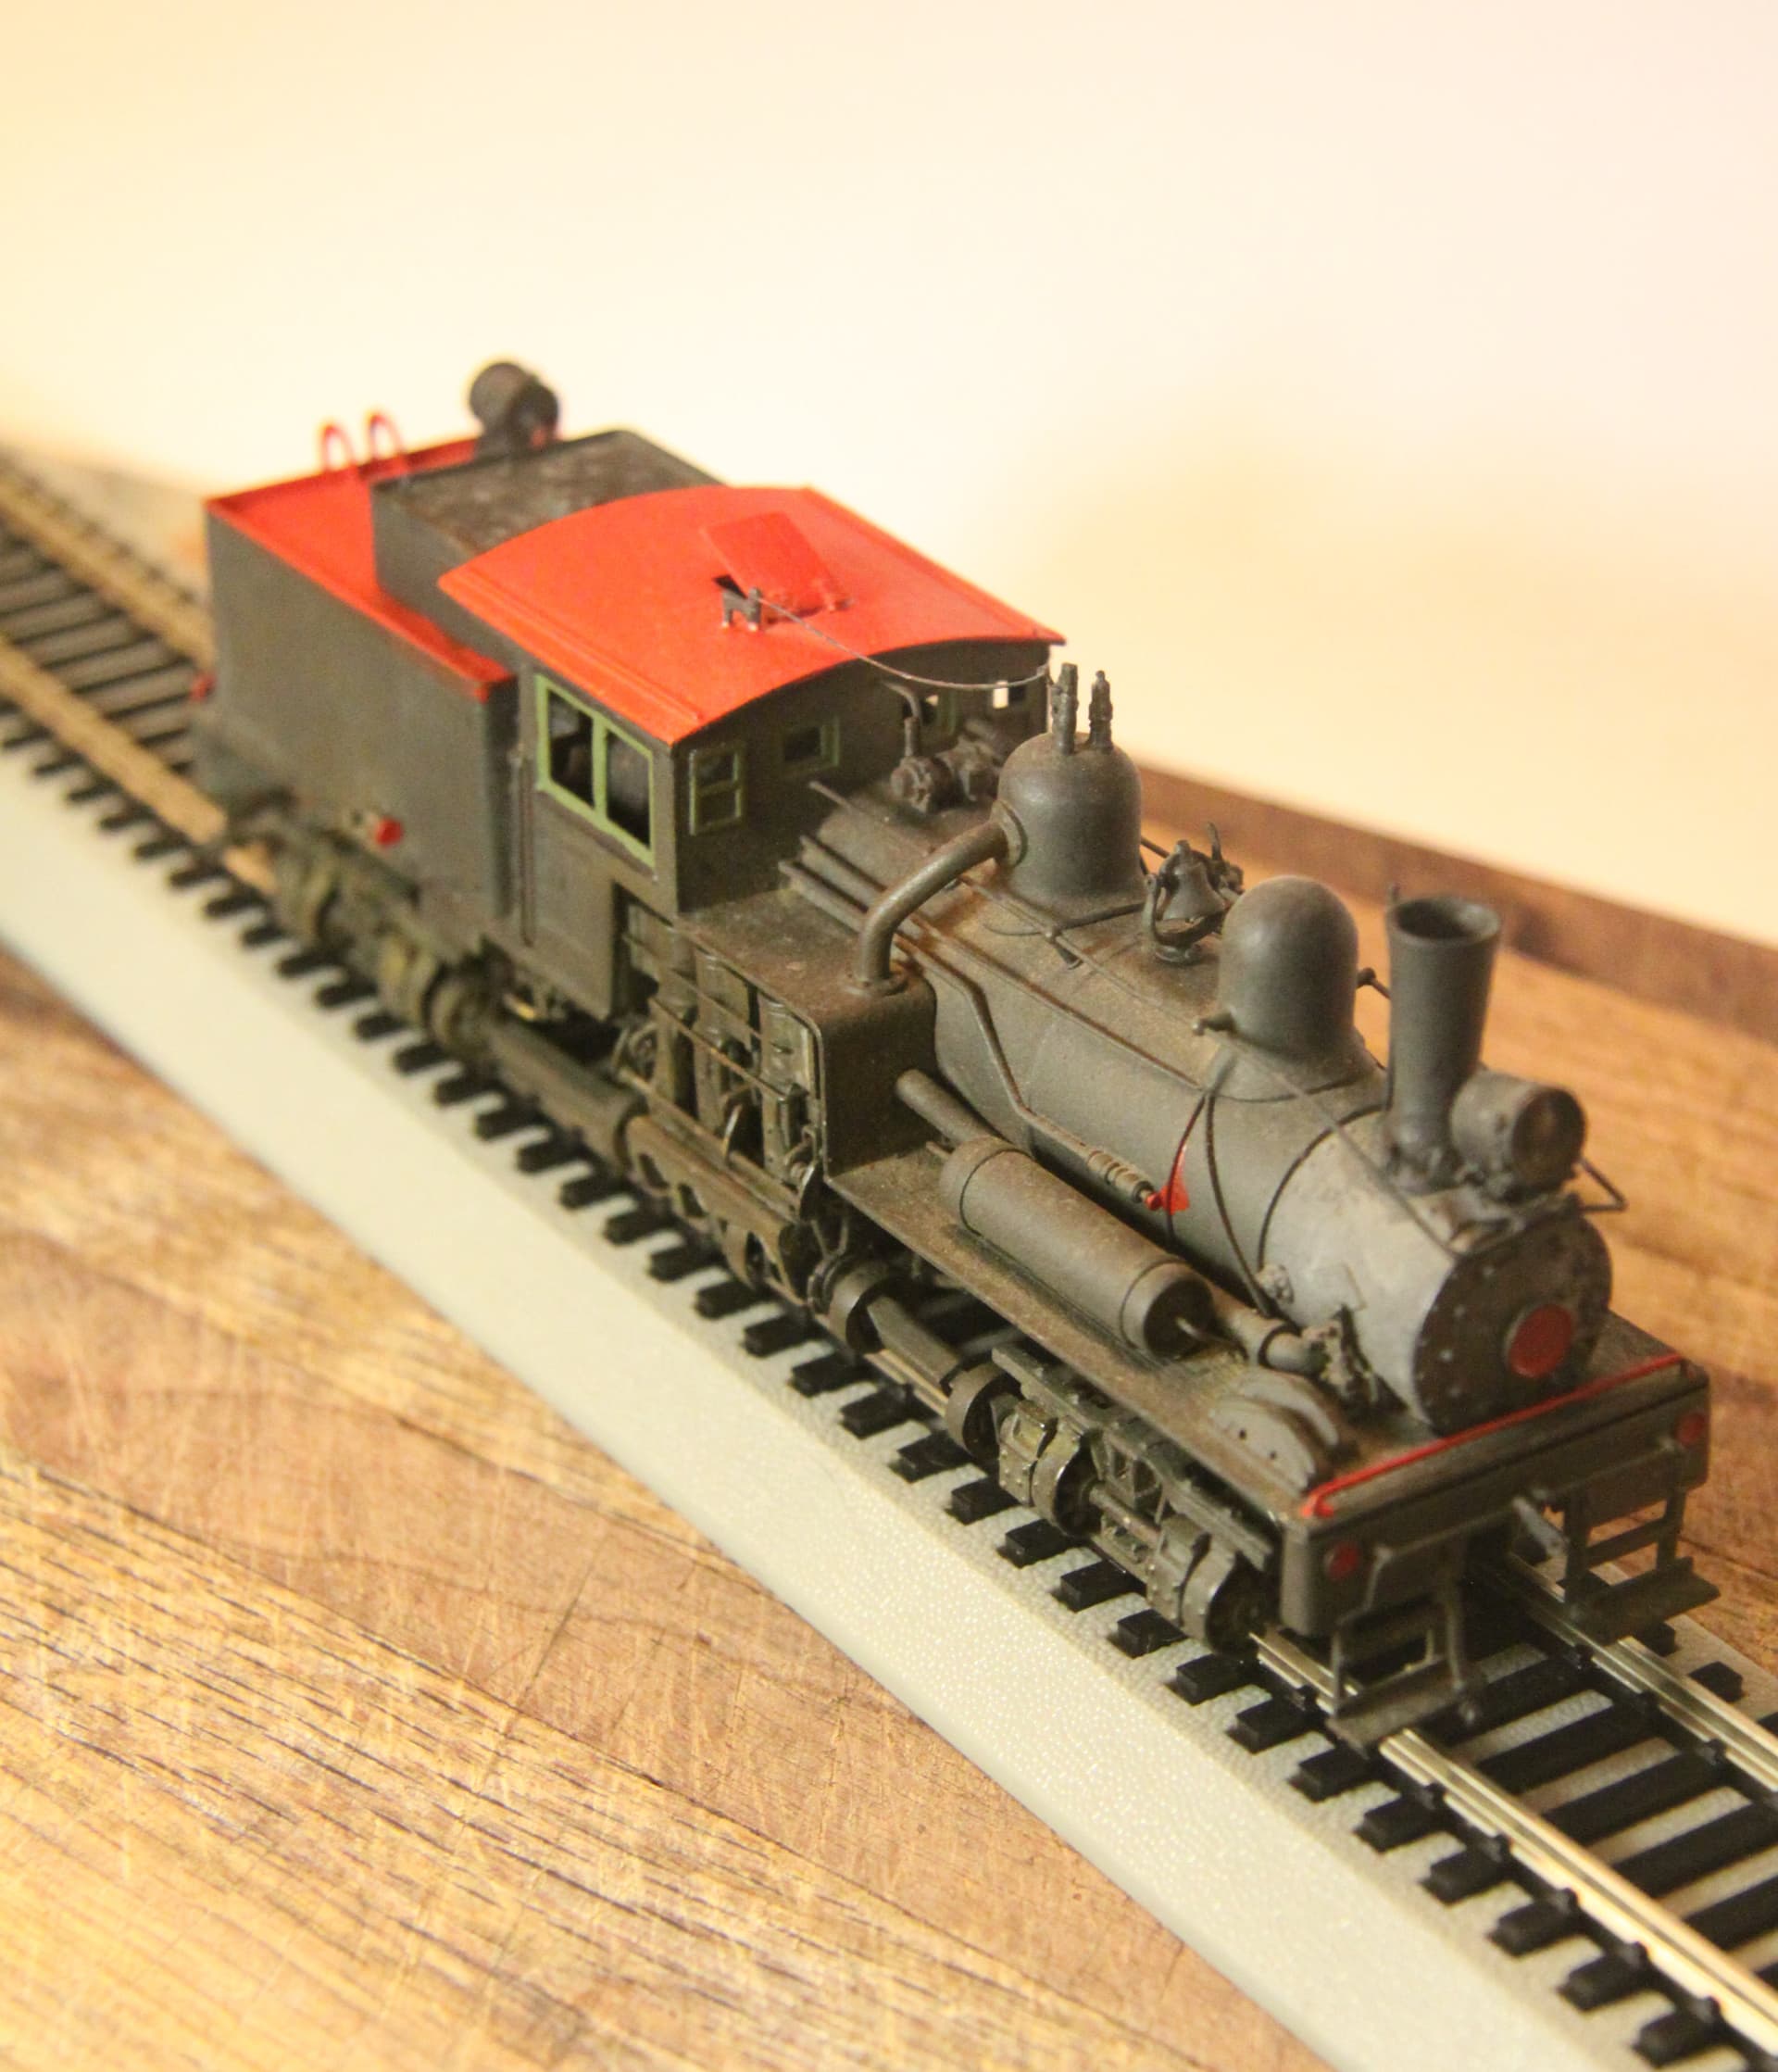
I SHOULD have set my camera on a tripod and then selected a slower shutter speed and a smaller iris setting (higher f number) to give me a greater (or deeper) depth-of-field.
1 Like
My camera has the following options:
- Exposure
- ISO
- White Balance
- Focus Area
- Metering
Which of these options would I use to apply your advice?
Raise your ISO (known as ASA in the old days) this will make the image sensor more light sensitive and will cause the exposure mechanism to select both a higher shutter speed and a smaller iris setting. (Warning: Selecting Higher ISOs may induce more “noise” into the digital image however it WILL increase you depth-or field so you will want to do some experimenting.)
Rogue, When you say you can control Exposure do you mean simply choosing lighter or darker image settings or can you separately control both shutter speed AND f stop on your current camera?
1 Like
It’s only making a lighter/darker image.
Unfortunate.
When selecting a new camera do be sure that it gives you the ability to control both shutter speed and f number. Don’t overlook the USED camera section of many good camera stores. This can save you hundreds as opposed to buying a new camera and it will still get you the control you desire.
Again even on your current camera selecting a higher ISO should give you some degree of improved depth-of-field.
1 Like
I will definitely look out for that when I buy a new camera.
Would picking a medium ISO be a good balance, then?
Does your camera possibly have settings that look like an icon of a “running person” and also a “sun and mountains” landscape icon.
What these settings actually tell the camera:
The Running Man: = Hey camera, this is going to be an action shot with fast movement in the picture so please favor the higher shutter speed settings."
The Mountains Landscape: = Now camera, this will be a more sedate, slow moving shot so please favor the slower shutter speeds BUT ALSO use a larger f stop number (smaller lens opening) because I will need greater depth-of-field for this shot.
1 Like
Rogue, Sorry but you missed the point here - if you choose the HIGHEST ISO setting available on the camera this will cause the metering mechanism to select faster shutter speeds but also smaller iris settings giving you the increased depth-of-field you desire.
This is sort of a way to lie to your all-automatic camera to still get the finished results you want.
But in photography it is always a trade-off of one thing for another, so you MAY end up getting more noise (grain) in you photos than you desire. Experiment and see. In all likely hood the higher (or even the highest) ISOs won’t give you any problem as long as you are only making small print enlargements (8x10 or smaller) and/or you are only publishing your pictures on the internet.
1 Like
A reminder: your camera lens with give you the LEAST depth-of-field when used at it’s maximum CLOSEST focusing distance. It is often better to back up a little, focus at a greater distance and then crop in on the subject later using GIMP.
Here I cropped in on your photo. I also lightened the mid-tones ever so slightly and increased the contrast just the slightest bit. Try the “Curves” tool found under “Colors” on the top tool bar in GIMP. You will love it!

1 Like
It does have a landscape mode, but it does not allow for changing the ISO.
So “noise” isn’t much of a problem? Understood. I’m only really publishing these photos to the internet, so I guess it will be fine, then.
Thank you for your patience, sir. I appreciate your help.
1 Like
Using “Curves” as apposed to the “Lighten/Darken” tool in GIMP:
The “Lighten/Darken” tool (sometimes called “Brightness”) lightens or darkens EVERYTHING in the photo whereas with the “Curves” tool you can choose to L/D just the dark tones, or L/D just the highlights or just the mid-tones. *
Samples shown here are intended to be extreme examples:


*p.s. Lightening the darks and darkening the highlights as in this last photo, is what they call a form of extended exposure range.
The Beauty of using “Curves:”
If you were to use the simple “lighten/darker” tool it applies the tool to everything in the photo so lite details disappear into pure white and very dark details disappear into sold black.
However; with the “Curves” tool you grab the middle of that sloped line to lighten or darken JUST the mid-tones while the dark end retains almost all its’ original values. Same with the white (lite) tones.
This allows you to maintain your lights and darks without loosing detail there while strengthening the mid-tones.
EXAMPLE is the bottom image. You are actually expanding the dyanamic range of the image while maintaining the original light and dark details.
1 Like
So let us assume your camera is in “Running Man” (Sports) mode as the default. Selecting the “Landscape” mode will tell your camera to use slower shutter speeds and higher f numbers, which is exactly what you are wanting here for your model photography.
1 Like
I’ve taken the photos, and the landscape mode photos turned out better than the high ISO (on the more manual/program mode) ones.
1 Like
We spoke earlier of using a third broad light to place highlights and edge lines on your subject.
In this photo I wanted to illustrate my technique of “refinishing” these America Flyer Hopper Cars. They are molded in a matte black plastic that accumulates a lot of small surface scratches. What I am showing here is that a fresh coat of matte clear spray will eliminate those minor scratches creating an entirely new surface to the model, making it look almost brand new.
The photographic point I am trying to make here is that I used that extra light to create a broad highlight reflection over the entire side of this Hopper Car to show both the new surface and the now complete absence of scratches. (This is exactly the same technique I used for years shooting the black plastic Square D circuit breakers in the studio.)

1 Like
Post removed by author: ![]()
![]()
![]()
Ah, I see. I guess you already caught it, but the program/manual mode on my camera allows ISO adjustment, while the landscape mode does not. The camera is a Samsung ST30, if you’re interested.
Question: Does you camera have an “A” and an “S” setting?
One means “Aperture Preferred” the other means “Shutter Preferred.”
In the “A” setting the camera may let you select an aperture setting and then the camera will choose the proper shutter speed to go along with it.
So you would then select a high f number (8 - 11) but then your camera is going to select a SLOW shutter speed so for this you probably need the camera on a tripod.
No, not this one. I have a larger camera that probably has those settings, but it’s old and the batteries are finicky. In addition to that, I’m leaving for college soon, which will be overseas, so I’d like to see what I can do with this current smaller camera for now, as it will likely be my only camera in addition to my phone for a white.

This is one of the photos taken with the landscape mode and the lamp to the side.