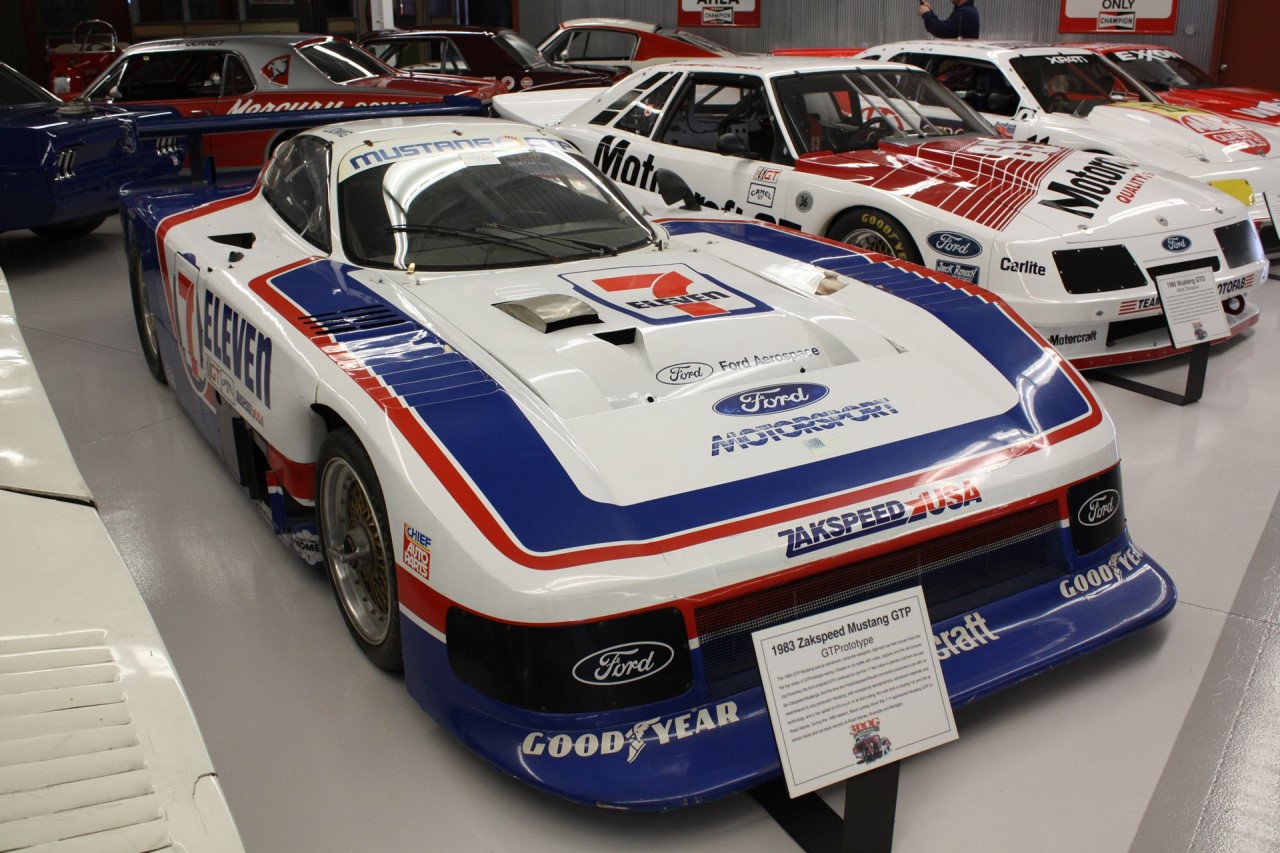
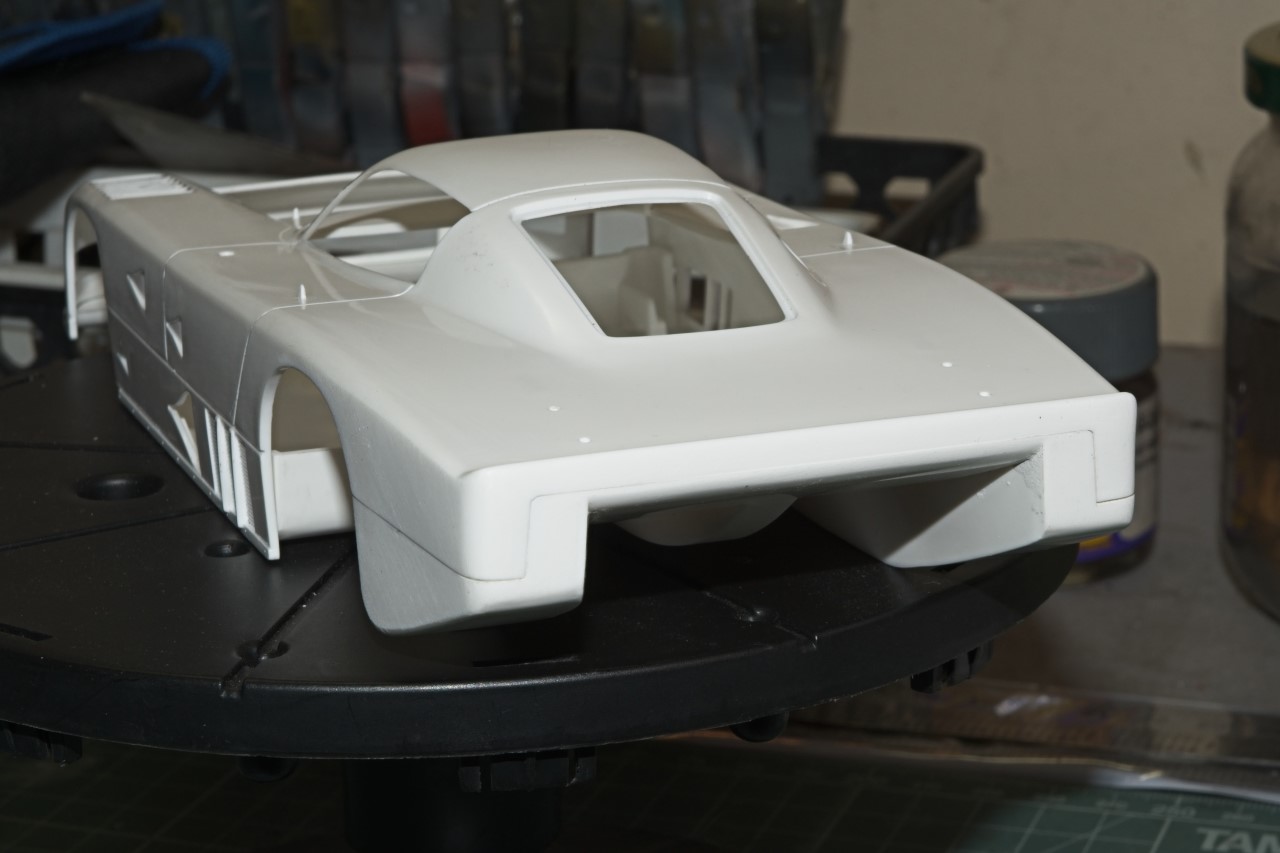
After time off from finishing the Fujimi Porsche 917K, it’s time to clear off the workbench and start my next build. This time I turned the clock way back to the 1985 Monogram release of their 1/24 scale IMSA Ford Mustang GTP car.
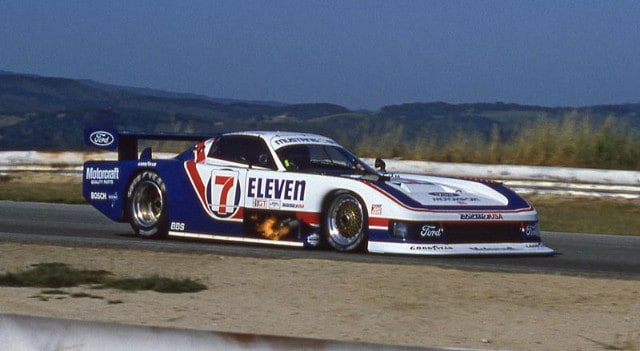
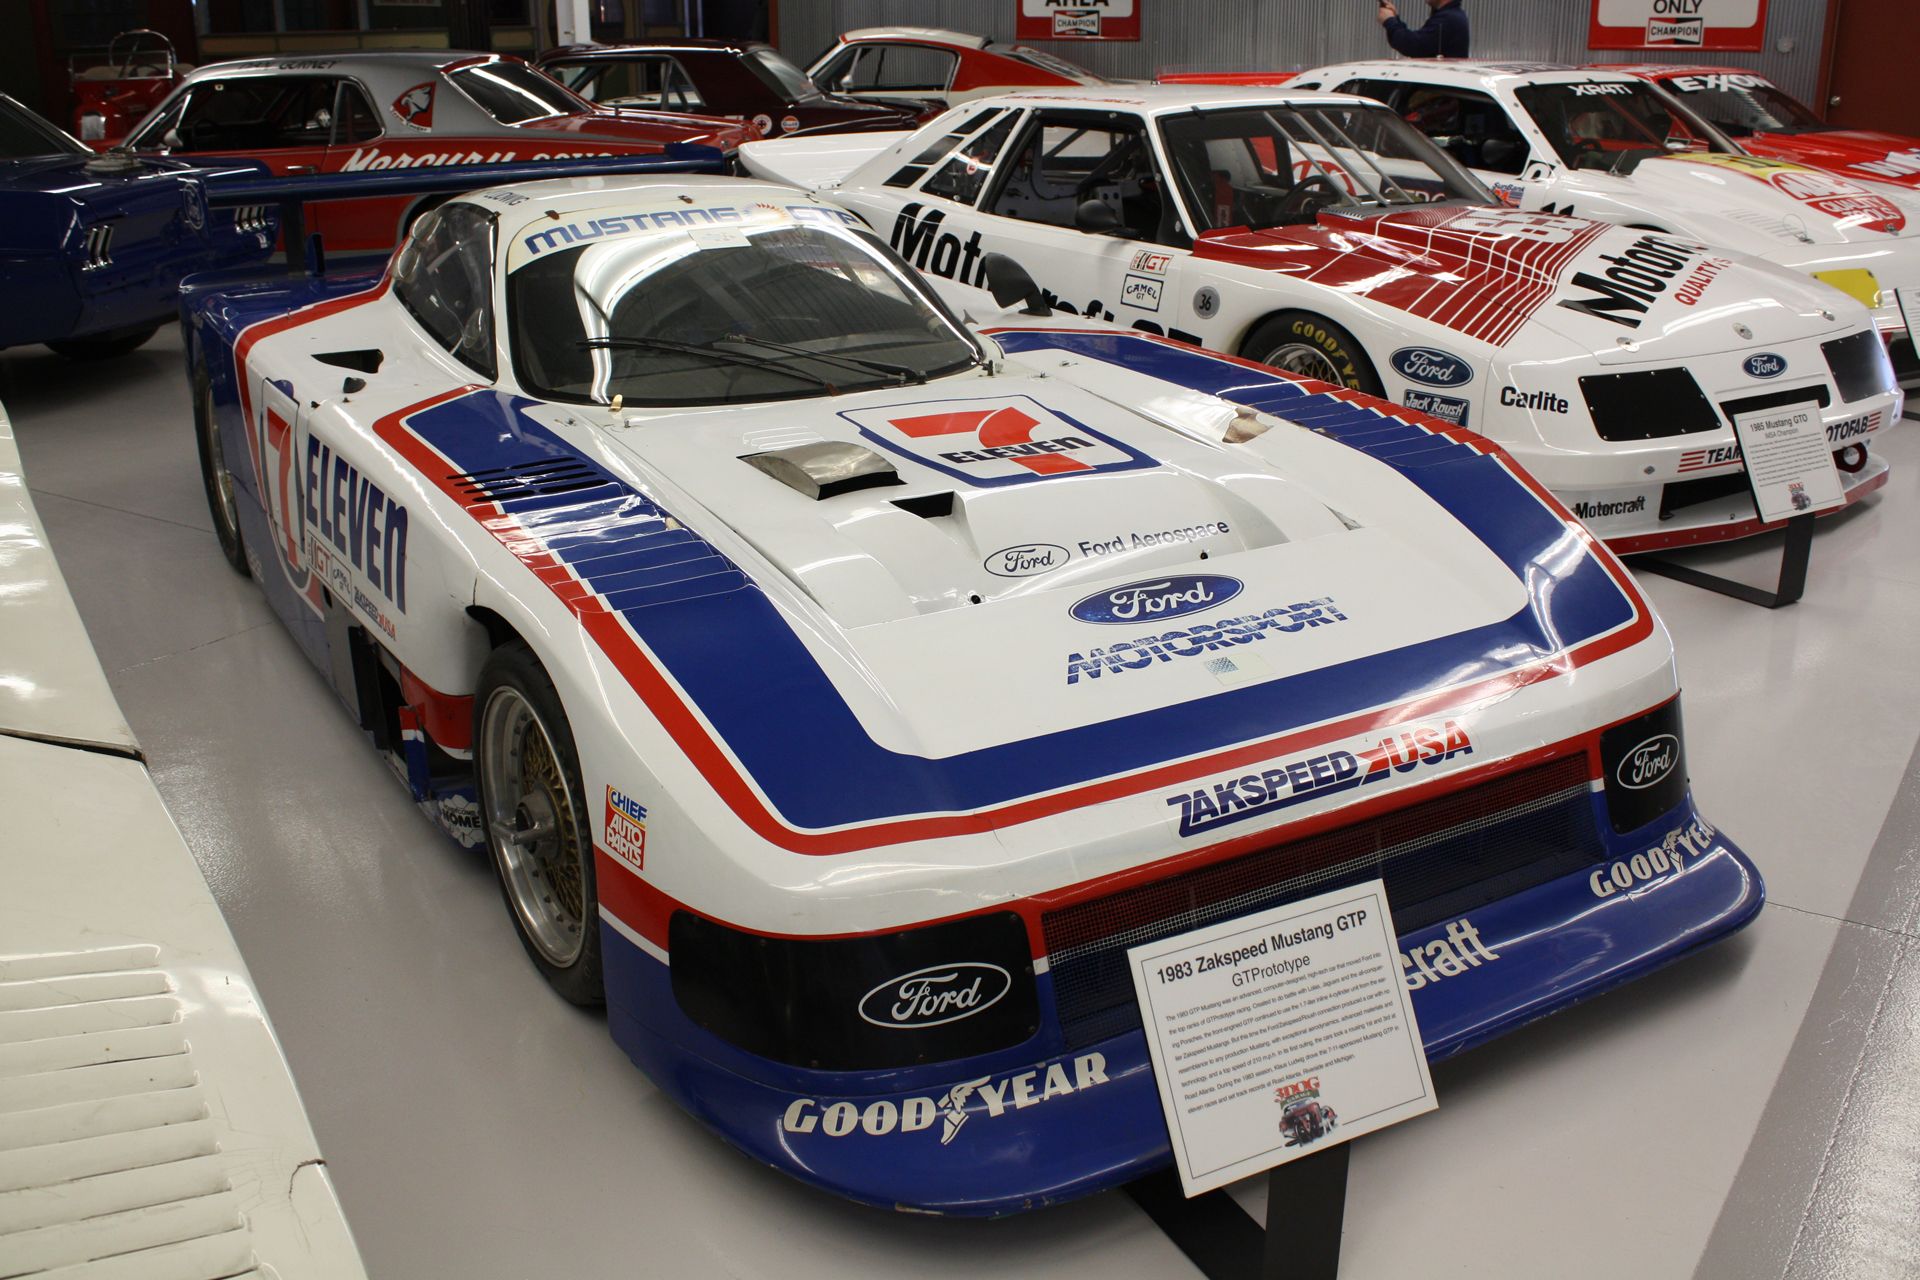
During the 1980’s Ford was once again involved in a big way with motorsports on almost all professional levels, and that including IMSA Sport car racing in it’s top class: GTP. That would pit Ford against Porsche, Jaguar, and Lola. But Ford decided to go a different way with the latest technical advancements in chassis, body, and engine designs. So the car chassis was Kelvar and Carbon Fiber, and the body was all Fiberglass, that was changed over to Carbon Fiber for the 1984 season. Going with a 1.7 ci 4 cyl turbo engine placed in the front of the car vs the usual mid engine design allowed Ford to create a bottom air flow that produced more down force then even Indy Cars did. Now that’s amazing. In short the car was about the fastest car on every track that year.
The 1st race of the 1983 season was at Road America, and Ford entered both cars. Motorcraft was one sponsor and 7 11 the other. The Motorcraft car won the race, and set the lap record! now there’s a great start for a new car. Unfortunately they didn’t win another race that year
For the 1984 Ford upped their game and replaced the 1.7 ci engine with the 2.1 ci turbo 4 cyl. This required to move the driver from the right side to the left side of the car. Once again the car was super fast but didn’t win a single race. Ford canceled the program and went with the Mid engine Probe GTP car.
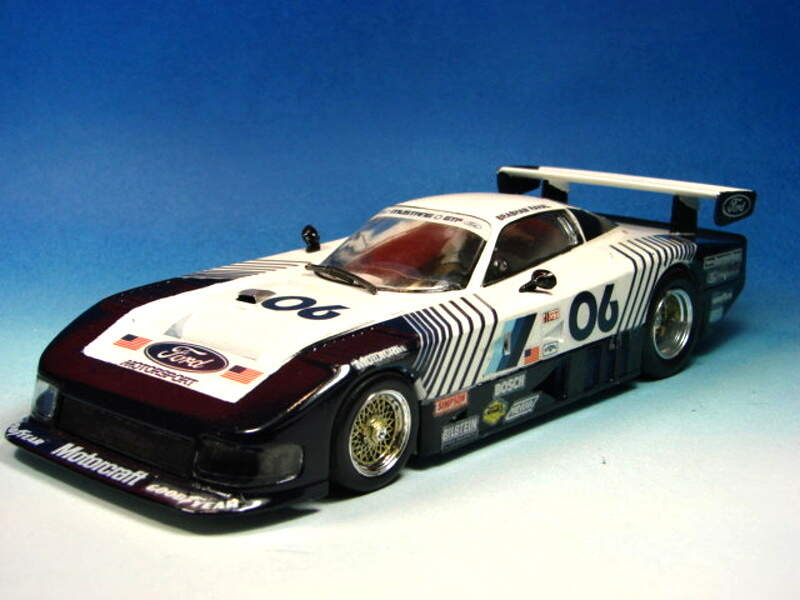
Monogram still went ahead with plans to kit the 1983 winning Road America car, but somehow screwed up and photographed/measured the 1984 7 11 sponsored car. So that had the wrong car and wrong sponsor. Yet they released the kit #2708 as the 1983 car while it was the 1984 car. Go figure that one out. Then they went and released the 1984 car as kit #2709. And finally they did a re-release of the #2708kit once again with the wrong car but right decals.
Trying to correct the molded body to the correct 1983 car is a major undertaking, something that honestly I’m not capable of pulling off. But the car that I wanted to do is the 7 11 1984 car. And guess what, Indy Cals has the correct sheet for both years. So my build will be the correct version of the 7 11 1984 car.
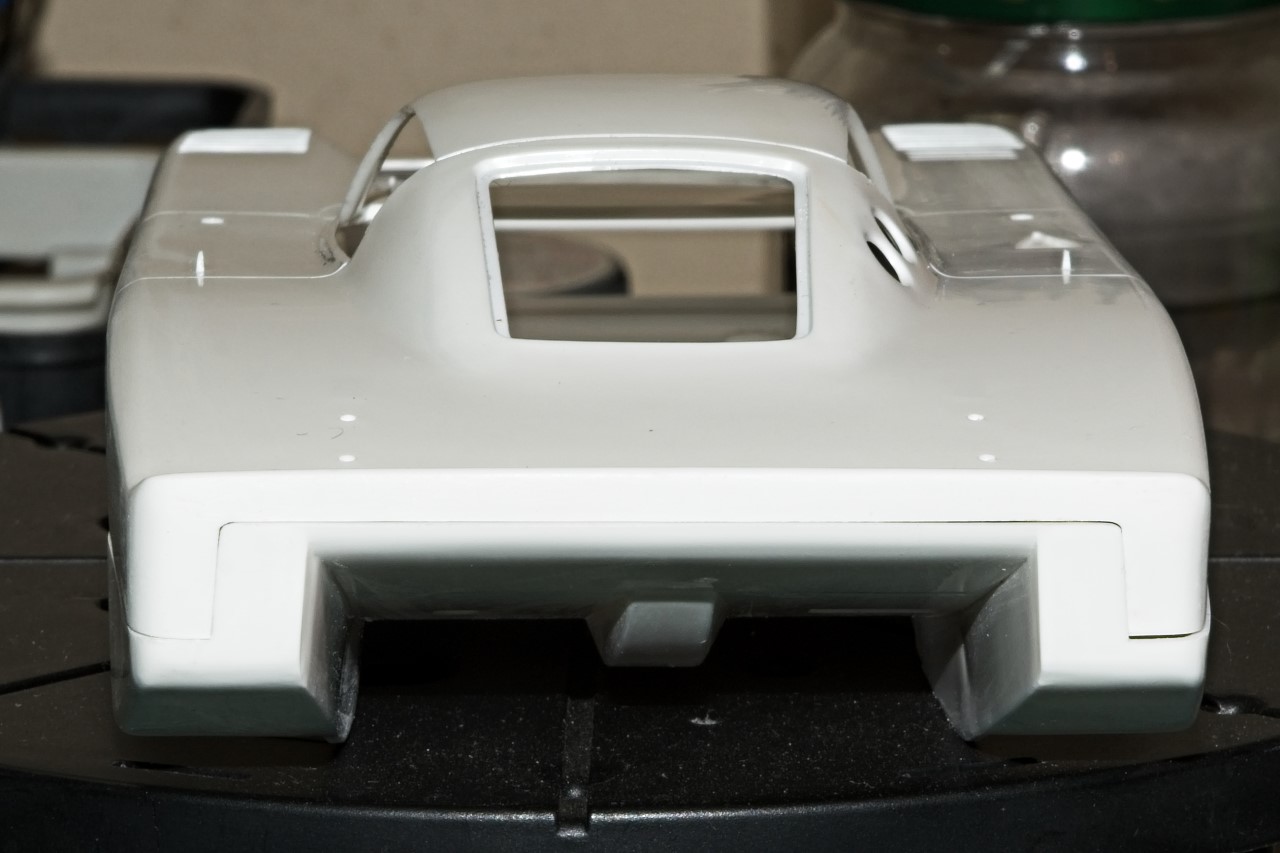
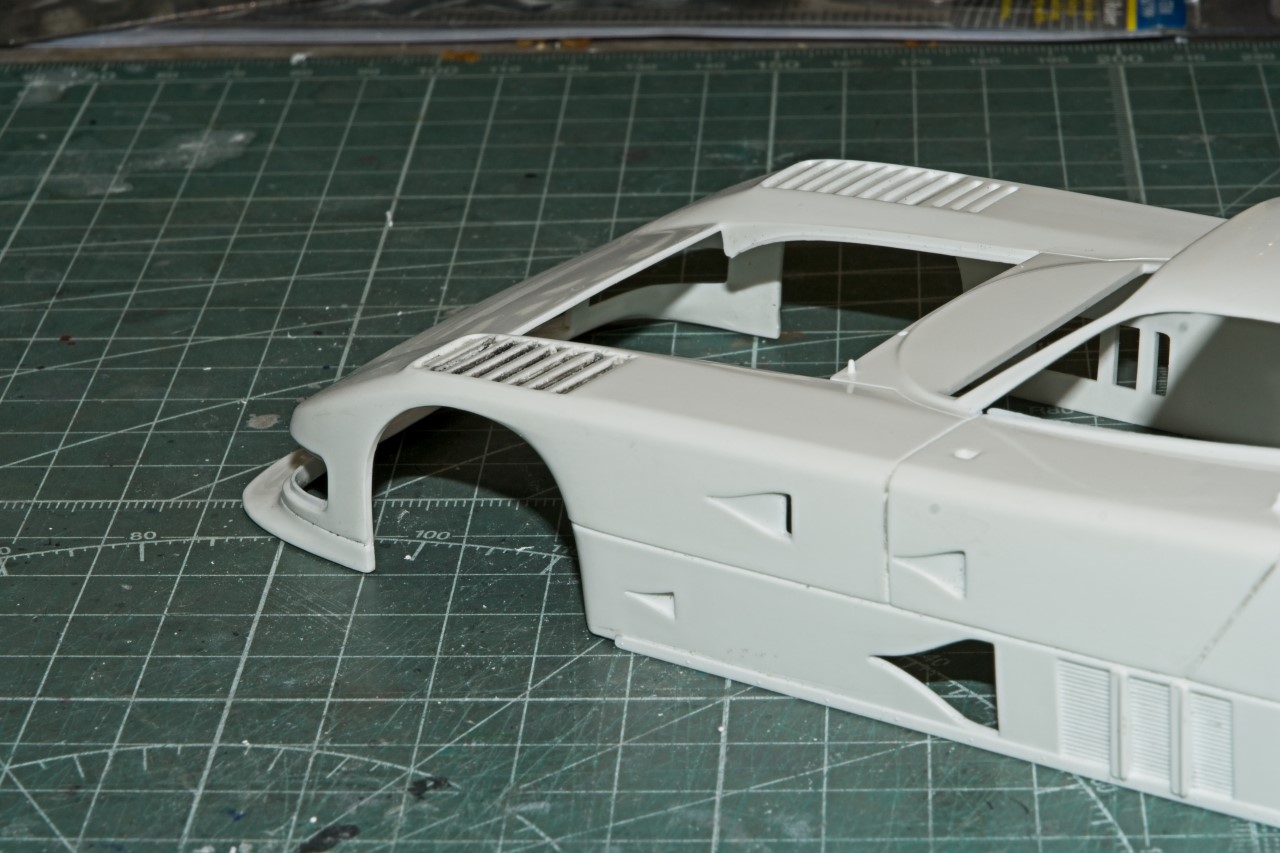
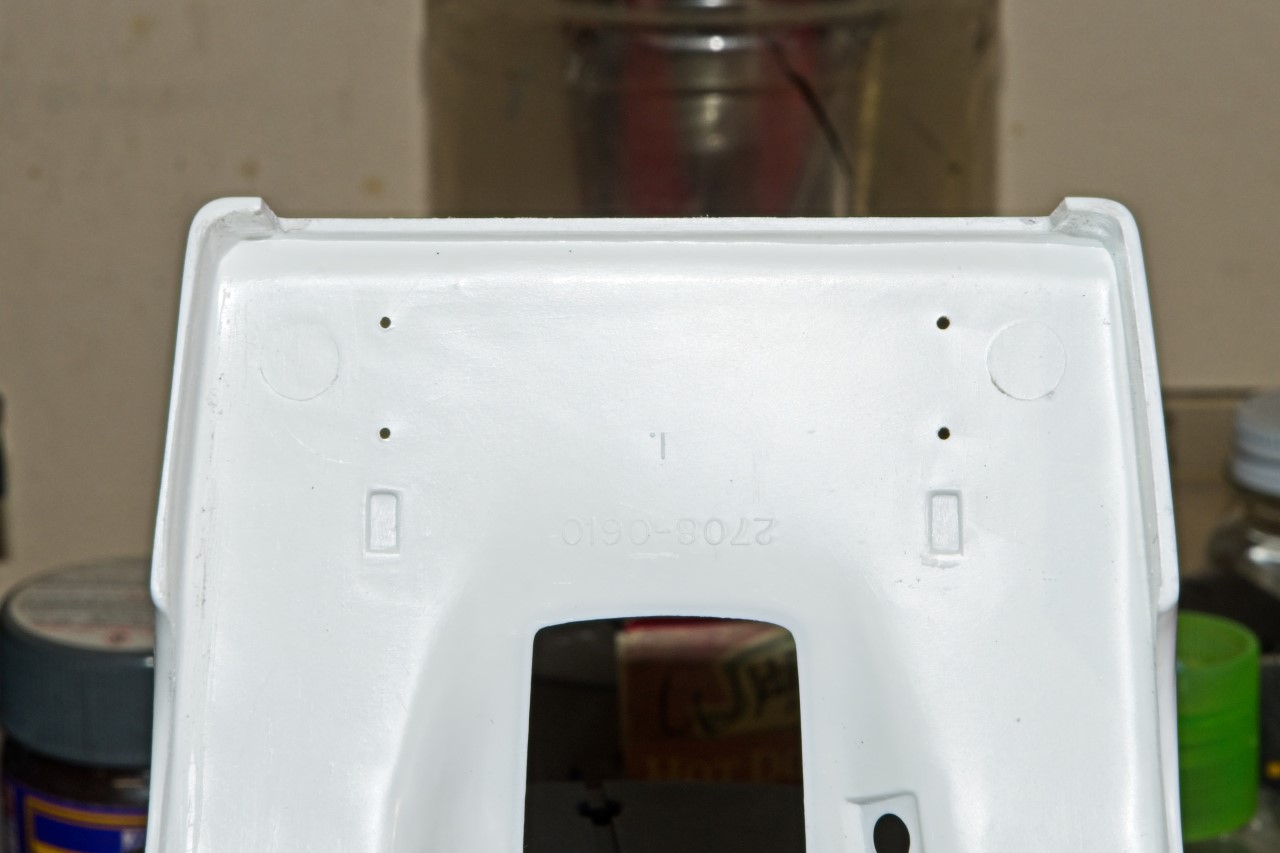
All I’ve managed to do after a few hours of prep work is rescribe the panel lines especially for the doors, and start to clean up the mega sized mold lines.
One issue that is of concern is while the body fits over the lower part and chassis, the rear has a complex parts line right in the middle of the rear end. This needs to be addressed in some manner so that I can prime, paint, decal, gloss, and finish the shell without having to glue the top and bottom prior to paint.
Looking forward to this Joel. Interesting looking car.
I guess Ford ignored the old motto - to finish first, first you have to finish. No point having the fastest car if isn’t reliable.
Locked in for the journey here Joel, great looking project!
Funny coincidence, I’m facing the same issue at both ends of my '56 Corvette! I will dry fit the bottom clips front and rear and see if the chassis assembly can be shoehorned in with them in place.
Back in the 1980’s reliability for the most part wasn’t anything like it is today. Everything seemed to break on a race car. Getting more then 1/2 the field to finish a race was a major accomplishment.
And manufactures world wide like Ford used racing as a means to sell cars. And what they were selling was new technology to make the family car faster, safter. lighter, rust free, and more fuel efficient as the oil embargo of the 70s had changed our lives forever.
For Ford building a just like race car to what was already running on the track made no sense, as it wouldn’t generate any greater market share. But new technology showing how those little fuel efficient 4 cyl turbo and fuel injected engines could run with and beat the big old iron guys would. Gone were the cast iron chassis and metal bodies, as Carbon Fiber and Kevlar proved stronger, lighter, and never rusted. Repairing them from an accident became replacing them instead. Slowly but surely they got the hang of reliability especially as the Japanese were taking over the car market on the street, and now winning on the track as well. And this kind of tech war has grown and still thrives today bringing us great racing, while reliability has become of equal importance.
joel
D,
So glad you’re pulling up your favorite chair for my journey back in modeling time with an American kit maker. Can’t remember the last American kit I built it’s been so long.
I was thinking the same thing about body clips to help align the upper and lower sections and also as a gluing surface to protect the paint work.
I still can’t figure out how to mask all the various openings if I go with the build 1st, then paint last sequence that the instructions show, and is the opposite of my preferred building method.
joel
Remember, back in the early GTP era, there were zero restrictions on power output. And the 'ole Zakspeed I-4 turbo was putting out power well north of 800. Further to that, the Zakspeed engine was simply the wrong application; essentially an F1 engine that found it’s way into a endurance sports car via a sweetheart deal between Ford’s Kranefuss and Zakowski.
Mike,
That was so typical for the era. The no engine restrictions is what killed my all time favorite series: Can Am. Even the Bruce and Denny show couldn’t get any Chevy racing engine house to come close to what the Porsche 917/30 was pumping out.
The Zakspeed Mustang proved to Ford just what those turbo charged 4 cly engines could do. And those cars were beasts in every sense of the word.
Yes, F1 lead by Renault started to make the switch over to turbo charged 4 cyl engines that could produce well over 1,000hp, leaving the normally aspirated engines far behind. But F1 did ban ground effects as those cars literally stuck to the track and could most likely drive at speed upside down on a tunnel roof. IMSA let the GTP cars have full ground effects.
In any event I’ve started my journey with the build, and it’s already proving quite a challenge with part fit and molding issues. But so far, I’ve over come both issues that I’ve tackled to date.
I’ve got my eye on you for this one as well buddy .
I know it will have some dandy paint and decal
work .
Hope Mrs W is feeling better every day.
Cheers- Richard
Richard,
Thanks for asking about Mrs. W, she’s making great progress and the pain is finally starting to really let up.
Wow! Now I’ve got all my buddies on board. Talk about a little added pressure.
Working on update #1 already. Making corrections for alignment and a little detailing thrown in for good measure.
I’ve seen the race footage that Brock Yates shot with his 8mm camera on you tube. When these cars ran correctly, they were literally rocket ships on wheels.
joel
Jesper,
Agreed that the exhaust of those 4 cyl turbos when the drivers lets off the gas lets raw unburnt gas escape through the headers, and the heat of the pipes and gases sets the gas on fire. In the daylight it was a show for sure, but at night it was just plain spectacular.
joel
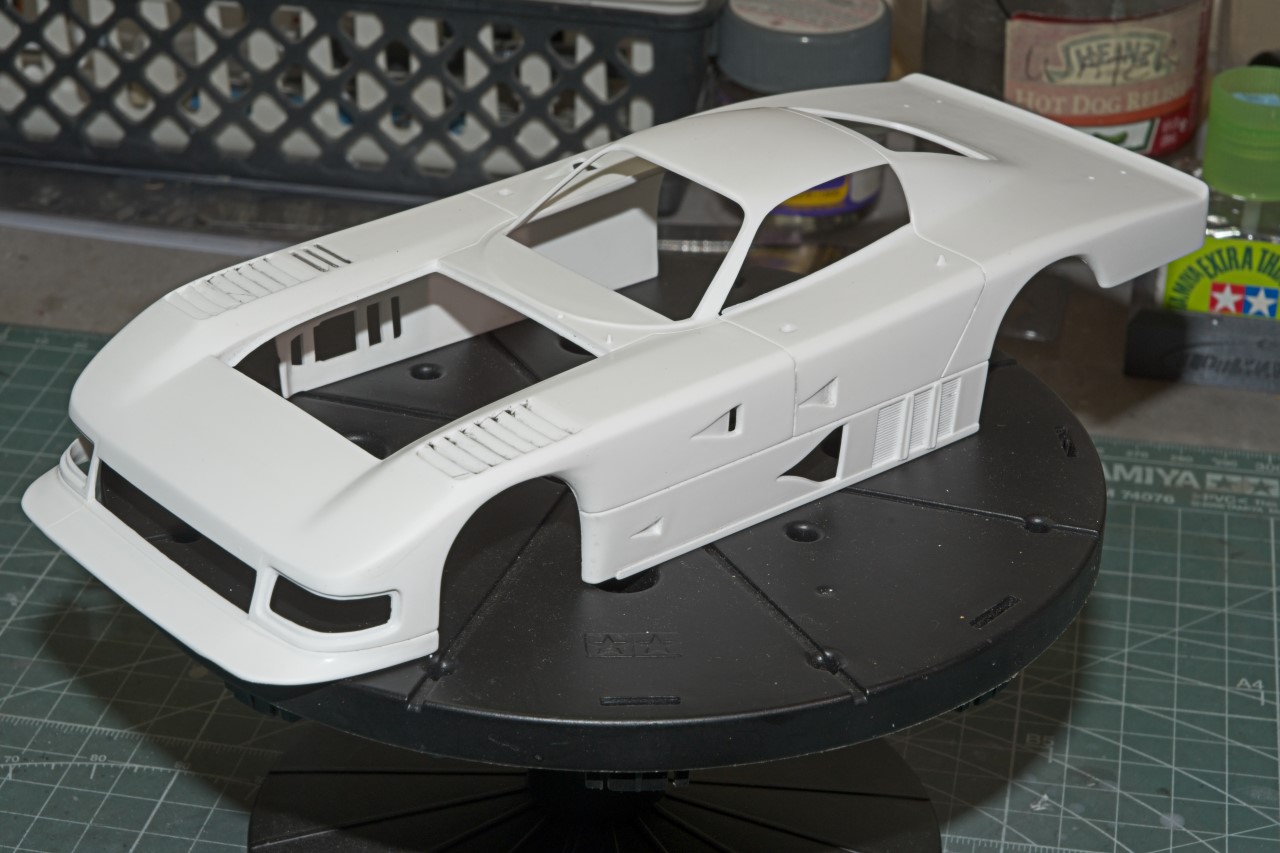
Time to start with the body corrections and fixes, so the body sections and the chassis can get to the paint shop sooner then later.
1st up was doing something to make the front air brake vents looks some what better then what must have been considered cutting edge back in the mid 1980’s, but not so much now as it’s just a 90 degree step for each vane.
The body plastic is rather thick so I decided since the decals will go completely over the vents, just creating the illusion of an open vent would be the best and naturally the easiest course.
So using two different scribers, and the back of a #11 blade, I scribed each vane. Then I tested the effect with some Tamiya Black PLW. Still some clean up is needed, but you’ll see the effect I’m after.
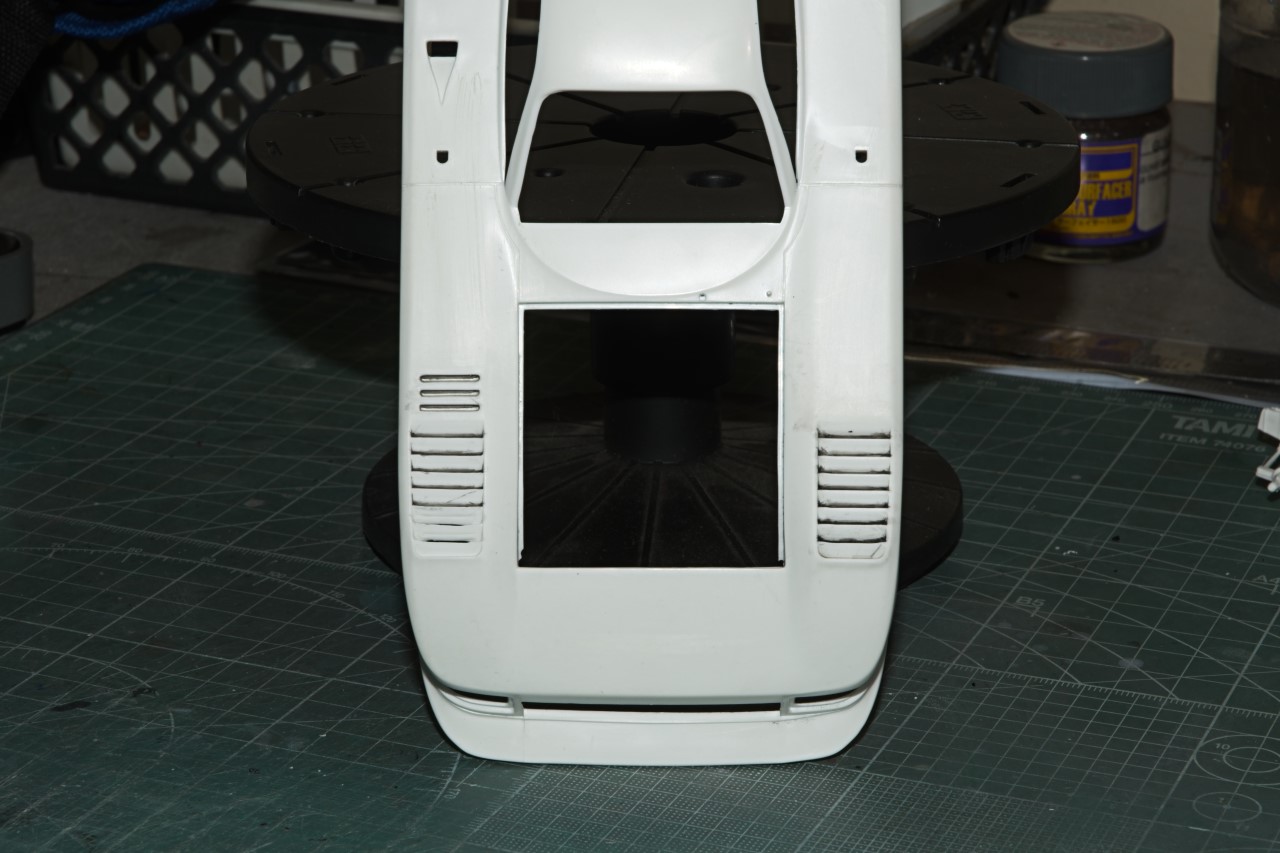
Next up was trying to solve two issues with the same fix. 1st issue was to work on getting the rear quarter panels and the back of the rear deck which are part of the top and bottom body sections to perfectly align, and yet be removable so that I can mask the interior as needed, and then be able to remove the masking. The left quarter panel has a rather large lip and the rear end deck just plain doesn’t fit flush nor square.
1st step was to add sheet plastic alignment tabs on both sides to
force proper alignment. As you can see they’re rather large, but work perfectly. Then sand and file the left side that has the lip.
Jesper,
I sure hope so. But it’s really all about how I handle the decals so that they settle into each recess to the max. Thinking of letting the decals almost dry, then cutting and using a liberal dose of Solvaset to make them fully settle around each vane.
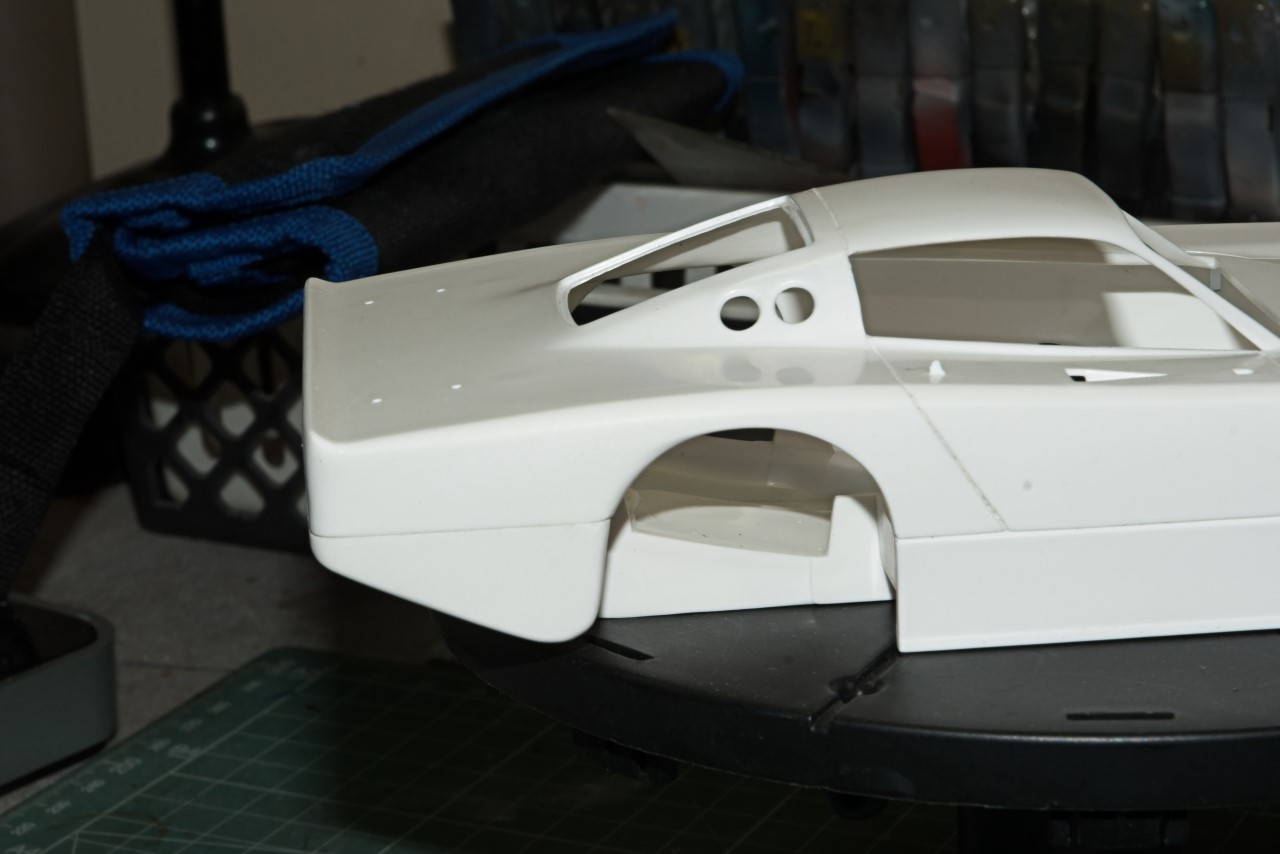
Spent a little more time working on the top front fender vents. I evened out the leading edges of all the vanes, then worked on the taper of the each leading edge. Removed a little more of the PLW but I’m not concerned with how much is left as the primer and paint will completely cover it.