Looking great Joel, all of this prep work will pay dividends as the paint goes on and the body comes together.
Cheers, D
Looking great Joel, all of this prep work will pay dividends as the paint goes on and the body comes together.
Cheers, D
Torsten,
I never did that kind of detailing before, so I was more then just a little nervous about screwing up, and damaging a kit I can’t replace. But for once luck was my co-pilot.
joel
D,
Thanks for the thumbs up. I finished the parts for the oil cooler modifications and corrections, and got all the parts ready to prime and paint the body. Painting early part of this coming week.
joel
Coming up to my favorite part of your builds - paint and decals !
Richard,
Mine too.
joel
Great piece of surgery Joel.
Jesper,
No one was more surprised then I as to how well the vents turned out.
joel
https://www.youtube.com/channel/UCNi4nA3h-7bdfGdzX_B6iLQ
check this guy out
Max,
I checked out the You Tube site, but what am I looking for? I can’t find any reference to the Ford Mustang GTP build. Just Bill Elliot’s Coors Nascar build.
joel
Time for another update, which is a little of this and a little of that as I’m trying to make some progress on more then one front at a time.
1st priority is getting both the upper and lower body shells primed, painted, decaled, glossed, polished, and waxed. Only the upper body shell will have the main White color, while the lower shell will only have the Ford Motorcraft Dark Blue on the tail along with the back clip of the upper body shell.
Monogram did an outstanding job of molding the upper shell as all the details are crisp, and all the recessed panel lines are recessed. I did have to deal with a little flash but mold lines along the fenders from the front to the back were some of the largest, ok, the largest I’ve seen. Took a good deal of sanding and polishing to get the body ready for primer.
With a White molded body, and the base coat being White, using Tamiya’s White primer was out of the question. So I went with my home made primer of equal parts Tamiya Gray and White primer, thinned 1:1 with Mr. Color’s #400 Leveling thinner. This way I could see where I primed, and where I didn’t, as well as a aid in applying the White color coat. I gave the body shell 48 hours to dry and cure, then a very light rubbing out with Tamiya #3000 sponge wet. The primer coat was just smooth enough yet offer grip to the color tack coat. No picture of the primer coat as the pictures all look like dull white exactly like the body shell, nothing like what it looks like in person.
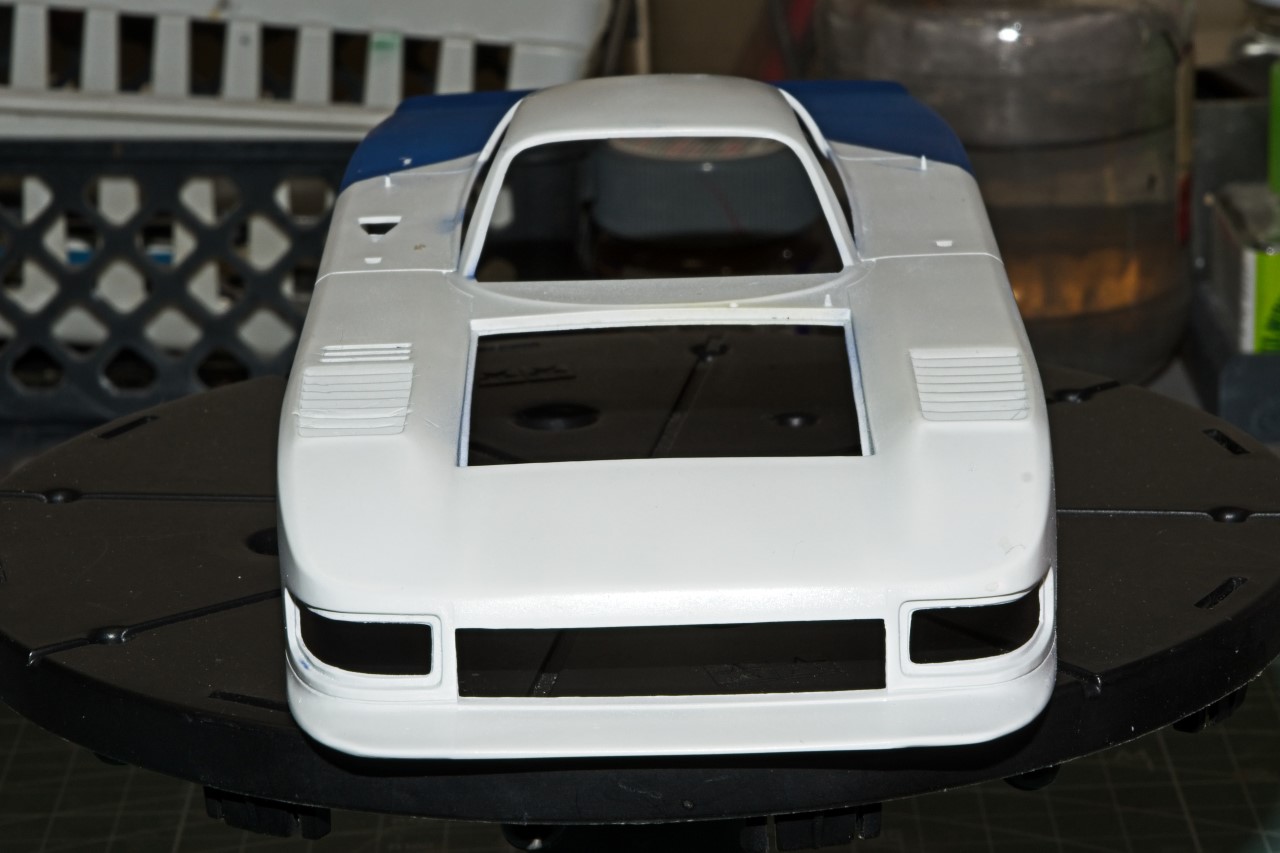
I’ve lost track of just how many different bottles of White I have from Gravity, Zero, Scale Finishes, Tamiya, Mr. Color, and MCW paints. For some reason I decided to finally try the MCW lacquer paints as I’ve them for literally years. Glass bottle, metal cap with treated cardboard seal, and a steel ball when I started to mix it up.
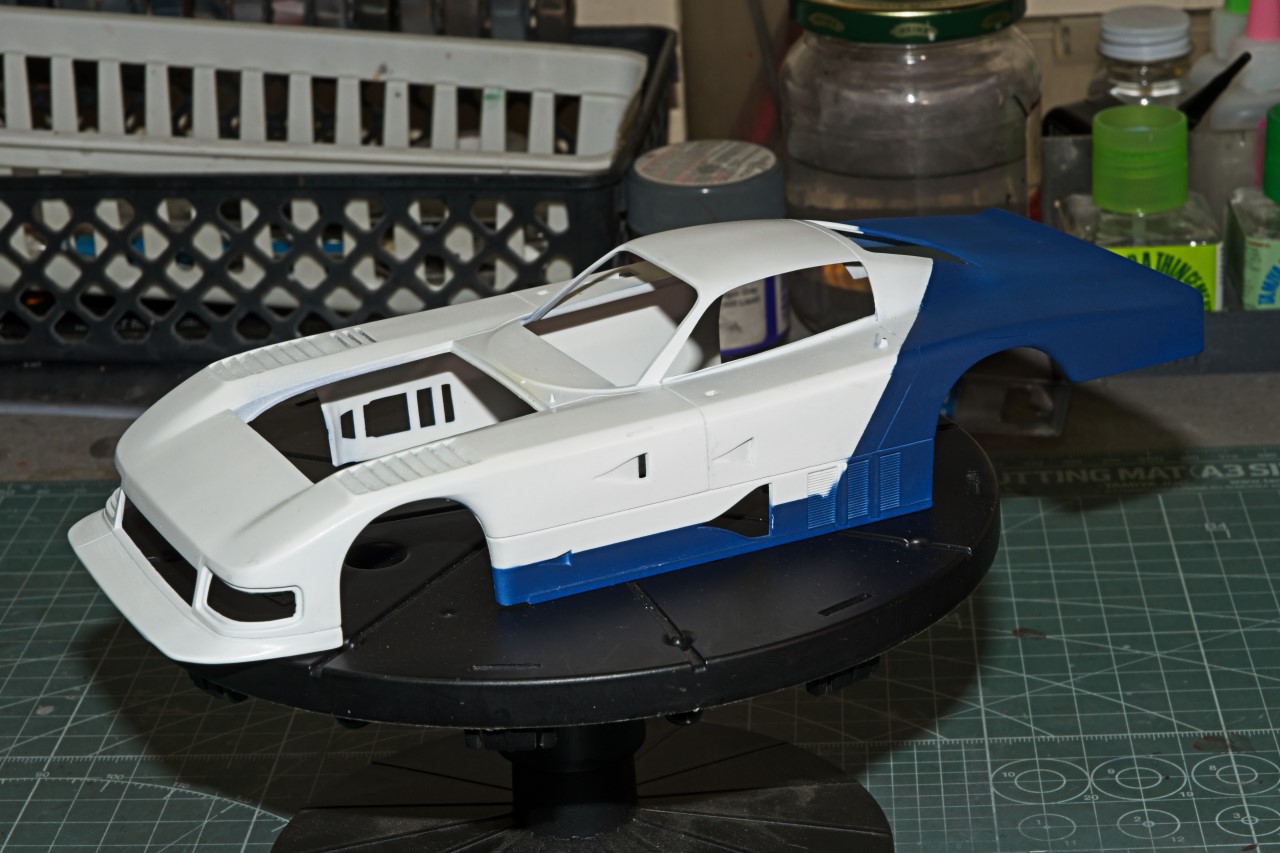
Air brushed with just my usual method, and the body looked great. 3 days to cure and then I lightly polished it with 6,000, 8,000, 12,000 emery cloth. The picture is the upper resting on the lower shell which hasn’t been prepped yet for the Dark Blue color coat.
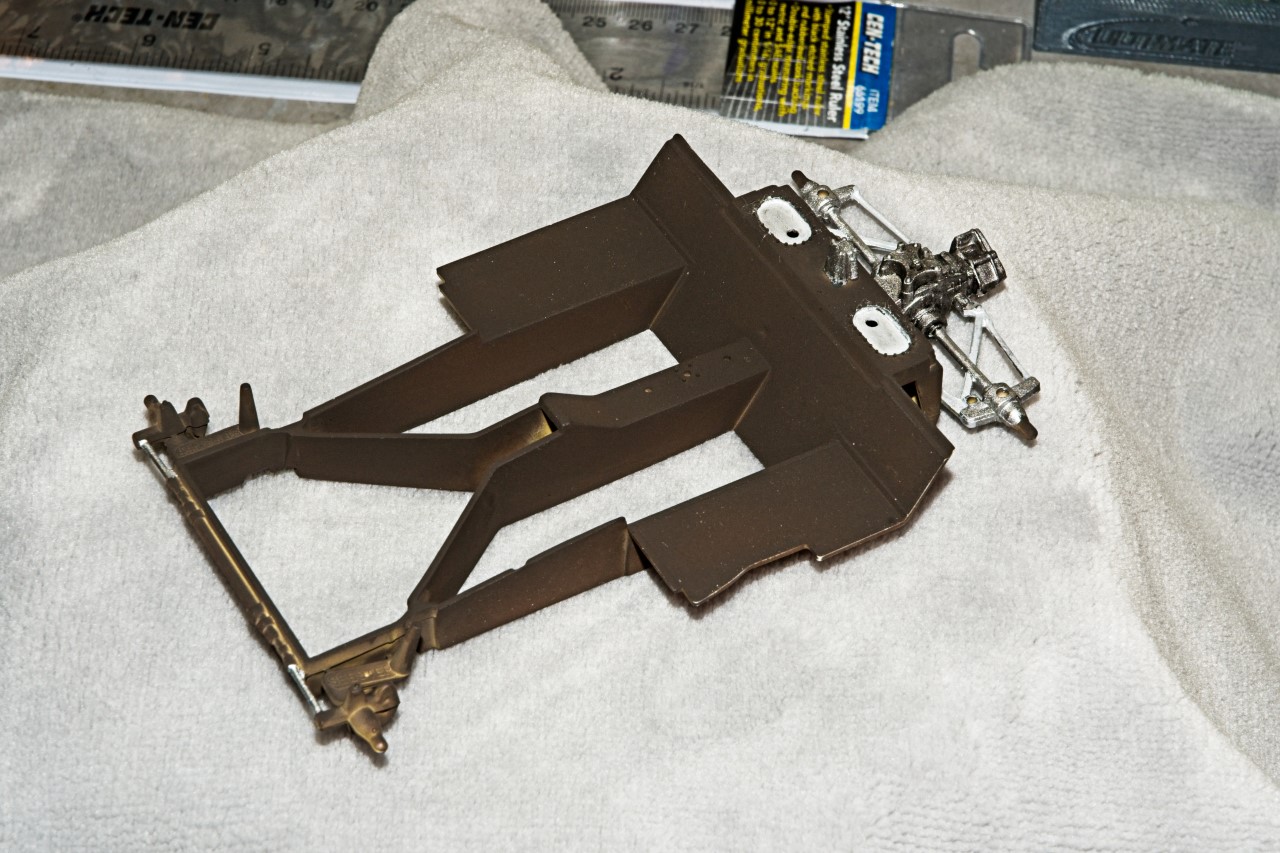
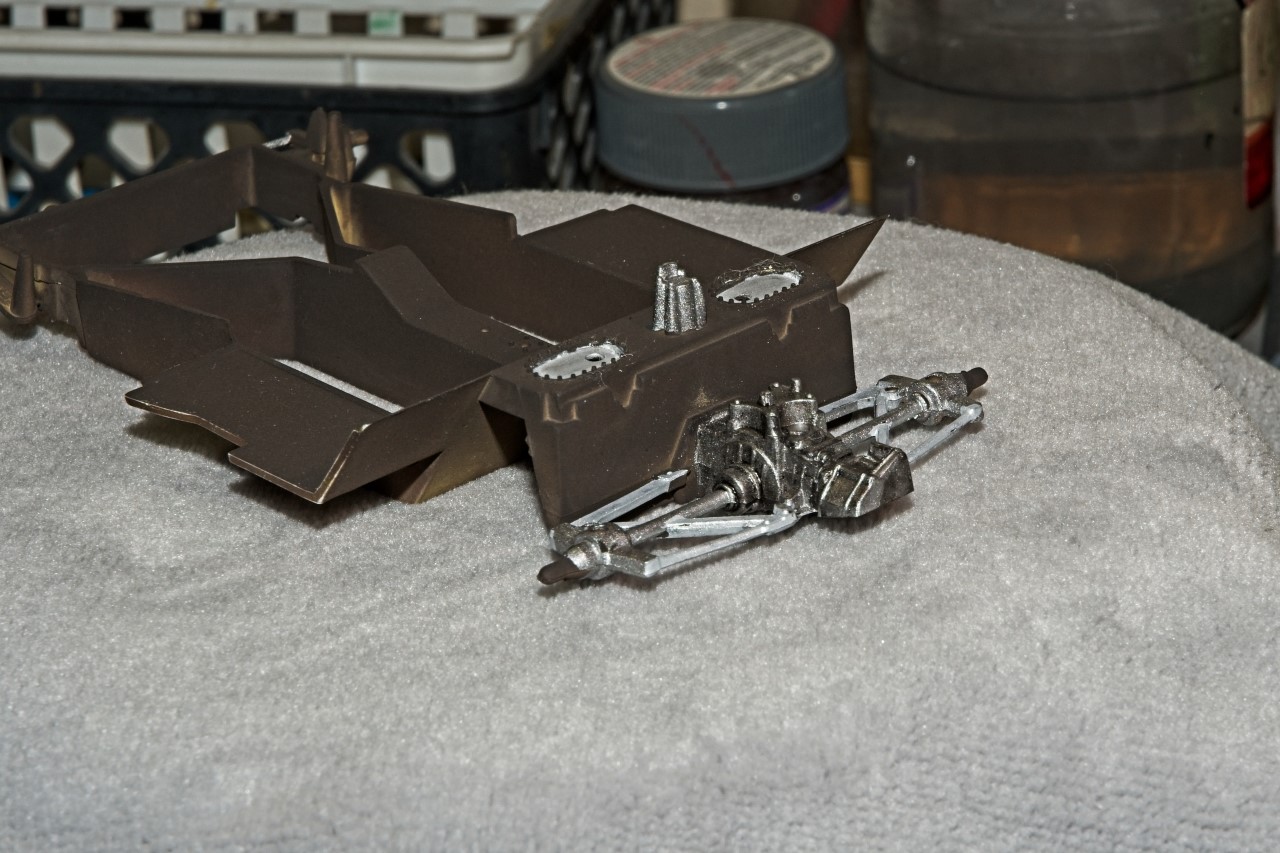
Now comes the fun part. The chassis which is Kelvar, and the lower shell for 1984 is Carbon Fiber, was painted a Dark Grayish/ Brown. Not sure why, but in most of the pictures of the real car I have it sure looks like just plain old Dark Gray. But all my written references clearly state the Dark Gray/Brown. Only trouble is I didn’t have a single bottle of paint that came close to it. So I just made my own. I used Tamiya XF-69 Nato Black mixed 1:1 with Tamiya XF-10 Brown, and once again thinned 1:1 with Mr. Color #400 Leveling thinner. The color is dark, but you can see that there’s a Brownish tint to it.
The Chassis
joel
Looks like a very smooth finish on the white Joel. Should look really good under a gloss coat.
Nice work on the interior. As you know it’s usually hard to see anything once it’s all buttoned up so I am more relax about internal colour accuracy, though yours seems pretty good.
cheers
Michael
Michael,
Thanks for stopping by and checking out my build to date.
Yep, I’m more then satisfied with how the MCW White lacquer paint came out. I was somewhat concerned that after all these years of it just being stored in one of several shoe boxes that I use to store paints, it didn’t need any additional thinning.
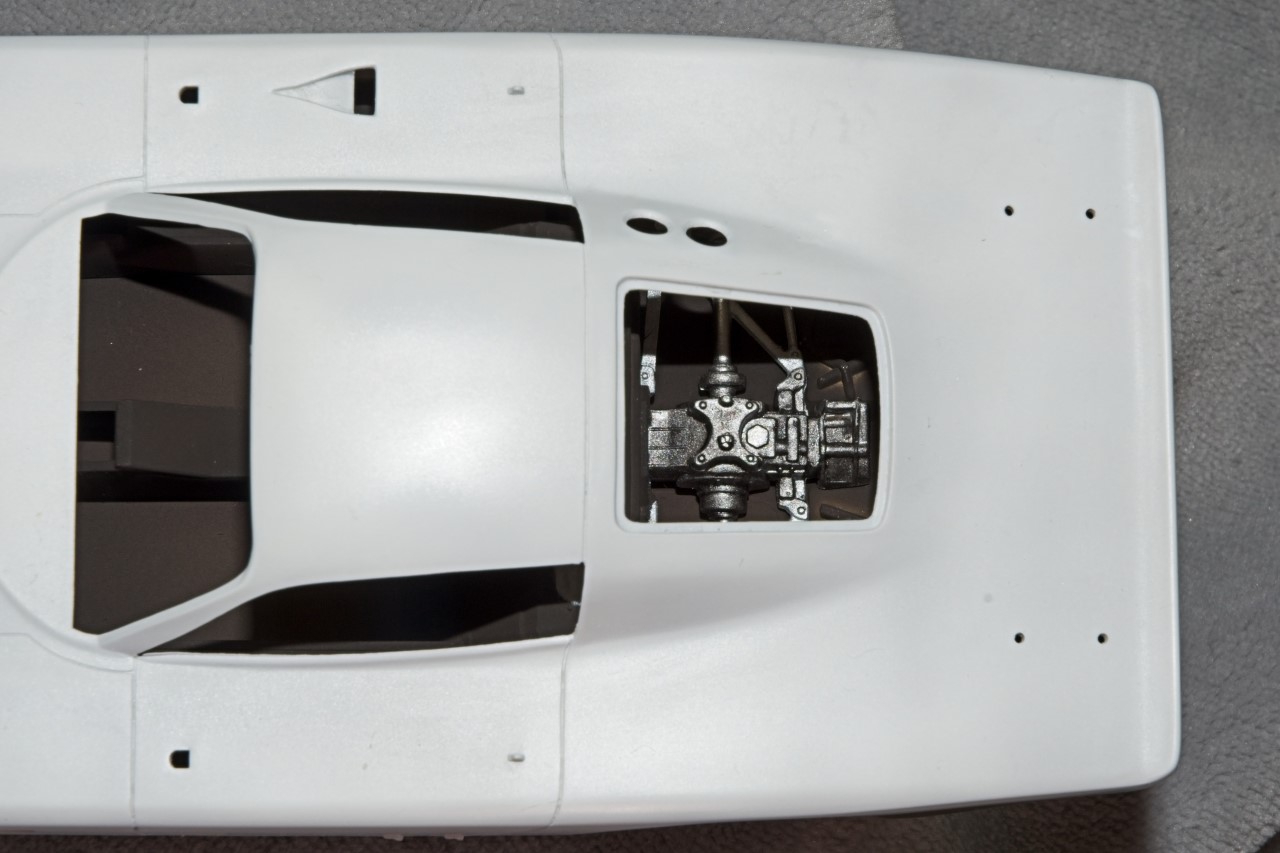
More to be added to the rear end section so it will look pretty busy. Some tubing, the two gas filler lines, and the cockpit bulkhead should fill up that area just fine. It’s the engine area that just might look a little sparse with what’s supplied in the kit.
joel
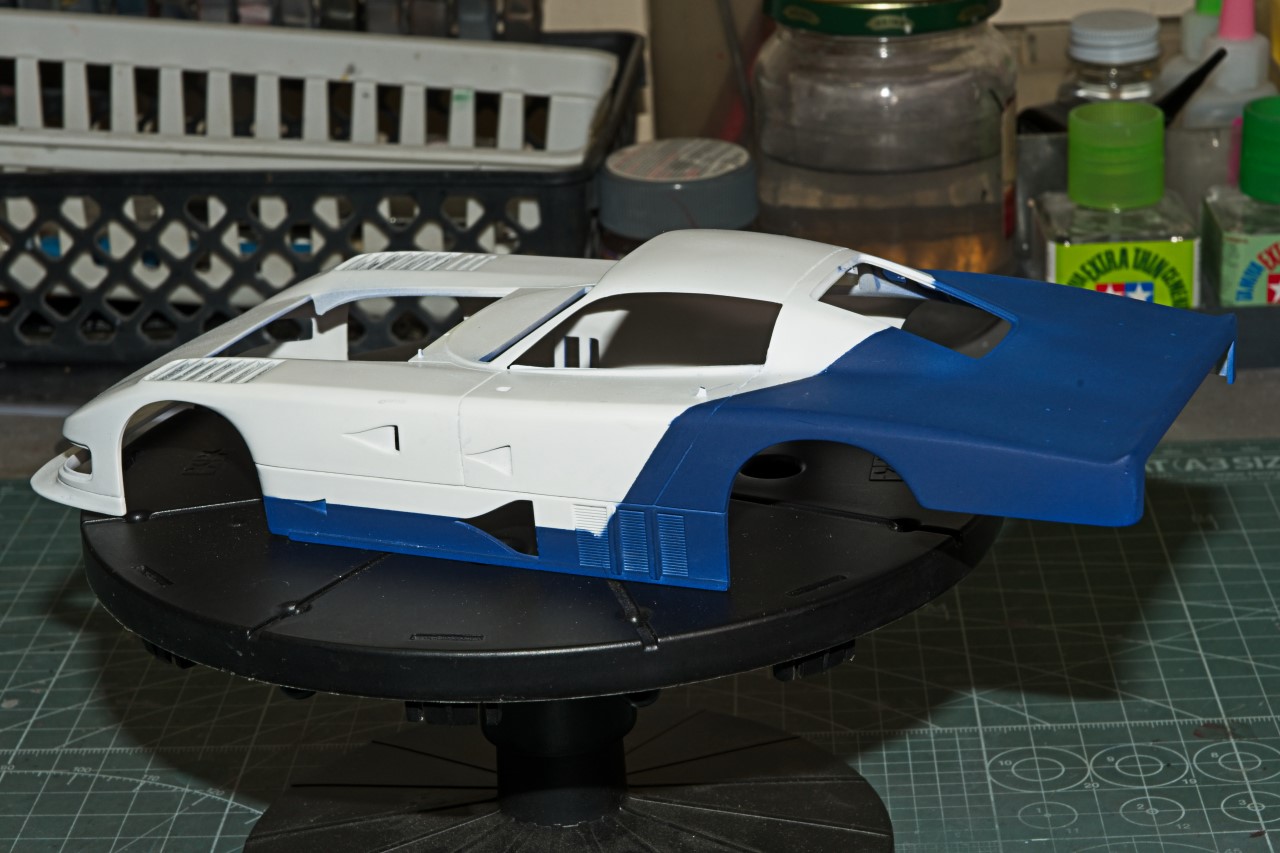
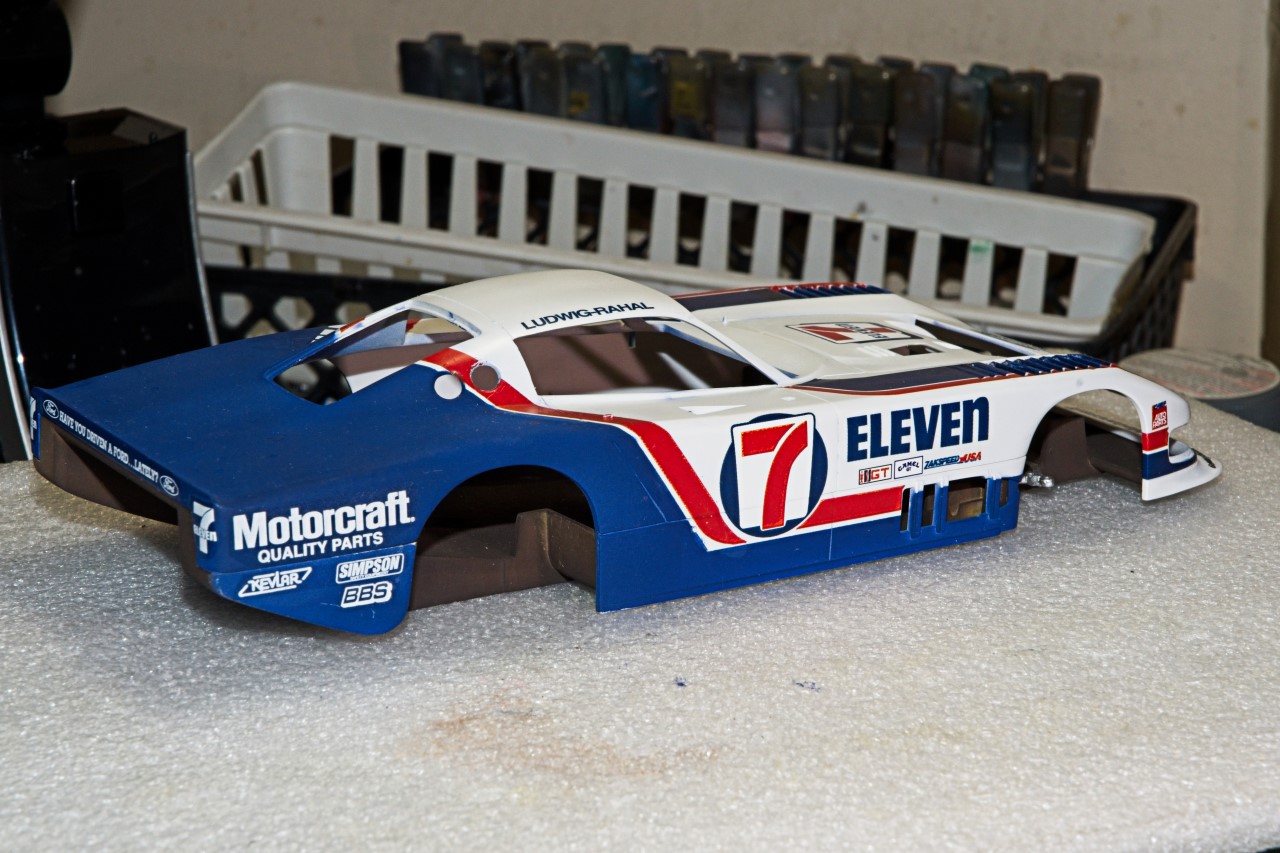
Time to air brush the Dark Blue on the upper body shell as well as the lower rear fenders.
I gave the upper body shell and the lower shell fenders a light wet rub with Micro Mesh 8,000 and then 12,000. A light wipe with a pc of paper towel damp with Iso Alcohol to remove any particles still on the shell, then attached to my Tamiya paint stand and into one of my storage boxes while I picked out the correct shade of Blue.
At 1st I wanted to go with the MCW Valvoline Blue but it has a Greenish looking base to it, so it’s time to checkout my overly large collection of lacquer and Acrylic Lacquer paints.
Easy enough to blow through my Mr. Color paints as I actually didn’t have any Blues. Then I hit the nearly full shoe box of Gravity paints and there was a good 1/2 dozen bottles of Blue, but all were bought specifically for models in my stash that I keep on promising myself that it will be next or right after the next build. Even have the correct Blue for the Tyrrell 005. So I moved on over to the Tamiya shoe box. Gee, only 4 different shades. I finally decided after testing them that XF-8 was as close as I could get .
Just one last task to accomplish before I hit the paint booth, and that was the extensive masking. Of course I totally forgot to take a few pics, but as soon as you see the paint scheme, you’ll instantly know why the masking took 2 days and a ton of Tamiya tape of various sizes.
After the paint session and cleaning up my Grex AB, it was time to remove the masking. Just always love how it takes hours to apply the tape, and like 10 min to remove all of it. Anyway, here’s the shell with the tape removed. The demarcation hard lines came out ok but there is some over spray. Dark Blue on White is a dead give a way. Luckly, most of it will be covered by decals. Still need to paint all the grills and exhaust plates before decaling can start.
joel
Masking is never easy. Even though the paint have bled through, a few places, is looks sharp and the two sides look identical. Great job Joel.
Jesper,
Thanks so much for stopping by and liking my painting efforts to date. It’s much appreciated.
The little bit of bleed through is mostly in areas that will be decaled over or painted like the 3 intake grills. what doesn’t get covered up I’ve been working on very carefully trying to remove. Not easy for a half blind old man.
joel
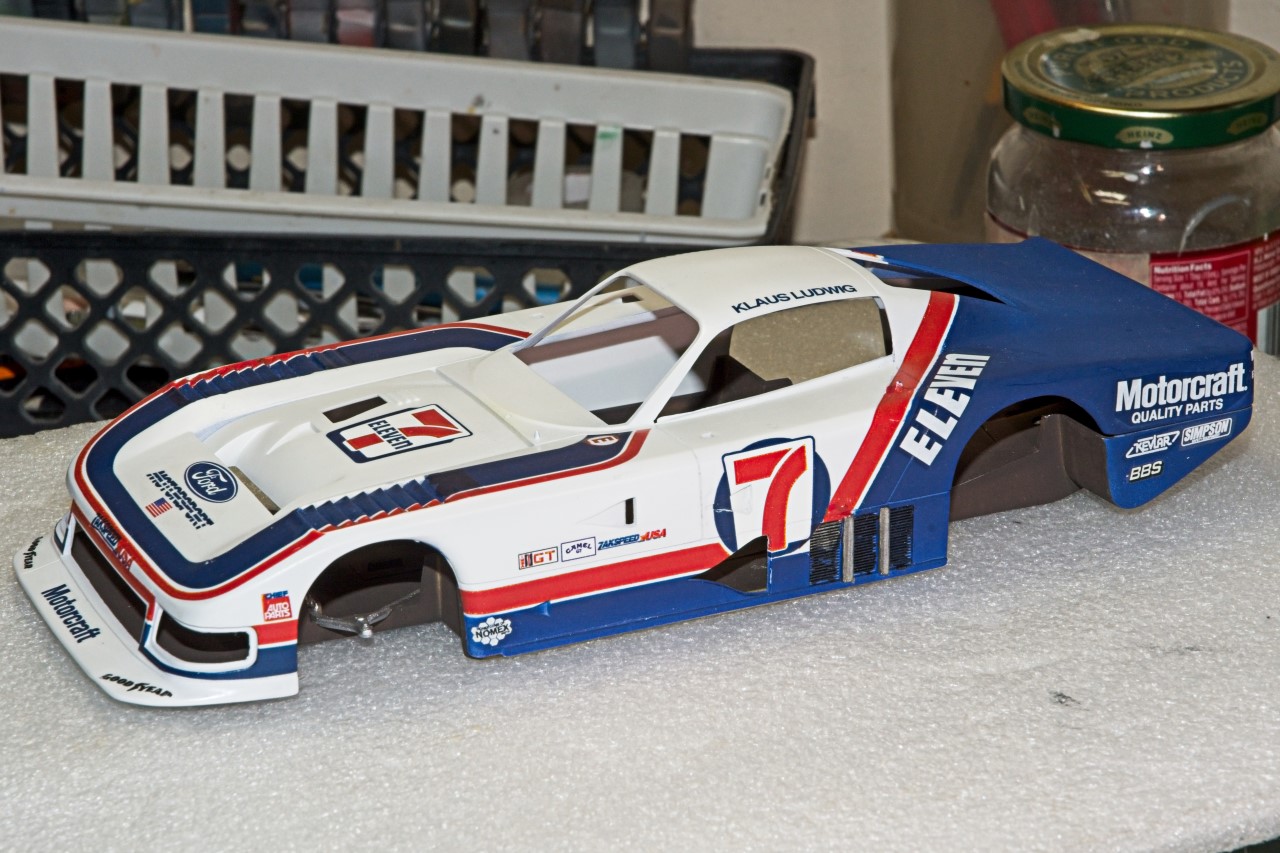
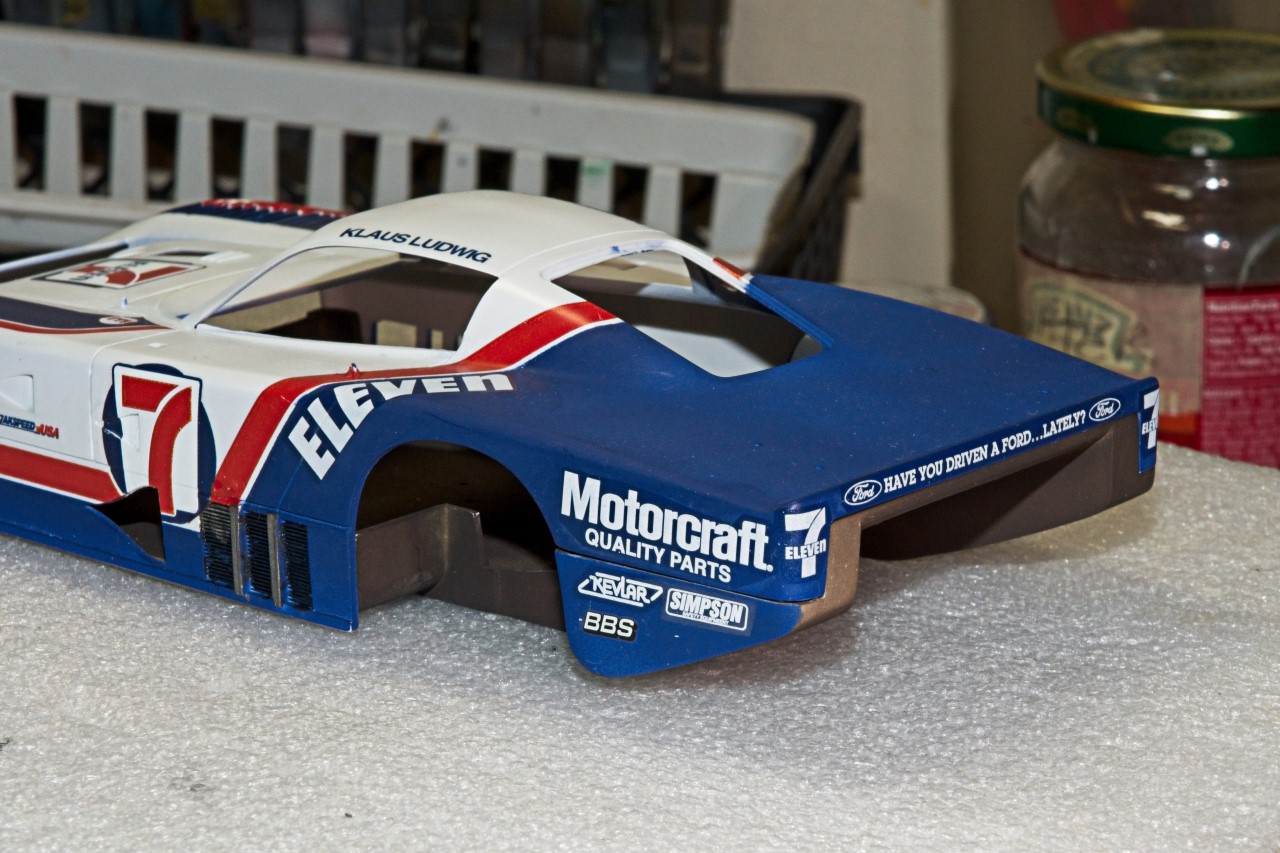
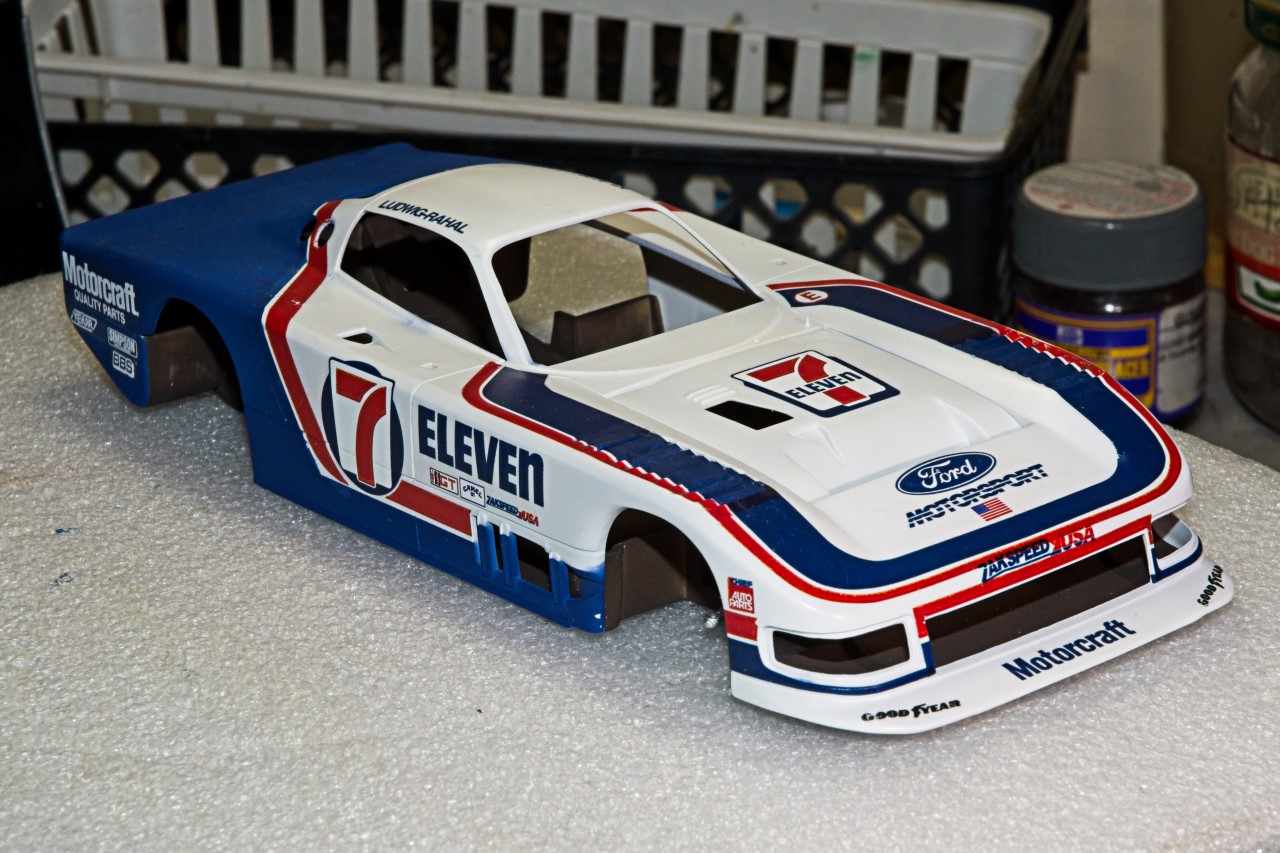
For the last week I’ve been working on decaling both the upper and lower body shells with AM decals from Indy Cal. The decals seem to be even thinner then previous ones I’ve used, and do require a very gentle touch as not to rip or damage them. For the most part I now let the decal solutions do nearly all the work and only roll a Q tip over them when they’re almost dry. One issue I had is that the main rear wing decal came with a beautiful finger print embedded in it. I reached out to Michael at Indy Cals and he’s said that had to have happened during printing, so he’s replacing the decal, which I hope to have sooner then later.
As it stands right now I still have small paint issues to repaint, and or repair but all should turn out well even in my case.
At this point it’s just the decals on the paint, no gloss coats as yet.
Here’s a few pics of where the build stands as of now. The lower body shell is just loosely dry fitted so there’s slight gaps .
joel
Nice work Joel, especially over those louvres above the front wheels. You wouldn’t call it a pretty car but I am sure it’s maker liked it. And no, I can’t remember the last time I was even in a Ford let alone drove one ![]()
cheers
Michael
Exceptional decal work Joel.
You are too kind sir ! ![]()
Lovely work Joel, the decals look to have laid down really nicely and will look great with the gloss coat. frustrating to have the thumb-print drama when you were on a roll there, but I’m sure it will get sorted.
Cheers, D
Michael,
The vanes in both of those front fender vents for the brakes would have been hard enough to get the decals to lay down, I made it that much harder on myself with the idea of lets create the illusion of open vanes as they literally went straight down and stopped, looking rather odd and toy like. So what I created for myself was even a steeper step that exceeded the amount of stretch that the decals could provide, and the newly created lips became a self induced nightmare. Fortunately, the Tamiya paint is a perfect match, and many very light thinned coats of paint helped to cover any decal rips.
the car itself was cutting edge and went against the current mid engine big block design. It was super fast, but broke down in almost every race over it’s two year life span.
For me, the 7-11 scheme is way nicer then the Ford Motorsport scheme of the sister car.
joel