Thanks for stopping by. I have been modeling since I was a child but recently miniature painting has consumed my pastime and I would highly recommend it to anyone looking for new ways to make your models stand out. There are some really talented people painting miniatures and I am looking forward to bringing what I have learned to my models
I choose this subject because it ticked a lot of my boxes. I have always loved PE although most of my experience has been building aircraft and don’t ever recall seeing any this small. This is going to be interesting. I also really love these early iron ships and like to display my models without them taking over the room so the 1/700 scale works for me. If I had a room just for my models this blog would be on Joy Yards BB63
Another passion of mine, History: has me wondering why this subject isn’t as popular as the Bismarck. The story of the SMS Emden is amazing and more interesting.
I also enjoy photography so if there is something you want to see, feel free to ask.
I purchased “The Light Cruiser SMS Emden by Samir Karmieh” from Books a Million but have not received a shipping notification yet which is slightly concerning. They took my money and set an email confirming that so far. Considering what it took to find this book I am hoping not to receive an apology and a refund.
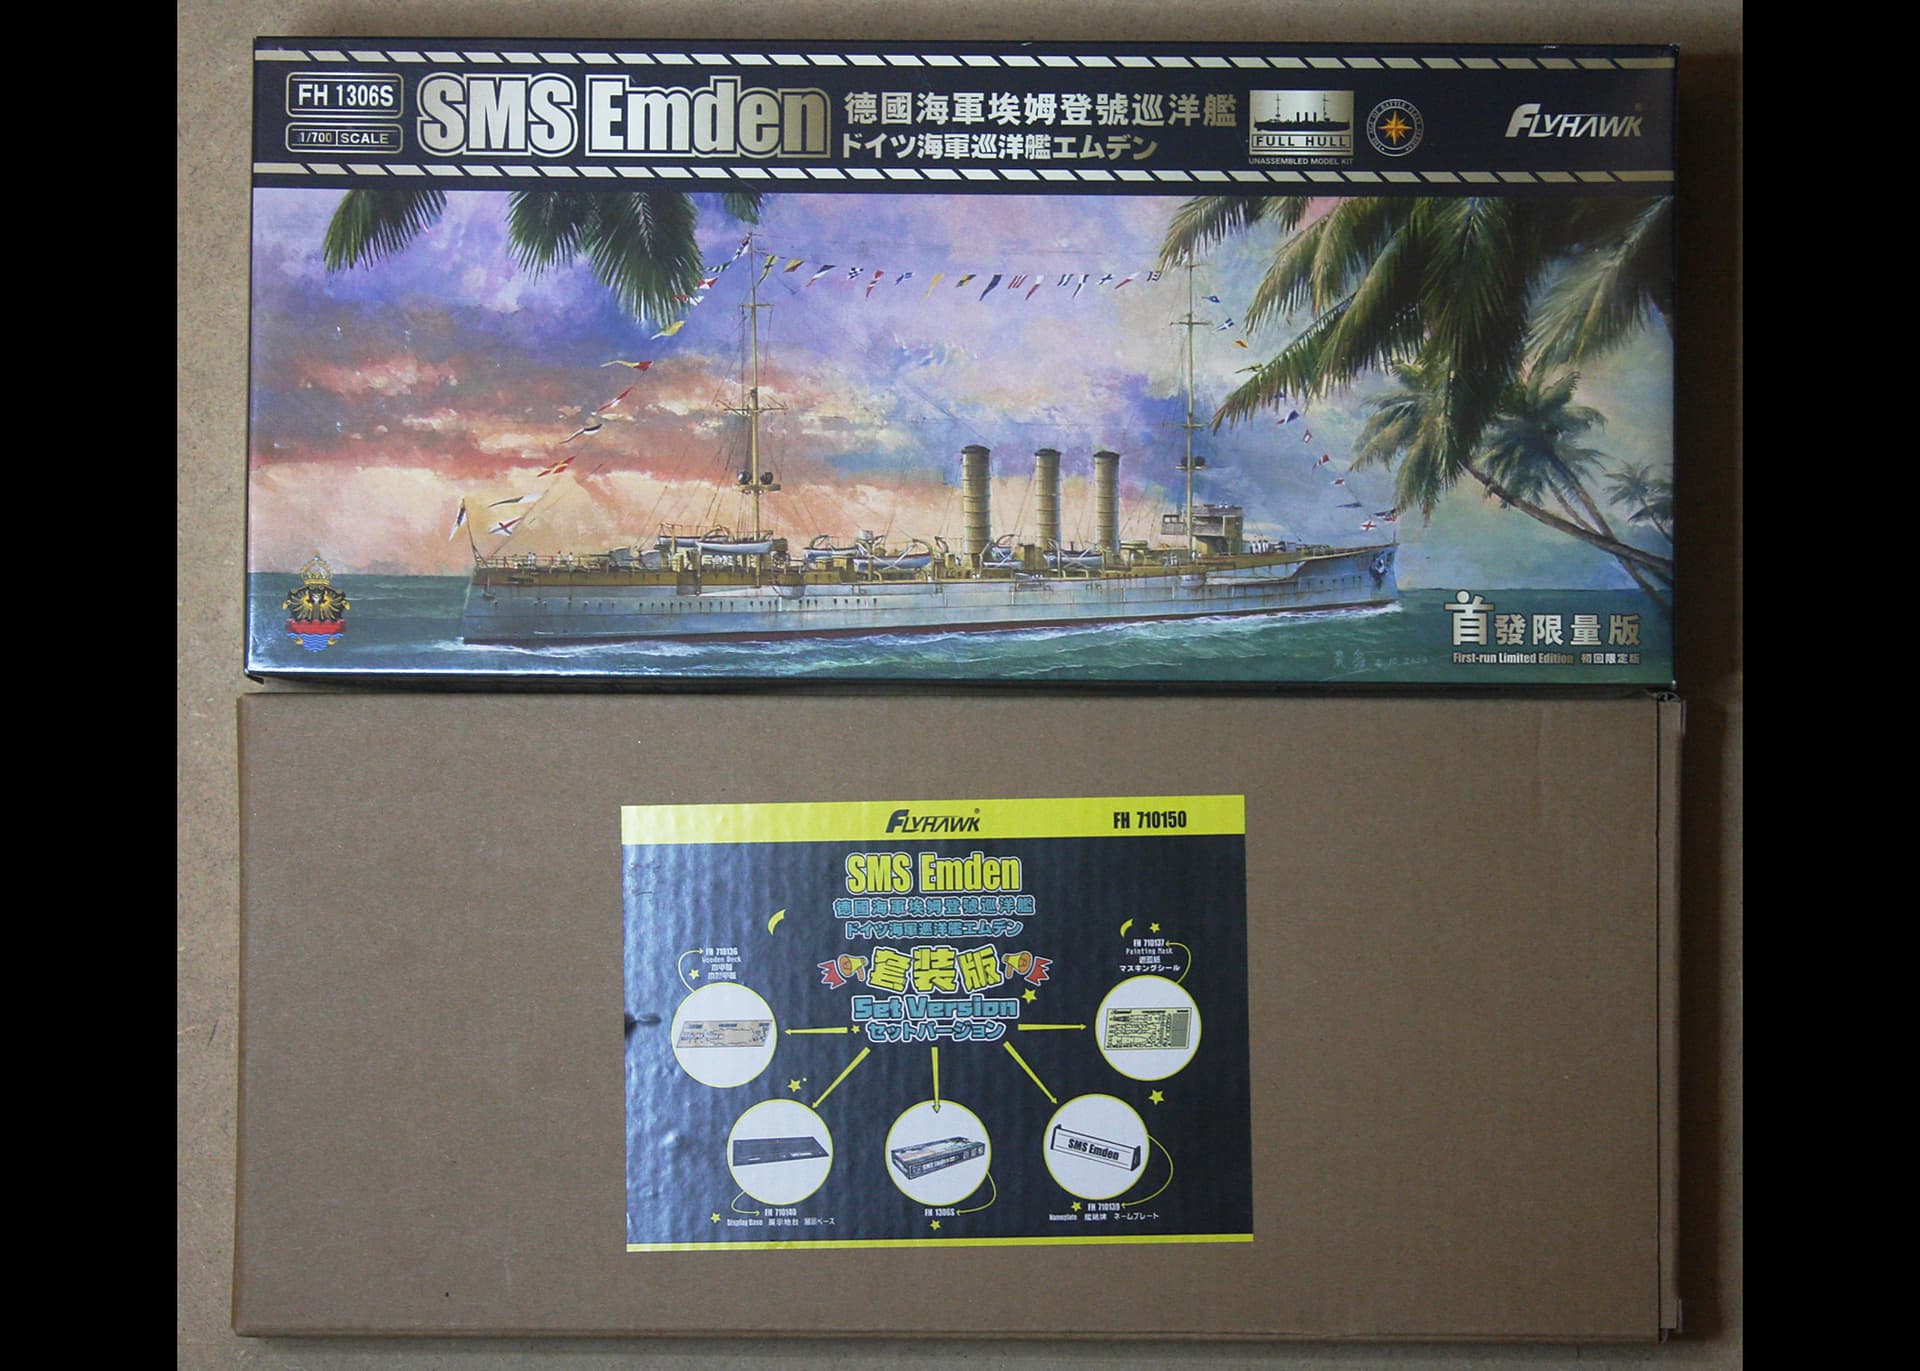
Please find below a some information found on Wikipedia and a pic of the box. More to follow 
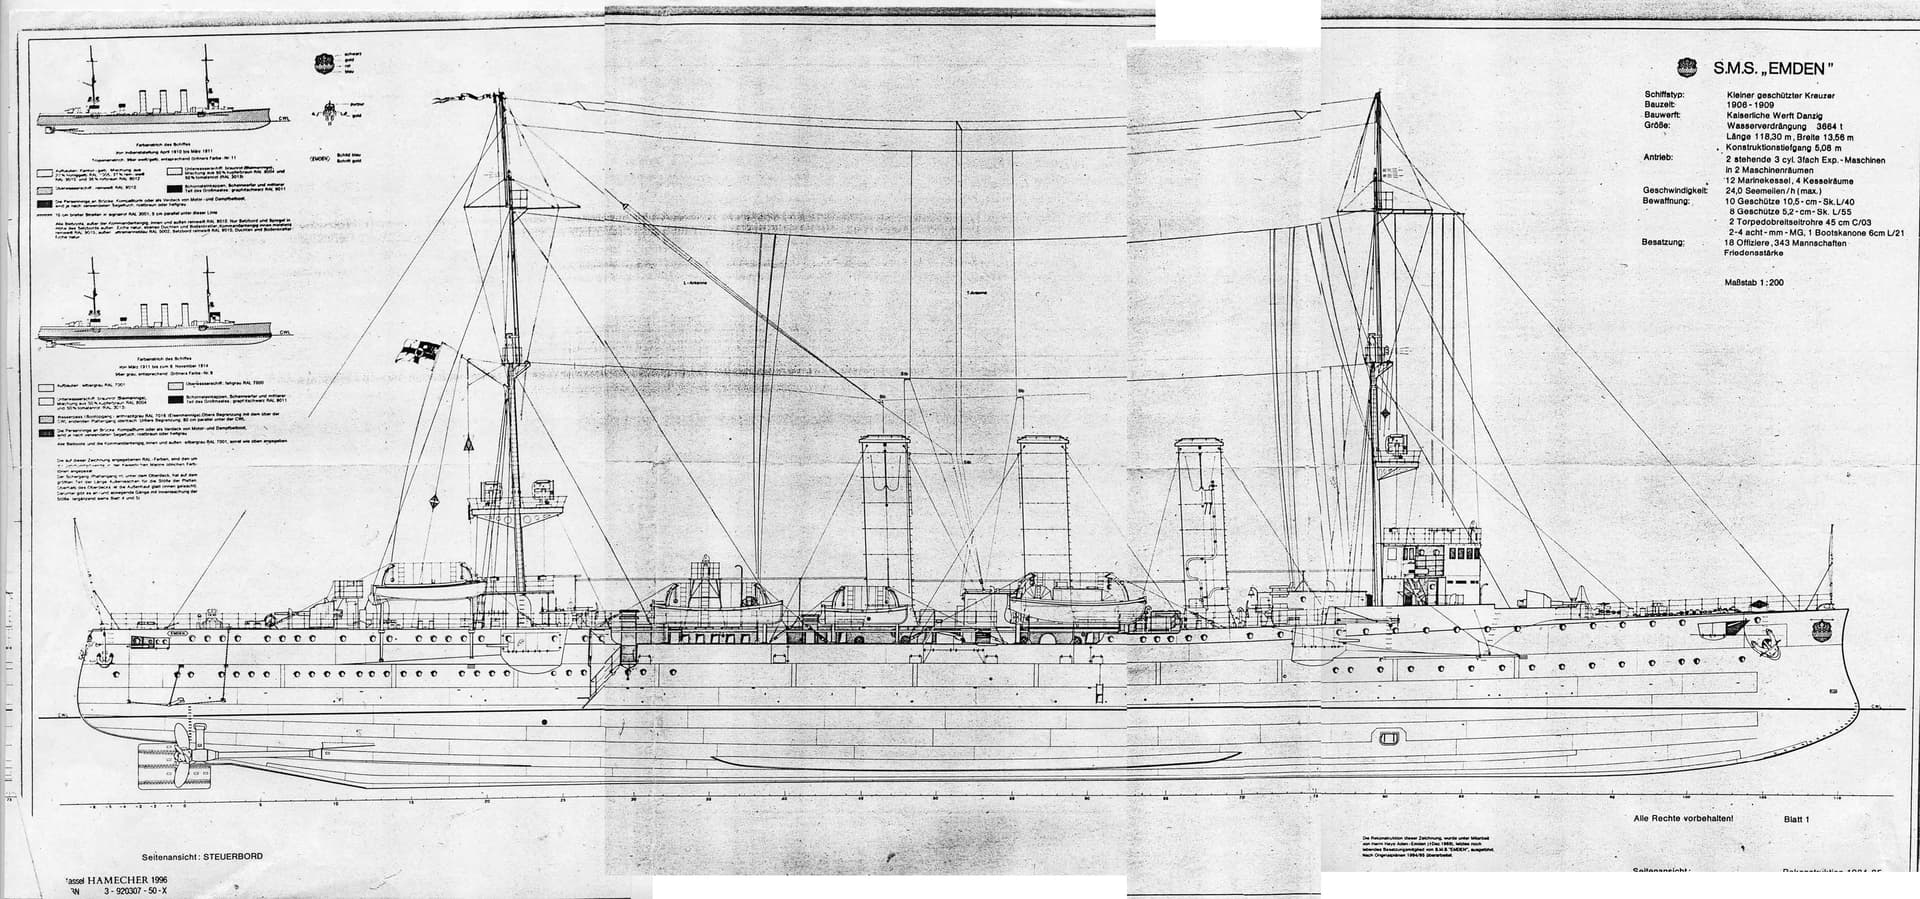
SMS Emden was the second and final member of the Dresden class of light cruisers built for the German Kaiserliche Marine. Named for the town of Emden, she was laid down at the Kaiserliche Werft in Danzig in 1906. The hull was launched in May 1908, and completed in July 1909. She had one sister ship, Dresden
Launched: May 26, 1908
Length: 388′
Builder: Kaiserliche Werft Danzig
Construction started: November 1, 1906
Captain: Karl Friedrich Max von Müller
Armament: 10 × 10.5 cm (4.1 in) SK L/40 guns; 8 × 5.2 cm (2 in) SK L/55 SK L/55 guns; 2 × 45 cm (17.7 in) torpedo tubes
Armor: Deck: 80 mm (3.1 in); Conning tower: 100 mm (3.9 in); Gun shields: 50 mm (2 in)
8 Likes
Looking forward to this build! How about some shots of the model parts?
1 Like
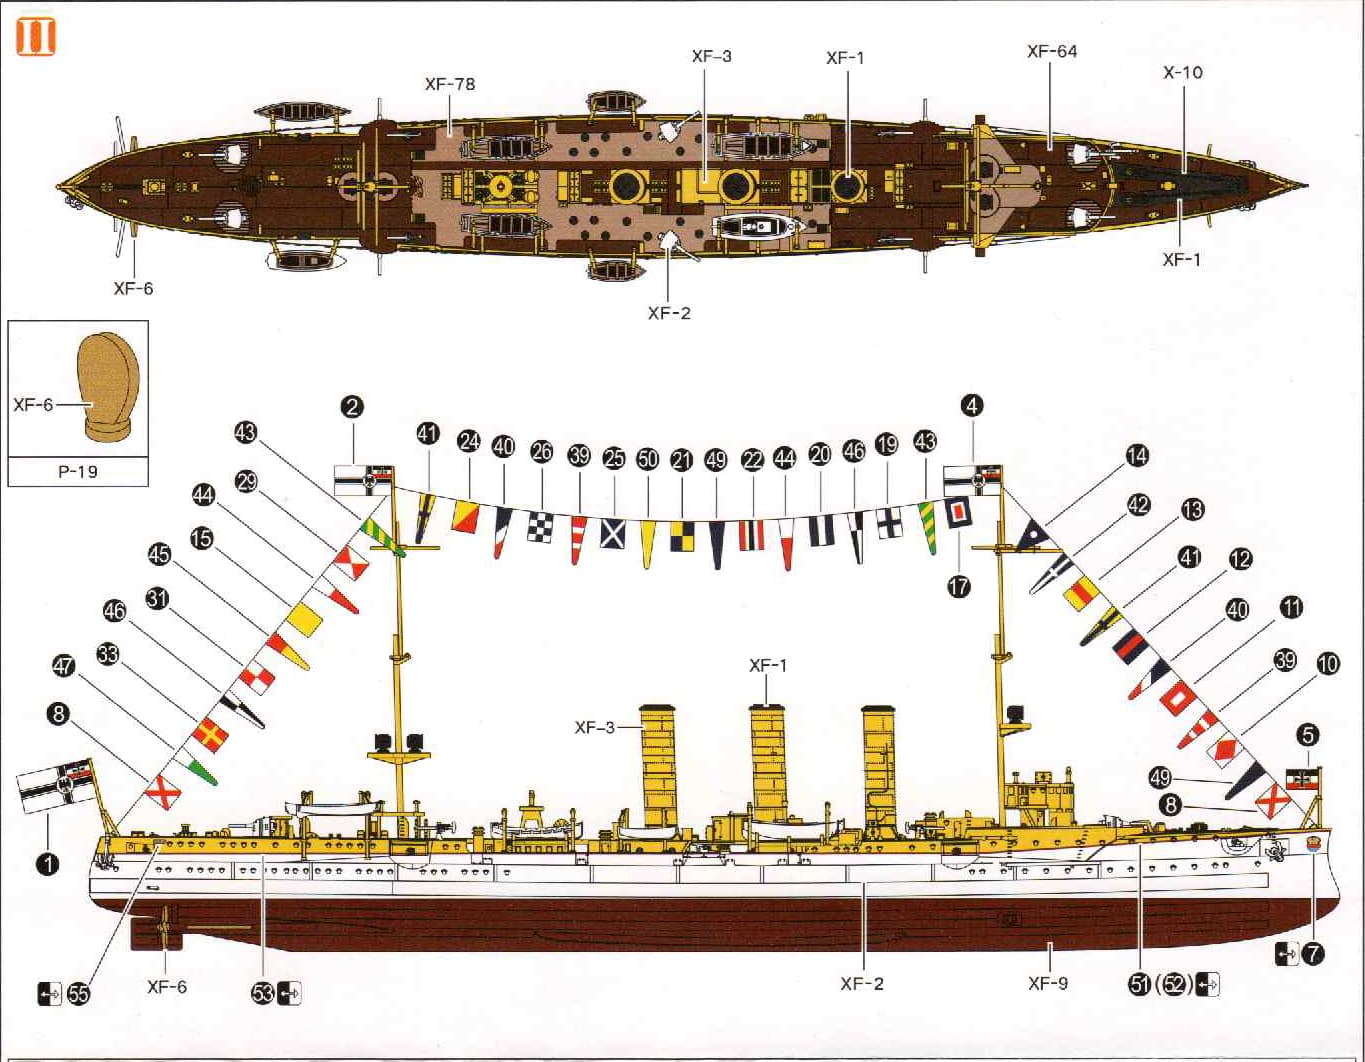
My Initial thoughts on Fly Hawk’s Kit number FH1306S
The actual ship is only 388 feet so the model is quite small and the PE even smaller. Some pieces would give the letters on a coin a run for their money.
Nine sprues and a few loose parts are packaged in 4 thermally sealed plastic bags with the deck, lower hull and waterline base wrapped in foam. The PE and brass parts are sealed in plastic with cardboard backing and the 3D printed parts come in a small plastic box. Decals are protected by a film overlay and their own reusable plastic bag. In short, even though many parts are extremely fragile I would think the outer box would need to be severely damaged before any parts were damaged in shipping. The Deluxe version comes in two boxes shrink wrapped together with the parts in the second box all secured in plastic bags backed with cardboard.
Detail on the parts is state of the art and considering their extremely small size some of the best I have ever seen (Pics to follow) Decals are crisp and flat, not glossy and include a large selection of what I believe are International maritime signal flags. There are actually two sheets, one being quite small and packaged with some additional PE. The included 3D printed parts are clean and crisp highlighting the advancements in this industry and the paradigm shift this industry is going to make in modeling
If I had a criticism it would be the instructions. Clearly the person that designed these enjoyed building some of Iron Shipwrights early kits. Although they do follow the modern trend of showing an image of where the parts need to go, followed by them being on the model in the following image with that image showing you the next parts to install they are CAD drawings and there are not a lot of them, so they are quite busy and considerable time needs to be allotted to them to ensure you don’t paint yourself into a corner. There is also a base kit so the PE is on separate instruction sheet adding to the challenge…
I won’t bother with a review as Martin J Quinn has done a better job then I ever could on this kit over at http://www.modelwarships.com
Comments welcome and happy modeling 
Hi Tim
Thanks for chiming in Martin J Quinn has posted excellent images of every part in this kit
http://www.modelwarships.com/reviews/ships/sms/cl/Emden-700-fh/FlyhawkFH1306.htm
If there is something you would like to see and don’t see on Martin’s review let me know
Ahoy Modelers 
Today I spent my hobby time doing my favorite hobby pastime “futsing” or in layman’s terms, doing very little but having a great deal of fun in doing so
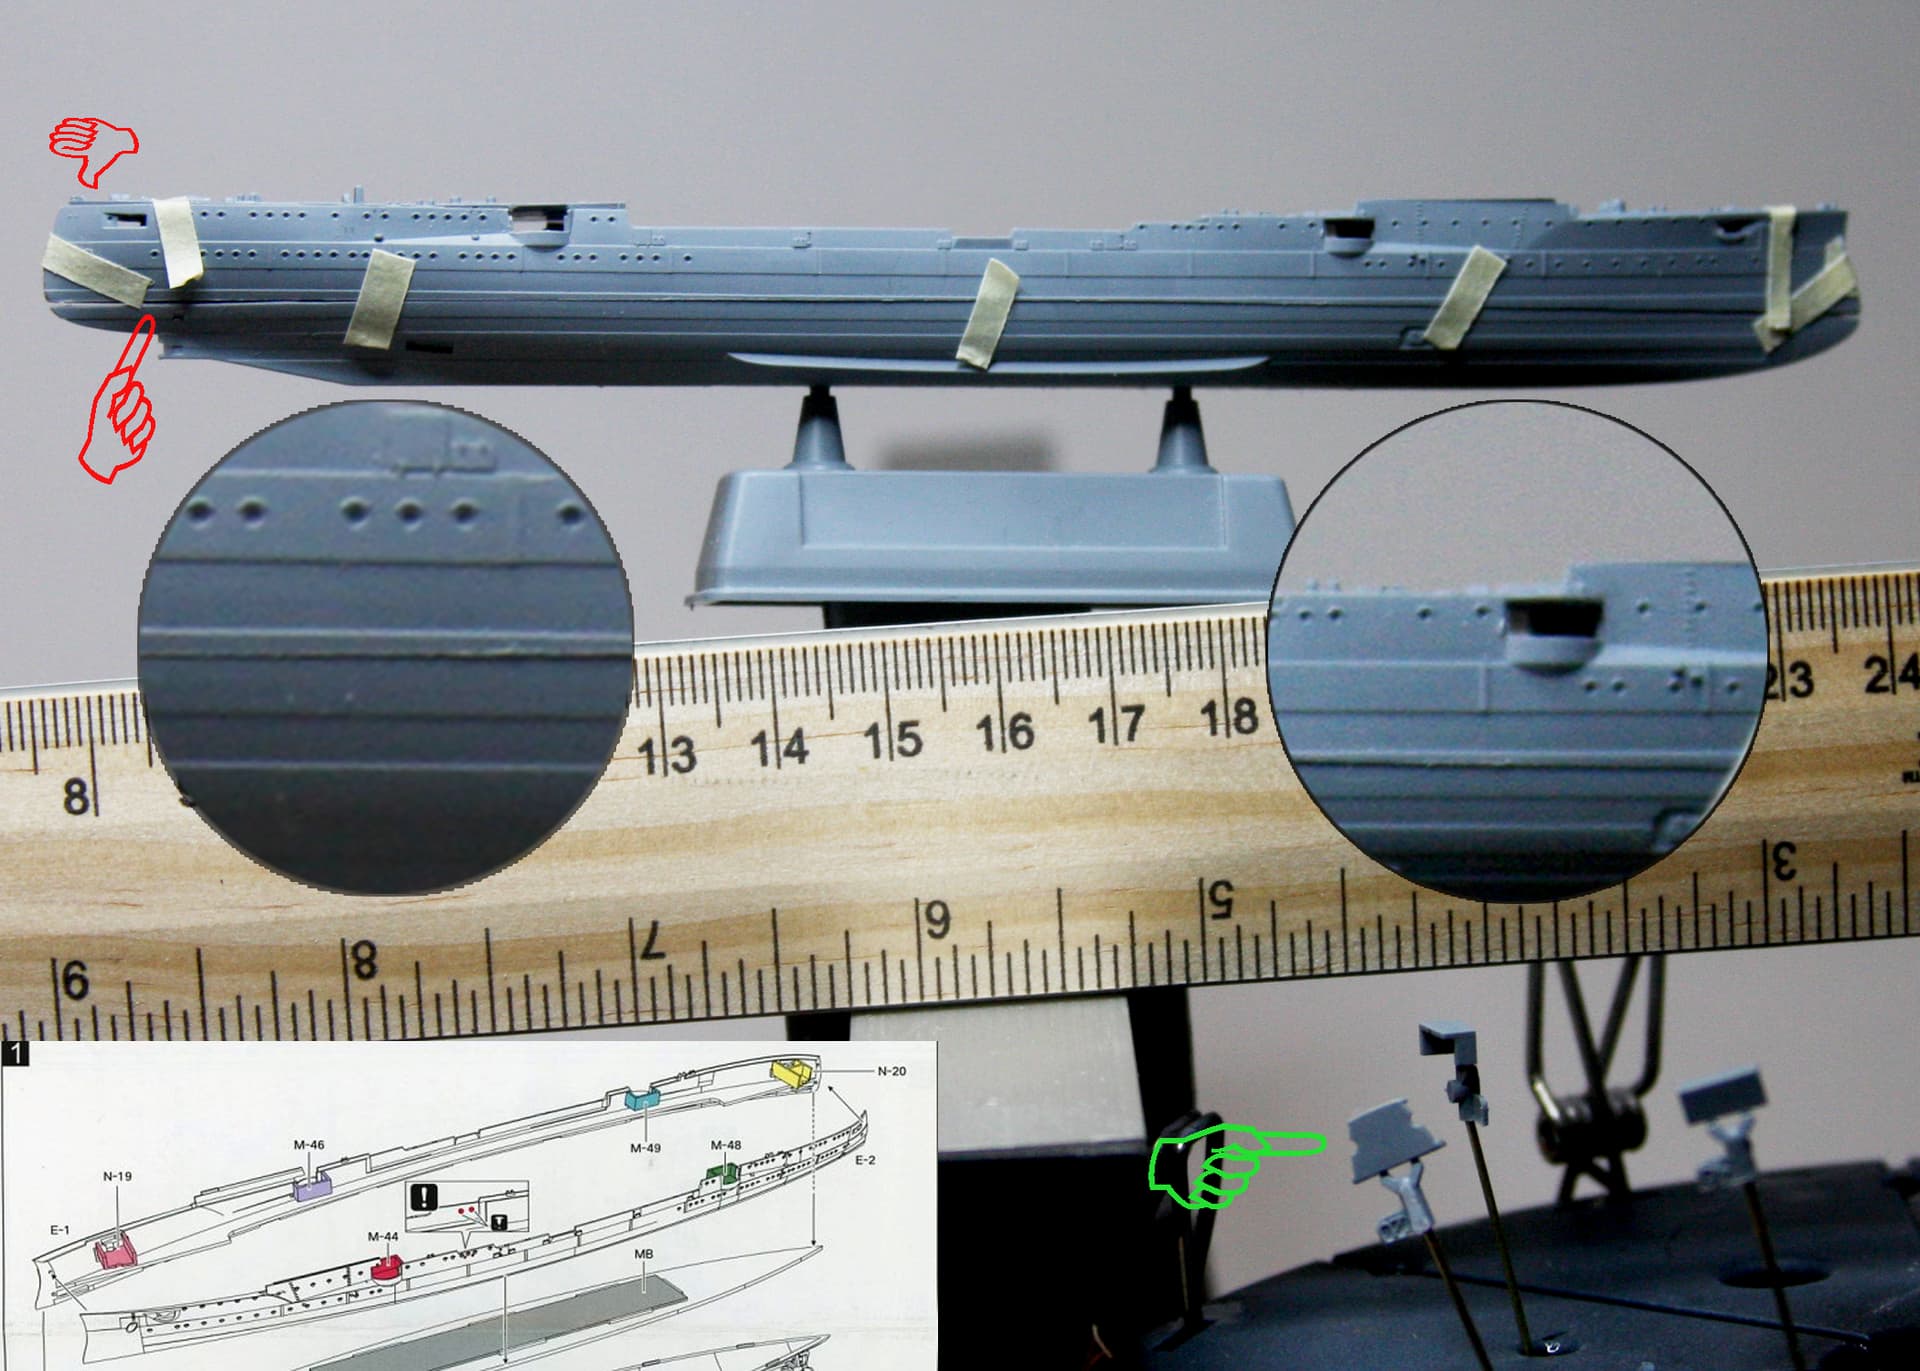
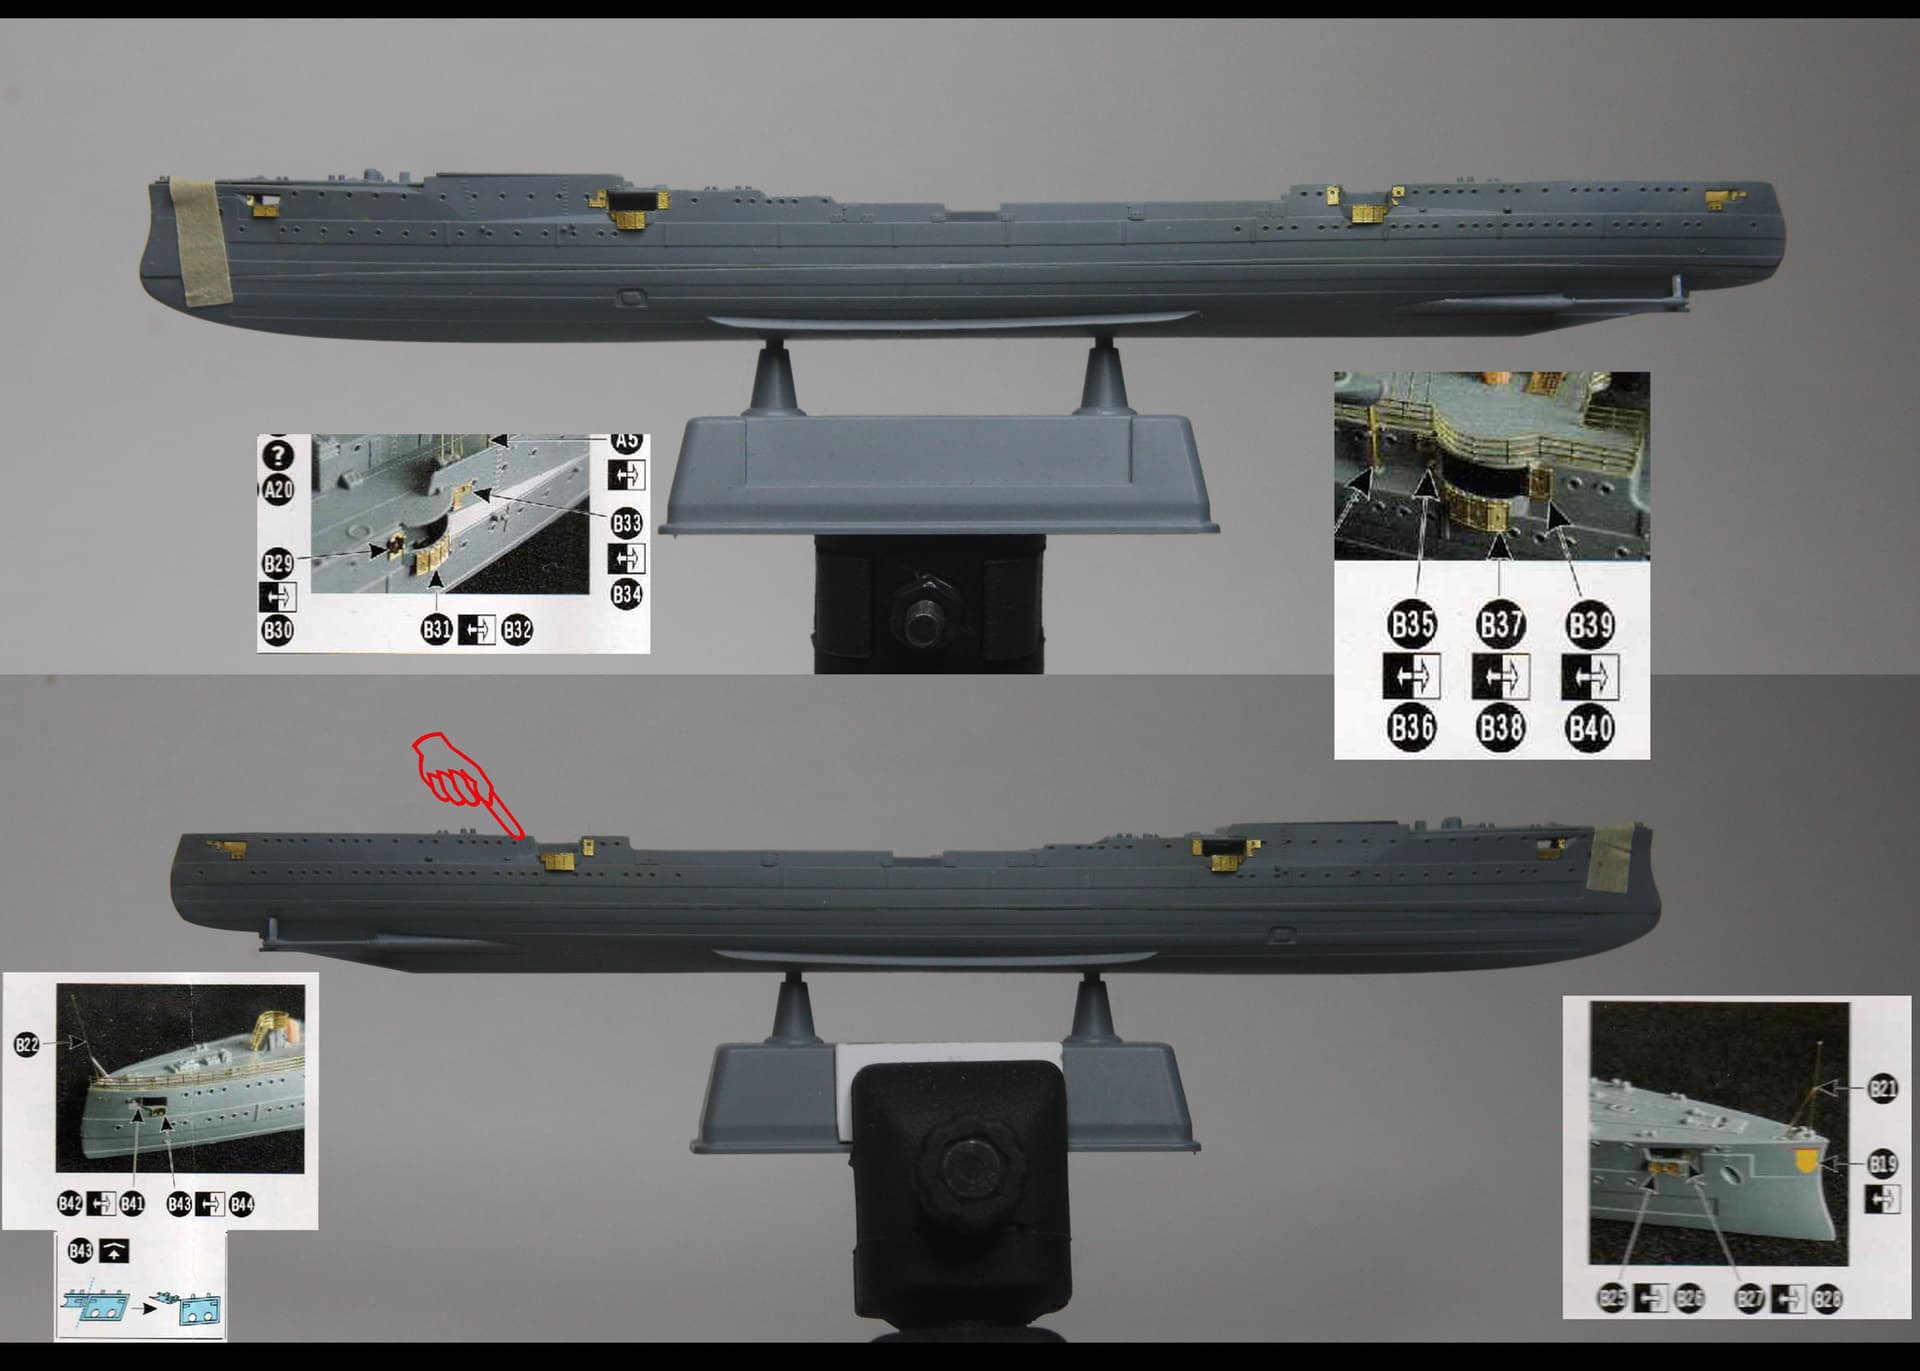
Step 1 has you gluing the compartments for the SK L/40 and SK L/55 guns and drilling some holes before mounting the upper hull to the lower. I removed the parts N19/20 and M44,46,48,49 from the sprue leaving one gate to use to hold the part for painting. I am undecided on primer at this scale and the color of the interior of ships of this period. Consider they were firing guns in a confined area so I am sure some thought went into the color. I might just take some liberty here considering it seems von Müller was a bit of a pirate at heart. I also might just close these considering the difficulty of these being open will cause with a gun turret daring me to snap it off the entire build. Suggestions welcome.
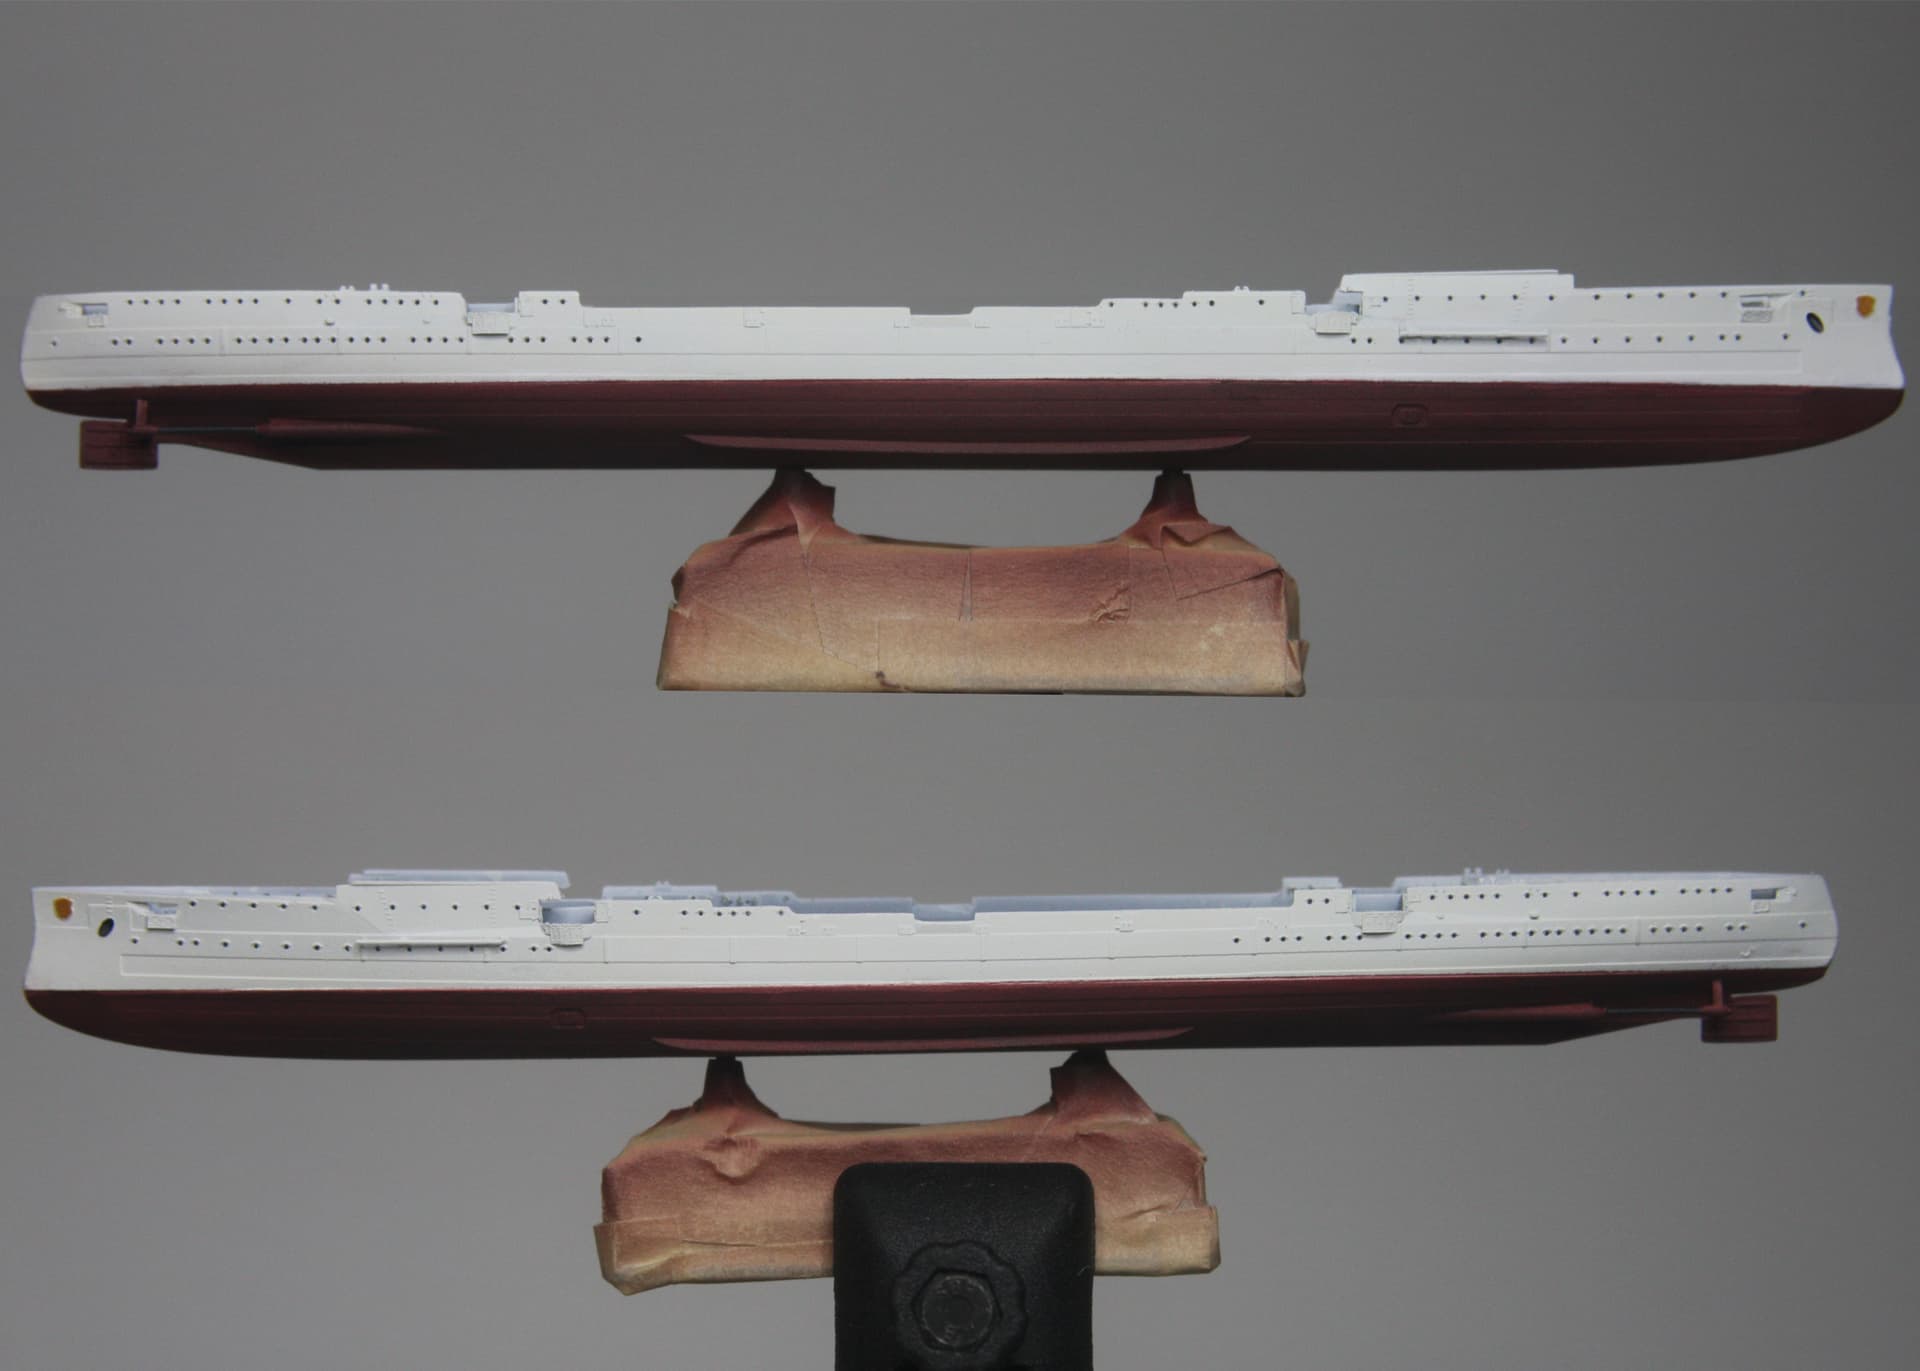
As you can see the detail on this kit is outstanding, Well I hope you can see. pictures will get better when I get my tripod and remote out of storage. Fit is excellent however I did have to reduce some of the port side alignment keys on the lower hull and the sprue gates on the upper hull are on a mating surface so extra attention was required there. There is also some minor warping which happens with plastic and at this scale .05mm is noticeable plus there is a minor fit issue with the rear deck which I have not yet resolved and might just resolve with some hotter glue
Either way, Thx for stopping by: Comments welcome and happy modelling
5 Likes
Ahoy Modelers
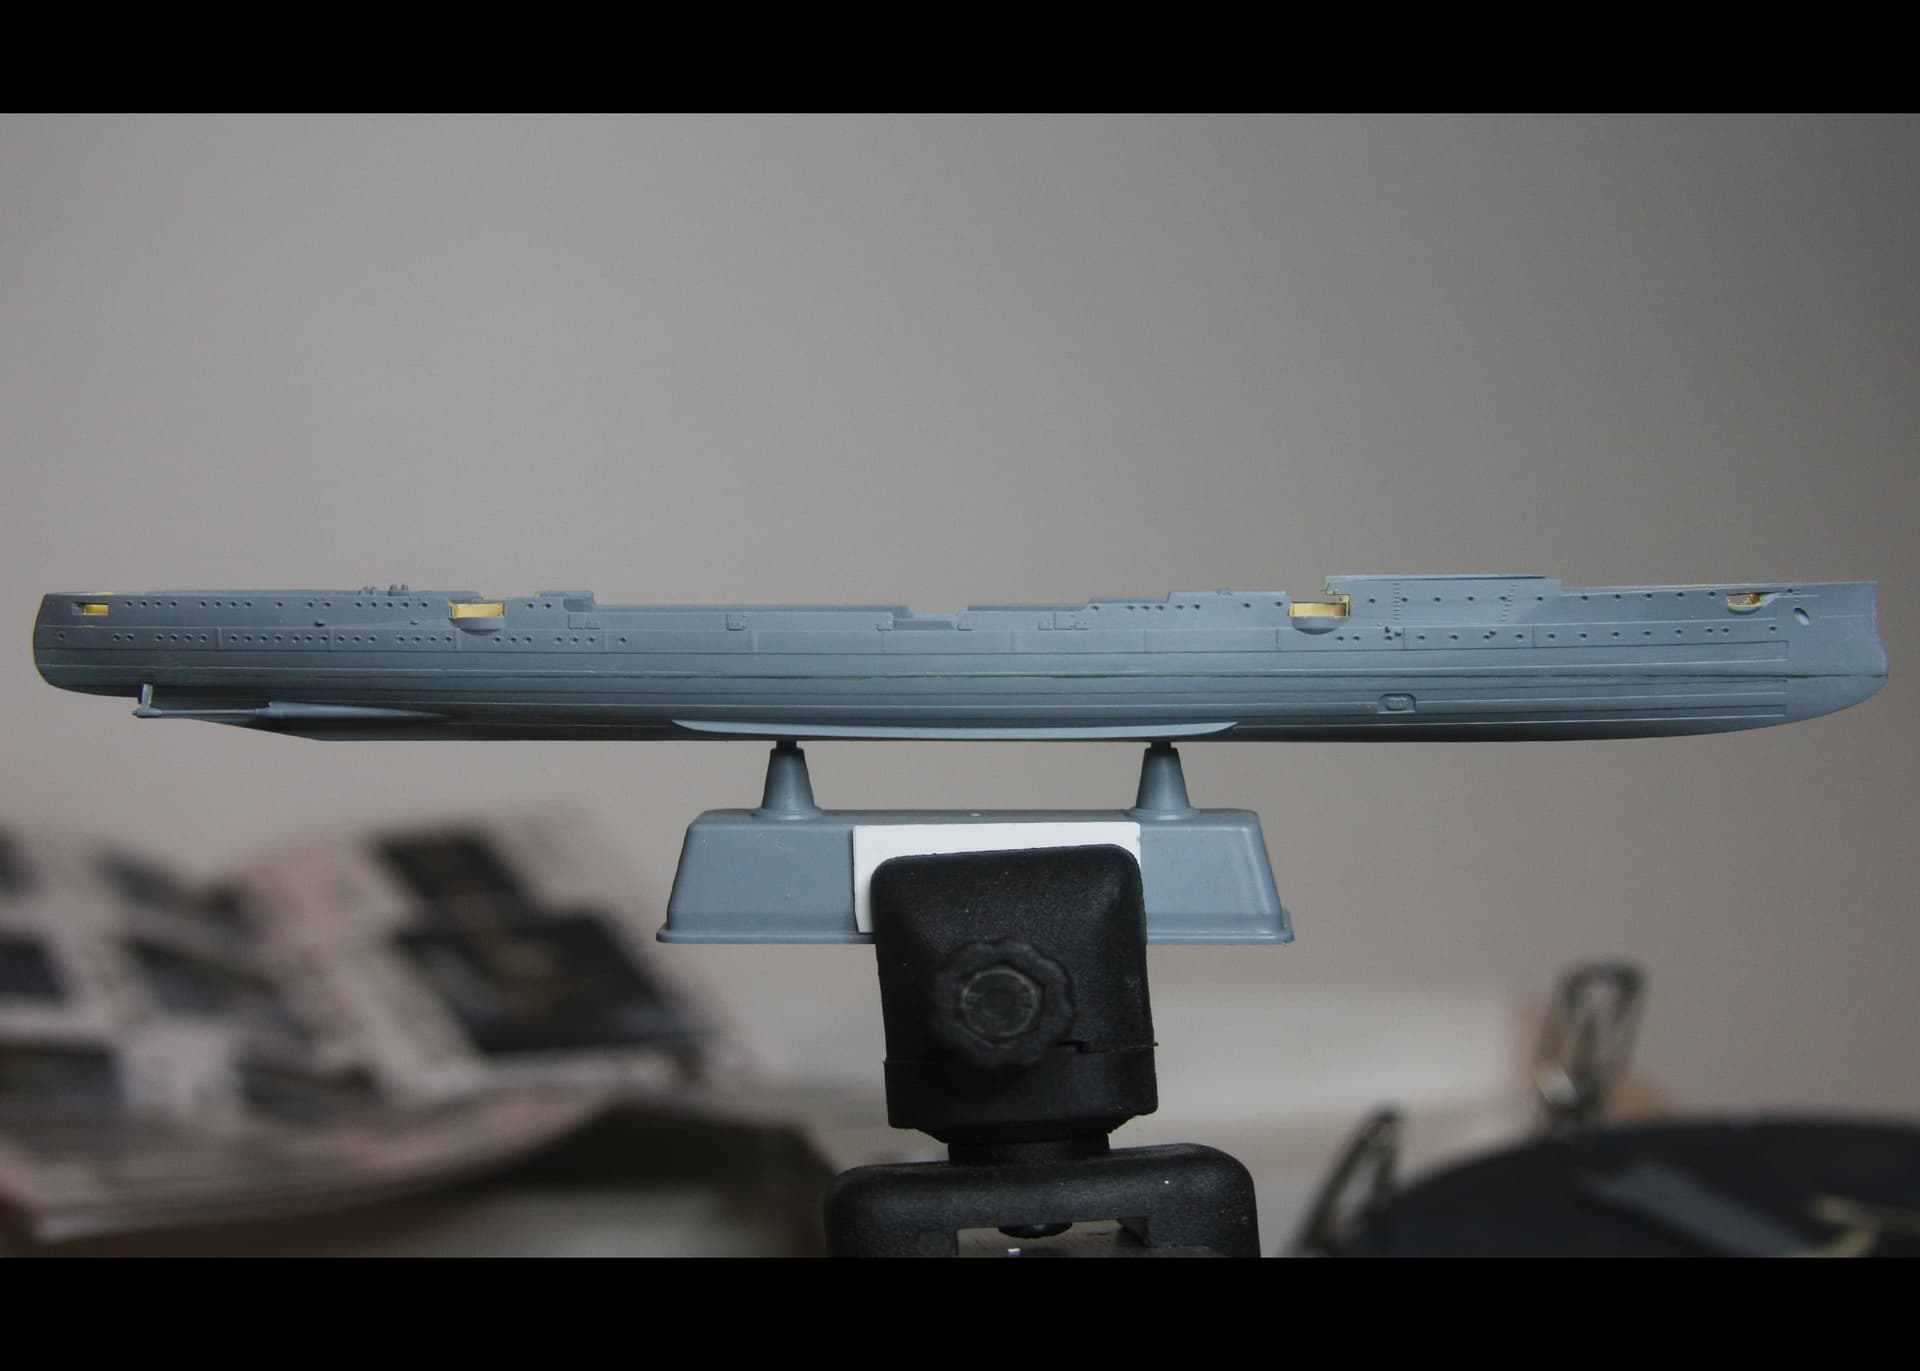
Next I glued the hull, mounted the inner gun decks M44,46,48,49 and N19,20 which I painted prior installation and the Starboard screw shaft. Considering my new plan (see below) painting the M and N parts at this time isn’t something I would recommend.
For anyone considering this kit, parts M44,46,48,49 I had to trim along with remove some of the mounting guides on the upper hull to properly fit these.
I also learned today that the liquid greenstuff I recently purchased for another project can be removed with 92% alcohol reducing the amount of sanding needed to fill gaps saving detail
I am considering painting the hull, installing the decks followed by masking and painting them then installing the wooden decks. Comments regarding this order would be greatly appreciated
Till next time; Happy Modeling 
5 Likes
Ahoy fellow modelers
Well its been an interesting week in the shipyard and abroad
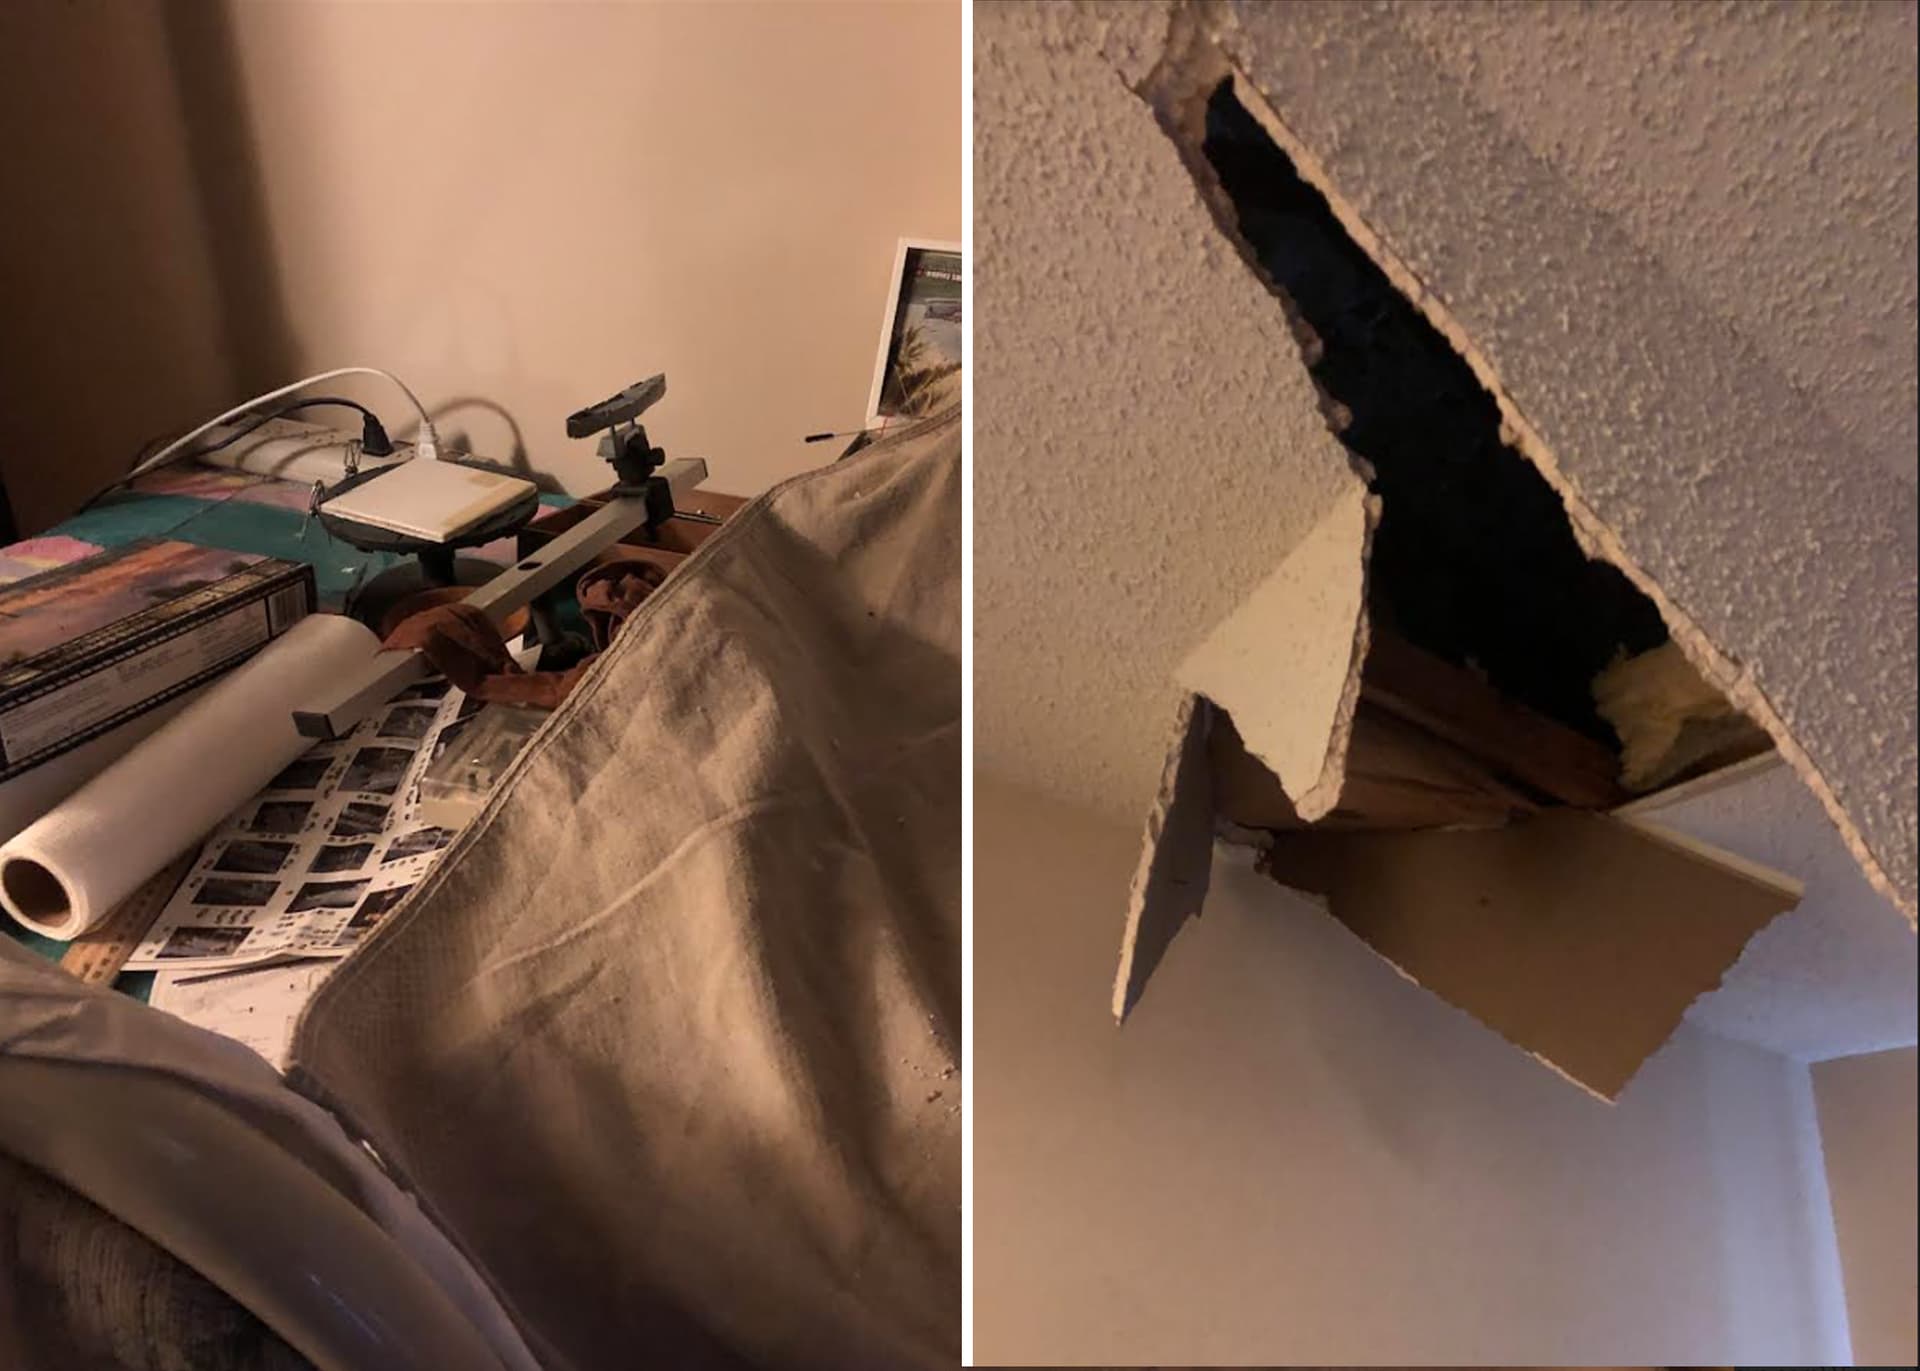
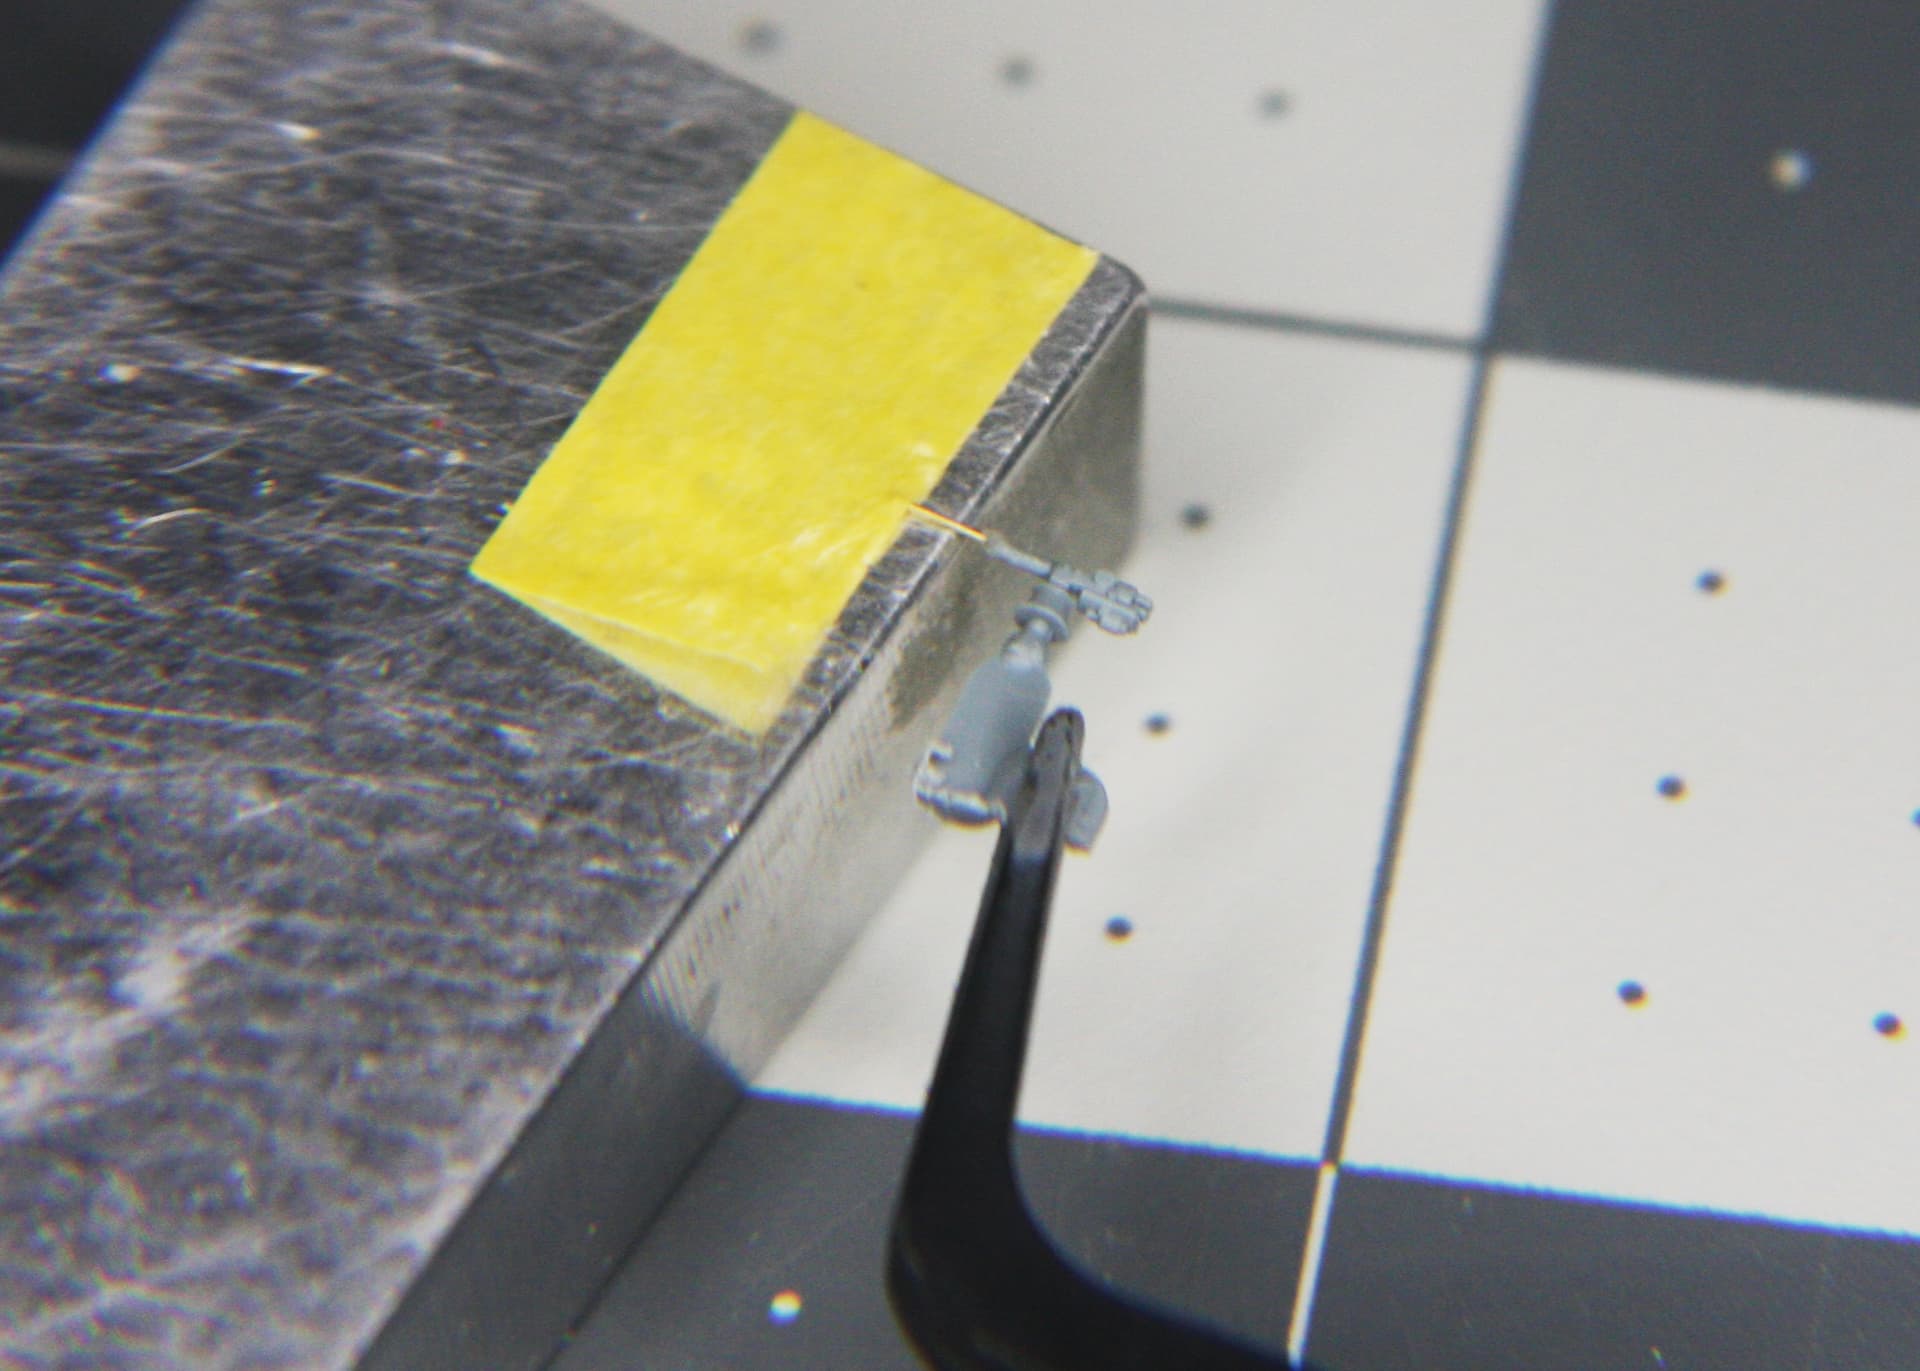
It started with a reminder that when working with PE your work area should be spotlessly clean and why I like 5 minute epoxy for the really small stuff. A door on the starboard side had enough of me and my attempts to super glue it and decided to make a break for it with the aide of the his ally the carpet monster. I have been here before and have used nylon stocking material over the end of my vacuum with much success to repatriate these troublemakers
Well that was until the contractors installing my HVAC system decided to give him a hand by falling through the ceiling above my hobby/computer area. No one was injured including my current model but the contractors started to clean up the mess as I was outside addressing questions regarding the placement of my new AC compressor at the time
As of now he is still on the run but even though the contractors vacuumed I plan on making another attempt before deciding how I want to handle this.
Option A: Leave this door off
Option B: Remove the ones already installed and leave all these doors off
Comments and advice welcome
1 Like
Ahoy Modelers
The good, I switched to 5 minute epoxy and cannot put into words how much easier it is to use with this 1/700 scale PE. Finishing the PE on the hull was a joy
The bad, PE part #35 is still on the run
The Ugly, The contractors have not completed repairs on the ceiling
Next on the list is a last look for 35 including a complete cleaning of my hobby area followed by applying some diluted Titebond white glue to all installed PE to hopefully add one more line of defense against the upcoming tape for painting. Having little experience with ships at this scale or plastic model ships period I plan to be reading and researching other modelers posts here to hopefully attack this new endeavor with confidence. Feel free to post links if you think they will be helpful
The tape is there to hold down the deck which is only temporarily installed to see if I can take it off and reinstall it with the PE. It was also on as a reminder
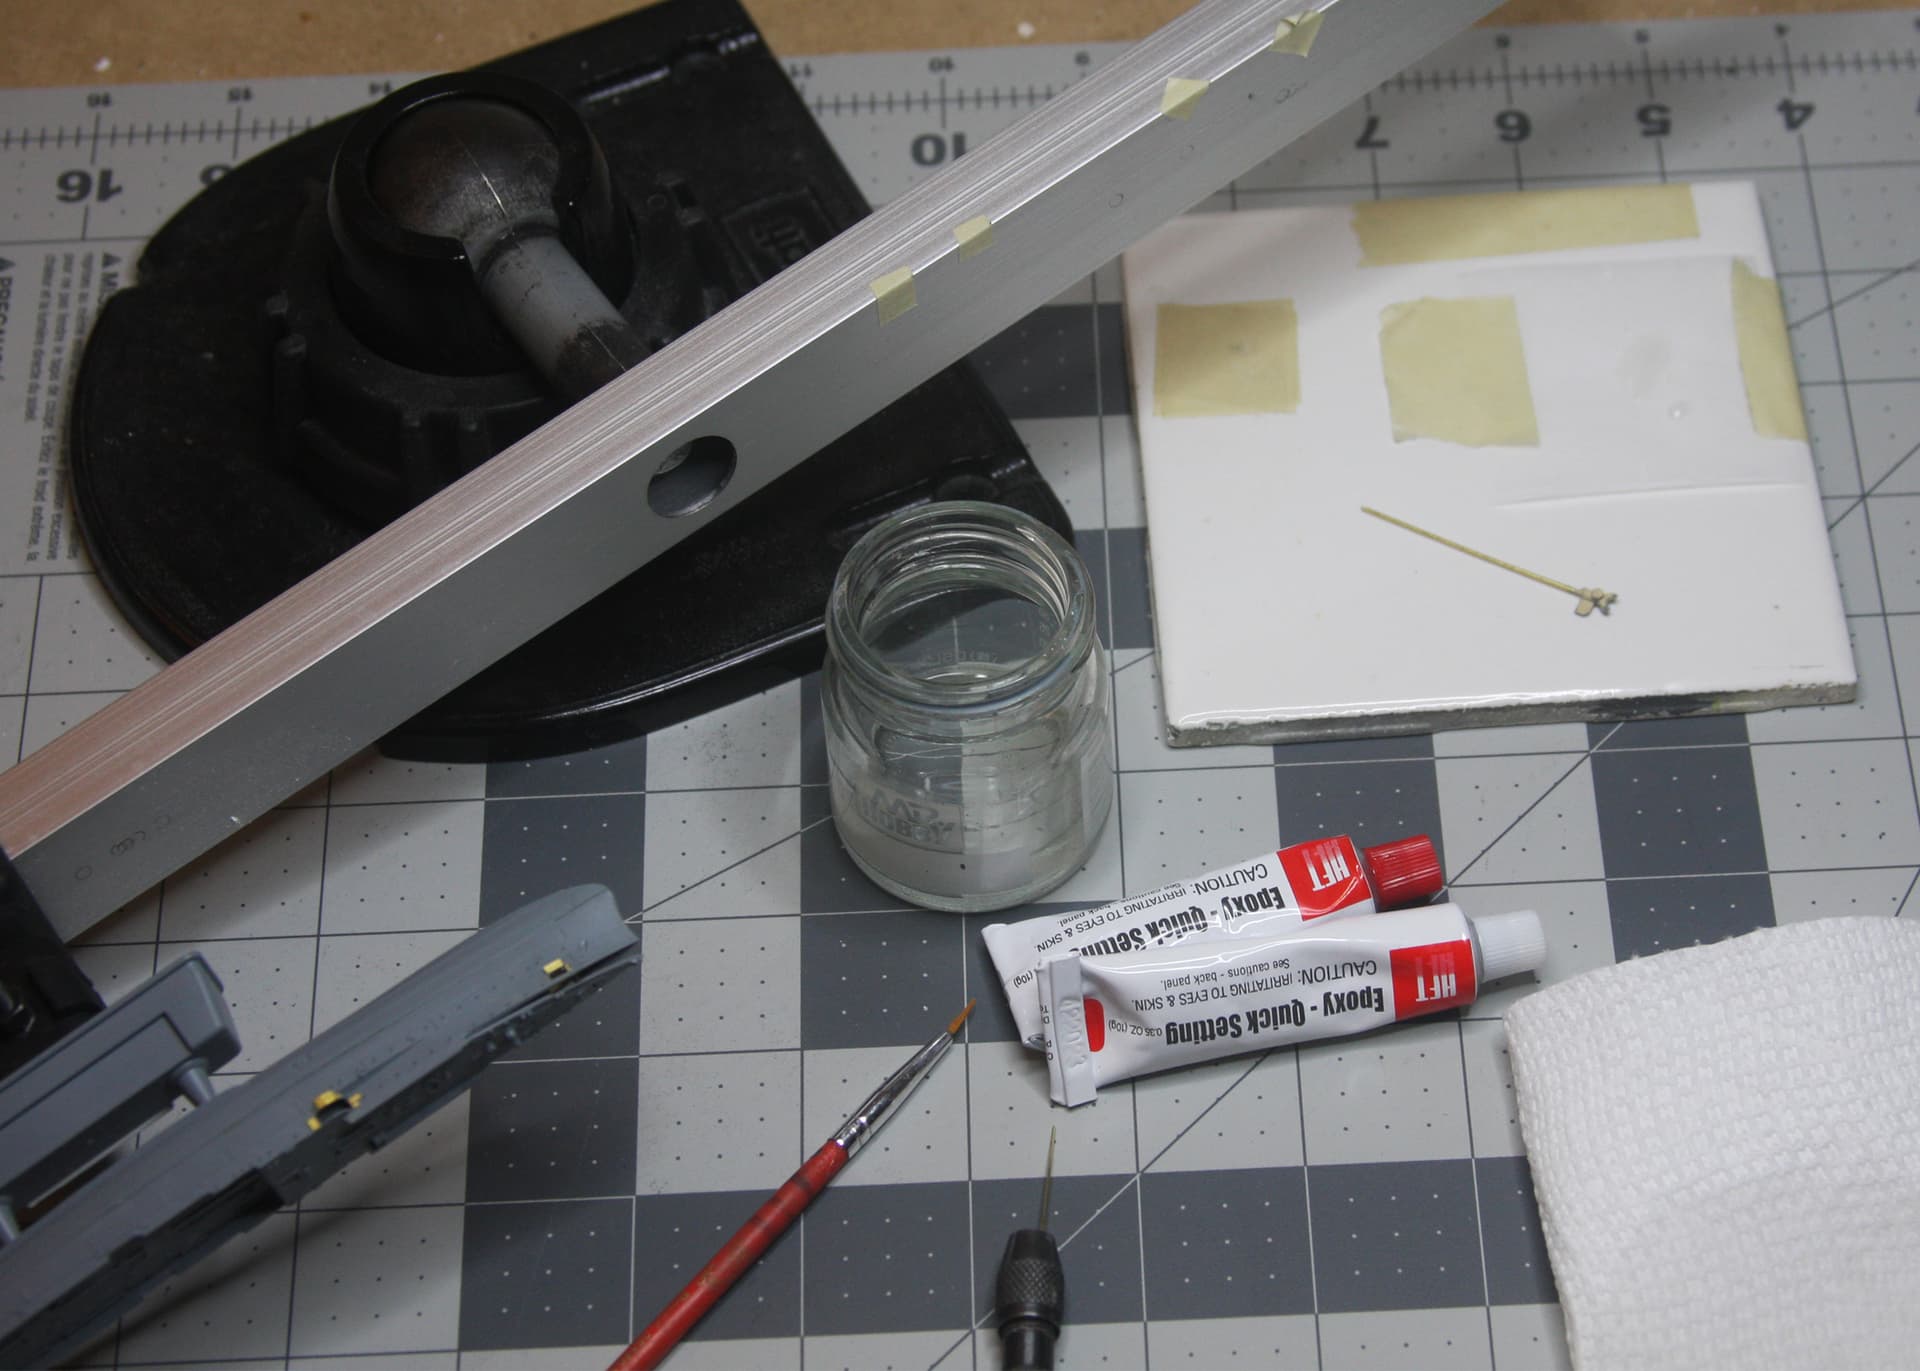
Here is an image of my epoxy set up and tools. The pot is 91% isopropyl which I use to thin and clean epoxy
Till next time
Happy Modeling 
3 Likes
Ahoy Fellow Modelers
Today was another productive day in the shipyard
35 remains on the run but it’s absence is barely noticeable along with all the other PE extras I spent hours applying
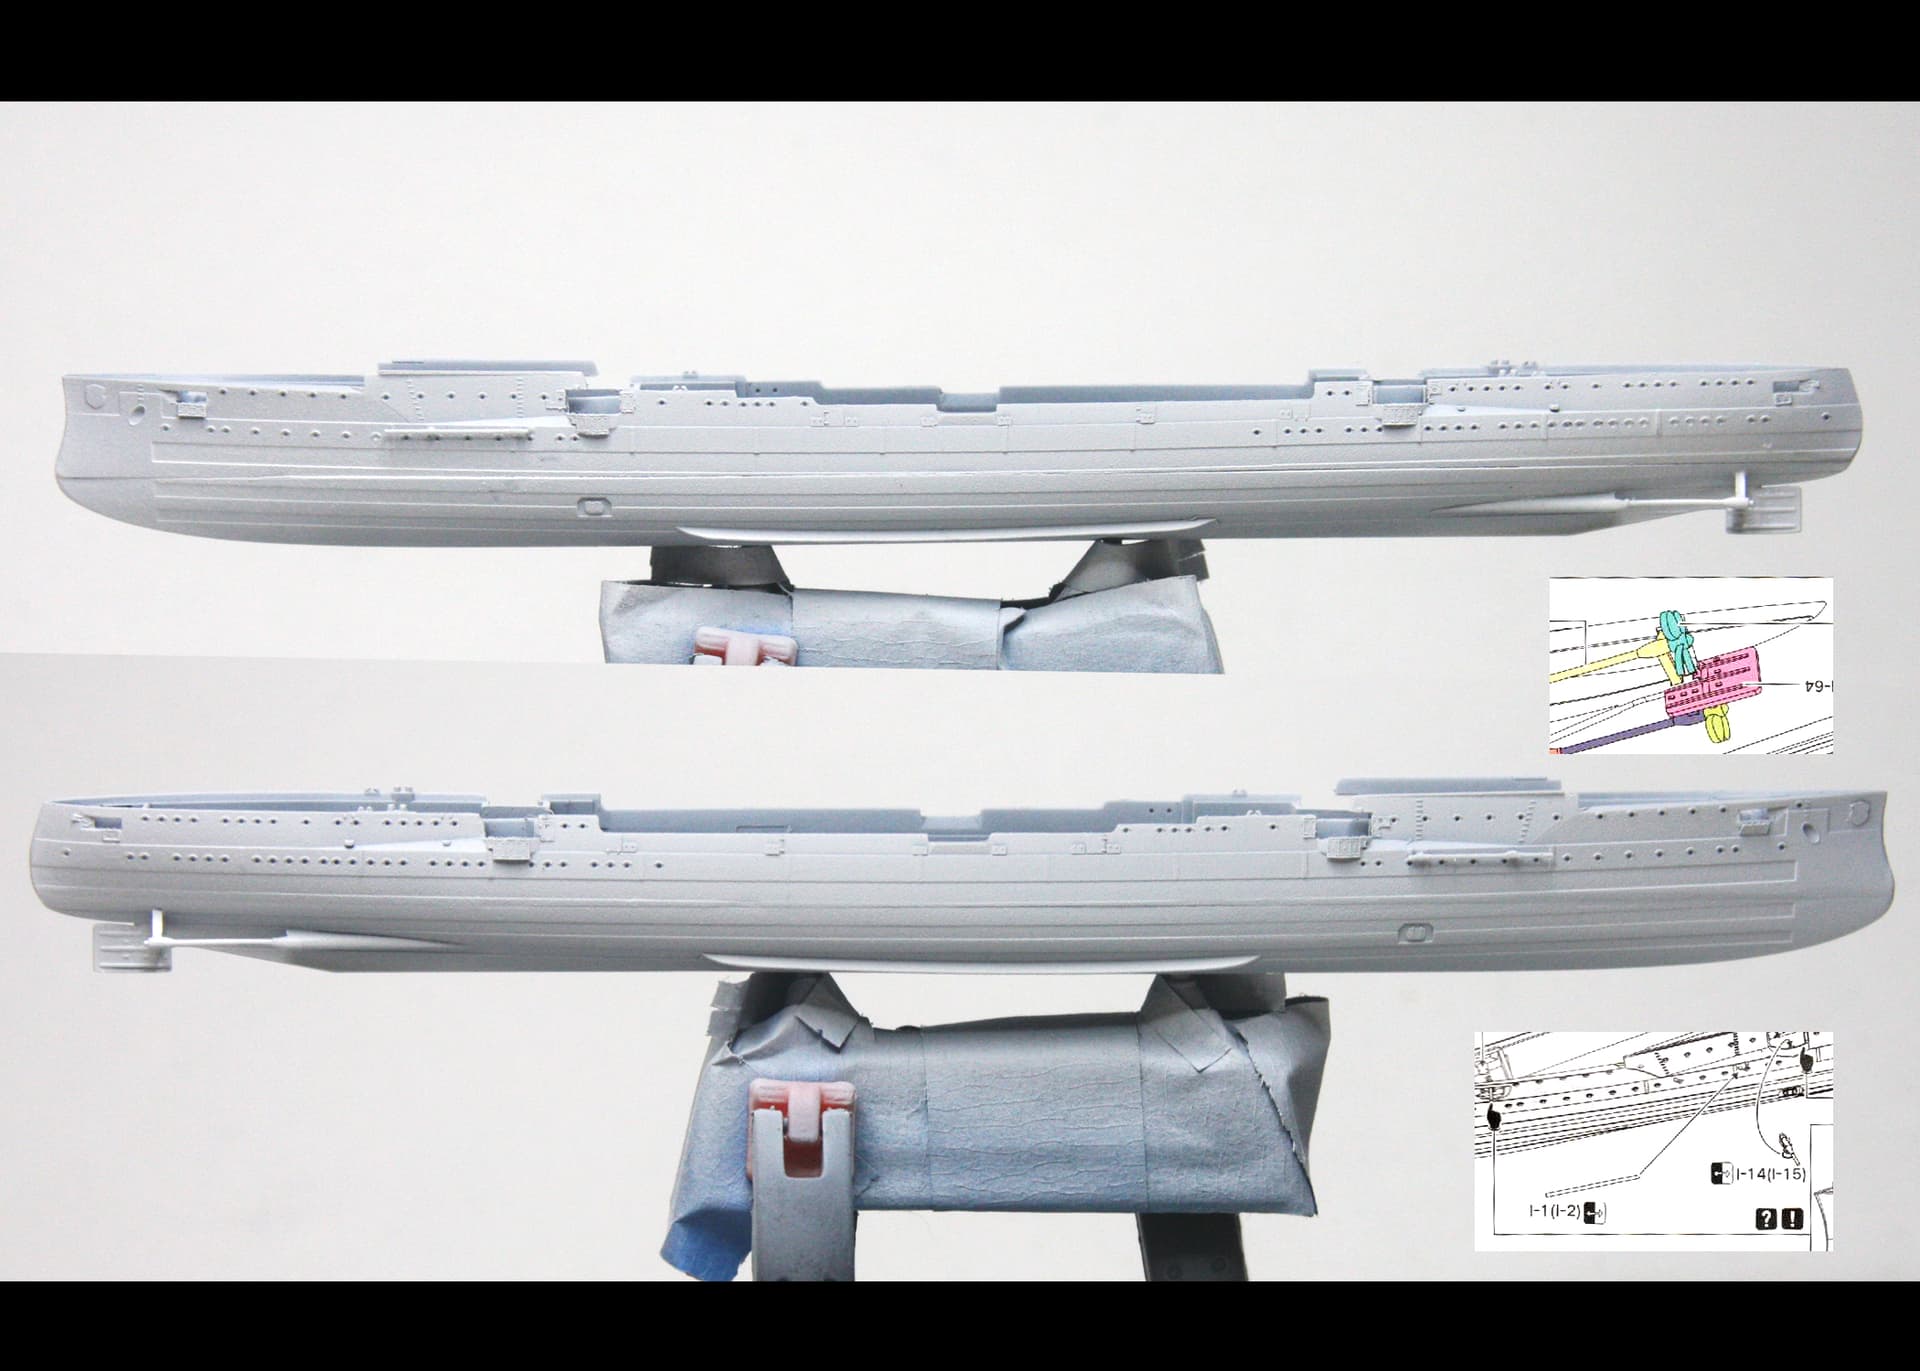
I replaced part# I1 and I2 with a piece of piano wire that matched its diameter. I would have used brass had I any. This being the deluxe version I think Fly Hawk just missed this as this should have been included as brass. It was way past my ability to remove the gates on these included plastic parts after carefully sawing them off. I also used CA as epoxy just didn’t have enough tack. The keen eye will notice I added the ship’s rudder
As for painting. Having painted highly detailed miniatures for the last decade my airbrushing skills have vastly improved. Although this will be the most finely detailed thing I have ever painted. With that in mind I went with paint so thinned it might not even be considered paint anymore. I filled my cup 4 times ghosting on coats you just had to assume were there. A coat of primer was also applied along with final coats of Minwax Polycrylic Clear Ultra Flat. While I have never used Minwax on plastic model kits it has made my tabletop miniatures extremely durable and my hopes here are it will along with the primer will prevent the dreaded paint removal that tape is so good at. I will let the model cure for a few days before I attempt a boot stripe and the bottom paint.
Hopefully I can hide some areas I missed with the boot stripe or bottom paint too. See the port bow
Either way I am very pleased with where I currently am on this project and have thoroughly enjoyed my time on it so far
Decks are next Well after I try gluing a piece of brass the thickness of a hair on a piece of 2mm piece plastic
Till next time, Happy 1/700 scale modeling 
4 Likes
I see Fly Hawk is not recommending a boot stripe. Comments on this topic would be helpful considering this scale
Thx
2 Likes
I can talk mainly for WW II (and modern) ships - boot stripes for German ships are quite common. They are even quite wide, somewhere around 2 m is common.
I have the habit of painting a very dark grey (it is not black, but really close to) ‘belt’ on the ship, then mask it. I’m doing 1/350, so 6 mm masking tape is fine, for you anything between 2 and 3 mm would work. so I get an even boot stripe. Then I paint upper and lower hull, remove the masked boot stripe last. Just my approach.
Cheers
Jan
1 Like
Boot stripes were not always present, it’s a case of checking references and photos of the ship in question for the time you want to model and see in he/she did or didn’t have boot stripes.
1 Like
Flyhawk is generally quite correct in their painting instructions.

1 Like
I know Revell instructions do not show a boot stripe,however both of these refrences do

1 Like
This video may be of some interest, but as all the images are in B/W it is inconclusive if there is a bootstripe visible, or just the lower hull color. https://www.youtube.com/watch?app=desktop&v=a496UEqAJP4
Then there is this model, apparently made by a crew member - no bootstripe:
Then there’s this build: SMS Emden 1914, Flyhawk 1/700 - Dresden class light cruiser - iModeler Great rigging - I hate this guy! 
If you check the smaller drawings in the upper left corner, it seems to indicate that there was no bootstripe pre-war, but there was during wartime! The rest of this site - useful info:
SMS EMDEN SHIPS PLANS
1 Like
Thank you Biggles50, Tojo72, Littorio, and JJ1973
I have decided to paint the lower hull and then attempt to make a decal using printable decal paper to apply a boot stripe. If it fails there wasn’t one
Biggles, that site was excellent
1 Like
If you prefer going the decal way for boot lines, Micro Scale has printed pinstripes in various widths, and colors : Microscale Decals: Striping - 3 and 4¾ inch widths - Black
Although, nothing looks better than a well-masked painted stripe.
1 Like
Ahoy Fellow Modelers
Today I painted my first plastic hull. I actually had to buy bottom paint
Am I happy with my work. Rarely But its what drives me to always do better
I also learned some valuable things which will improve not only my future models but my miniatures. This one required some touch ups.
- Always paint tape with the color you are painting over before painting the finish color when taping to prevent bleed. Telling yourself its Tamiya tape doesn’t work
- instead of dry brushing a lighter color to highlight use a darker color filter and then remove it on the edges with a medium stiffness brush after it dries. Its more subtle
- Drill portholes after “all” painting (I had to do mine twice)
Next I have to decide if I want to attempt to fit the brass barrels to the eight 4" guns which at 1/700 scale are actually 0.0057142857142857" guns. Then I get to find out if my plan for the deck is something I can accomplish or if I painted myself into a corner
But for now its back to work, so my next update might be a few. Thankfully I love my job
Thanks for stopping by, comments welcome and happy modelling
1 Like
“instead of dry brushing a lighter color to highlight use a darker color filter and then remove it on the edges with a medium stiffness brush after it dries. Its more subtle”
For “reverse highlighting” I semi- gloss coat the model (full gloss, or matte, will give different results), then brush on a black oil wash, then using a not too stiff brush, remove it by brushing it into corners and raised detail. Constantly clean off brush so it doesn’t become loaded with oil paint.
1 Like
Ahoy Fellow Modelers
For anyone looking to participate in this insanity this is how I am getting it done
2 Likes