She is looking suitably weathered and the Stand looks great setting her off very nicely…Cheers Mark
1 Like
She’s looking amazing.
1 Like
that name “BlueFatty” AKA Doraemon
1 Like
Konnichiwa ![]() the story continues
the story continues ![]()
I plan to finish the smaller detail at the stern first. Therefore I started to build the most aft double AA-platform of the ship for two triple AA-guns. This platform is additionally bolstered with sisal bags for a bit more splinter protection for the gun crews. Two single 25 mm AA-guns were additionally added at the rear aircraft hangar area, bolted with a quadratic base plate on the ship´s deck. The two AA-machine gun command turrets with interiors are from BLUE FATTIE, the ammunition boxes from WULA and the guns from BUNKER STUDIO
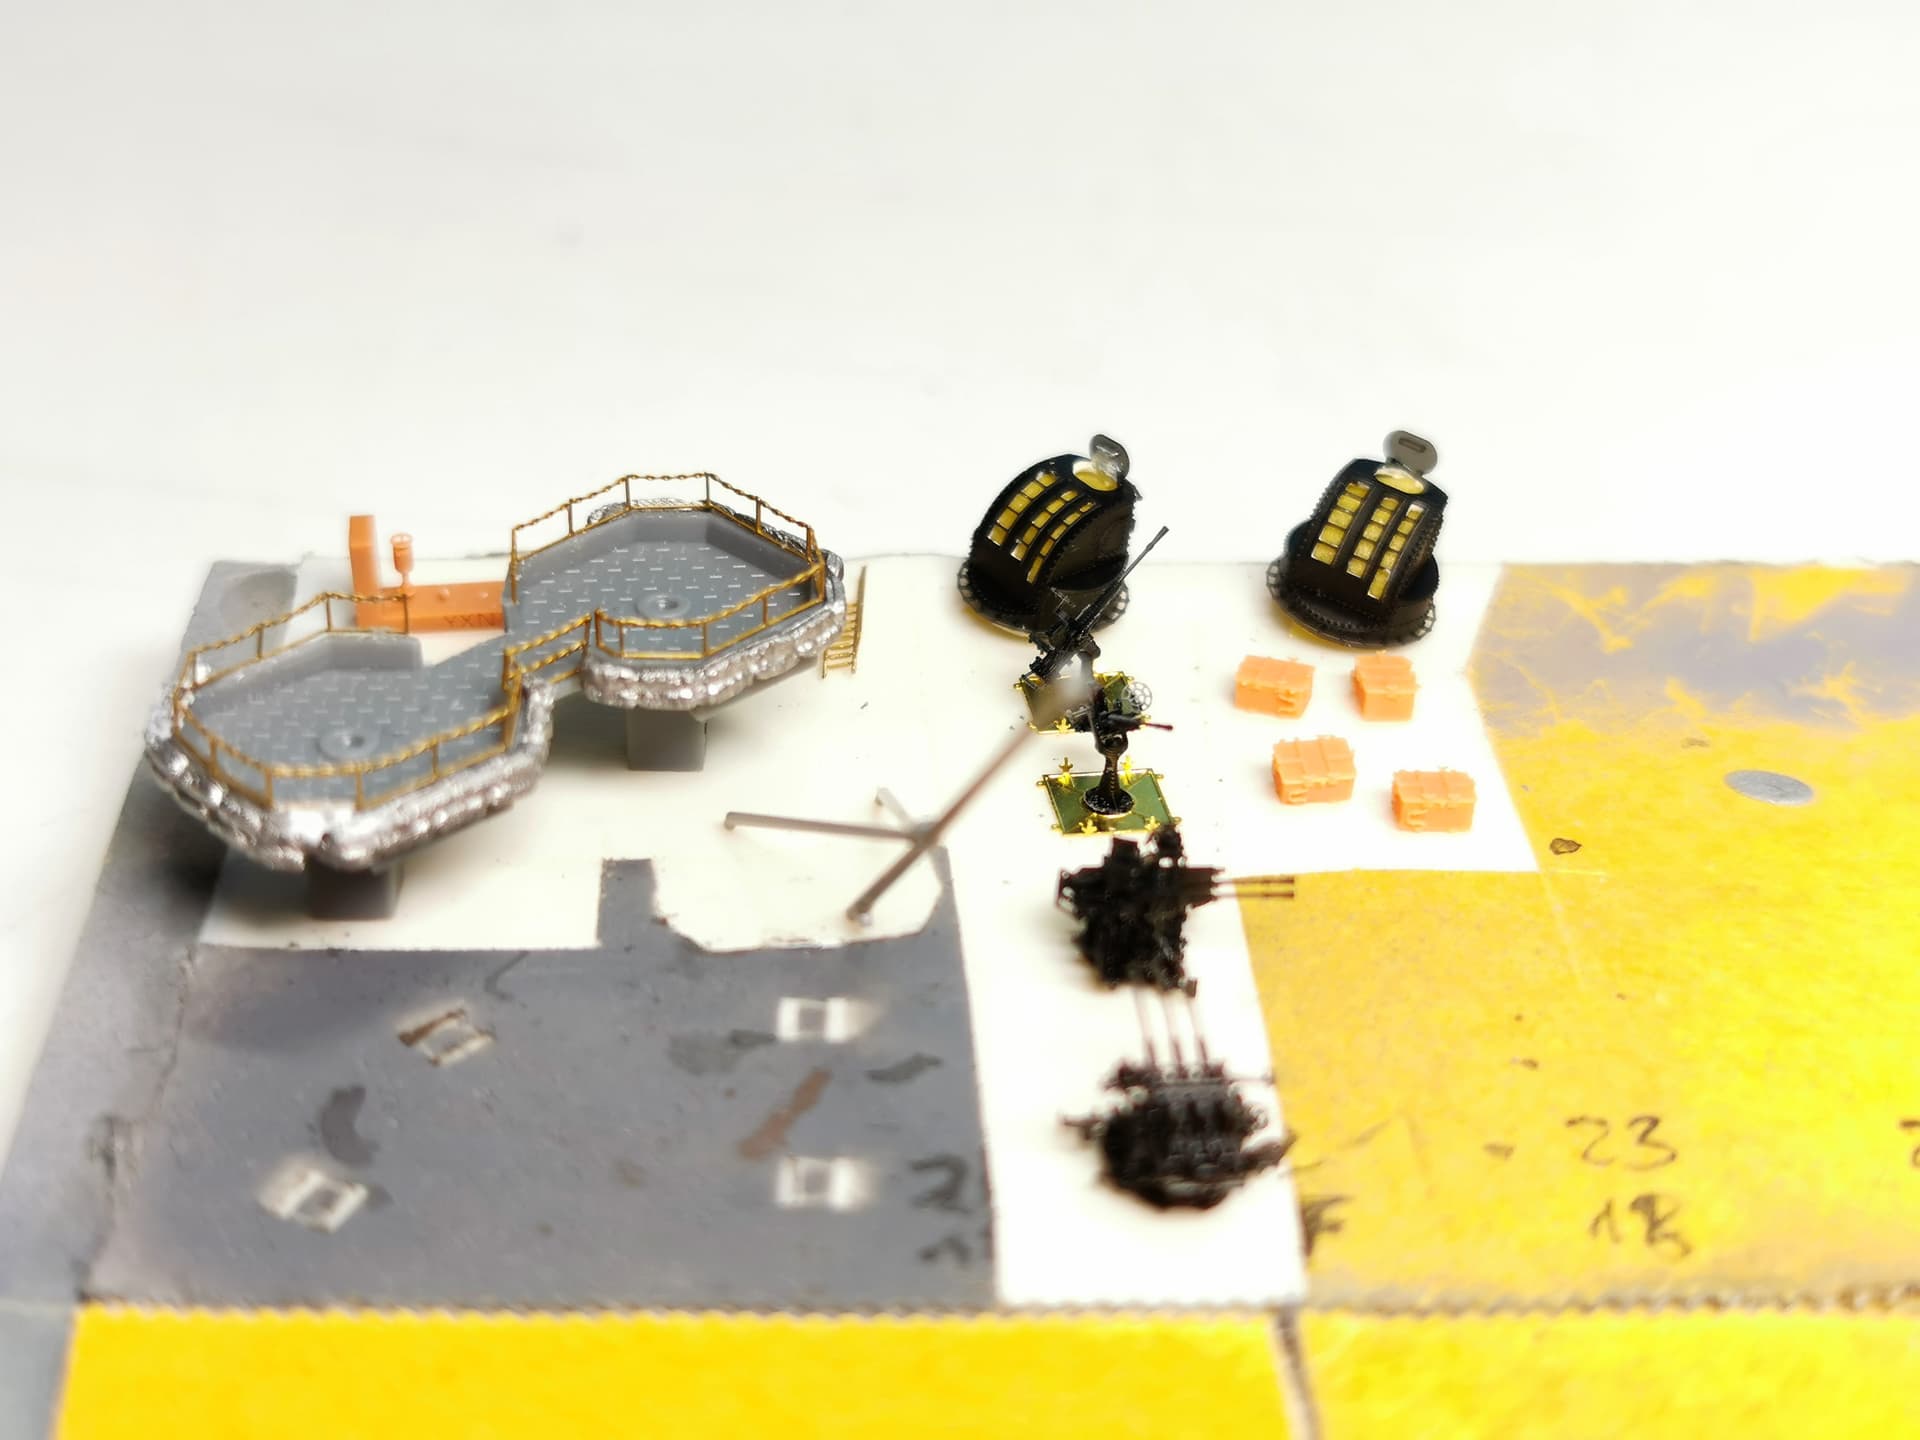
The interior of the machine gun command turrets is also provided. I painted it in white and gave it a black acrylic wash. Not too much work here as it will barely be seen behind the openings but its there ![]()
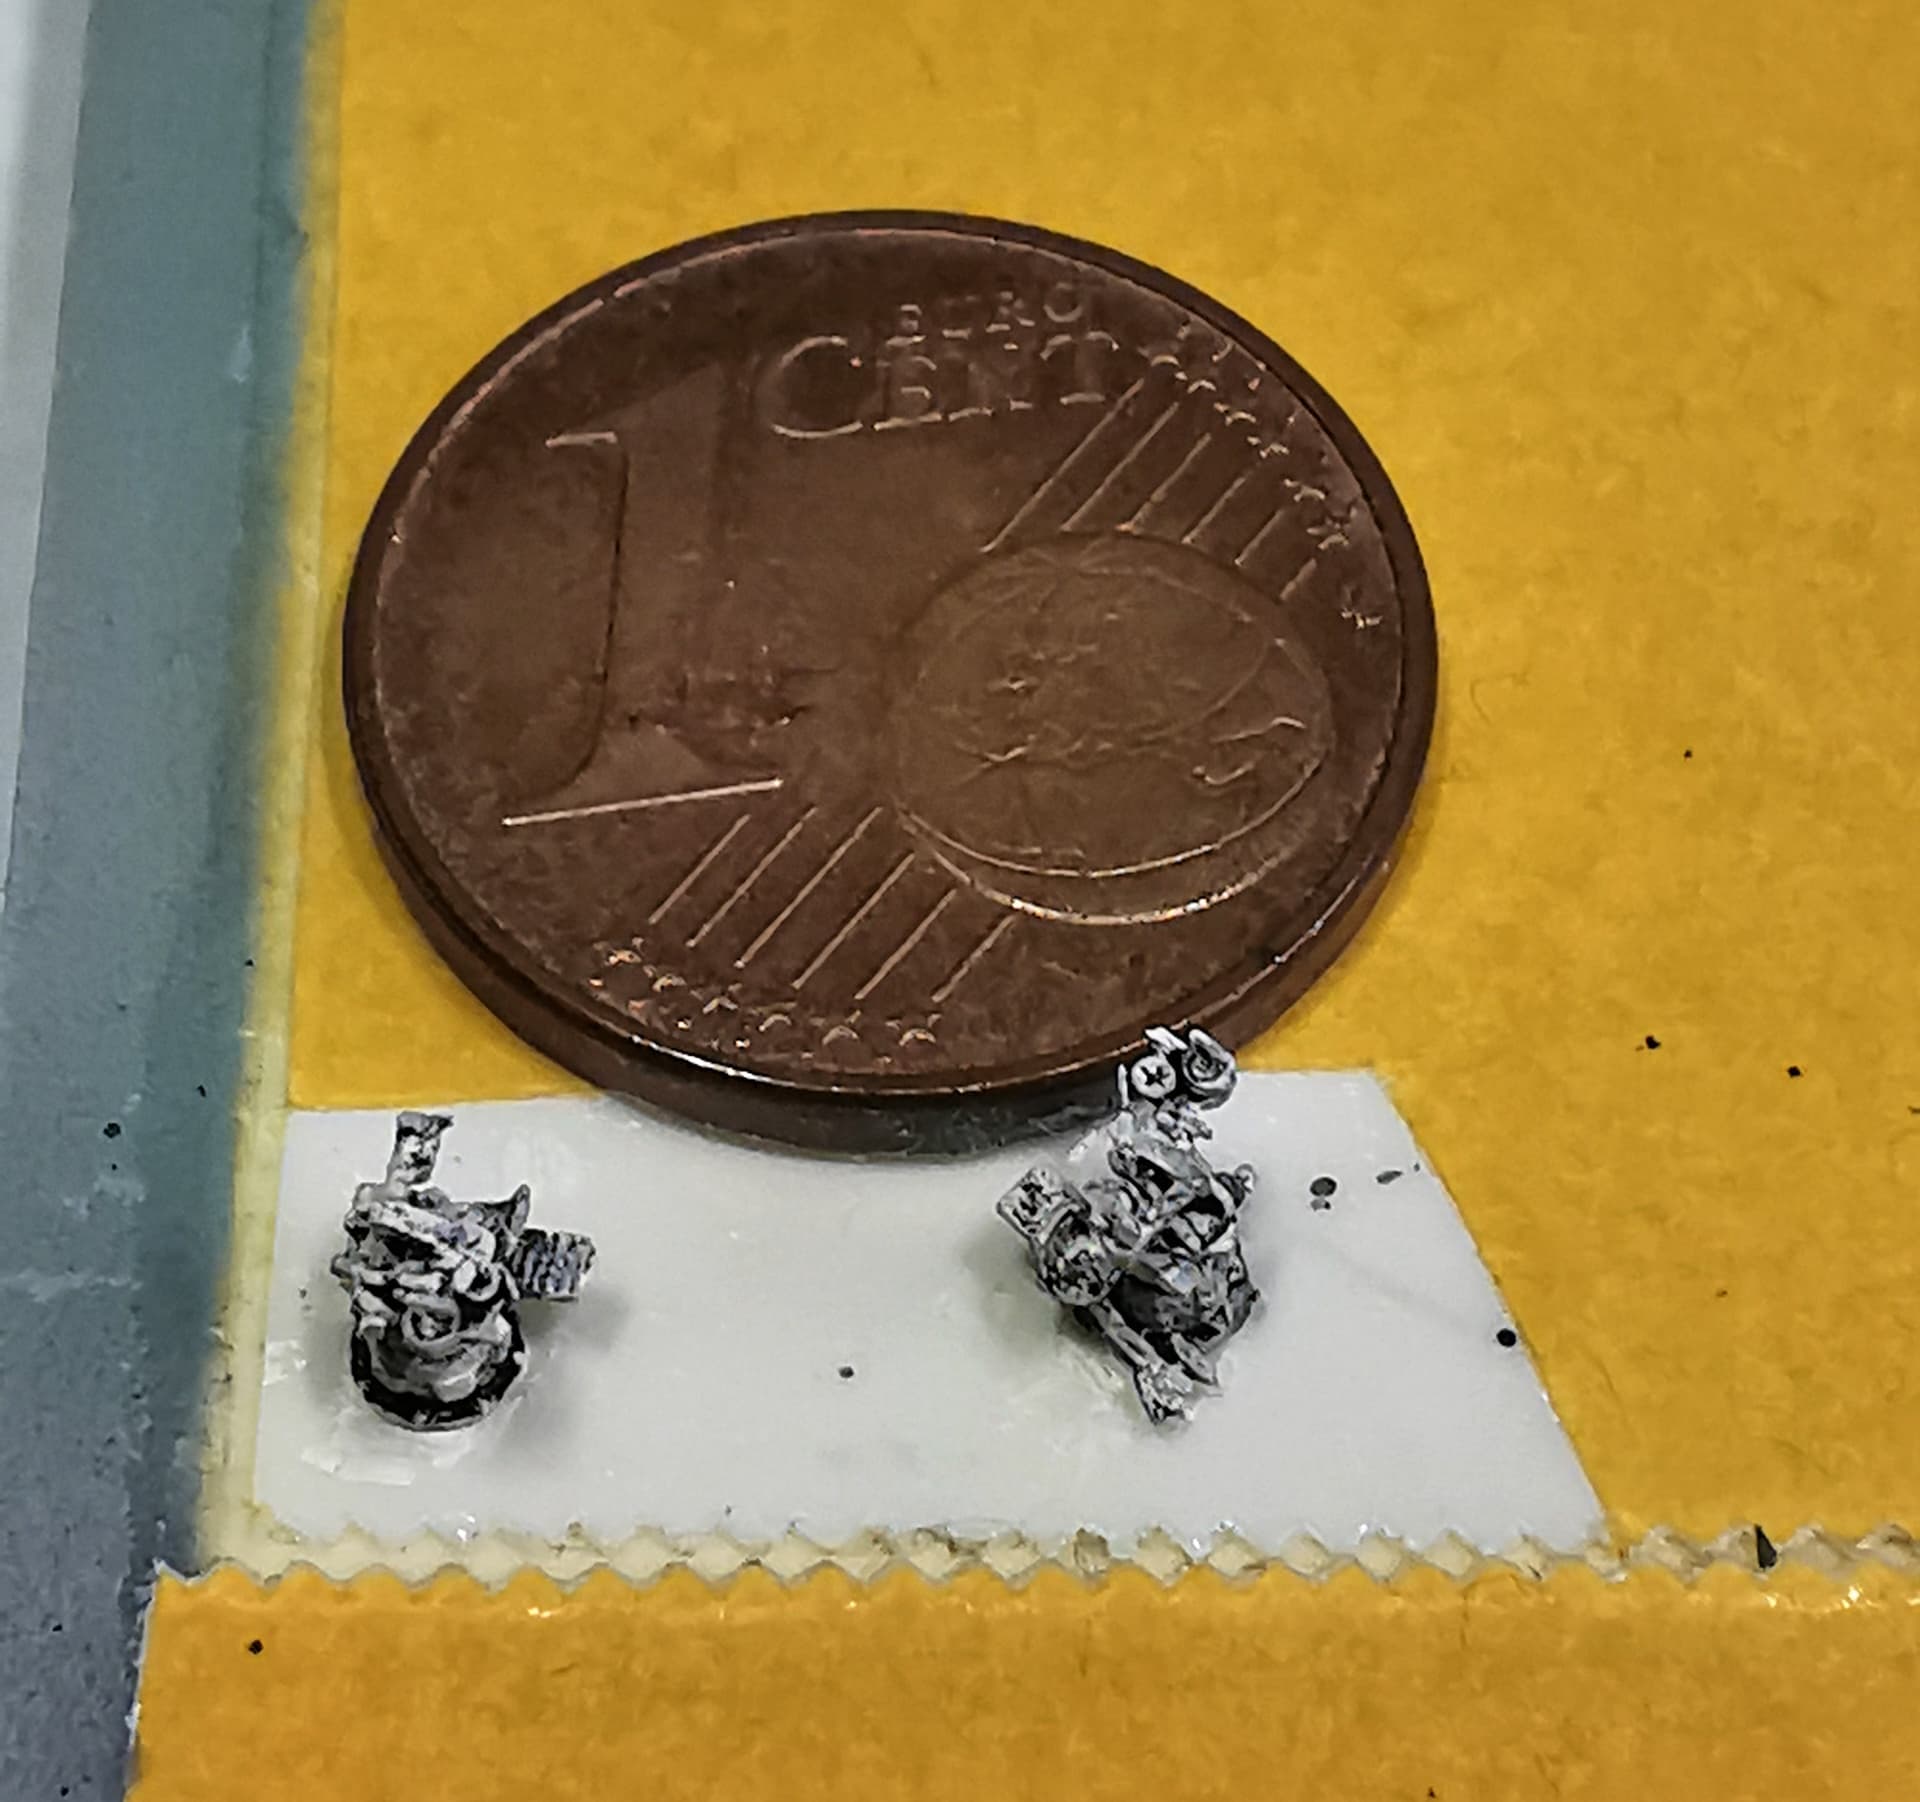
As most reliable sources state that all triple AA guns at open platforms didn´t had a splinter shield I snipped them off. But the detail of these 3d-printed (veeery fragile) parts are mindblowing!

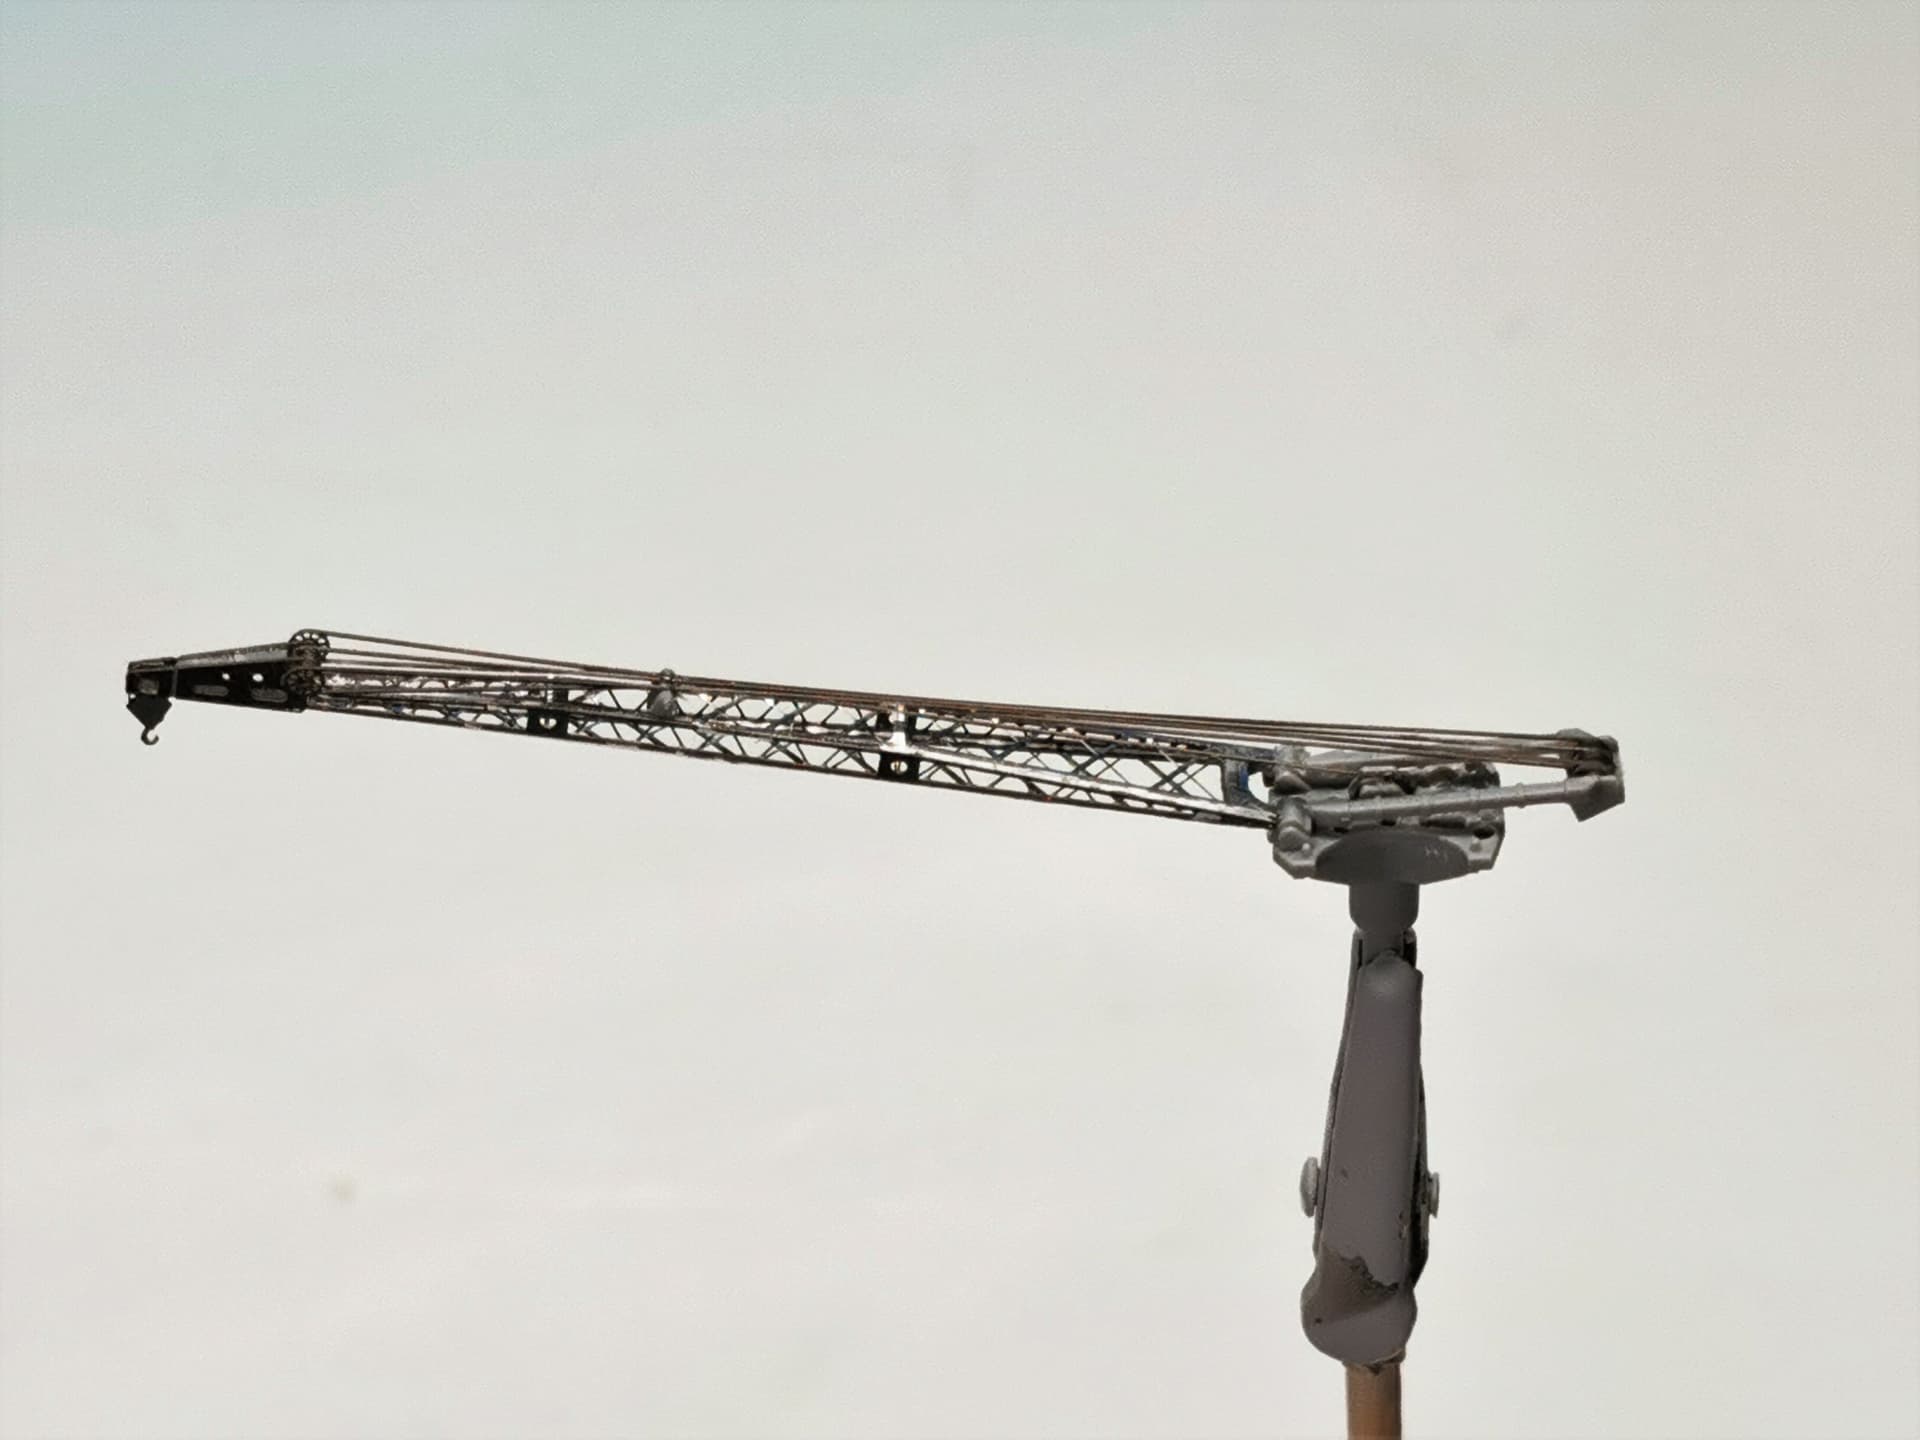
I also build the crane out of some original plastic kit parts and the crane´s jib out of KA-MODEL´s etched set. Some seams of the etched construction were closed with white putty. The upper part of the crane was ommitted as the real one was also removed at Yamato´s last cruise for a better field of fire for the aft main guns and also there was no more necessity to handle lifeboats or aircraft inside or out of the hangars for this last mission.


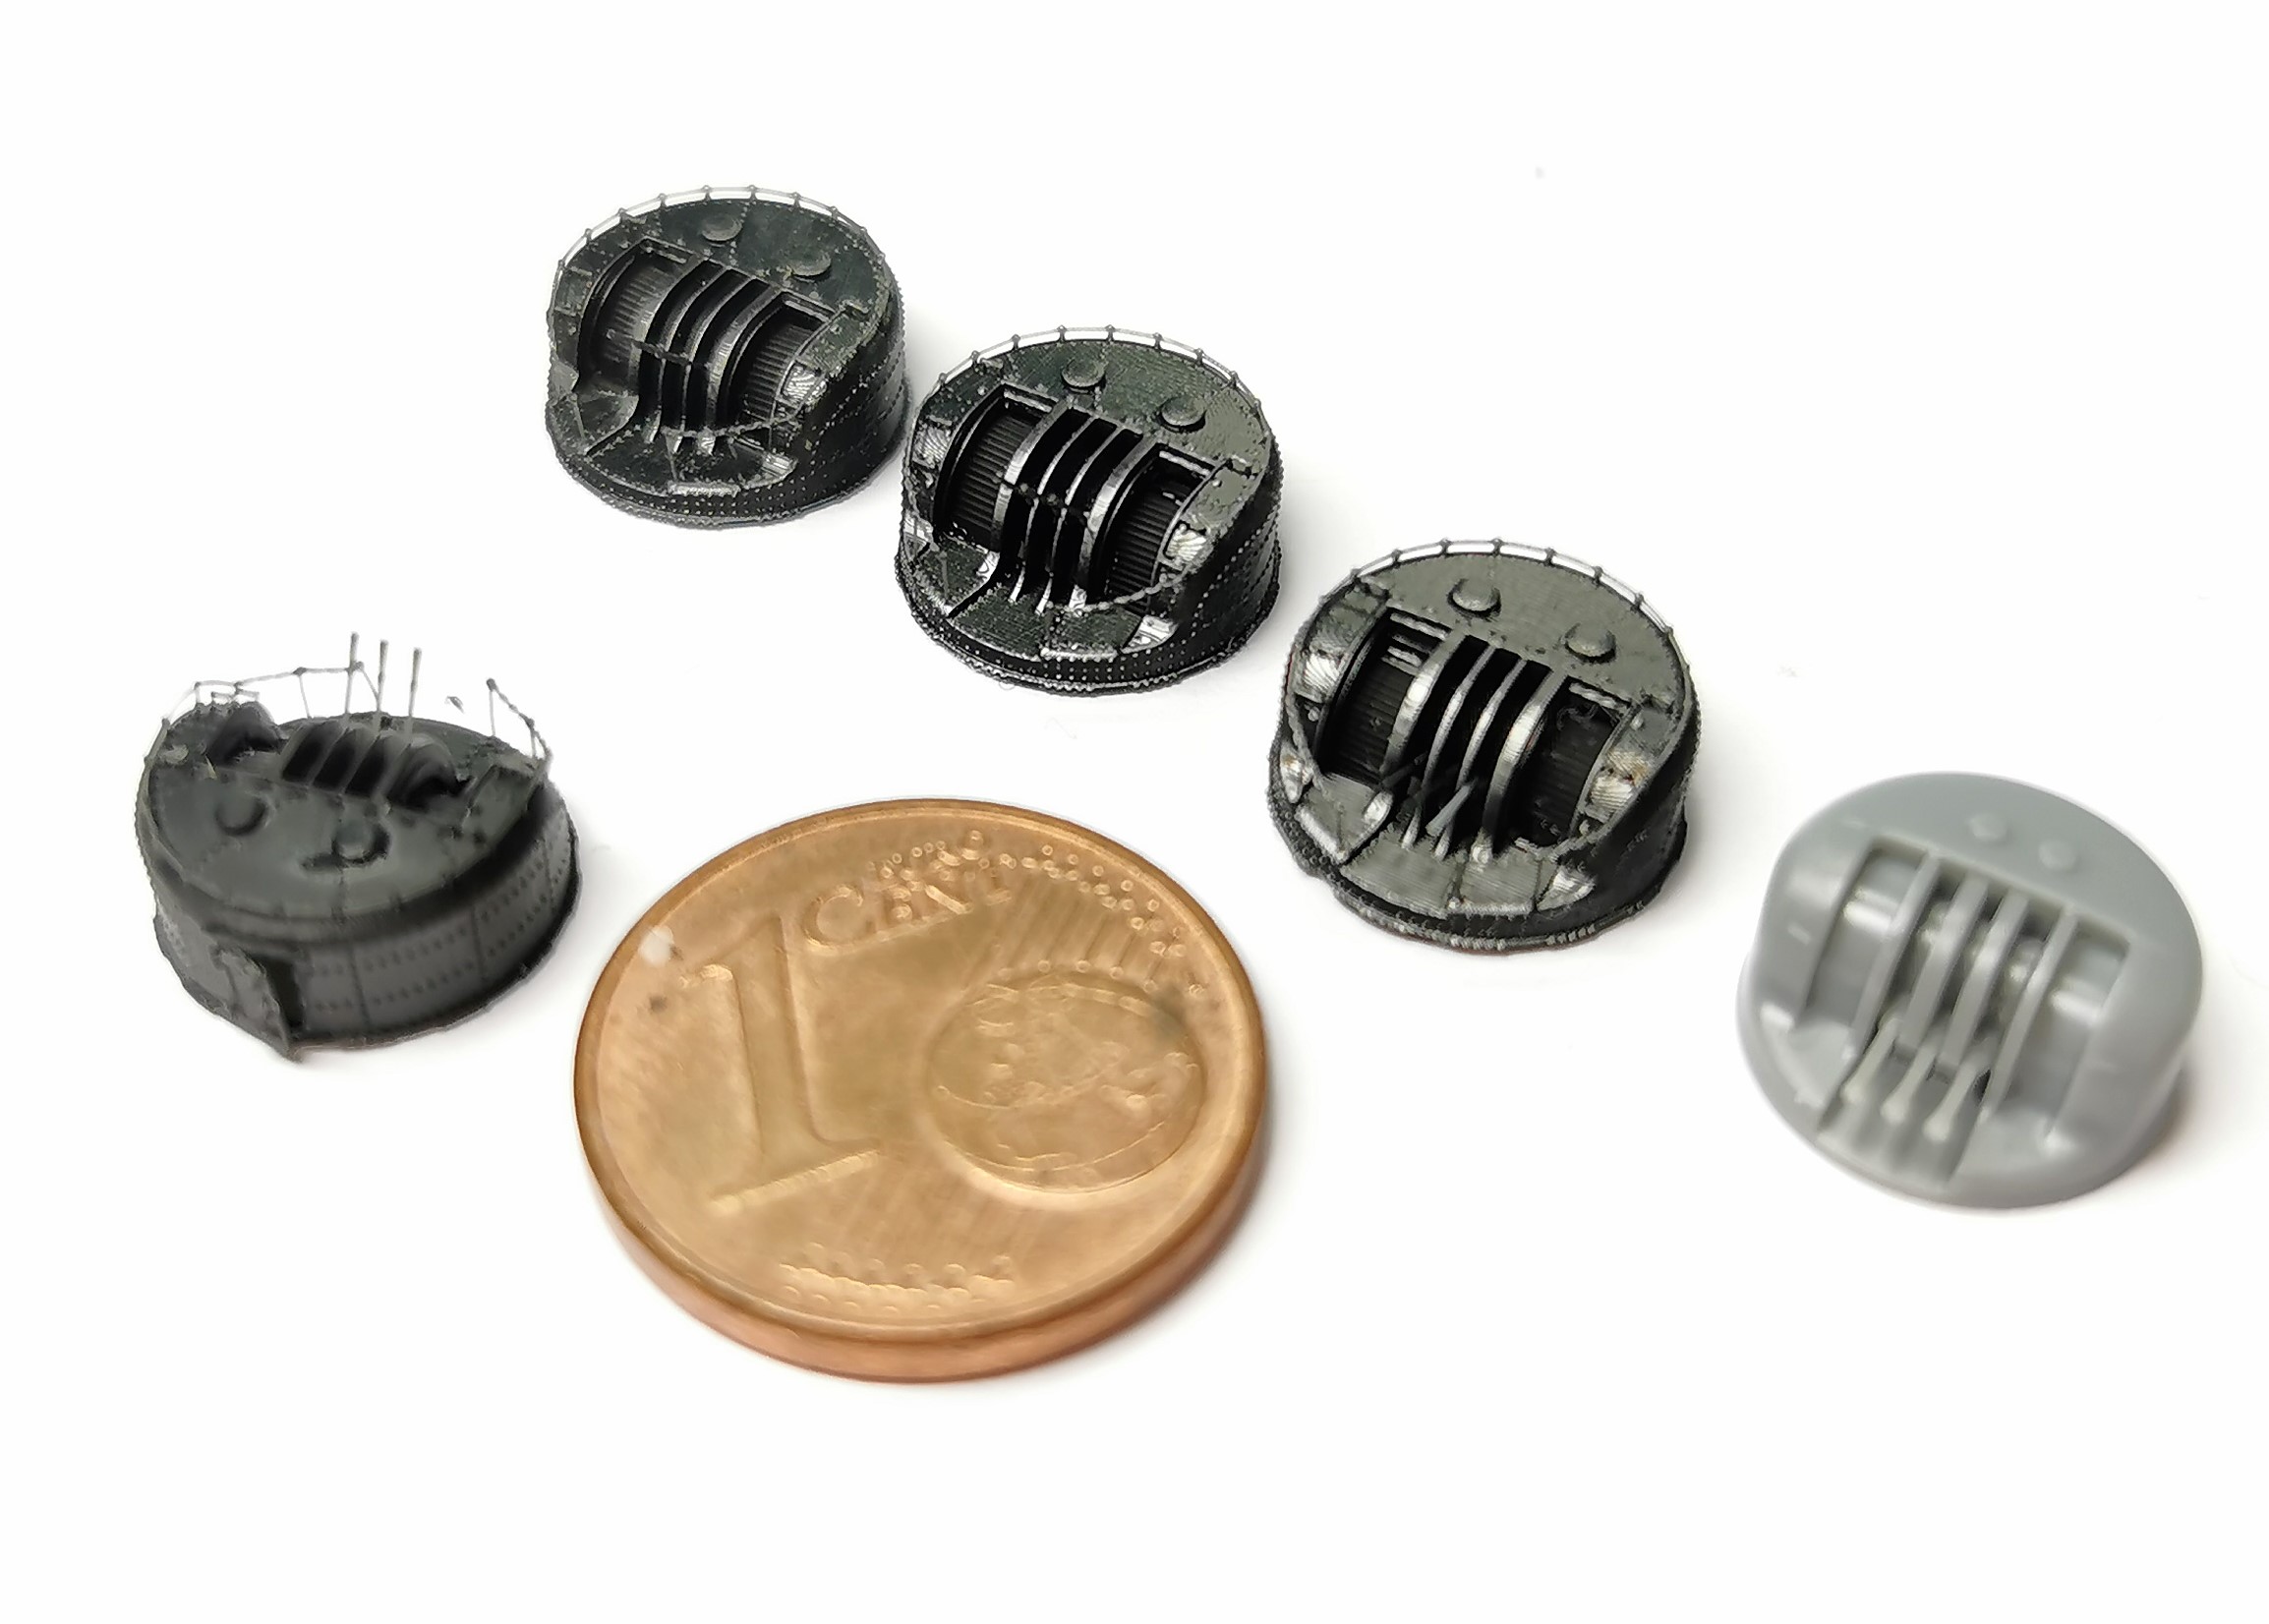
And finally I couldn´t resist to build also all four armored triple AA-gun turrets at the aircraft deck. Here I carefully assembled the parts (mega fragile - actually broke one single gun barrel and had to replace it with stretched sprue). They look fantastic with all their small detailed bolted surfaces


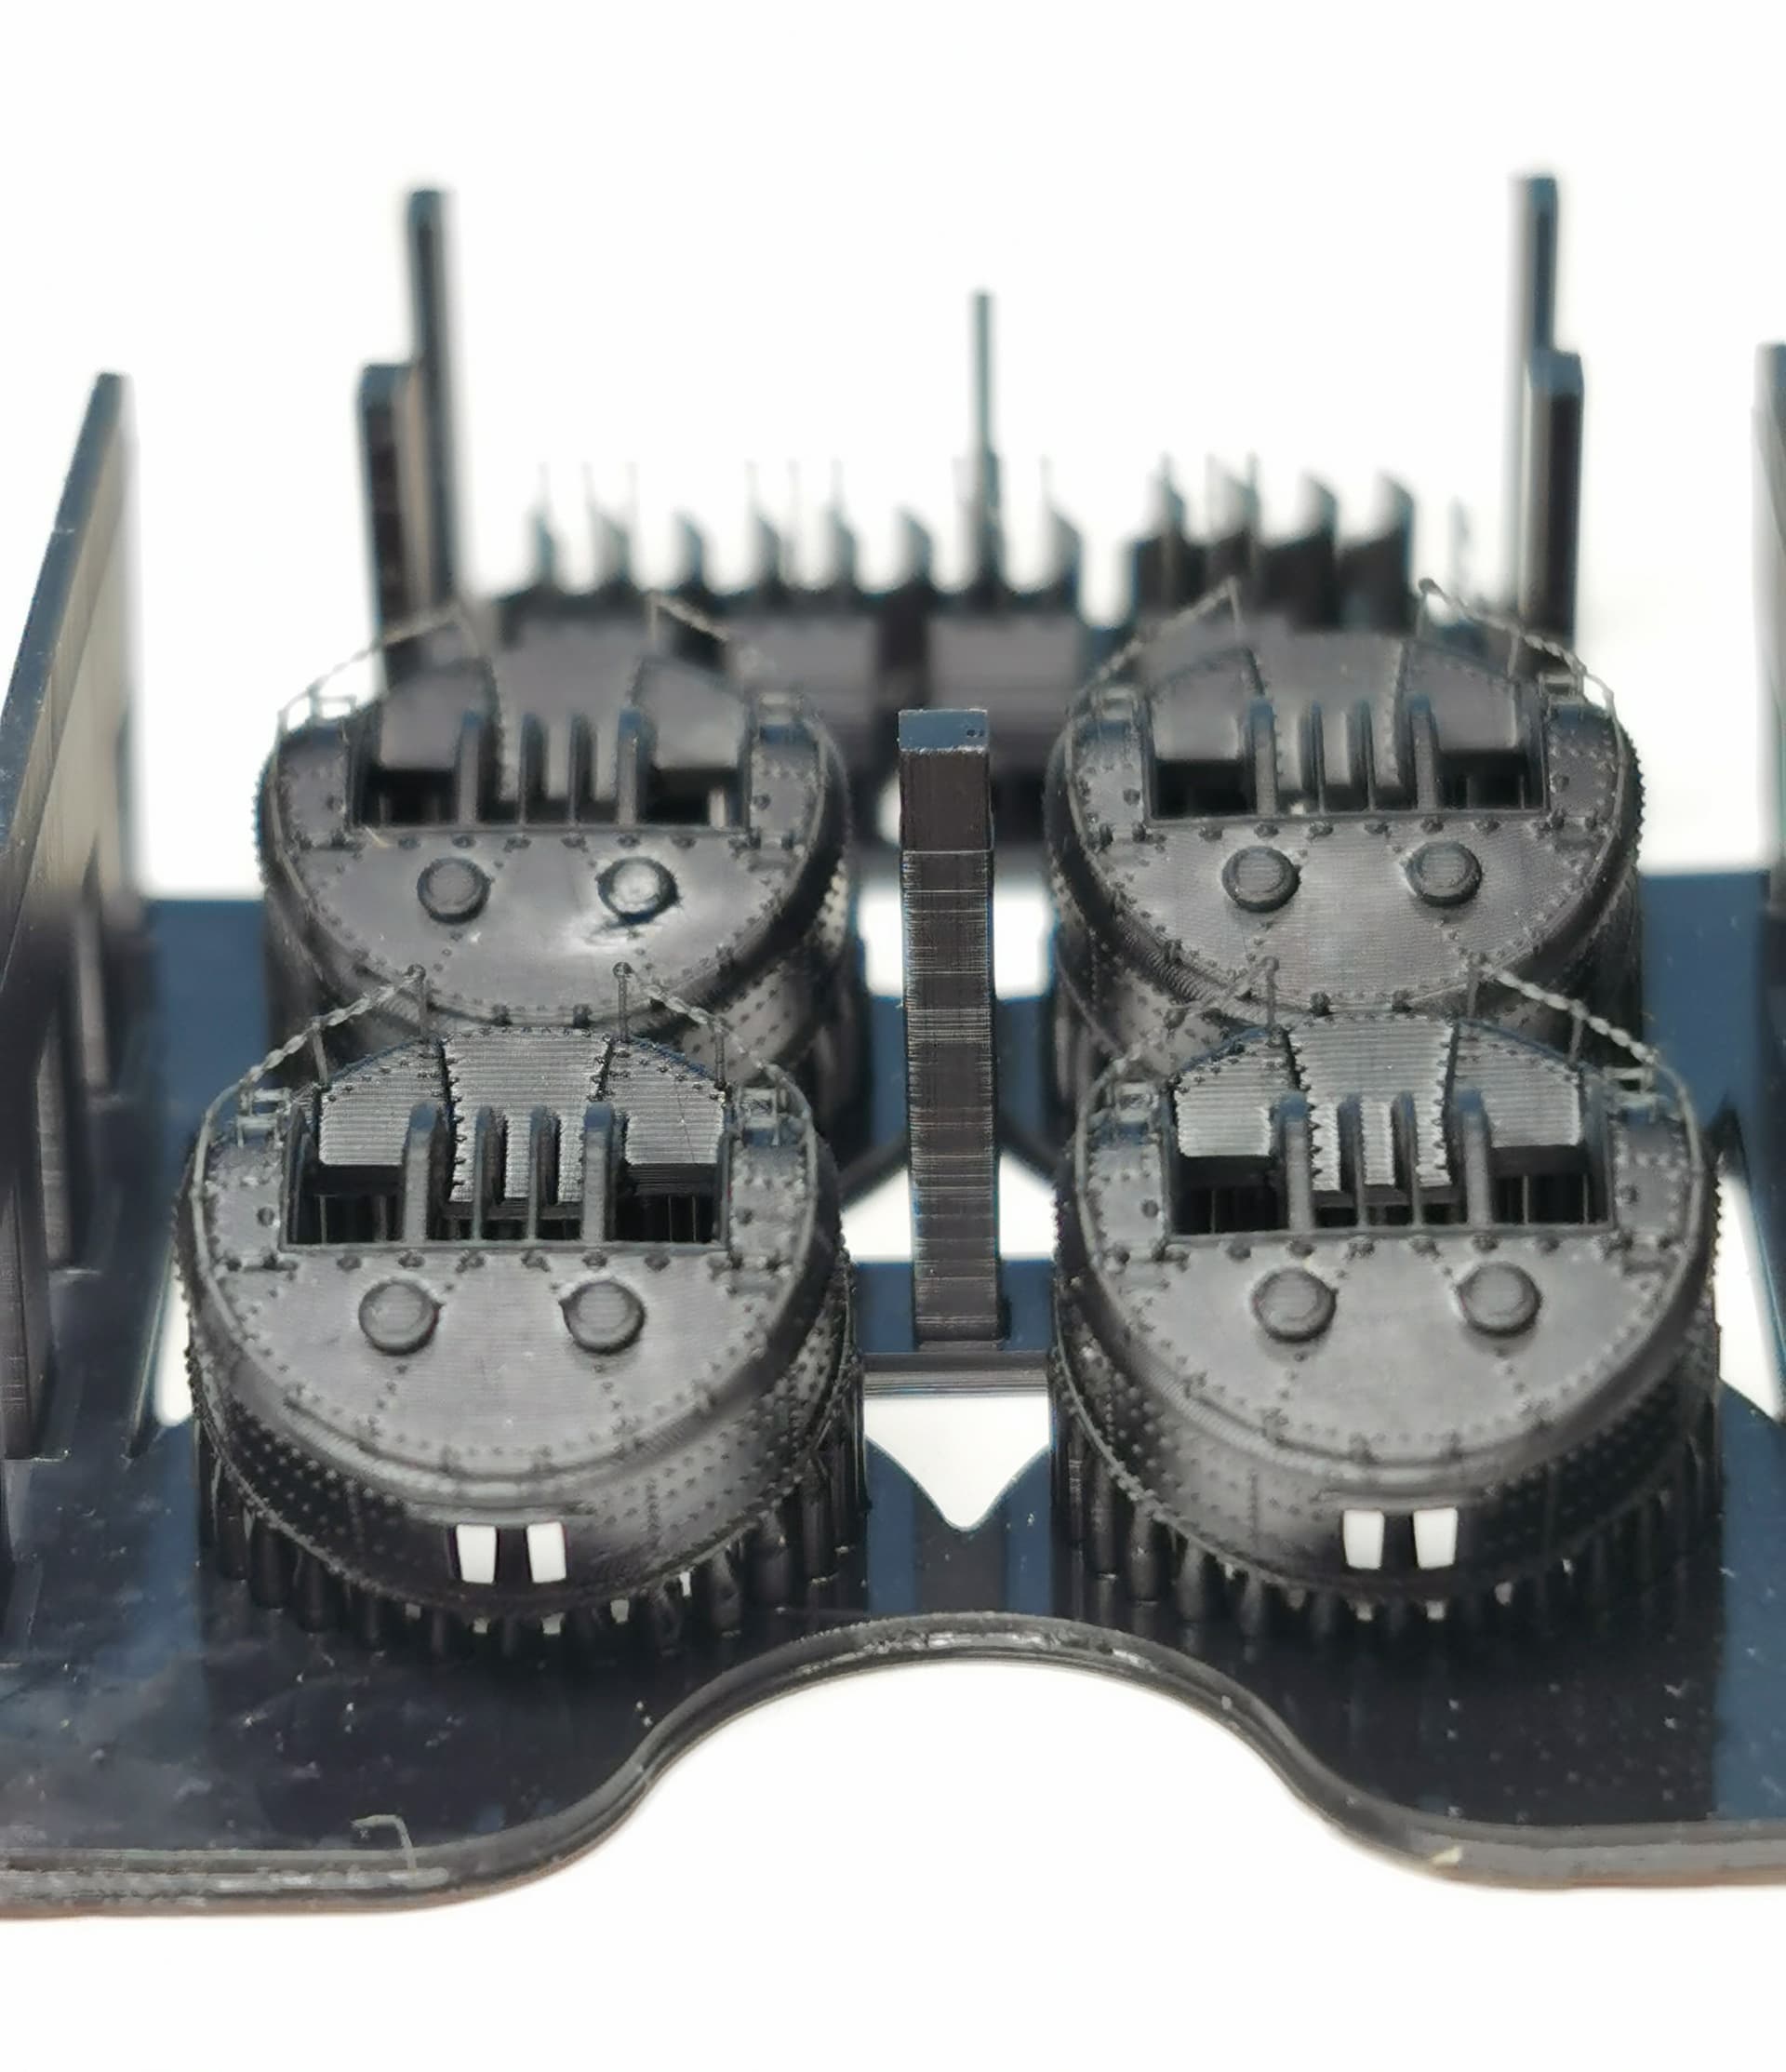
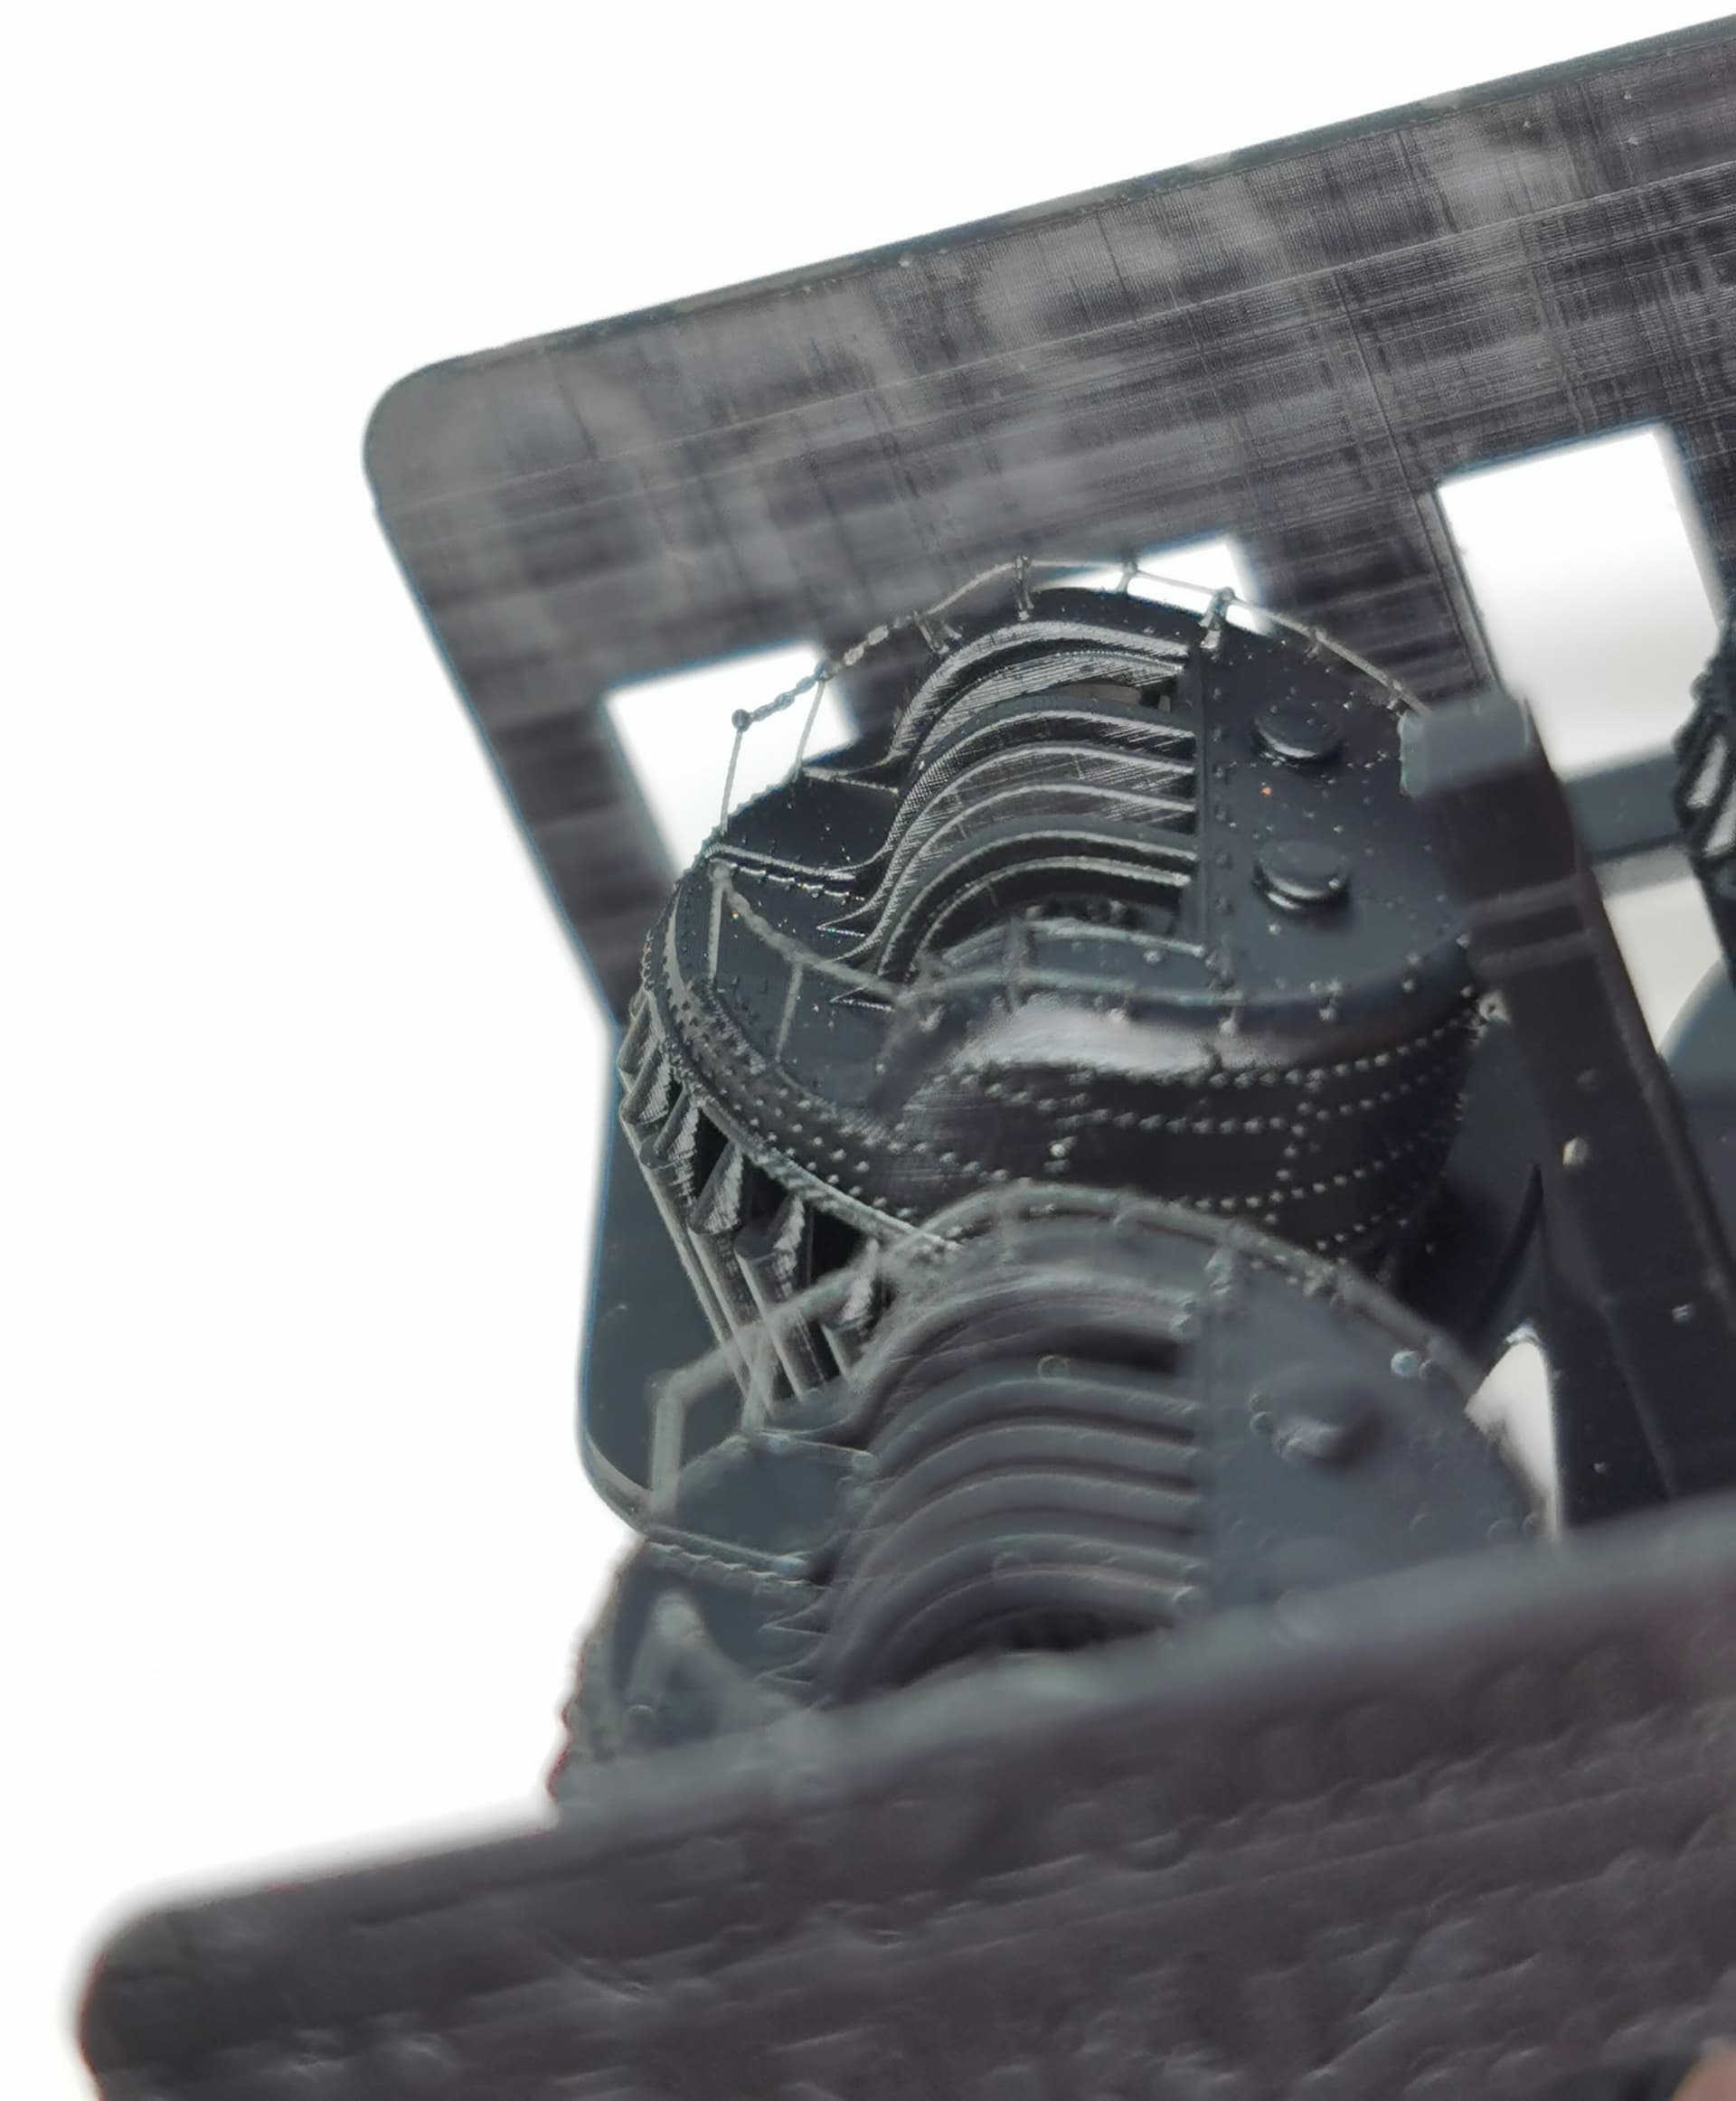
And this is how they look assembled together with a turret from the standart kit - what a difference ![]()
Decanting the spraypaint bottle ![]()
![]()
18 Likes
Again … WOW !! That is some amazing PE and 3D work there Thomas… That would shatter my nerves doing anything that small and detailed. Fantastic work ![]()
![]()
3 Likes
The comparison photo shows how far the hobby has progressed, moving away from just molded on basic shapes to full detail parts with no assembly required.
I have the resin equivalent of those AA turrets for my Yamato, and all the rails and details need to be glued on.
Looking forward to more progress ![]()
![]()
2 Likes
woouwww !! This is a real craftsmanship ![]() Prost…
Prost… ![]()
1 Like
Stunning work, Thomas!
That stuff you are adding is simply amazing! And a skilled worker, as we know you!
Cheers
Jan
2 Likes
Thank you Jan ![]()
![]()
![]()
Prosit Yaman ![]()
P.S.: May a lot more people get rescued out of the houses in Turkey and your neigboring country Syria ![]()
6 Likes
Thank you so much ![]() … and grateful to everyone who shared Turkey & our neighbor Syria’s pain and supports … my prayers with all those affected by the earthquake
… and grateful to everyone who shared Turkey & our neighbor Syria’s pain and supports … my prayers with all those affected by the earthquake ![]()
7 Likes
Those 3d Printed triple 25mm are splendid. Must admit I am great fan of 3d Printed light AA,
Following allong on this impressive build.
Cheers, Si
1 Like
Hello Si, yes me too ![]() But these parts are overproportional fragile - already broke two gun barrels of four guns in work
But these parts are overproportional fragile - already broke two gun barrels of four guns in work ![]()
1 Like
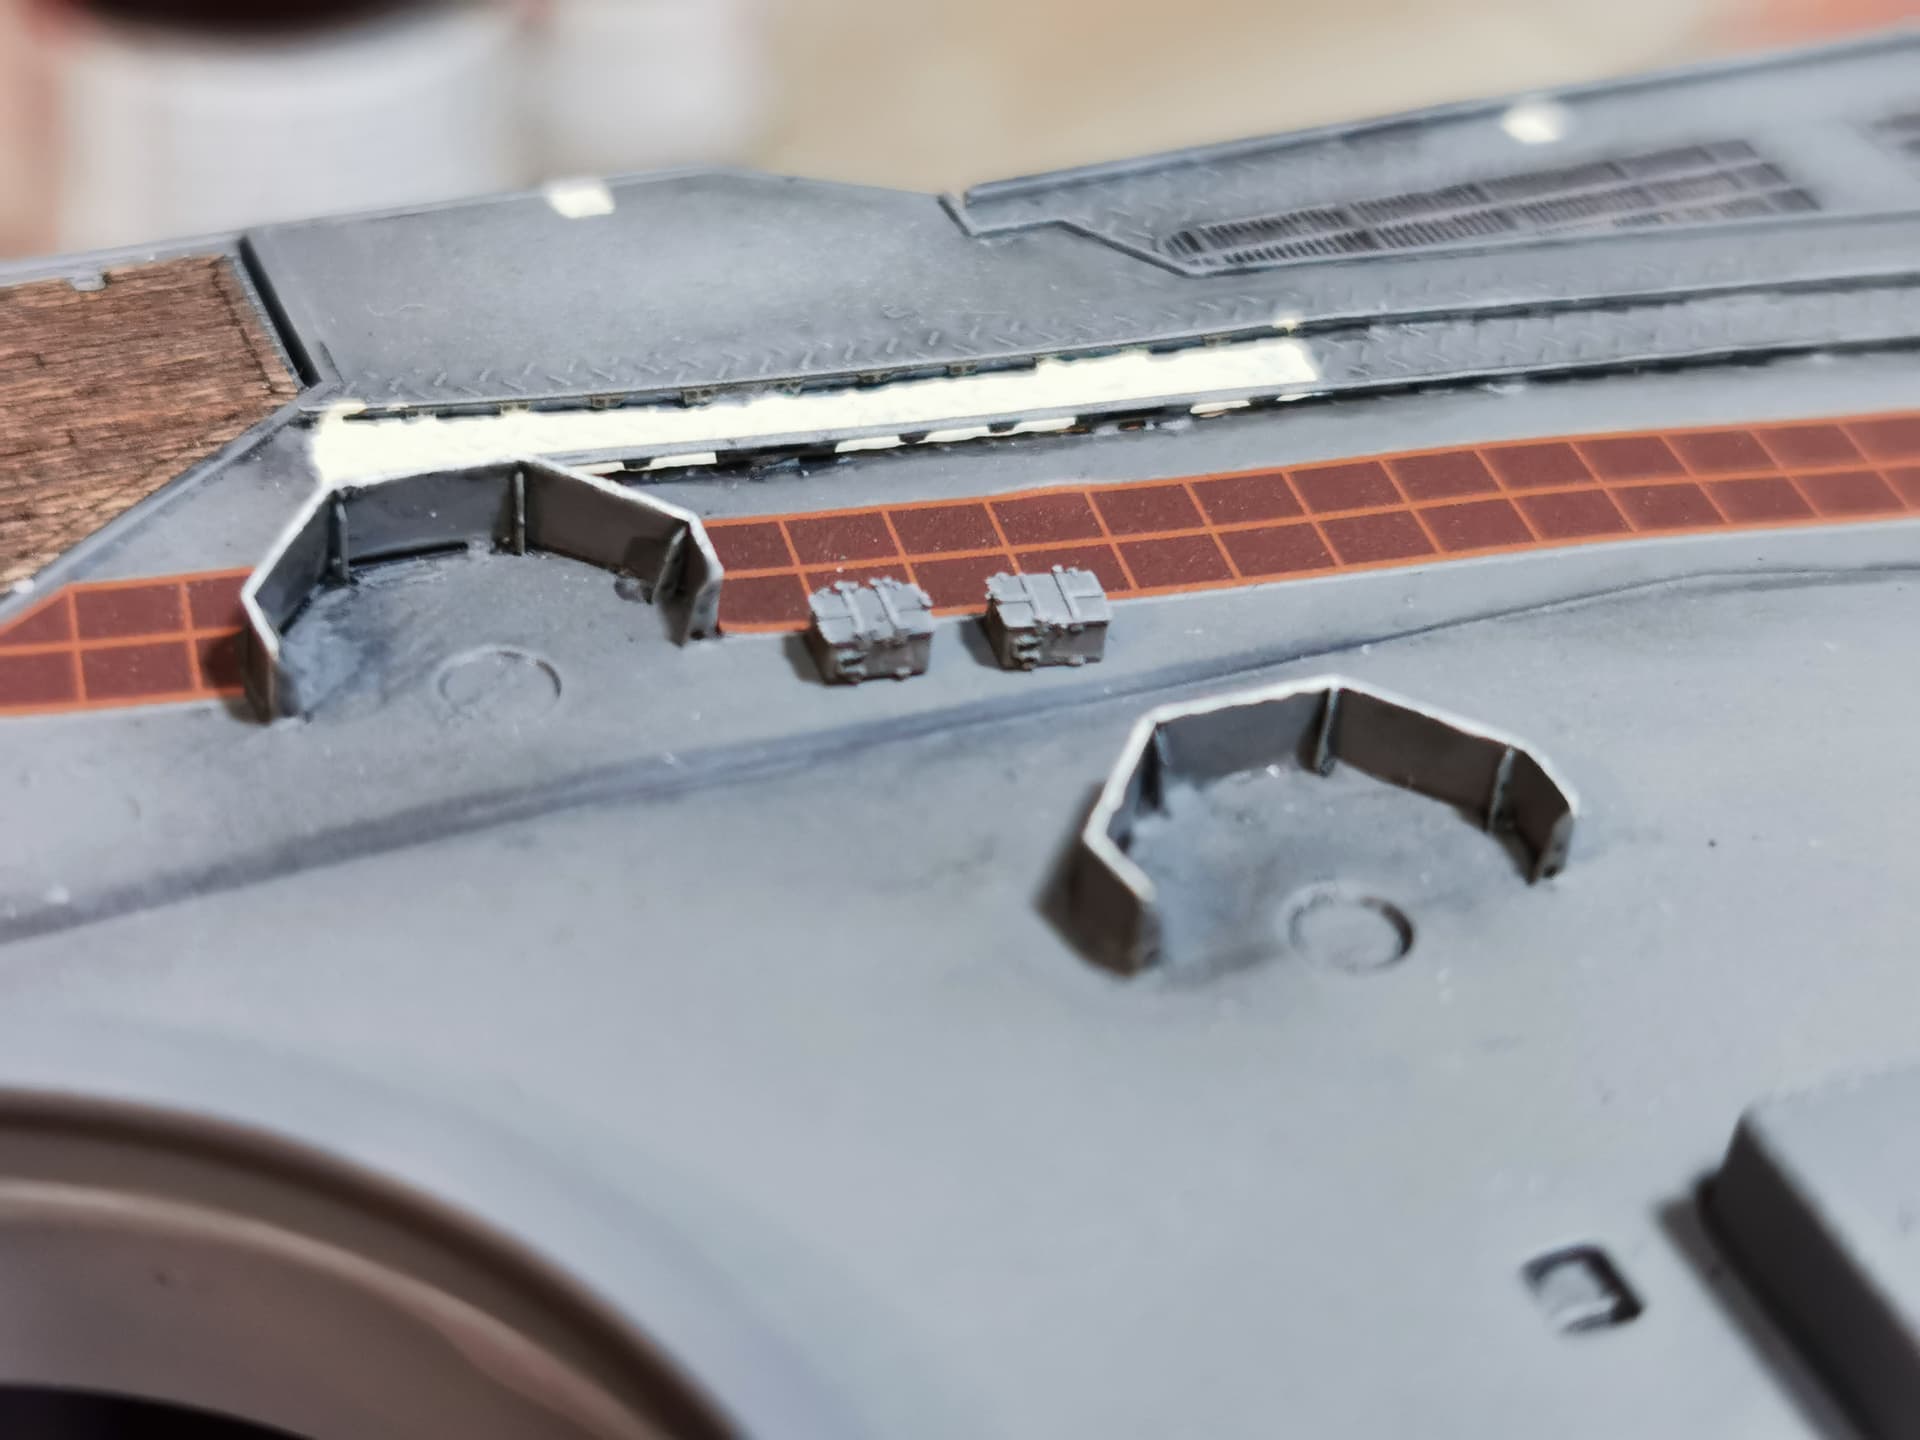
Some eye candy at the end of my weekend work: A lot of small parts for the deck have been build and spraypainted. I drybrushed the winches and placed these first. These are also excellent detailed 3d-printed winches from BLUE FATTIE

Also four ammo boxes for the AA-triple gun batteries at the aircraft deck. These are from WULA, also of excellent detail
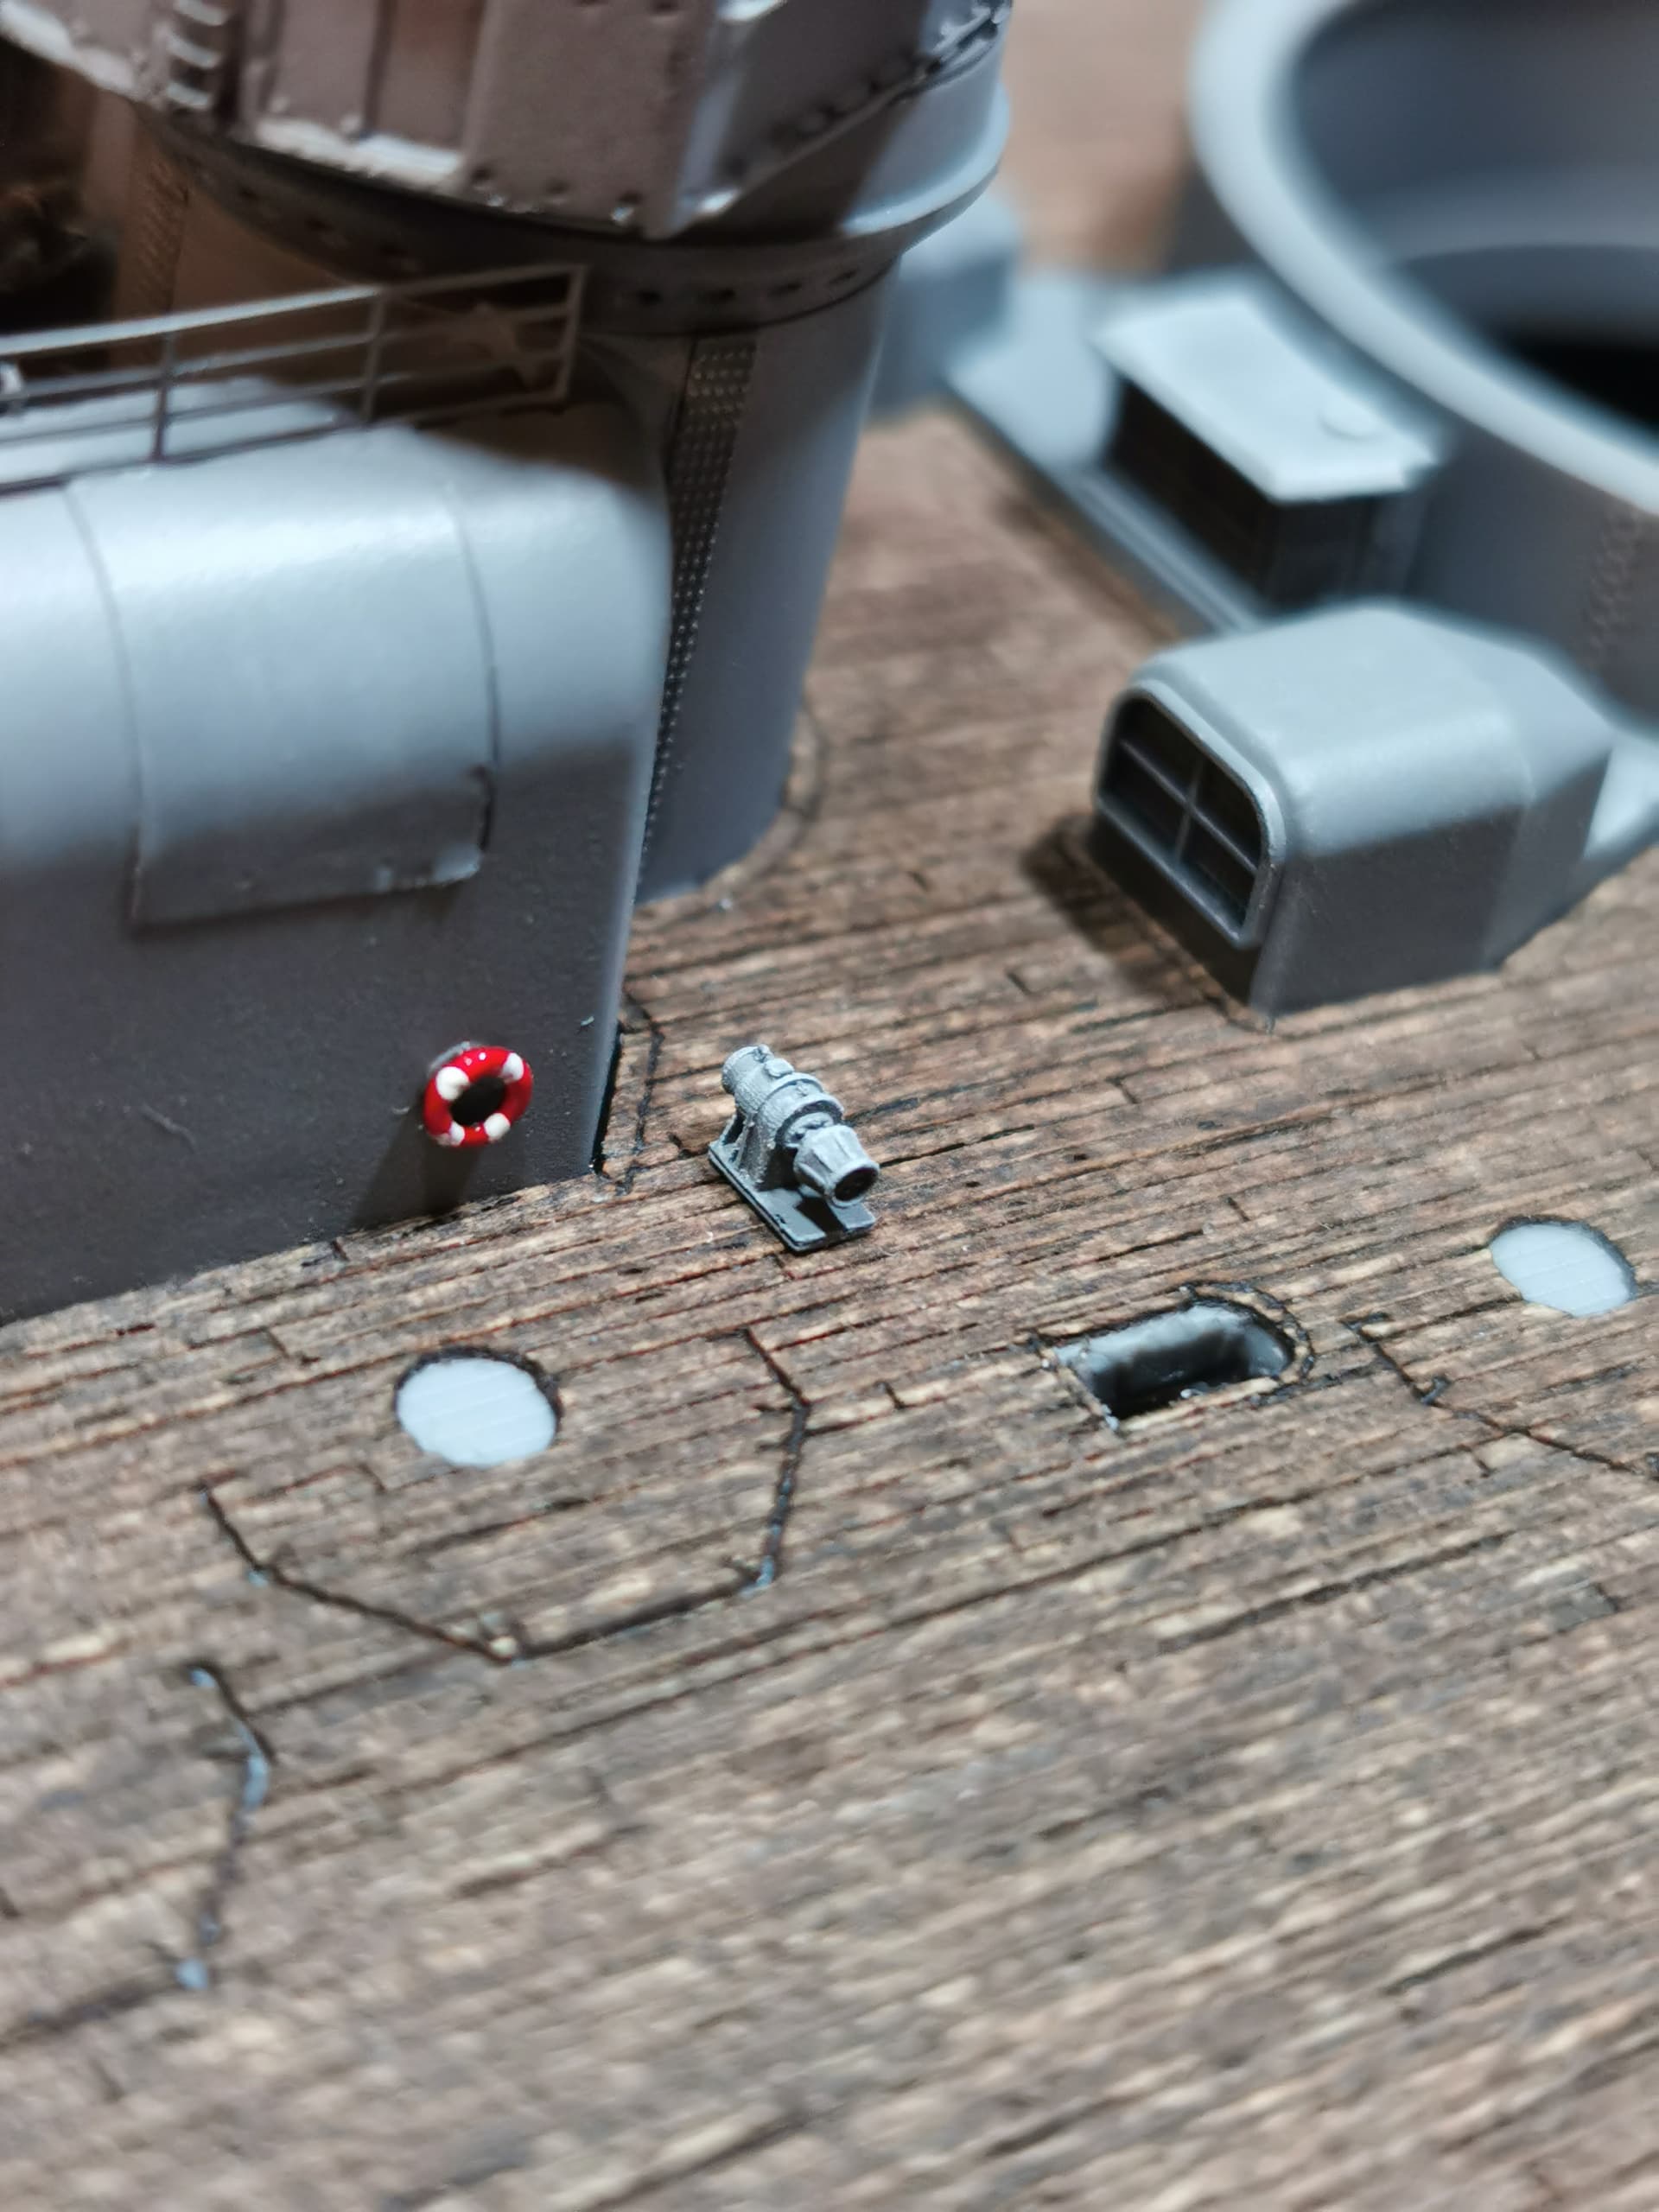
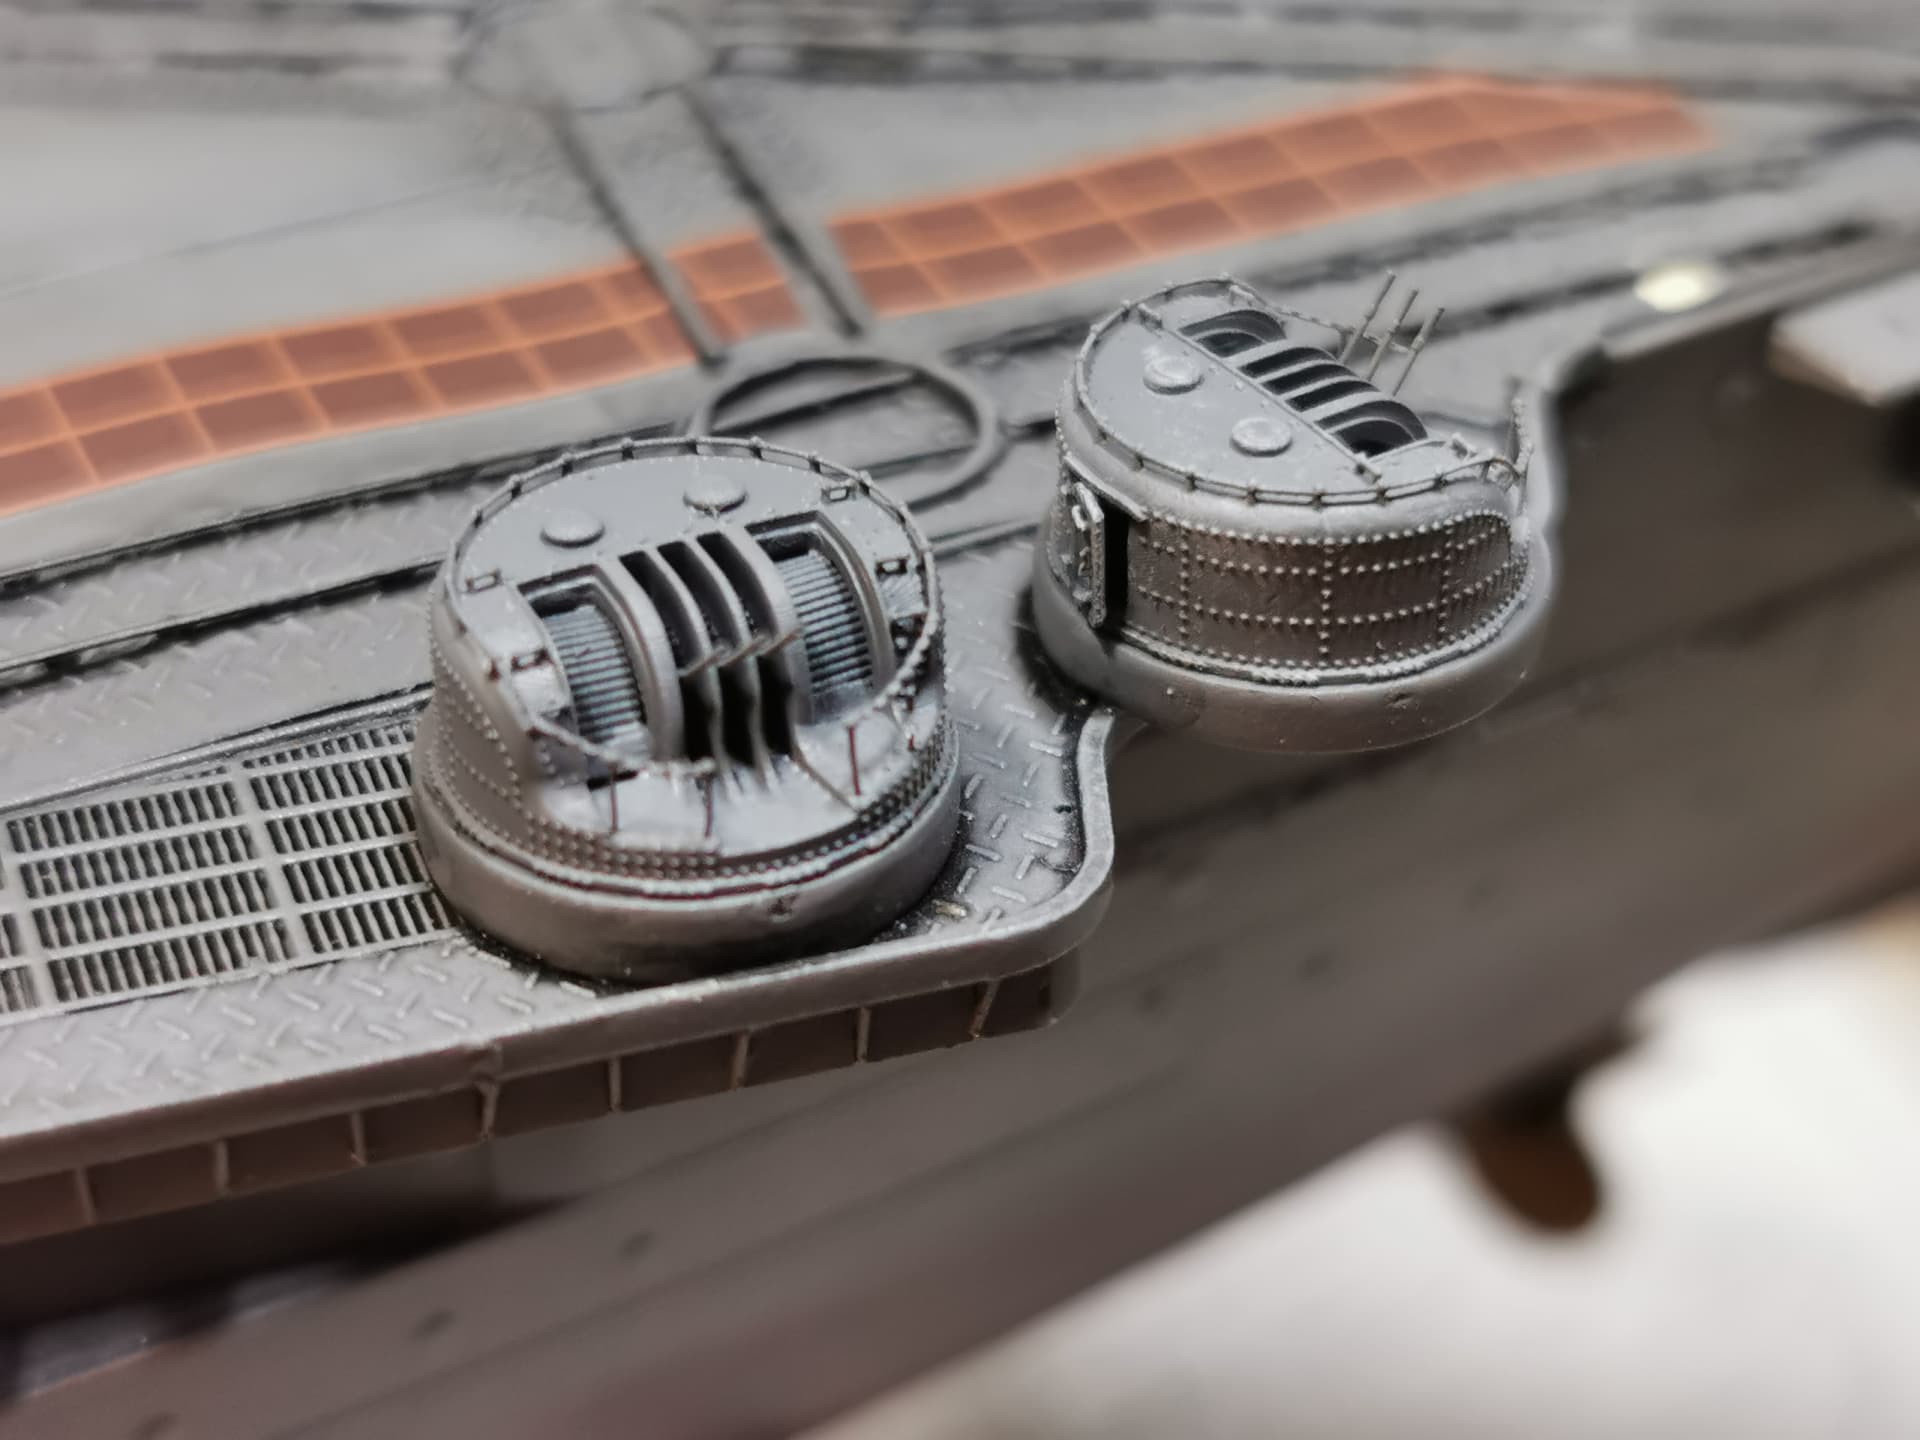
Then I progressed with the aft two AA-gun control stations above the aircraft hangar. I first glued the optical device at its place…

…and then imposed the housings over them. Looks great in my eyes ![]()
![]() You dont see details inside the housings but you can recognize there is something inside
You dont see details inside the housings but you can recognize there is something inside

I couldn´t resist and testfitted the armored triple guns at their aft pedestals. These are not drybrushed nor barrels got painted but they look terriffic ![]() Well worth the money
Well worth the money ![]()
Thats it so far for this weekend ![]()
13 Likes
I’ve not used that manufacturer, I usually use Black Cat, their material has a little flex in it. I still occasional break something, I have lost a few barrels on the RN quad 0.5".
Good luck with the rest of them.
The armoured triple 25mm mounts look the bussiness in place
Cheers, ![]()
Si
2 Likes
Sensational detail work. An amazing build. I am really enjoying following along.
2 Likes
This is such a fantastically detailed build. A huge amount of time and effort but every piece is worth it. It looks phenomenal Thomas … stunning work mate
3 Likes
Thomas, as was already said - splendid work, those details are absolutely amazing!
Eye candy, as you rightly say!
Cheers
Jan
2 Likes
Looks amazing. I am really in awe at what 3D printing can do and how far its come.
2 Likes
Wow. The detail really pops with the 3D printed Parts. Beautiful work…Cheers Mark
2 Likes