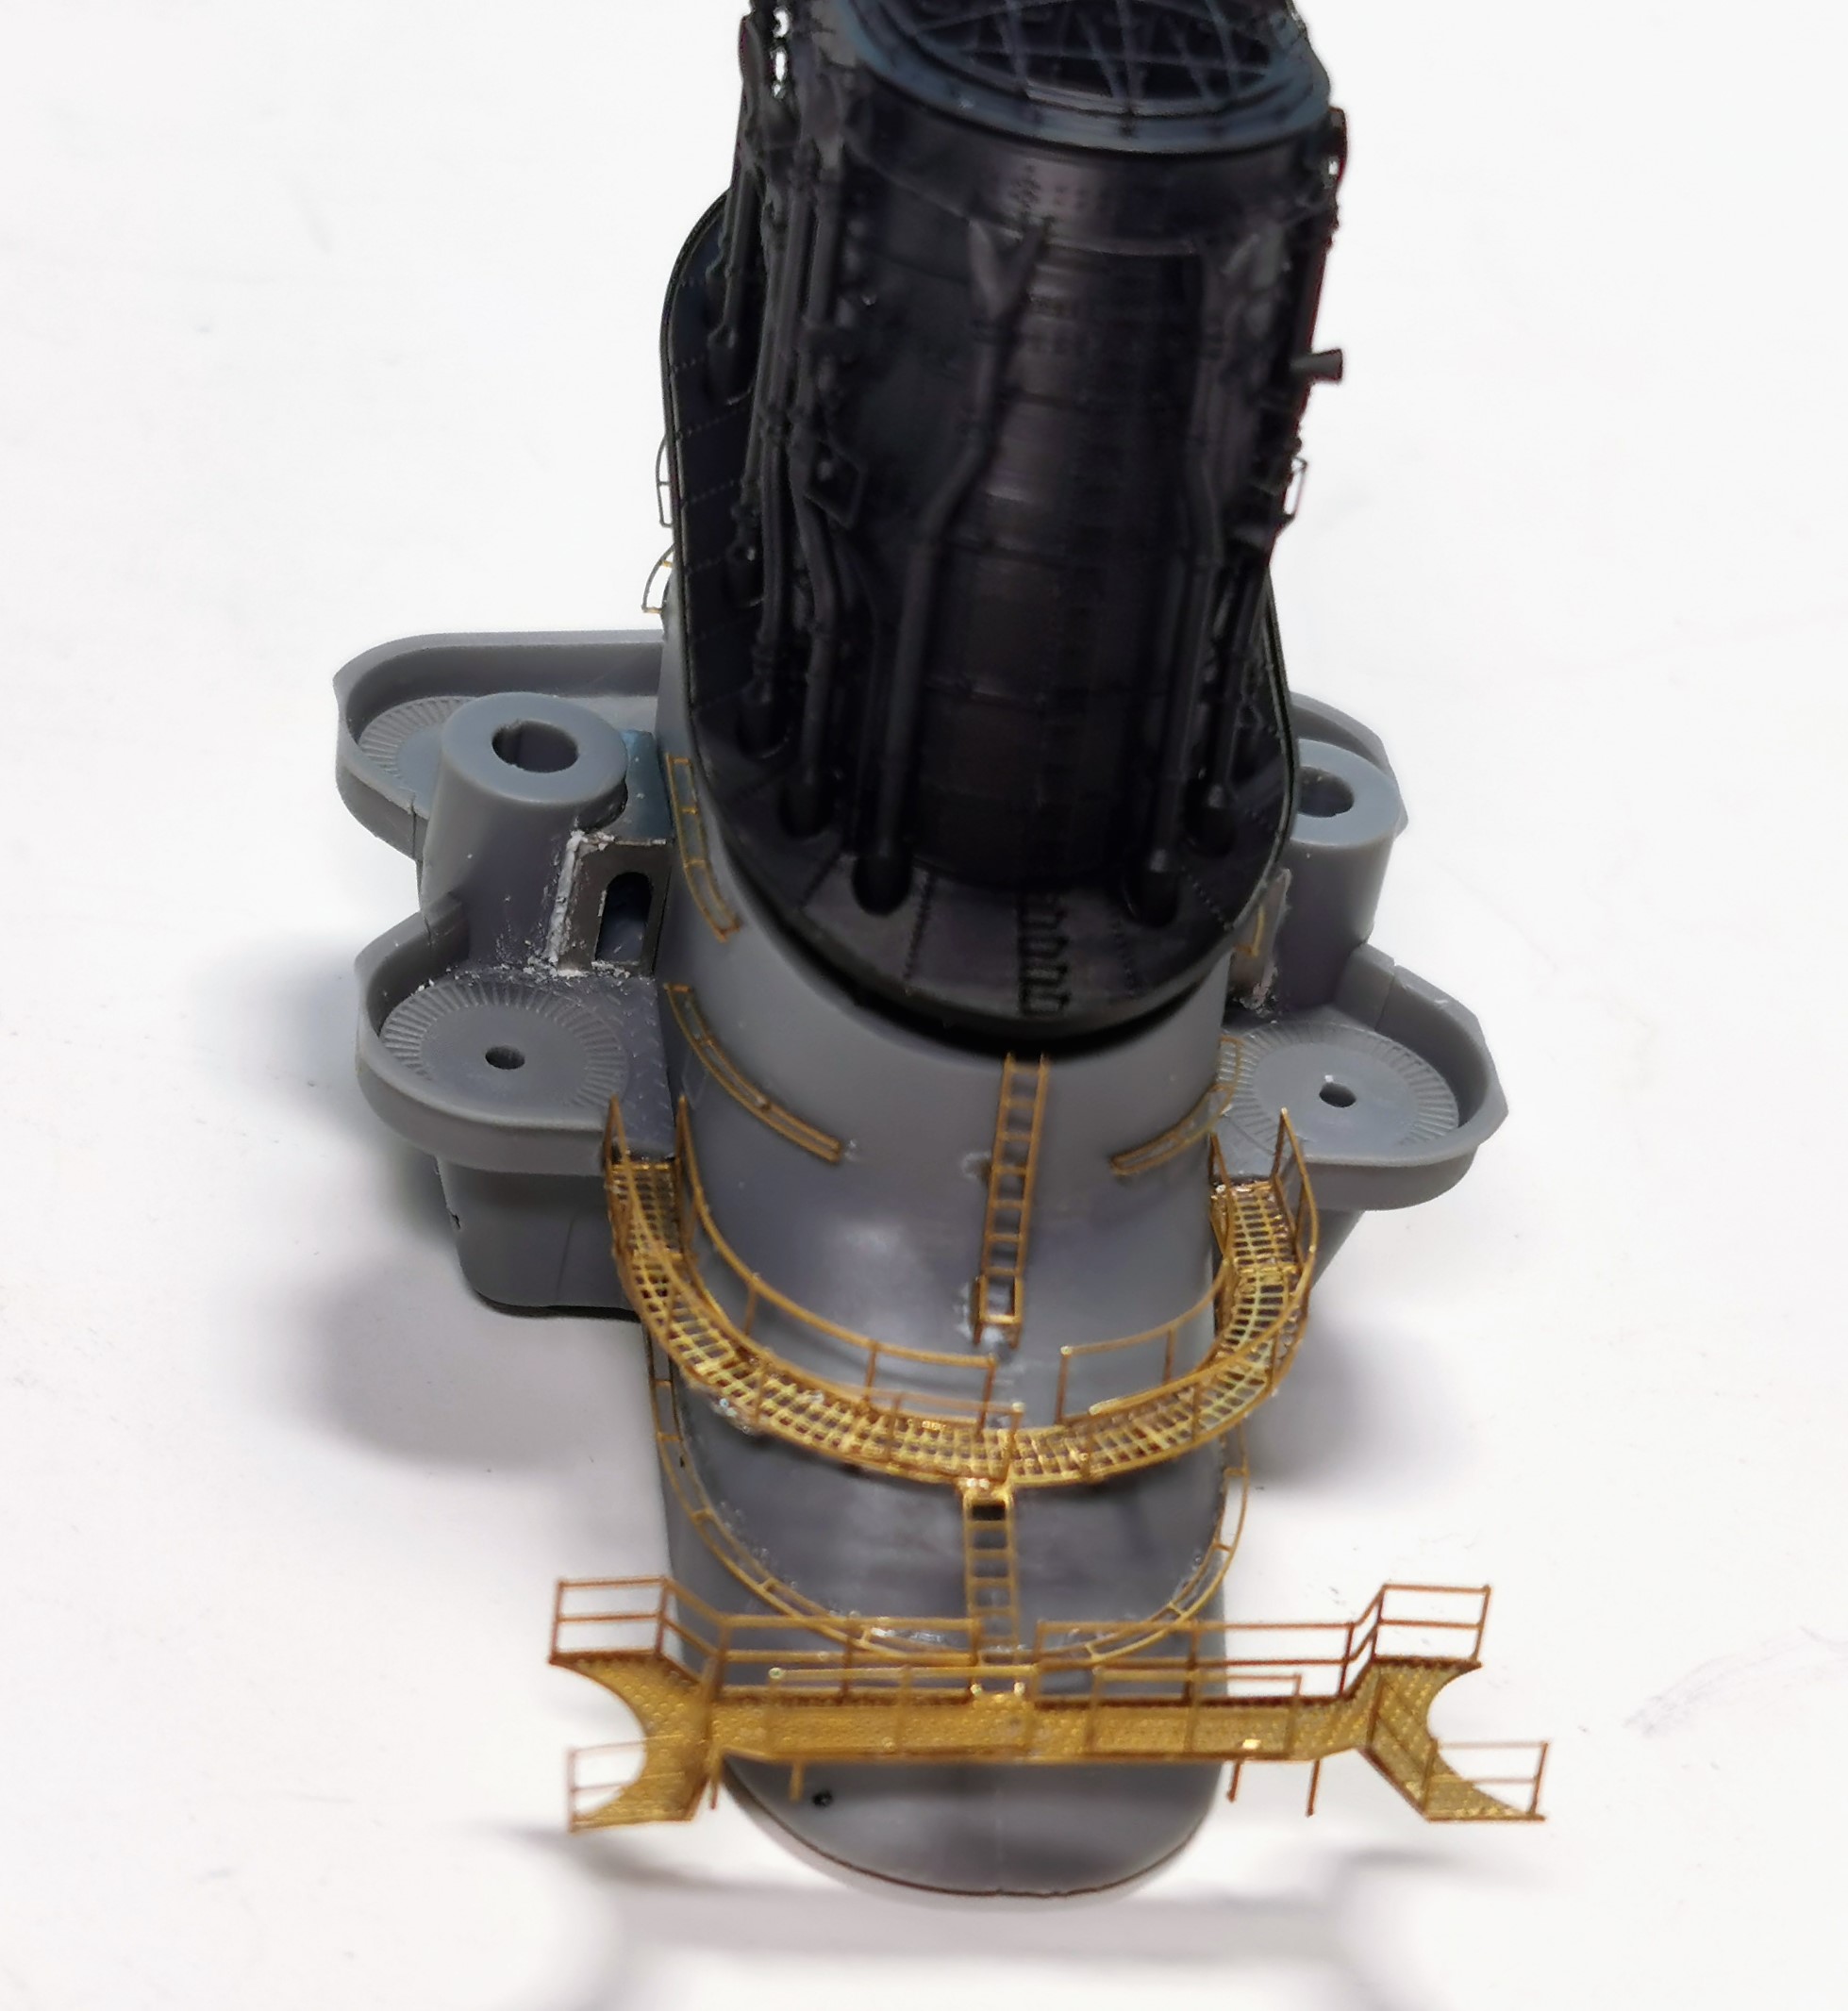
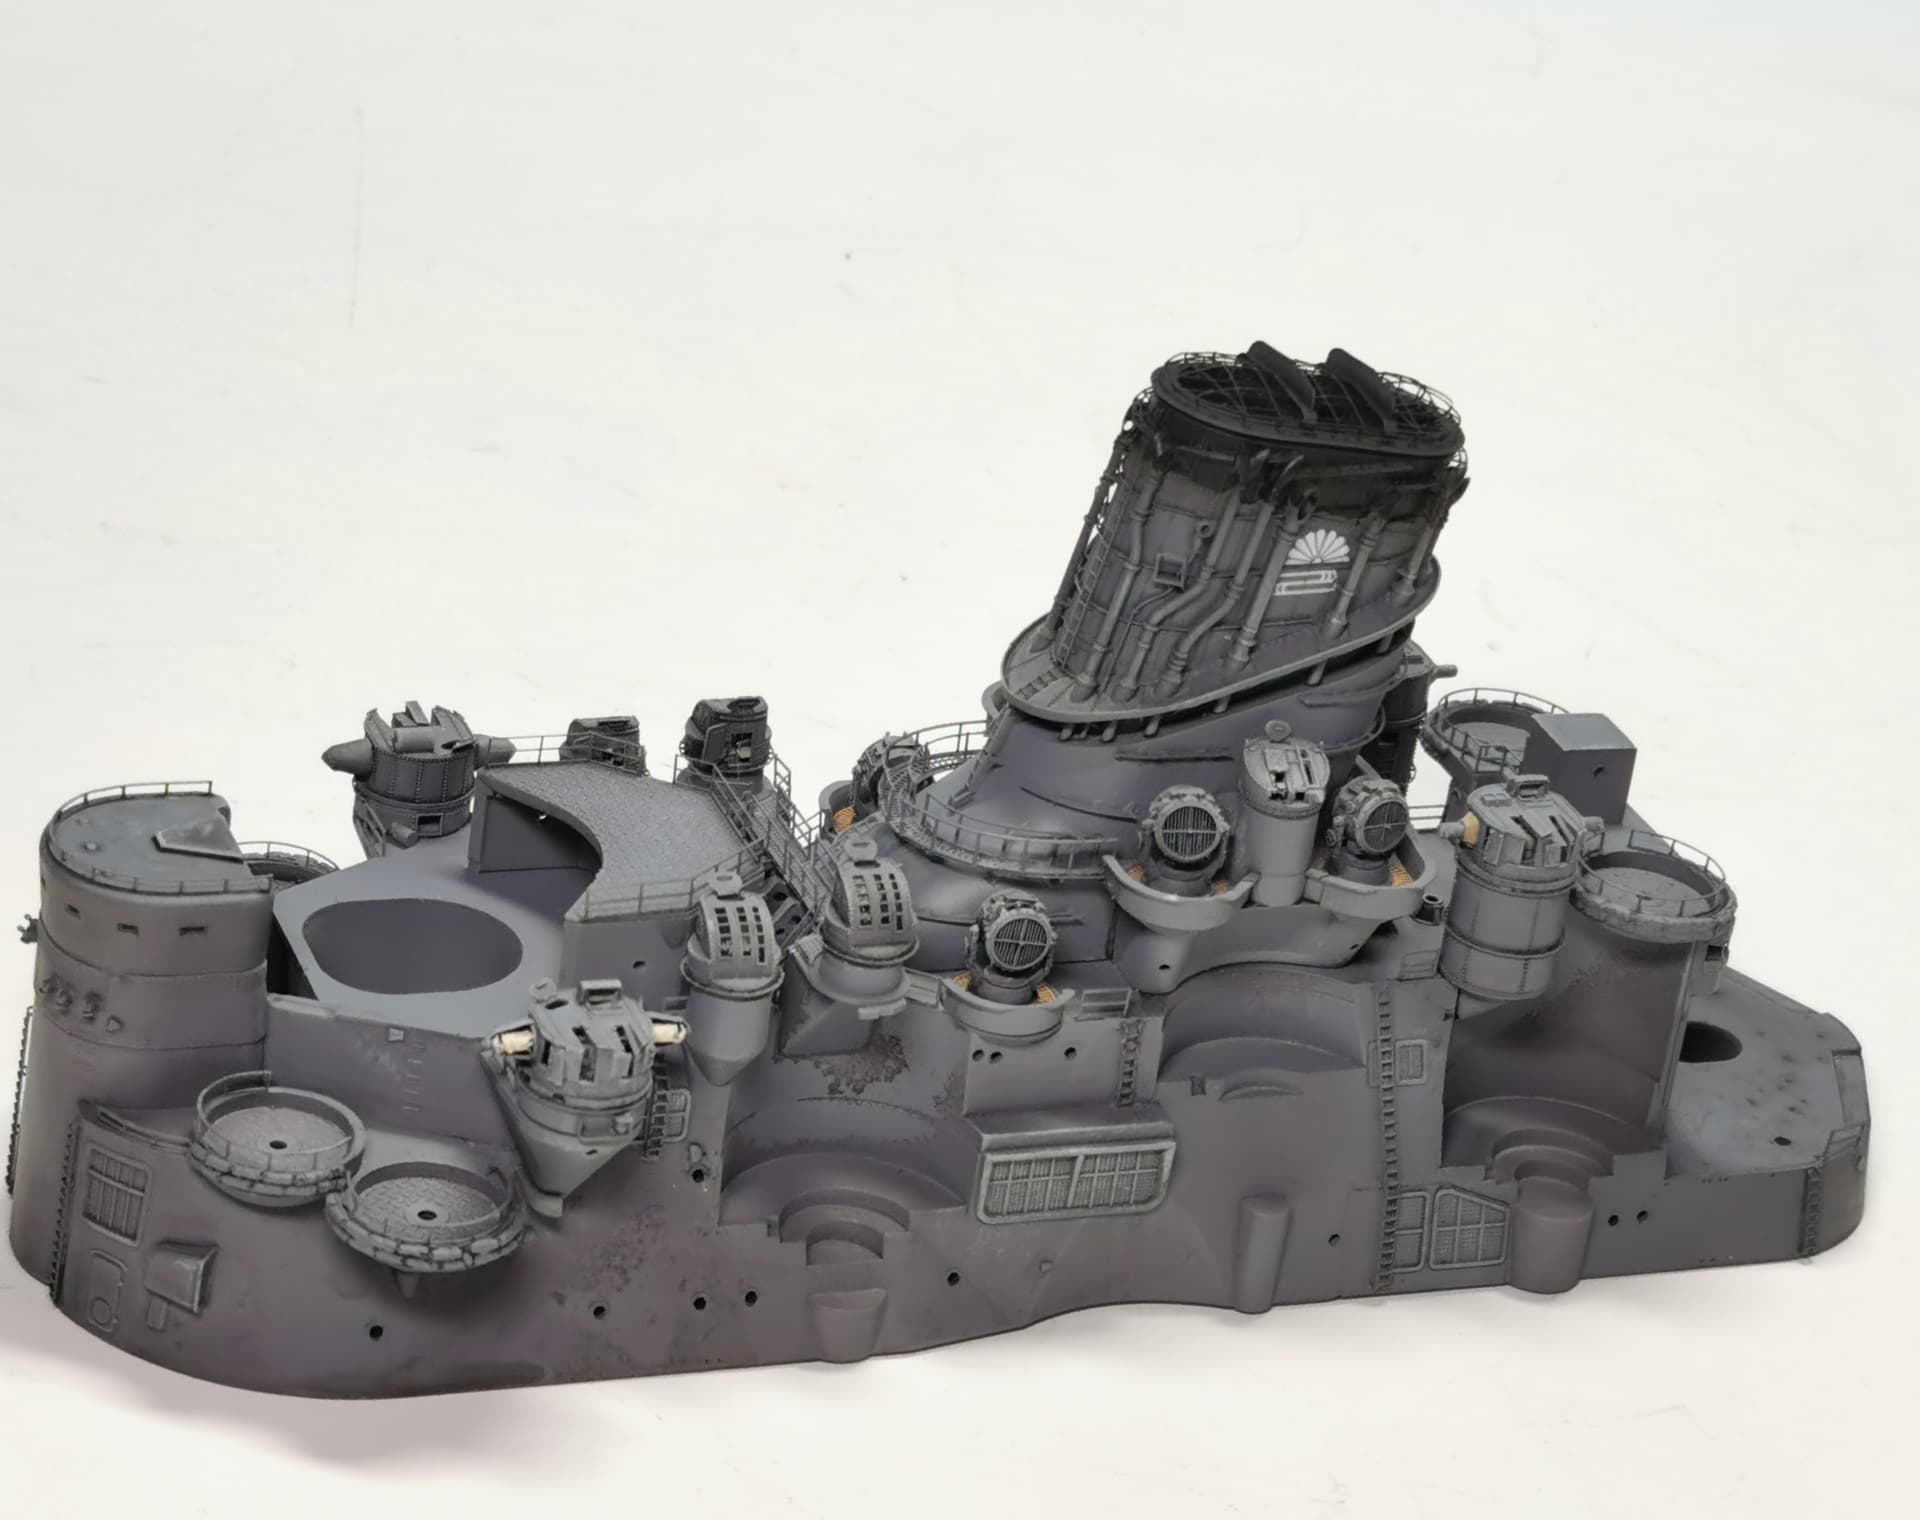
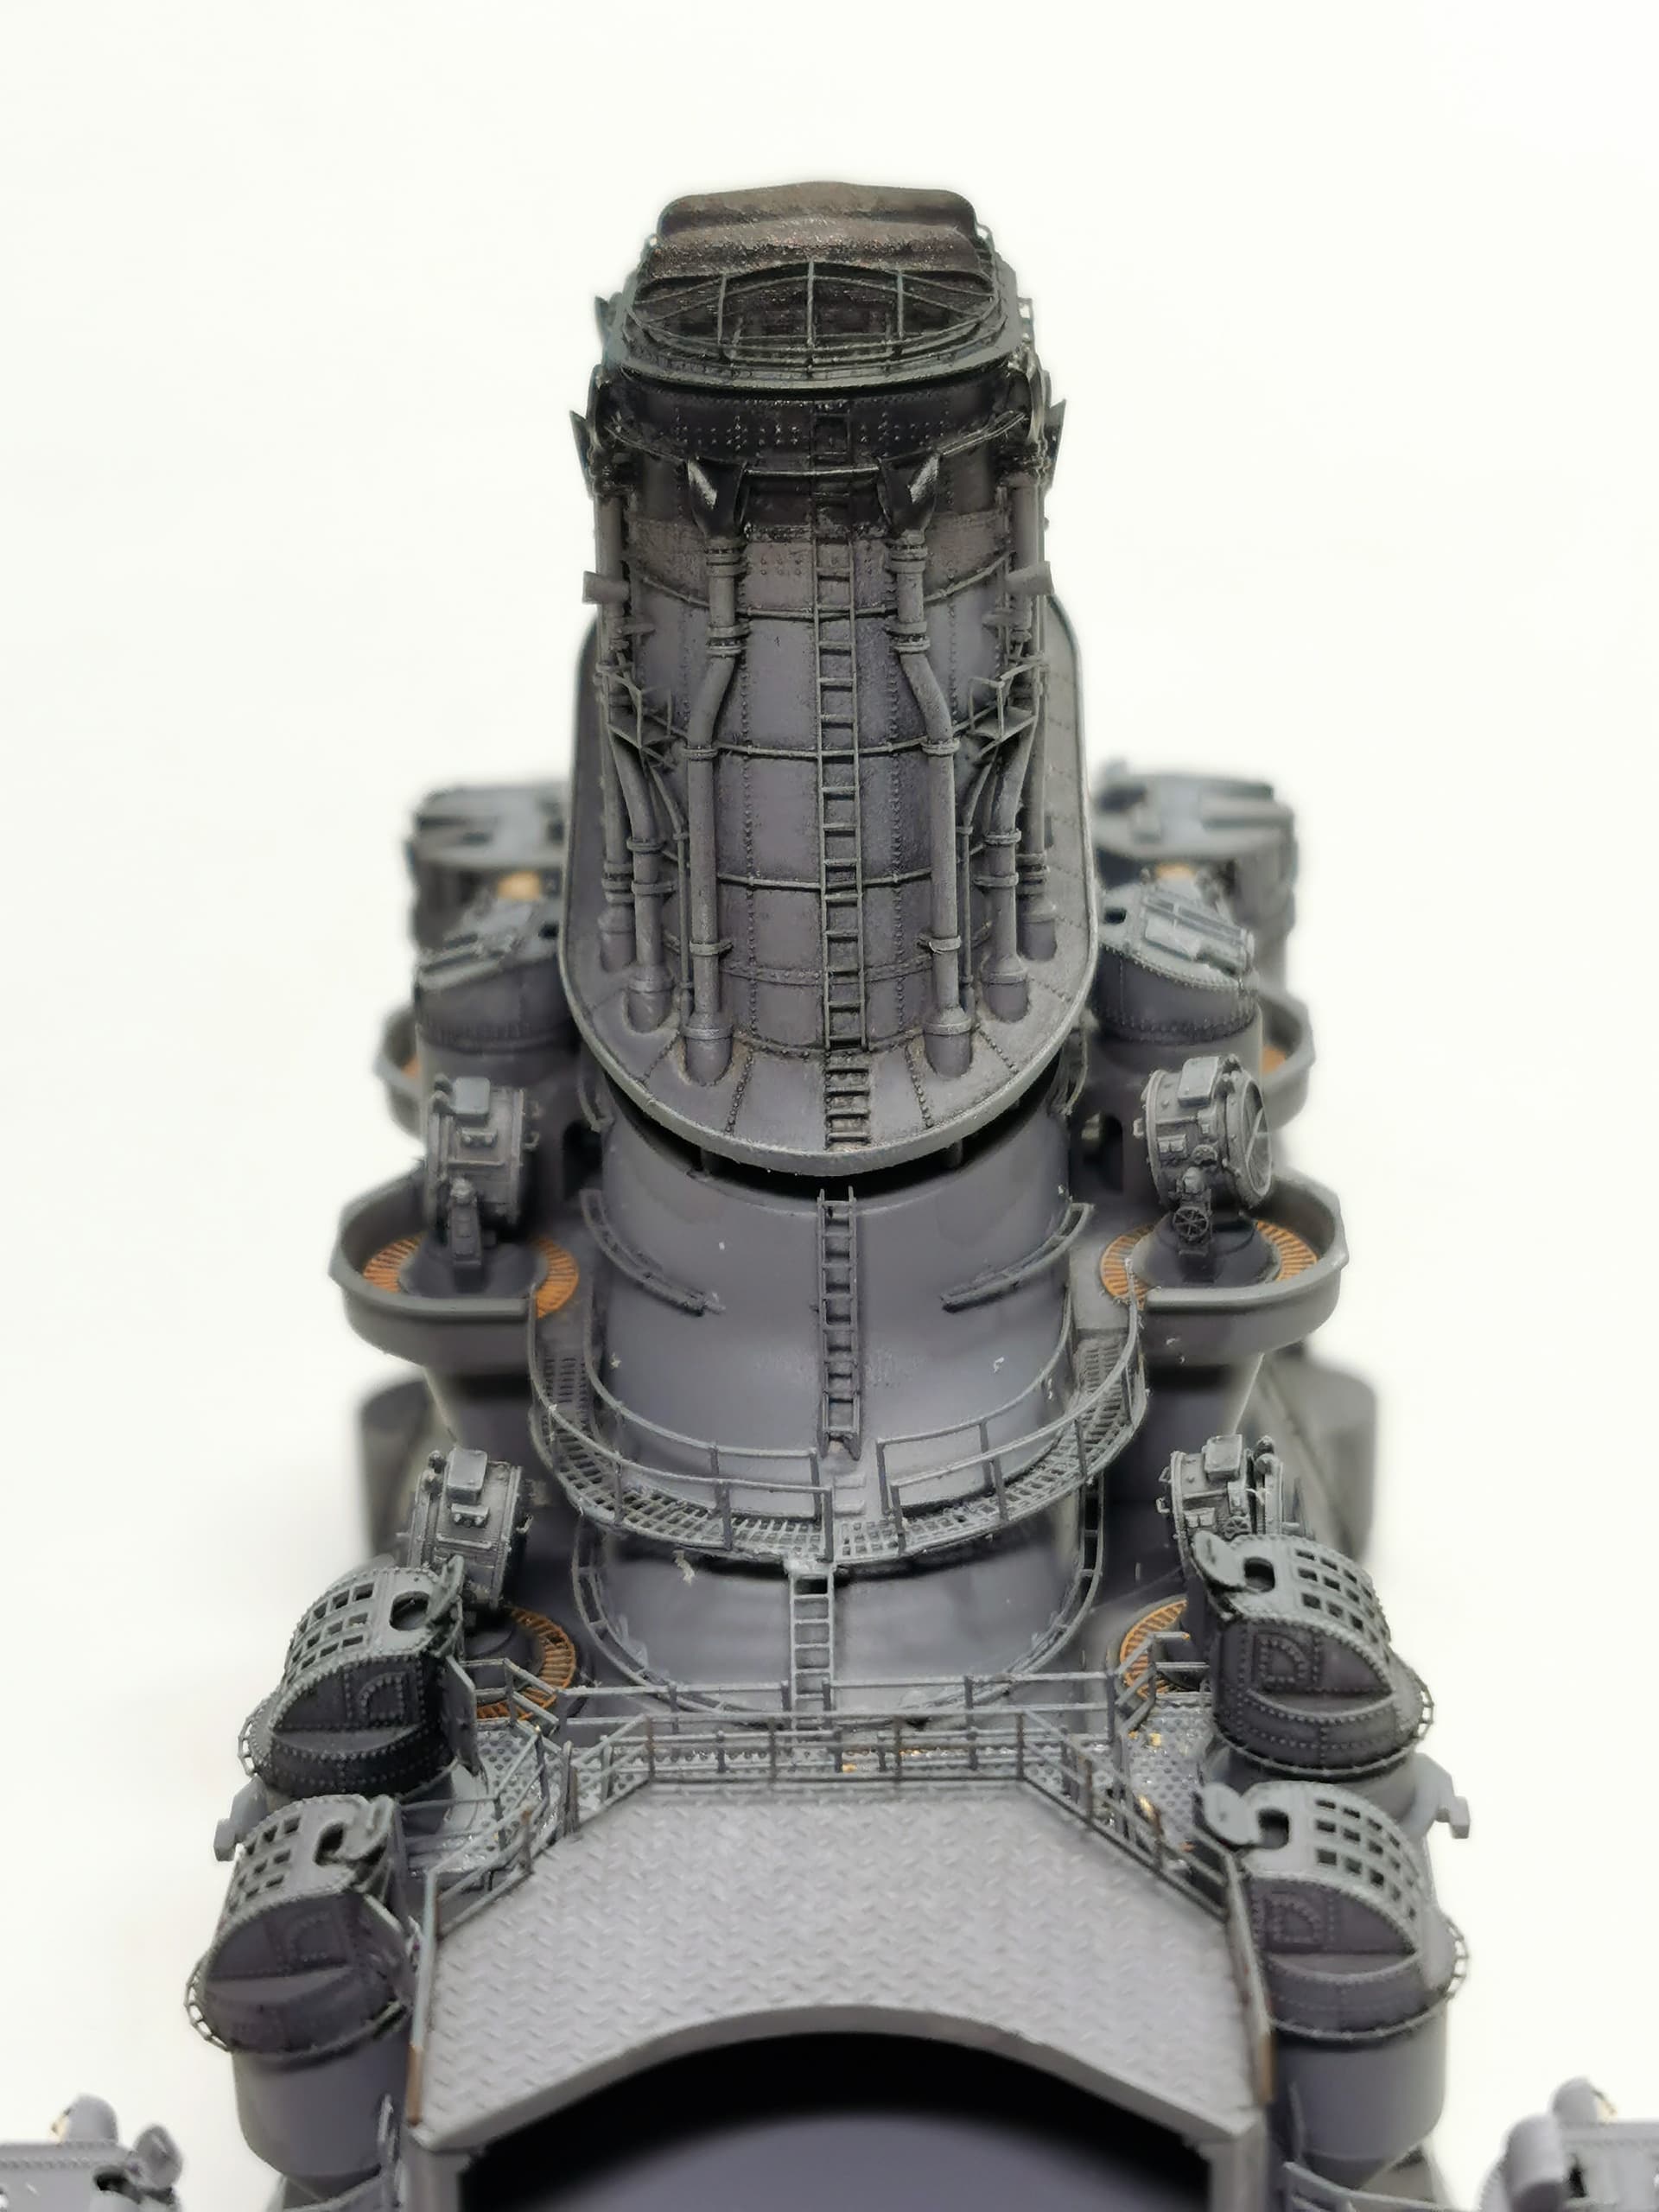
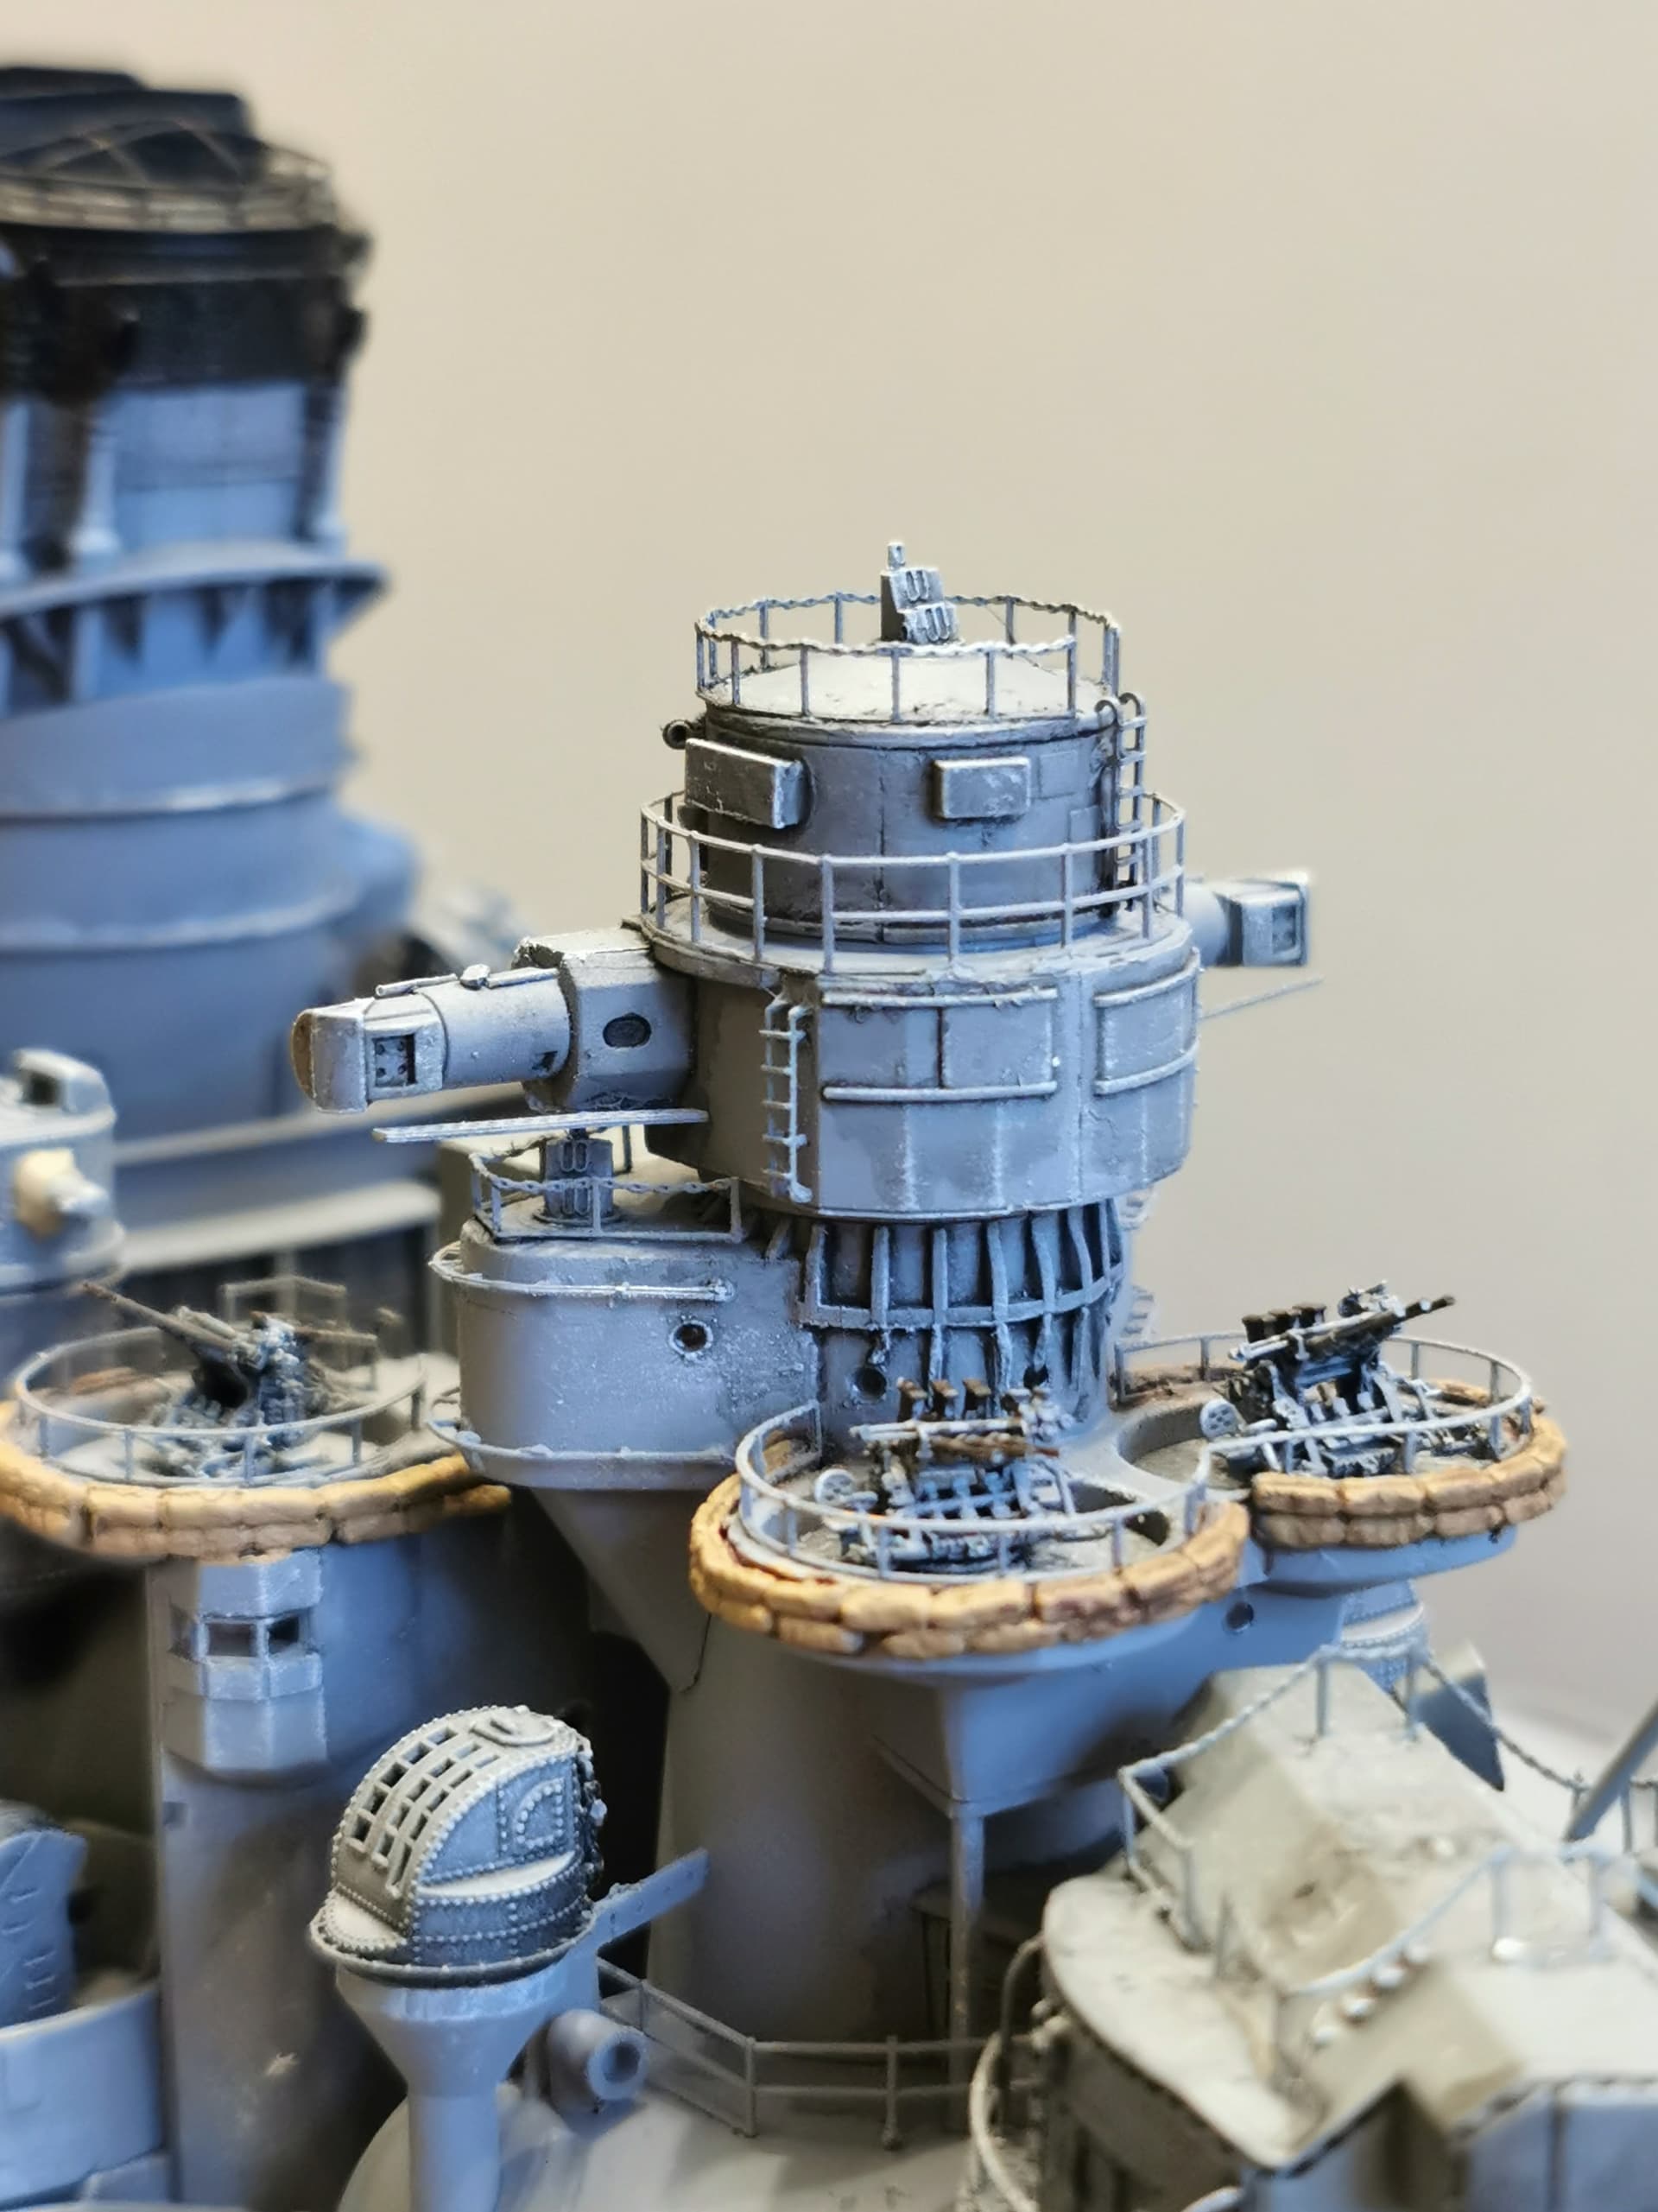
One small and last update of this weekend: I made the etched walkway around the funnel toward the searchlights. As the etched walkway from TAMYA´s etched set is without railings and pretty simple looking I opted to use KA-MODEL´s one which is much more sophisticated looking but also trickier to build
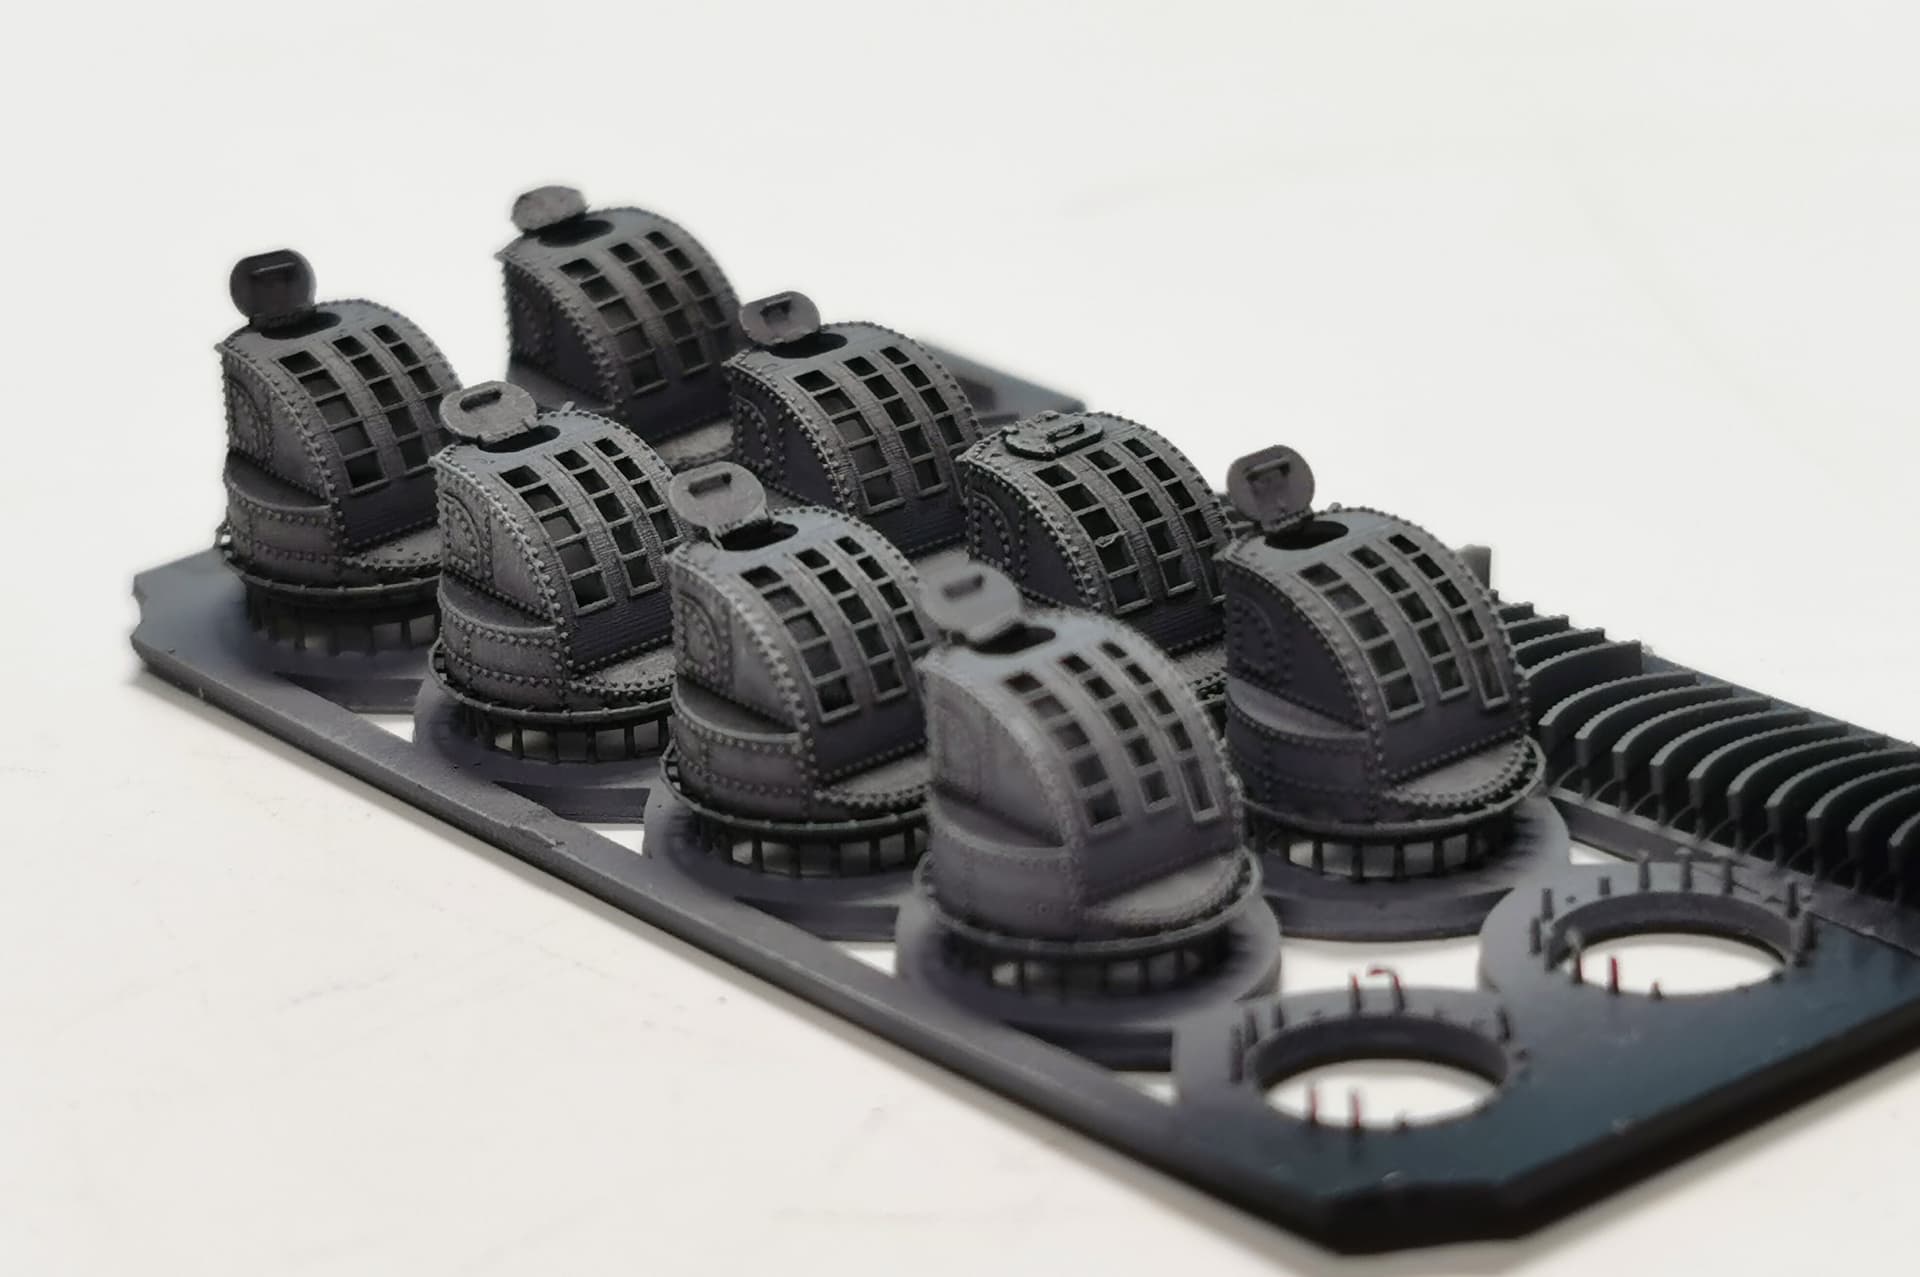
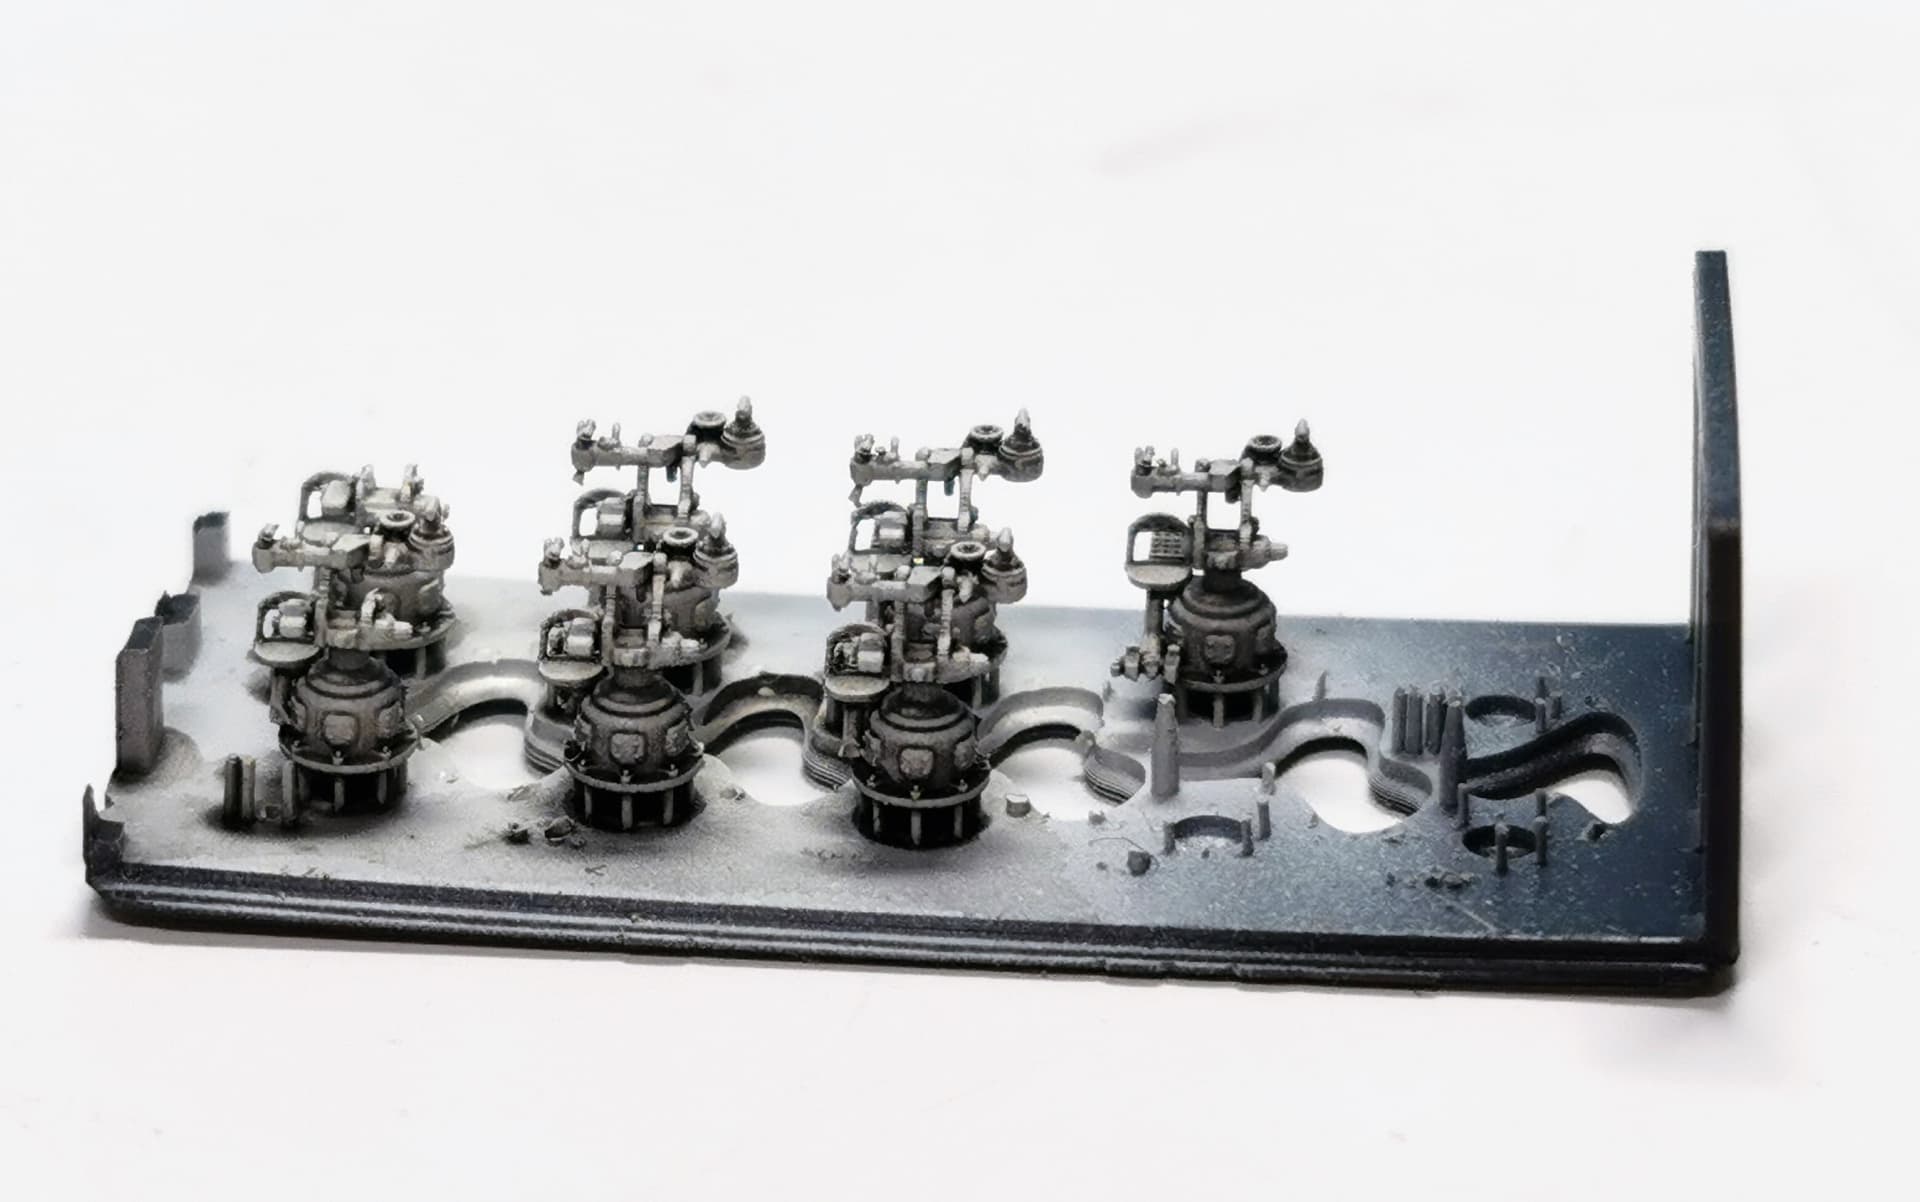
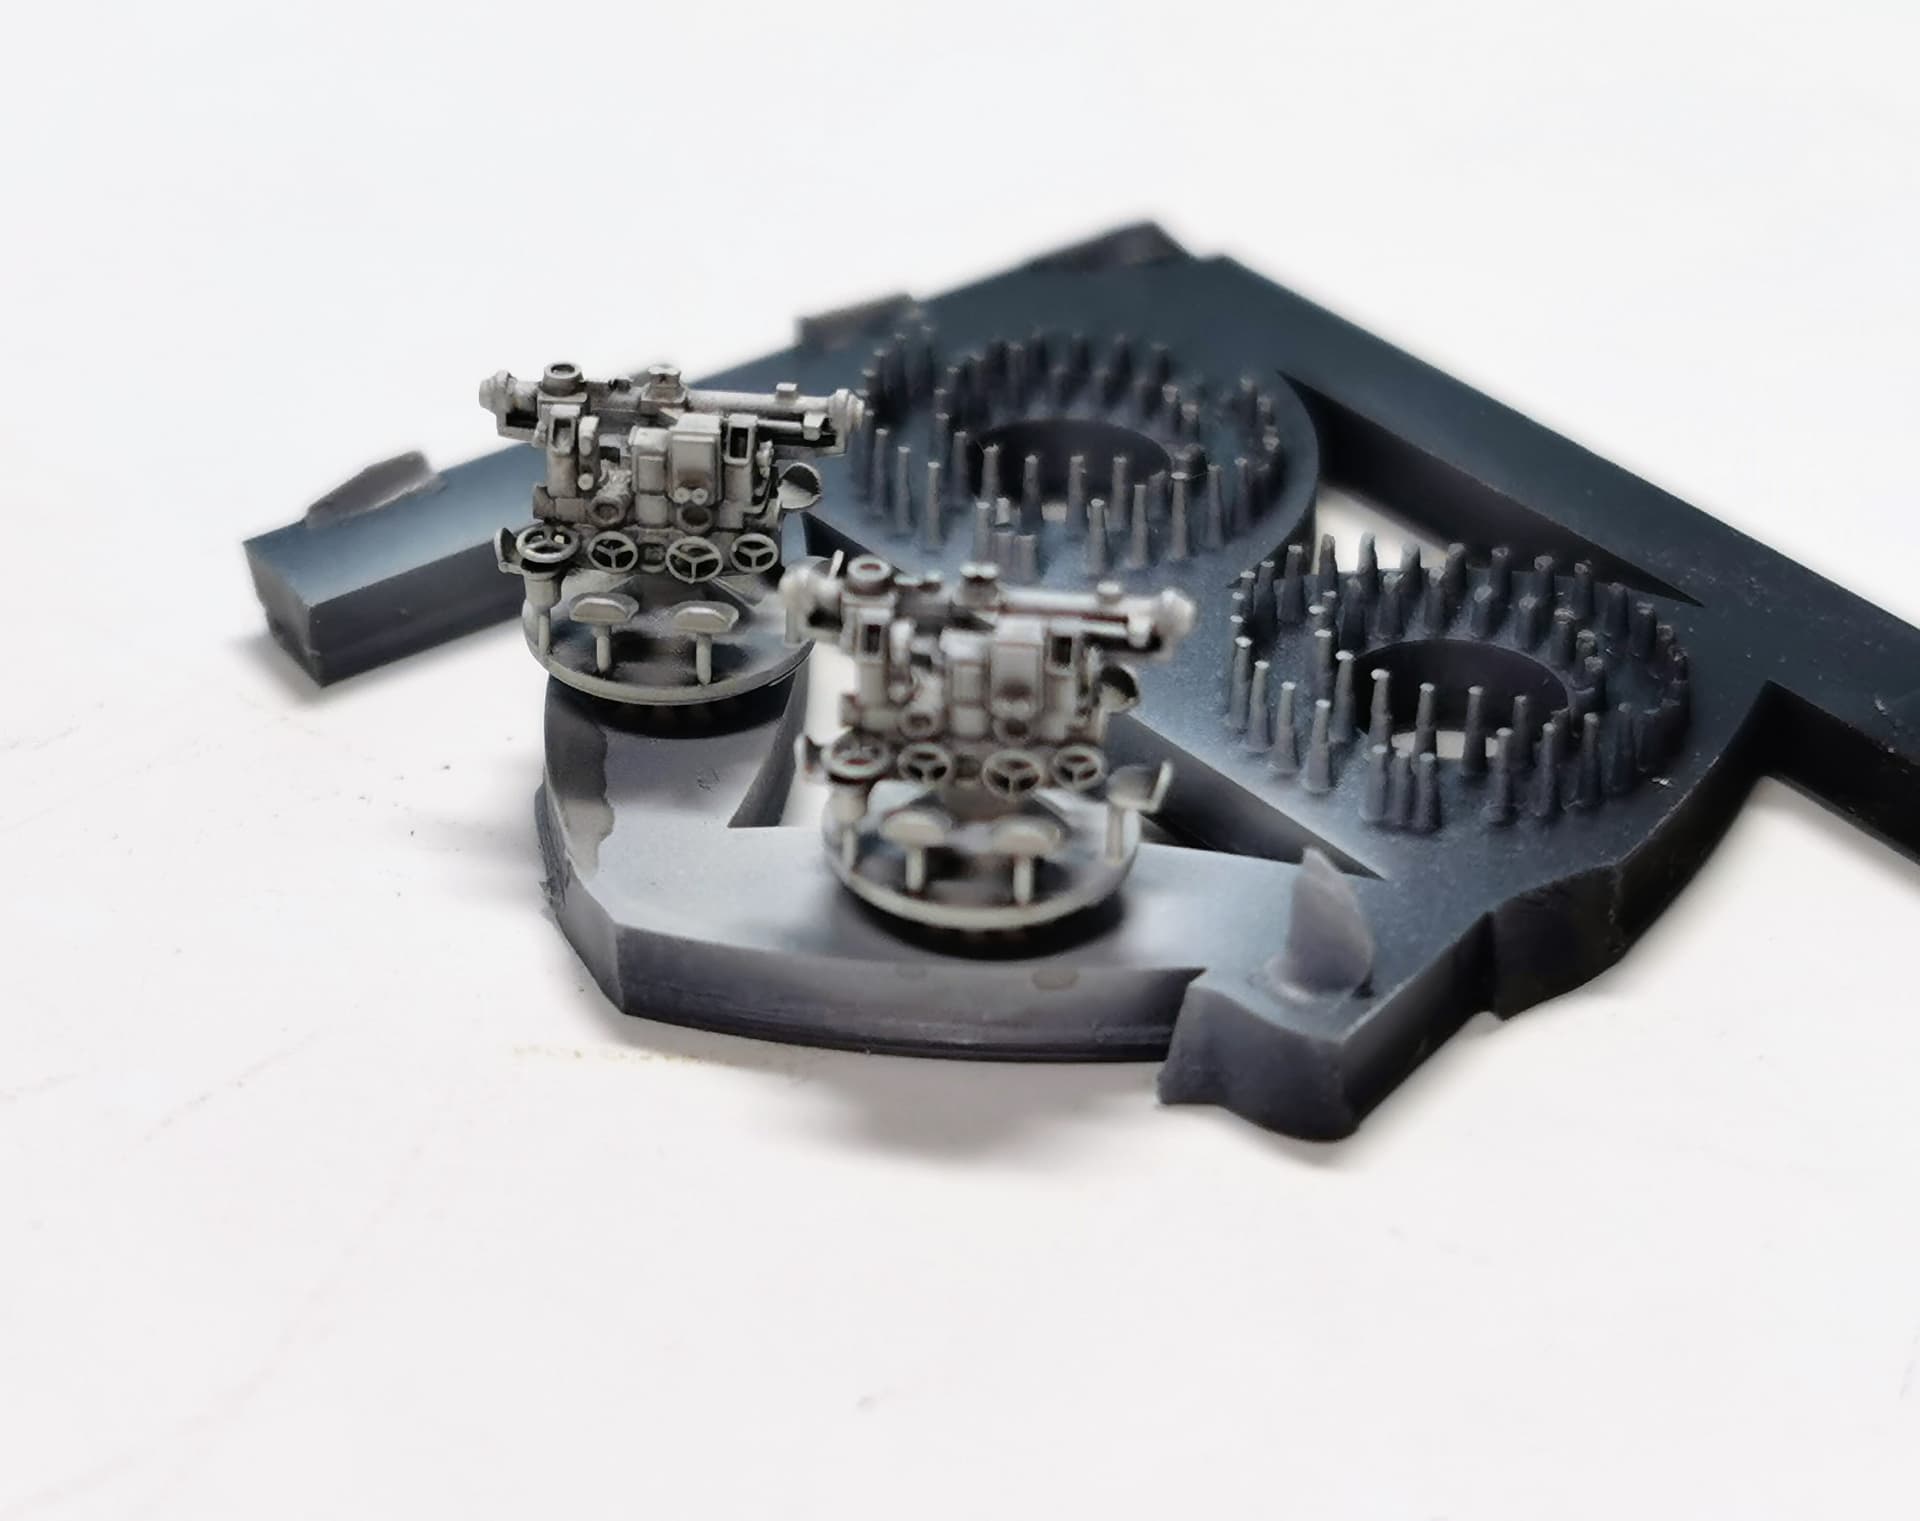
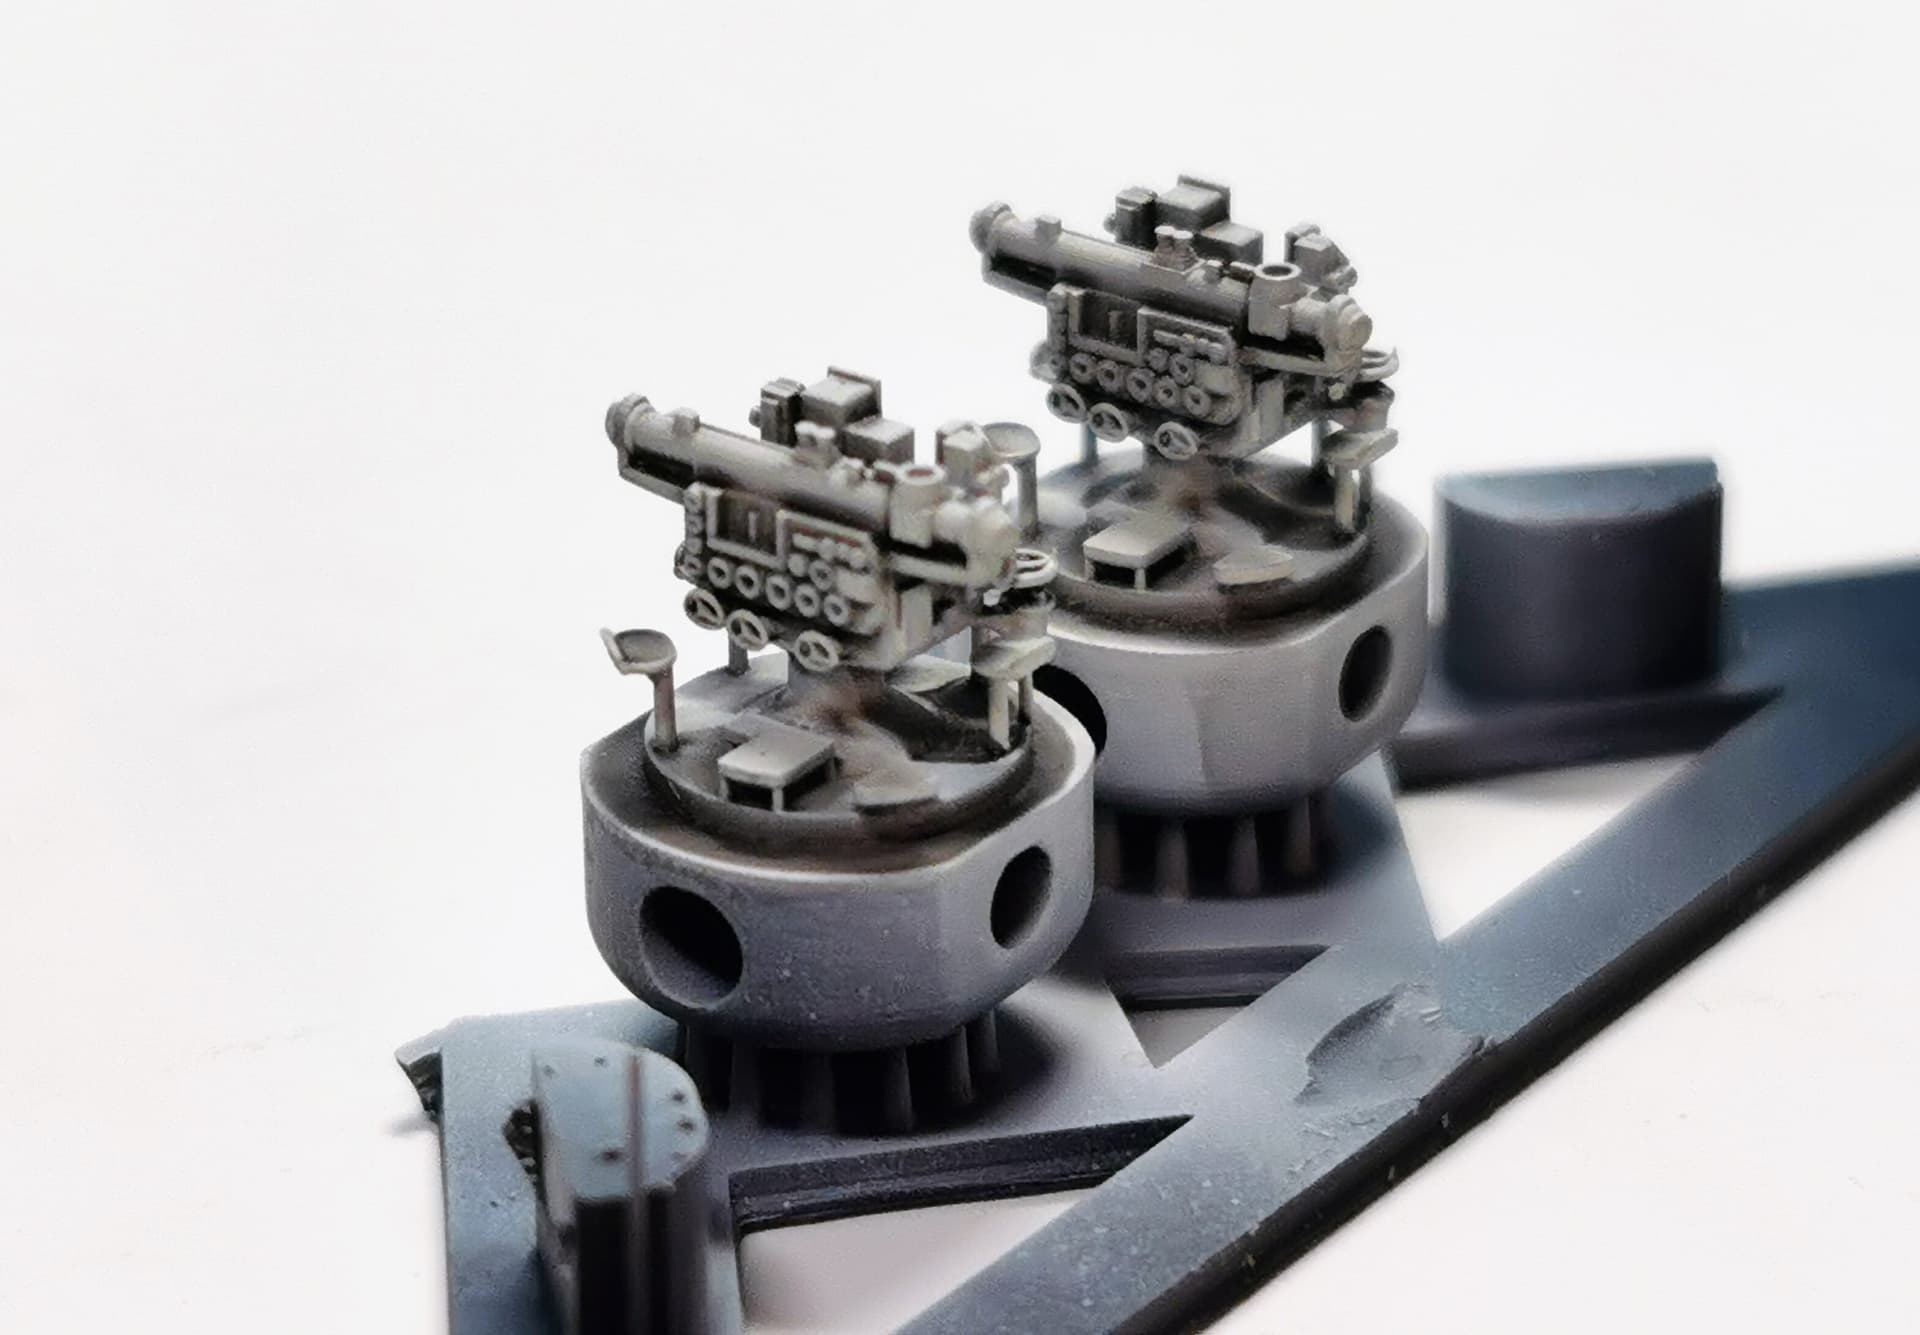
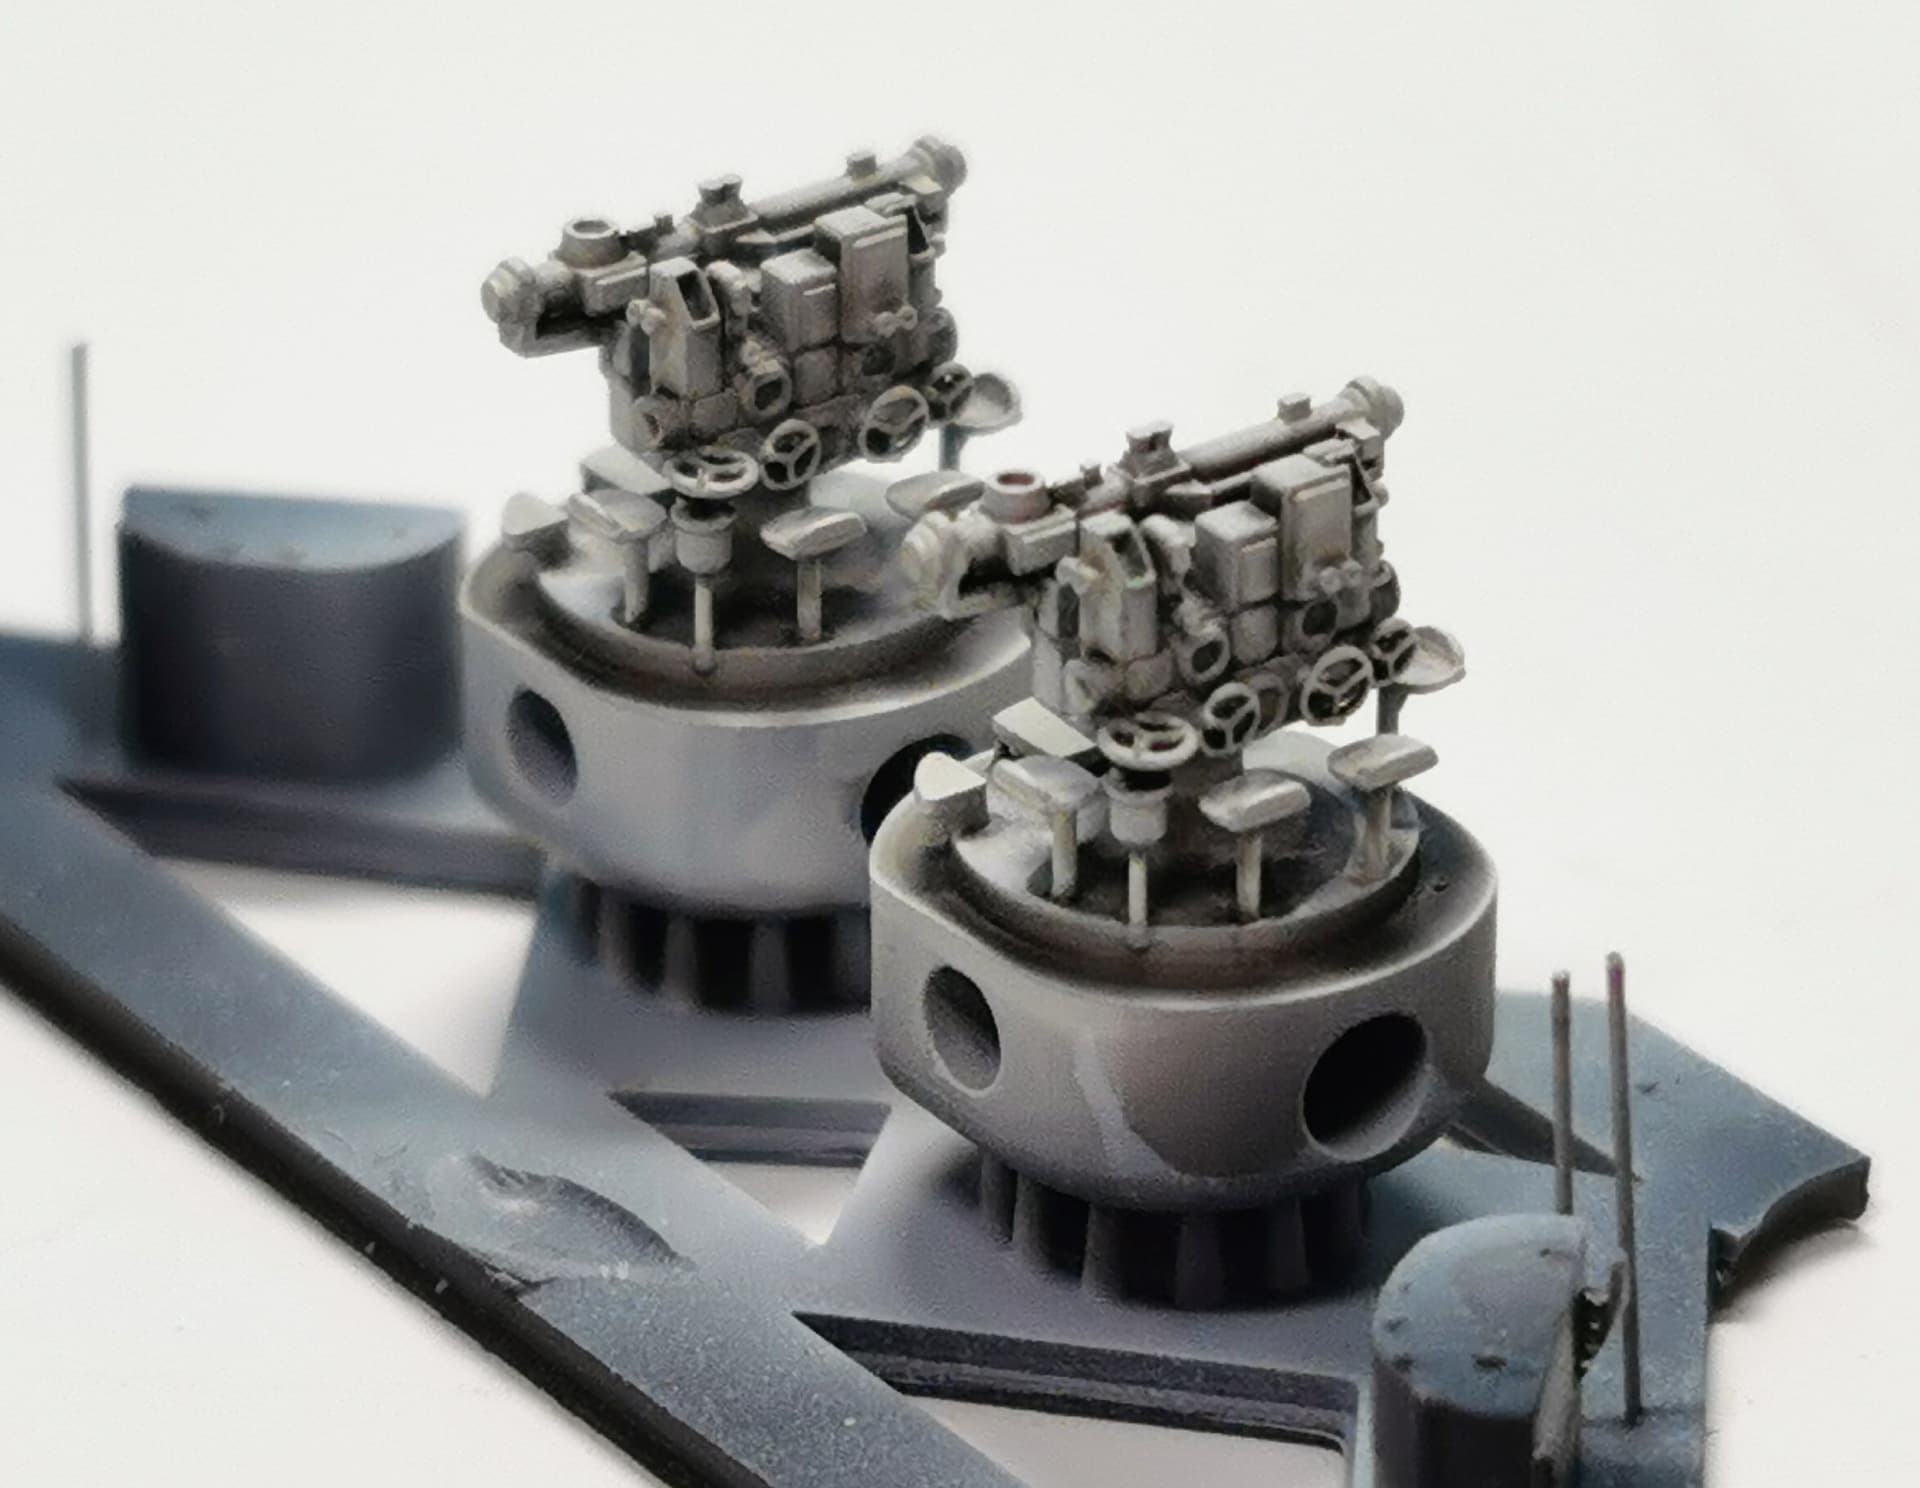
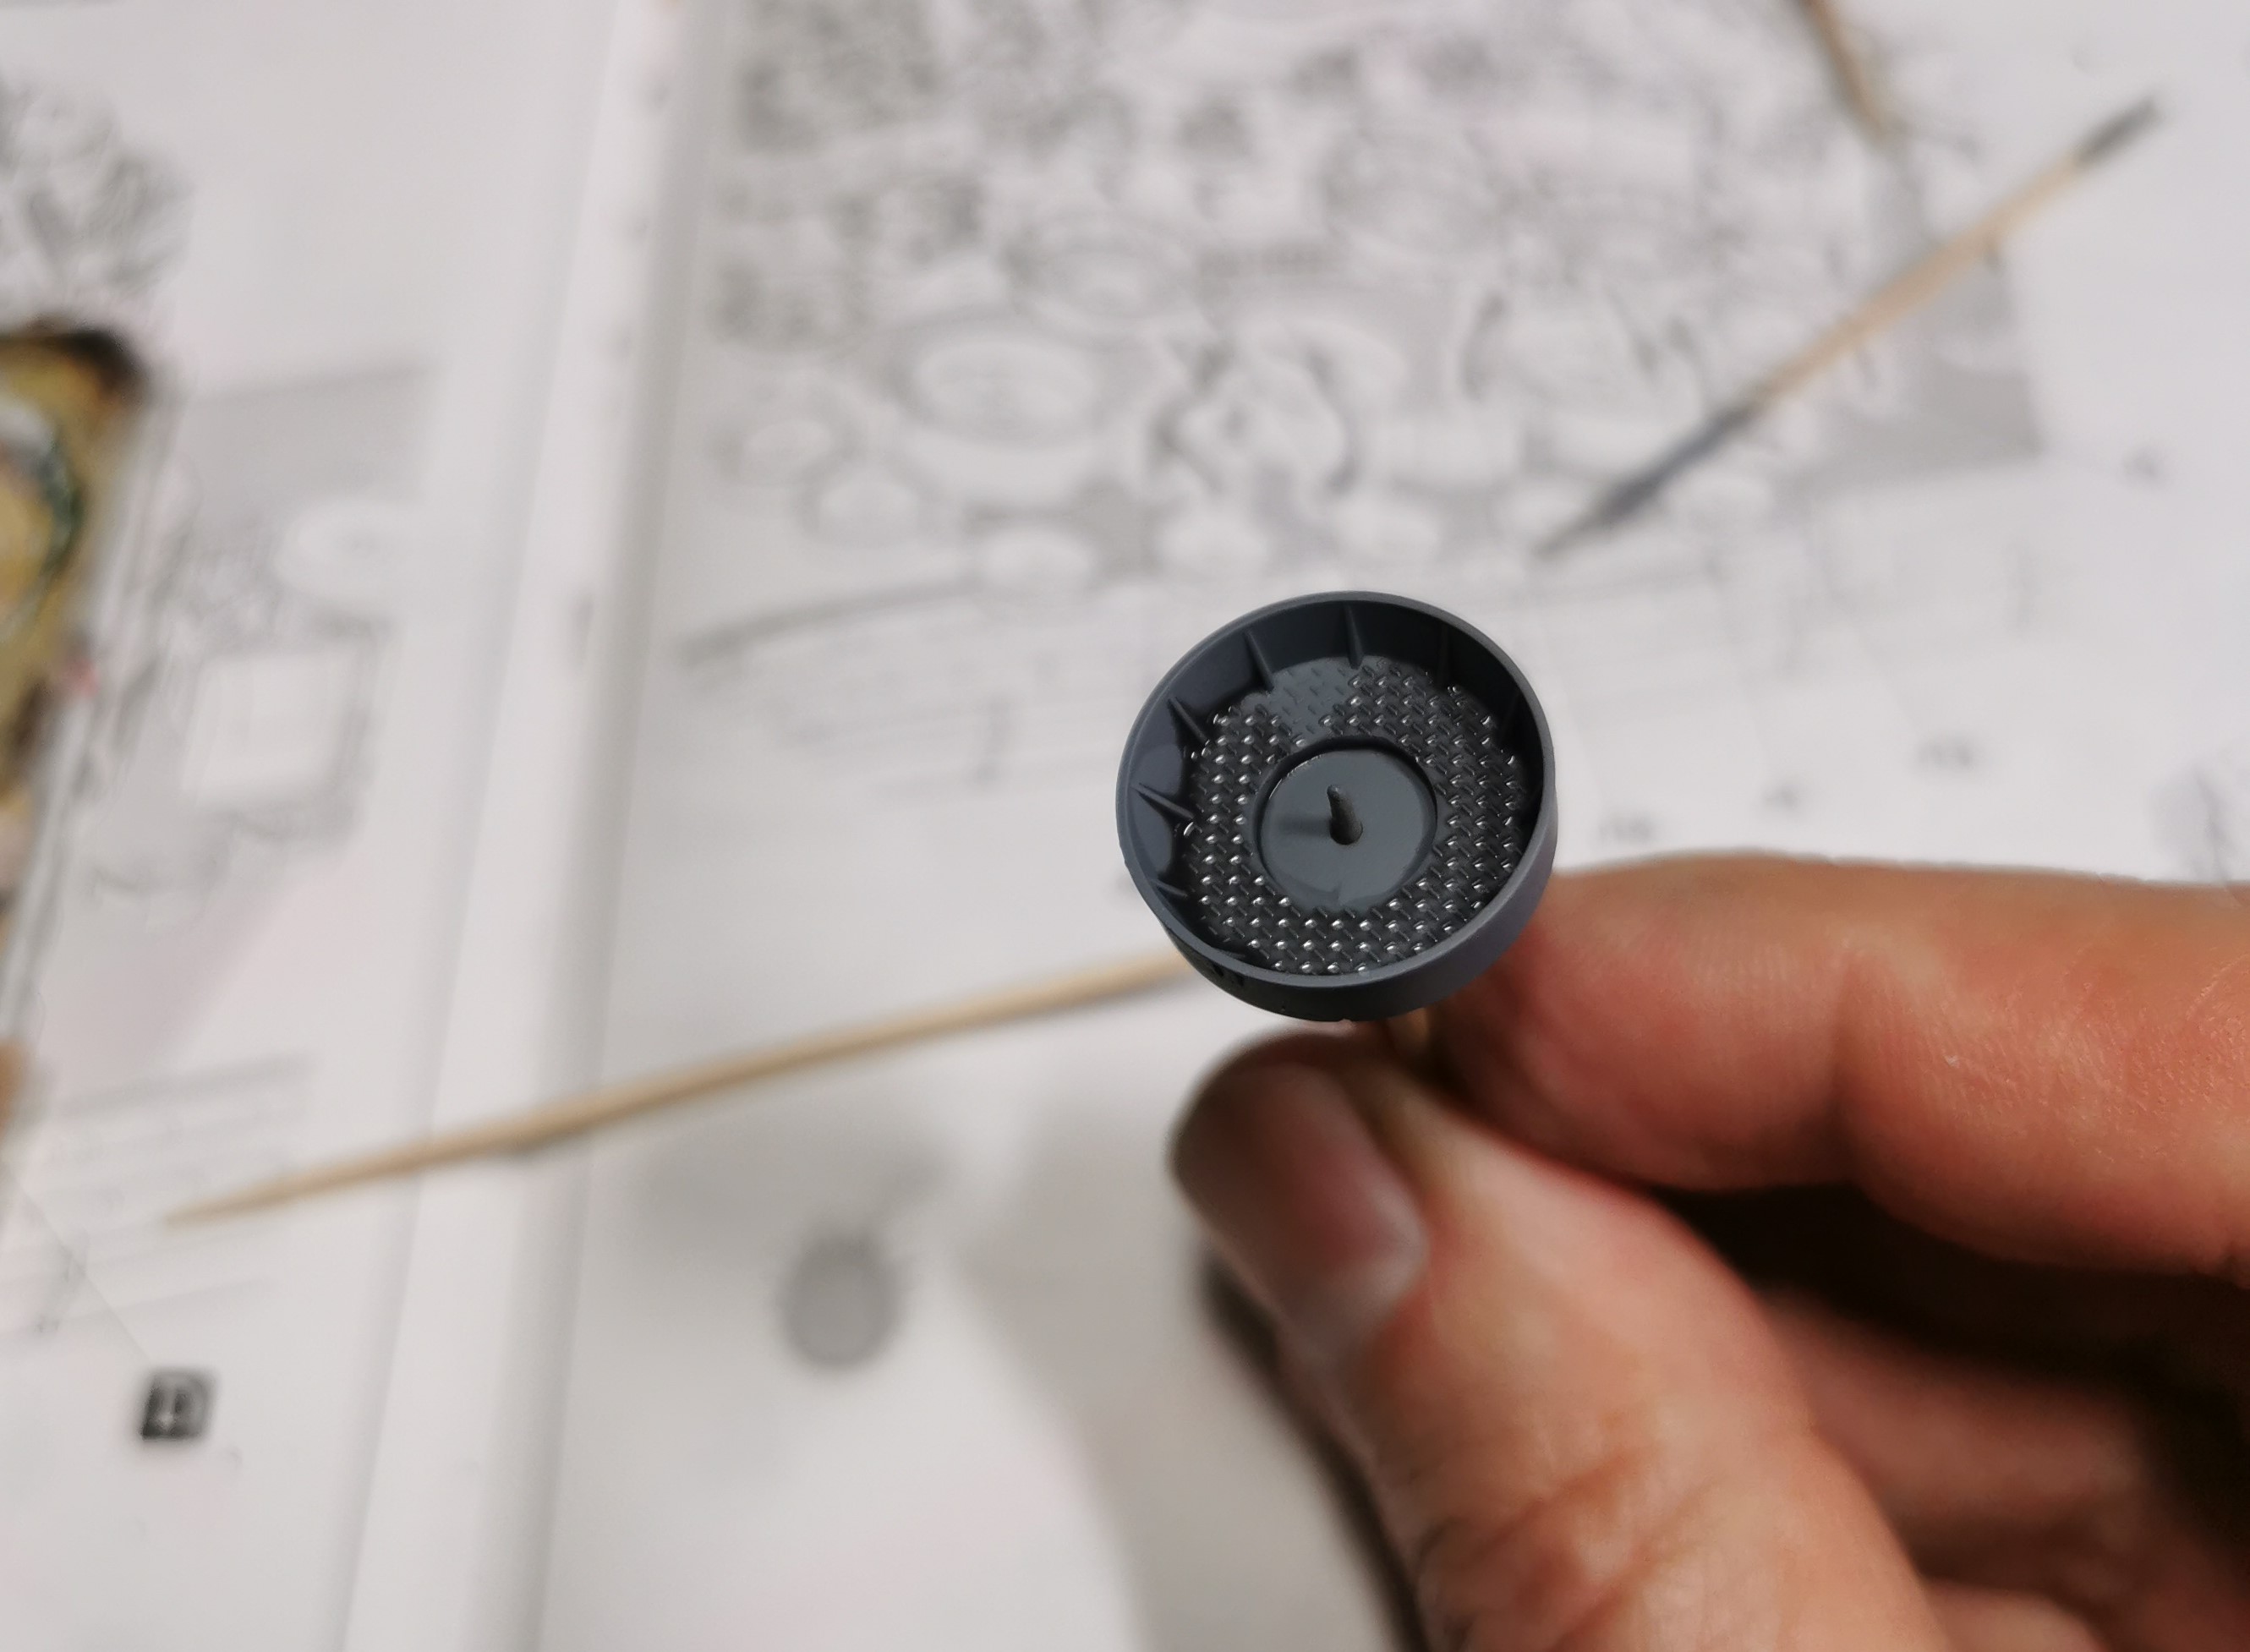
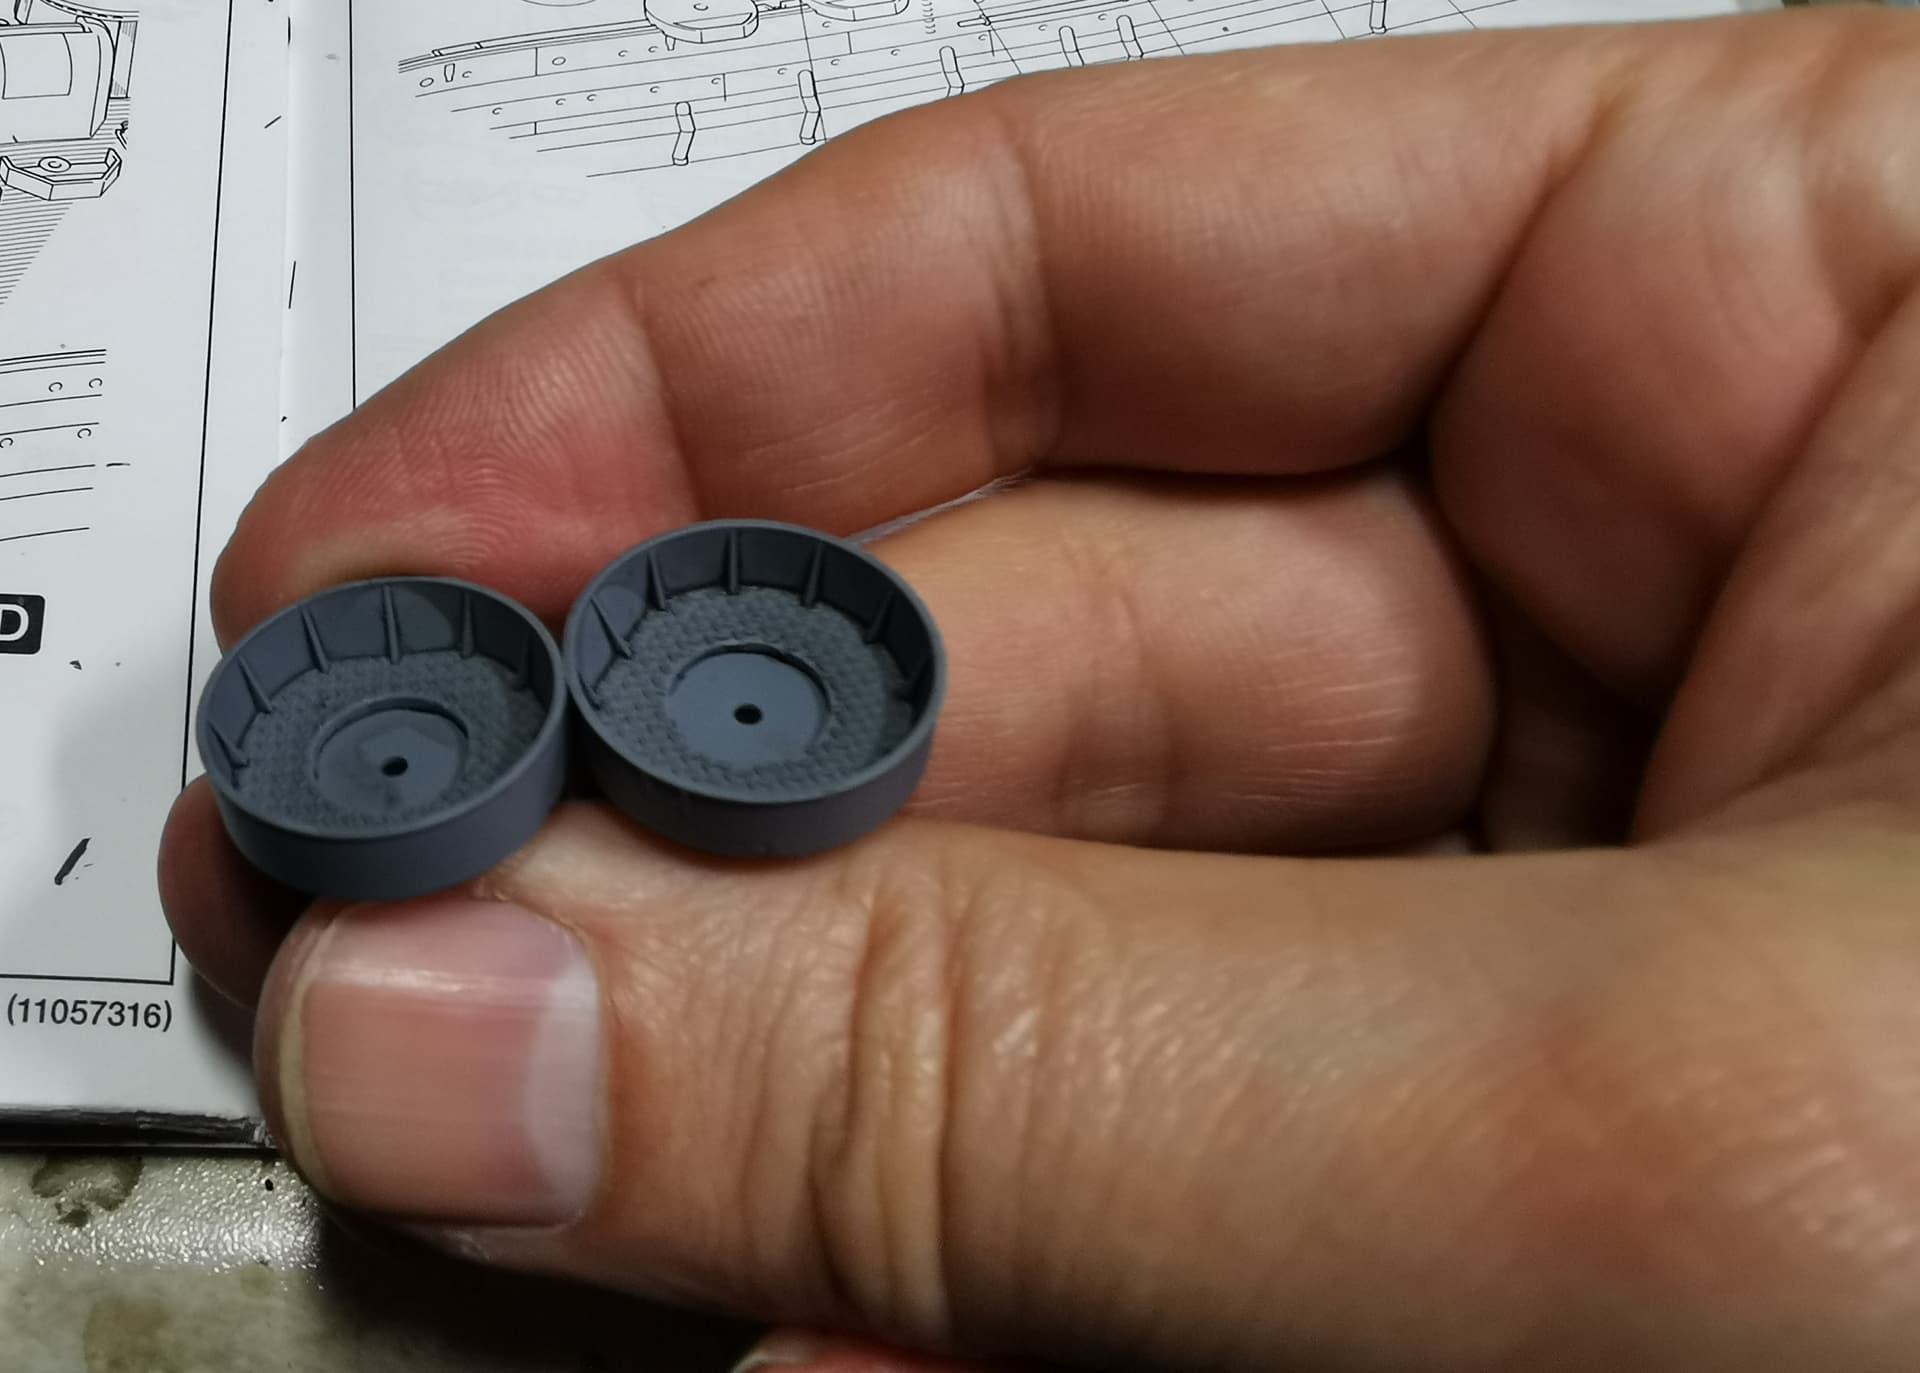
I spraypainted everything with Kure grey and treated everything with Black glaze and a careful drybrush with light grey. First were the tiny Type 95 Kai 1 machine gun control towers and their inner life
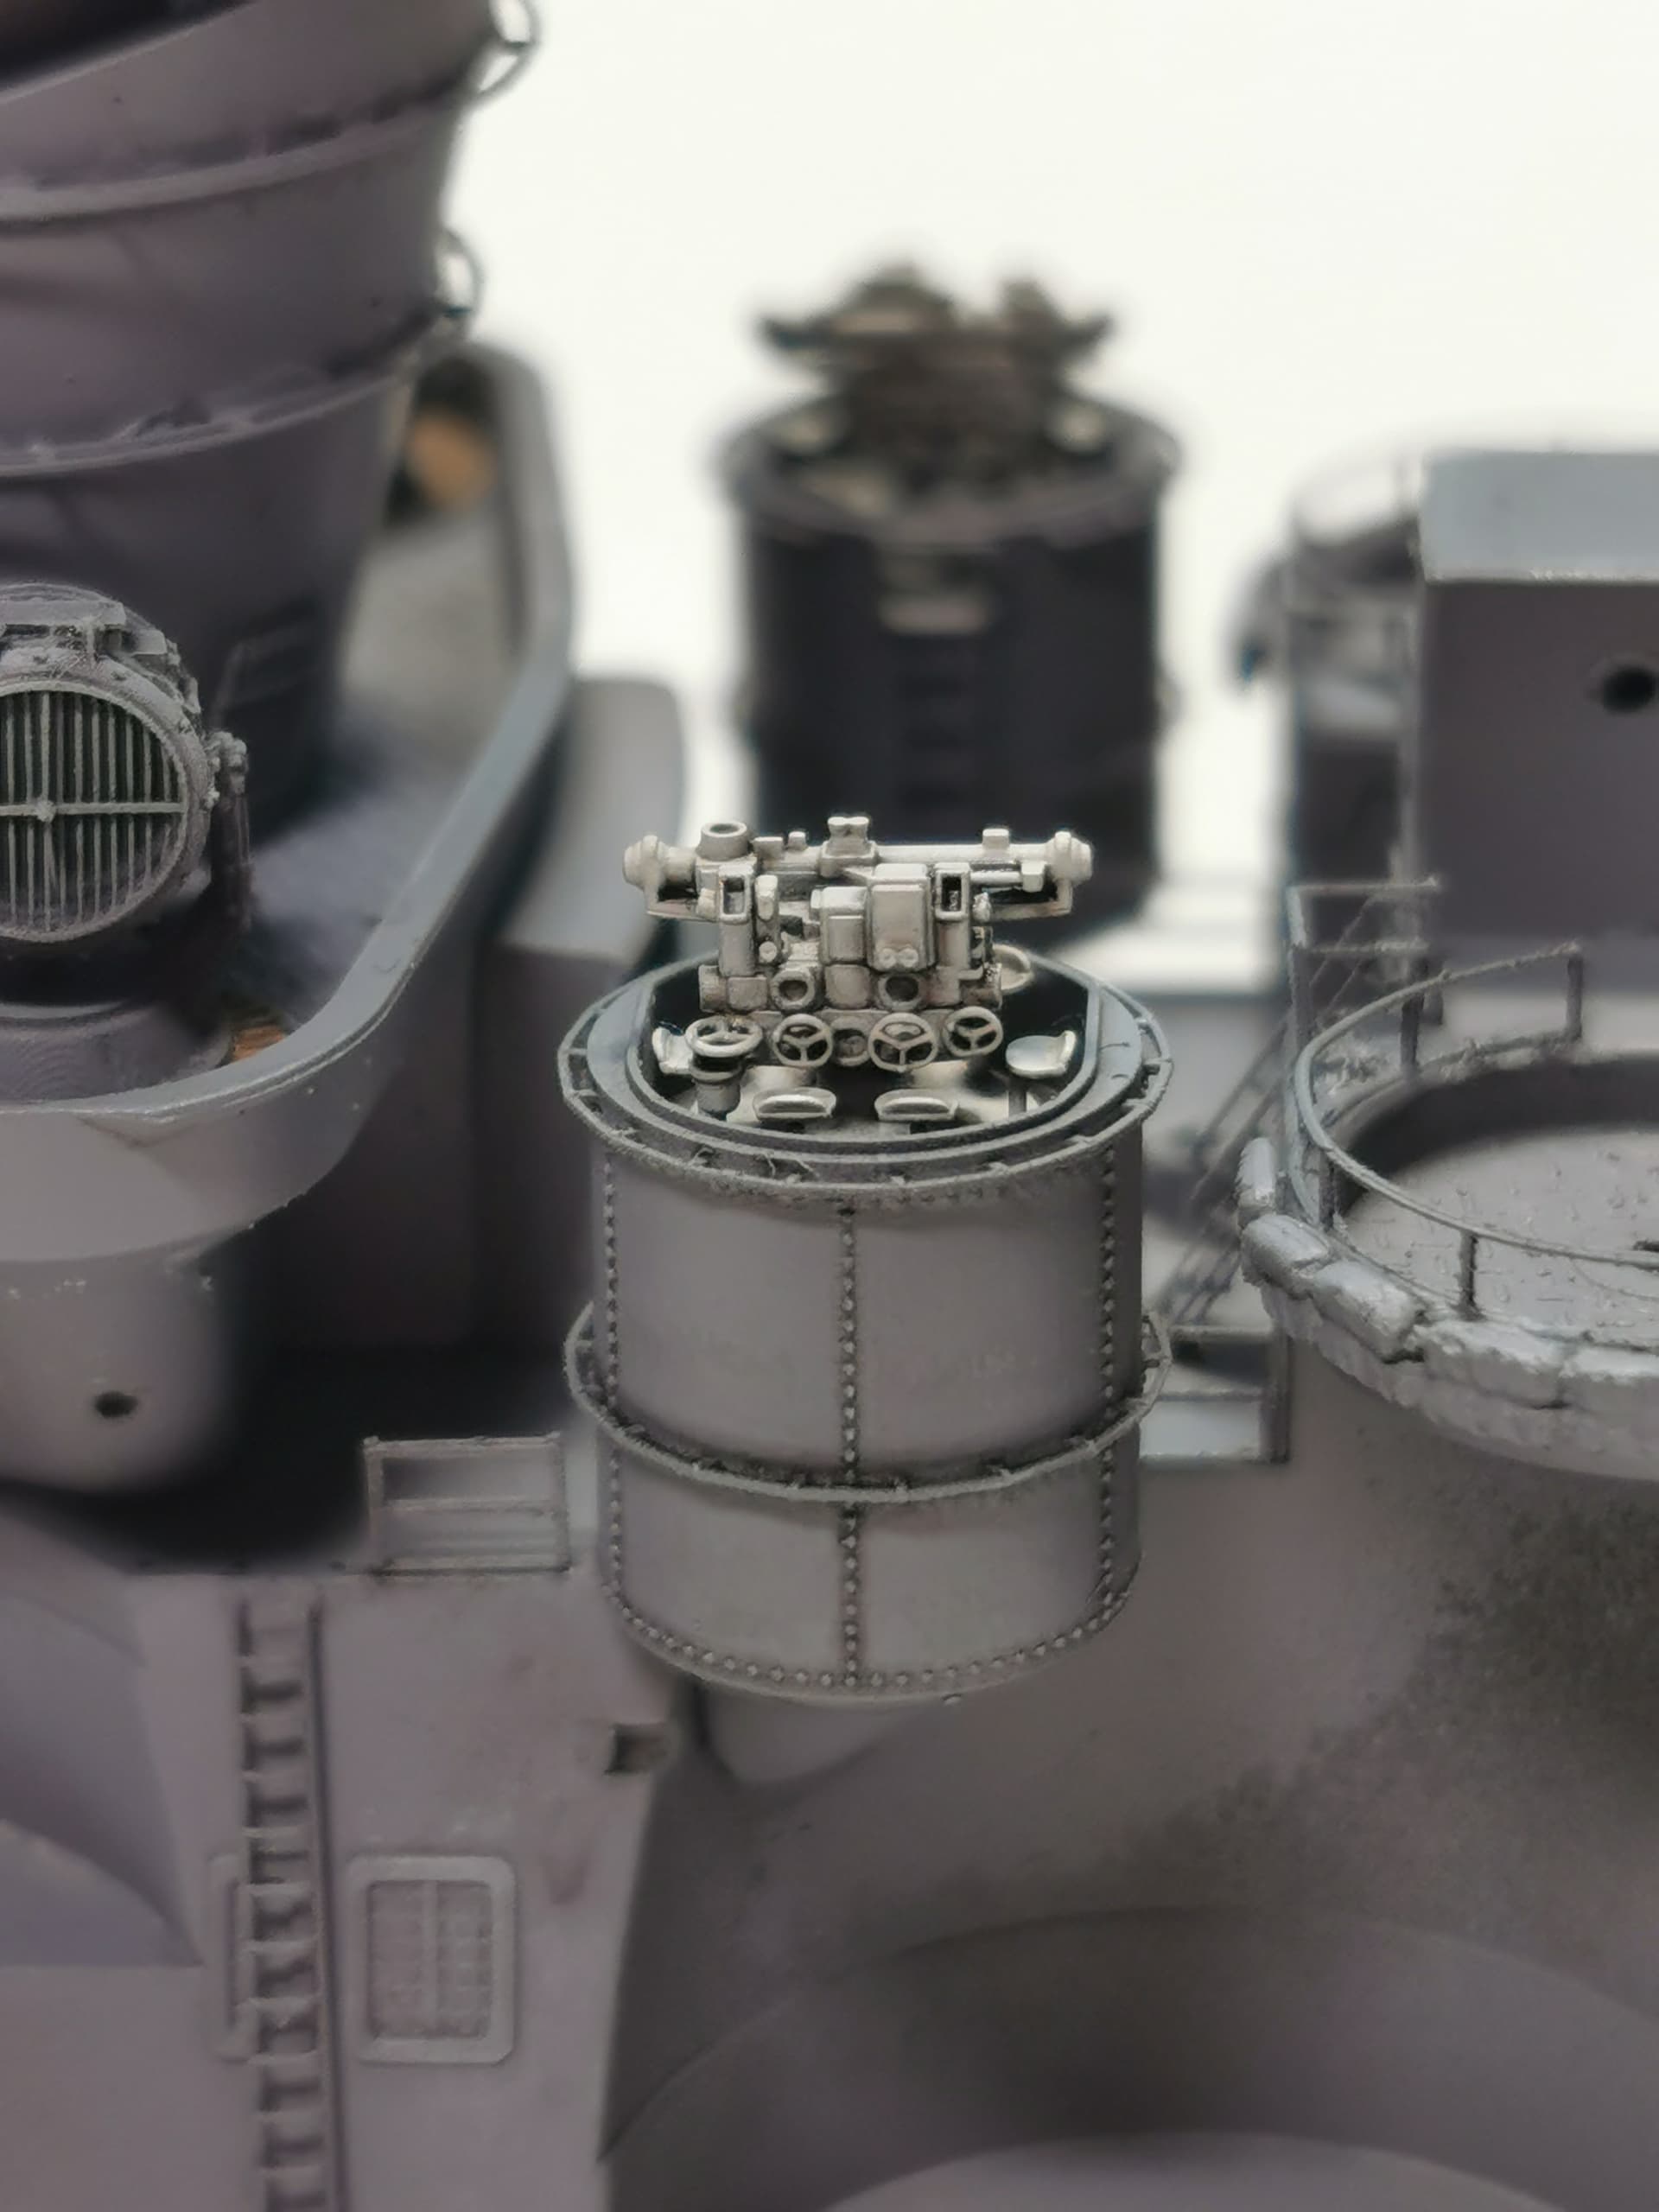
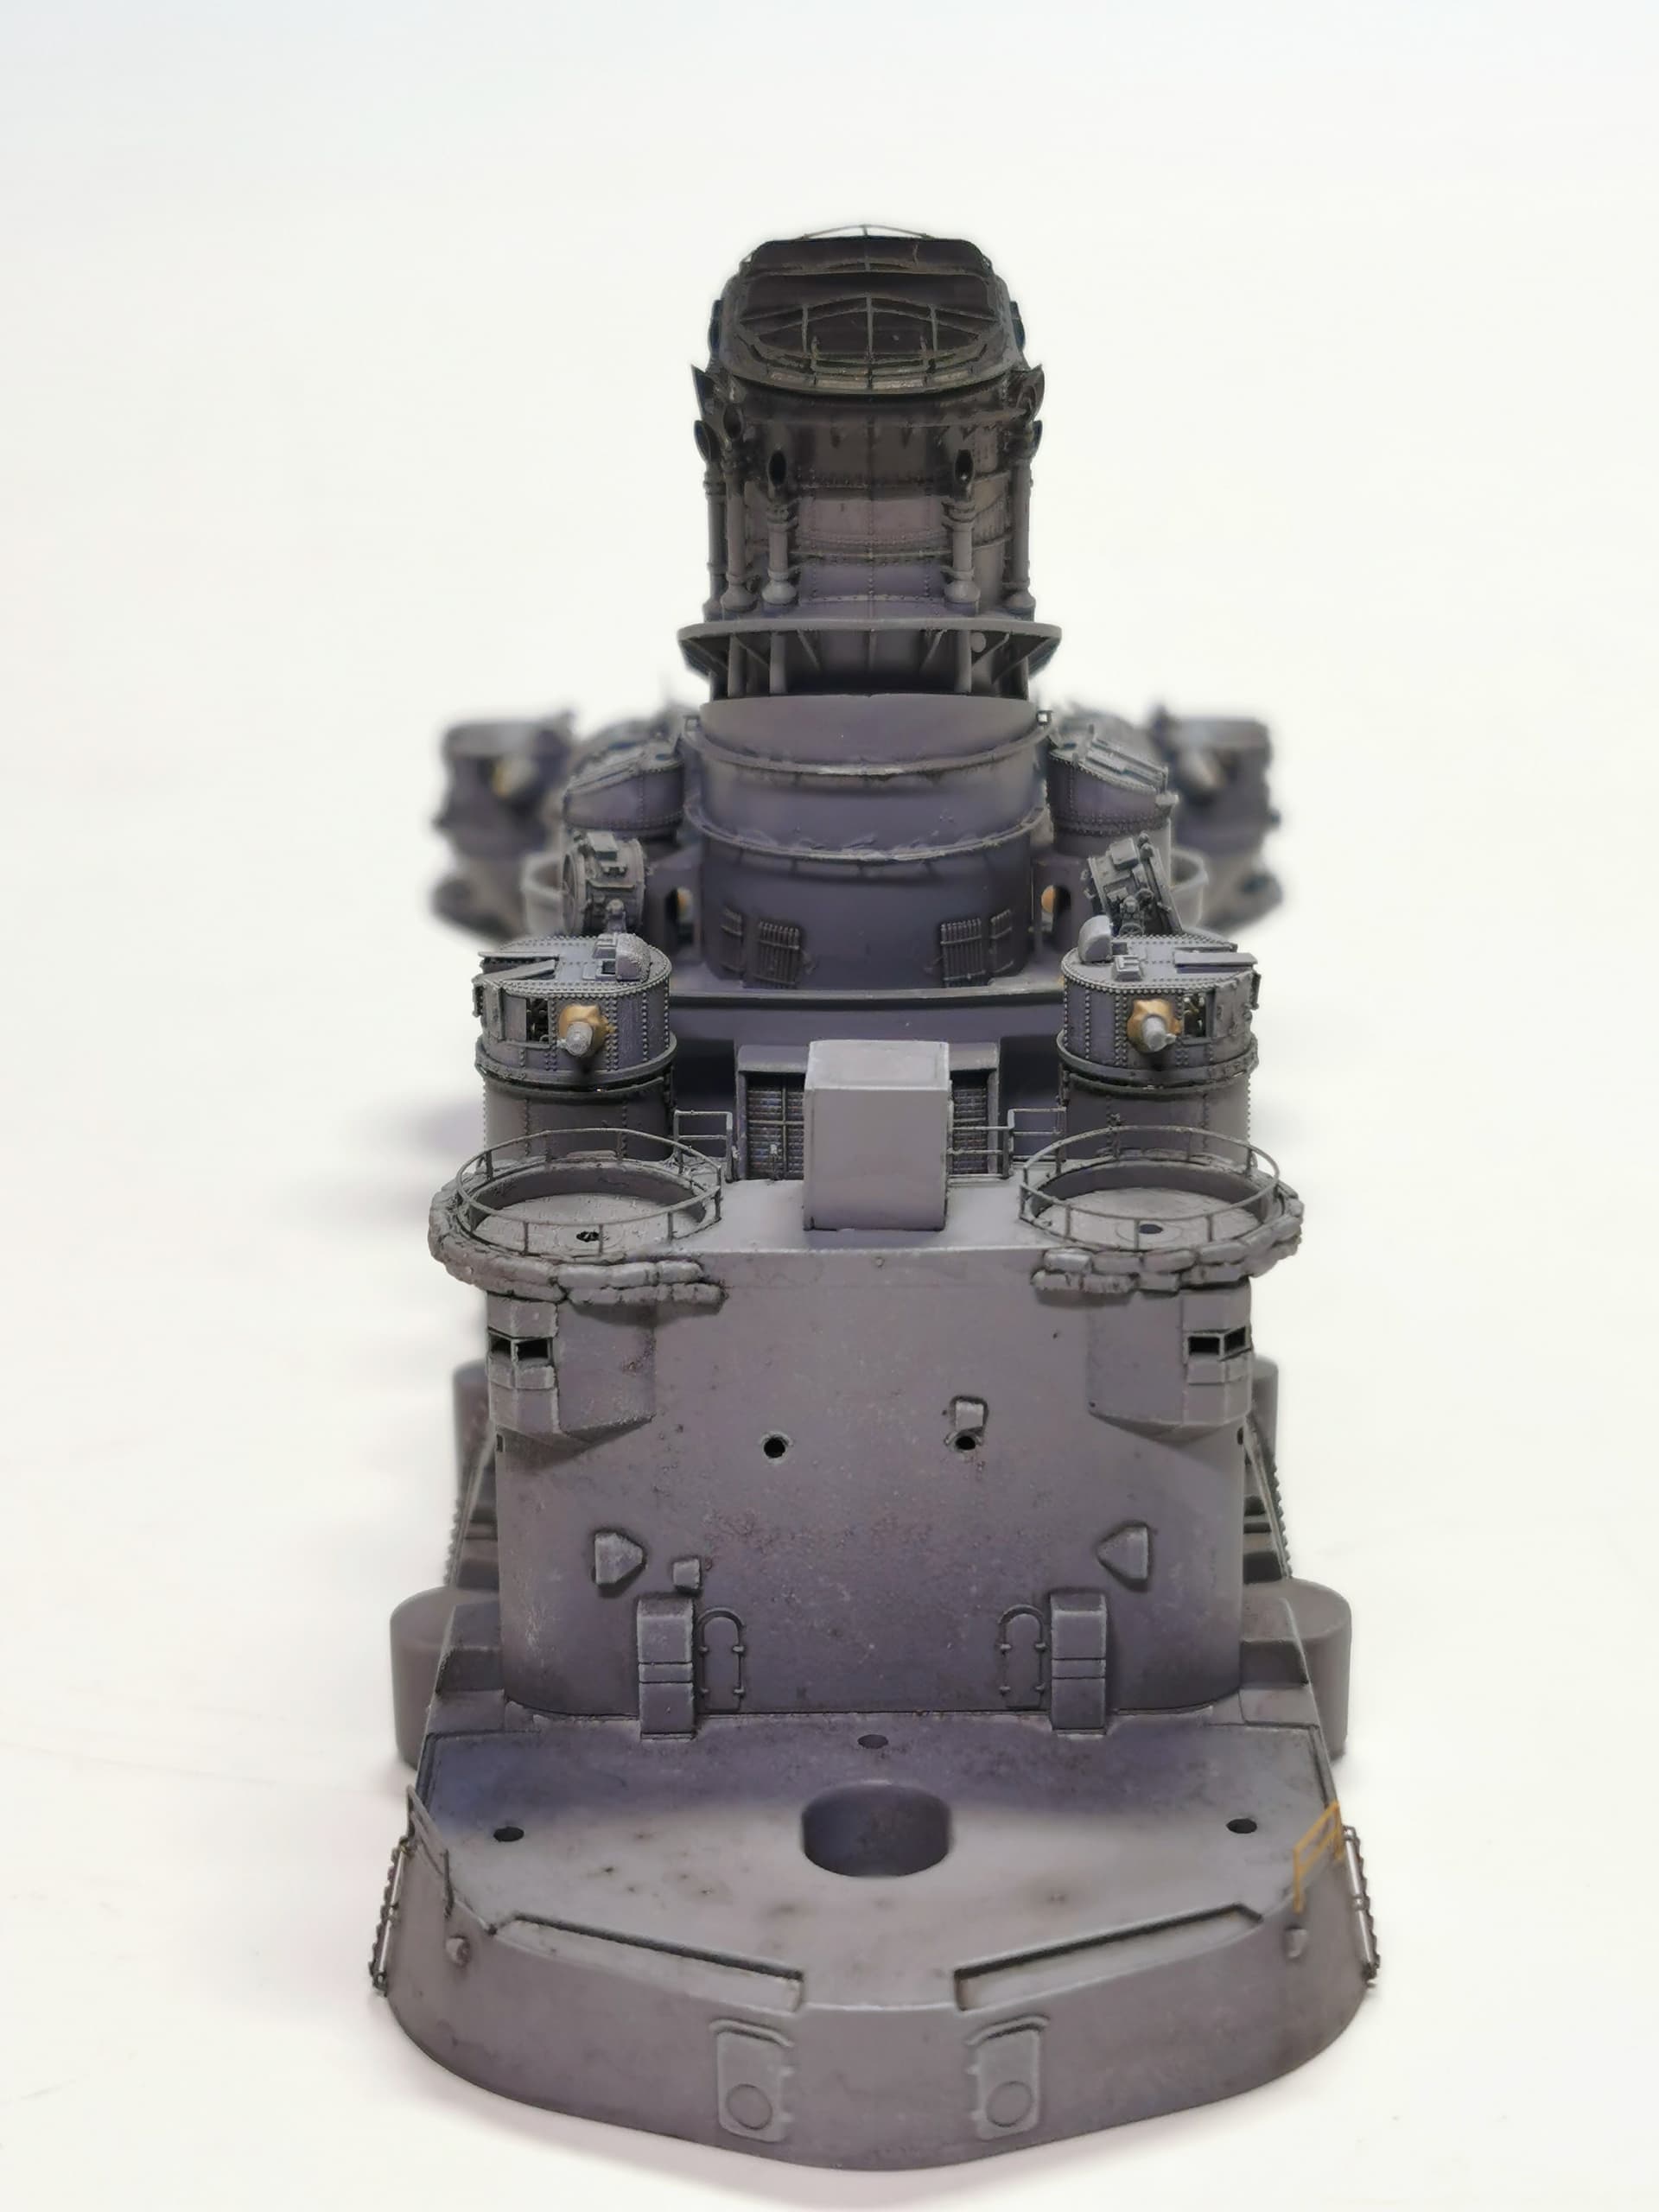
I applied the white painted chrysanthemum crest at the funnel which was carried during Yamato´s last sortie, glued the funnel on top of the base superstructure and fixed all these tiny searchlights and turrets. During this works the etched gangway between the funnel and the outer machine gun controllers broke apart had had to be fixed again but now everything is finished.
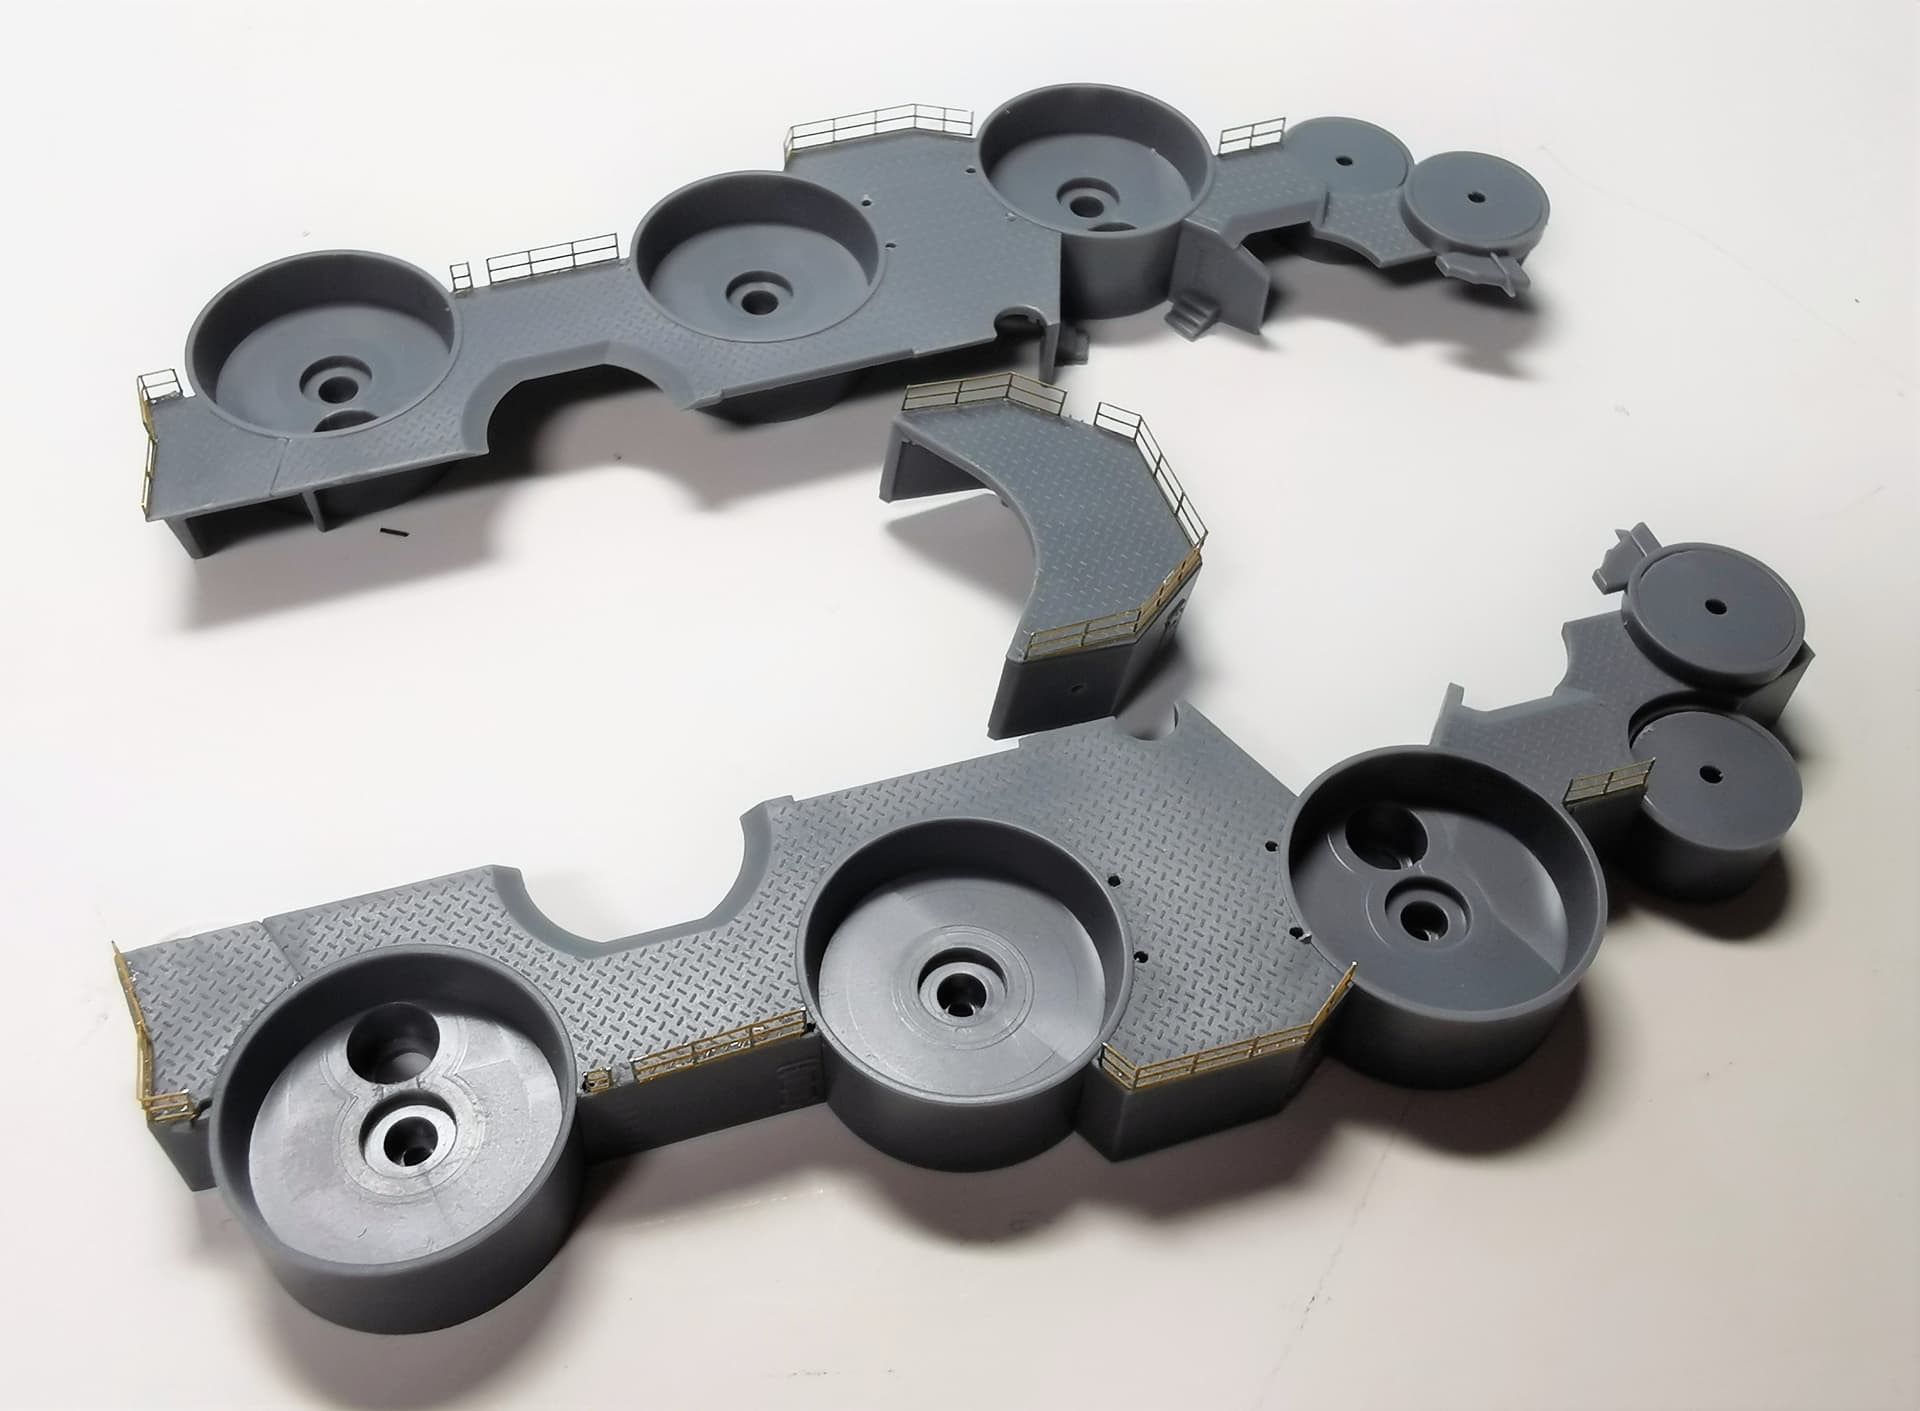
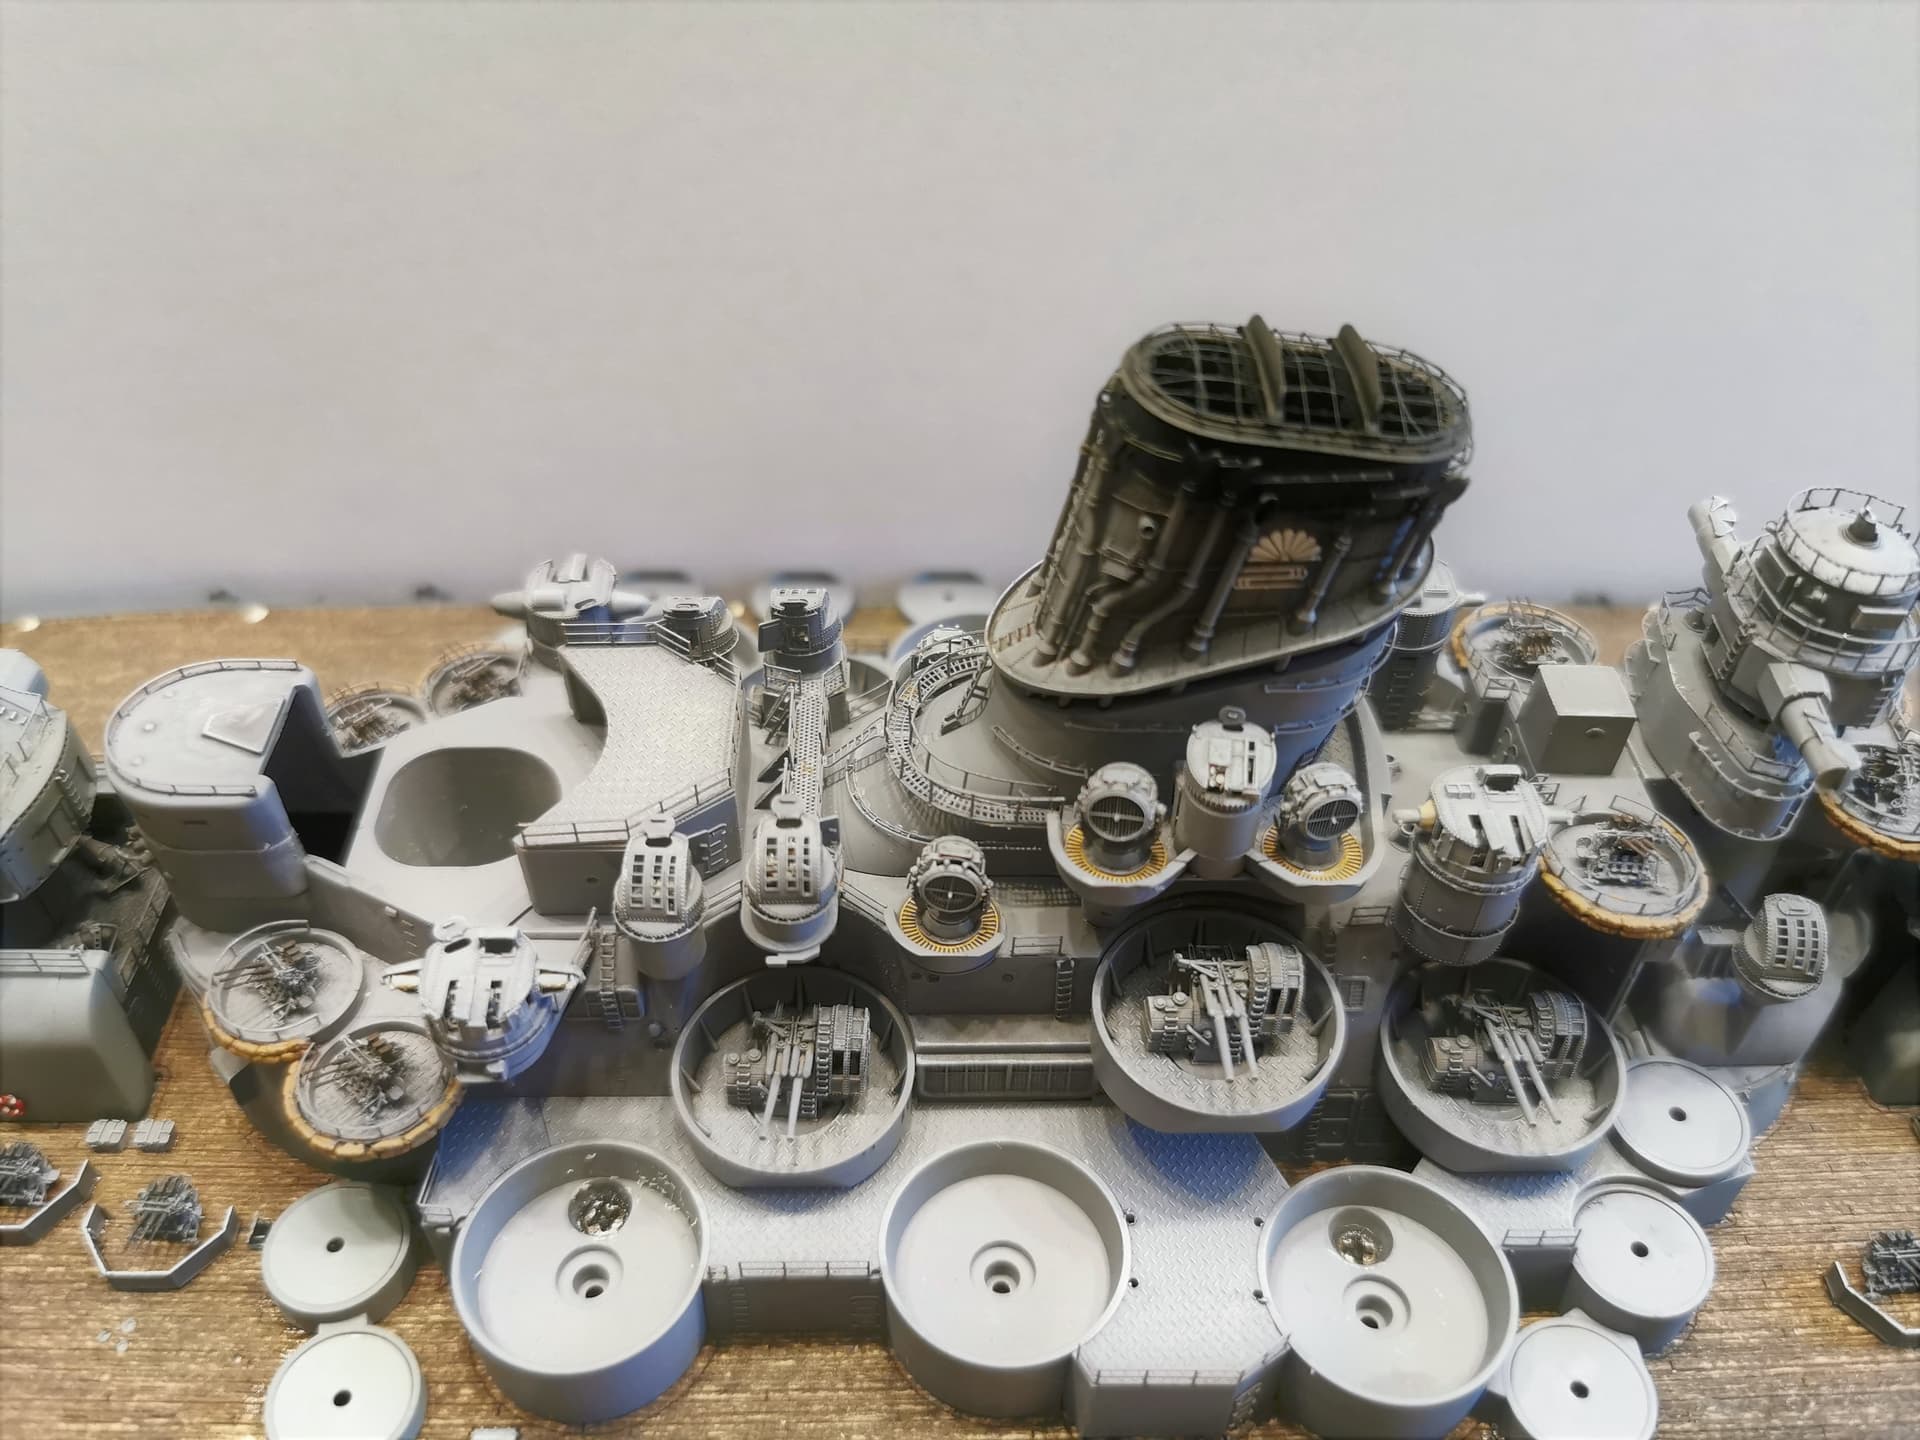
Next will be painting those sisal bags, producing even more triple AA-guns for the open emplacements and fix the superstructure and the gun belt structure atop the ship´s deck
Thomas, this beauty is looking better and better! I especially like the effect of your painting. The parts have depth and character without the excessive contrasts or heavy weathering so often seen.
Please, take a moment and give us a little tutorial on how you do your painting (what products you use, specific techniques, pitfalls, etc.) Inquiring minds want to know!
Thank you all again for your attention and the great comments
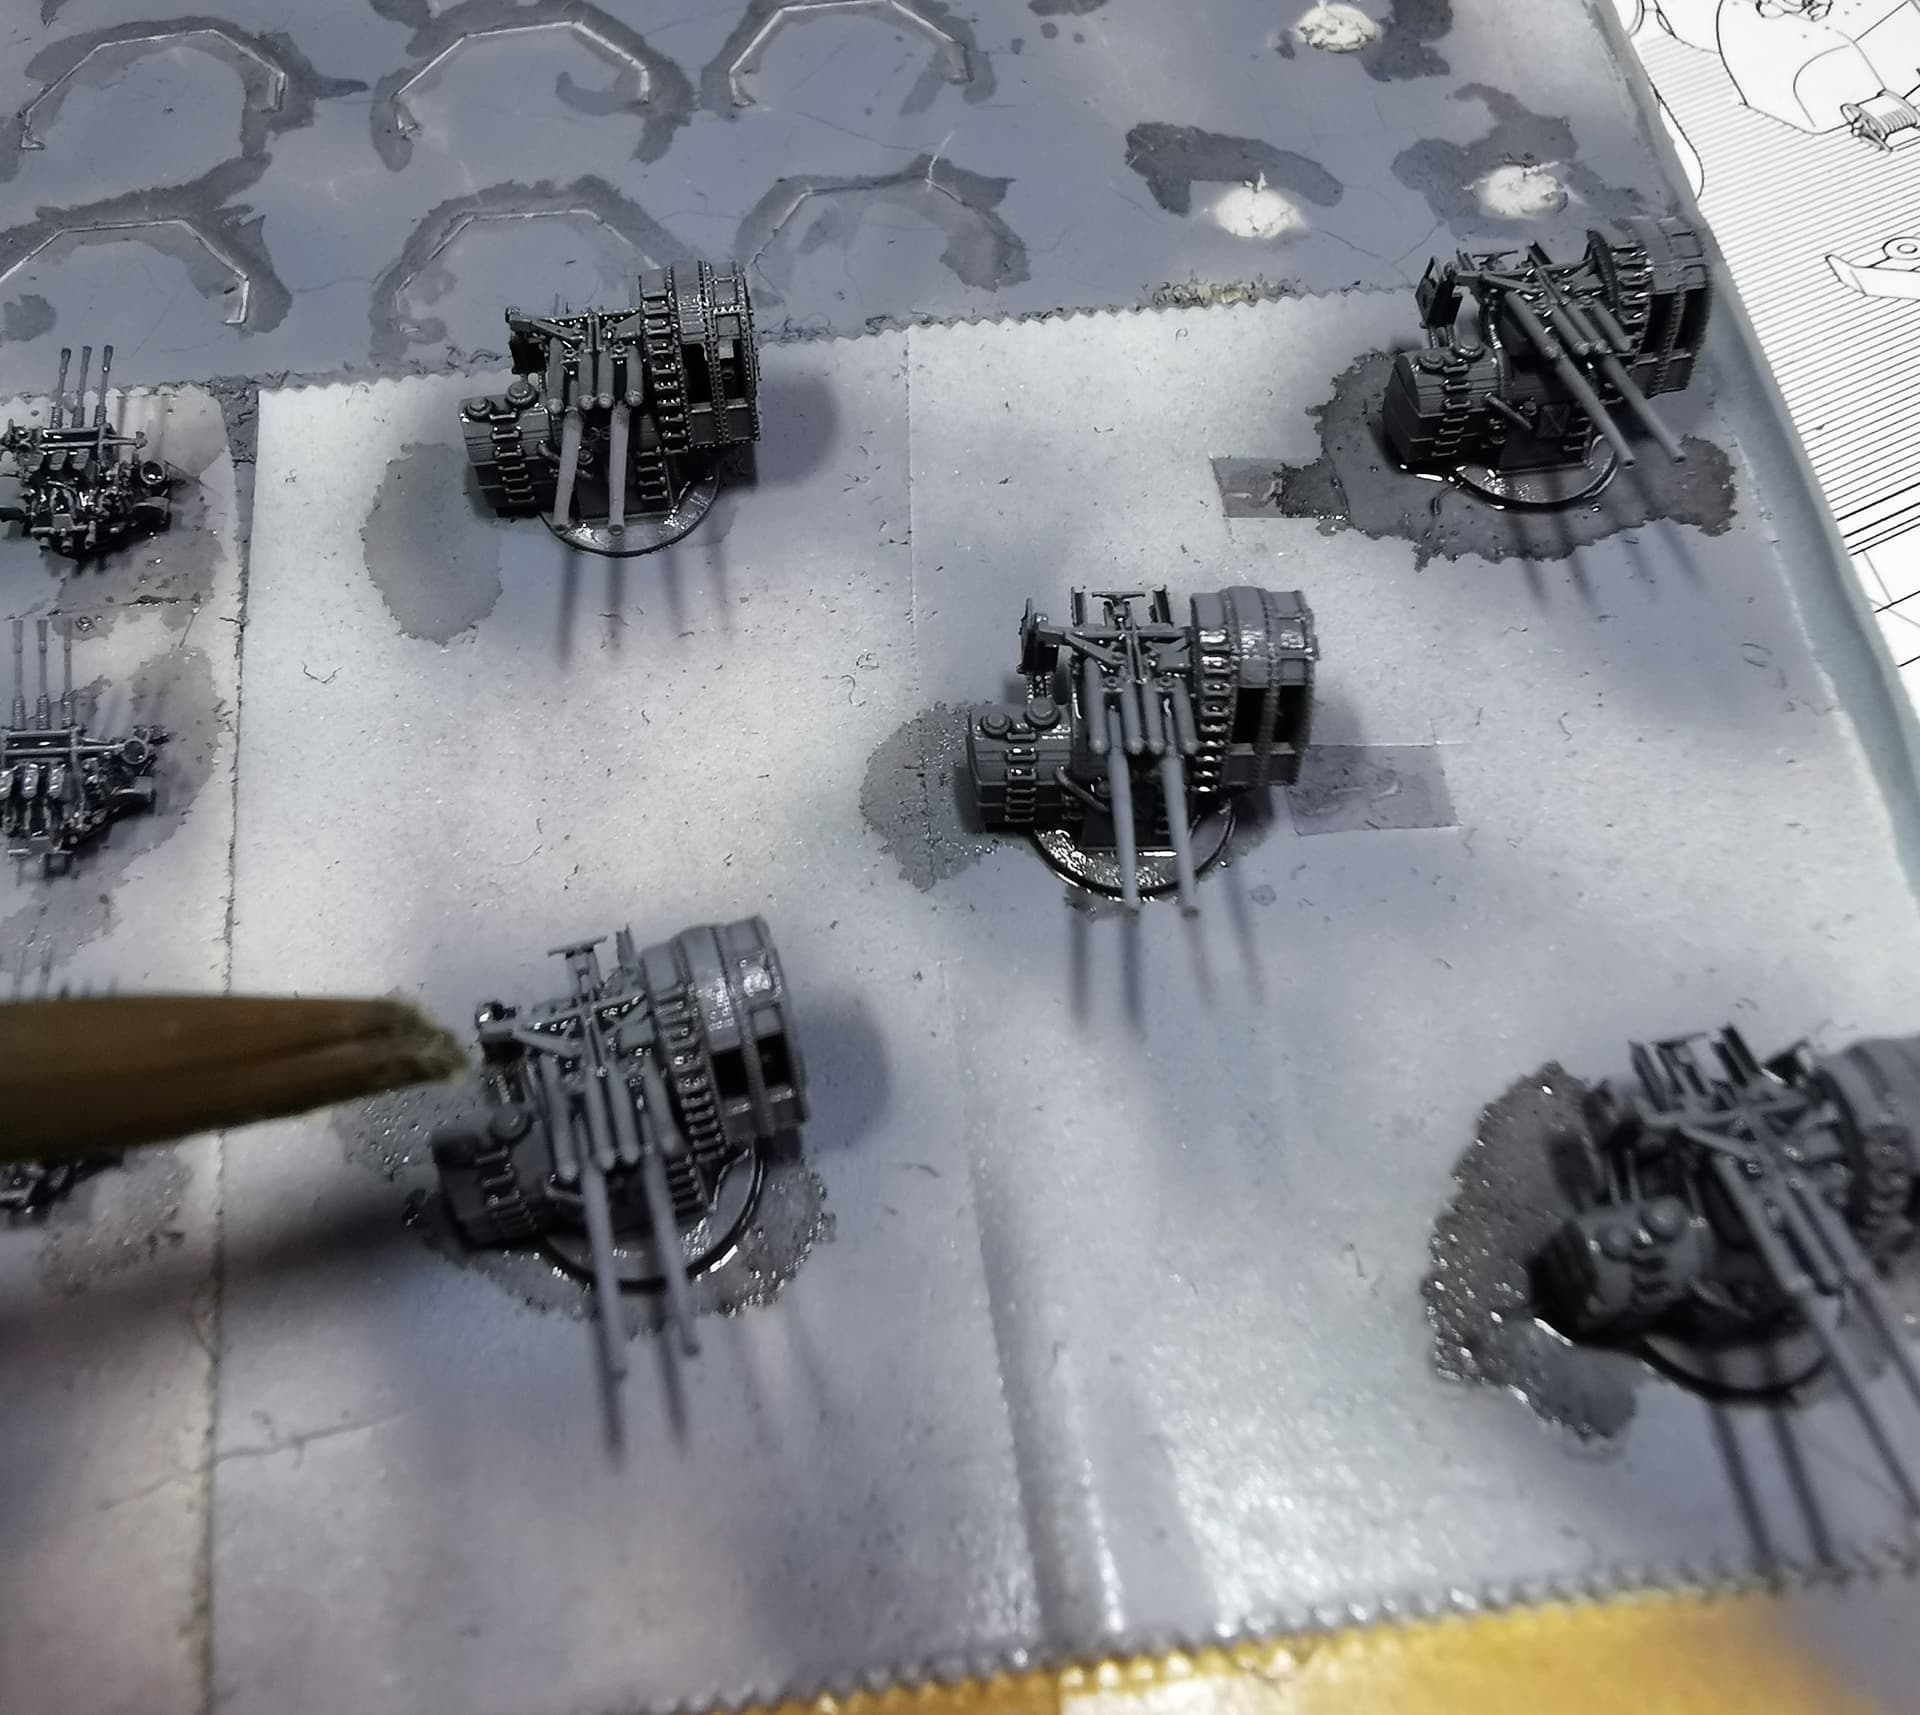
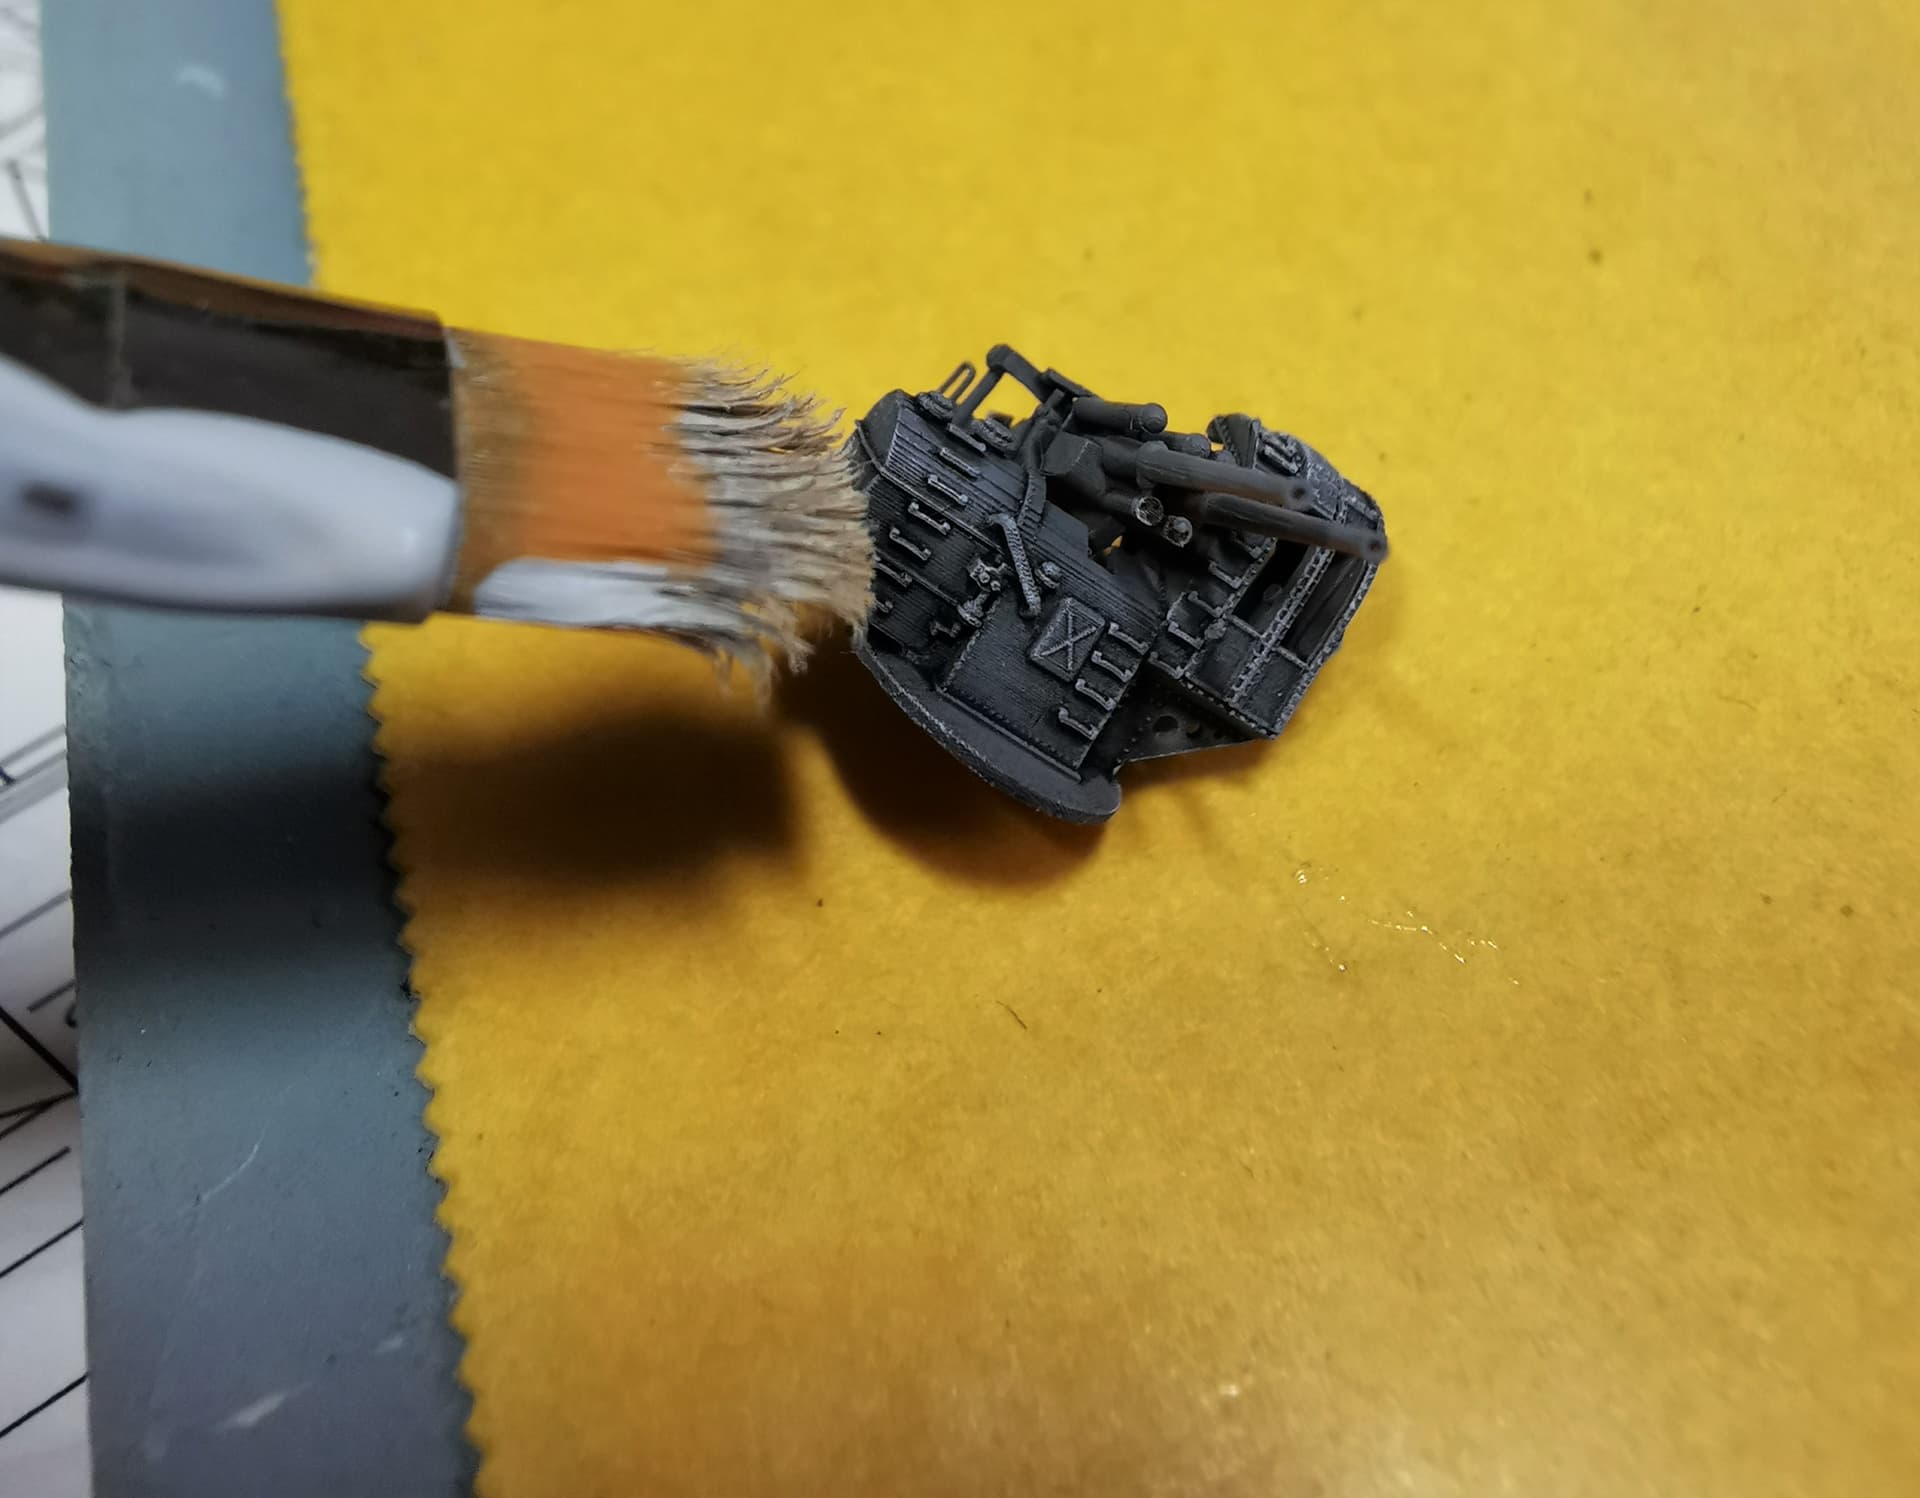
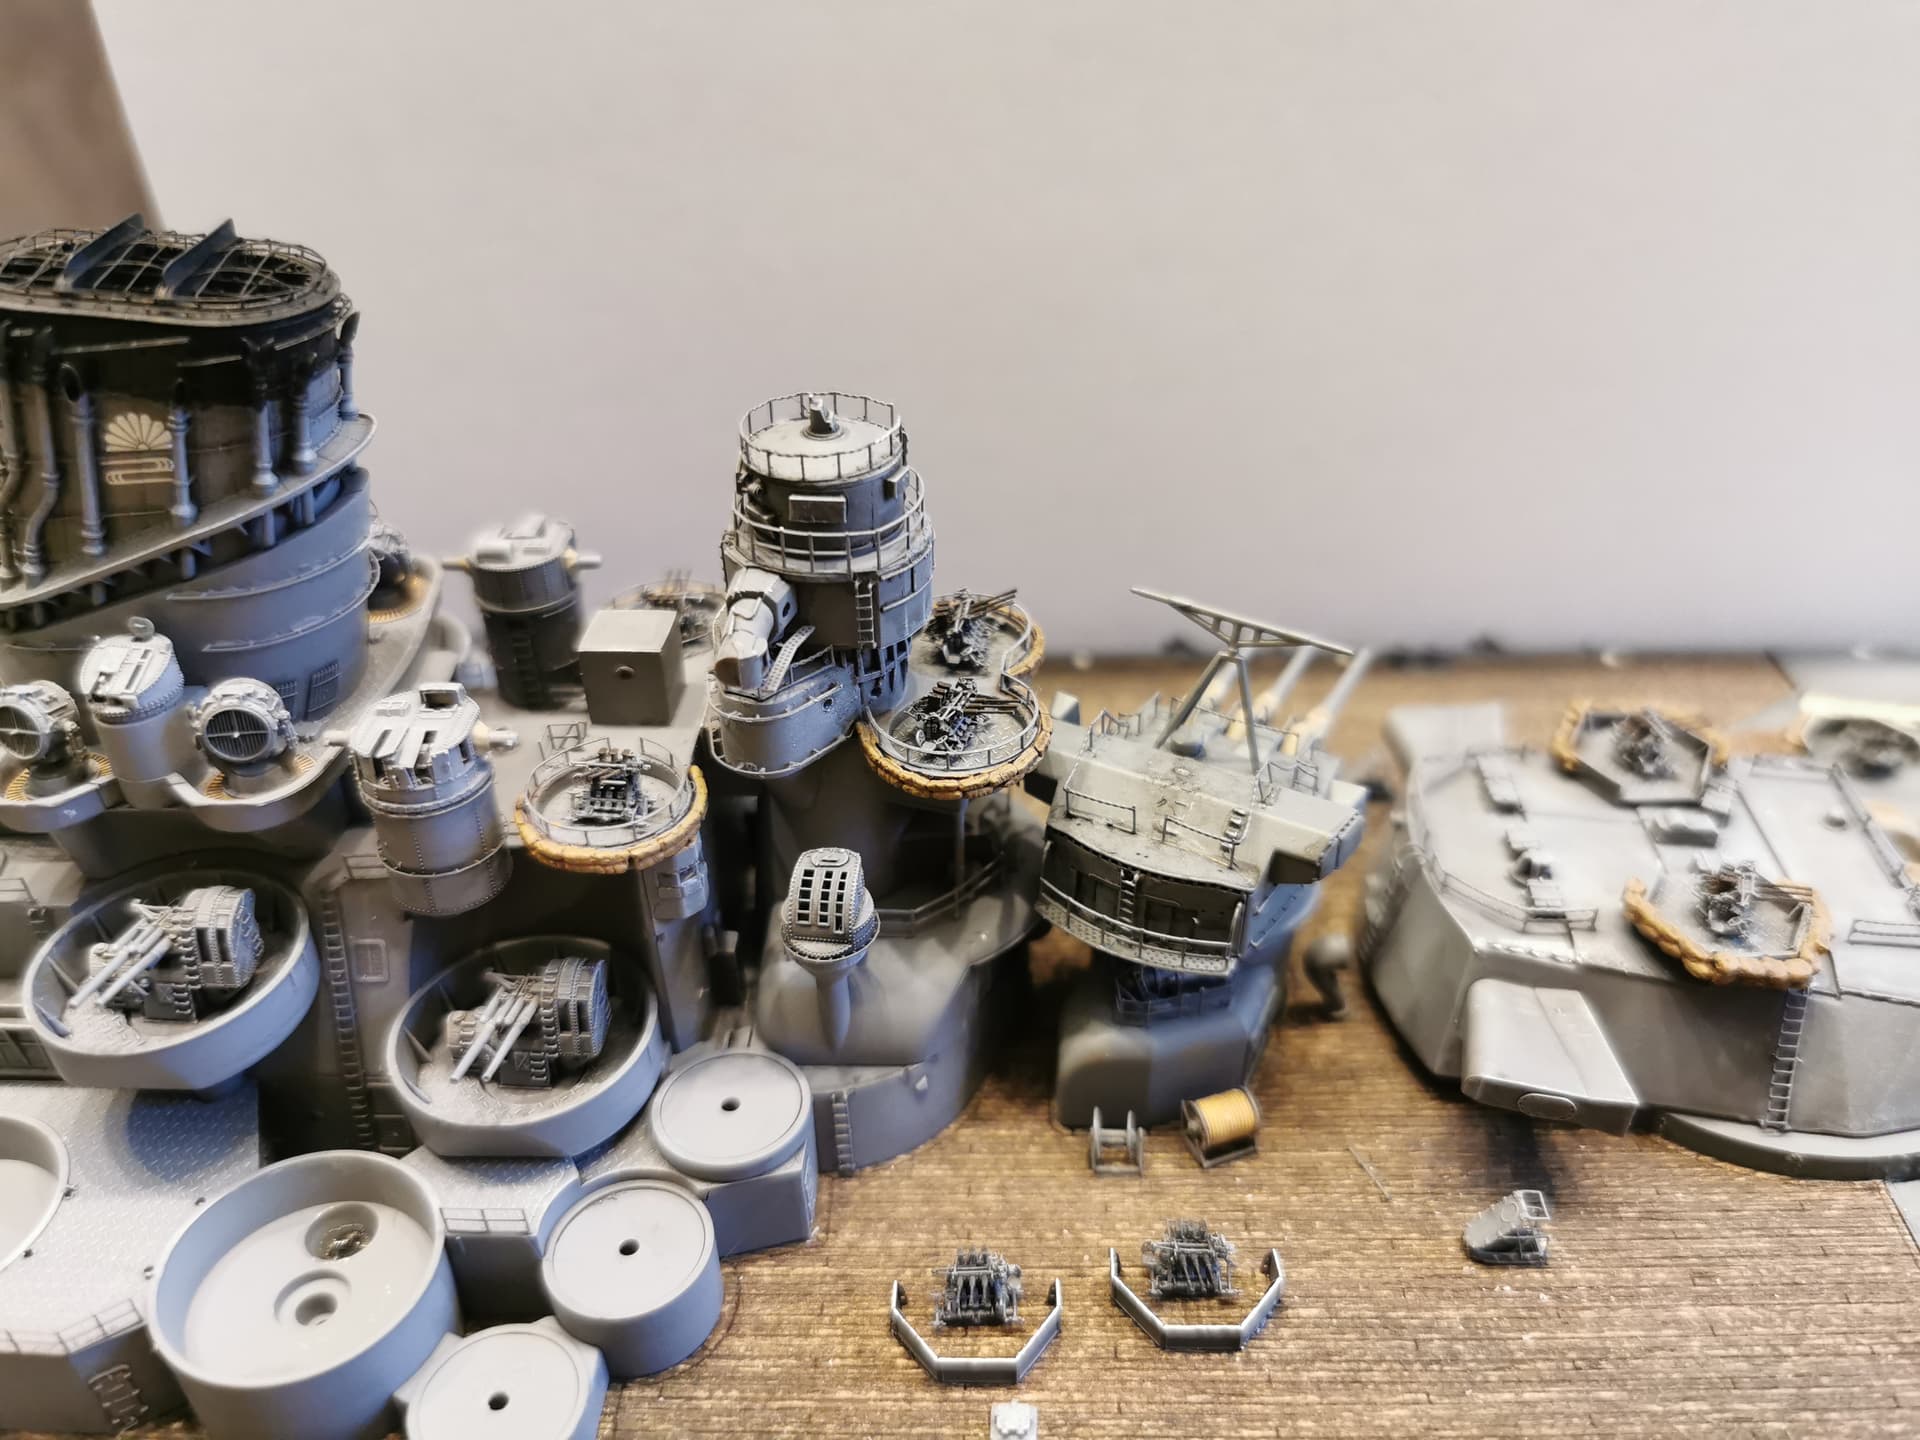
Hey Tim no problem, I will give you a small tutorial how I did my surface painting within the emplacements for the 12.8 cm Type 89 AA-guns and those guns itself.
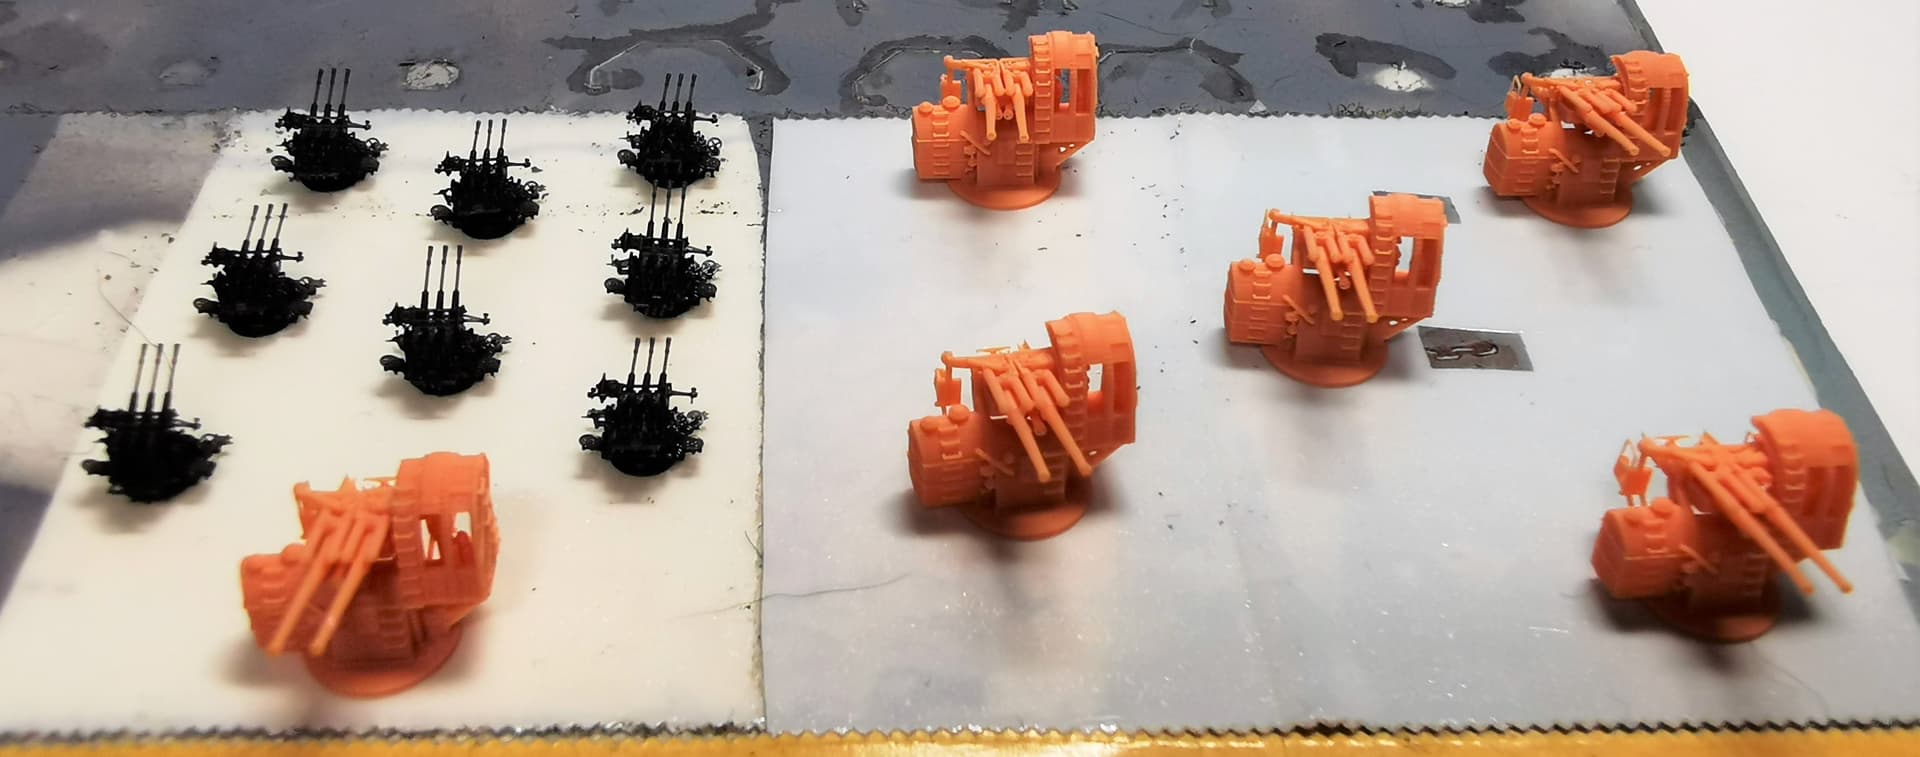
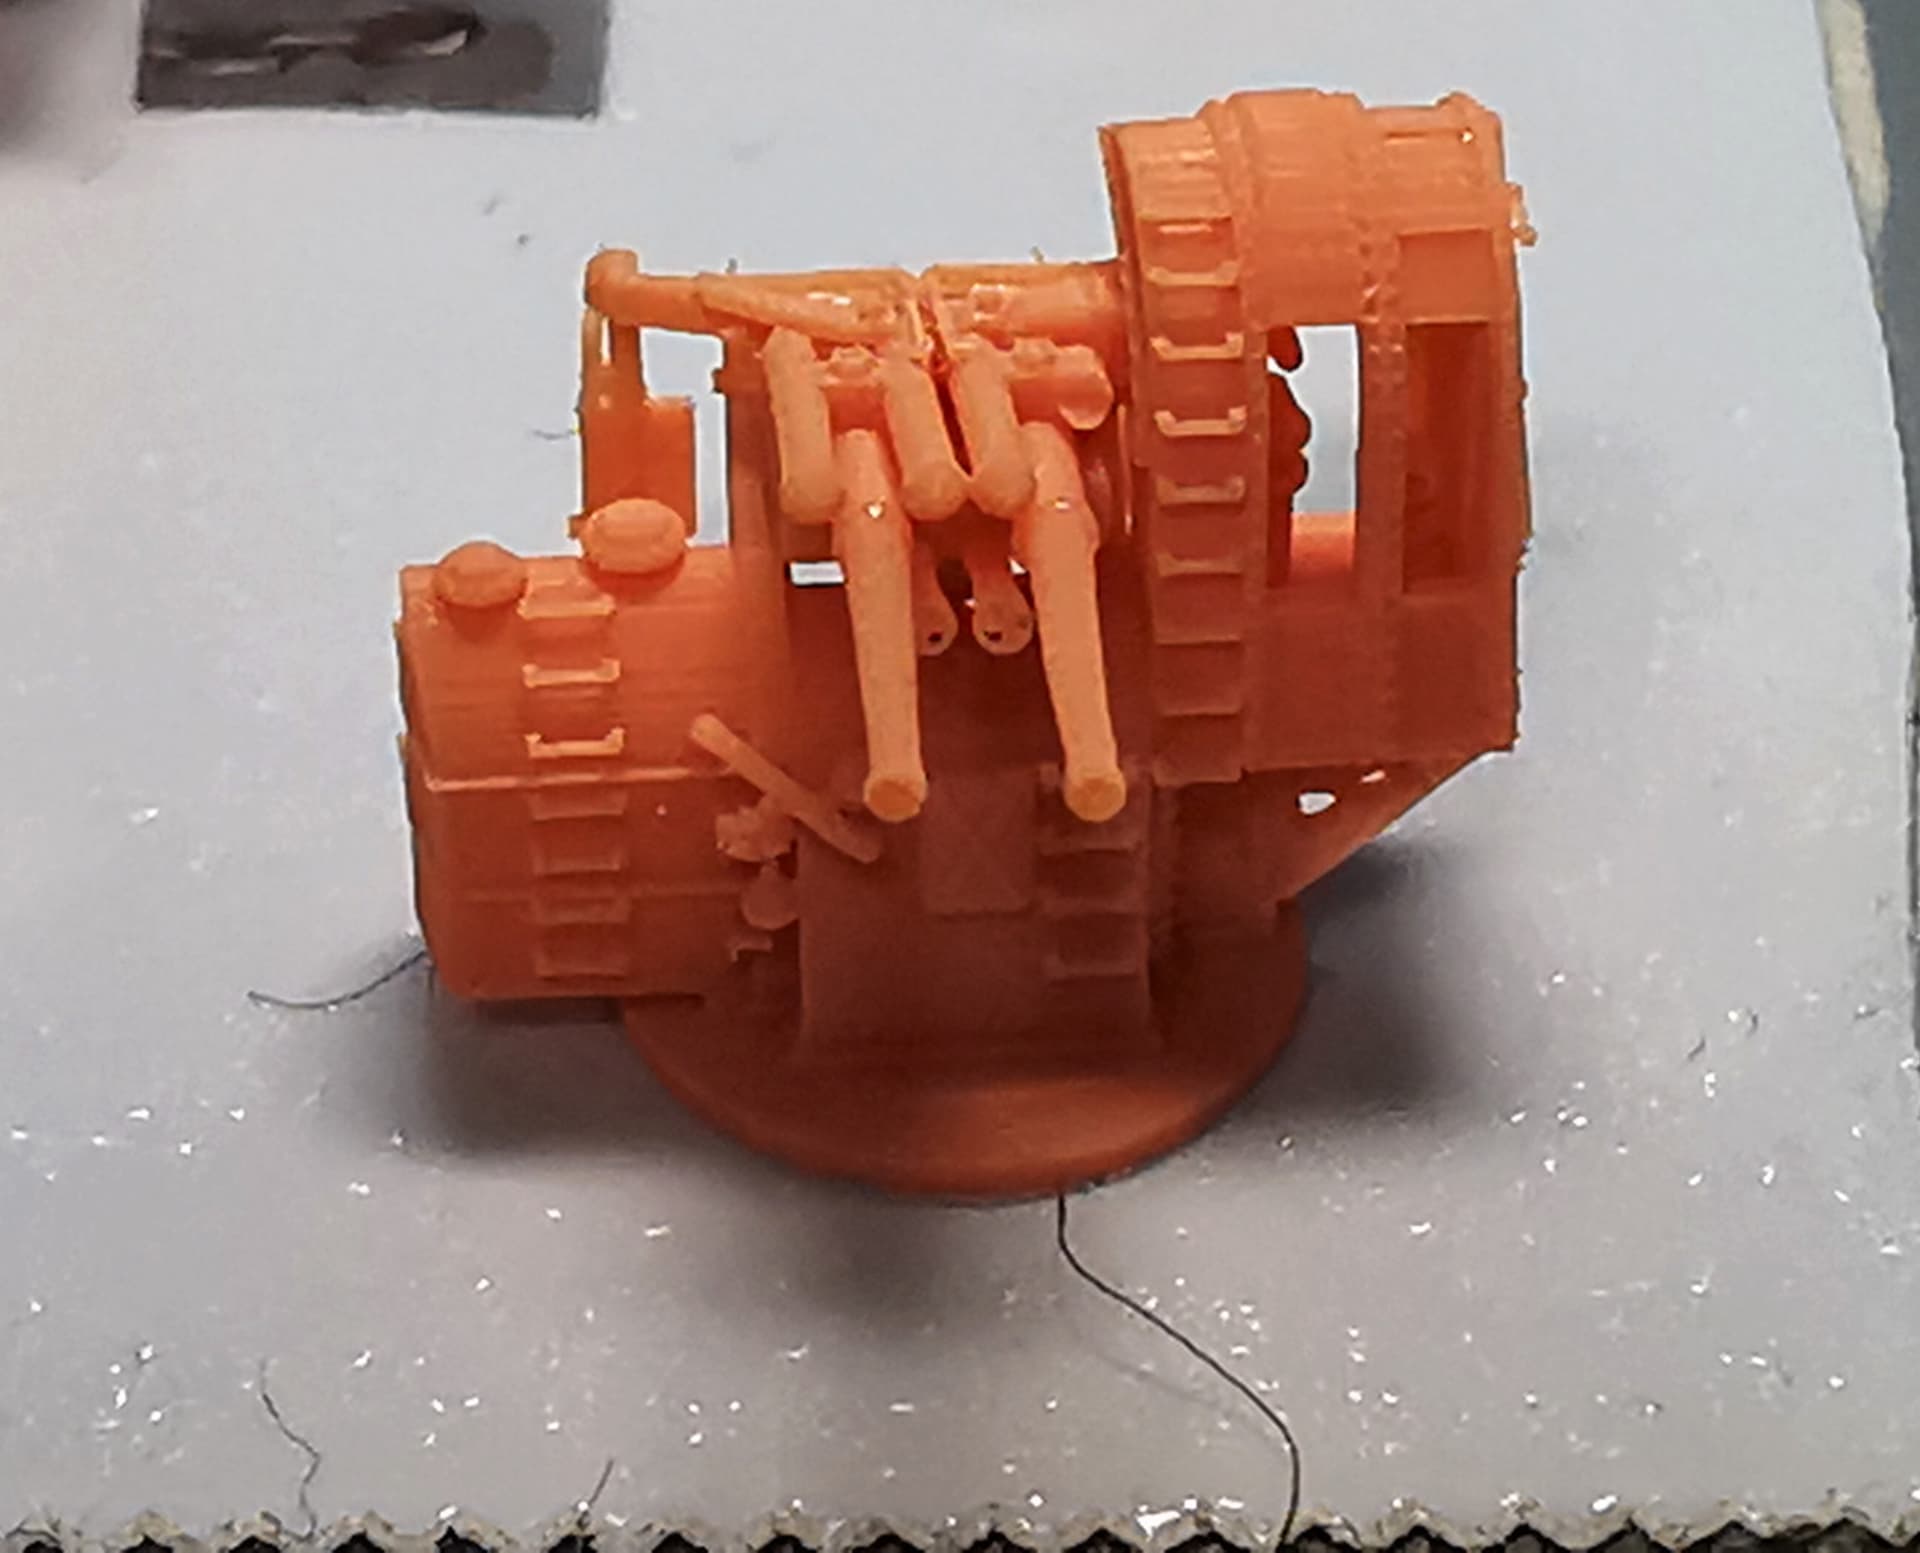
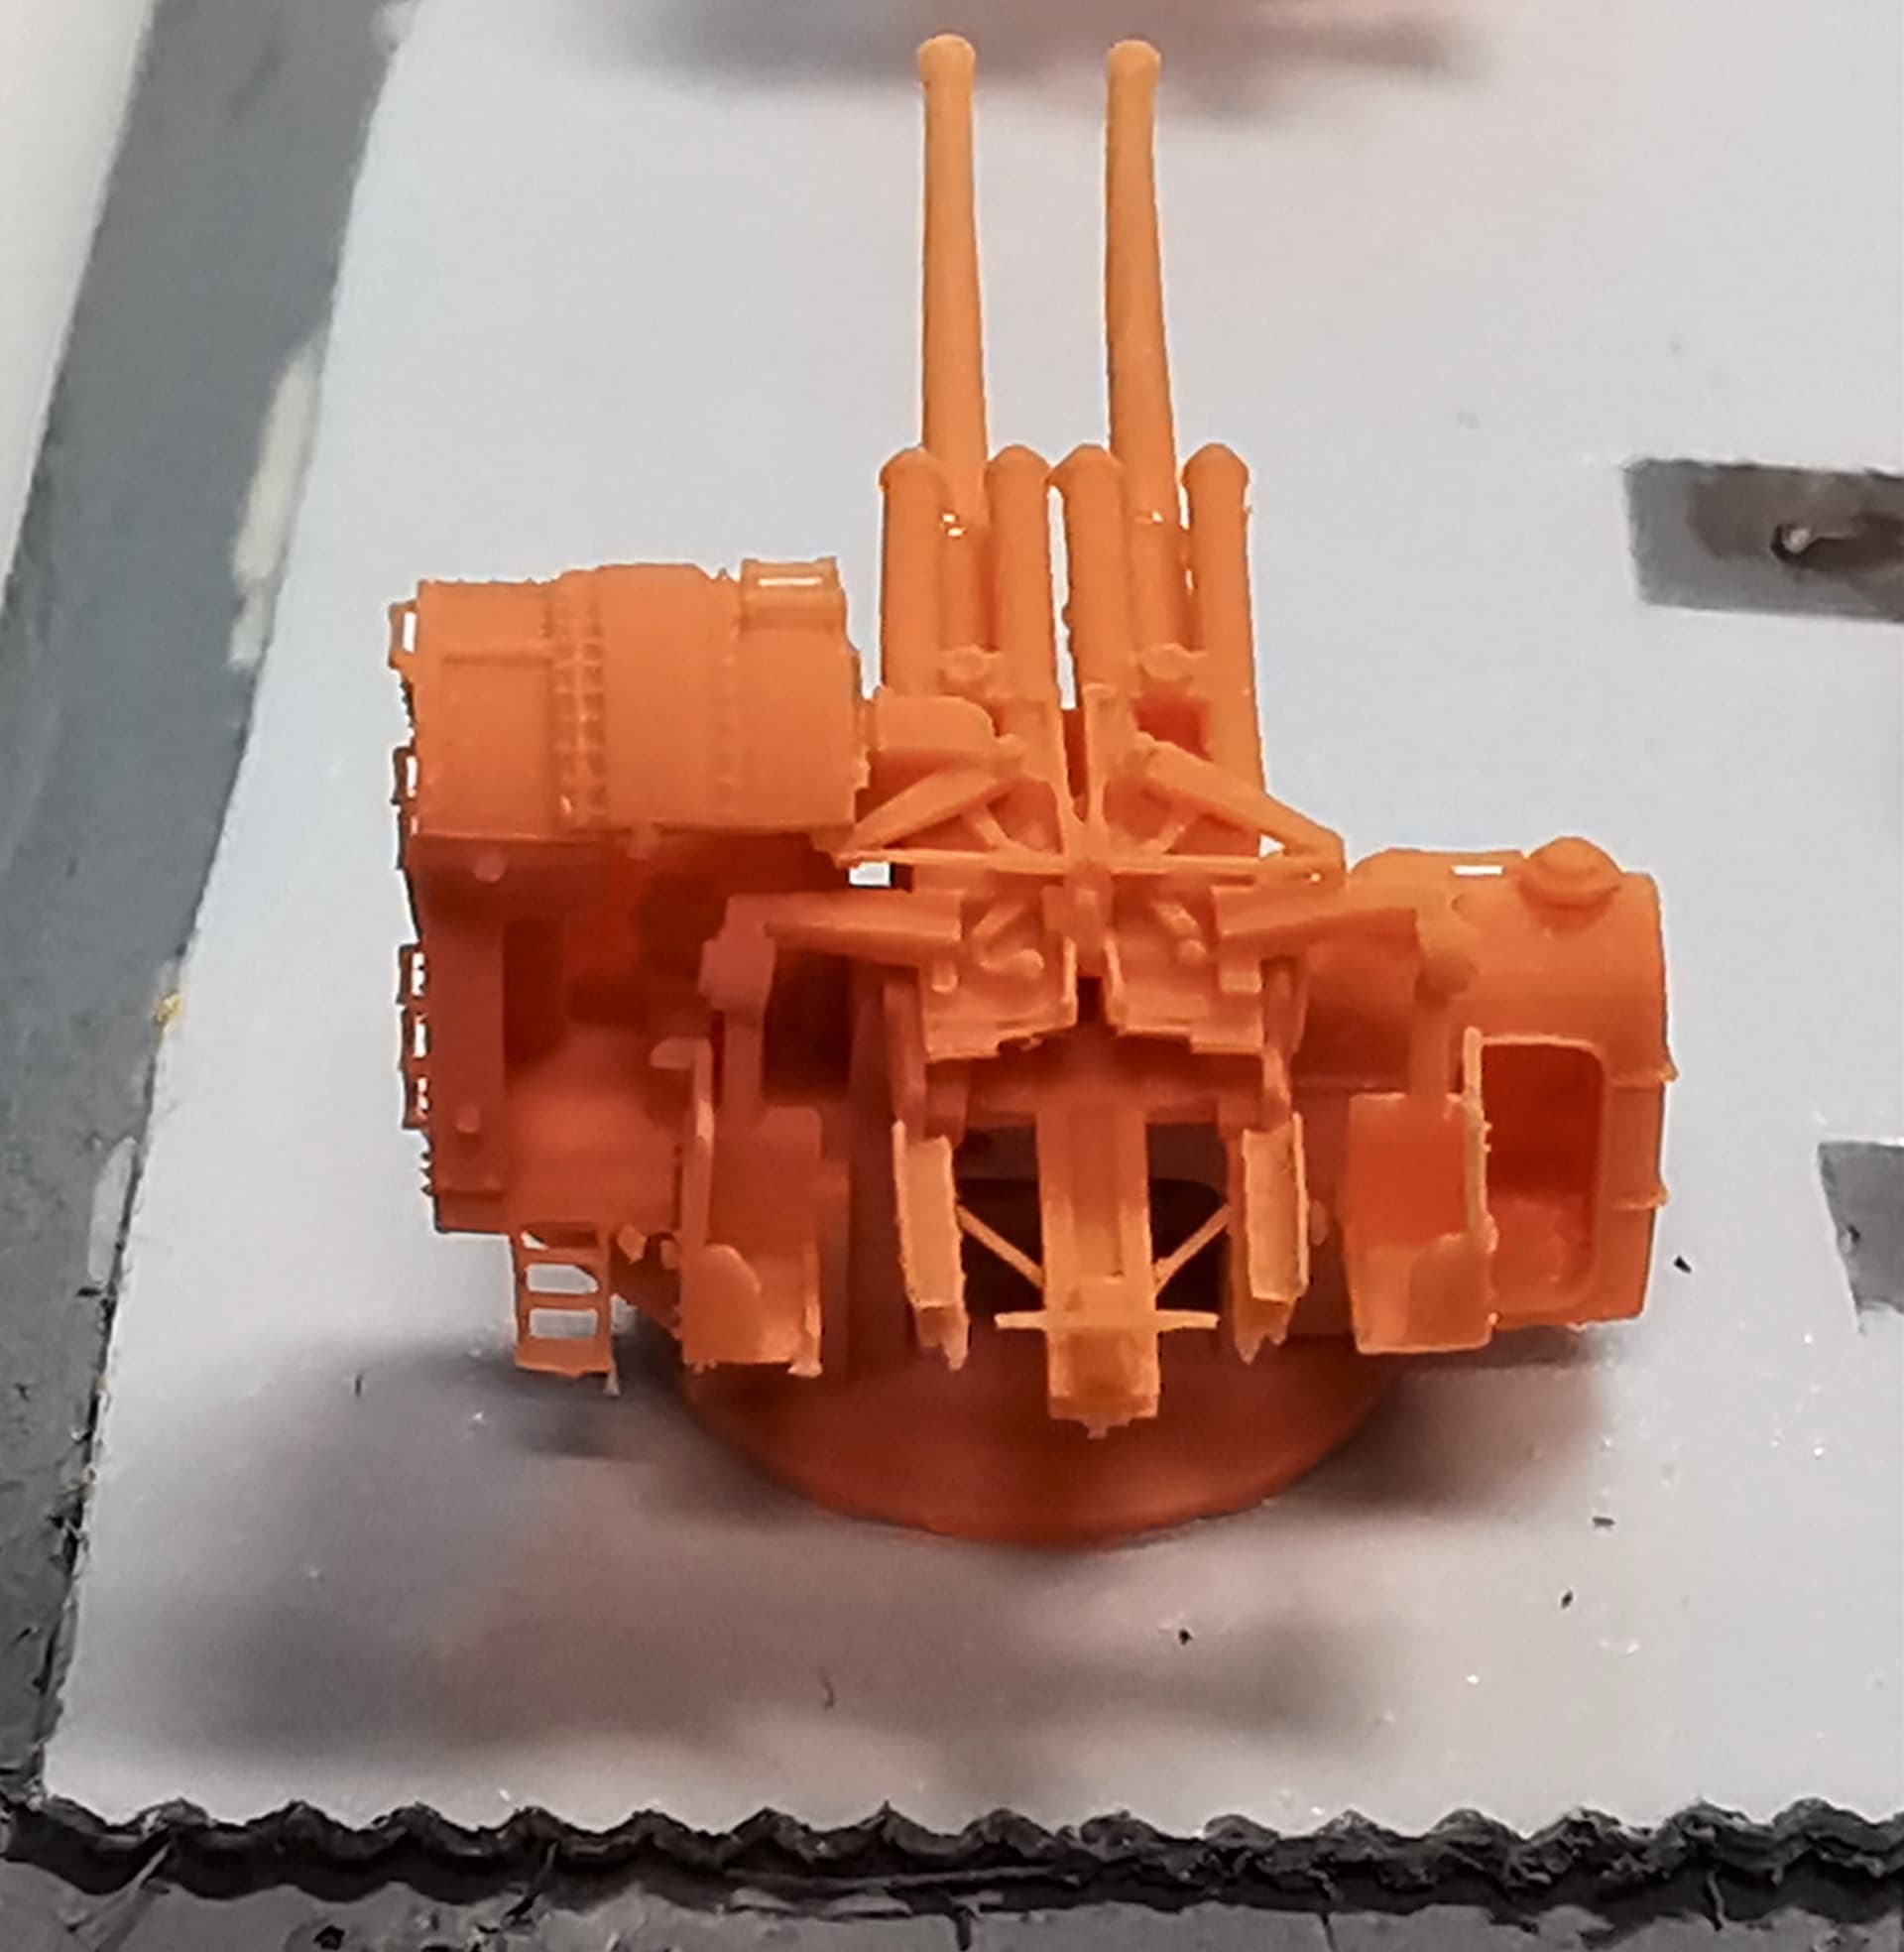
First we get everything off the sprues, clean up, and seal small gaps at the gun emplacements with putty
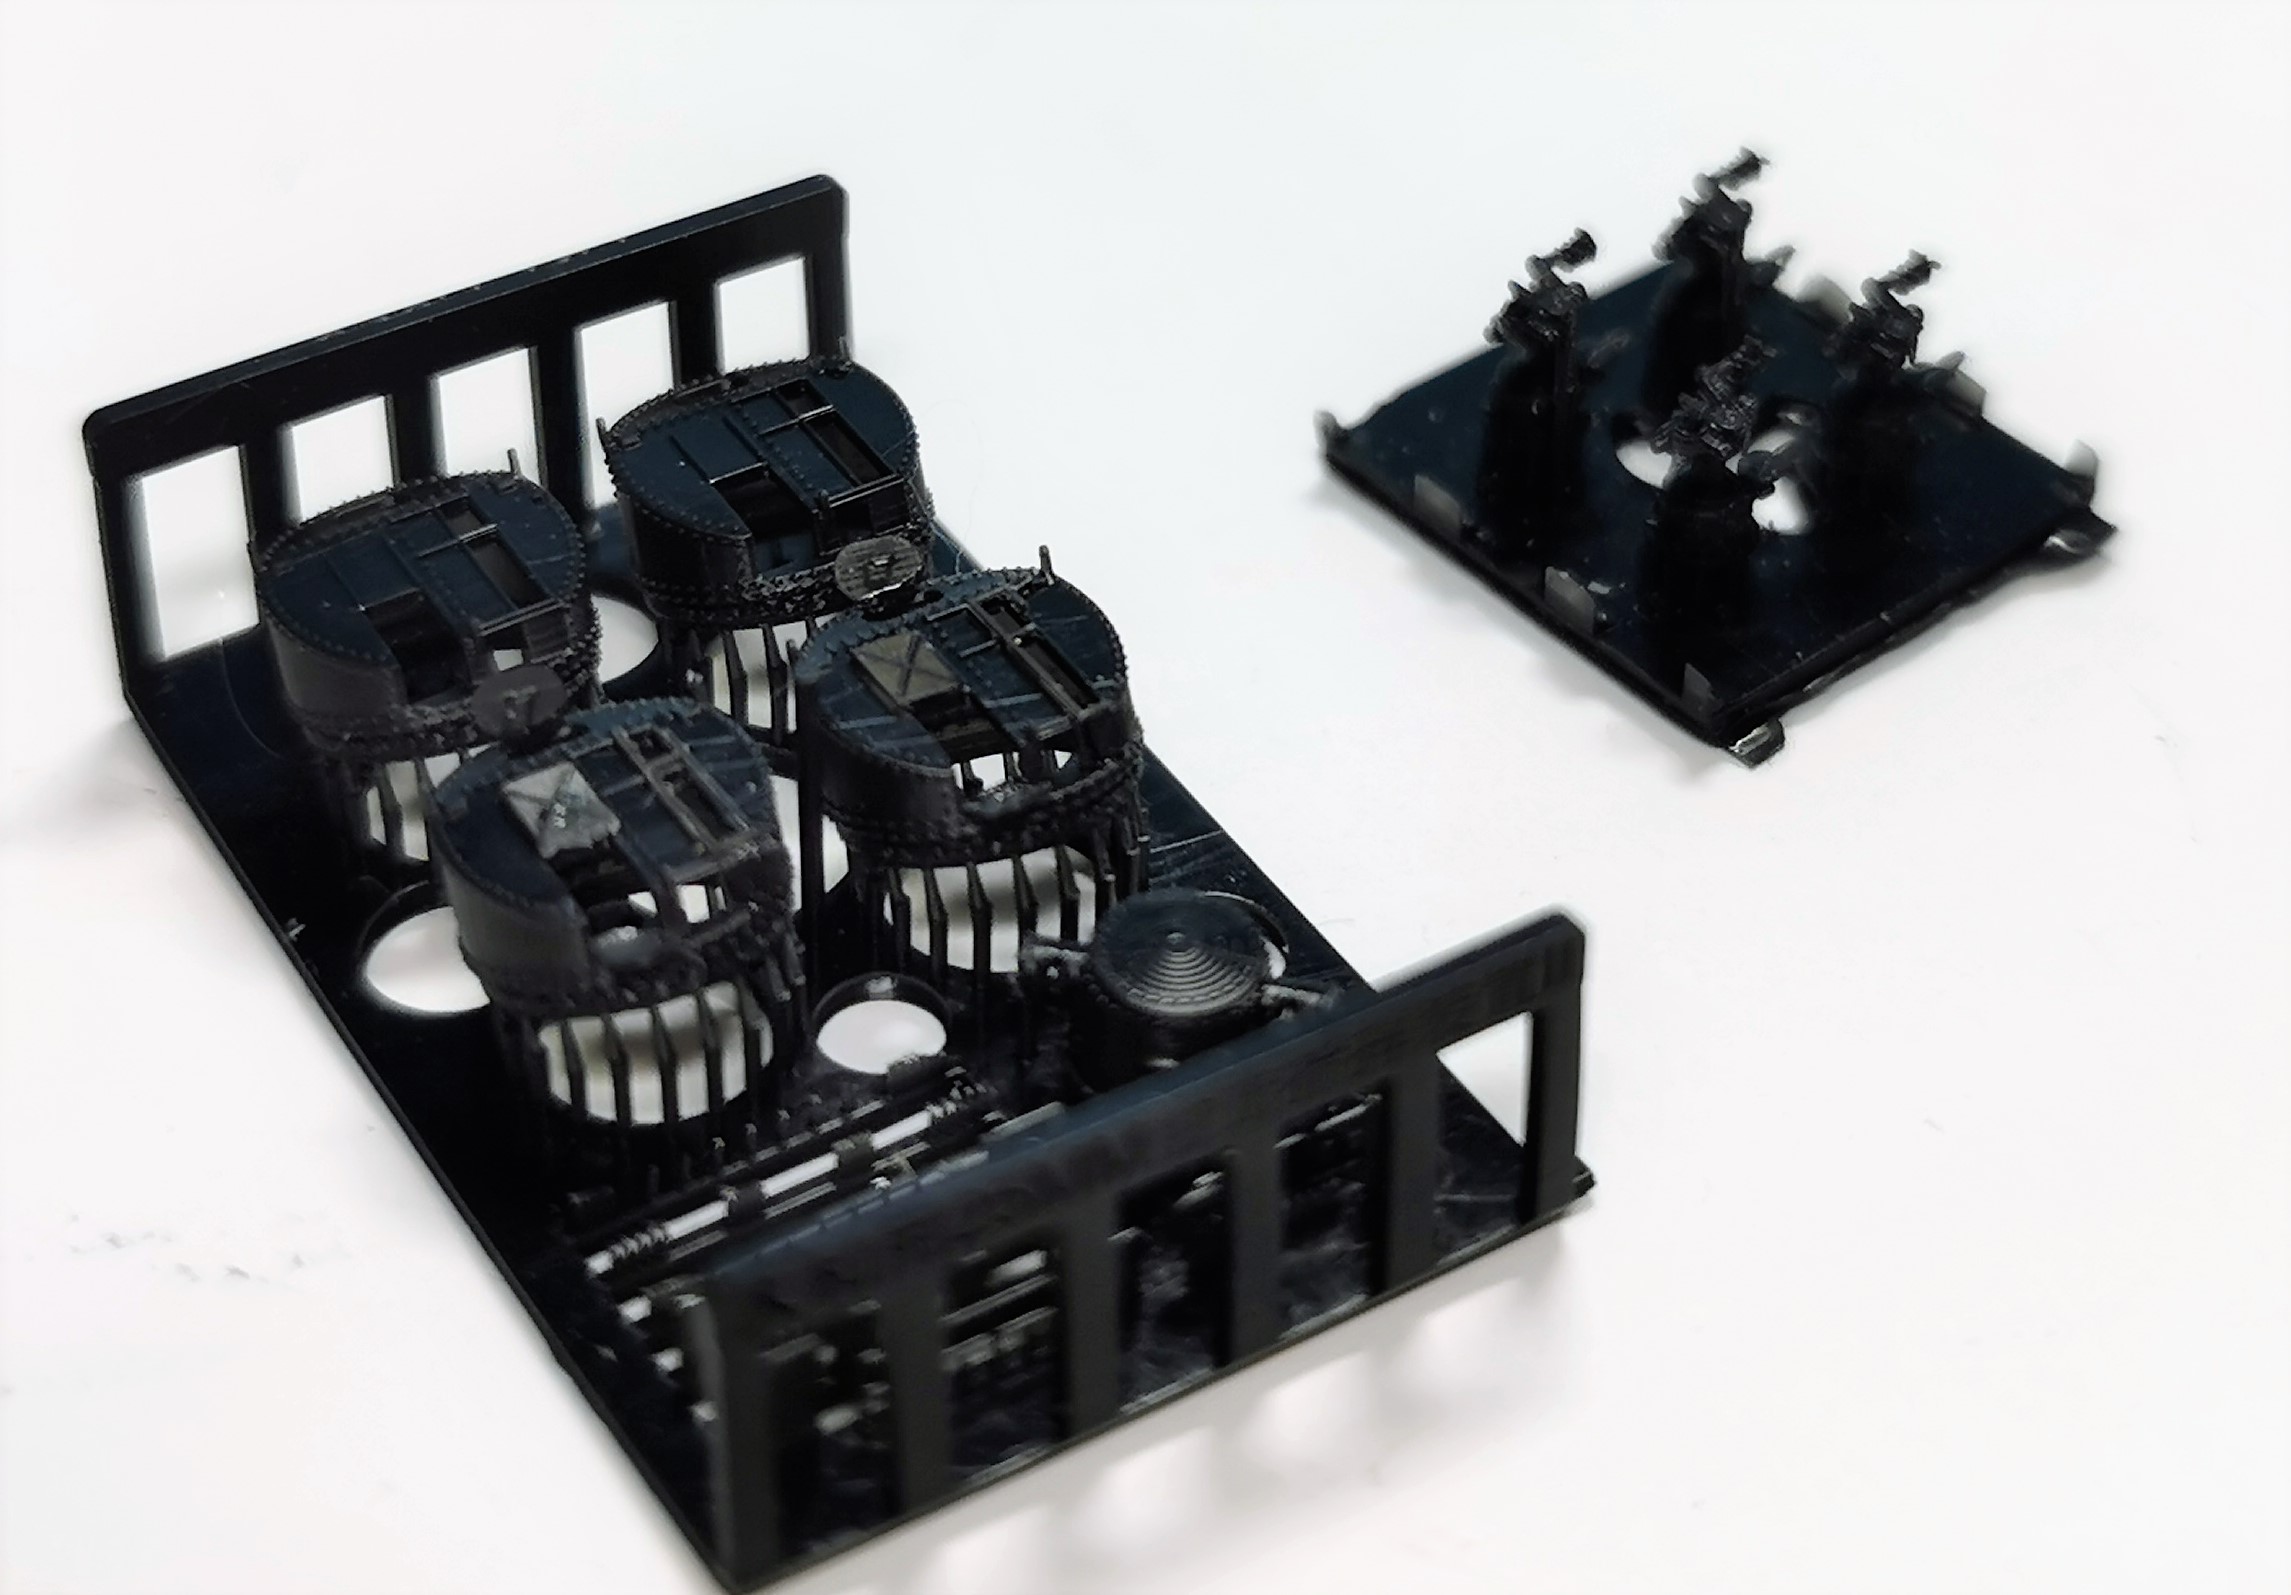
By the way these 3d printed guns from WuLa are also great but have fragile gun barrels (actually broke two during painting and handling). Look at these details and they have an interior also!
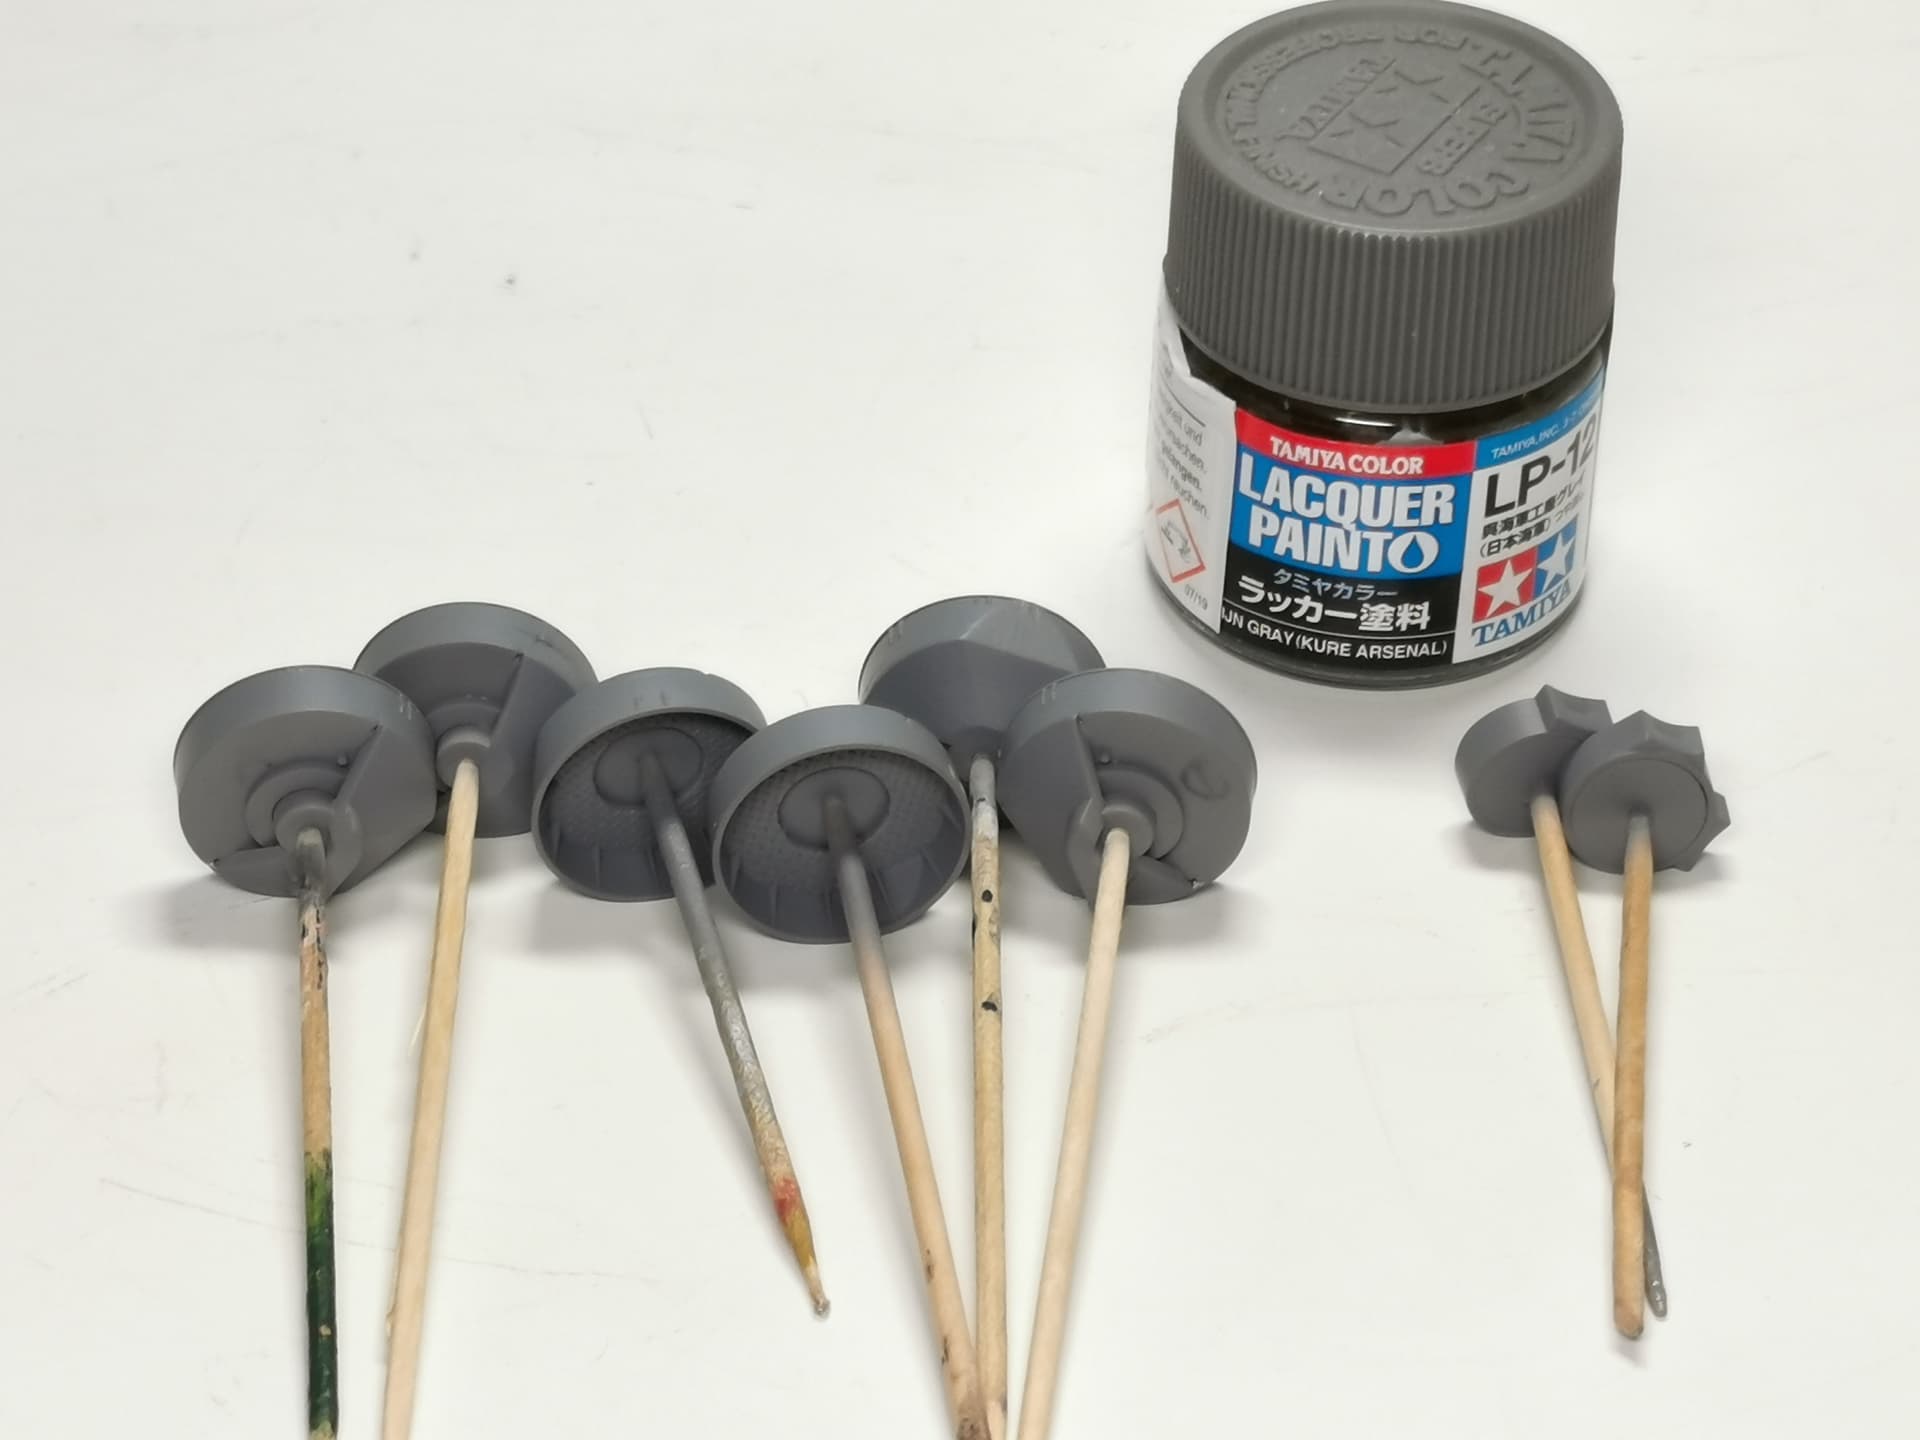
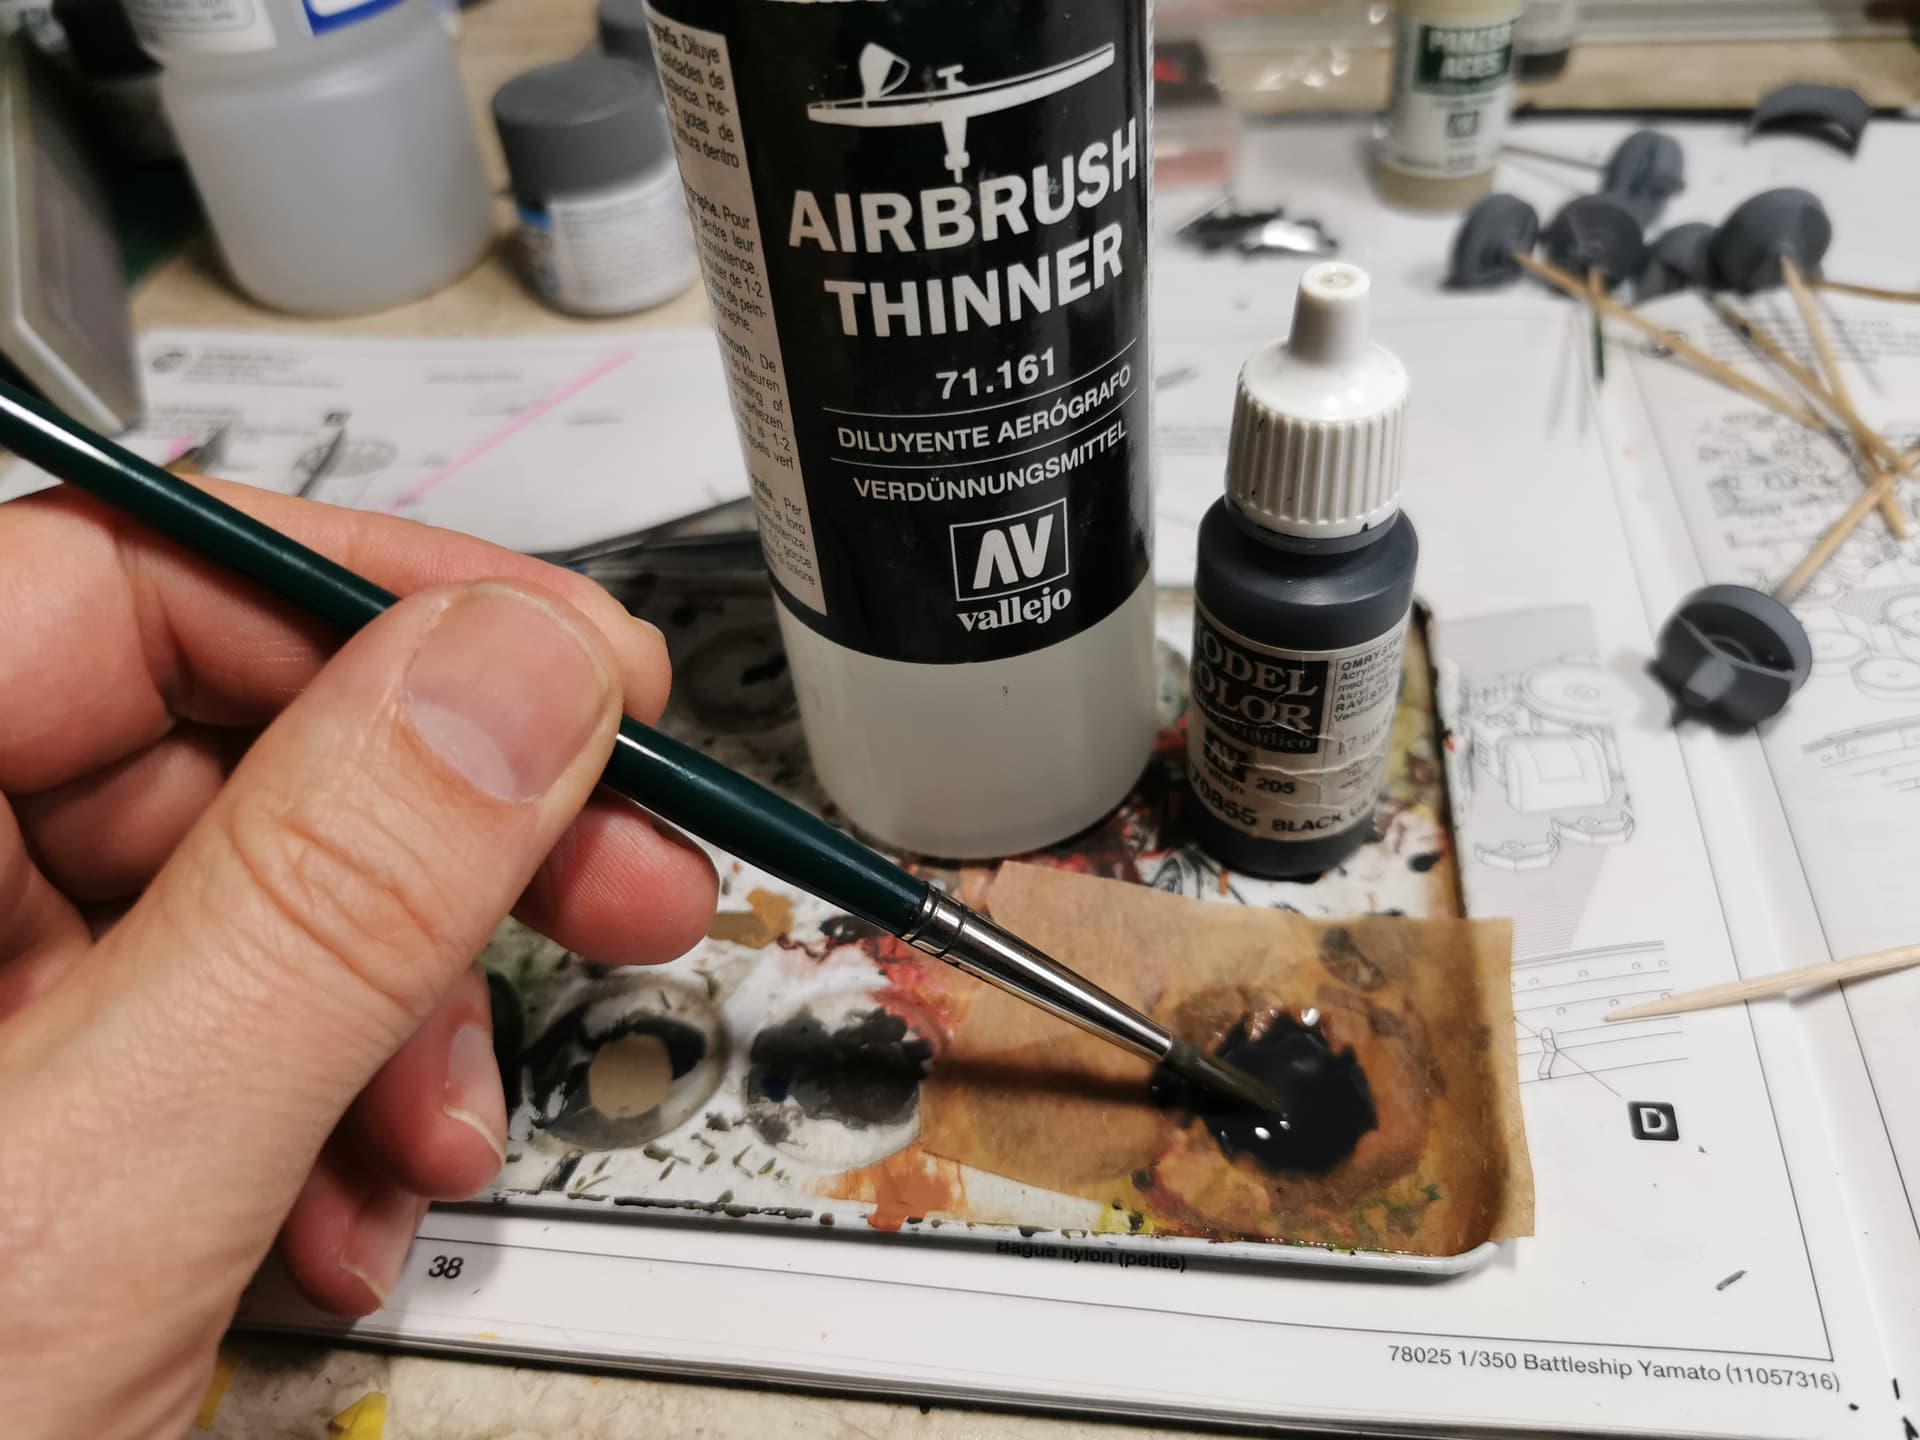
Ok continue with painting. I airbrushed the surfaces with Tamiya LP-12 Kure grey (I found out that in my opinion Tamiya is superior to GUNZE as it is more liquid and don´t need a retarder. If you spraypaint GUNZE colors without a retarder you need to be real quick…)
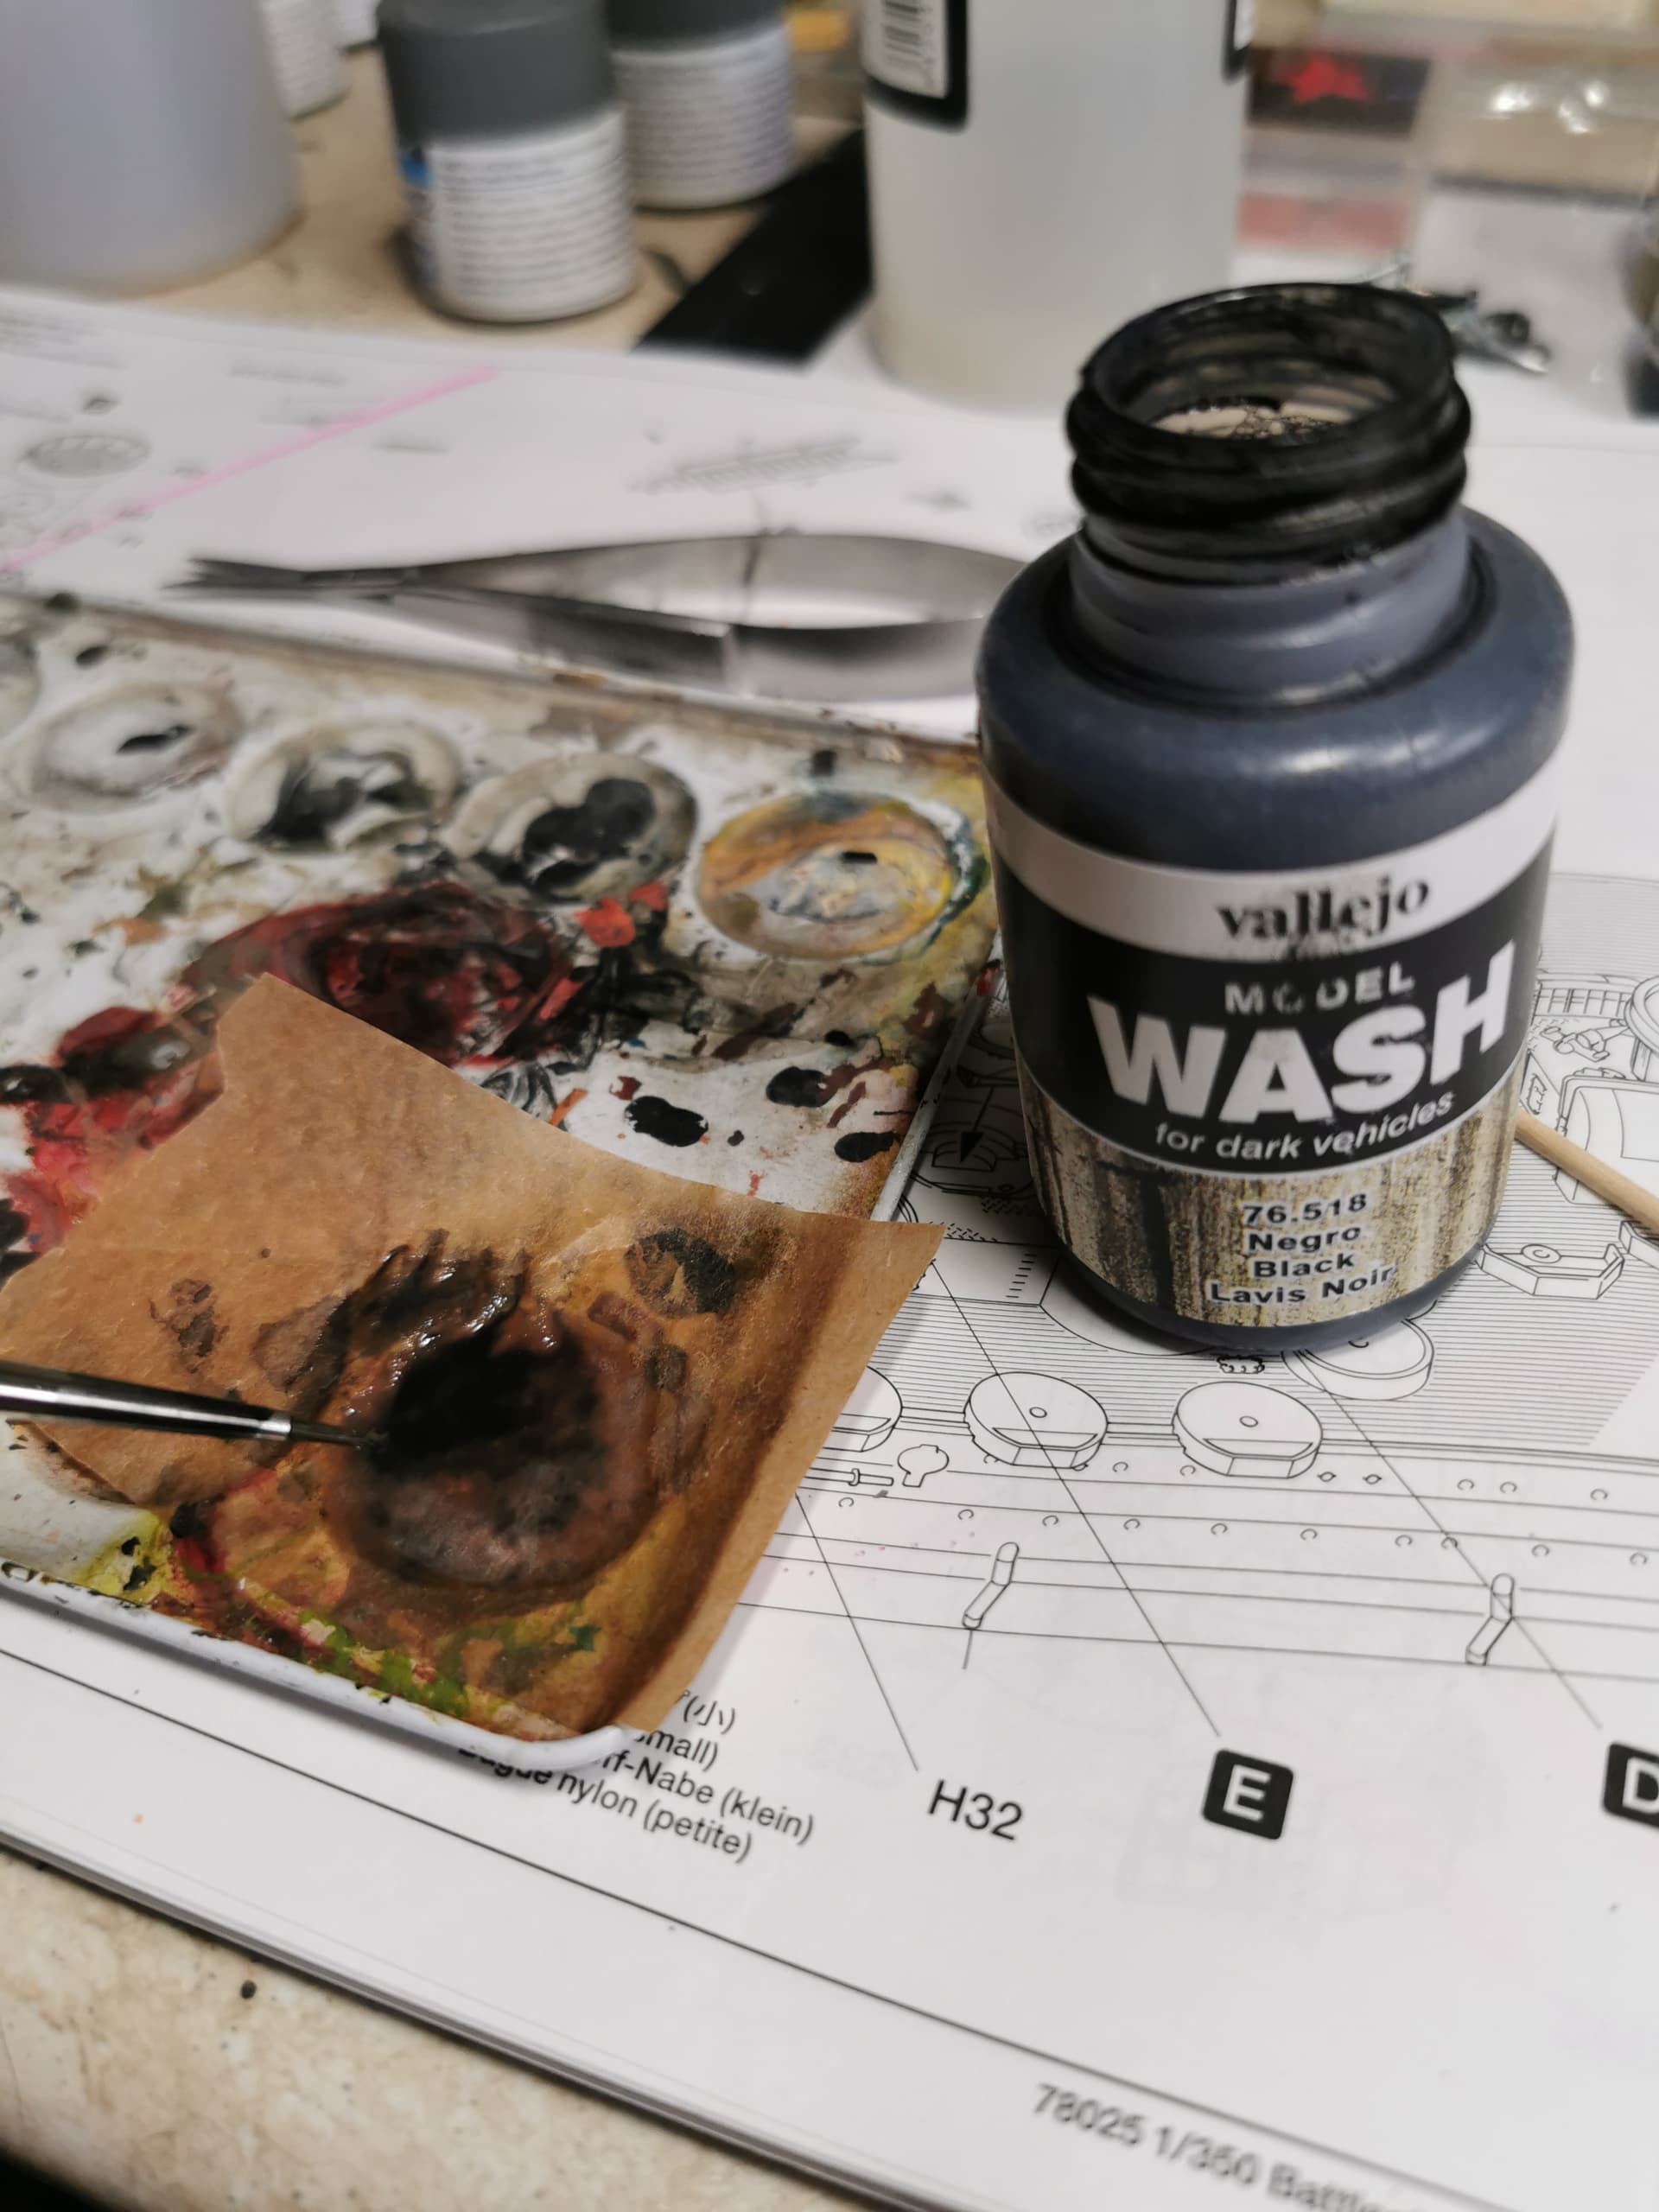
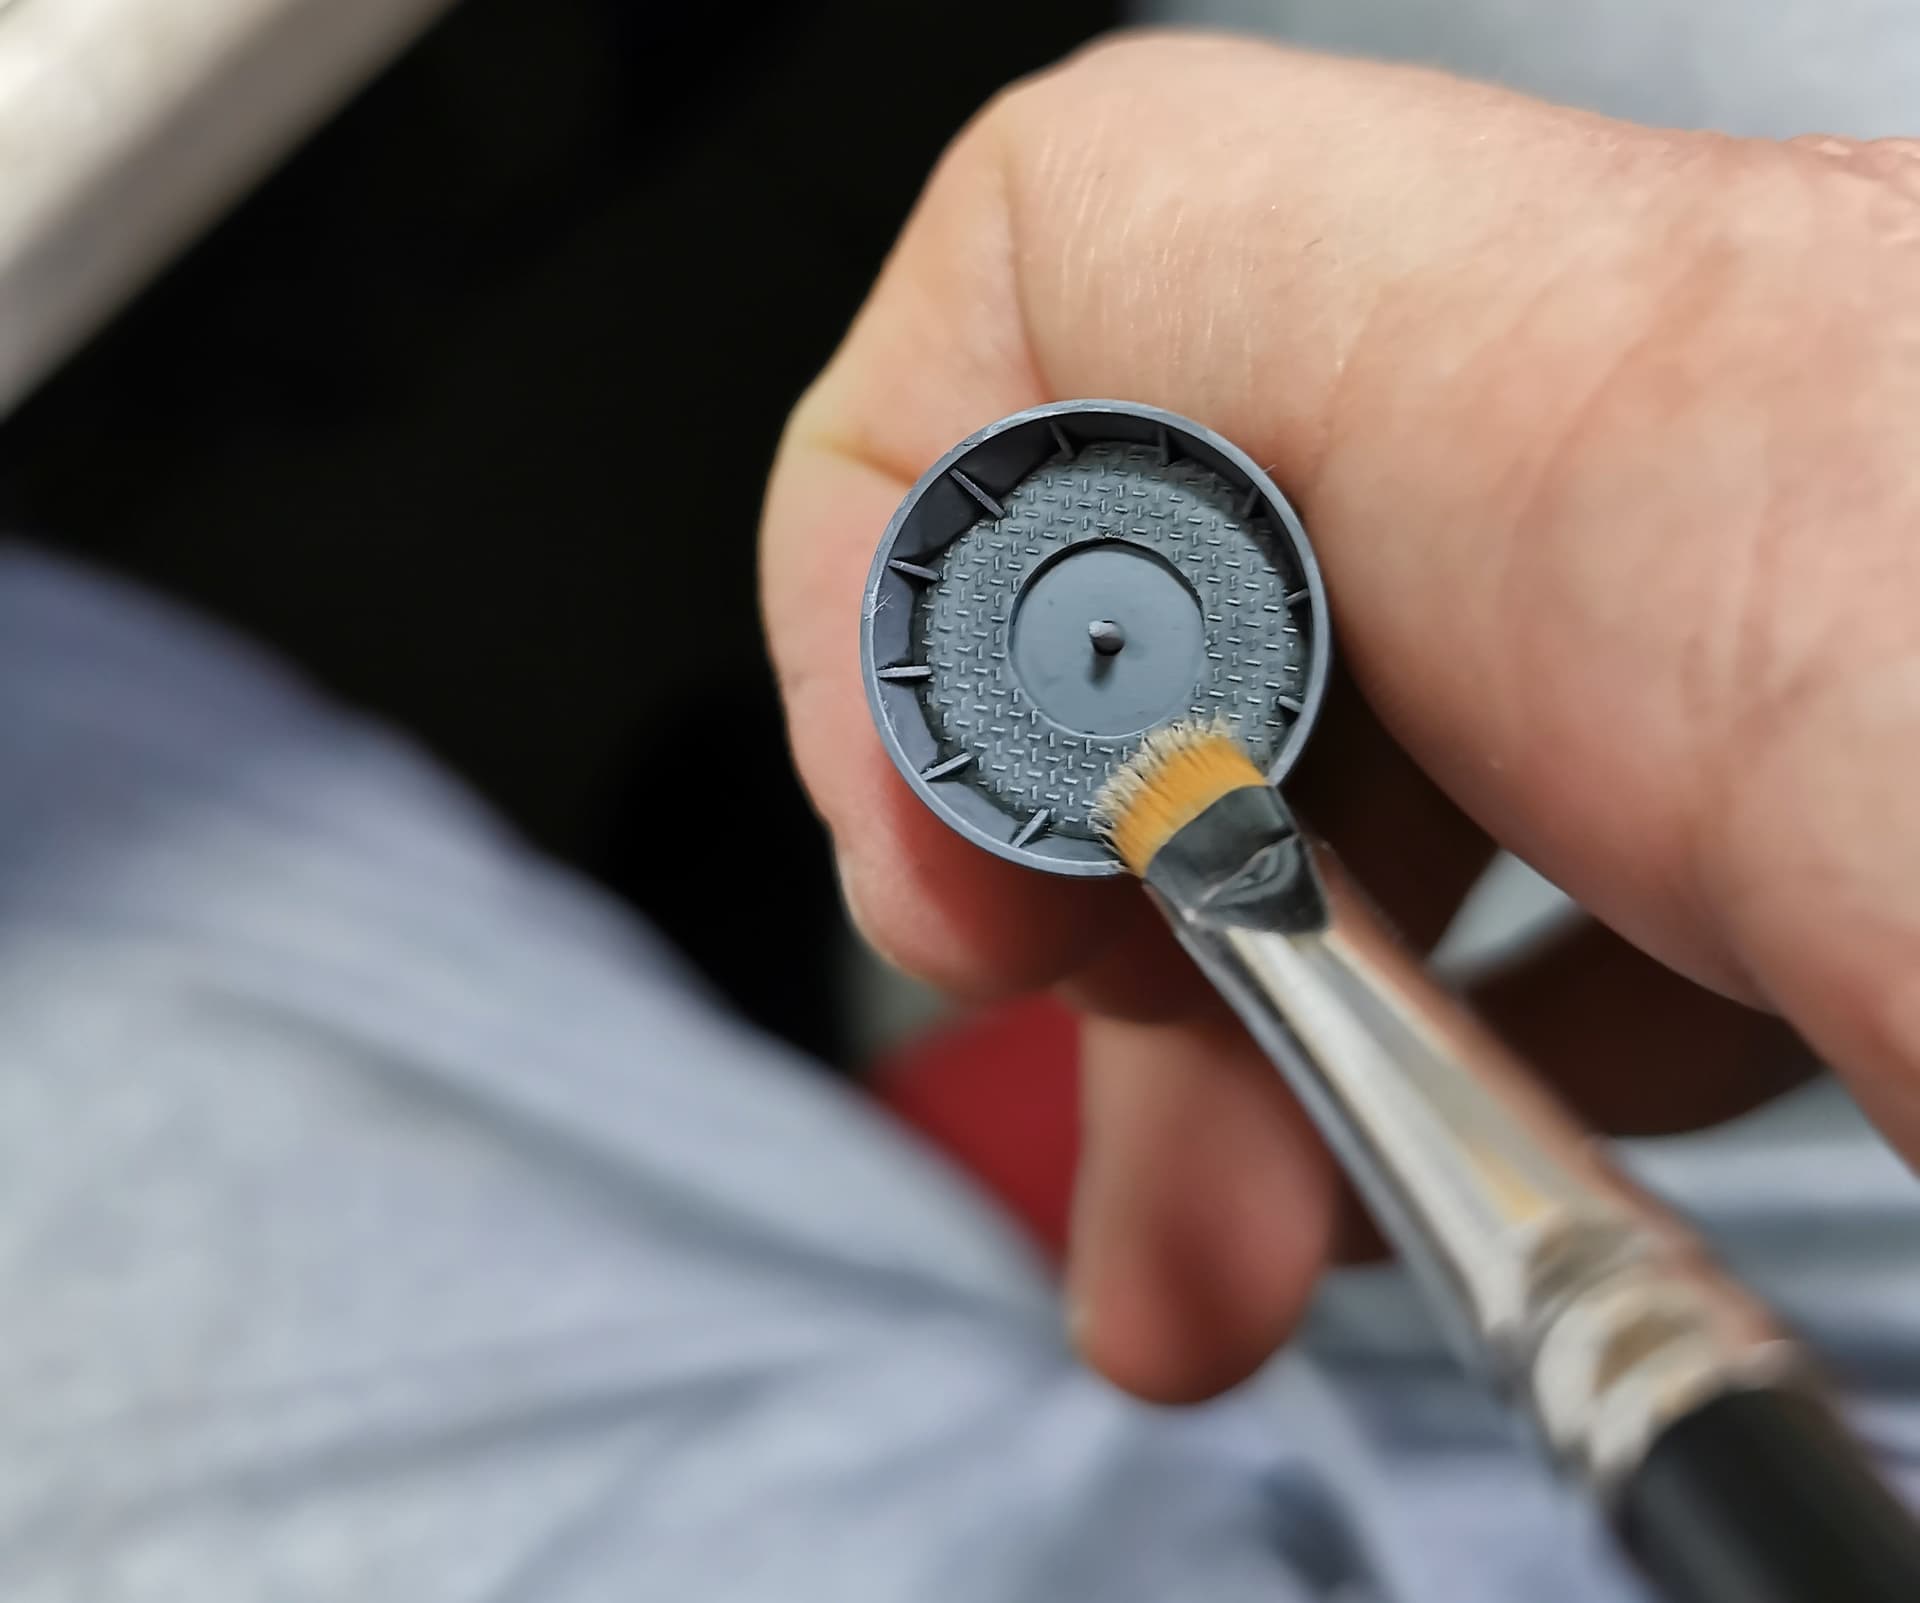
For adding more depth to the surfaces I have two different ways: one more subtle is an enamel wash with Vallejo´s 70855 Black Glaze. You have to mix it with Vallejo´s Airbrush thinner. Here you can vary how much contrast you need - more contrast less thinner, less contrast more thinner; just try it out. For the floorplates I need a more subtle darkness. By the way: I keep my acrylic colors always atop a baking paper which have some drops of water below; this way the color don´t dries up so fast and you will gain more time to calmly paint.
You can add more contrast if you use an acrylic wash. I use again Vallejo for this task. Personally I feel the finished mix still too strong and always use a drop of thinner with them when using it
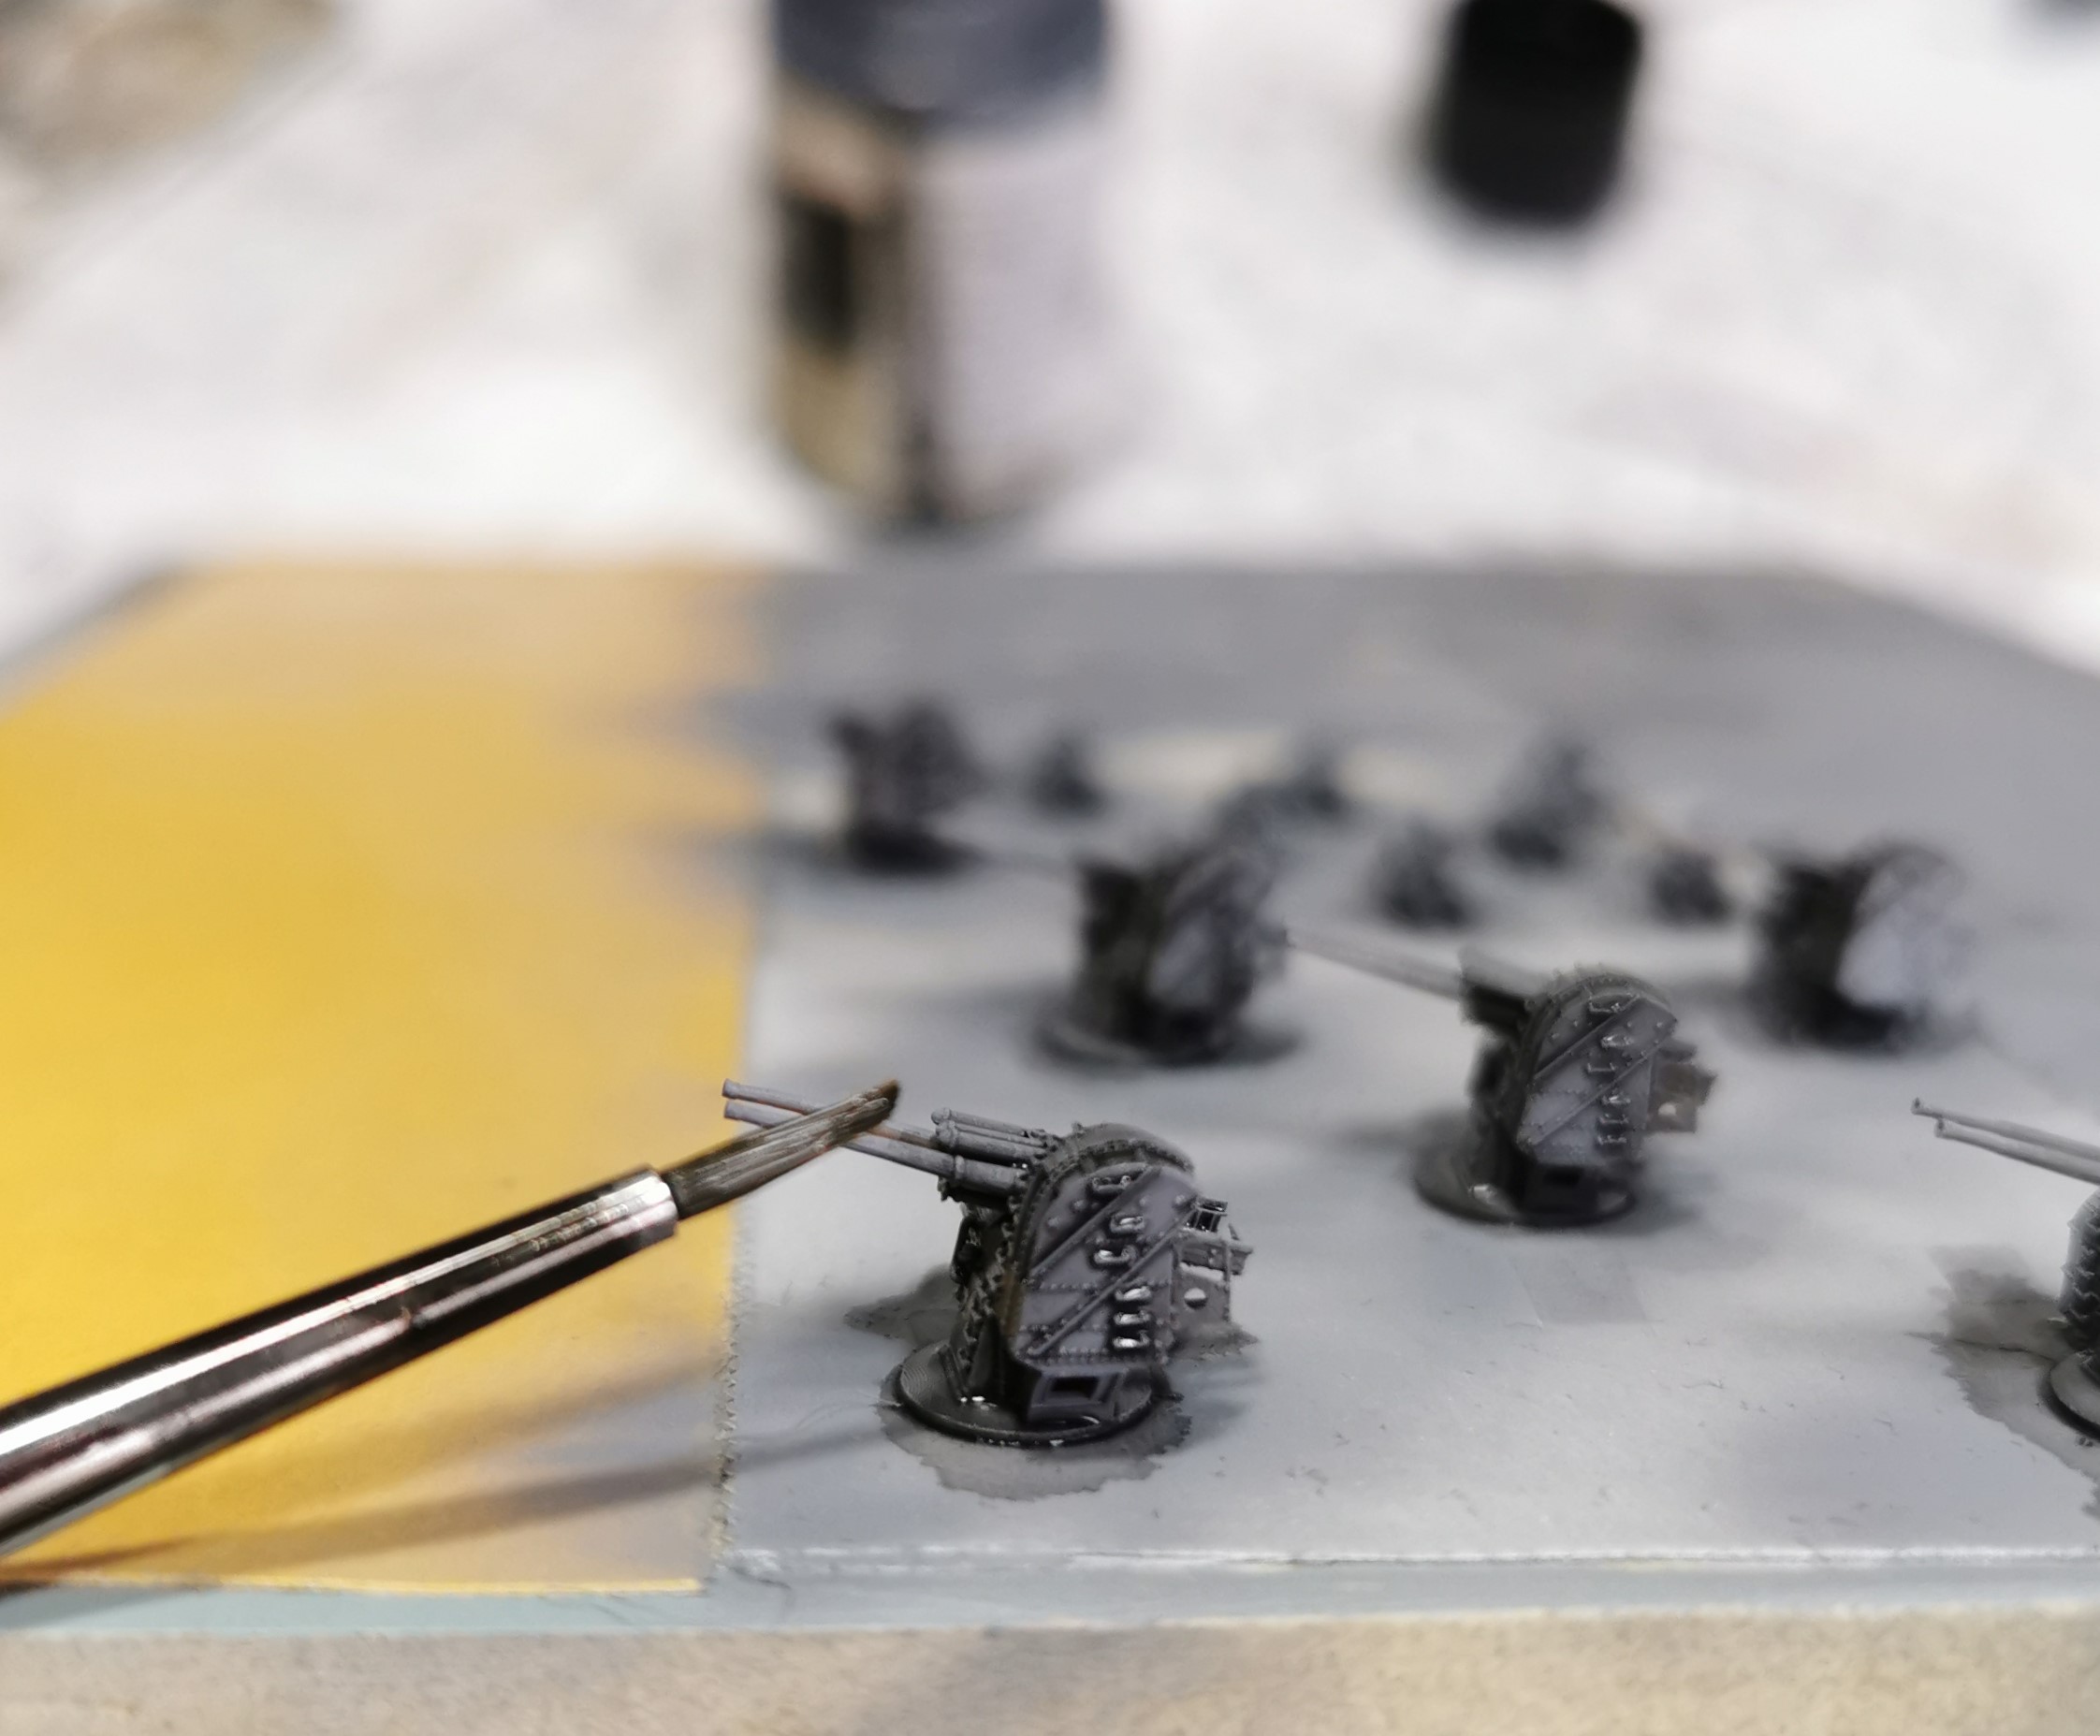
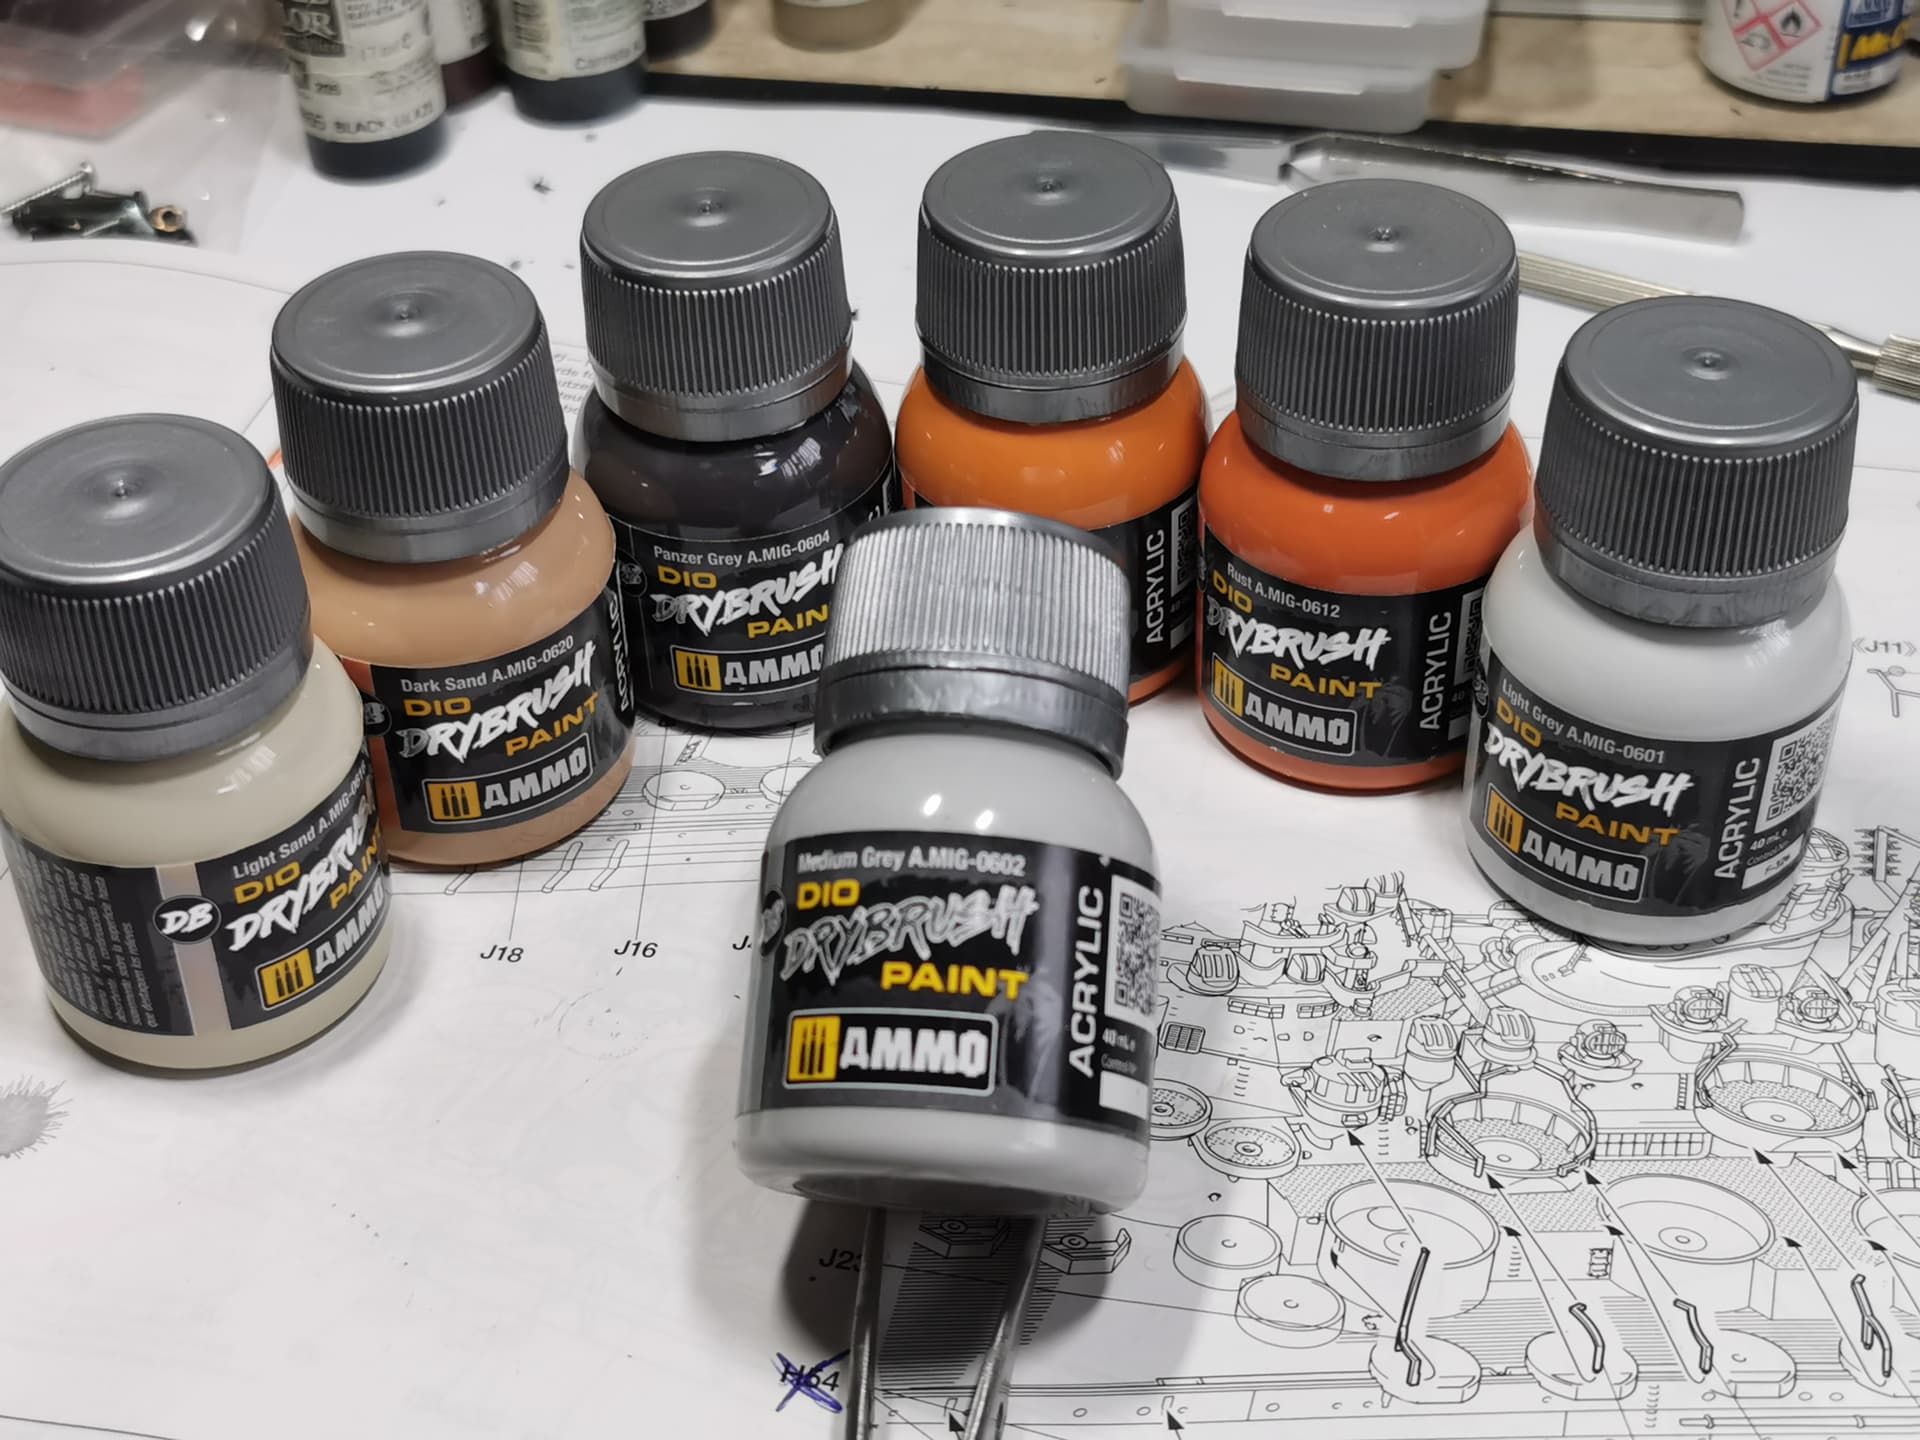
To highlight the details I use AMMO of MIG´s acrylic dio drybrush paint. It is a viscous, similar like paste paint and its available in different color tones. I use several of them
With this paste you can gently drybrush the surfaces. Just dip your wide drybrush pencil into a small amount of color and strive off almost all paint again at a kitchen tissue. If just very less paint is still into the brush you can strive over your workpiece and bring out the details. Utmost care is required for this stage not to break up multiple parts or gun barrels - don´t ask me how I know
Thomas, thanks for that! Your range of techniques are similar to mine, but the products are all different from what I’ve used in the past - so some new paints for me to try out. There is certainly no arguing with your results!
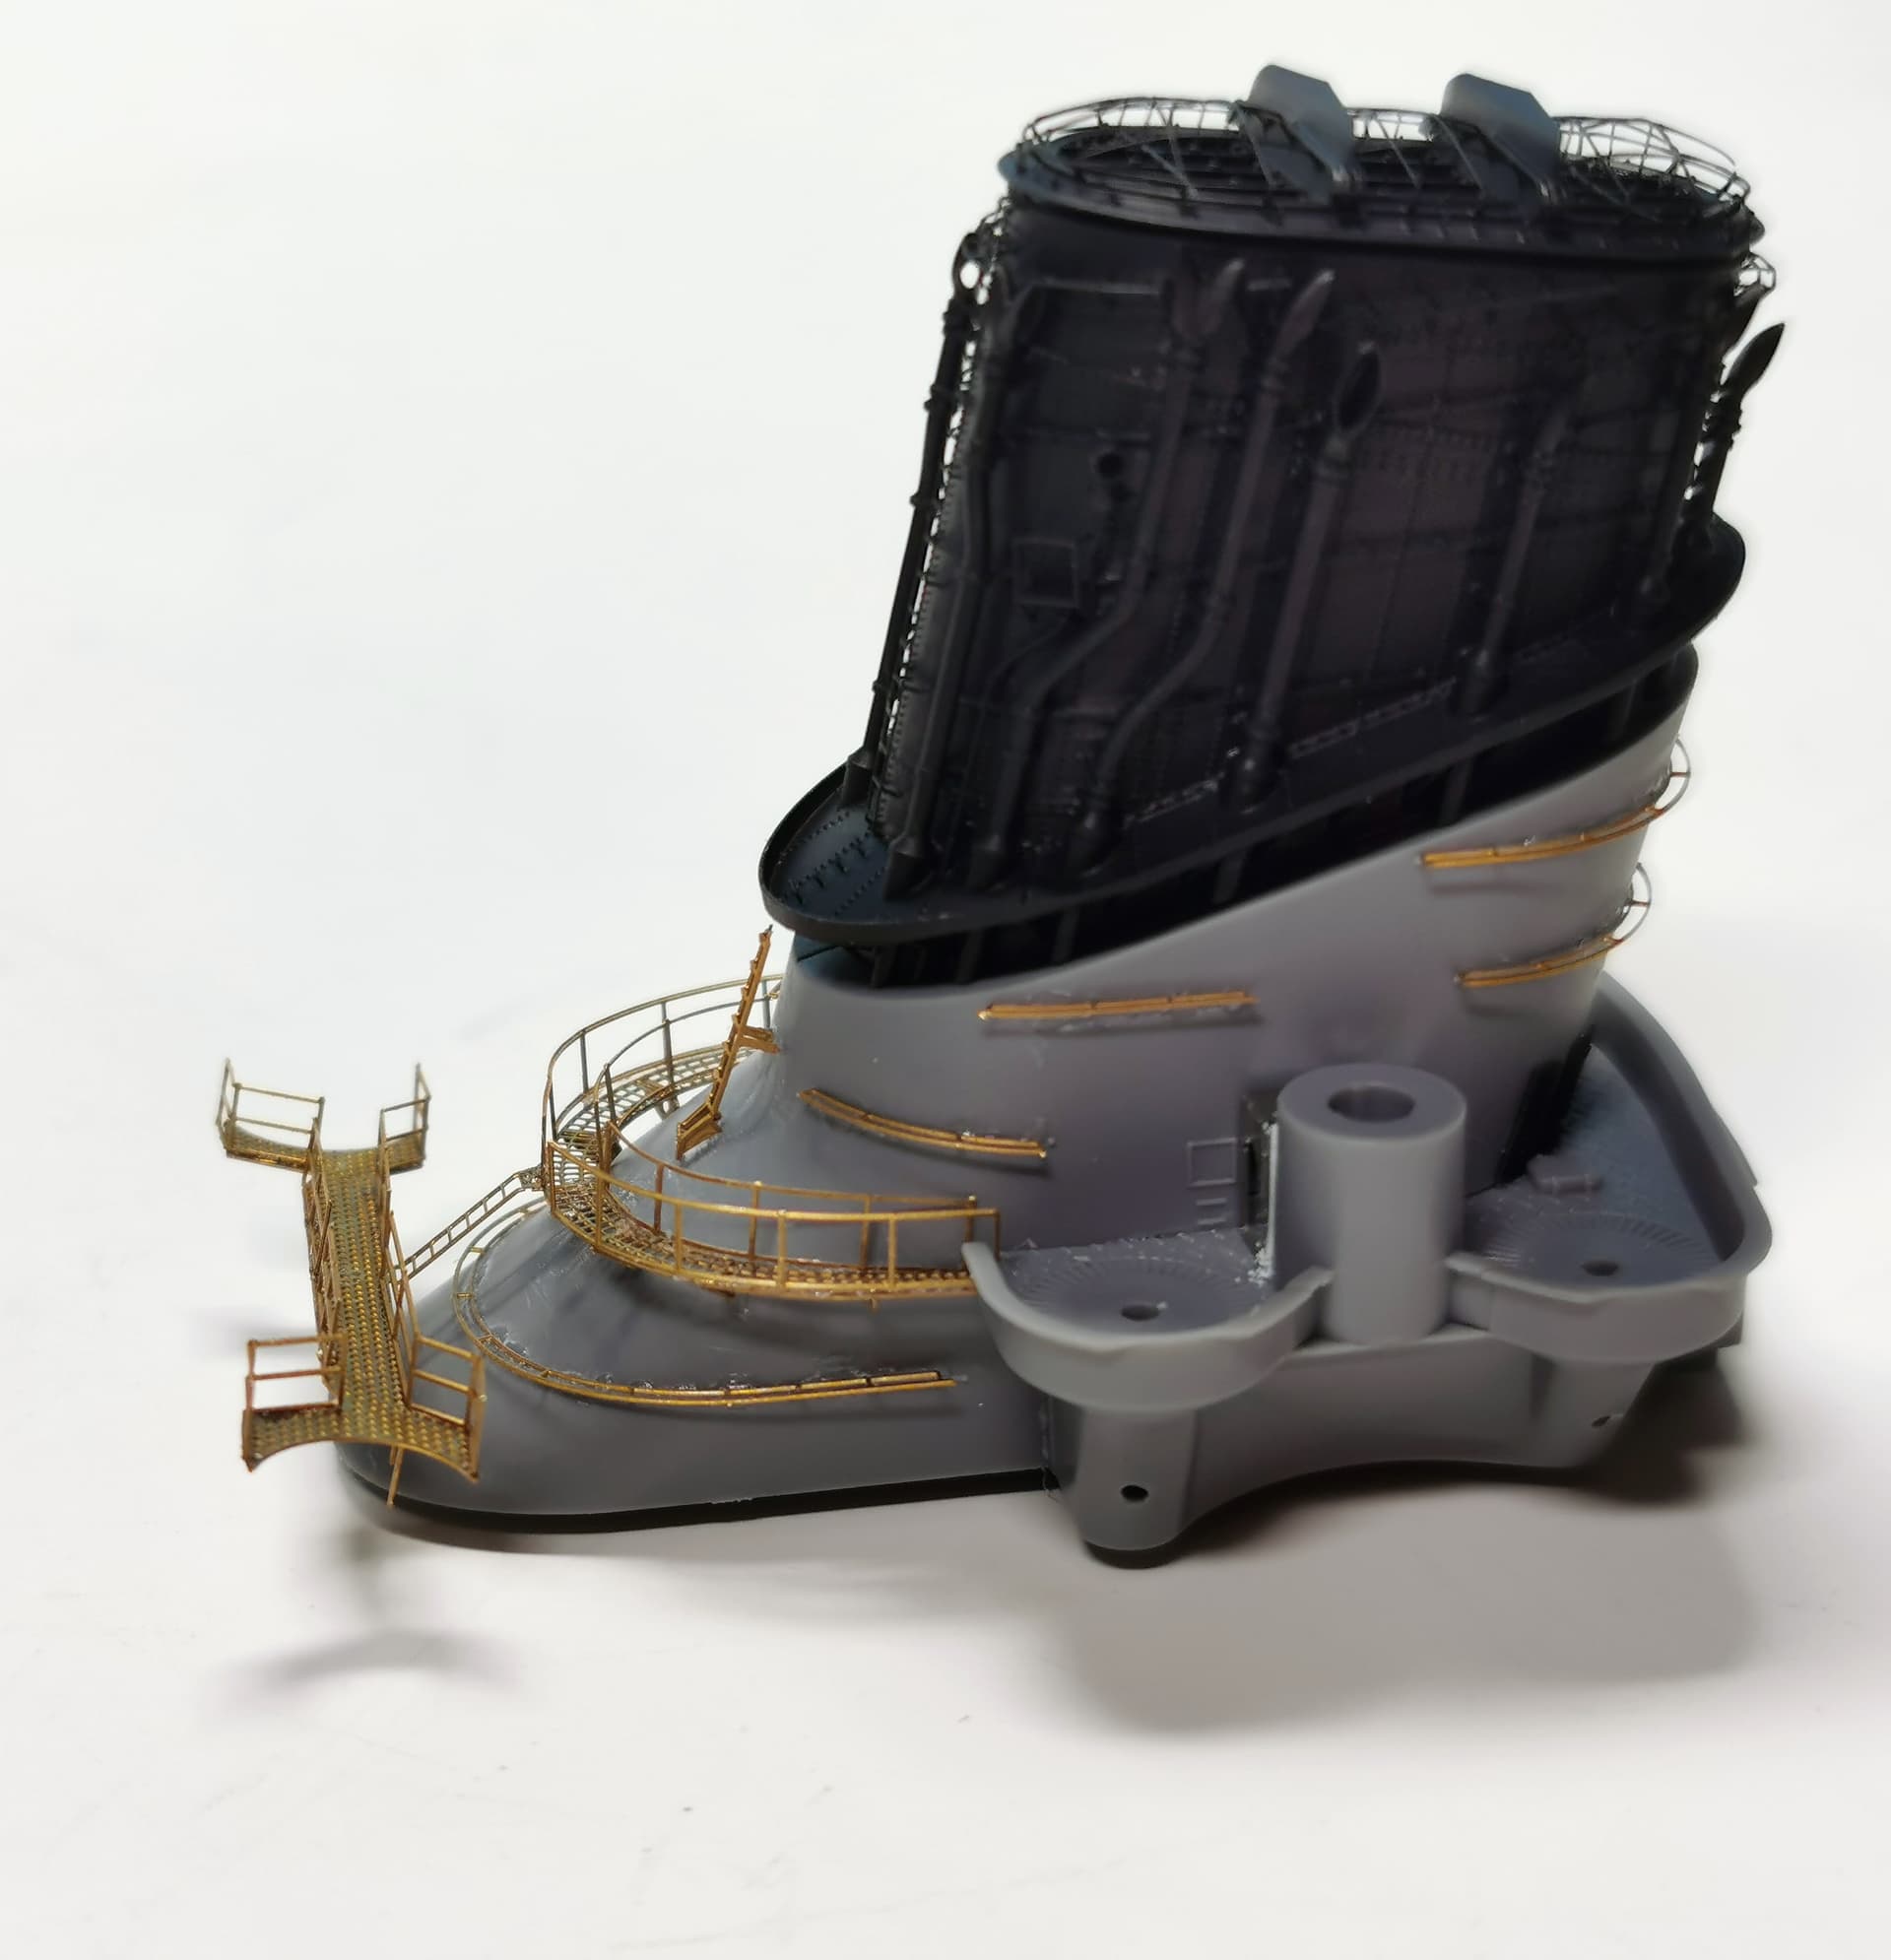
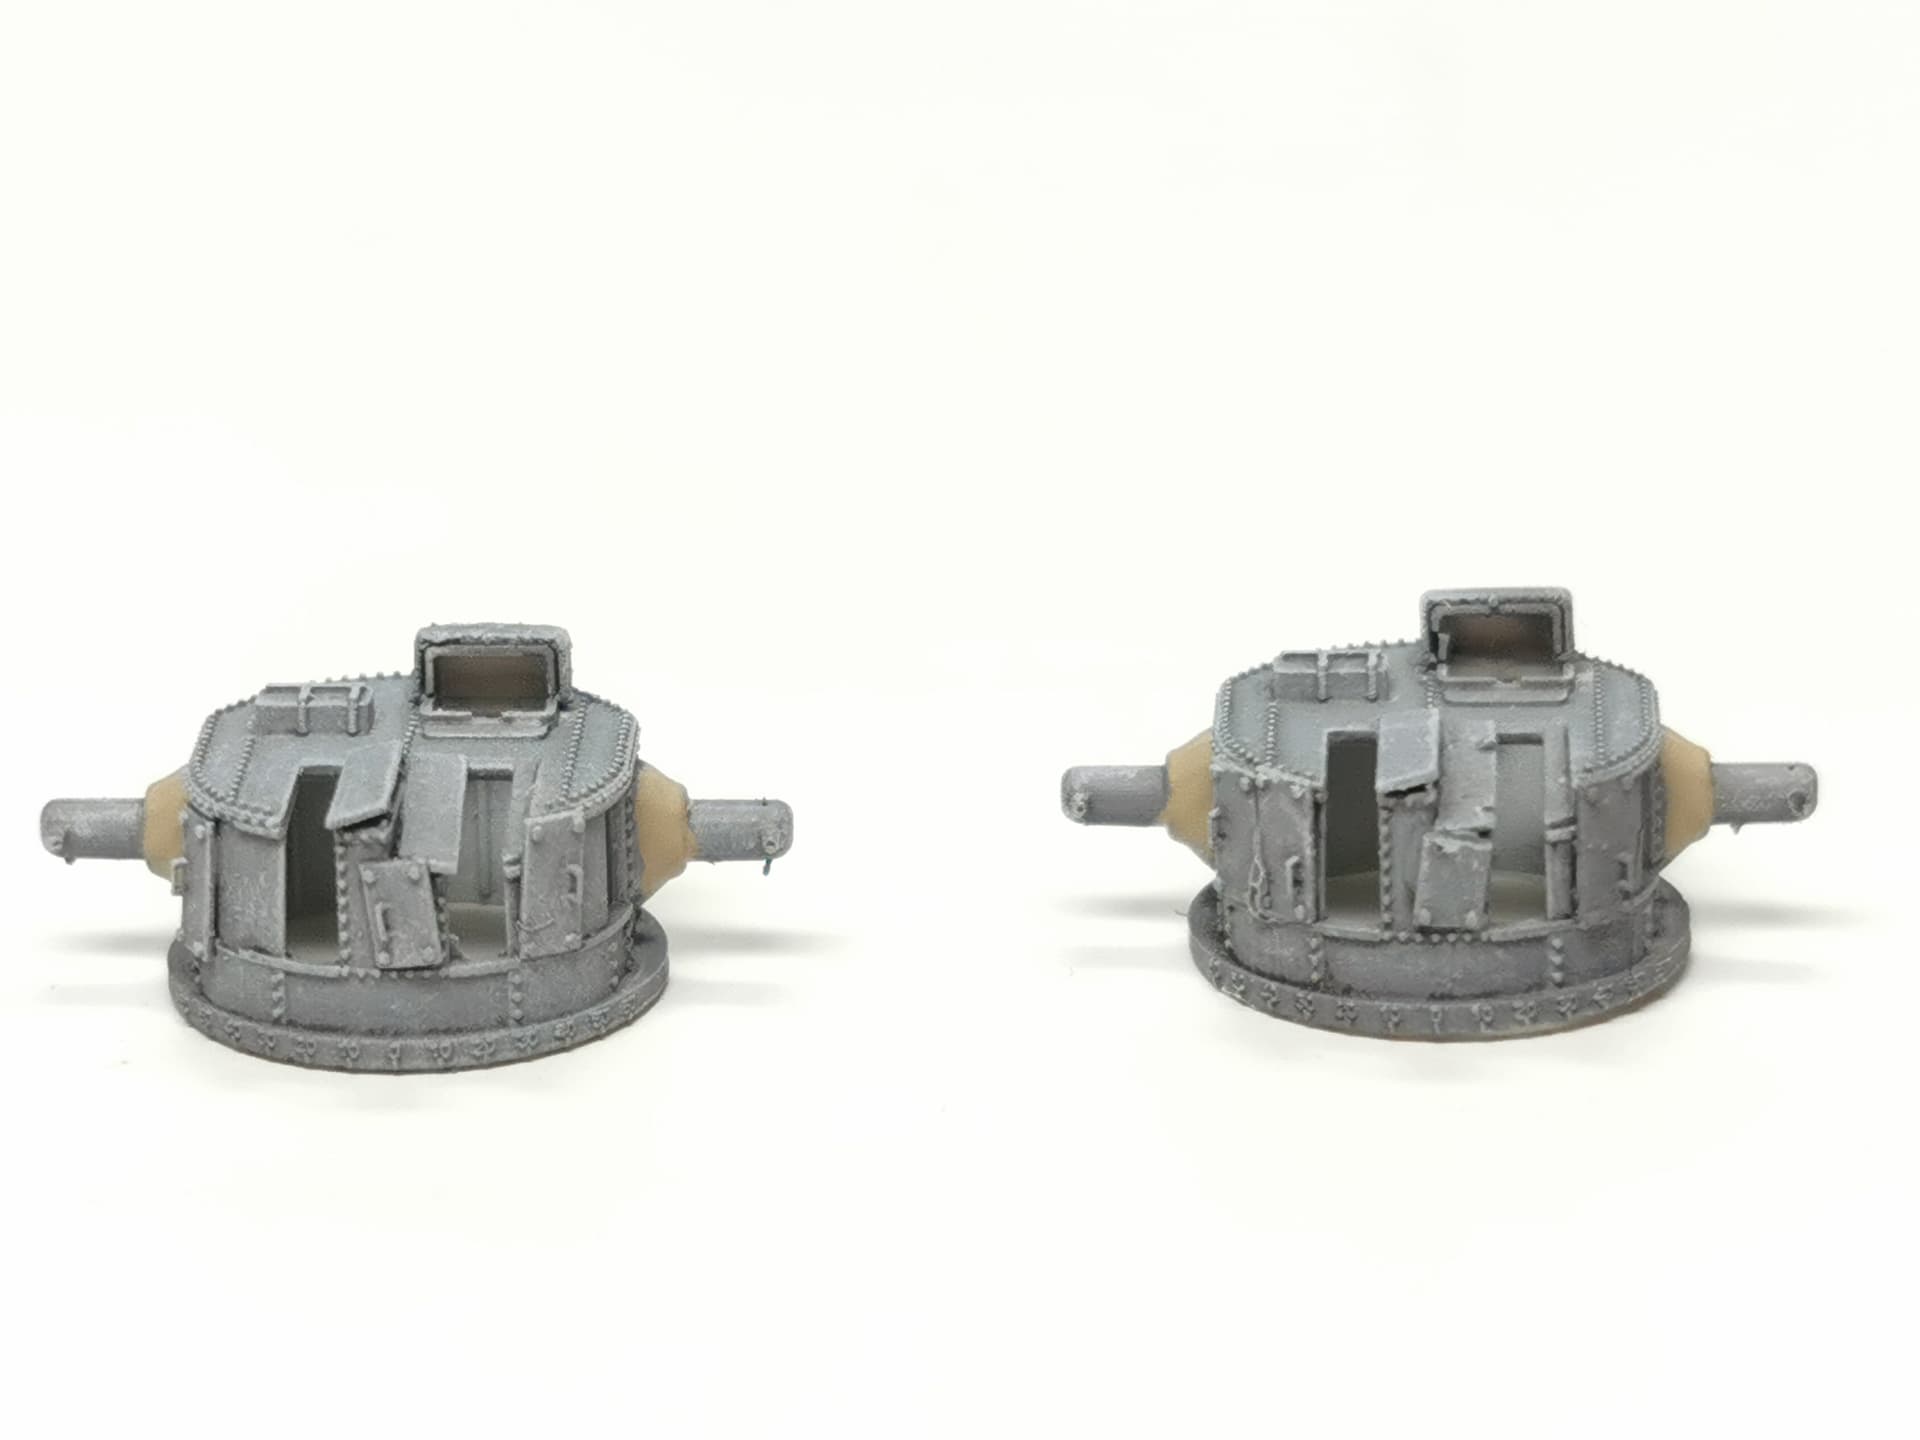
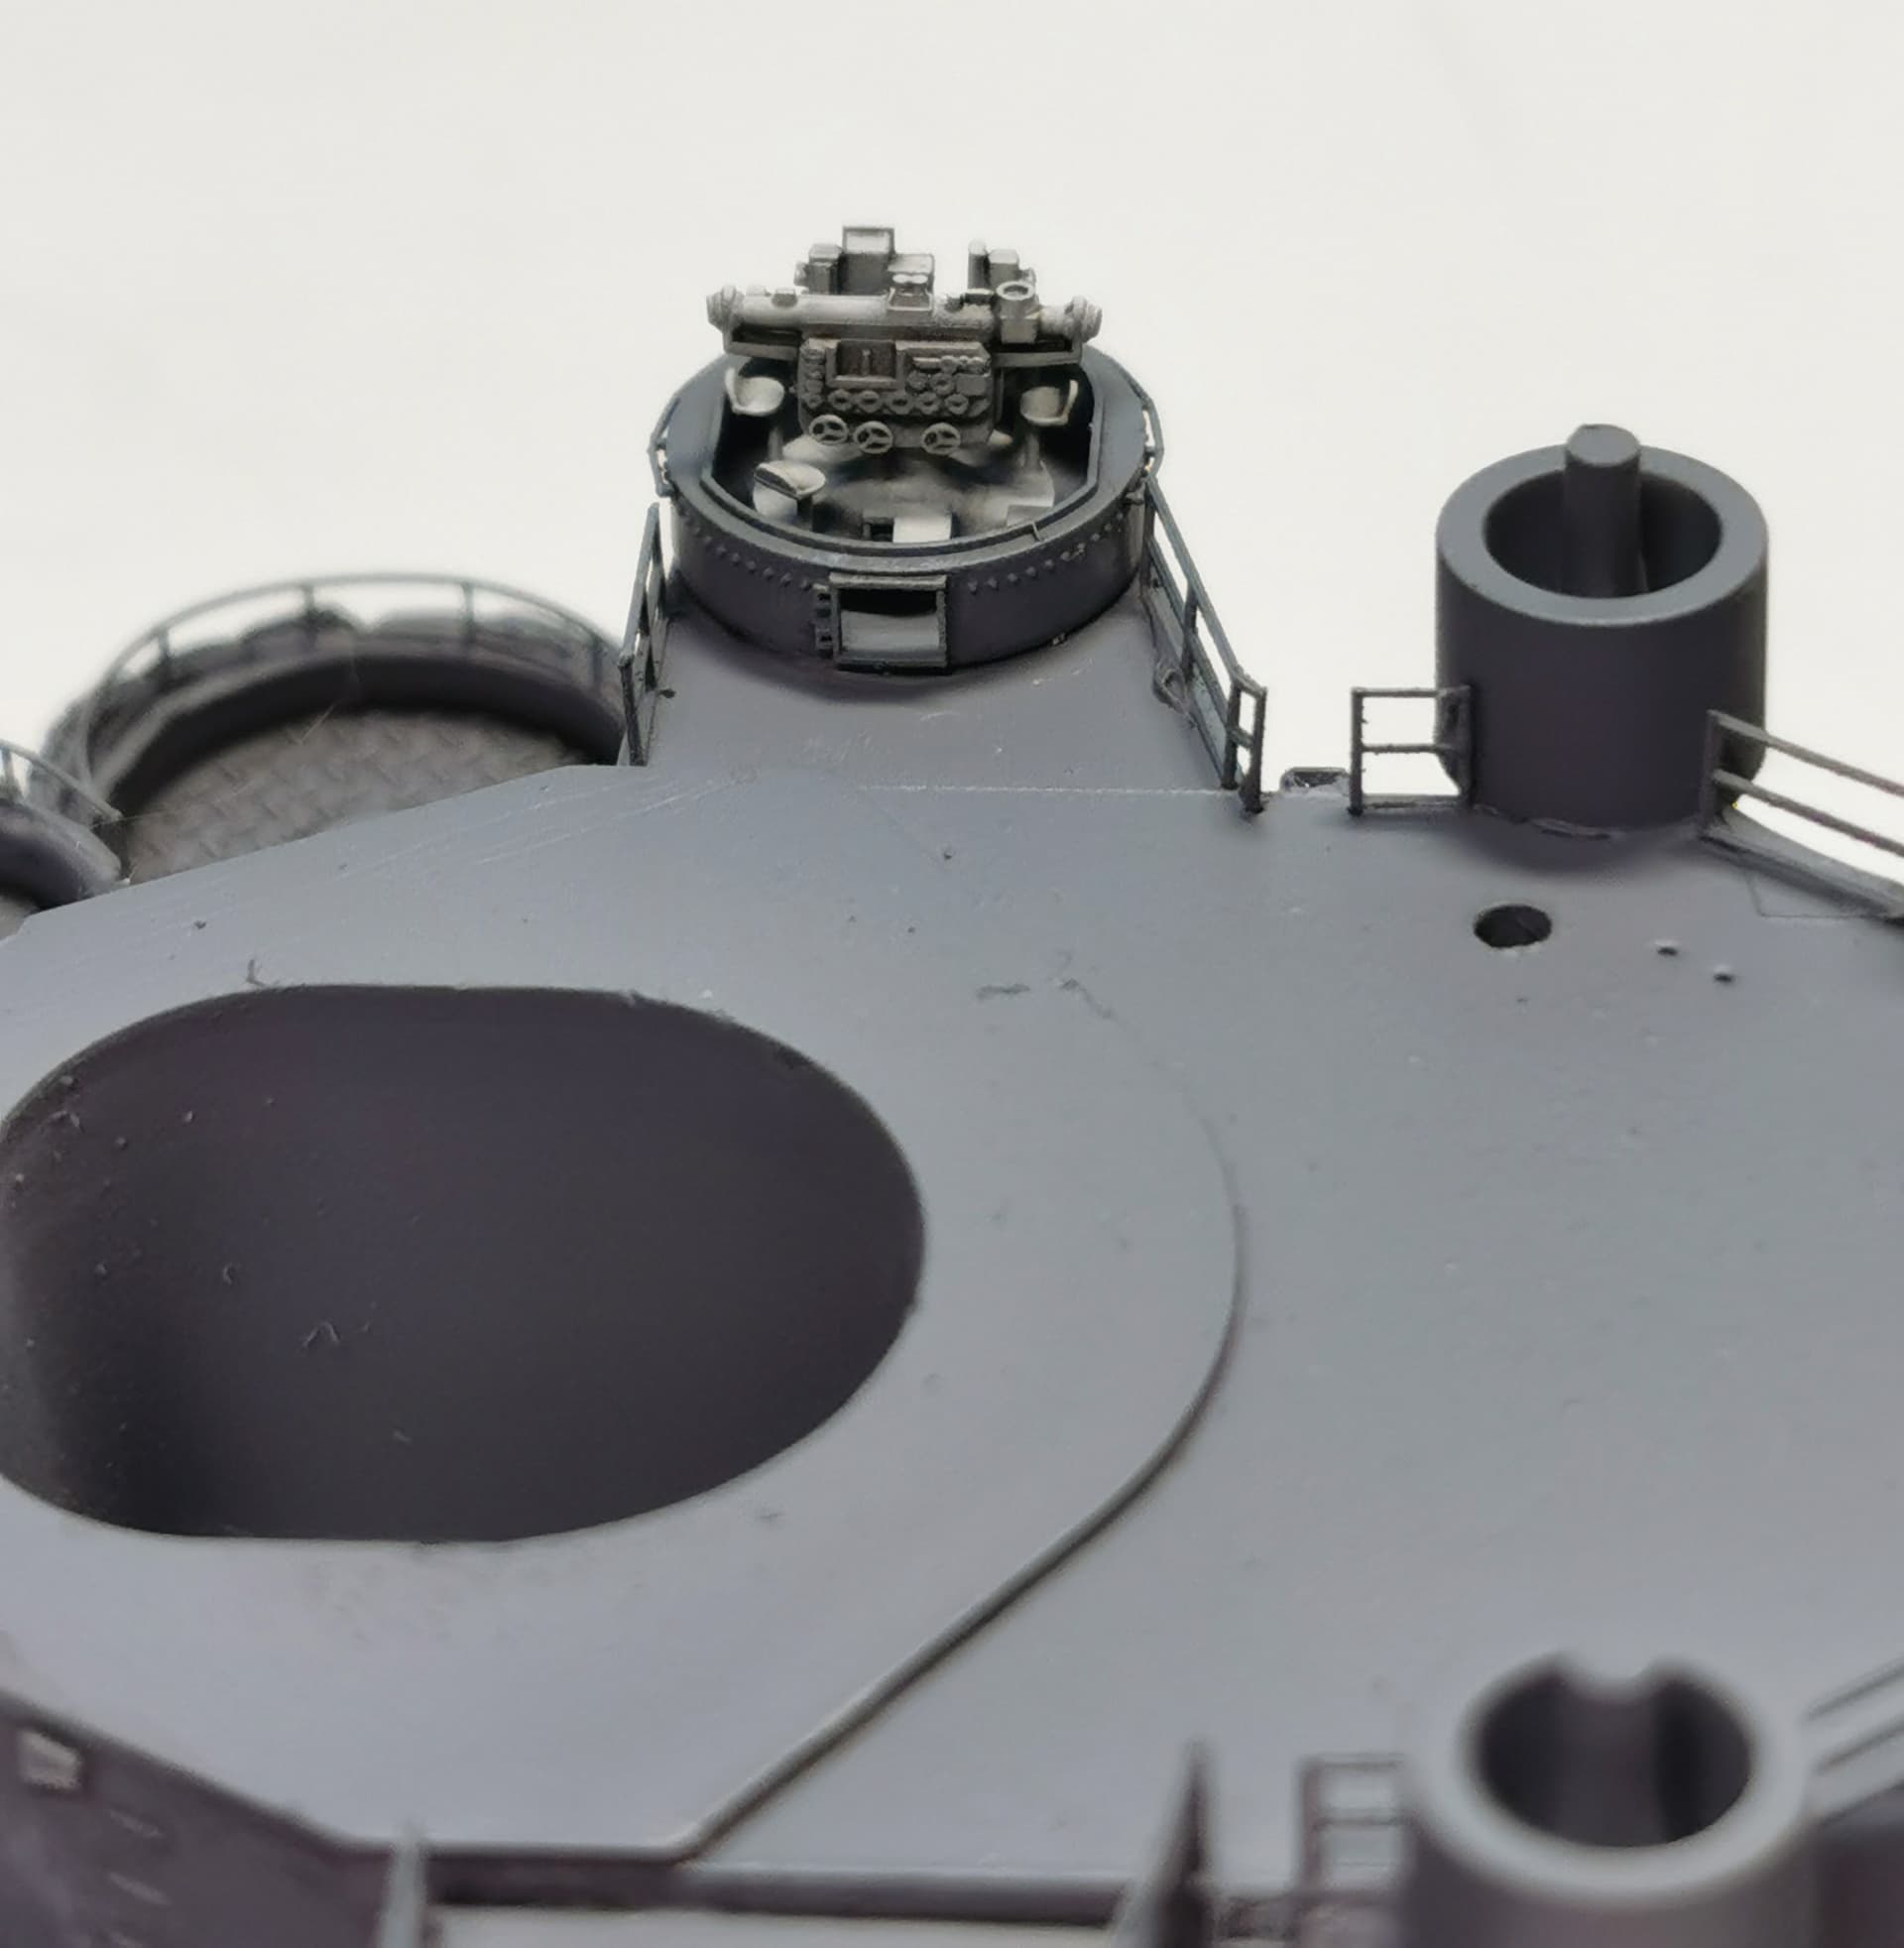
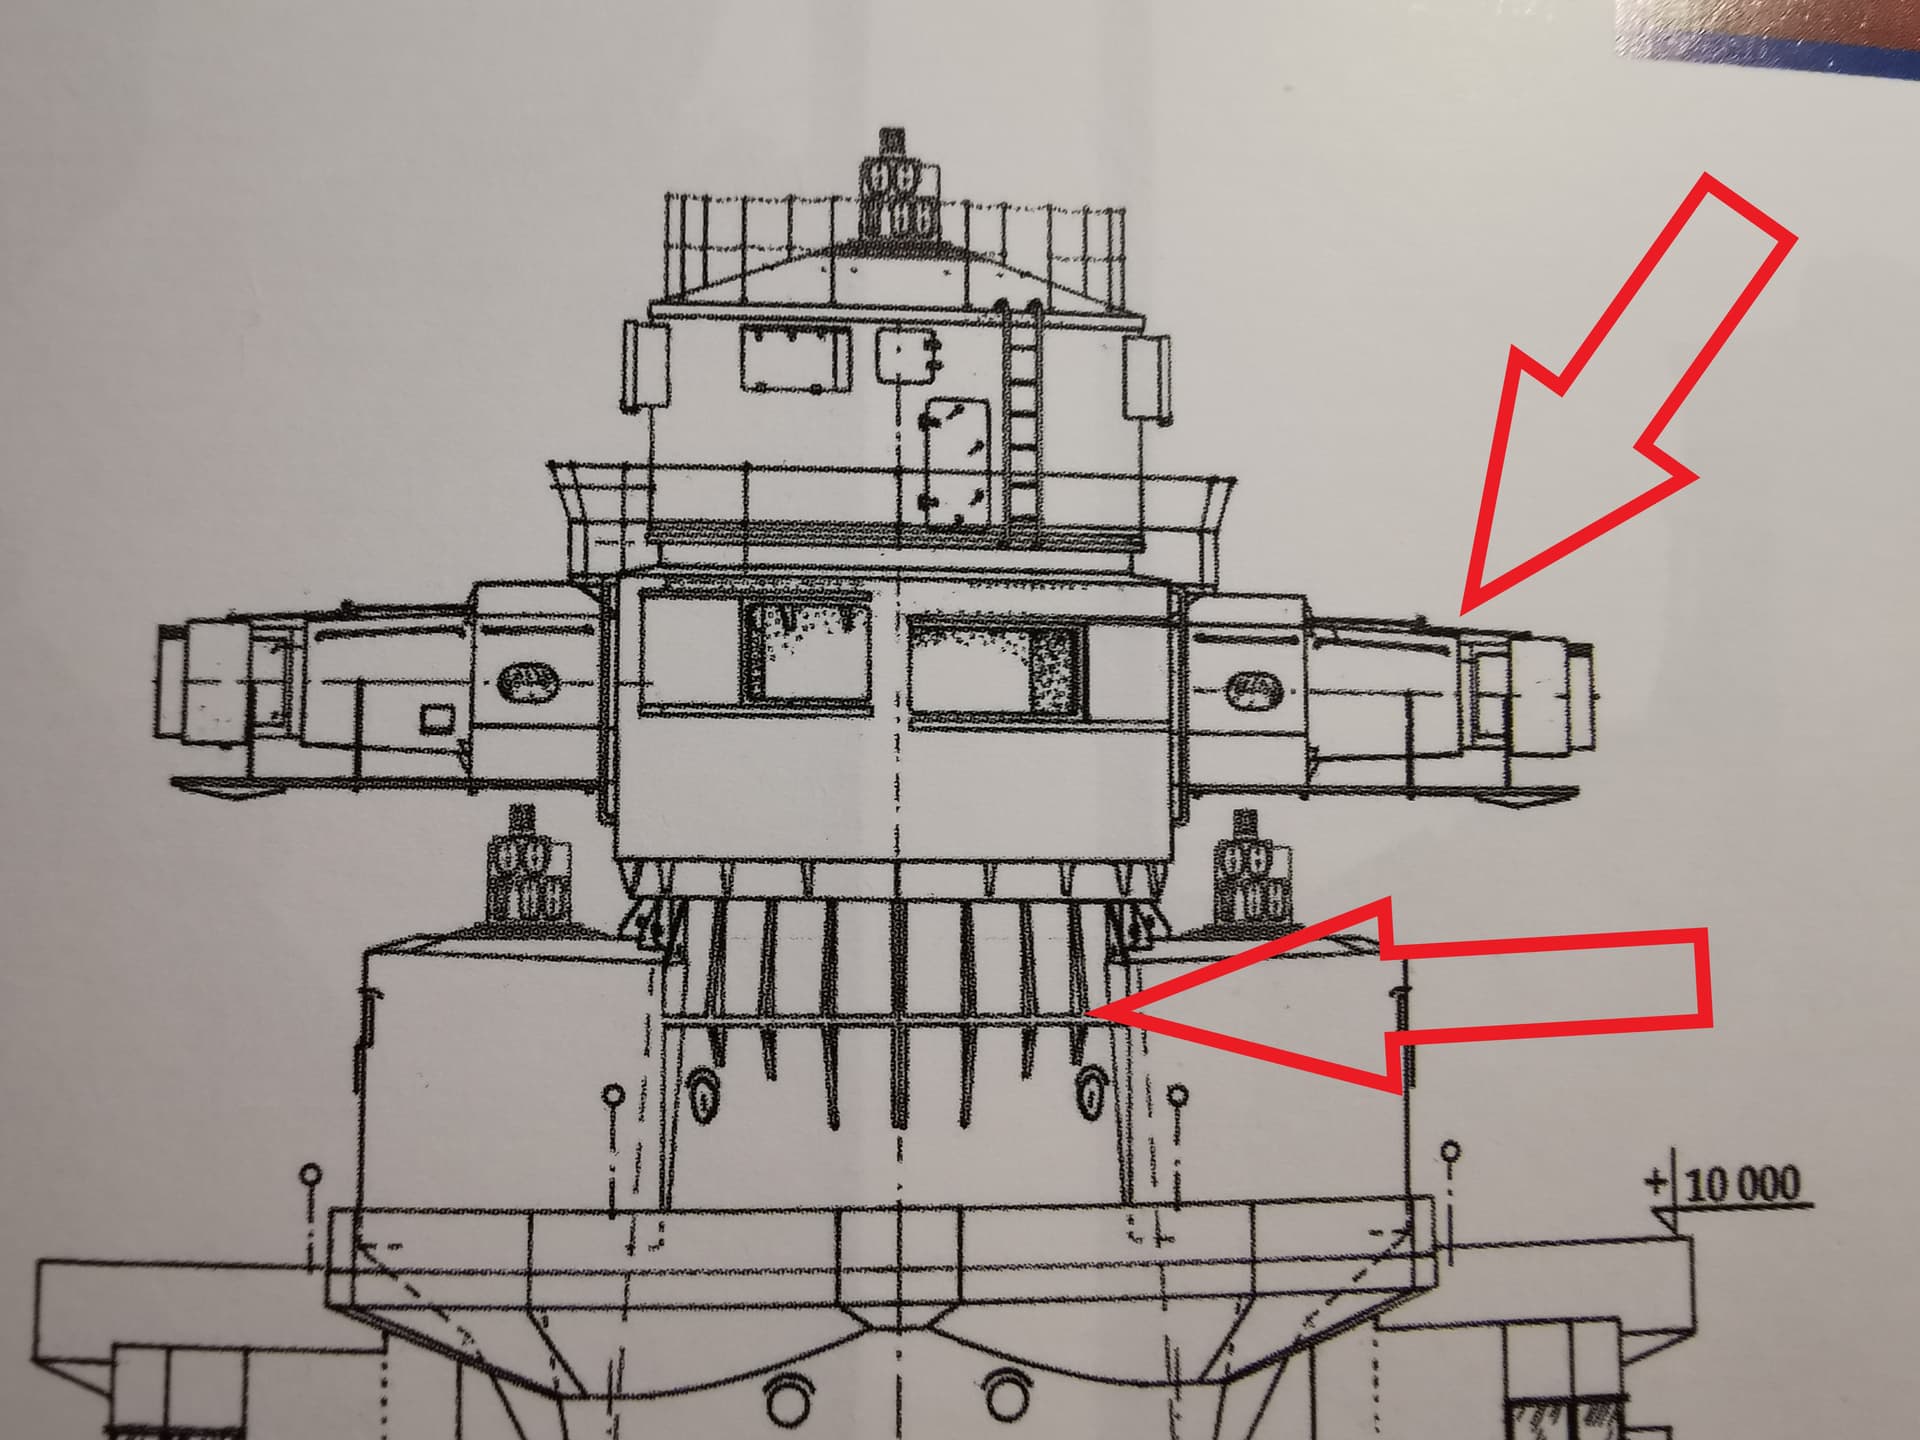
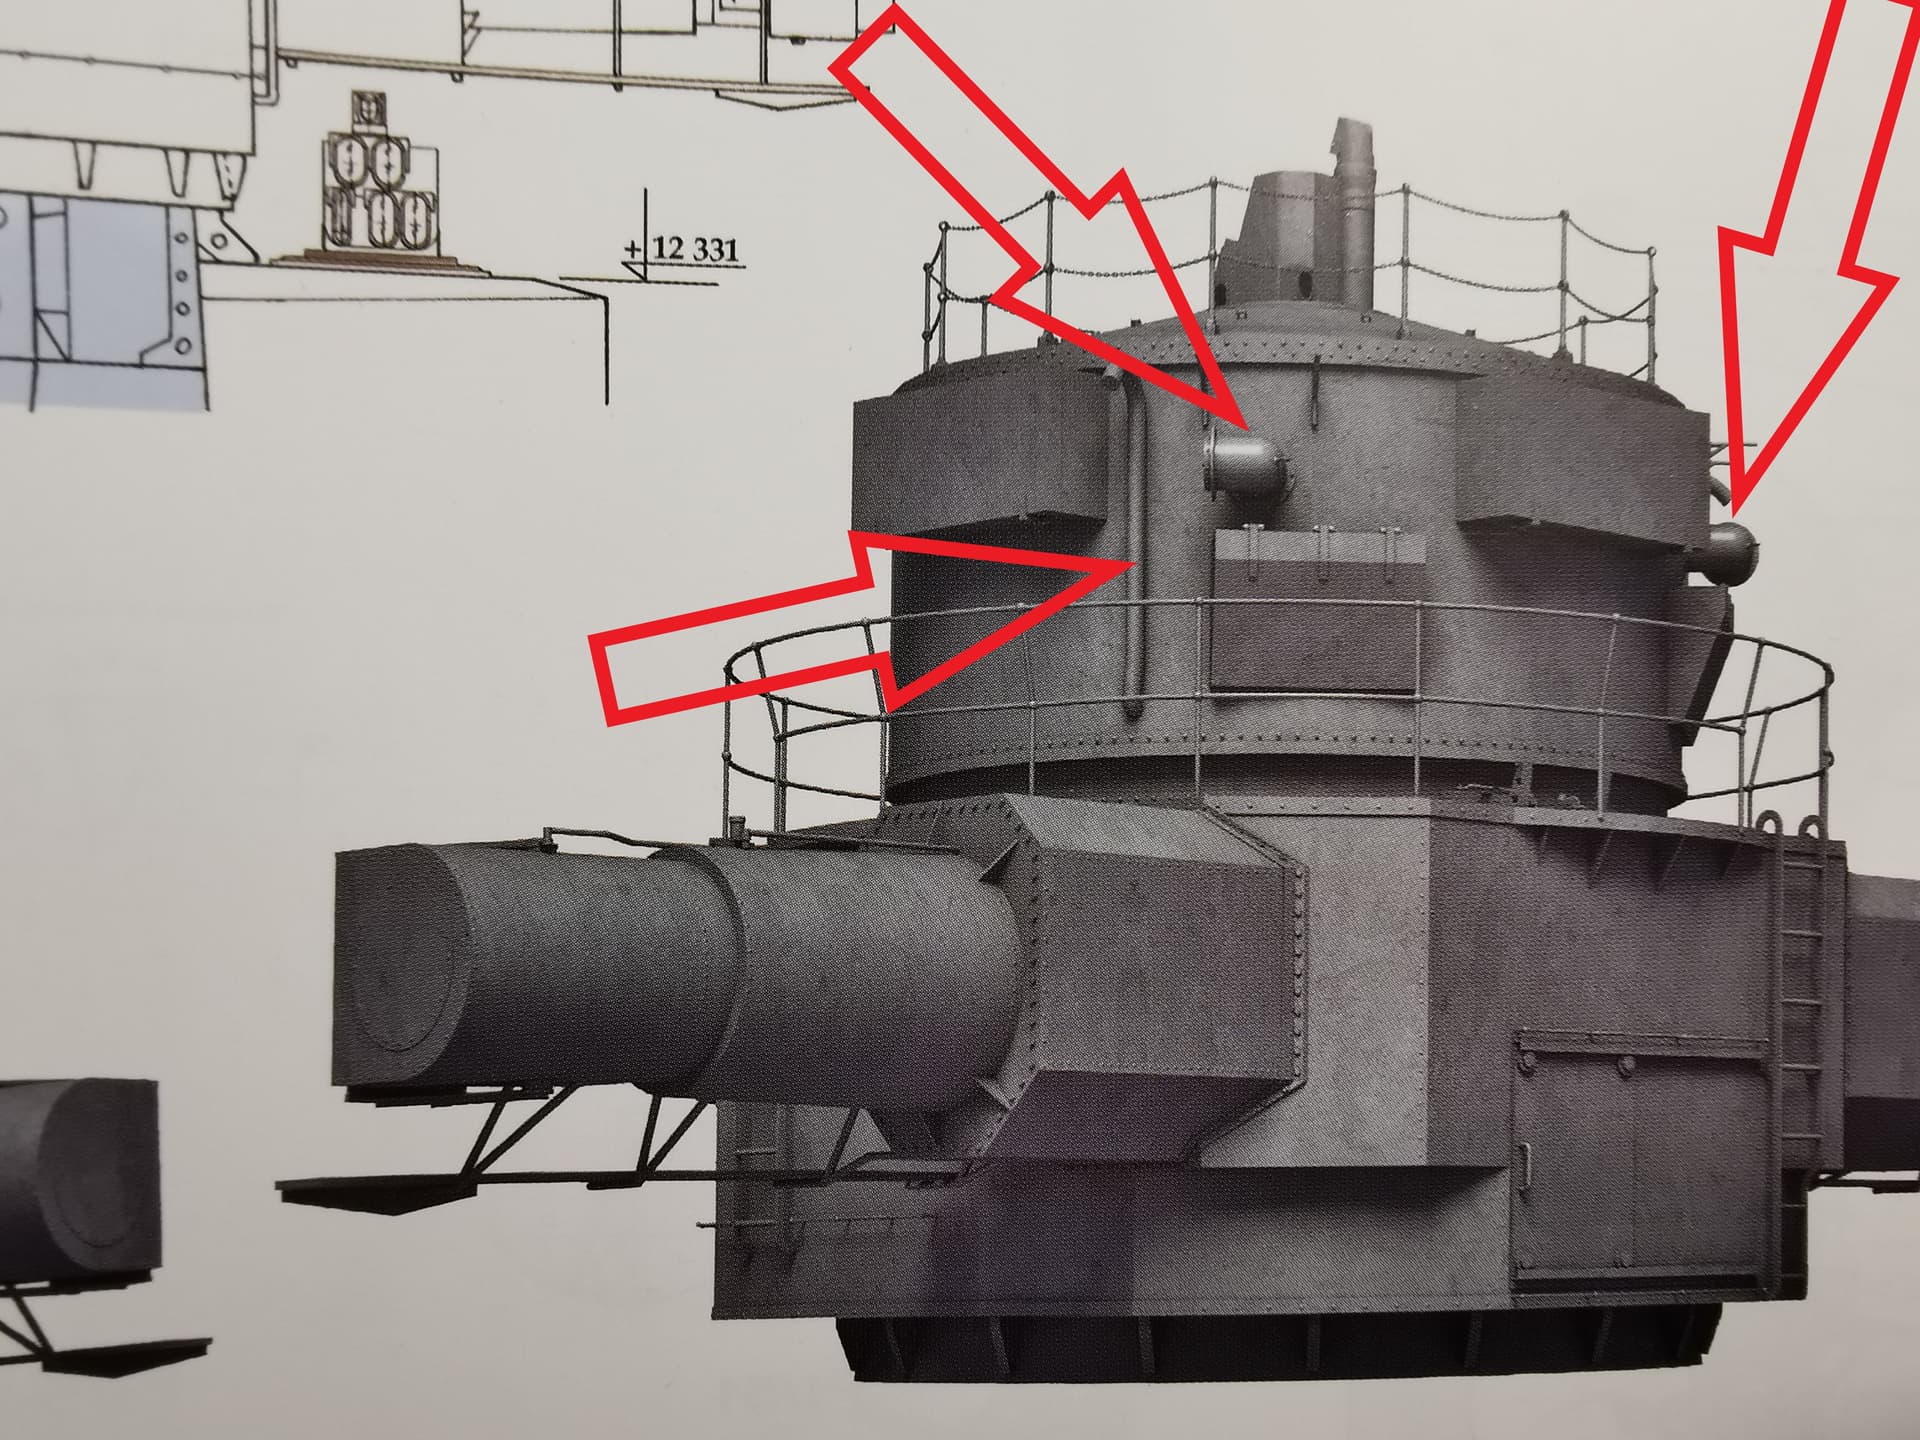
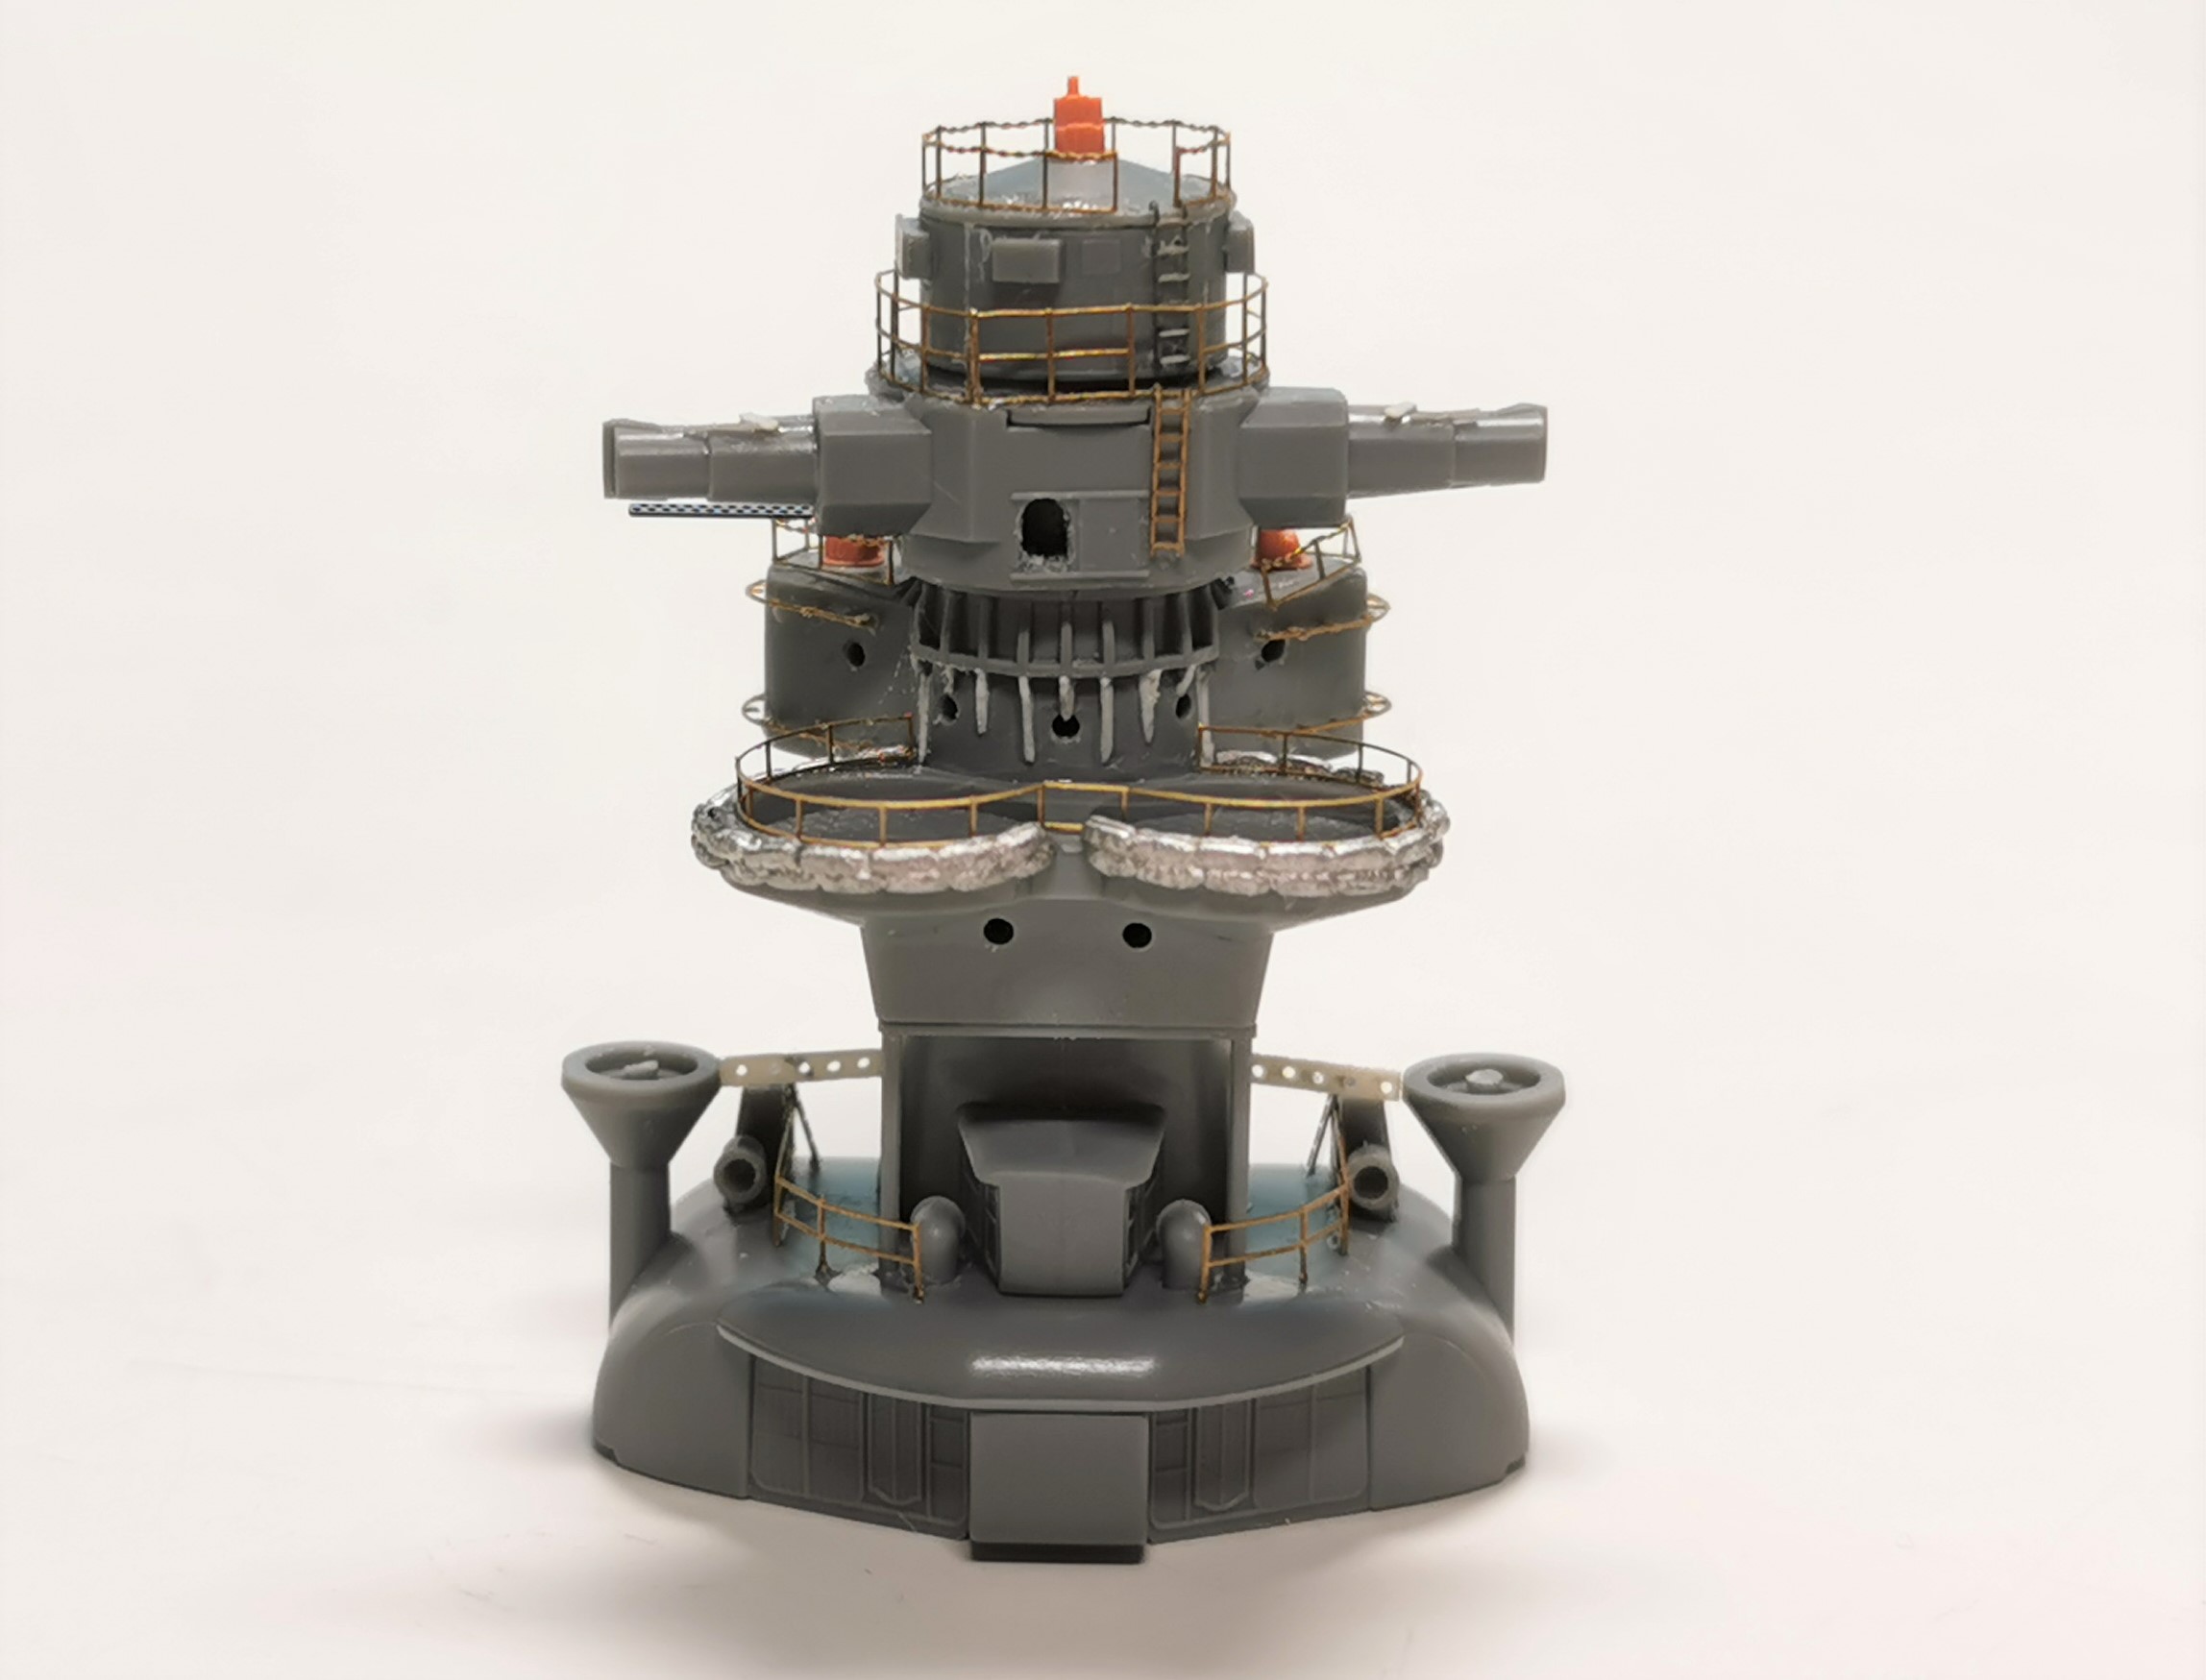
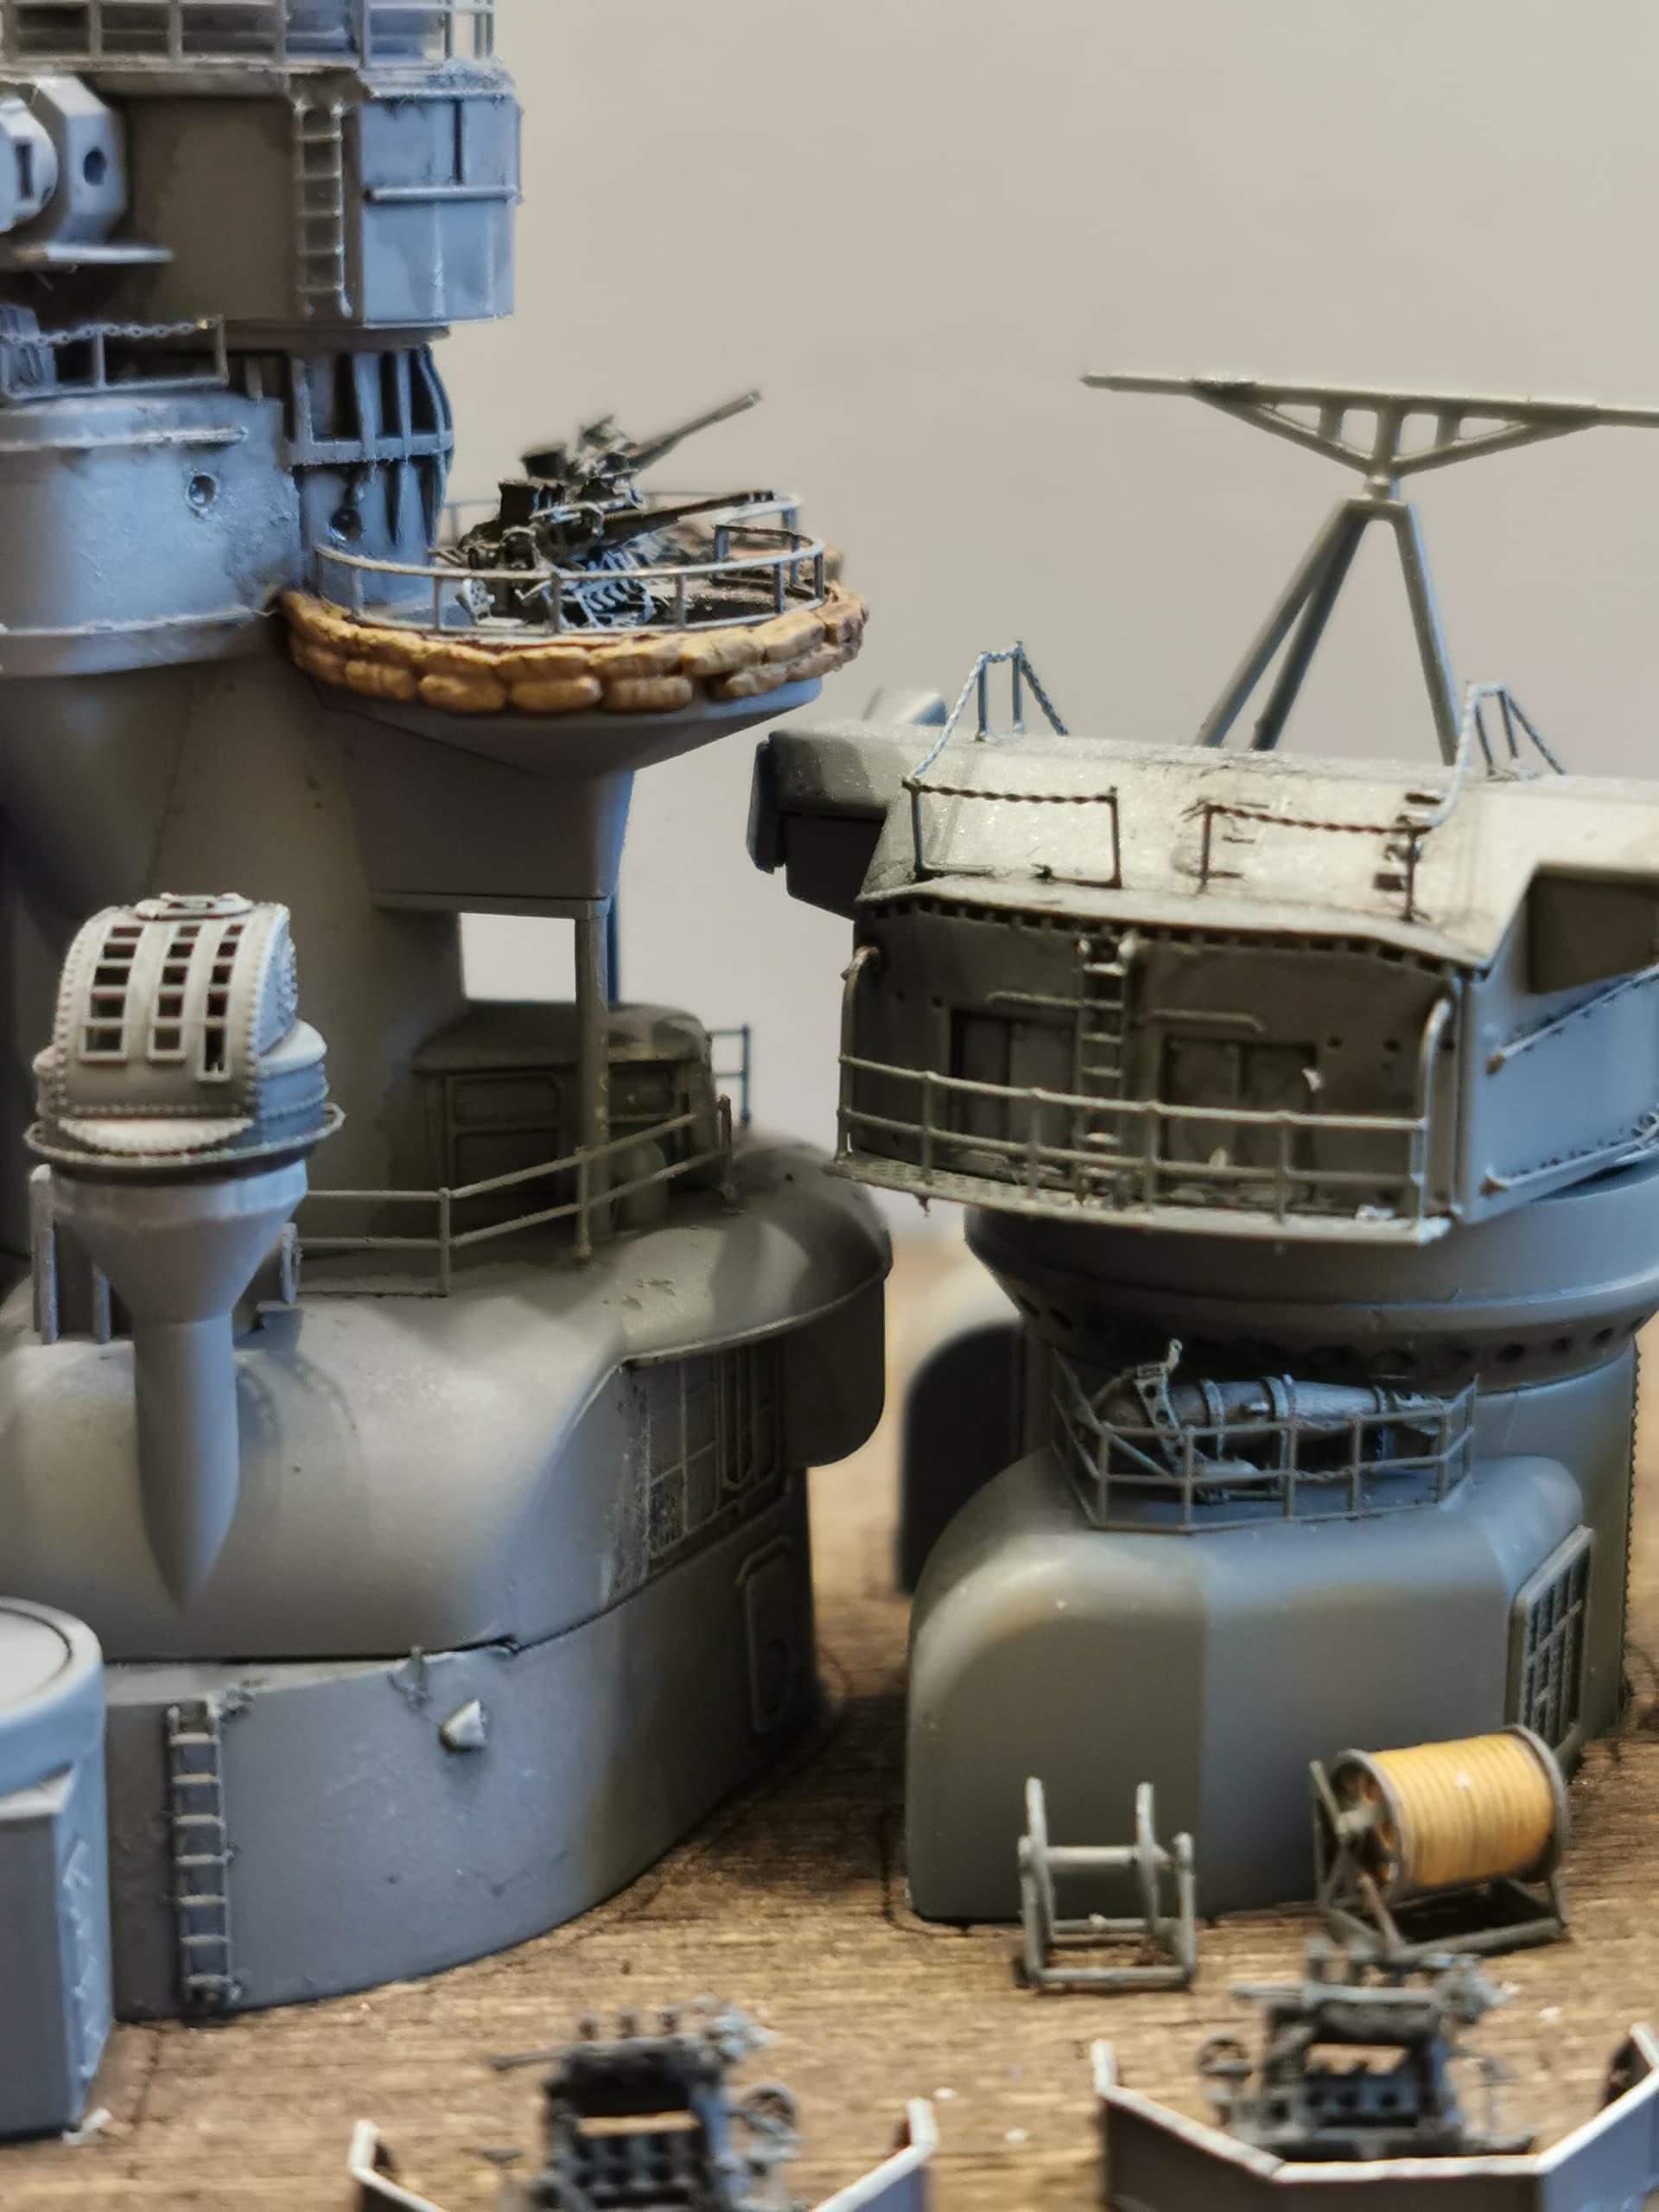
Parallel to my small tutorial and gun painting I worked at the rear “Hoiban” and 10 mtr. rangefinder superstructure. Some difficult work here as there is quite an amount of small etched parts and I decided to improve some visible details here Tamiya has ommitted. The rangefinder turret ring is reinforced by circumferential reinforcement angles. At the rear Tamiya show them just at the upper part of the horizontal leading reinforcement sheet but not the lower ones. I decided to show them also and used thinnest evergreen sheet for these. The real sheets were perforated but because of the small scale I used plain sheet. Tamiya show you three portholes here, one in the middle. I already drilled the portholes after I discovered my reference book don´t show the one in the middle but I will keep it now.
There are also some small details added at the top of the “Hoiban” turred: I added two missing telephone line lead-in tubes and two vertical pipes which function I don´t know but they are visible. also the mechanism for opening and closing the flaps for the rangefinder oculars were made by evergreen sheet and thinned sprue. The three periscope towers are 3d printed parts from from YX models. The two rear Type 95 machine gun control towers received reinforcement sheets out of evergreen again as these were also missing within the kit.
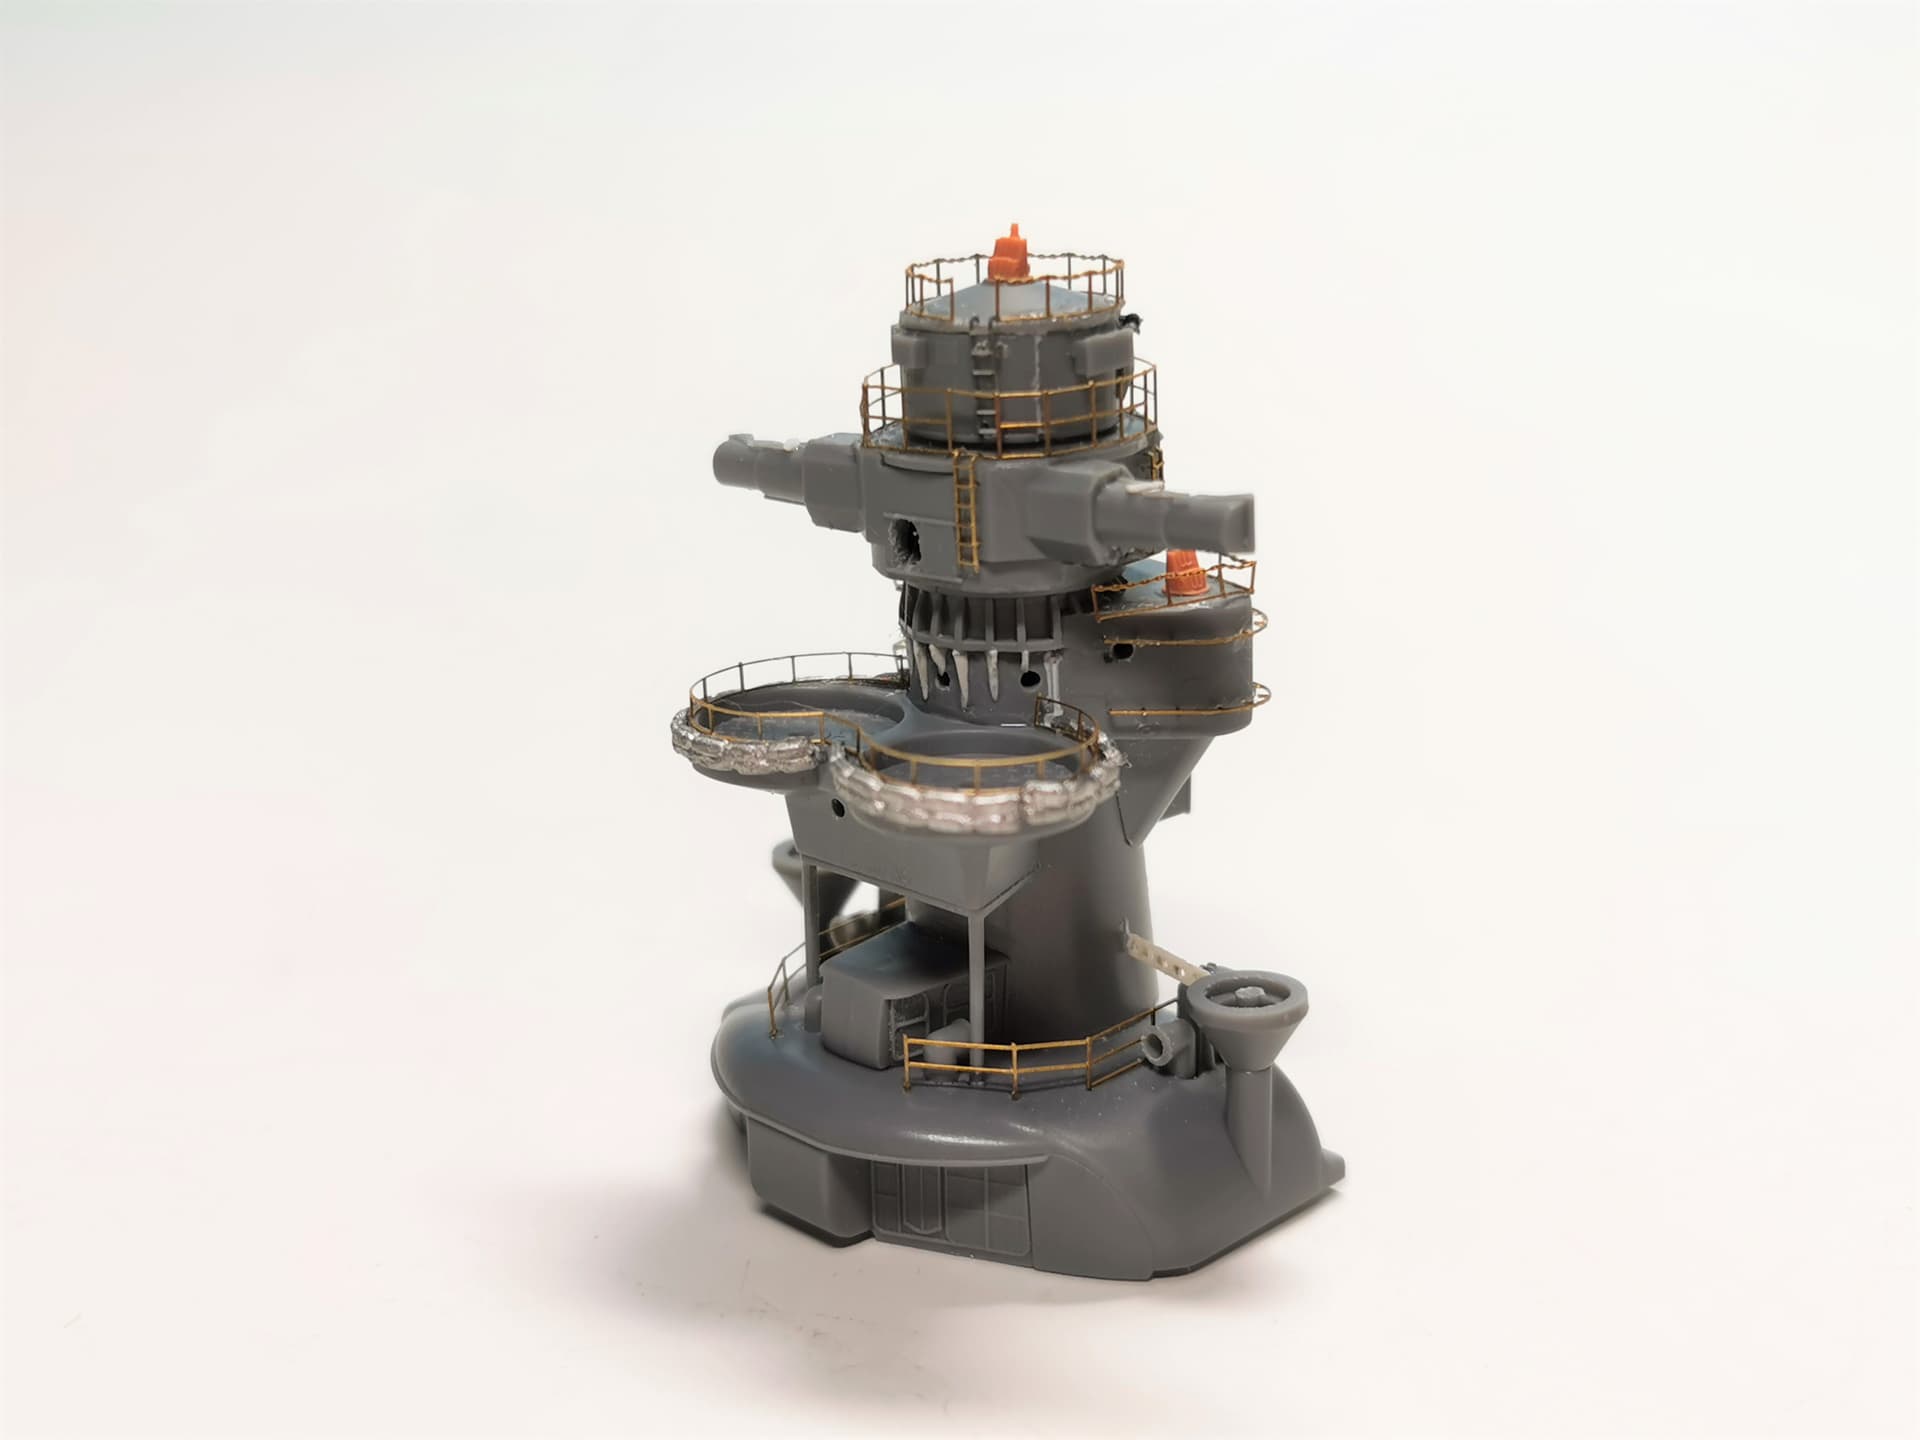
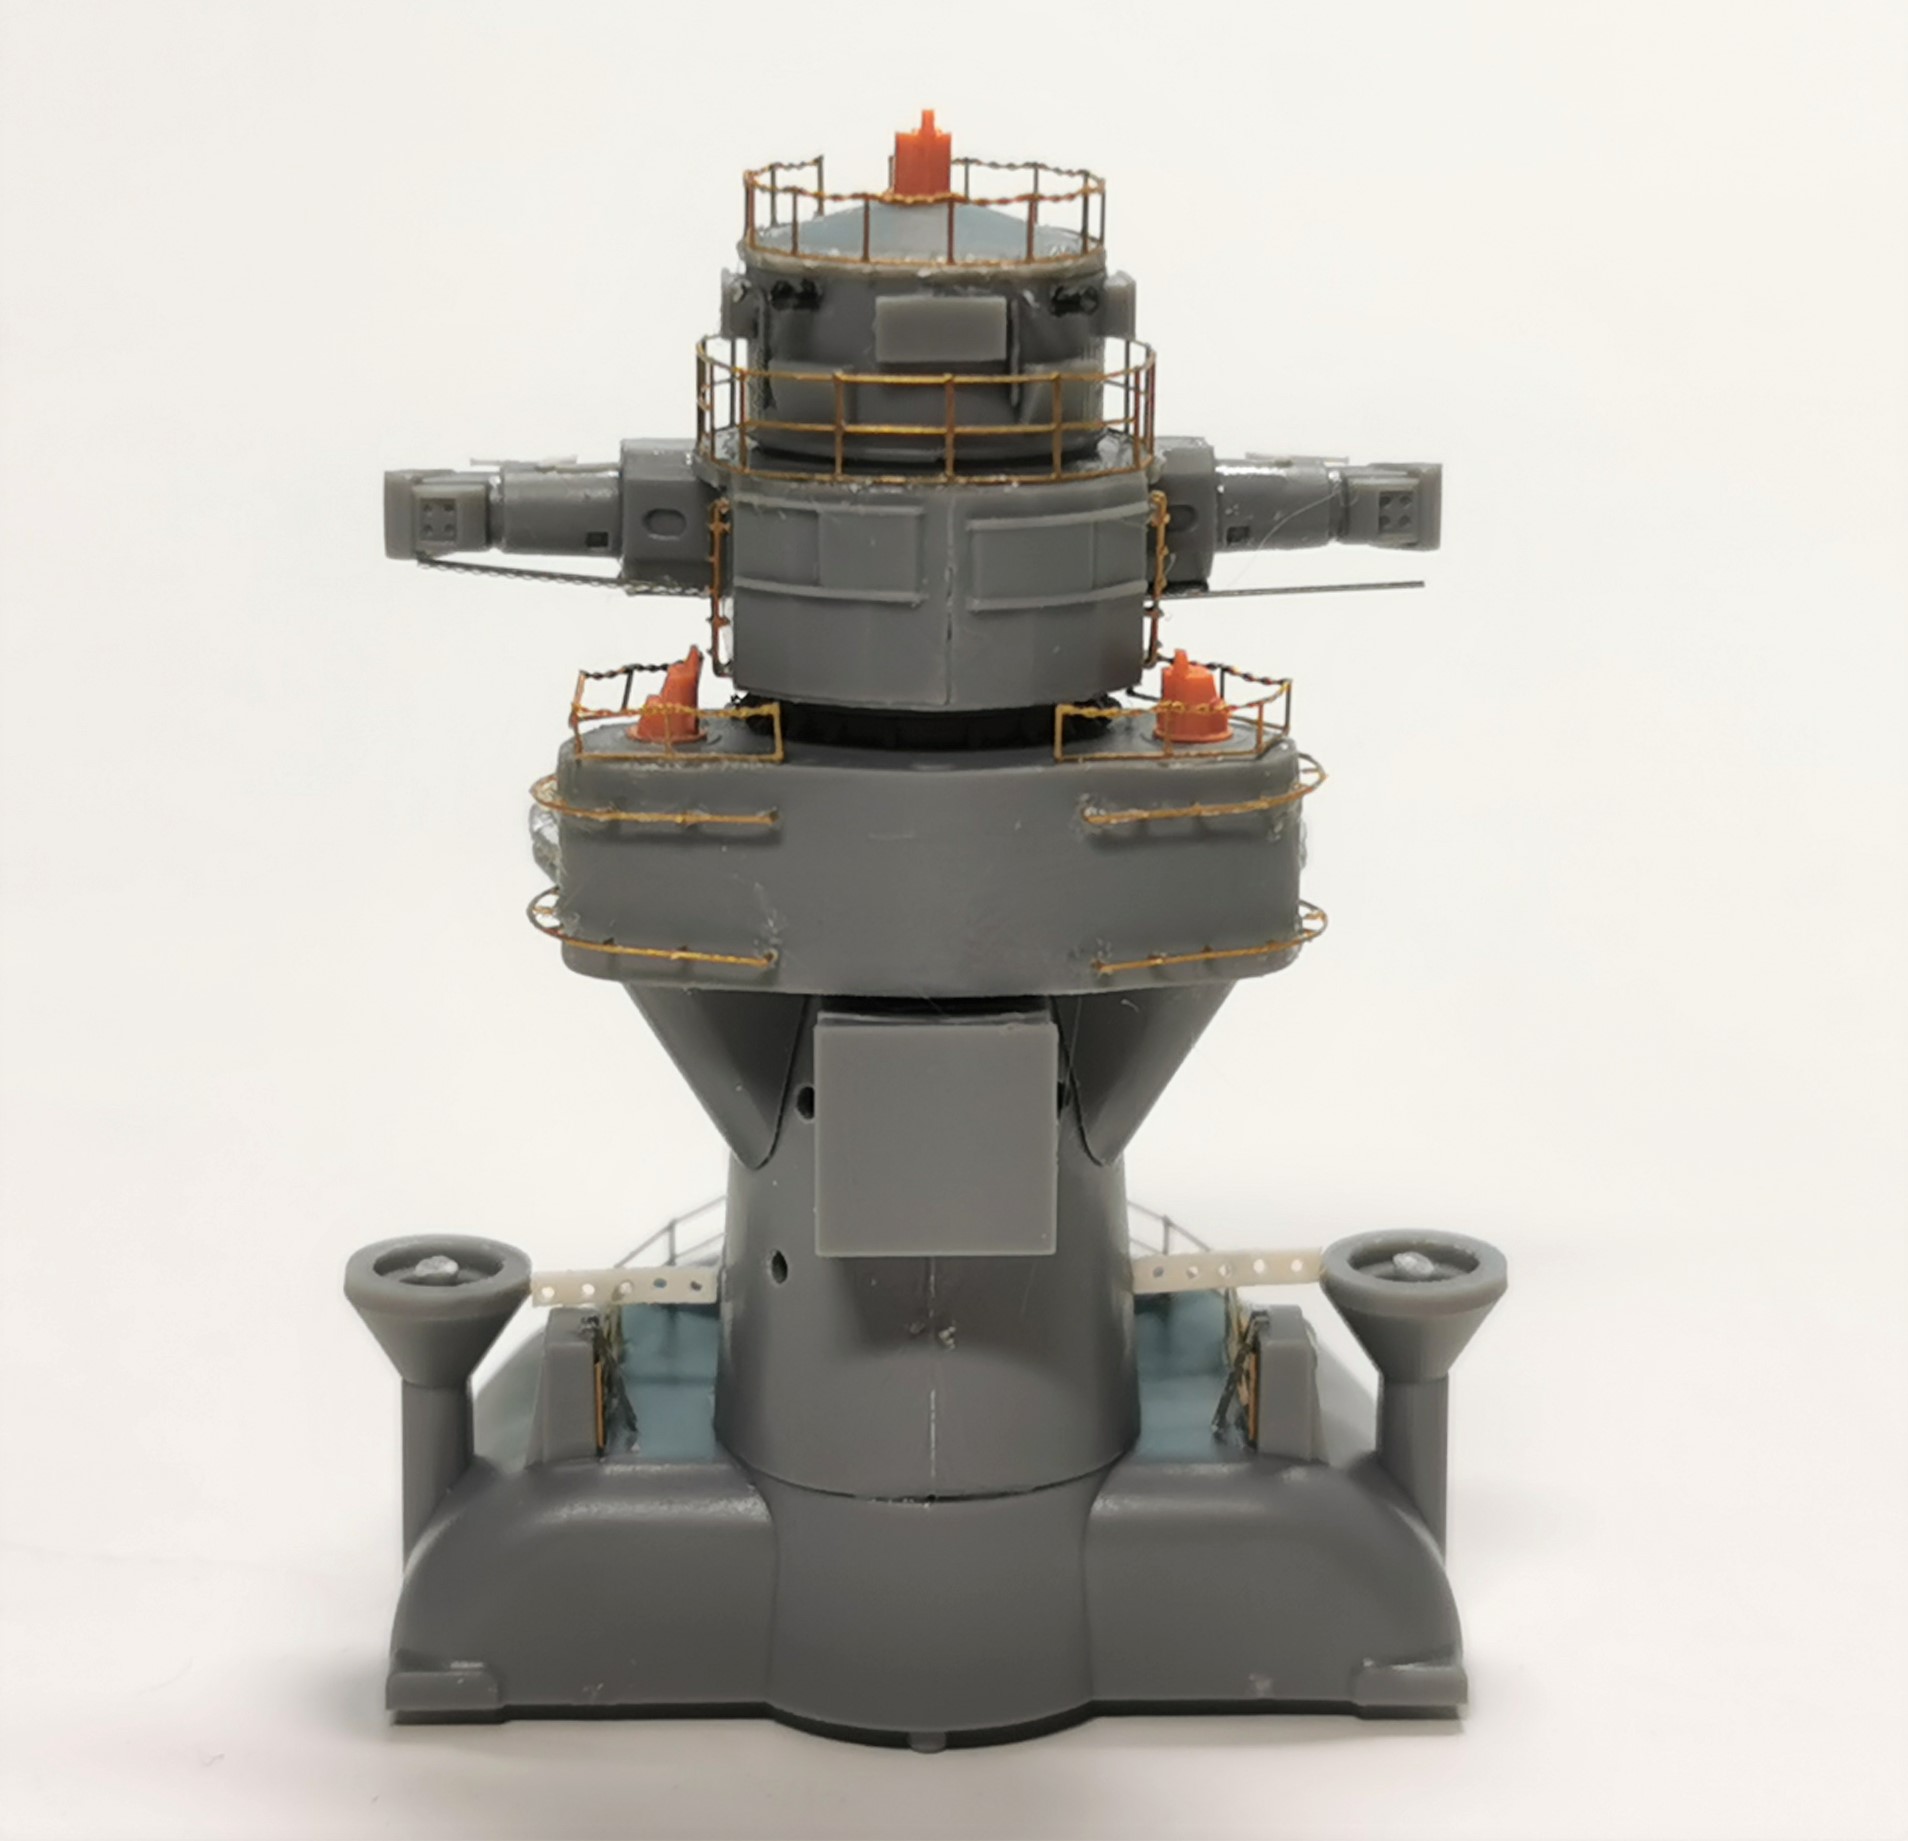
This is it after finishing the painting and installing it into the ship´s superstructure. Sorry the pics are not ideal but the lighting conditions are bad today. I found out that inexplicably the rear turret is touching the Hoiban turrets structure with its rear entrance platform…
P.S. I just found it out now why the rear turret don´t fit: I mistakenly interchanged the frontal and the rear turrets. The frontal one have an entrance platfom for the gun but the rear one not. Turrets changed, problem solved
I am ashamed of myself for not following the updates of a true artist. Any complements would be foolish to say and patronizing. An absolute joy to catch up on and made me smile soooooo many times. Thank you Thomas! Seriously!
just more great and stunning work, she’s really becoming busy looking!
Glad the issue with that turret resolved itself quickly - I know that sometimes you run into trouble like this with aftermarket parts not fitting or enlarging substructures in a way that they eventually don’t fit any more…can be very embarrassing…
And thanks for your little tutorial and insight in your painting techniques - as Tim says, your paintwork really looks spot on!