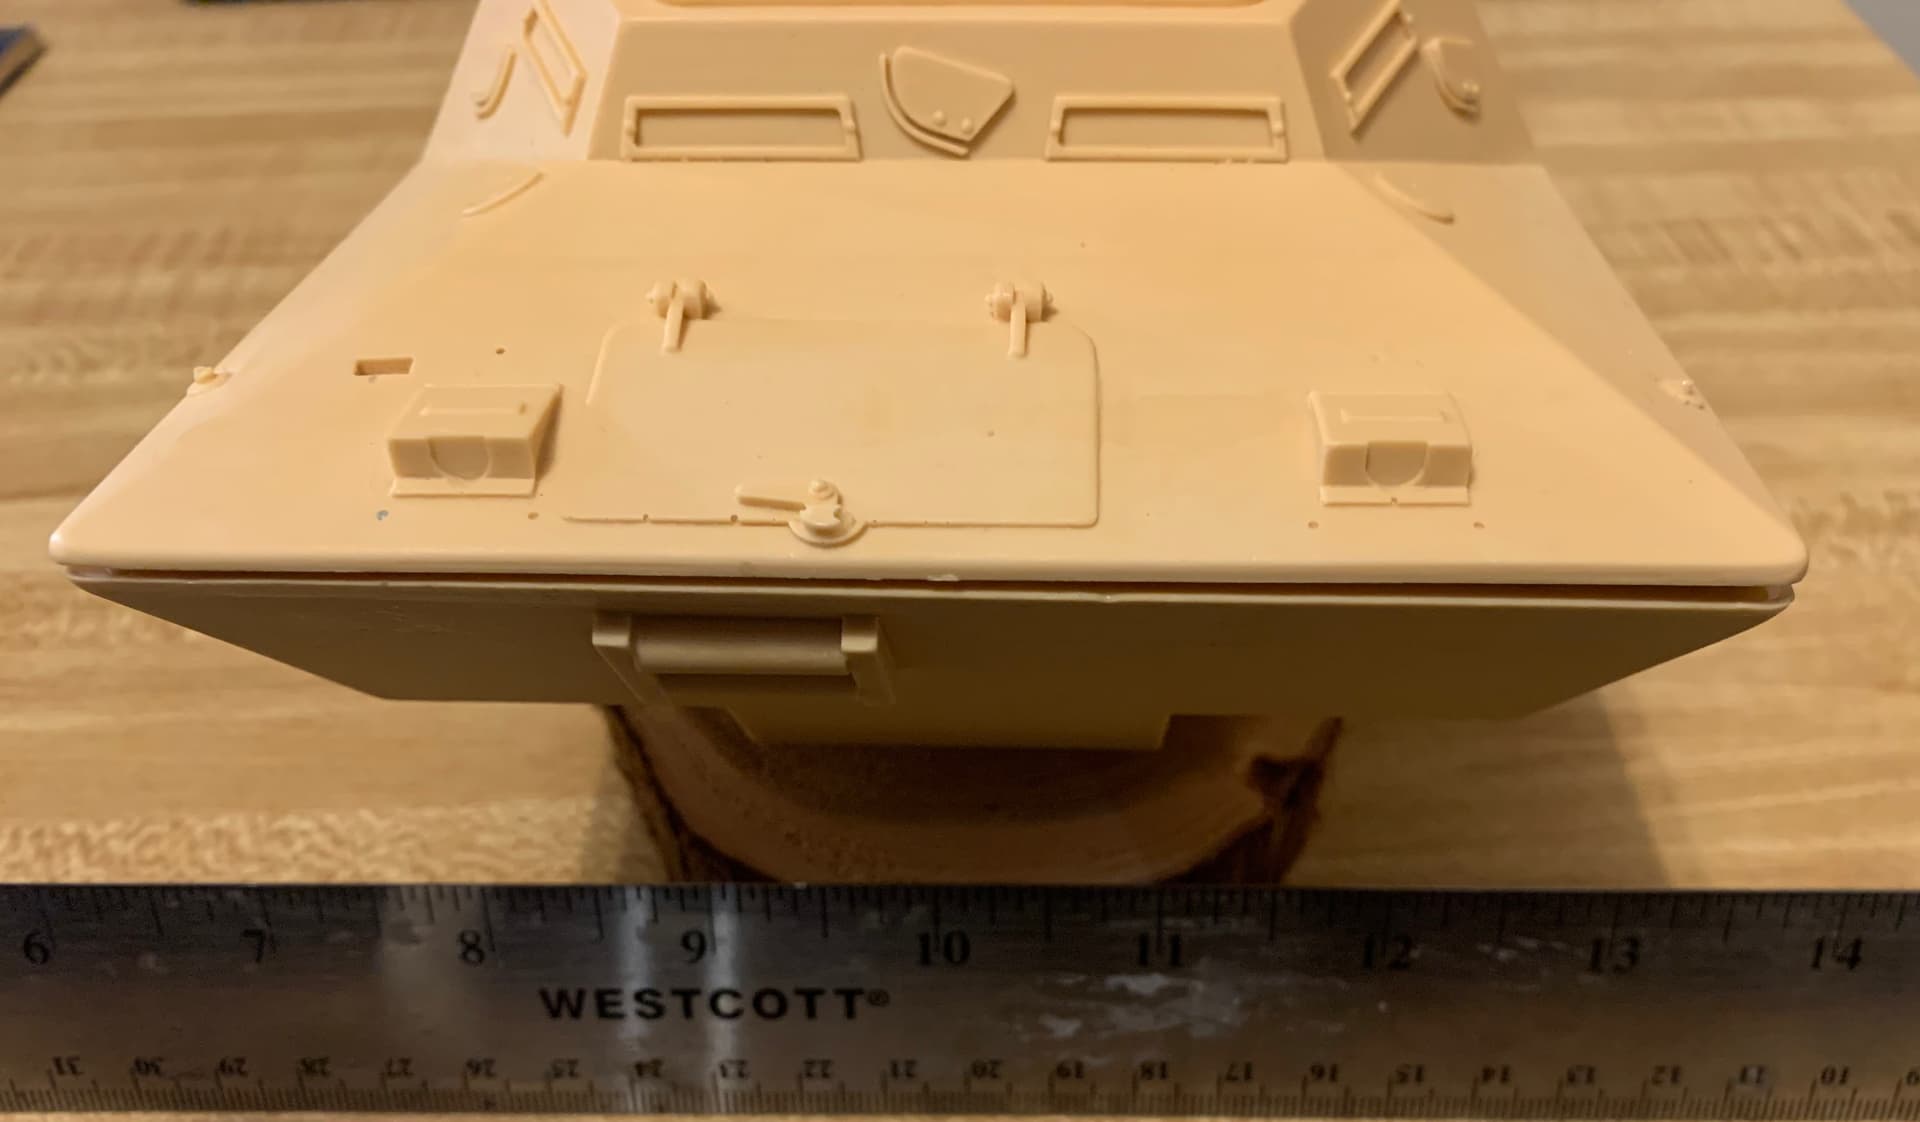
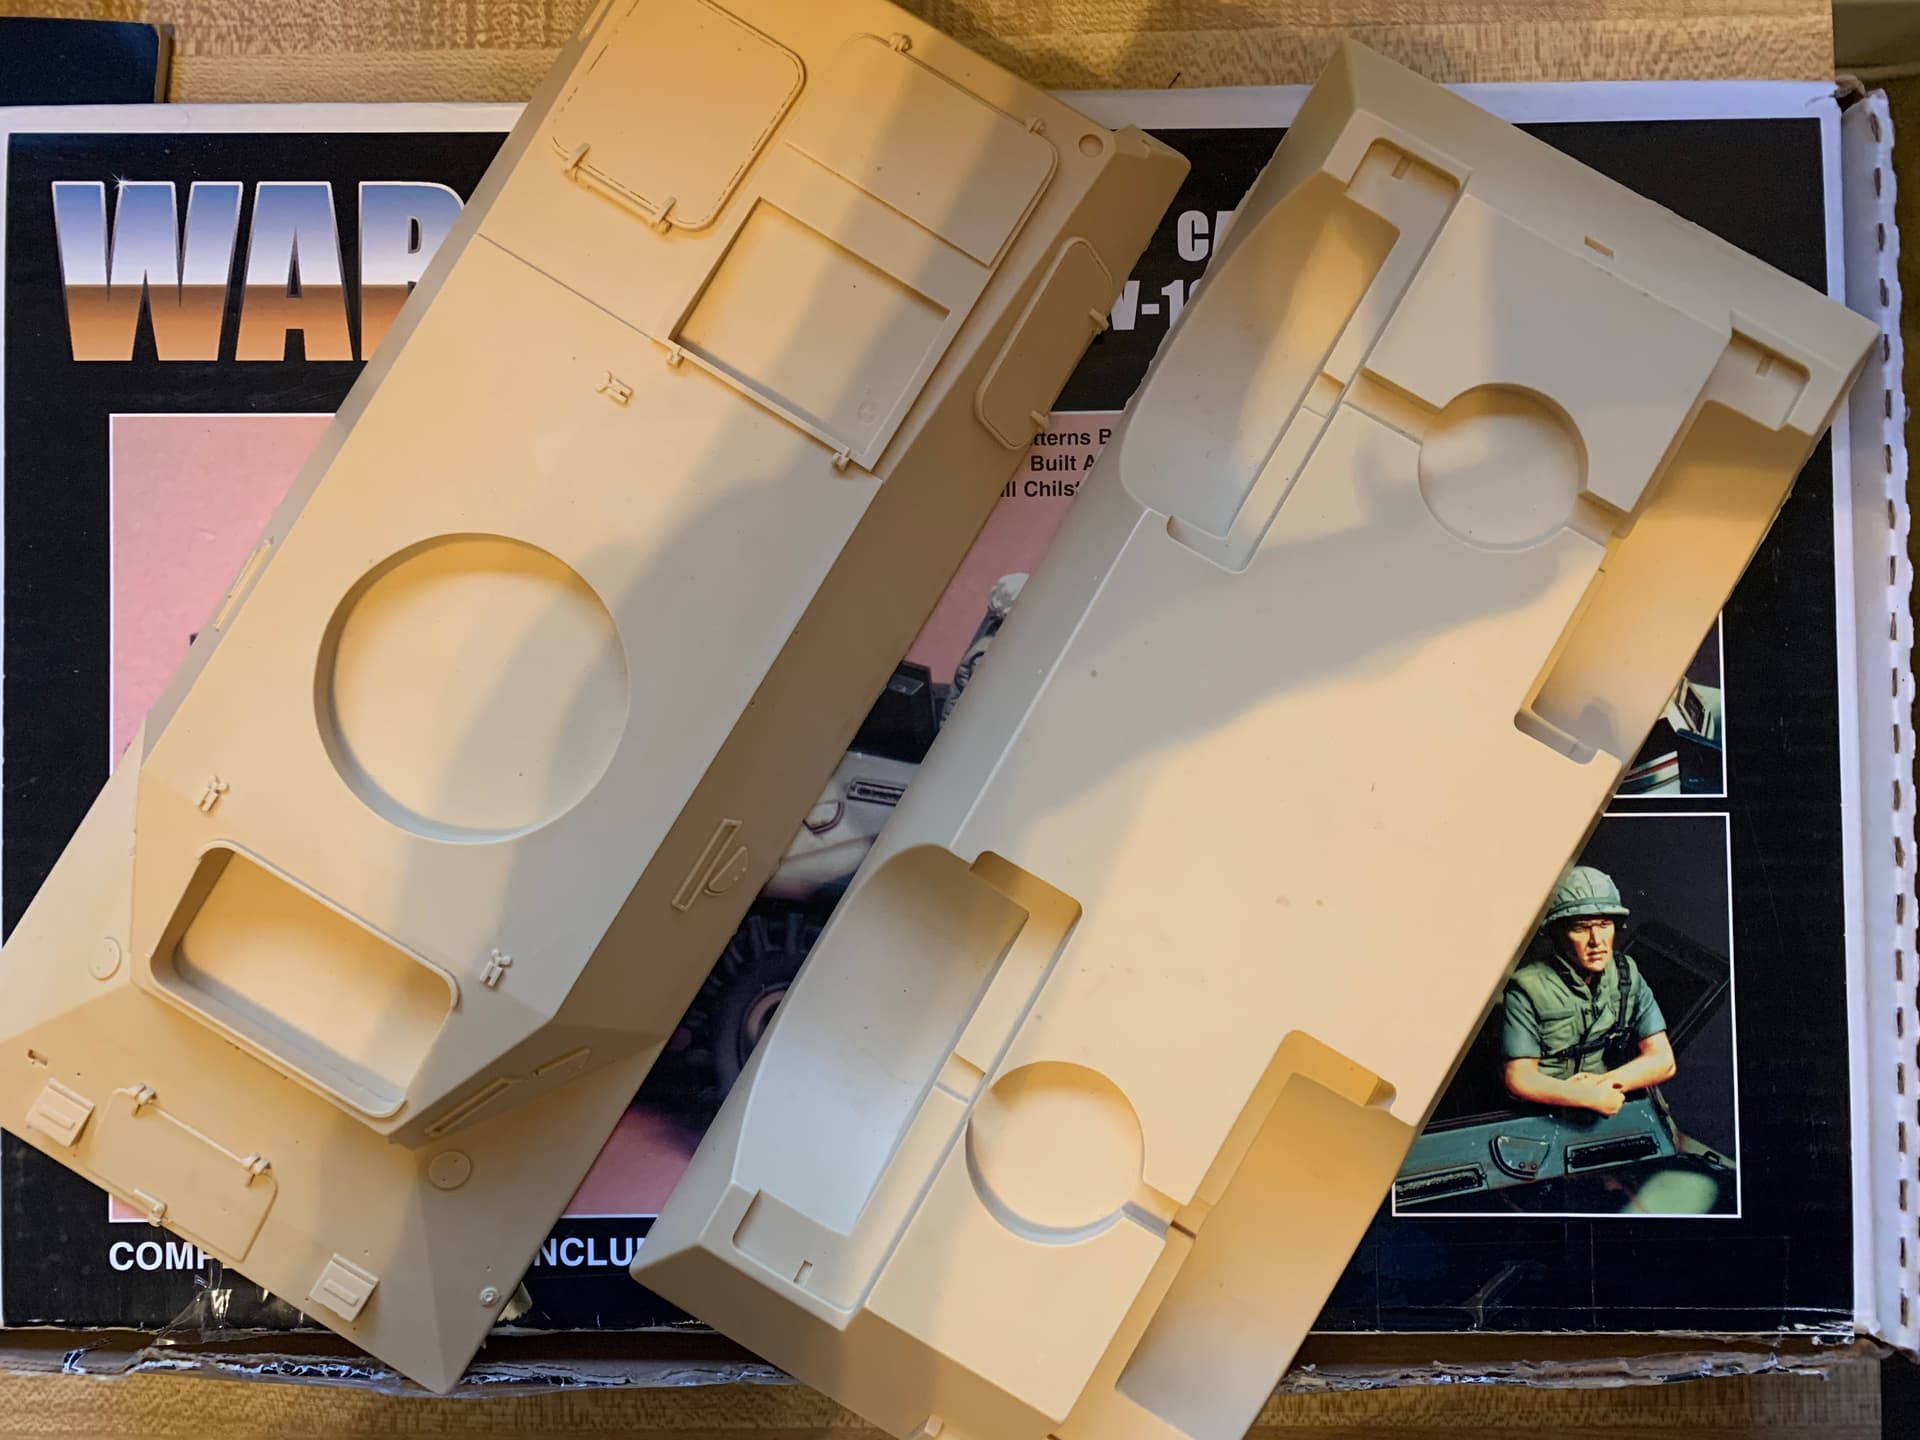
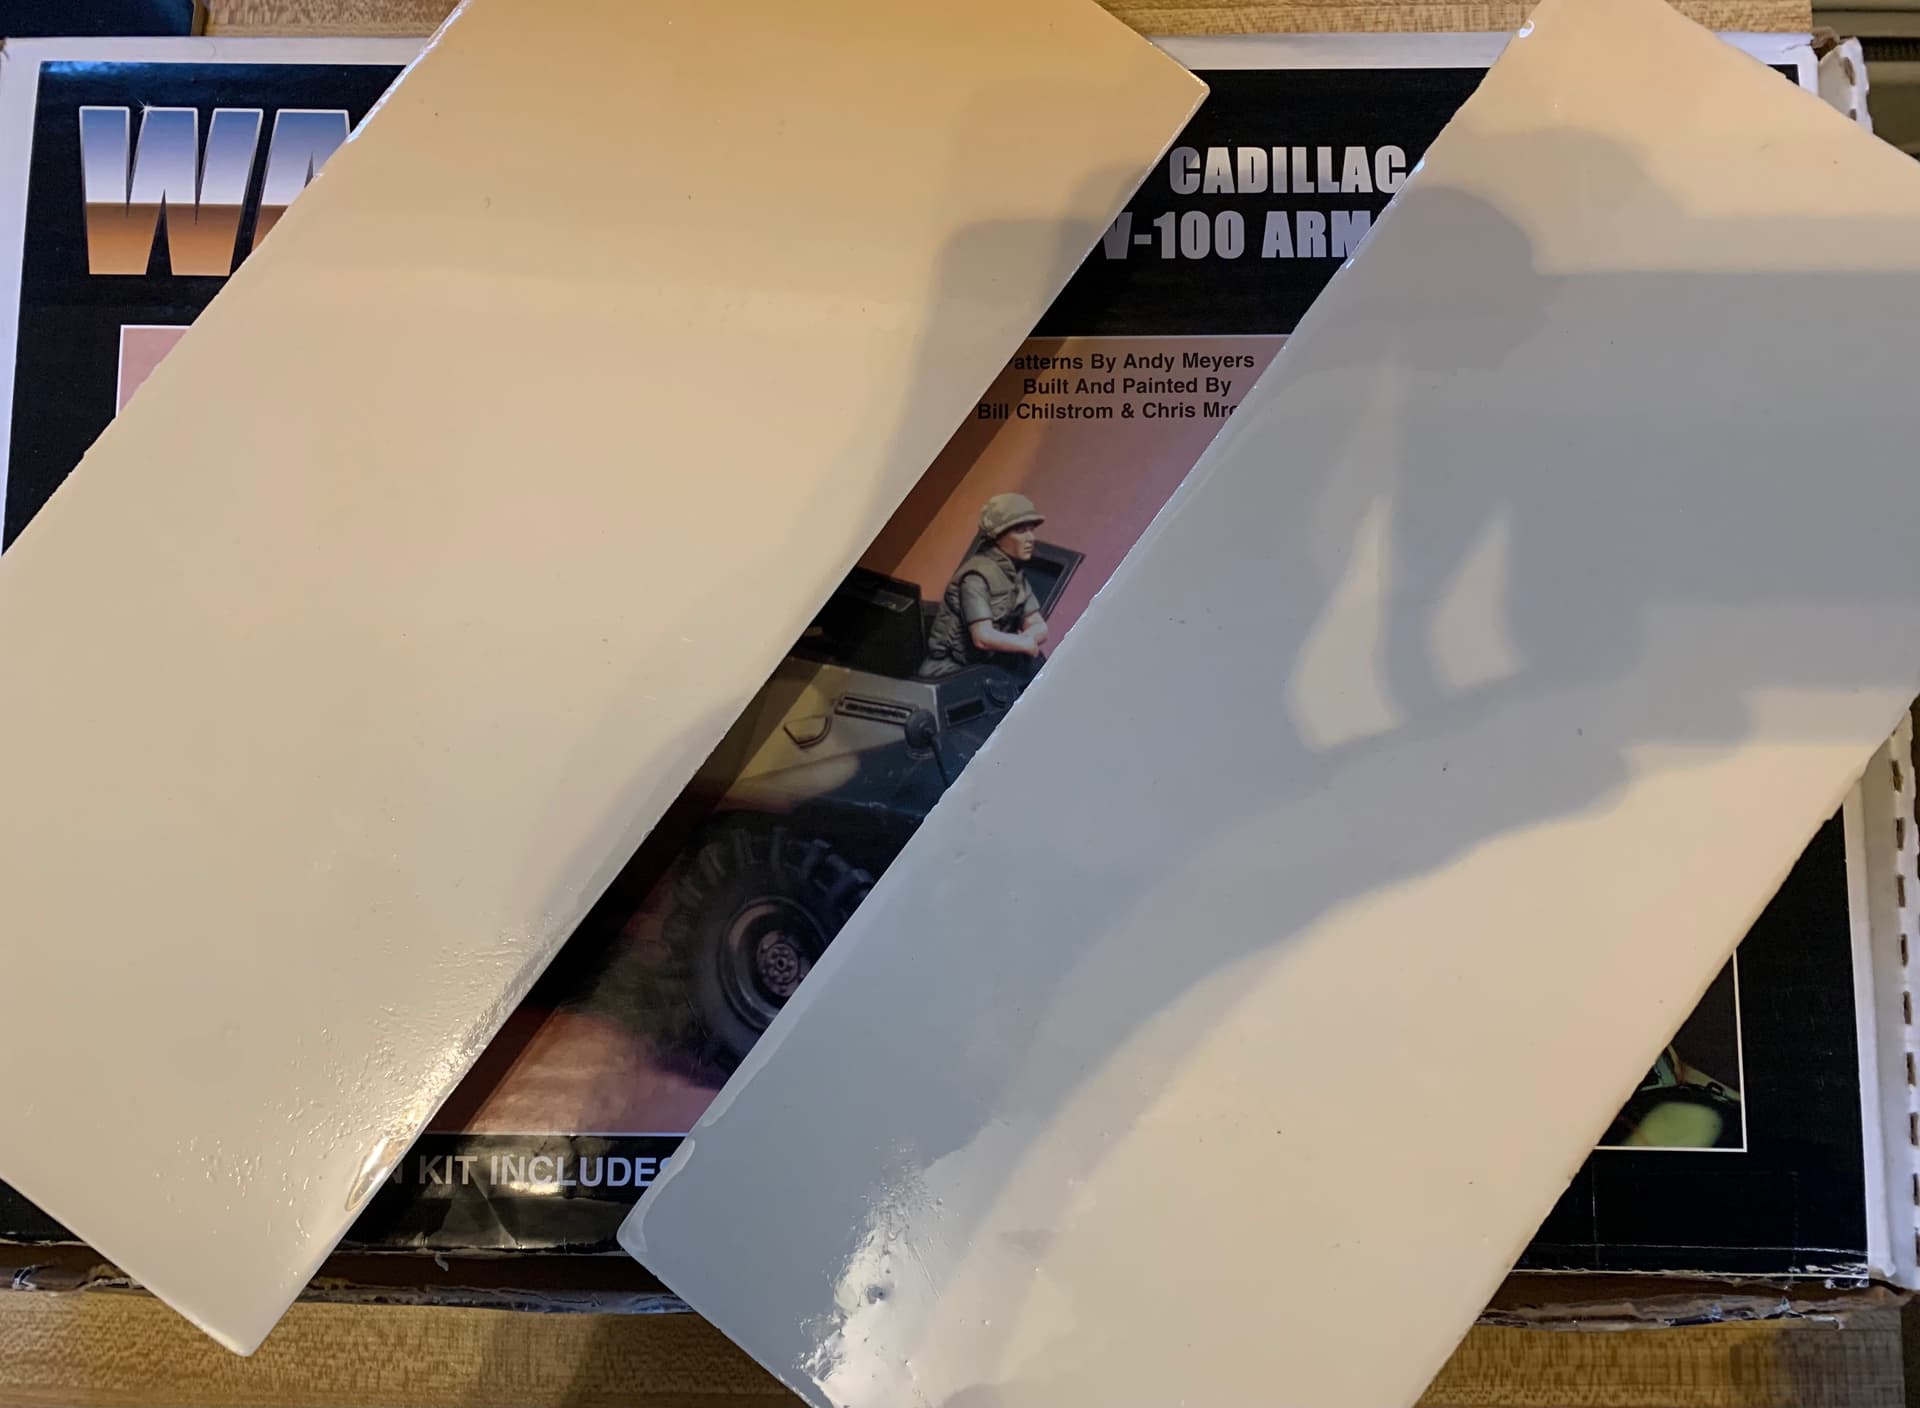
This past summer I finally acquired a kit that I’ve been after for 20 or so years–the 1/16 scale V-100 from Warriors. The hull is made of an upper and lower half, each separately and solidly cast. They measure approximately 13" x 5 1/2" (33cm x 14cm). I assume they were made from a single part mold and as such the middle section is a little higher than the edges. Being able to mate these two halves has been preventing me from getting started thus far.
I’ve never had much luck sanding resin flat (figure 8 method over sandpaper) even when it’s just a resin torso and legs. To say nothing of having to source some massive sheets of sandpaper.
Option 2, I have a palm sander I could use, probably lots of test fitting and putty. I’m also worried about keeping the edges straight.
Option 3, use a Dremel to grind out the center hump and leave a lip around the edge to fine tune. This also has me wondering if there will be enough material to secure the two halves.
To a lesser degree, I’ve also got the wheels to contend with as well.
First use a pencil to mark either the upper or lower the surfaces that contact each other. But not both upper and lower at the same time.
Fit them together and rub them a little across each other. The pencil mark should transfer to the part it hits. That’s where you need to reduce.
Use a new scalpel blade gently shaving with a reverse angle on those spot and repeat until it all meets together.
Sanding on a sandpaper sheet larger than the part flat over a flat surface (glass?) ensures a flat edge. Use the whole hand, or both if needed, to apply an even pressure on all parts.
It does not guarantee it will be levelled, though, so work slowly and check often.
It worked fine, easily and quickly for MiniArt walls, which are not resin but the technique should be equally useful.
I assume that there is nothing visually important in the centre of those chunks of resin?
I would use the Dremel or a sharp chisel to gouge out the resin in the centre, leaving 1/3 inch
around the edges. When the center hump is gone the edges can be slowly sanded down to fit
using fine grit sandpaper.
The central hump will cause a rocking motion during the sanding so that one sanding stroke touches the center and one edge and the return stroke touches the center and the other edge. This rocking motion will result in a round of surface instead of a flat one.
The problem depends on the height of the hump in relation to the width and the thickness of the object. The thickness gives your hand a moment arm which makes it difficult to hold the hull halves level when pushing them across the sandpaper.
If the hull halves could be mounted in a machine it would be easy to mill them flat
See TopSmiths post below about the preferred sanding motion. Reduces the rocking motion significantly.
I totally forgot to say this (why is there no emoji for shame??)
I agree with Robin. Dremel out the center portion, down about 1/8th inch deep on both the upper and lower half’s. Wear a mask. Then sand using a large piece of sandpaper on a flat surface like a table top, using a rotating motion not a back and forth motion.
Are they solid ? If so then , as others have noted you need to remove material from the interior leaving enough on the perimeter for glueing contact surface .
A plate of glass works well for a surface plate and it looks like you will need a big one . Abrasive sheets can be had in large sizes - try McMaster-Carr. Place abrasive sheet on glass and tape around perimeter.
The figure eight motion is ideal if your surface plate/abrasive is big enough- if not linear motion will work if you are careful.
Here is the important part - use wet or dry abrasive and LUBRICATE it . Soapy water . Use only the lightest of pressure - just enough to move the part over the abrasive. Let the abrasive do the work and cut the material - you don’t need to bear down on it . If it doesn’t cut then you need coarser abrasive. The lubricant facilitates this but more importantly it floats the particles of material out of the abrasive allowing it to cut .
Resin parts can also be bent back to shape to a minimal degree by gentle heating - warm water , hair dryer , etc.
HTH
I didn’t realize they were solid. I think coating one surface with an indicator like pencil graphite and rubbing the two together will show the high spots. Then follow up with knife, Dremel or sandpaper depending on the size of the problem.
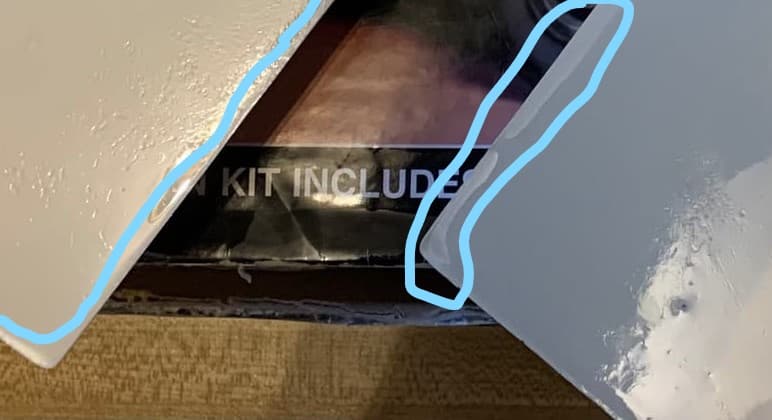
The shifting highlights along the edges look as if the resin has tried to climb
up along the edges of the mould. Need to sand down the whole chunks of resin
until the sanded area reaches the edges.