New airbrush

In an unfriendly environment, I believe an acrylic paint prone to being finicky should be filtered before going in the airbrush.

Mix up whatever concoction special thinner, flow max elixirs, magic potion retarders etc desired with the acrylic paint and strain that mixture through a paint filter.

It can be shocking how much crap and debris of harden paint bits are hidden in the paint just waiting to clog up an airbrush with a .3 mm tip.

The special chemistry of retarders & flow improver have more opportunity to be effective when airbrushing if potential contaminates are removed from the paint mixture.


Filtering works wonders, I do it as needed with some of my pet finicky 30+ year old enamels that were reconstituted from sludge.

The filtered mix sprayed perfectly.

Sidenote - spraying a CC of Tamiya Airbrush Cleaner (Testor’s Liquid Cement works too) does wonders for cleaning crap out of an airbrush after a session. Good ventilation is mandatory when doing that.

2 Likes

You’ll be hard pressed to get Vallejo paint through any smaller than a .5mm airbrush, and you are still going to get tip dry and clogging. It’s the very nature of the paint, a latex acrylic, to skin over as soon as it hits the air. This leads to all sorts of problems. Some claim fame to have shot Vallejo through a .2mm for fine lines, but that is an esoteric mixture of paint, thinner, flow improver, retarder, needle position, and air pressure that I find life is too short to try to achieve.
It’s the Vallejo paint. It’s a latex acrylic, It has rubber in it. It will only thin down to a certain point and is troublesome across the spectrum.

3 Likes

I do use Vallejo paints, but not as much as some other Acrylics for reasons cited. I only use their primer on pristine figures that don’t require sanding.

1 Like

Overglorified house paint?

In light of what Matt shared regarding, Vallejo, I’d also consider the following.

  1. Shaking or mixing will saturate the Vallejo in the bottle with the small amout of air in the bottle. Overtime some paint might cure and create debris that will aggravate the potential for clogs unless the paint is filtered.

  2. The Paasche VL with a hand polished medium #3 needle should prove an excellent airbrush for spraying that paint.

I have some 15 year old Vallejo brush paint and will try spraying in my trusty VL and update. I’ll add a drop of Kodak magic photo-flow as a wetting agent.

I’m NOT going to test Vallejo red or yellow or orange colors as it’s my understanding some of their old brush paints had cadmium in them since they weren’t designed to be sprayed.

2 Likes

That, sir, is EXACTLY what Vallejo Model Color paint is!

2 Likes

I just need a slick marketing campaign to launch my line of Armor Buff’s - Colors for Model Buffs

I’ve got the perfect supplier in mind…there’s one around the corner…

5 Likes

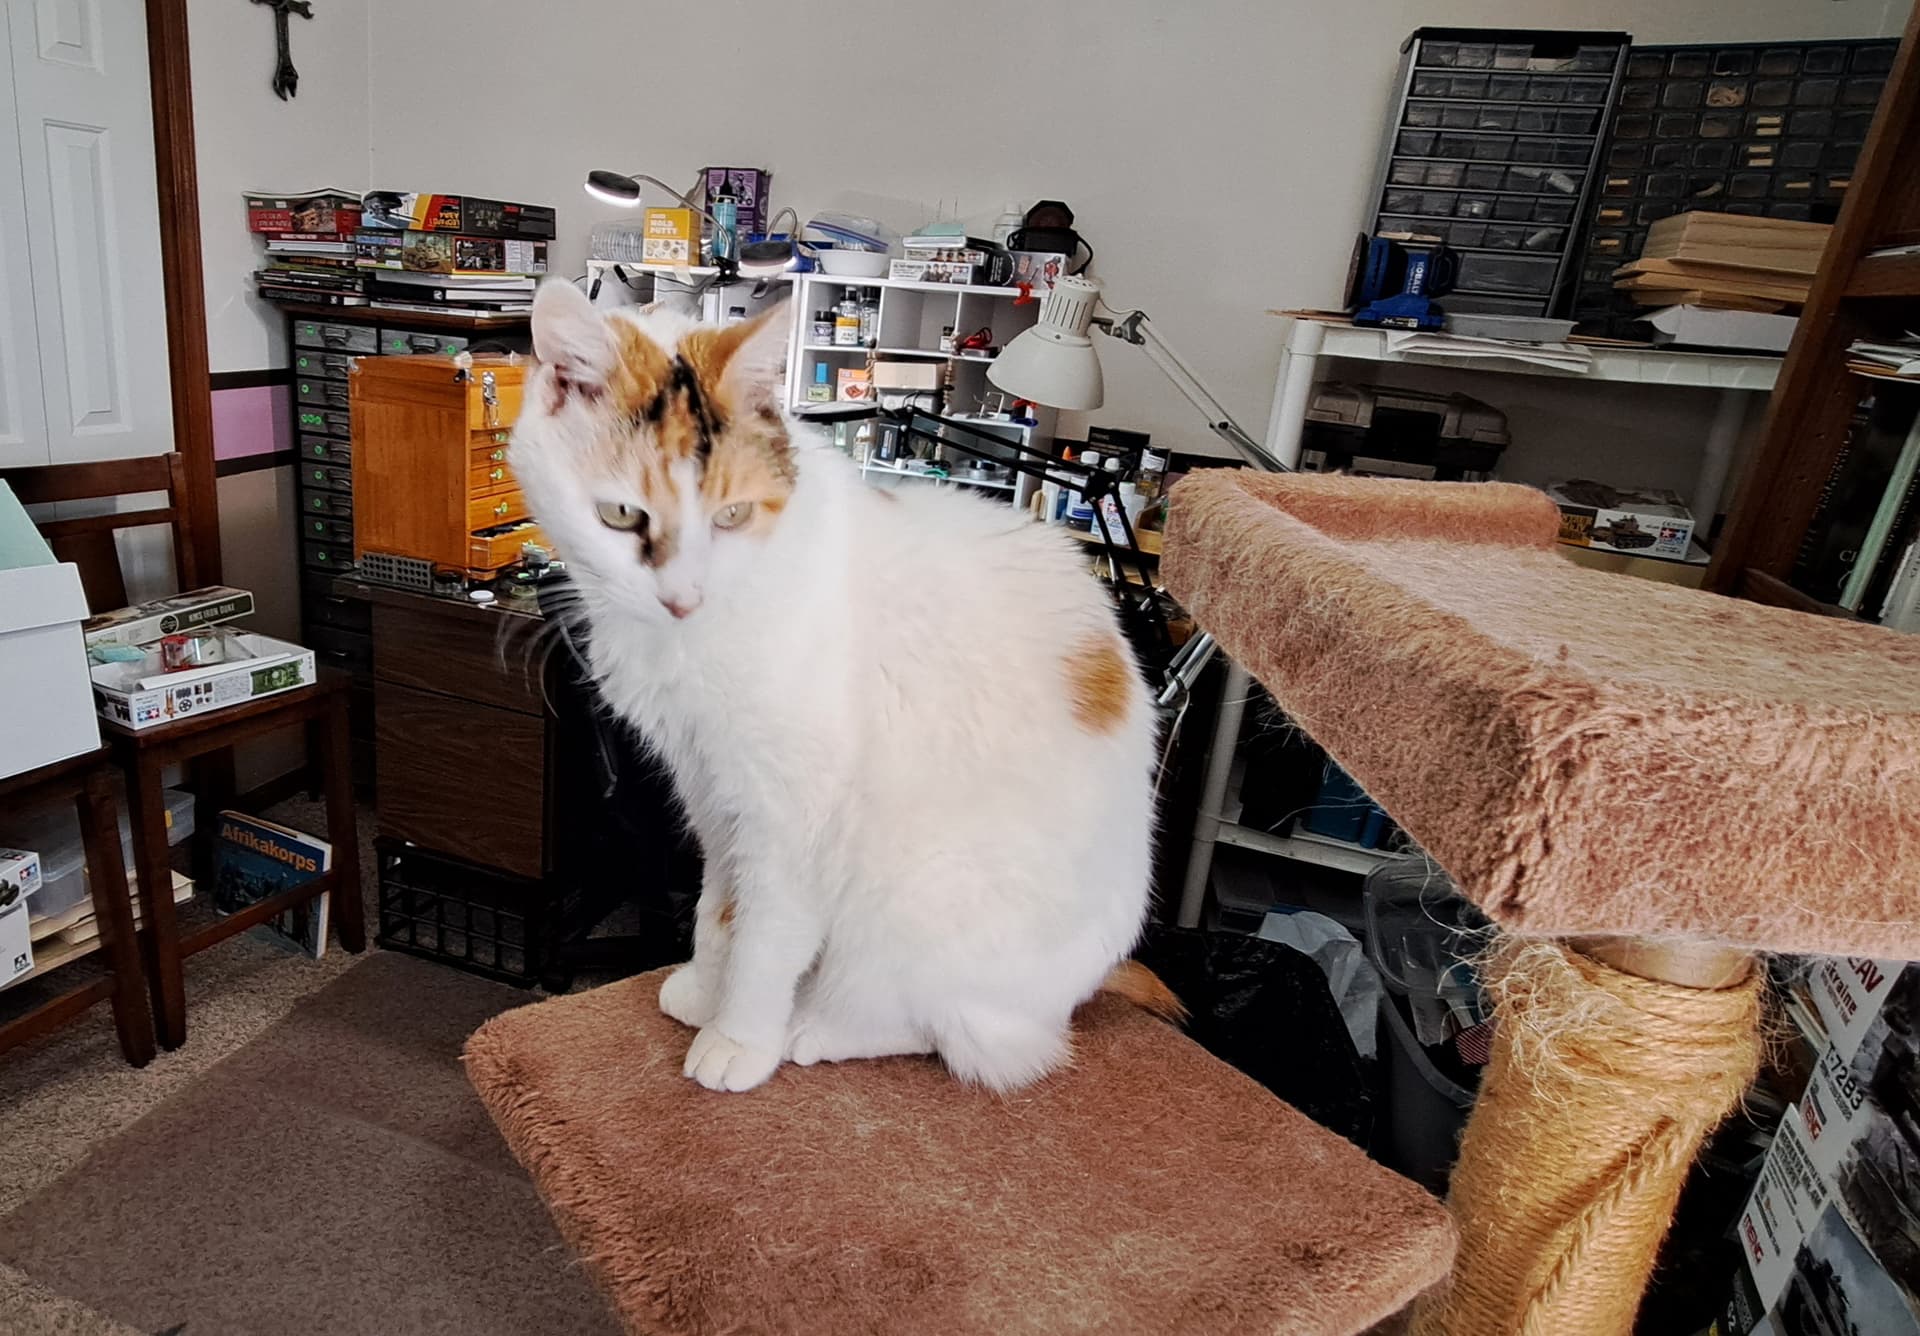
Here we go, “Airbrushing Vallejo - Experiment #1” by Armor Buff & Kali-Katt, senior project engineer.

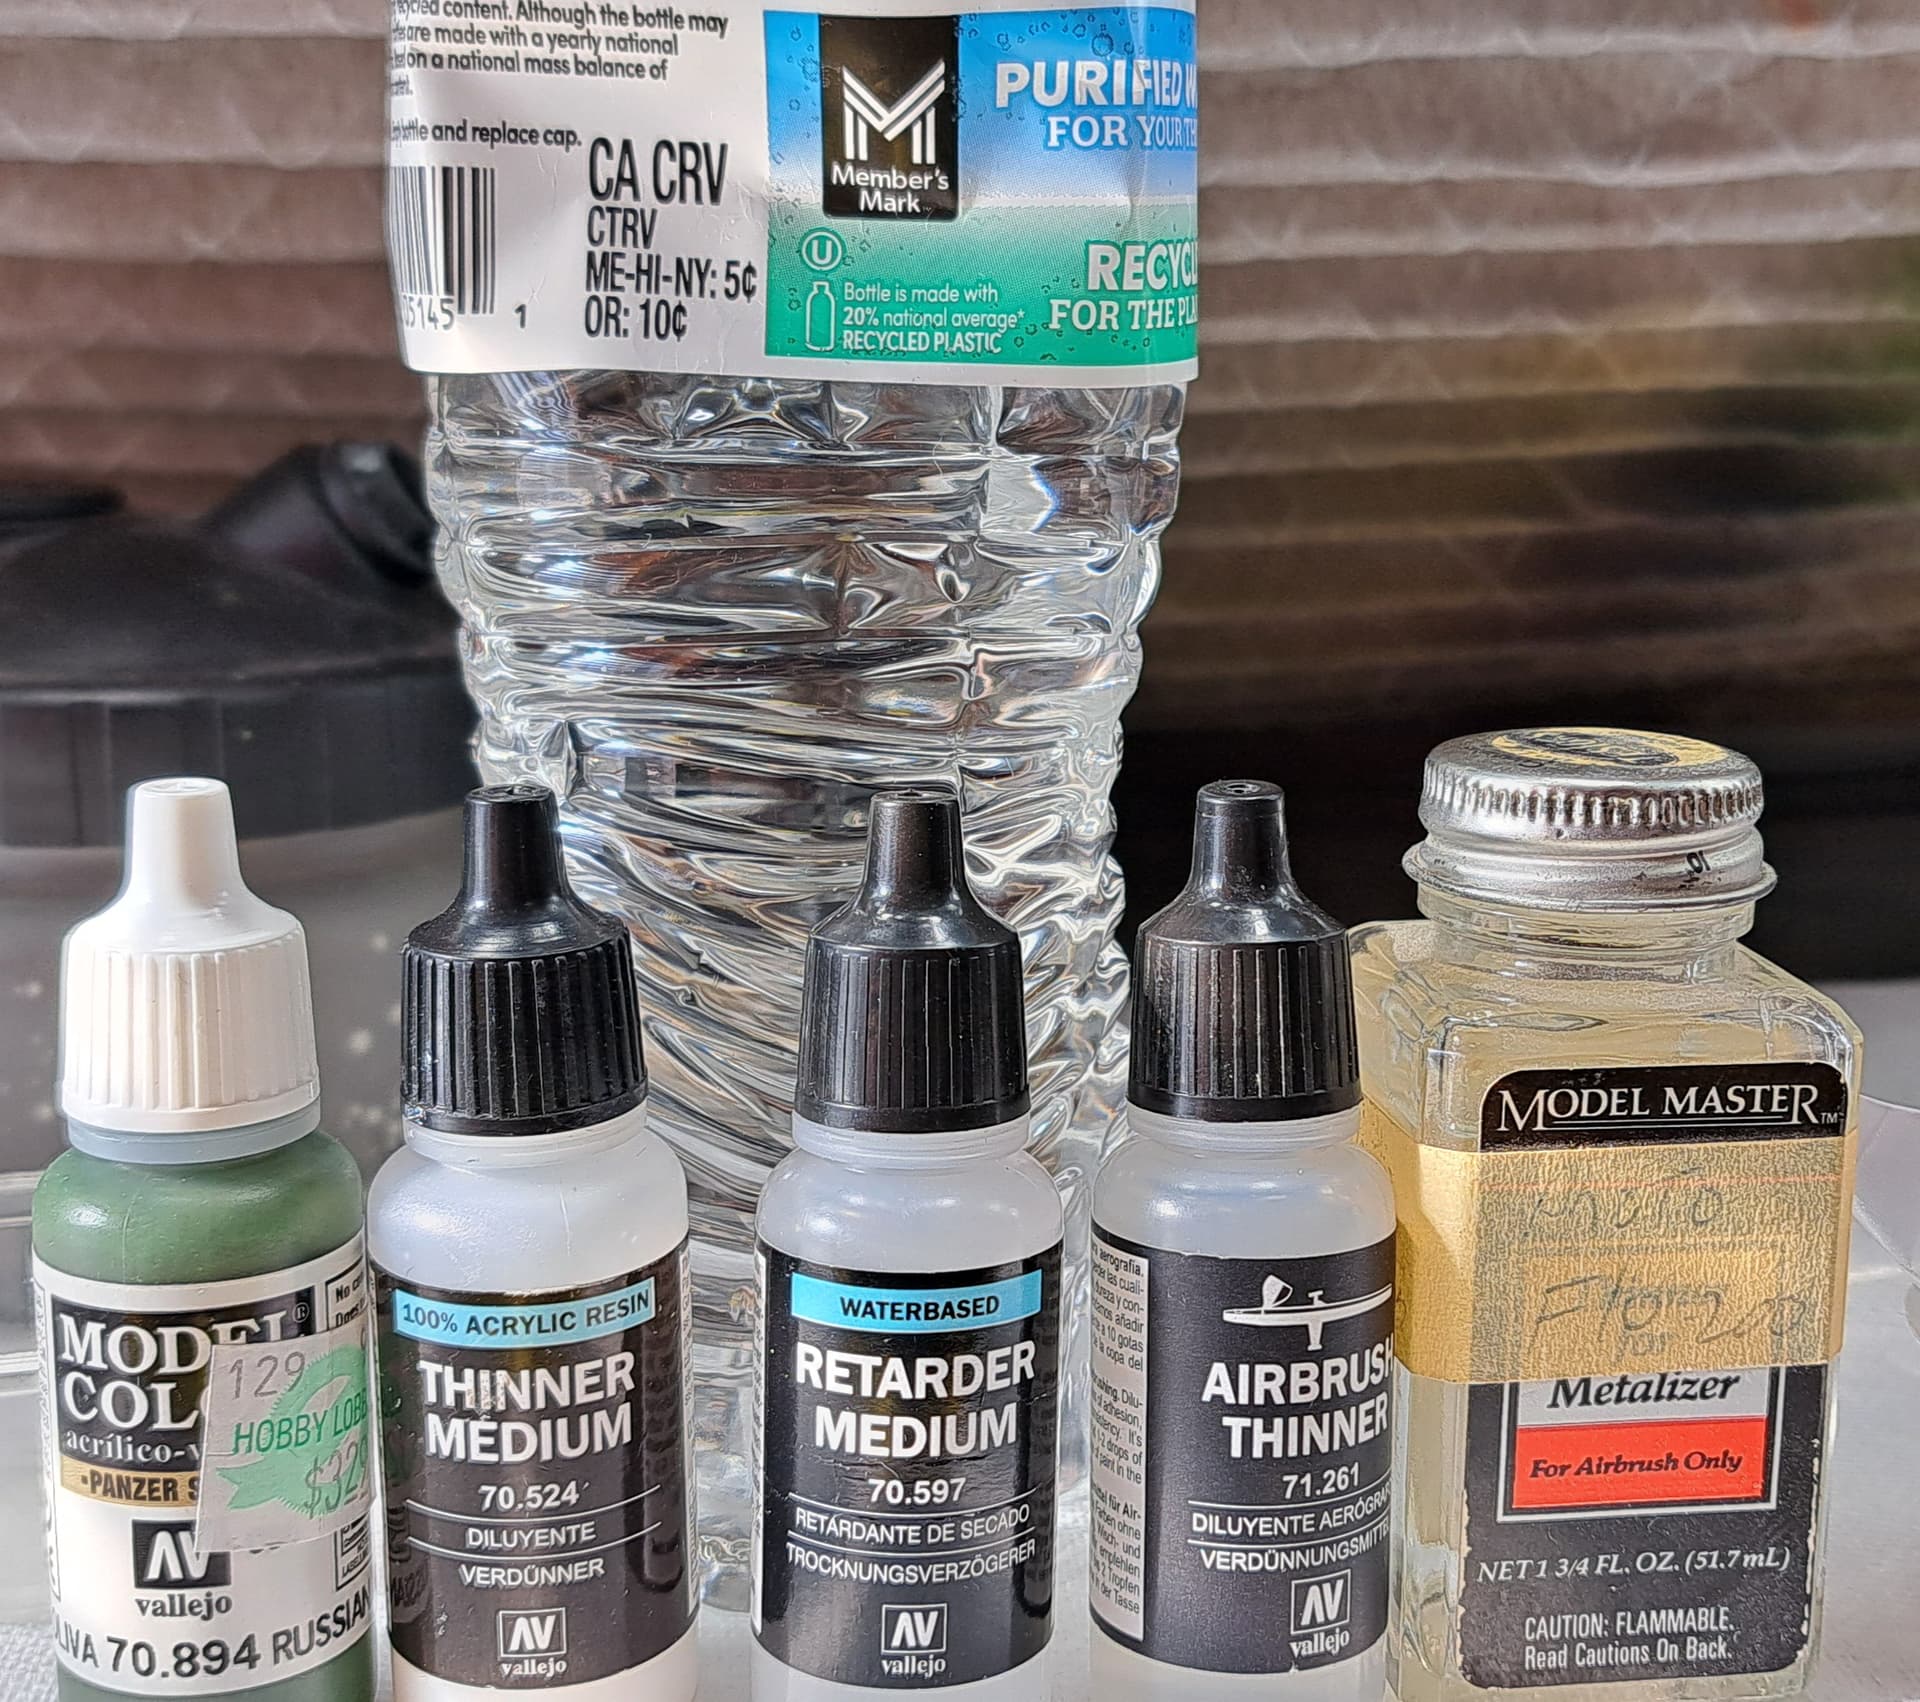
What’s being sprayed Russian Green as shown below by Vallejo.

Model Color Russian Green is the brush grade Vallejo paint. It was placed on a laboratory grade vortex paint mixer for two minutes.

Medium Thinner is acrylic resin base. I used it so that the crappy binder in this lame paint doesn’t implode when its thinned excessively to make it spray. I use this when brush painting thinned Vallejo. I don’t know if you need it but someone I respect who got top performance out of Vallejo explained that I would be wise to use a little bit of it when excessively thinning Vallejo back in ~2009.

Retarder Medium is used to slow drying time. It’s thick and must be diluted.

Vallejo Airbrush Thinner - i use a drop when brush painting etc.

Sam’s Club bottled water - local water is hard and nasty even with a water softener.

Kodak Photo Flow - It’s a wetting agent for old fashion photography development aka a flow improver, Kali says it’s a surfactant…makes water wetter by breaking surface tension.

No internet research was done, this all shooting from the hip.

Drops of this and that, a lot of Sam’s water etc were mixed into a home brewed Kali-Katt researched airbrush thinner beta version 1.0

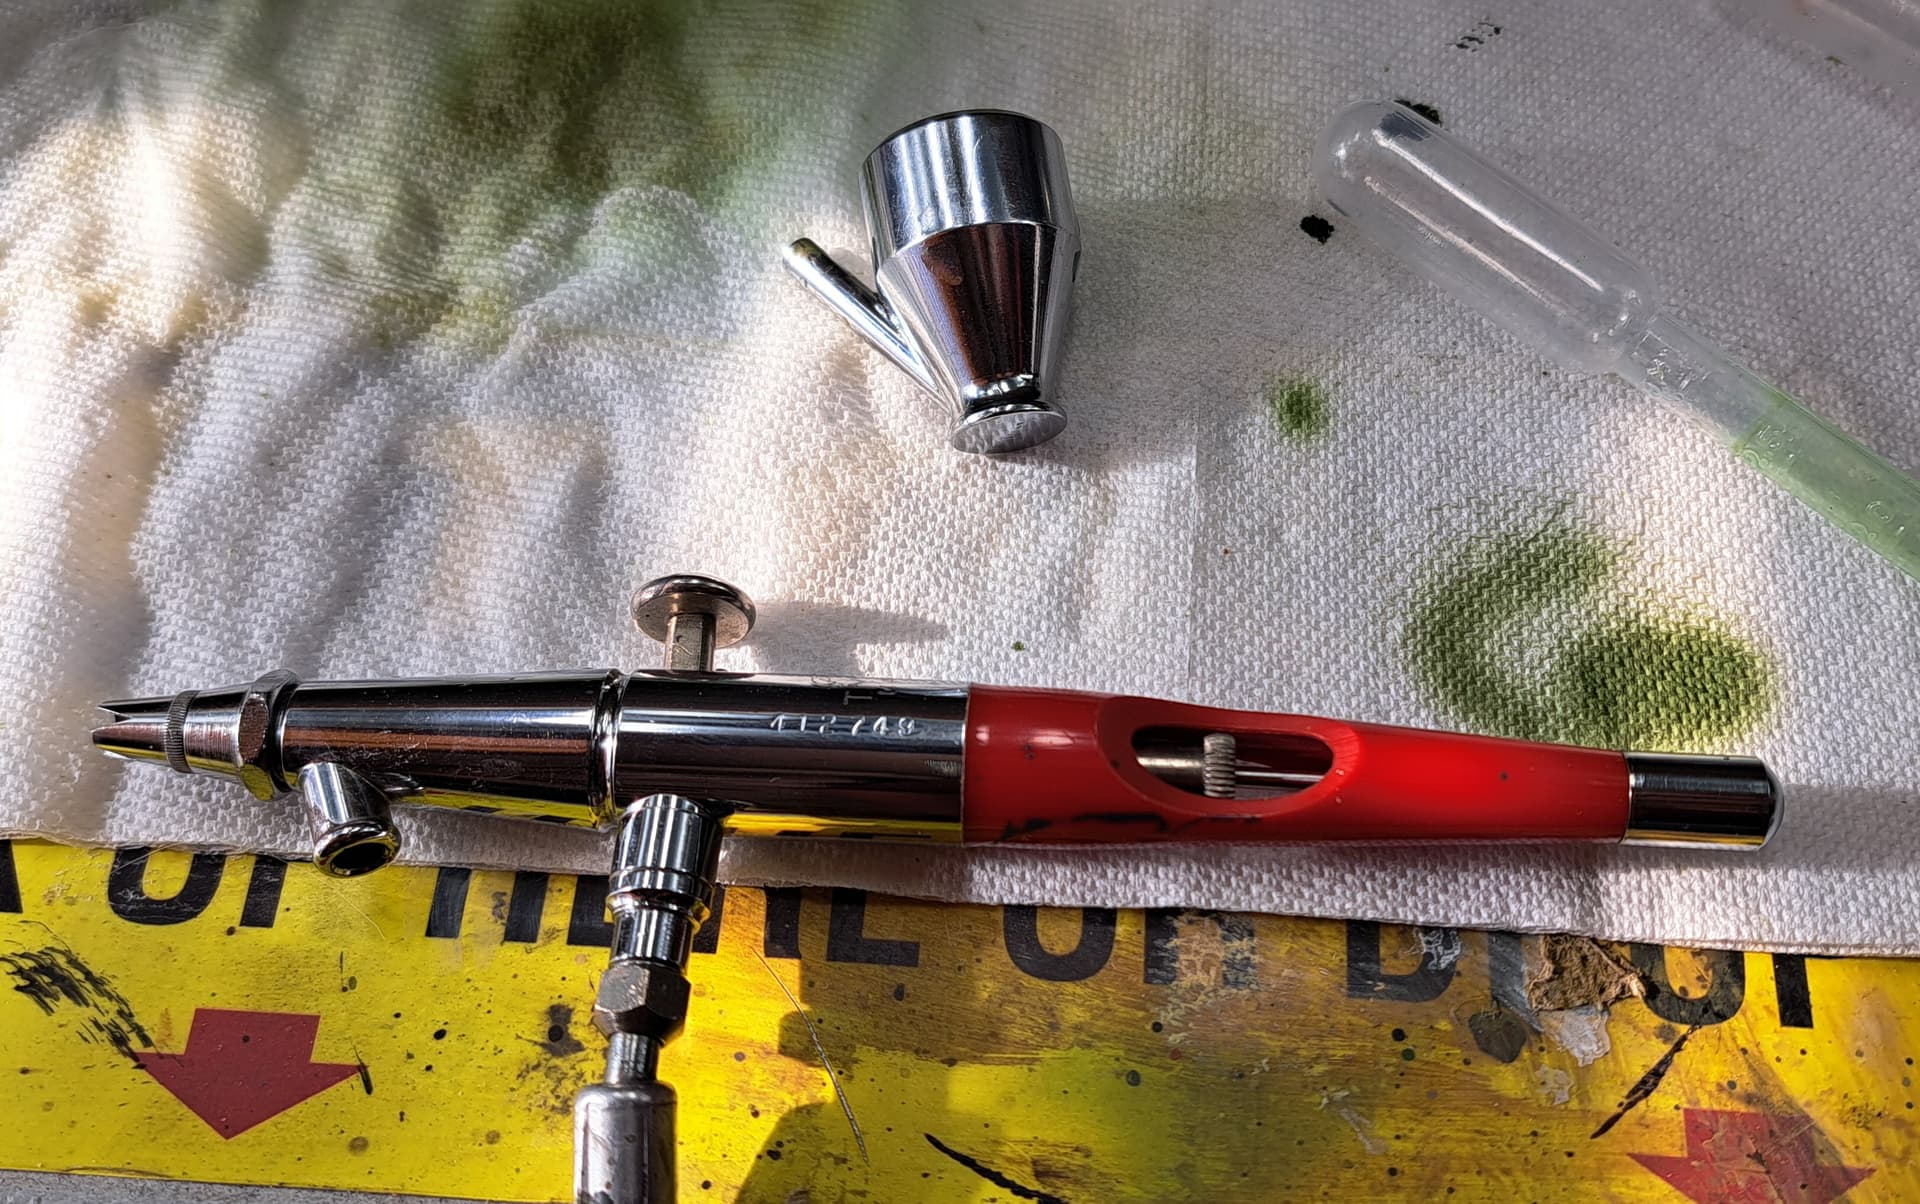
The airbrush, mid 1990’s Paasche VL.

I couldn’t find the bigger #3 needle etc so using the smaller #1 (.55 mm) which is more prone to clogs (per the airbrushing guru’s) than the bigger #3.

Yes, that’s big needle by today’s .25 mm needle standards.

However, the VL #1 will go 1/32 of an inch fine line with minor thinner & air pressure adjustment. Guru’s that know what they are doing have been known to cut 1/32 of an inch lines in half going down 1/64 inch or so I’ve been told.

This VL has a hand polished needle (helps fight dry tip), cut away crown tip, tweaked trigger & cut away rear to blow clogs out. The needle and nozzle were gently lapped together for a precision fit of near antique parts & technology. The VL leaks so all threads are coated in beewax just like Mr Paasche did in the 1890’s or whatever.

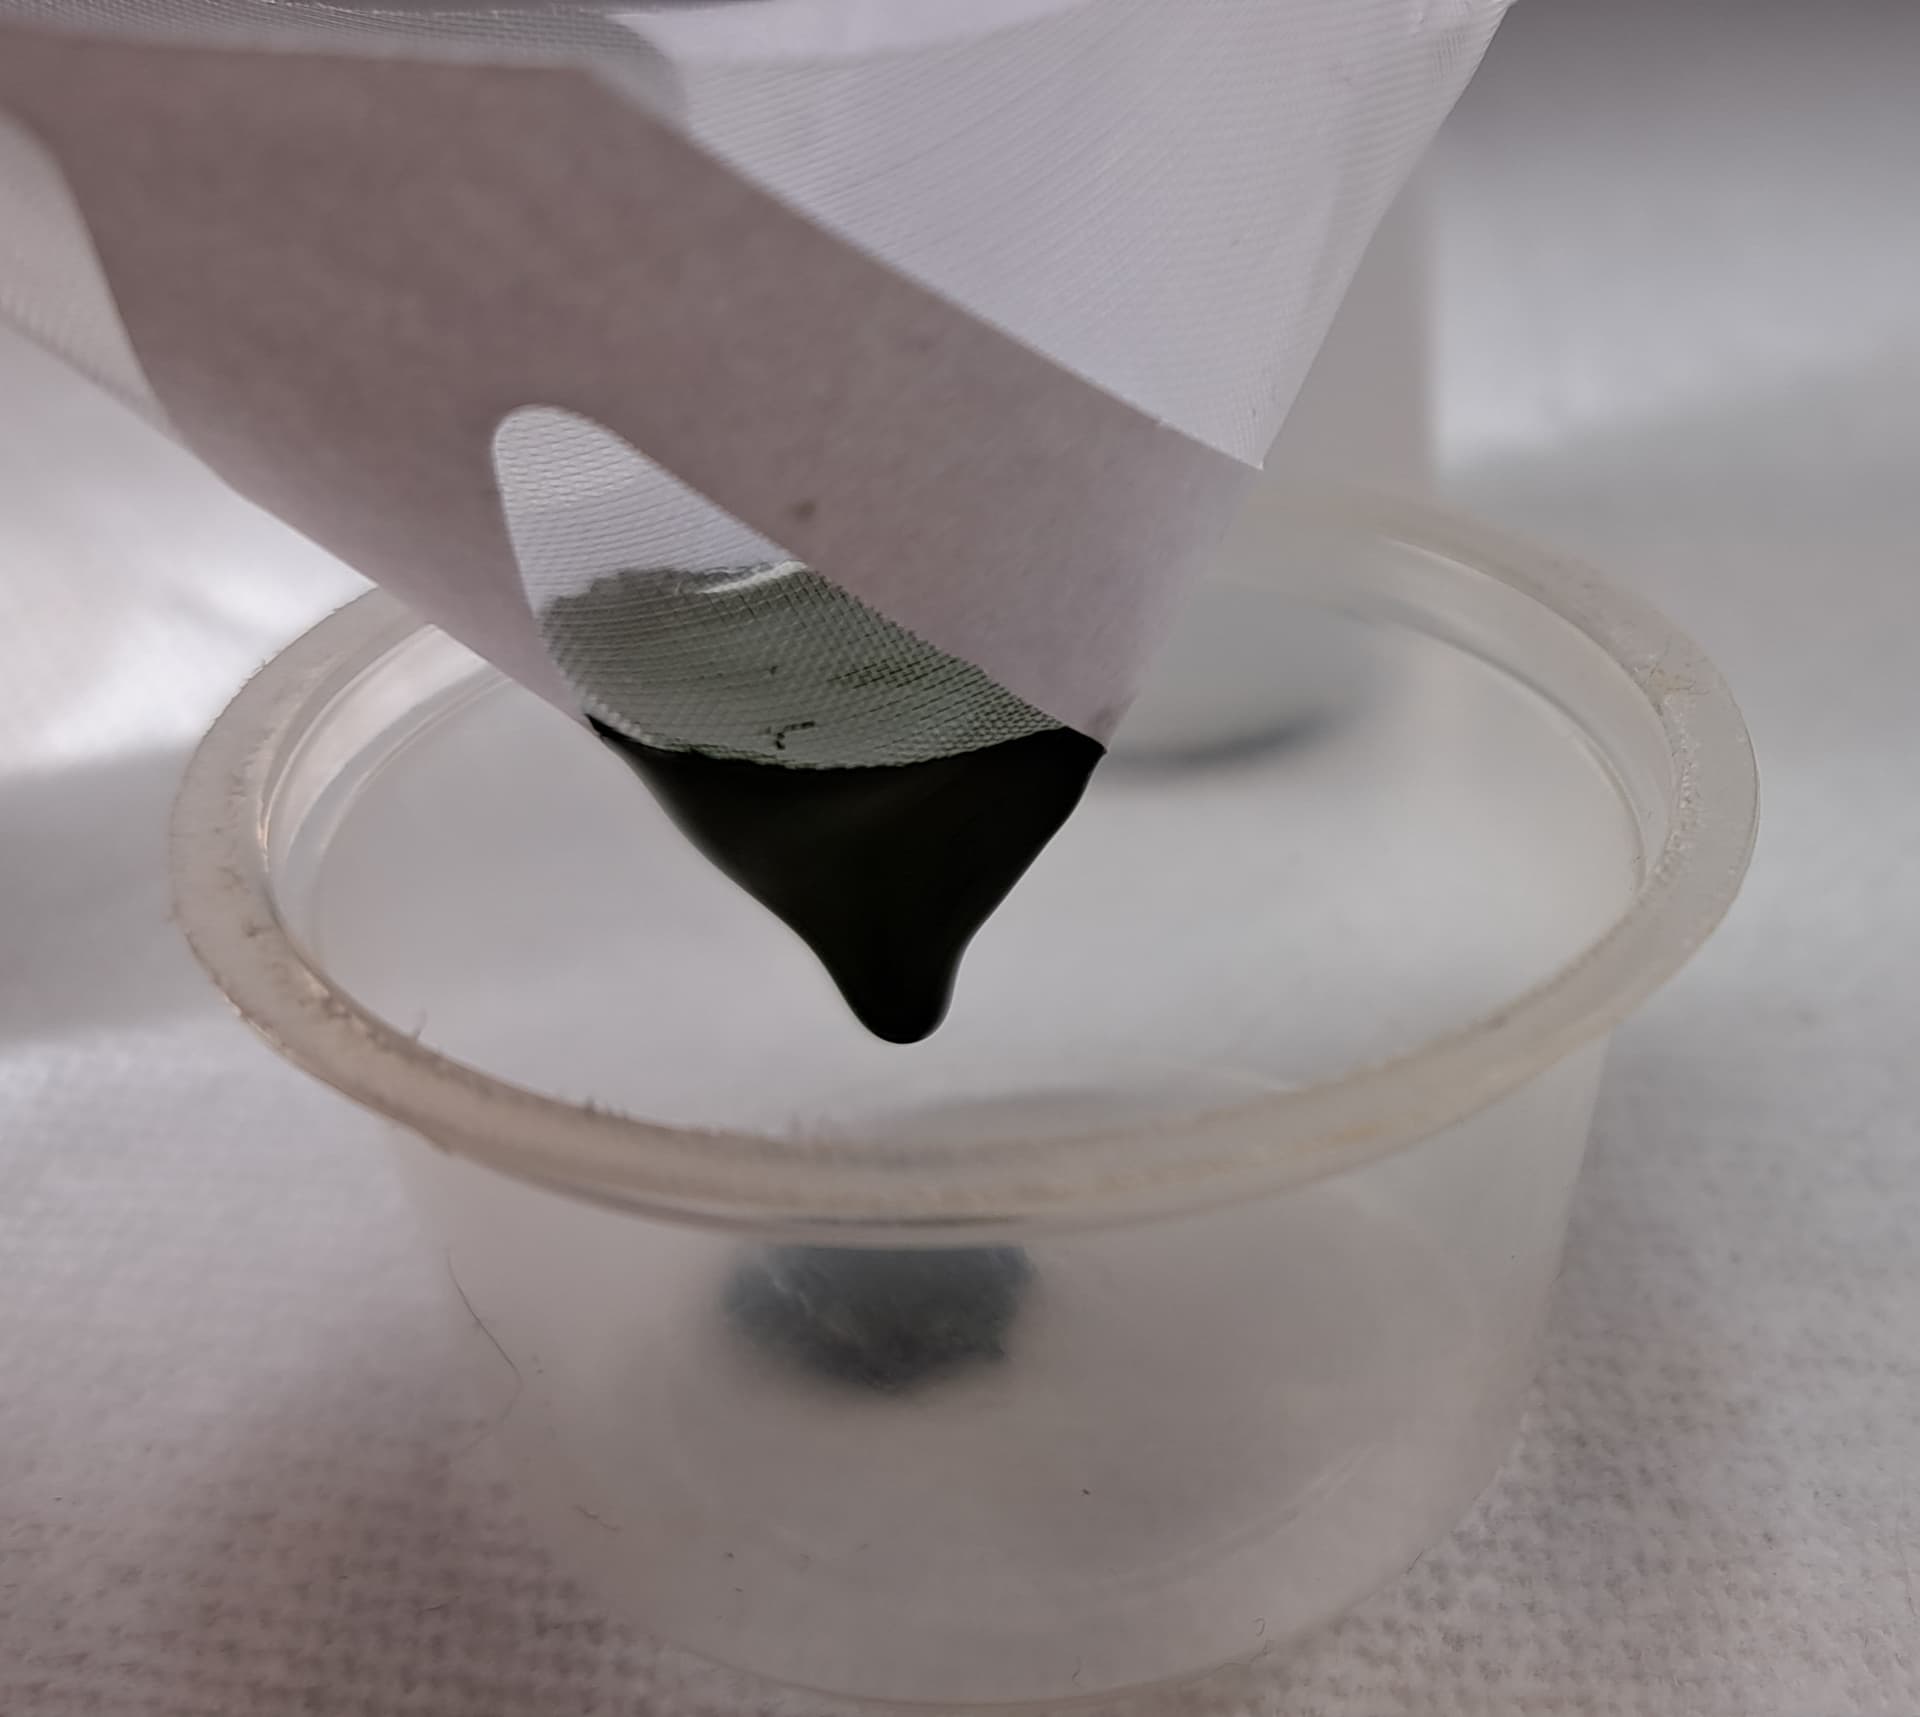
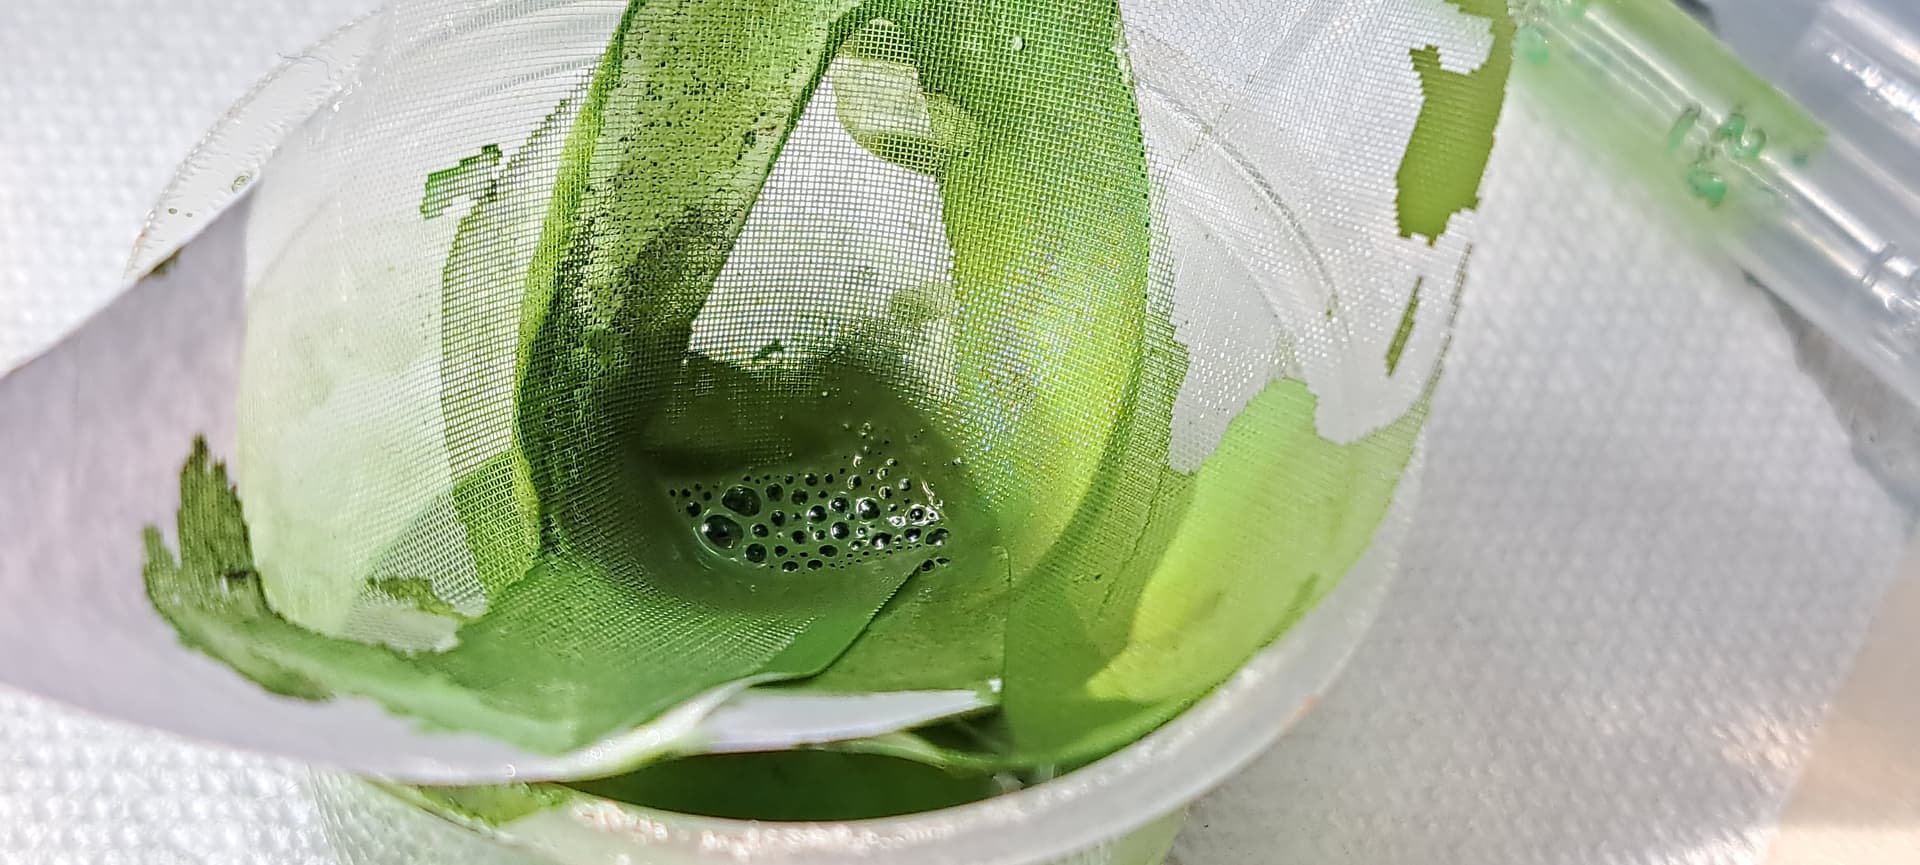
Filtering that nasty Vallejo house paint through a house paint filter. Note how thick that stuff is!!! It’s like snot from sick kid in kindergarten!

Adding thinner and cycling through filter repeatedly.

There was a lot of paint that stayed in the filter as shown above. This is after the clean filtered thinned paint was cycled through it half a dozen times. So what’s left in the filter is crap in my opinion and that Vallejo paint bottle was full of it.

Temperature is 70 degrees, outside humidity is 48%, 20 psi air pressure, sprayed five minutes, no clogs, no dry tip.

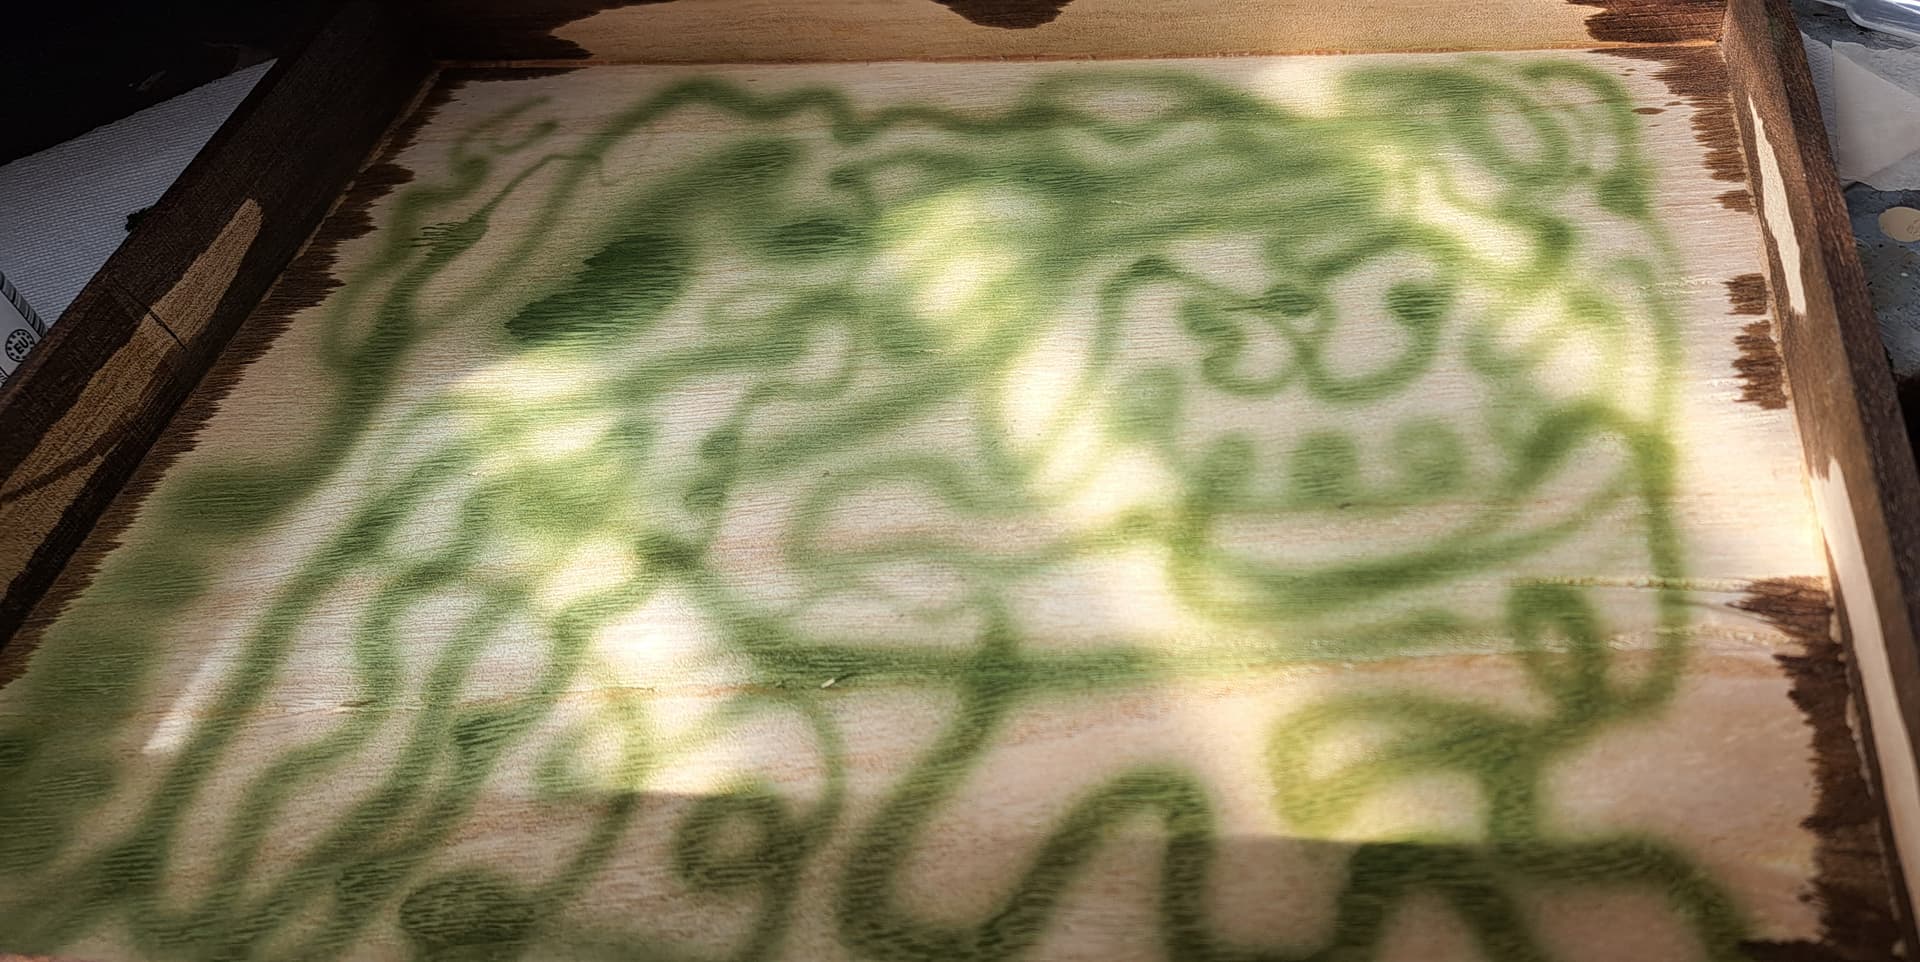
Painted a few index cards probably ~ 5 to 7 more minutes using a wider pattern. No clogs, no dry tip. Paint was very thin and color had to be built up gradually coat by coat. I’m sure the thinning ratio isn’t optimized.

Cut air pressure to 12 psi, 5 to 7 minutes screwing around, no clogs, no dry tip.

Chopped air pressure to 5 psi

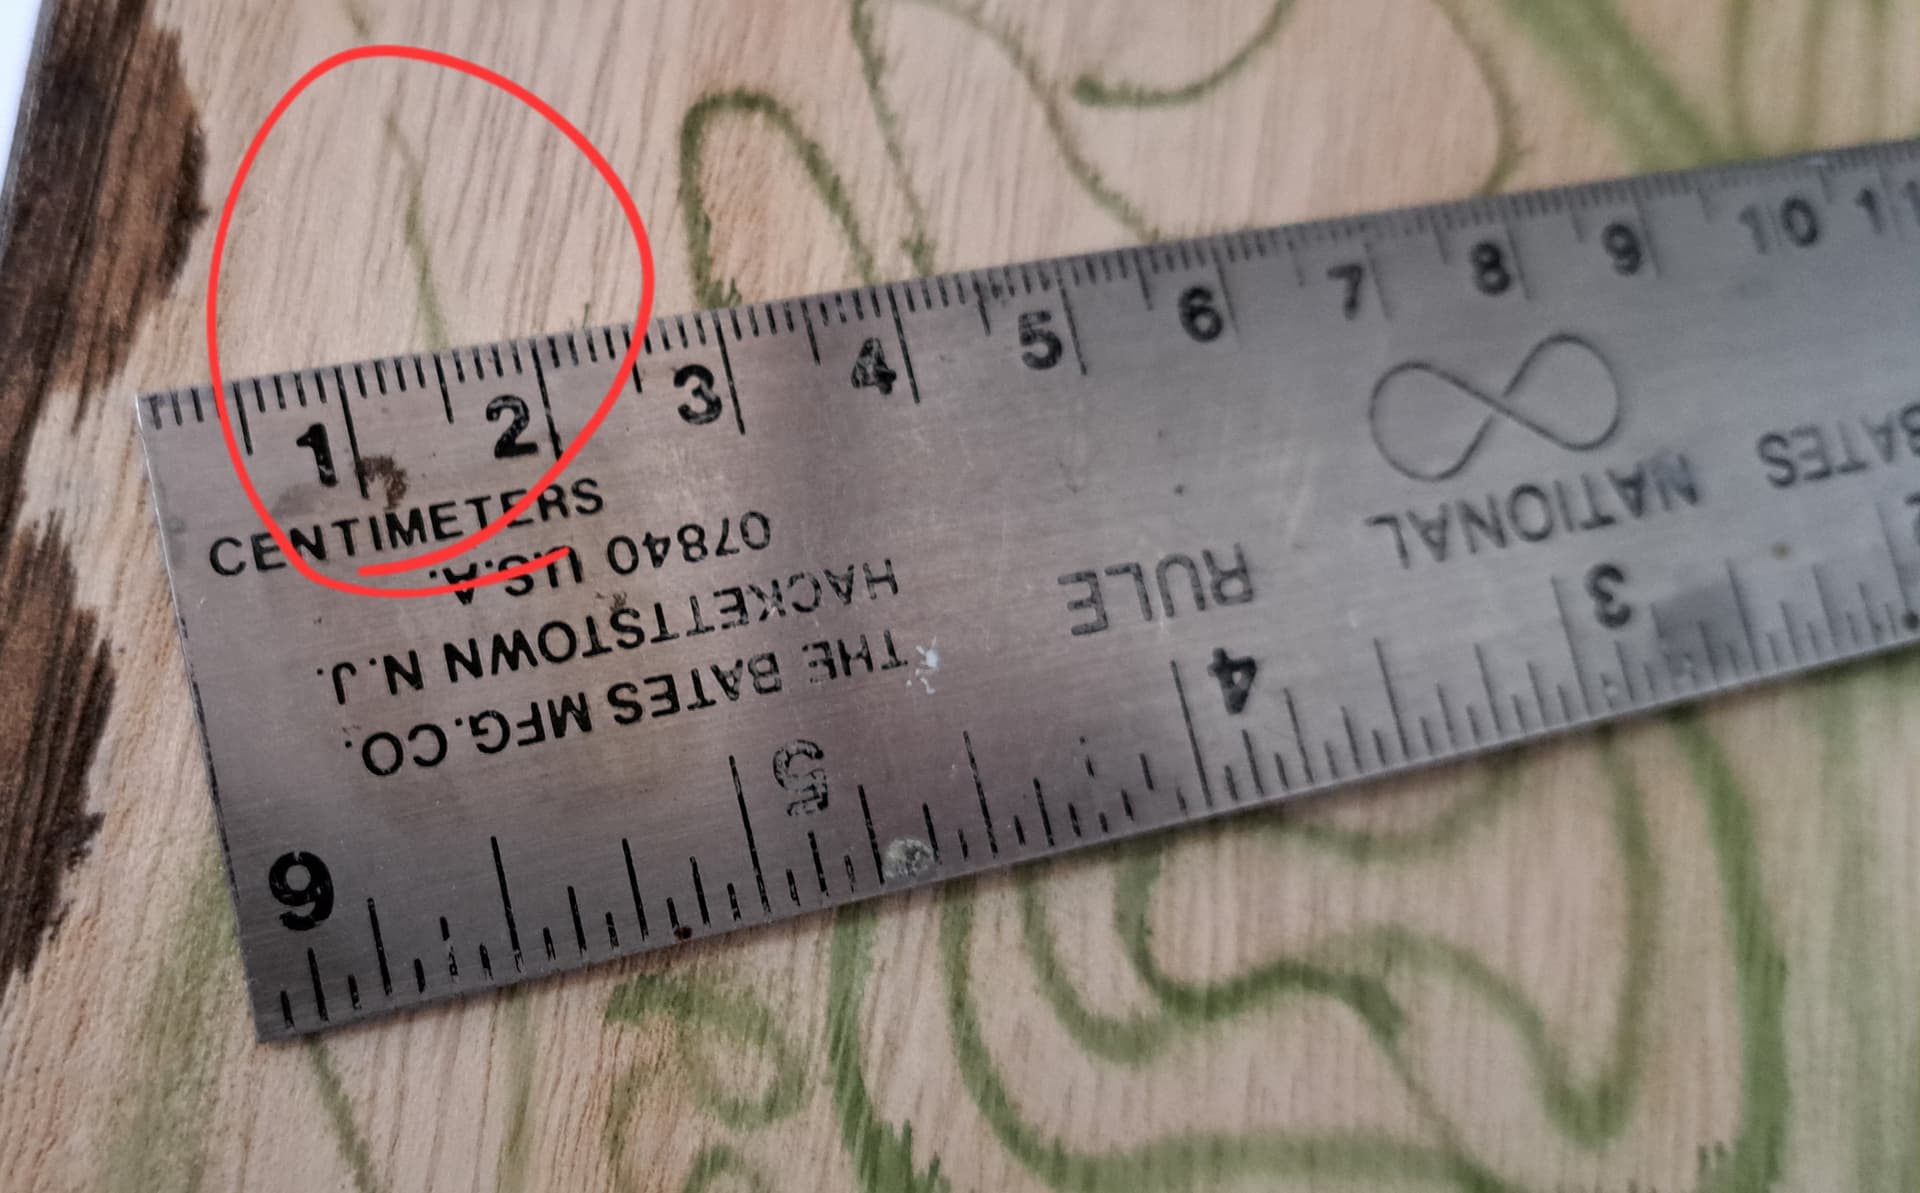
1 mm line consistent. I’m pretty sure (98%) with slightly adjusted thinner ratio this would have sprayed 1/32 inch per book spec for the VL…or slightly better based on past experiences with the VL.

I do not keep old models around as test mules. So unfortunately spraying index cards and an old wood base is the best I can offer at this time.

My opinion, Vallejo Model Color should always be filtered.

More opinion…

I wouldn’t consider spraying Vallejo Model Color in any dual action airbrush other than a Paasche VL or similar airbrush with at least a big fat .5mm needle. It will go 1mm thin line without much effort. How often are thinner lines needed painting plastic models?

Floquil, Tamiya Lacquer & AK Real Color, really any self respecting halfway decent laquer or enamel absolutely :100: slaughters Vallejo in the ease of use when it comes to airbrushing.

For airbrushing Vallejo Model Color is the second worst quality paint I have used in 48 years of airbrushing. The very worst was in the 1990’s with Badgers initial line of new acrylics that were formulated wrong at the factory and flashed into goo about 15 minutes after being exposed to air and went solid very quickly there after.

Airbrushing Tamiya’s Acrylics thinned with X20A is much easier to use than Vallejo Model Color.

YMMV

Happy modeling

5 Likes

Thanks for trying, Wade. I have done all those things and far, far more with my airbrushes and the results are completely different. Completely different. I will look at the Paasches.

2 Likes

Doug, I definitely understand as humidity & temperature could be major variables etc.

FWIW - If you try a Paasche VL, VLN-3 Needle size 3 (0.75 mm) is likely do be less hassle than a #1, at least initially.

Since, I’ve talked up basically an antique airbrush so much, I’ll go all in on supporting the Paasche VL.

If you try the VL and don’t like it for any reason, I’ll buy it for what you paid and cover the shipping. No questions and no arguments.

3 Likes

That is very kind of you, Wade, but not necessary. I am not hurting for funds. I am extremely frustrated with my own lack of know how and talent.

There are many different variables between your experiments and my situation, almost all associated with the airbrush used.

For example, my Iwata SBS is a side loader. The paint path goes down by gravity, around a 180 degree bend, up a small tube by siphon, through a 90 degree bend, down a slightly larger tube by siphon, through another 90 degree bend, into the airbrush body, and out the nozzle.

In contrast, in my Master gravity feed airbrush, the paint goes down by gravity, through a large hole at a 60 degree bend, into the body of the airbrush and out the nozzle.

I have identified 4 distinct places in the Iwata where even a small clog will mess things up–first bend, second bend, oculus, and nozzle. Of those, I only learned that the oculus clogs this month.

On the Master gravity feed airbrush, all clogs occur at the nozzle.

All attempts to clean the nozzle can push paint back into the nozzle and oculus. When using solvent based paints, the solvent essentially melts the paint so the paint push is rare. With water based acrylic paints, alcohol, proprietary thinner, or water is not agressive enough to dissolve the paint so it can push back into the nozzle and oculus, creating a clog and forcing a cleaning.

The Master airbrush I purchased is very similar to the one recommended in the first post of this discussion. Mine does not have the air flow valve beneath the forward barrel or removable cups.

The biggest problem with the Master is the trigger–it is very stiff. If I can figure out how to soften up the trigger–perhaps by using a more mild spring, or sanding the spring to reduce tension, it would dramatically improve.

On my Iwata, I have replaced the nozzle twice, the needle 4 times, the air hose once, and the entire compressor twice. The best I ever accomplished was to advance from terrible to bad. It did spray slightly better with solvent based paints for the obvious reasons.

There are a lot of variables.

While I would love to spray reliable hairlines because that is exactly how I paint in art programs, I am open to a 0.5mm needle. In my opinion, 0.7mm is too big.

Another issue I have is switching back and forth between Badger primer and Vallejo paint. I am now fairly certain that alcohol is not a good cleaning agent for Vallejo paints. Alcohol removes Vallejo paint very quickly, but it also causes little paint gum balls to form. The design of the Iwata airbrush nozzle makes this worse.

The inside of the Iwata nozzle is not a smooth cone. It consists of two cones joined by a ledge near the tip. Gum balls form on the ledge. My hypothesis is that these gum balls form turbulence in the paint flow, causing the flow to twist, sort of like a tornado. Paint does not come out in a stream, it comes out like a vortex, resulting in over spray.

The oculus of the Iwata is even worse. Little gum balls attach to the occulus, slowly causing it to shrink. Paint flow goes through the oculus, adding to the accumulation but also causing the air flow to compress, then expand, like a jet engine. This causes the spray to widen out.

As best I can tell, the Master does not have these issues but I am still experimenting with that one.

I also recently discovered that an air hose leak was causing a fair bit of mayhem. That is now fixed.

For now, I am going to tinker with the Master trigger spring and see what happens.

3 Likes

Doug, according to Google’s AI…the Master & Harbor Freight Avanti are basically the same airbrush. I have a $27 Avanti I use on the road. It’s pretty with laquer and enamels, no idea with acrylic.

With the Avanti, I’m ~ 6mm lines, not consistent. Trigger isn’t horrible but it sure doesn’t suit my preferences. It’s good for area work in my limited experience.

Next week I’m going use some Iwata lube on it and see if that helps the trigger, if ir doesn’t a Neoeco will replace it.

2 Likes

After using the Master a few times, I decided it is almost perfect for priming. The color cup is huge. The paint path is a straight shot. Cleaning the nozzle is relatively quick. Having a dedicated airbrush for priming keeps primer out of my Iwata–a very good thing. The only major issue is the stiff trigger. My right index finger is not strong enough to control it.

3 Likes

Doug I also use a dedicated brush to shoot primer. Does it make any difference? Who knows but I’m sticking with it!

4 Likes

i use a retarder i got at michaels for acrylic paints. i still get clogging, but that doesn’t explain why it happens with lacquers and enamels too.

1 Like

I would filter the paint after thinning and prior to spraying.
What do you use th clean the AB? I am thinking contamination if any is left in the AB.

1 Like

i use lacquer thinner to clean out and i always break it down . only when i am switching colors will i clean with a flush out. is there a tool or method to clean the nozzle tip out? i was thinking of a fine wire but i don’t have any wire small enough.
what does everyone here use?
Joe

1 Like

Depends on which airbrush…

Paasche VL tear down in middle of 2021 with ultrasonic cleaning.

Typically after session empty color cup, flush airbrush with Goof Off paint remover usually ~2 or 3 cc’s until sprays clean. Pull & wipe down needle with Goof Off. Clean tip with Q-tips or paint brush soaked in Goof Off. Unscrew tip and wipe clean if needed. Reassemble and spray 1 cc of Tamiya Airbrush Cleaner through airbrush.

Pulled tip & nozzle this month for first time in ~3.5 years cleaned with Goof Off. Used pipette. Checked cone with needle.

The VL is my work horse, no idea how many sessions probably ~80 to 100 before nozzle was pulled and cleaned. That’s the beauty of a .5 mm needle & nozzle that will do 1/32 inch lines.

I do filter paint a lot of times to avoid problems. That helps reduce excessive maintenance and hassles in my experience.

Likewise, Goof Off is a harsh paint remover. It will eat O-rings in some of least robust designs if any is left in the airbrush. Tamiya Airbrush Cleaner is likewise a powerful cleaner. I like to shoot some X20A to after the harsh cleaners are used to make sure all of the powerful solvents are out of the airbrush.

My other airbrushes get more frequent tip & nozzle cleaning say after ~5 sessions.

Be sure to have excellent ventilation, proper respirator & gloves to be safe.

3 Likes

For the nozzle I tear a thin, tapering strip of kitchen roll, twist it into a narrow “rod” that tapers to a tiny point, and use that. There’s an art to it, but generally a 1" wide strip, tapering to less than 0.5" should do. This is after all the usual spraying of cleaning fluids of course!

Never use anything hard like wire - it can crack the nozzle tip open if forced!

1 Like

I use lacquer thinner to clean, I always break it down, and as for cleaning the nozzle - never use a wire or the needle. It will flare or crack the nozzle. Going on from Tom’s recommendation, go on EBay and enter “paper points” in the search bar. You will find these:


These are very fine, strong paper rolled into very sharp points. I have these in Fine for my .2mm airbrush and Medium for my .35mm and .5mm airbrushes. Just take your WET nozzle, insert an absorbent paper point and twist several times. You will be amazed at what gunk comes out of your nozzle, and wonder how your airbrush ever worked in the first place. You’ll get stuff you shot 4 colors ago. These are cheap and they are absolutely the best way to clean the nozzle. I’ve been airbrushing for 45 years and I haven’t found better. My airbrushes never clog now.
I’ve posted these before, but it was several years ago. This is for the newer guys. Get some now.

8 Likes

I use these & concour

2 Likes