Thanks for the feedback John, ![]()
![]() …I also meant to ask about Drake’s Island, was it impressive, and have you been saving, it’s apparently going on the market,
…I also meant to ask about Drake’s Island, was it impressive, and have you been saving, it’s apparently going on the market, ![]() .
.
G, ![]()
Hi all,
Slow progress at the moment, but have started on the second bit of pathway and waste ground.
Cheers, ![]() ,
,
G
Nice work G.! I love the way the worn asphalt over the sets turned out!
Looking good G… Scenery and the roads/pavements are looking superb.
Drake’s island was amazing… we got some RIBs over from Stonehouse and the owner met us there ready for the tour. Really nice bloke, had about 35 minutes in depth history of the place and it’s usage through time from Romans till present, he also supplied wine, tea and coffee etc. Then we had the tour, probably about 2.5 to 3hours…really in depth and went over every part, through the various tunnel systems linking the gun emplacements and magazines…
He said he is just getting rid of it as it’s so hard to get anything done on it. Logistics is the killer…and n insane amount of red tape, … Plus the place has tons and tons of asbestos on it that has to be removed and you can’t get anything crazy done as everything on the island is grade 2 listed. He is selling for (asking) £6m , but he openly said, to doing anything meaningful, the new owner would be looking at a minimum further 10mil plus… If I had 6m I would buy it now lol
Thanks both, your kind words are appreciated, ![]()
![]() .
.
Drake’s Island sounds amazing, I’m very envious John, ![]()
![]() .
.
G, ![]()
Hi all,
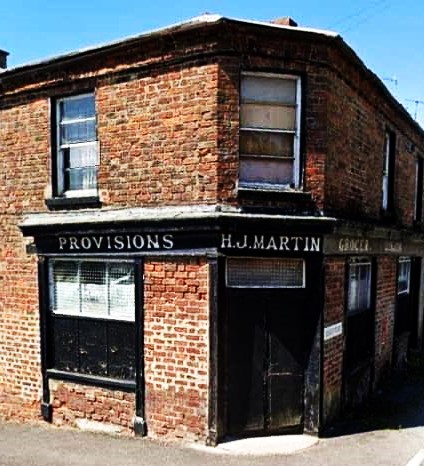
Decided it’s about time I started to scribe the brickwork for the corner shop, but decided I’d go for ‘stretcher bond’ as it’s easier than the ‘Flemish bond’ I created for the bridge/embankment walls, ![]() .
.
Started on the smaller element…
I need to try some different thickness paper as the paper starts to distort once scribing begins.
Spraying it with a primer helps strengthen and ‘waterproof’ it…
Then it’s mounted on a card ‘former’ using pva glue…
Each brick is approx. 3mm x 1mm,Cheers, ![]() ,
,
G
Hi all,
Managed to get the gable end brickwork scribed up and mounted at the weekend.
A few scribing errors occurred, but I think these can be hidden once painted.
Below are some general images of the two walls in situ.
The corner joint will be masked by signage and quoins.
Cheers, ![]() ,
,
G
Still have to remind myself of the scale of this … looks great mate.
Thanks John, much appreciated, ![]()
![]() .
.
G, ![]()
Hi all,
Starting to build upon the first lick (Step 1) painting of brickwork.
Step 2 is to add various ‘homemade’ washes, these are created using cheap poster paints thinned with water.
Step 3 is to pick out individual bricks in various colours using cheap oil paints.
Step 2 & 3 side-by-side, this hopefully shows the progression of colour build.
Below is an image showing the type of finish I’m aiming for once I’ve added further washes and dry-brushing.
Cheers, ![]() ,
,
G

Hats off mate … Great technique… It really pulls the colours through ![]()
![]()
![]()
![]()
Cheers,
M
Hi all,
A Managed a tad more painting of the brickwork over the weekend, added mortar between the bricks, and also managed to bring the gable end wall paint up to the same point as the front wall element.
The black area will be the base of a partial ‘Bovril’ advertising sign.
I had mentioned previously that the brickwork on the bridge buttress didn’t match my ‘new’ method of scribing bricks, so I’ve started to paint new elements to over-clad the old ones…if it works, ![]()
![]() .
.
This build is turning in to a learning curve, in future I need to think of any ‘brick’ related elements as if it’s a kit, as it’s proving easier to paint individual parts, as opposed to a in situ whole structure, ![]()
![]() .
.
Cheers, ![]() ,
,
G
Very nice mate. The brickwork really stands this one out, it’s great attention to detail and getting those tones spot one. Bovril backdrop looks nice as well …
I’d imagine you’re going to sleep counting bricks by now, someone needs to set up a Debricking therapy retreat in a rural (campsite) environment. As a recovering brickophile myself I partially agree with your observation that it’s better to treat walls as kits rather than paint the whole thing in situ.
But – for illustration purposes only - I offer a vacu-formed building I did many years ago…
In the 2nd image it’s obvious the right-hand section was painted using a different colour palette to the left-hand more orange section. To me (now) it looks weird and I don’t know why I did that, especially because I constructed the whole building and painted the entire thing before installing it on the diorama, for ease of handling/painting AND because I didn’t intend a mis-match between sections.
In other words, I would agree to treat a building as a kit in terms of painting it before installation, but I would also say build the whole building and paint it in one go with the same colours, then put it in situ.
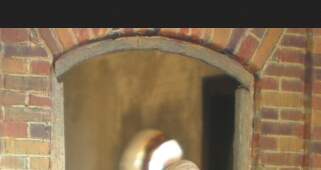
If you make arched door openings you will need to have brick arches above them.
Rectangular openings are fine with straight lines of stretcher bonds above them since
those bricks are supported by a load bearing structure inside. Usually angle irons, could also be the door frame itself.
Partial door arch borrowed from Tims photo:

G, amazing work. Glad to see you posting again.
I seem to recall seeing such arches standing slightly proud of the surrounding brickwork, so making them as a separate applique piece should not be a problem. Please note such items are available as injection-moulded accessories for modellers scratch-building in styrene.
M
Thanks to everyone above for their feedback, much appreciated chaps, ![]()
![]() .
.
And thanks to Robin and Tom regarding arched brickwork above doors and windows, ![]() , I hadn’t forgotten, I’ve been trying to work out how best to do them, so should be able to add them later this week,
, I hadn’t forgotten, I’ve been trying to work out how best to do them, so should be able to add them later this week, ![]() .
.
G, ![]()