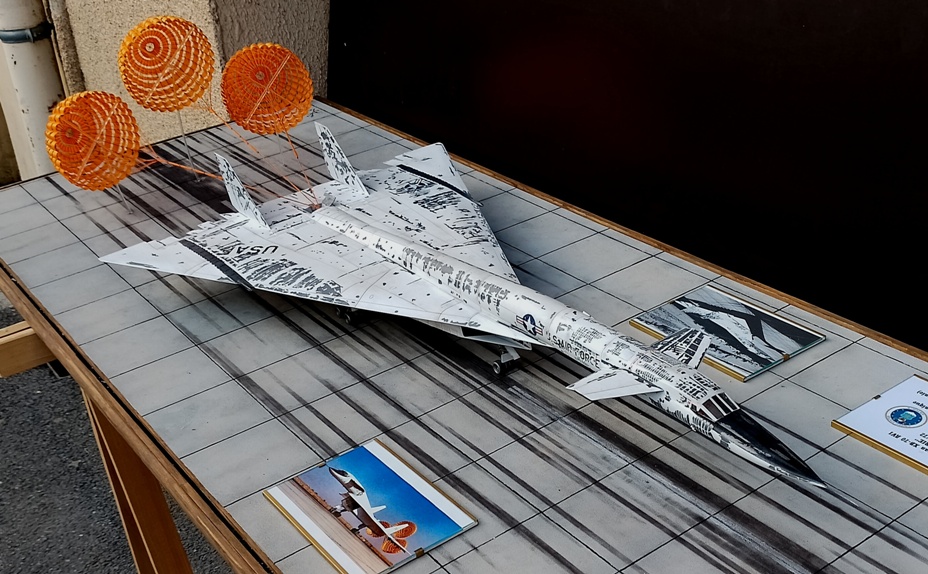
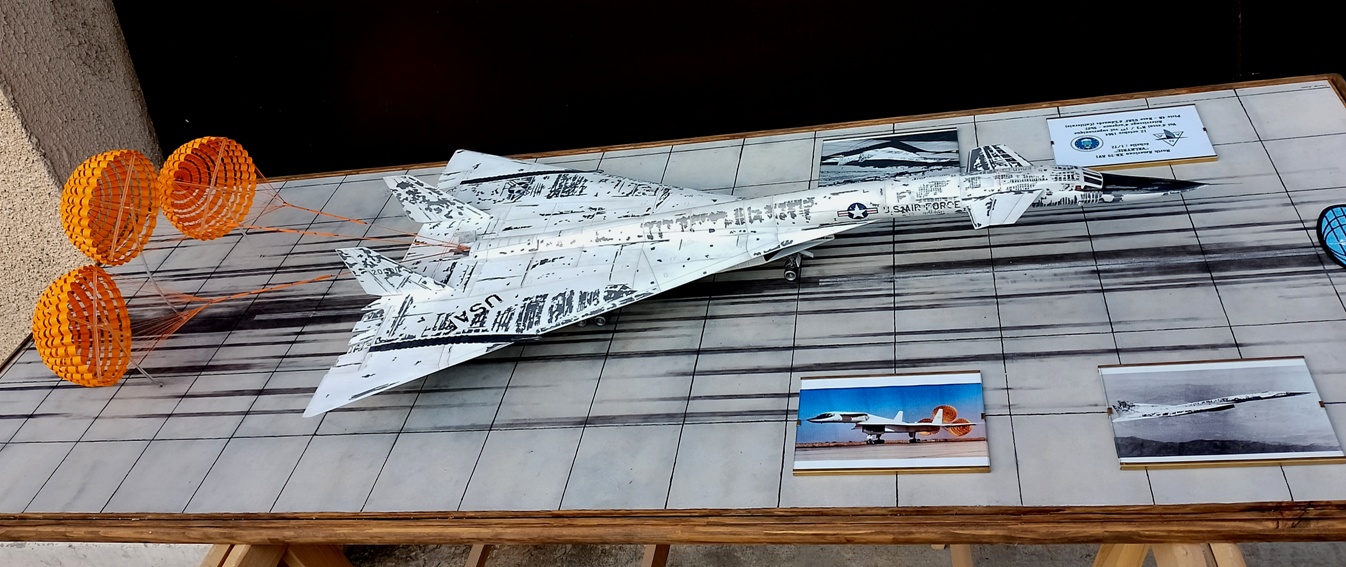
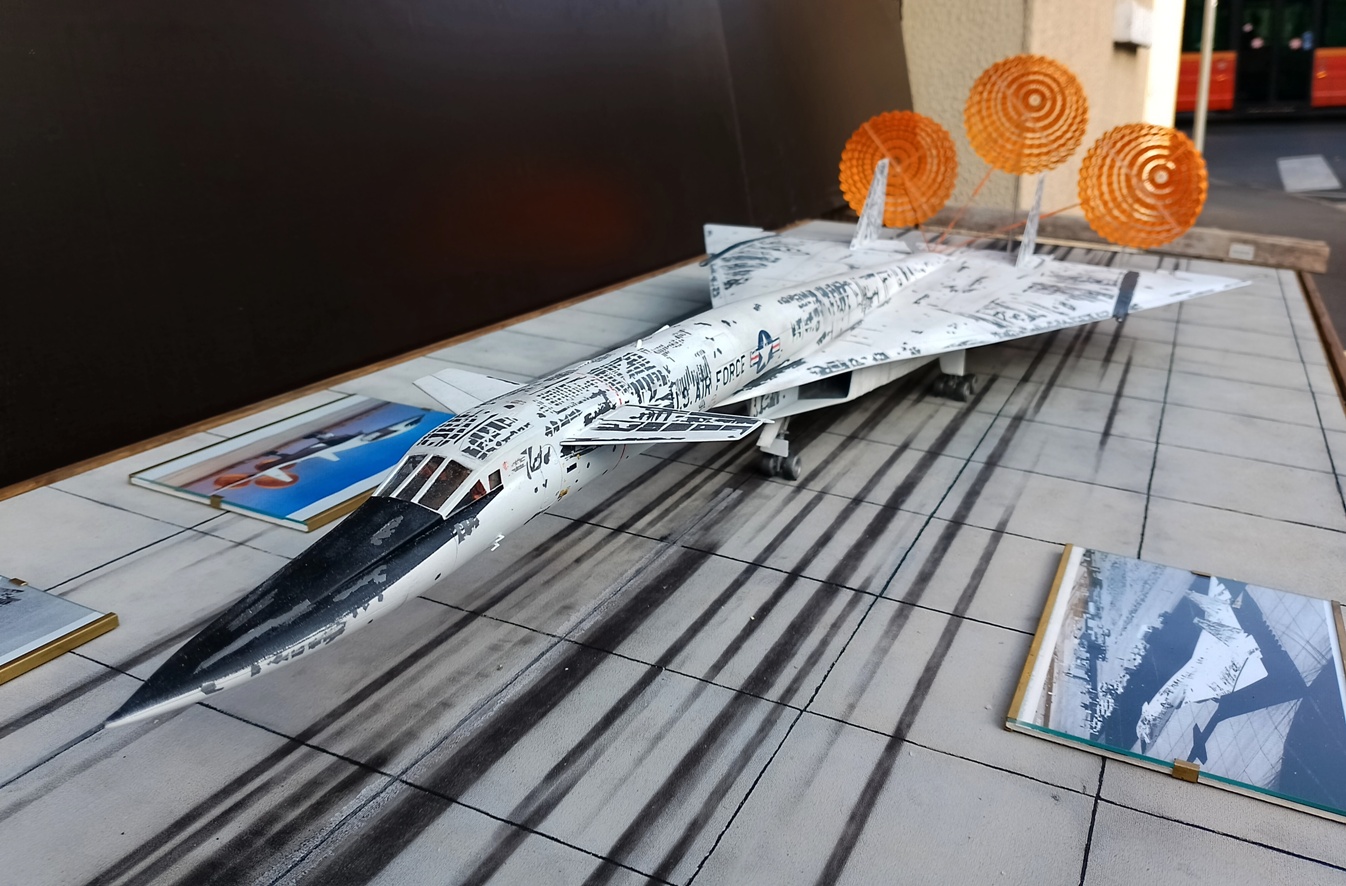
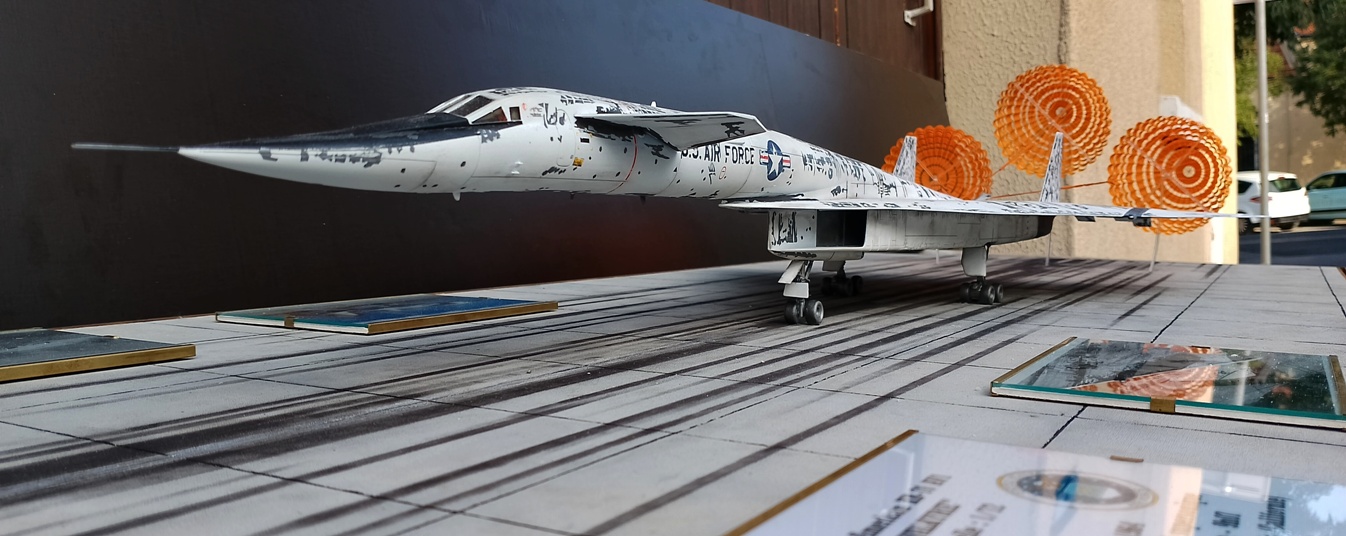
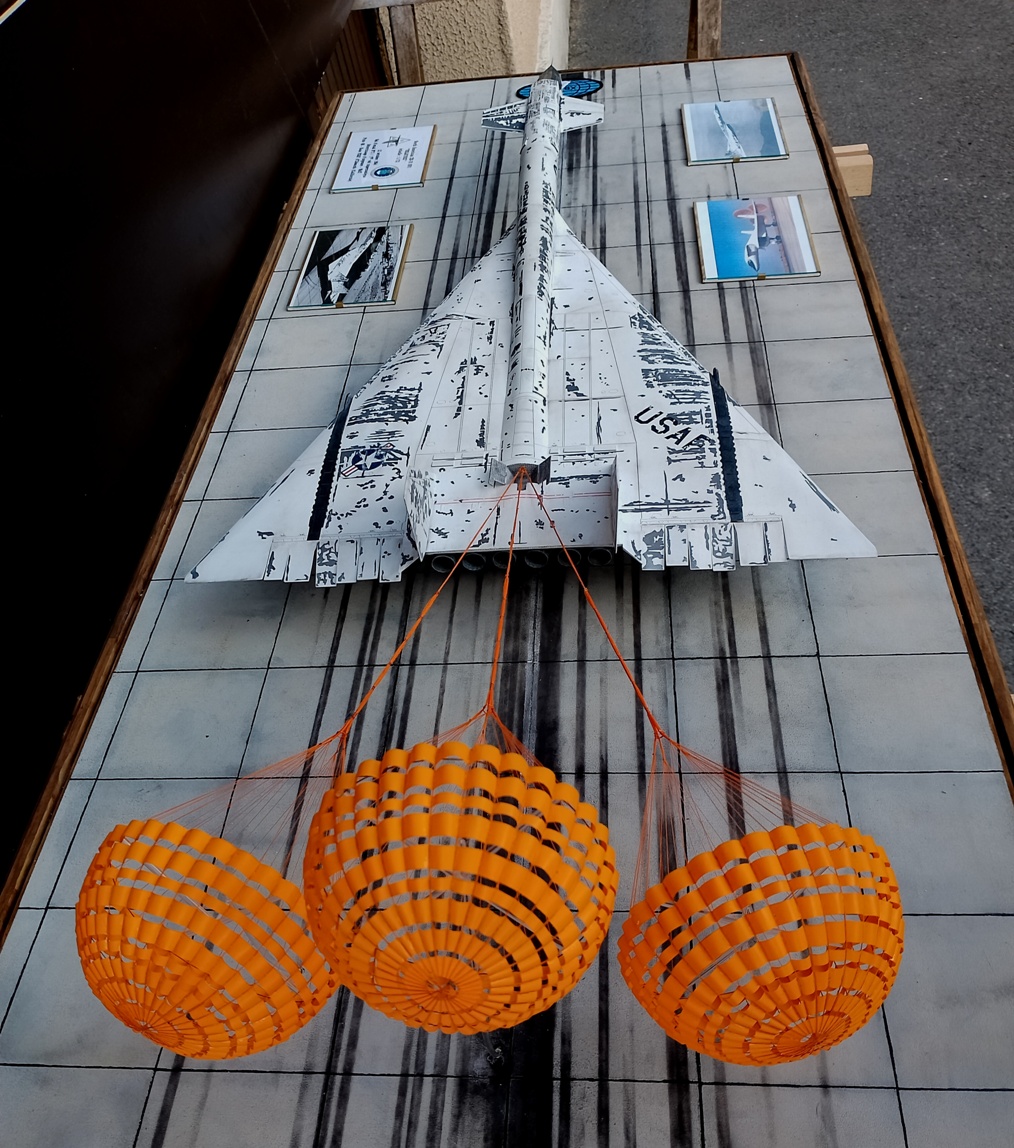
North Américan XB-70 AV-1 “VALKYRIE” 1/72 October 12, 1964, Test No 3 9:07 am Emergency landing Edwards USAF Base (California).
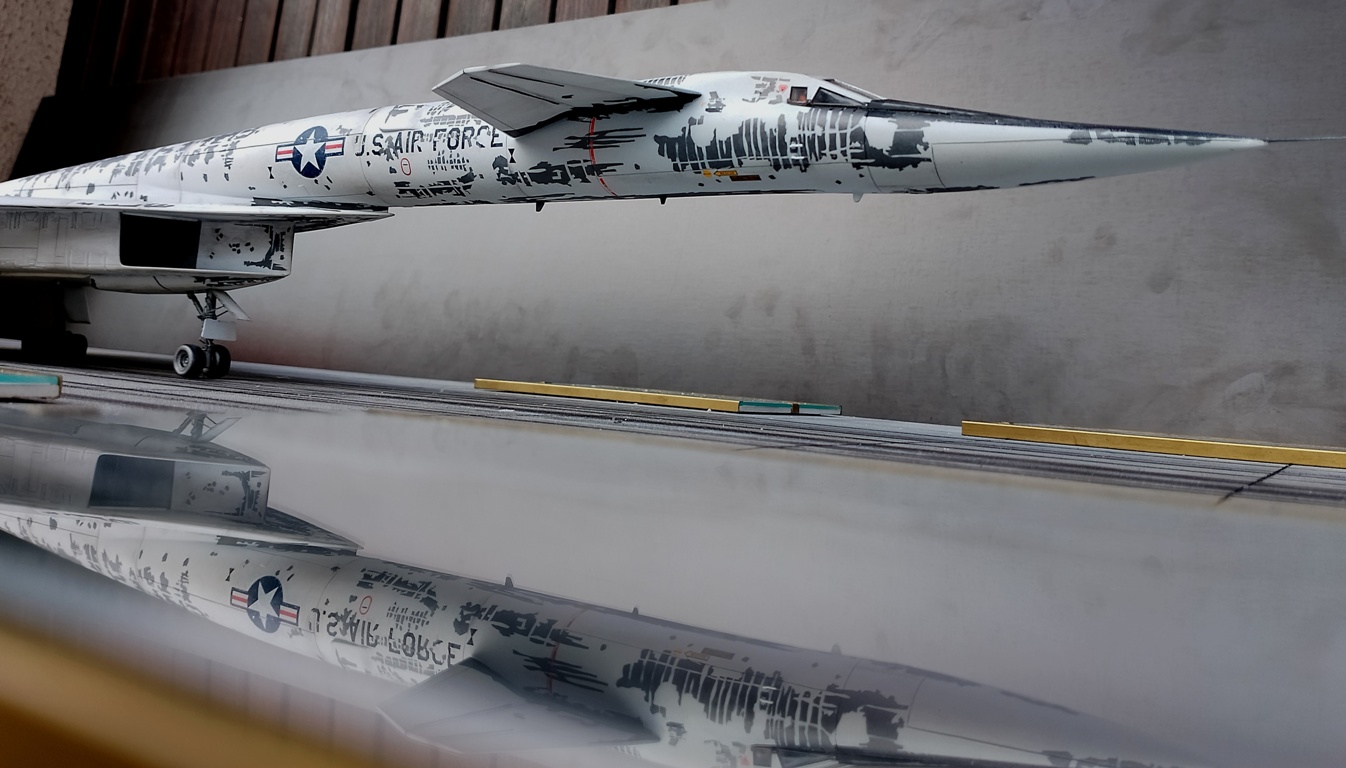
In a word: FINALLY!!! There you have it, this crazy project of creating the XB-70 “Valkyrie” in its landing configuration after its flight No. 3 and its accidentally particular livery has come to an end, after almost 500 hours of work. To summarize, this is the 1/72 Italeri kit, enhanced with PE packs from Armory Models and Brengun and lots of scratches…
But enough of the blabla, let’s move on to the photos, which were not an easy task to take, given the size of the thing
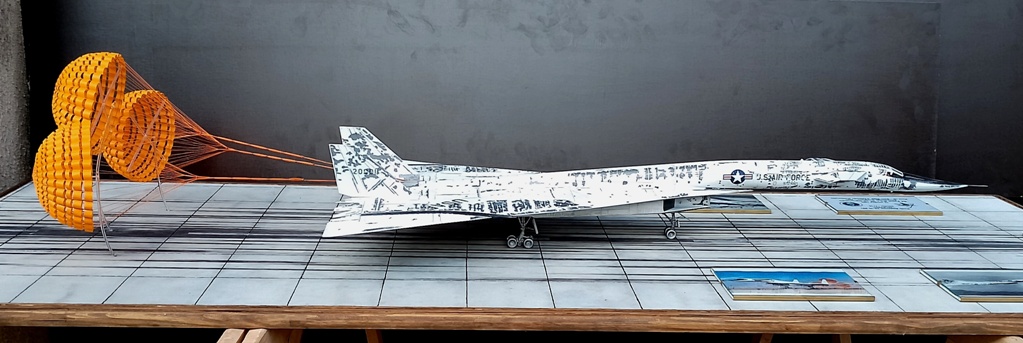
display dimensions : 150 x 60 cm (59 x 23.6 inches)
Aircraft + drag chutes dimensions : 120 x 45 cm (47,2 x 17.7 inches)
Aircraft alone : 78 x 45 cm (30.7 x 17.7 inches)
thanks !!
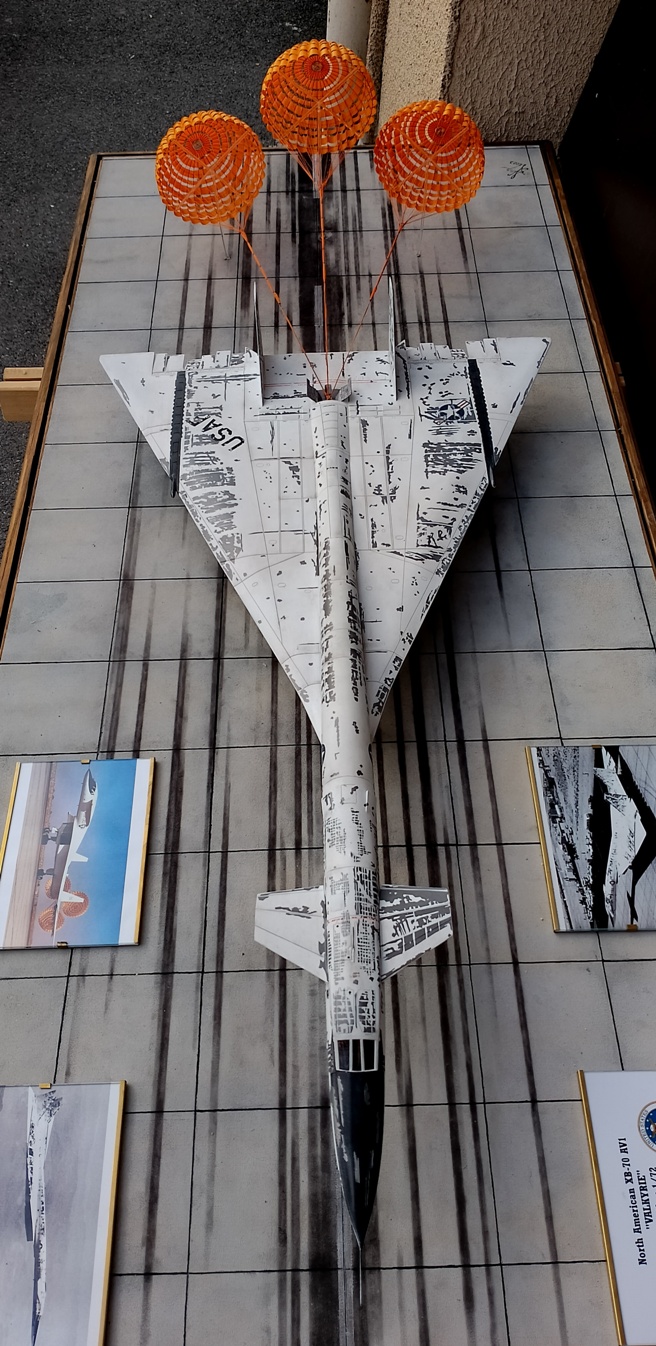
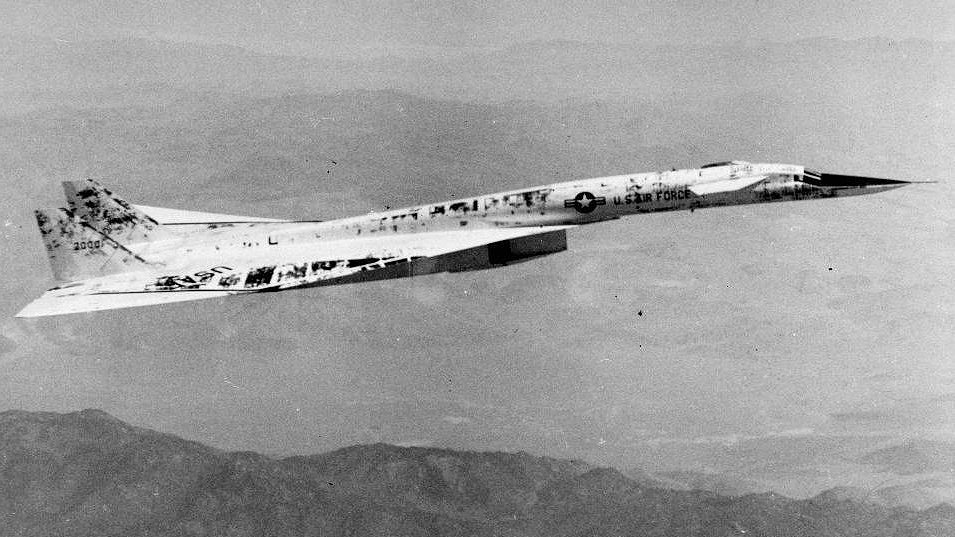
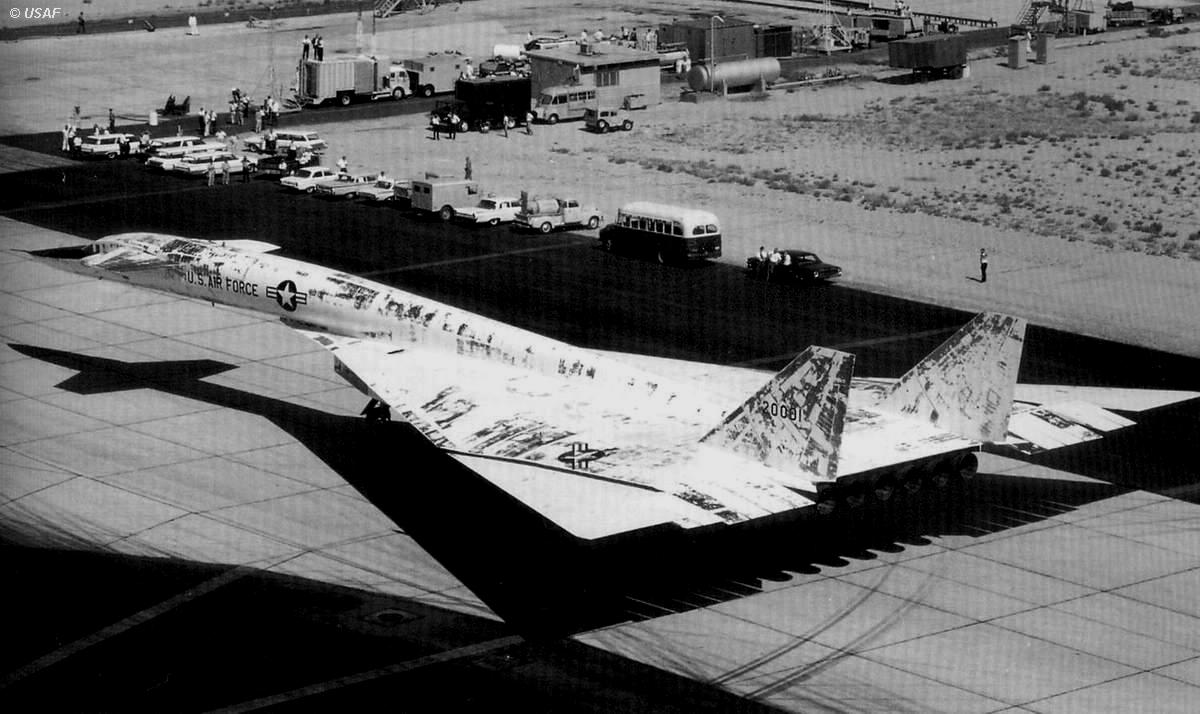
in fact, during its test flight No. 3, on October 12, 1964, the paint came off in entire patches… between the supersonic flight, temperatures recorded at nearly 300° in certain places and the fact that each time when a VIP was announced for a visit, he was systematically repainted with his immaculate white livery (up to 8 layers of paint were counted). In short, it didn’t last very long.
here are photos taken during this famous flight No. 3
Thank you for the compliments
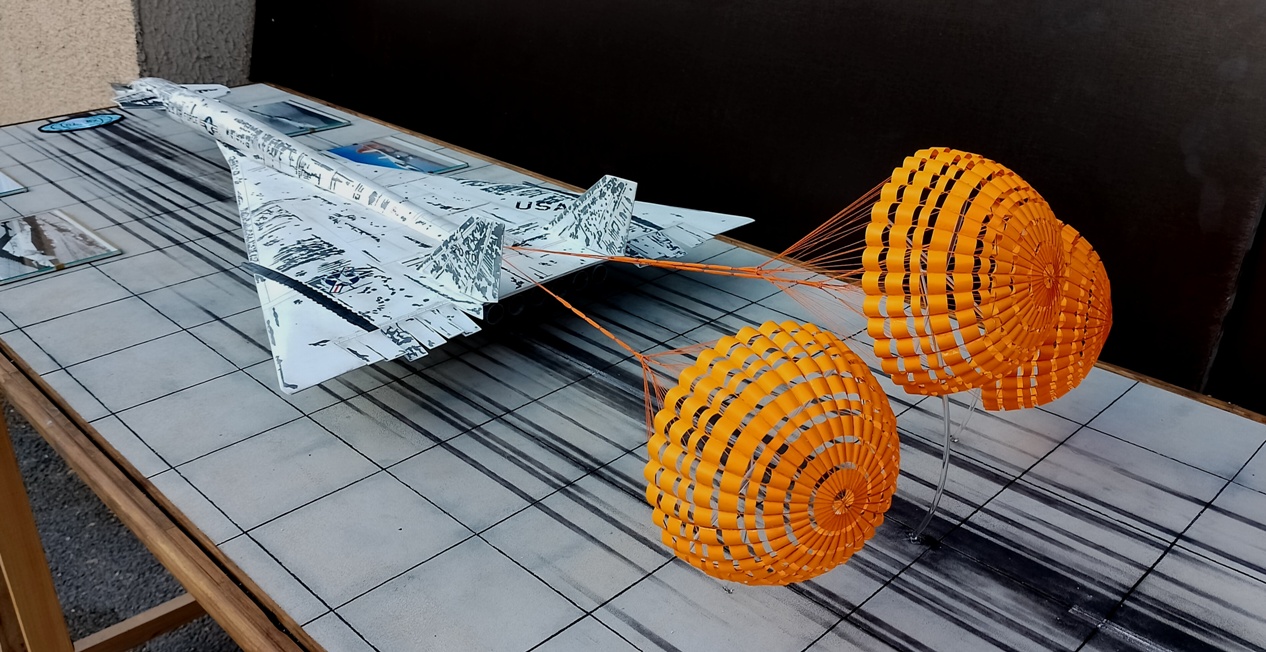
Parachutes are full scratch. They require more than 200 hours of work. Just the design, between the plans, the first tests, it represents around a hundred hours…
for each parachute there are:
40 hours of work
4 meters of brass
15 meters of sewing thread
300 wing elements, cut out and glued one by one.
they are models in themselves
if you wish, a tutorial on making parachutes is here (but it’s in french (i’m french) ; sorry, I didn’t think at first that my parachutes would cause such a sensation) :
if you wish, the details of the assembly are there (it’s also in French but, just in case, the language of photos is universal). It’s basically a forum dedicated to naval modeling, since that’s what I am basically.
the XB-70 is my very first plane, moreover, my first model made from a box
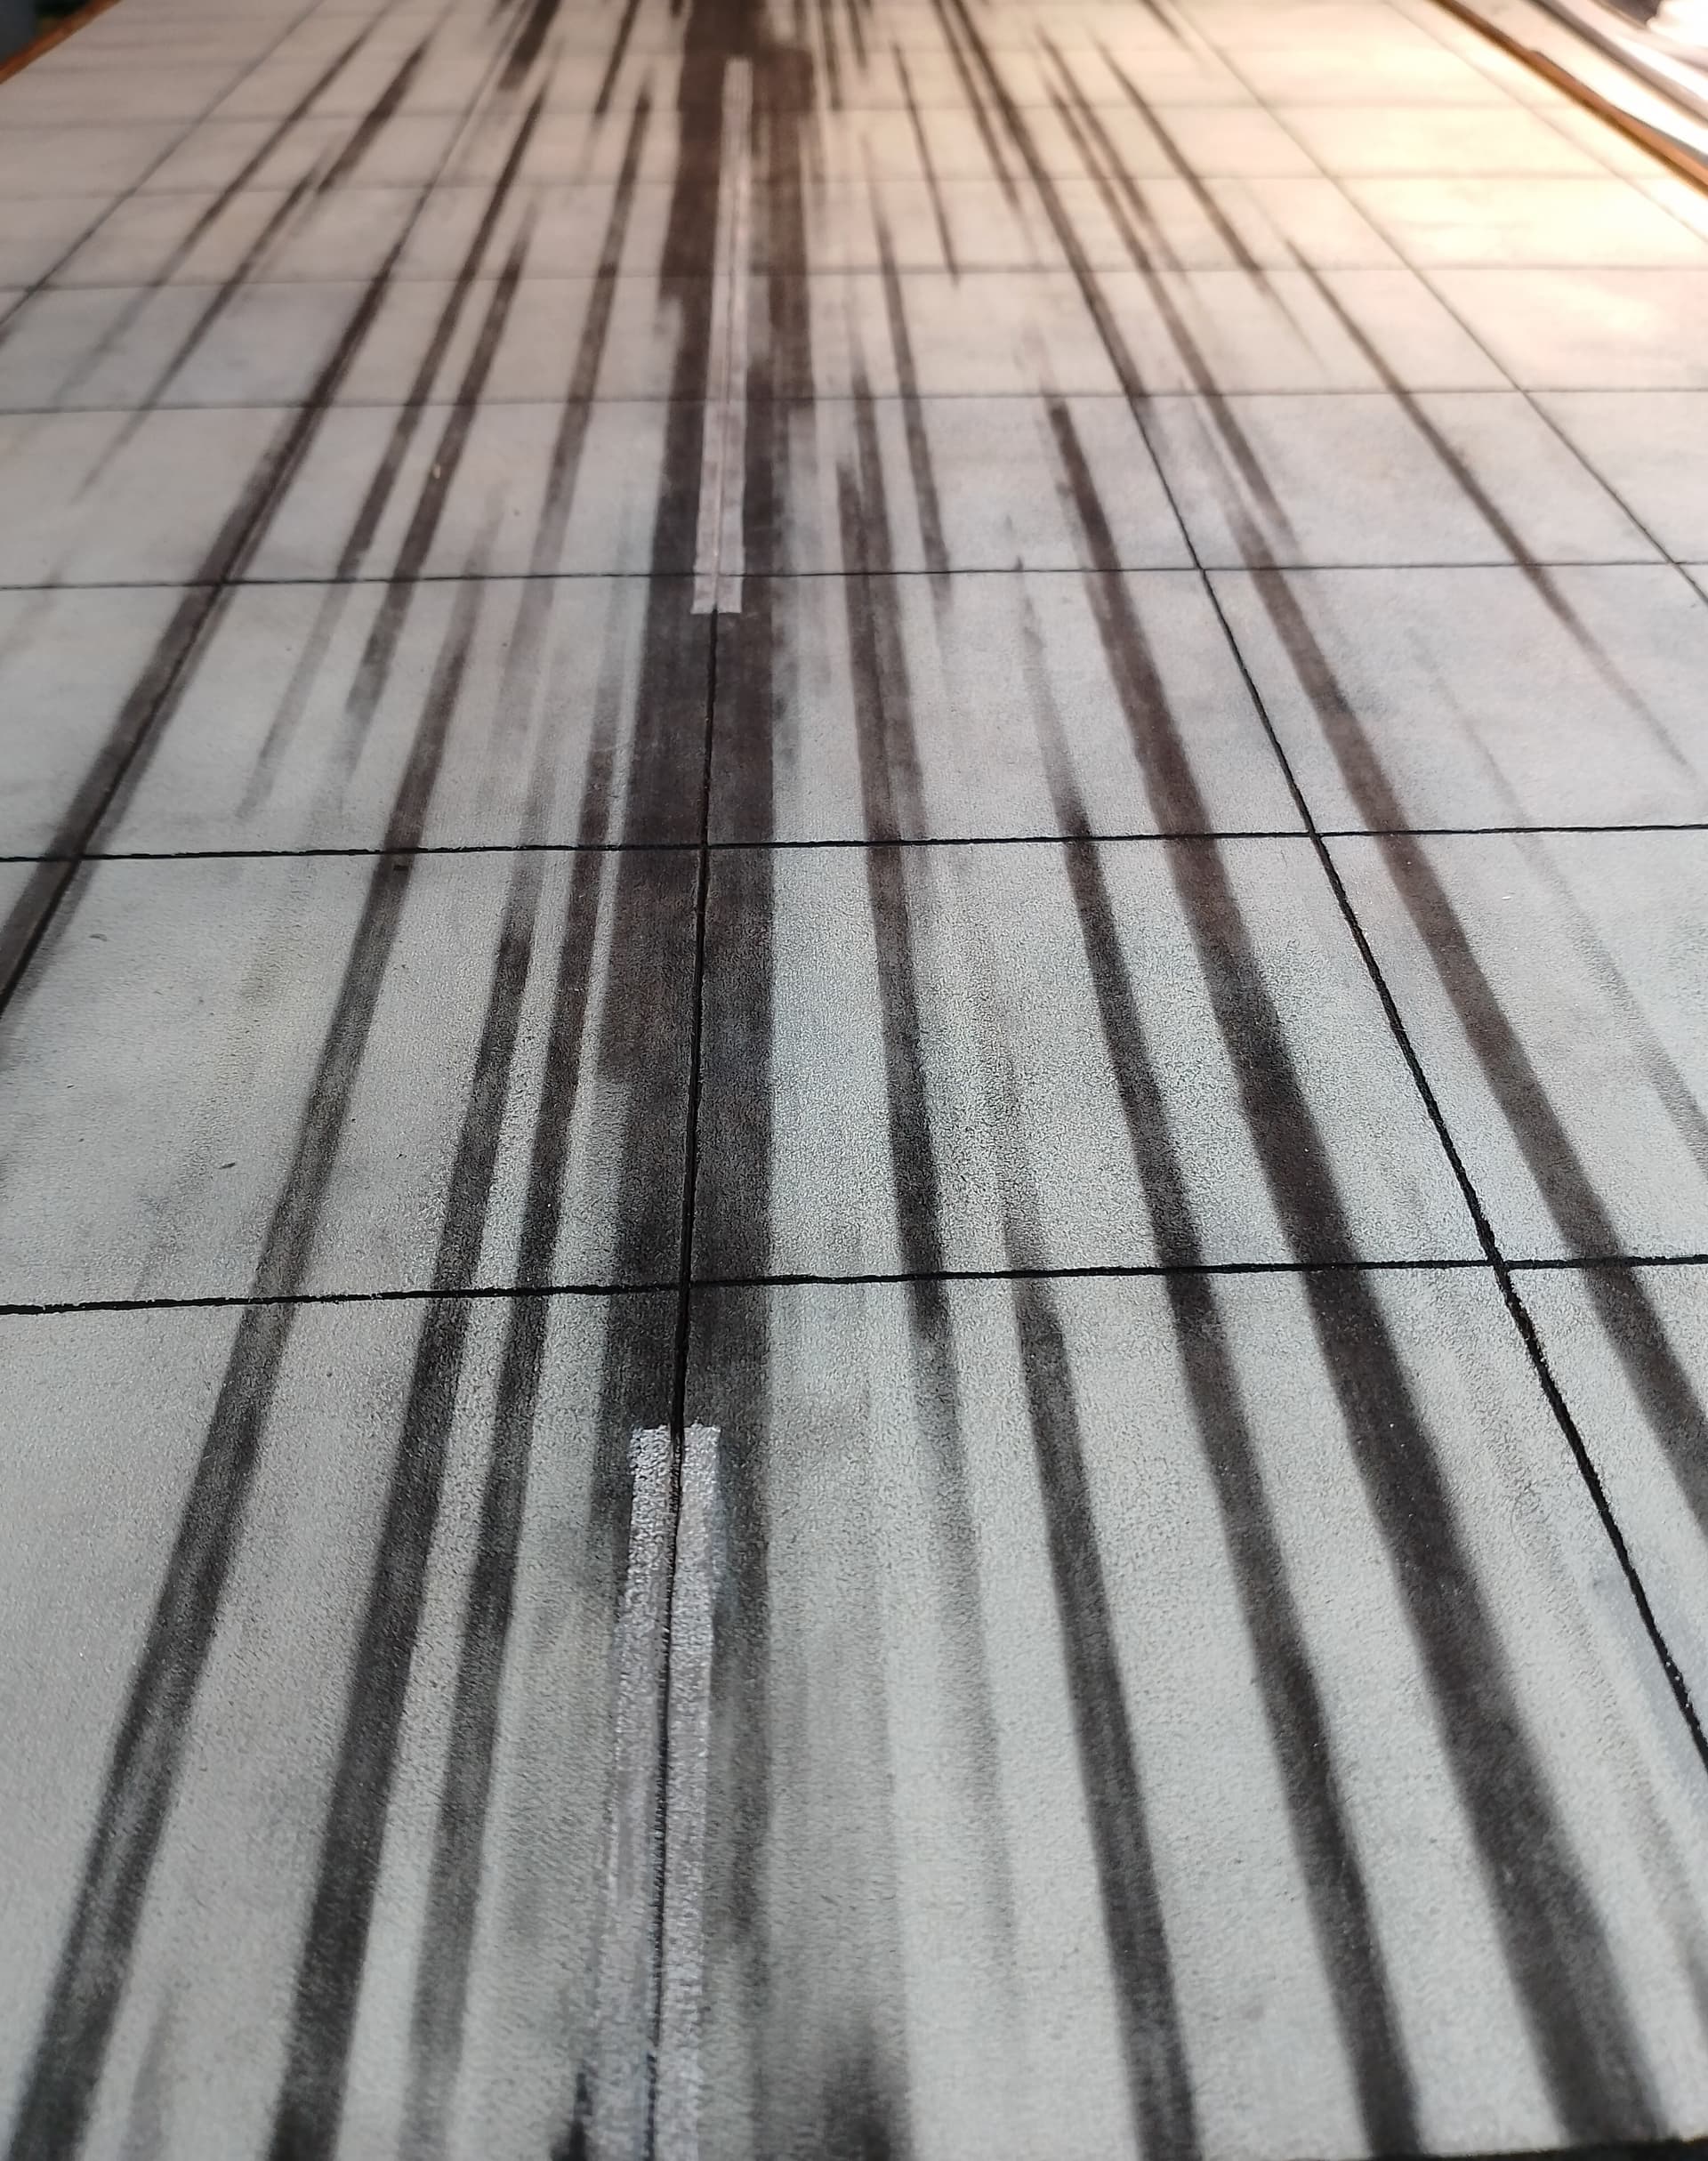
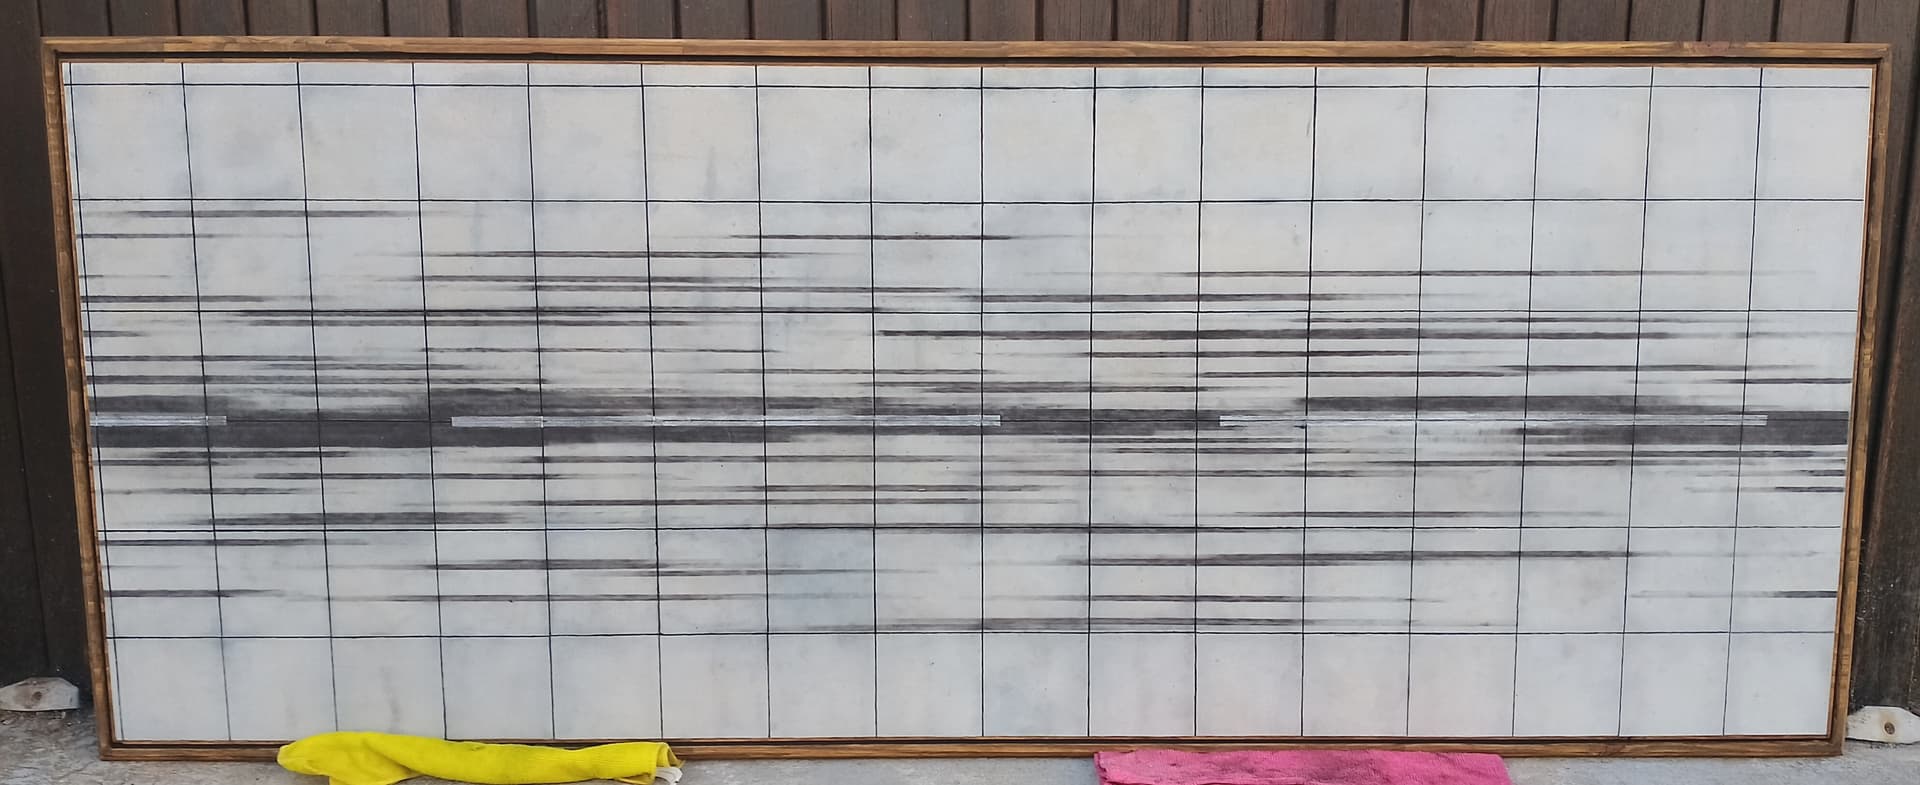
the dynamic effect is due to the rubber marks on the run way. they are not a plain gray, they darken then fade, which gives an impression of blur which makes you believe that it is dynamic.
It’s really very easy to do with a brush and mascara (that’s what I used). At the beginning, you just need to gradually darken one half, then do the same thing symmetrically on the other half.
To achieve them, I found nothing better than using mascara; 2 rules to delineate the contours along the length, a brush and off we go…
the dynamic effect is renforced by the fact that the prachutes are deployed.
In our mind, because we know how it works, they open thanks to the speed of the wind rushing into the sail, so our brain tends to imagine and reconstitutes this speed necessary for the parachutes to inflate. It’s really just an optical illusion.