Thanks John,
The creeper isn’t quite finished and I will be posting on it soon… I took a punt on something interesting from Italy and it was worth the wait!
Thanks John,
The creeper isn’t quite finished and I will be posting on it soon… I took a punt on something interesting from Italy and it was worth the wait!
Thanks Wink ![]()
Thanks G,
Glad you finally found me! More to come…
Thanks Erwin,
Always glad to get your appreciation.
Thanks Barney/Steve.
More to come!
Thanks John.
Yes, it worked out OK in the end…
Thanks Colin,
We are all learning from each other…
Thanks Chris,
You’re very kind. More to come…
Tim,
Just went back and ran through this thread again, as I wasn’t sure I had caught all the steps leading up to this current appearance. Stunning. I’m gob-smacked. Your work is absolutely beautiful and you are a master artisan. The completeness of your detailing, the subtle tones, and the myriad of colors are phenomenal. This is a truly outstanding piece in every way.
Building a farm or field gate
Like most people, I’m sure, I like to take the easy route most of the time… but every now and then I am pleasantly surprised to find that there’s something I want for my diorama which I cannot find in pre-made or kit form.
Now I will be glad for someone to prove me wrong, but after extensive searching I could not find anyone who makes a 1/35 scale version what must be one of the most common sights in any rural setting: a farm or field gate.
Maybe I wasn’t using the right search terms (although I can tell you now that there’s no point looking up ‘Belgian gate’ because you come across something used to block roads from advancing forces…)
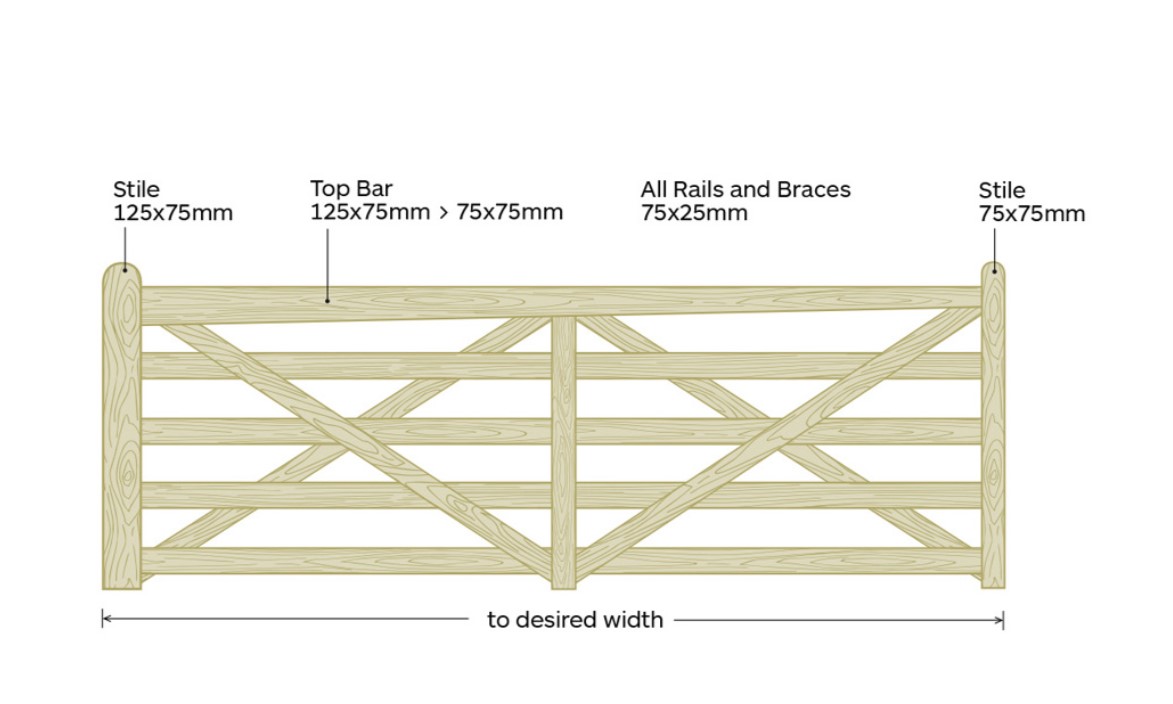
Anyway, after a bit of research, it seemed to me that farm gates in North West Europe (and probably many places elsewhere) tend to fall into two main types: wooden five-bar and galvenised metal.
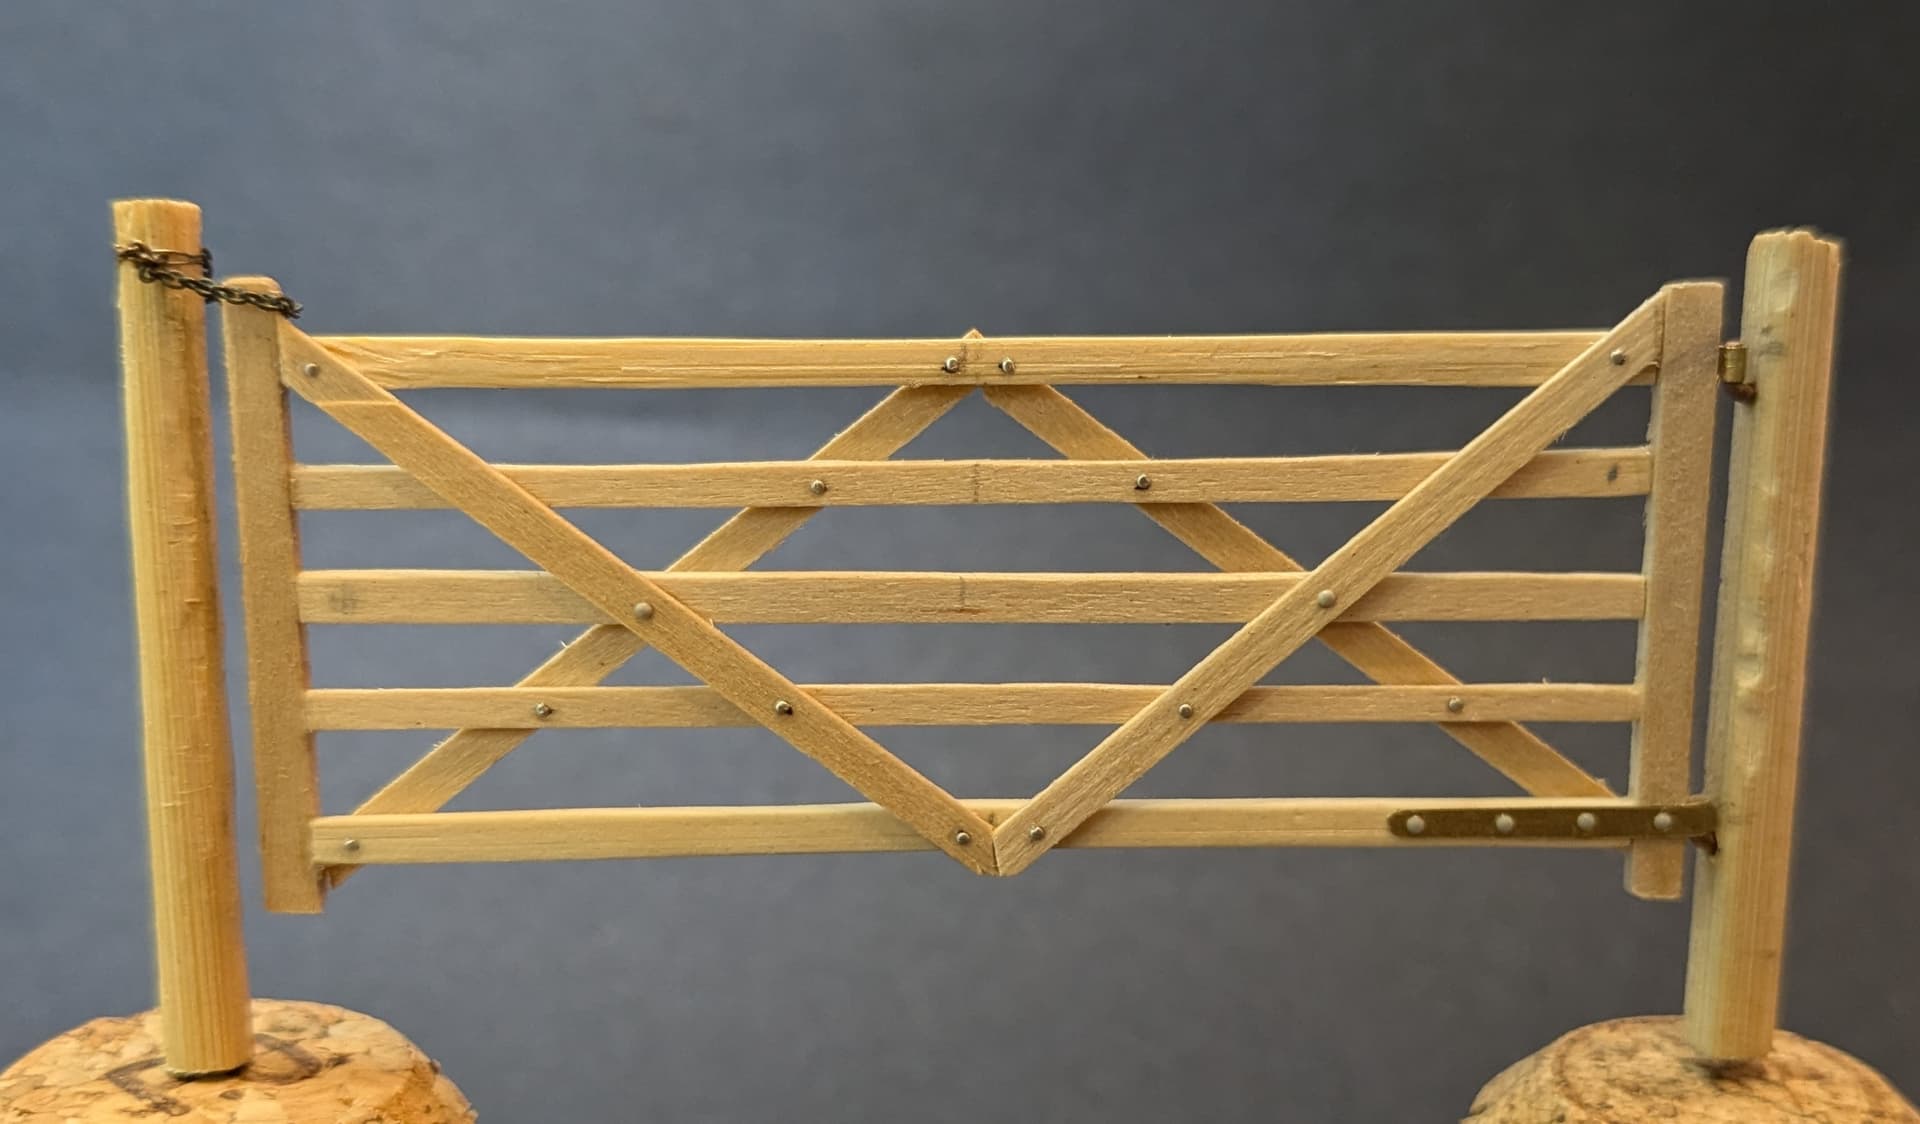
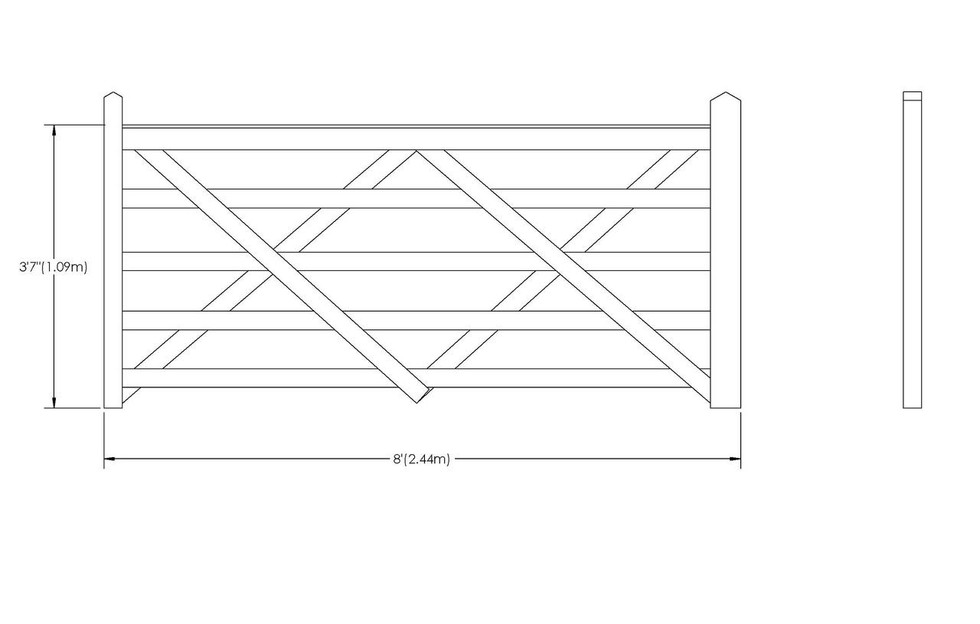
I decided to go with the wooden version. Here are a few images:
As you can see, the five-bar gate derives its strength from a simply construction using diagonal cross-braces. I worked out the rough dimensions, but I wasn’t too scientific about it. I used a figure to judge the height, based on the simple fact that an adult should be able to lean on any gate and the width (which can obviously vary quite a bit) was determined by the position on my diorama.
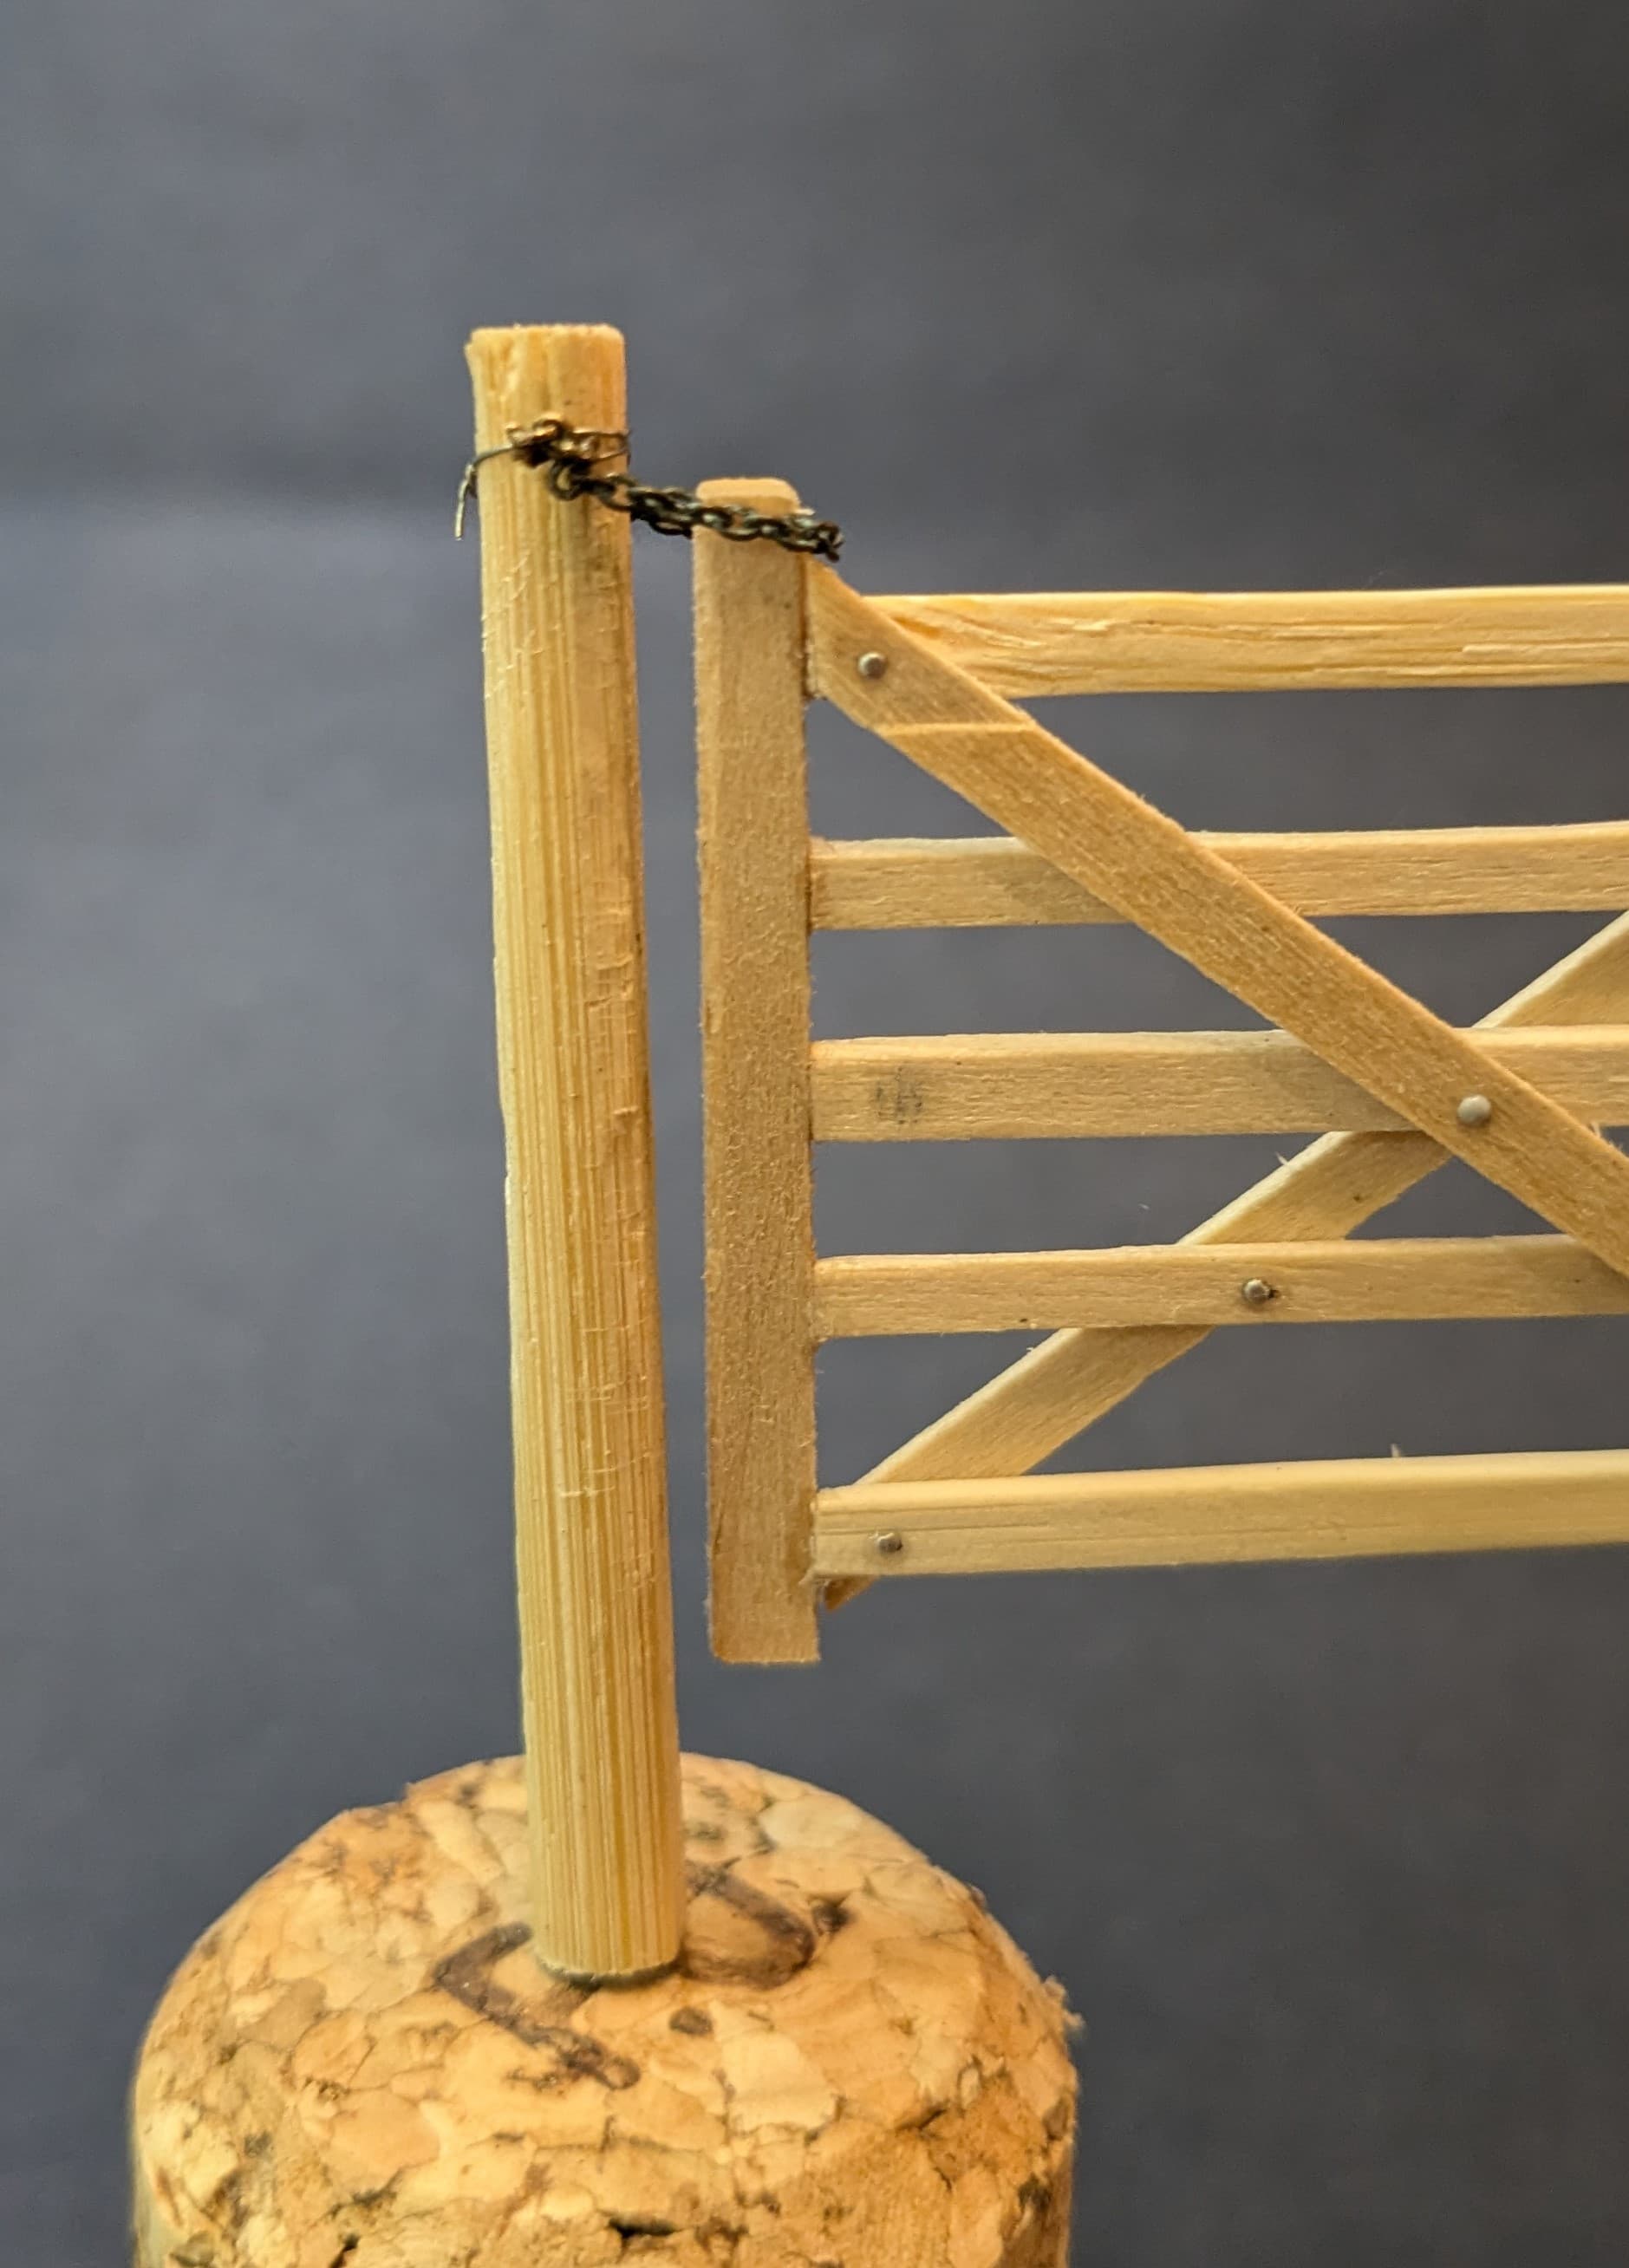
I then got to work. I decided to use various types of wood rather than plastic because I was worried that the latter would warp. The slats were mostly cut from the sort of stirring sticks you get in coffee shops and the uprights cut down from rectangular wooden rod that I had bought somewhere. The posts at either end are from bamboo chopsticks.
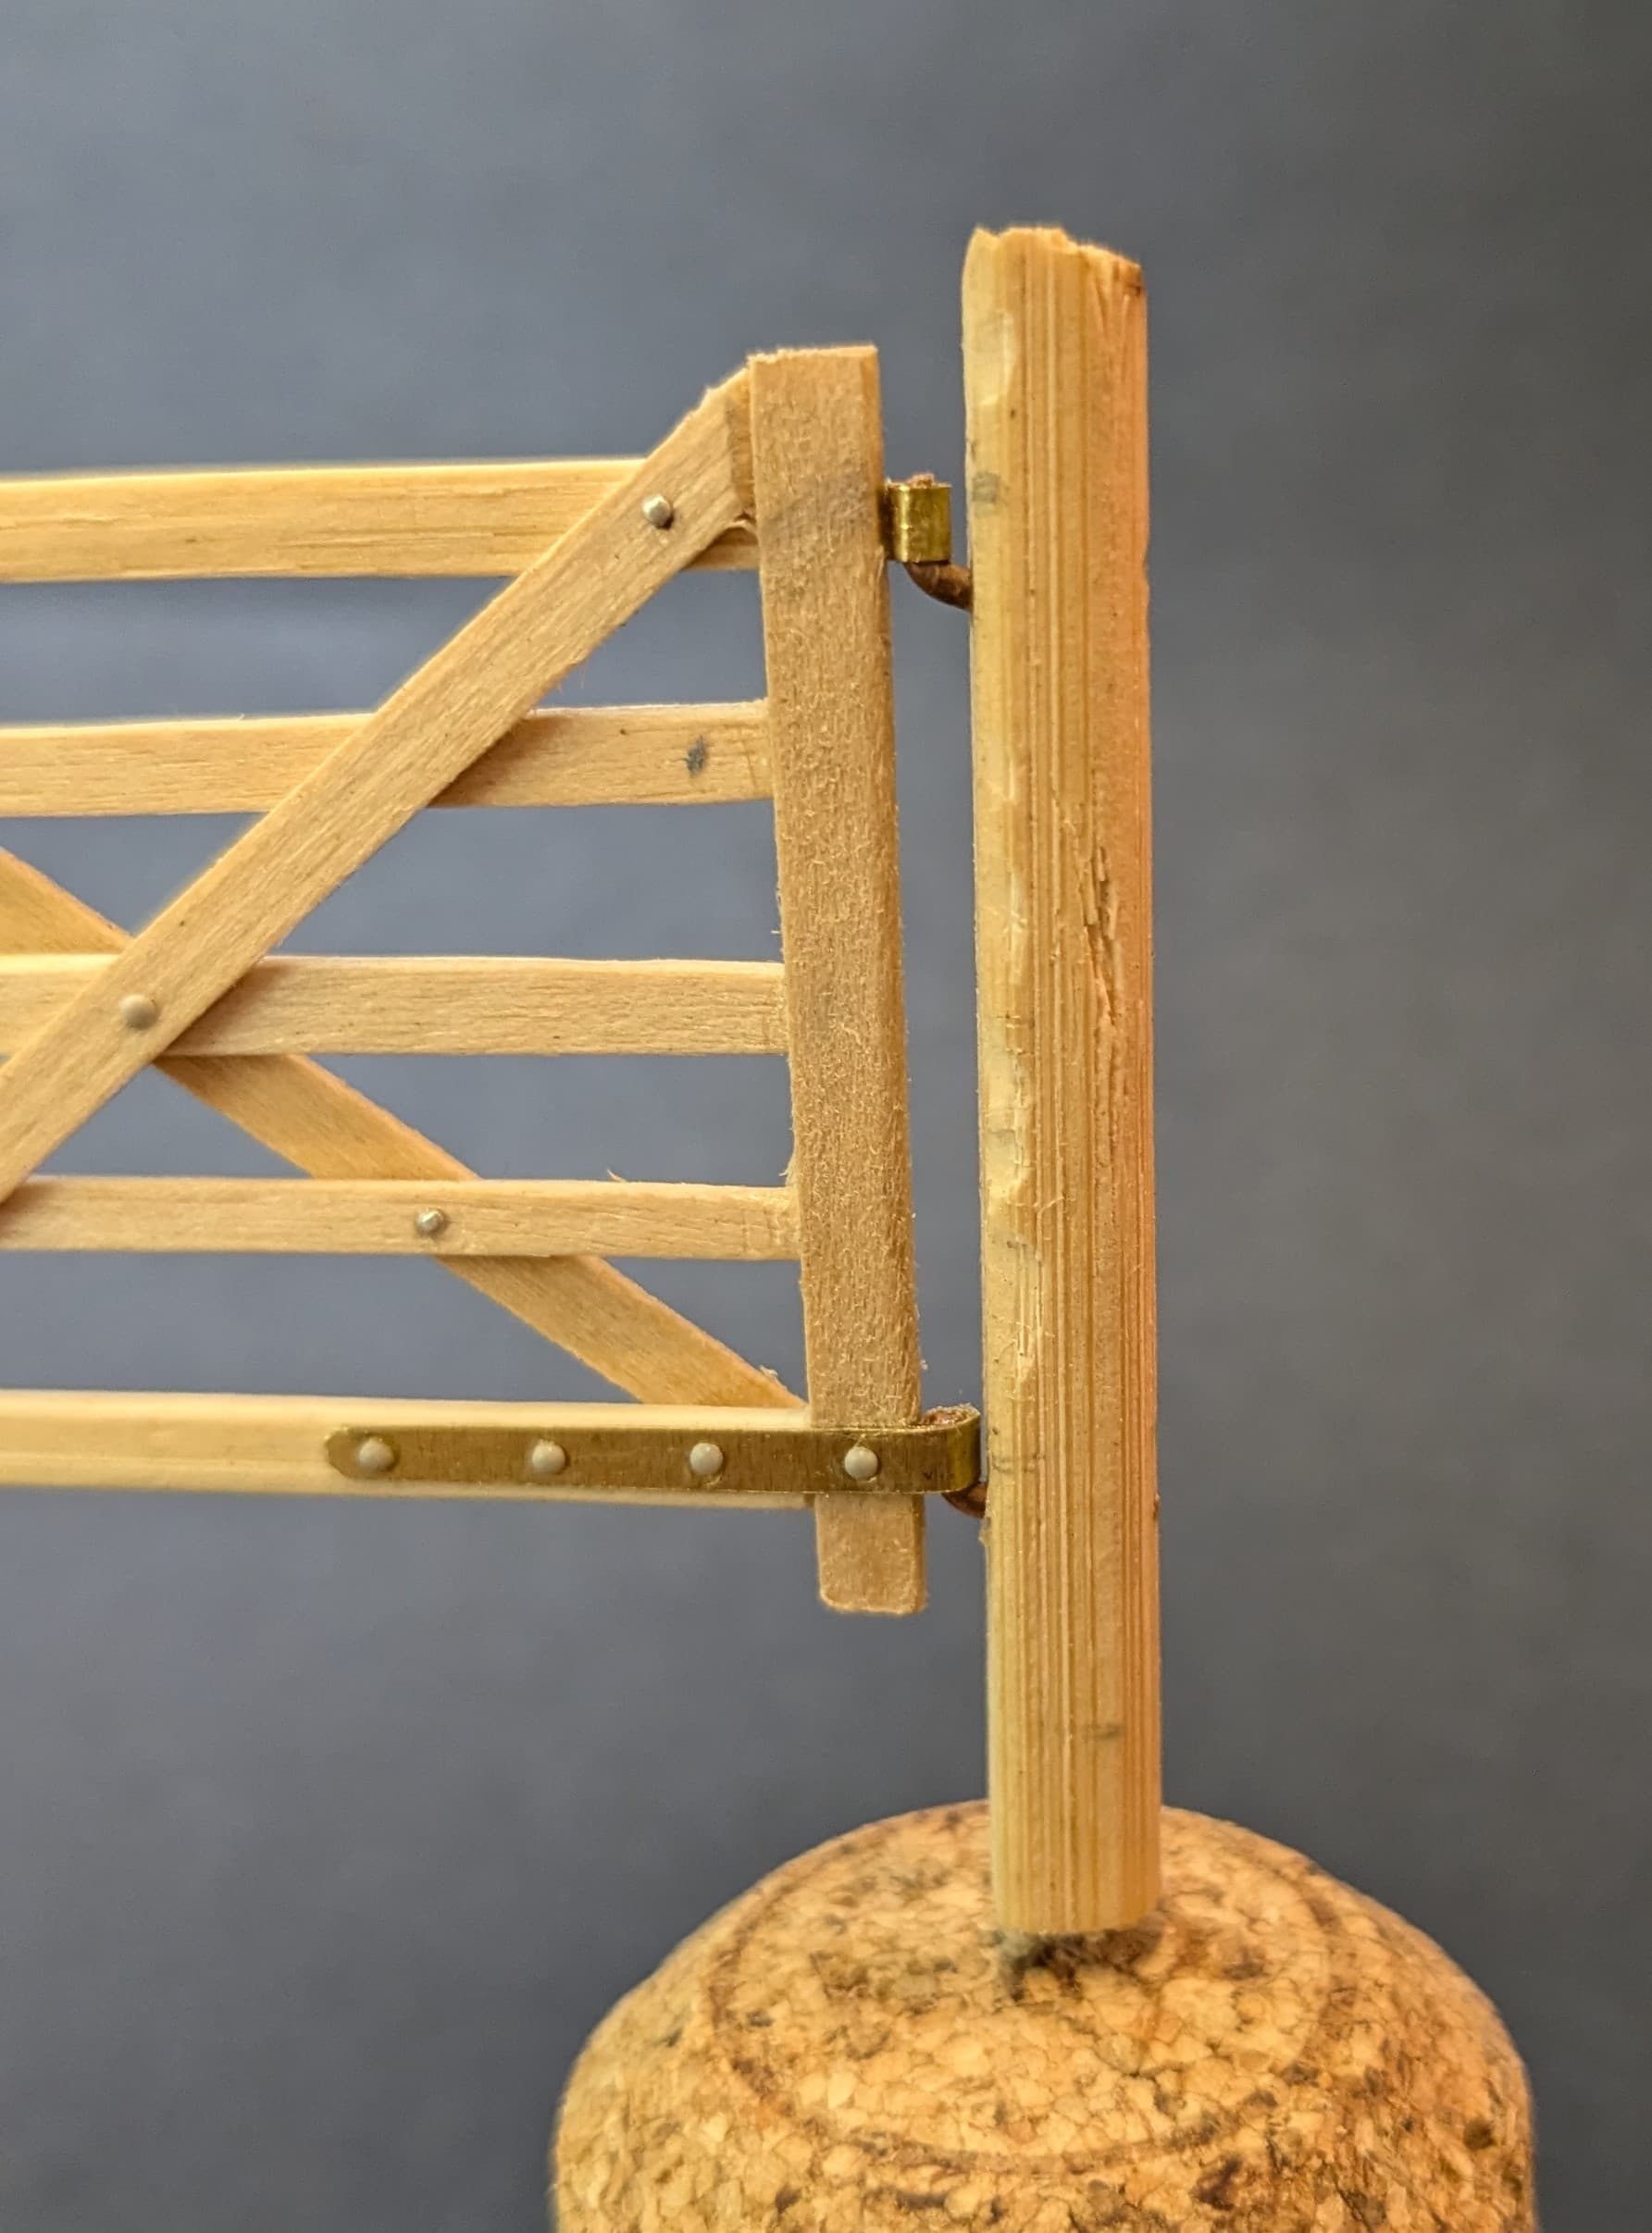
Details were then added. The hinges are simply bent from copper strip and hung on lengths of bent brass wire. This means they actually pivot and can be easily removed for painting. I then added larger rivets from a Meng set (the ones you just shave off a plastic sheet) and smaller ones were punched out from pewter sheet. Finally I added a length of fine chain to the other pillar. Everything was then attacked with a craft knife to give it a well-used appearance.
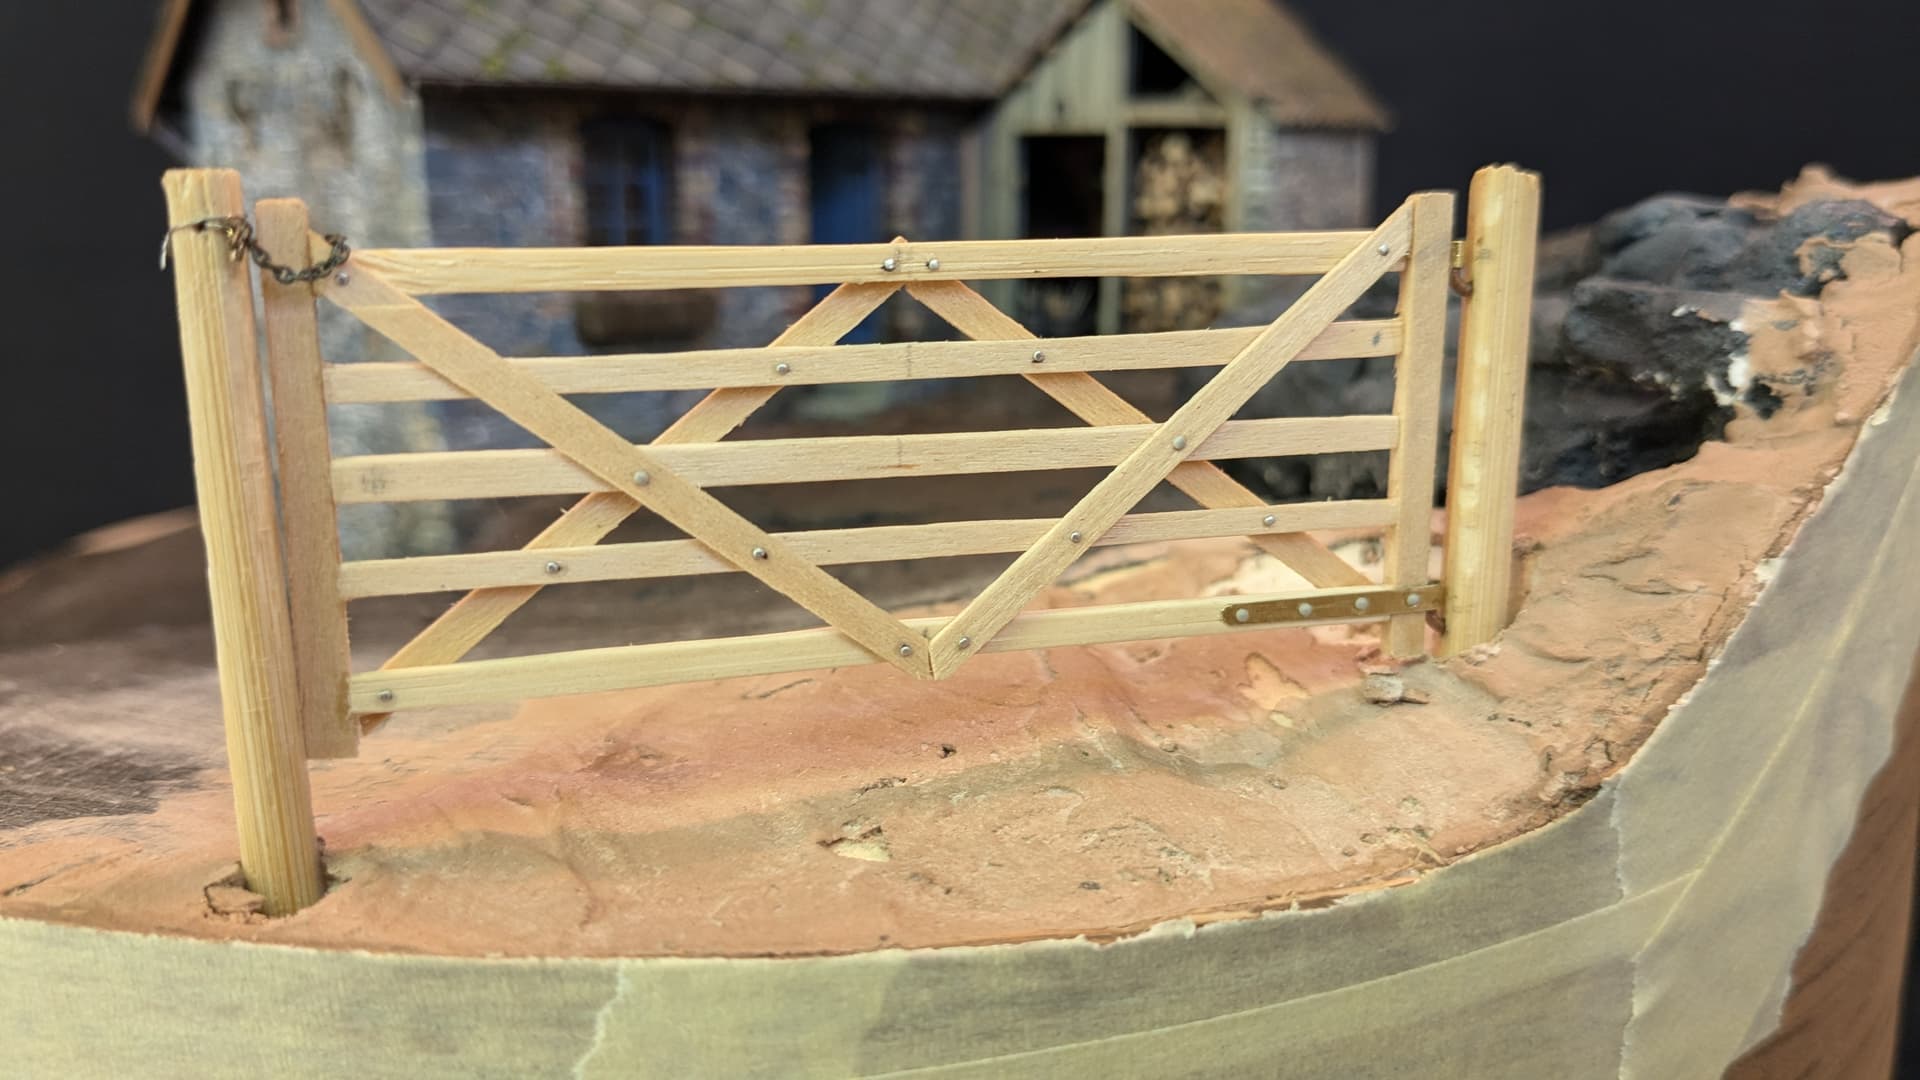
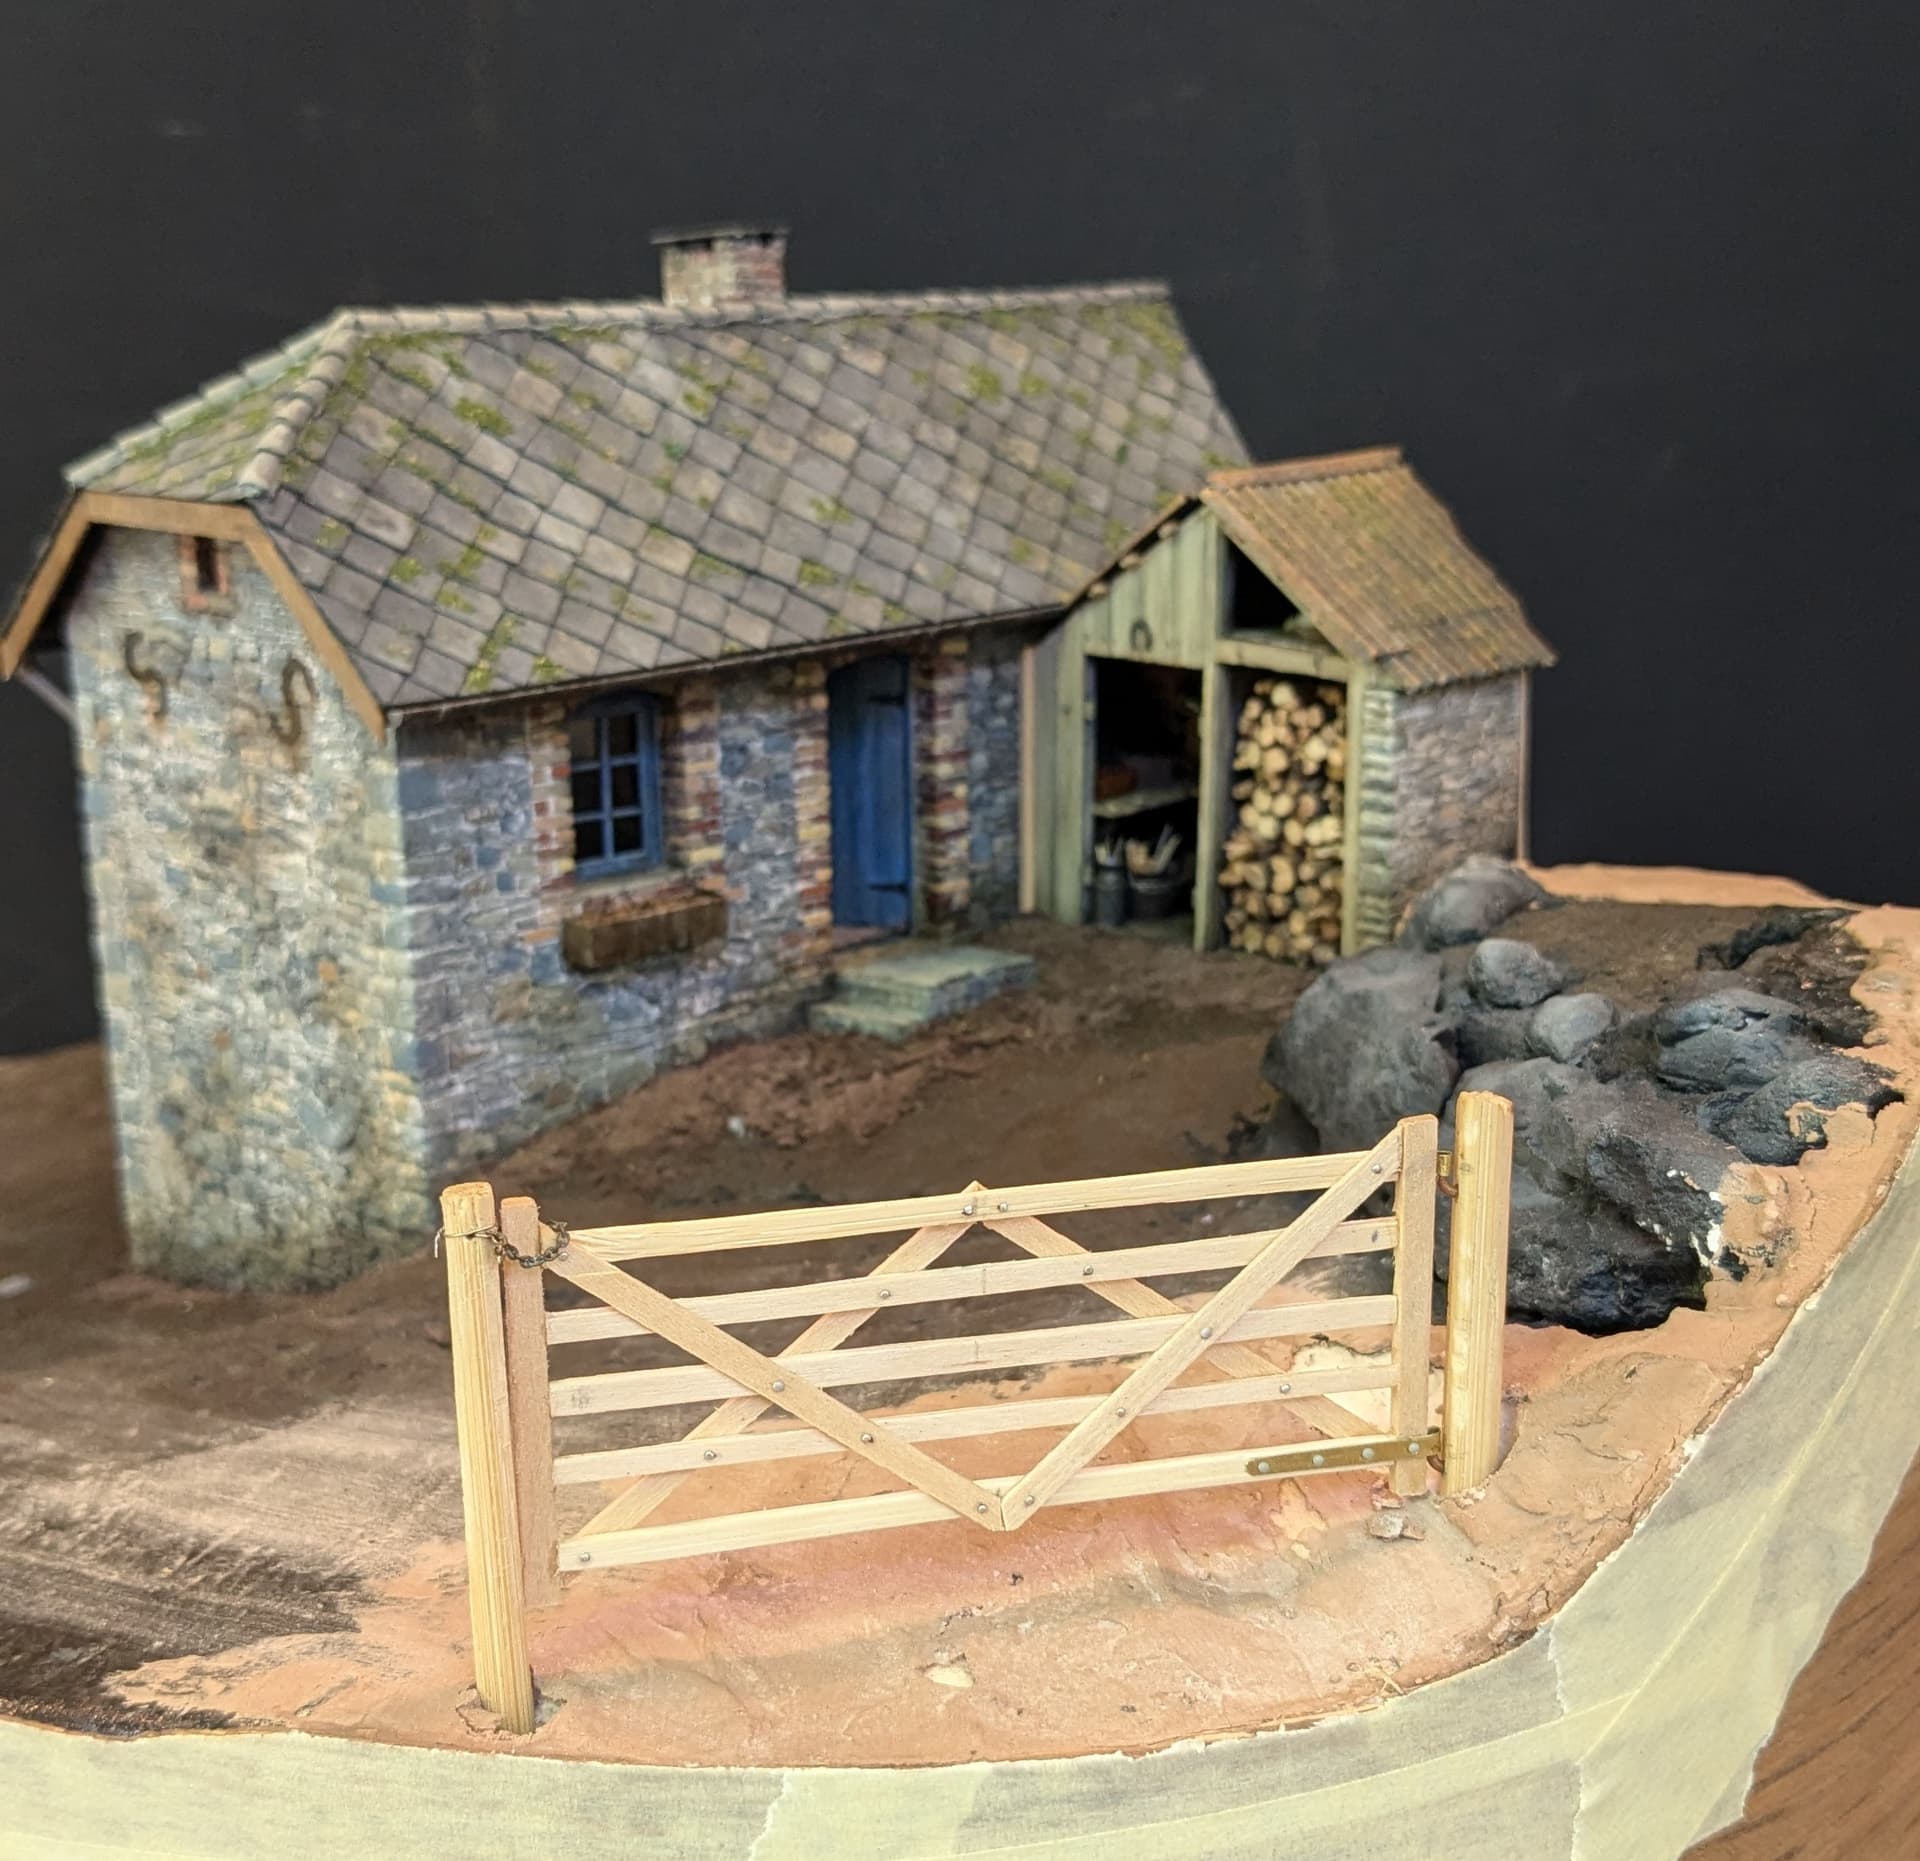
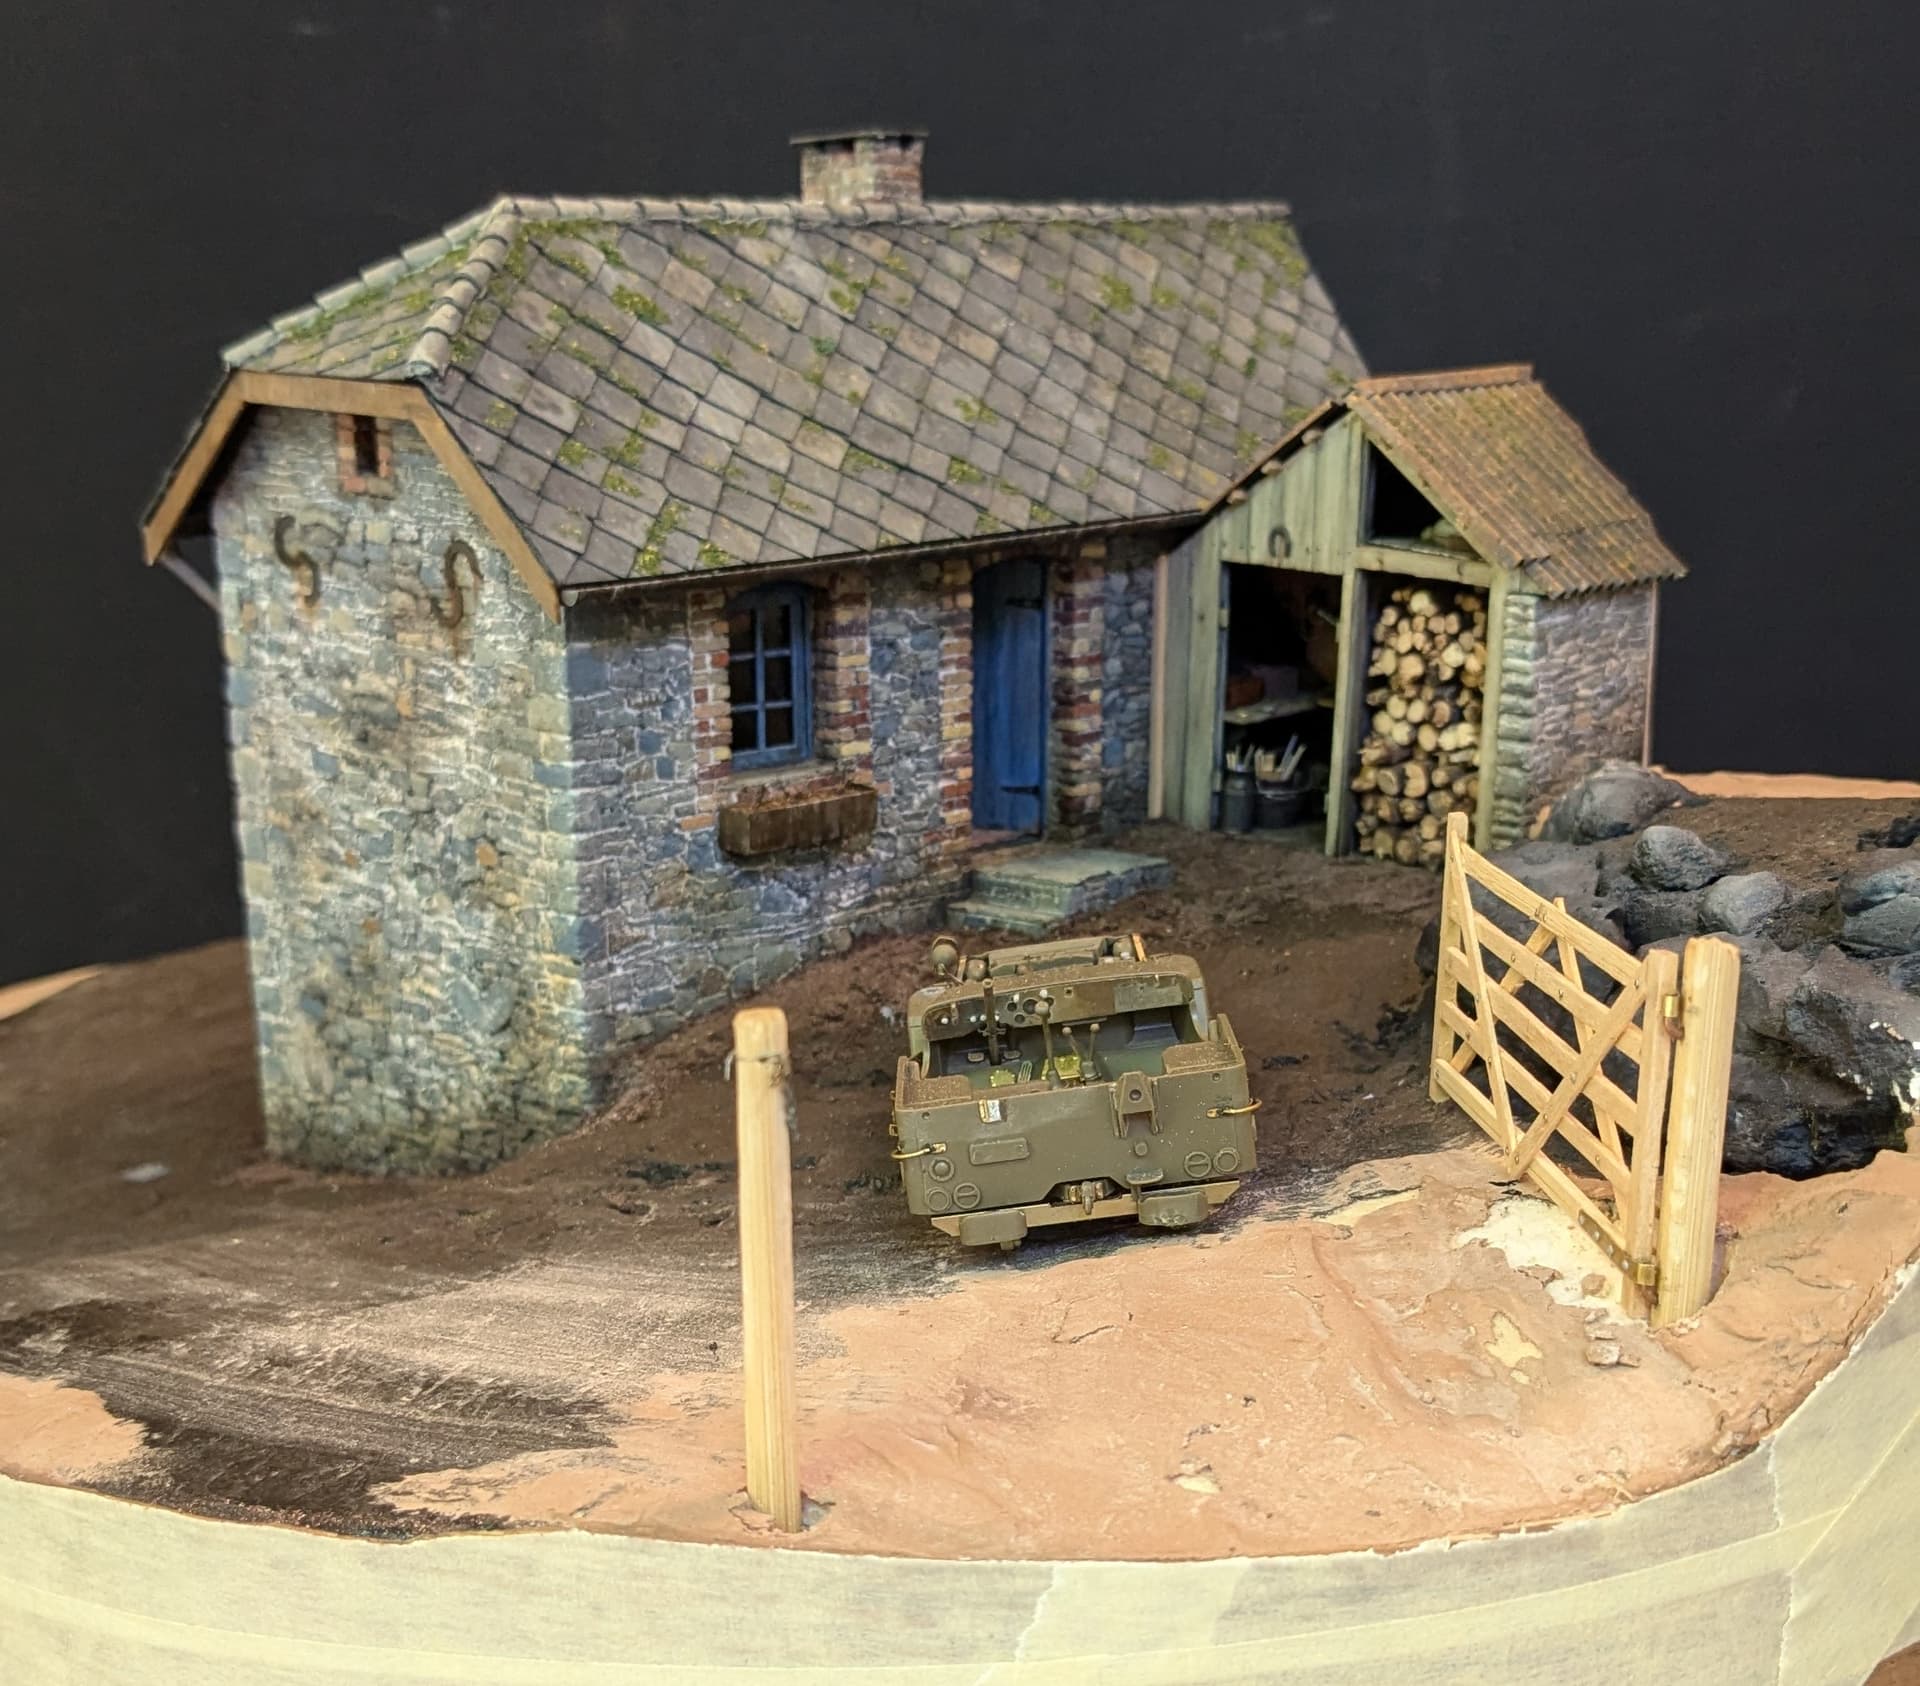
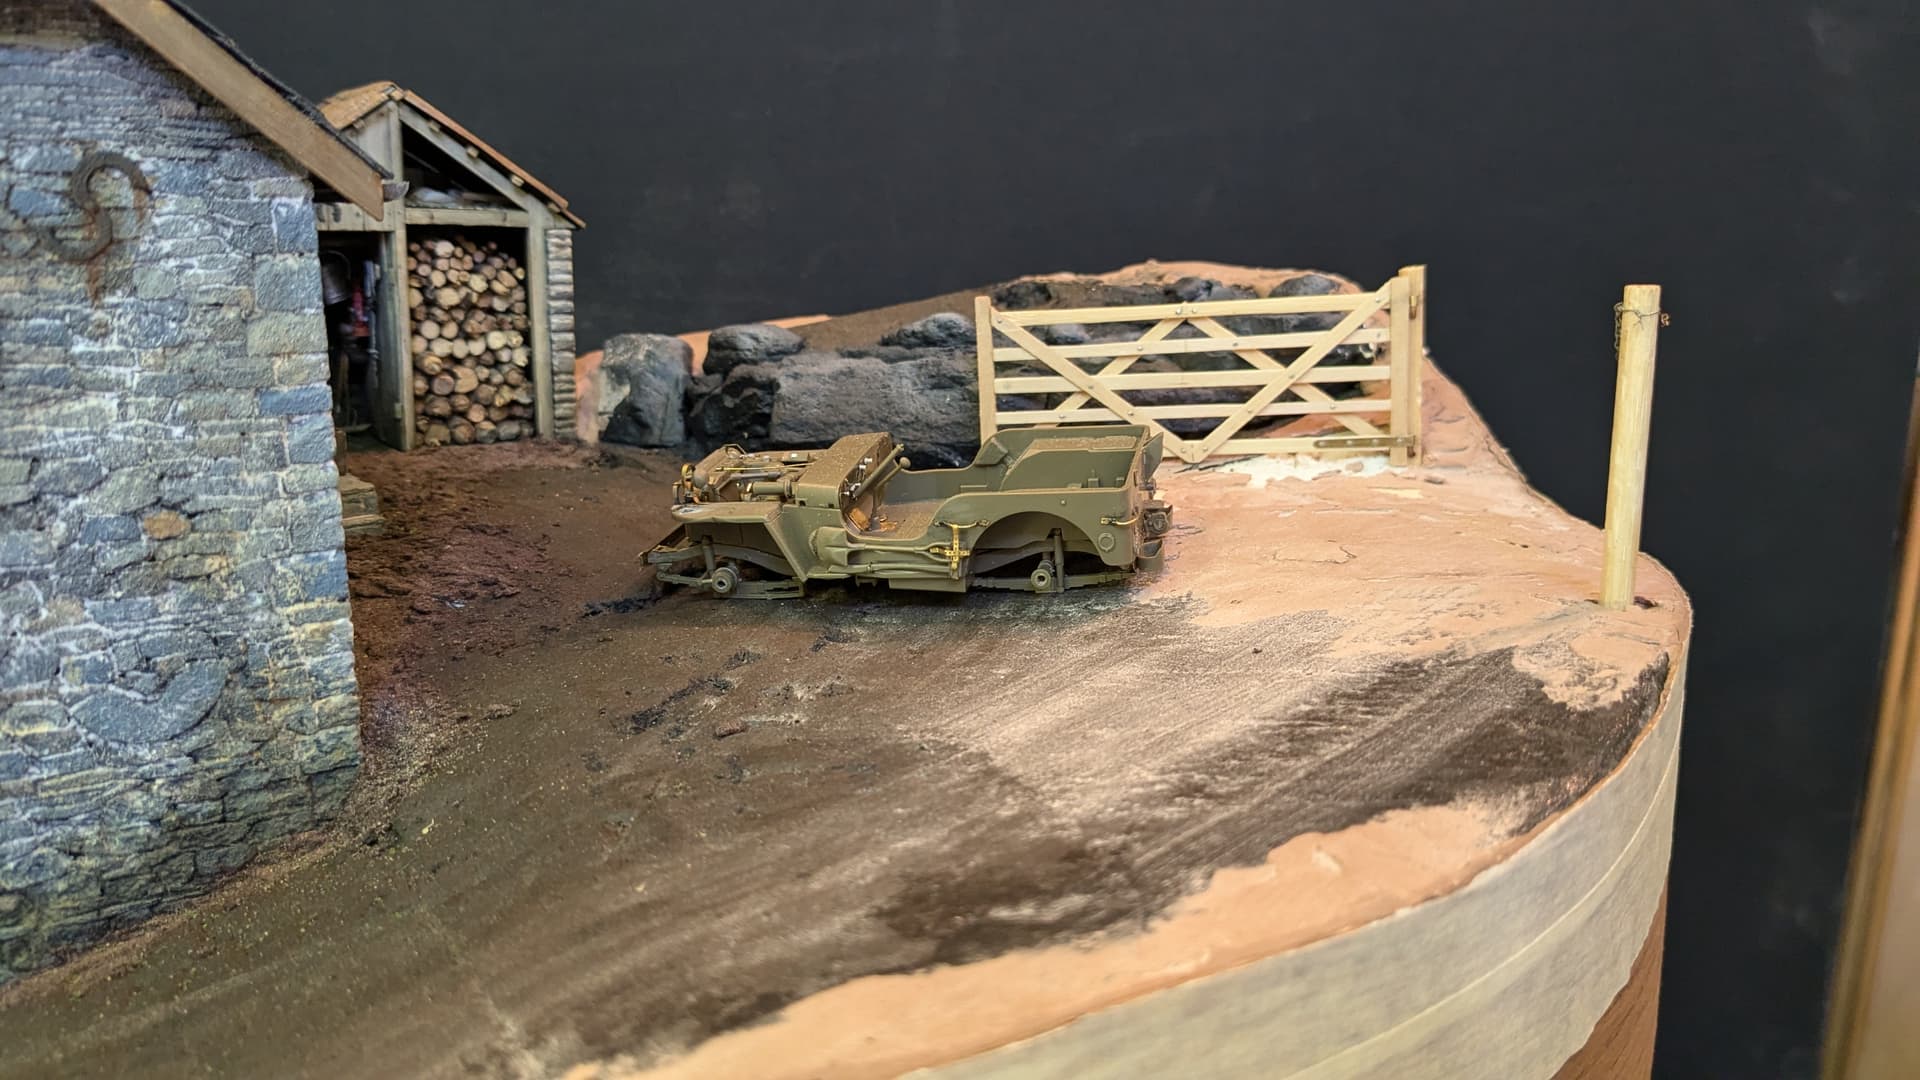
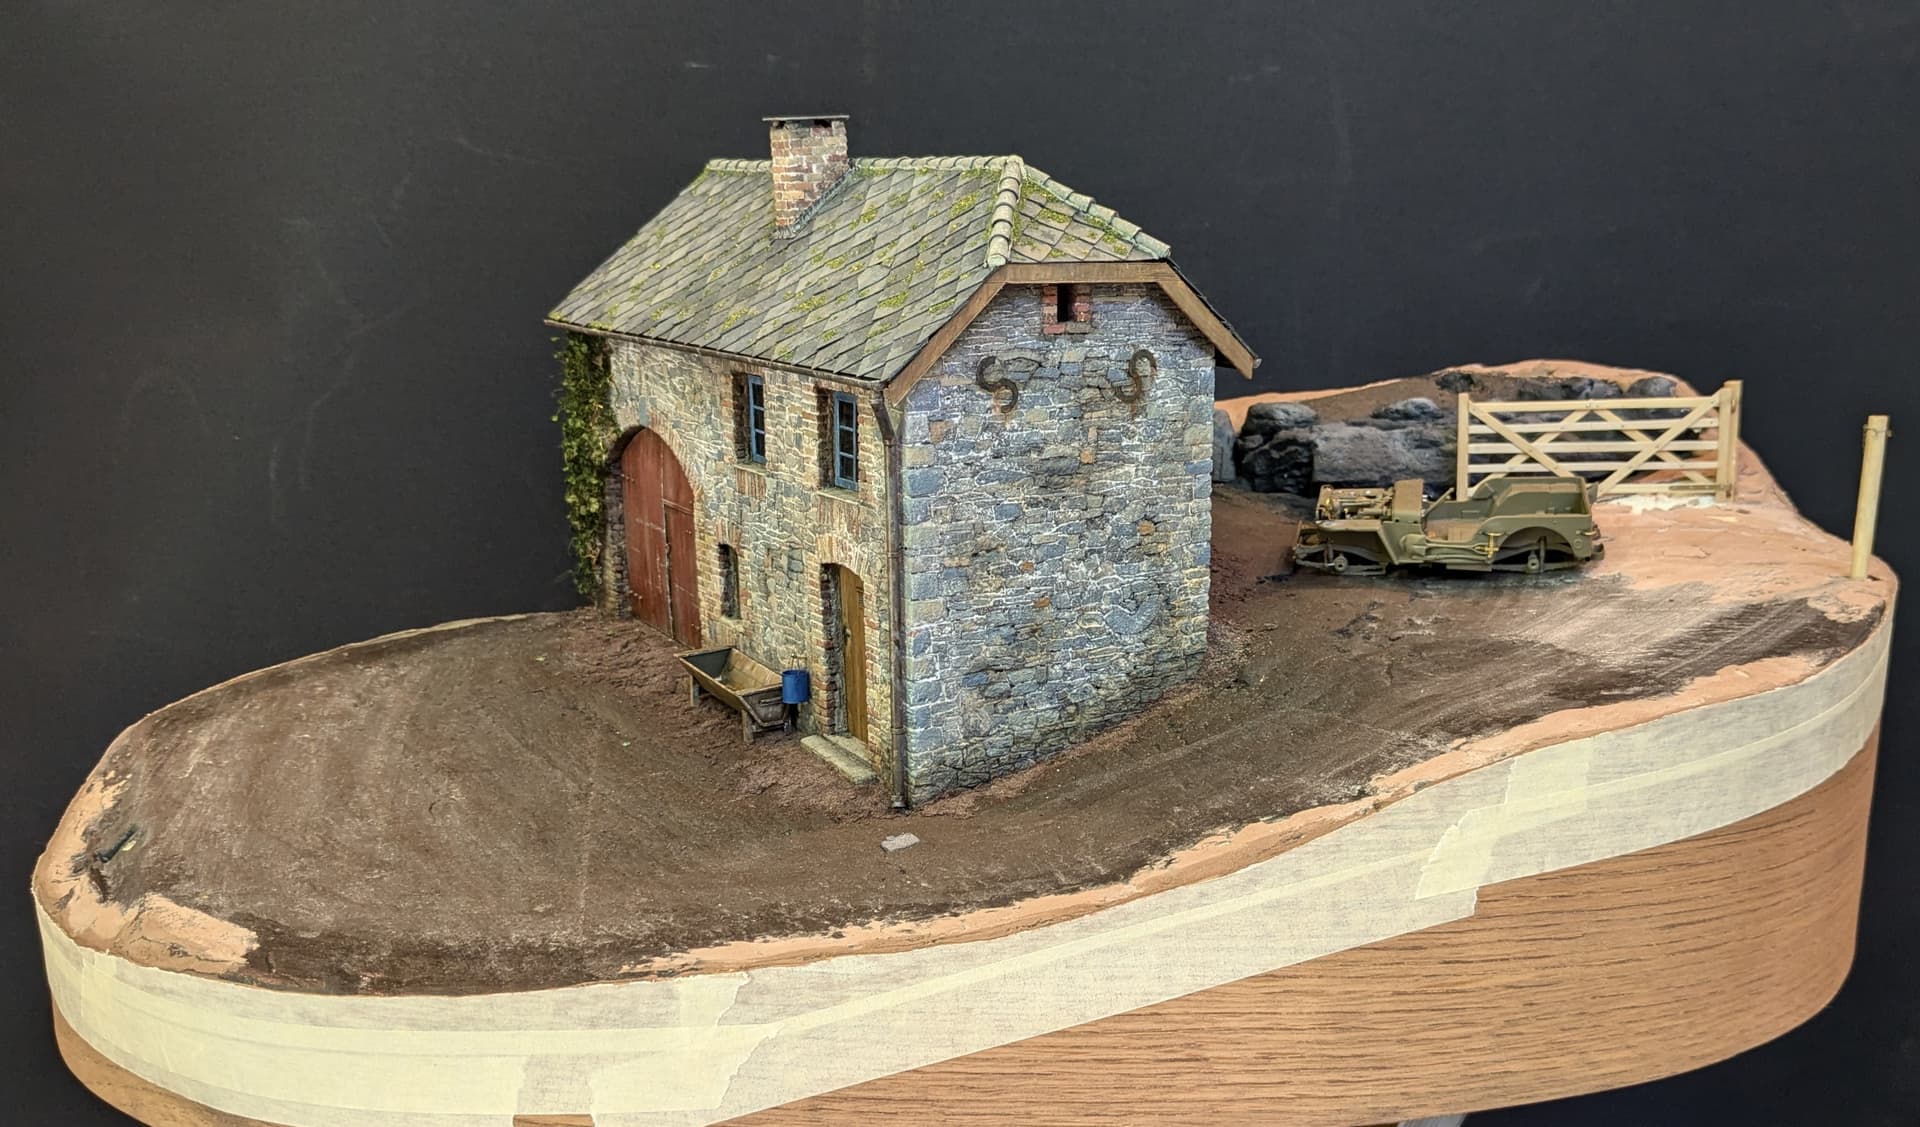
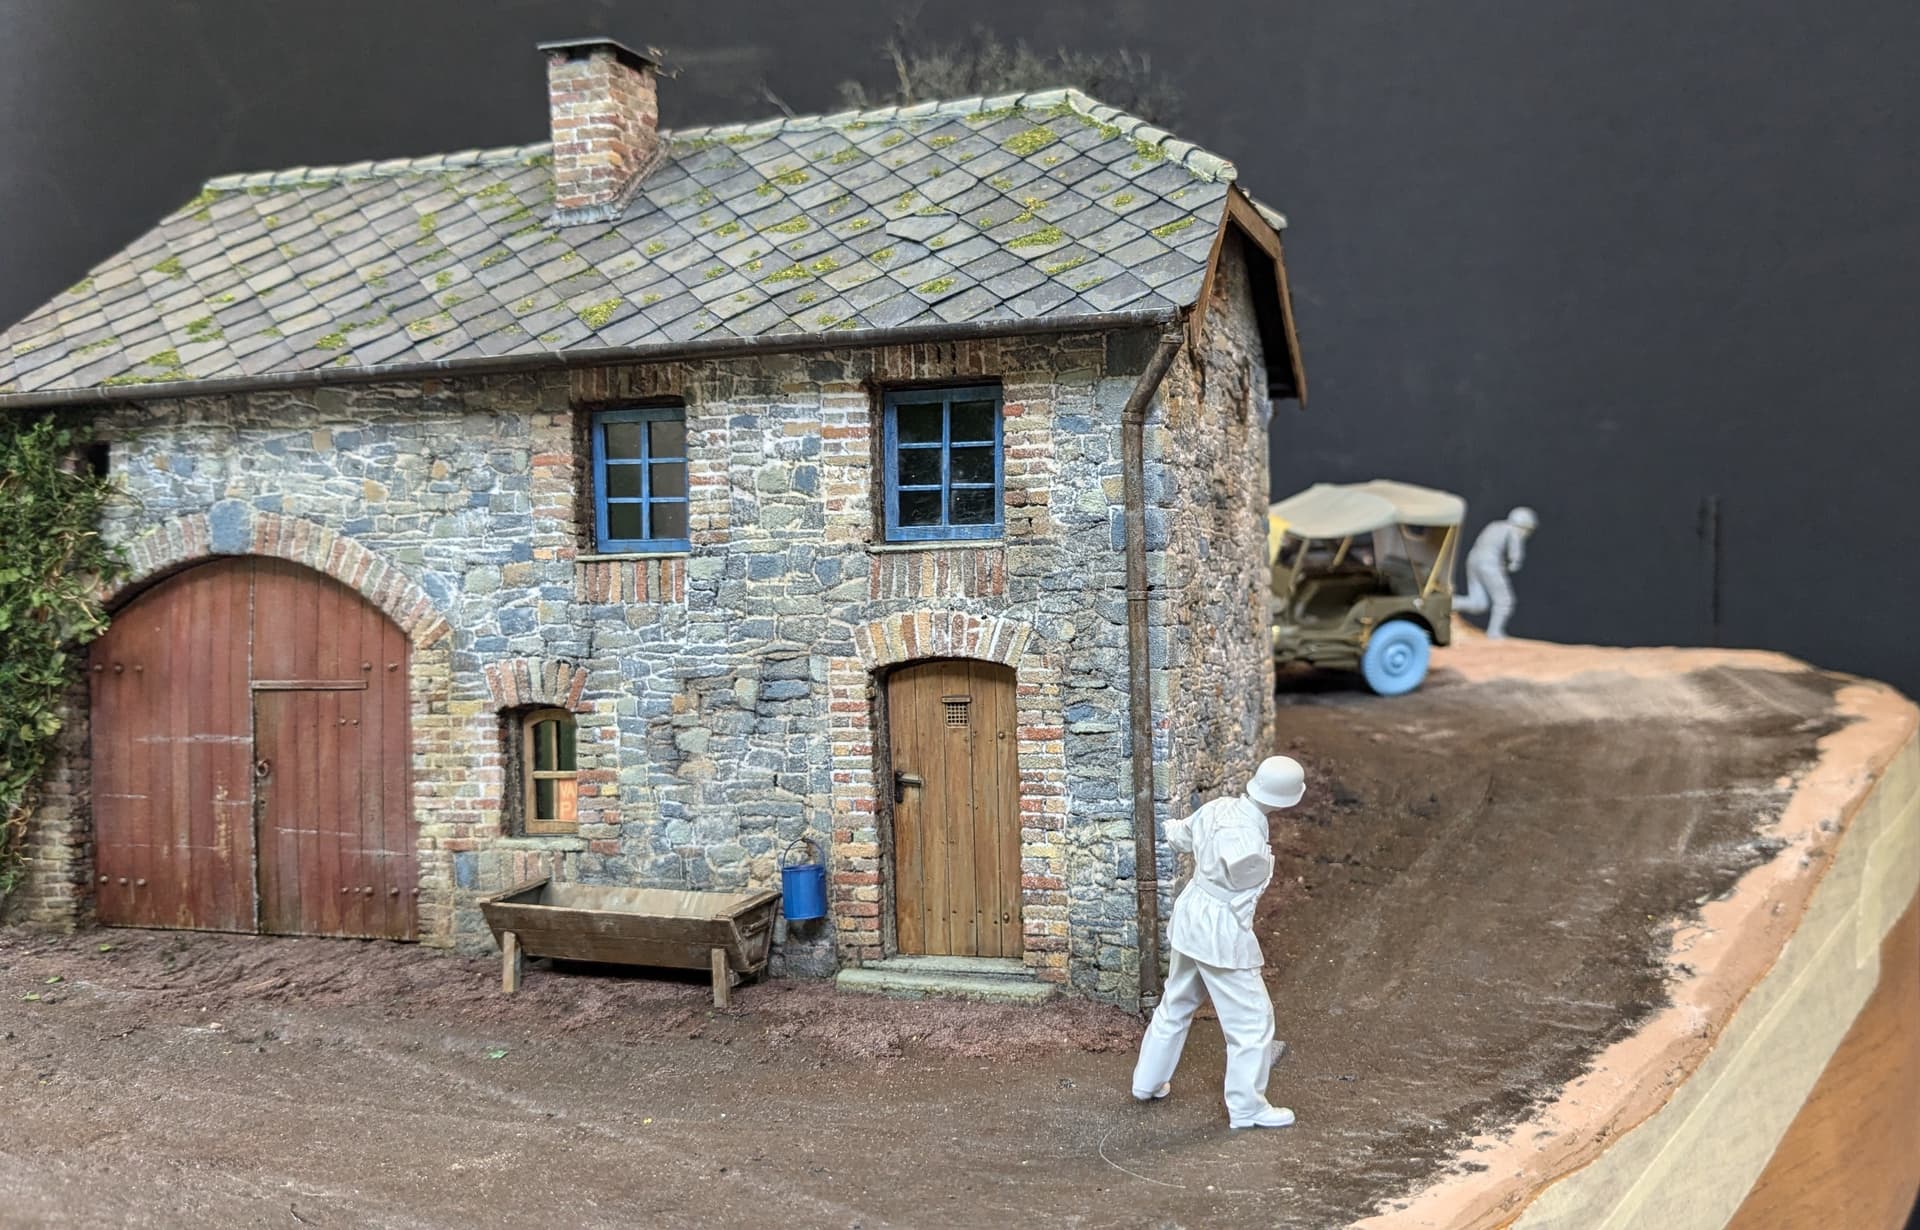
Here you can see how it fits into the diorama.
This is a view you won’t see when everything is finished, because the gate will actually be swung open. This all helps to tell the story, because it clearly shows the route that the jeep took into the farmyard. It also adds much-needed visual interest to the top right of the scene. In these pictures, the gate looks a little over-scale, but that’s because a) it’s far to light in colour and b) the jeep doesn’t have any wheels…
A lovely piece of scratch-building there Tim. In a way the fact you couldn’t buy an aftermarket gate is to our benefit because we get to see how to build an authentic looking one from scratch. The way you have considered it as both a piece of scenery and a device that can help tell the story is a really valuable lesson in terms of putting together a diorama.
Thanks Karl, that’s very kind.
Problem-solving is sometimes the most enjoyable part of this hobby…
That’s a great 5bar… Really adds to the scene showing a new aspect and helping build the story up. Really neat piece of work.
That’s an excellent piece of carpentry, perfection - it does look biggish but then they have big cattle. Will there be a fence to go with it? Maybe not worth it, I had the same issue with Anthropoid – the contradiction (or is it irony?) of fences that just stop at the edge of the base.
Fantastic piece of carpentry Tim, nice detailing, ![]()
![]() .
.
G, ![]() .
.
The nice thing about discovering a thread late like I did, is I can see all the cool progress pics one after the other. Awesome work and some great reference pieces in here. Definitely going to follow this one!
Thanks Karl. I still find it odd that noone seems to have ever made one in 1/35. The metal version would be easy to make in moulded form - but hard to do from scratch…
Thanks for the comments Tim. Working out where things should stop at the edge of the base is often a headache - but I’ll work something out!
Yes, the gate does look quite large but I’m pretty confident of my measurements. Maybe it’s just the glaringly light colour that makes it stand out. We will have to wait and see…
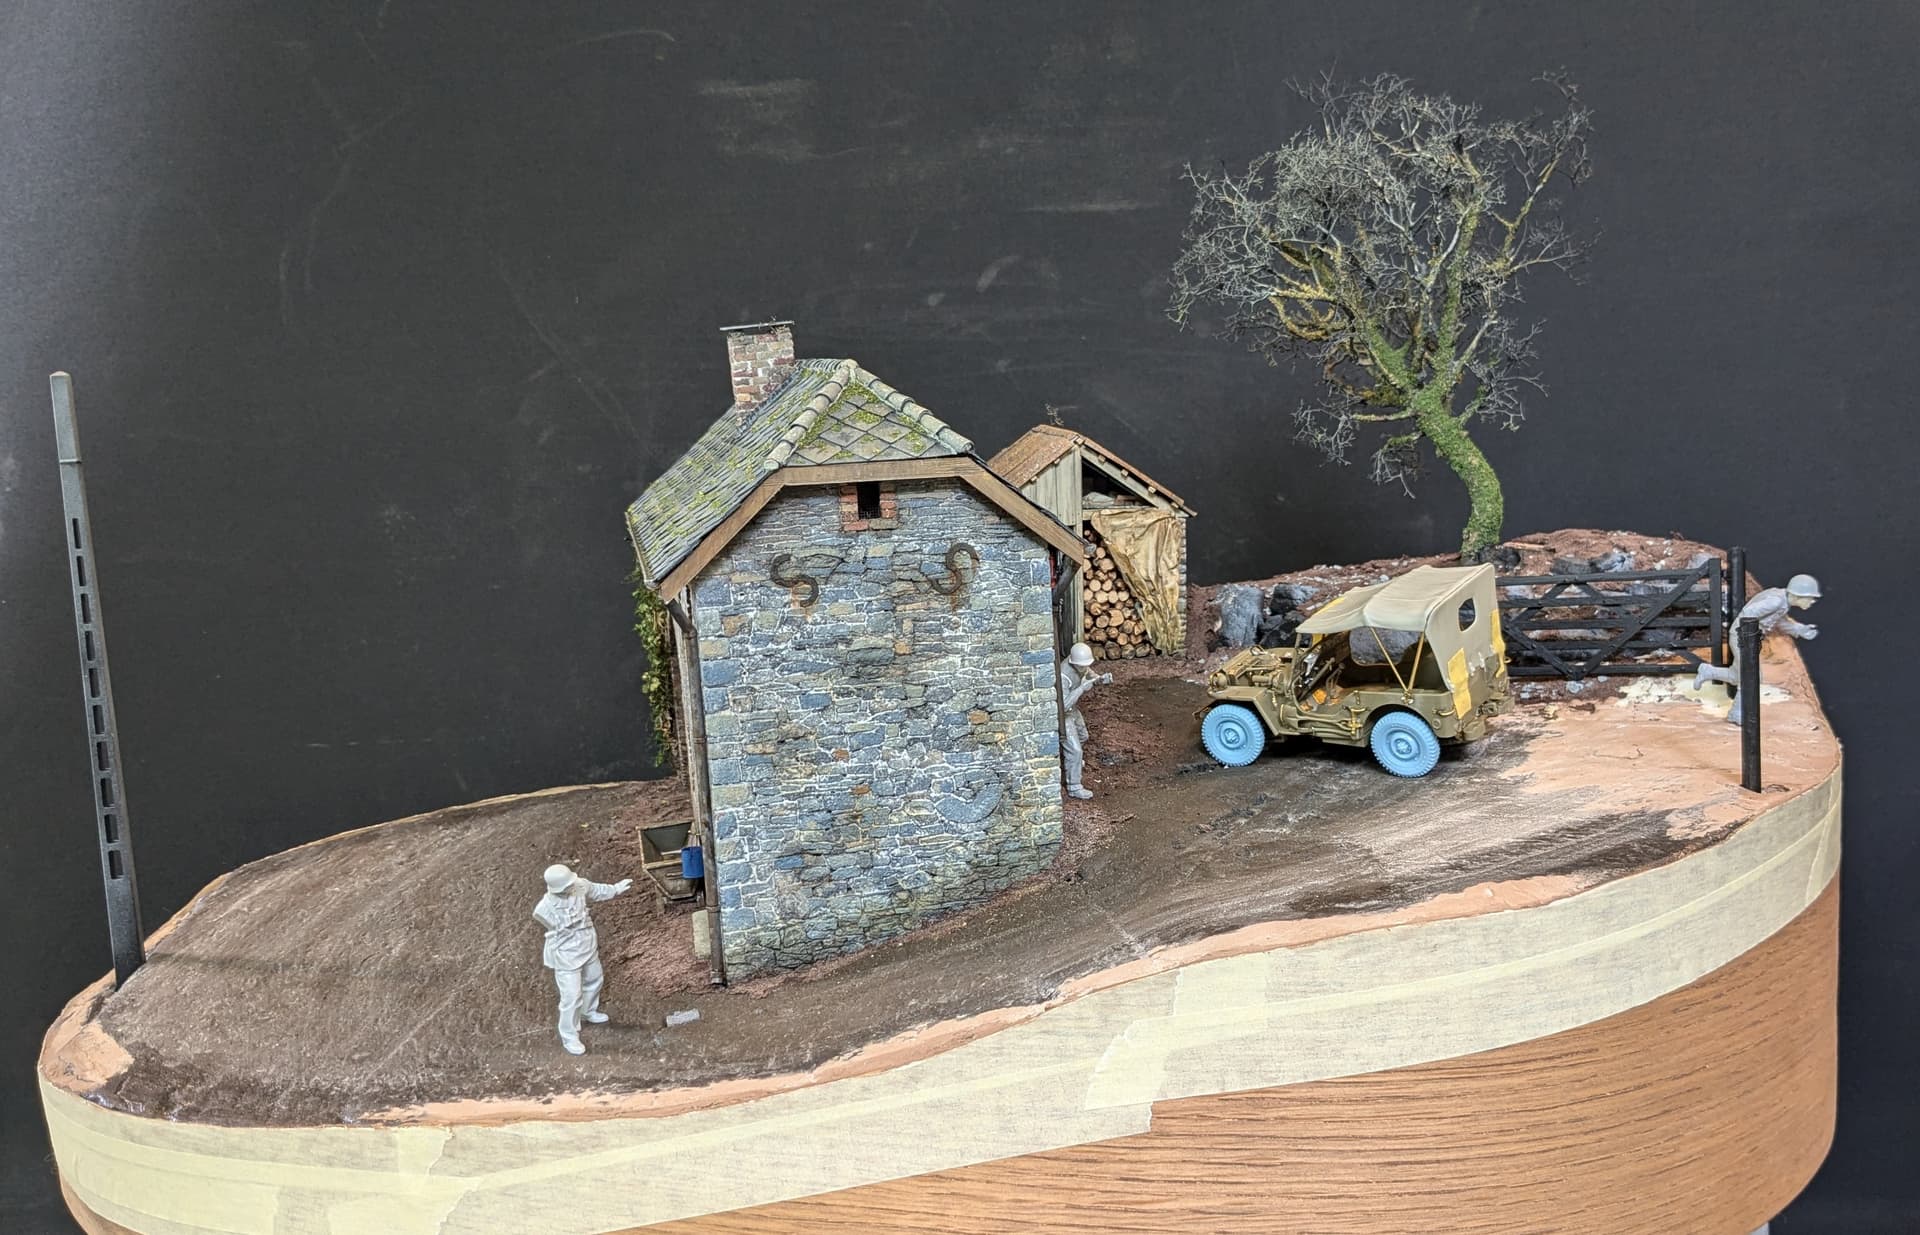
Telling the story, potential figures… and how to add a feeling of jeopardy
Here is the backstory:
The early stages of the advance of the Kampfgruppe brings an SS recce unit into a Belgian farmyard (recently abandoned by the occupants who, for the last few weeks at least, had been living with the relief of Allied liberation). The Germans are confident - so far they have made rapid progress against little or no opposition - but the experienced panzer grenadiers are understandably wary.
Unknown to these (re)invaders, the farm is now occupied by some American GIs. Their story is told by the broken-down jeep (perhaps shot up during a rapid retreat). They have taken refuge in the farmyard, but as they try to fix their vehicle, they hear the sound of approaching engines and tracks. Friend or foe? Looking out of an upstairs window, to their horror they realise that they are in a very dangerous position…
I always conceived this diorama as an ‘encounter scenario’… hence the title, but I cannot claim that I had everything planned from the start. I have nothing but admiration for those modellers who can settle on everything at the outset of a project, but I suspect that for most of us ideas just evolve. How dramatic should it be? How many figures would I need? What exactly would they be doing?
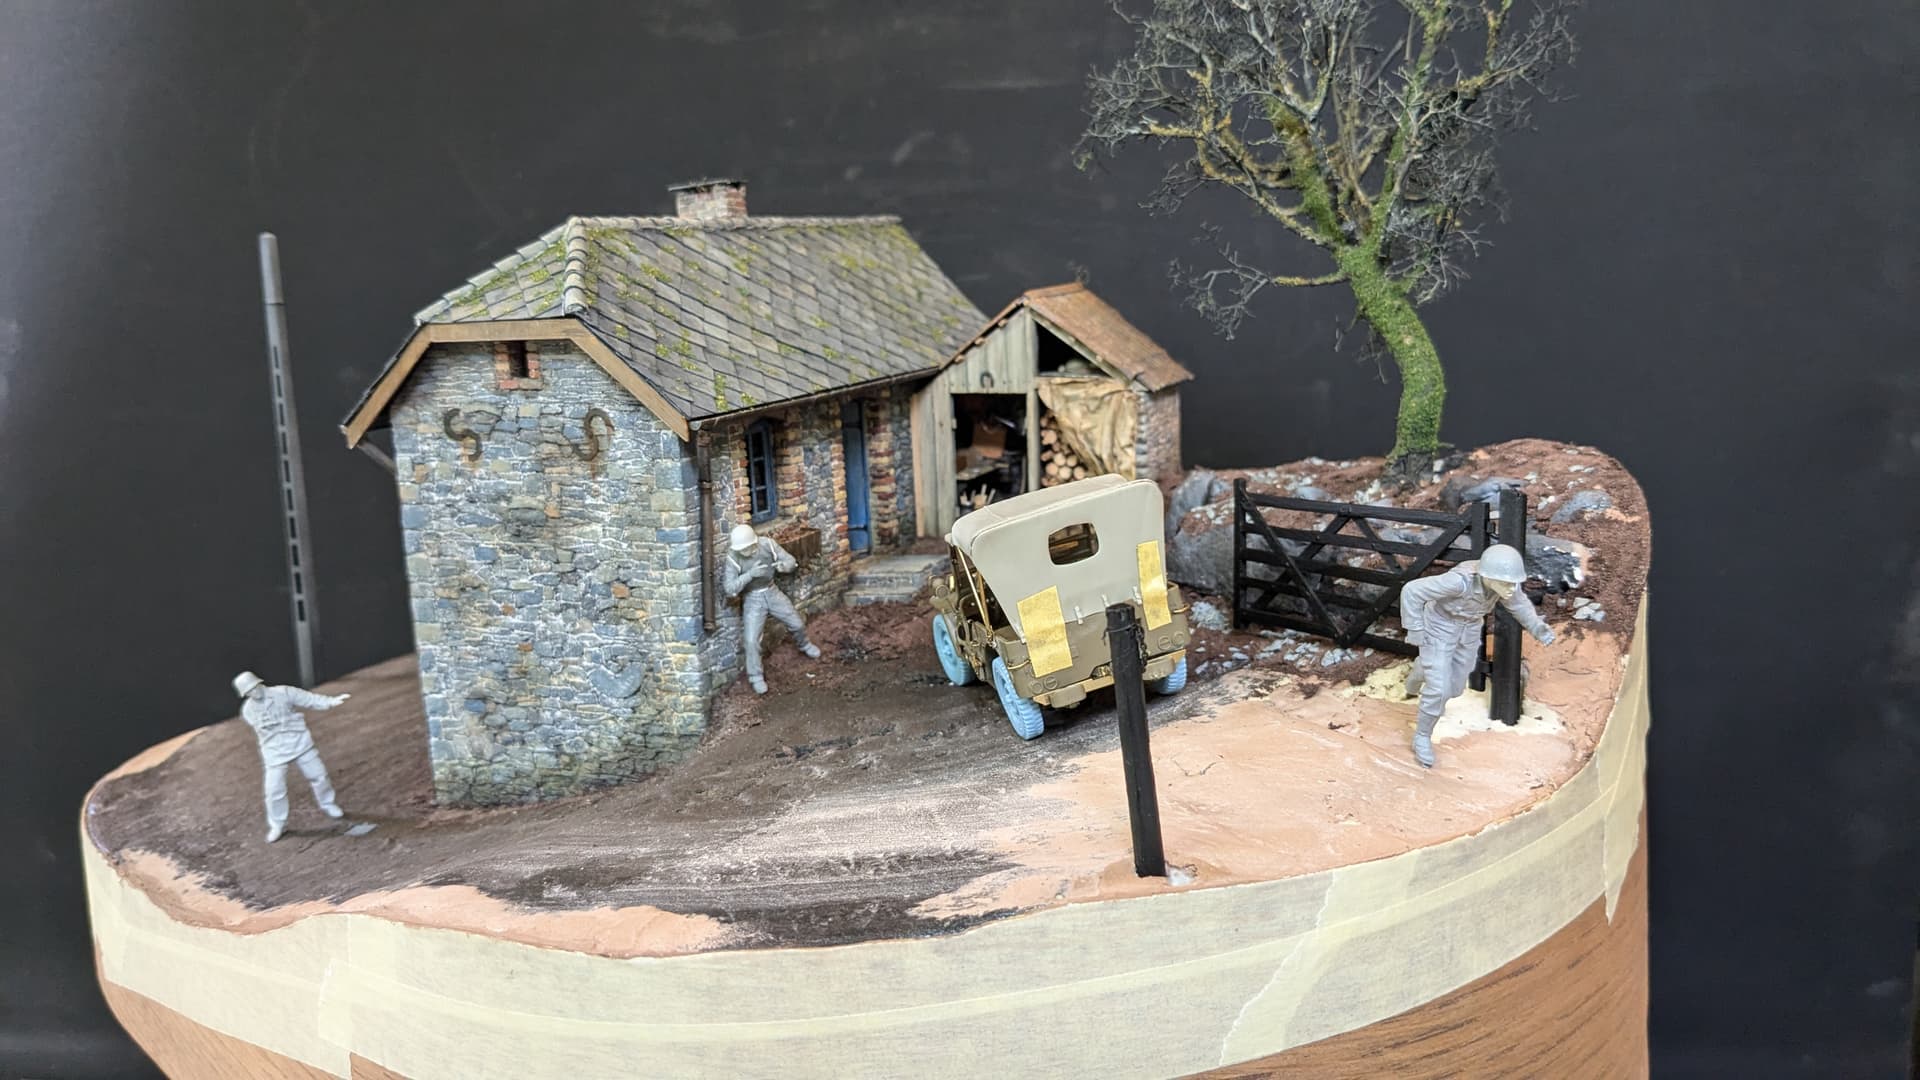
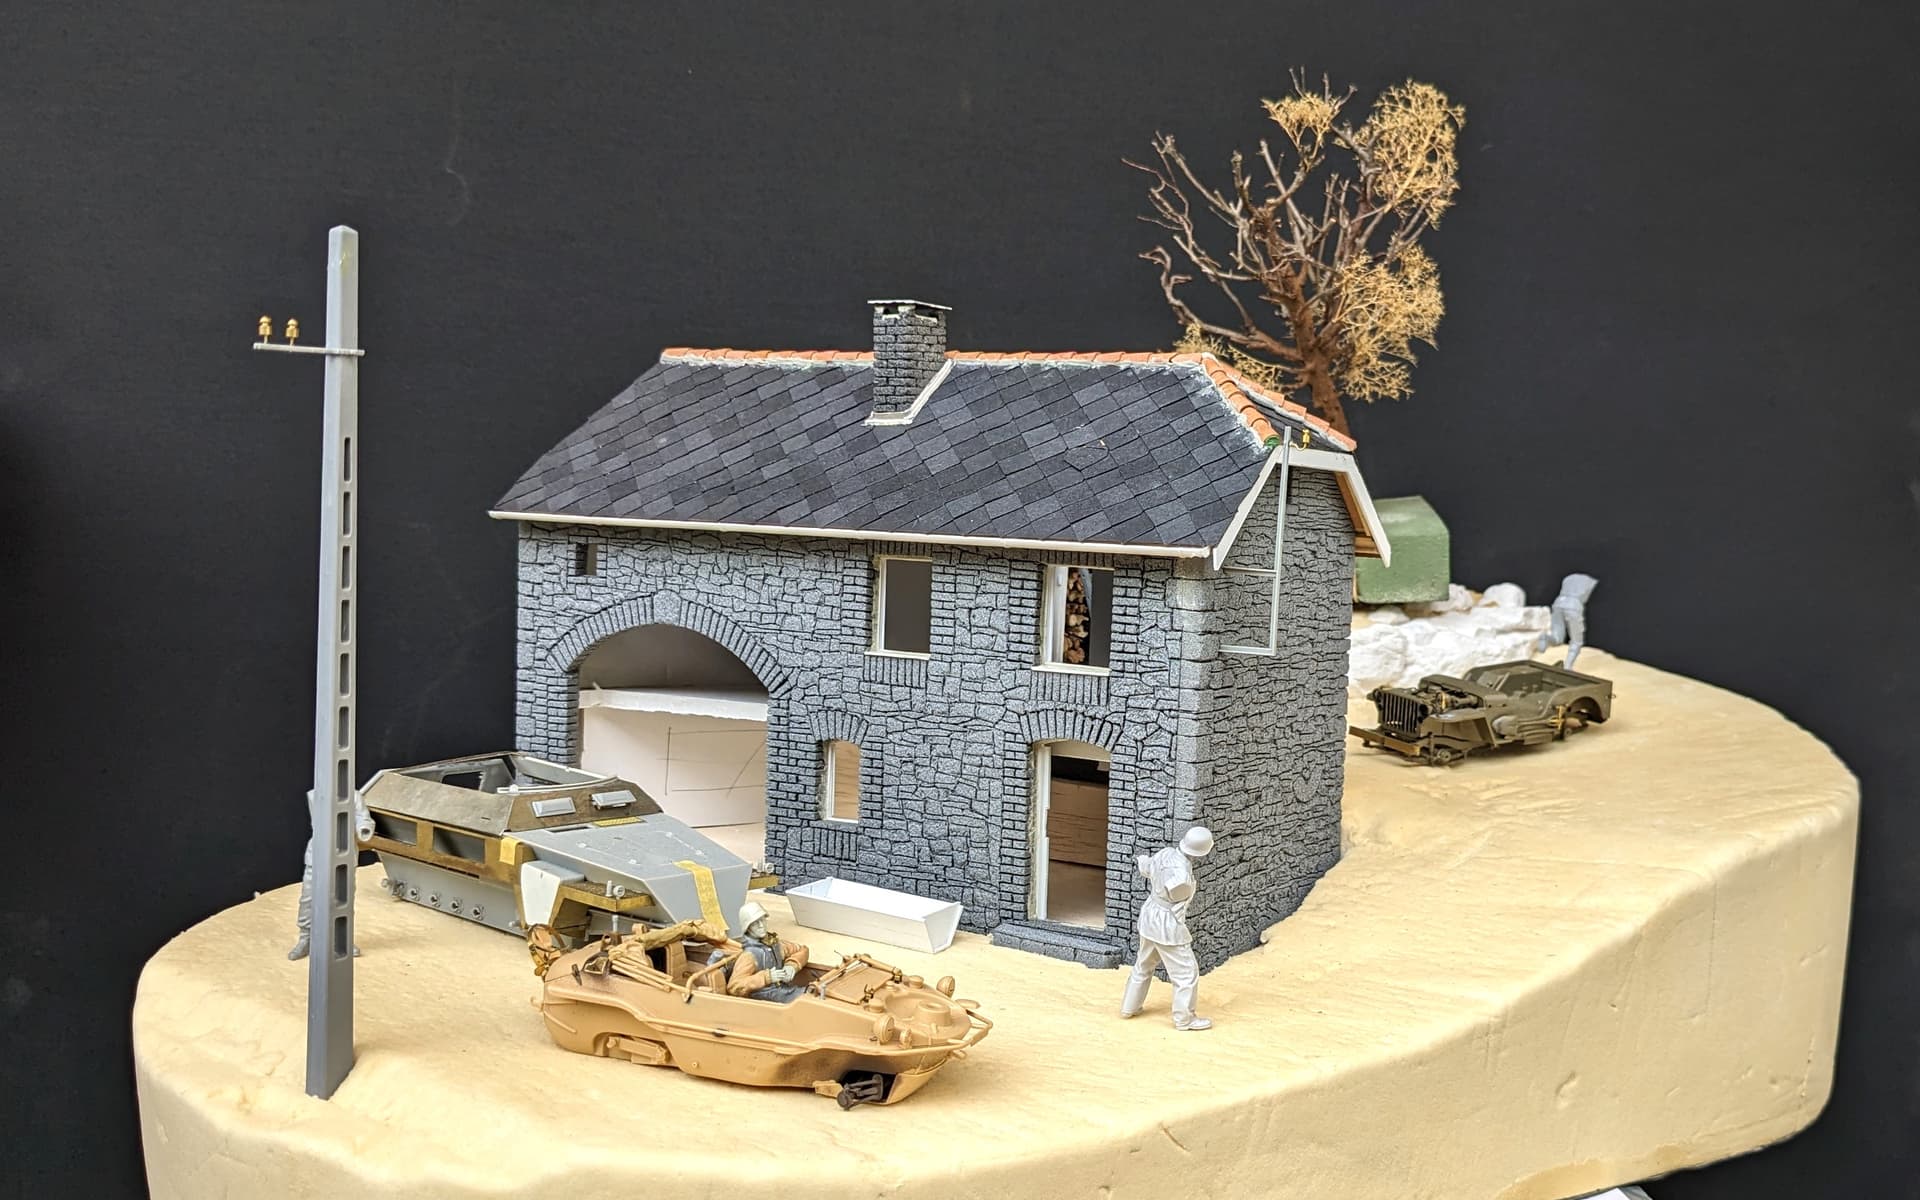
The position of the building was always intended to create a natural division between the left / lower part of the scene and the right / higher area. But it was also designed to break the line of sight - that way the idea that both sides might find themselves surprised by the other made more sense.
In the early shot above I had started to work out the relative position of the vehicles and figures.
The Alpine SS panzer grenadier is not only a magnificent piece of sculpting and resin casting, but also a very great pose. He is also a useful focal point: his forward crouch and out-stretched left arm help to take the viewer’s attention around the corner where his looking, but also back to the vehicles and other troops who are dismounting and coming up behind him.
Because they have yet to find out what is lurking around the corner, I can probably go for some more relaxed poses for the rest. Obviously I still have much work to do here, because I’m working on the basis of two men in or around the Schwimmwagen (the photos from Kaiserbaracke Crossroads clearly show that each had a two-man crew) and another six from the 250 halftrack. So that’s a mere eight figures, almost all dressed in SS camo smocks… oh dear!
But what of the Americans? Well, at least here I am limited by the carrying capacity of the Jeep (four at the most). Looking around for potential figures, I couldn’t find many resin options in suitable action poses. In fact, in the world of Alpine, etc most GIs seem to spend all their time just lounging around!
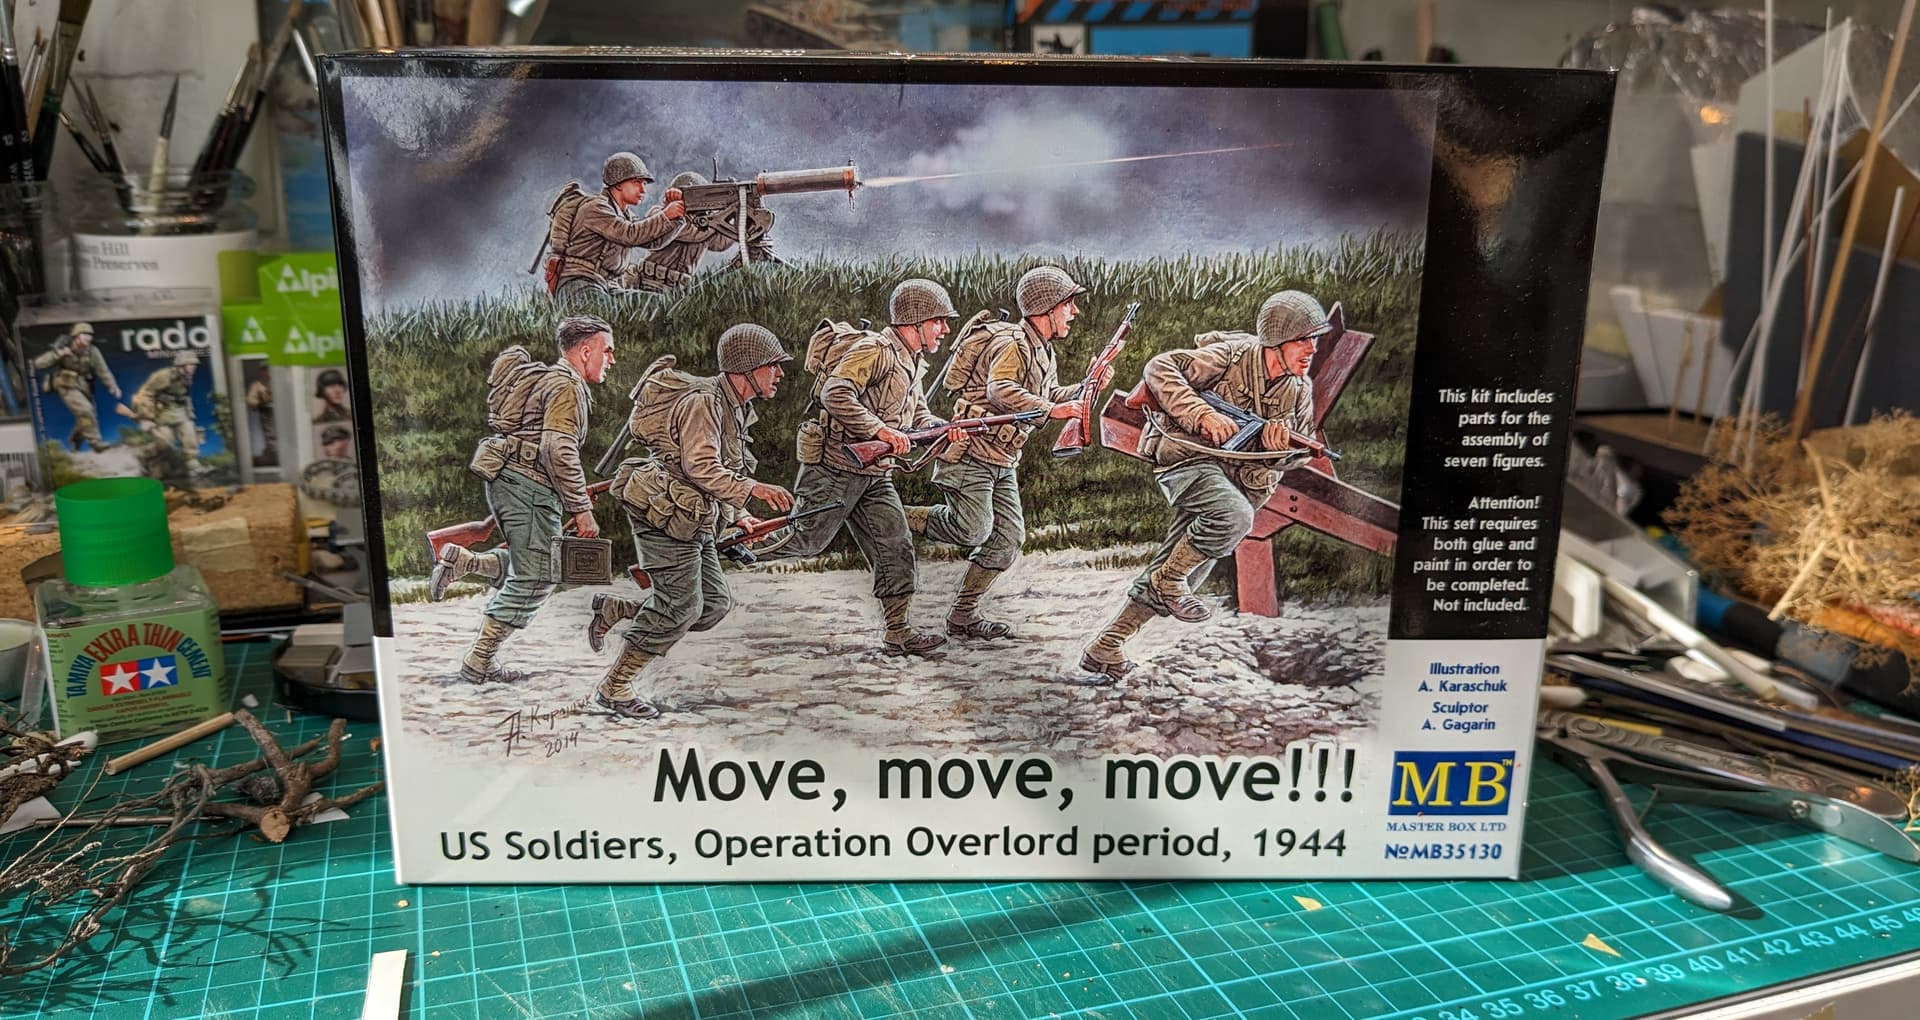
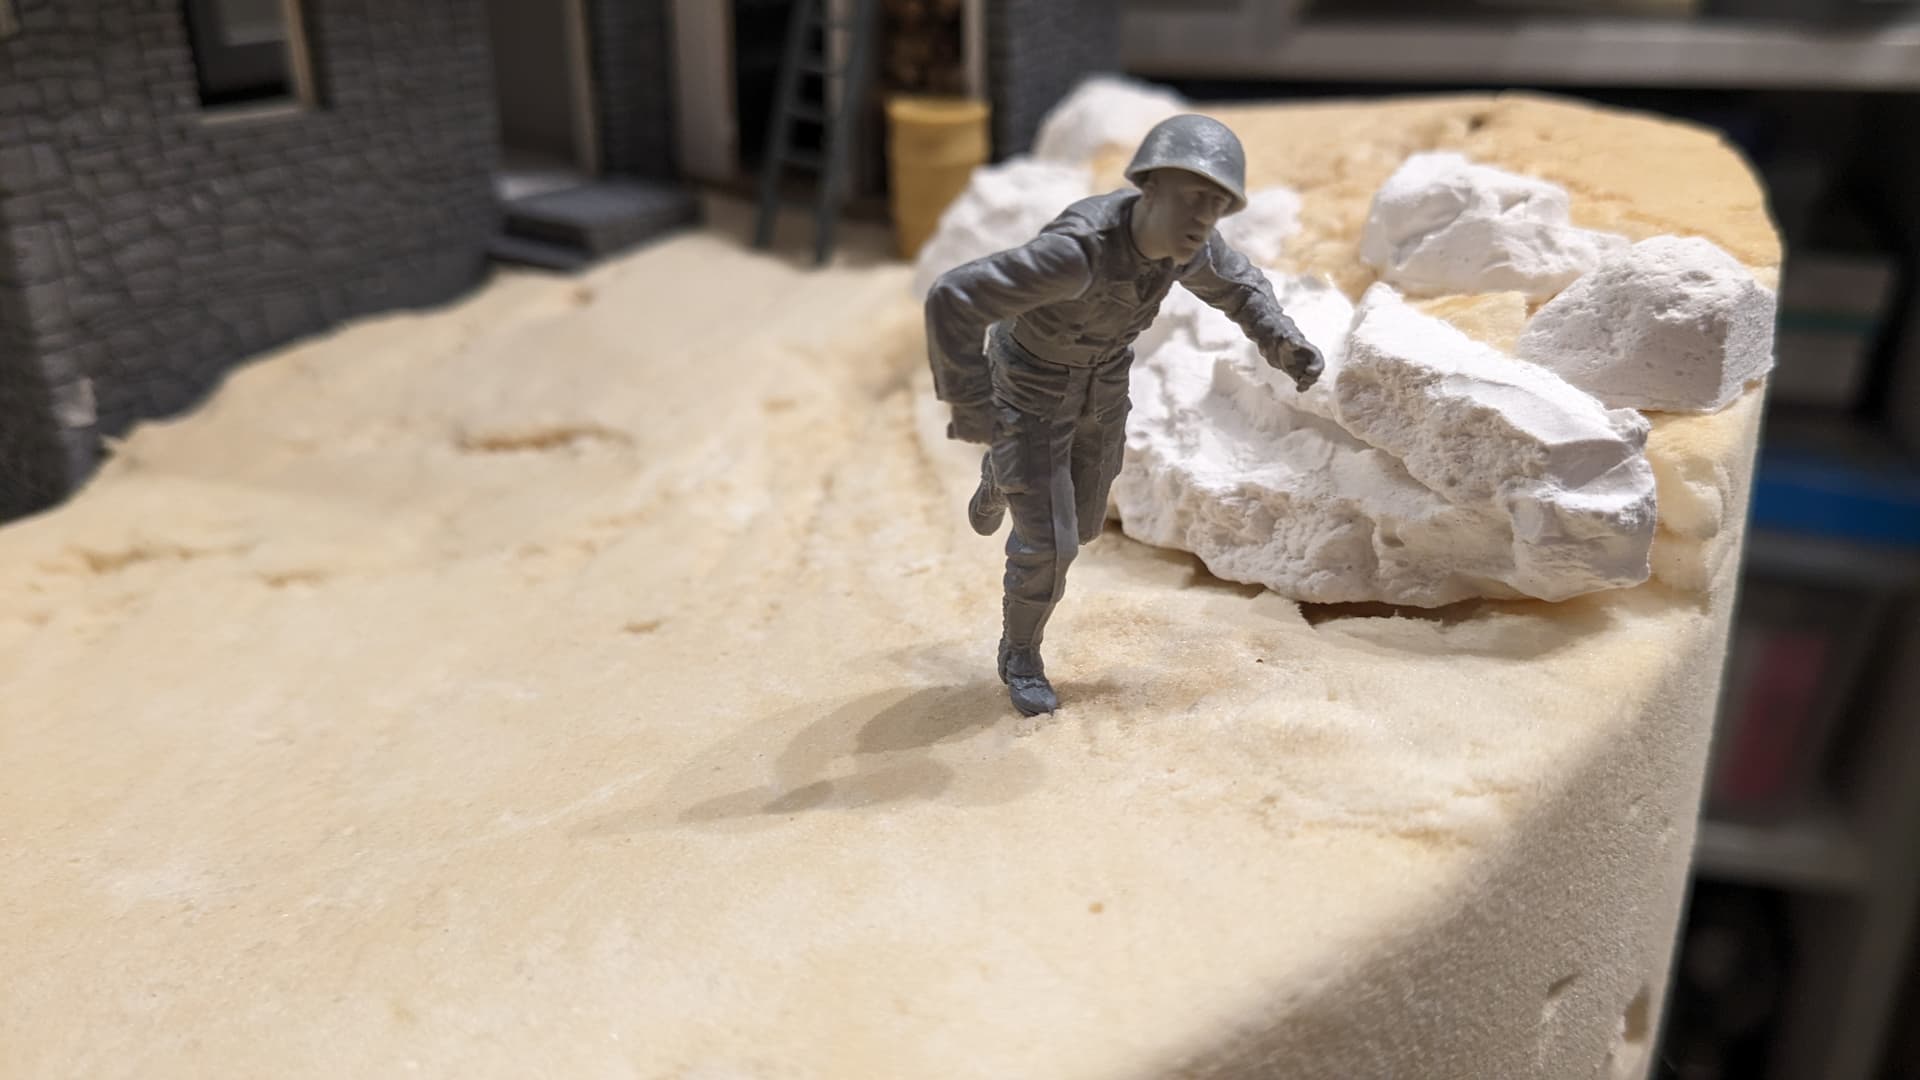
Luckily there are plenty of other options out there, especially from Master Box and Mini Art:
From the Master Box Move! Move! Move! set I have already started to cobble together a figure of a GI running away from the rapidly evolving situation. This is early days: he’s just white-tacked together with a Hornet head, but the pose is energetic and he looks like he’s running for his life… Obviously those gaiters will have to go.
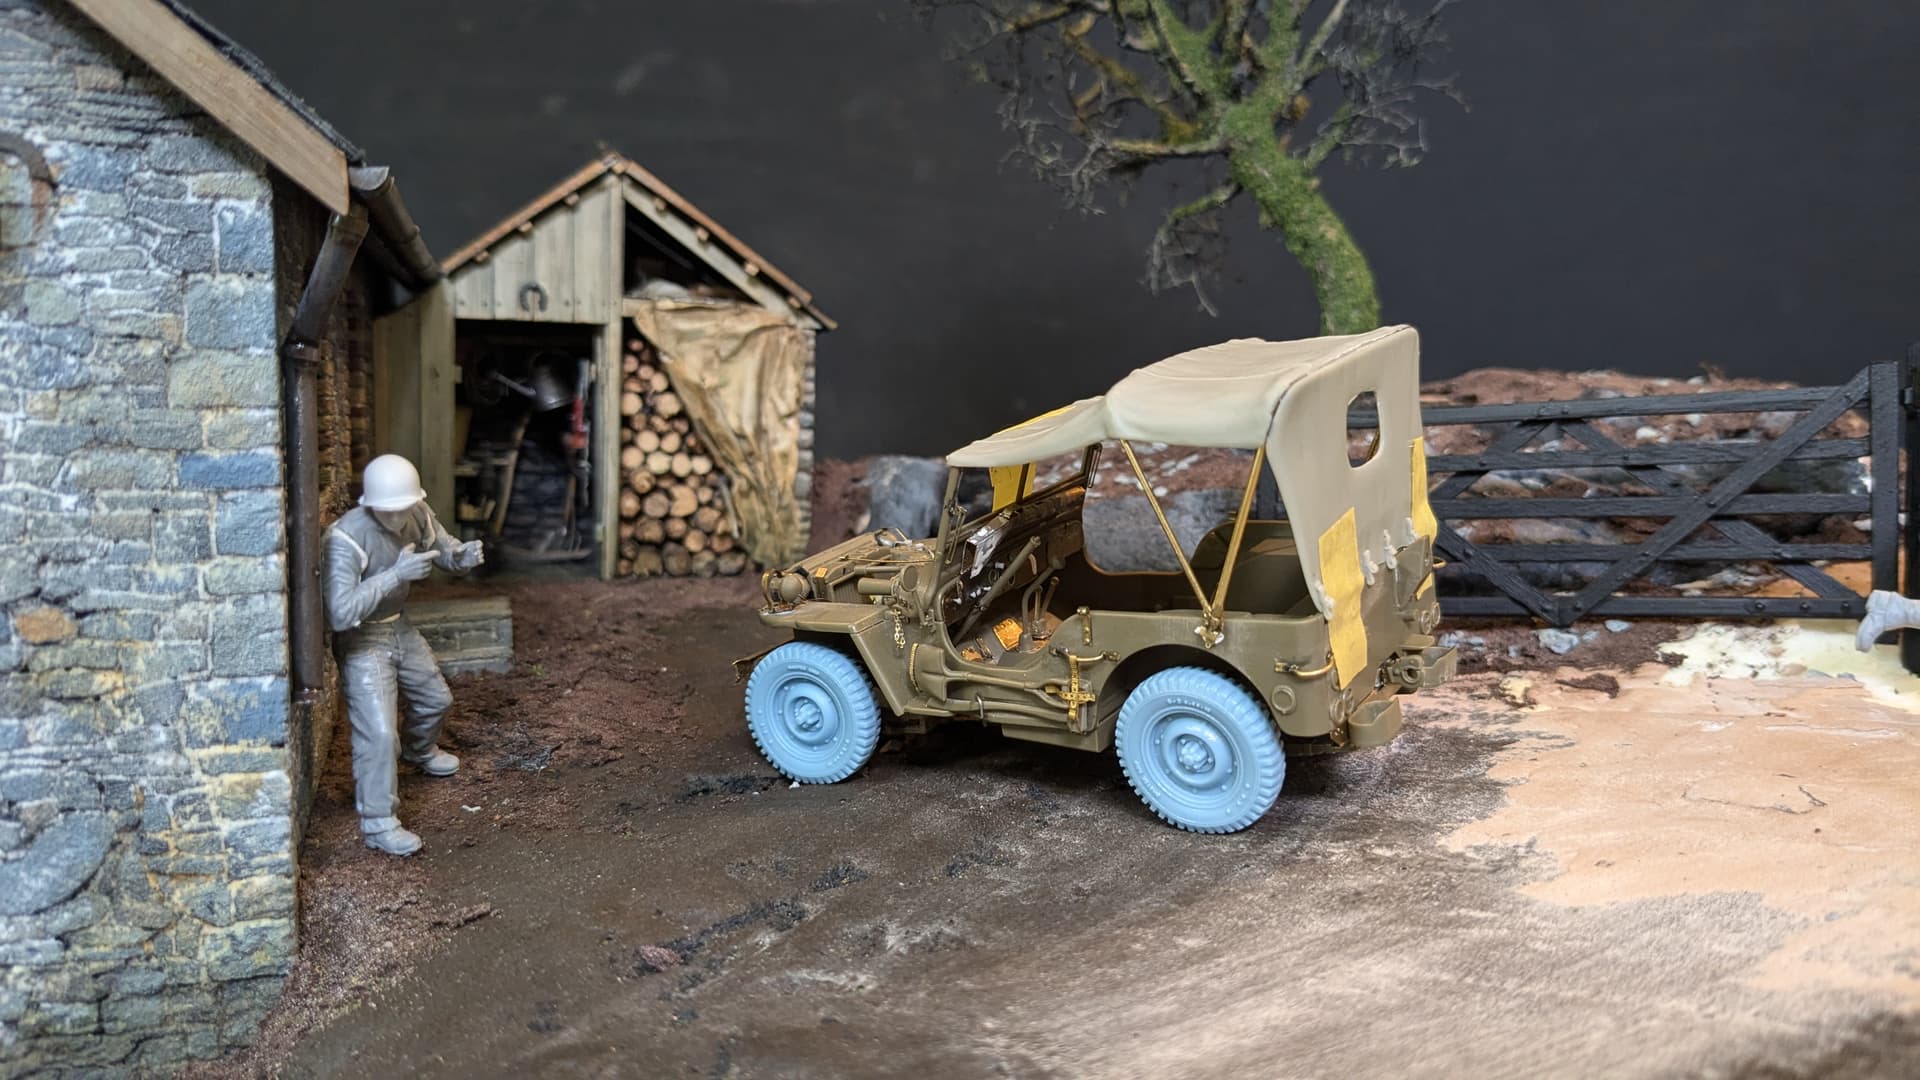
From the Miniart Close Combat US Tank Crew set there’s a great figure looking around a corner with his grease gun. By swapping the legs and adding an Alpine head I think I have found the guy who is about to face-off with the SS grenadier…
So why a tanker and a GI? Well I’m going to use the excuse that this is a mixed bag of soldiers who were driving somewhere when they ran into the German advance. Maybe the tank crewman (who is probably going to be an officer) was hitching a ride with some infantry.
Anyway, the takeaway from all of this is that sometimes you need to create the landscape before you can really begin to populate it. At least, that’s my excuse and I’m sticking to it!
Hopefully, there’s quite a bit of other progress that you can see here: the Jeep, the tree, etc. I will be covering these in more detail very soon…
Your discussion around how you are bringing this together is fascinating in and of itself. Pretty much any scene I (seldom) do is never strictly planned but a product of ongoing changes and consideration like this.
I also appreciate the way you have considered the story behind the scene and why, as you explained, there is different US troops on the scene. The narrative of the confusing early stages of the German advance are kind of condensed into your scene. I like the length between the Panzergrenadier and the running US soldier too- the undulations in the terrain help make it an interesting perspective for the viewer.