P-47D Razorback - Trumpeter 1/32

Hi guys from Italy, glad to be here for the first time. My previous Su-35S really worn me out, so I decided to return to an old love of mine, being this love born over 45 years ago when I clumsily built an old Matchbox kit in 1/72. I thought I would do a simpler and faster job. And so it was, but with a lot to say
The P-47 Thunderbolt is definitely an overrepresented aircraft in every scale. Maybe for the fascination it arouses when you look at it, maybe for the relevance it had during the conflict of the Second World War, maybe for the technical innovations it brought. Or maybe for all these things together and for others.
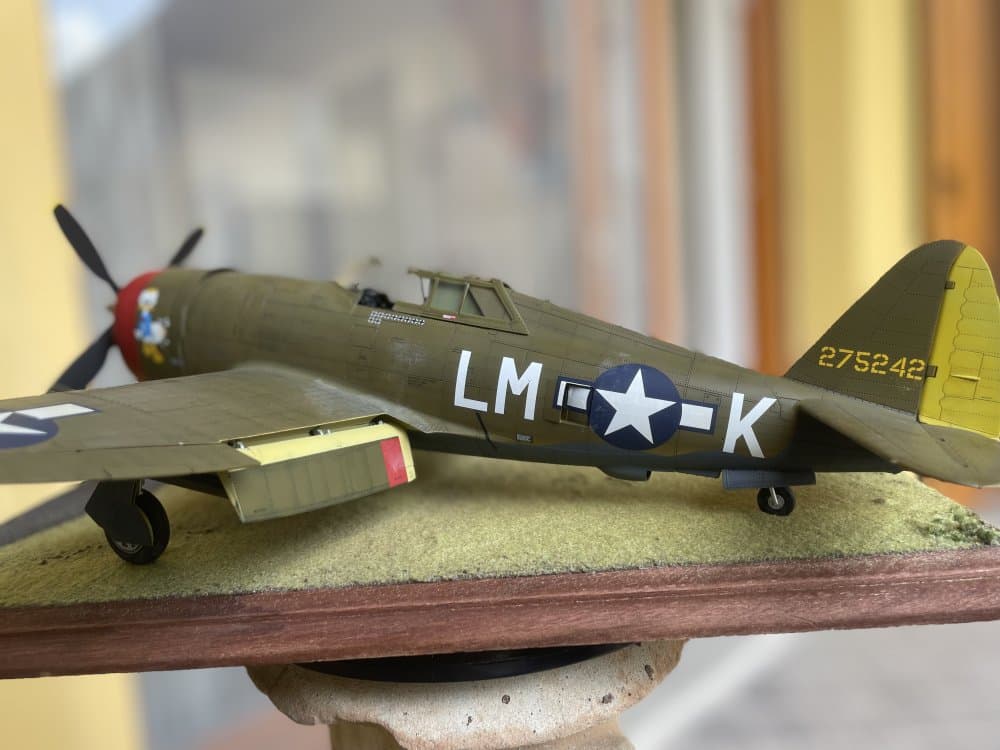
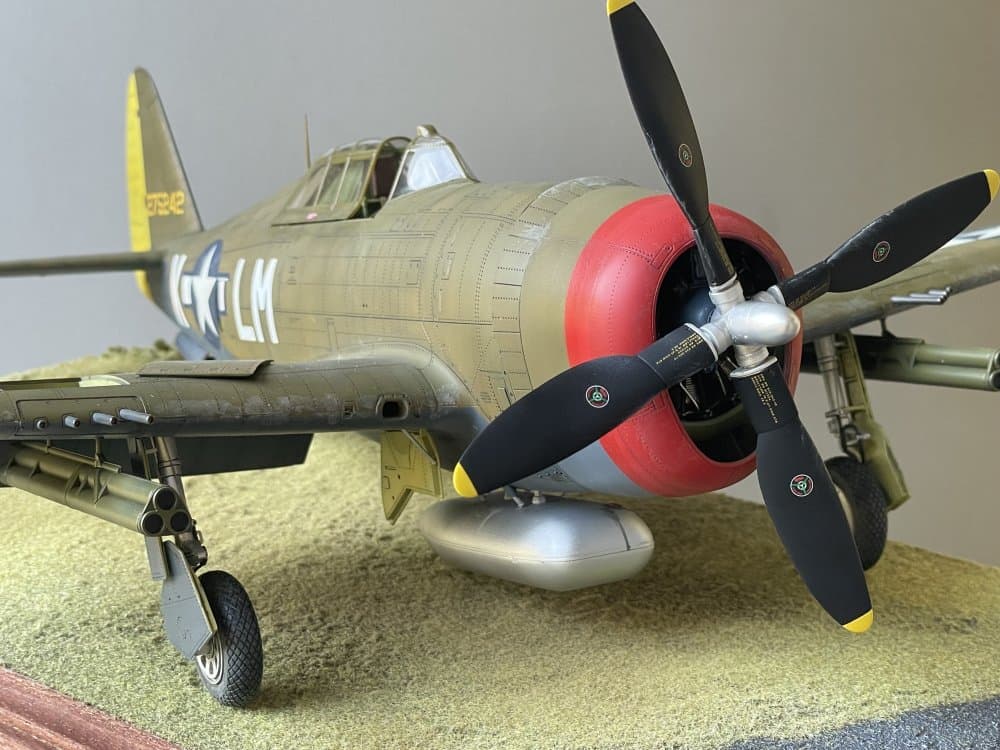
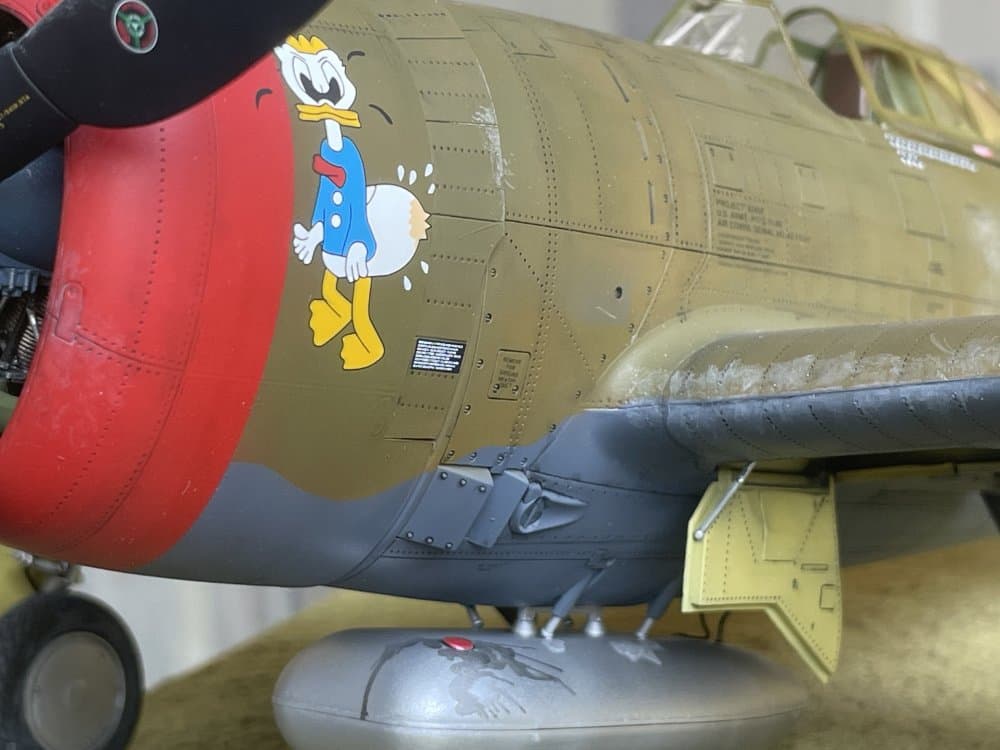
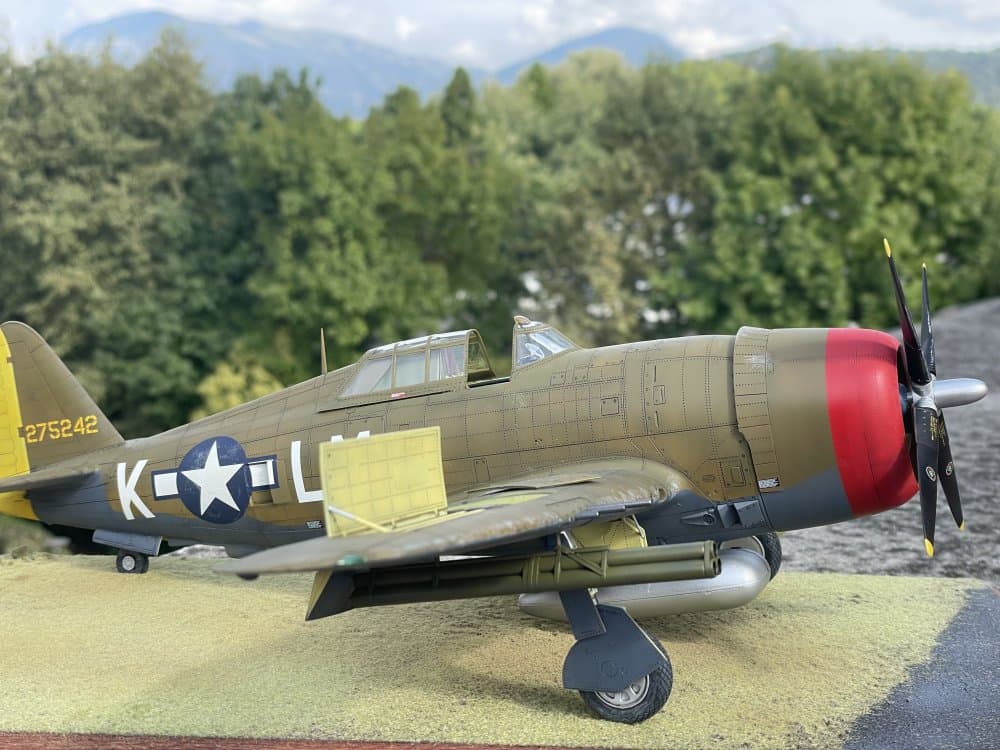
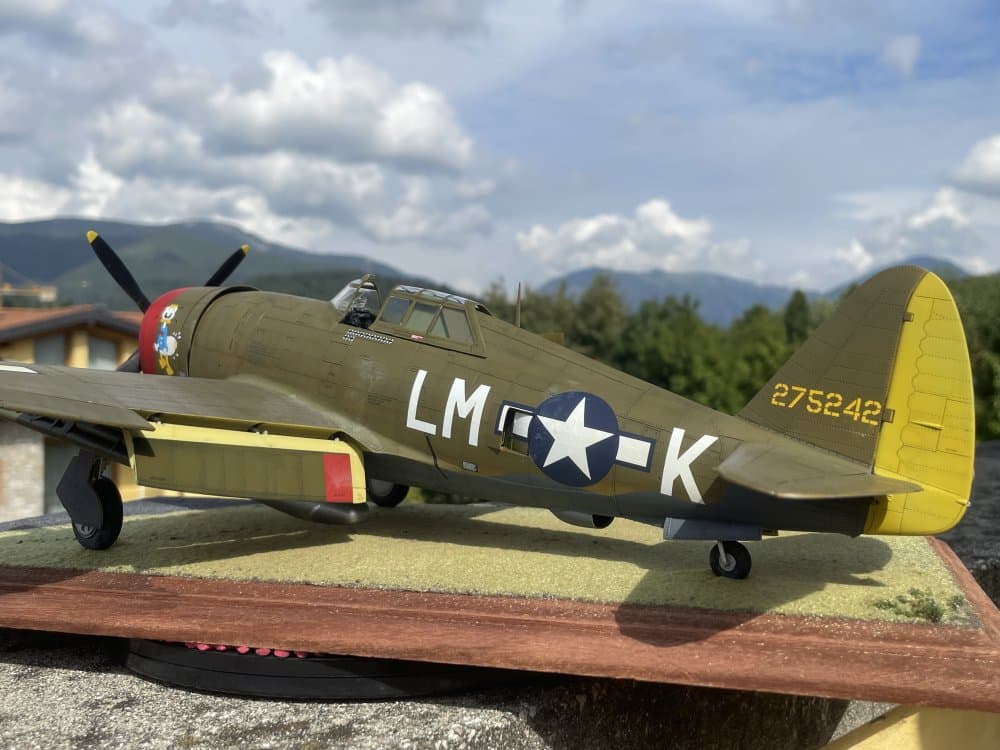
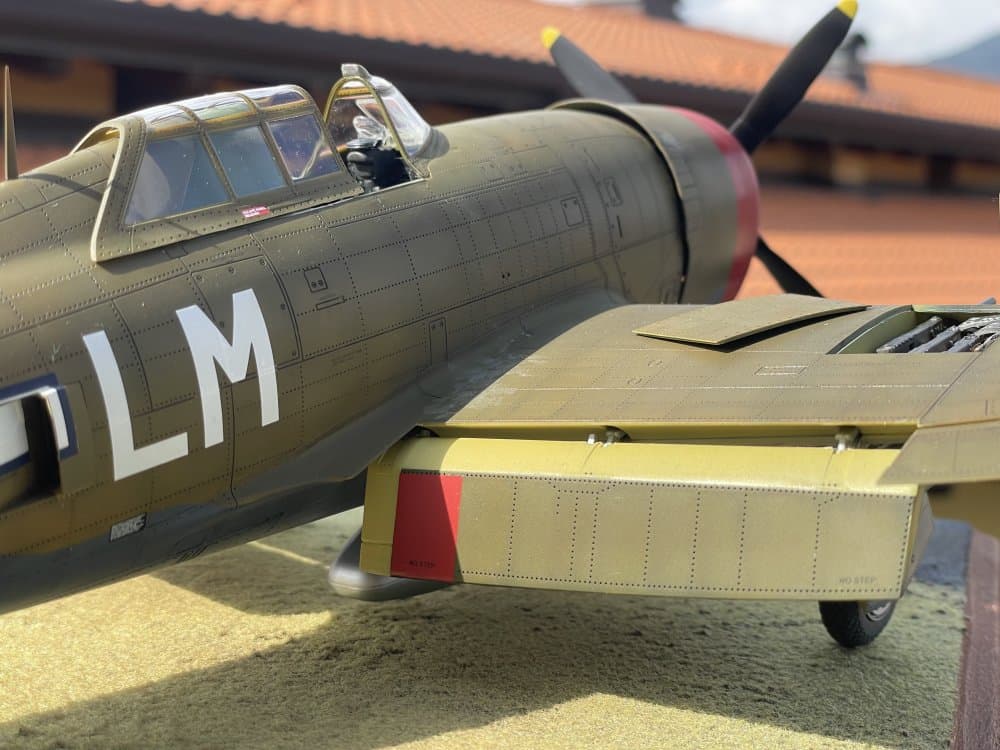
I am pleased to give my very modest contribution by presenting you my scale reproduction of the legendary Thunderbolt, Razorback version…
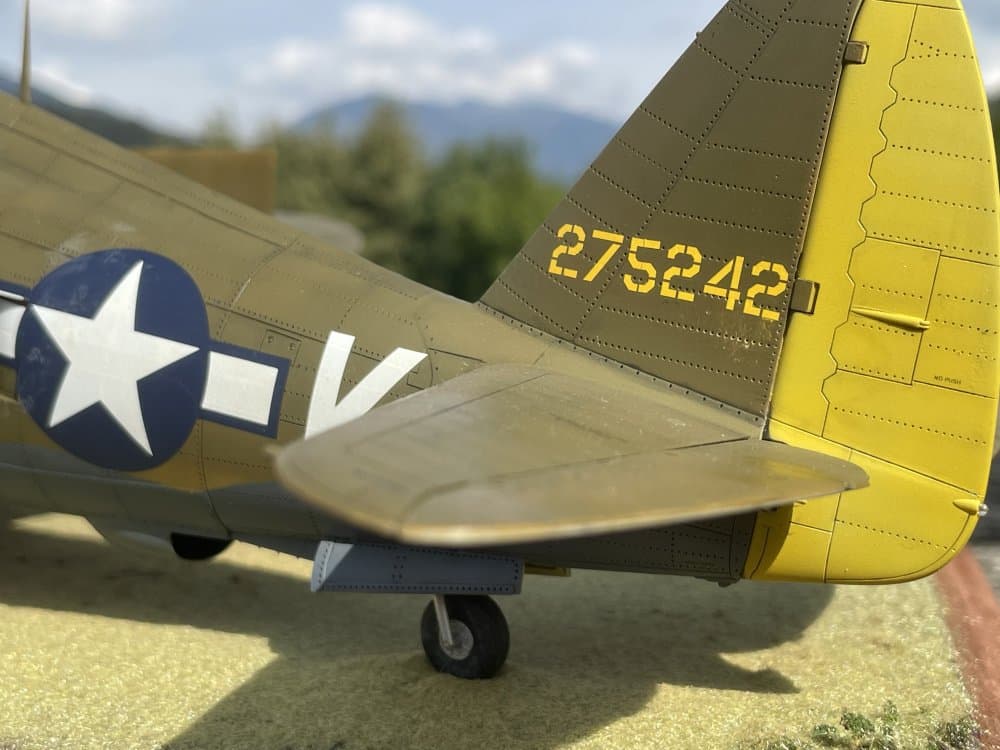
My model, In real life, was an aircraft of the RE-11 production block from Republic’s Farmingdale plant.
The kit is a Trumpeter in 1/32 scale. On this box I will make some final considerations, after the presentation of the model.

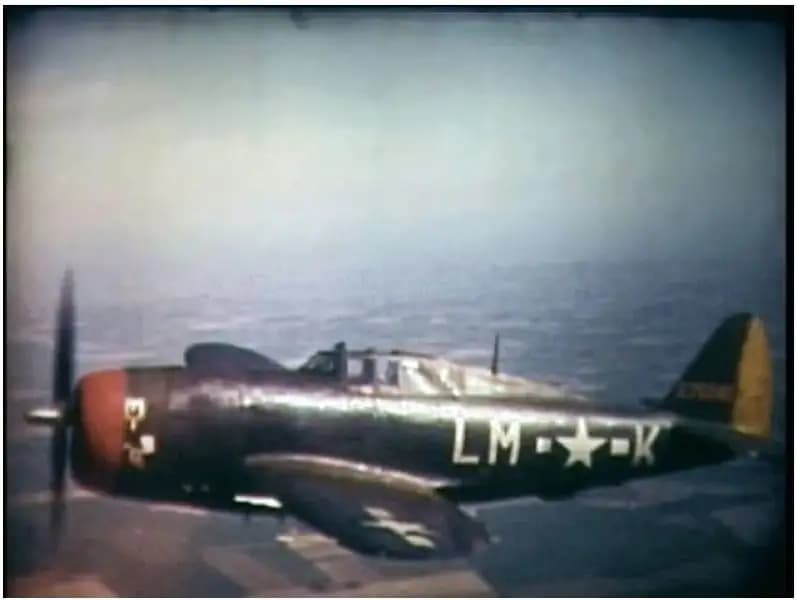
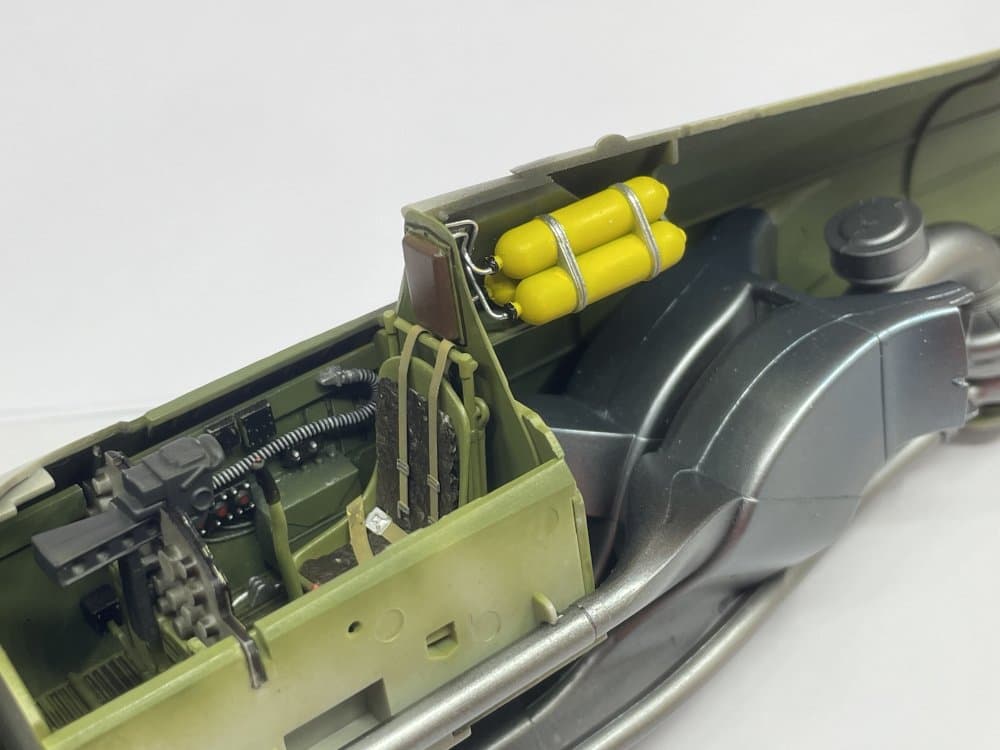
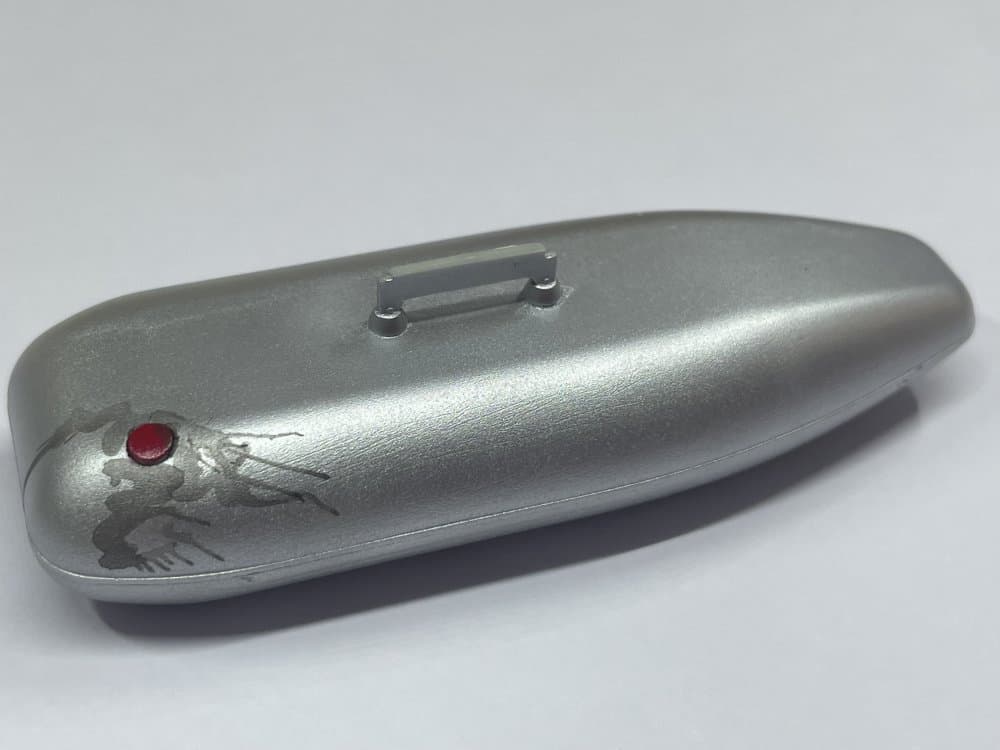
First the photos, starting with a rare historical color photo of the subject. I’m also posting some pics of mi WIP here. Just one thing I would like to clarify: this photo is the only historical color one I have been able to find on the web of this specific aircraft. Are there other color photos that I have not found that show the aircraft at a different time during the war? Many modelers reproduce the same subject with the yellow hood band in compliance with the kit instructions. Are there other sources where the aircraft appears with the yellow band or are many of the models in circulation wrong? I do not have the truth in my pocket, so the discussion is open on this and any documented observations are welcome.

Here are the photos:


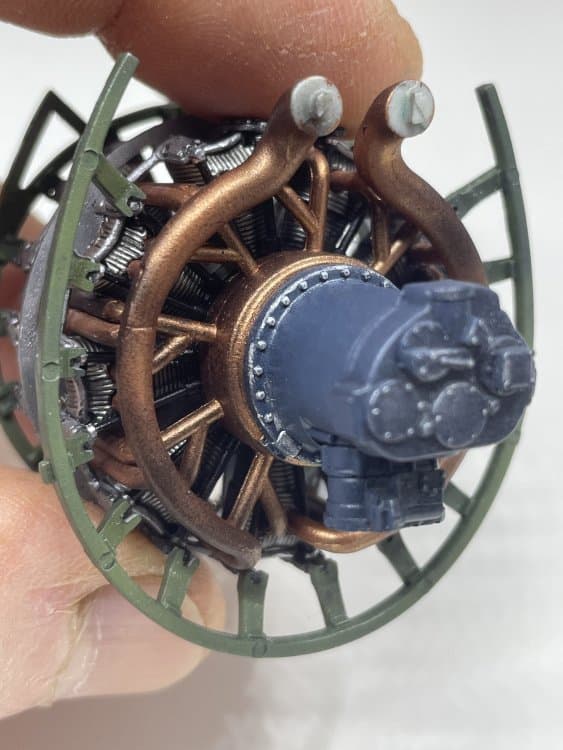
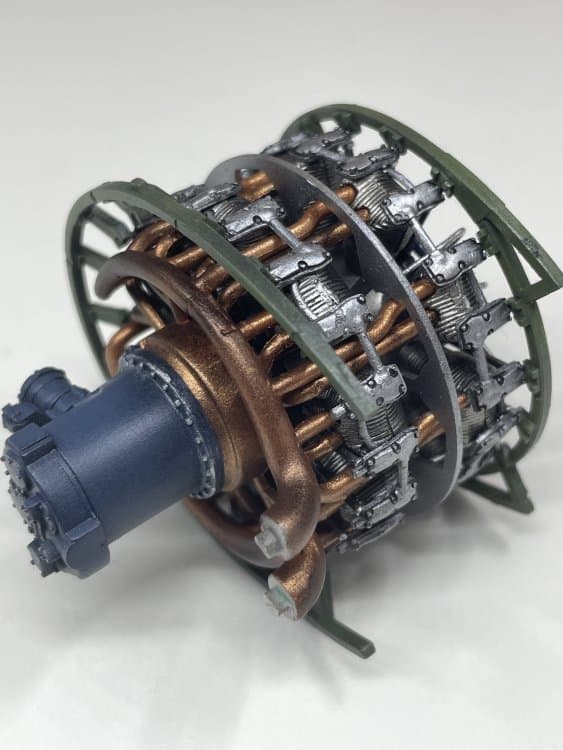
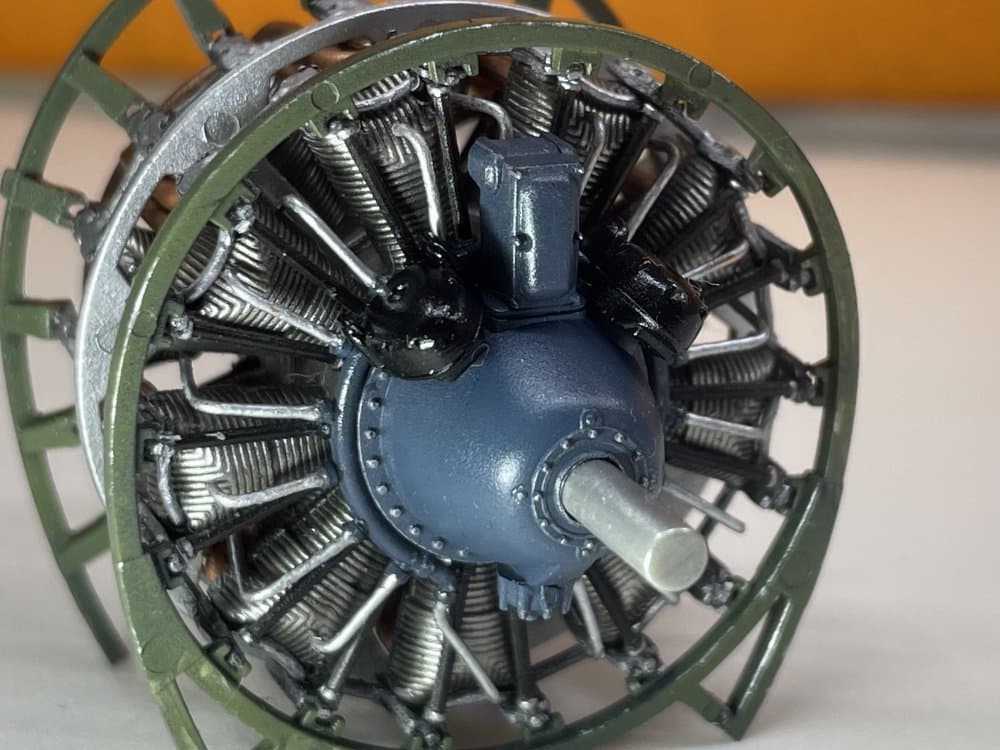
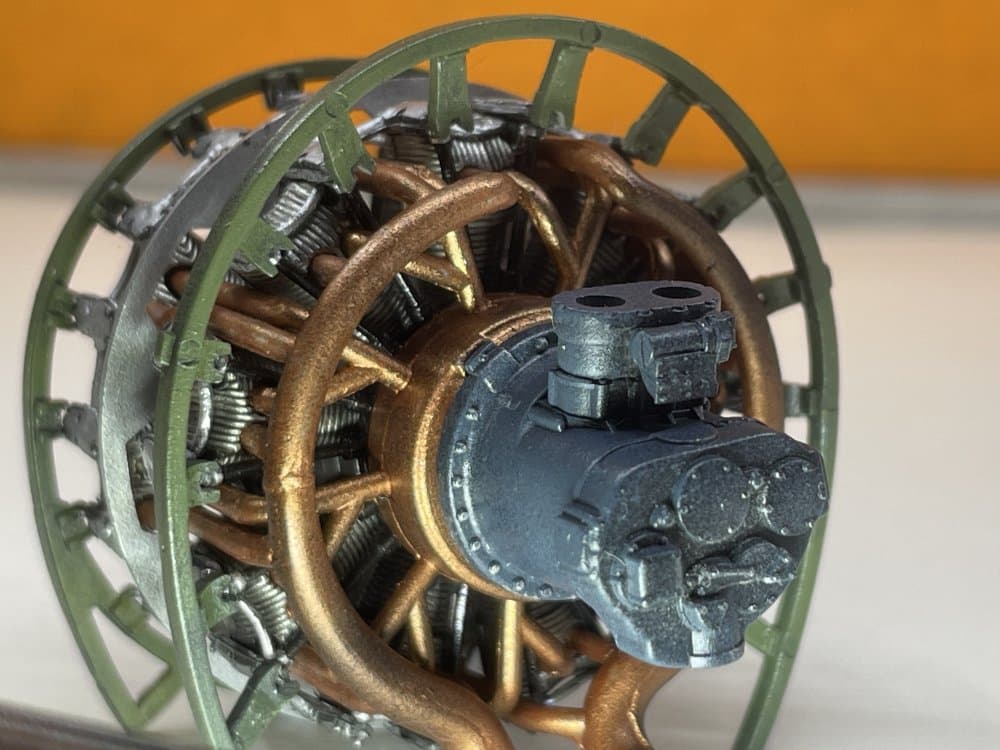
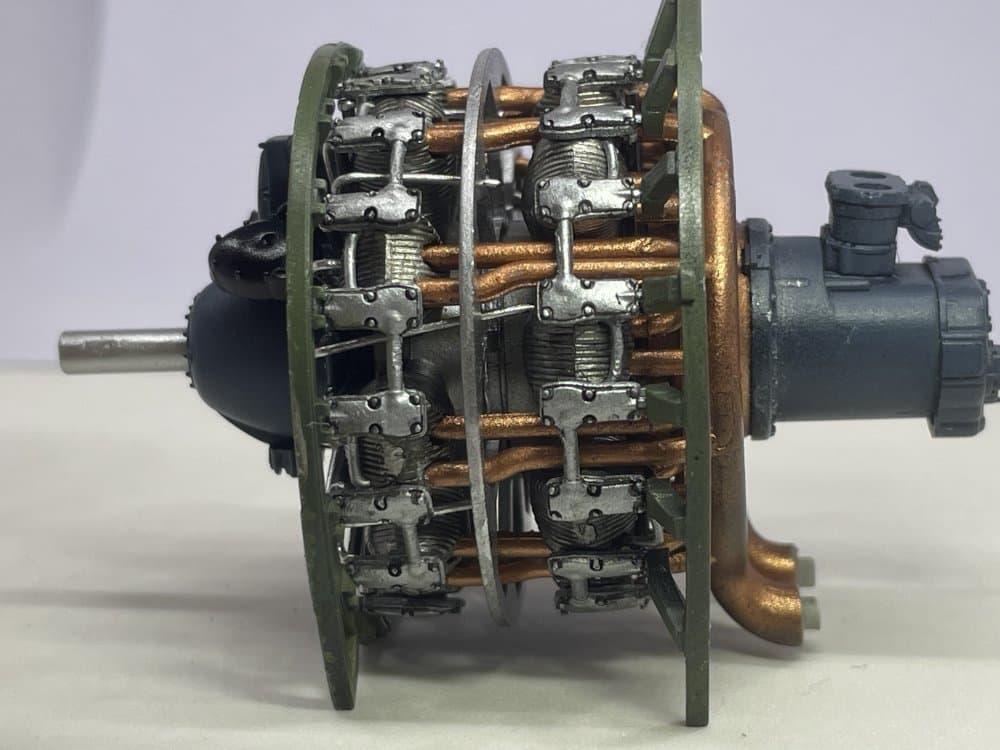
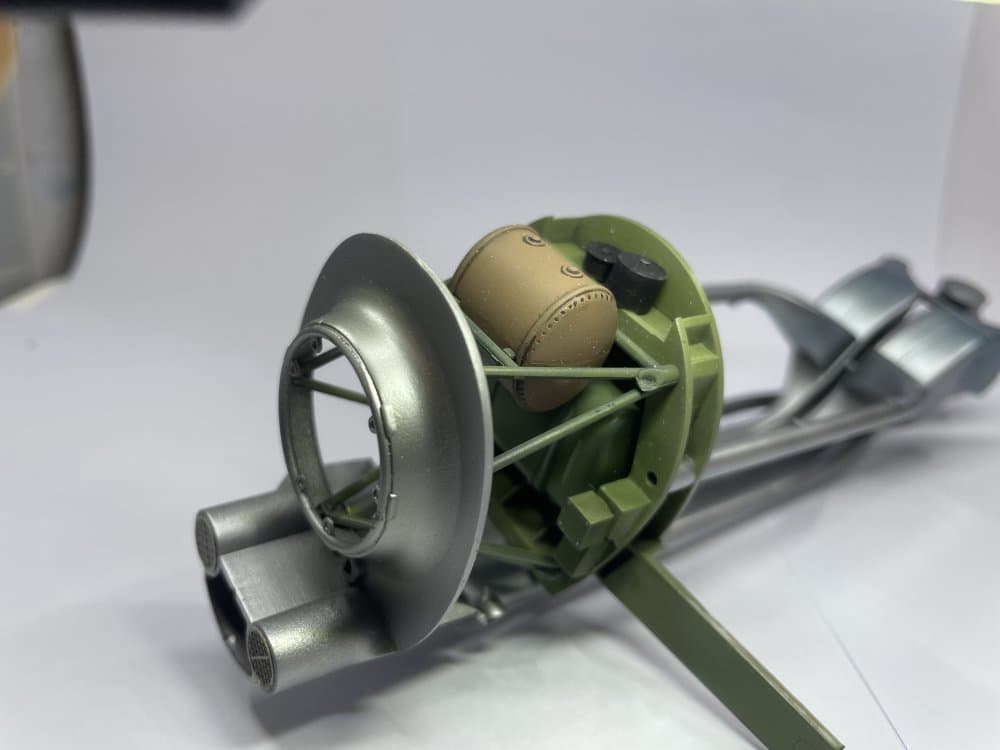
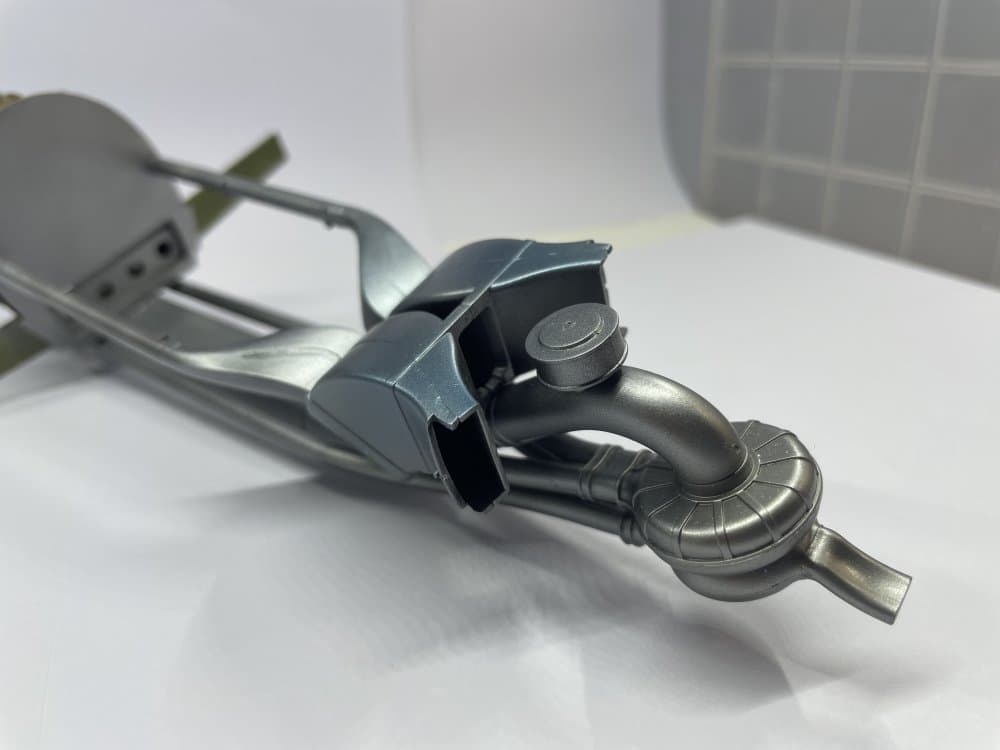
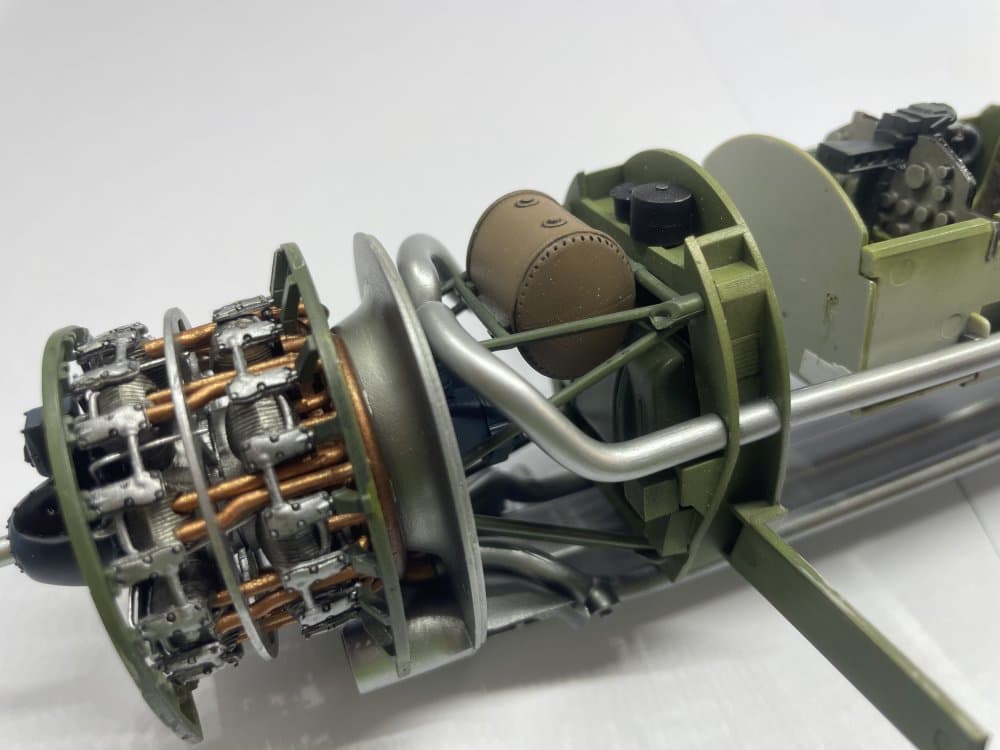
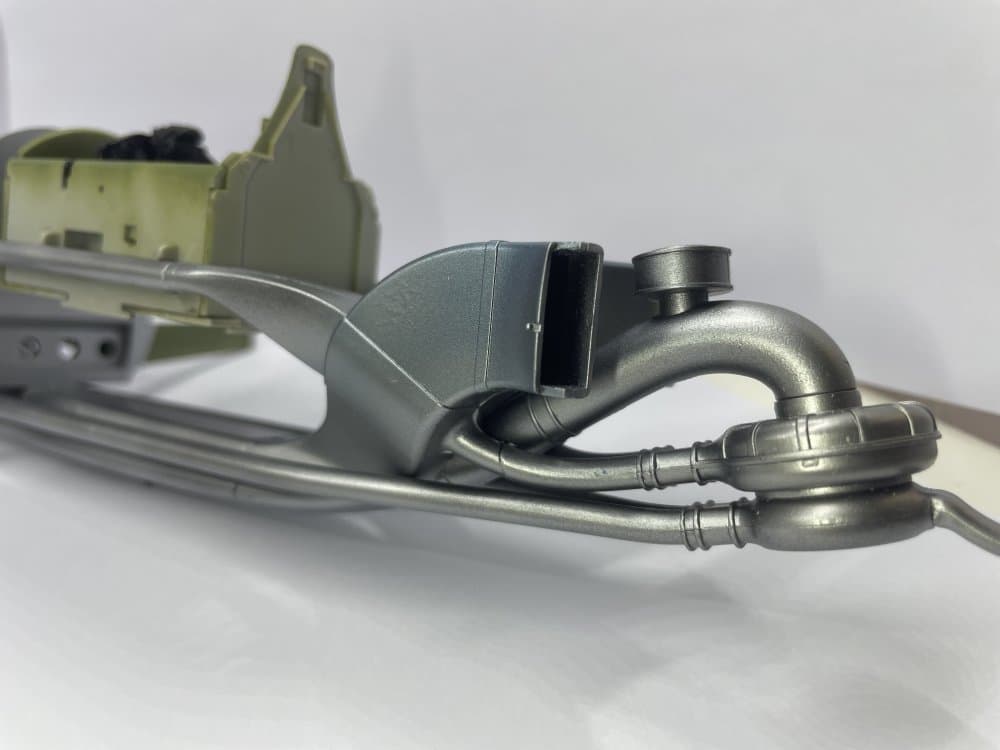
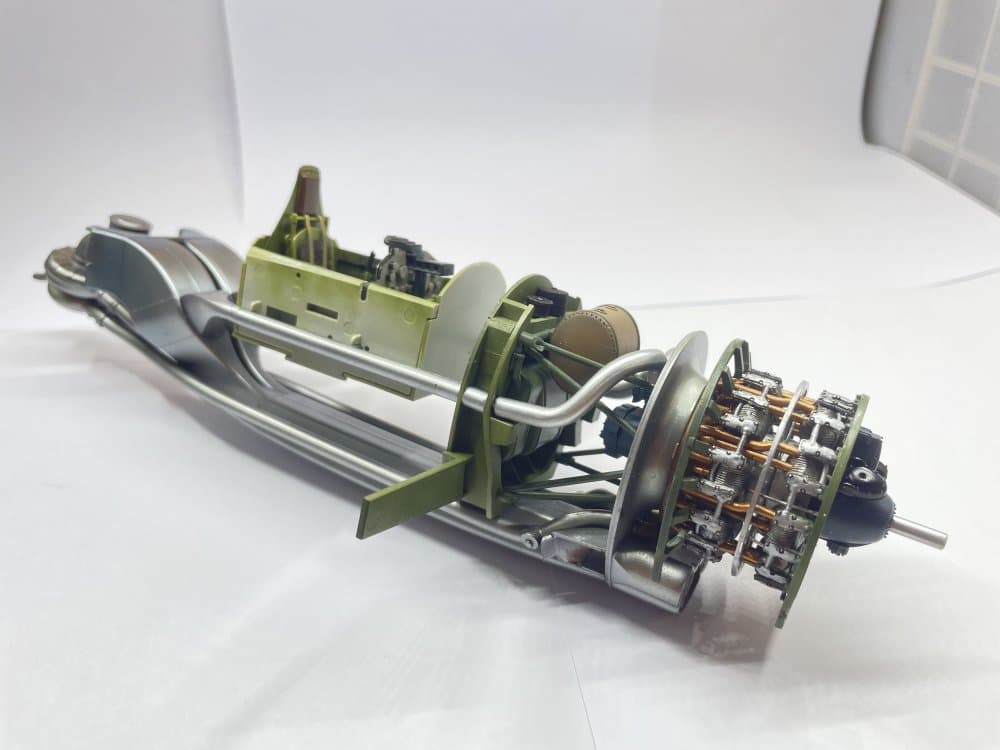
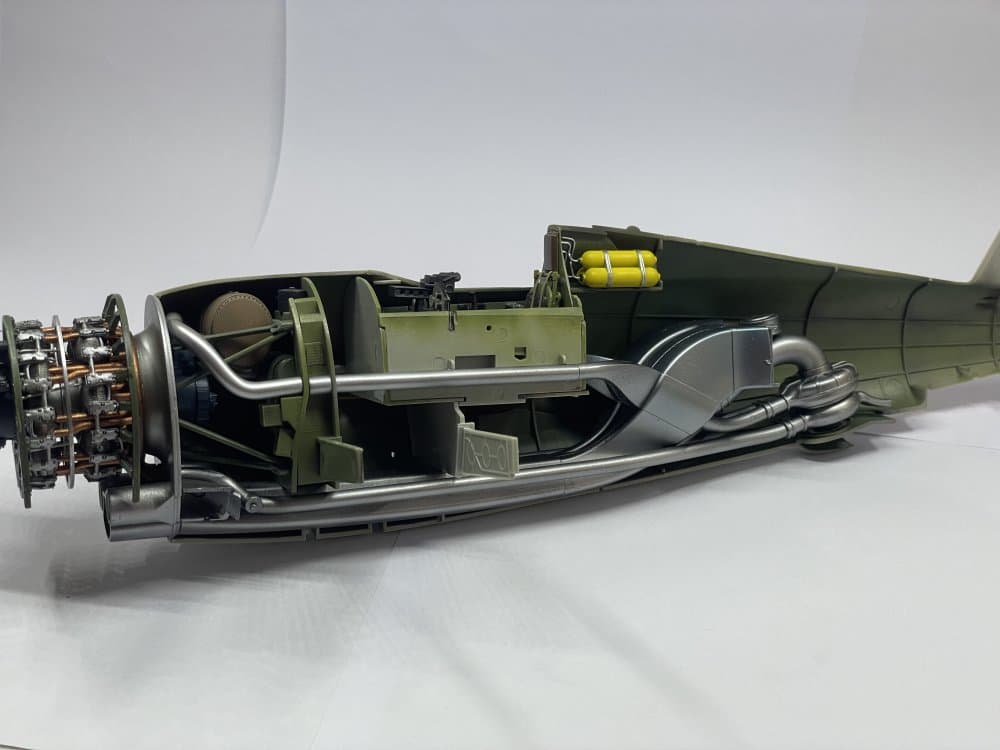
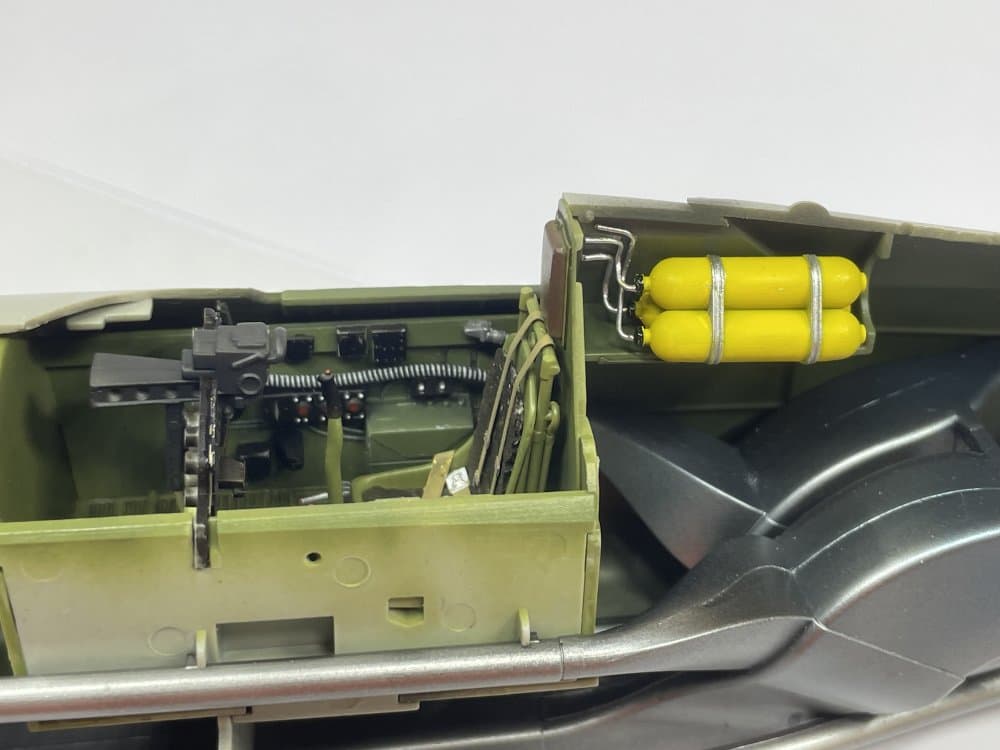
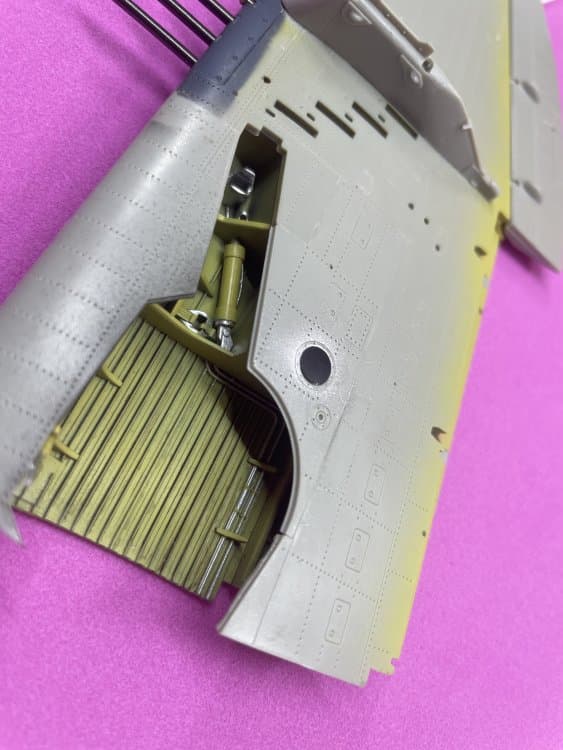
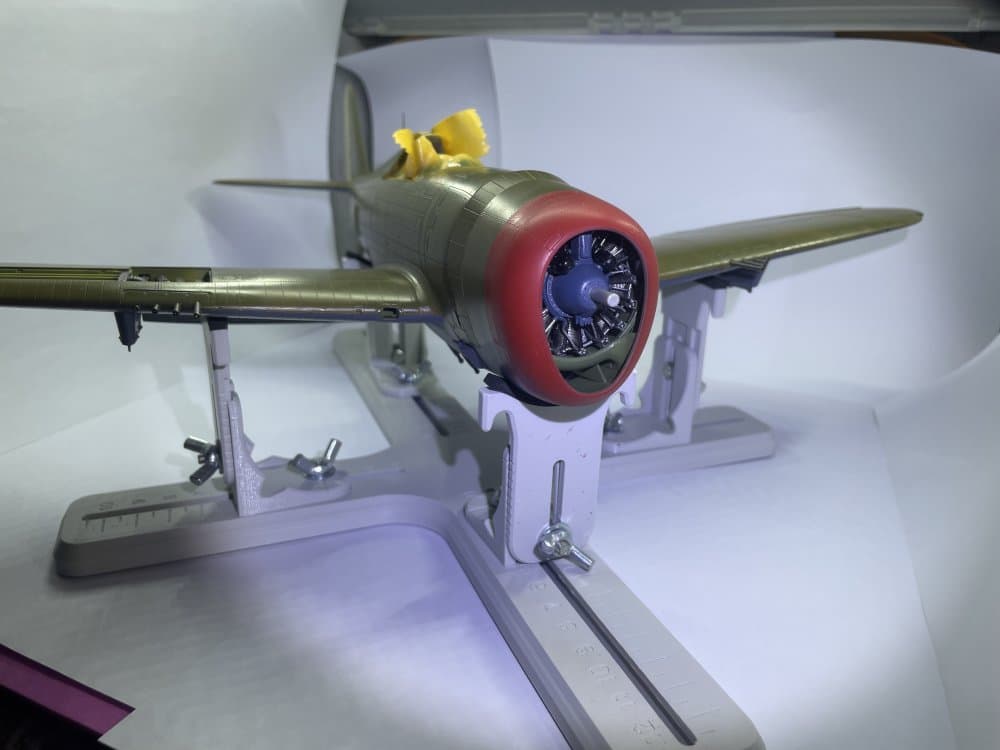
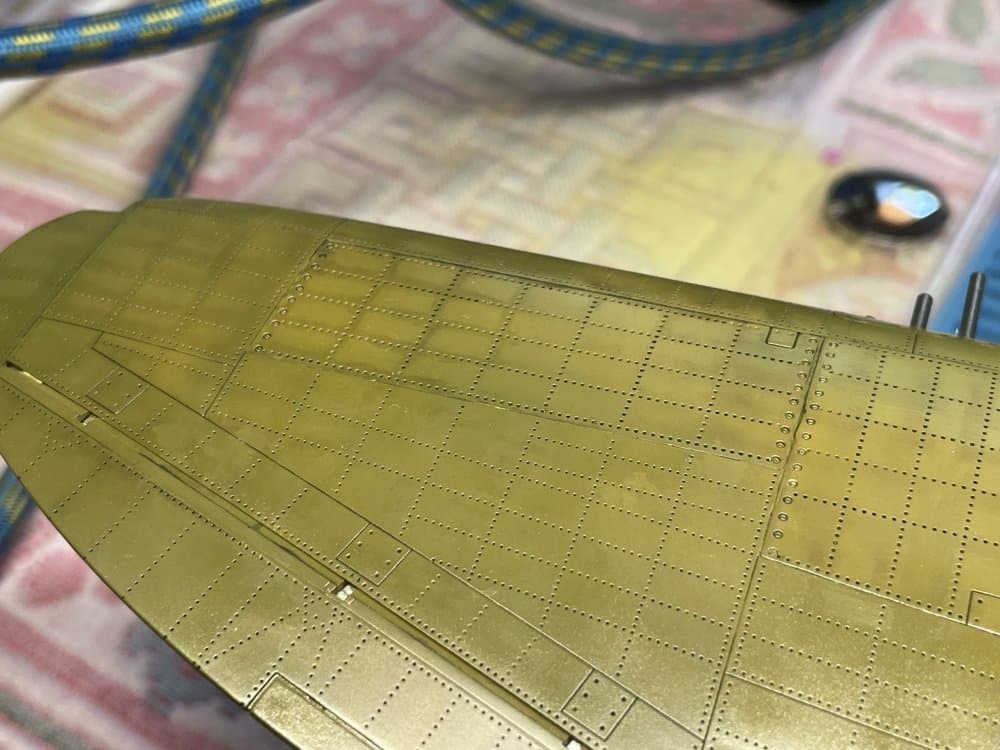
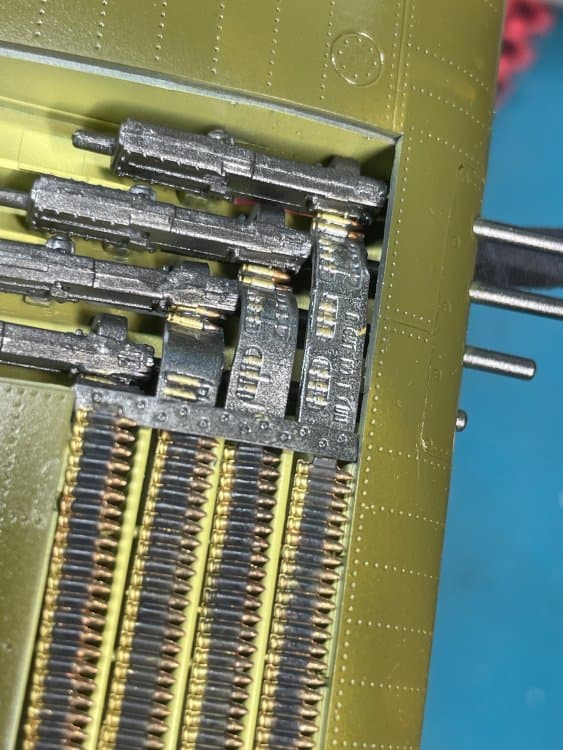
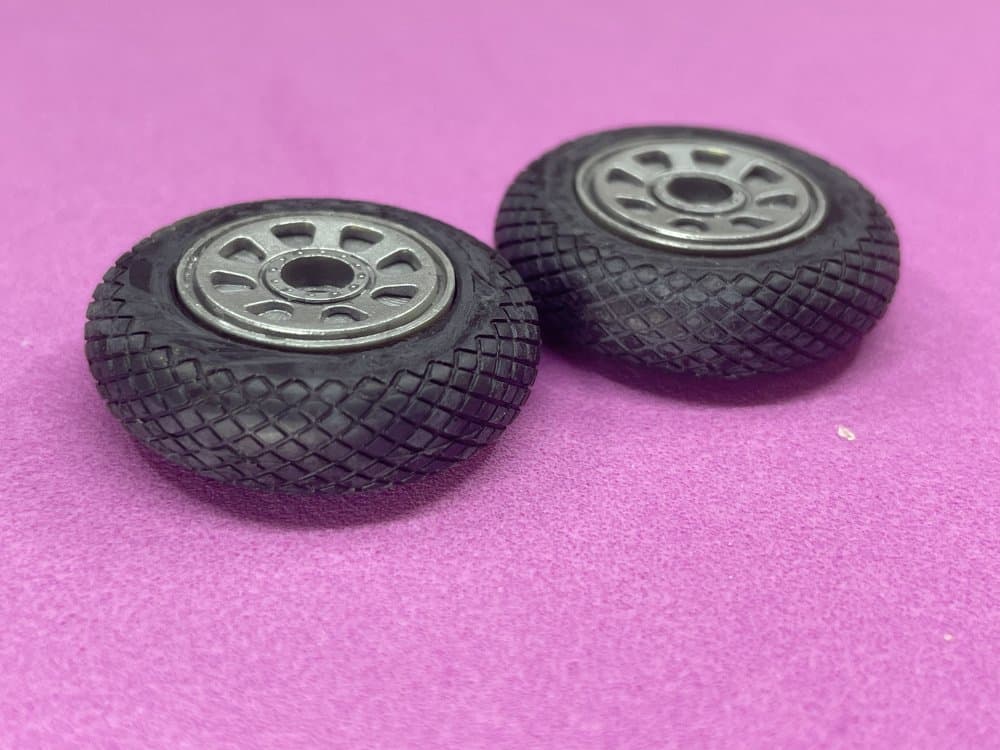
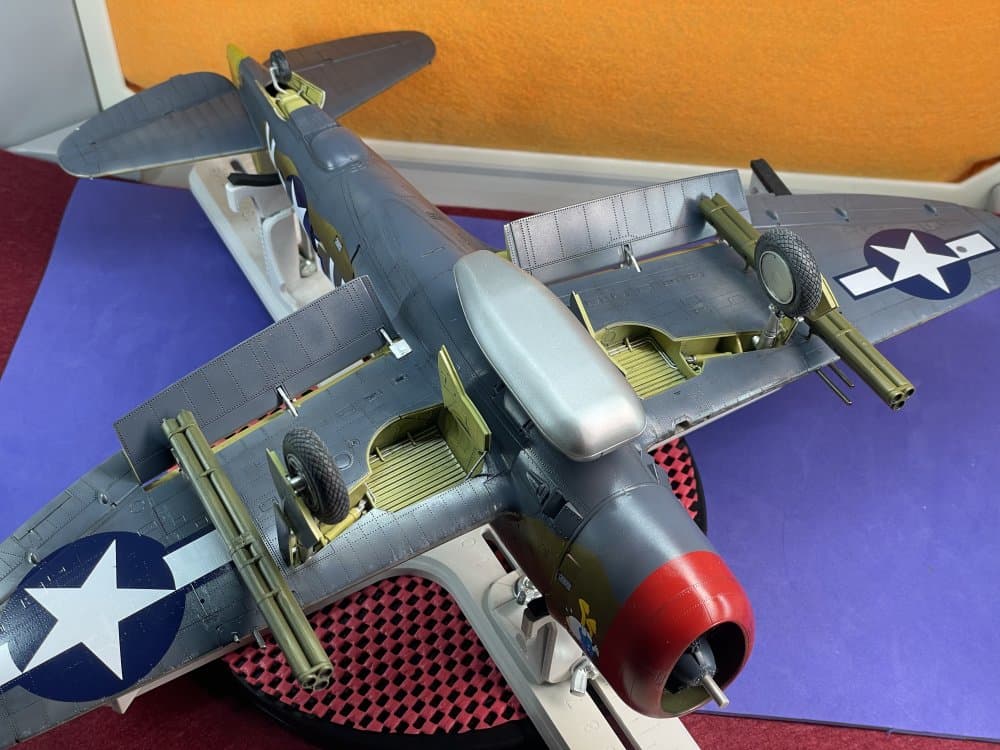
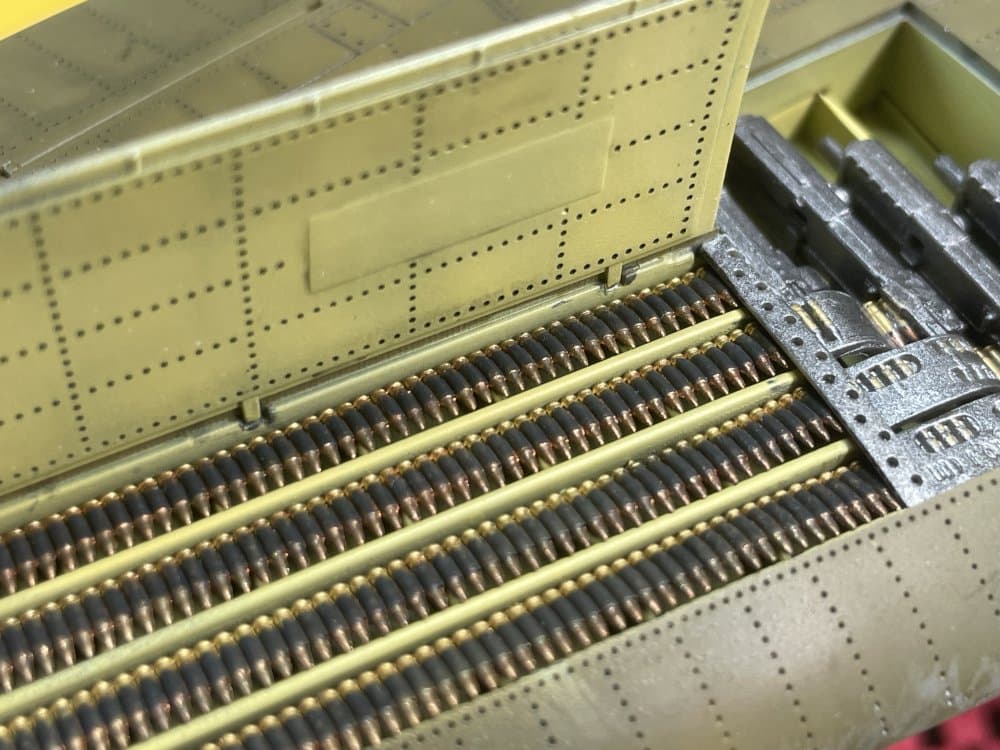
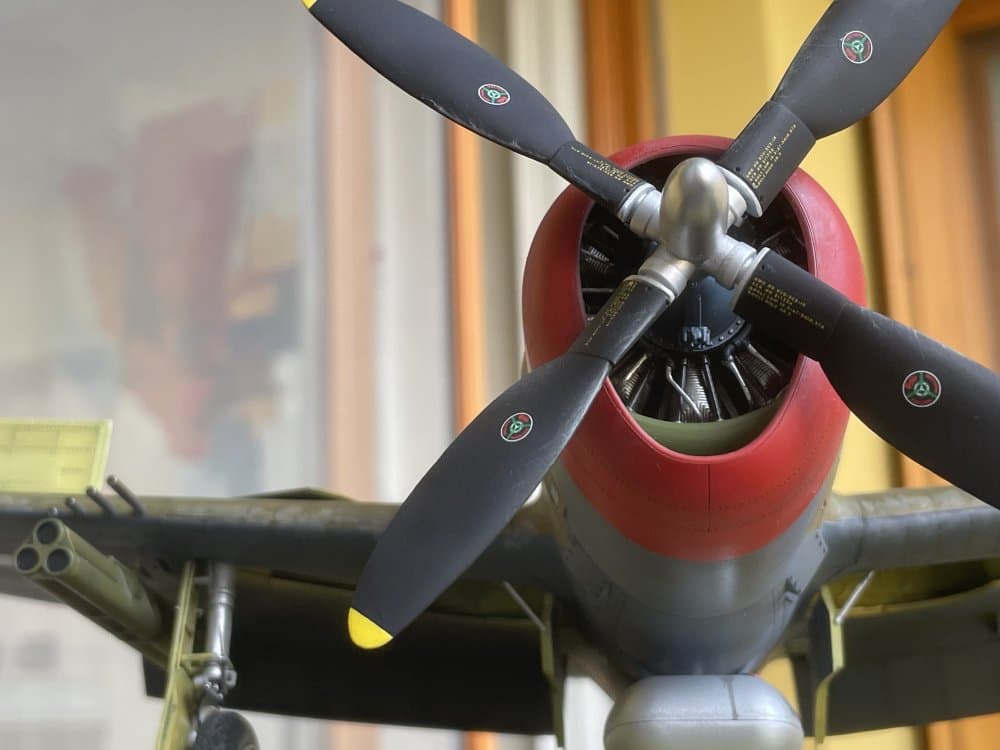
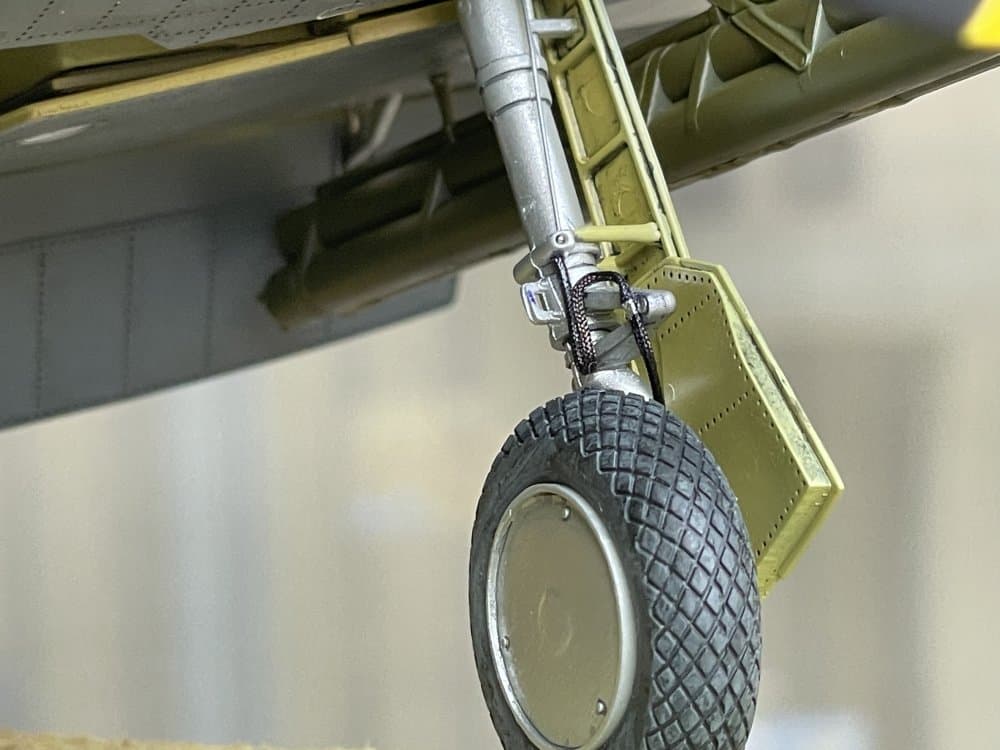
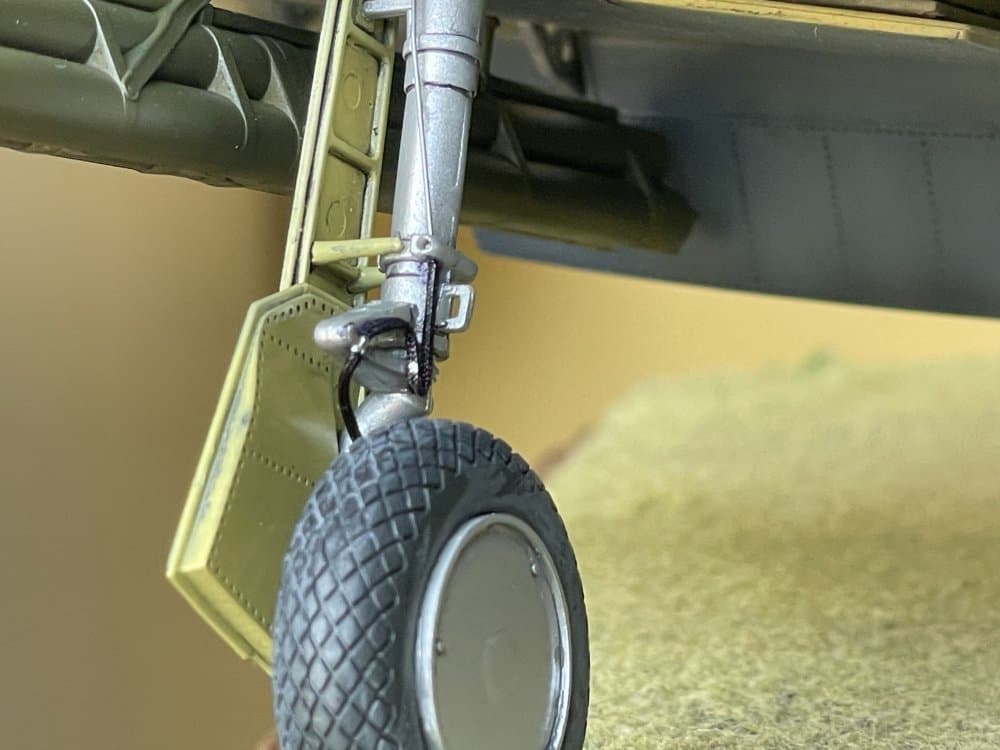
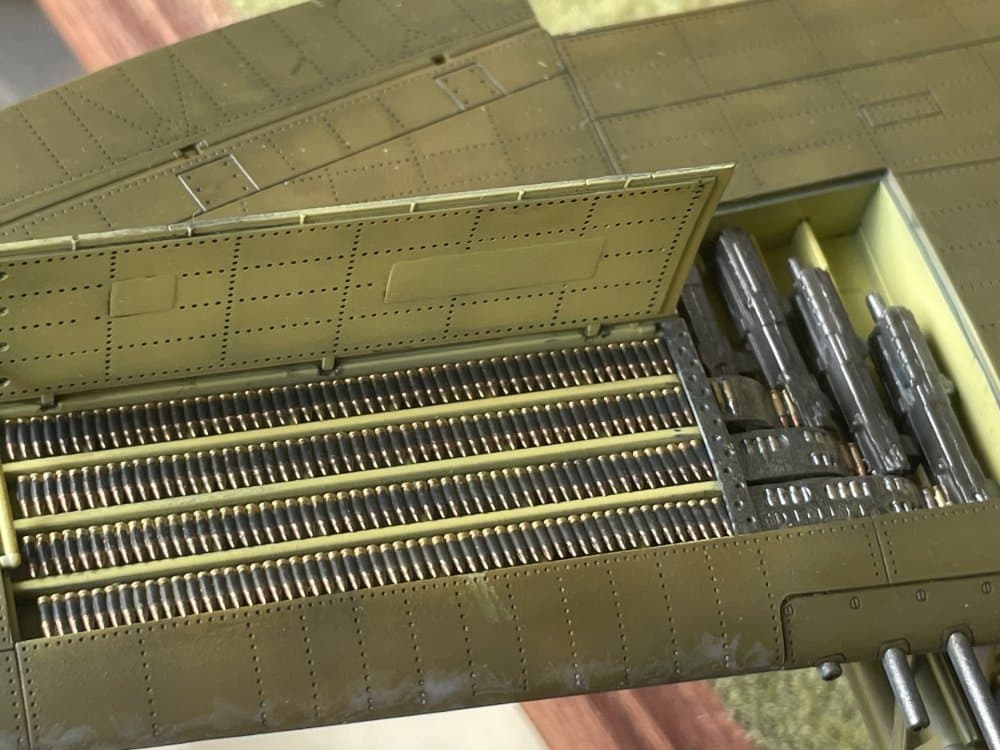
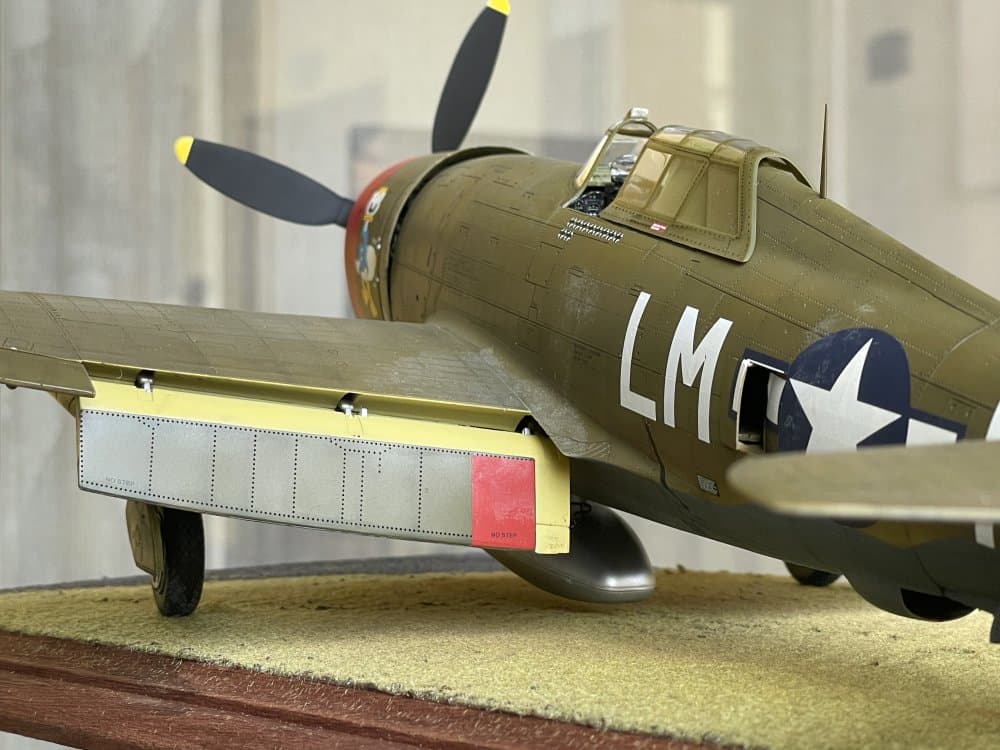
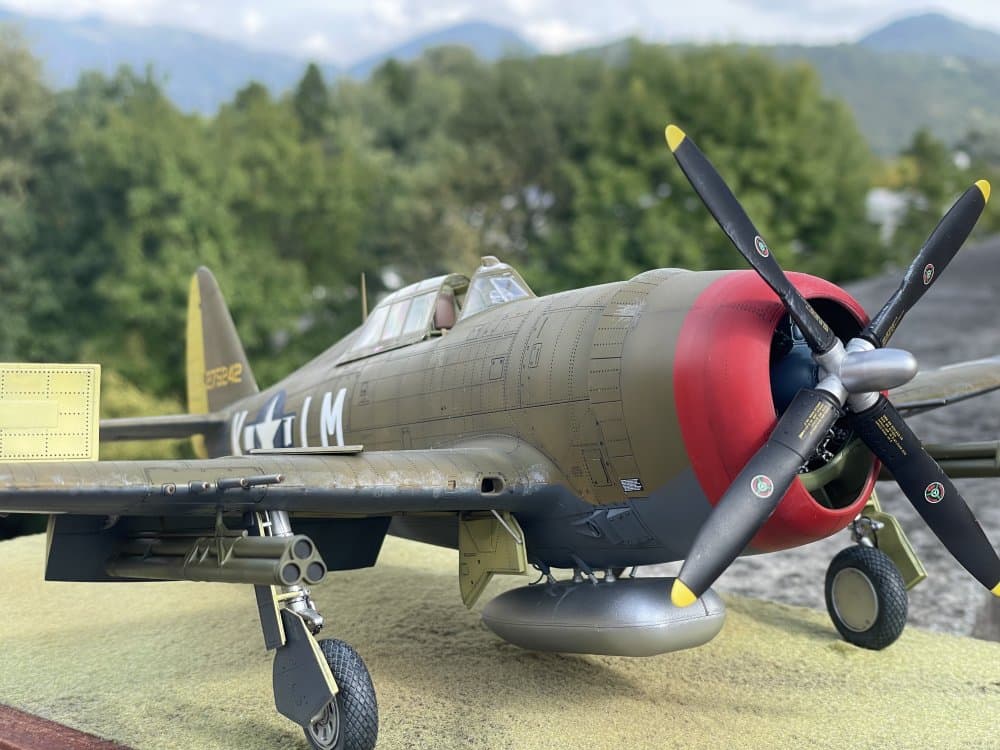
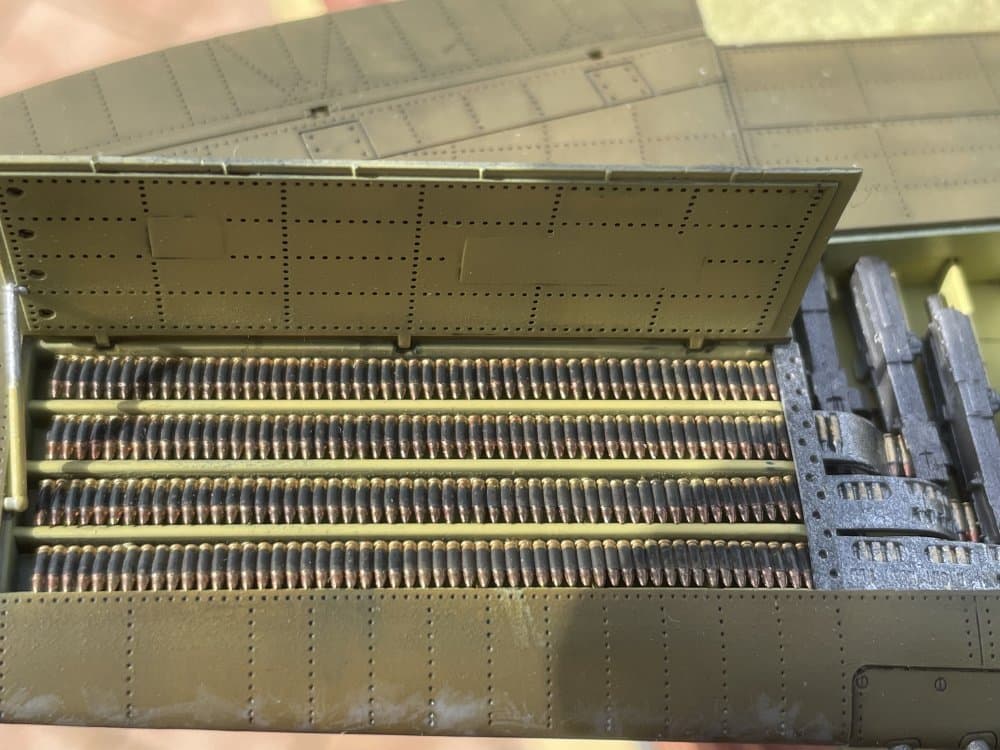
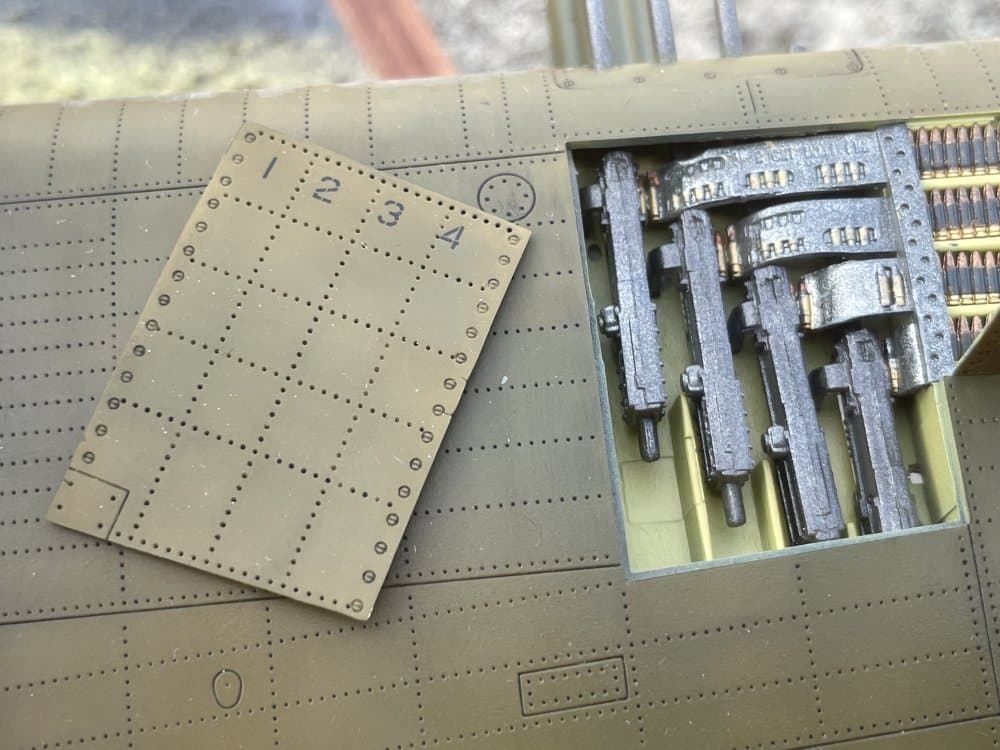
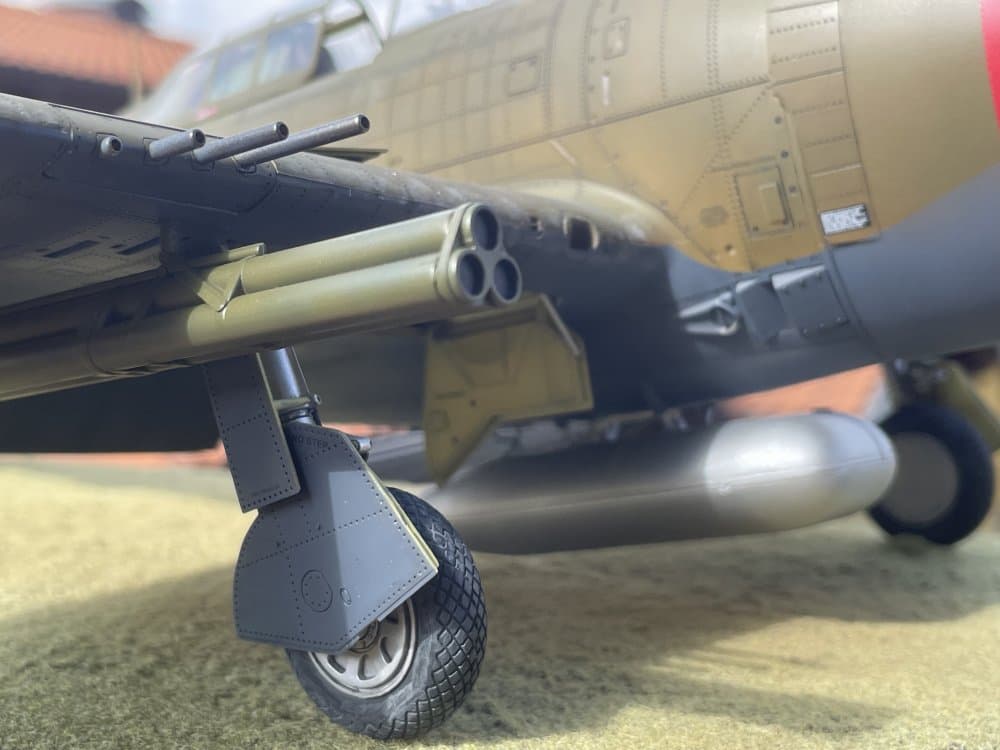
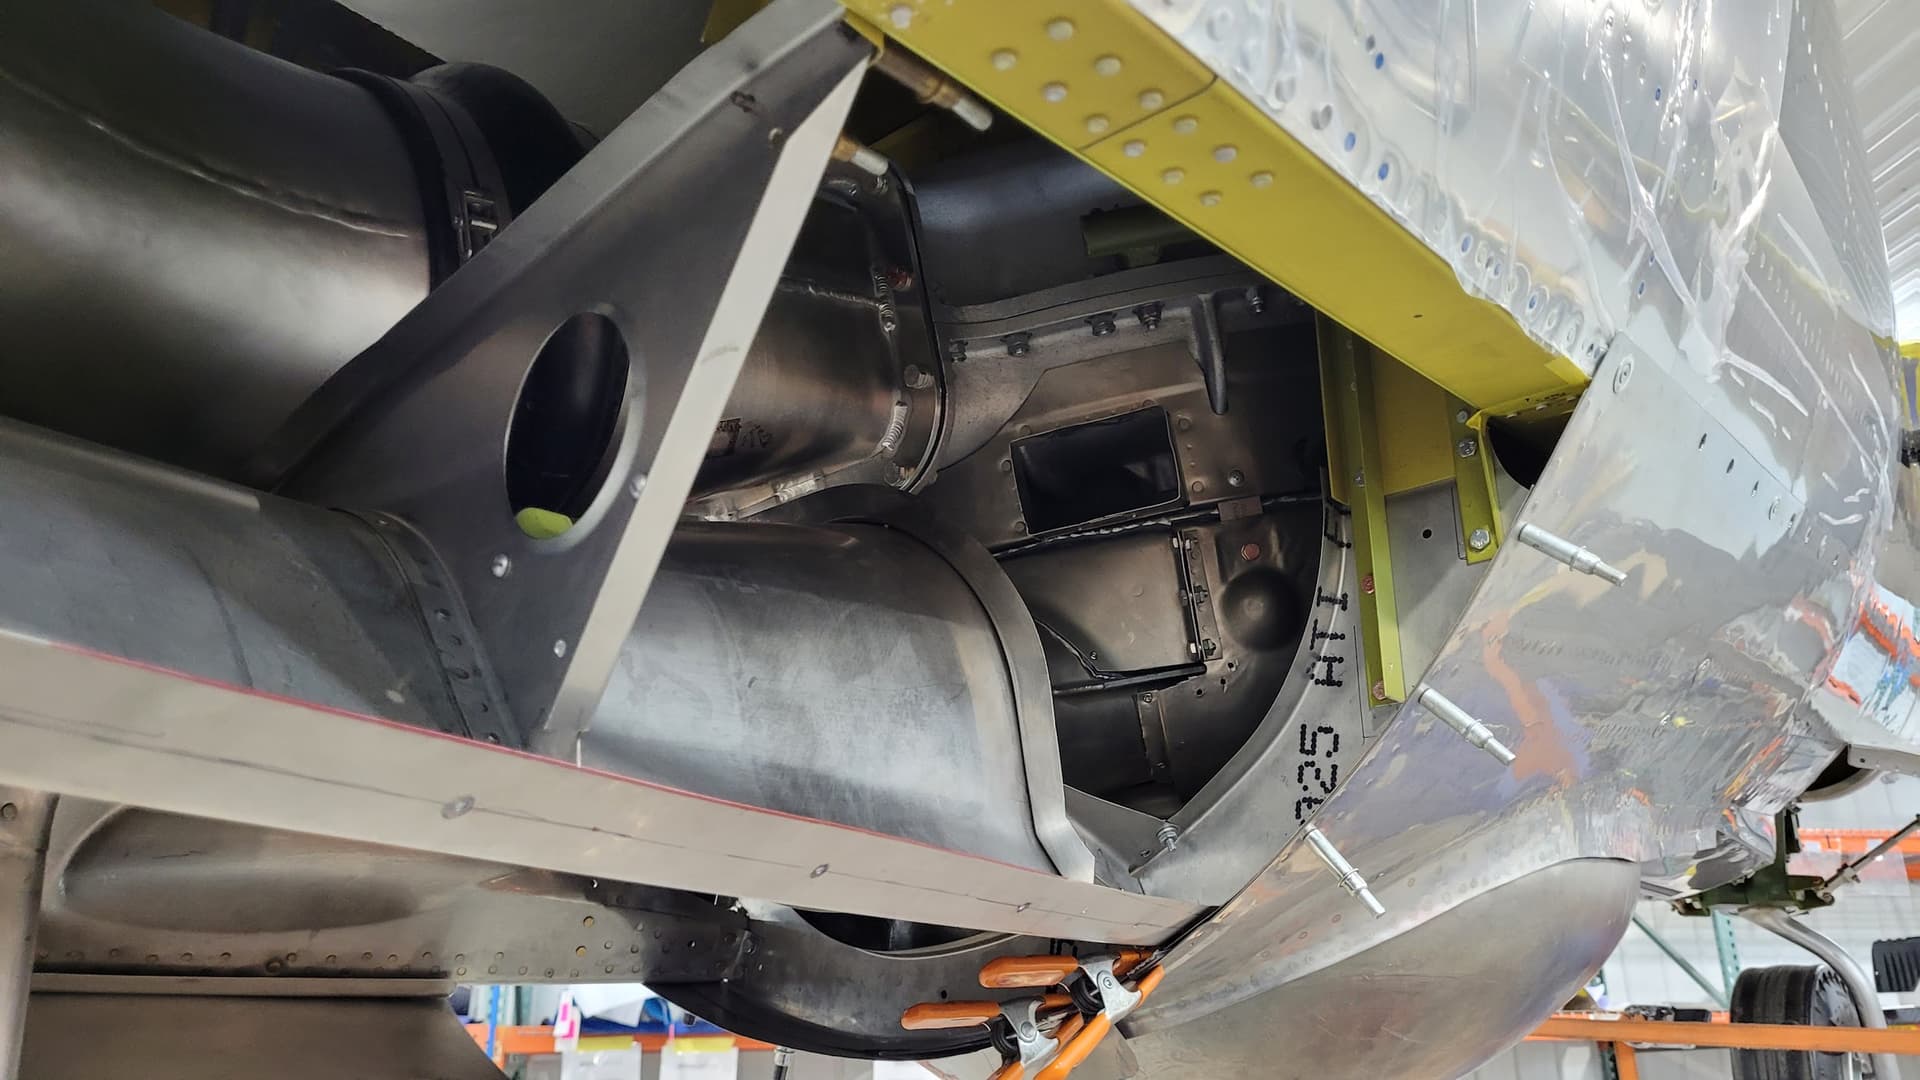
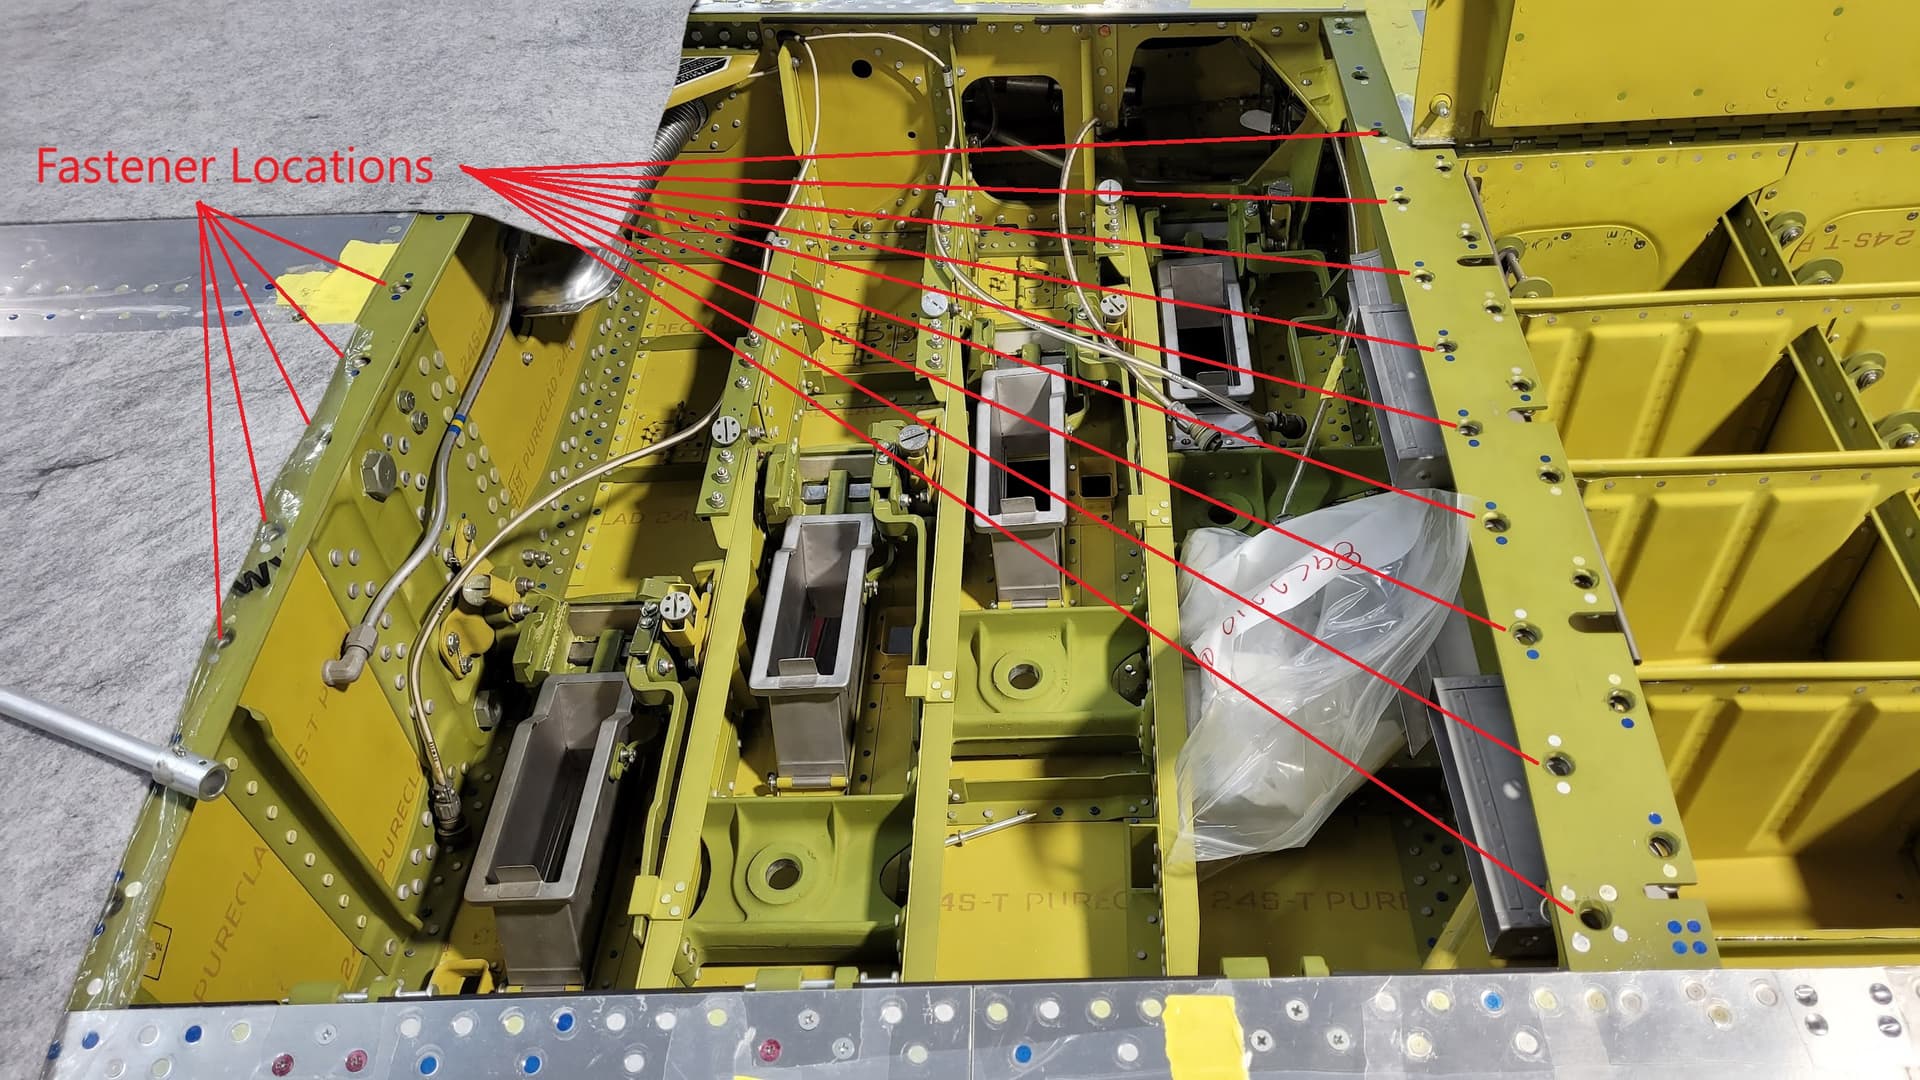
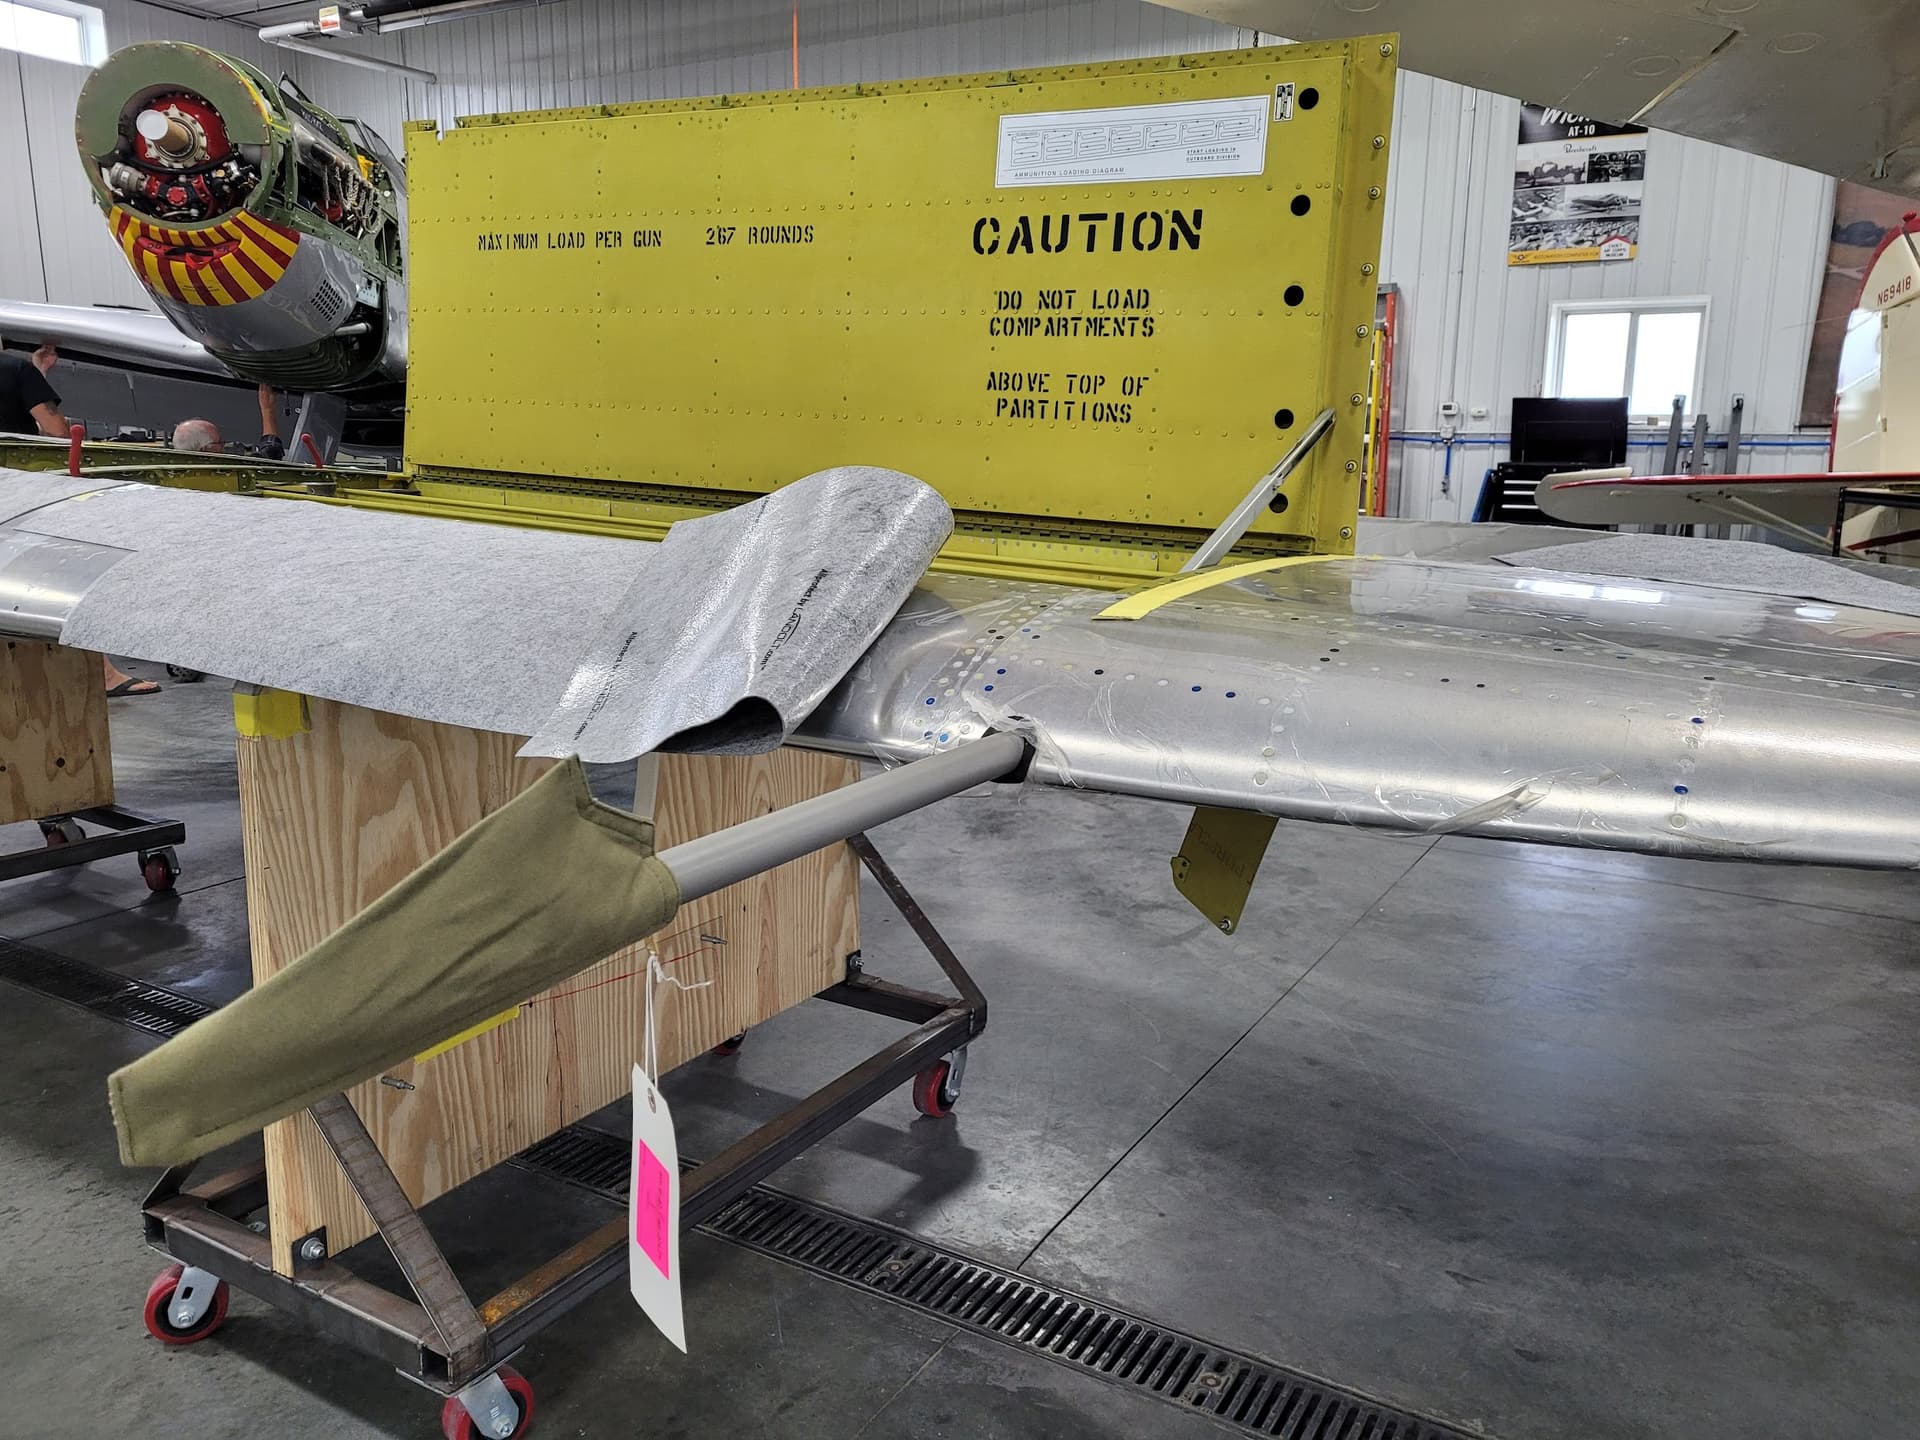
As mentioned above, this kit (Trumpeter 02262 in 1/32 scale) has some undoubted qualities but also some serious flaws. I mention, among the positive aspects, a remarkable surface detail, the well detailed wheel bays, the tires in one piece of soft plastic and, of course, a frankly wonderful power unit, both for what concerns the engine in the strict sense, and the whole supercharger part. Also the general fit is quite good.

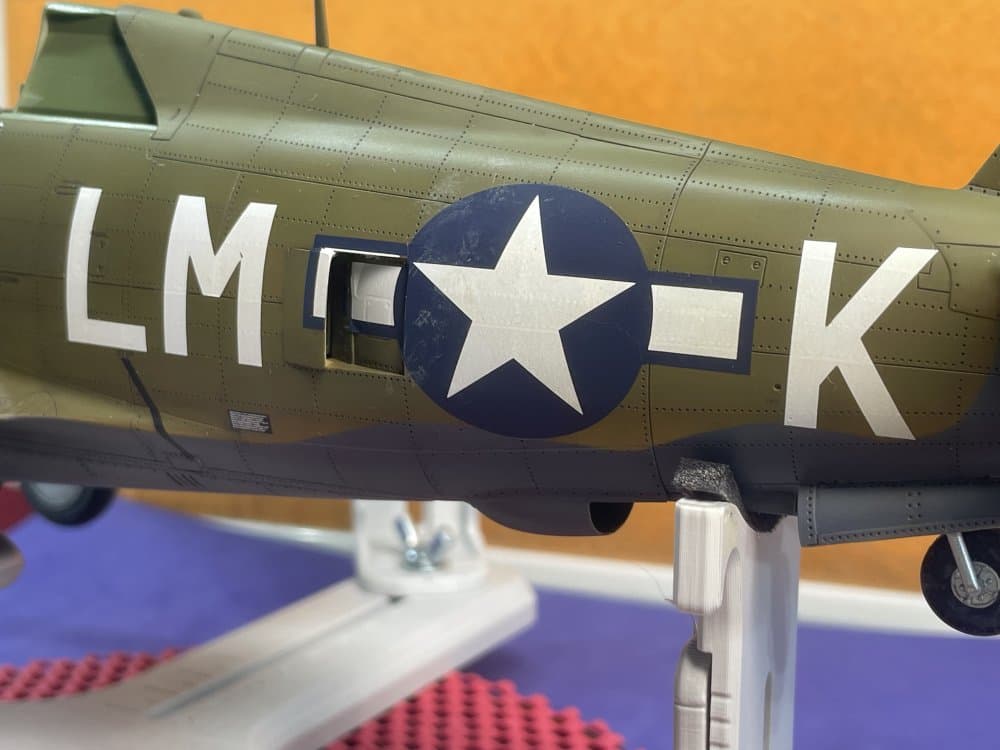
The negative aspects concern various approximations in the instruction booklet as well as in the decal sheet. I will say right away that for this last aspect I resorted to an aftermarket sheet from Techmod (32004) that deals with the same subject.

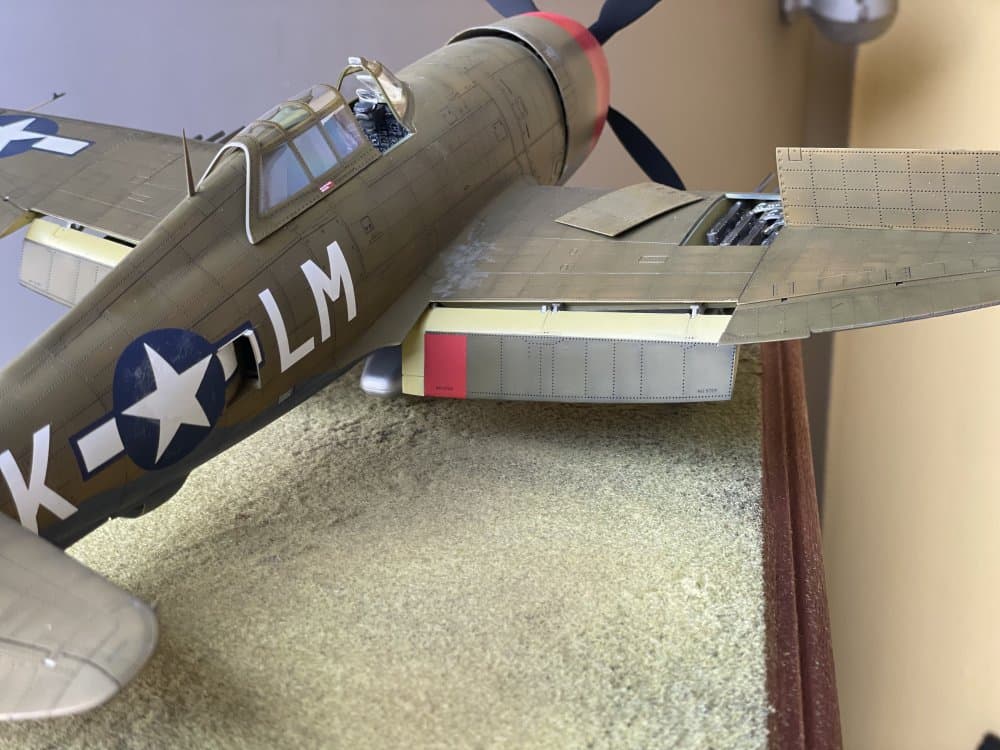
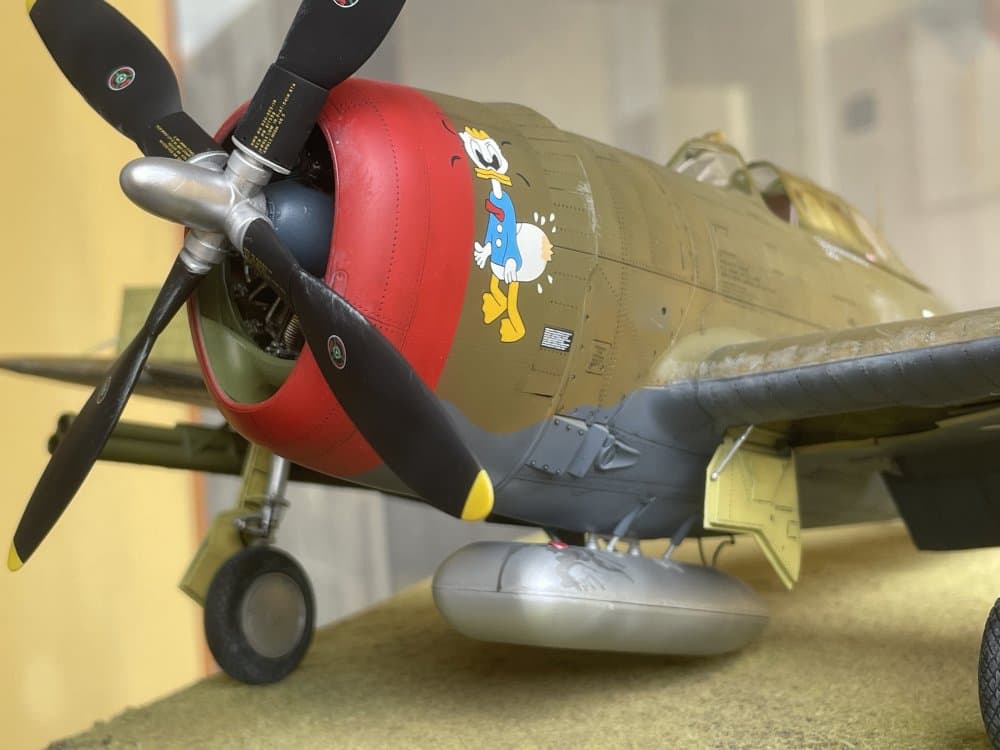
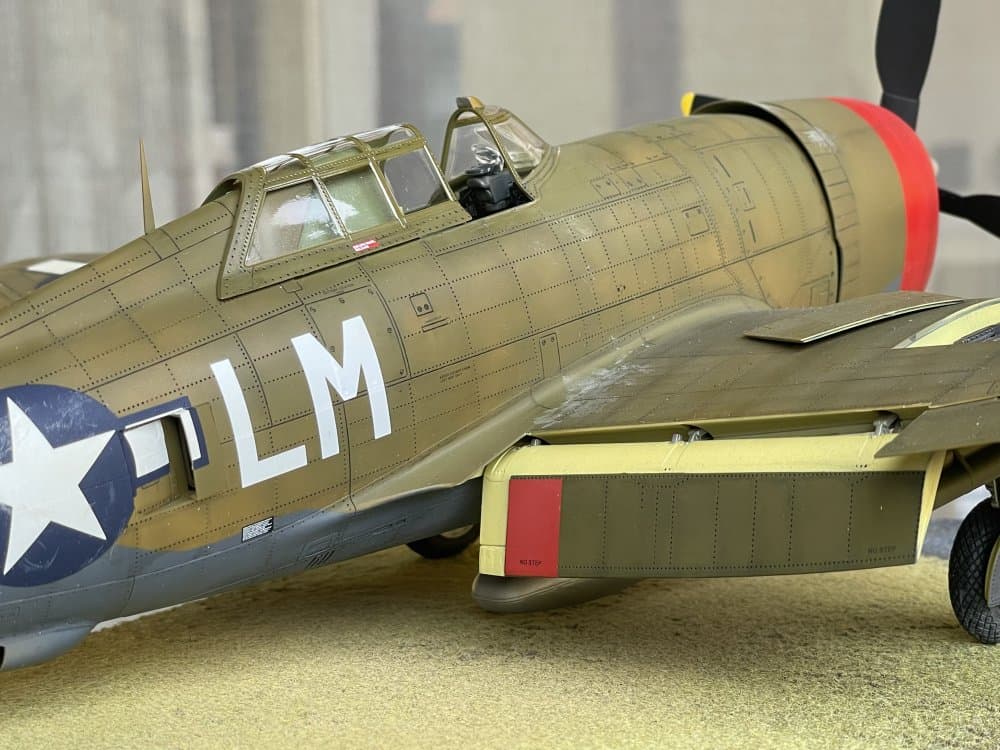
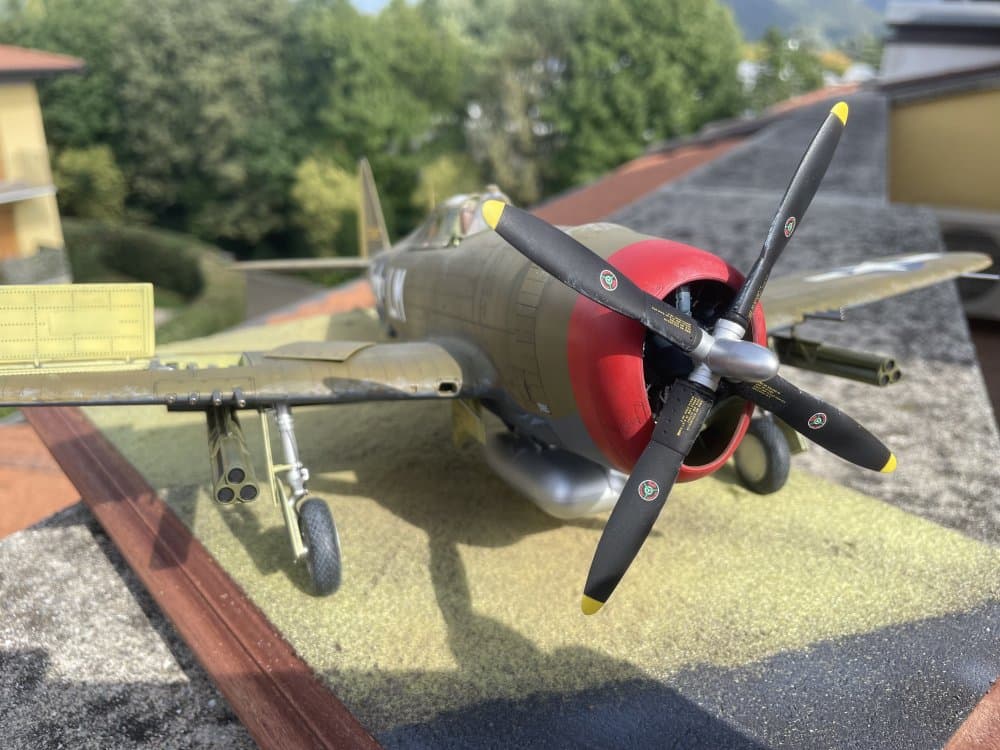
I mention here, for example, that the instructions do not distinguish which pieces to mount and which not in reference to the different versions of the aircraft. The circular antenna on the dorsal spine is given generically as an alternative but it is not said that this aircraft did not have it at all. Again, the underwing pylons are given as ready to assemble but in real life they were implemented starting from the D-15-RE and D-15-RE versions. The decals are insufficient, the national insignia are very fragile, incorrect correspondences between the decal number on the instruction booklet and the decal on its sheet. Inaccurate stencils. The right side/lower/upper views of the subject I represented are completely missing from the painting instructions. The color of the colored band on the engine cowling is given as yellow even if in the historical photo I published it is clearly red (to be honest the same error occur on the Techmod sheet). There are other things to say but I will skip them so as not to go on too long. I only ask: is it so difficult for the manufacturers to provide detailed and historically truthful instructions?

In short. a good research work really helps a lot to avoid historical inaccuracies in the correct representation of the model.

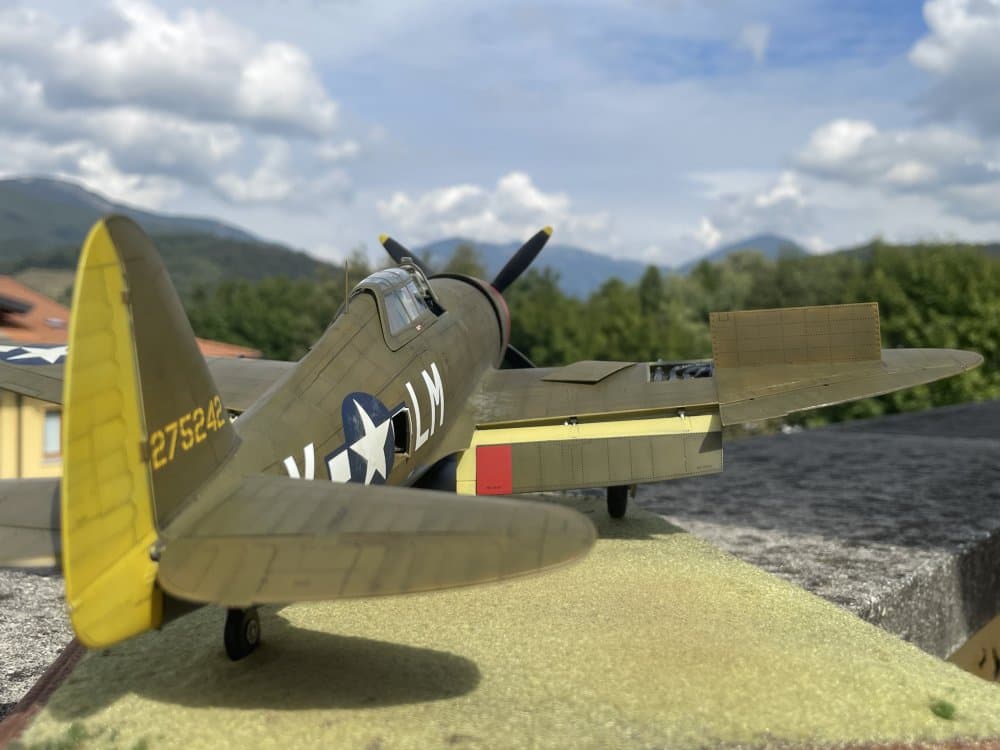
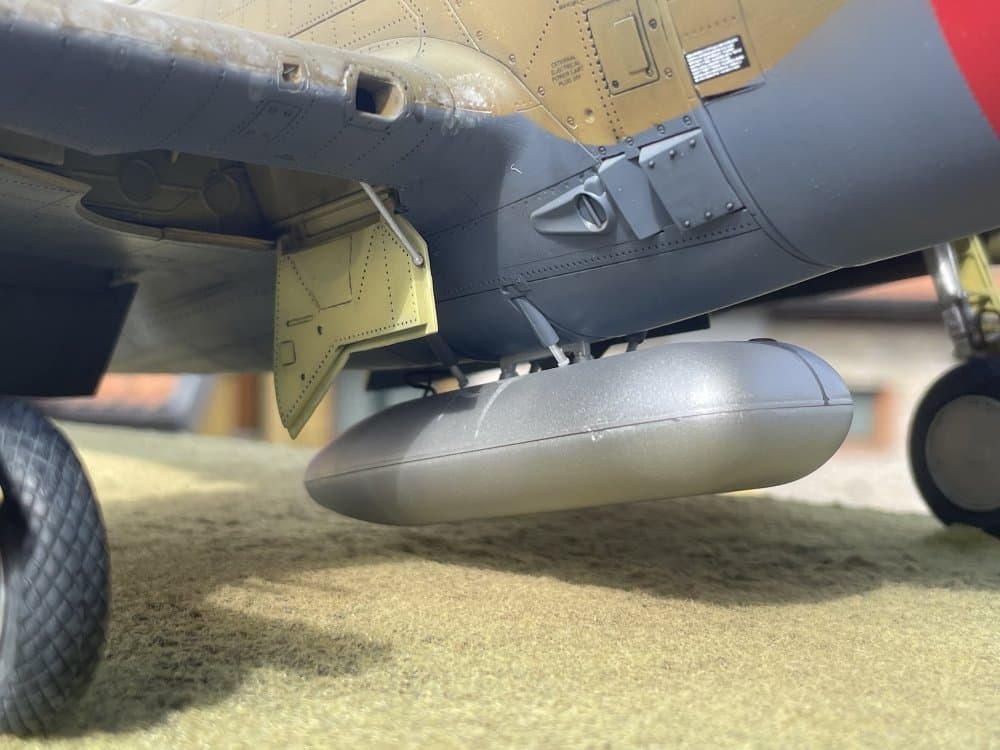
I preferred to represent the aircraft in its ground attack role but, guys, the only doubt that I have left, on this topic, concerns the rocket launchers. I have not been able to find certain information about the presence of this ordnance on aircrafts of this block. I seem to have understood that in any case, once implemented, they could also be mounted on previous versions of the P47. Is that real? Anyone can give me an accurate information?

That’s really all.

Dan

10 Likes

Dan, this a great and inspirational piece. Looks like your research has paid off. I too have a Trumpeter kit but also have the Hasegawa kit also. Hope to build one of them in near future.

Btw, I love the markings you decorated it with as the Donald Duck nose art is very cool. :wink:

So, what’s next on the work bench?

Mike

I am completing a little Mitsubishi Zero 1/72 scale to make a gift for a friend of mine who admires WWII aircraft but is not a modeler.
My next real job, and it will be a very very demanding job, is a De Havilland Mosquito, again in 1/32 scale, from the Tamiya kit.
Cheers
Dan

2 Likes

Looking forward to see your next project !
Superb work on the P-47 !!!

Thank you Nito.
I’d like to post some of my previous finished models too, beyond the next WIP of the Mosquito.
Only a matter of time :smile:
Cheers
Dan

1 Like

Really nice rendition of a really nice plane. Too bad all of that fabulous induction system is no longer visible. A modeler’s connundrum.

Thanks Builder, Your comment is greatly appreciated.
And yes, a demanding and beautiful final effect work that goes to hide inside the belly of the plane never to be seen again…
To tell the truth this kit gives the possibility to admire the inside of the front part of the plane since the hood is presented in transparent plastic. But I favored the final effect “operational plane” for my construction.
Cheers
Dan

Tamiya Mosquito is a heck of a kit. I have it also in the to build list. Way to many models and not enough time :rofl:

I am sure your friend will appreciate a 1/72 Zero from you. Anyway, know you can post and know how easy it is then we expect a full build my friend. We want the Italian touch :wink:

Thats a great build and a super finish on it. Looks superb with top detailing.

Thank you Johnny. Very kind of you

1 Like

I’m not a wingy thing builder but this really appeals to me. I especially like the open gun bays.

A very nice build. The only thing I would suggest is painting the tracer tips.
As for the kit itself (which you can’t help) that gun bay panel is a little iffy. Where do those Dzuz fasteners actually hold the panel in place? Trumpeter may have used some creative license here. I’m curious enough to do a little research myself…

Often the case with aircraft, and armor kits with interiors. In this case the only way to show off that nice work is some sort of maintenance scene - which if you’ve got the gun bays open sort of makes sense.

This is a great resource:
https://www.368thfightergroup.com/P-47-armament.html

Your comment is sincerely appreciated, especially since it comes from a modeler who doesn’t build “identified flying objects” :smile:

That’s a welcome suggestion. Thanks

in reality the piece proposed by Trumpeter seems to be realistic, verifying the photos of the time, for example this one

at a rough guess it looks like the door can be held in place in the way Trumpeter also replicated. However if you find any better indication I will be happy to take it into account.

Yes you are right. This time however I preferred to reproduce the closed nose. I have two other boxes of the P-47, there is a good chance that on the next one I will adopt a solution like the one you suggest. I am fascinated by the personal story of Colonel Gabresky who flew on the P47 (bubbletop). Sooner or later I will reproduce his plane with his story

:laughing:. Ha Ha… I’m not very confident about this but I hope that reincarnation exists because one life won’t be enough for me to build all my warehouse, but maybe not even two, let’s hope for 3 :wink:

Thank you Bravo, I had already consulted this site but in reality I had not found an answer to my doubt here either, but it is certainly possible that I did not notice what I was looking for. Any help on this topic will be welcome

It looks as if Trumpeter made a half-hearted attempt at the holes for the Dzuz fasteners on one side, and forgot the other side completely. As for the panel, I think it may be thicker than the kit piece portrays. It has bracing riveted to the back side, which explains all of the rivets on the panel. It’s hard to tell from your photo how thick Trumpeter made it. Is there detail on the back side? As you can see, the adjacent ammo access panel is quite thick.

Yes you are right, Trumpeter probably made the two panels of weapons and ammunition with insufficient thickness, even considering the scale. You’re also right about the holes for the fasteners. But as I often say in these circumstances: why does Tamiya cost three times more than Trumpeter (and many others) for the same subject and the same scale? Let’s ask ourselves some questions.
Cheers
Dan

I think a lot of the Chinese companies have to guess at certain things because they can’t actually get access to subjects. And I know for a fact they cannot find everything on the internet that we can.