@litespeed Thanks a lot! Posting build progress online and the resulting interaction with other modellers has been a huge part of the enjoyment of this hobby for me for the last 15 years or so, it does also help keeping a bit of pressure up in the projects, making sure that most of them eventually get finished  ! There is also a kind of diary element in it, in many ways the process is more interesting than the final result and I sometimes go back and look through an old build.
@agincajun The Devastator was always kind of a dream kit but I never got it! I have heard that it isn’t a simple build though…
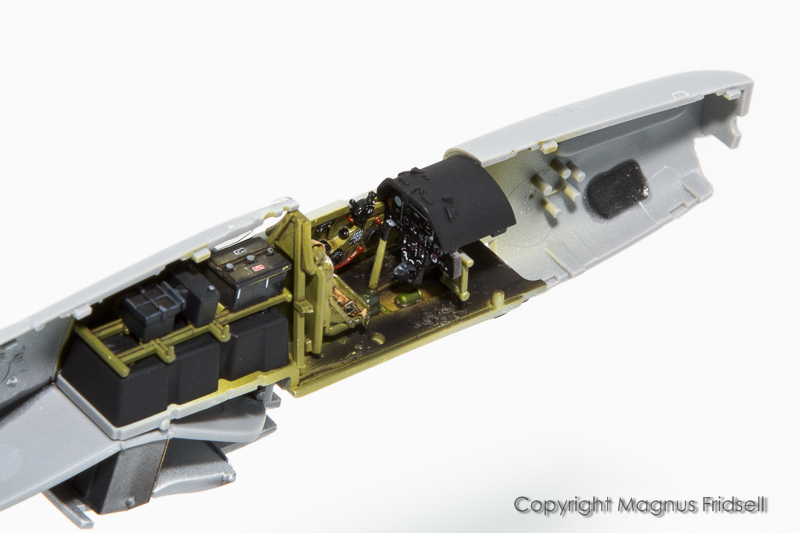
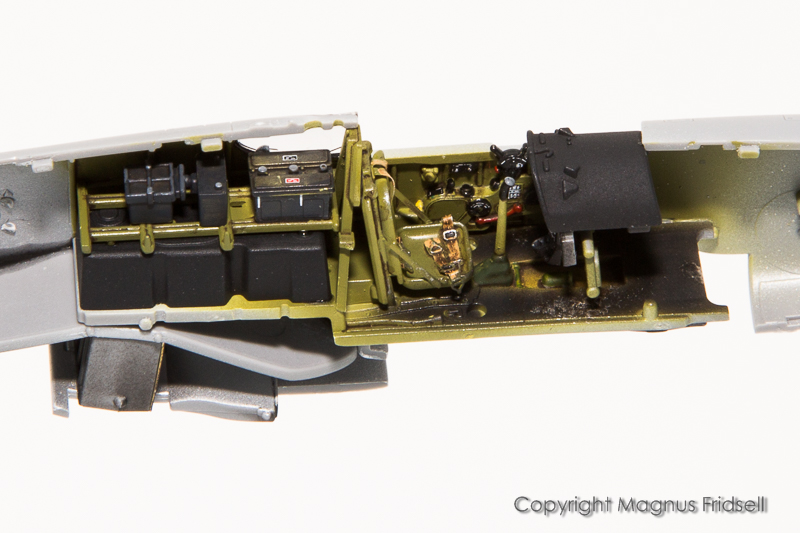
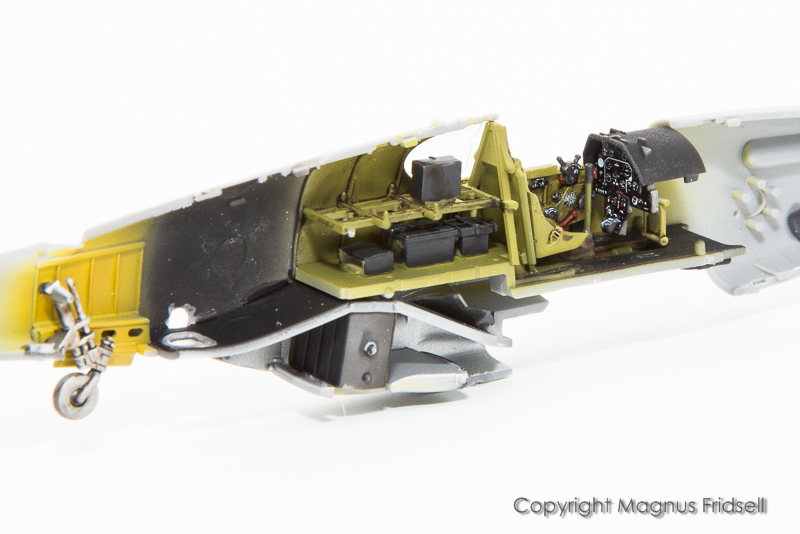
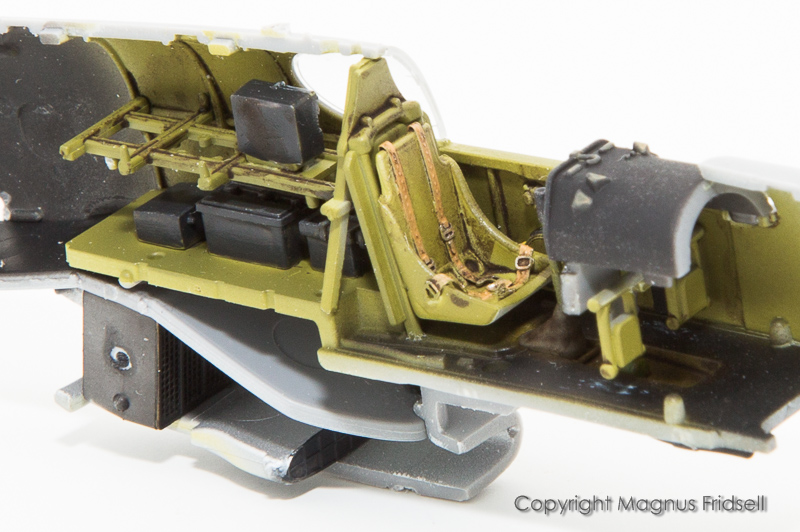
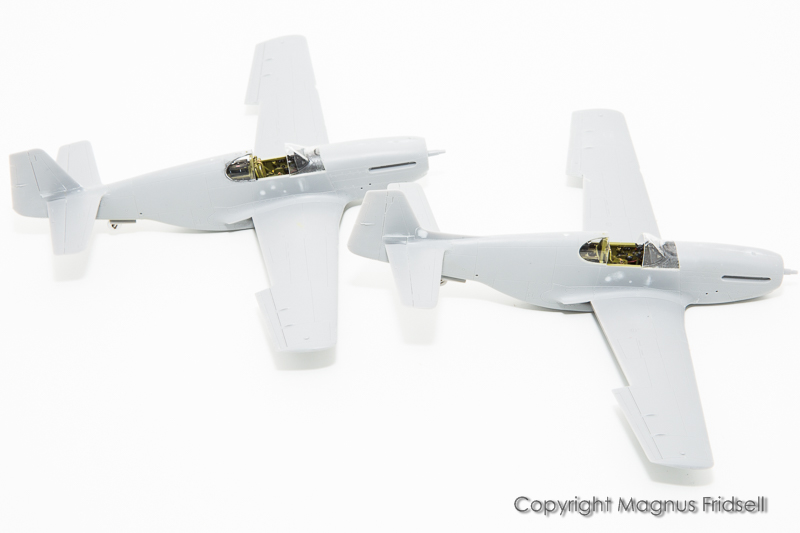
A last look into the cockpit before committing to glue…
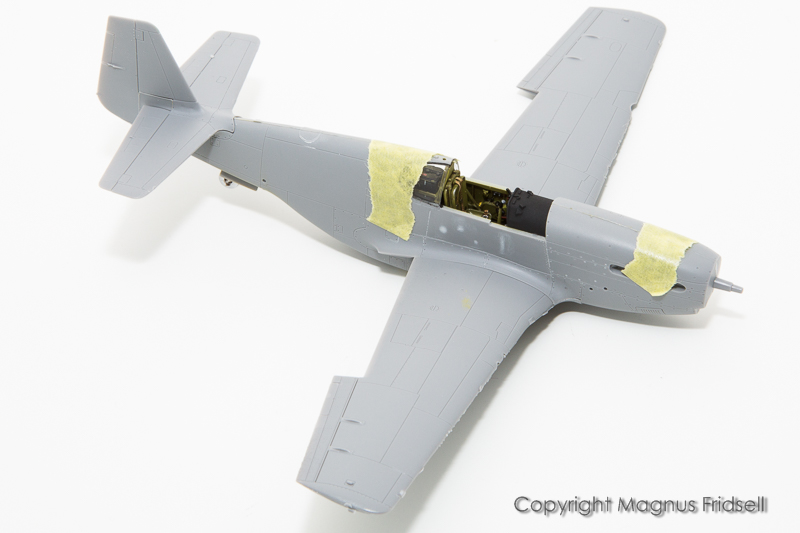
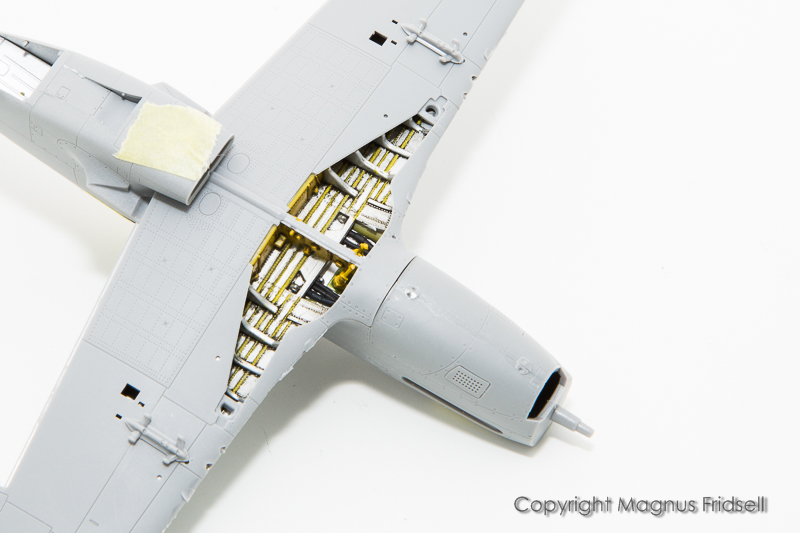
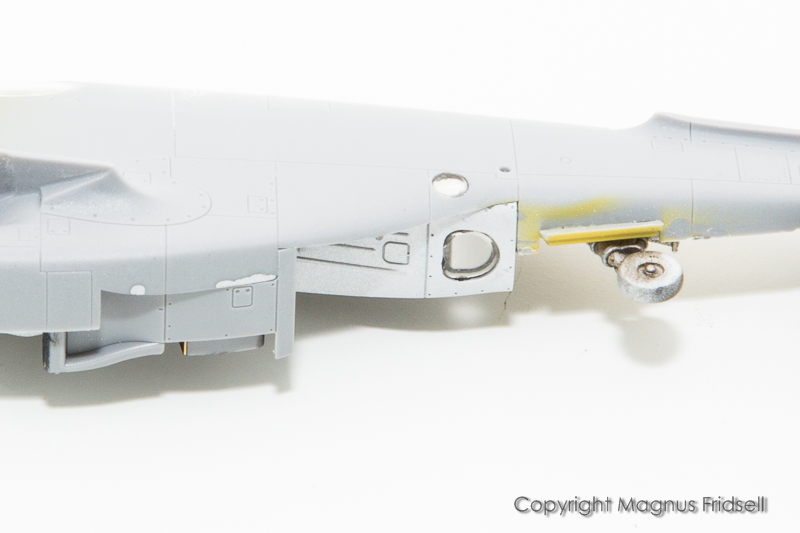
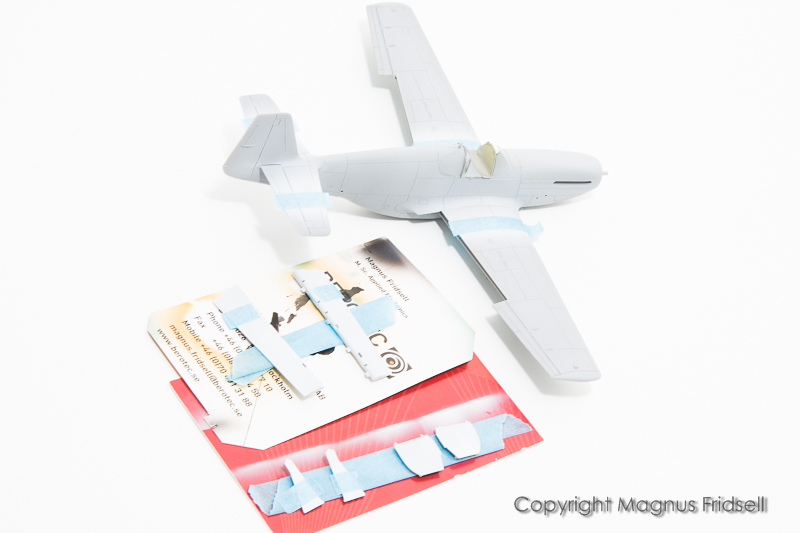
…and now I’ll leave this one well alone for a day or two in order for the seams to really settle, I’ll keep myself busy with prop, wheels and landing gear and I might even crack open the second Mustang. Wings and tailplanes are just snapped in place, I’ll do the sanding of the fuselage seam before gluing them in place You can see the filled-in sink marks on the fuselage side in this photo. Use only a thin layer of putty and leave it for a few days before sanding so it doesn’t go on shrinking after you’re finished!
Gear wells! The yellow zinc-chromate ribs were no fun painting, I painted them freehand and then added a wash in order to get a bit sharper borders around them. Not enough space around them to mask them properly so I have no better idea how to do it either…

Magnus
9 Likes
That’s what I also like about build blogs, no matter if it’s mine, yours or someone elses. I also go back in my blogs and have a look how I did this or that. And remember (and see) the mistakes I made … 
Seeing the pics of your wheel wells I was curious why you painted only the wing ribs and I got to looking into it, this is what I love most about this hobby I think, the volumes of information that most people would think is useless is intrigueing to me, for anyone that isn’t already knowledgeable about “zinc chromate” here’s an intresting link - http://www.ipmsstockholm.org/magazine/2004/01/stuff_eng_interior_colours_us.htm
. . . thanks for sharing your build Magnus, I’ve learned so much just from peripheral research following your progress.
Cajun 
Nice work on the landing gear bay.
After seeing the job of painting the wing ribs, I though of a possible solution: use a sharp blade, or engraver, to engrave a groove (like a panel line) each side of the ribs. That will give a positive trough for lining solution or oil washes to flow into for a really sharp delineation.


Friends! Thanks !
Back to the salt mines since a week ago and it immediately affected update frequency…
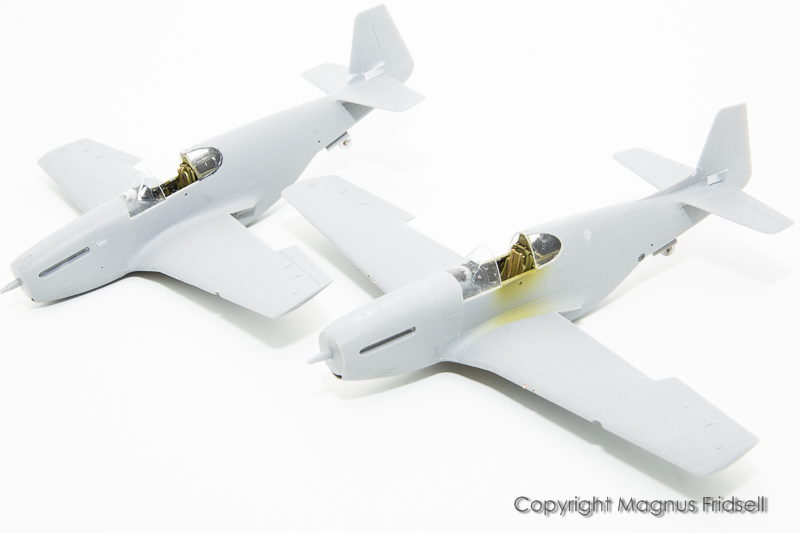
I’ve started the second kit I bought at the same time as the first one…
…and here you will see some of Arma’s attention to detail: this one has no fuselage tank and a different radio arrangement…
…and a different kind of seat!
Being a PR version, it of course has small windows for the cameras that need to be opened in the plastic. Not too difficult, indentations are prepared in the parts so with a drill and a file and some care it is easily done!
Magnus
6 Likes
Yes, Arma Hobby’s attention to detail and the variety of parts is very impressive Magnus 
Good work there, Magnus! So I guess your praise for Arma is about the same I have for Eduard. Both companies are european  At least something we can do better than
  …
…
@BlackWidow I get the impression that at least Arma manufactures their moulds in Europe, many companies (in general, not only model manufacturers) does the moulds in the Far East even if production of the plastic parts themselves are done in Europe after the tool is finished and tested.
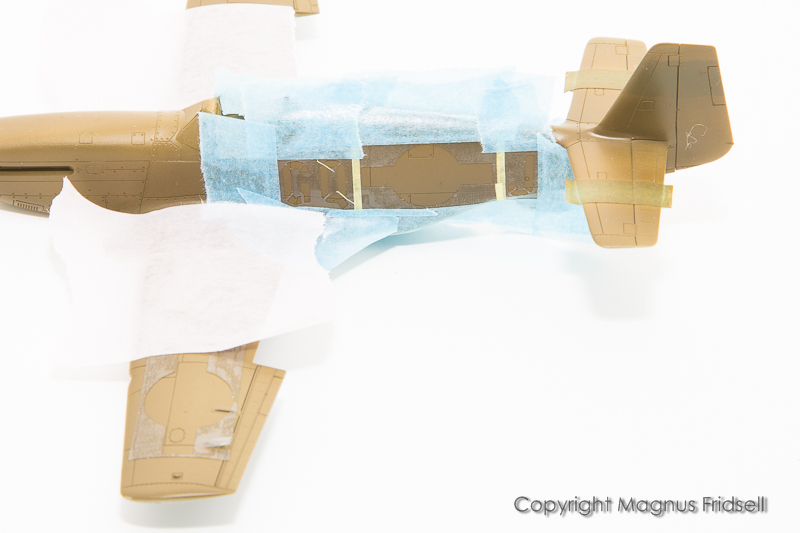
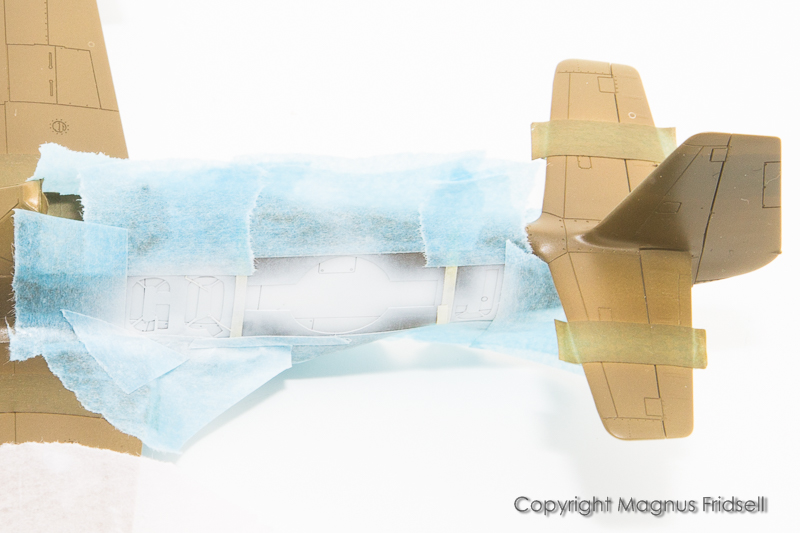
Only trouble spots, apart from the sink marks on the fuselage sides, are the fin-to-fuselage interfaces…
…no matter which tail you use the fit is a little “meh” but a tiny bit of filler will fix it!

Magnus
5 Likes
Have to admit, I’m a little jealous of these Magnus 
Thats good to know about the fit of the tail Magnus. Can see the dabs of filler on the fuselage sides too 
@Russelle I’m sure they will eventually find their way to Australia so you just have to be patient !
@litespeed I wish the tail parts had been designed differently (=in a more conventional way) but it was made this way to cater for tails both with and without the dorsal extension. A minor problem in what overall is an excellent kit!
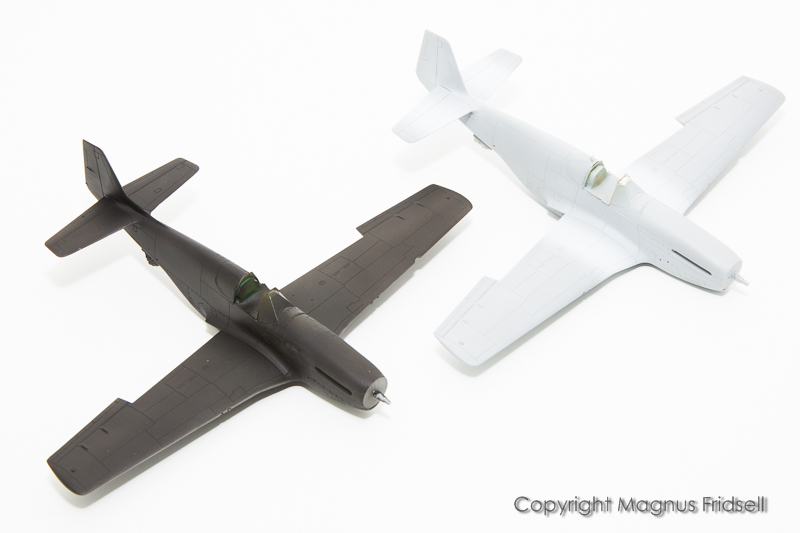
Boring update… Both in primer, the black one will get a coat of gloss black later tonight in preparation for the NMF!
Magnus
4 Likes
Things are moving forward this Sunday night!
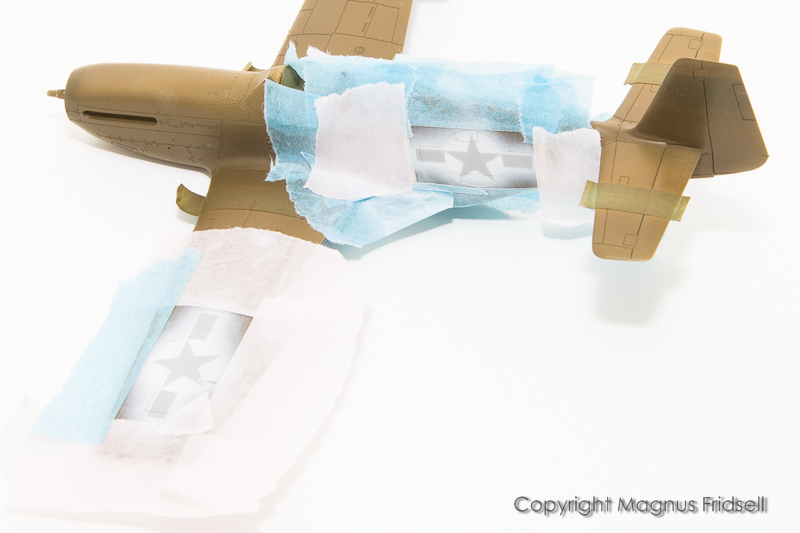
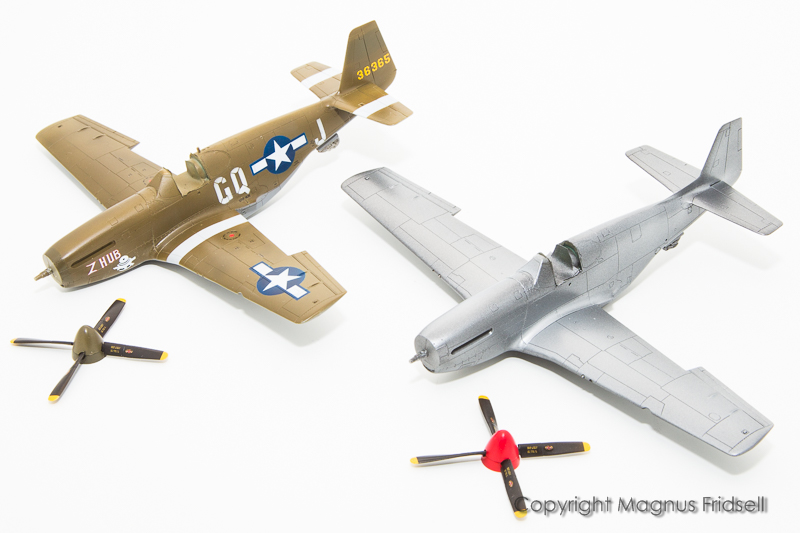
Masking for the white ID-bands…
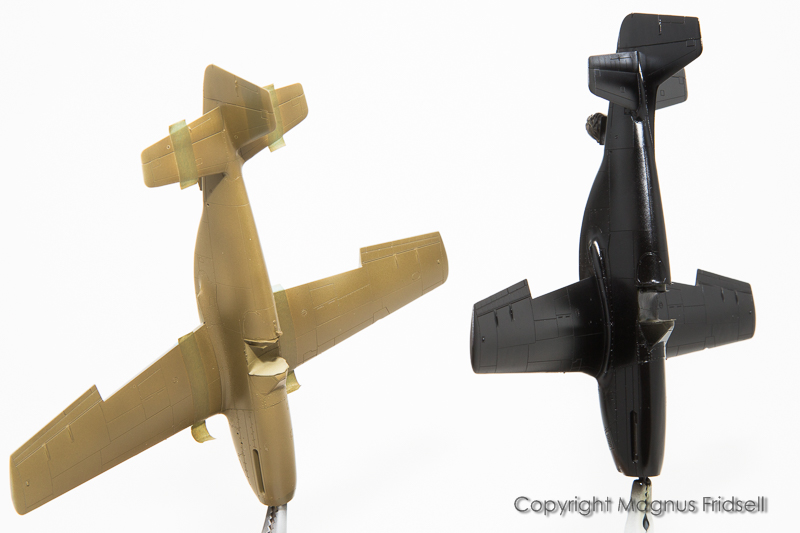
…and some paint for both machines! MrP “Super Gloss Black” and Gunze H52 “Olive Drab”. “Z Hub” had it’s fin band overpainted, I masked off the area and added some green to the OD in order to get a bit of contrast.
Time to let those harden for a day, I’ll do some decal work on the props next!
Magnus
7 Likes
I love the way you’re able to hold your planes by the “nose” Magnus and spray them in one session, as opposed to 2: one for the top; one for the bottom. 
I can never seem to master that without the plane wobbling and spinning around 

@Russelle I much prefer other ways of holding the models really, accidents have happened in the past!
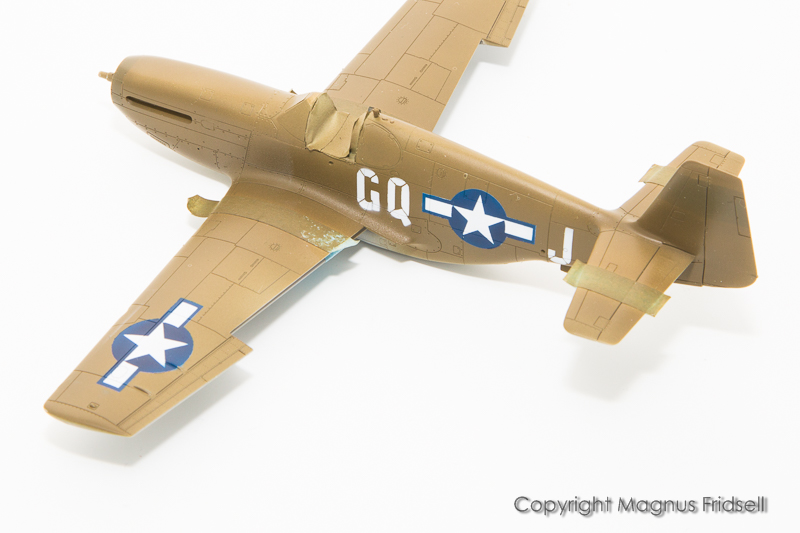
I’ve made masks for all the larger markings, the process of using them many of you’ve seen before but here we go again:
Magnus
6 Likes
Great work as always Magnus… those painted on markings are the best! 
I too had a couple of accidents with planes ‘flying’ off the cocktail stick they were mounted on during painting, and coming to grief in fiery ‘explosions’ of cursing 
Have you done a tutorial on how you make the masks for those markings somewhere? I’d really like to try that. I’m not sure what to do about all those tiny stencils all over planes - I guess I’m stuck with decals for those.
Oh, your build looks terrific!
Looks terrific Magnus, great admirer of your painted markings
@phil2015 The markings are cut using a Silhouette Cameo II cutter, it’s reminiscent of an old style pen plotter but with a knife instead, so I don’t cut them by hand. When it comes to creating the designs, they have to be drawn some way or another, I use a combo of my everyday CAD-software (Creo) and the Silhouette Studio-software that comes with the cutter and is used for preparing the designs for cutting. And you’re quite right, for stencilling we’re stuck with decals, the cutter works best for the major designs!
After a morning at the work bench, all decals are on…
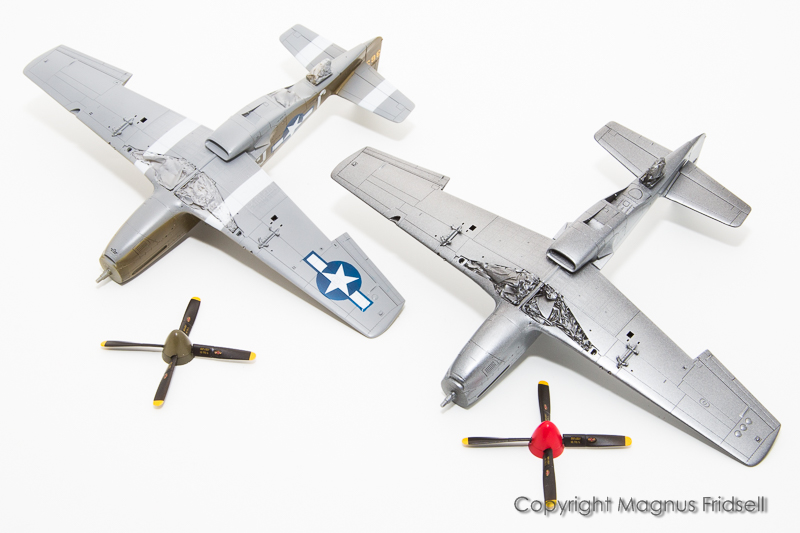
…and I have also made a start on the natural metal photo-Mustang. I bought some MrP metallics since my old supply of Vallejo had gone bad in their bottles. They spray easily but coverage is very bad and a black base might have been a wrong decision… It looks a lot better in these photos than in reality where it is very dark and really not very metallic-looking at all… Oh well, I’ll have to figure something out!
Magnus
7 Likes
hmm… now that would indicate that you’re a product designer Magnus…? If that’s the case, then our “styrene brothers by different mothers” score card gets another tick! 
Meanwhile good luck with sorting the PR Mustang! 