P-51 B/C Mustang 1/72 Arma Hobby

Finally it’s here, the Arma Hobby P-51 B! It turned up right before the New Year but a family holiday came between and I got to start it a few days later after returning home.

I have avoided checking the reviews already online until now in order to be able to enjoy the parts on their own merits. Brettt Green has done both an unboxing-video and a written review, the last one released very suitably on Christmas Eve :slight_smile: !

Even if many of you have already checked out the other reviews, here’s my take on it:

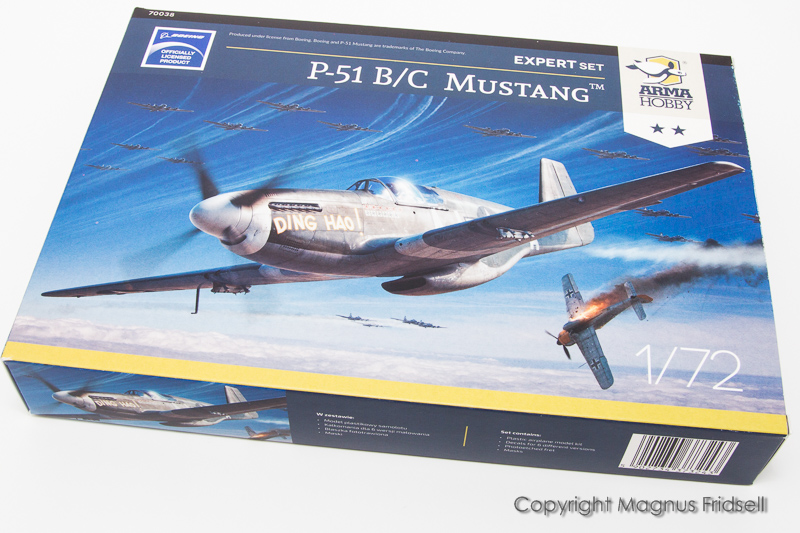
Box art. As usual with Arma a good looking one!


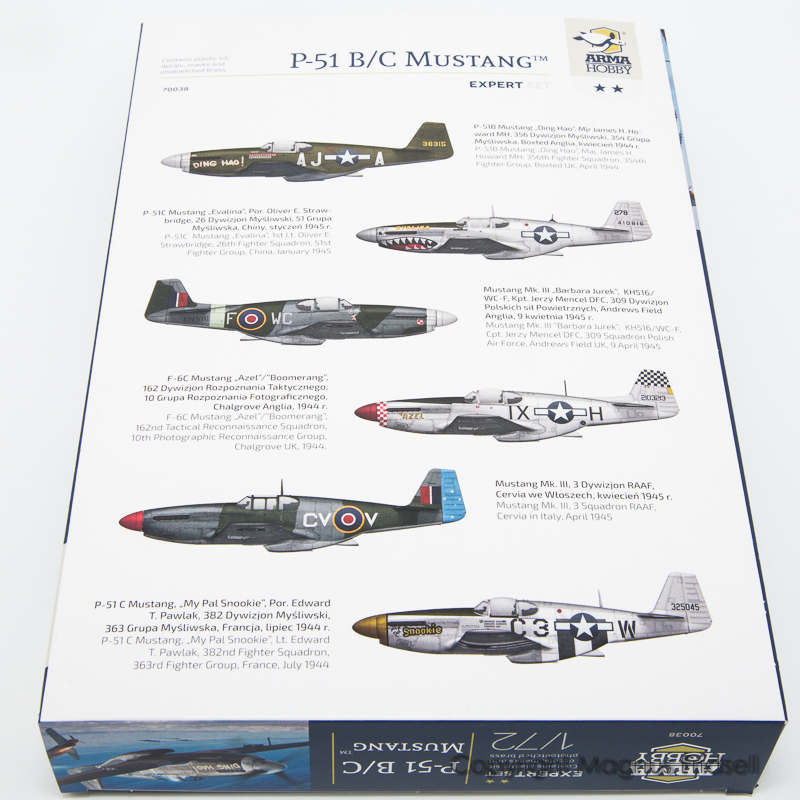
A nice mix of alternatives, covering both the P-51 B/C and the photo reconnaissance variant F-6C. There is also some bonus markings in the form of the second from top but in Japanese hands, test flown with Hinomarus and all!

All parts come on two sprues…

…a big one with the main parts of the aircraft…


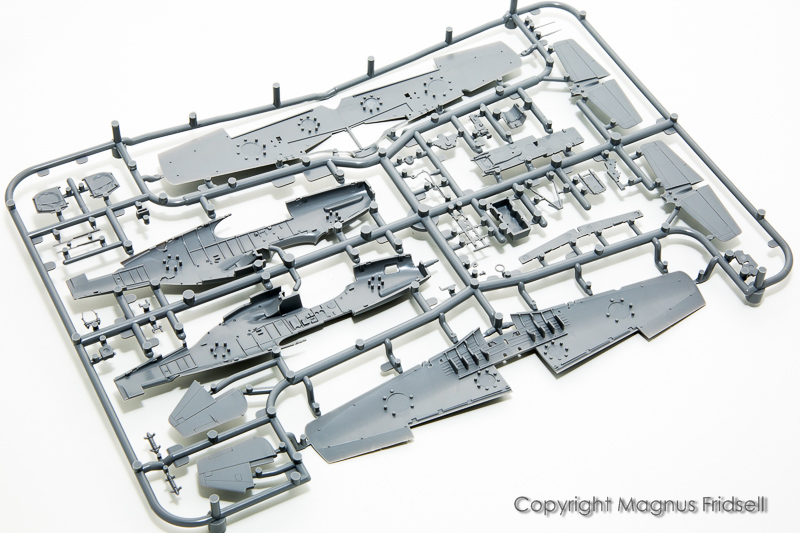
…this shows the other side of that sprue…


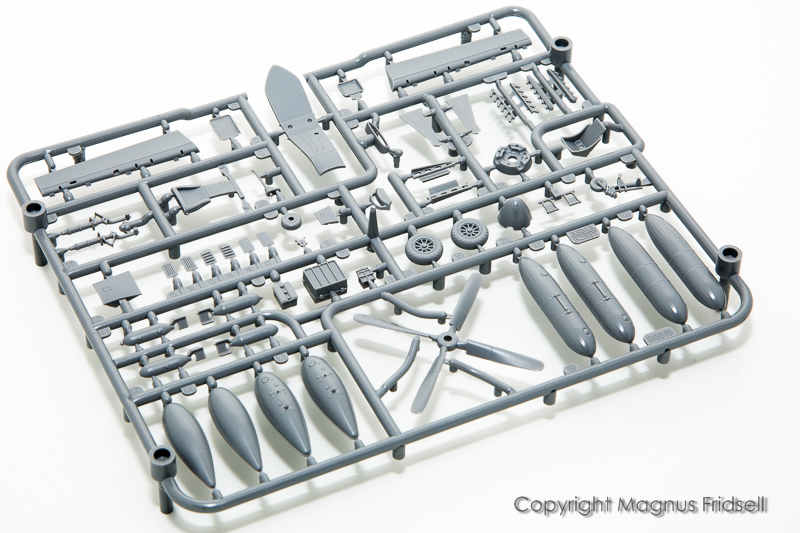
…and a smaller one with different variants av drop tanks, bombs and a bunch of details that ended up here I suspect because they are common to the P-51 D/K… It was written (more or less in passing) in the latest newsletter that we can expect a D/K later in 2022 :grin: !


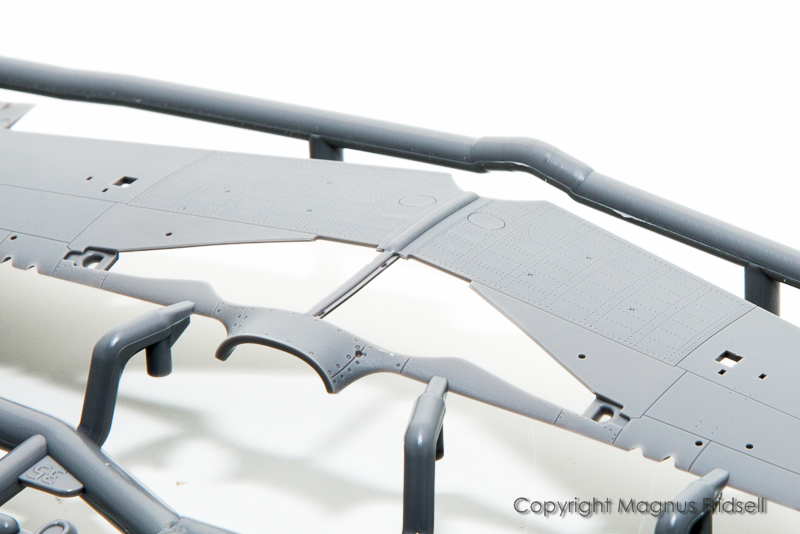
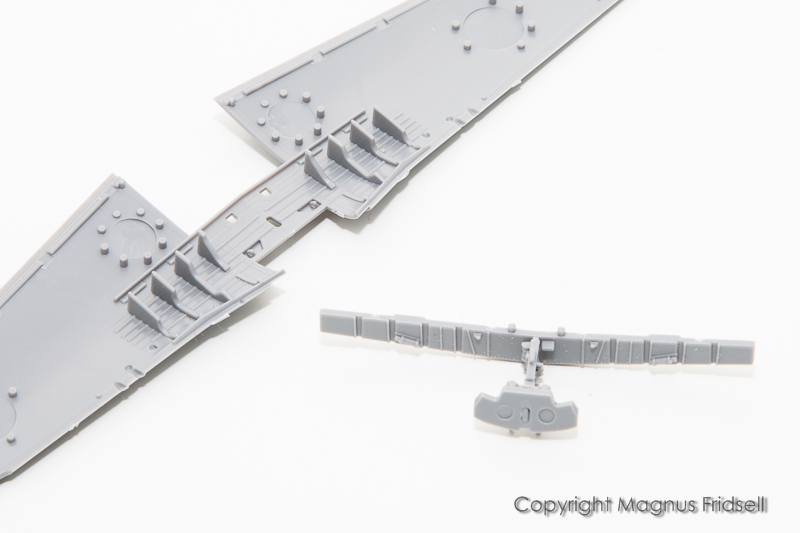
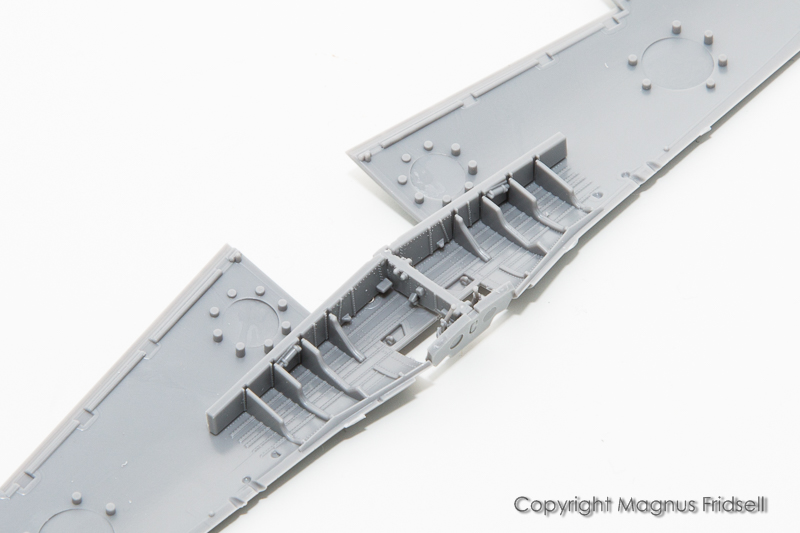
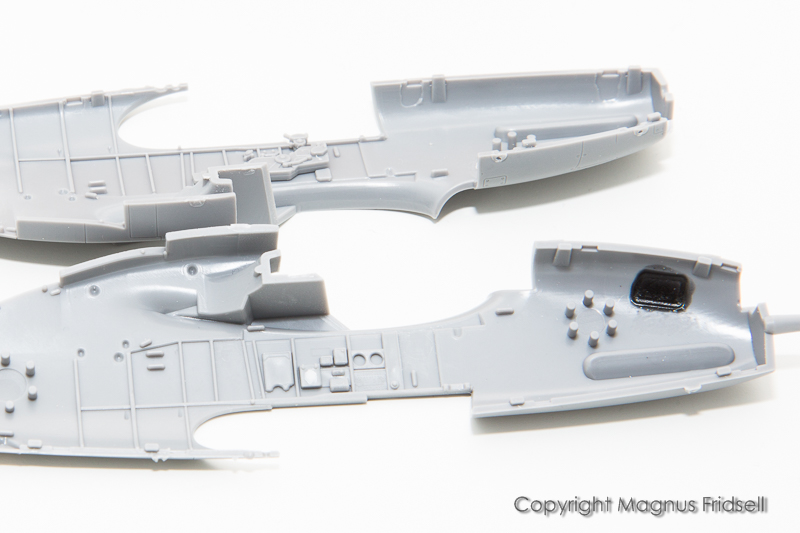
This shows the level of surface detail, not bad at all! Hard to tell from the photos but there is even a hint of oil canning in the panels, a really nice touch.


And this is the rest of the stuff from the box: a big decal sheet, clear parts for both the ordinary “birdcage” canopy and two different blown Malcolm-canopies (one each for closed vs. open position), a small fret of PE and a sheet of masks, oddly enough cut from masking film as opposed to the usual yellow tape! If I understand it correctly, these masks are a temporary solution in order to be able to ship the kits before Christmas, later on there will be tape masks (which I greatly prefer) as usual. I am however sure that these will work just fine as well!


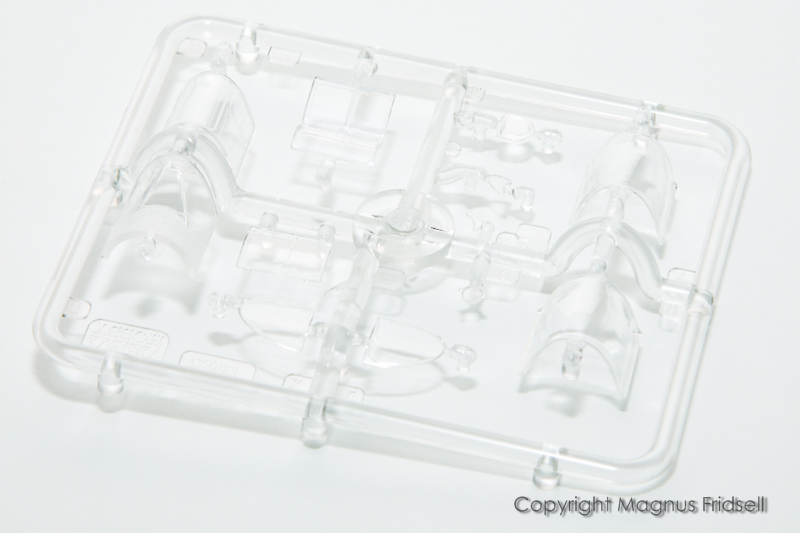
Close-ups of clear parts are difficult but anyway, here they are! They are good but not Hasegawa-level, especially the blown canopies aren’t as optically clear as I would have wished. I will probably find a substitute in an old set of Falcon canopies when I come to building one of these!

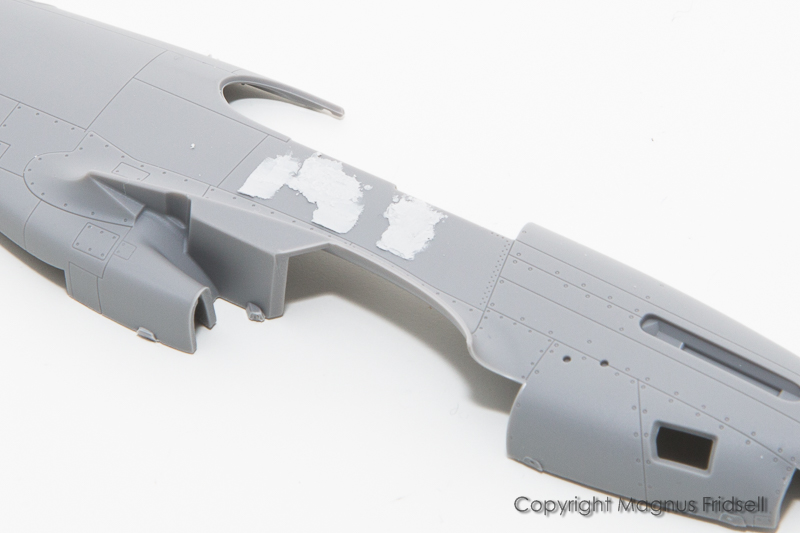
It seems like ALL P-51 B variants known to living man are covered. There are different lower nose panels, different fins (I had no idea that some B/C-Mustangs came with the dorsal fin, I thought it was for only the D/K in order to compensate for the loss of keel area when the rear fuselage was cut down) and also two different kinds of seats (another first for me :slight_smile: ). Finally there are three (OMG) different radio arrangements (yes, it is true) and of course the photo reconnaissance specific parts…

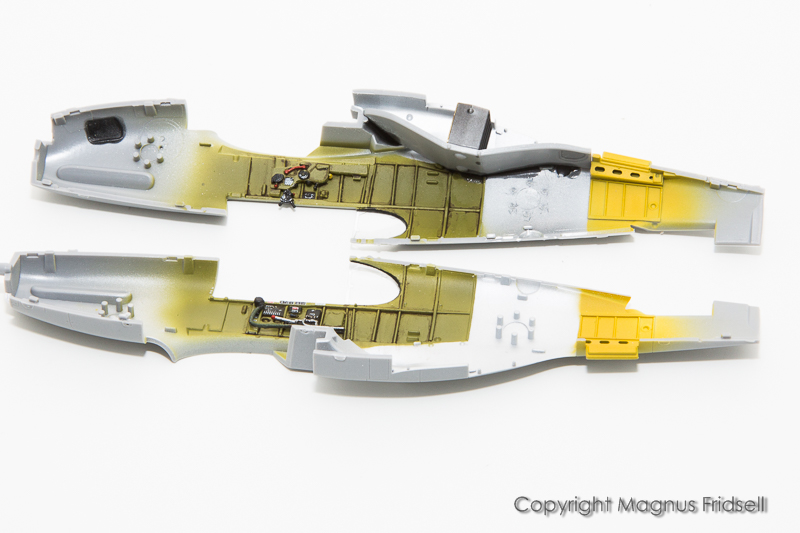
I have just started but have already realised that the model isn’t that complex, the instructions are however! I know it is against all modelling principles but it is worth studying the instructions and making notes of where to drill and what parts to use or not for your specific choice of subject!


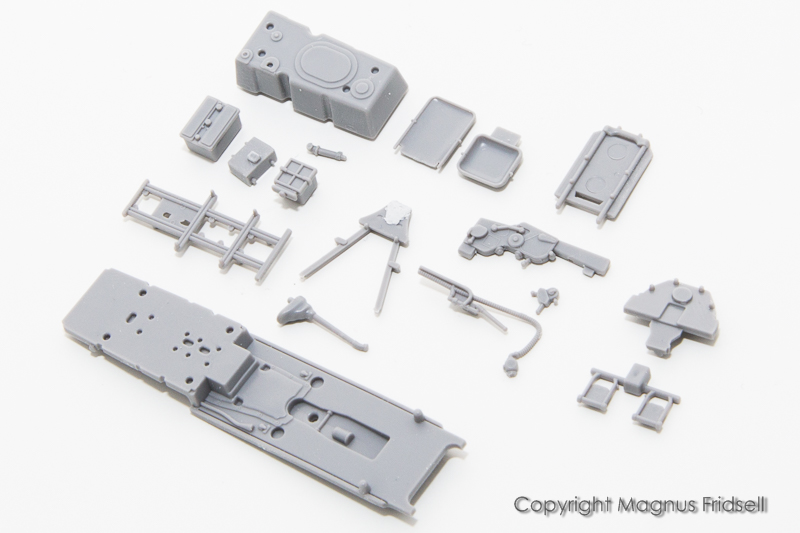
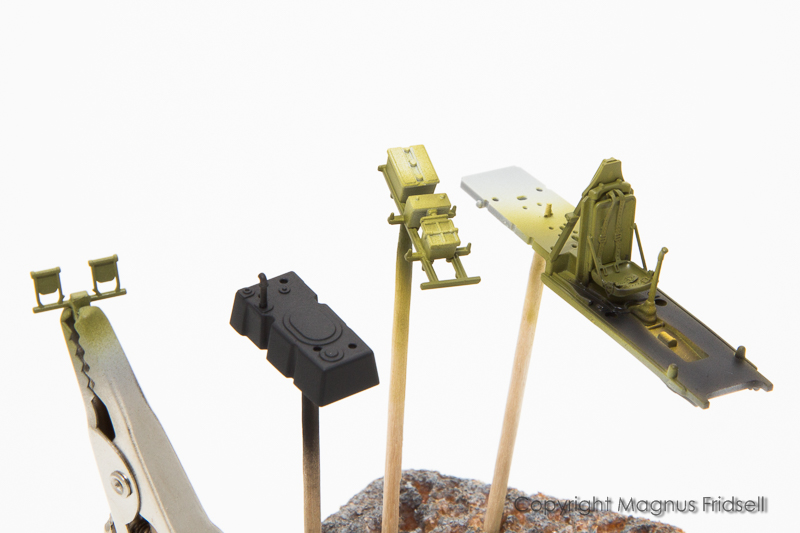
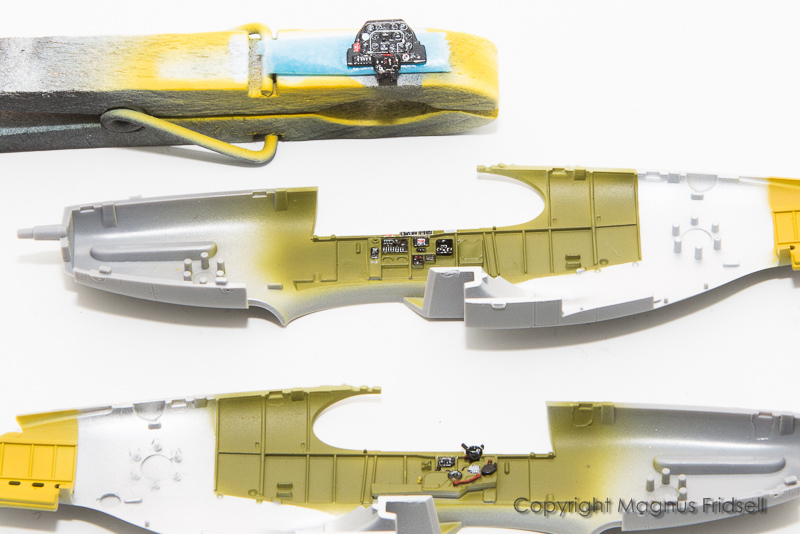
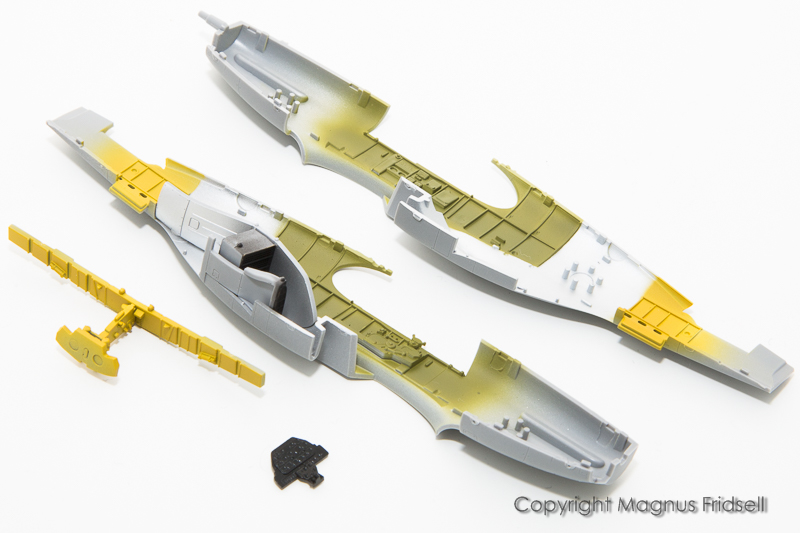
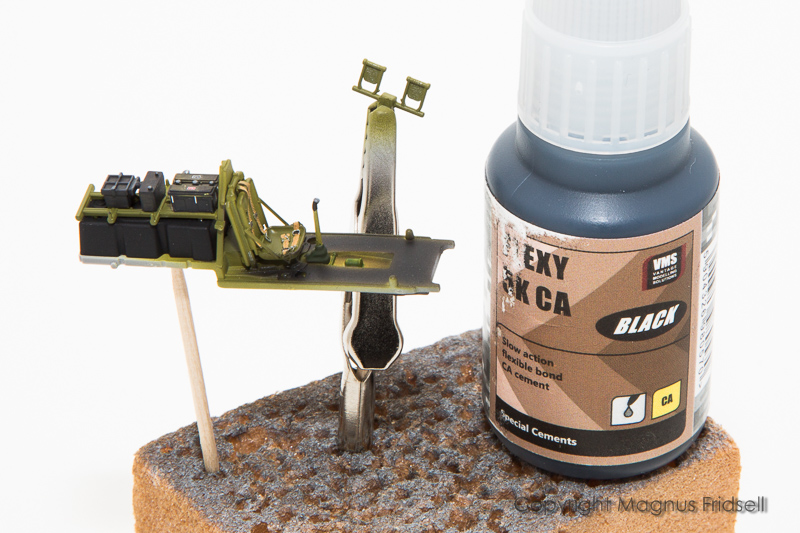
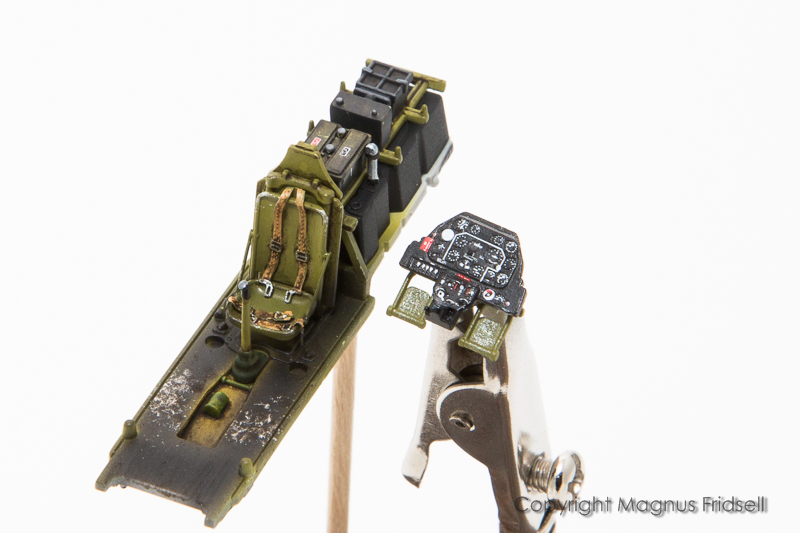
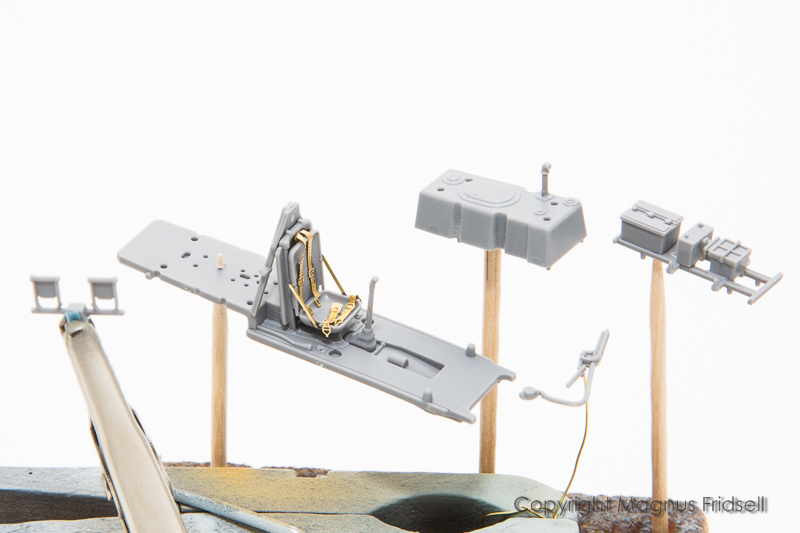
One final photo right now, this is what goes into the cockpit and behind the seat, this is what I call a bunch of stuff! I’m sorry that I have turned the instrument panel upside down, there will be more photos of it later on!

This is what I call a good start to 2022! And I promise, I will return to my Messerschmitts in due time!

:raising_hand_man:

Magnus

11 Likes

Nothing like a great-looking kit that practically falls together! :hugs: No big hurry for this one so I’ll order from my LHS. :smile_cat: Thanks for the review! :+1:
:grinning: :canada:

Looking forward to your Mustang build Magnus :smiley:

Would be nice to see them do a 1/48 scale version.

@Biggles50 You won’t be disappointed, I promise!

@litespeed Thanks for keeping me company!

@totalize I doubt there will be a 1/48 version since Tamiya is the one to beat. On the other hand, stranger things have happened so let’s hope for it :slight_smile: !

I’ve decided upon which aircraft to build! There is (as we all know) a strictly enforced rule saying that if you buy an Arma Hobby P-51B the first model you build MUST be of an RAF subject with a Polish chessboard on it. However, Arma has one of these for release in February with the exact subject I was planning in the box art so I will take the risk of an unpleasant visit from the Mustang Police Force and do something else instead!

Several hundred aircraft of all involved nationalities ended up in Sweden during WWII. A few were refugees or defectors but most got here due to enemy action, for technical reasons or simply for old fashioned lack of fuel.

The first of quite a few Mustangs to arrive during the war landed on Rinkaby airfield in the south of Sweden on 13 May 1944, a P-51B-5-NA flown by Eldon E. Posey. It was later flown as a hack in the Swedish Air Force until SOC in November 1952 for lack of spares. This was the only B-Mustang to fly with the SwAF, the only other B that got a SwAF serial (originally “Hot Pants”) was only used for spares.

Forced Landing Collection has a superb page with period photos (even one in colour!) and two very nice profiles by Claes Sundin showing the aircraft in both US and Swedish service. There is also a scan of the protocol from the interrogation of the pilot. It’s in Swedish but the pilot is remarkably open with how the bomber escort works and also with his general thoughts about the war (it won’t be easy…). Finally he tells the fascinated Swedes about the D-Mustangs that have blown perspex canopies “lacking metal framework, just like the nose dome of a B-17G” :slight_smile: . After the interrogation protocol there is a flight test protocol from a very impressed Swedish pilot who likes the Mustang a lot, finding it easy and comfortable to fly.

Posey’s adventures didn’t end in Sweden, he was on his way back to England just a few weeks after the emergency landing. He continued flying until his luck ran out over the Ardennes in late 1944 where he was badly wounded. You can read the story here!

After the war he got a Ph.D. in mathematics and actually became a maths professor, not bad for an old fighter pilot! He lived until 2008, passing away at the age of 87.

Decals come from Moose Republic Decals. Robert Bergwall does well researched and well printed decals for Swedish subjects and I can highly recommend them!


There are a few sink marks on one of the fuselage halves as well as on the landing gear doors…


…there is also a slightly tricky one on one of the boxes in the cockpit but with careful handling of the putty it can be fixed! I also reinforced the panel below the nose with black CA from the inside, I used very sparse amounts of liquid glue when fixing it in order not to mess up the edges around it and I don’t want it to pop into the fuselage when everything is closed up later on! Side console and throttle quadrant added to the far fuselage half while I wait to attach the oxygen connection on the near one in order to simplify decal attachment. There are decals in the cockpit, loads of them…


Some sub-assemblies before priming!

:raising_hand_man:

Magnus

6 Likes

Nice start. I think a 1/48 P-51B/C would give the Tamiya kit a run for it’s money if the engineering on this one is as good. Detail is nice on the Arma kit. We really need a 1/32 P-51B/C to replace the ancient Trumpeter kit.

There’s a couple of things Arma has over Flyhawk (Flyhawk’s 1/72 Dauntless); decals for the instrument panel; and included PE. Flyhawk, like Arma, is easy to assemble with well-defined surface detail. Instrument panels are excellent with gauges and needles, which needs careful dry-brushing, to bring out, but would definitely benefit from decals; and the absence of any of Flyhawk’s well-known PE is also a bit of a disappointment (no seatbelts!). However, since this is Flyhawk’s first attempt at aircraft I hope they realize the improvements.
:grinning: :canada:

1 Like

Thanks for the additional info Magnus. The images of ‘Hot Pants’ are very interesting. The fastners on the nose and fuselage really stand out :smiley:

@totalize We started with a request for 1/48, now we’ve graduated to 1/32 :grin: ! It’s all about trends and making money so some time, now or later, there will for sure be a new 1/32 as well! Since I’m well and truly stuck in small-scale, I am thankful for the fact that there are so many new and very good 1/72 models released now. 20-25 years ago it was all about 1/48, then there was a flurry of 1/32, the only things that happened in my scale during that time were short-runs… Not that I really minded but there is something special about cracking open a box of new, high-spec, plastic, wondering how far they have pushed the limits this time :slight_smile: !

@Biggles50 Have you actually seen that Dauntless? Sounds like something for me, I have a Hasegawa in the stash since more than 15 years ago but haven’t gotten around to it yet. Regarding the seatbelts, I would go for a set of Fine Molds plastic ones if there weren’t any in the kit!

@litespeed I have also been thinking about the fasteners, they really stand out on that green paint job. It wasn’t like a car engine where you open the hood once a year checking the oil, those covers have obviously been on and off MANY times! On many photos of natural metal Swedish Mustangs, they stand out like black dots. In that case I think it was an ageing thing, they turned dark over time. A wartime Mustang is seldom more than a few months old while we flew them in Sweden for almost a decade, the last ones leaving in 1954.

Before our usual project update, there is one further note regarding the model: some of the sprue gates are rather substantial and I would advise using care and a razor saw in order to not break the part or adjacent parts. This kind of statement from me is usually a candid way of admitting that I have done the mistake myself but this time all parts have actually survived :grin: !


More interior painting to do, have to get to work with the hairy stick on this one…


…and this is the result from an early morning at the workbench. I don’t like decals so better get them done as soon as possible. I have to admit to myself that the result looks good and is a lot better than what I possibly could paint. By far better…

The instructions are a bit ambiguous here, showing just two of the boxes painted black. ALL boxes should be painted black on this side of the fuselage, the decals going over the black and providing the details.


The wing/center spar and the forward wall of the gear wells come in three parts…


…that are to be glued together. I recommend fixturing them using the wing parts…


…leaving them overnight to set thoroughly. Don’t glue the spar to the wing, the beam and the wing inner surfaces are painted in different colours and if gluing at this stage you’ll get masking mayhem later on!


Pics are a bit out of sync but here you can see the freshly painted spar (zinc chromate yellow) and also the instrument panel right side up as I promised earlier :slight_smile: !

:raising_hand_man:

Magnus

9 Likes

Great choice, and thanks for the link! Keep 'em coming!

This looks like an exceptional kit Magnus and I expect you’ll have a splendid looking Razorback when it’s through, I’ve sort of deviated from the customary 35th scale armor and temporarily returned to my first modeling passion of WWII fighter planes, 1/72 isn’t my forte but I’m starting to appreciate the scale considering display concerns. I’m really anticipating your technique when you get to the fuselage join, this has always been my achilles heal on A/C models and it’s what dissuades me from tackling this genre. Looking great so far, I’ll be watching :grinning:

Cajun :crocodile:

I’m working on the Flyhawk Dauntless even as I speak! I ordered one as soon as they were available. It’s a fairly easy build, but I’m taking my time as I also have figures, tanks, and ships on the table! :exploding_head:
:grinning: :canada:

@agincajun Thanks for keeping me company! Regarding fuselage halves: make sure that they really meet (shave/sand away a bit from the cockpit parts or whatever mars the fit if necessary), clean them using a fine file or some sand paper from all traces of paint (I sometimes mask the edges before painting) and use a moderate amount of liquid glue to put them together. THEN: let the model rest for a few days so that all liquid glue gets to evaporate, a simple way to avoid “ghost seams” where the plastic shrinks due to the solvent. My ideas about the process that works for me :grin: !

@Biggles50 I’ll get myself one if I find one!


Cockpit more or less finished now, lots of detail! Much probably won’t be seen but it was fun doing it and I know it’s there :grin: !

A friend of mine pointed out that the lap belts are too far forward in the seat. They certainly are but I won’t be able to fix it due to the CA glue seen to the right in the photo. I can wholeheartedly recommend it, it works excellent with photoetch, being black it is easy to see where you apply it and the bond is slightly flexible avoiding the brittleness that I have always found is a drawback with CA glues. The only negative aspect is that it can’t be sanded, nothing prohibits keeping an old tube of ordinary CA for those cases though!

:raising_hand_man:

Magnus

5 Likes

@magnusf ; This is perhaps the best price, especially in USD. I got mine from the same shop - they are reputable. Flyhawk FH6001 1/72 SBD-3 Dauntless | eBay
:grinning: :canada:

@Biggles50 Thanks for the link!

And a tiny bit further…


A dark wash to help the shadows a bit and make it look a bit grimy. Sorry for the silver mess on the pedals, it didn’t turn out well at all. Below that flaky silver is a North American logo, faintly visible in the plastic, a really nice touch even if it is almost impossible to see it!


Fuselage halves. I’ve glued the tiny windows aft of the cockpit opening, always a worry but it went OK. I wish thought that Arma had come up with a better solution for it, maybe doing them with a bigger section of the fuselage. Oh well, we can’t always get it all, can we?

I’ll let this settle for a while and then it is time to close the fuselage!

:raising_hand_man:

Magnus

8 Likes

Cockpit looks great, Magnus! A lot better than my F-80 Cockpit, which looks quite rudimentary compared to this or my latest Spitfire Cockpit.

Torsten :wave:

Very nice Magnus. Do you normally work in 1/72 scale? If so what do you like about it as say compared to 1/48 scale. Sorry for all the questions but in general is 1/72 scale still the most popular scale for aircraft?

@BlackWidow The decals included in the kit are a large part of the result. The engraving of the instrument panel is rather shallow, a lot shallower than I would consider ideal for drybrushing but combined with the decals it turns out even better than the best pre-painted photoetch I’ve seen! I haven’t done any painting at all on it more than spraying it gloss black before applying the decal.

@totalize Just keep them coming :grin: ! I really have no idea what’s most popular in general (or rather, which scales sell the most) but I would say that for modellers posting on the Internet 1/48 and 1/32 seem to be very popular and have been for at least 25 years. In the early 1980s, when I started building models, I would say that the only company that was really devoted to 1/48 (with that I mean that the majority of their releases were in that scale) was Monogram - and what kits they made! Sadly, they were rare in Sweden but I’ve actually had a few of them, their P-38 even got built as a night fighter not too many years ago! Other companies also had a few in these larger scales but it wasn’t as if there was a steady stream of new releases. I think the “revolution” started with Hasegawa’s 109E-series where I think the first one was released in 1988, about the same time as Trimaster came on to the market and then the 48-race really was on :slight_smile: !

Regarding myself, I’m a small scale guy (1/72 and 1/144) out of habit and I can’t see that changing anytime soon :grin: ! I especially like the diversity of stuff available in 1/72 that still can’t be beat in the larger scales. On the other hand, I think everything I have done during the last decade is available in 1/48 as well so so much for the logic behind that thought…

:raising_hand_man:

Magnus

Such great cockpit detail Magnus :smiley: The value of modelers posting their build progress is incalculable. Highlighting areas in the construction were to be careful, even with bright, shiny, new release like this one. Thanks for the time and effort you put in recording your builds Magnus, its much appreciated :smiley:

1 Like

Yes indeed, their WWII carrier planes from the Pacific theater were the best when I was a youngster and truely cemented my enthusiam for the hobby, fond memories there!

Cajun :crocodile: