First time working with photo etched parts , so they are very small and when I snipped them out , (oh i already lost one ) I find them very difficult to grasp even in tweezers to hold onto them to file the metal cut pint off smooth…any suggestions ? should I get the photo etch bending tool?
I found that Blue-Tac was handy – a small blob over the part to be snipped off the fret prevented it pinging off, and then a small blob made into a cone shape was useful for picking up the part (with the pointy end) and holding it in position while the cyano dried. As for filing it I just tried to cut it “clean” with the sharpest scalpel, scoring it from both sides several times before using final pressure to cut it.
I use a PE bending tool (Hold and Fold) to hold the part down to file the edge nice and smooth.
Double sided tape is your friend. A piece of the clear scotch type on a piece tile or glass can be very helpful. As to a bending tool…definitely. It will make your life much easier.
Good Luck
Cheers,
Colin
I find it easier to sand the parts, rather than file. A 400 grit sanding stick is just as fast a file, but easier I find.
Tweezers flex too much which can can cause “tweezer launch” of small parts.
Invest in small flat nose pliers. They allow a firmer grip without flexing and can be used for bending small parts.
I use long nosed pliers made by Xuron (there are other brands as well)
Examples:
Short nose
Long nose
Other long nose
Looks like the one I use
Check the others in the left side menu panel.
Mine are 1.9 mm (slightly over 1/16th inch) wide at the end
For cleaning of the nubs left by the cutters, I use a ceramic knife sharpening stone. Files, no matter how fine, are still too coarse to do the job well.
![]()
I am with Robin, flat nose pliers are the best for holding photoetch while cleaning.
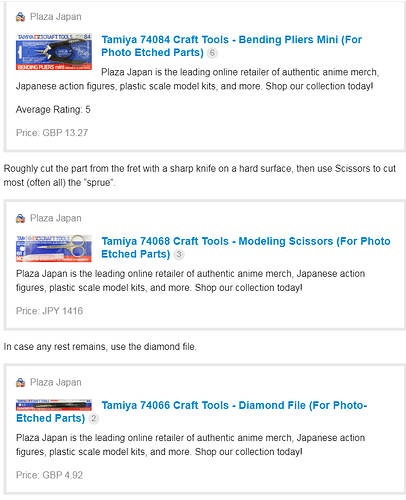
Personally, this combination of Tamiya tools works great for me:
Small nose pliers for holding or sometimes even folding the part:
Roughly cut the part from the fret with a sharp knife on a hard surface, then use Scissors to cut most (often all) the “sprue”.
In case any rest remains, use the diamond file.
Links are to the best Japanese shop I know, excellent prices & service, and reasonable shipping cost. (no affiliation other than being a happy and repeating customer).
To cut PE parts from the fret, I generally lay the fret flat on a piece of glass and cut through the attachment point using a straight-down “chop” or “guillotine” cut with a hobby knife. Since this will quickly dull or even break the tip of the blade, I don’t usually use an X-acto knife but rather one of the cheap “box cutter” type knives with the long blade that is advance while snapping off the old, used and dull portion (about the only hobby use I’ve found for these type knives).
To tool away the attachment burr, I hold the PE part as close to the burr with a pair of tweezers allowing just the edge of the part and the burr to stick out. The size of the tweezers depends on the size of the part (or the portion of the part with the burr). Holding the part close to the burr helps to prevent the PE part from bending or deforming as the burr is sanded away.
For the actual sanding, I almost always use a Flexi-File with a 320-grit strip. For some larger PE parts, I may use a small sanding block with 400-grip paper, but usually I do this with the Flexi-File which is quick, light and easy to see around as the burr is sanded away.
For very delicate PE parts, I may use a pair of fingernail clippers (“ultra micro flush-cut nippers” … LOL!) to nip the burr as close to the actual edge of the part before I do the final light dressing passes with the Flexi-File.
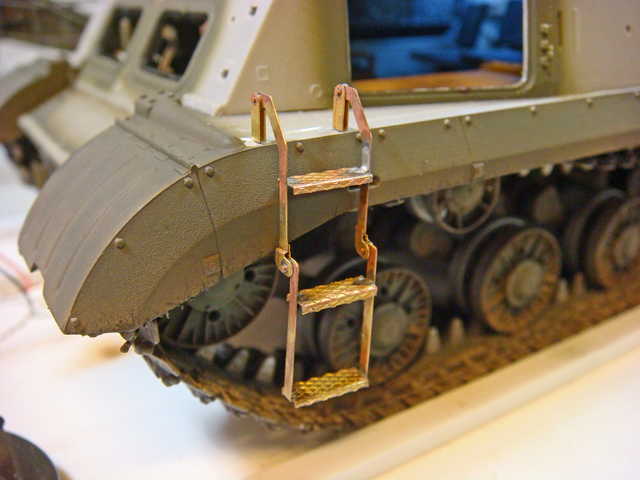
I recently used these methods to clean up the Voyager PE parts on these folding crew ladders on my SCUD missile launcher build.
Get the three Tamiya tools that Carlos @varanusk recommends. Also you can’t go wrong with the Xuron pliers that Robin @Uncle-Heavy recommends. I have all of them. Cut the PE with the scissors, hold it in the pliers, and remove the nub with the diamond file. Don’t use tweezers- you’re just asking for lost parts. Now that you have a clean part, you need to fold it. I strongly suggest a small, versatile folder that will be easy to use and take care of 90% of your folding needs. Hold N’ Fold has closed, so their “Bug” is no longer available. In it’s place, I highly recommend this DSPIAE folder:
That’s all you need and PE work will be a snap. Happy Origami!
Michael @SdAufKla, do you solder all your PE joints?
Cajun ![]()
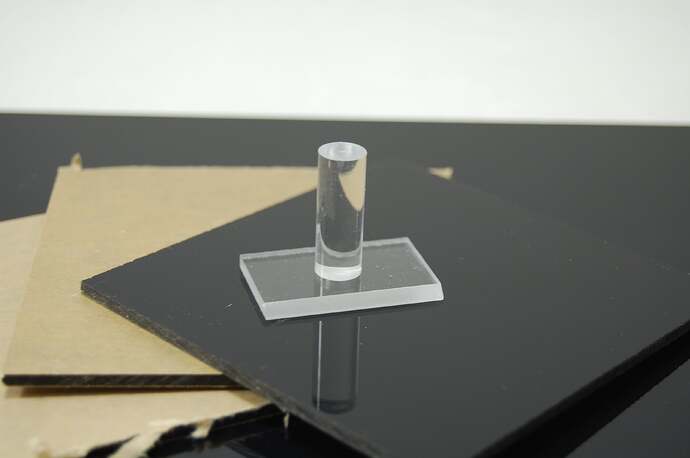
In addition to what’s been mentioned, I’ll add cutting on a small rectangle of acrylic tile won’t due the knife blade as quickly as cutting on glass. I have a glass desk top and switched to acrylic tile.
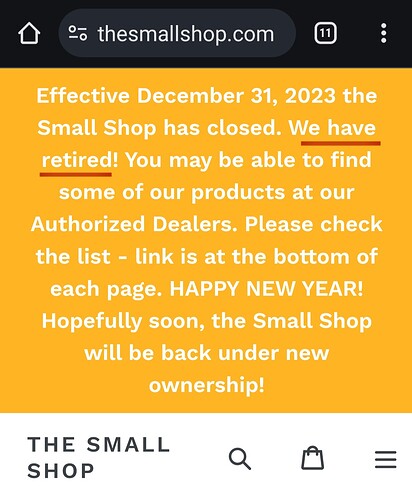
The Small Shop now out of business used to sell a PE trapper it works great.
However, reversed masking tape on acrylic title and smooth metal straight edge can be used to trap just as efficiently.
The Tamiya Diamond File works fantastic for removing burrs. I normally hold the PE part in flat nose pliers as mentioned above by various folks.
Good luck with adventures in PE.
I usually solder most PE joints.
I will very occasionally use an adhesive, but only if I think there will be little to no stress on the PE assembly later during follow up construction of finishing. Most often these adhesive joints are for light-duty assembly of things like rivets or bolt heads that are surface mounted to the other PE parts.
Solder has such a huge advantage in strength over any adhesive (for PE) that the effort is well worth it. These crew ladders would be almost impossible to handle if they were just glued together. Right now they’re single unit subassemblies that can be removed from the model (just test fitted in the photo). Even soldered together, though, my plan is to not add them until the model is either attached to the base or just before attaching it.
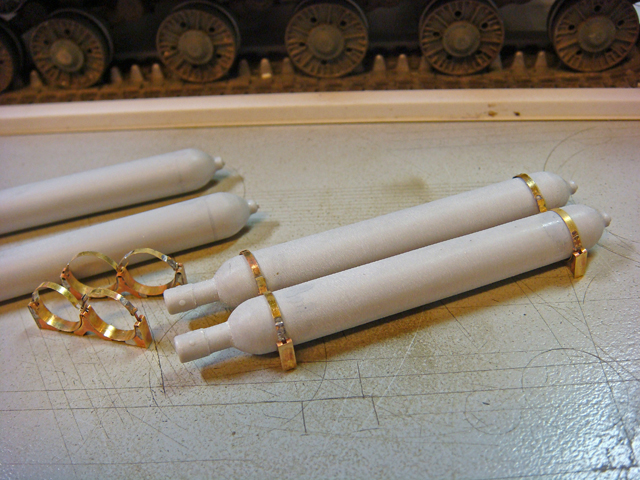
The compressed air bottle mounts will be added long before that, but the bottles will be kept loose until I’m ready to add their plumbing. The PE keeper straps will be glued into place over the bottles, though. So, a combination of solder for the basic assembly and an adhesive for final assembly.
I’ll show more of this and explain what I do on my SCUD build blog. For instance, the ladders and the bottle mounts will be glued to the model with CA. (Actually, the bottle mounts will be glued to .005" thick sheet styrene, and after the CA sets, the styrene will be trimmed and the parts glued to the model with regular styrene glue. This will allow me to adjust their fit and location with the air bottles.) After the glue joints set, I’ll use two-part epoxy putty to replicate weld beads around where the PE attaches to the model.
There are actually small, triangular gussets on the hinge mounts for the ladders I will attach by inserting the gussets into the epoxy putty weld beads after they’ve been added, but before they set. This method of adding the small gussets is an example of where I might use adhesives instead of solder.
Edit: I realized that I was talking about the compressed air bottle mounts and straps without showing any pictures (I had just uploaded them to my SCUD build thread…). Anyways, here are the PE bottle mounts and straps.
What? The small shop is no longer? Hmmm, I think I may have heard that, but I’m still saddened by it…
I guess I won’t recommend that anymore, but it is really awesome.
I know… I loved those guys. They had superlative customer service, too, along with great tools. I suspect that their hobby tools weren’t bringing in a huge slice of their profit, so the little “side show” business line was dropped. Very unfortunate, though, for us.
Hopefully their stuff will become available again, but as @SdAufKla pointed out, they had really great service also. It seems like high quality hobby things will get picked up by someone else who can do the production, but seldom in my experience does the service live up…
Heating the PE to about 400 degrees and then let it sit in the oven while it cools to room temp makes it a lot easier to bend.
The Small Shop Photo Etch Tools were best you could get .
I have the Bug , which is the perfect size for Aircraft Photo Etch .
A good quality pair of micro scissors works well for cutting Photo Etch from the the fret .
Annealing photo etch also makes it easier to work with . You just have to be careful not to burn it up .
