My order was entrusted to the state mail. it will arrive even later.
Also I guess I can expect my package to be rough-handled and kept in hot searing temperatures.
My order was entrusted to the state mail. it will arrive even later.
Also I guess I can expect my package to be rough-handled and kept in hot searing temperatures.
Forgive me for this other question:
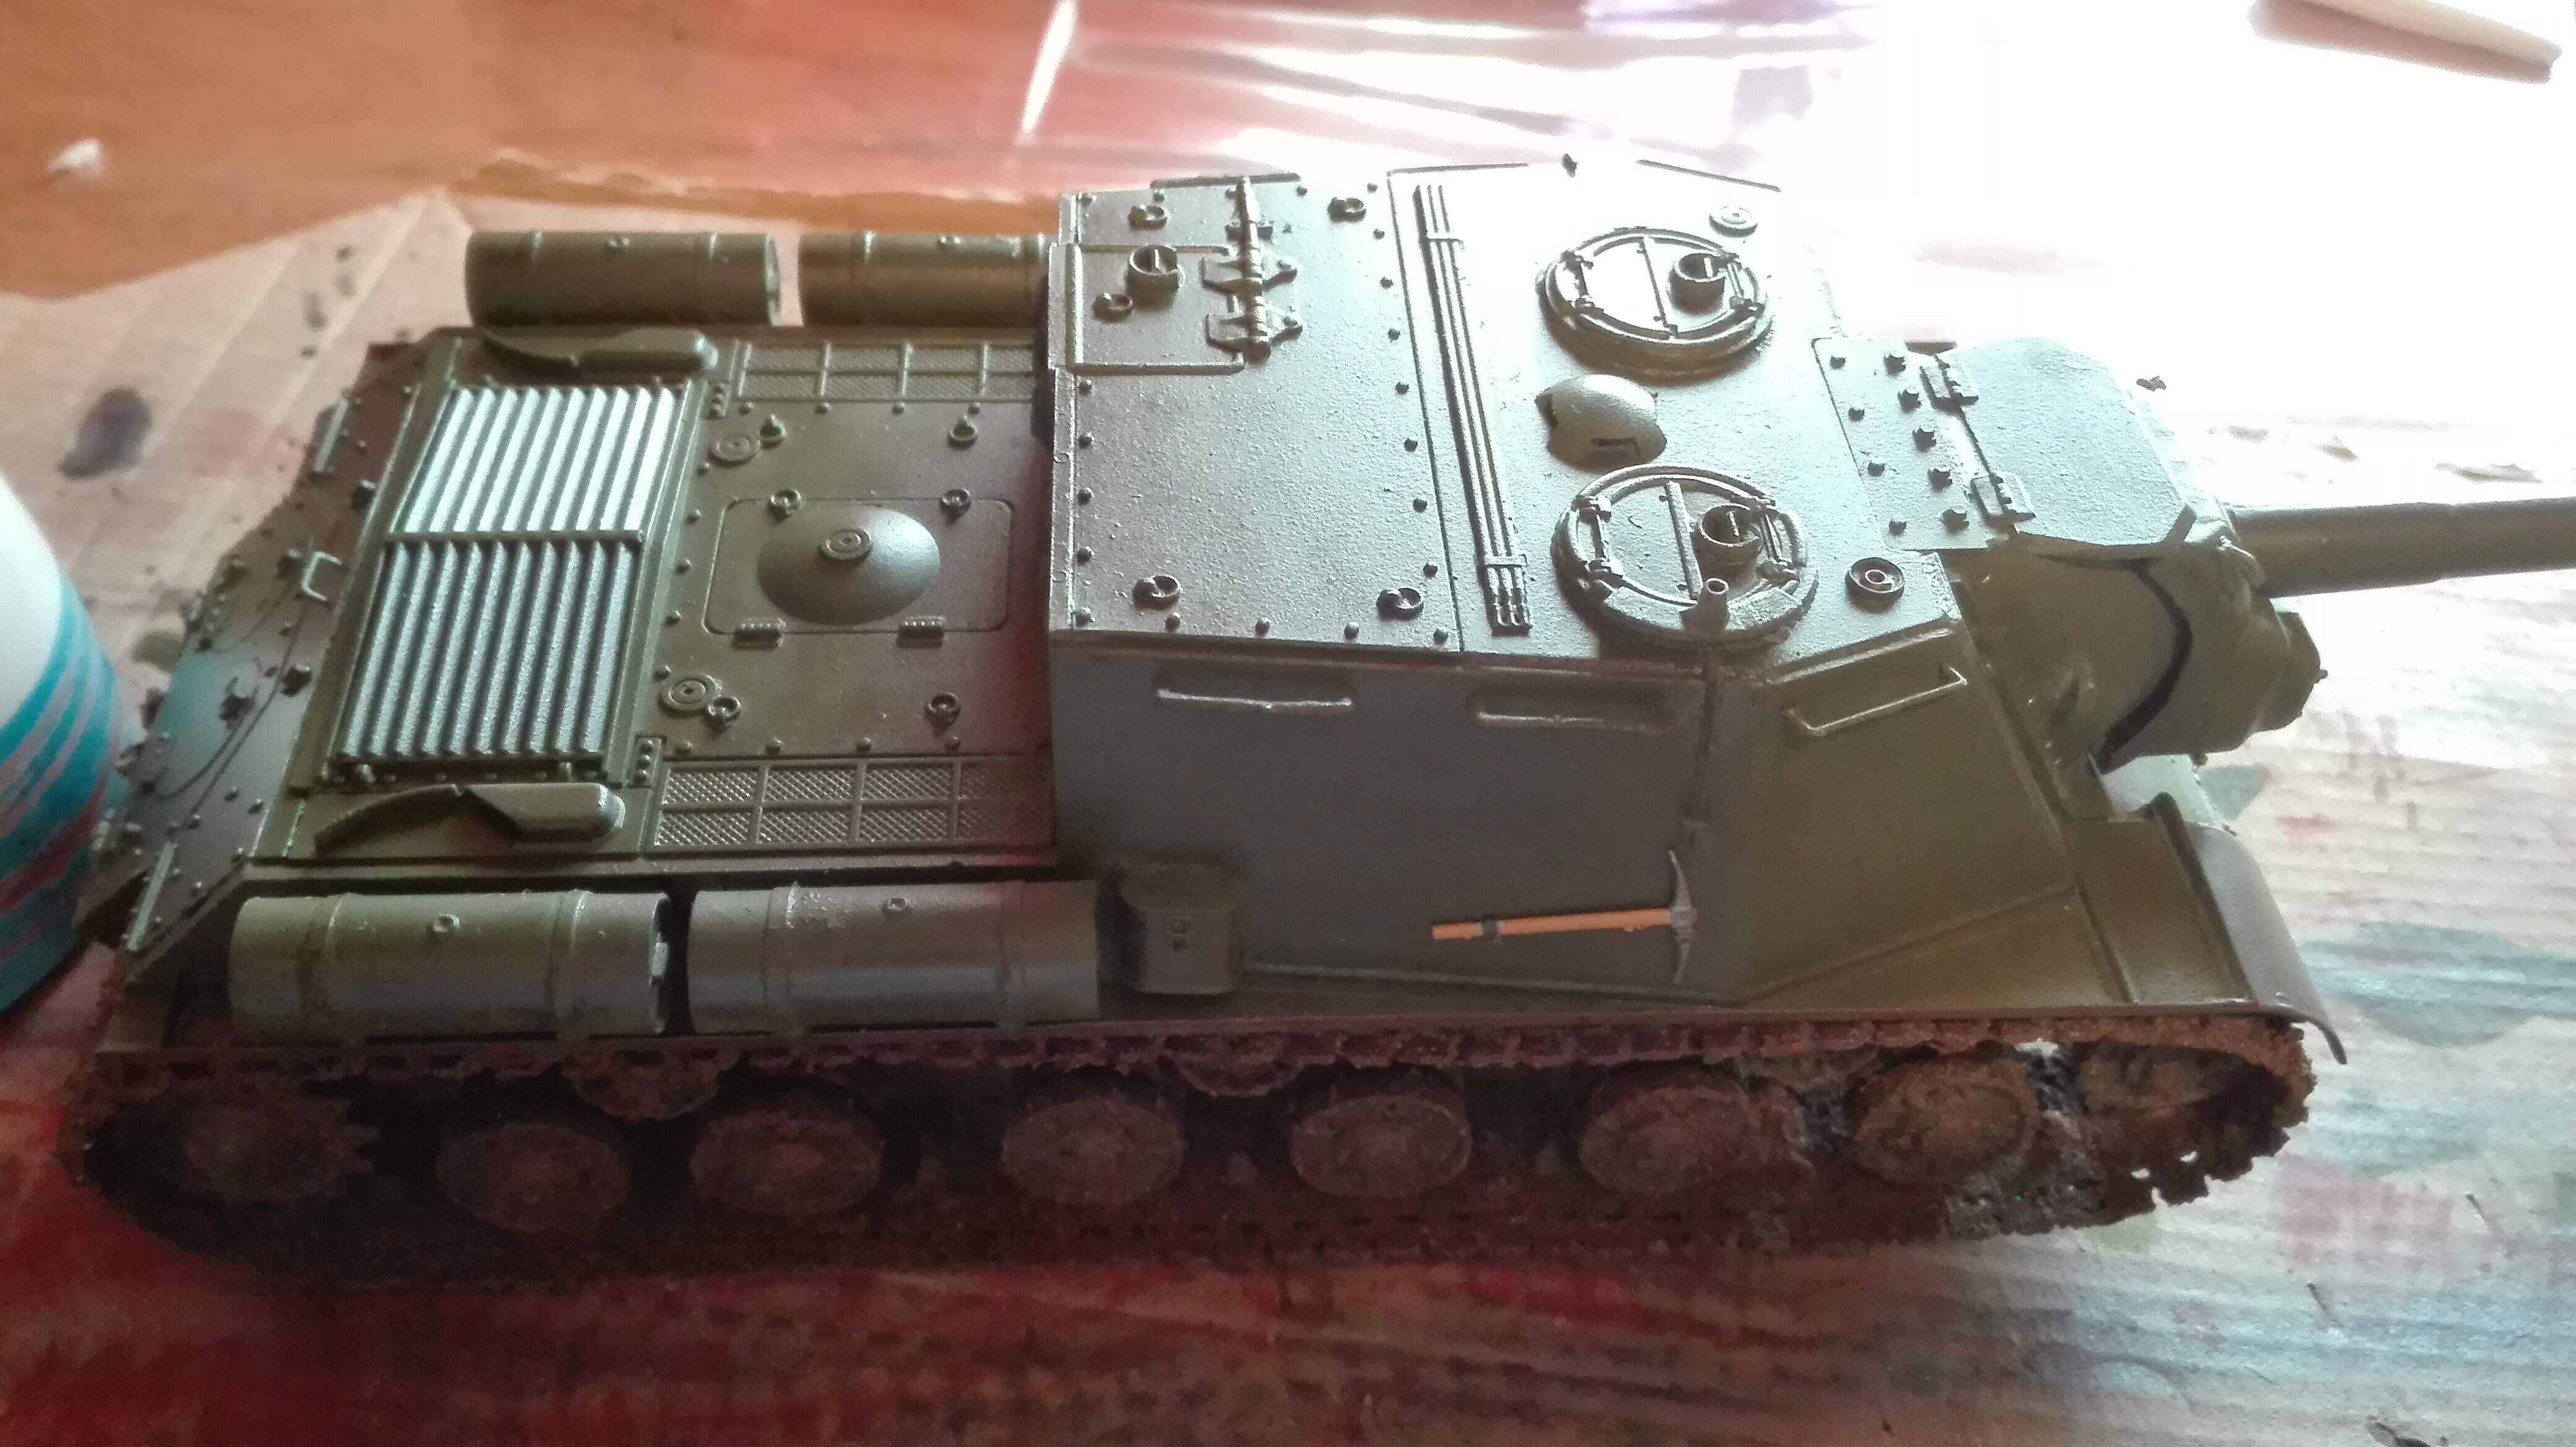
As you know, I am waiting for the varnishes and the pin washes.
Meanwhile I was thinking of “roughing up” the lower hull with some brown paint and vallejo mud effect.
Should I do this AFTER the pinwash or can I do it right away?
If it is to be done after the pin wash, is it recomended to do this on the gloss varnish right after the pin wash or on the matt varnish as final step?
Also, about the decals, its just a big white “7” number on the upper front side plate…how and when should I weather it and using what?
Meanwhile I was thinking of “roughing up” the lower hull with some brown paint and vallejo mud effect.
Should I do this AFTER the pinwash or can I do it right away?
If it is to be done after the pin wash, is it recomended to do this on the gloss varnish right after the pin wash or on the matt varnish as final step?
No, mud should cover the wash as the real one is on top of everything, that is, even after the matt varnish. In fact, the varnish is used only to help flowing the wash, once done you have to revert to matt as gloss is not realistic.
Also, about the decals, its just a big white “7” number on the upper front side plate…how and when should I weather it and using what?
That is part of the paint and should be treated the same. Varnish gloss, add decals, pin wash, varnish matt. Rest of effects.
Only if you add filters or oil dot technique, those should go before the decals.
At least that’s my view, others may differ… check yourself and experiment ![]()
Ok, so I just leave the model be for now and will rough it up after the final matt varnish.
By the way, I checked some “pros” work on the ISU and noticed that they also added some very dark engine exhaust grime near the exhausts. On the ISU they discharge right on top of the hull, so maybe it makes sense but I’d prefer your opinions on that.
Also, how can I do that? Vallejo has some engine grime products, but if there’s a cheaper way I am open to it.
You can do that airbrushing black, thinner than usual. Or using black pigment. Or oils, but I would prefer any of the other two.
It should also go on top of the final matte varnish, right?
Correct, matt varnish is just the base for the rest of processes
@Nightgaunt to expand on what @varanusk. Stated . Matt varnish is good to use when you want to do a filter and pigments. A satin varnish is used when doing a pin wash , the satin allows the wash to flow and the excess to be removed . just to clarify @varanusk has given you sound advice and shared good knowledge.
Ok thank you guys, today I might be able to airbrush the gloss varnish if the package arrives.
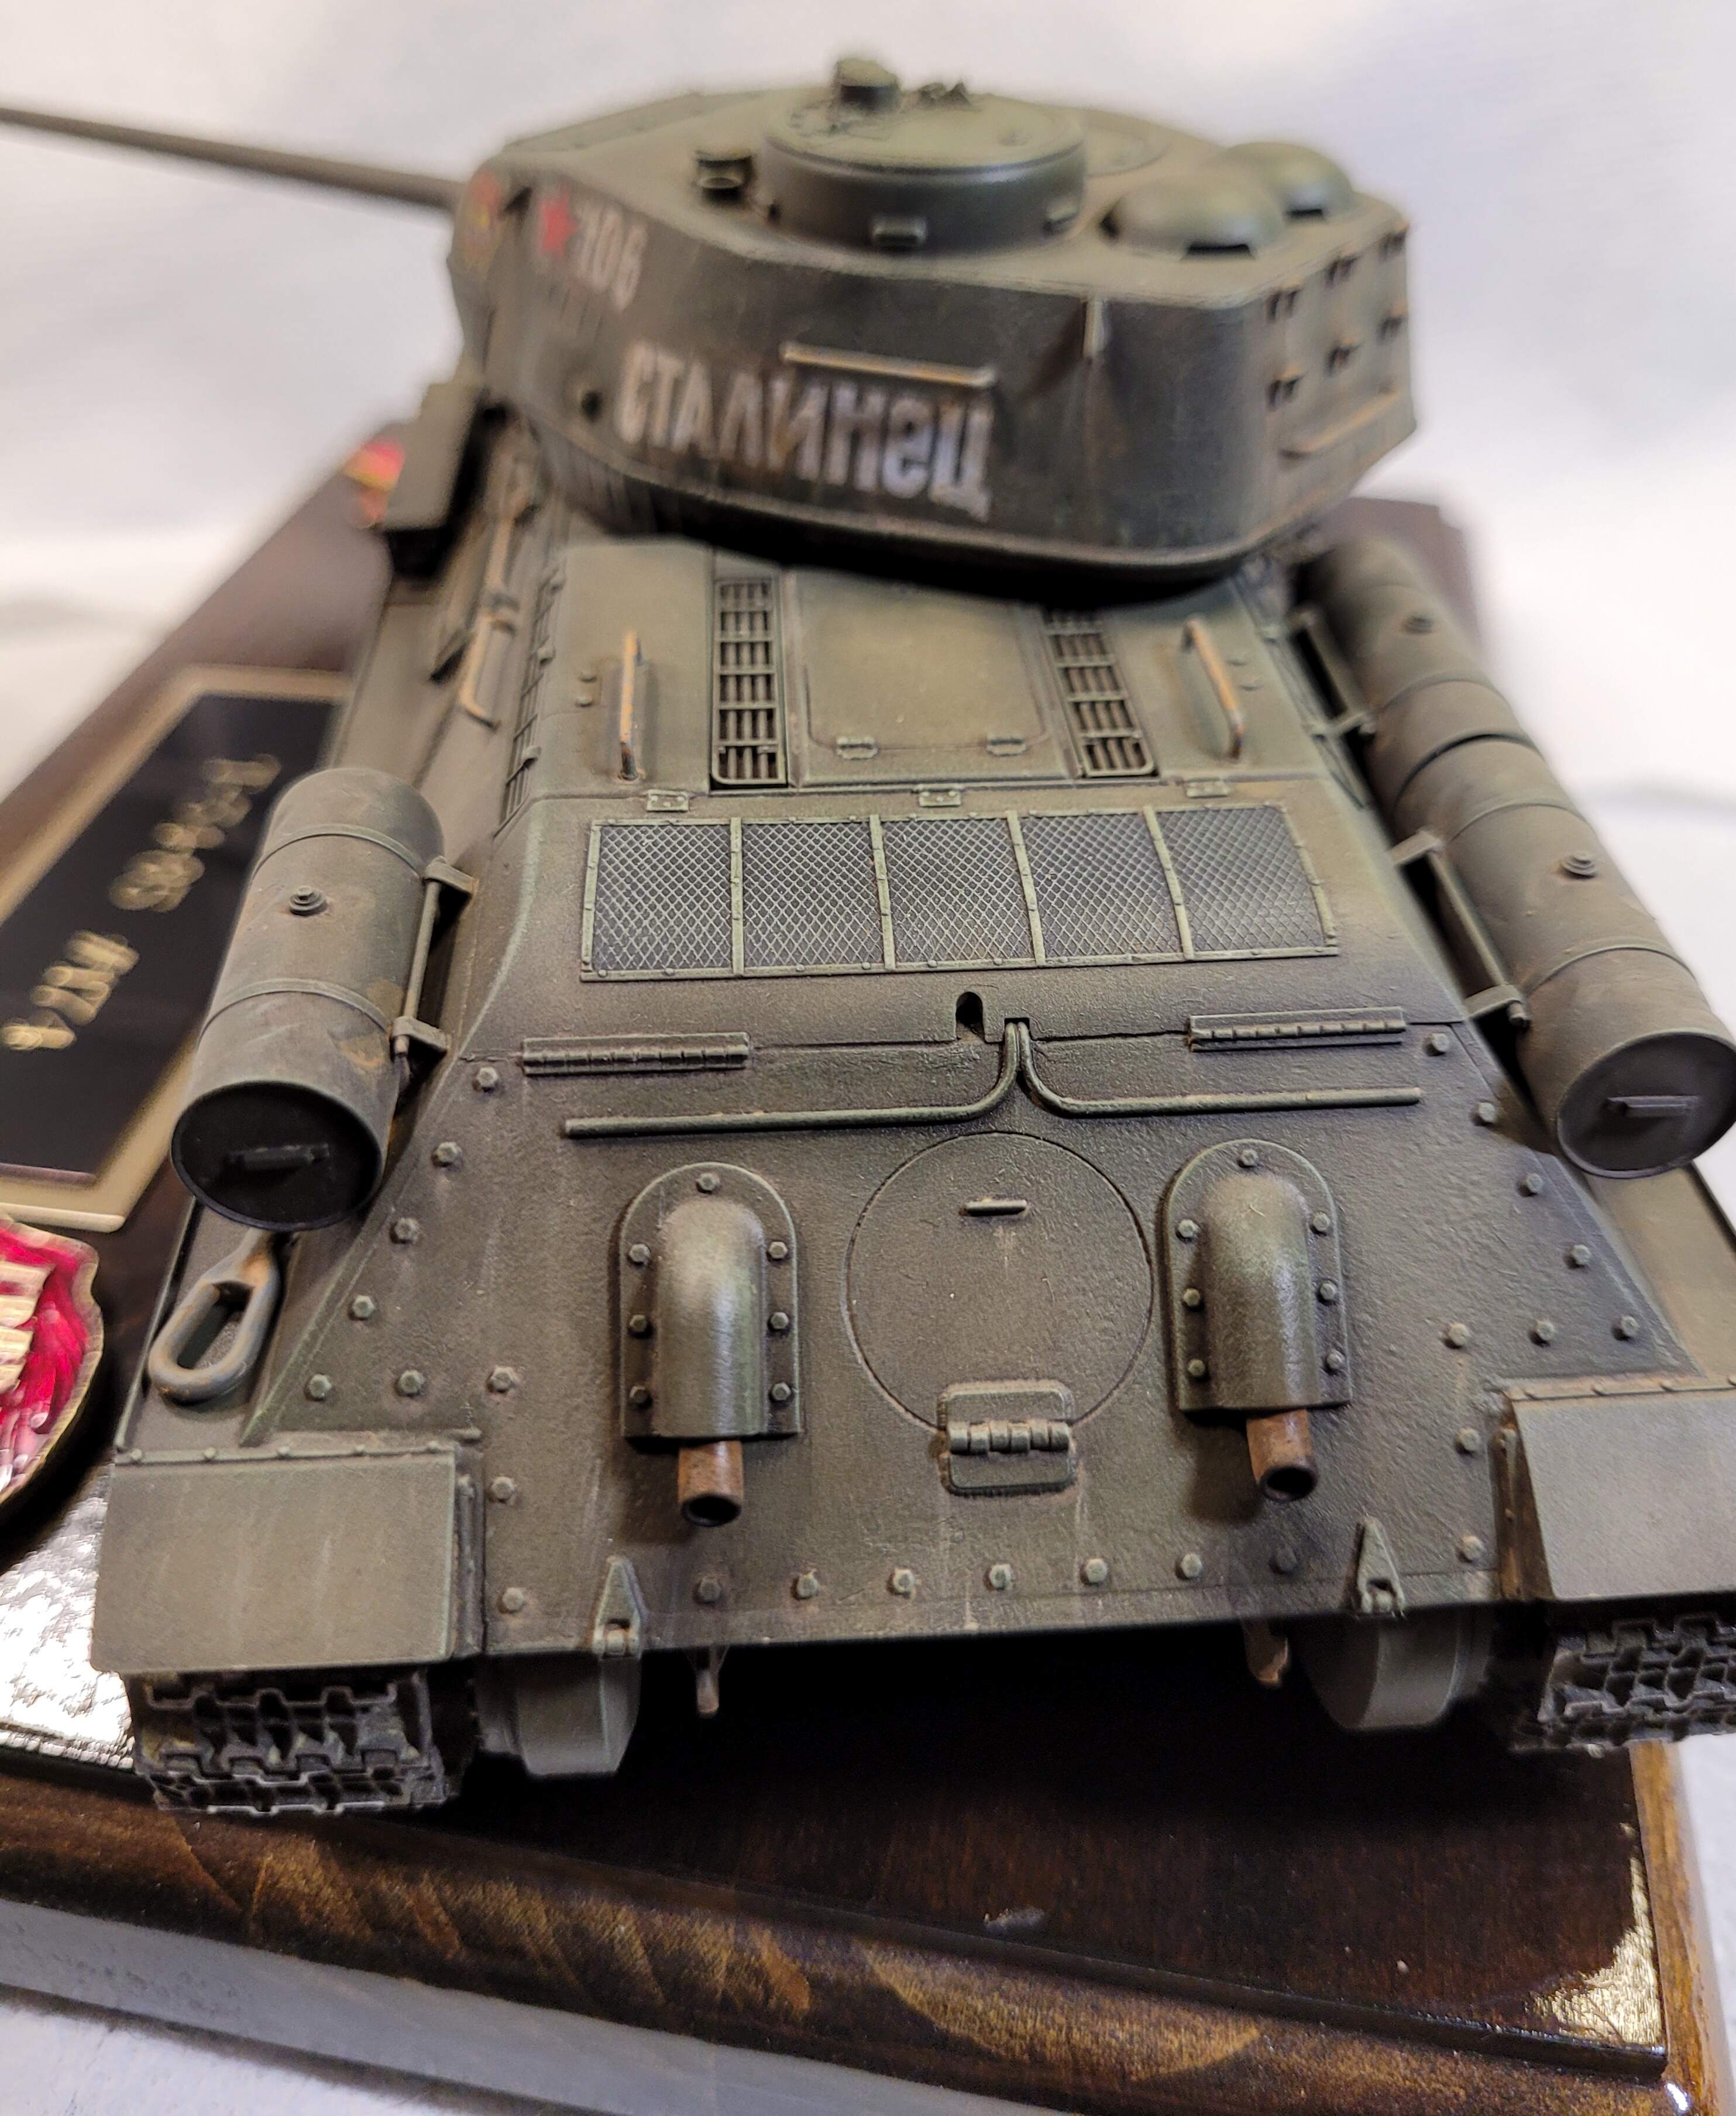
The big boy had his gloss coat and it’s ready for the prom:
I am very happy with the result, I was expecting disasters and was really worried.
I used a mix of 50% Vallejo gloss varnish + 50% vallejo airbrush thinner and also added 3-4 drops of flow improver.
Sprayed 2 very thin coats, I could probably have applied more but I was scared of mistakes.
It was the smoothest air-brush session I have ever had, with zero clogs.
Just once, for some reason a very small section had some white congealing, probably because I put the airbrush too near, but it scrubbed easily with a gentle napkin application and left no stains.
Now I will wait at least 24 h before the decals and pin wash.
Thanks again for the help, will keep you guys updated.
Often when I spray future while it’s drying it goes quite white but always dries clear
It happened right on the edge of the “brush stroke” so I suppose it was just excess pooling there.
Very possible. I find future does it when it’s a bit wet
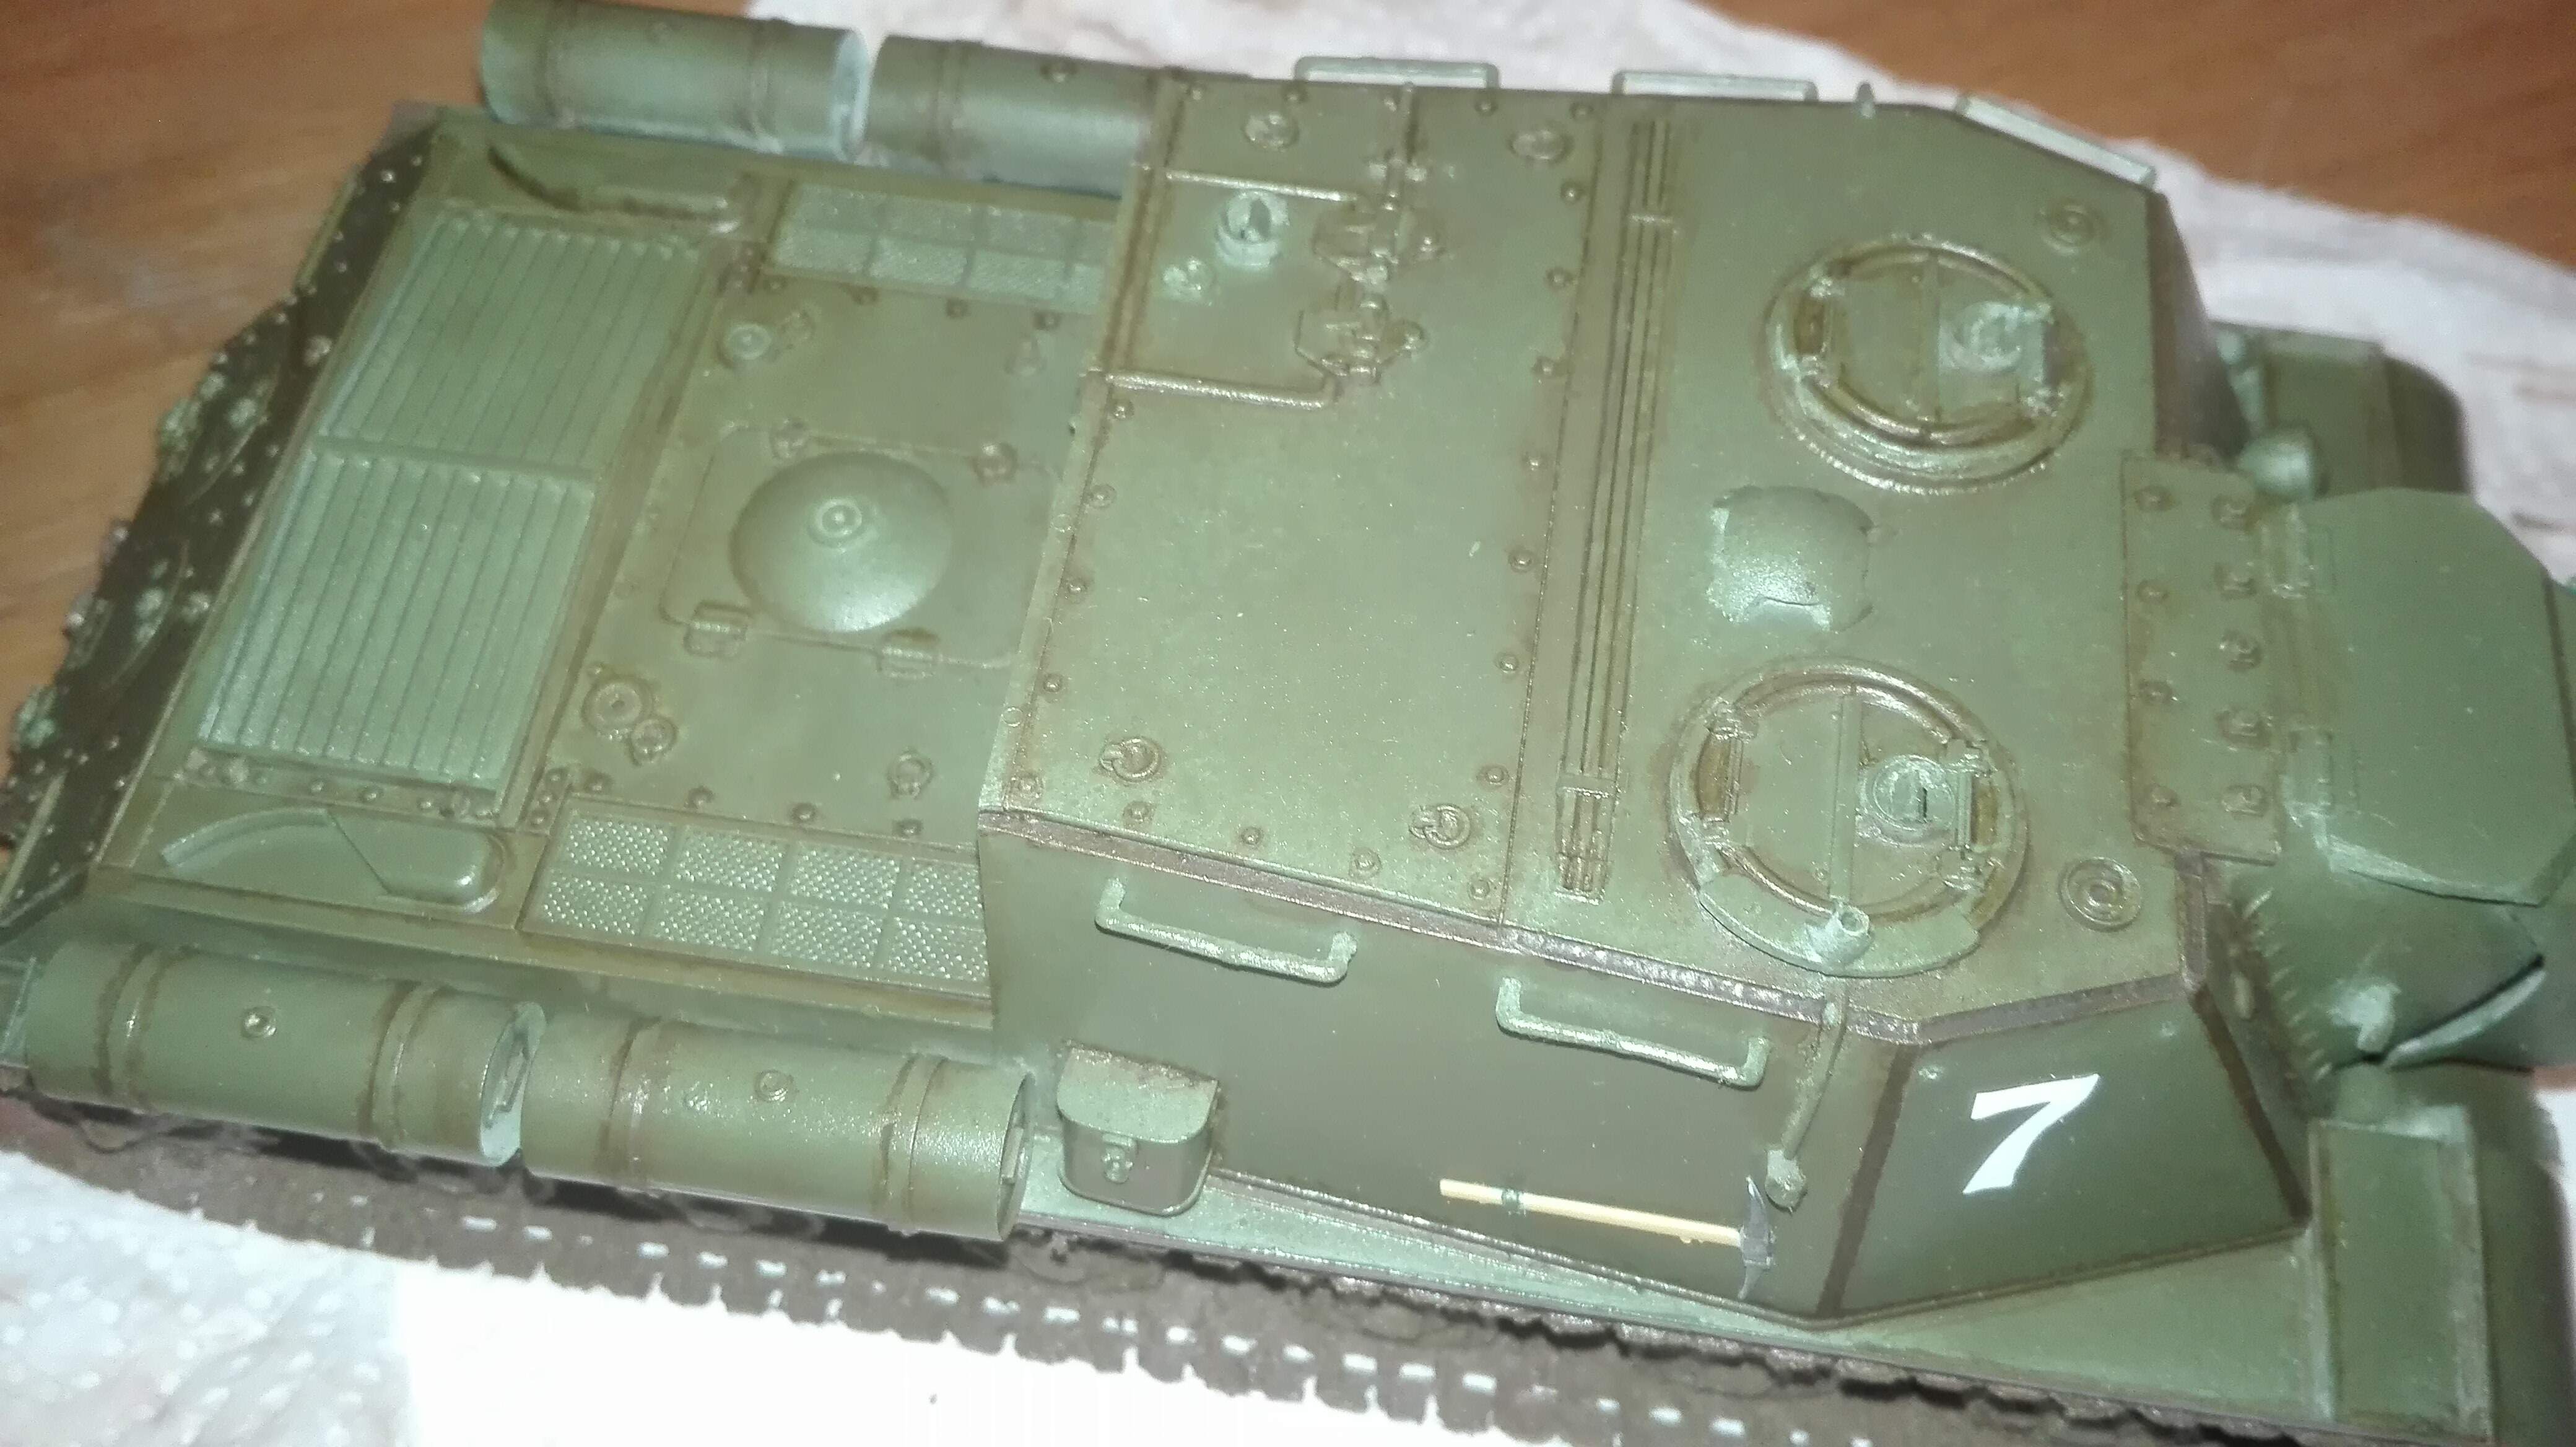
And here’s the (almost) done pin-wash.
I found very difficult to apply it, I tried to use it straight from the bottle and thinned and also tried to wet the surface but the application was very erratic; sometimes it flowed just like the videos, other times it just didn’t.
I waited more than 24 hours after the gloss, but the model still felt sticky.
Had to clean up lots of excess, but I left some to give a dirtier look.
What do you think? What can I do to make it better?
Looking at it, it seems fine to me, the photo still looks way worse than the original.
Also, I applied the decals. Sliding them was easy but they instantly set and there was no way to move them. I was lucky they ended up in the right spot and in the correct position. Wonder why did it happen.
Now I would like to make them a little dirty alongside the vertical panels which now feel way too clean. What can I do?
Decals can often be moved around after they’ve “set” by giving them a touch of microset, giving it a minute to work its magic and then very carefully moving the decal with a damp small paint brush.
As for the wash I think it looks good but if you are using the Ak washes, I too found they didn’t flow at all. I’ve had much better success with oils and naphtha thinner
I used the Vallejo washes.
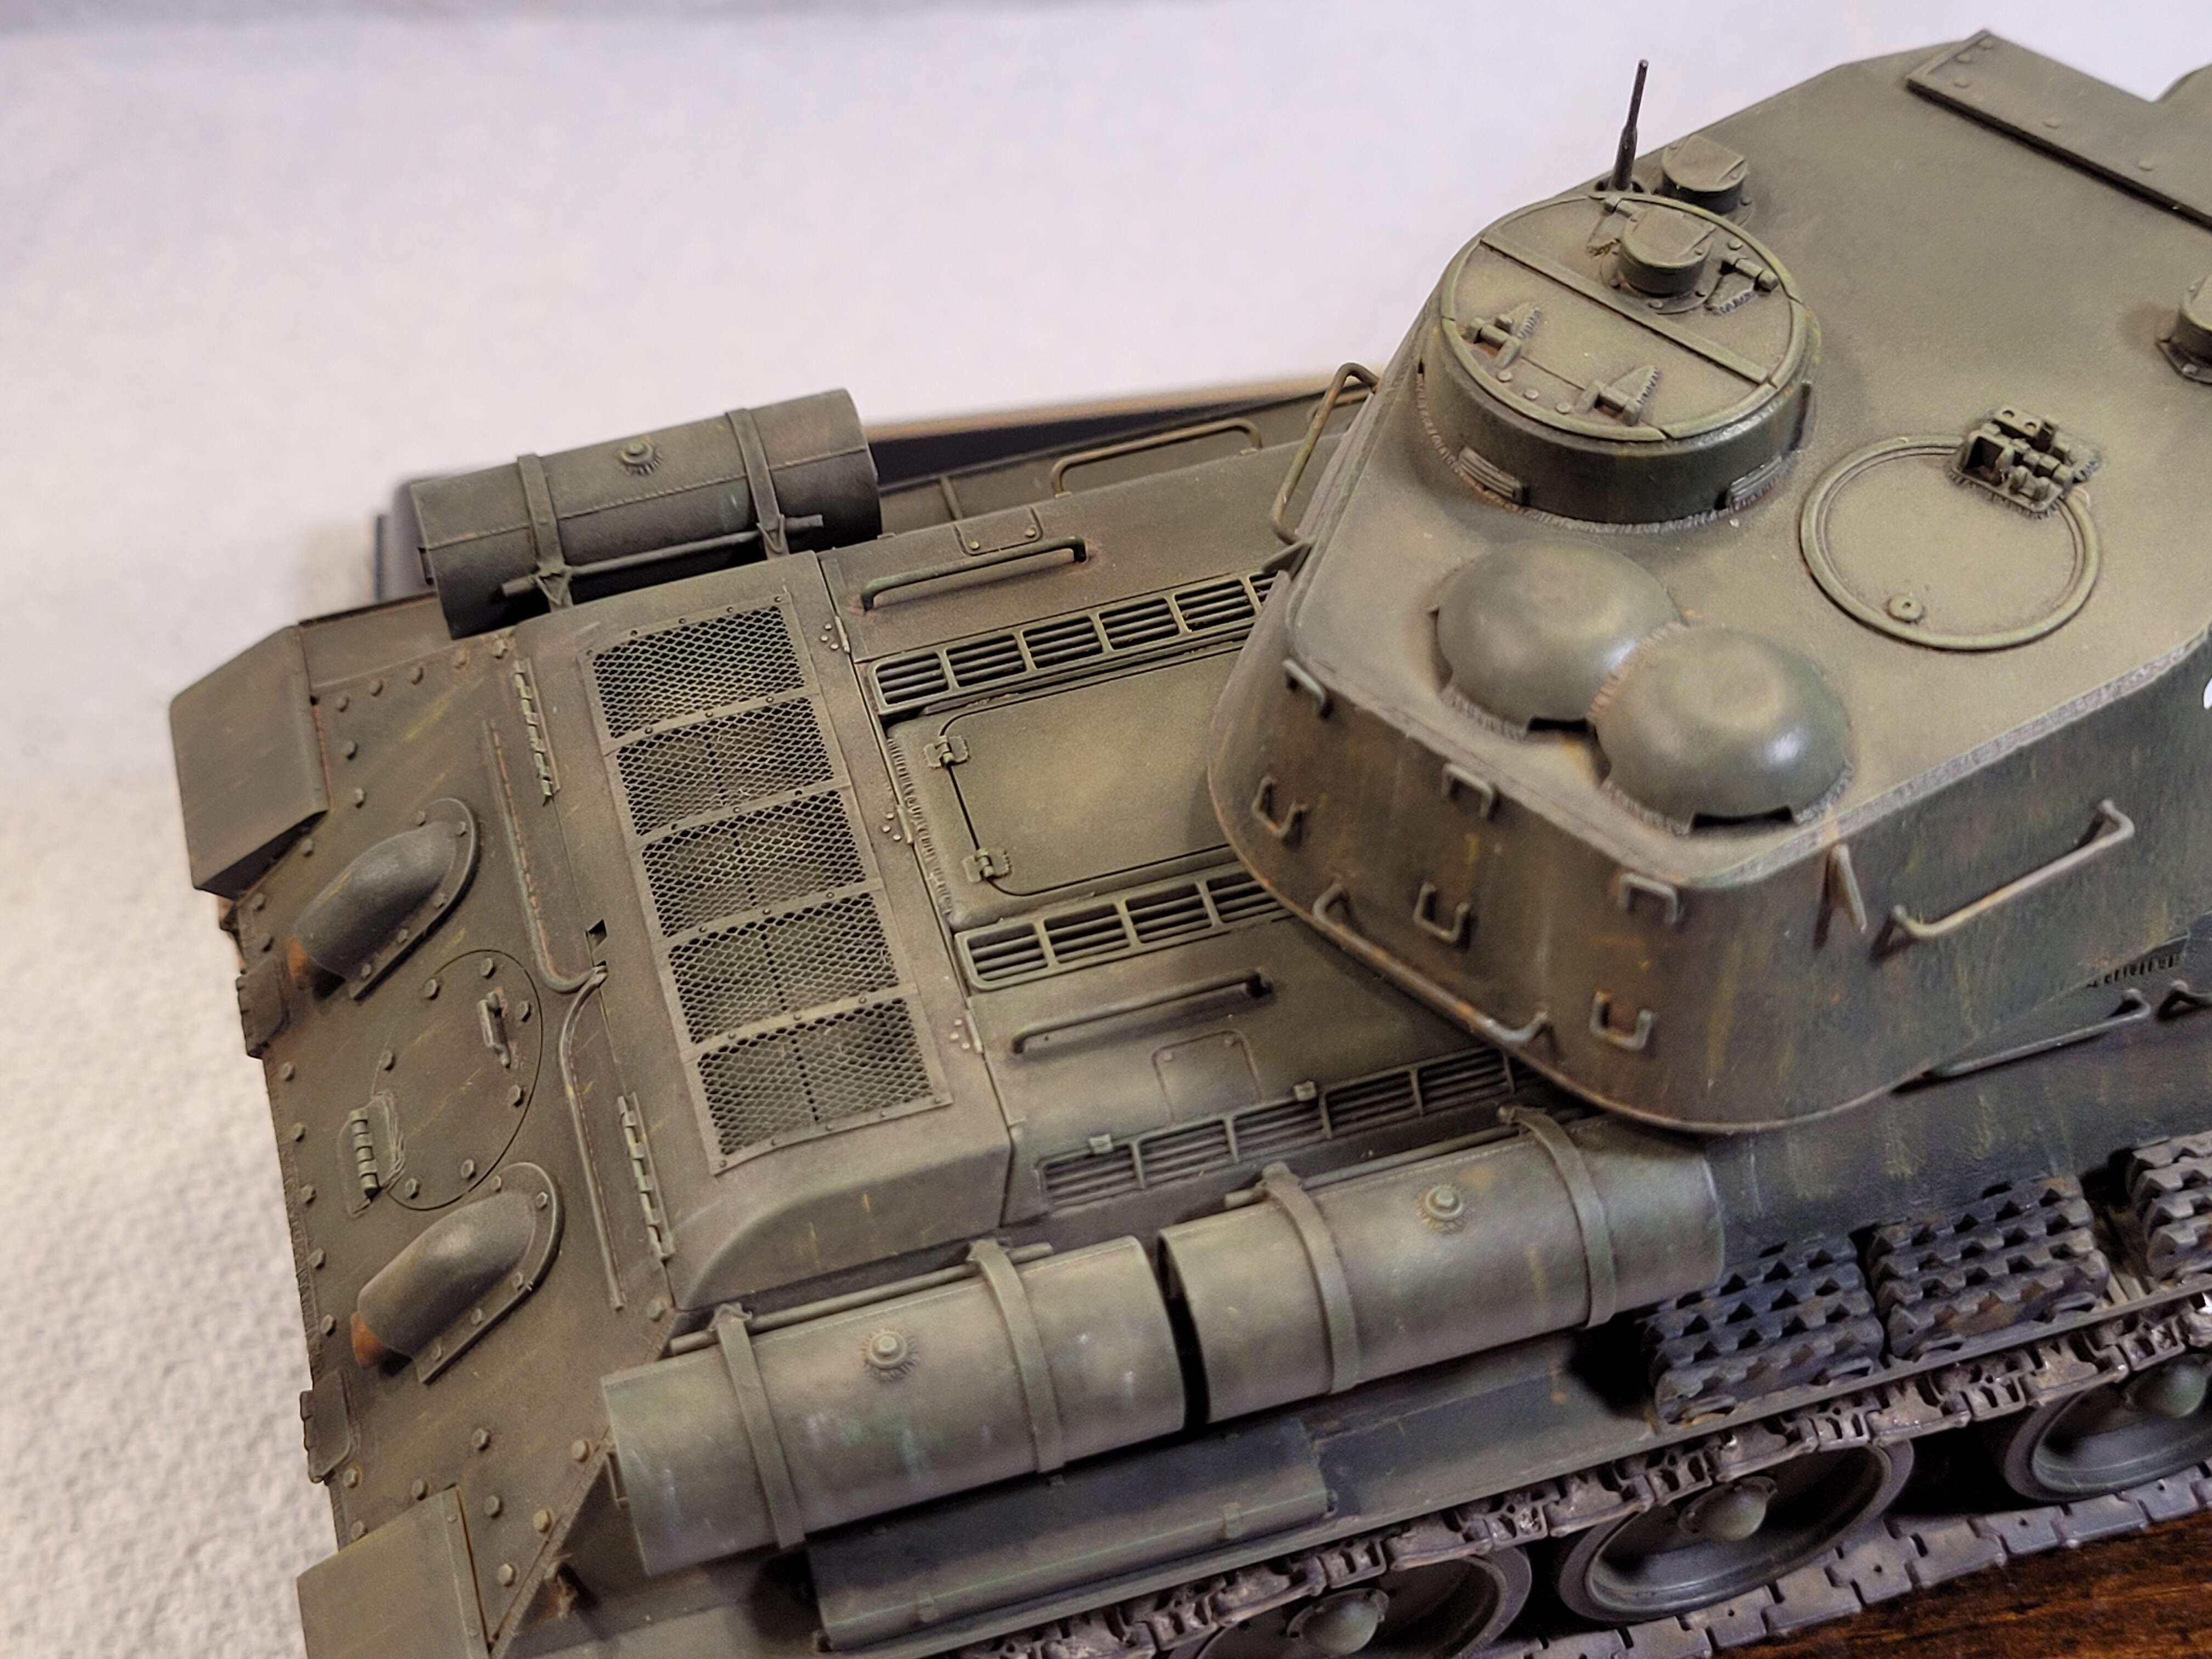
Now I was also wondering, what should I do with those three grilles on the back?
Is brown grime supposed to go on the two on the sides? And what about the big middle grill? I think I would need a black wash for that (I suppose).
If the model still felt sticky then the gloss was not totally dry, so the wash likely didn’t behave properly because of this. However, I think you have done quite well with the pin wash- you’ve got the main areas covered well.
Decals can be moved once they are on a model by putting extra water on them- if you need to move it ensure it kind of has a little bed of water underneath and then very gently tease it with a small brush or a pair of blunt tweezers to the position you want it. Then either gently brush the water off the decal and suck it up with the brush or use a cotton bud. This is what you do before they have any time to set or dry out- if they have set or dried a bit then @Mead93 has mentioned what to do.
Thanks guys, I am very glad you think it’s a decent work, I literally put sweat on it.
Some more questions:
What about the grilles? I really have no clue on them.
What about the vertical panels? They look too clean, especially the decals and the shovel/pick.
What about the exhausts, will some water thinned black be ok to simulate the grime?
Everyone has their preferred ways of doing the following. Really it’s a matter of doing several models and trying techniques until you discover what pleases you. With that said, I’ll share my thoughts and approach to the following on Soviet armor.
What about the grilles? I really have no clue on them
I like to paint molded plastic an off black gray like a rubber black or tire black paint. Then carefully drybrush the raised detail with the base color and later very lightly drybrushing the highest raised details with a quality artist oil like Titanium White.
Molded kit transmission cover grilles with painted as above and dry brushed.
If there’s photoetch just carefully drybrush.
What about the vertical panels? They look too clean, especially the decals and the shovel/pick.
When model is still glossy before flat coat and oil dot filter of tiny dots of white & yellow oil paints to vertical surfaces. These are faded downwards using a paint brush to blend.
A very thin filter of dirt. Typically 30 to 40 parts thinner to 1 part dirt color paint and lightly build up with airbrush.
Streaks can also be added or tweaked with pastel chalk dust.
Result
What about the exhausts, will some water thinned black be ok to simulate the grime?
I like to paint the exhaust Panzer Gray or similar and apply a wash of a couple of rust colors like brown and orange. The lightly apply ground up pastel chalk dust orange & brown. To the outer edge and inside ground up pastel black chalk dust.
Result
The vertical streaking looks good but I have no access to any of those products.
What if I place dots of Vallejo grey and brown wash and streak them down with a brush?