Point Du Hoc, Reedees Miniatures

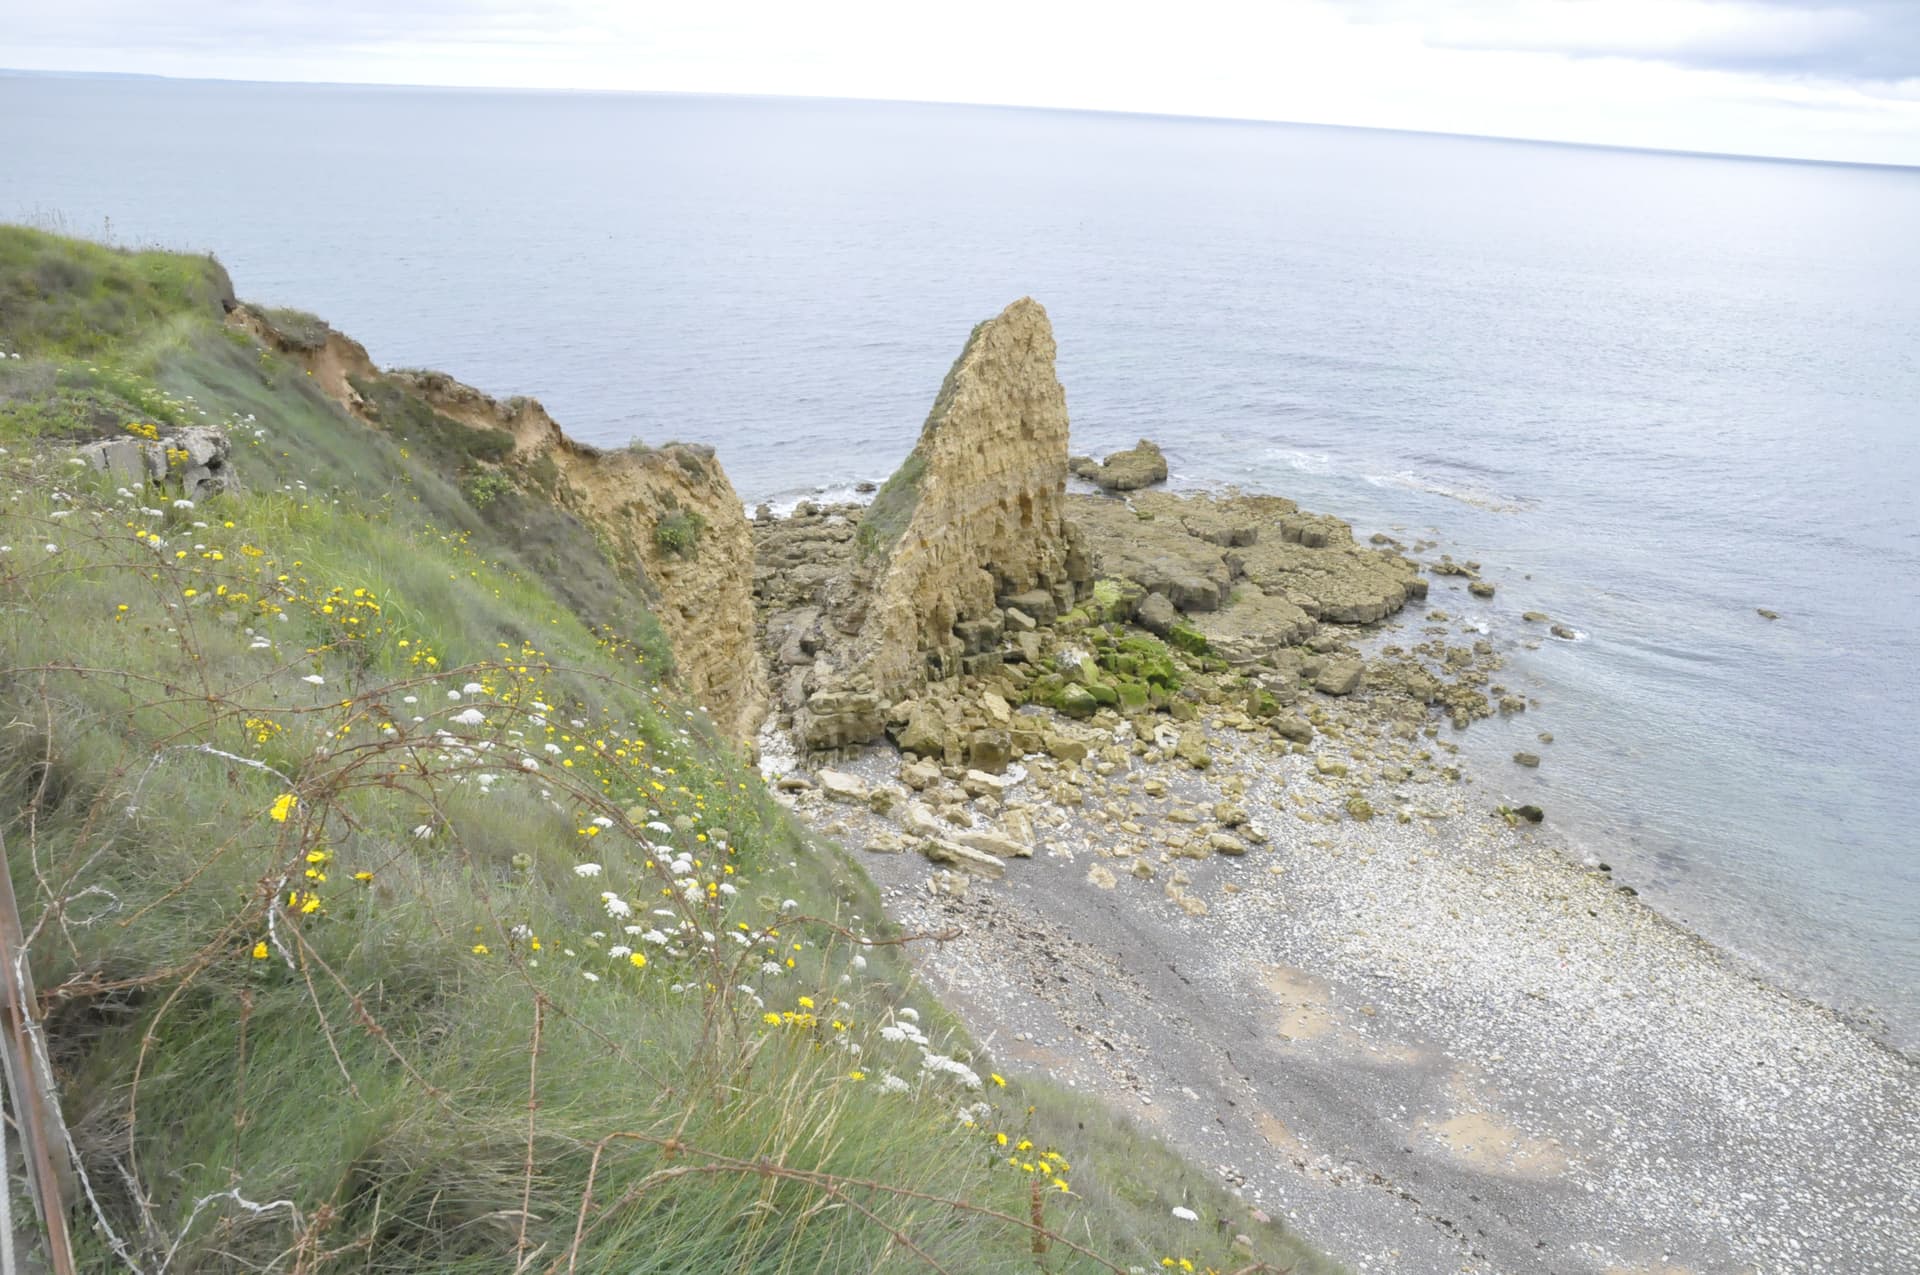
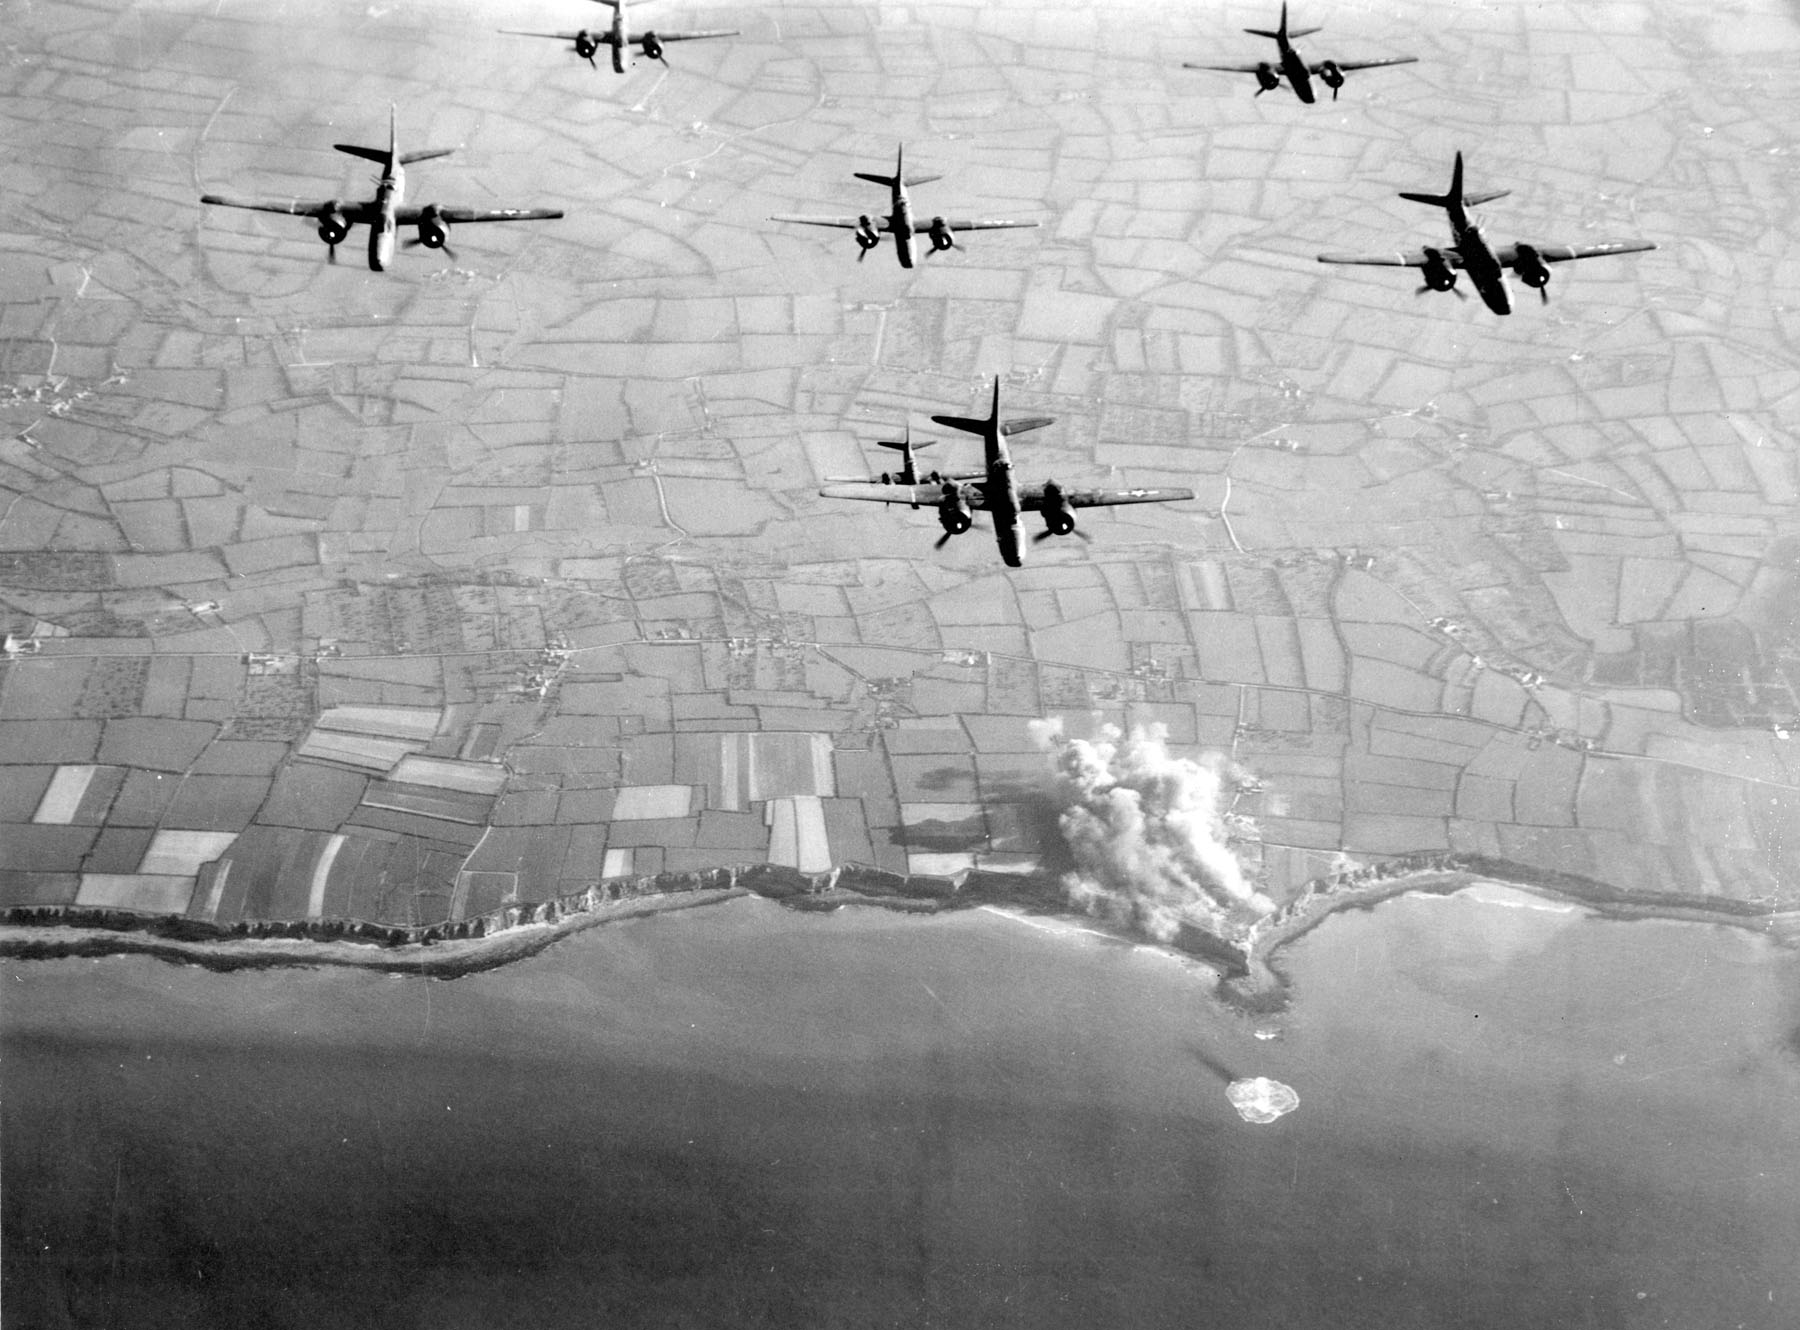
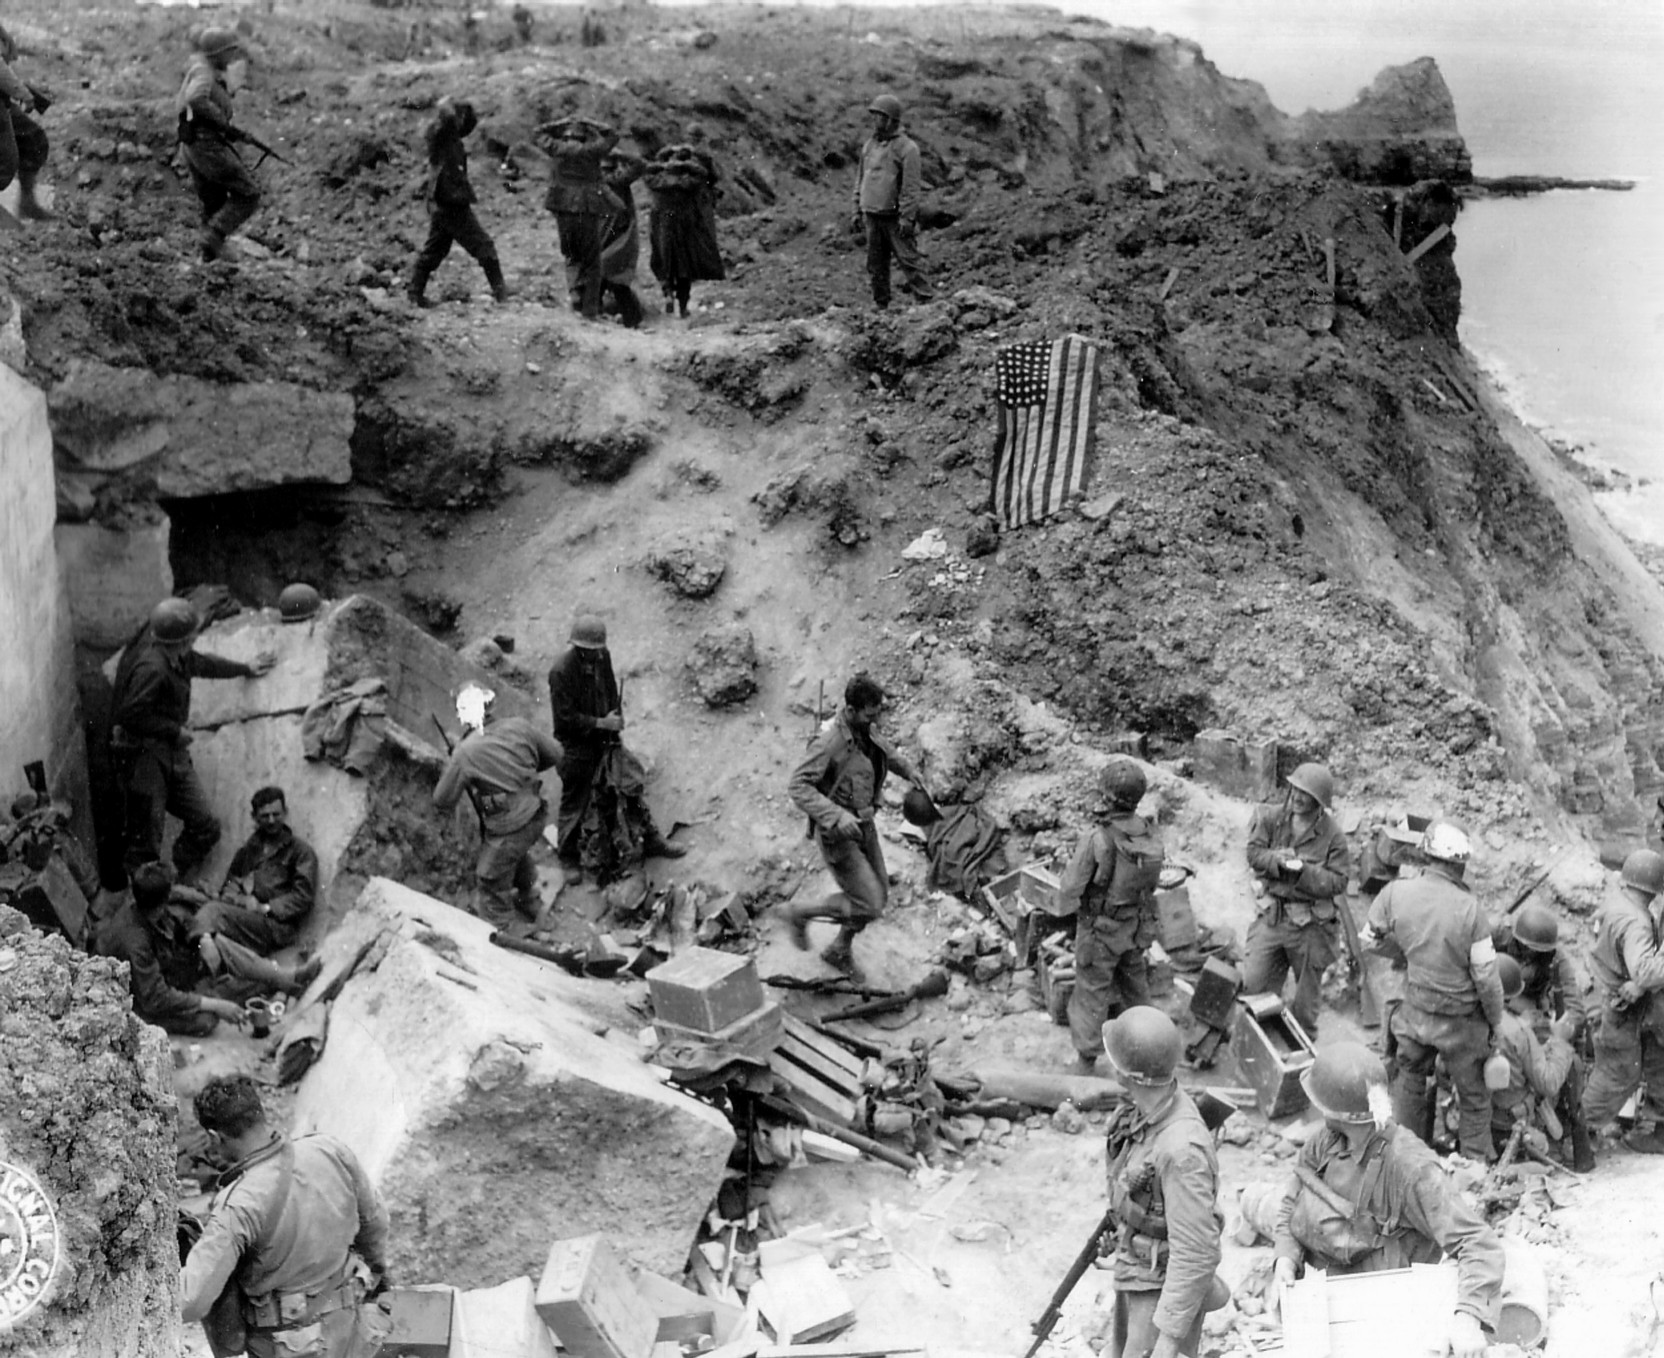
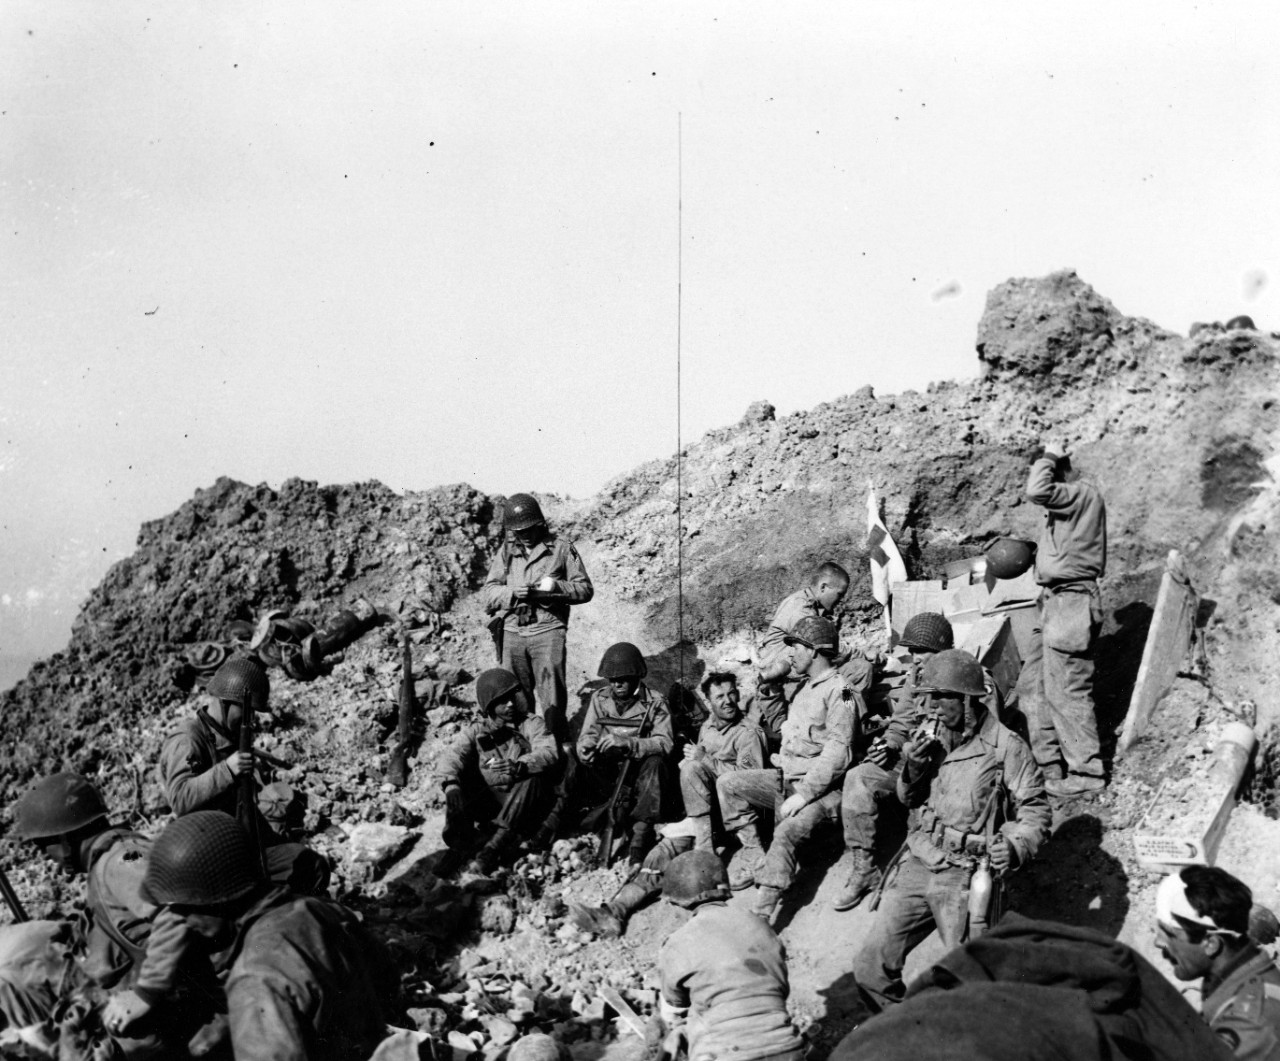
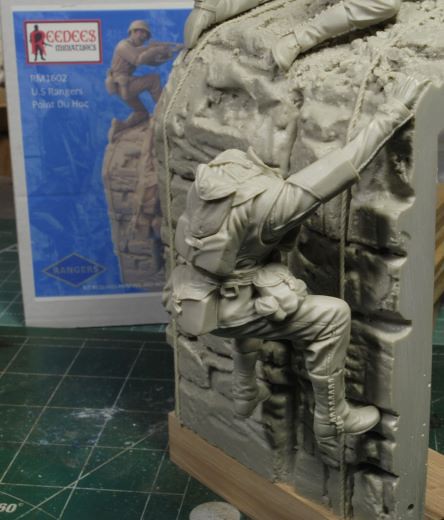
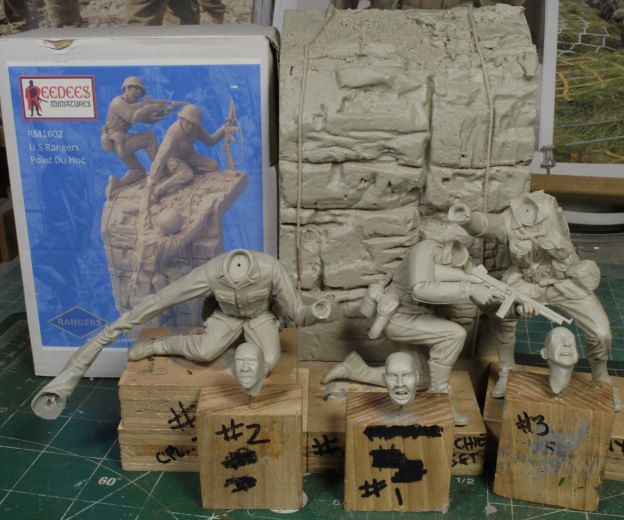
This is the wonderful set: RM1602, US Rangers, Point Du Hoc, vignette from Reedees Miniatures in 1/16th scale. These resin figures and base are created and sculpted by Steve Reedees. This set can be found at: Reedees Miniatures - 1/16 120mm

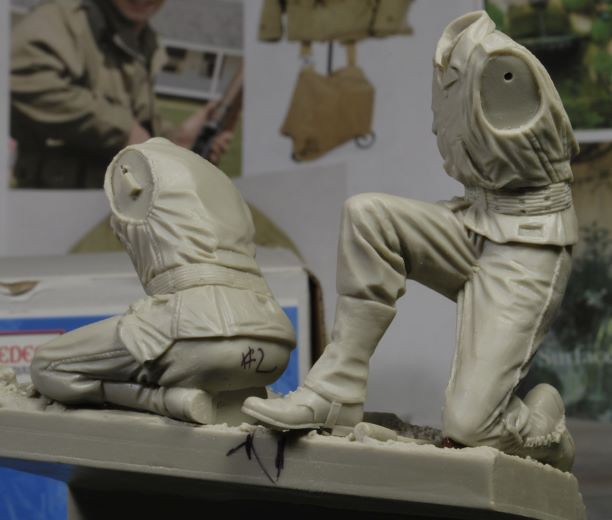
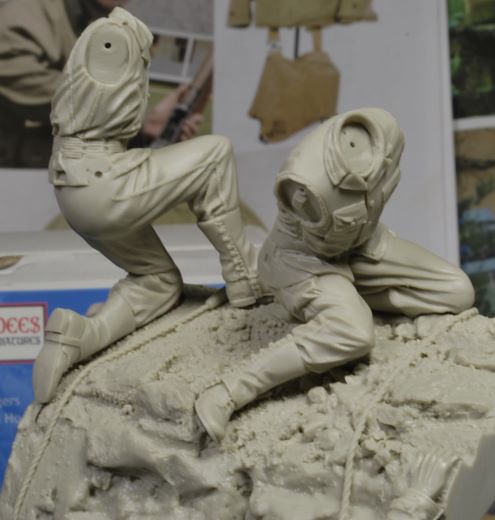
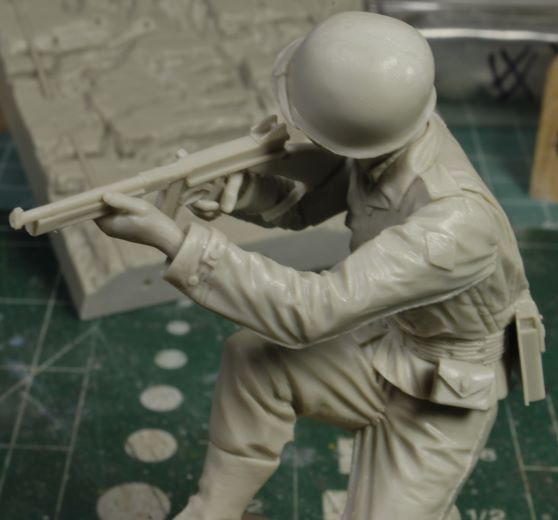
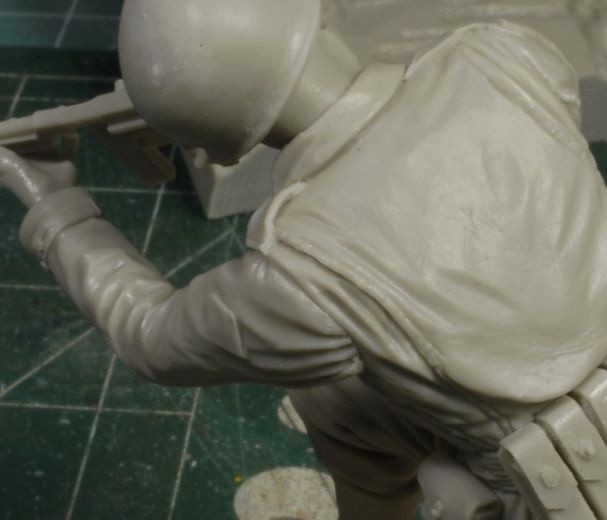
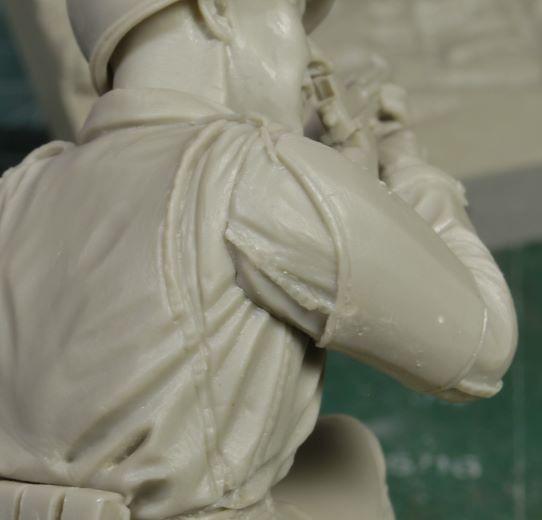
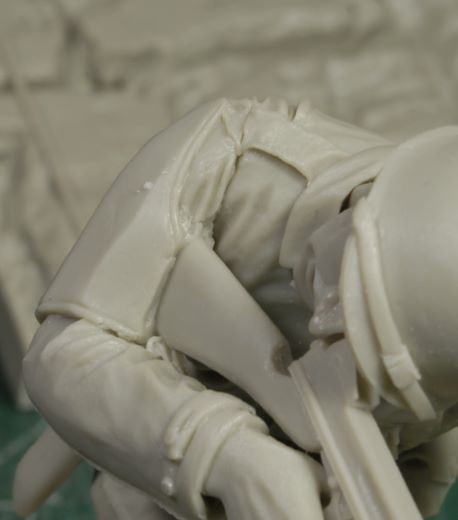
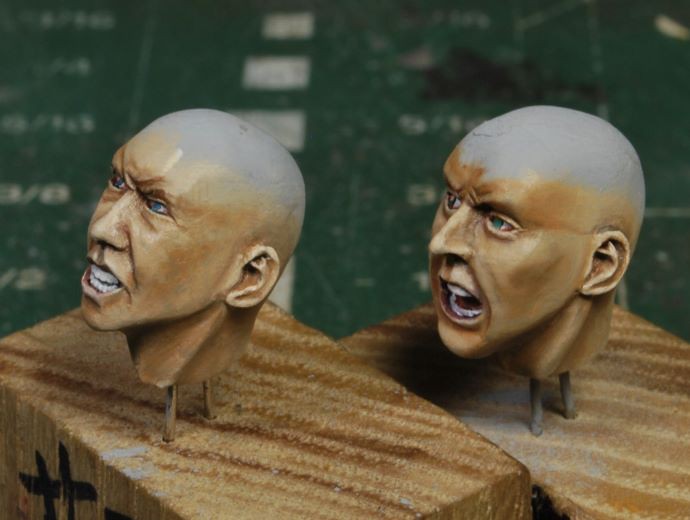
When you open the box the first thing you see is every parts set is carefully packaged and separated according to each figure within the set. The casting is incredible, and I’ve never seen anything but top-quality work coming from Reedees Miniatures, quality control is top shelf!

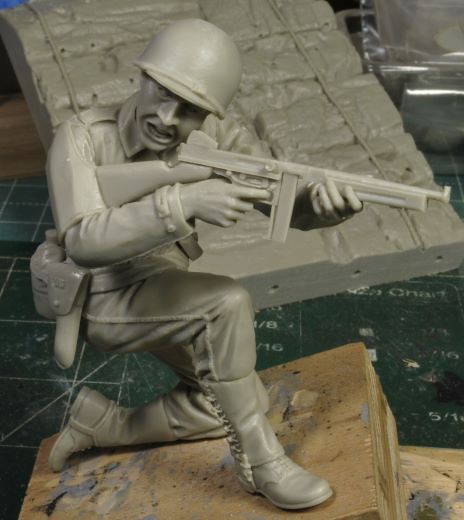
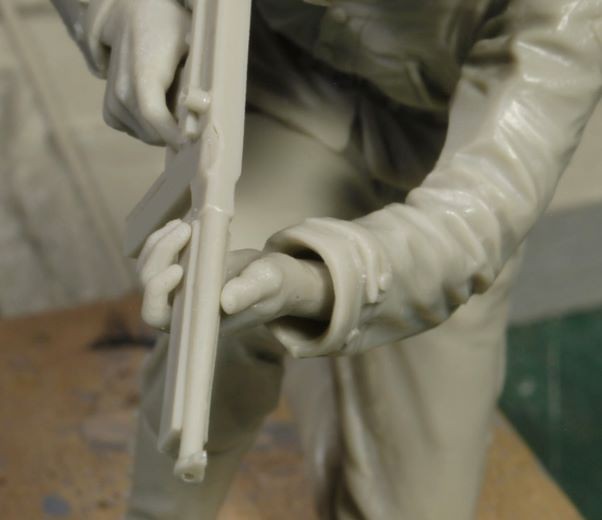
Call me biased, but I’ve worked with several of Steve’s figures, from 1/16th to 200mm, including weapons kits from the armory on his website. The kits have always been reliably well done, clean and crisp, requiring minor clean-up. This makes a painter like me very happy. BTW, the weapons are incredibly well done, too, and accurate. Did I say that already?

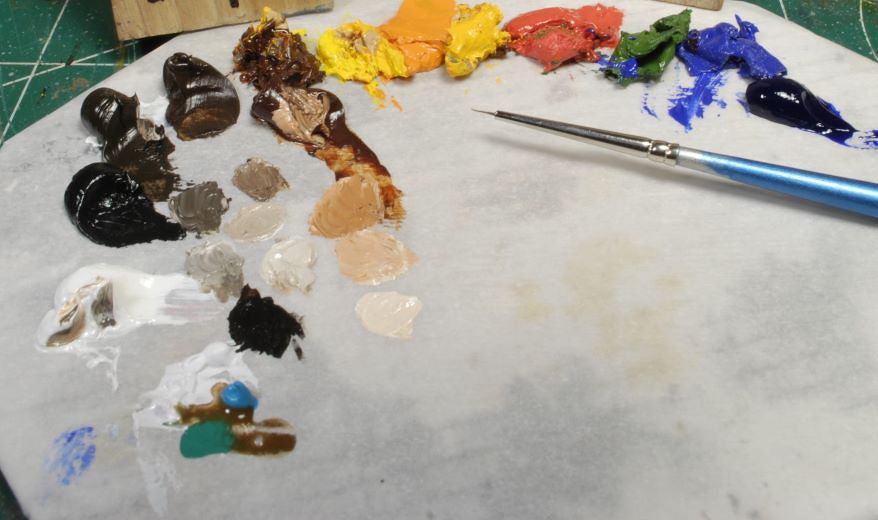
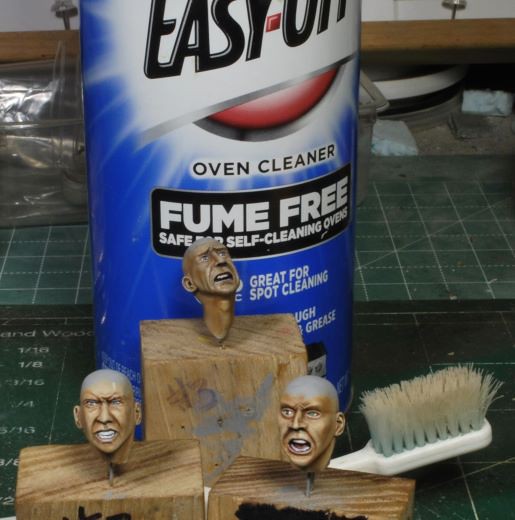
Seeing this set makes the painter in me want to get after it and get to “sniffin some paint and gluin my fingers together”. Sorry, I had to include my personally coined phrase on this set, it’s that good. Let’s just hope I can do it justice. So, here we go, let’s get er done!

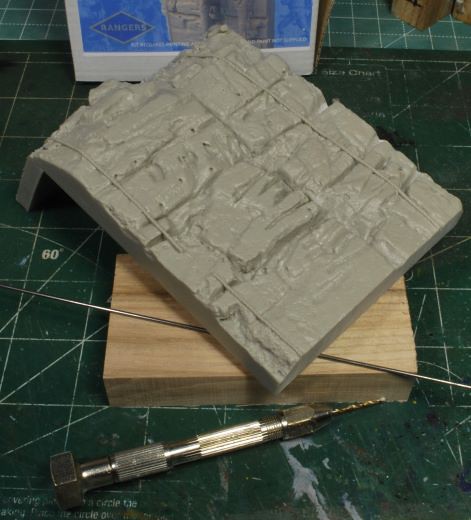
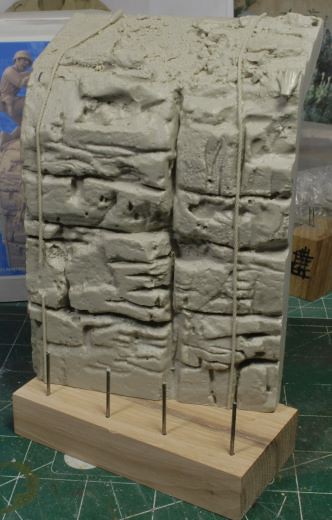
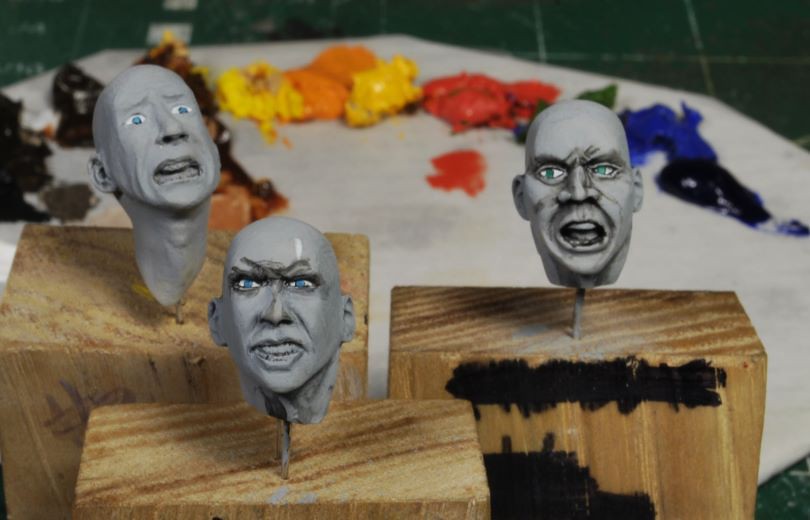
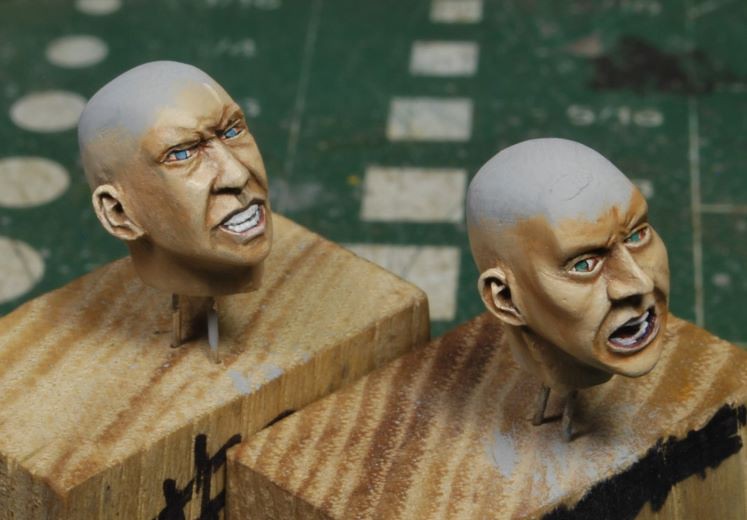
As we get further along, I’ll add a few pics of the rock wall section. Wow, very well done and minor slag as can be expected, but nothing needing any serious adjusting or heavy filing. I’ll break each figure down so you can see the quality of the sculpting and casting.

Quick note; I ran a test fit on the two adjoined figures within this set, spot on fit. This is going to be a fun run from all indications, working on a very welcome planned and carefully sculpted set. Ruck On, Bby!

More to follow, mue pronto, and thanks for watchin. Cheers, Ski.

7 Likes

Nice to see another set being tackled… I will be wainting for the next installment like a dog at the letterbox… Oh, and for a touch of authenticity, a picture of Pointe du Hoc I took last summer…

3 Likes

Excellent ref pic, thanks Erwin. I may need to add a bit of grass up top, but not much more than that. Curio cabinet space is limited when it comes to size.

2 Likes

The whole shazam would be a bit too much, specially in this scale… :stuck_out_tongue_winking_eye:

2 Likes

The whole area looked like a moonscape that morning between previous air attacks and the morning’s pre landing bombardment…

4 Likes

Thanks, Carlos. I do believe the grass would be a no-go, not recommended.

1 Like

Ski, from how the Pointe looked in those photos, I don’t believe there would be any greenery left to be seen. Not like those photos of how it looks today
It would be like comparing photos of Iwo Jima today to its condition during the battle.

2 Likes

The photo was mainly intended to get the colour of the rock right…

2 Likes

Roger that. I just saw a rendition of this vignette which did have grass and barbed wire, but I won’t be doing that. It wouldn’t look historically accurate.

2 Likes

Getting Started

The first thing you’re going to notice from this set is how clean the cast is and the lack of serious seam work required. I only found a few areas requiring attention and most of those were found after the primer coat.

When you get a set of figures like this the clean-up process moves quickly and the fun begins much sooner. After all, we know there will always be some clean-up, but what we’re really after is the fun of painting. This is pretty standard for Reedees Miniatures. I am never disappointed, and the craftsmanship is incredible.

The climbing Ranger fit right into his slot and hung there without any form of aid, meaning, he is very well placed. The other two were temporarily set in place so I could get a general idea of how this set will end up on the base.

After the general clean-up I began test fitting the arms, hands etc. The way Steve worked these figures is impressive. The arm fits snuggly and fits well, avoiding the need for any putty or filing. You will also notice the support hand for the Sgt. fits into its sleeve and tucks right under the Tommy gun fore stock naturally. I can see there was a heck of a lot of time taken to make this grip look realistic. Once again, the craftsmanship is glaring on this set. You can see from these photos just how well the arms lock into the shoulder. There are also keyways and pins that assist in the alignment, another great plus.

The set is now ready for some primer and a final review of each piece to catch any seam lines or small casting holes. This process was quick and easy, not much had to be done.

Base Stand Set

For the base I pilfered a scrap piece of Rustic Hickory from the shop and cut it to size. I sanded it and pinned it to receive the base, then later covered it with blue masking tape to avoid scratches and dings. There was one small rope section that broke off which was replaced with twisted copper wire to match.

Primed and Base Coated

After a good coat of Floquil Primer and inspection I moved right on to the base coat. As you can see from the photo, I used Tamiya paints and made a few custom colors for web gear and other parts.

As per my standard process I will begin with the heads and move onto each figure in order. So, let the fun begin!

More to follow soon and thanks for watchin. Cheers, Ski.

8 Likes

Great subject Ski, looking forward especially to you making those faces breath…well, pant actually.

Agree that the only vegetation remaining might have been a random weed or two. And because we’re such good mates I’ll toss in this IED to spice things up: there was talk of water effects in Das Boot which was summarily dealt with…now with these Rangers, would their uniforms be still semi-sodden, having recently waded/swam ashore….? :thinking:

2 Likes

Definitely one to watch and follow again… and in addition to DioMartin: I don’t see any clean uniform on any of those pictures :grin:

2 Likes

Those faces are great… You don’t need much imagination to figure out which head comes to which figure…
The brassard, is that a gas brassard? If so, they were made of paper, so a different approach is warranted than fabric.

1 Like

Oh no, they’ve had plenty of time to use handi-wipes, HA! :laughing: :rofl: :joy: :stuck_out_tongue_winking_eye:

Good point, Tim, may need to address that with some crusted damp sand on the boots and legging. Sheesh, all these things to think about, lol. Better now than later, eh?

True, that will need to be addressed after the final punch list is done. Weathering their uniforms and gear will definitely be done.

Yep, pretty flimsy and tore easily, from what I remember reading. Nothing special about painting these, just a good flat finish with a bit of dry brushing to simulate an almost paper-like fabric.

2 Likes

Really nice to see large figures like this that go together as well as these. Looking forward to seeing you get down to business with them!

1 Like

Tanks, Karl!

2 Likes

Let’s Face It, Again!

Getting started on the faces is always a re-learn process for me, regardless of how many faces I’ve painted in the past. It may sound like a pain in the hinny, but I’m used to it and expect it. This process is not a negative approach, but what I would call a warm-up session. So, I pick the likely candidate to be the ginny pig, or “crash test dummy,” and off I go. It’s always “crash and burn” on the first paint fling, so crash test dummy would be the appropriate term, HA!

My mix for the flesh work is very simple, as you can see from the palette, Windsor & Newton Burnt Sienna and Titanium White. To the left side of this string of tones I also have a small run for Brunt Umer and another for Raw Umber. These two darker tones are used sparingly to give depth where needed, such as above the eyes, under the lower lip, under the chin, behind the ears, and the inside of the mouth. Very rarely will you actually see a solid black tone in real life, so I rarely if ever use it on my flesh work. Working each shade from dark to light on the palette I now have the basic mixes for the flesh work. Time to fling some paint!

With the colors laid out on the palette I run an initial pass with a very light and very thinned shadow tone in all the deep recesses, then come back and lightly spread, or fan, those out with a damp brush. This process really needs to be very thin and light or they will all become crash test dummies in a hurry! I use a mix of Ivory Black and Raw Umber. After the initial shadows are placed it’s time to work the main flesh tones.

I didn’t take any sequential photos of the process, because I really don’t like to disrupt the momentum once I get into the grove, it kills the flow. I have taken SBS sequential photos in the past on prior builds, so I won’t be doing that on the facial work here. I will again refer to Daria Callie’s oil painting videos for quick reference.
https://www.youtube.com/channel/UCyGgRLbgcXjON9ZS5DaqMOQ

Yes, Daria works on canvas and we work three dimensional, but I find the concept is the same for oils. I found that by following the basic concepts of her approach I have eliminated a lot of the “heavy oiling”, or over painting, which can lead to a blotchy appearance if not corrected. If this video helps, good deal, and if not, forget about it.

There is still quite a bit of work to be done on both of these faces, such as feathering in more details, refining certain areas, but the initial passes have been made and the base tones will need to set up and dry for a bit.

One handy tool in the model bunker is the trusty Oven Cleaner. As you can see, this fellow is getting his bath for a re-do. Actually, this will be his second bath. It’s not uncommon to make three runs before I get back into the swing of things.

More to follow soon and thanks for watchin. Cheers, Ski.

8 Likes

Interesting to hear you also struggle to get back into the swing of painting faces- I get this as well- I always approach the face first and am always nervous, despite having done quite a few over the years as I’m sure you have too! There’s a fair few times they’ve had to go for a thinner bath at my bench, that’s for sure!
I was interested to see how these faces would come alive- you’ve really brought out some wonderful character in them.

1 Like

Thanks, Karl. There’s still quite a bit to work on these faces, but the main portion is applied. Ya, relearning every time is a given, lol. If I had 10 faces to paint in a row, it’d still be an issue. :wink:

2 Likes

I agree completely with you snd Ski. Always slow going for me with the face especially if I haven’t done a figure in a while, like now lol.

2 Likes