This is my first post here so If you have any notes concerning post formatting and such let me know! After about a month of almost full time work I’ve finished my most ambitious project to date. I didn’t document the project quite as well as I now would have liked to have done, so there are quite a few bits where I only have photos of them in the finished state. I hope you enjoy it regardless!
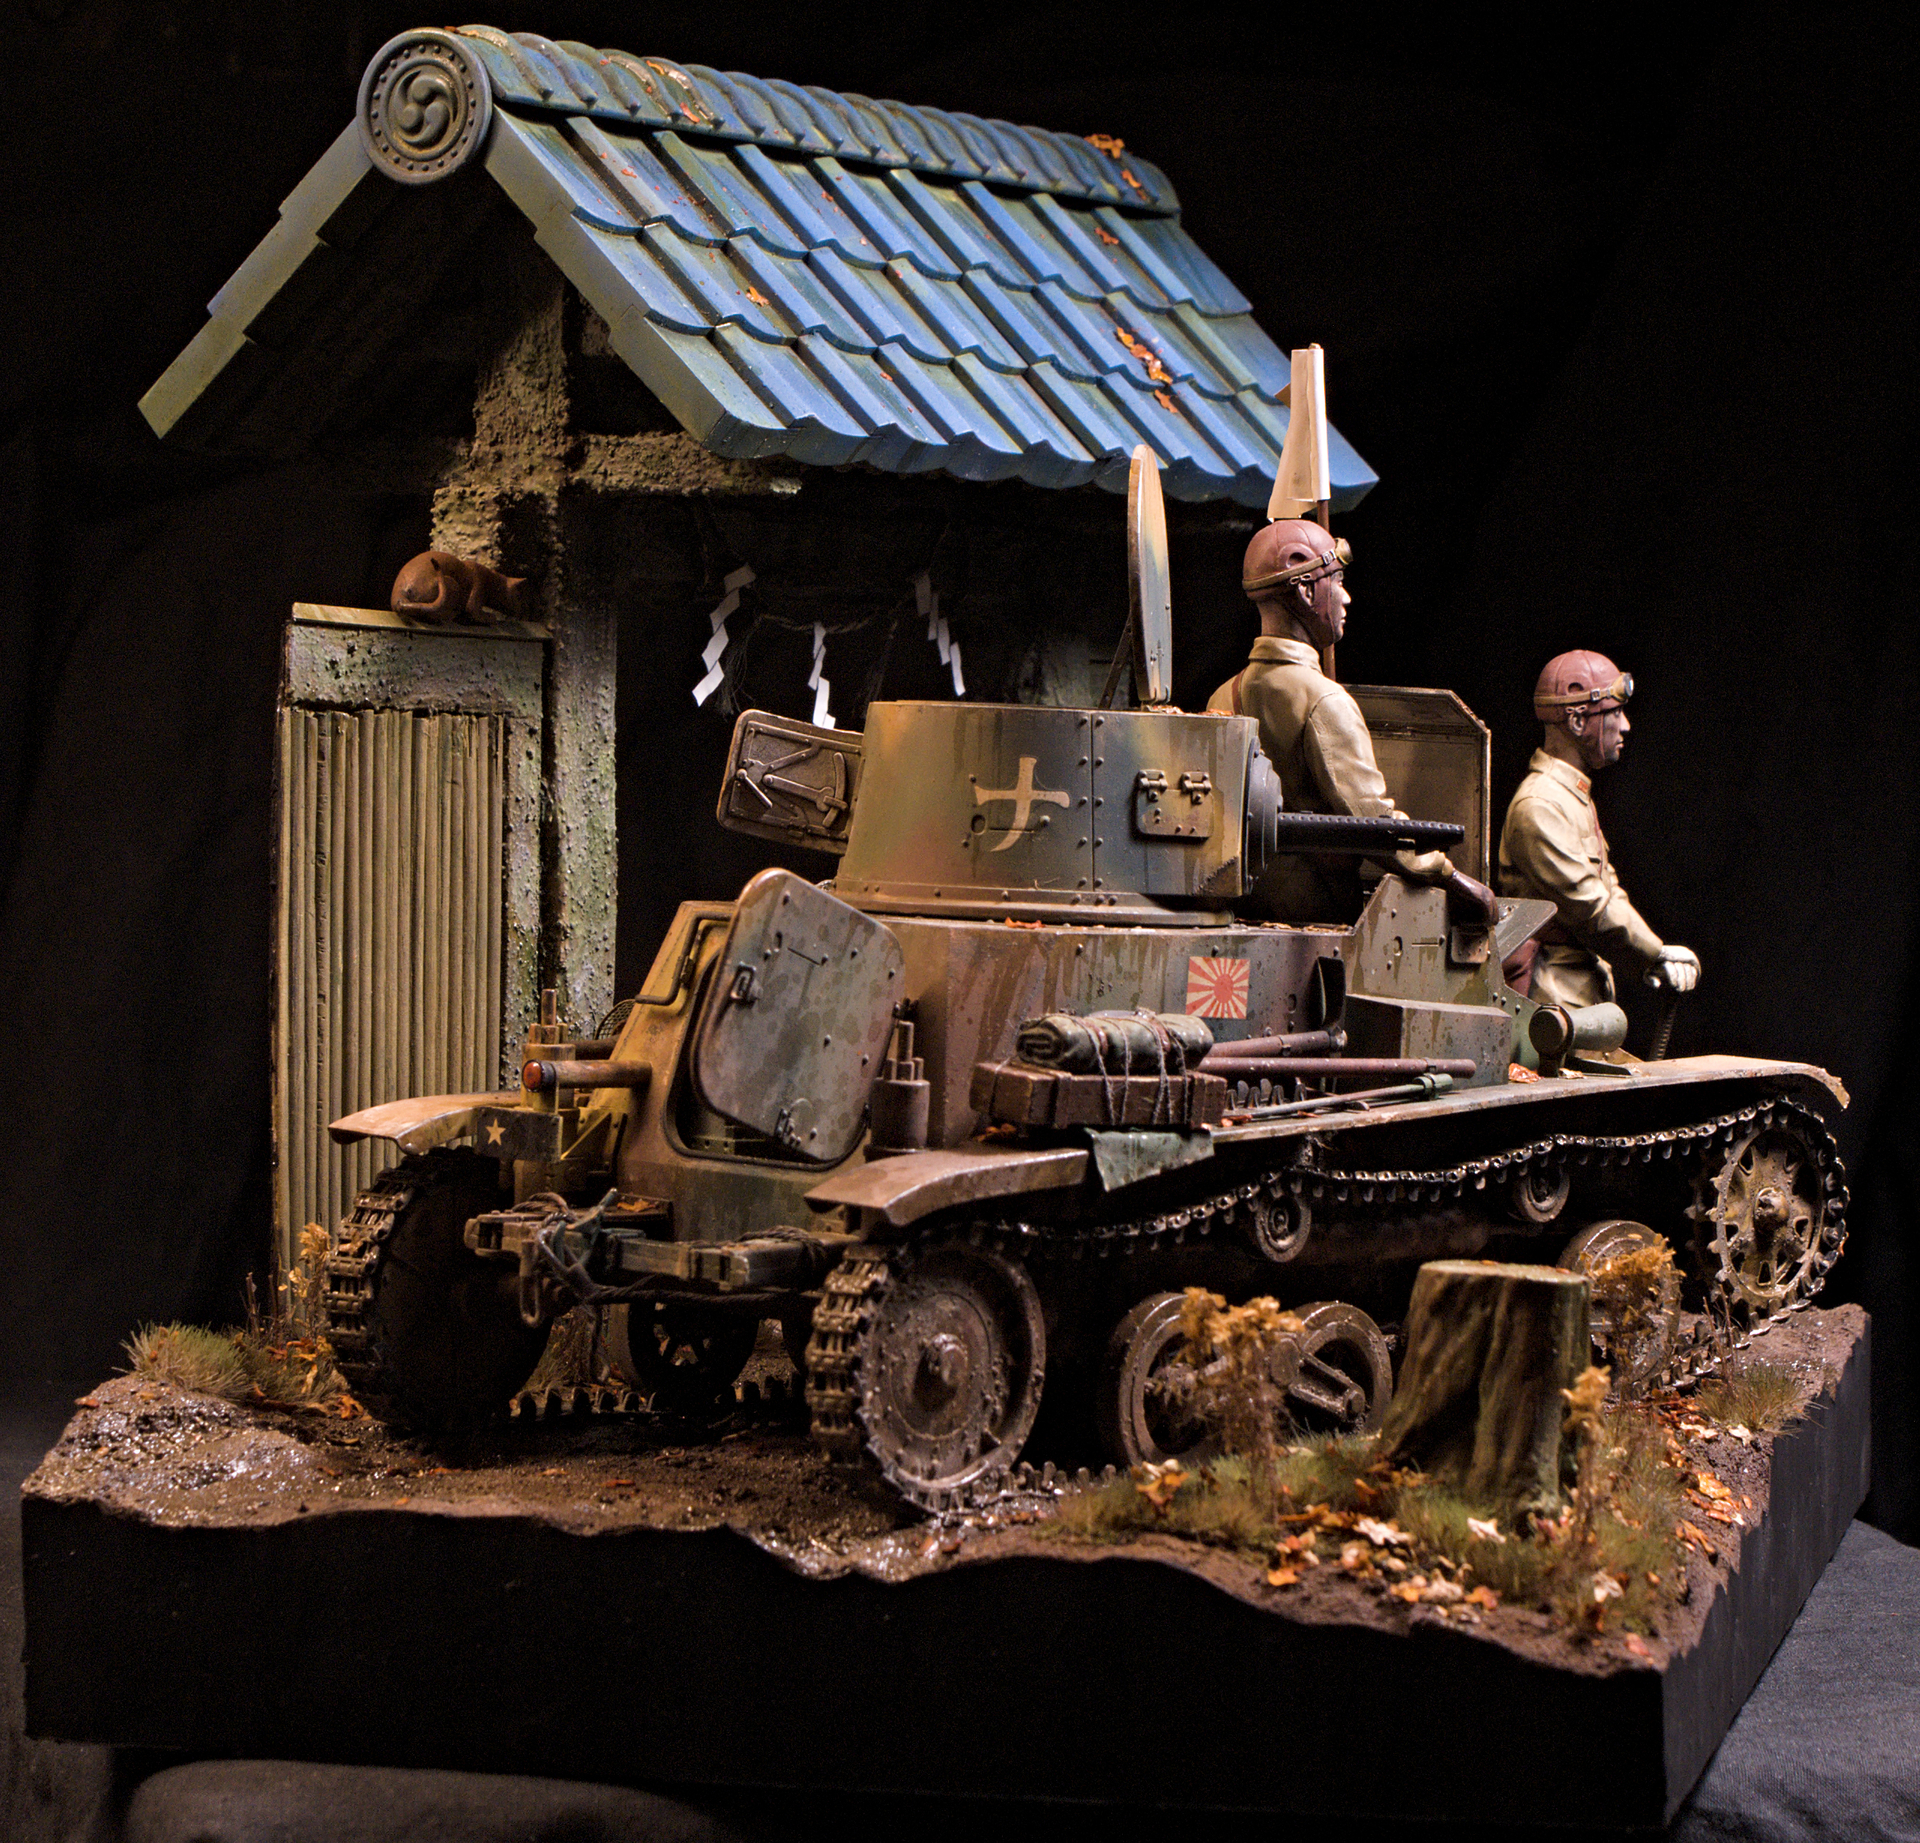
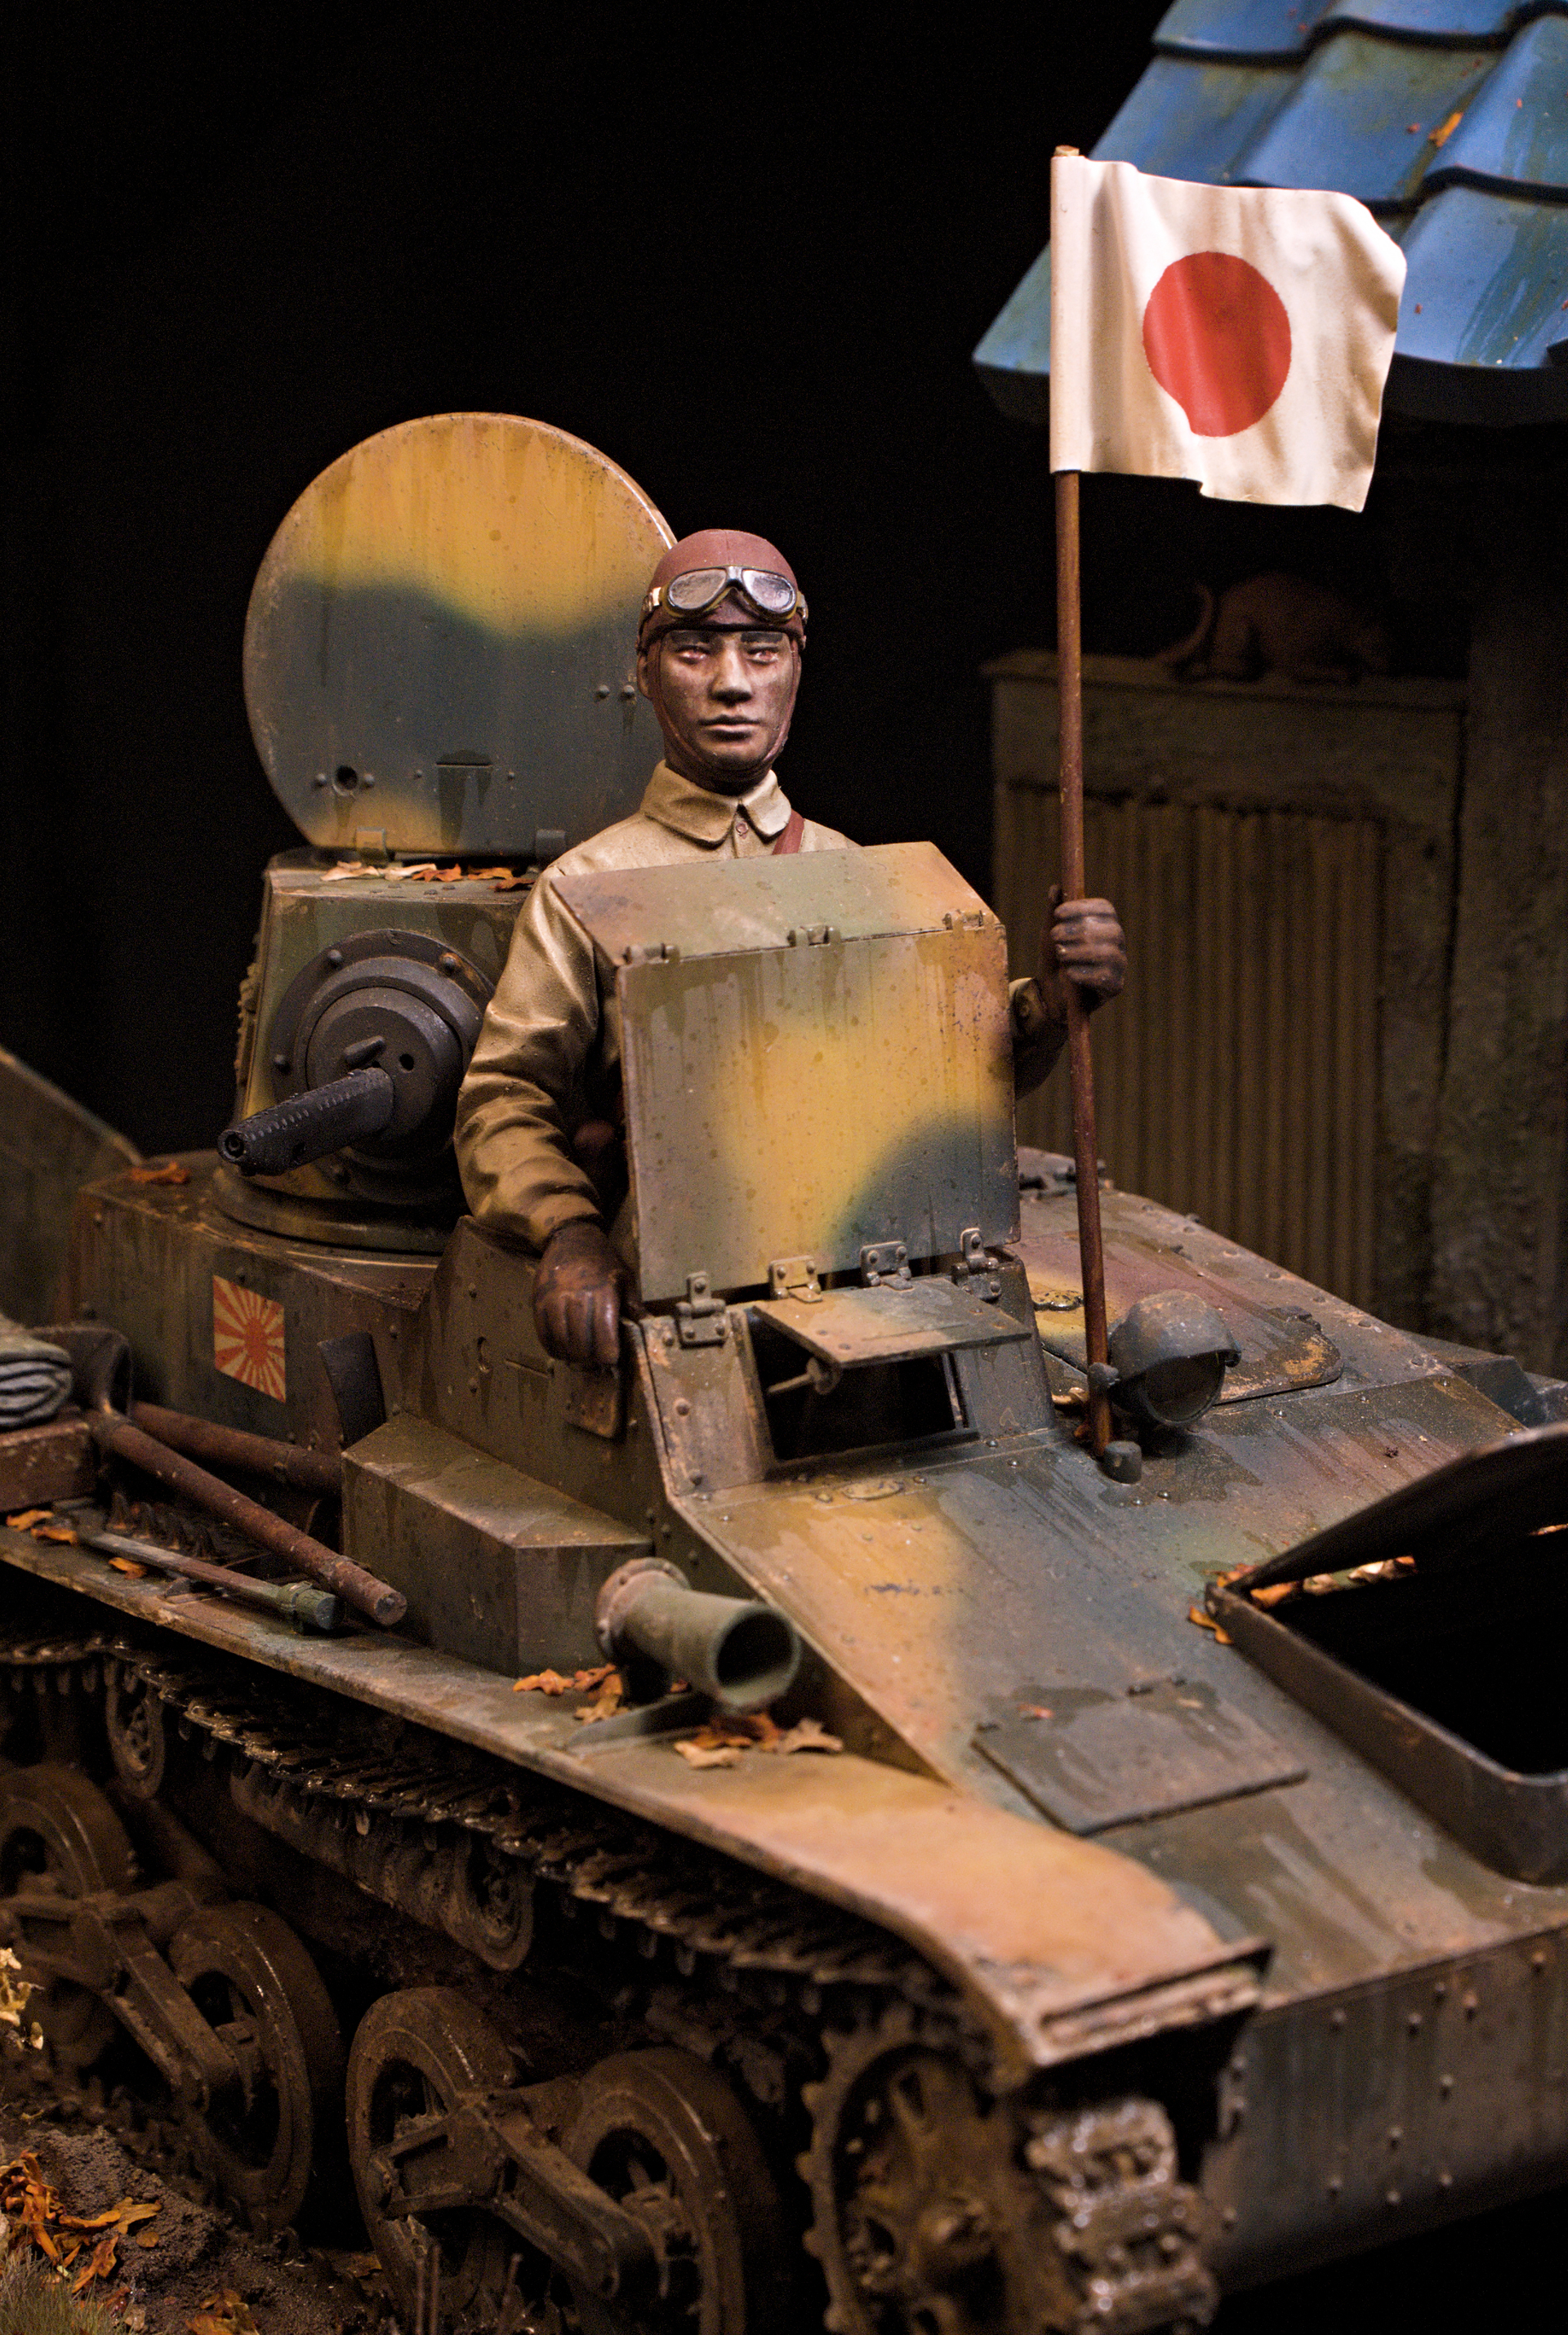
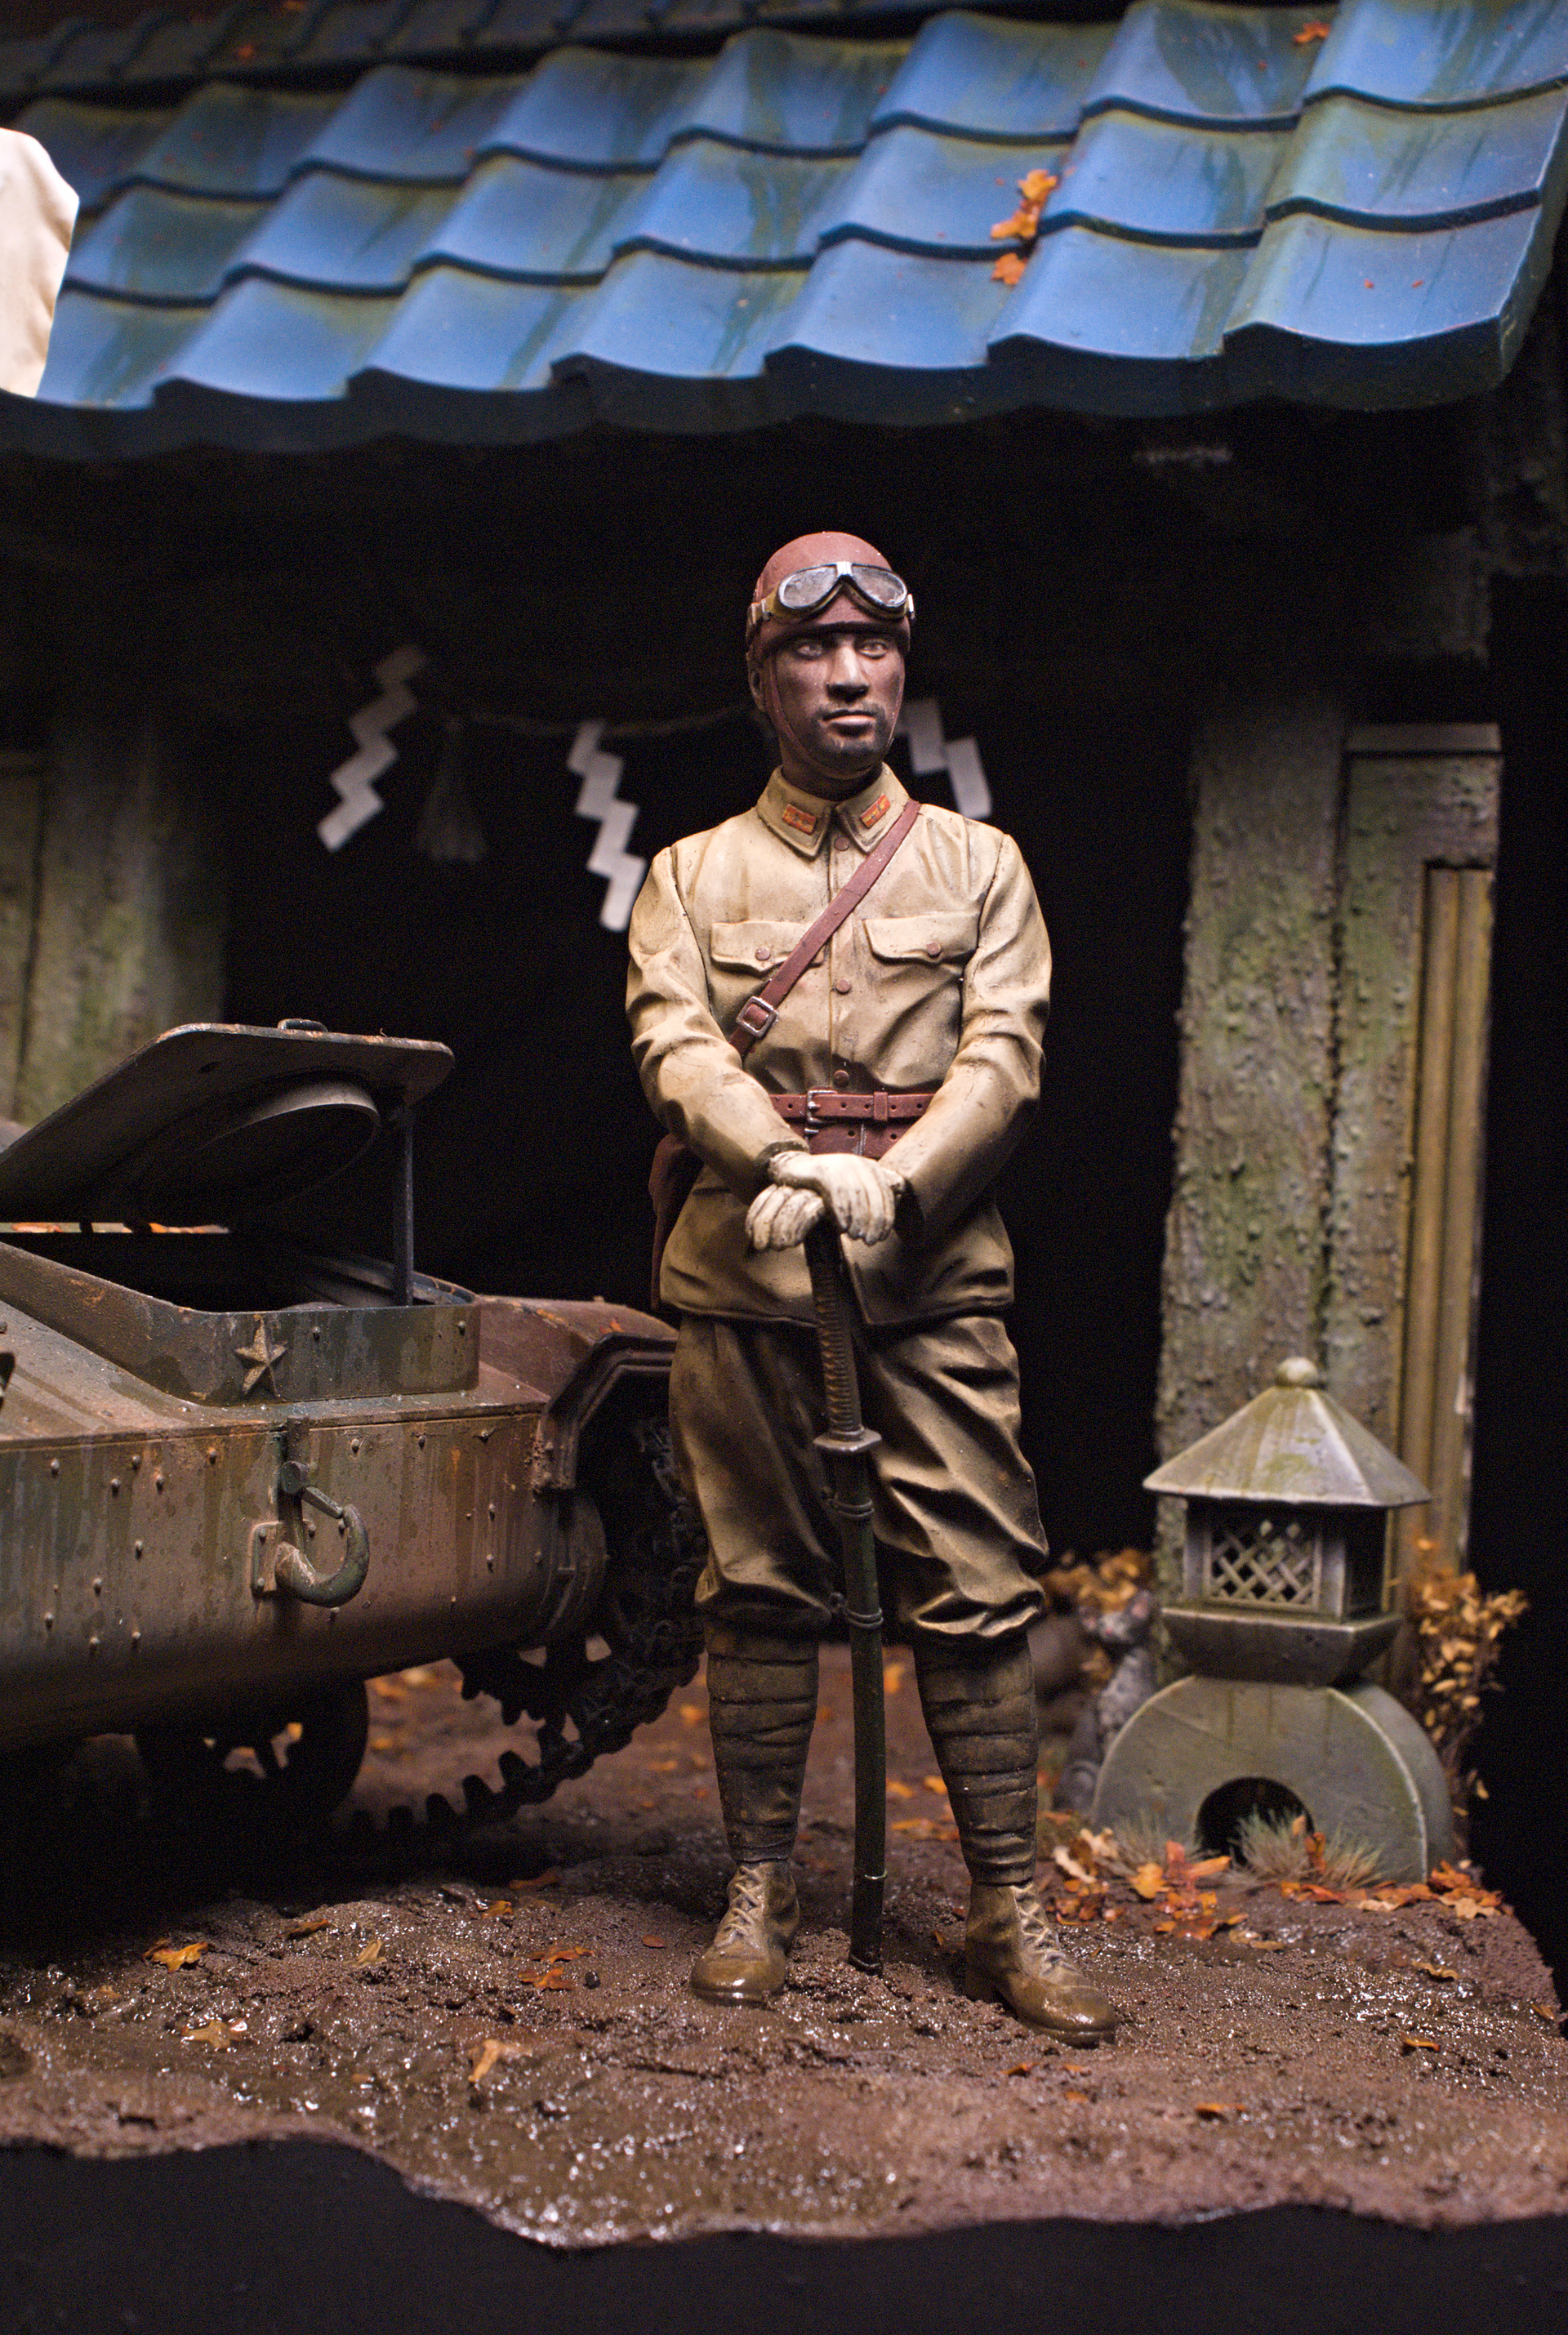
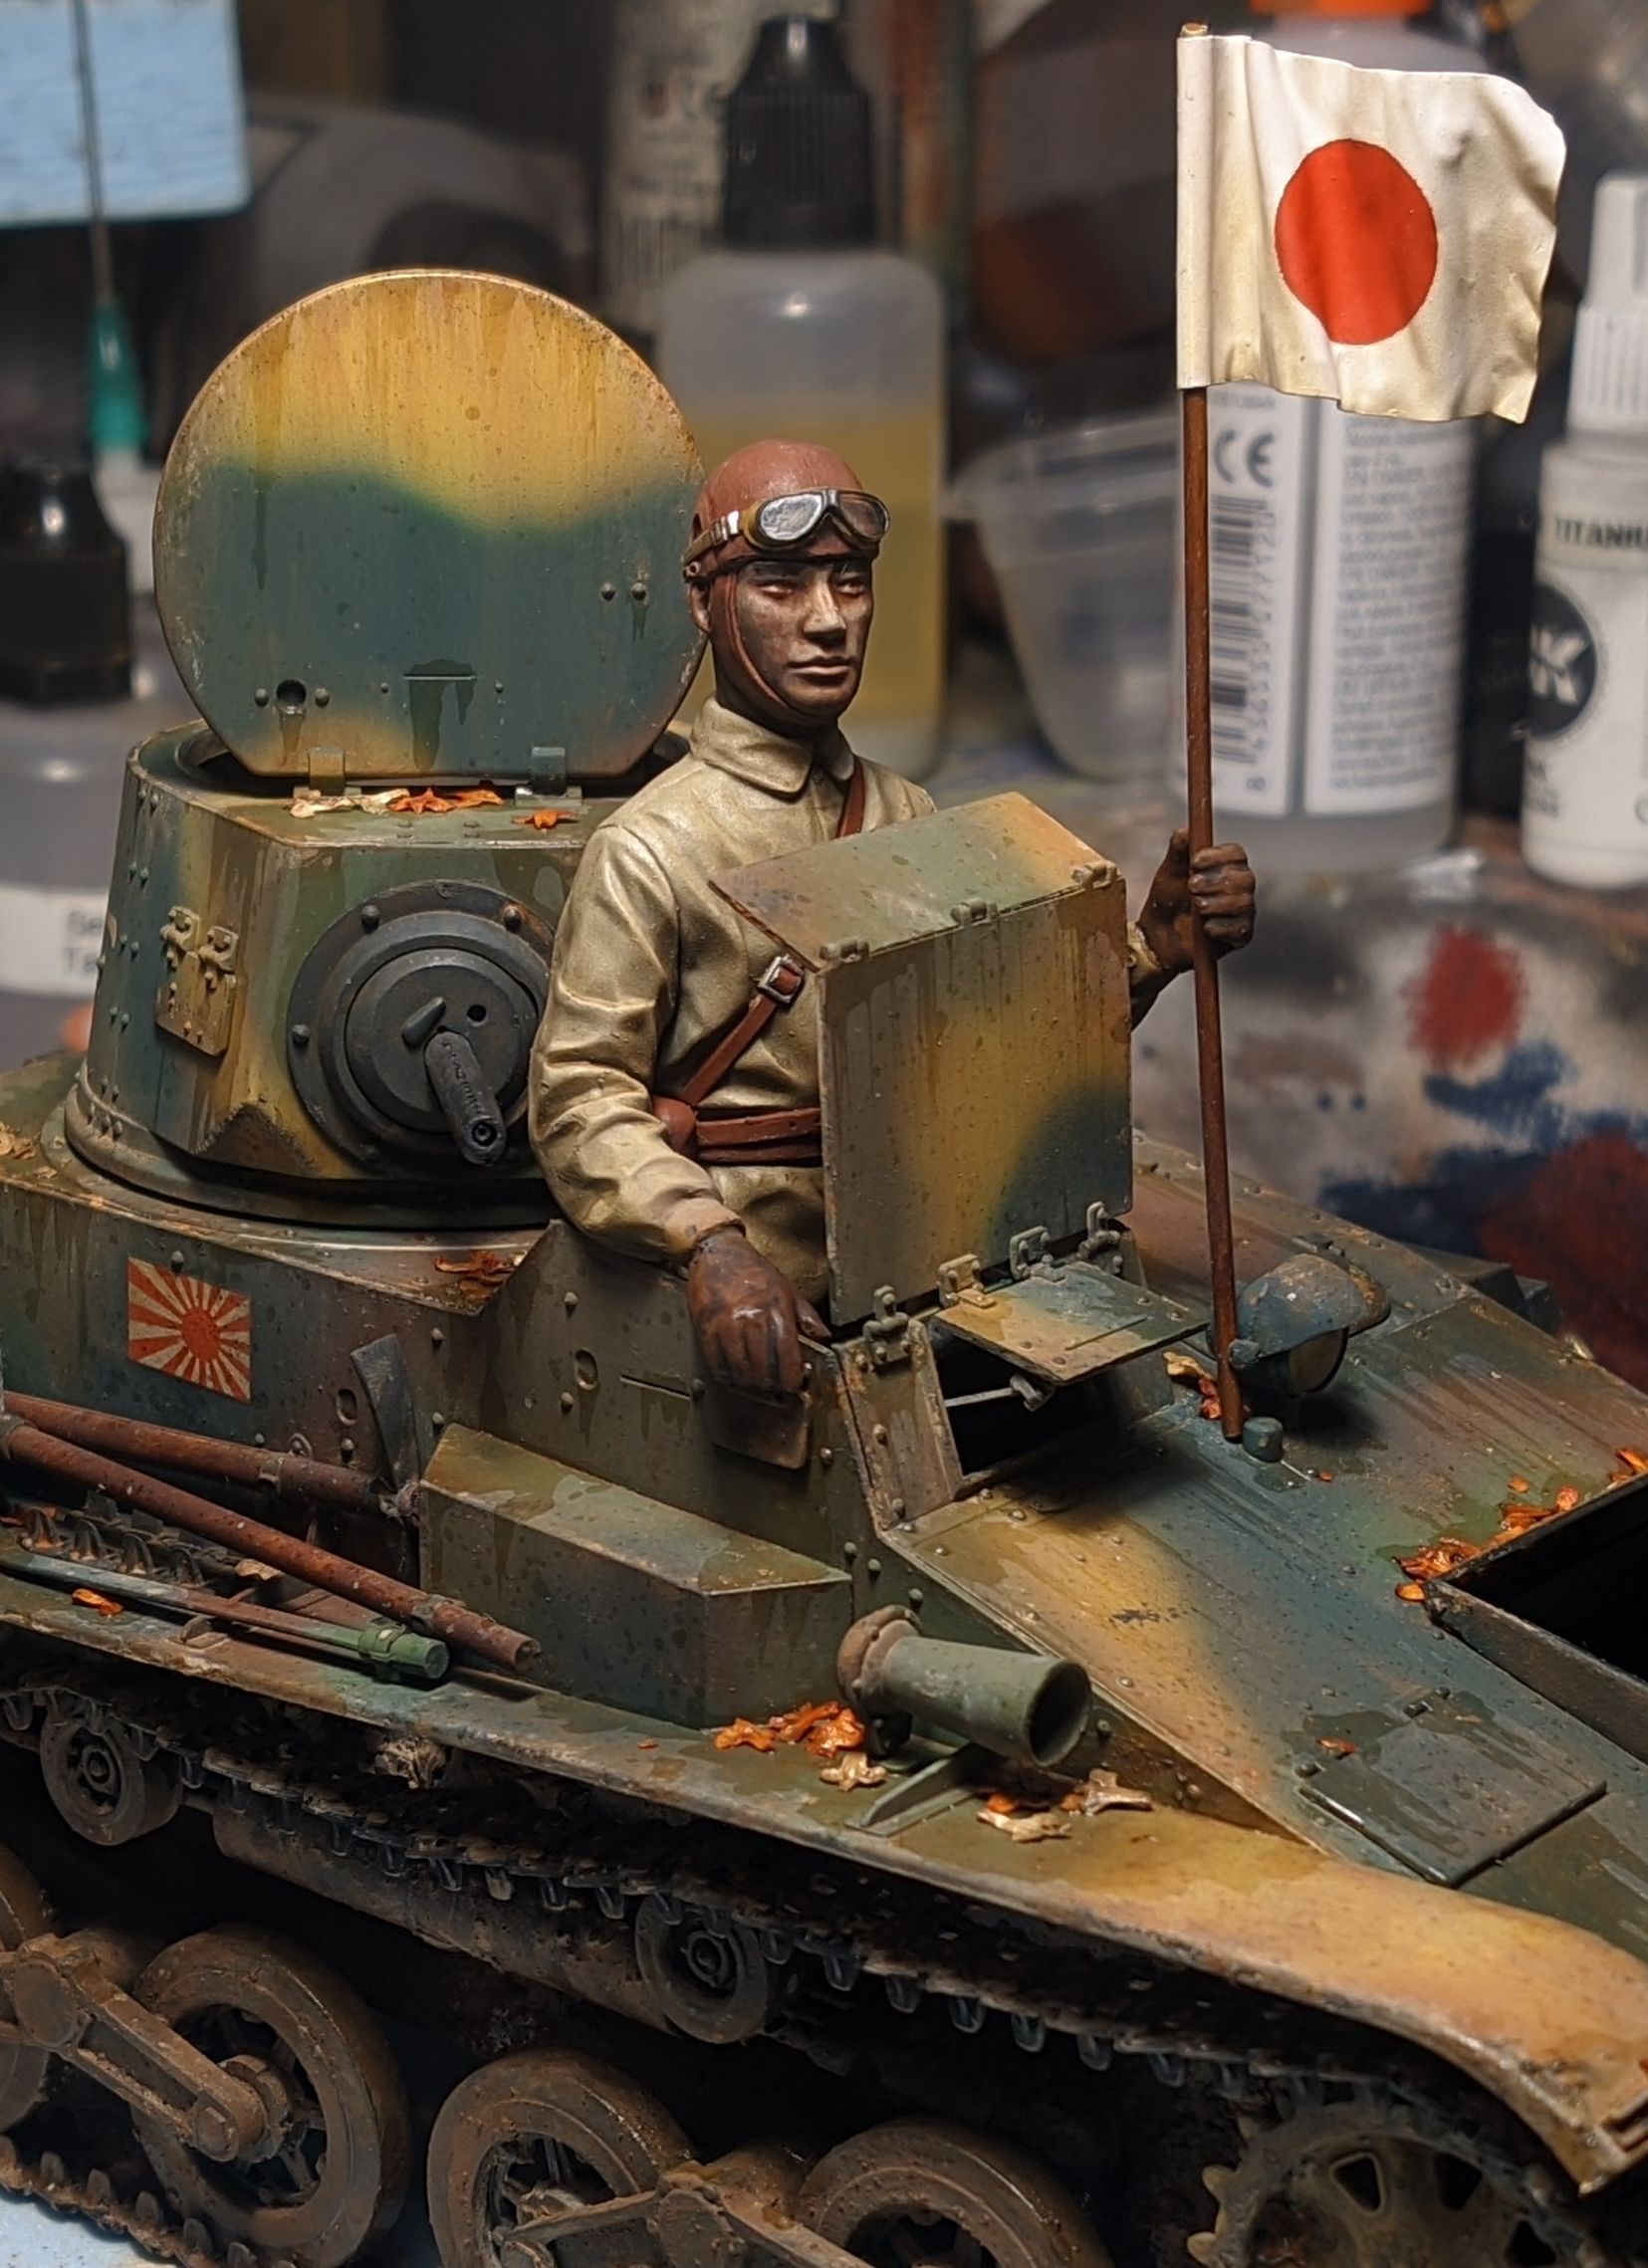
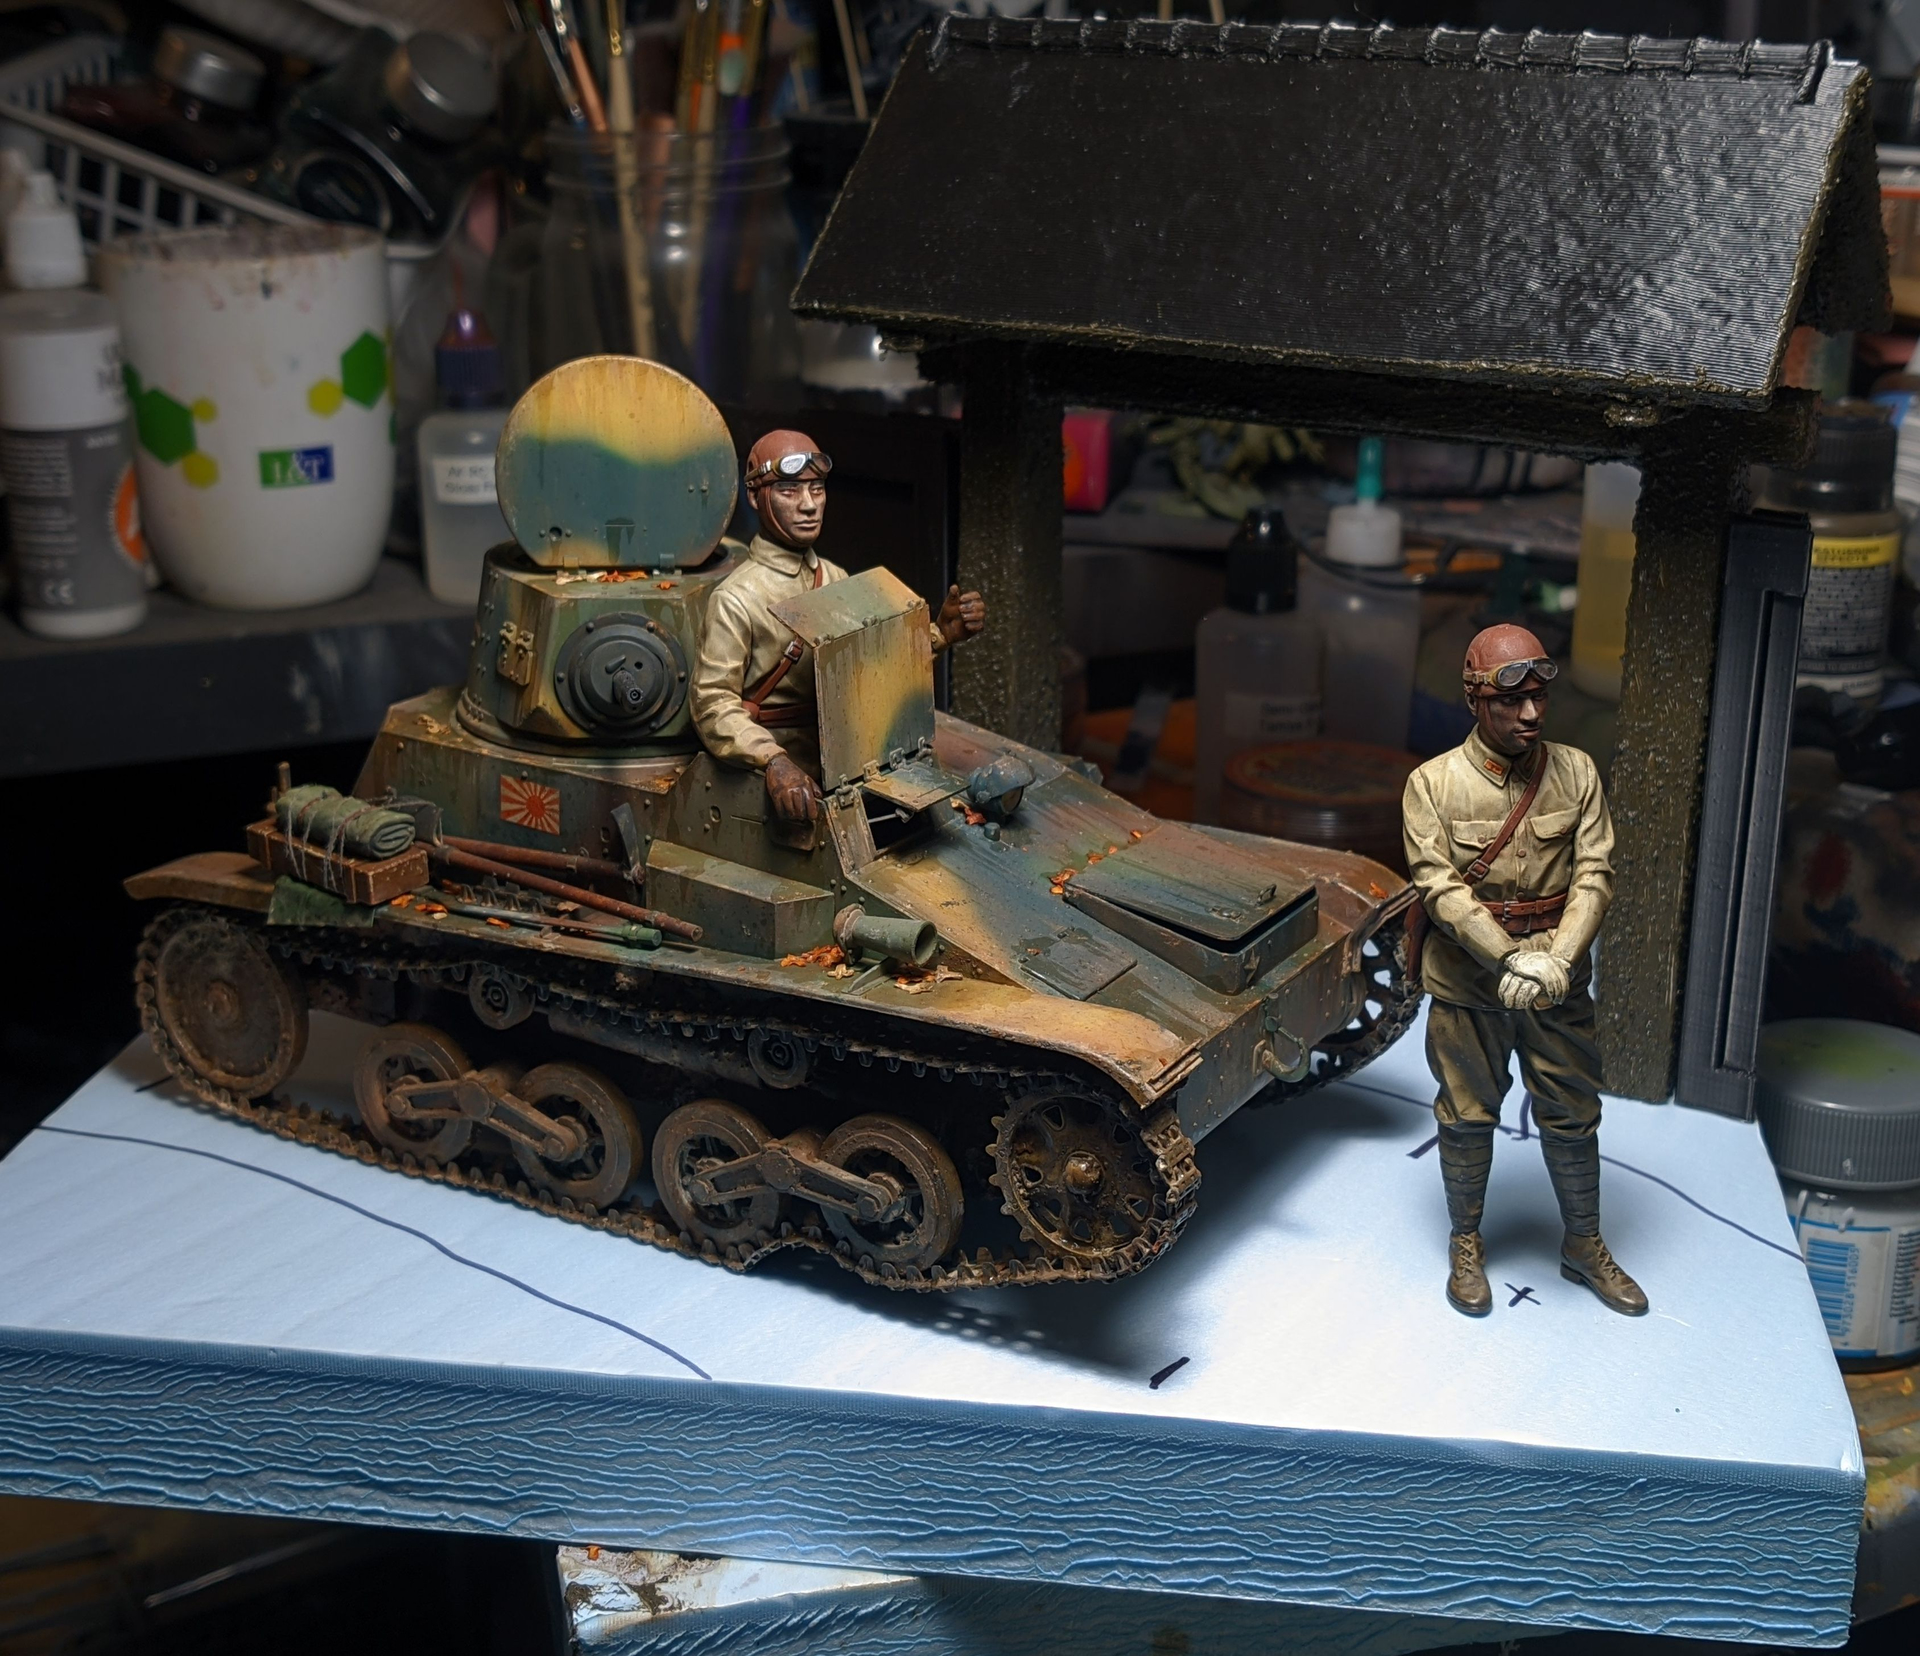
The tankette is the Takom IJA Type 94 Tankette Late Production, and the second figure is the Takom IJA Tank Commander, both in 1:16 scale.
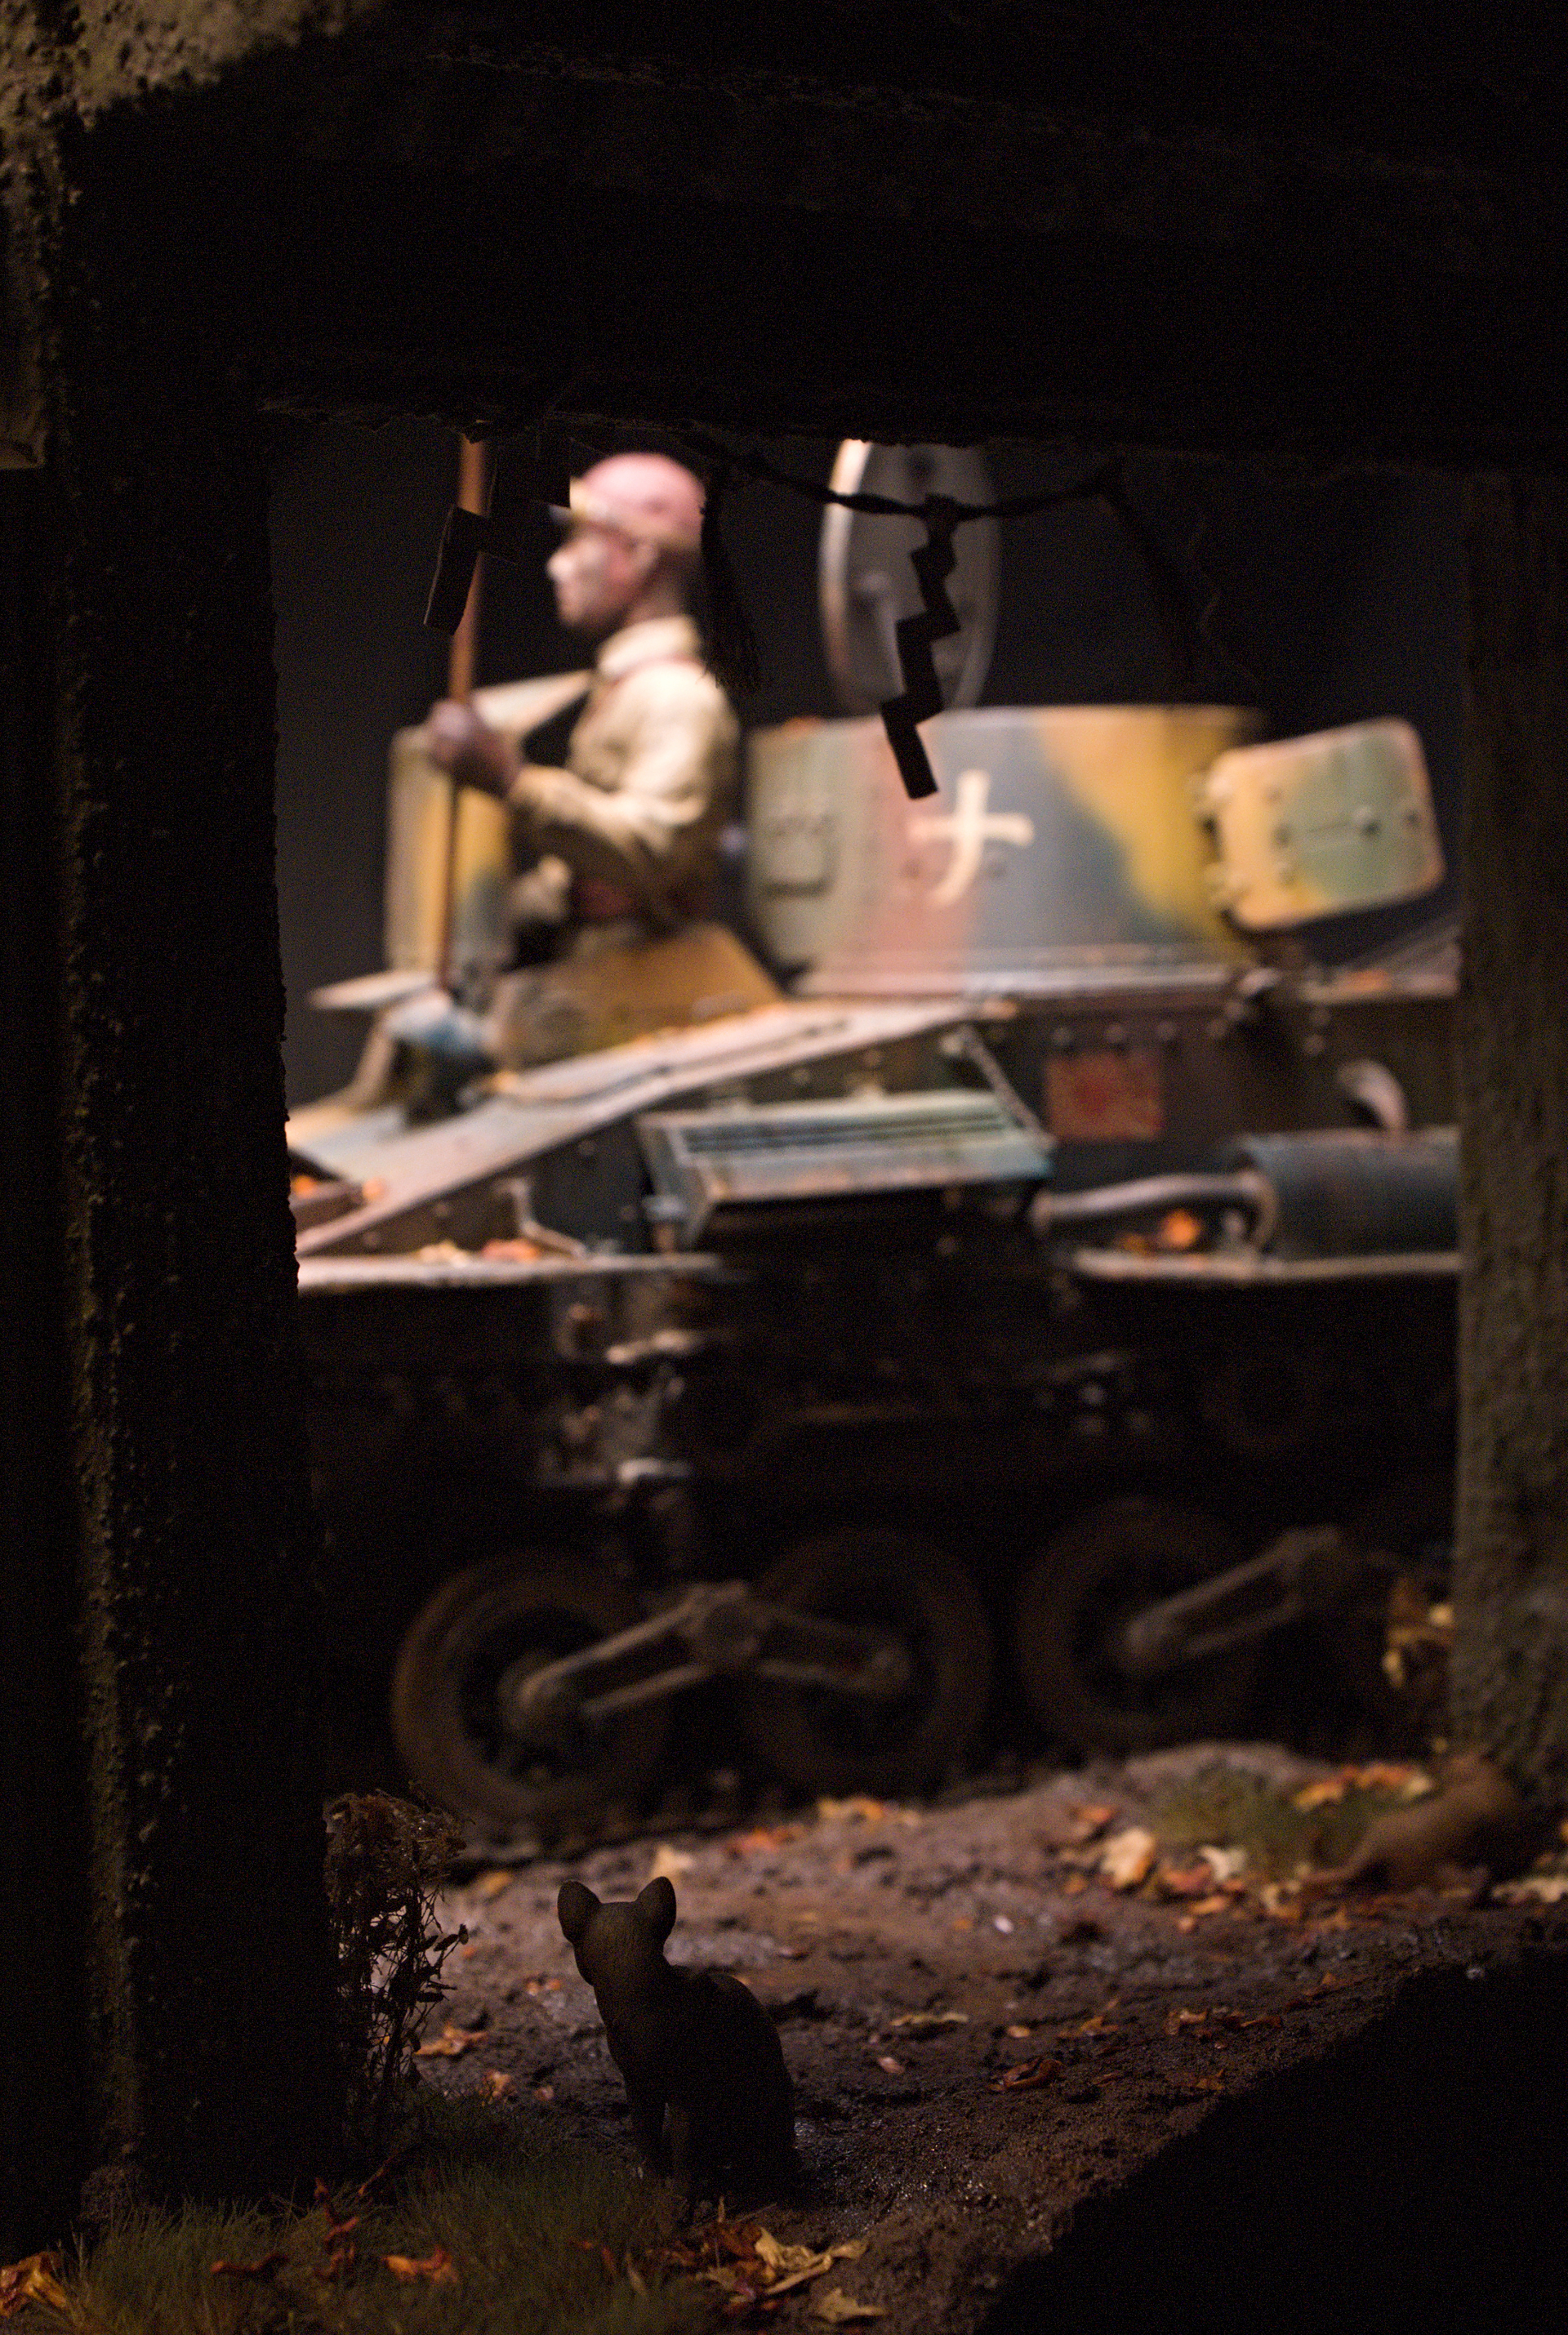
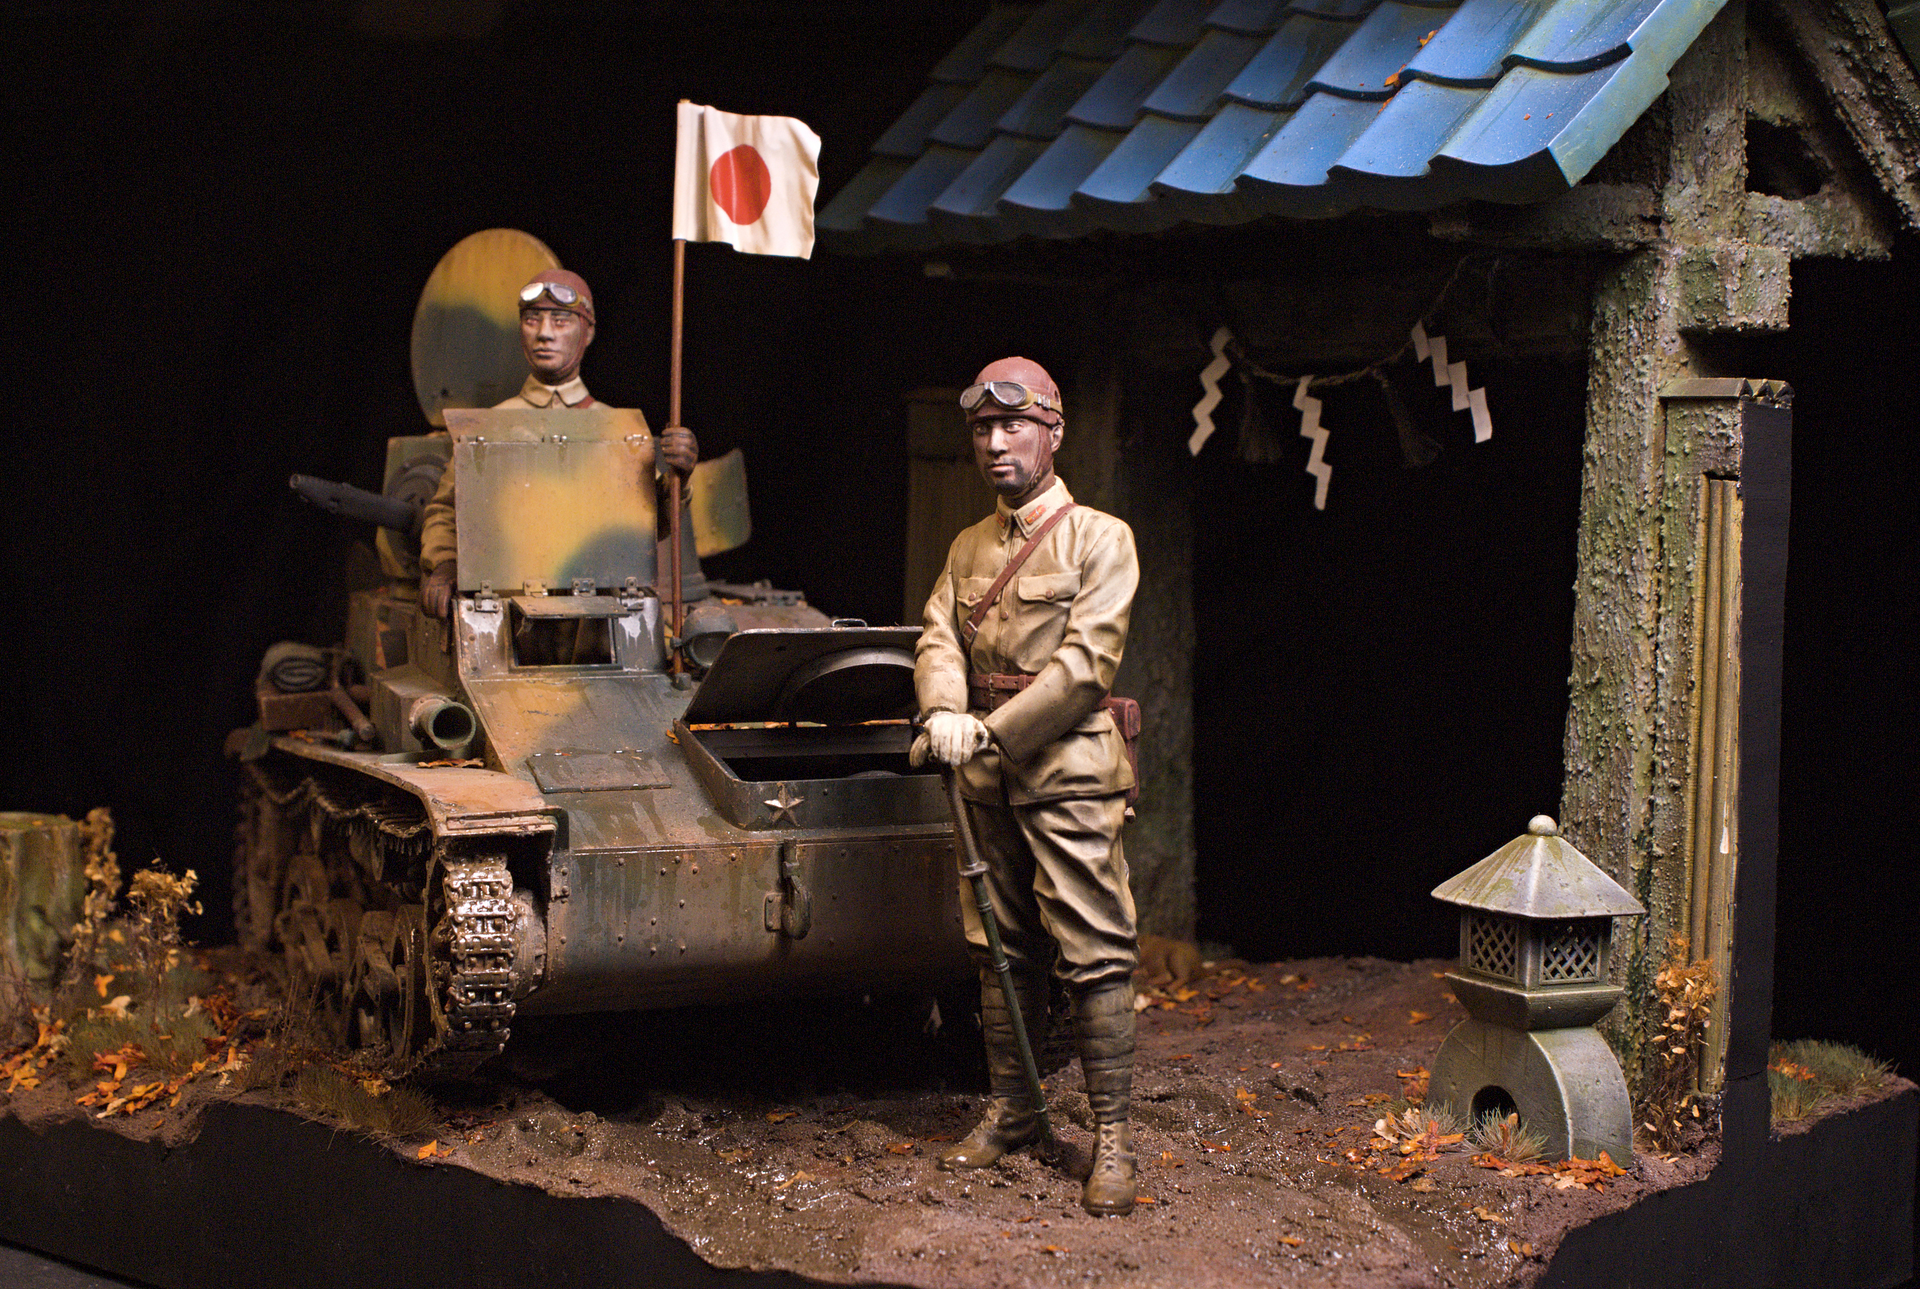
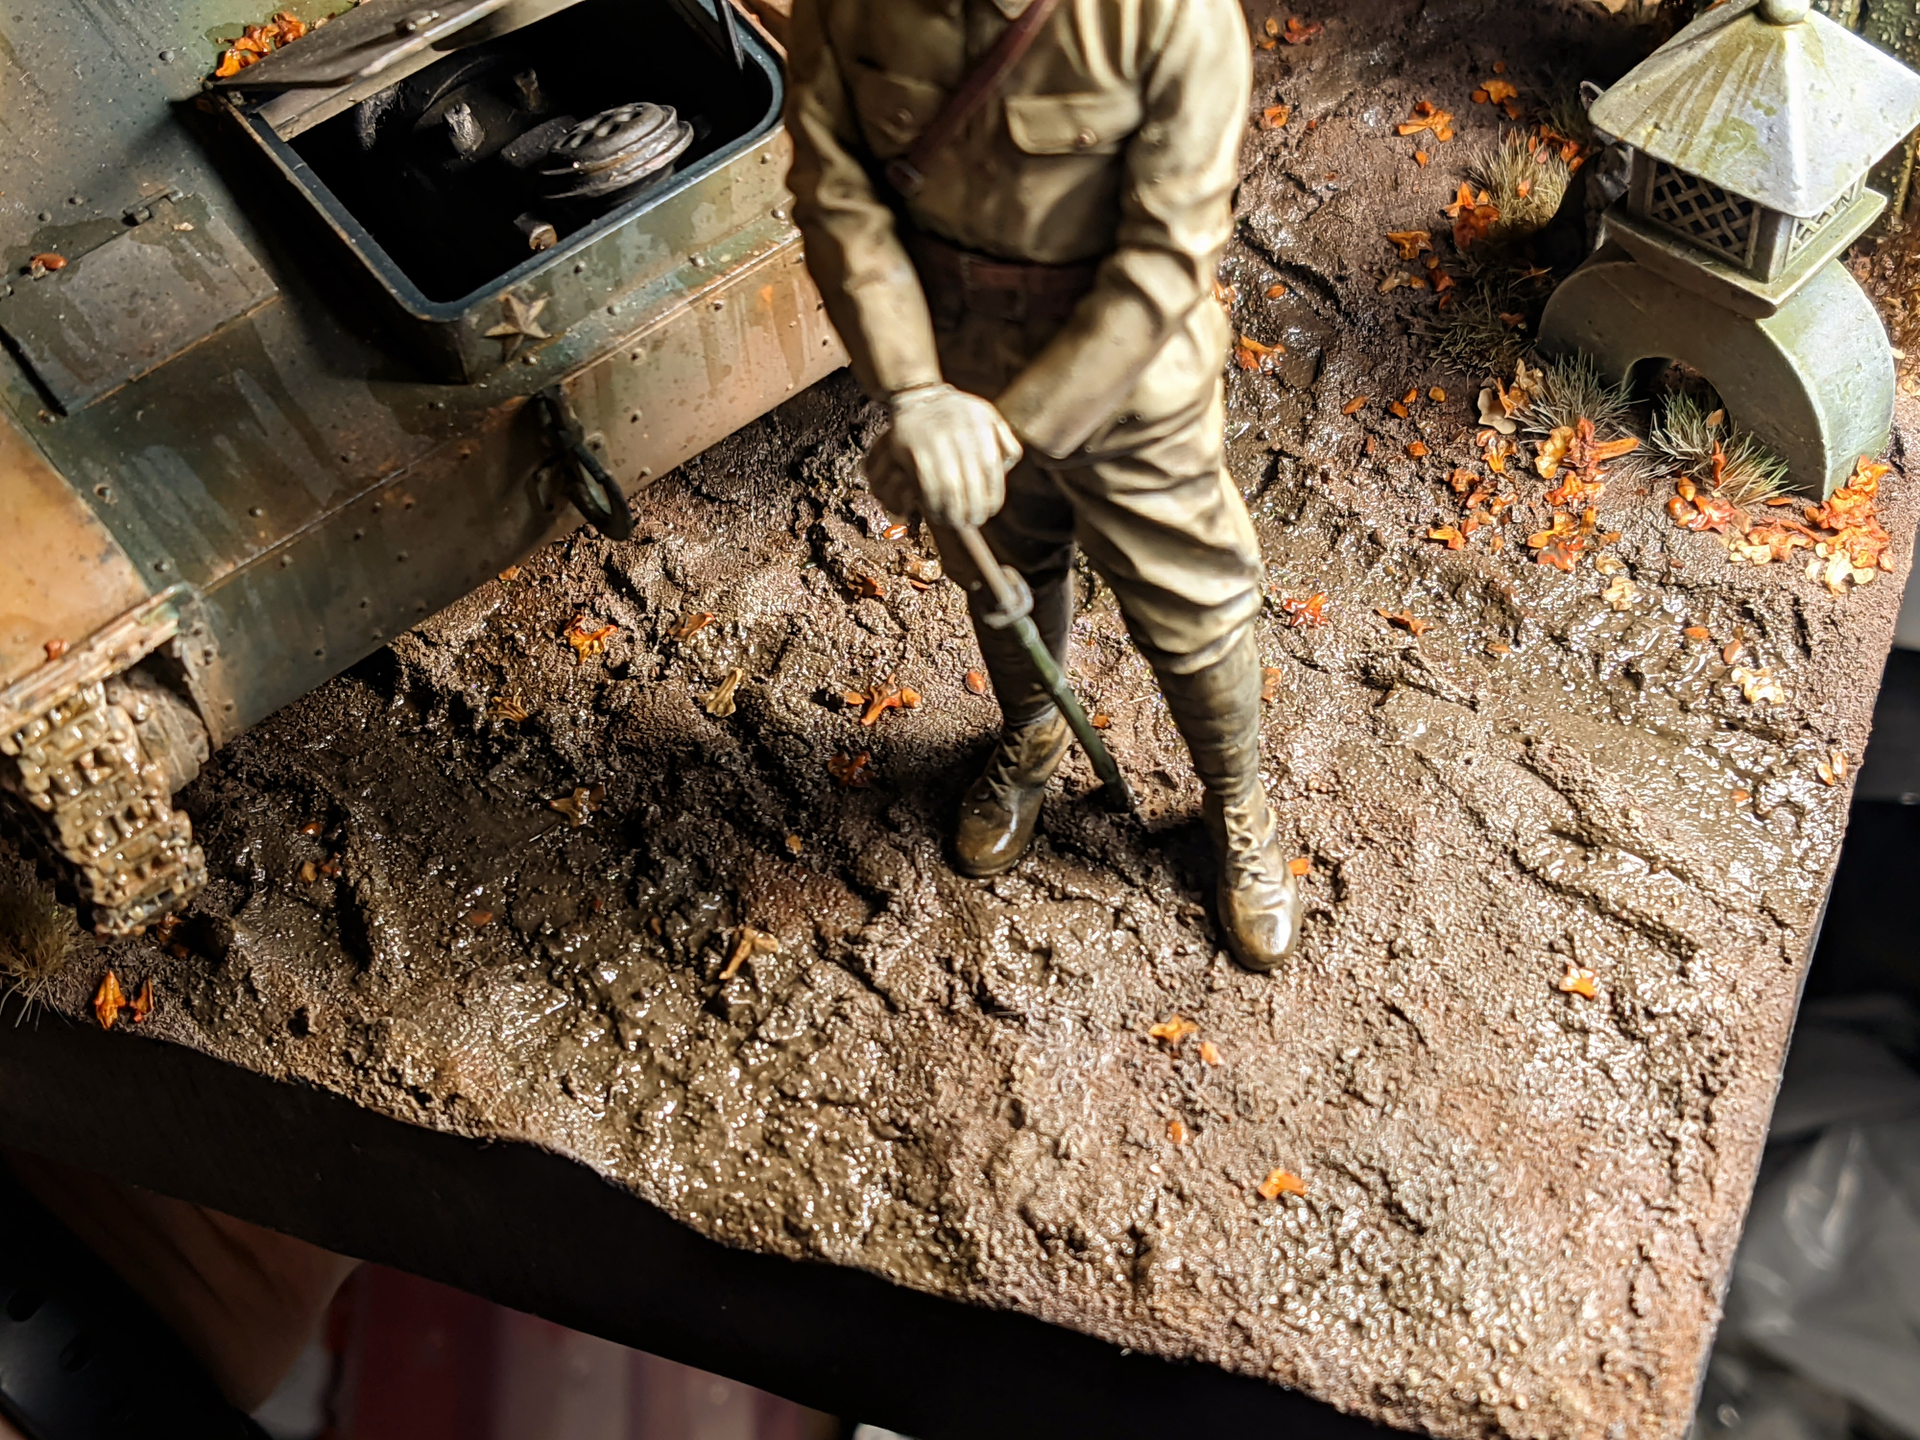
Finished diorama

The rubber band tracks in the kit were pretty good detail-wise but also super tight. The individual link tracks didn’t click together and were a hassle to work with so I got the R Model metal tracks for this kit.
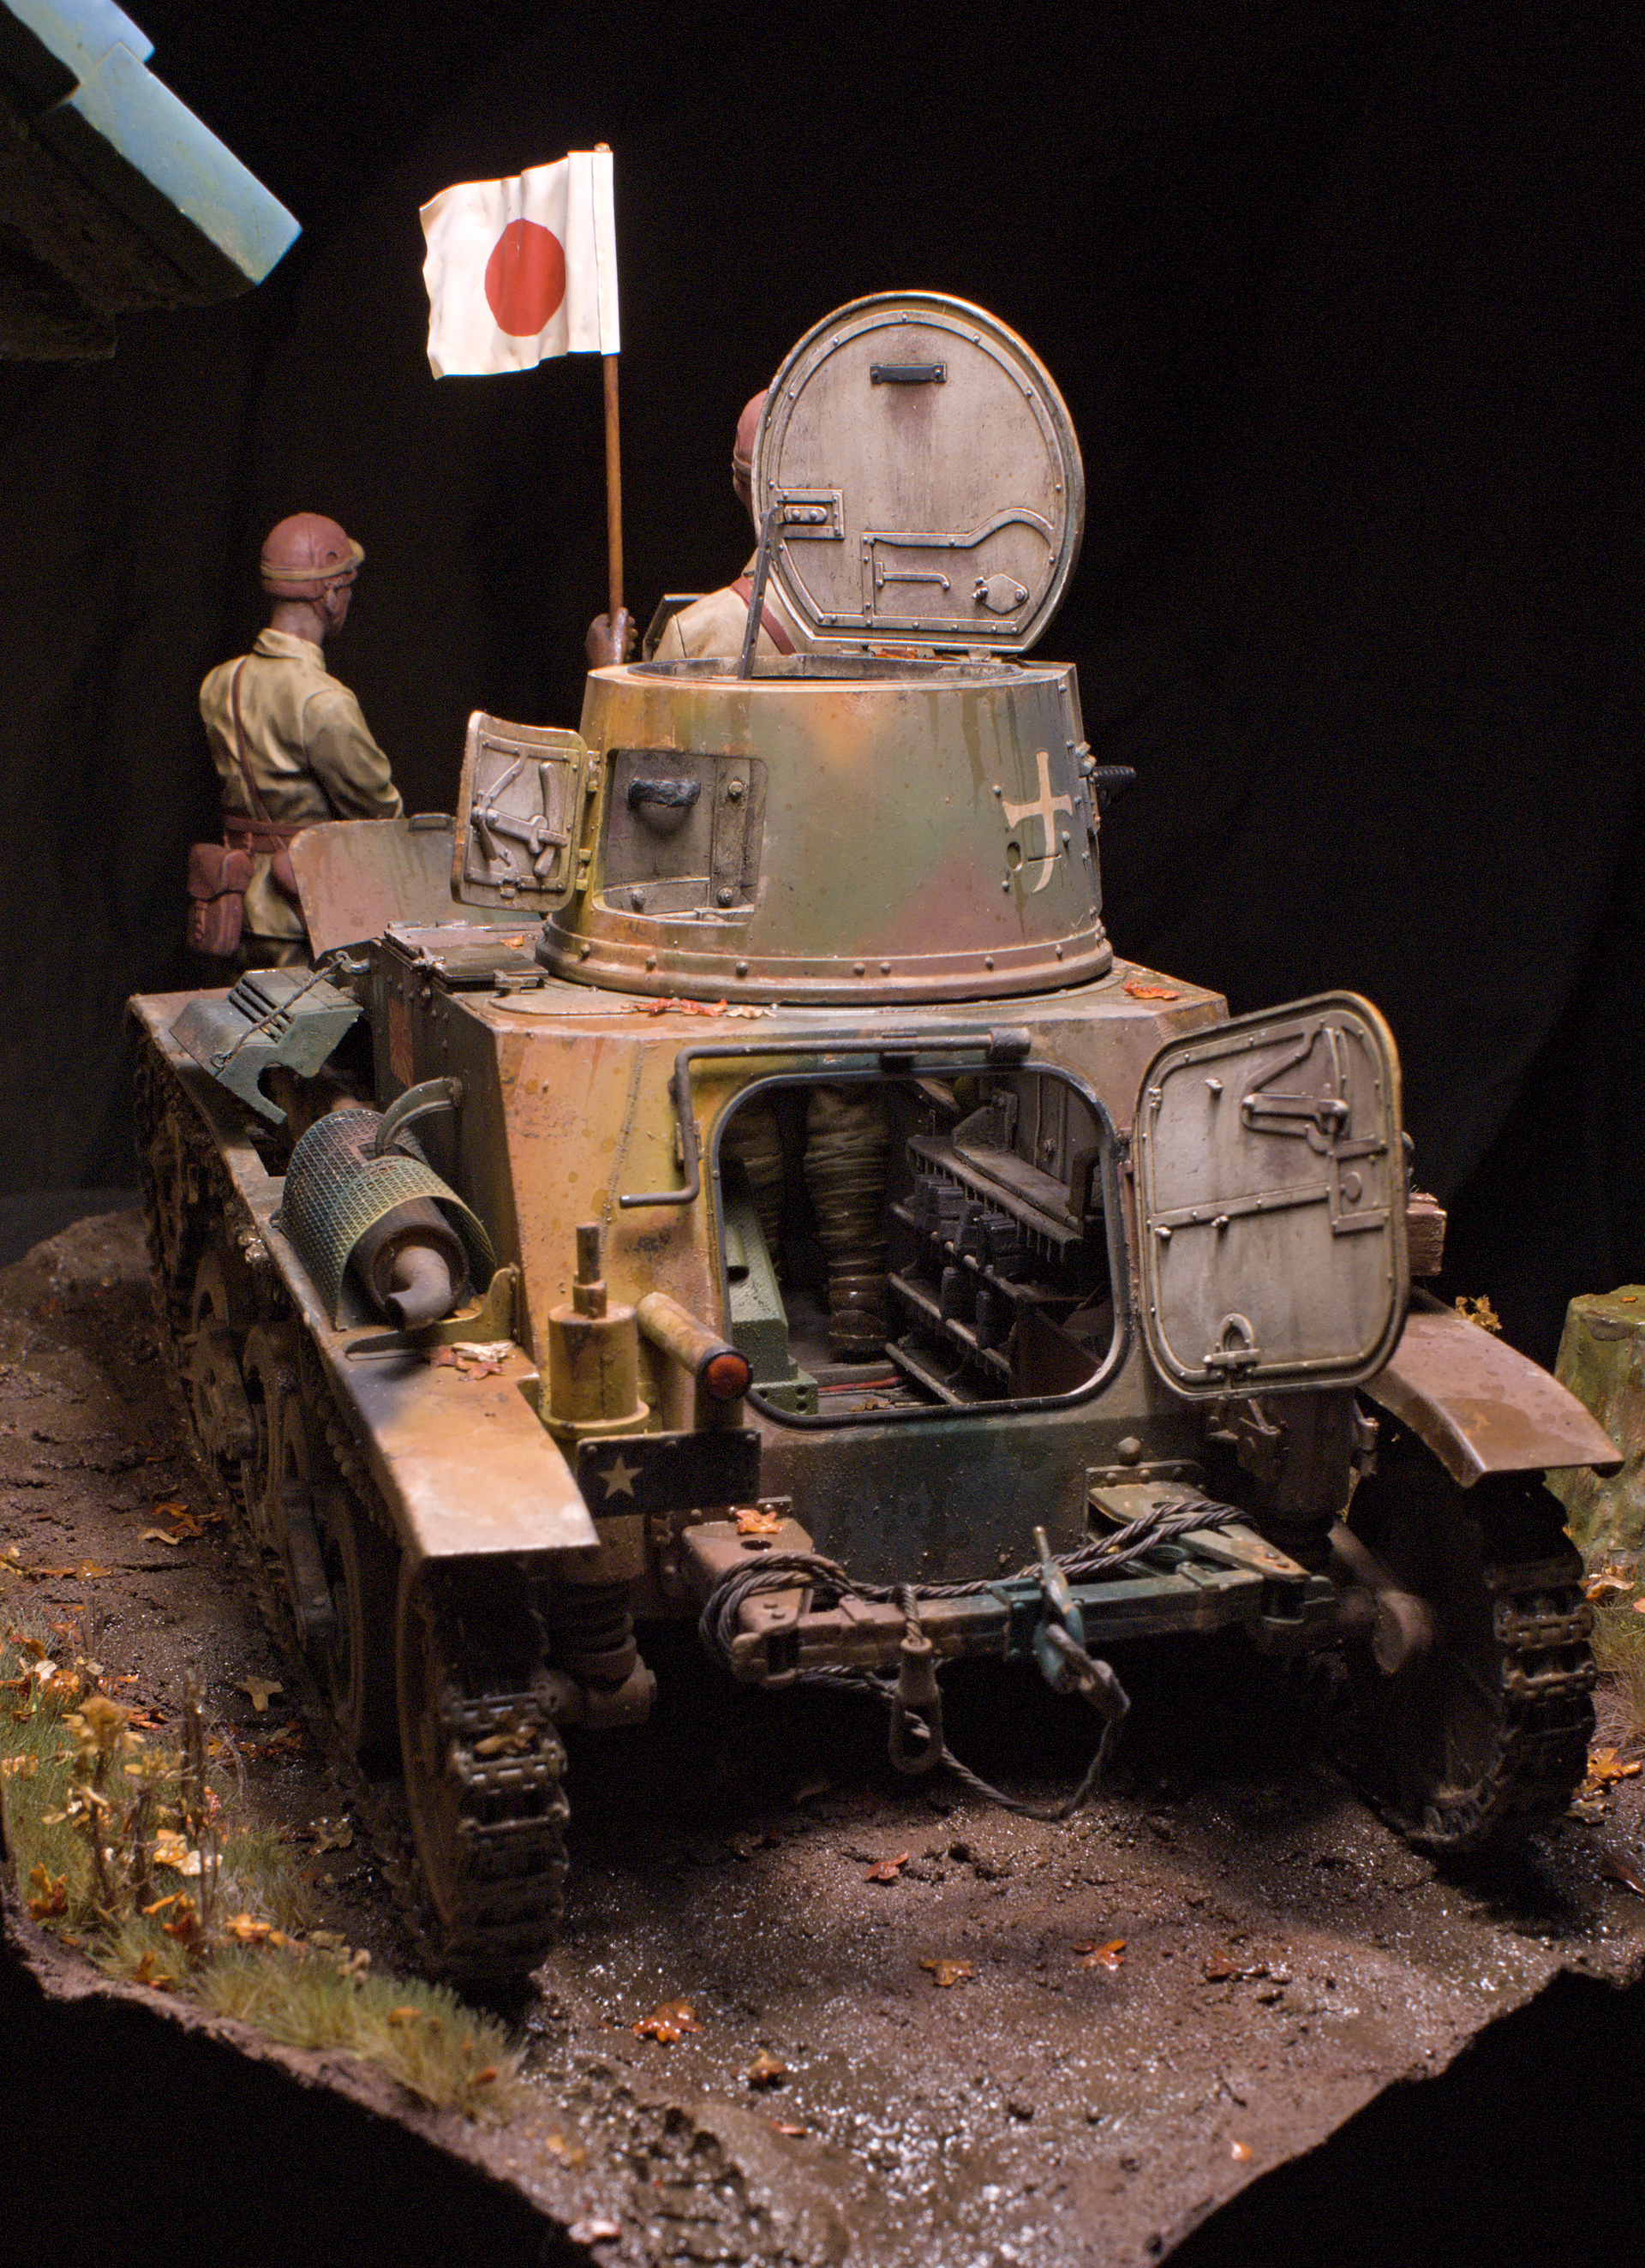

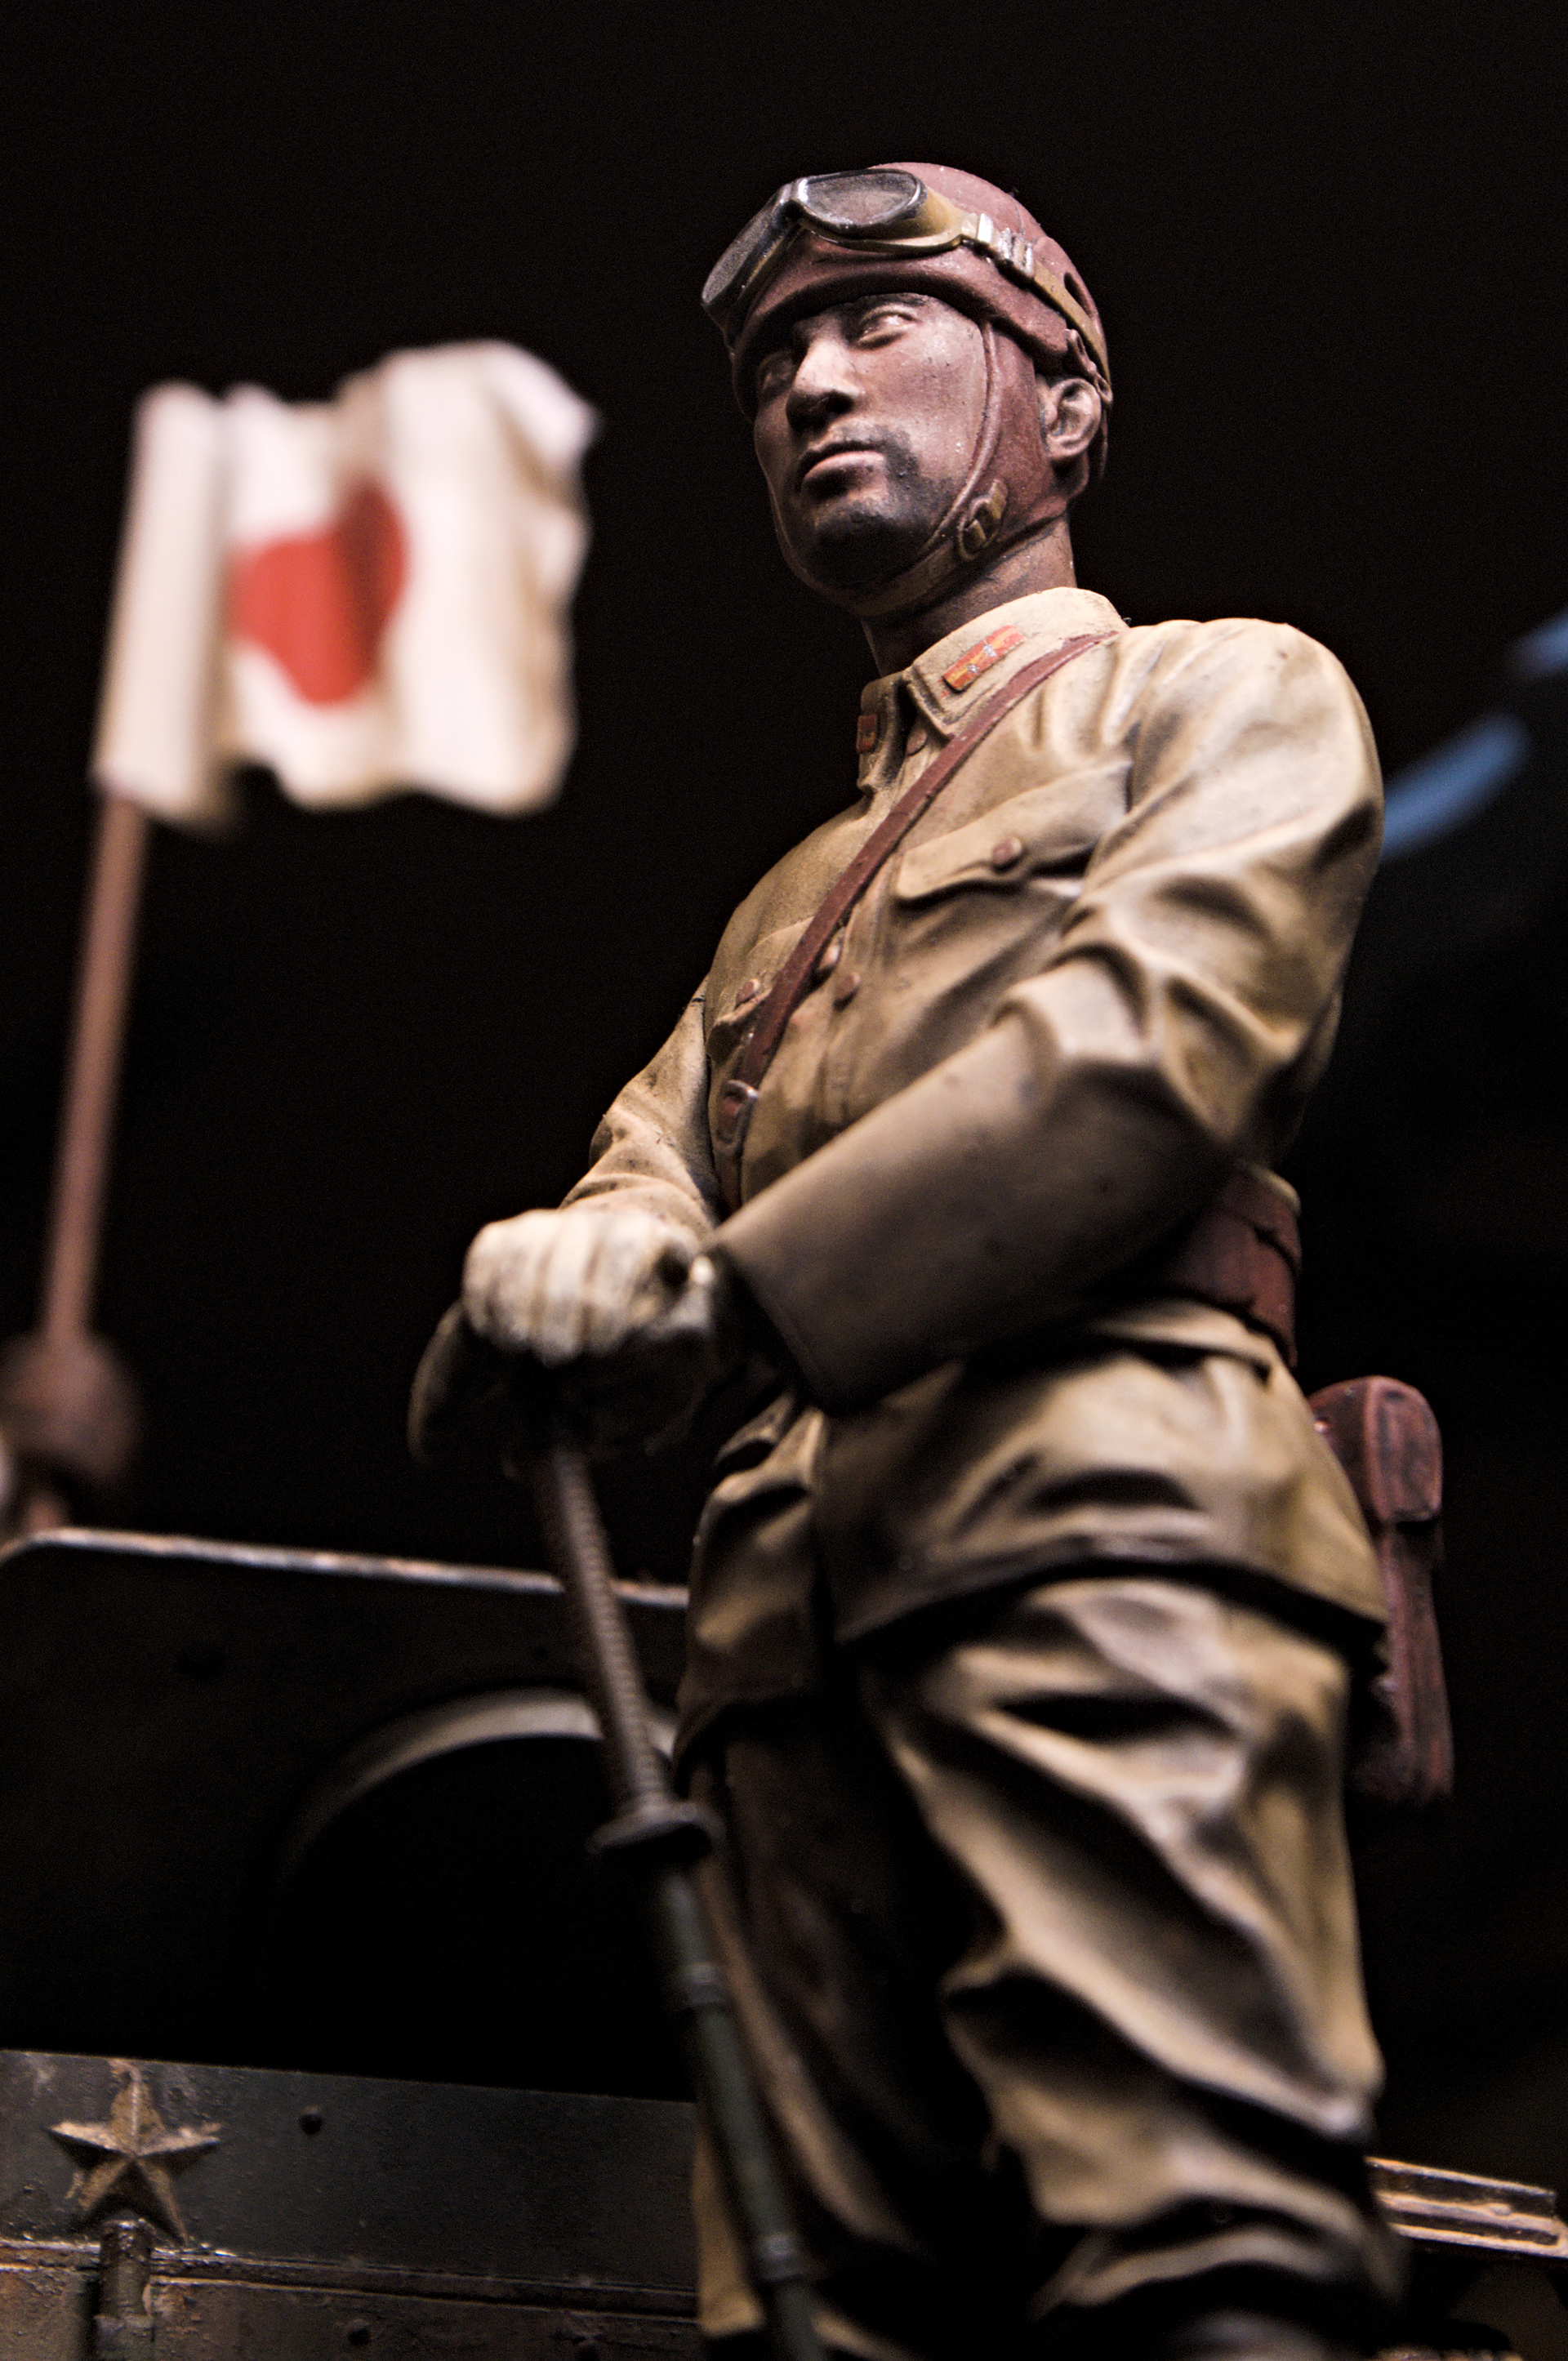
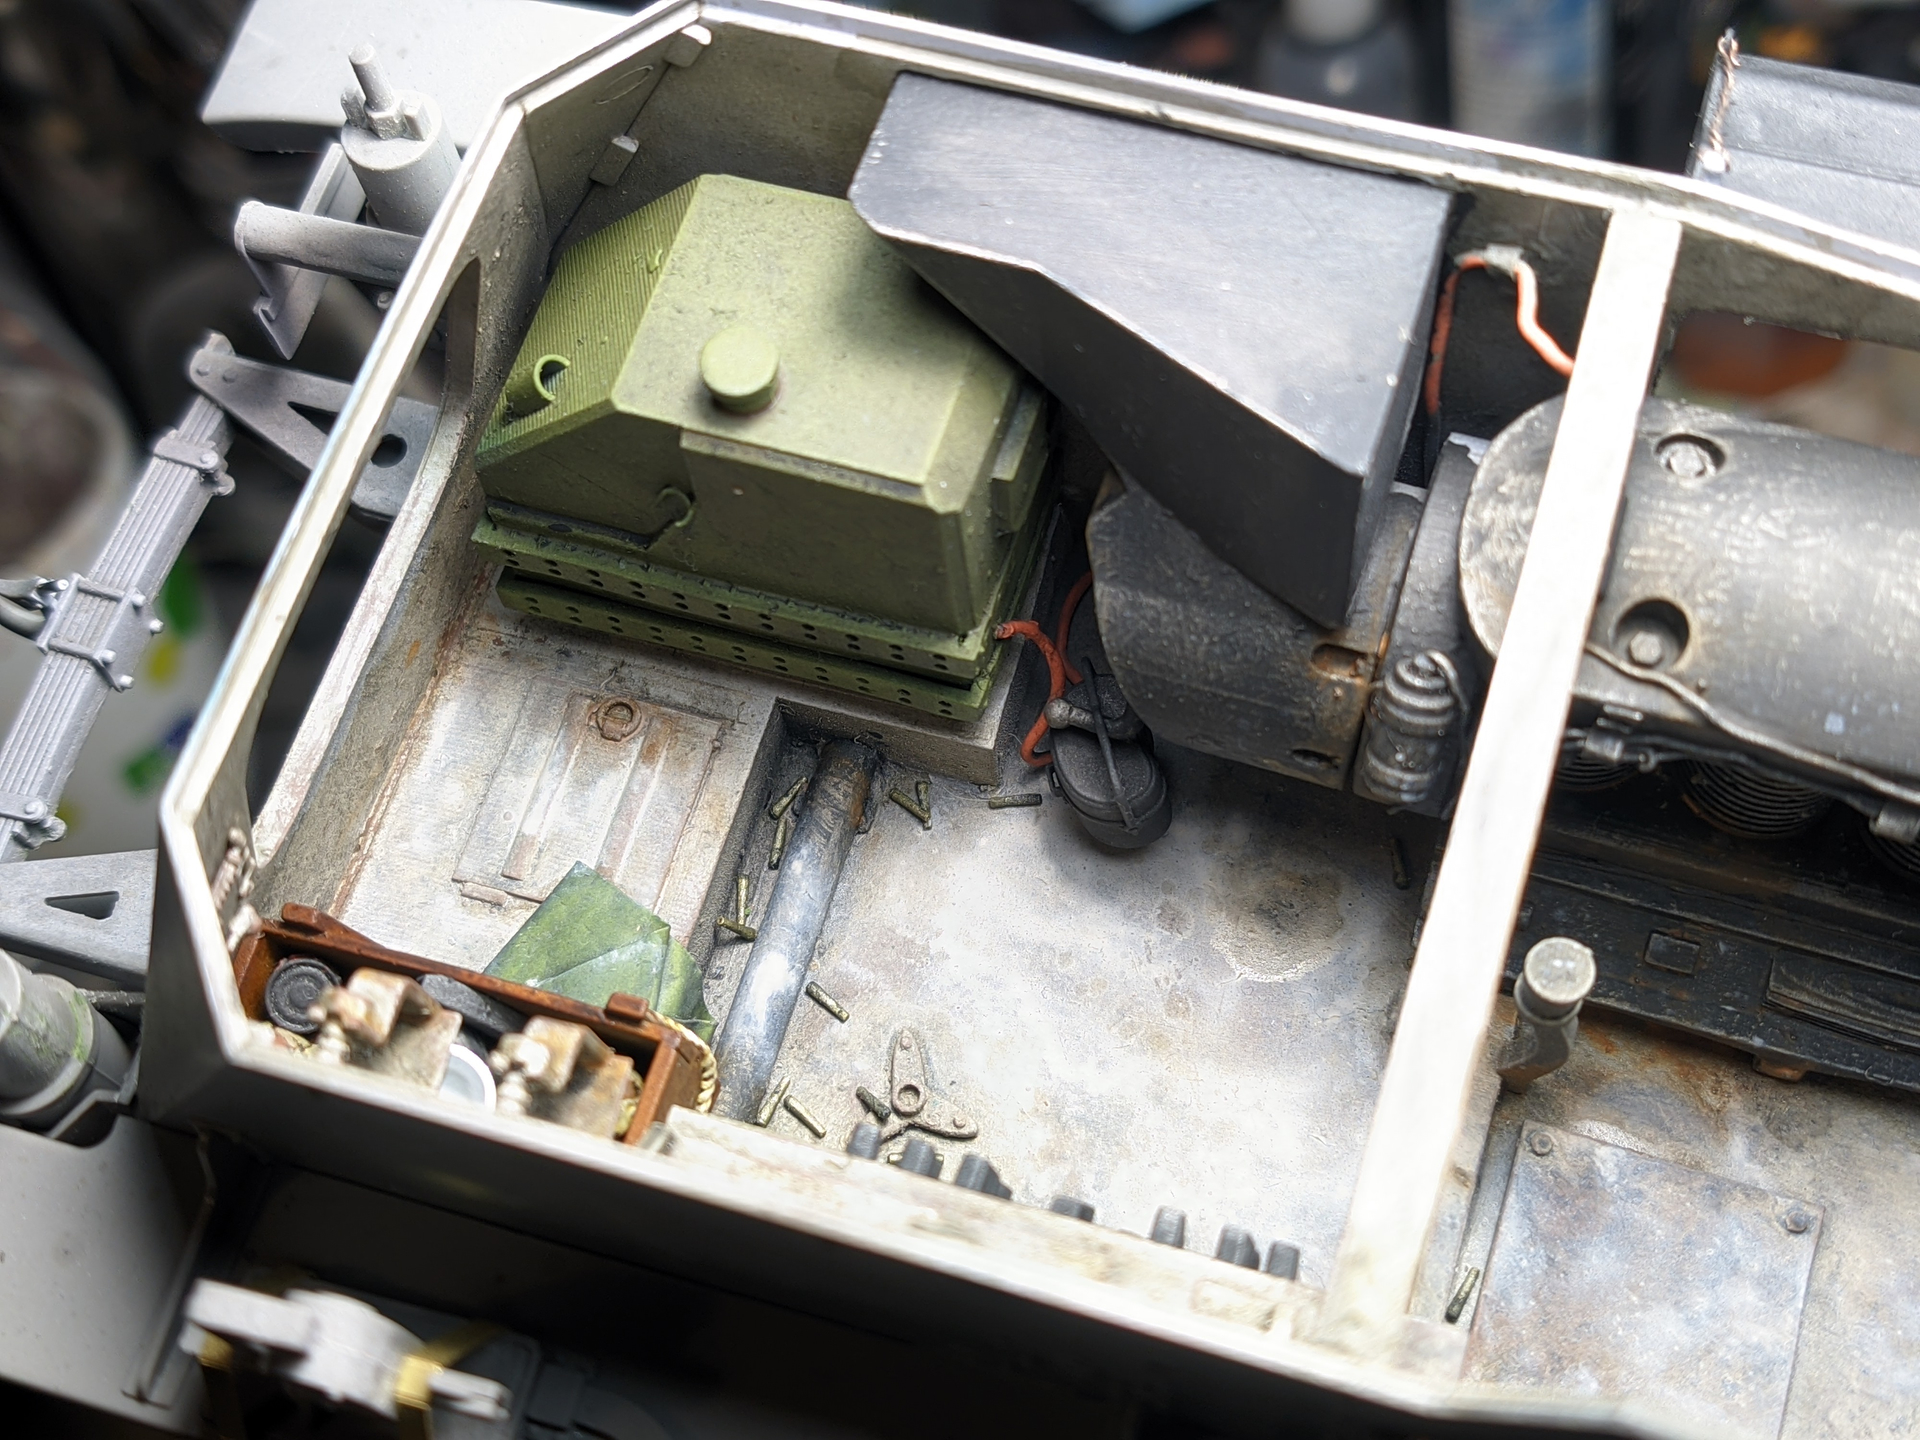
The flag was made from Green Stuff World craft pewter / tin foil which I painted with lacquer paints and then folded into shape. I was worried that the paints would crack or peel when folding but I had no problems at all with it. The tin sheet is kinda like aluminum foil but it’s about ~10x thicker at 0.2mm. I use it a lot for tarps and such, you can see one of those in other pictures on the inside of the tank near the rear door and another on the right side of the tank under the wooden crate. I’ll go more into how/why this figure got placed here a bit further down the post.


Project pics
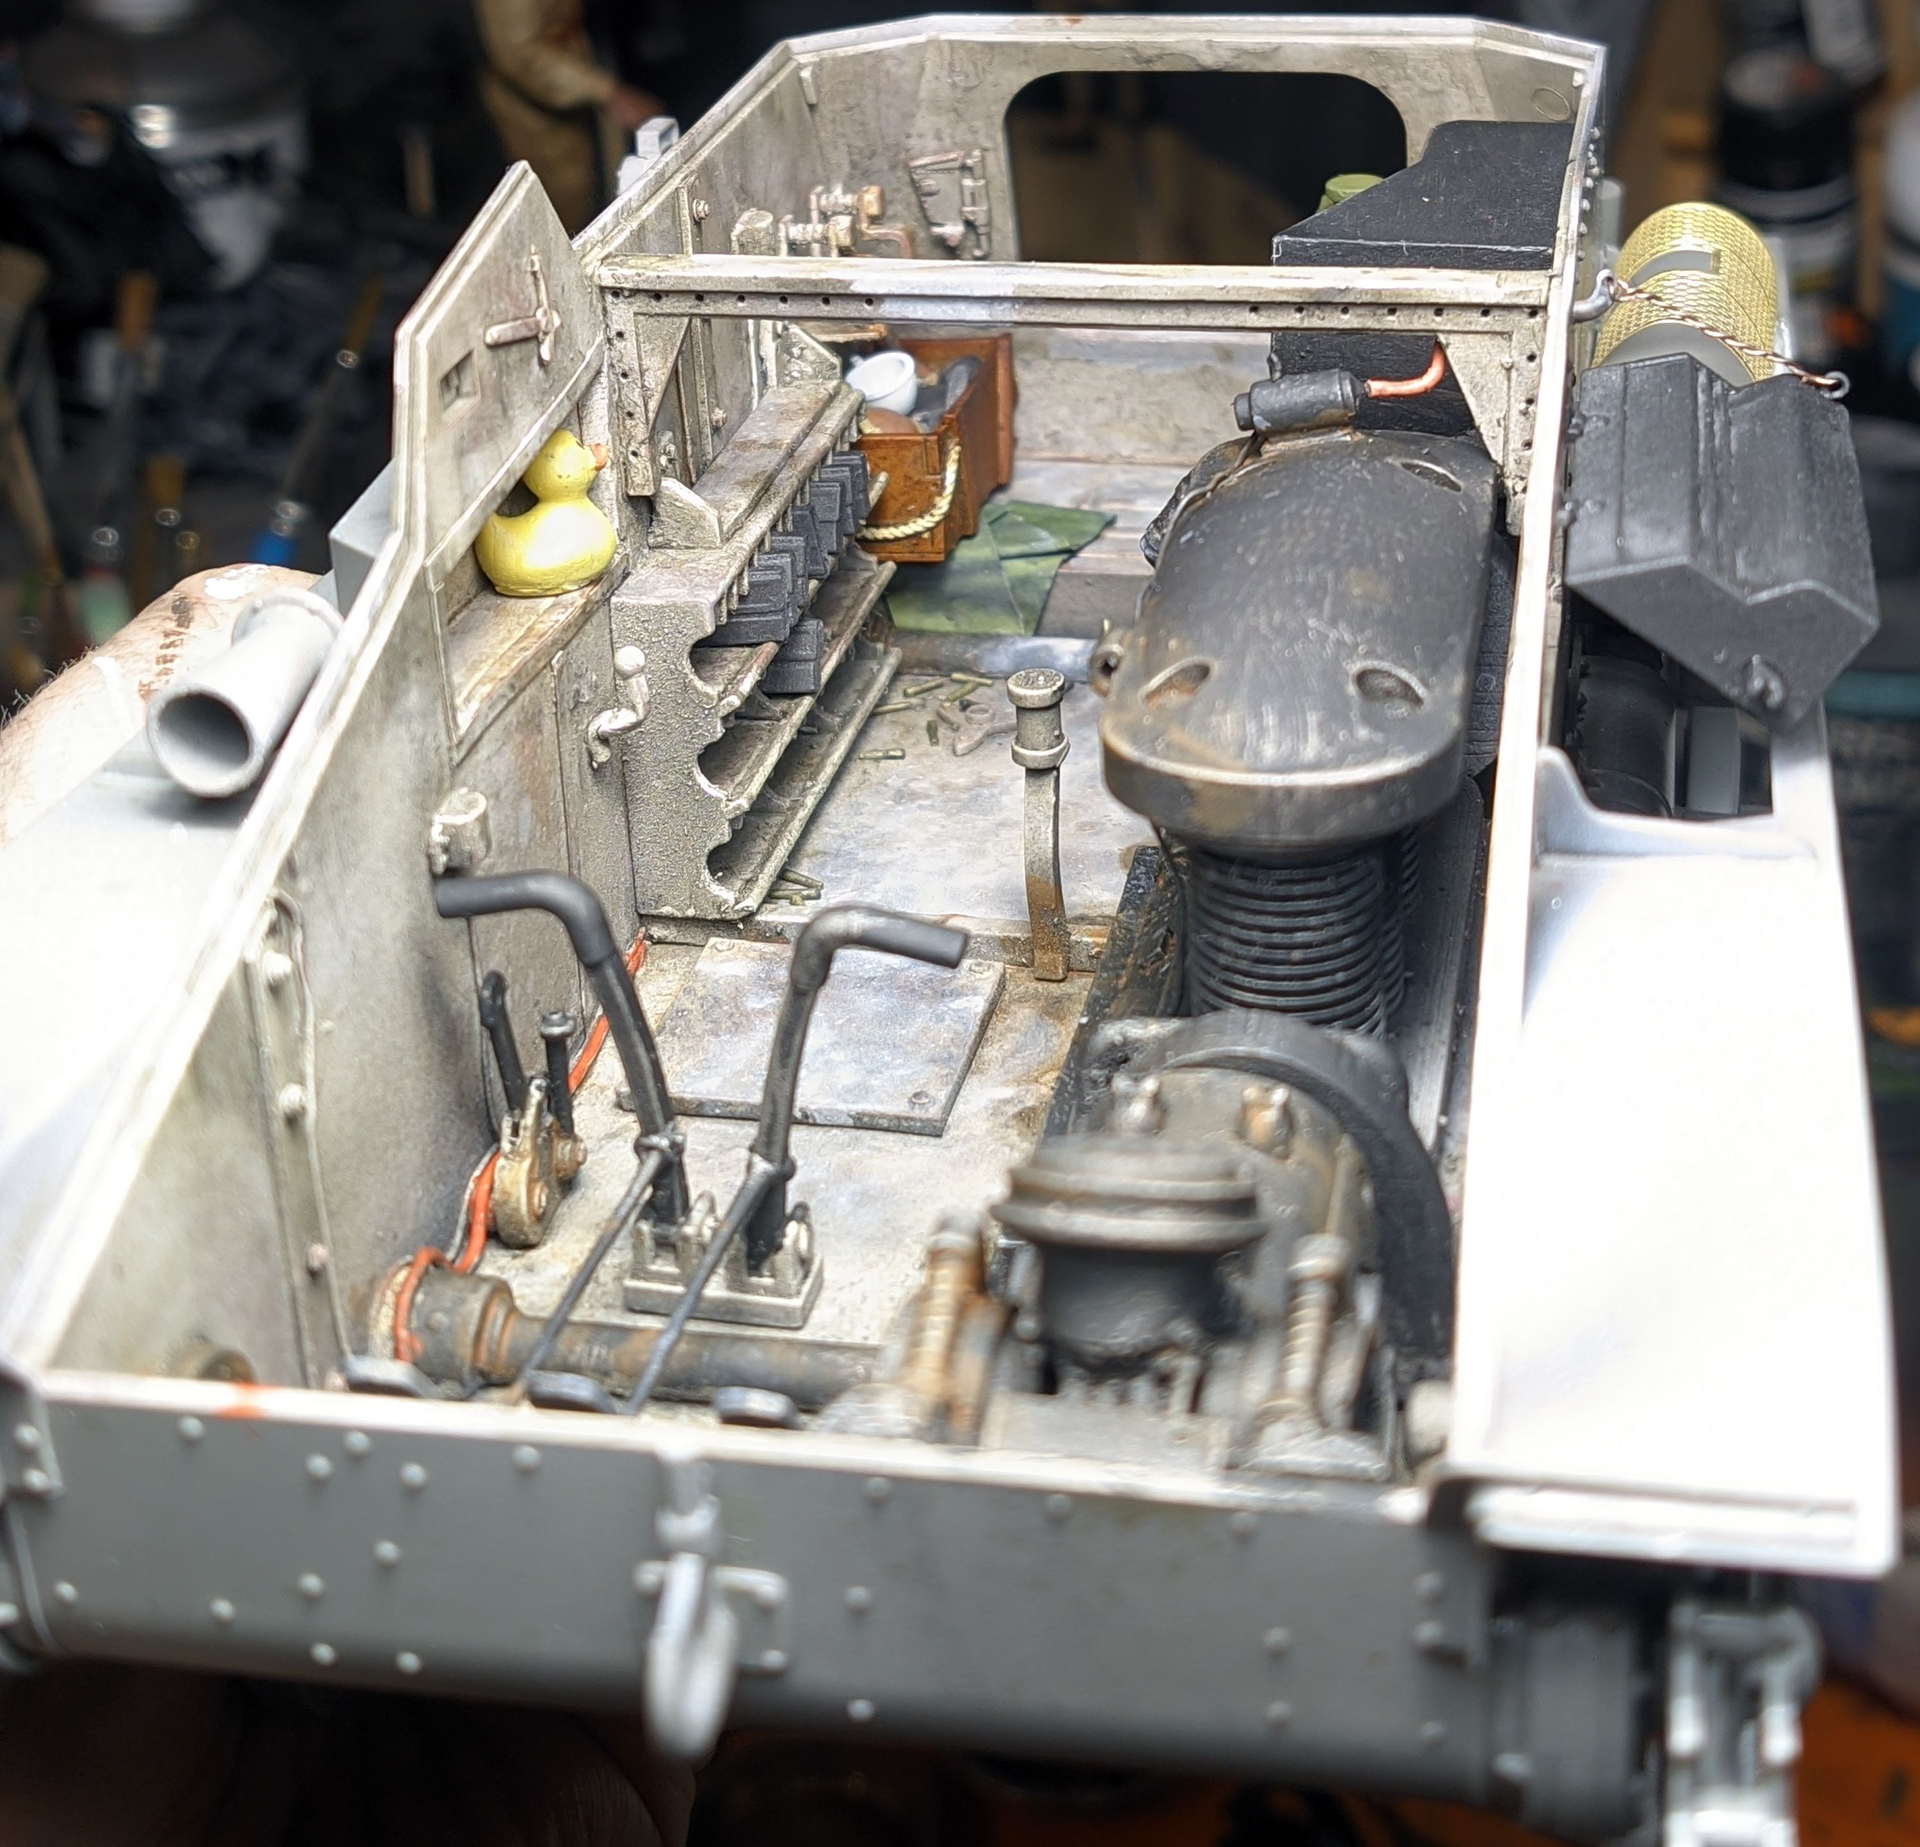
A massive thank you belongs to @mike_garcia for creating and sharing the files which formed the basis of this full custom interior. Without them I wouldn’t have made the interior at all. Here’s a link to his original post: Takom 1/16 Type 94 Tank with interior
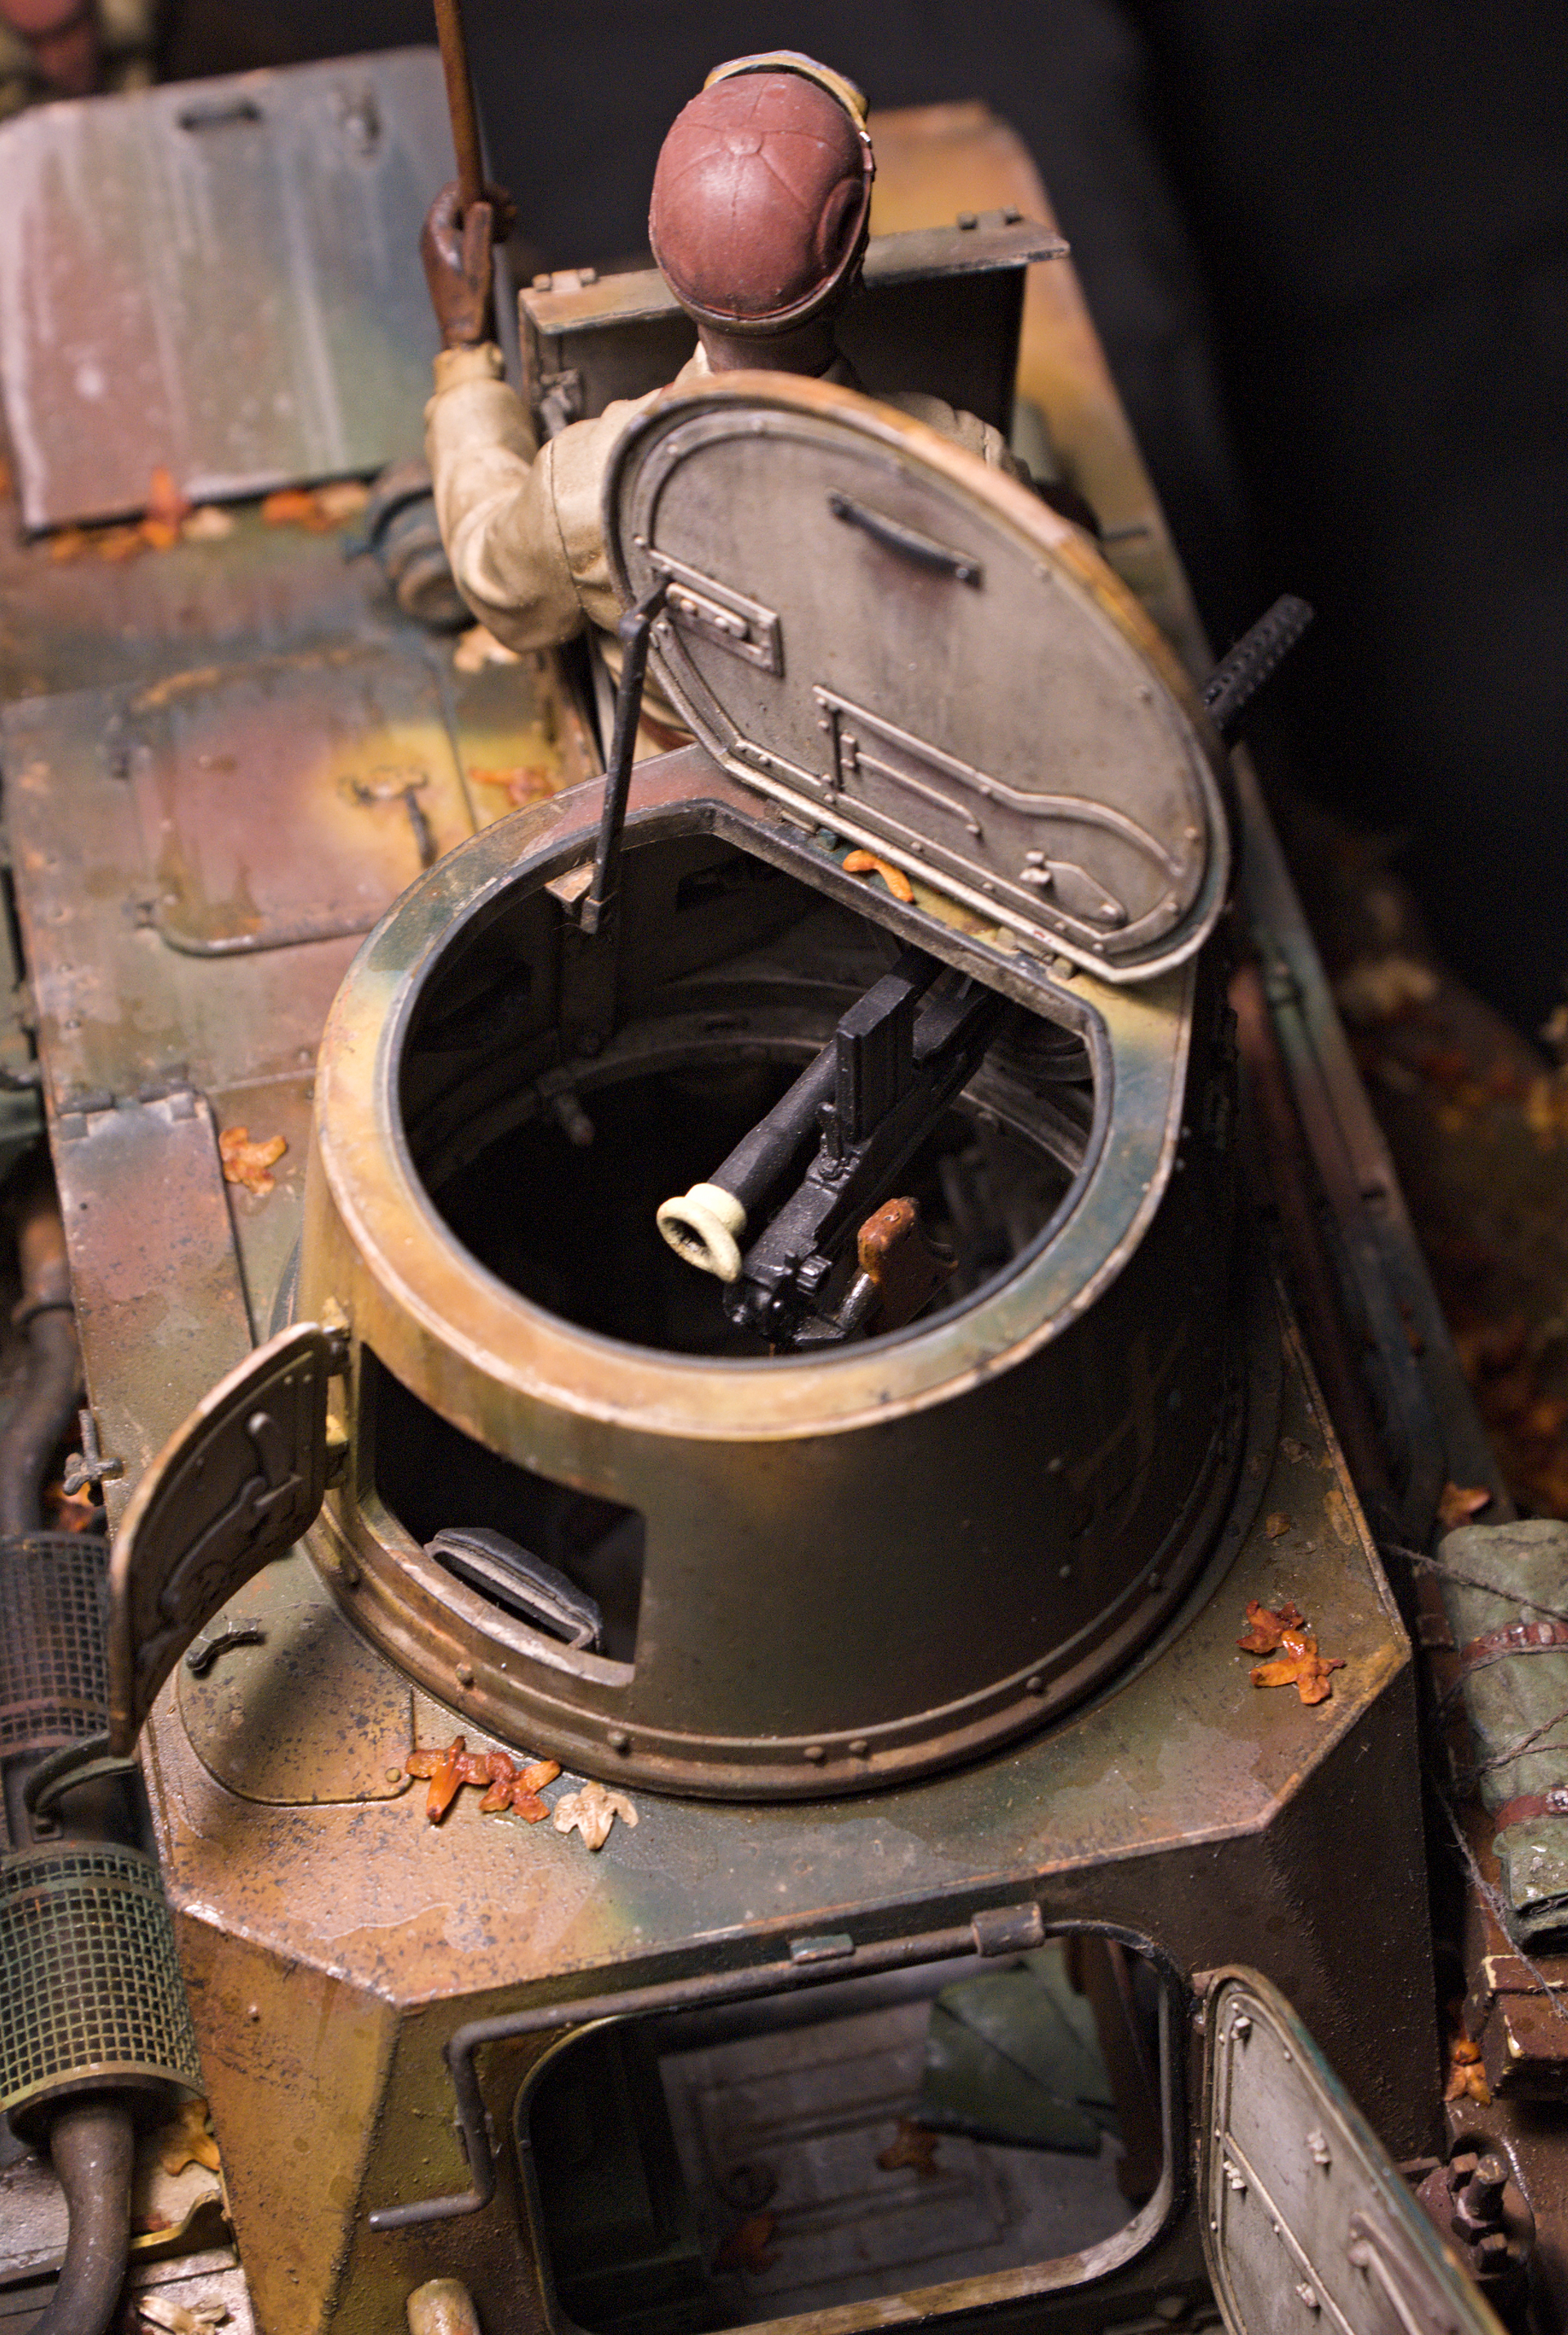
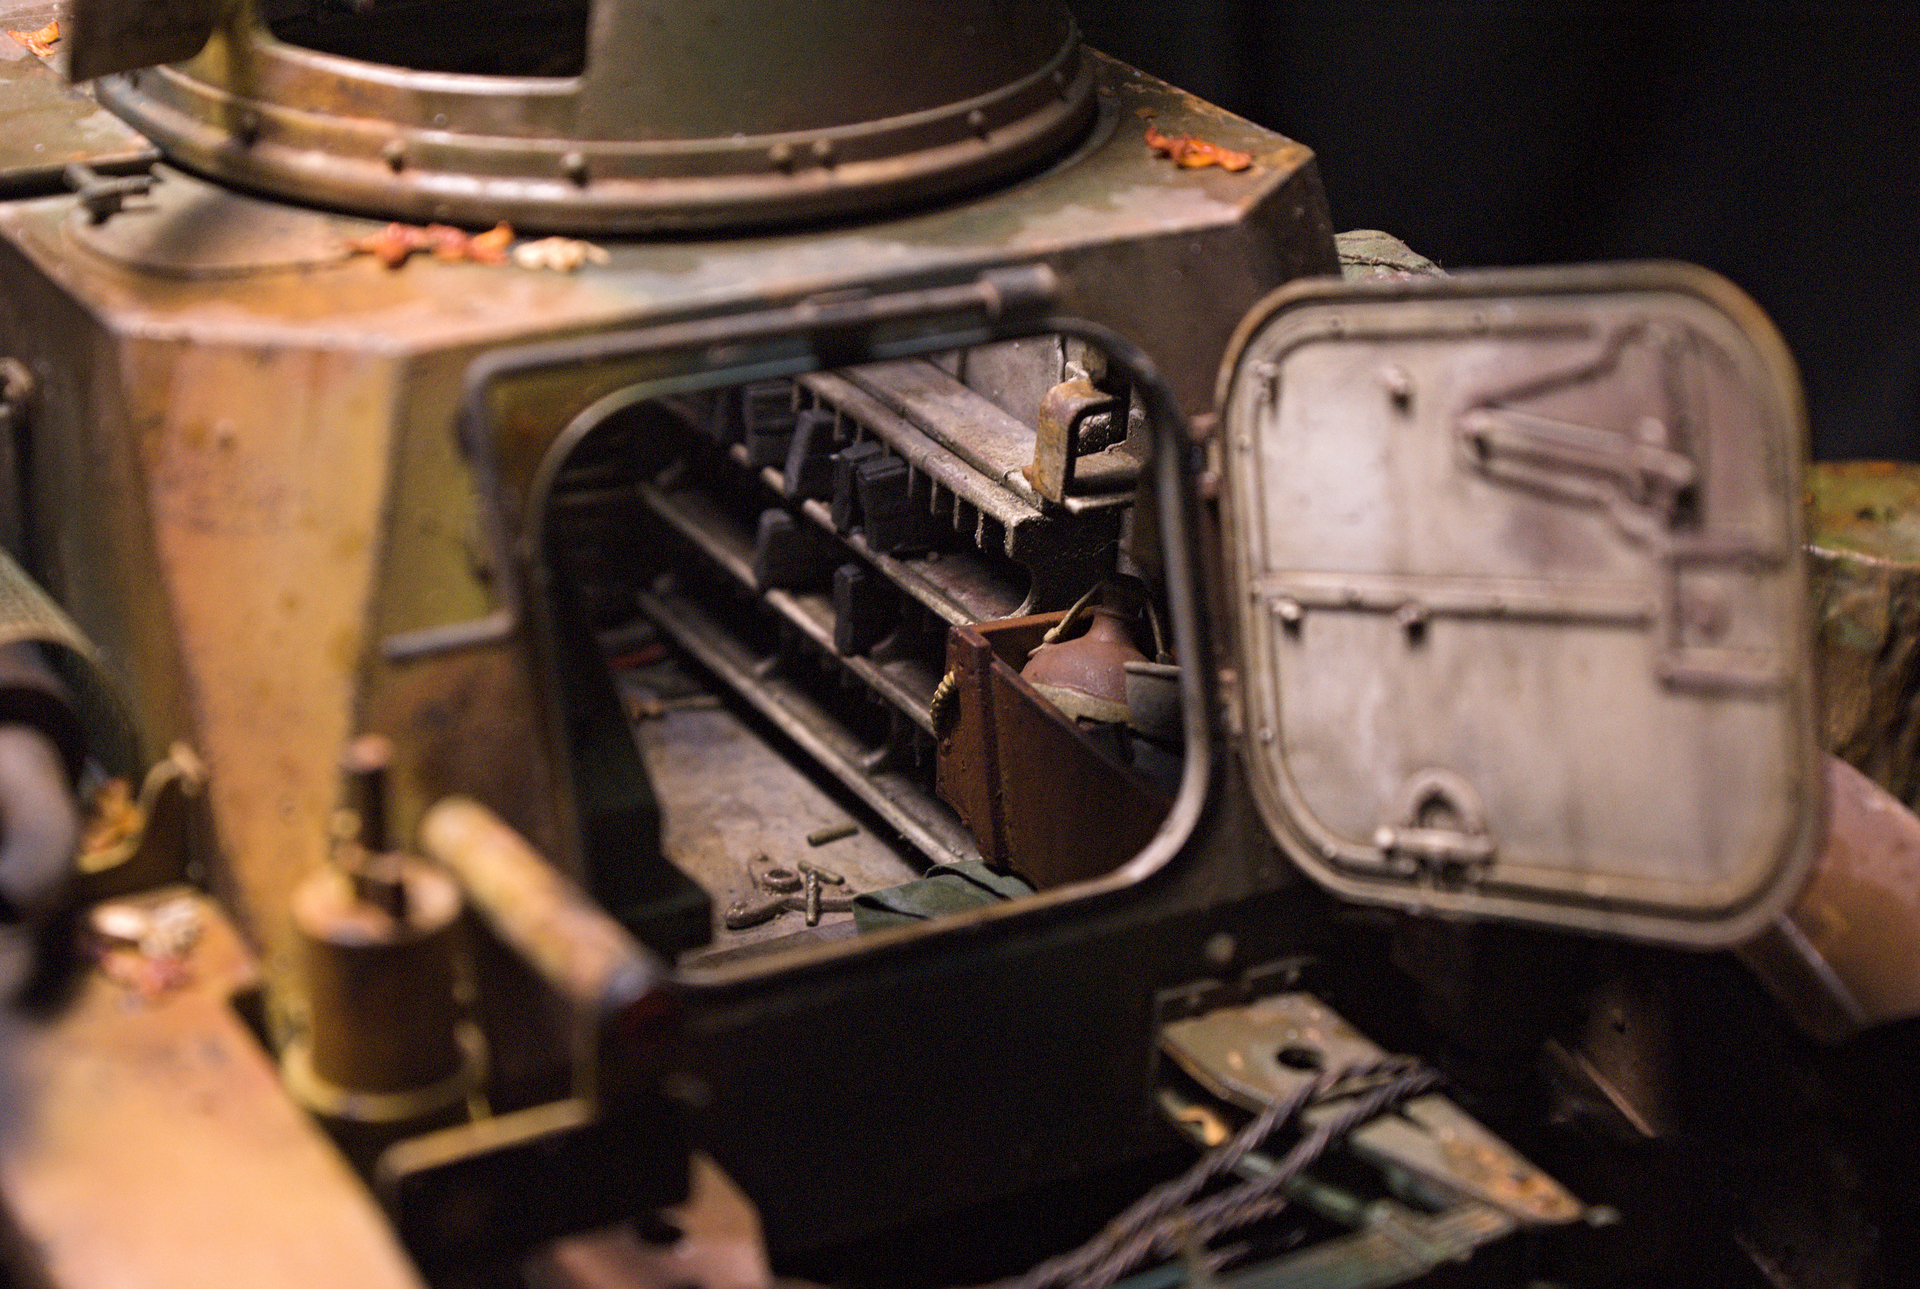
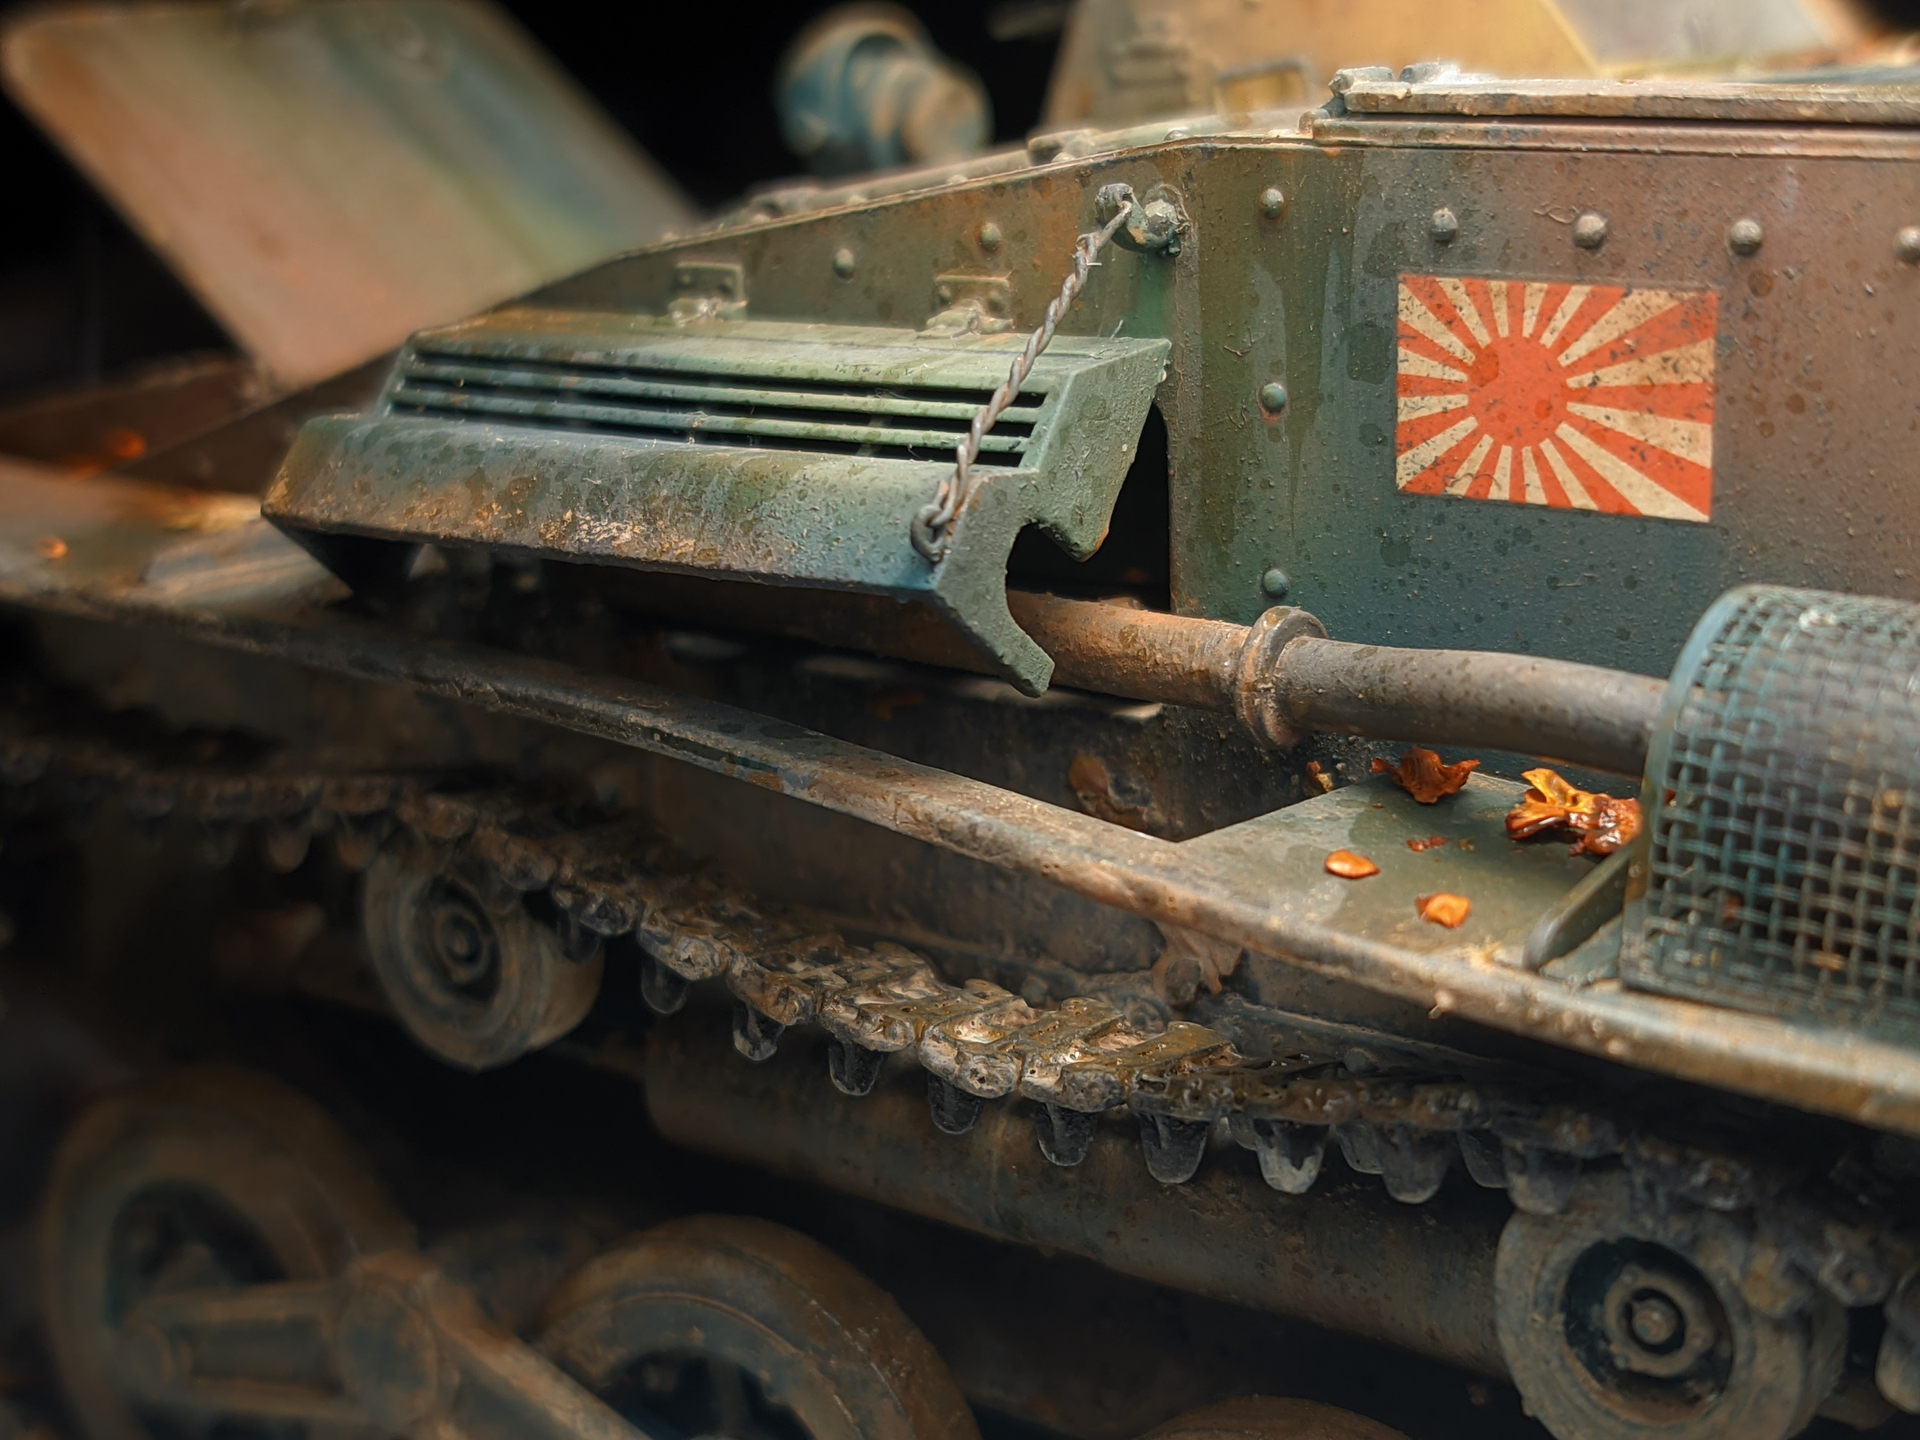
I noticed in one of the very few interior pics available of this tankette that this bulge on the outside of the tank is hollow on the inside.
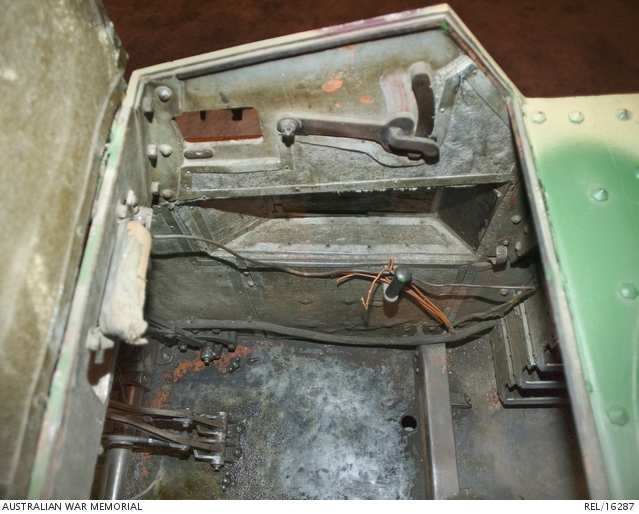
I ground the wall open and added some tin foil strips, same material as the flag.
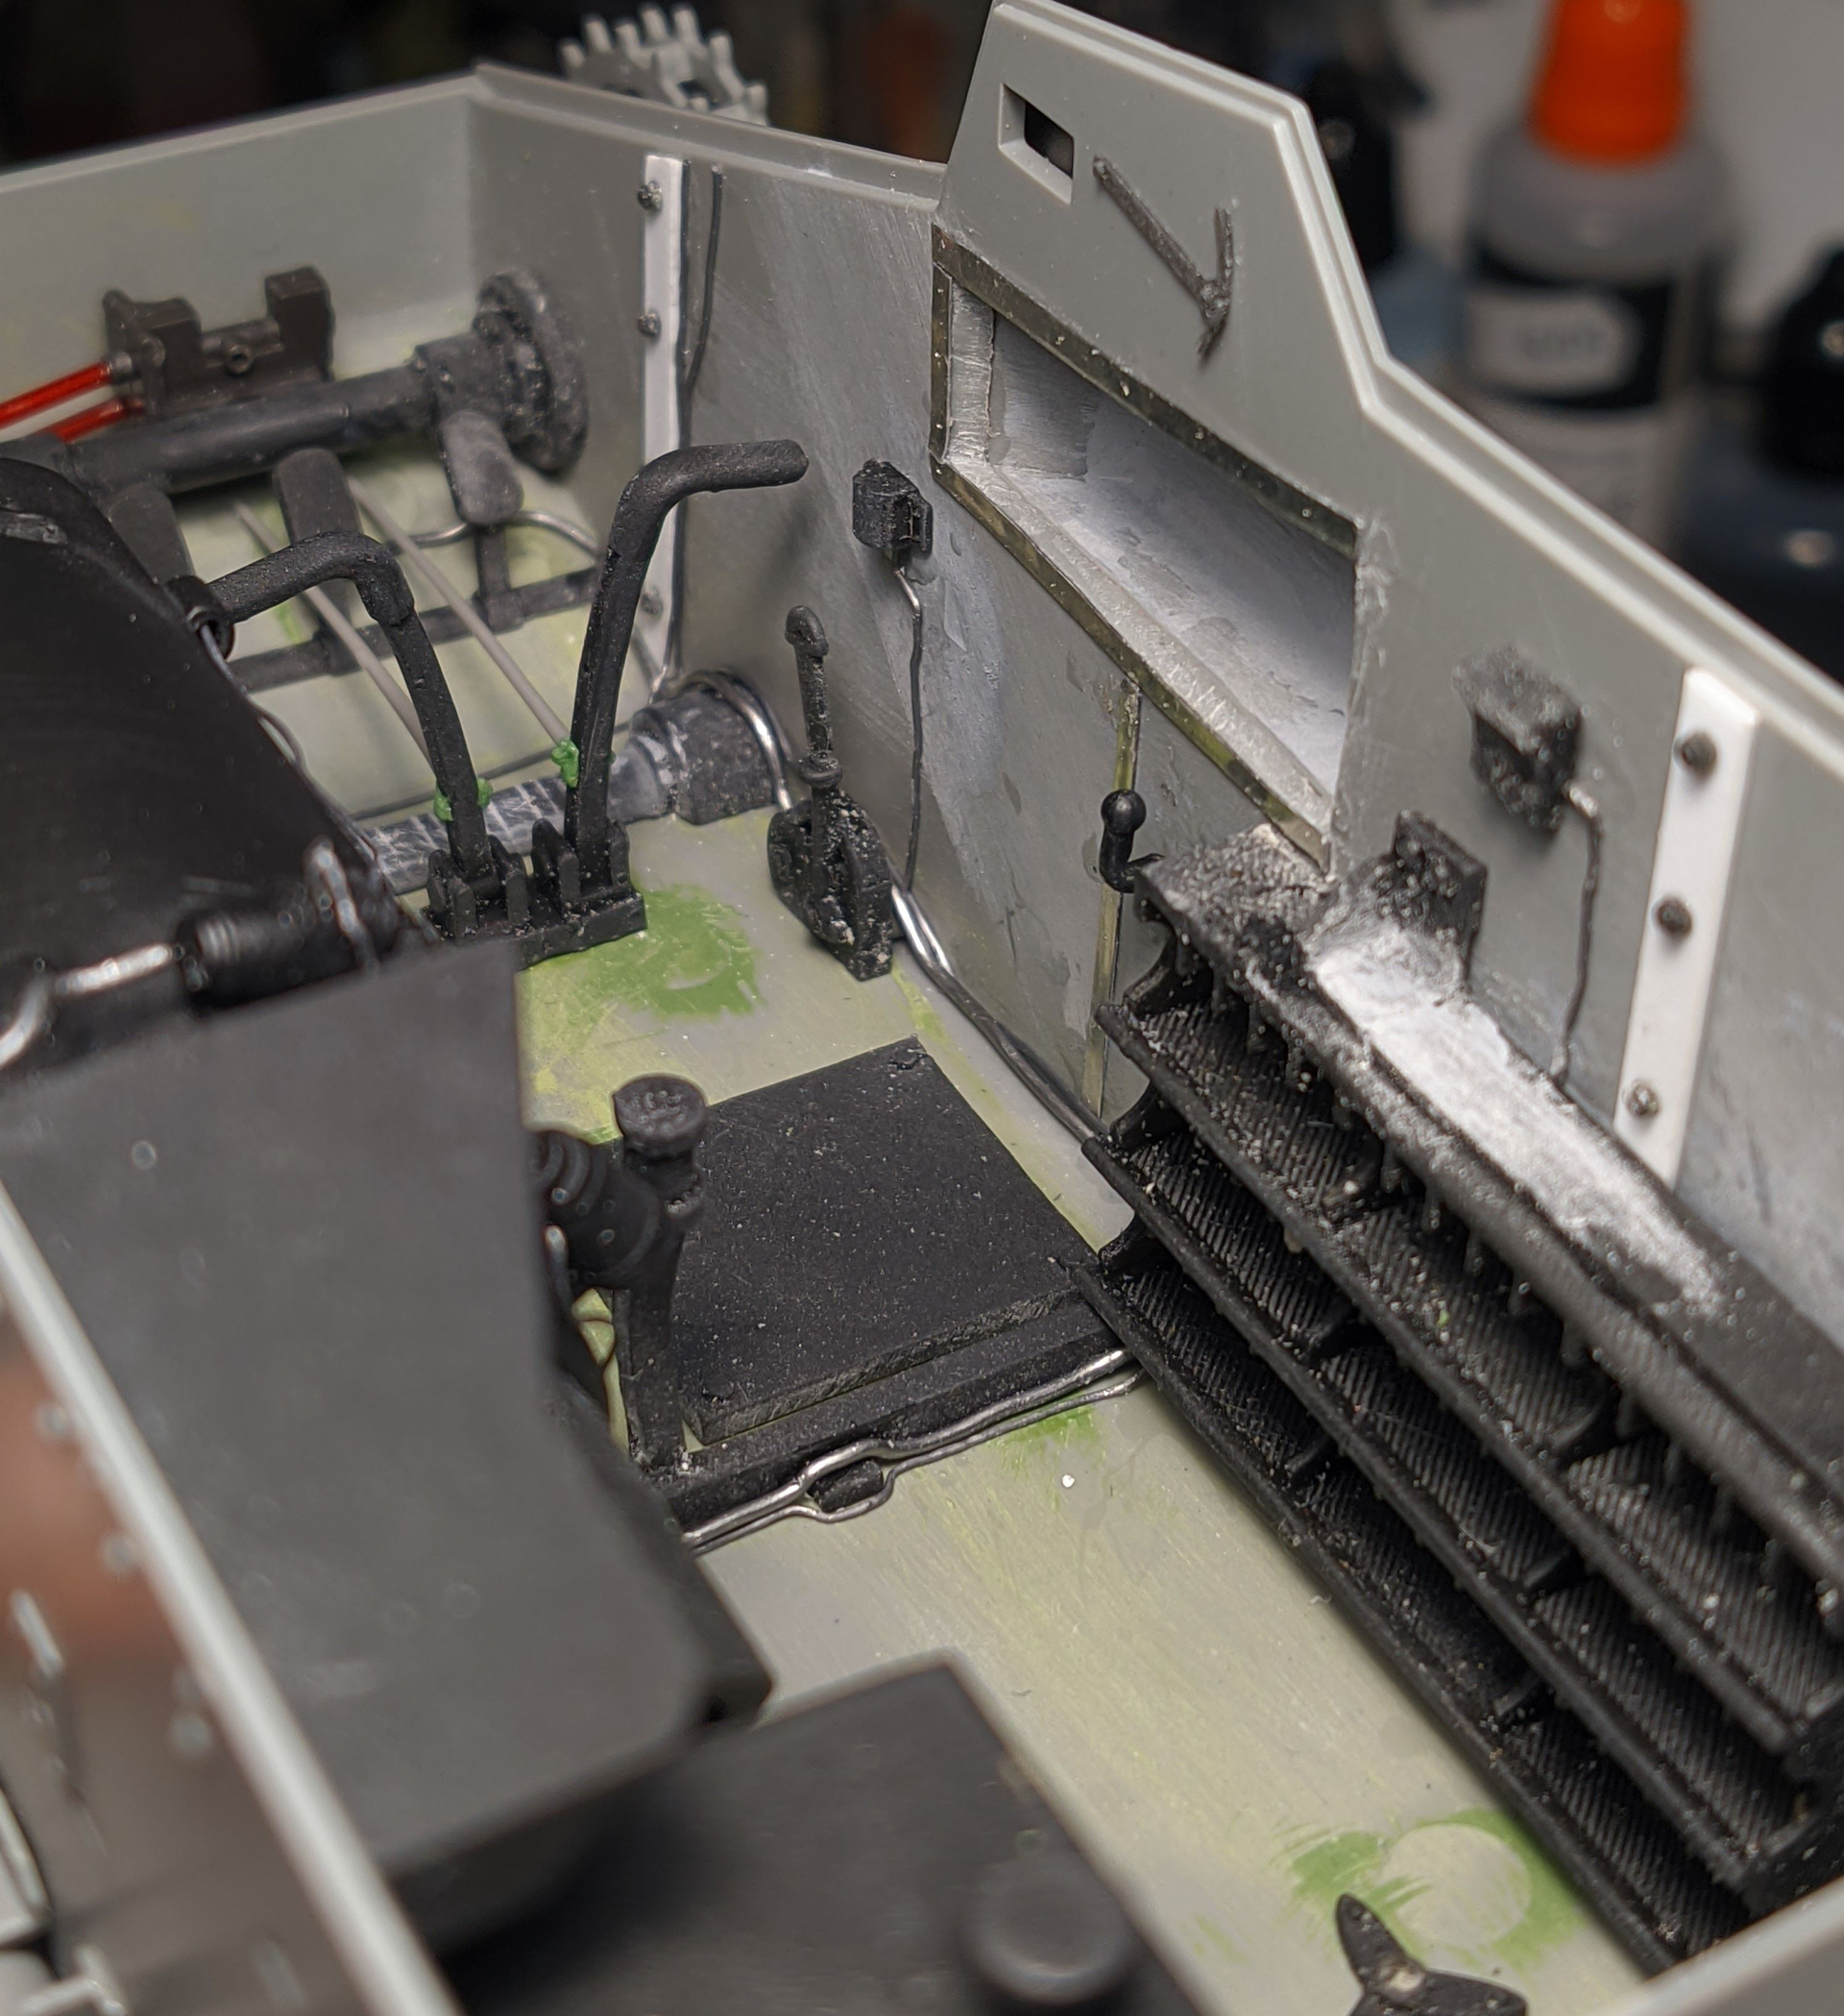

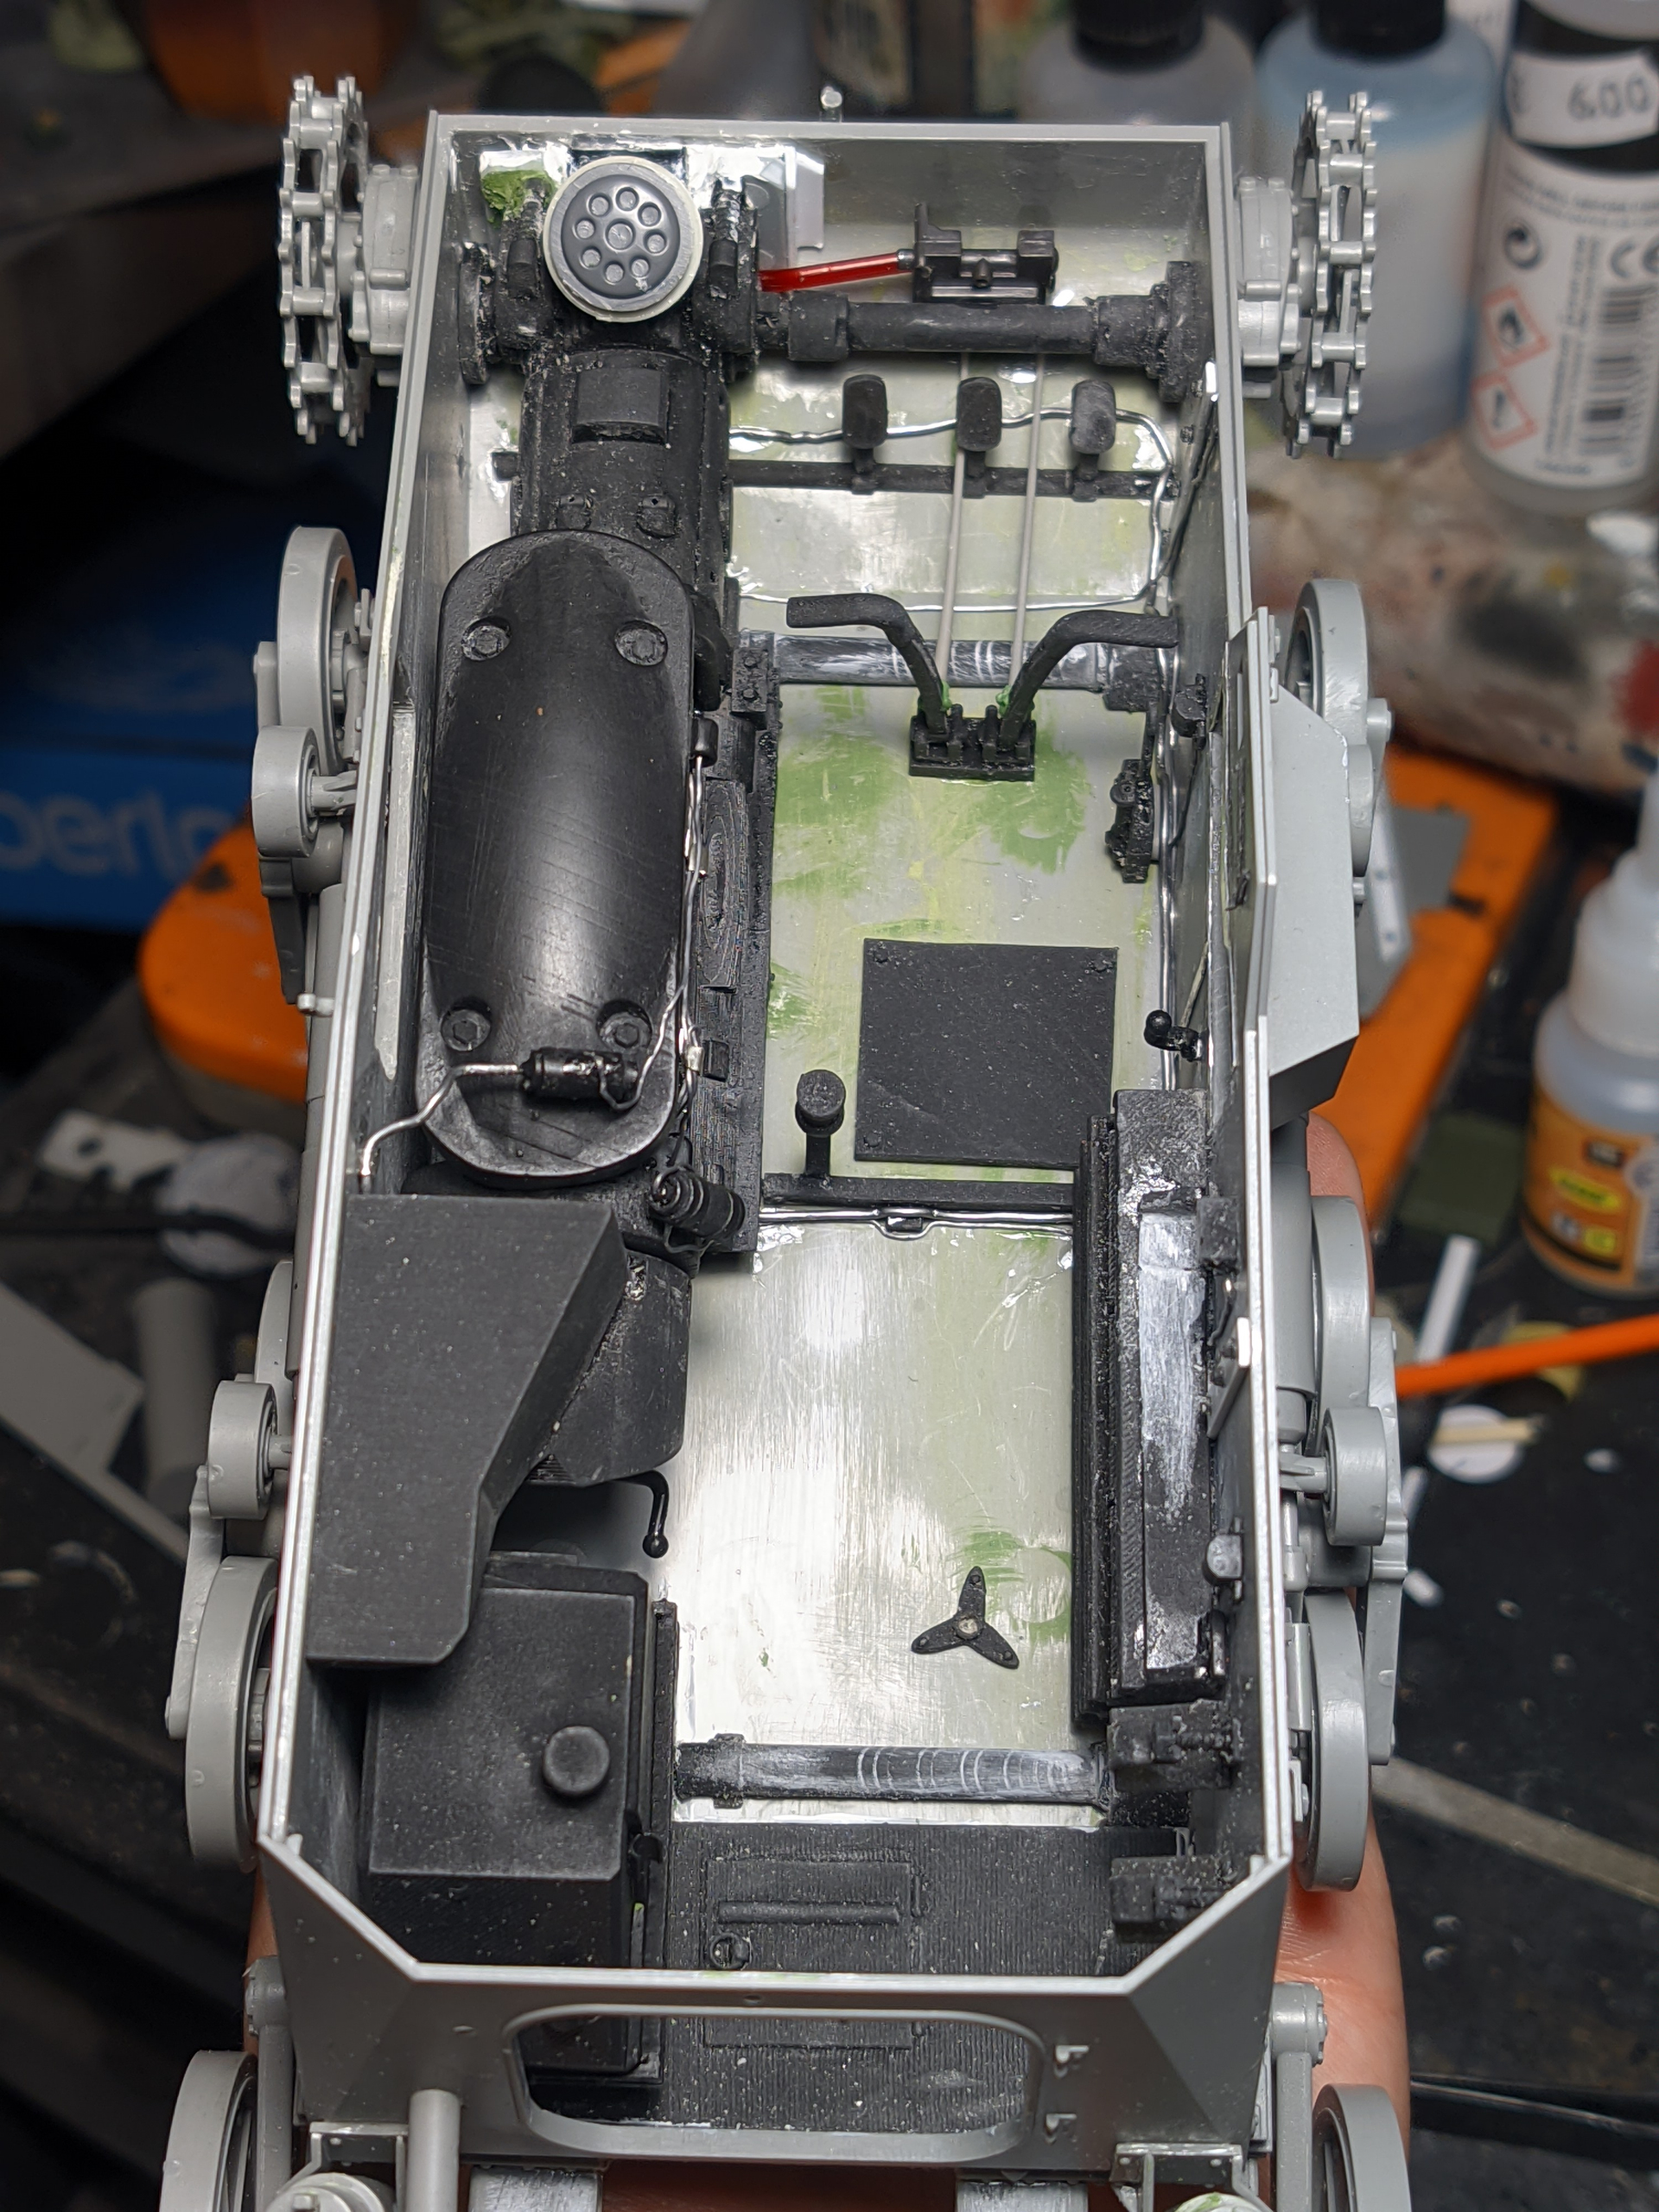
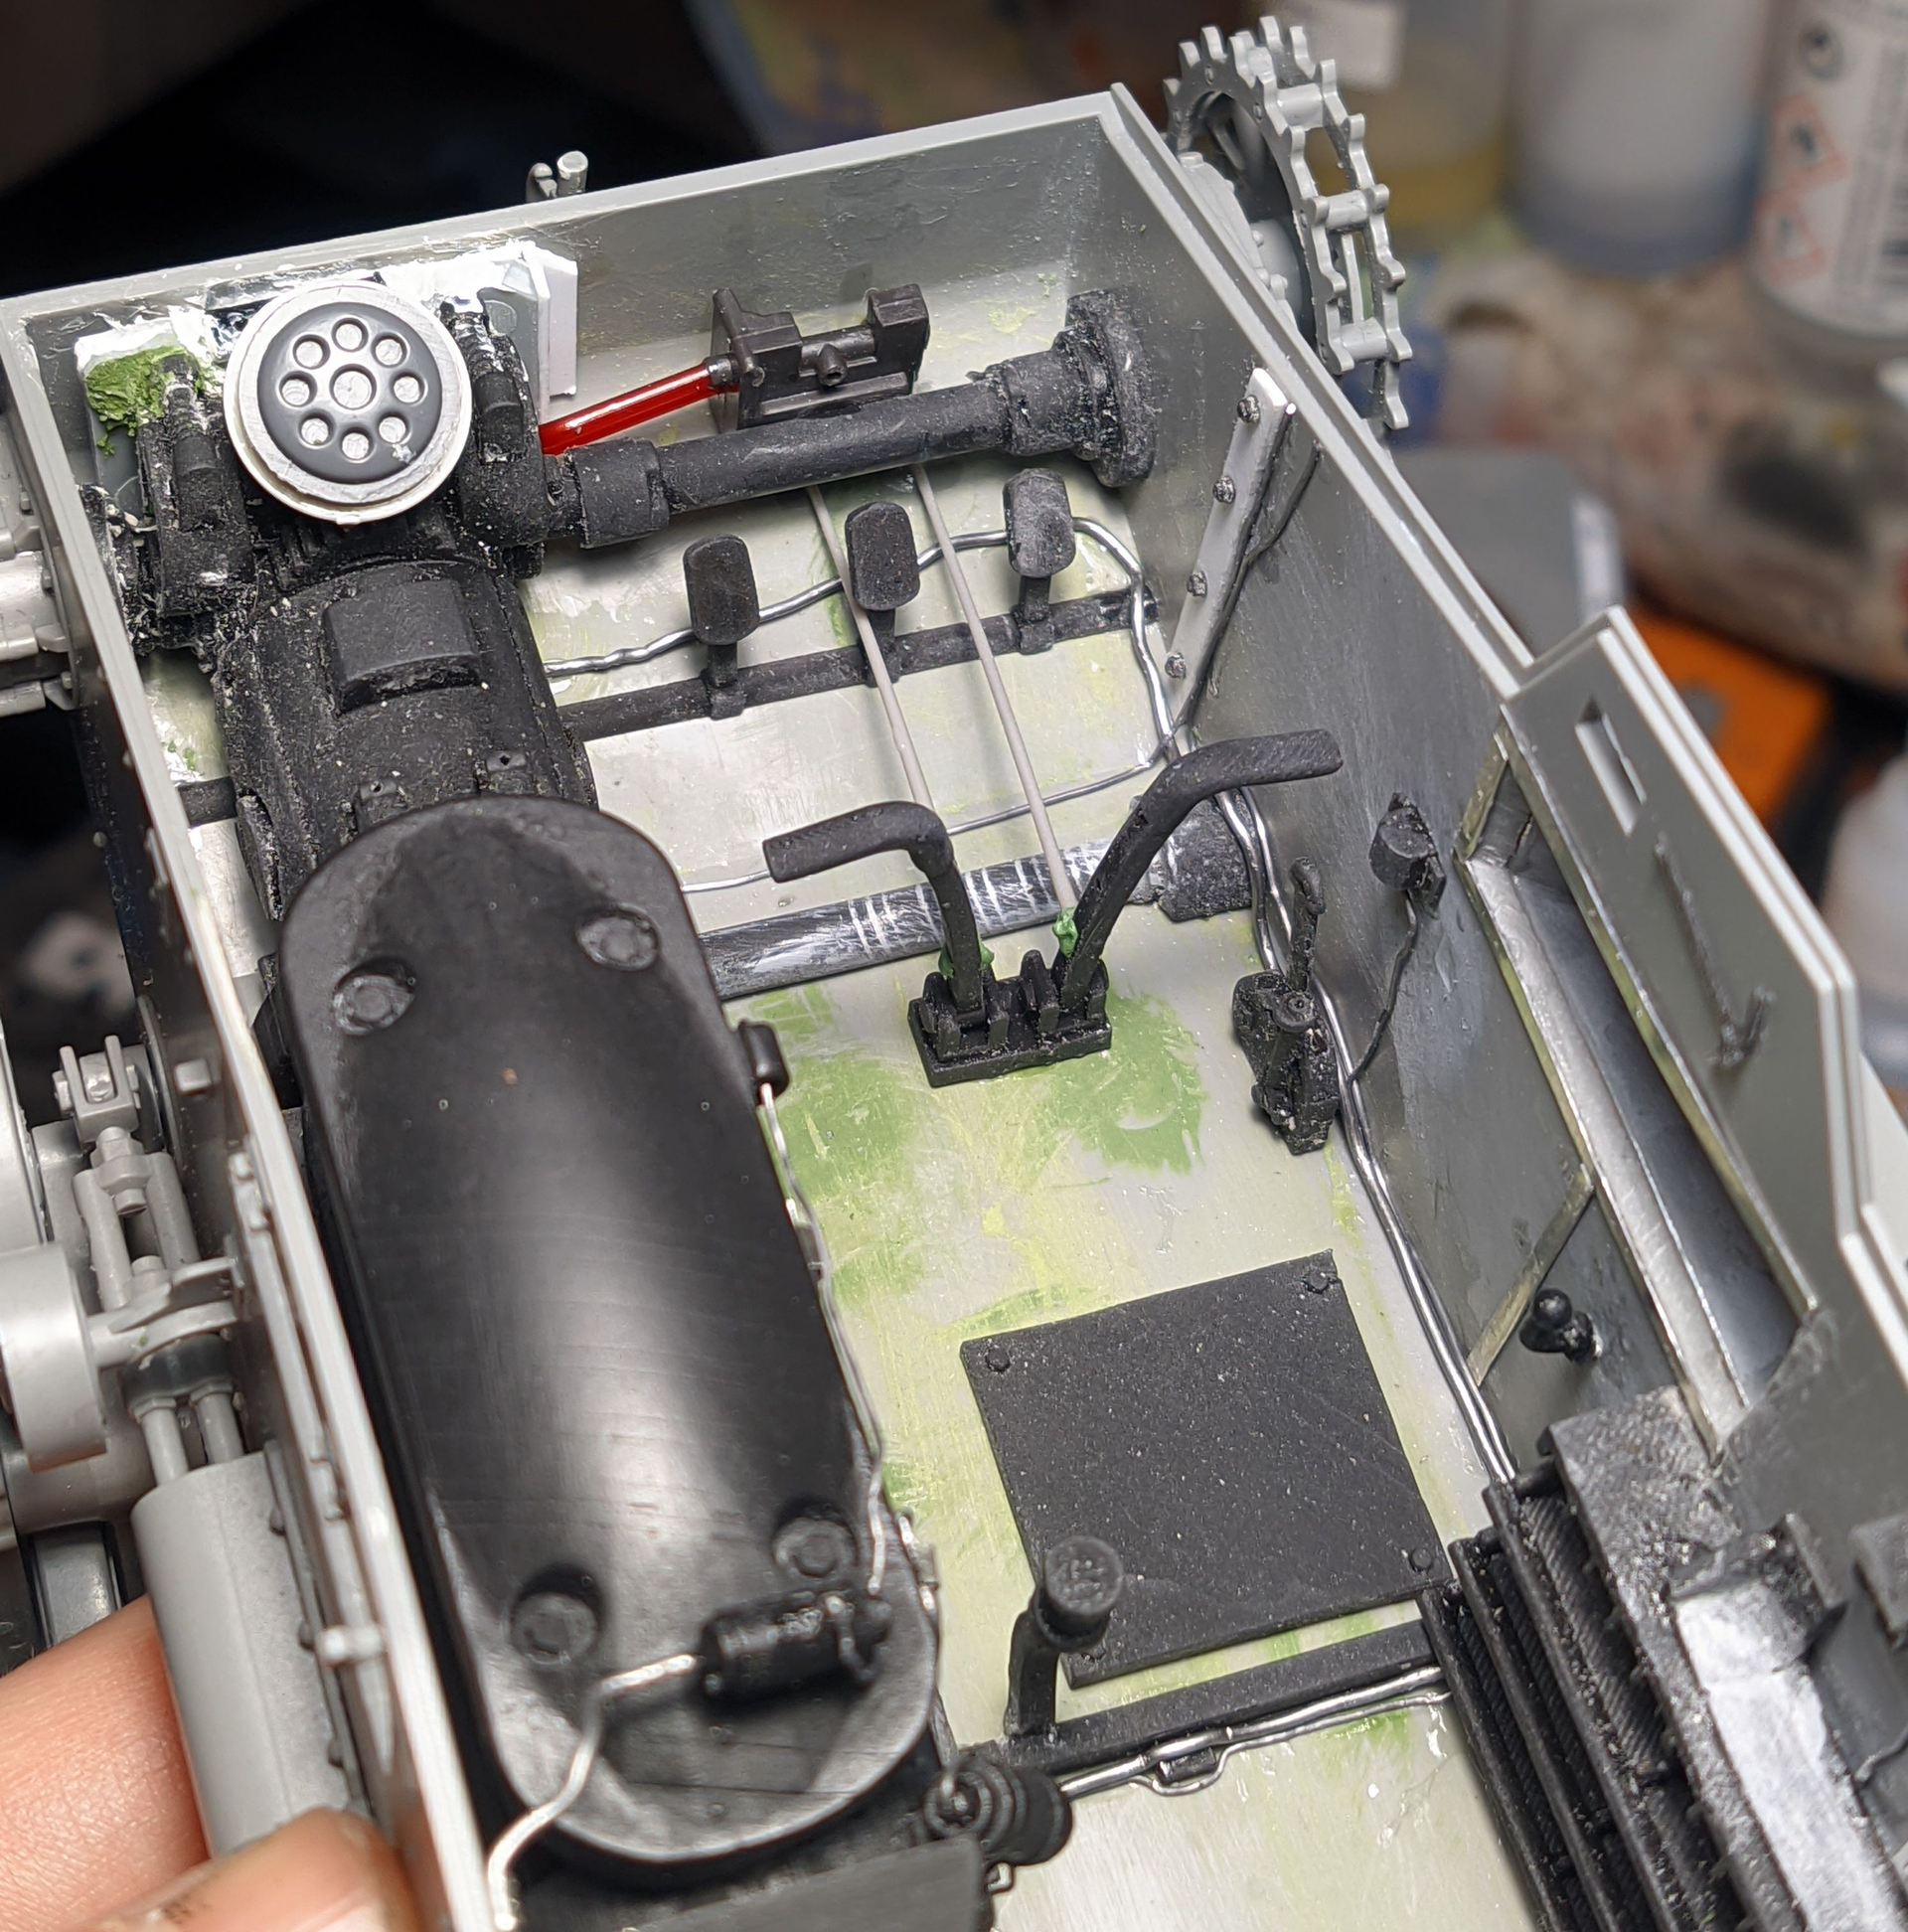
The round part I added on top of the transmission ended up being little too big for the hood to close completely but I intended to have it open anyway so I decided to leave it in place.

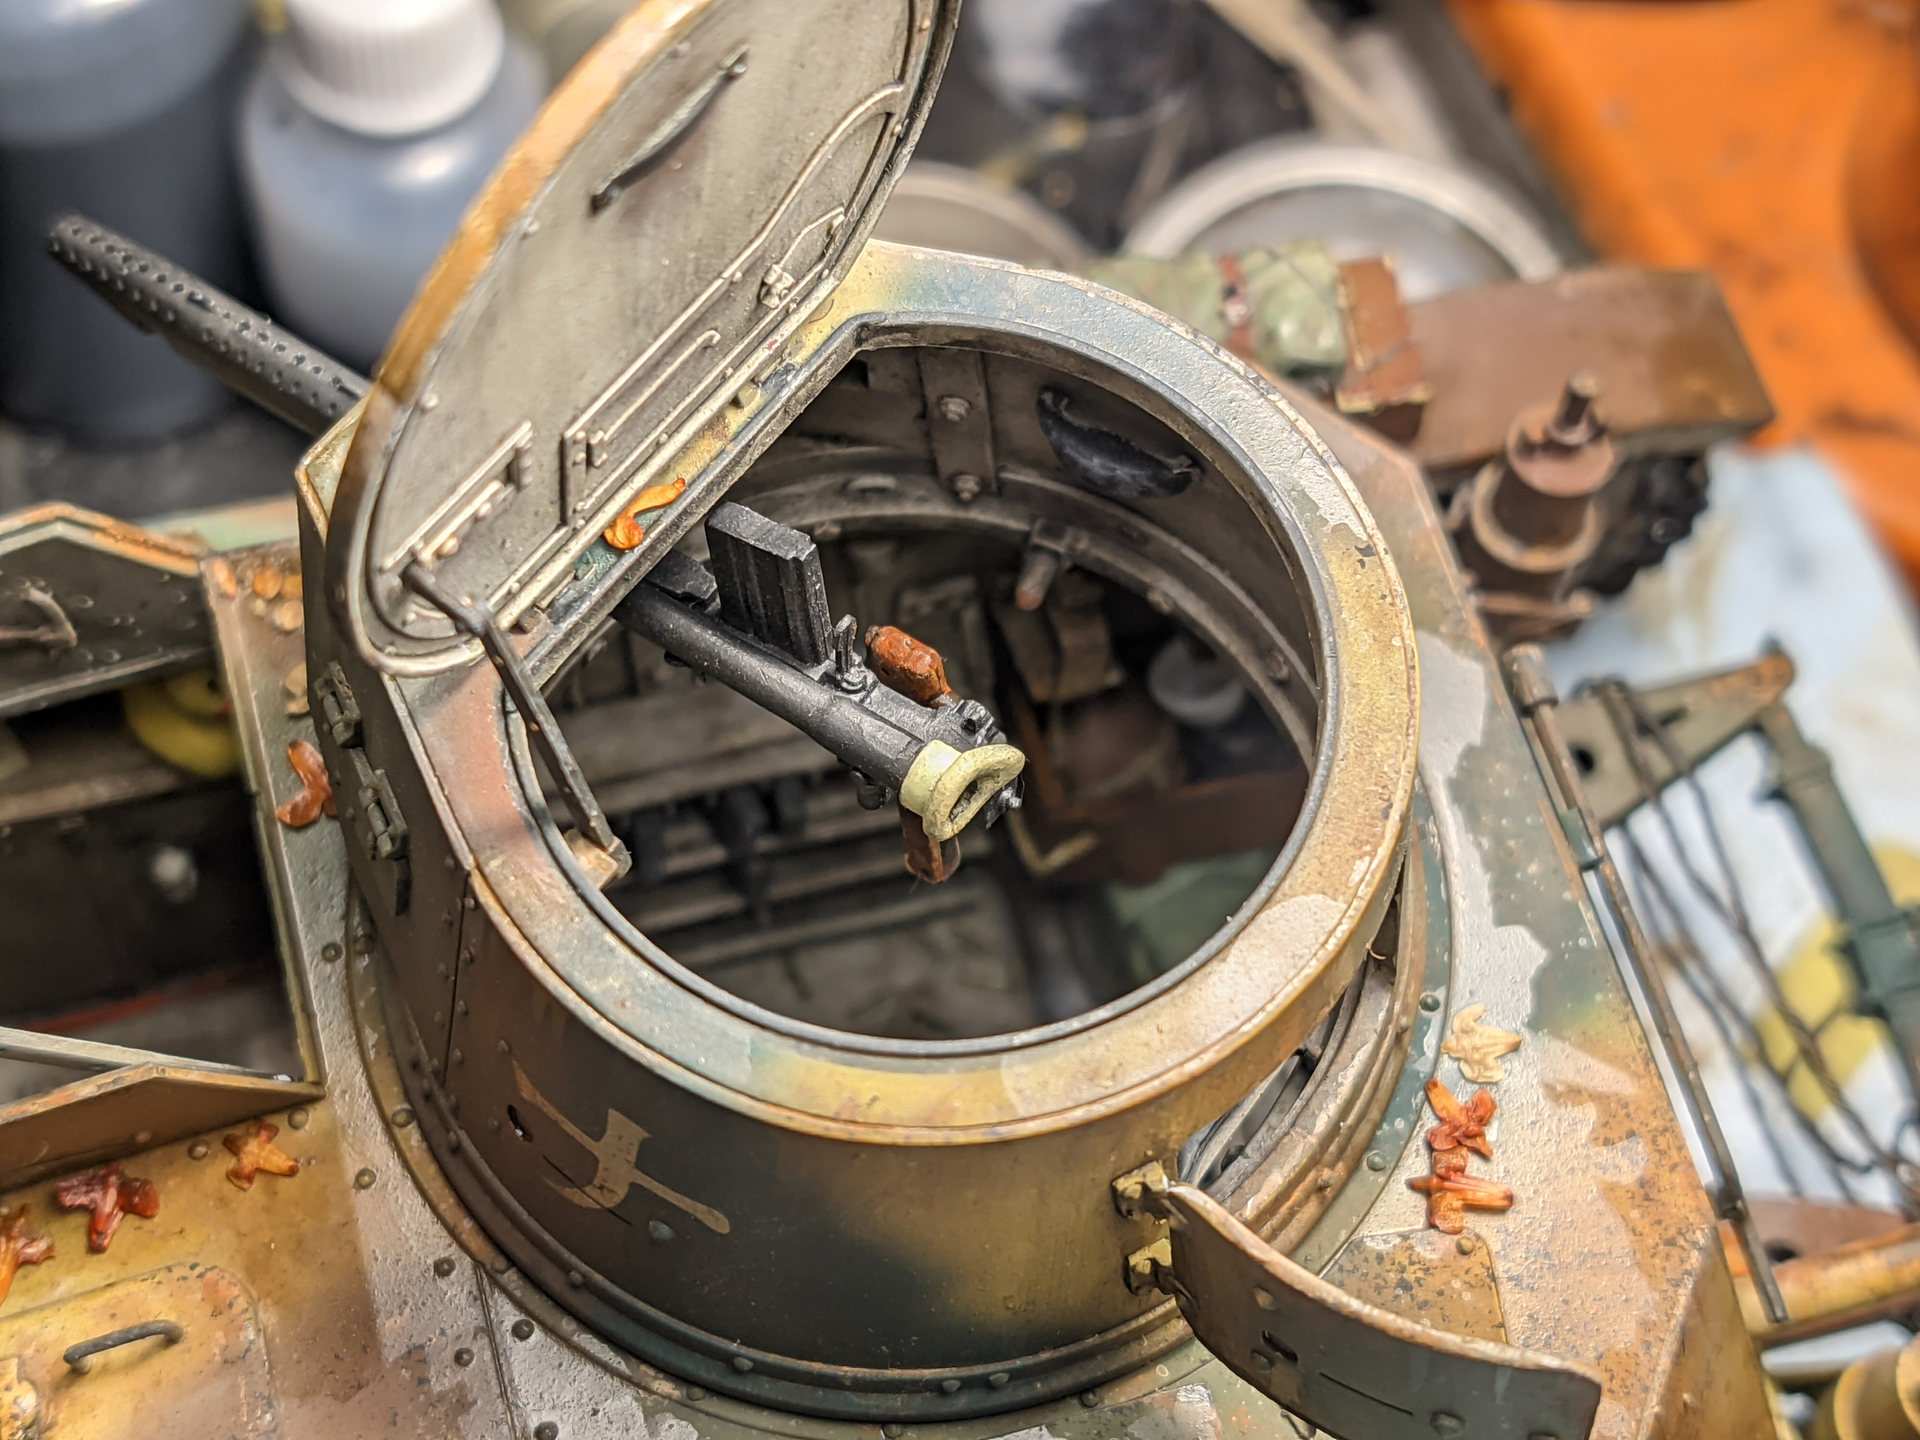
Turret interior. Mostly styrene strips and resin nuts. The original turret ring is replaced with an accurate one which also meant some modifications to the corresponding hole on the top of the hull.
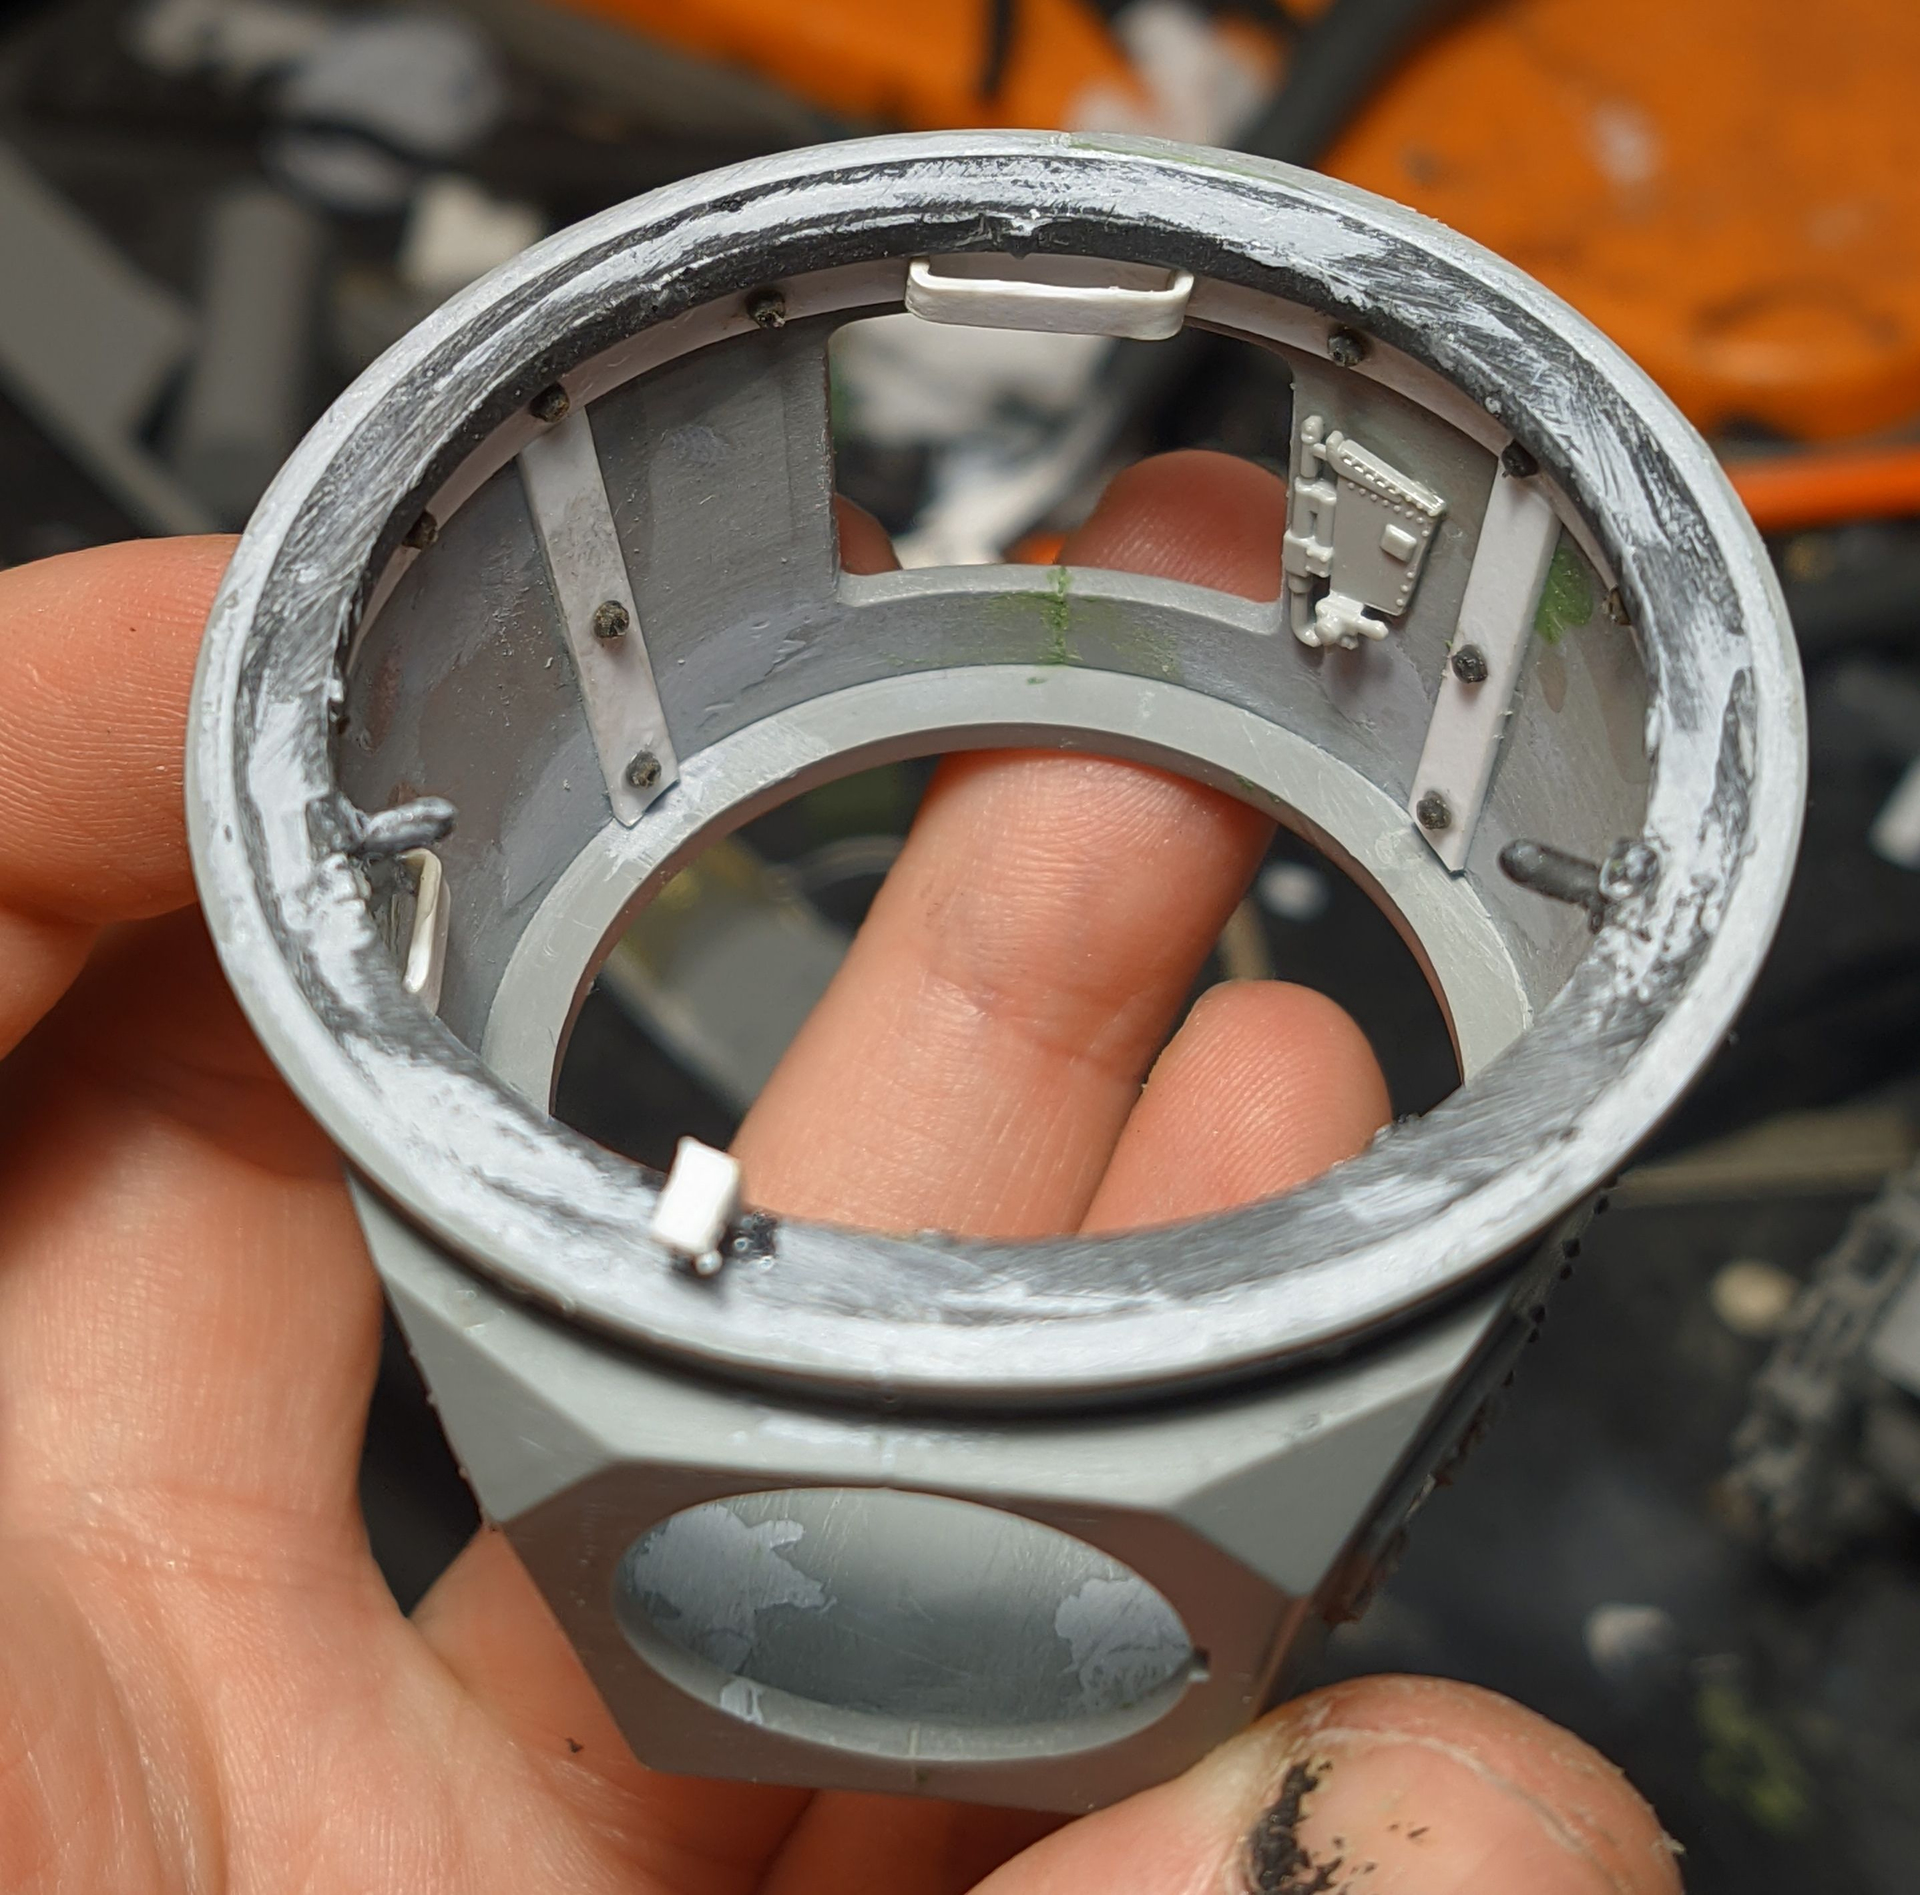
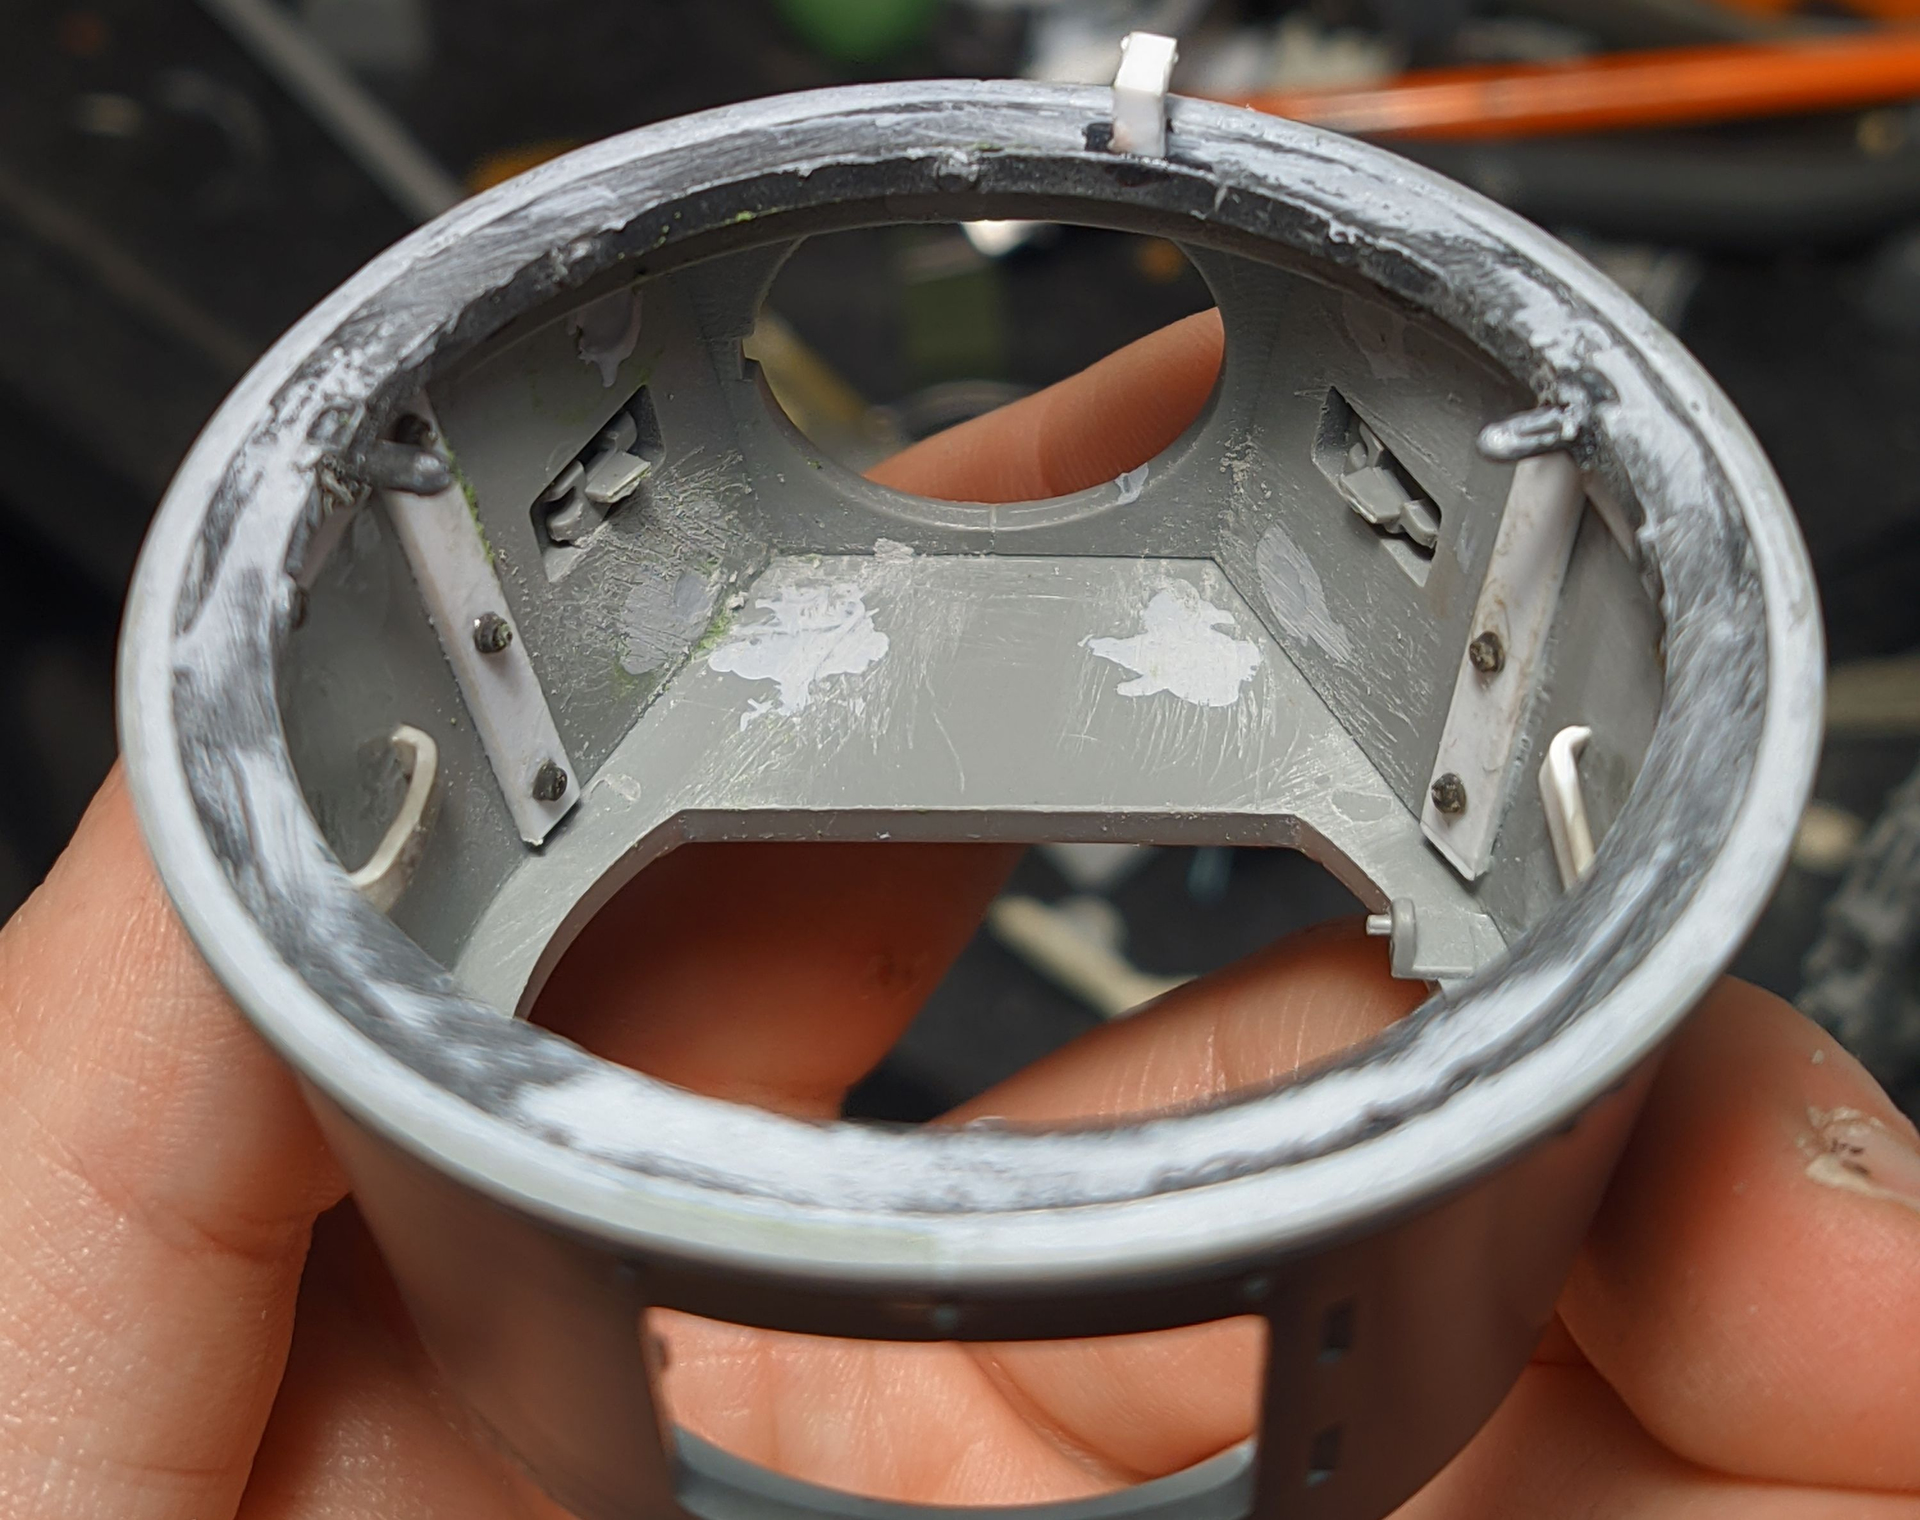
Top hull piece with added interior detail. The hole for the turret was enlarged accommodate the new turret ring.
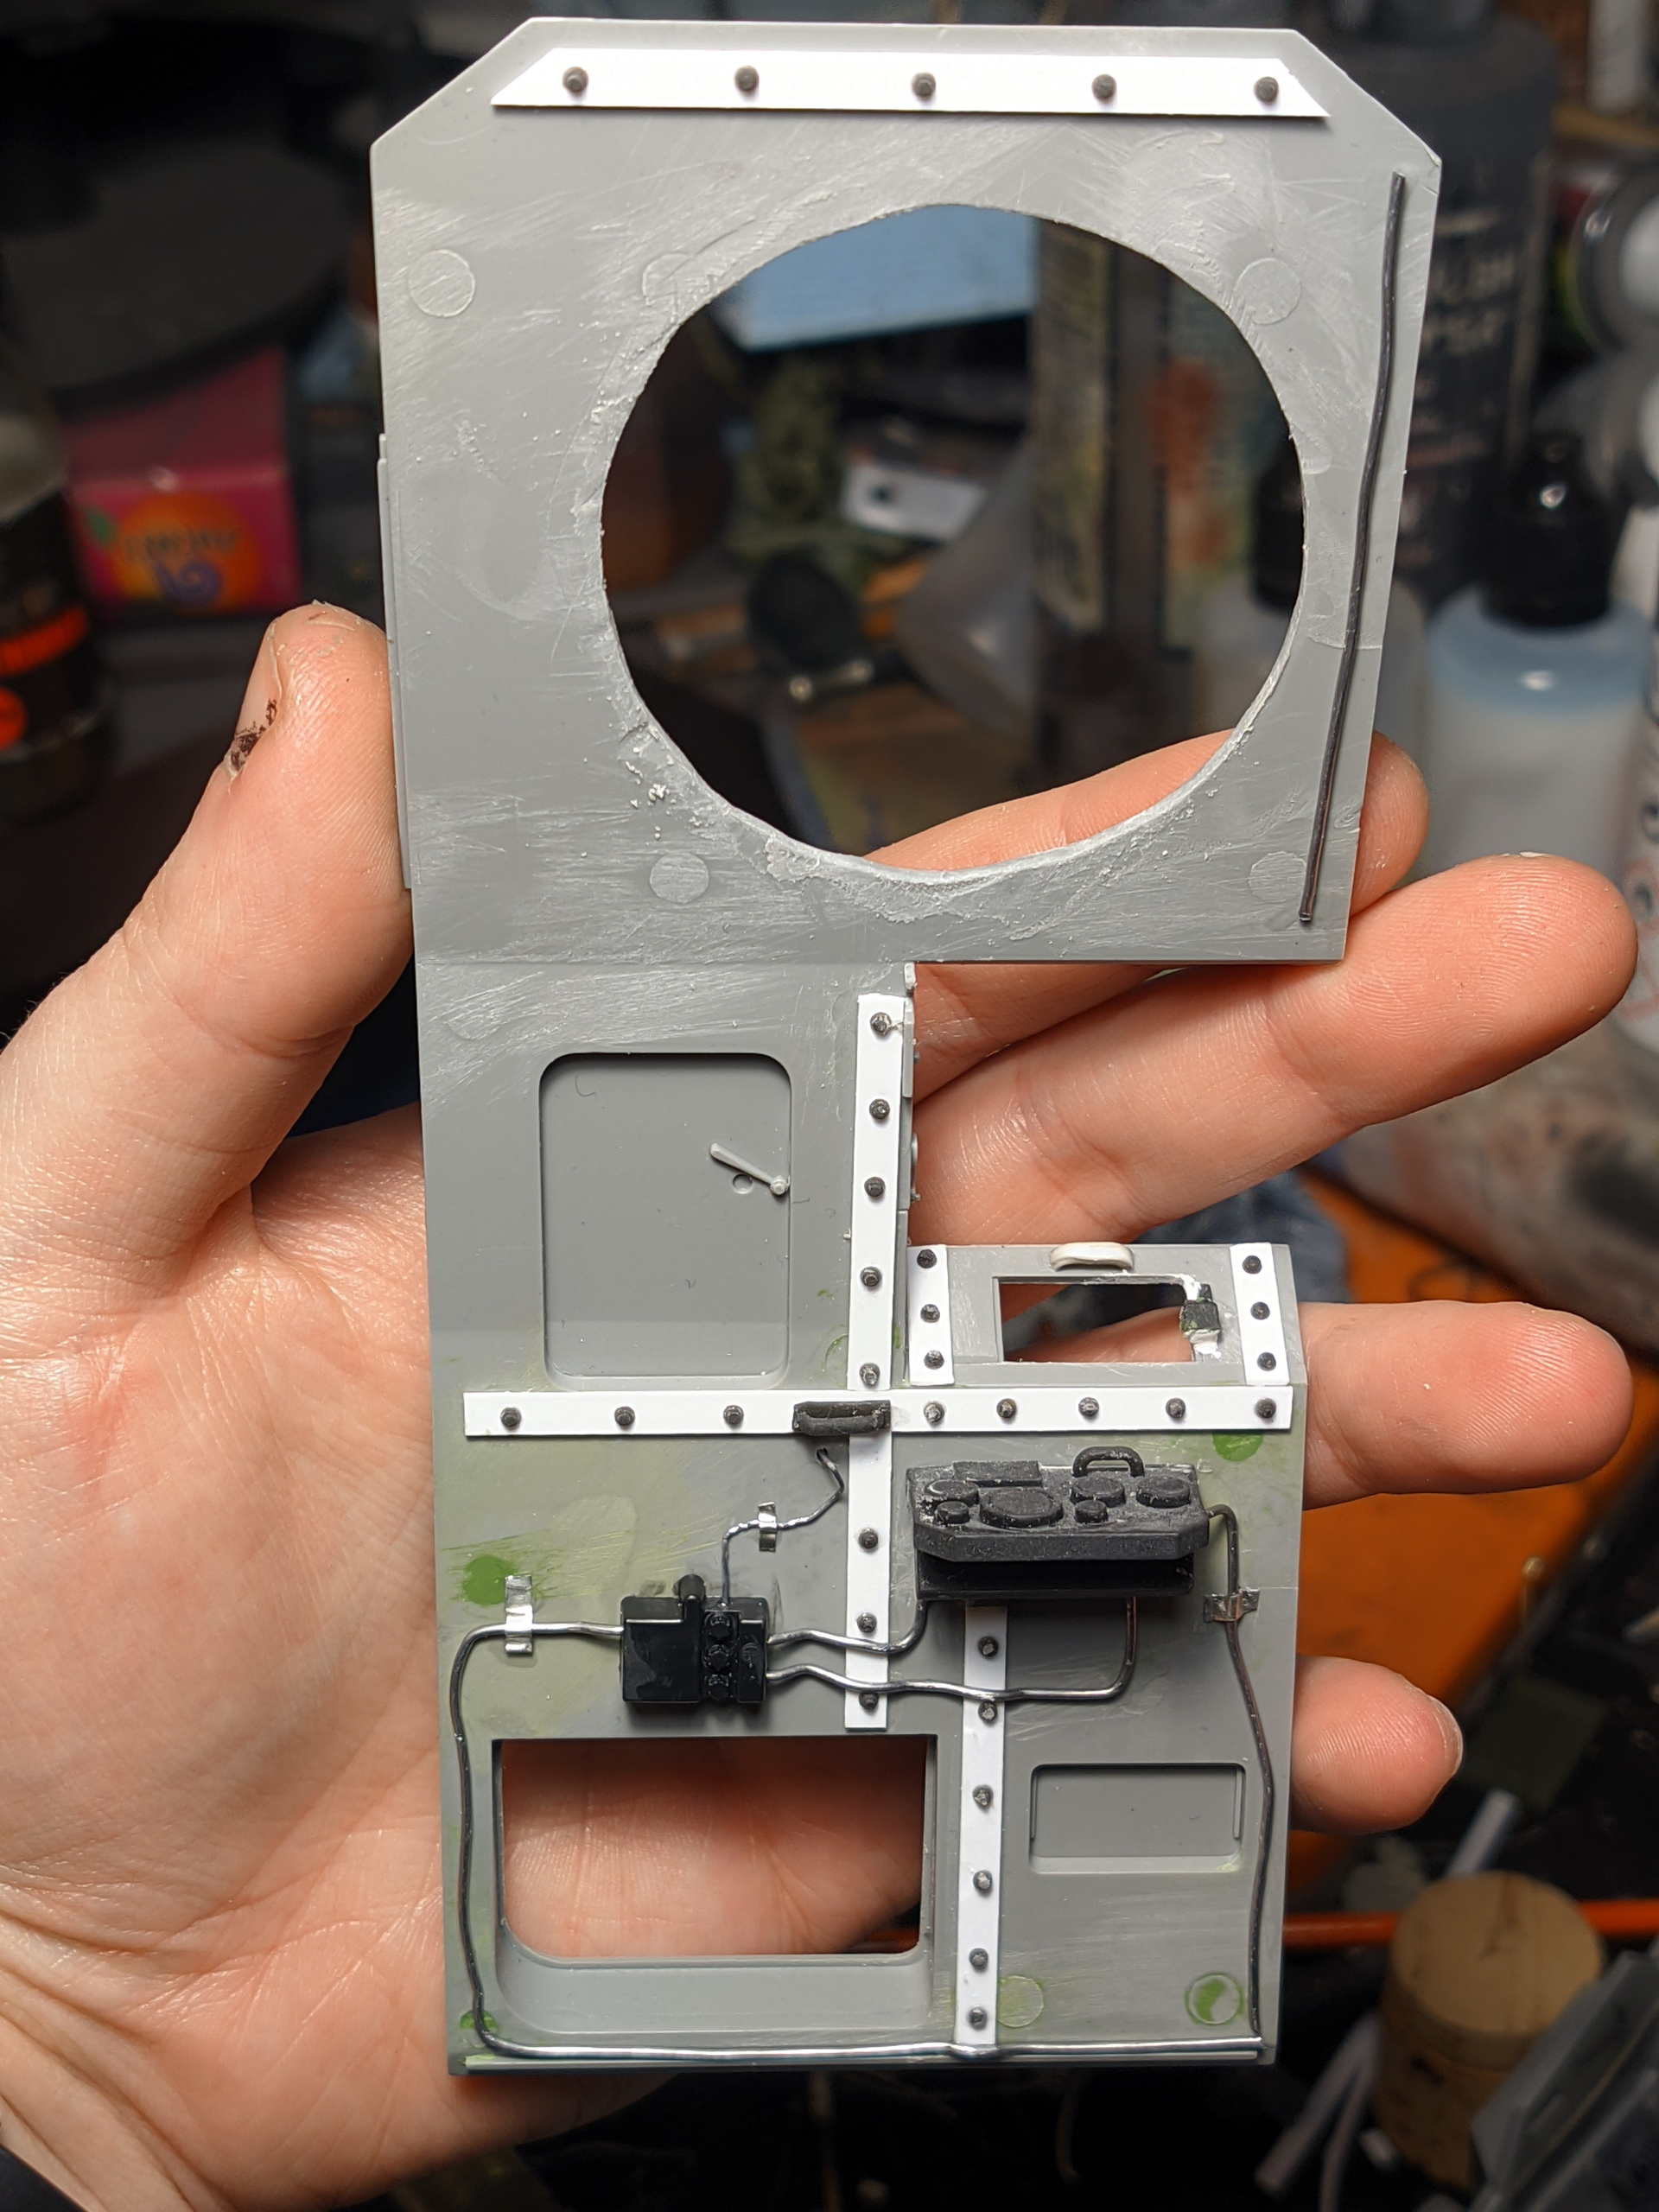
Enlarged turret hole from above.
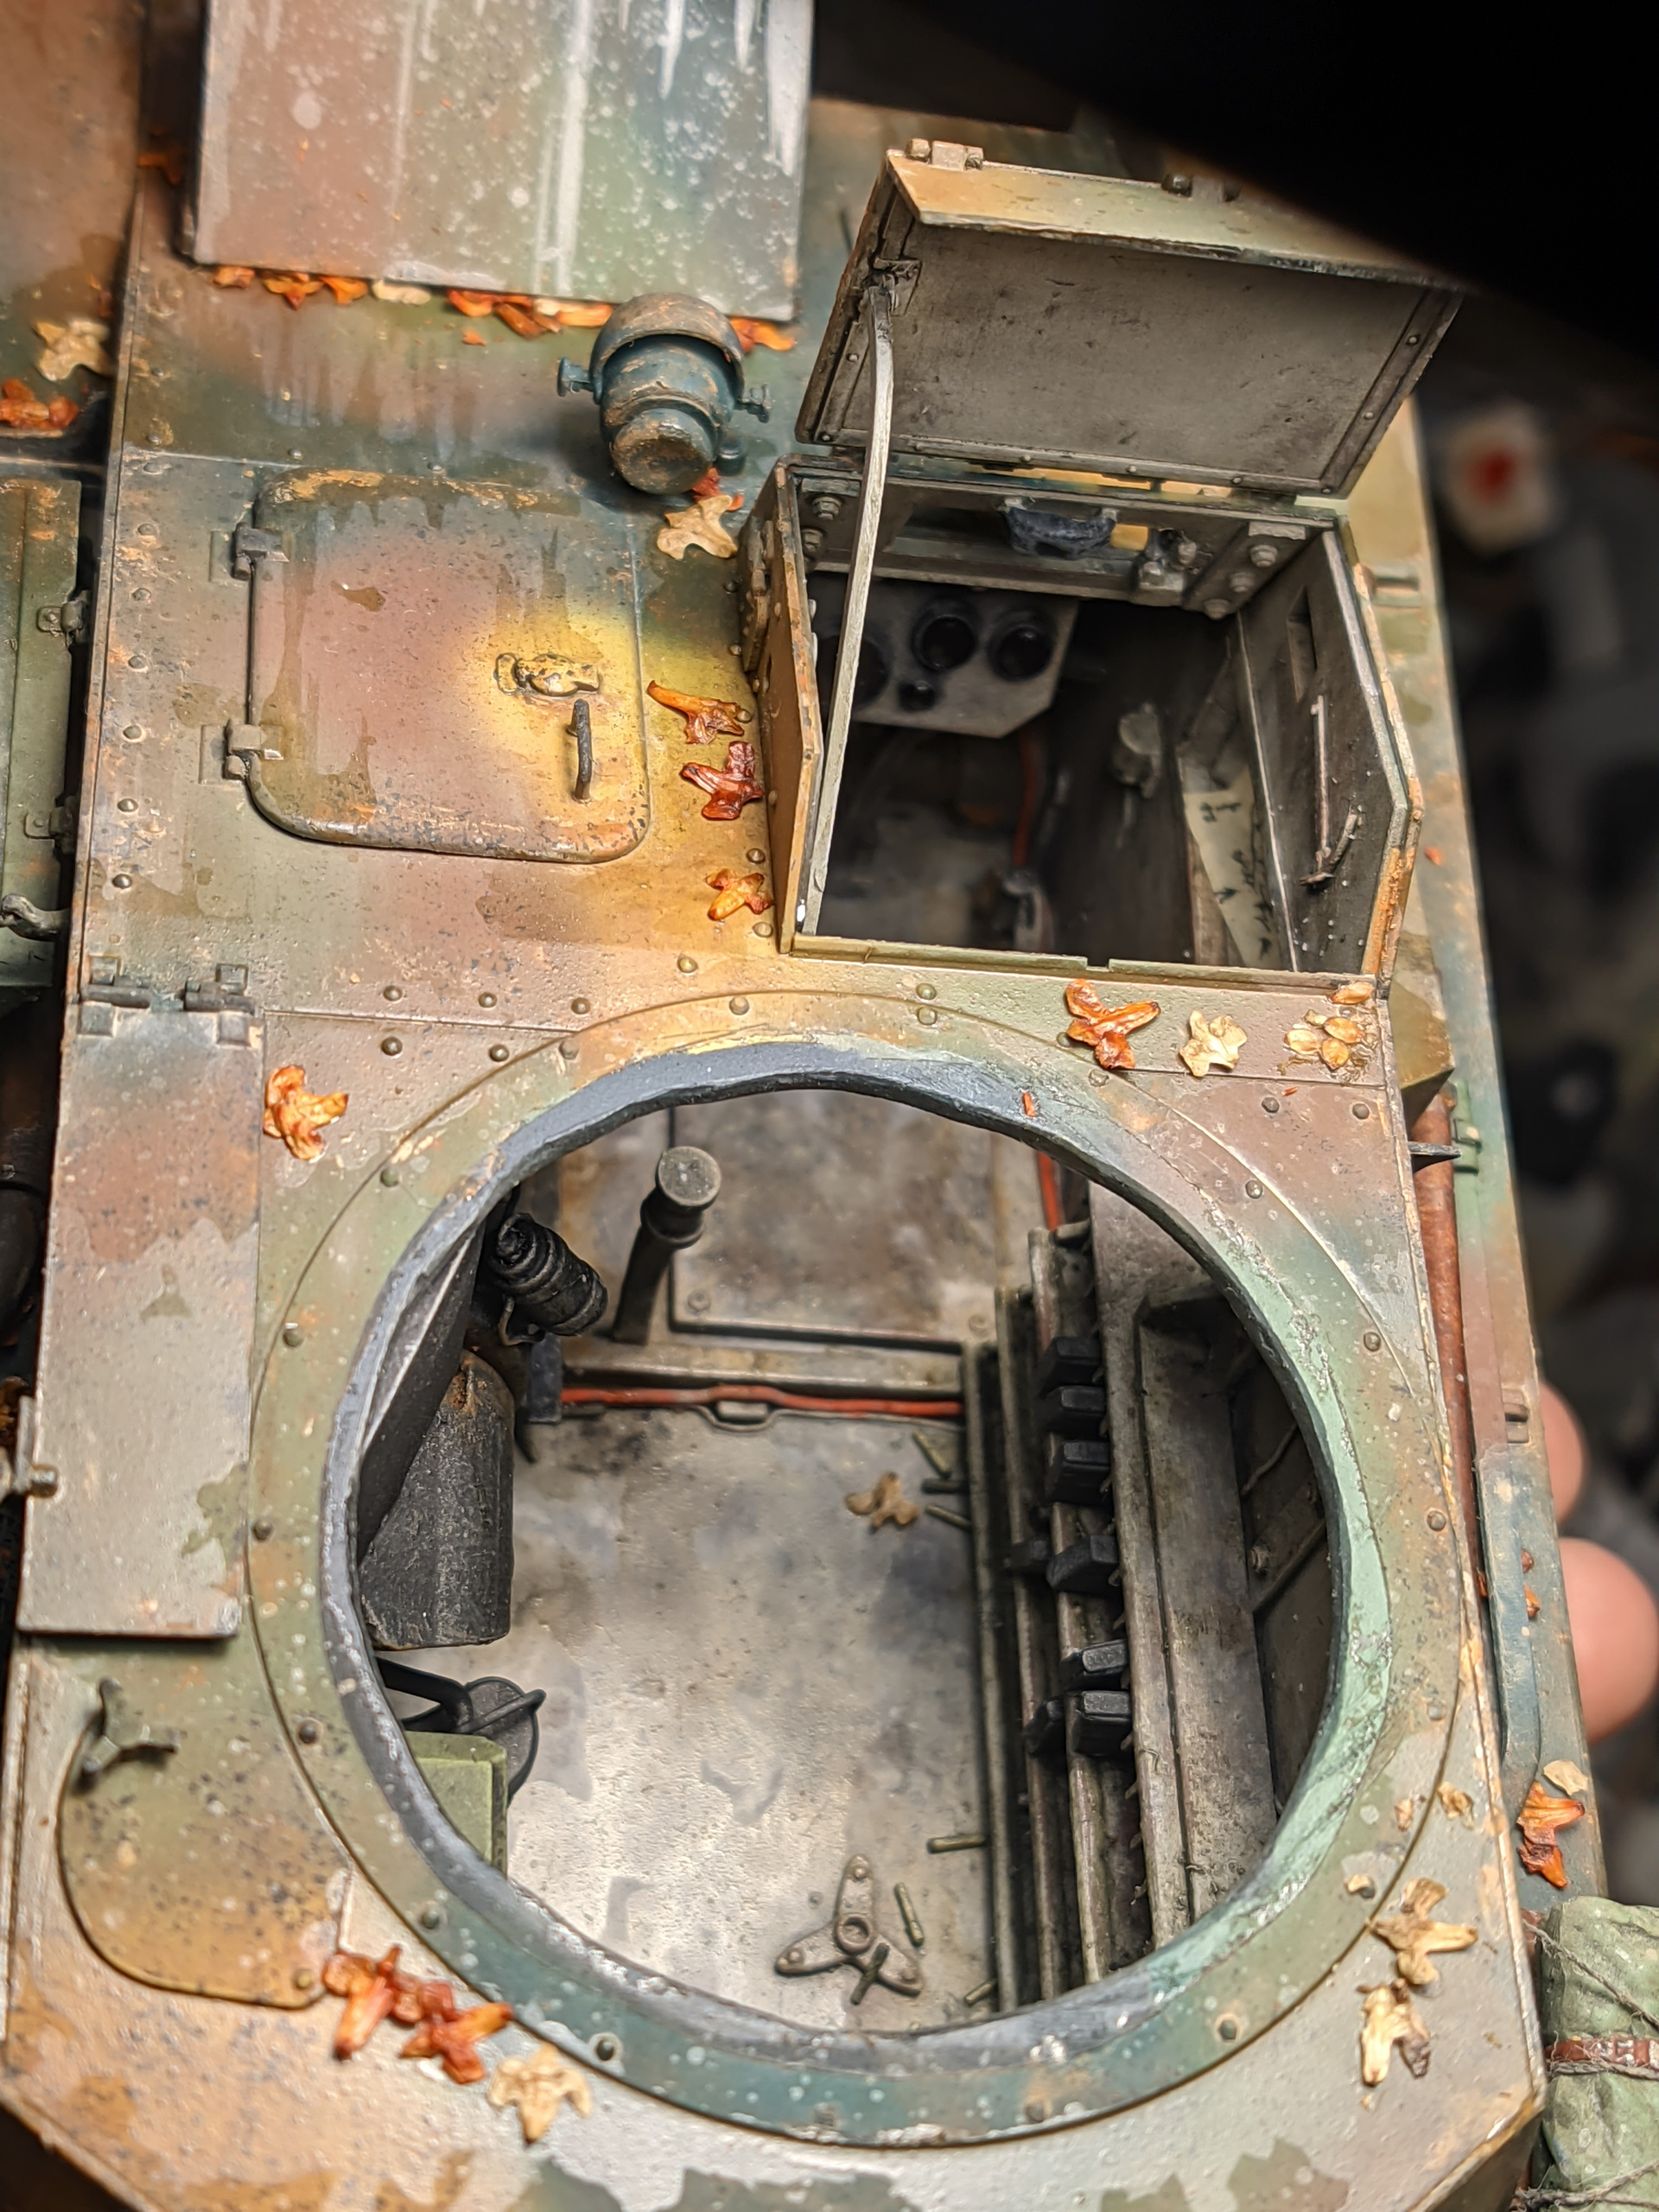
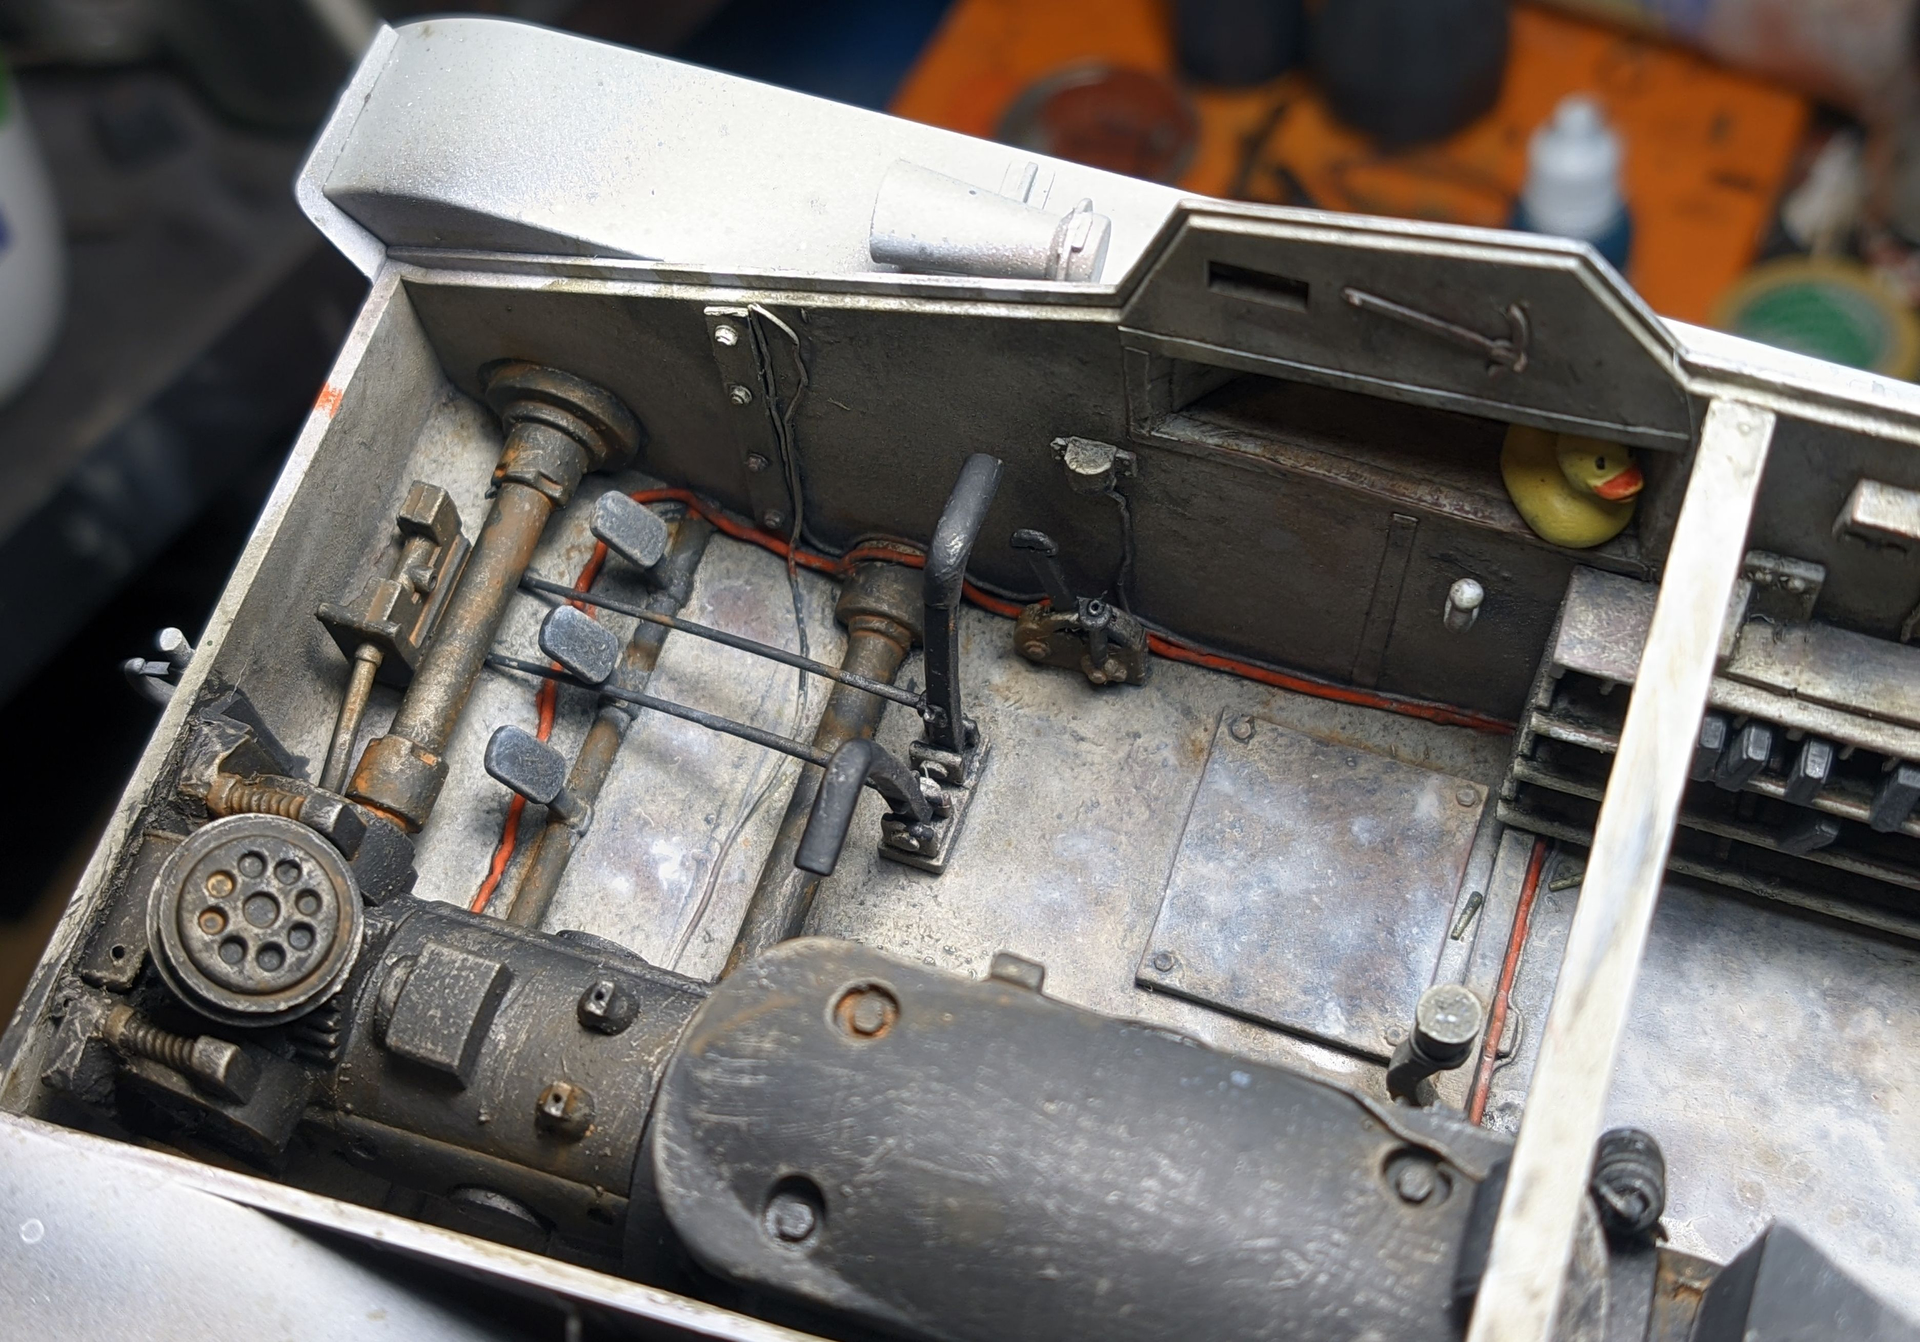
Interior mostly painted. I added some wet mud to the floor after painting the outside of the tank.
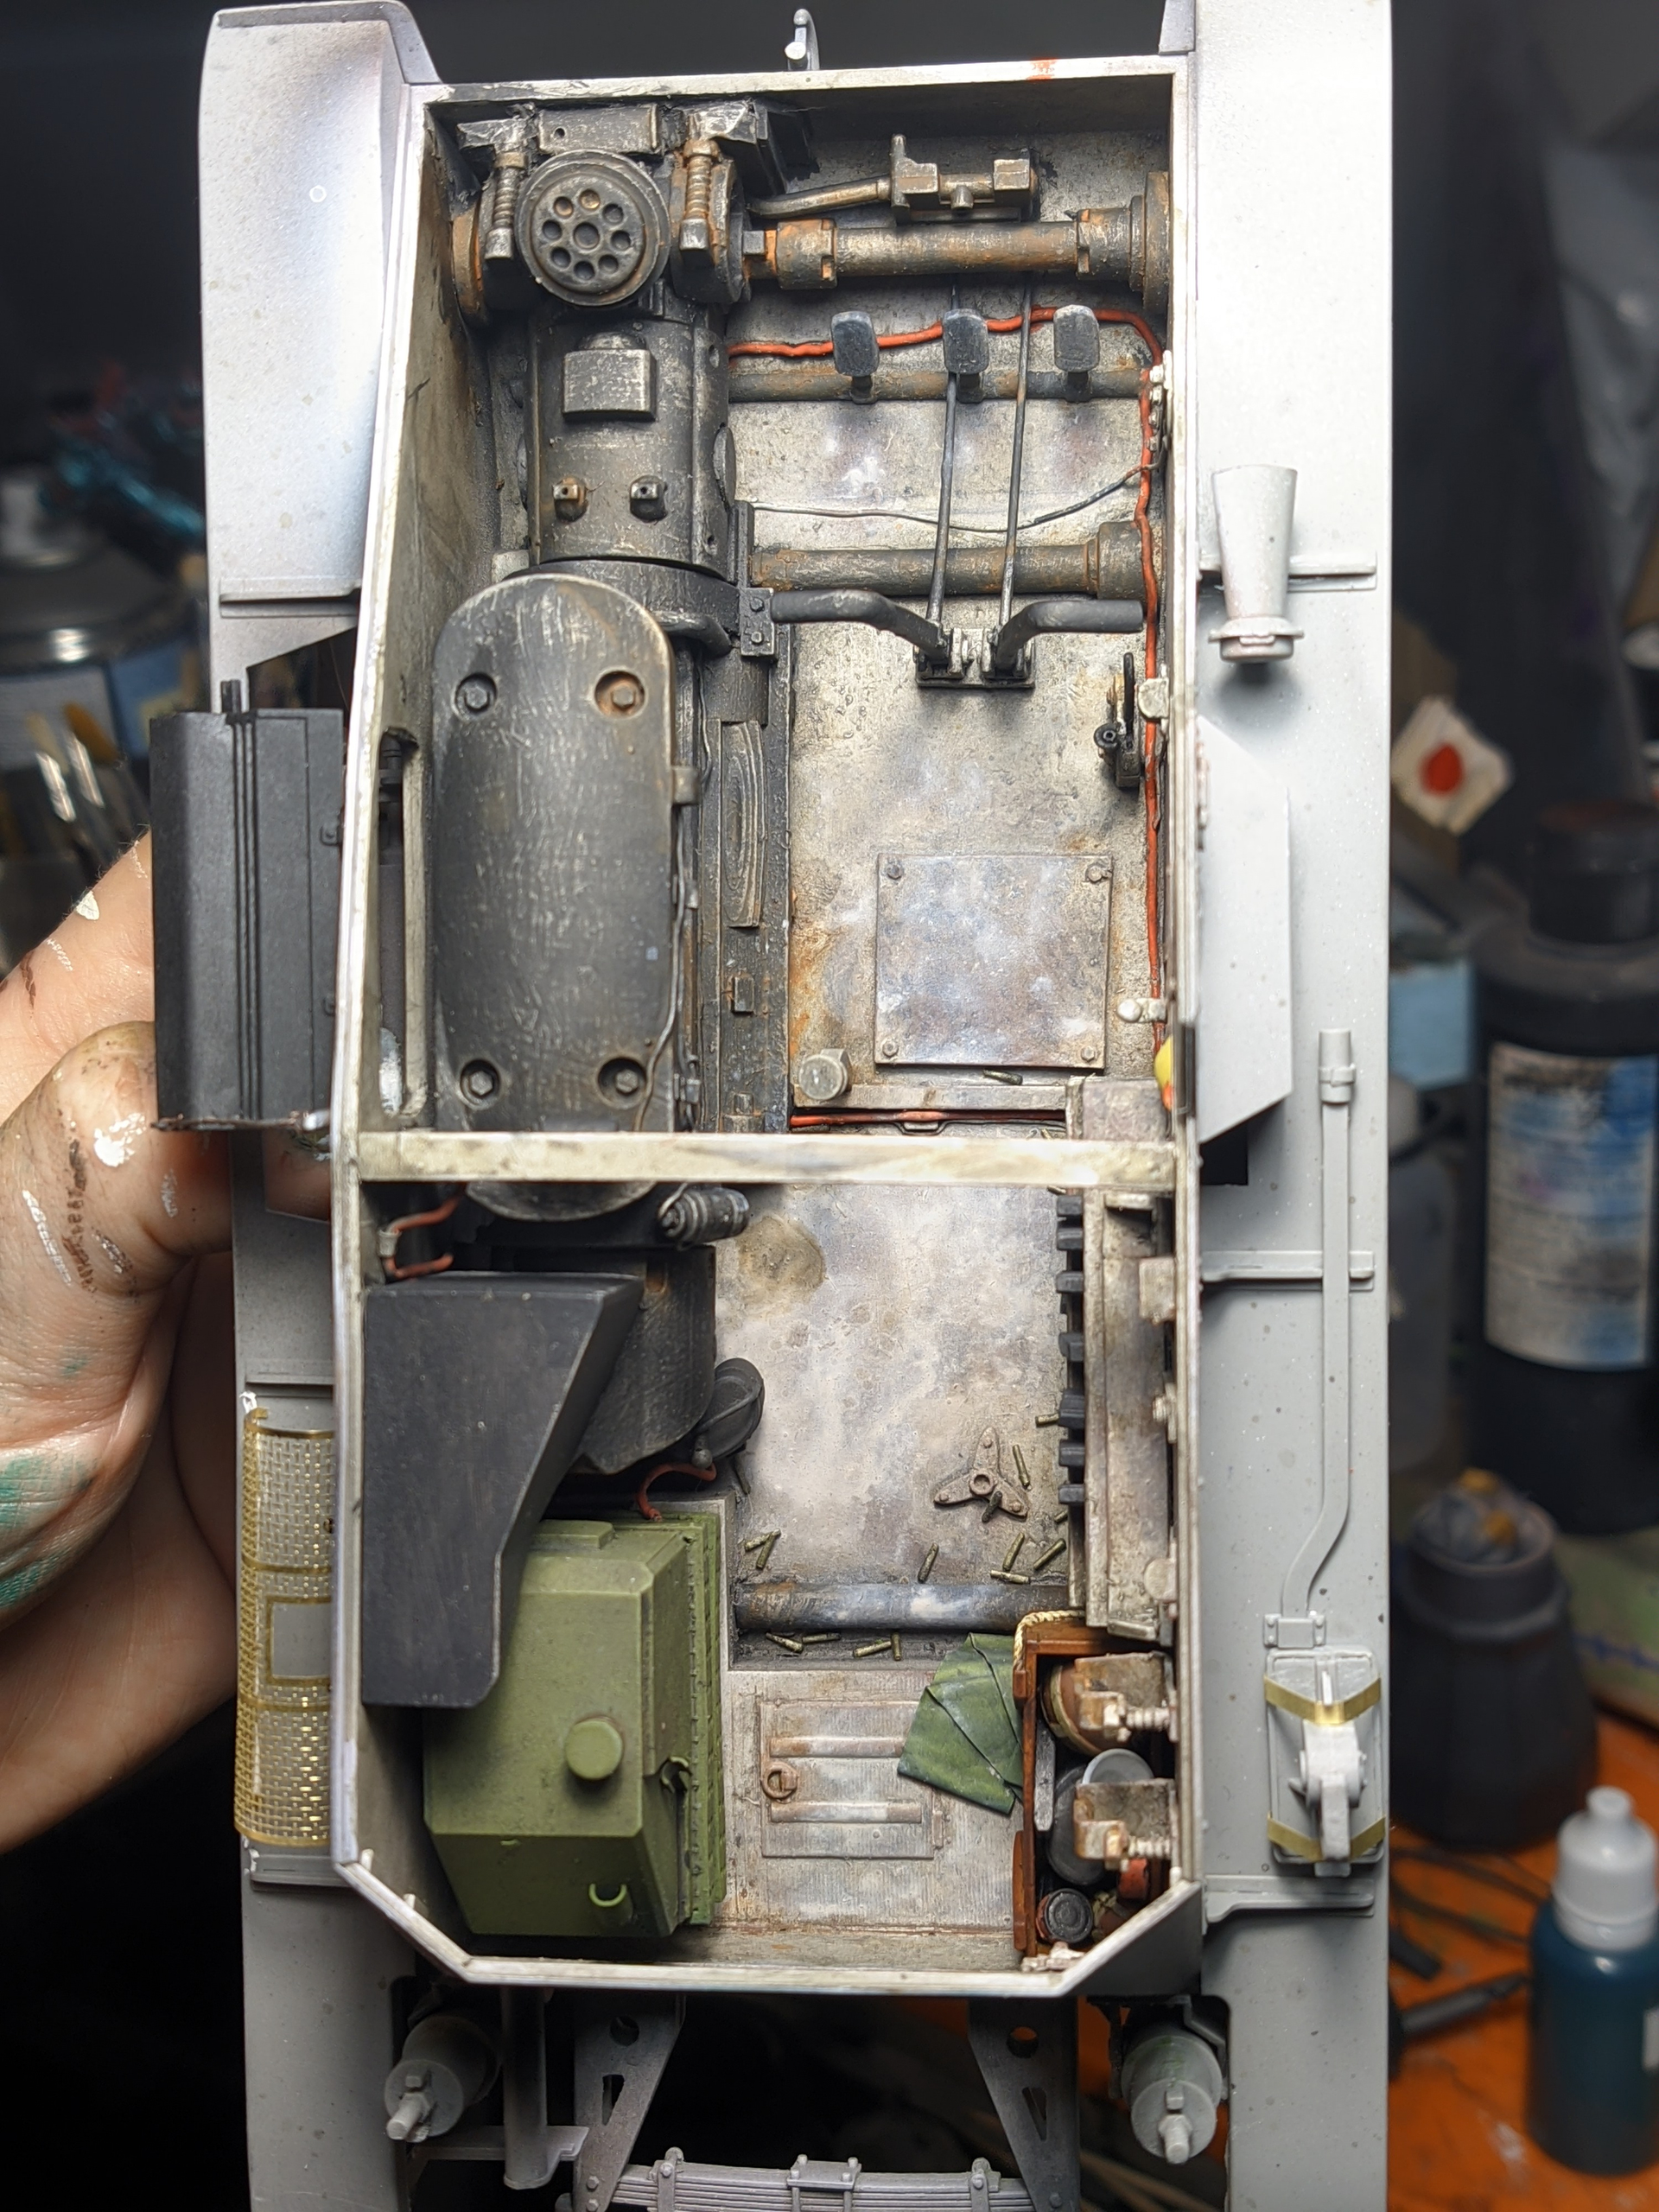
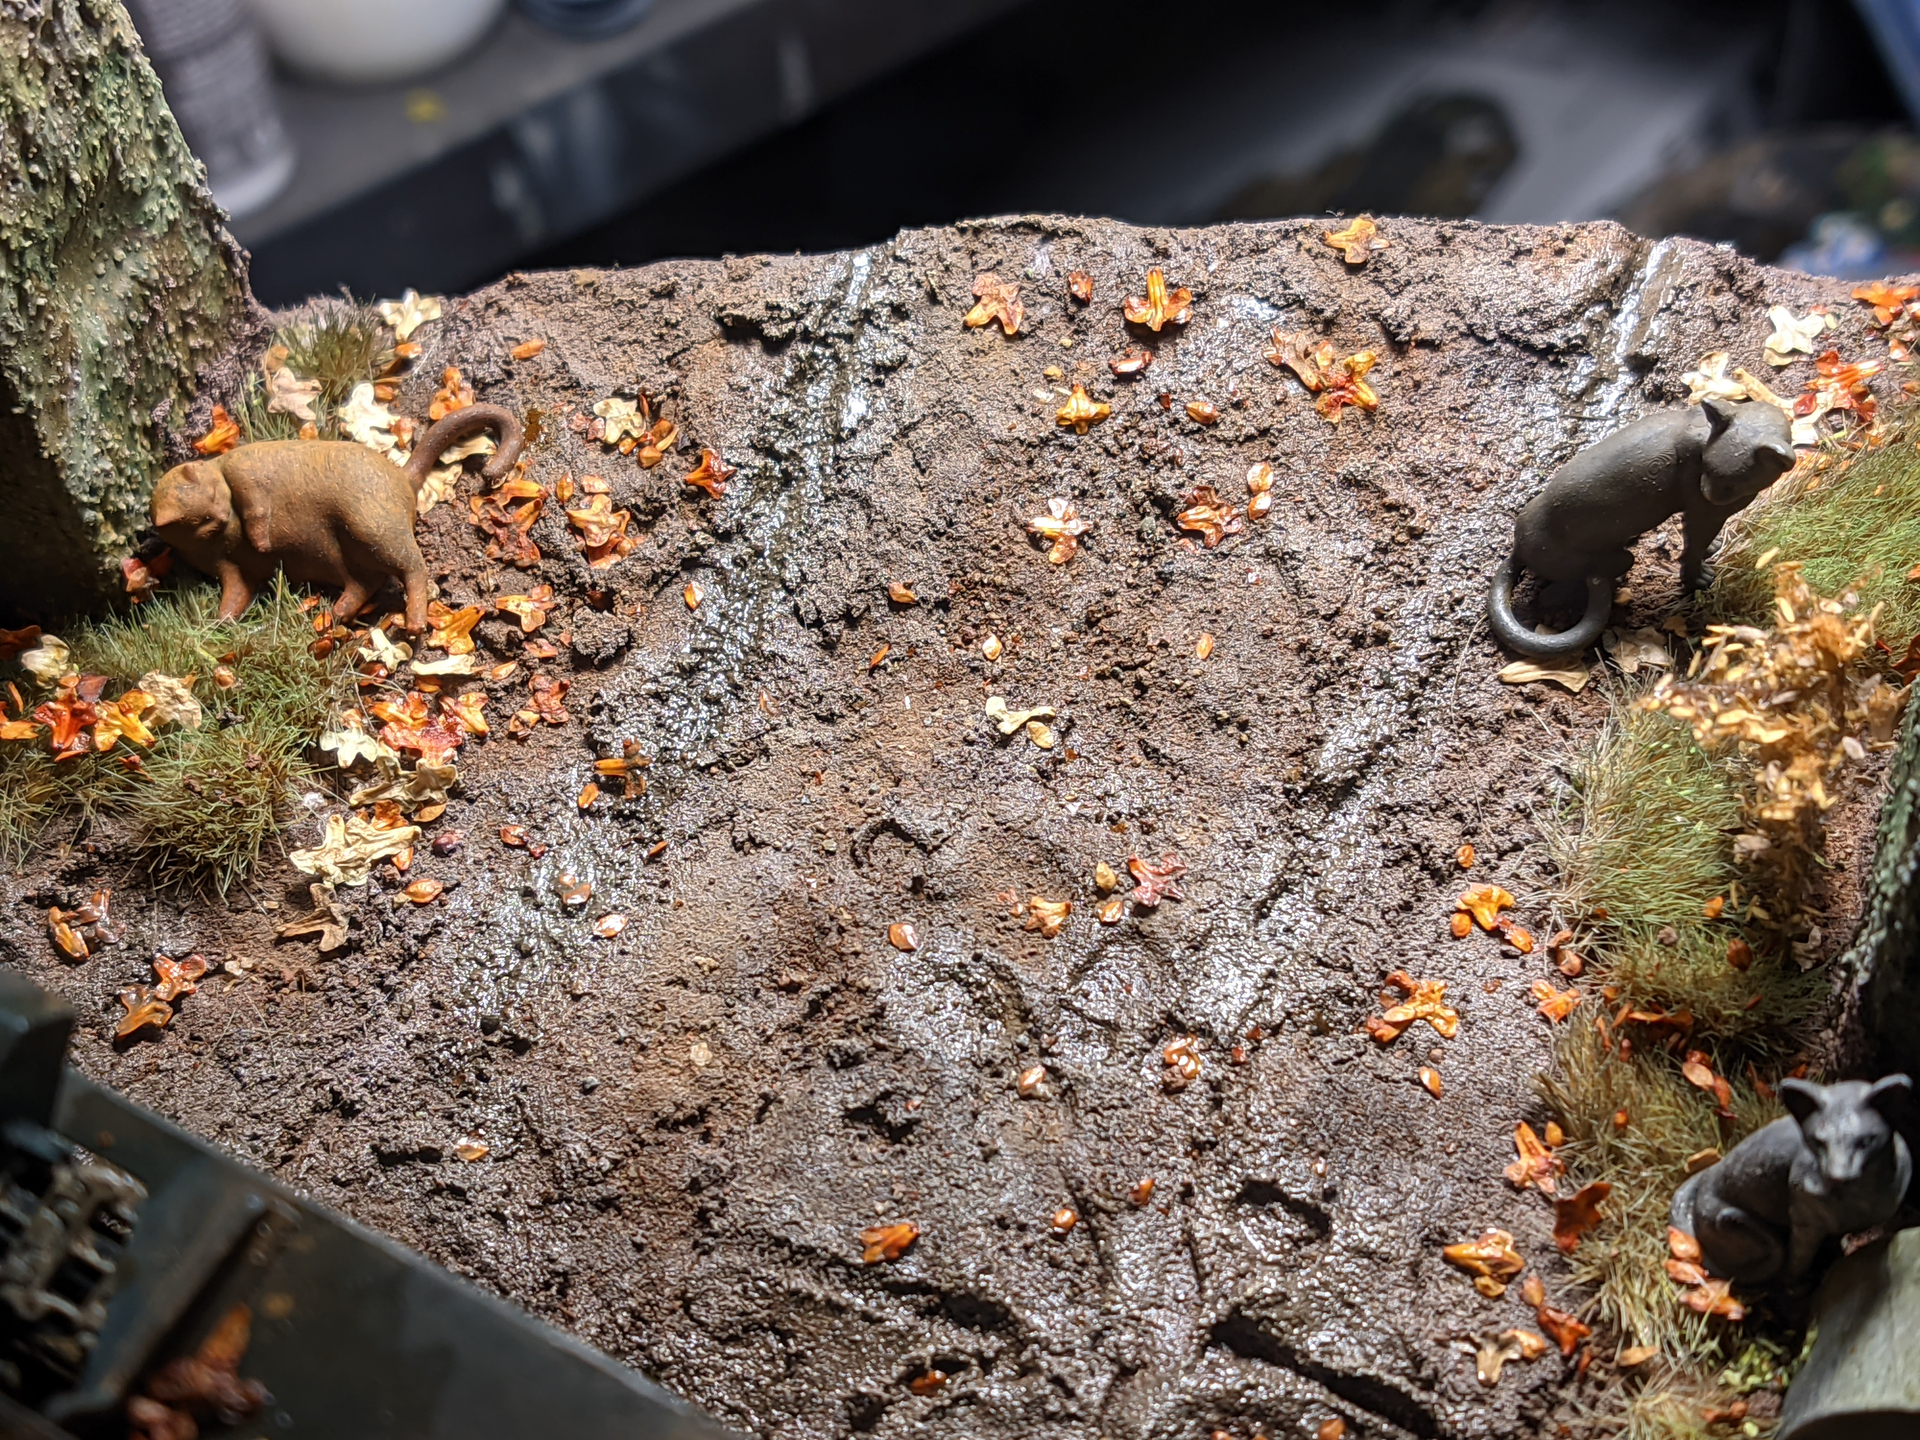
Most of this scatter was resin printed, files bought from JAPANESE・22 3D Models & STL Files to Download・Cults .


The instructions show the buttstock of the Type 97 machine gun folded out but I think the more accurate orientation is with it folded in. The inward folding stock was added because the gun is attached to the mantlet and therefore the stock is not needed when attached to the turret. The MG could be removed from the mantlet which is why the stock wasn’t removed completely.
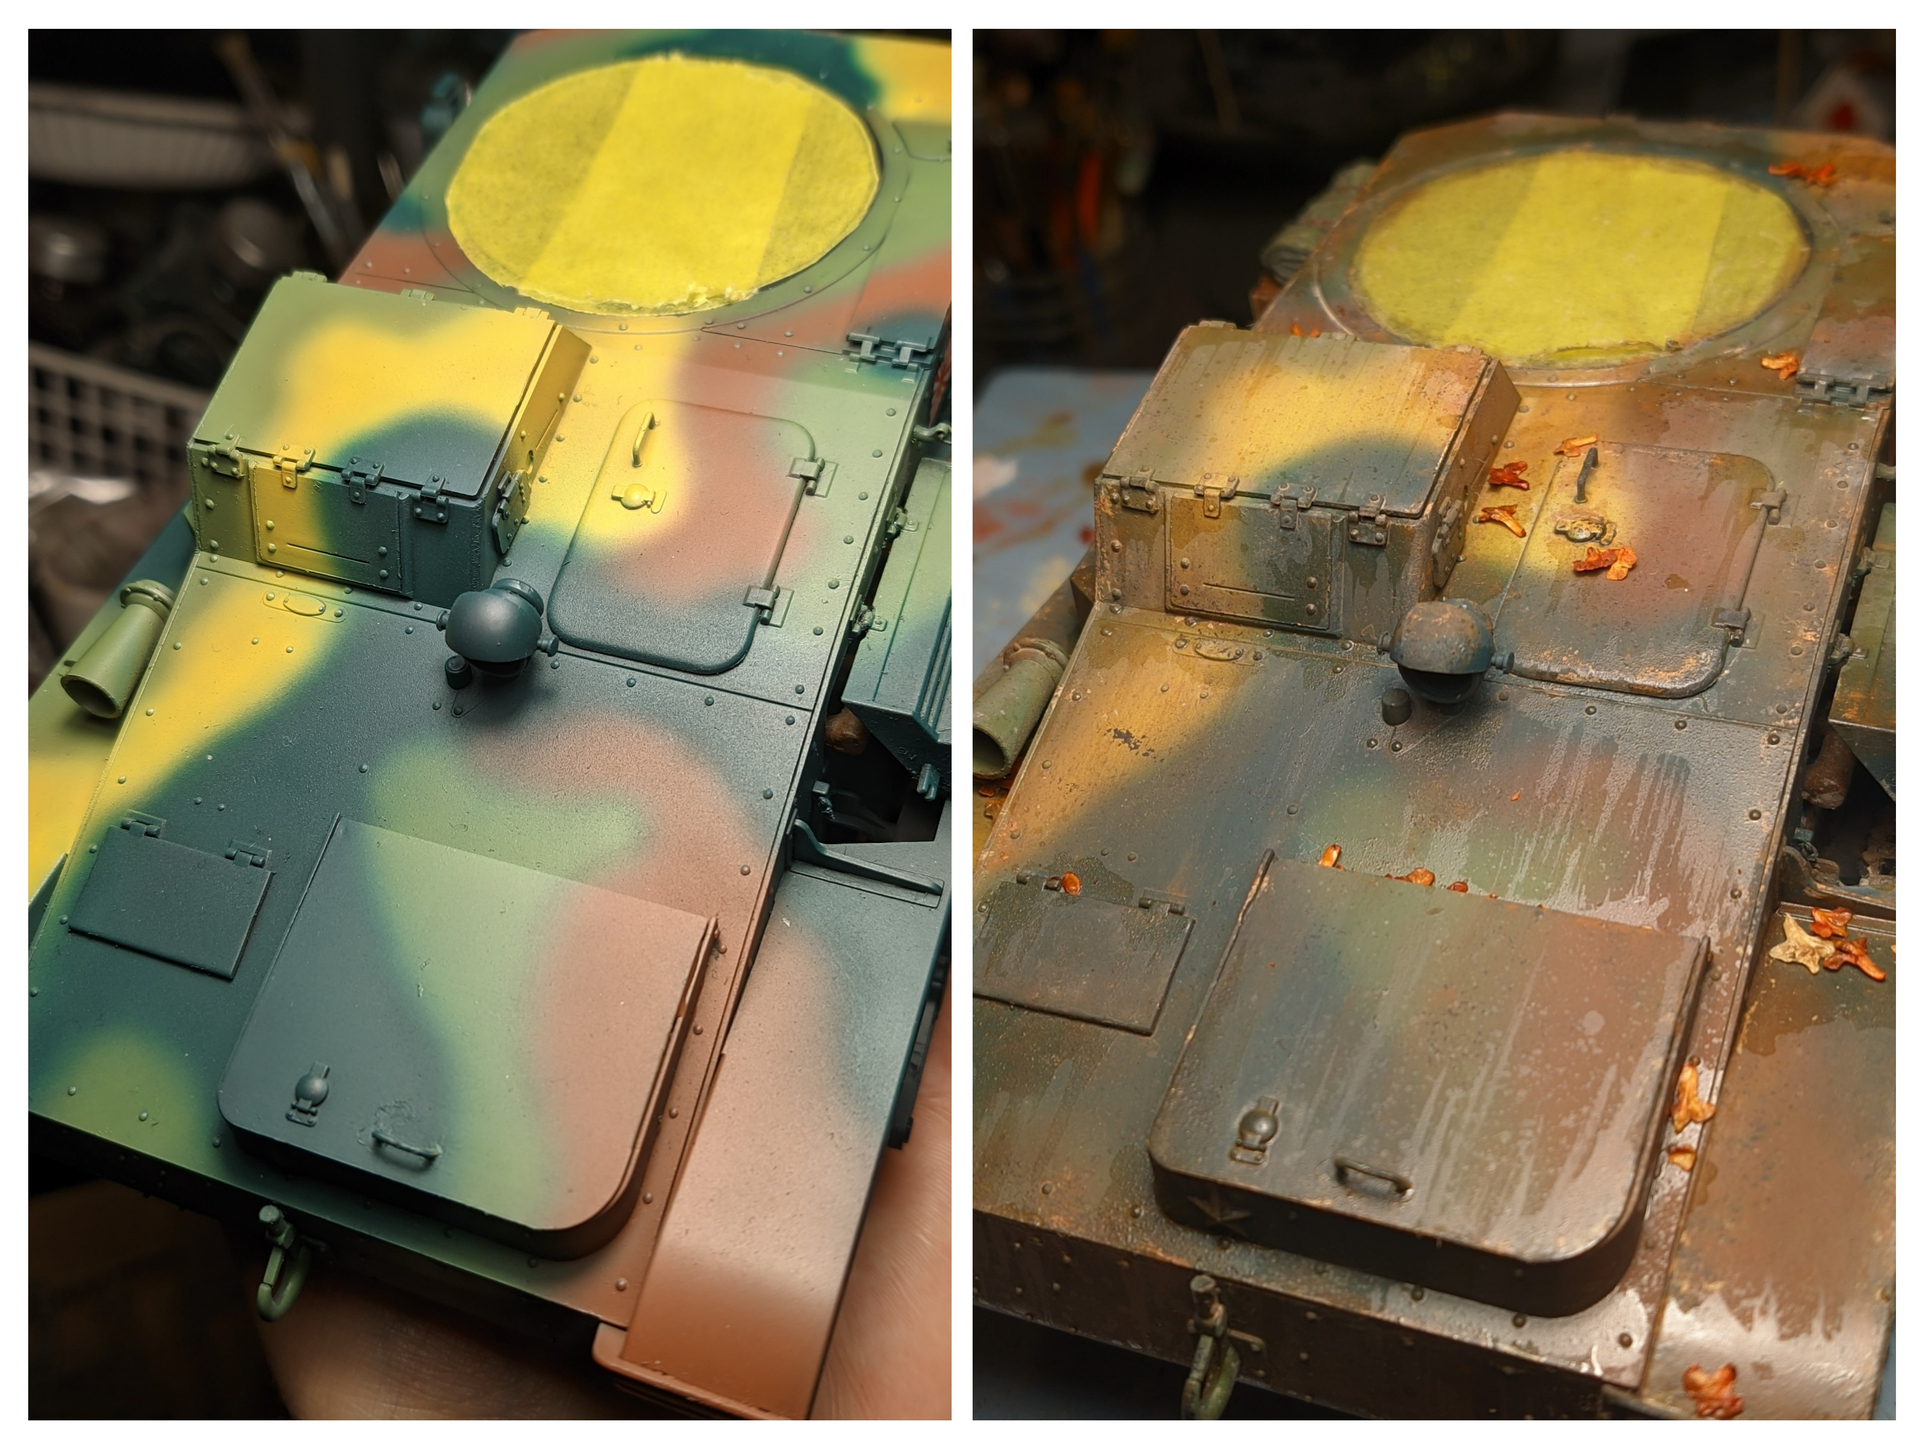
I always forget how much all the weathering tones down the paintjob.
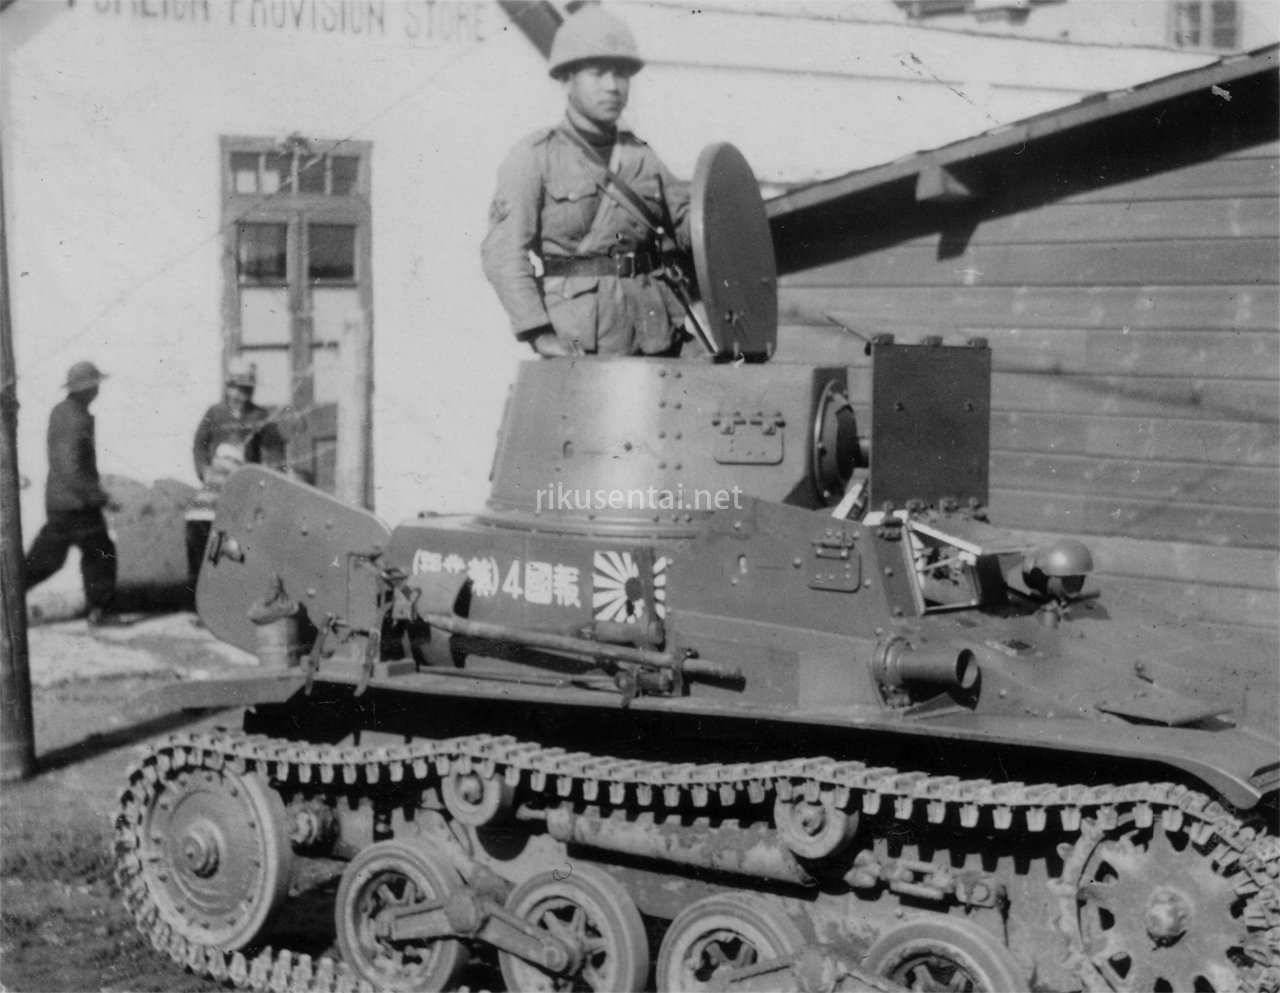
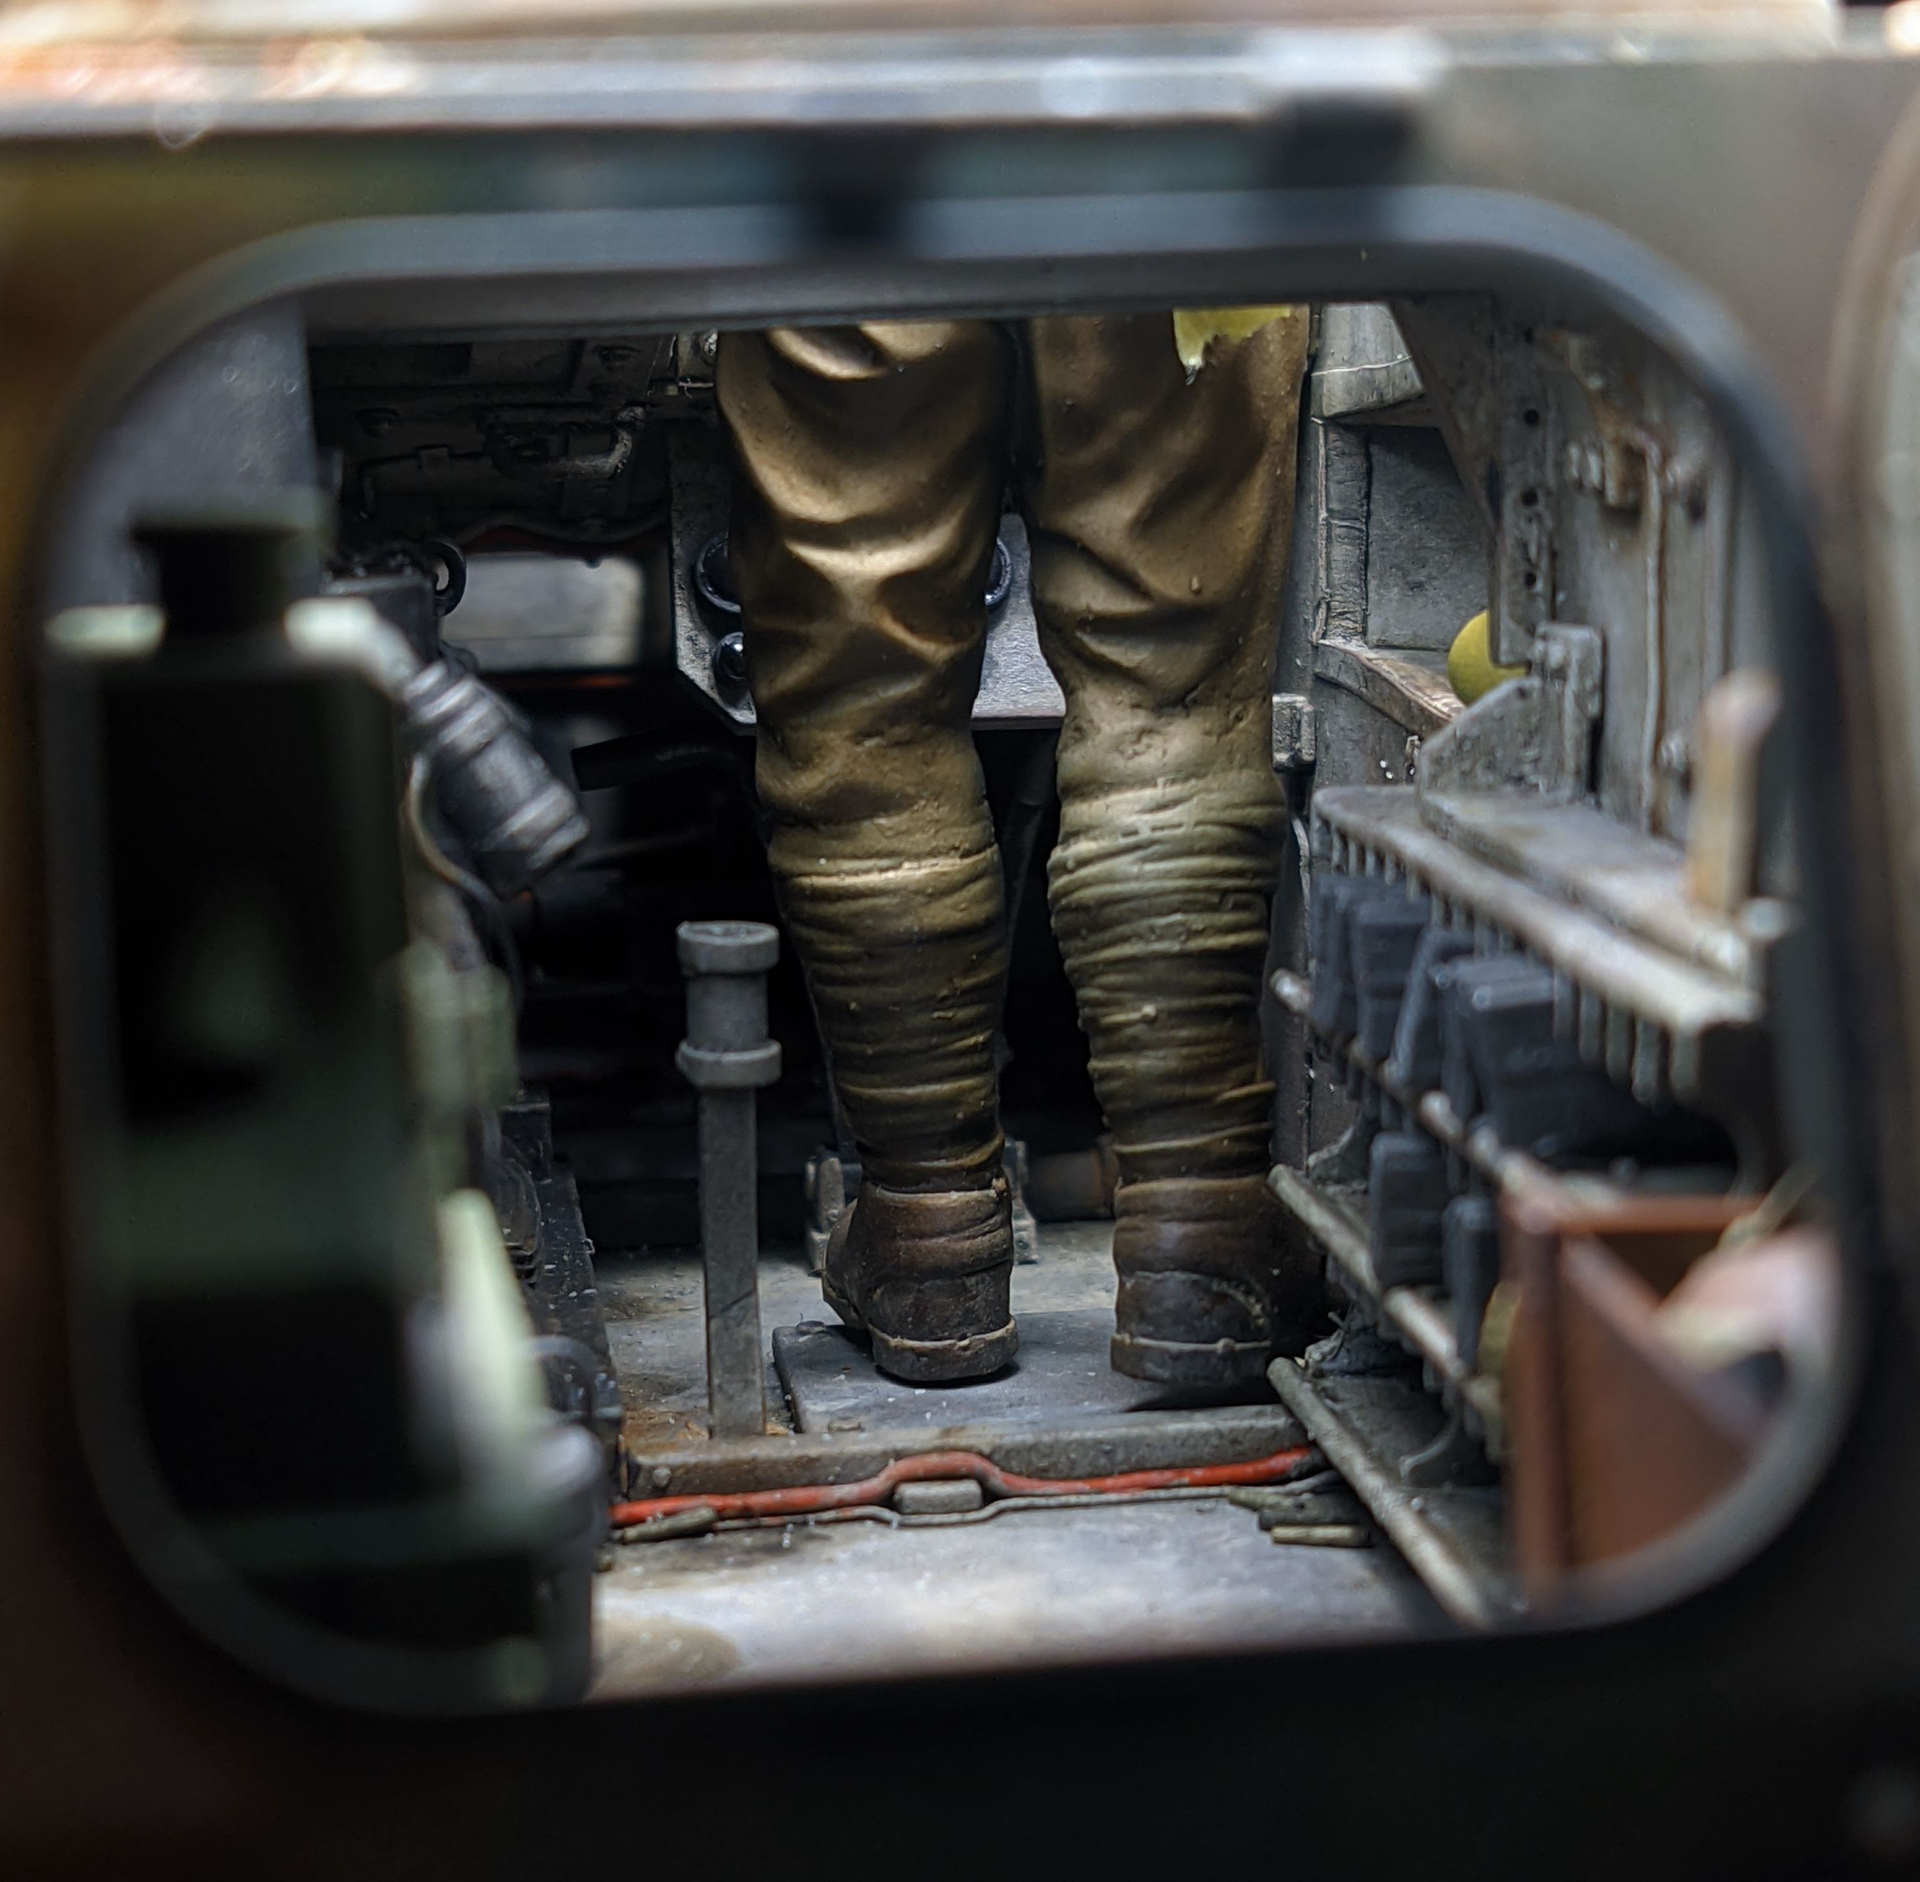
So, about the tank driver. Normally he’s positioned here poking out of the turret. Normally not a problem but with the full interior it became quite the conundrum. His legs are cut off at the knees, and even compensating for full length legs I measured that his feet would be about a foot (in scale) off the floor of the tankette.
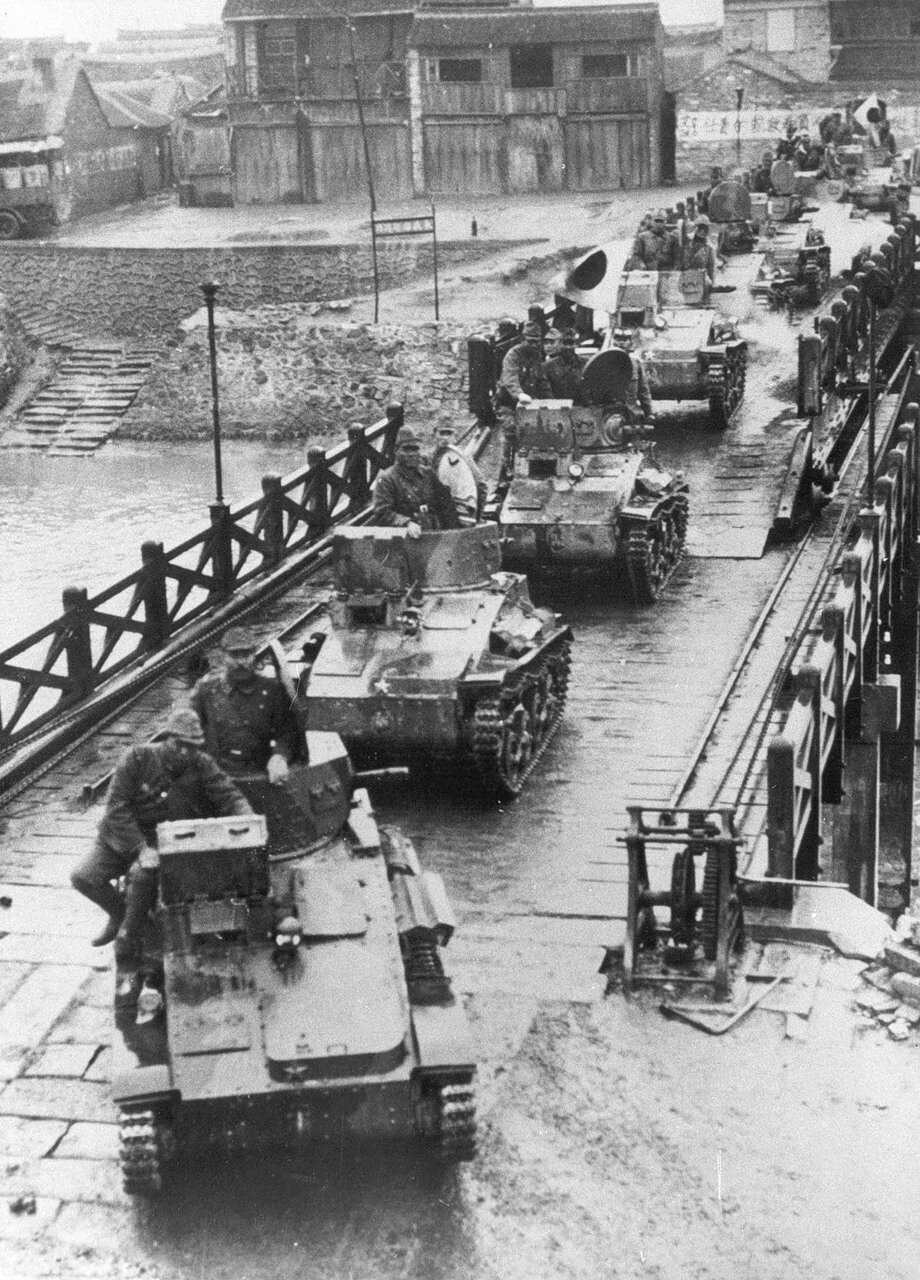
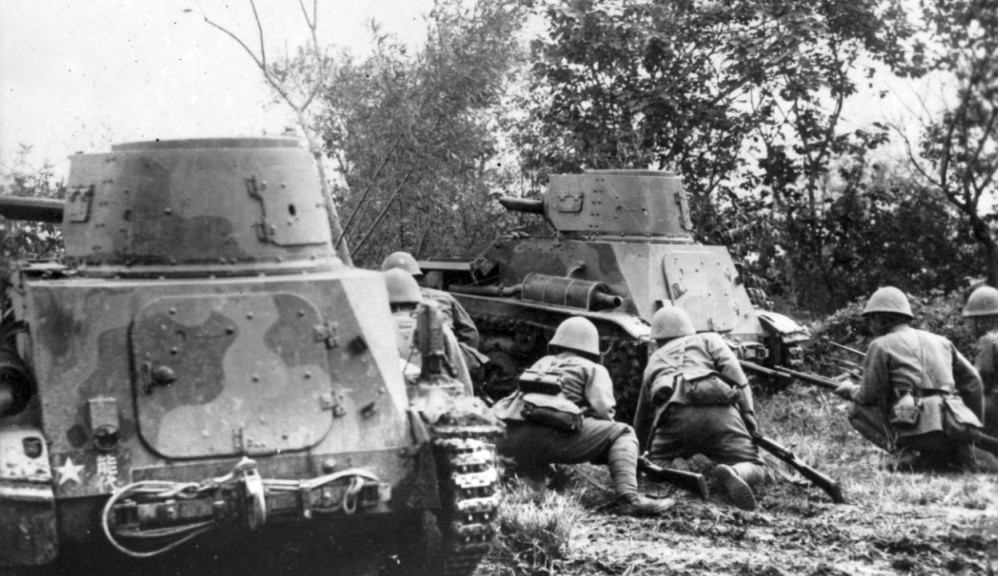
From numerous period pictures I know for a fact that standing up in the turret was a very common way for the tank commanders to pose, but I could not figure out where they put their feet. Resting on the turret ring?
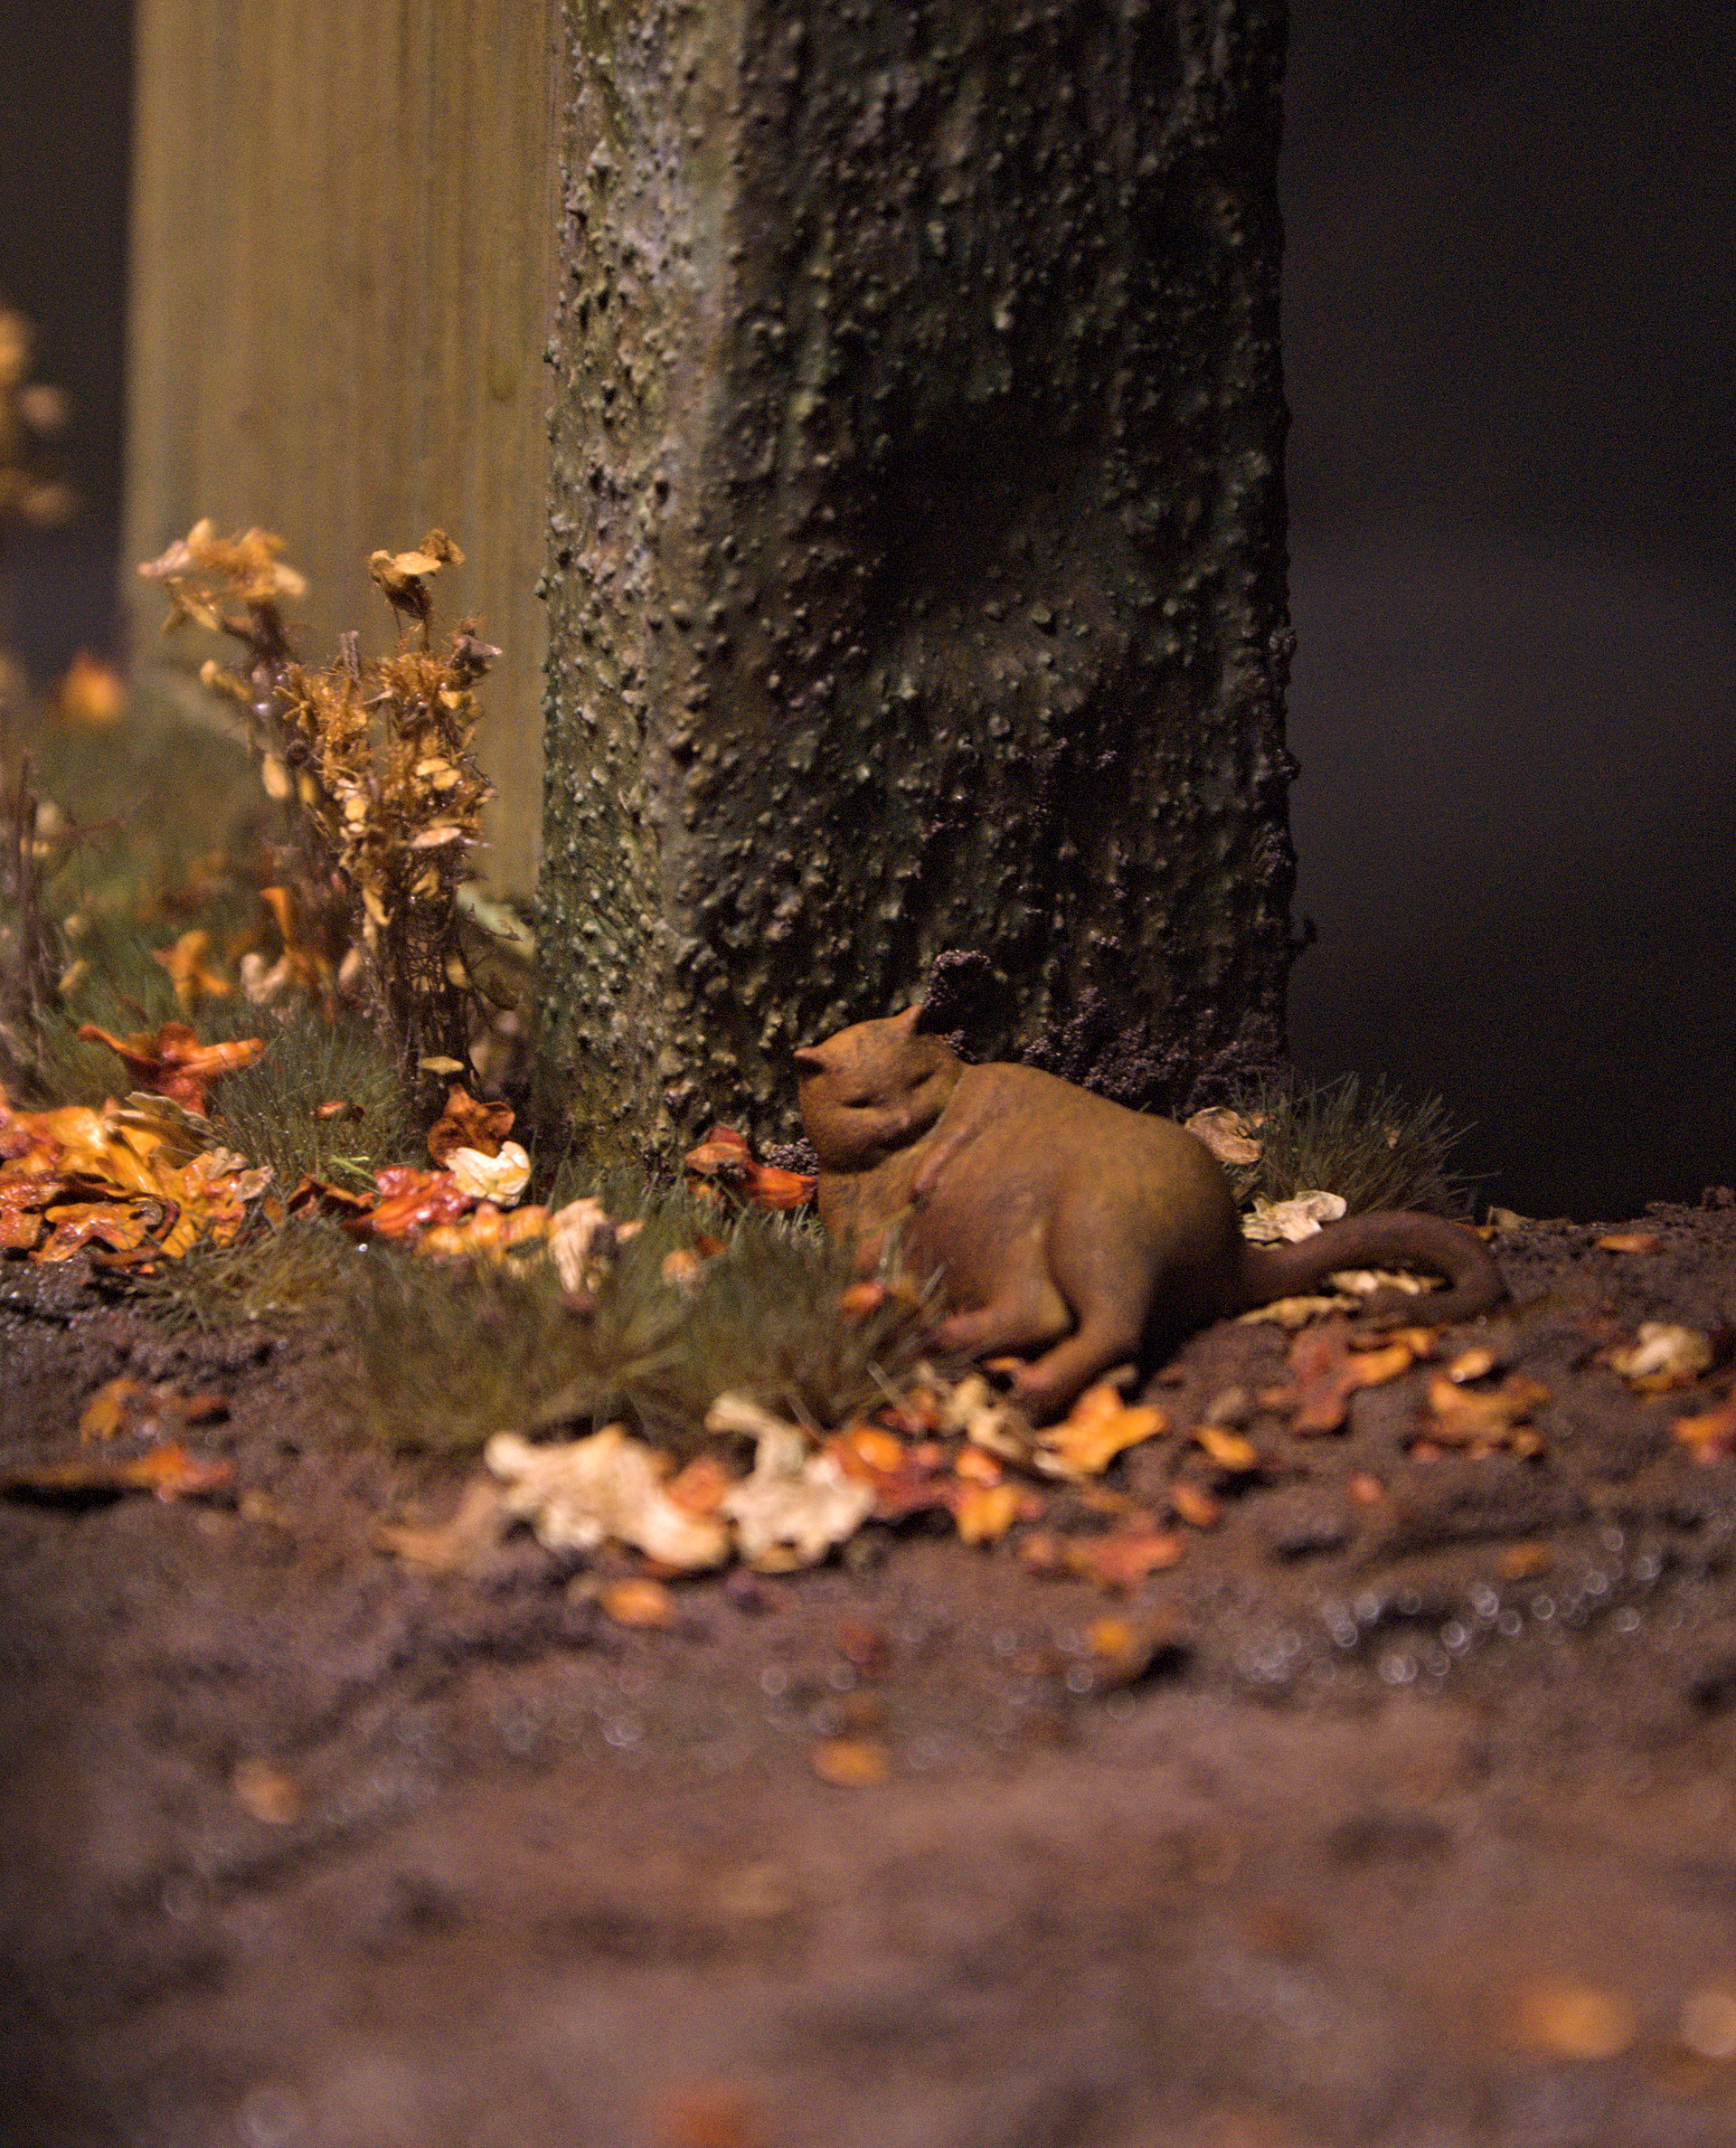
There’s some evidence of a possibly rotating thing mounted on the bottom of the tankette here, no idea if there was some removable platform here or if it was for something else entirely. Interior pics of the Type 94 are pretty much limited to this one example so I didn’t have much to go on.

I figured I needed to make new legs for him anyway so I printed the leg bits of a generic Japanese soldier and with the help of some putty to bridge the seams the driver had full extremities again.
Instead of trying to manifest some solution to the turret legs problem I opted to reposition the driver to the drivers hatch. It was a surprisingly good fit. With a little repositioning of the right hand to grasp the edge of the hull and the addition of the flagpole to the hand normally resting on the turret hatch, I think he looks quite natural there.
I noticed in most period photos that the exhaust manifold cover was held up at an angle with a chain which I quite liked the look of.
The part in the kit did support putting it in this position but the louvres don’t go all the way through so it looked a bit toy-ish. I modeled and resin printed a new part with real louvres. The new part can be downloaded for free from this link.
The temple gate was 3d printed. After printing it I thought the roof looked a bit too plain so I modeled and resin printed the tile roof which went over the original.
Mocking up the diorama.
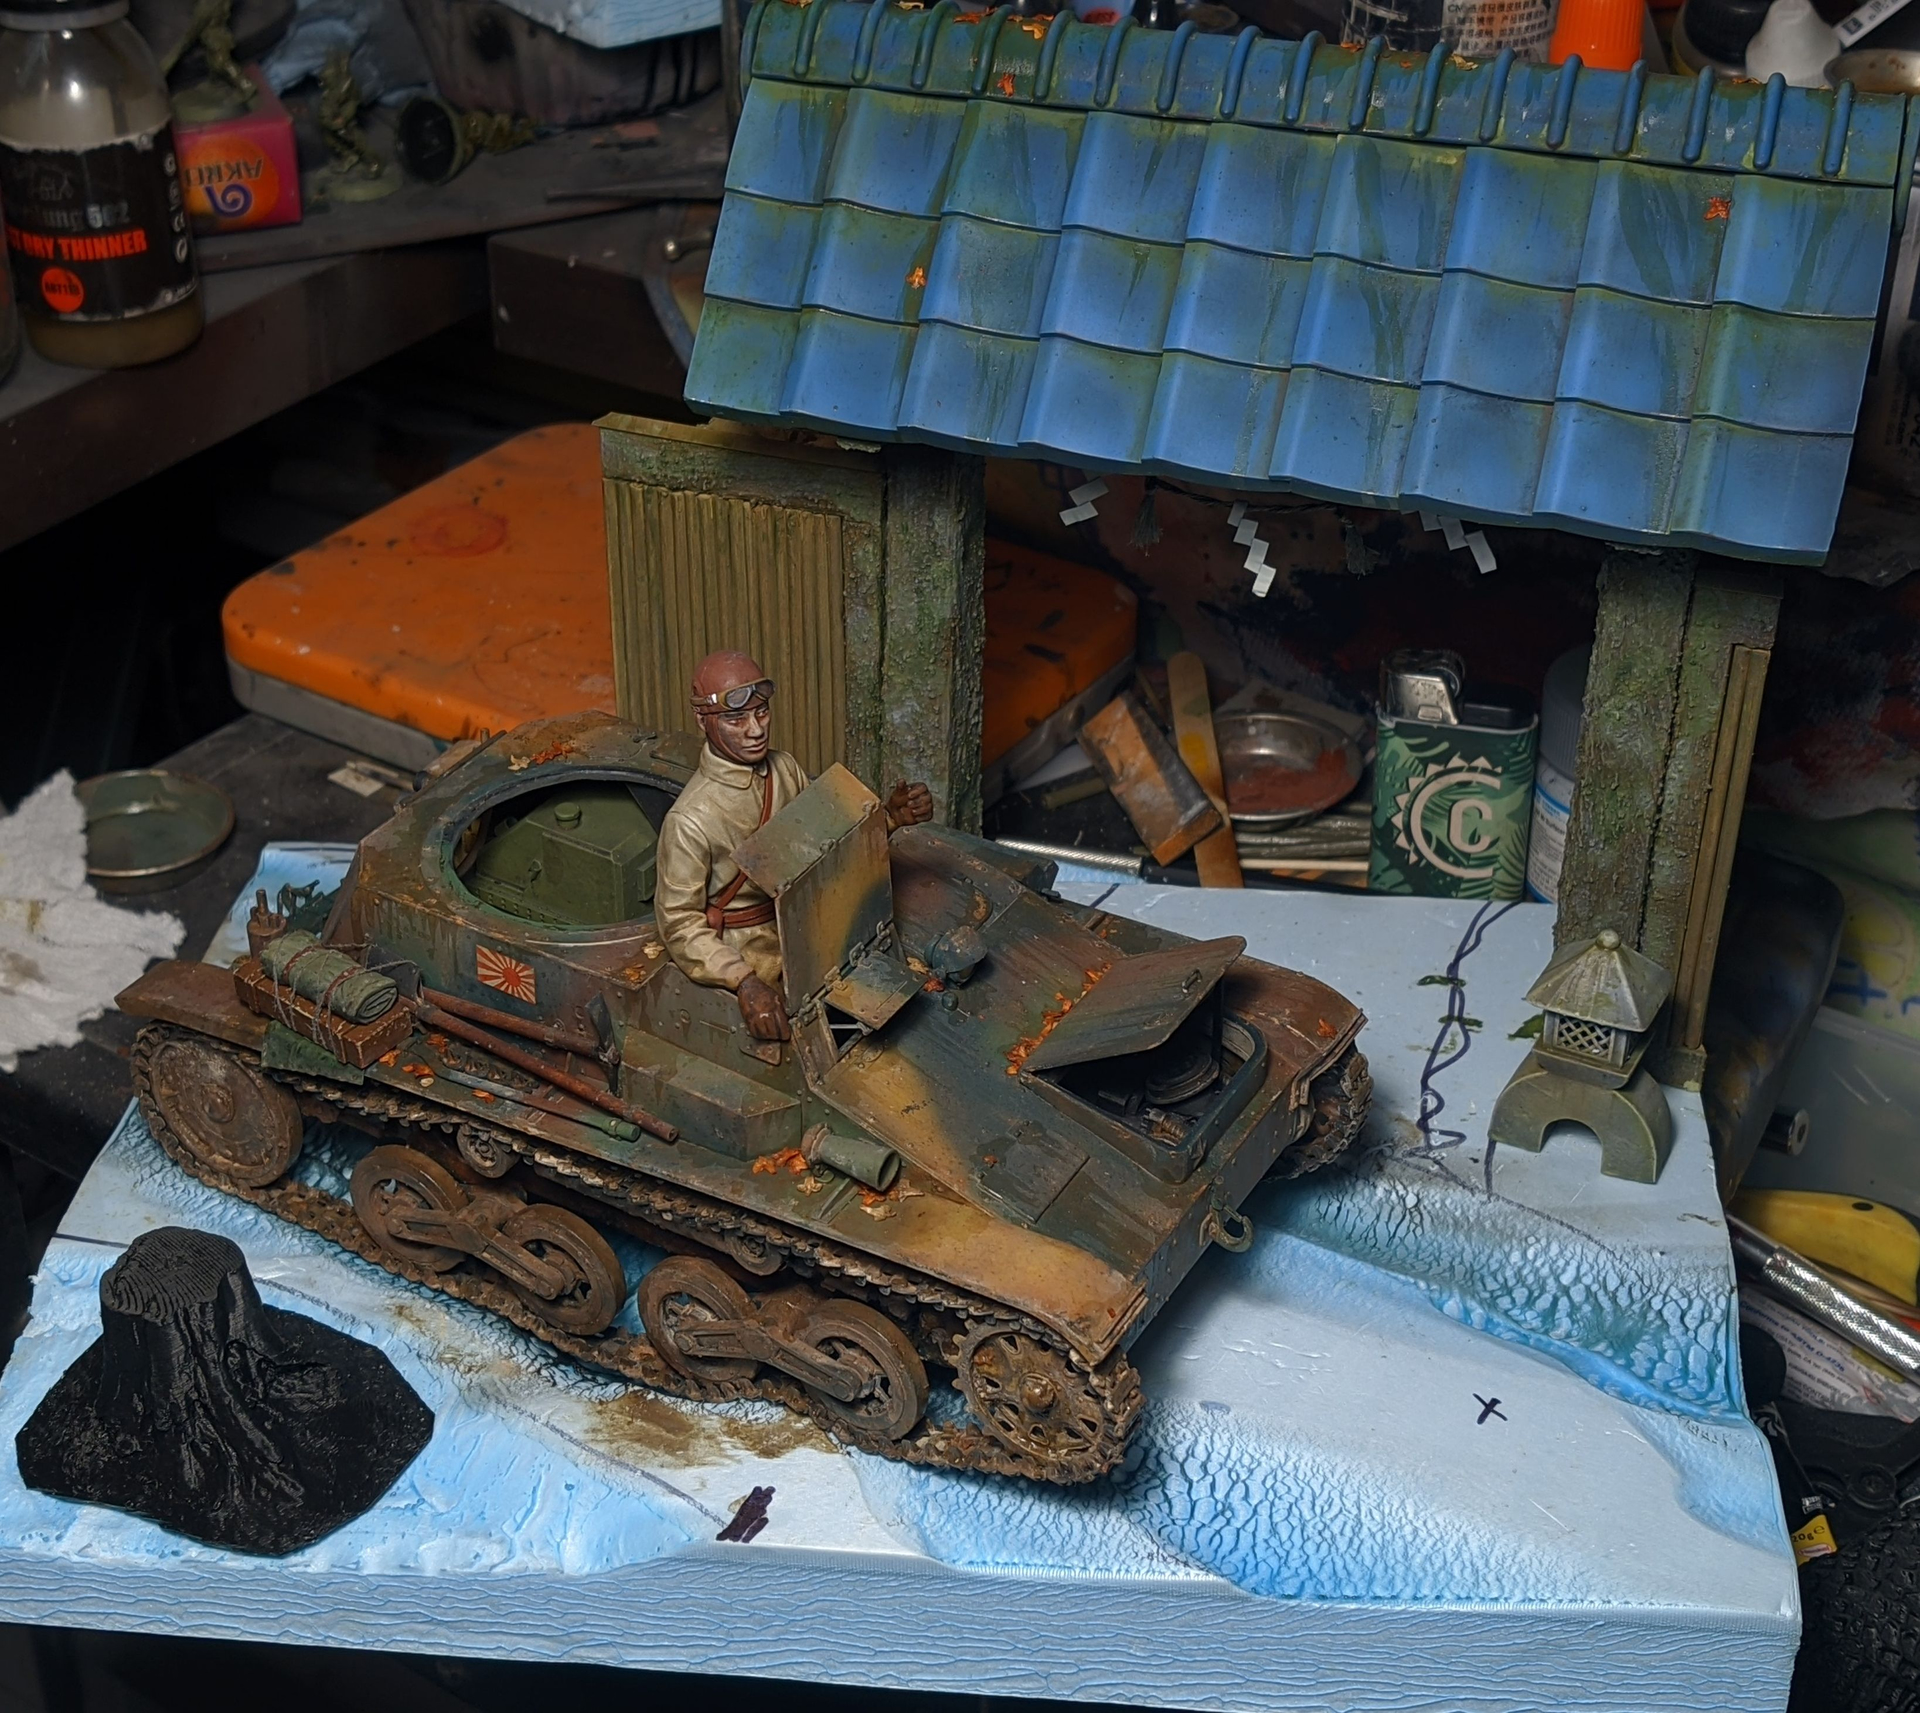
The Shimenawa was made from twisted copper wire and yarn, and the shide paper streamers were folded from more GSW tin foil. Doing paper crafts at 1/16 scale was interesting.


This was my first time using VMS Smart Mud XL 2.0 and I’ve been fully sold on it. This 20x30cm base ate up almost the entire jar but the results speak for themselves. After laying up the mud it was weathered with the same enamel and oil mud colors as the tankette.
Let me know what you think! If you have any questions about the project I’ll be happy to answer.
