Absolutely, the ideal deterrent for tailgaters.
3 Likes
![]()
![]()
![]()
![]()
Tim you’ve got a twisted sense of humor, I love it! Definitely a permanent solution to a temporary problem!
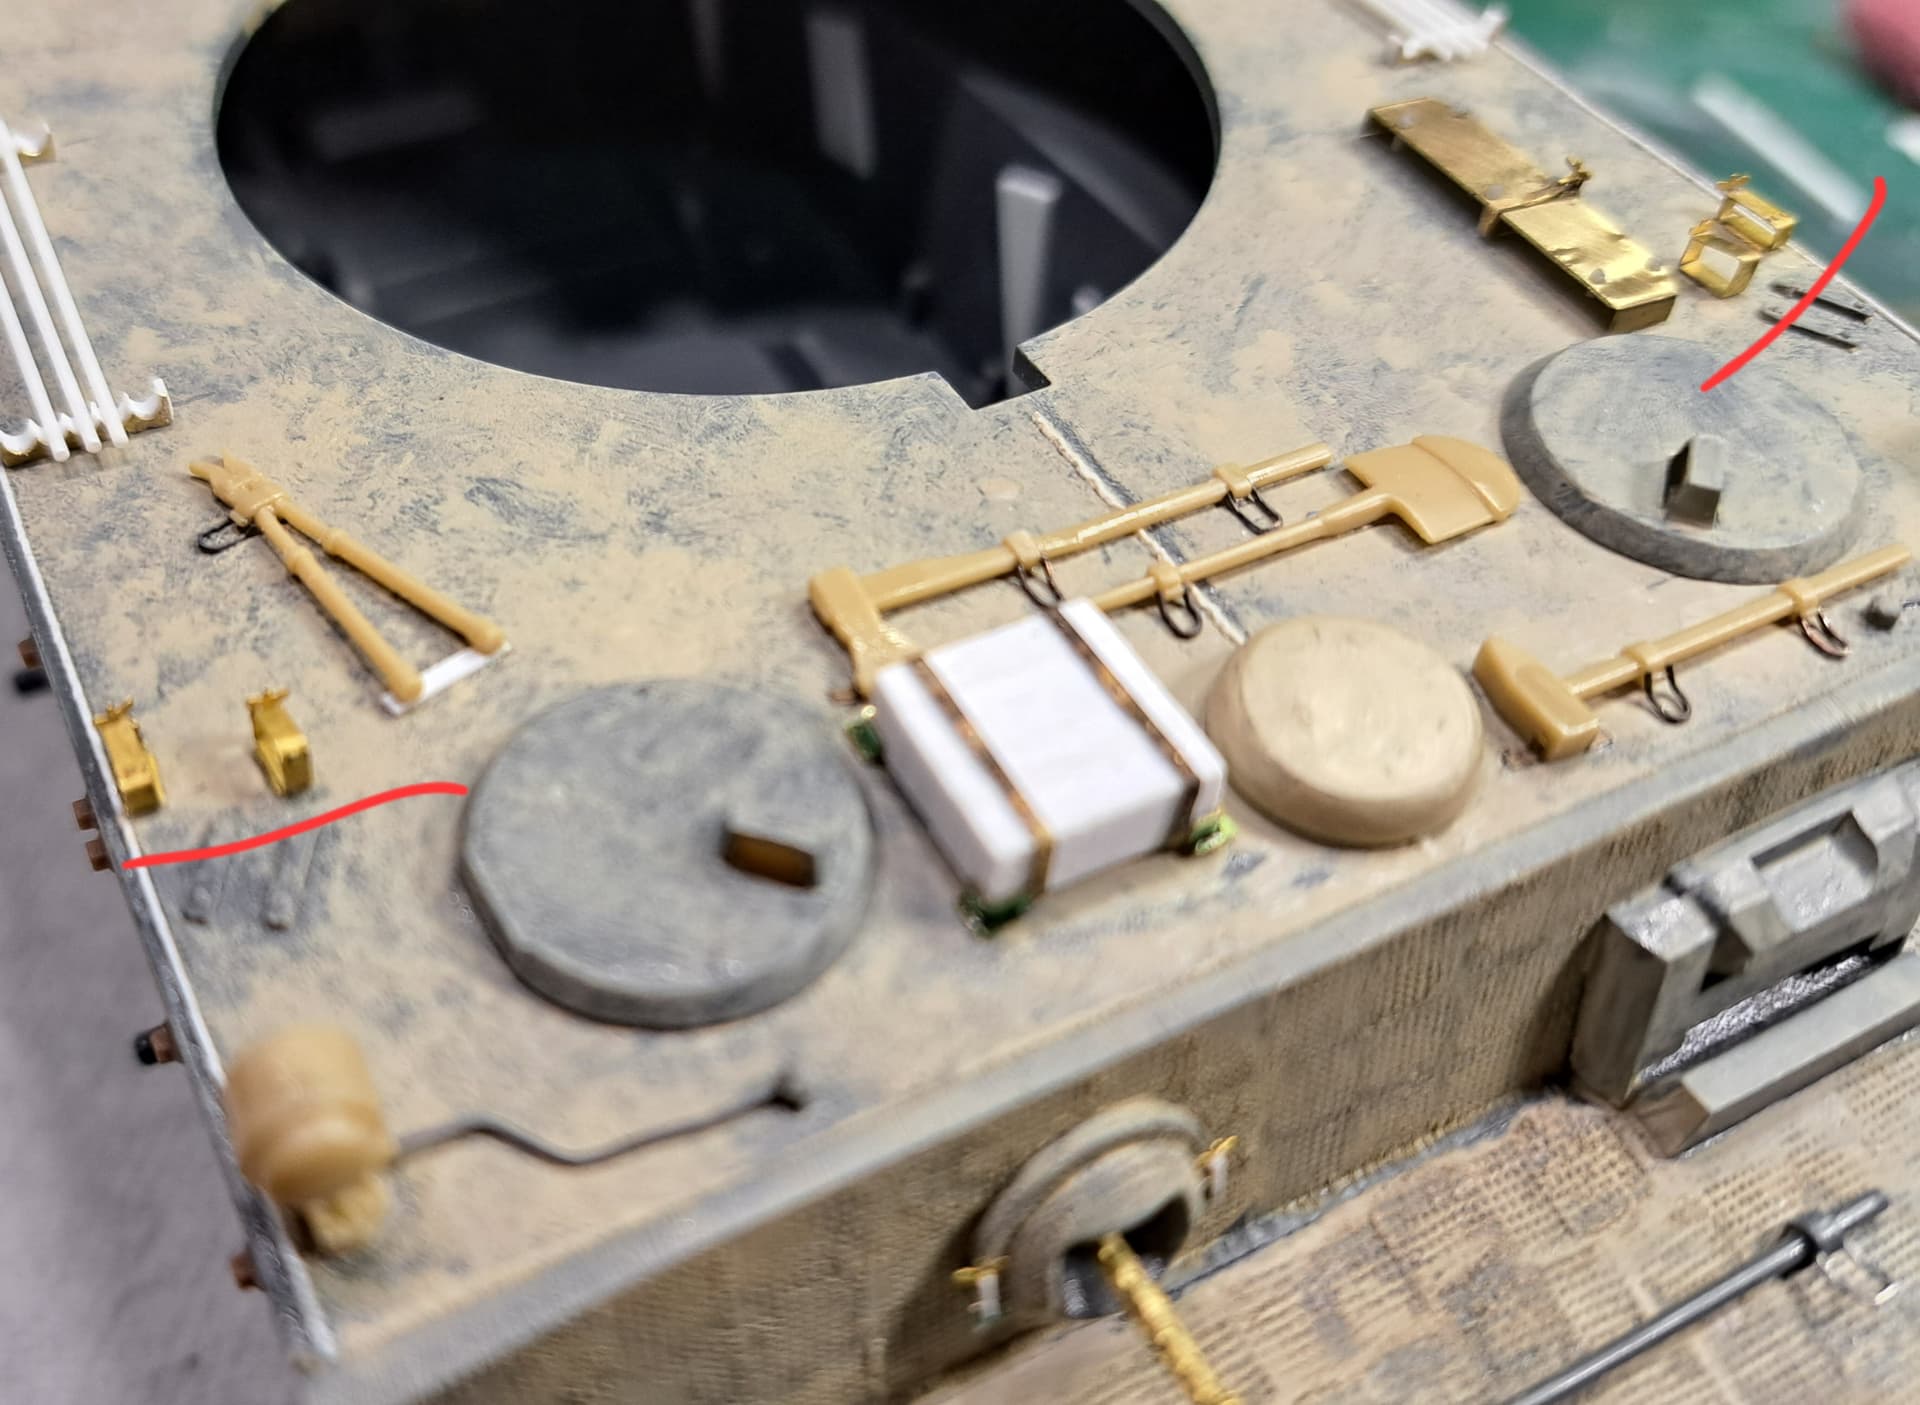
Planned to do the tow cables & main gun cleaning kit but decided break that into two stages. I realized that rear engine deck needs more attention.
The smart choice slap the 1989 tow cable & cleaning kit on model then move on.

Decided to keep to maximizing inefficiency and chop the tow cable ends from of the above part.
1989 kit tow cable ends. Bottom one has been cleaned up and drilled out for cable.

Used six stands of beading wire for tow cable, spun with drill then flame roasted to break temper.

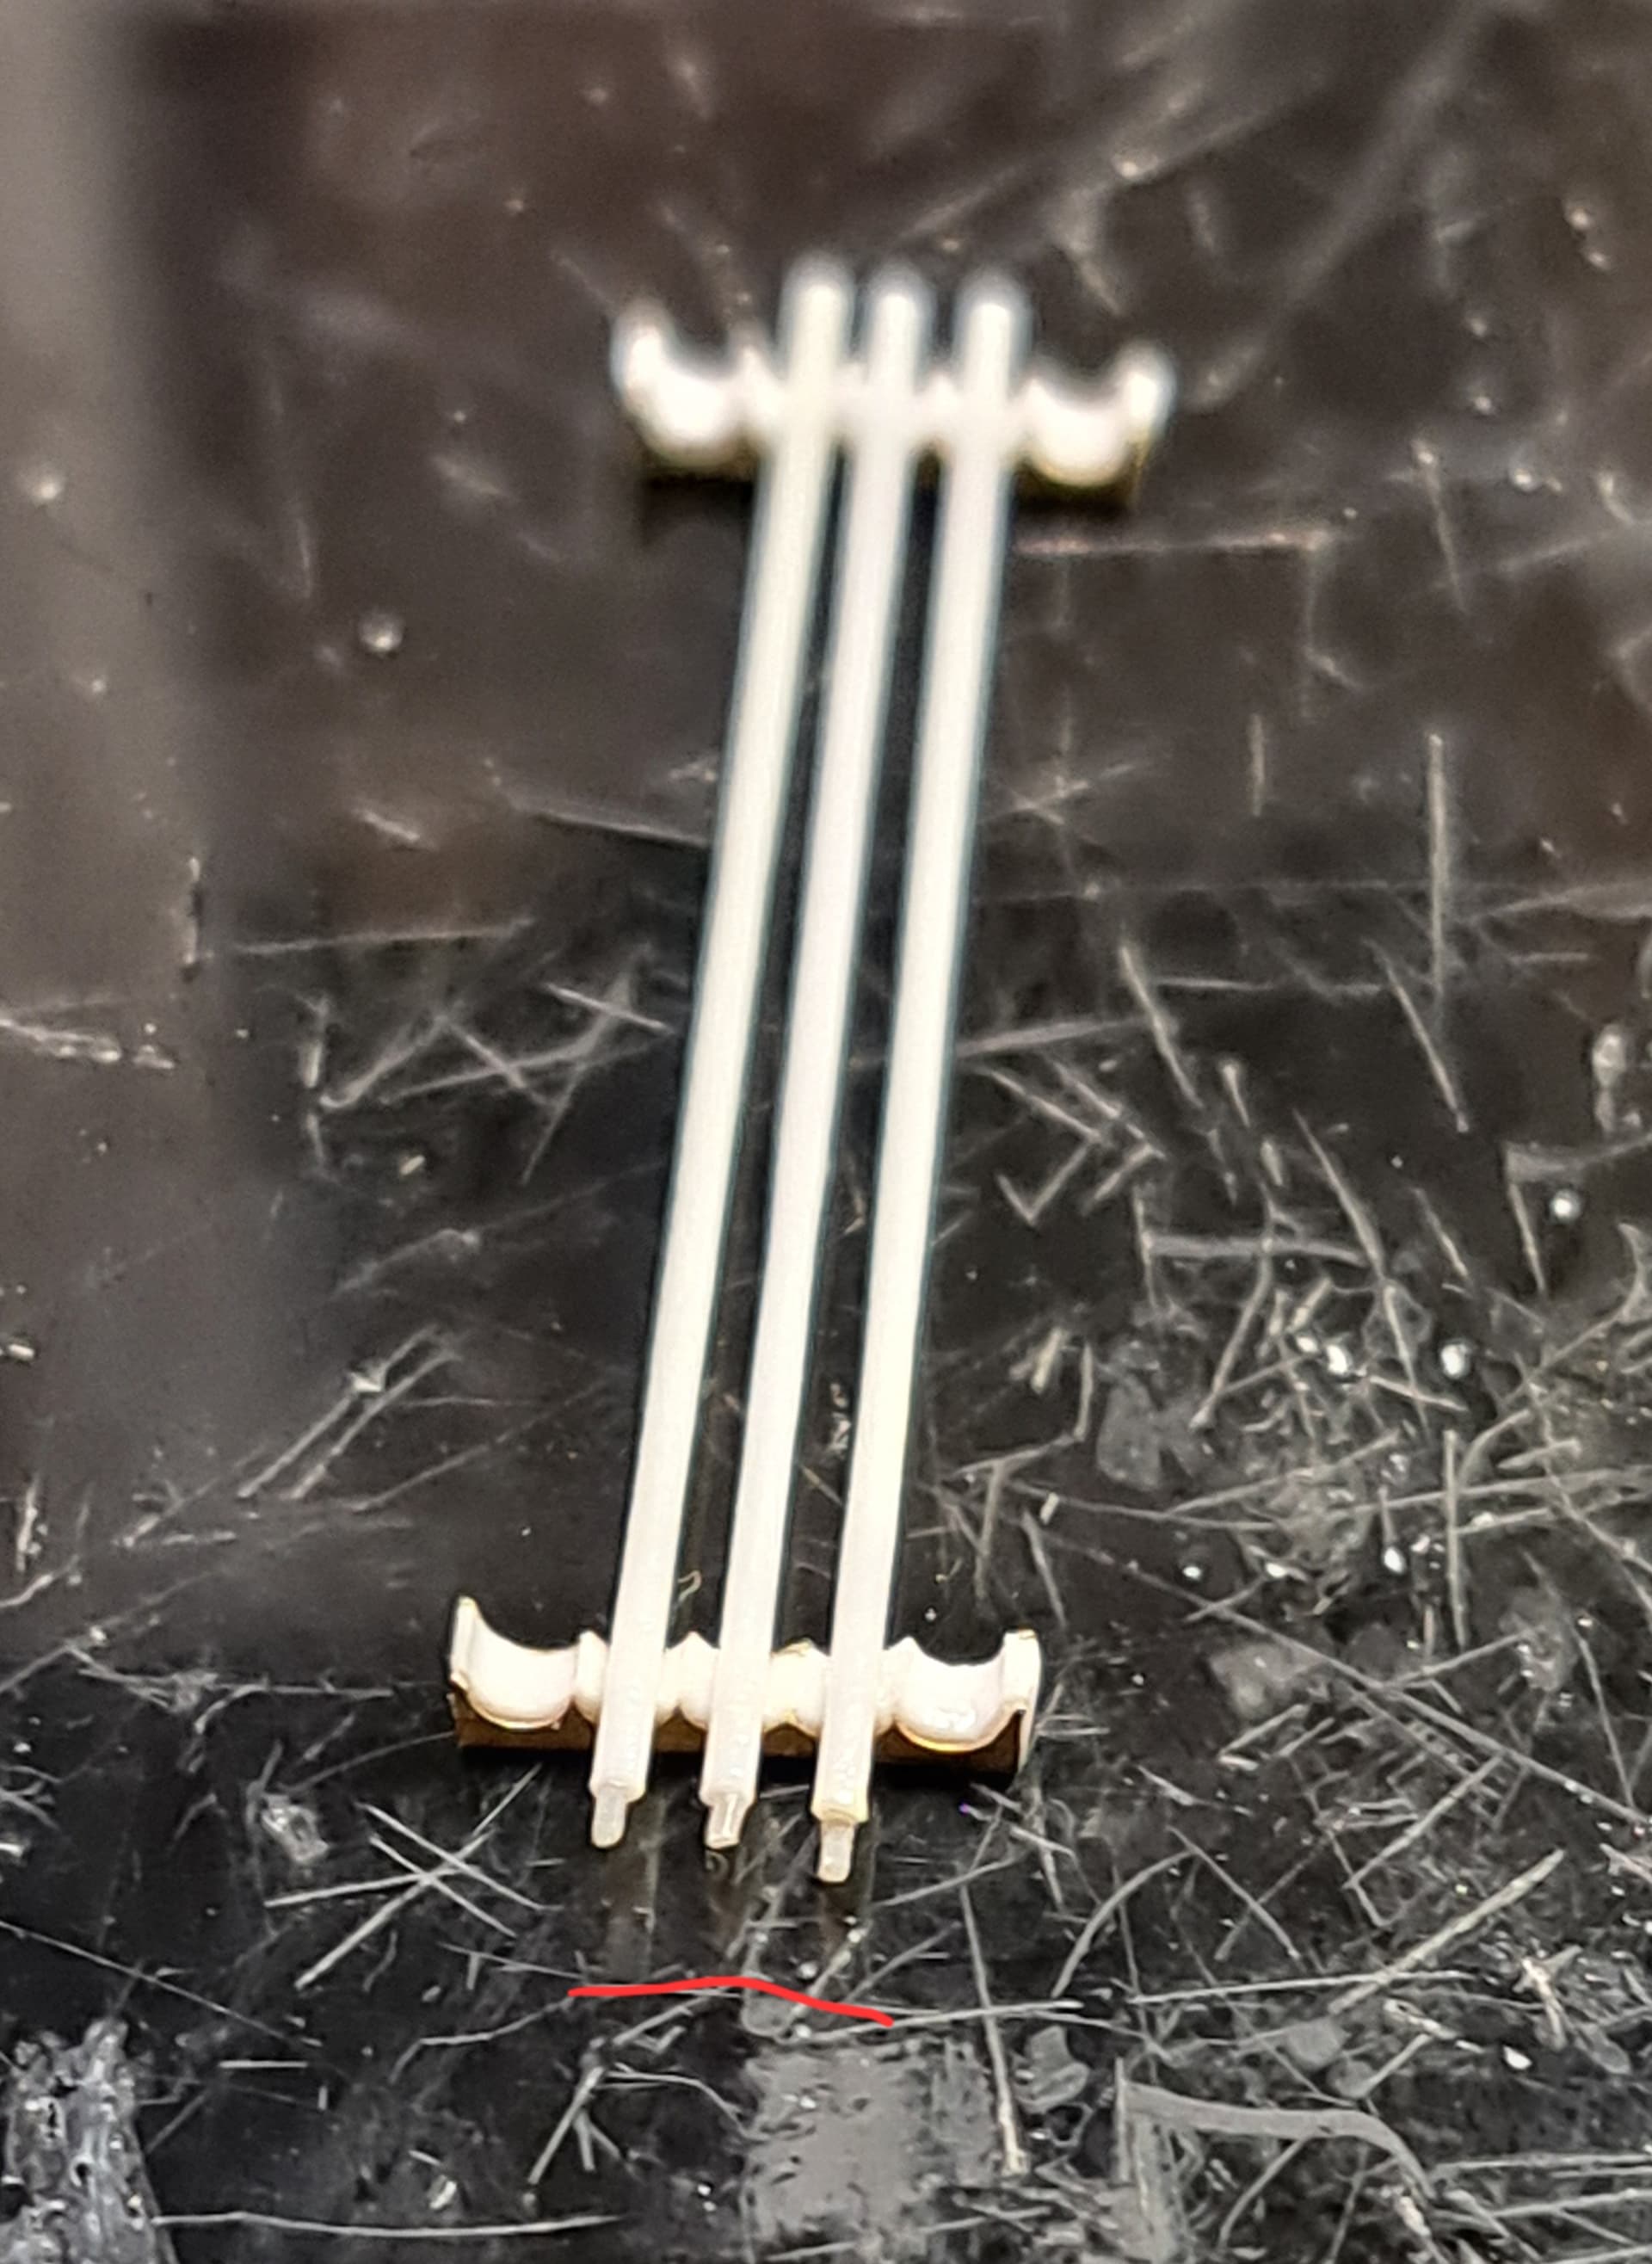
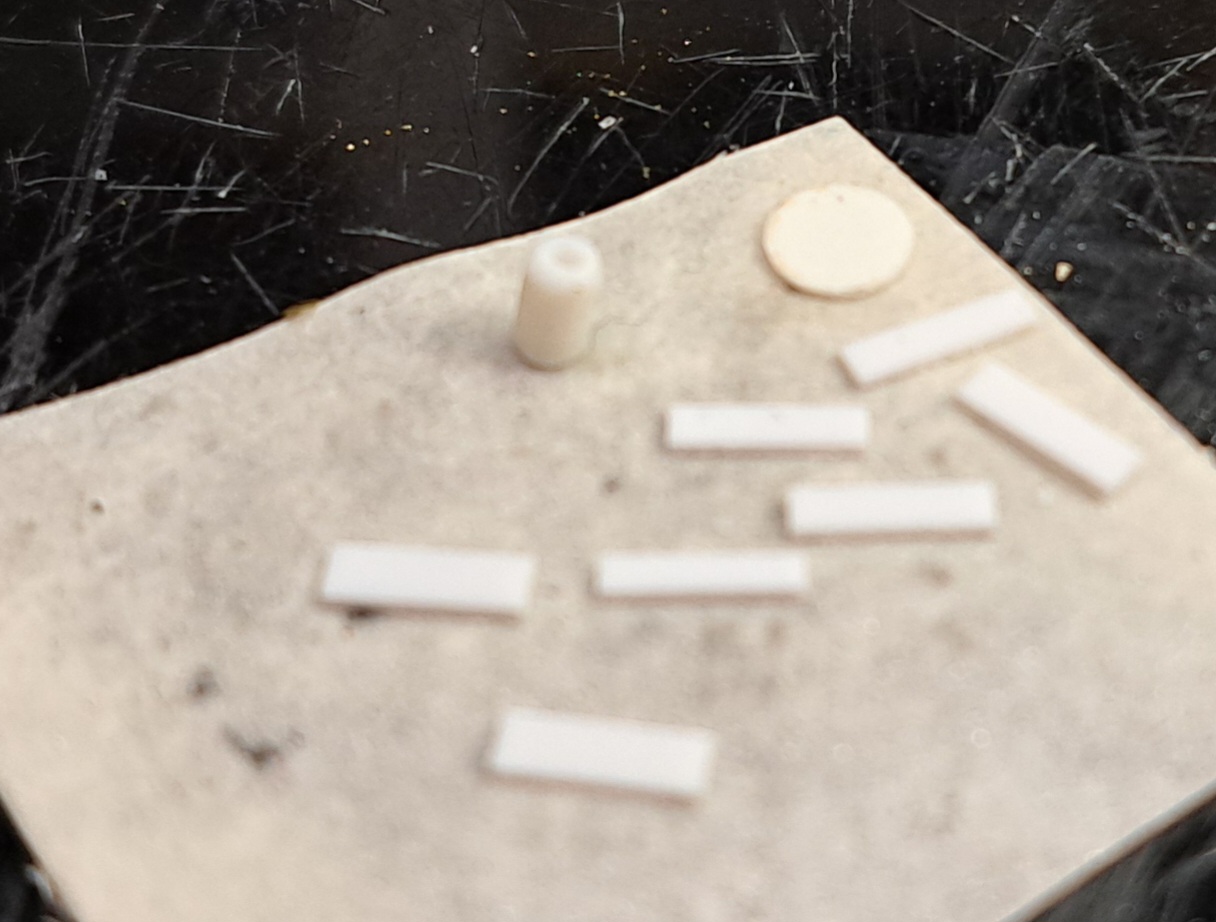
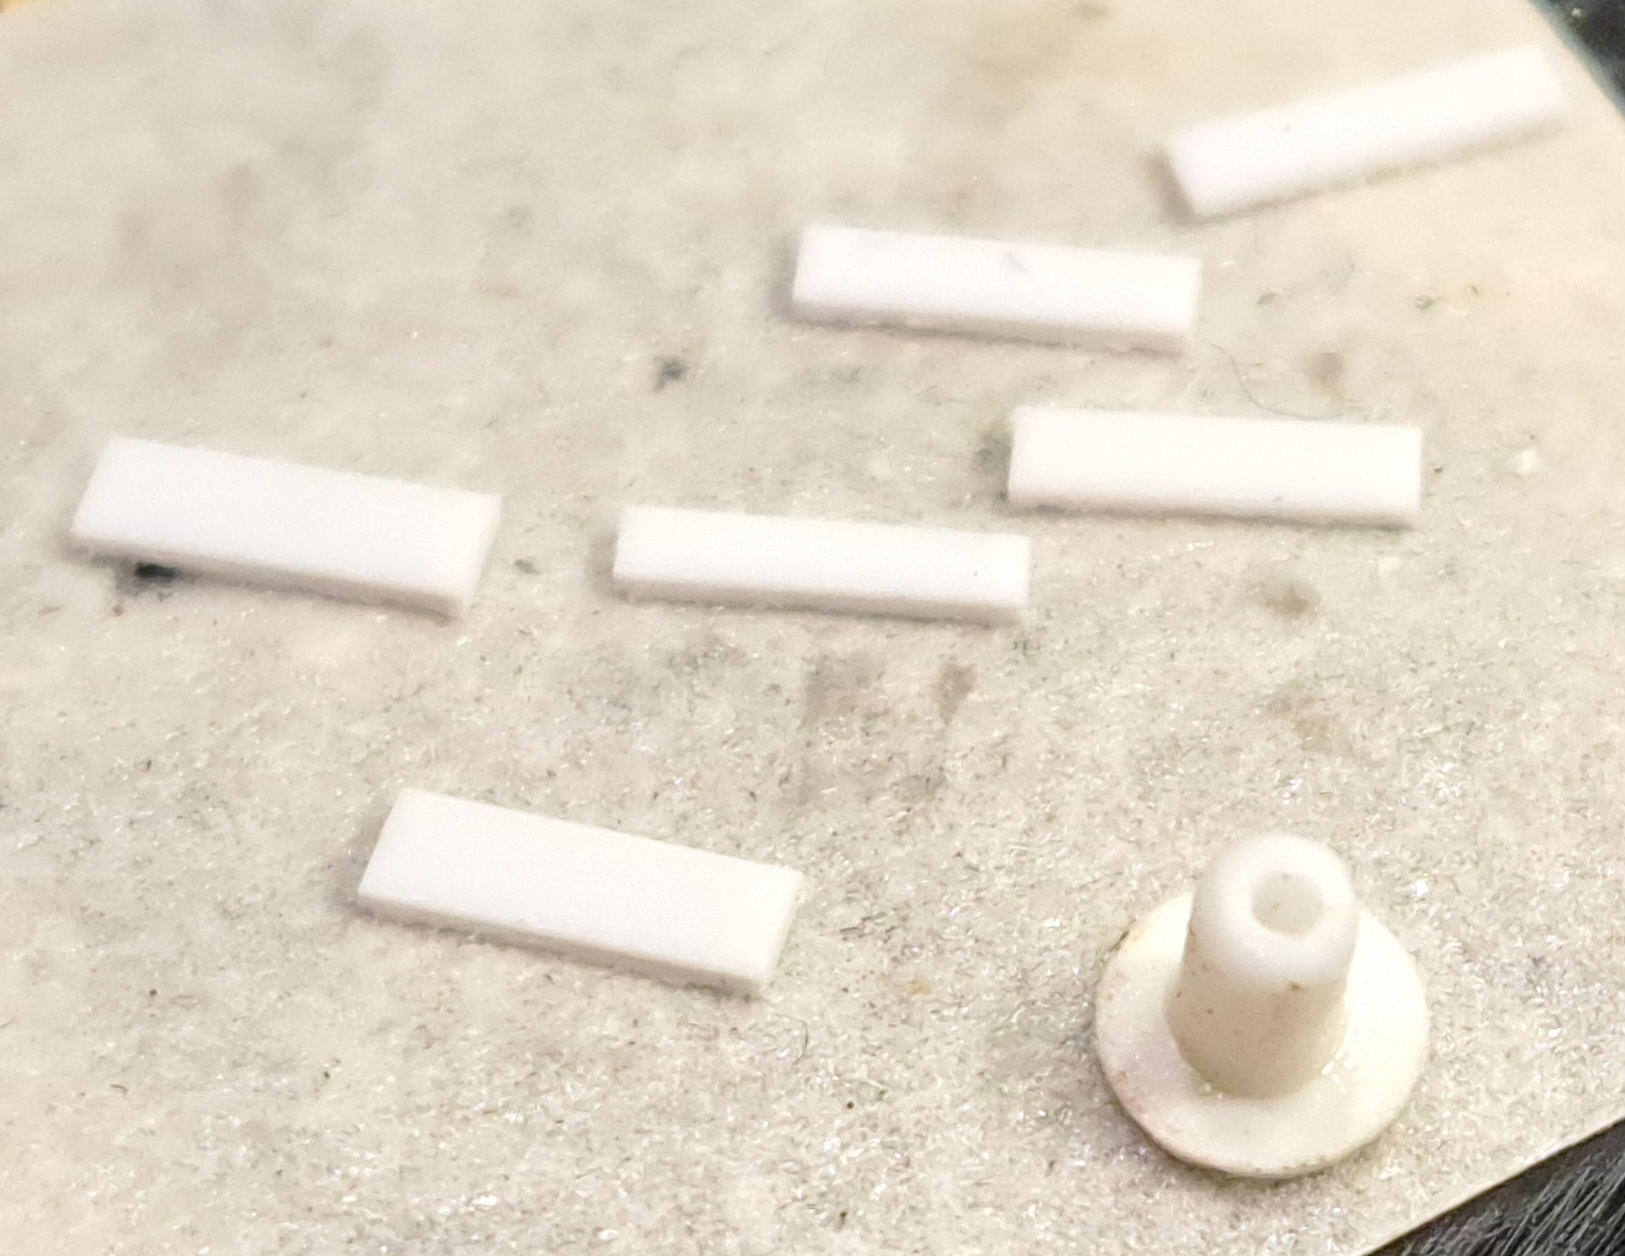
OTM provided a PE frame. One has to sandwich sheet styrene with CA inside the PE frame then cut and file to shape.

Made a “sticky” jig with tape based on measurements from kit part. Chopped styrene rod for cleaning kit to size. Spaced frame per kit part measurements the glued it together.

Echo

There’s a top PE cover & clasp for this but that will only go on after the tow cables are installed.
The best part about the PE & styrene rod gun cleaning kit is no mold seams to clean up as occurs with the kit parts.
Edit - pic with cleaning rod screw ends
7 Likes
Cleaning kit installed.

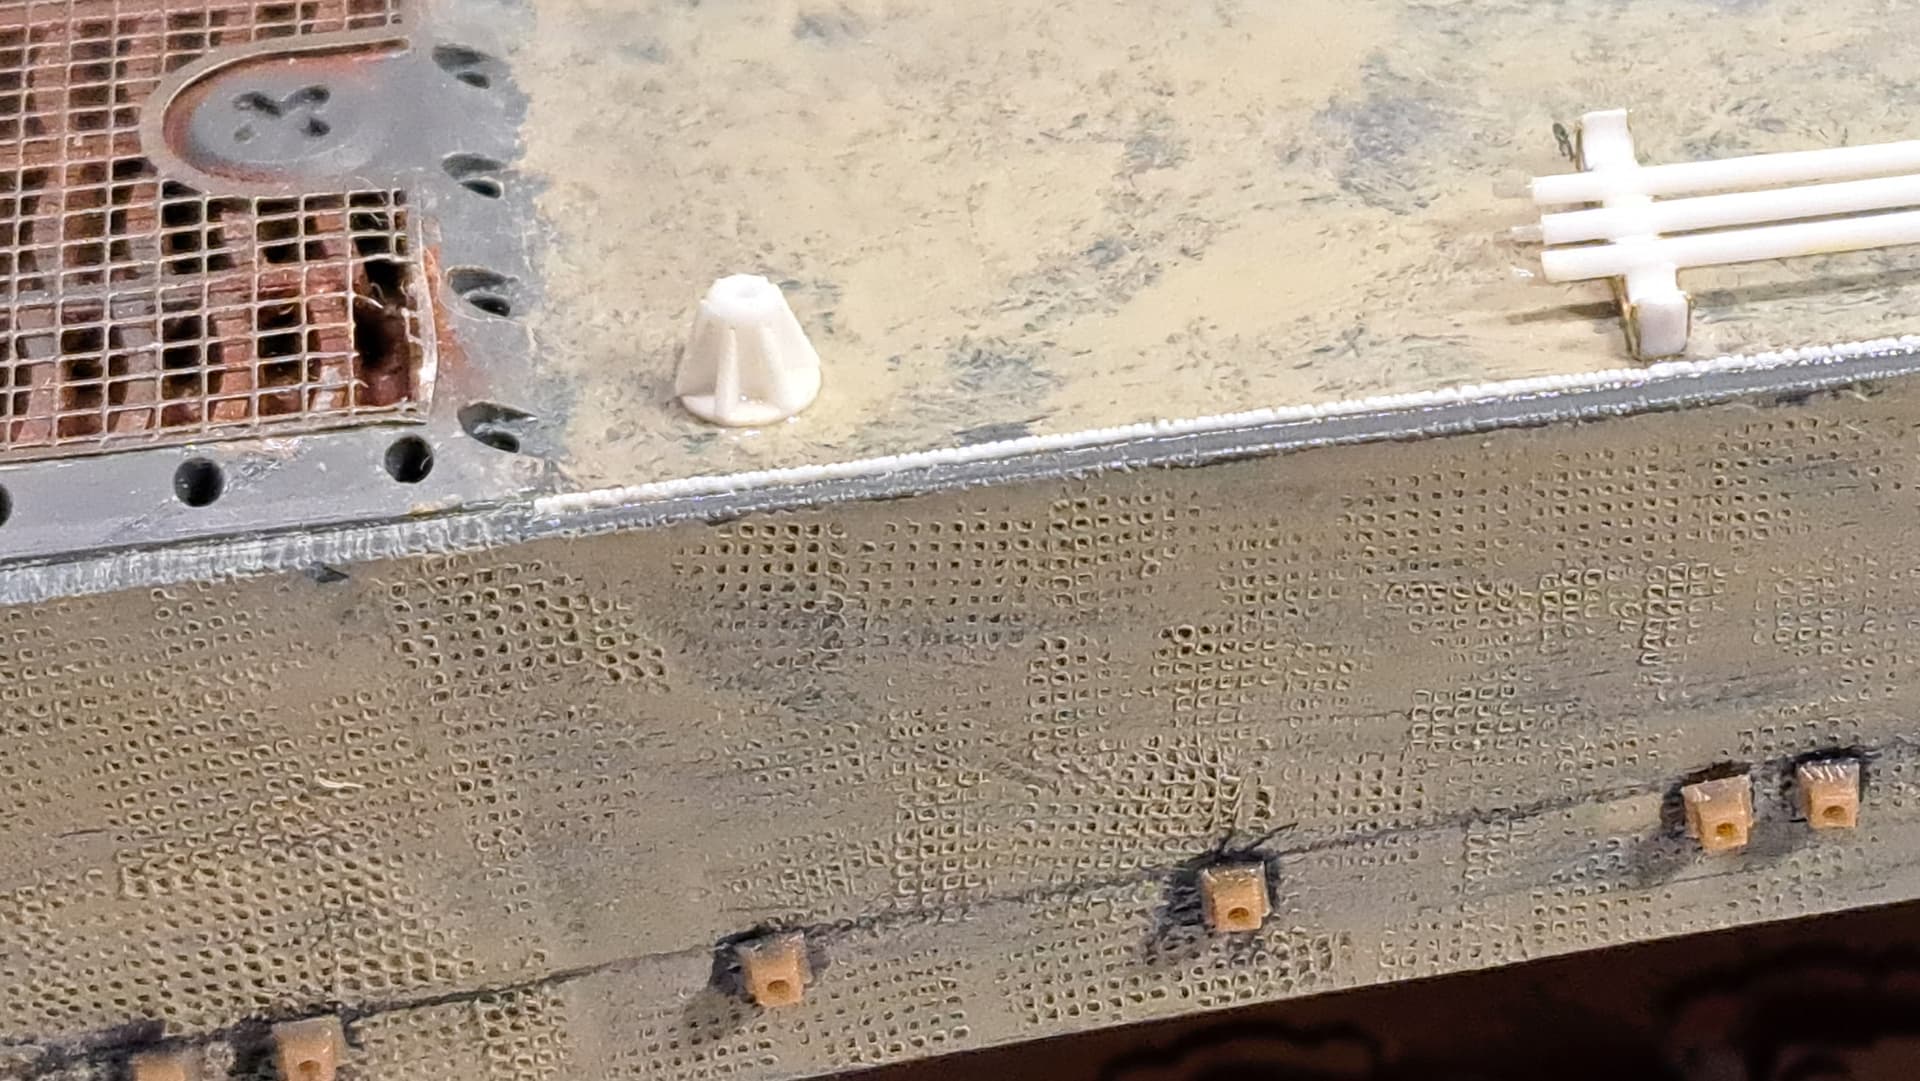
Moving to the rear engine deck, filled four massive holes. They were for holders for the pre-aircleaner hoses. They were probably 10x oversize in diameter. Still needs filling & sanding etc.

Cleaned up the 1970 kit air intake. Filled slight depressions in the top of it.

Drilled out openings of air intake.

OTM PE clamps, went together nicely.

For old stuff from 1989, I think OTM did pretty well with these.

The clamps would secure the hoses to the air intake.


9 Likes
Added base for air hose clamps and rails.
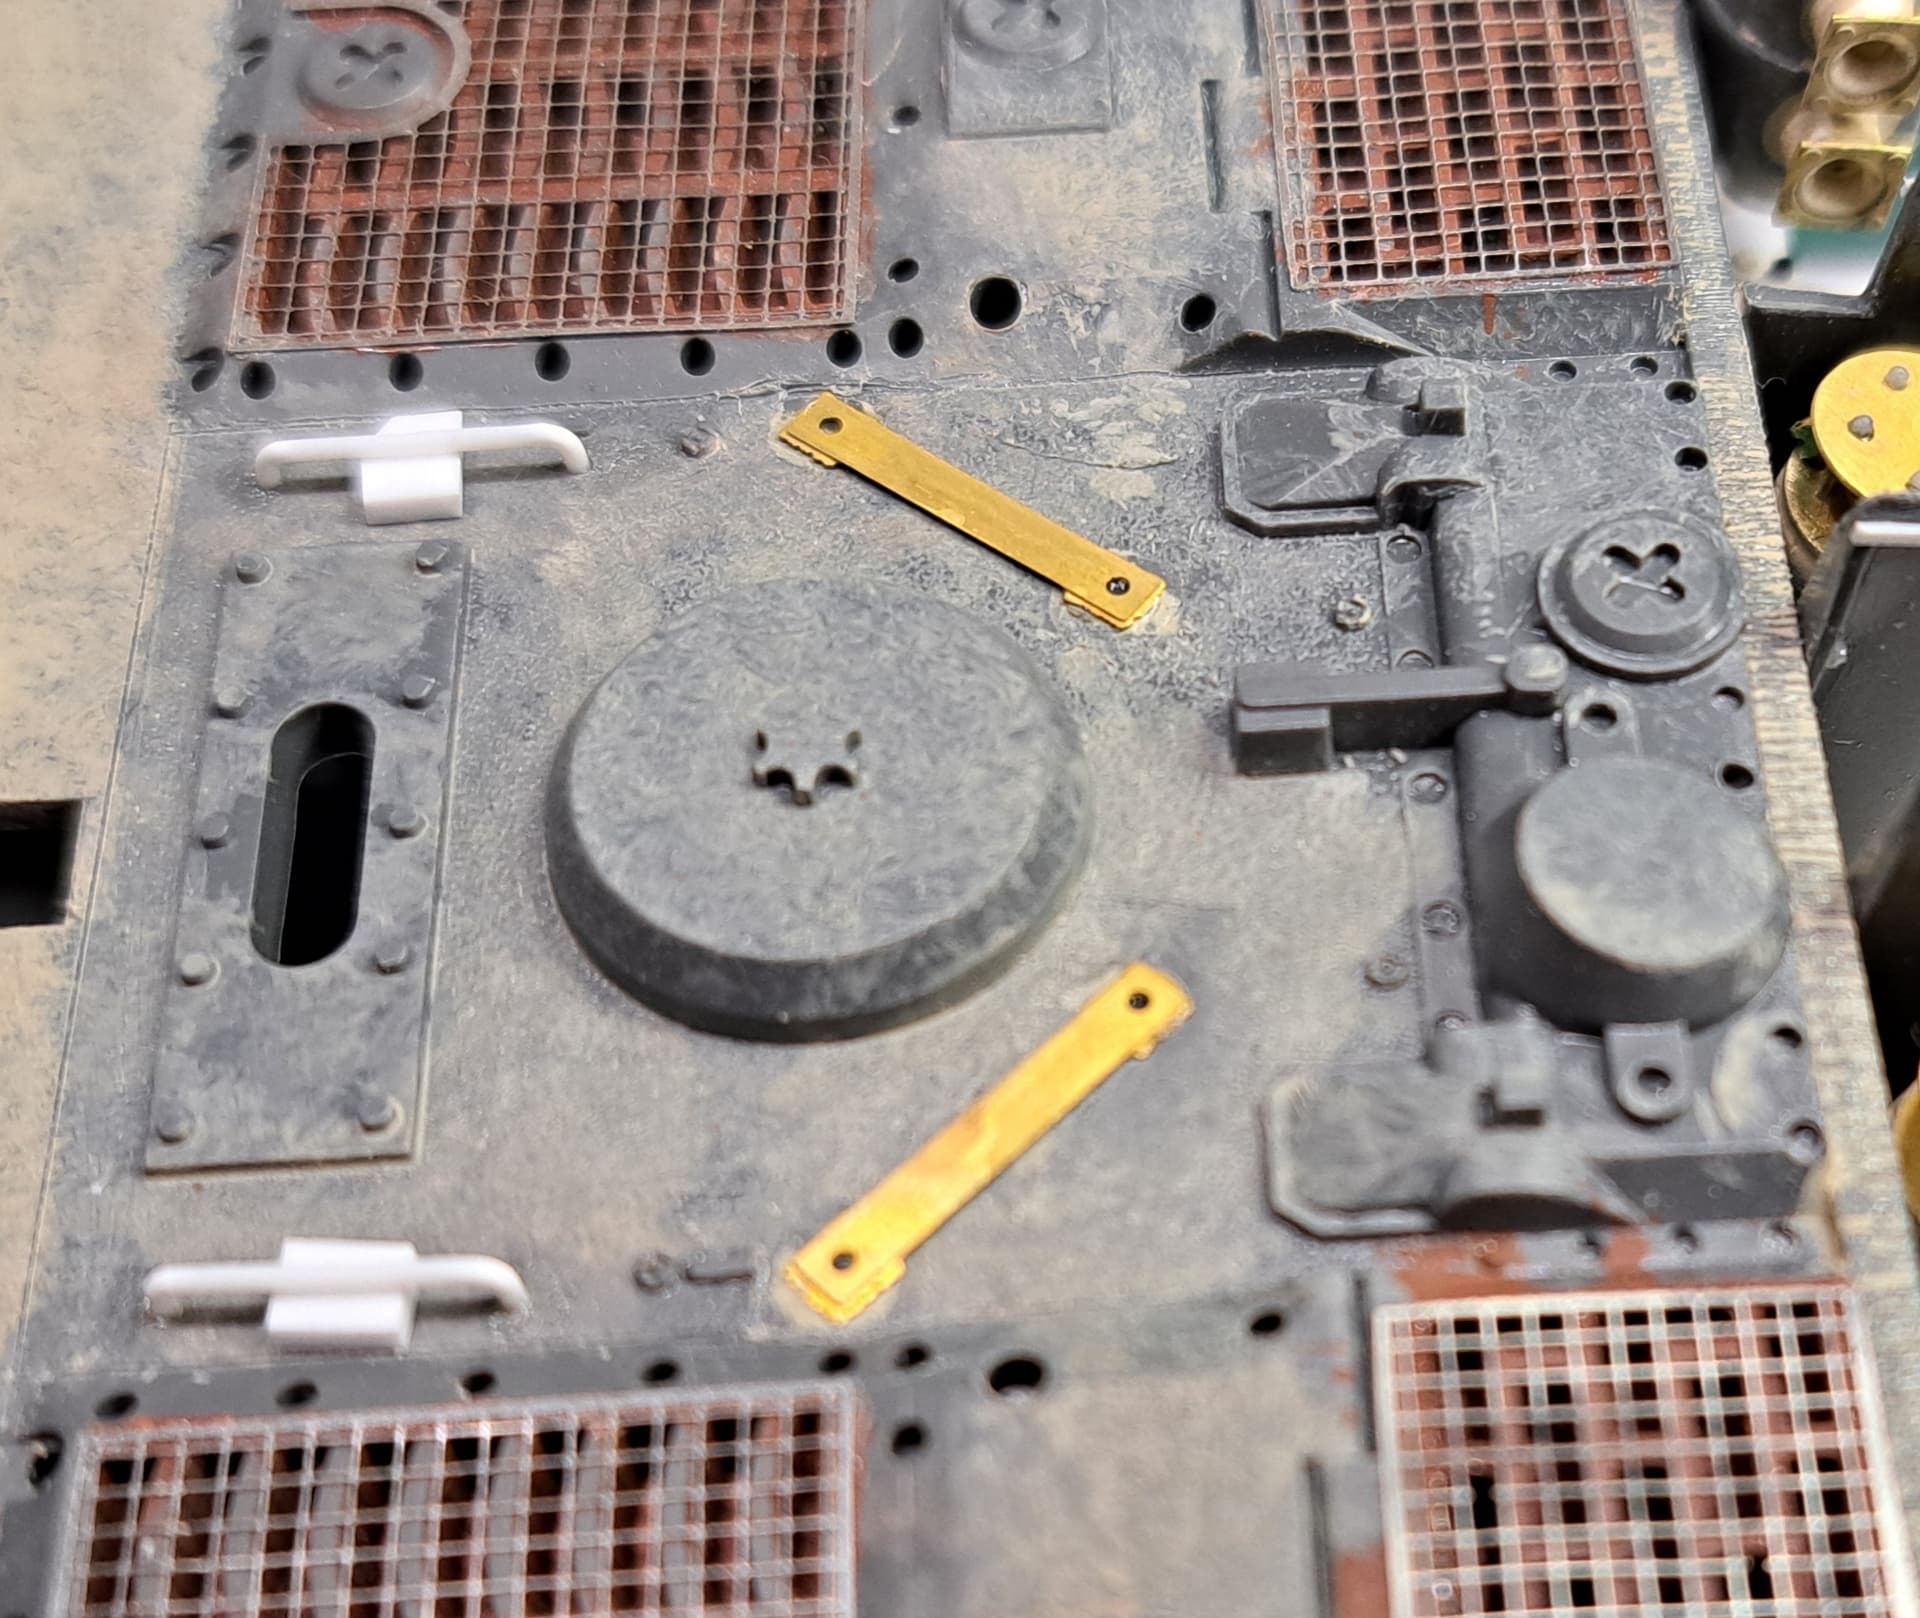
Added air intake
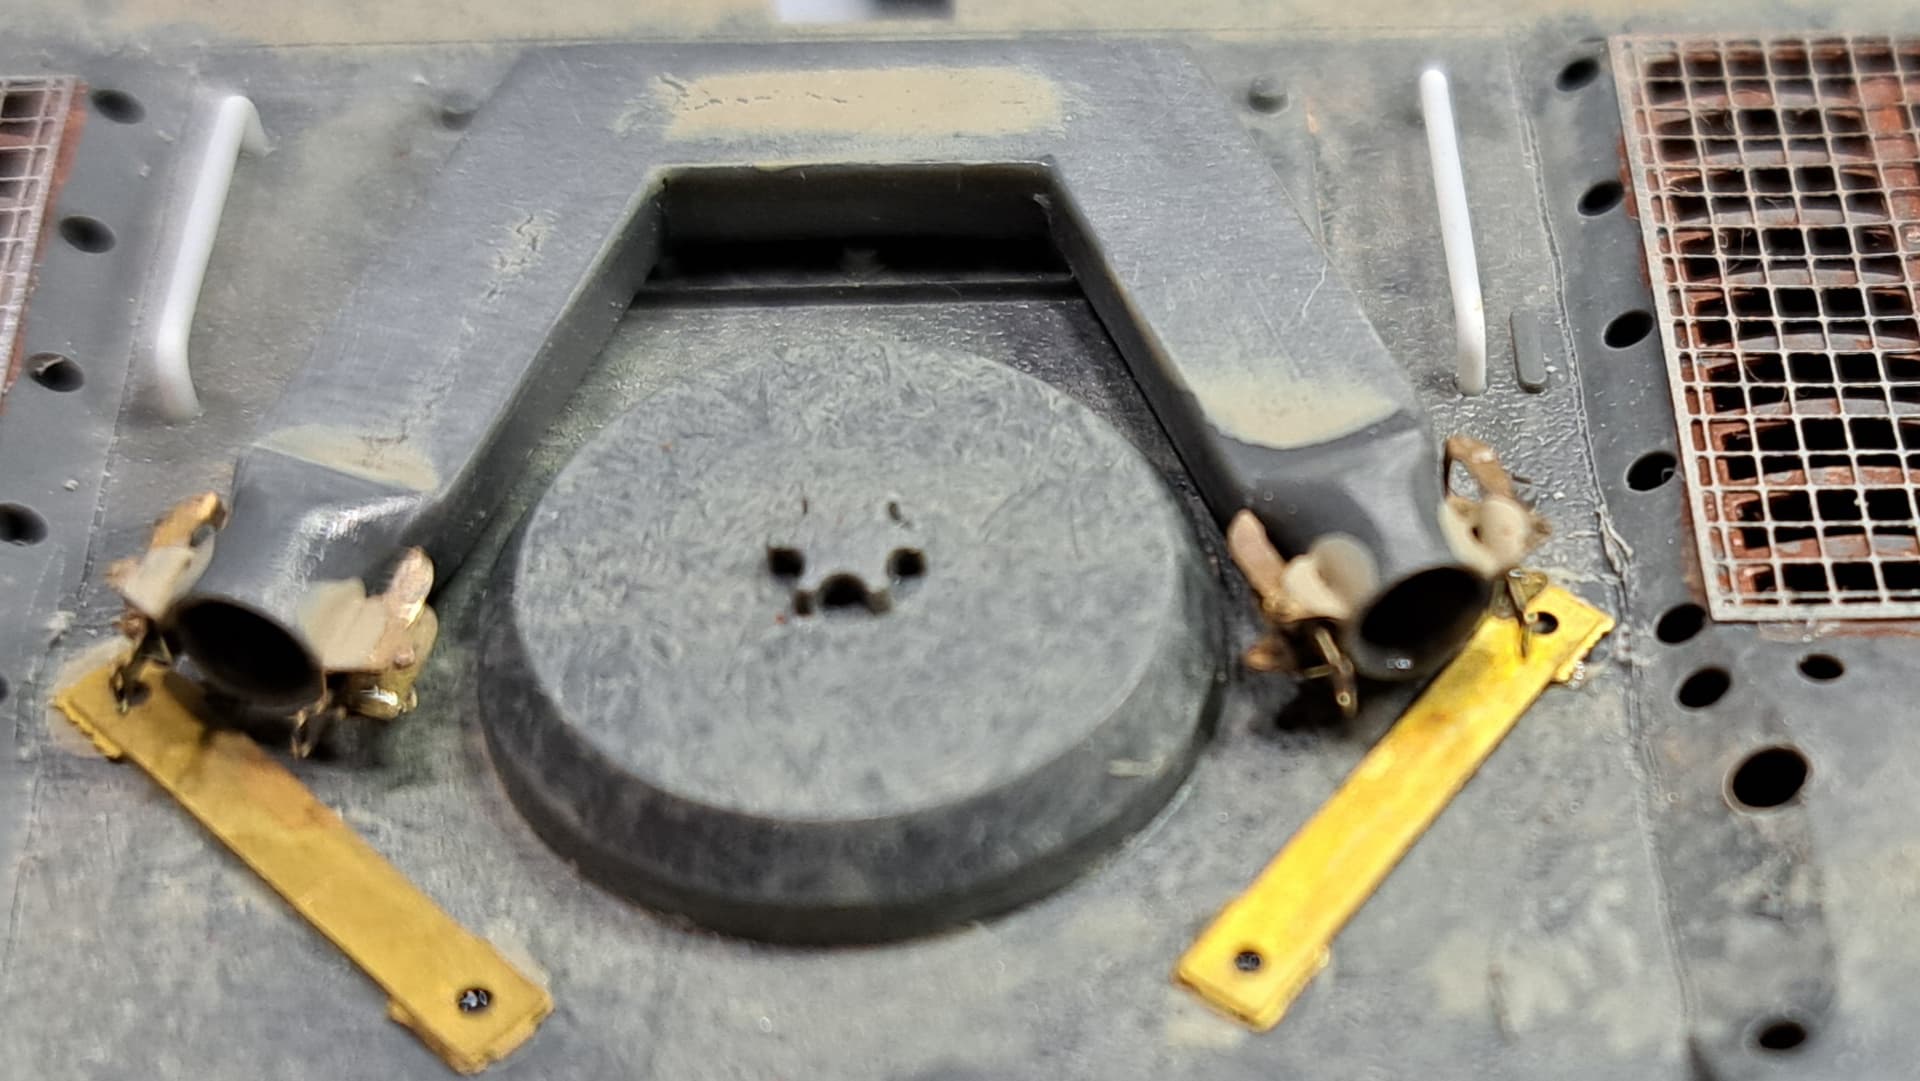
Added tow cable brackets front & rear.
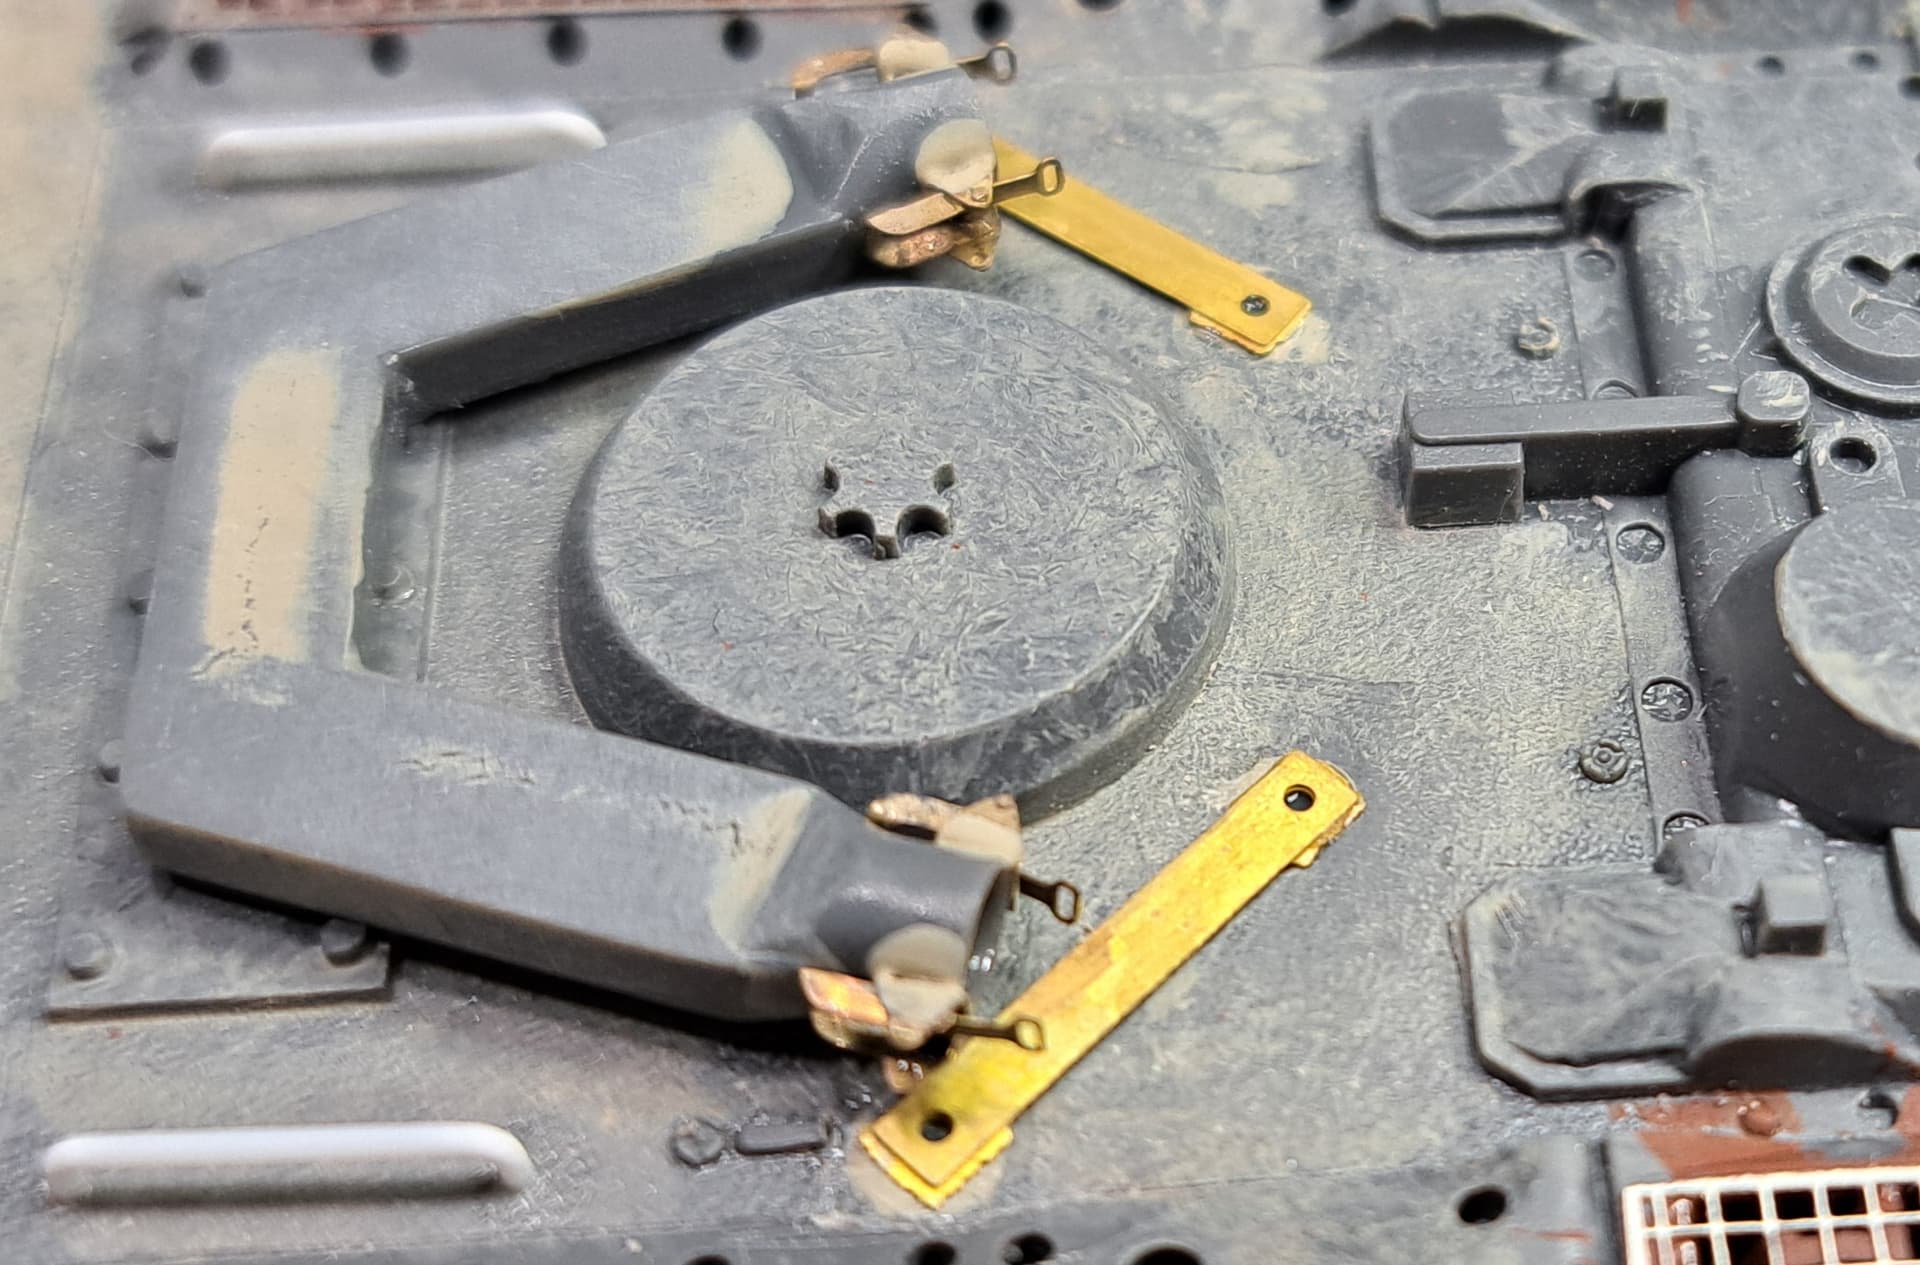
Molded in base for antenna was crude. Hopefully, one can be cobbled up from styrene rod, disc & strip.
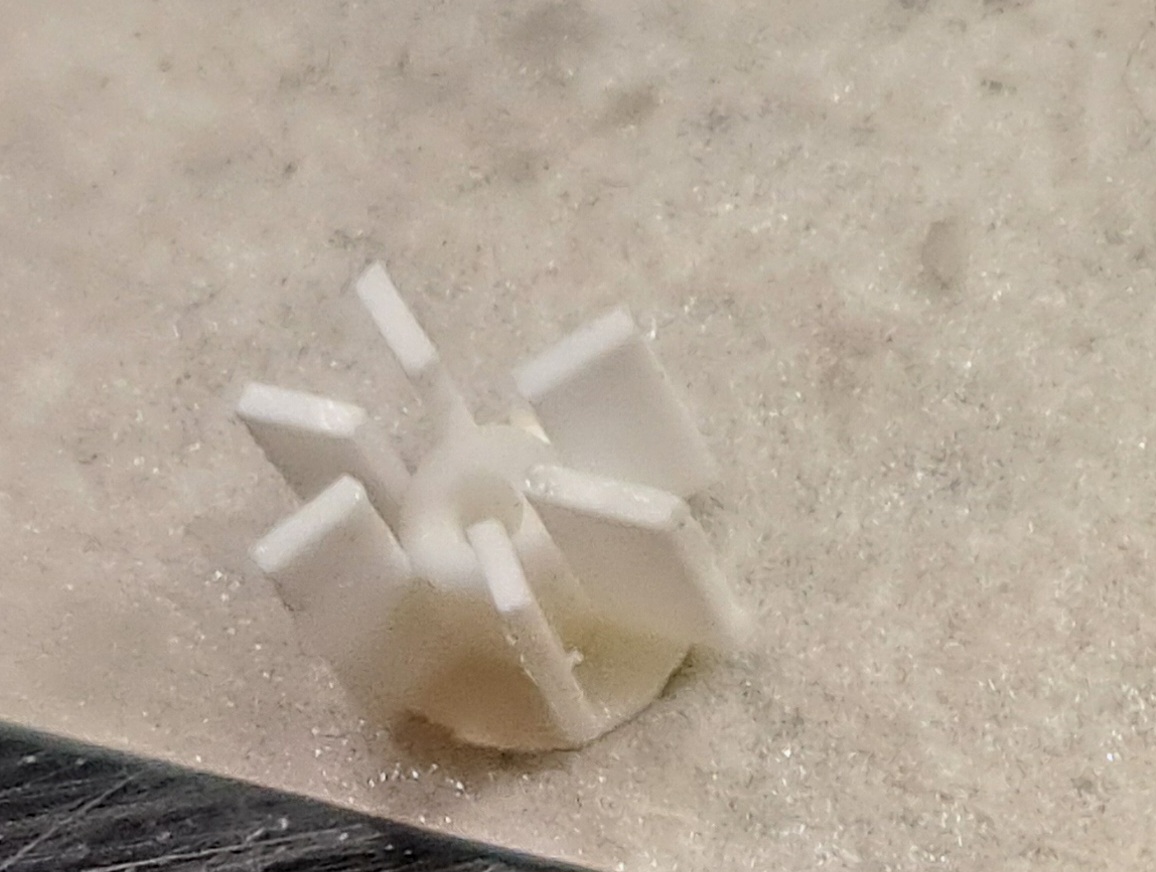
Trimming excess
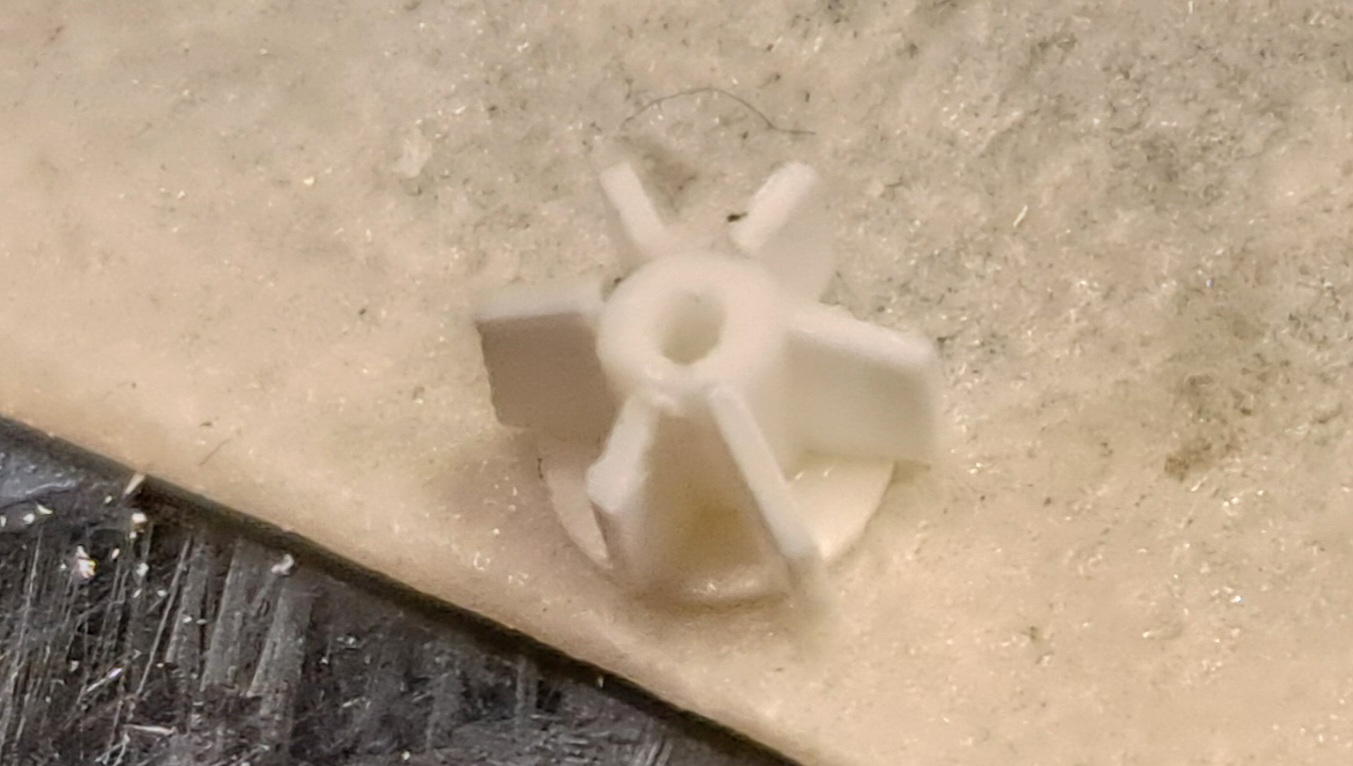
Trimmed and installed.
10 Likes
You inspire me to do better work. That antenna base/insulator thing is crazy! Not to mention the PE on the air inlet piping.
2 Likes
Really classy PE and scratch work Wade ![]()
2 Likes
Al & John, thank you!
The aerial base needed a little more love, as there’s a rubber thing around it and it holds the antenna in place with a wingnut.
Something Grandtline offered for trains


The kit fire extinguisher was molded into the hull so that was cut away previously. Decide to buy this incomplete 70’s Tamiya Pz IV H last year from a mom & pops shop becauseit needed rescued. Out of the old Tamiya 70’s kits the tools in the Pz IV’s were better.

Aber’s 1/16 scale fire extinguisher makes a nice illustration.
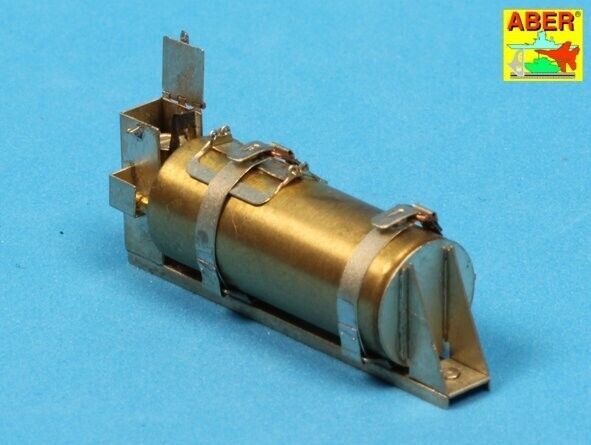
I’d hoped to try to scratch one but didn’t have any 4mm tubing, so it’s OTM PE & Pz IV fire extinguisher. Slightly under cut the molded in straps.

Tow cables went on at last!


Added crowbar

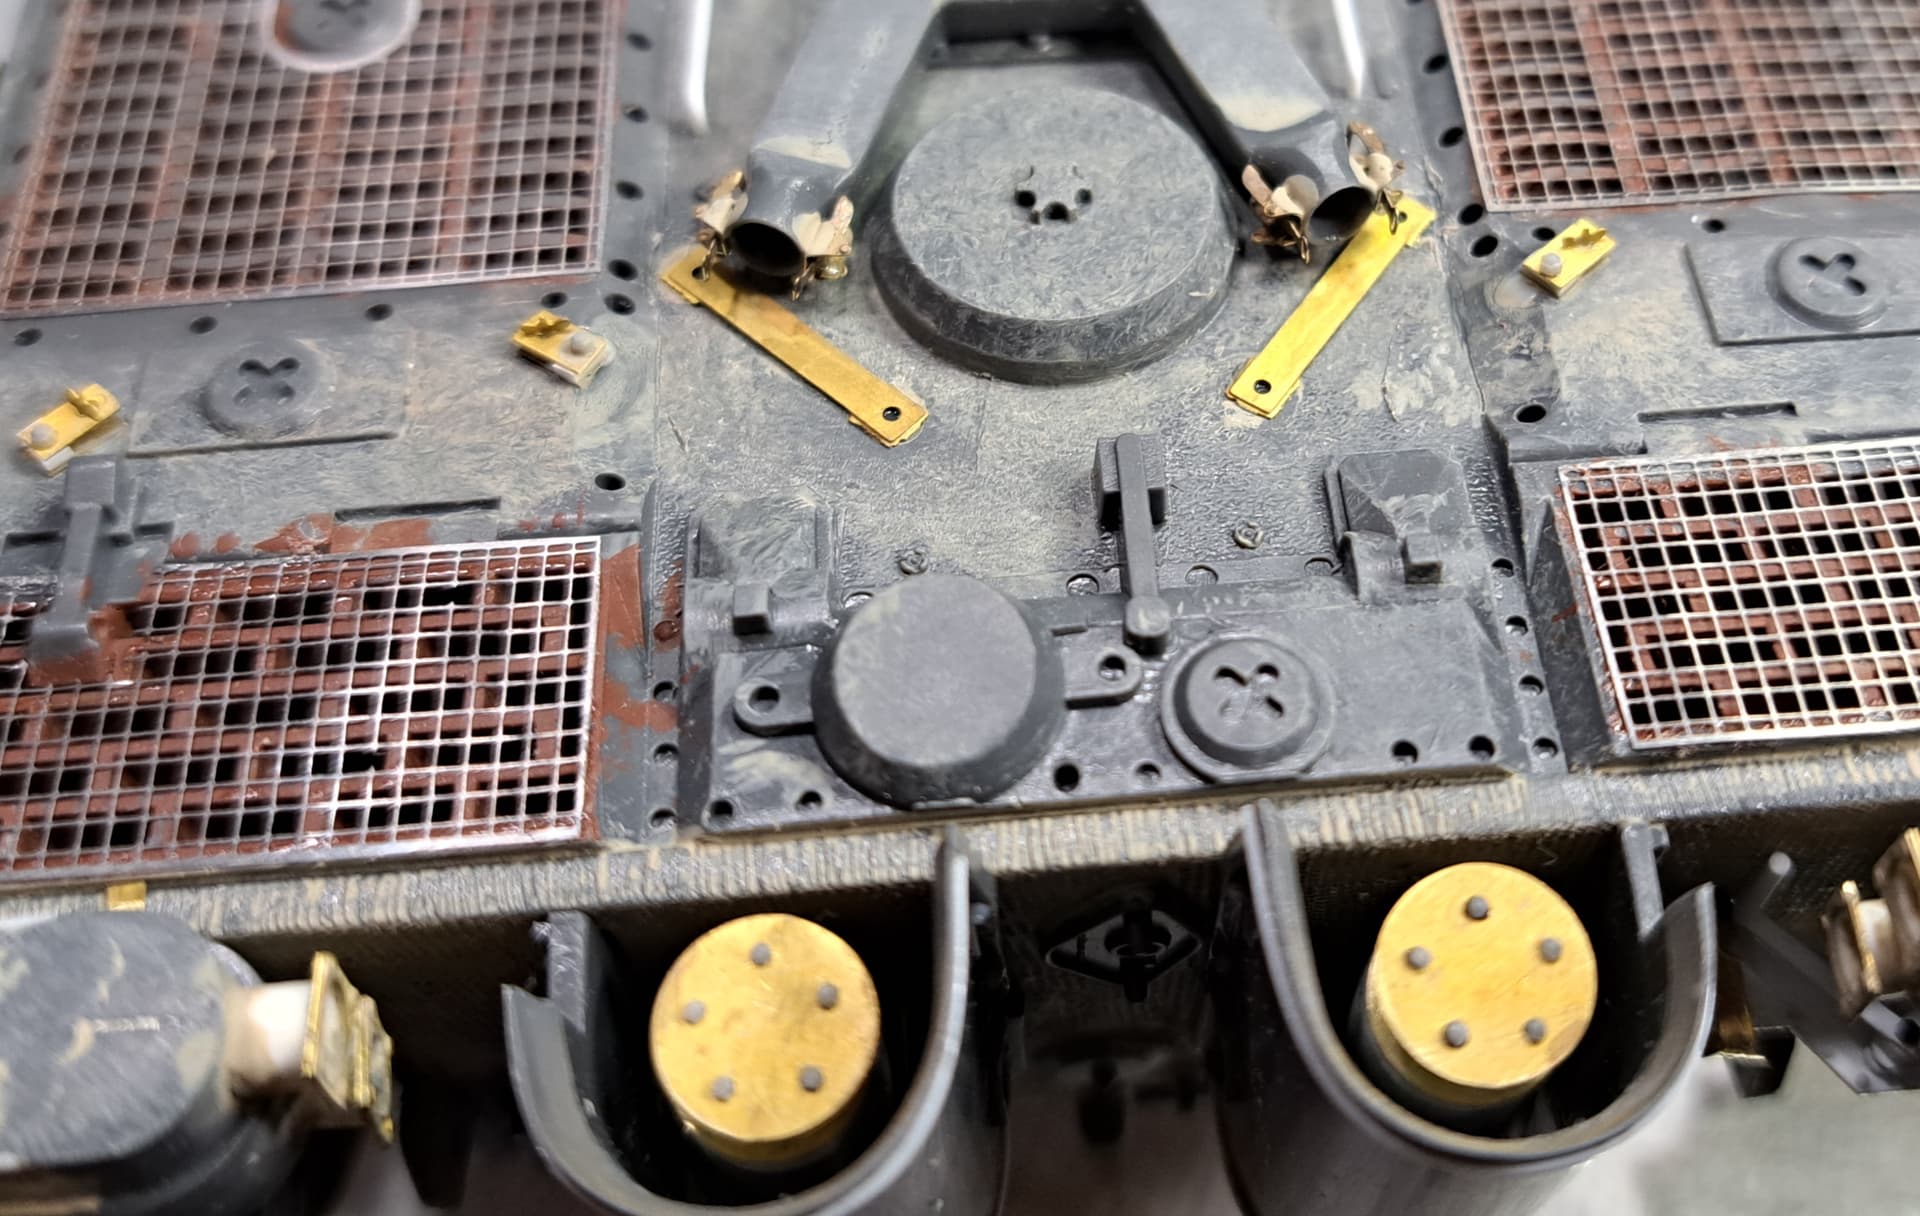
Other than touch ups, I think S-mine dischargers are the last detail to add to the upper hull.
11 Likes
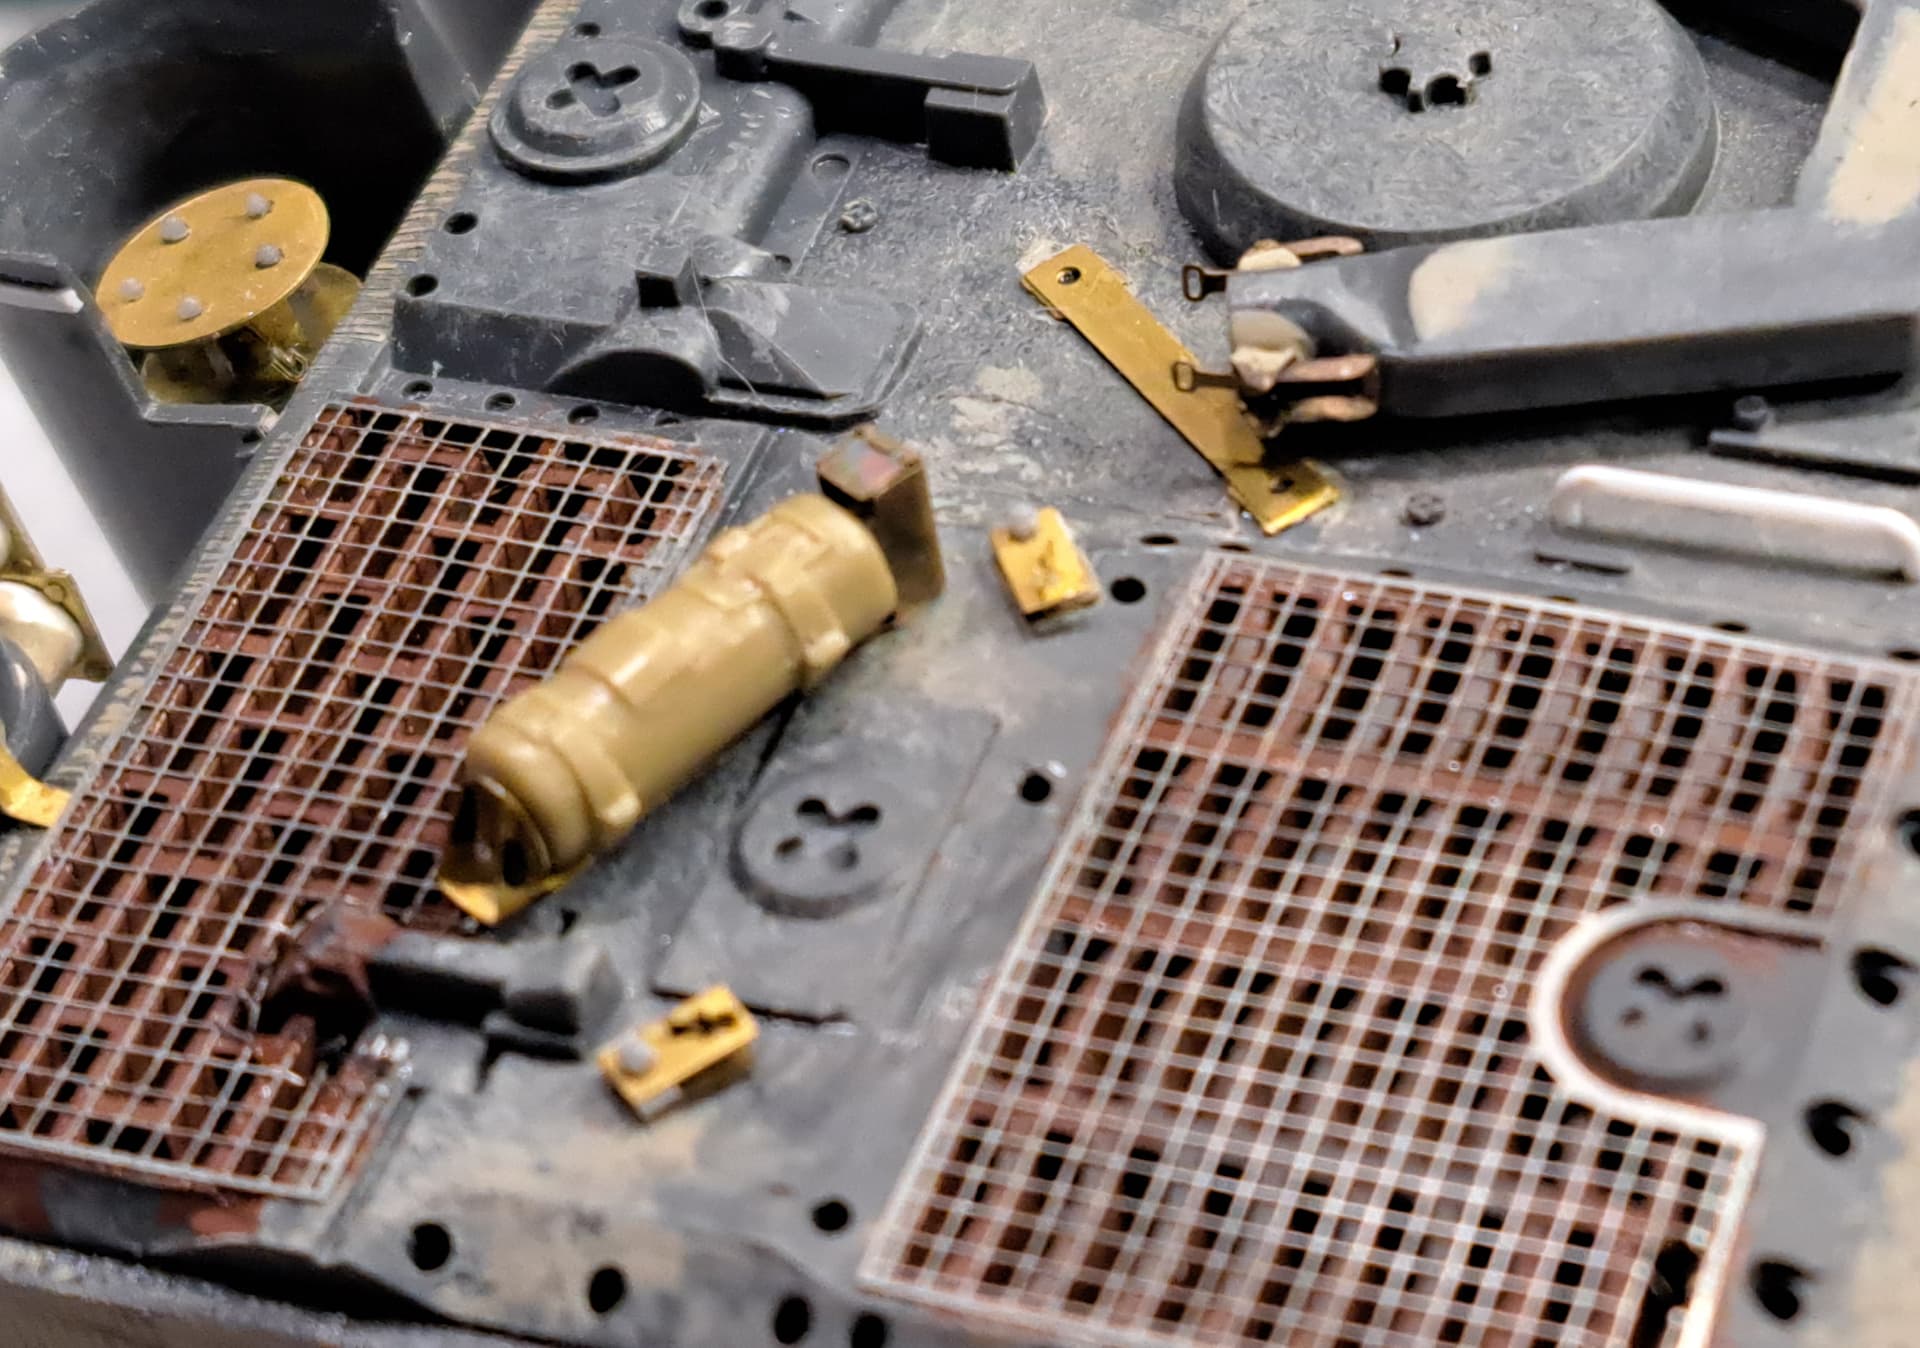
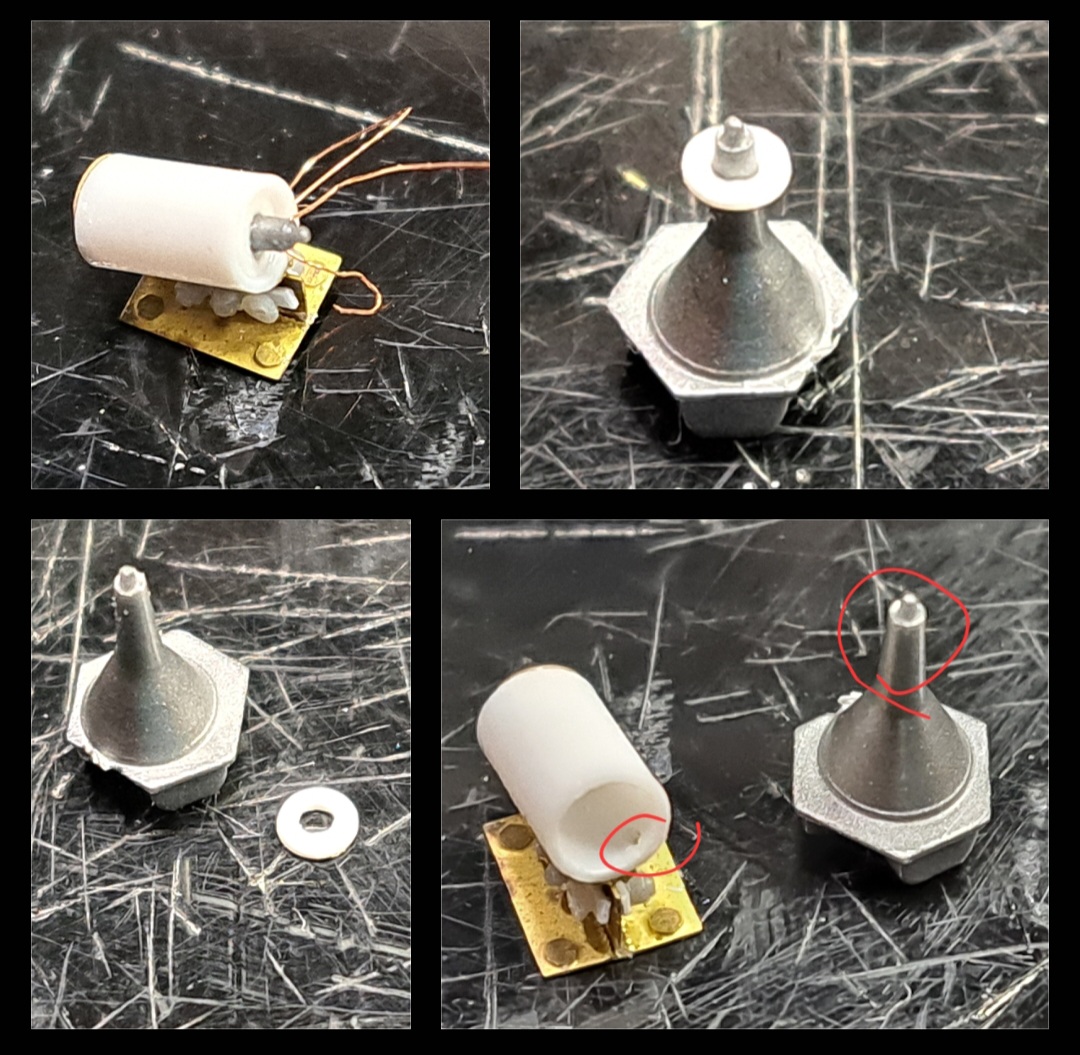
Today was S-mine launcher day.

General Discussion
S-Mine aka “Bouncing Beatty”
Specific Details related to model building are from the @DByrden Tiger1 website.
Pretty much everything below is wrong for a correctly detailed S-mine launcher. The OTM PE parts are old, I doubt OTM had access to the wealth if knowledge that’s a google search away. I apologize if this sounds negative out of the gate.
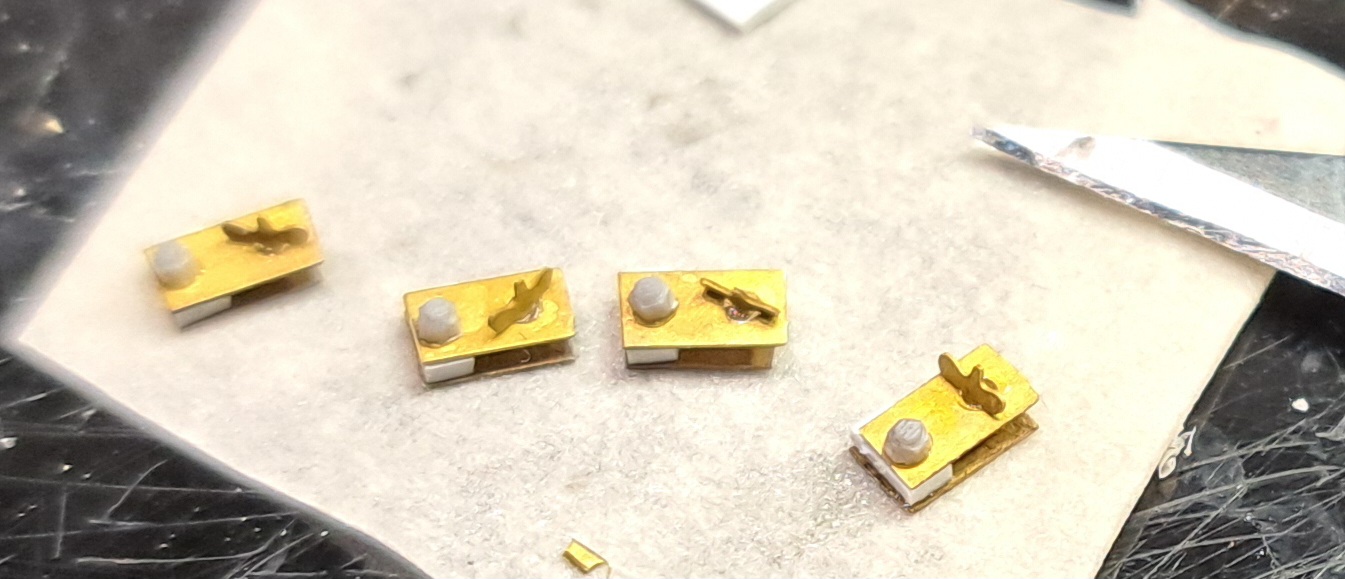
Parts & Instructions. The sharp eye will note various errors with the PE parts & instructions. Wiring is wrong, back of launcher is wrong, triangle neck is missing details that could have been etched in place, tubing supplied was too thick etc…for five launchers only four full sets of parts are provided.
It wasn’t a good day in the hobby room today…but a bad hobby day is still better than a good day at work ![]()

Luckily, I still had the OTM S-mine PE parts from a previous project done in 1990 plus the current set of OTM parts.

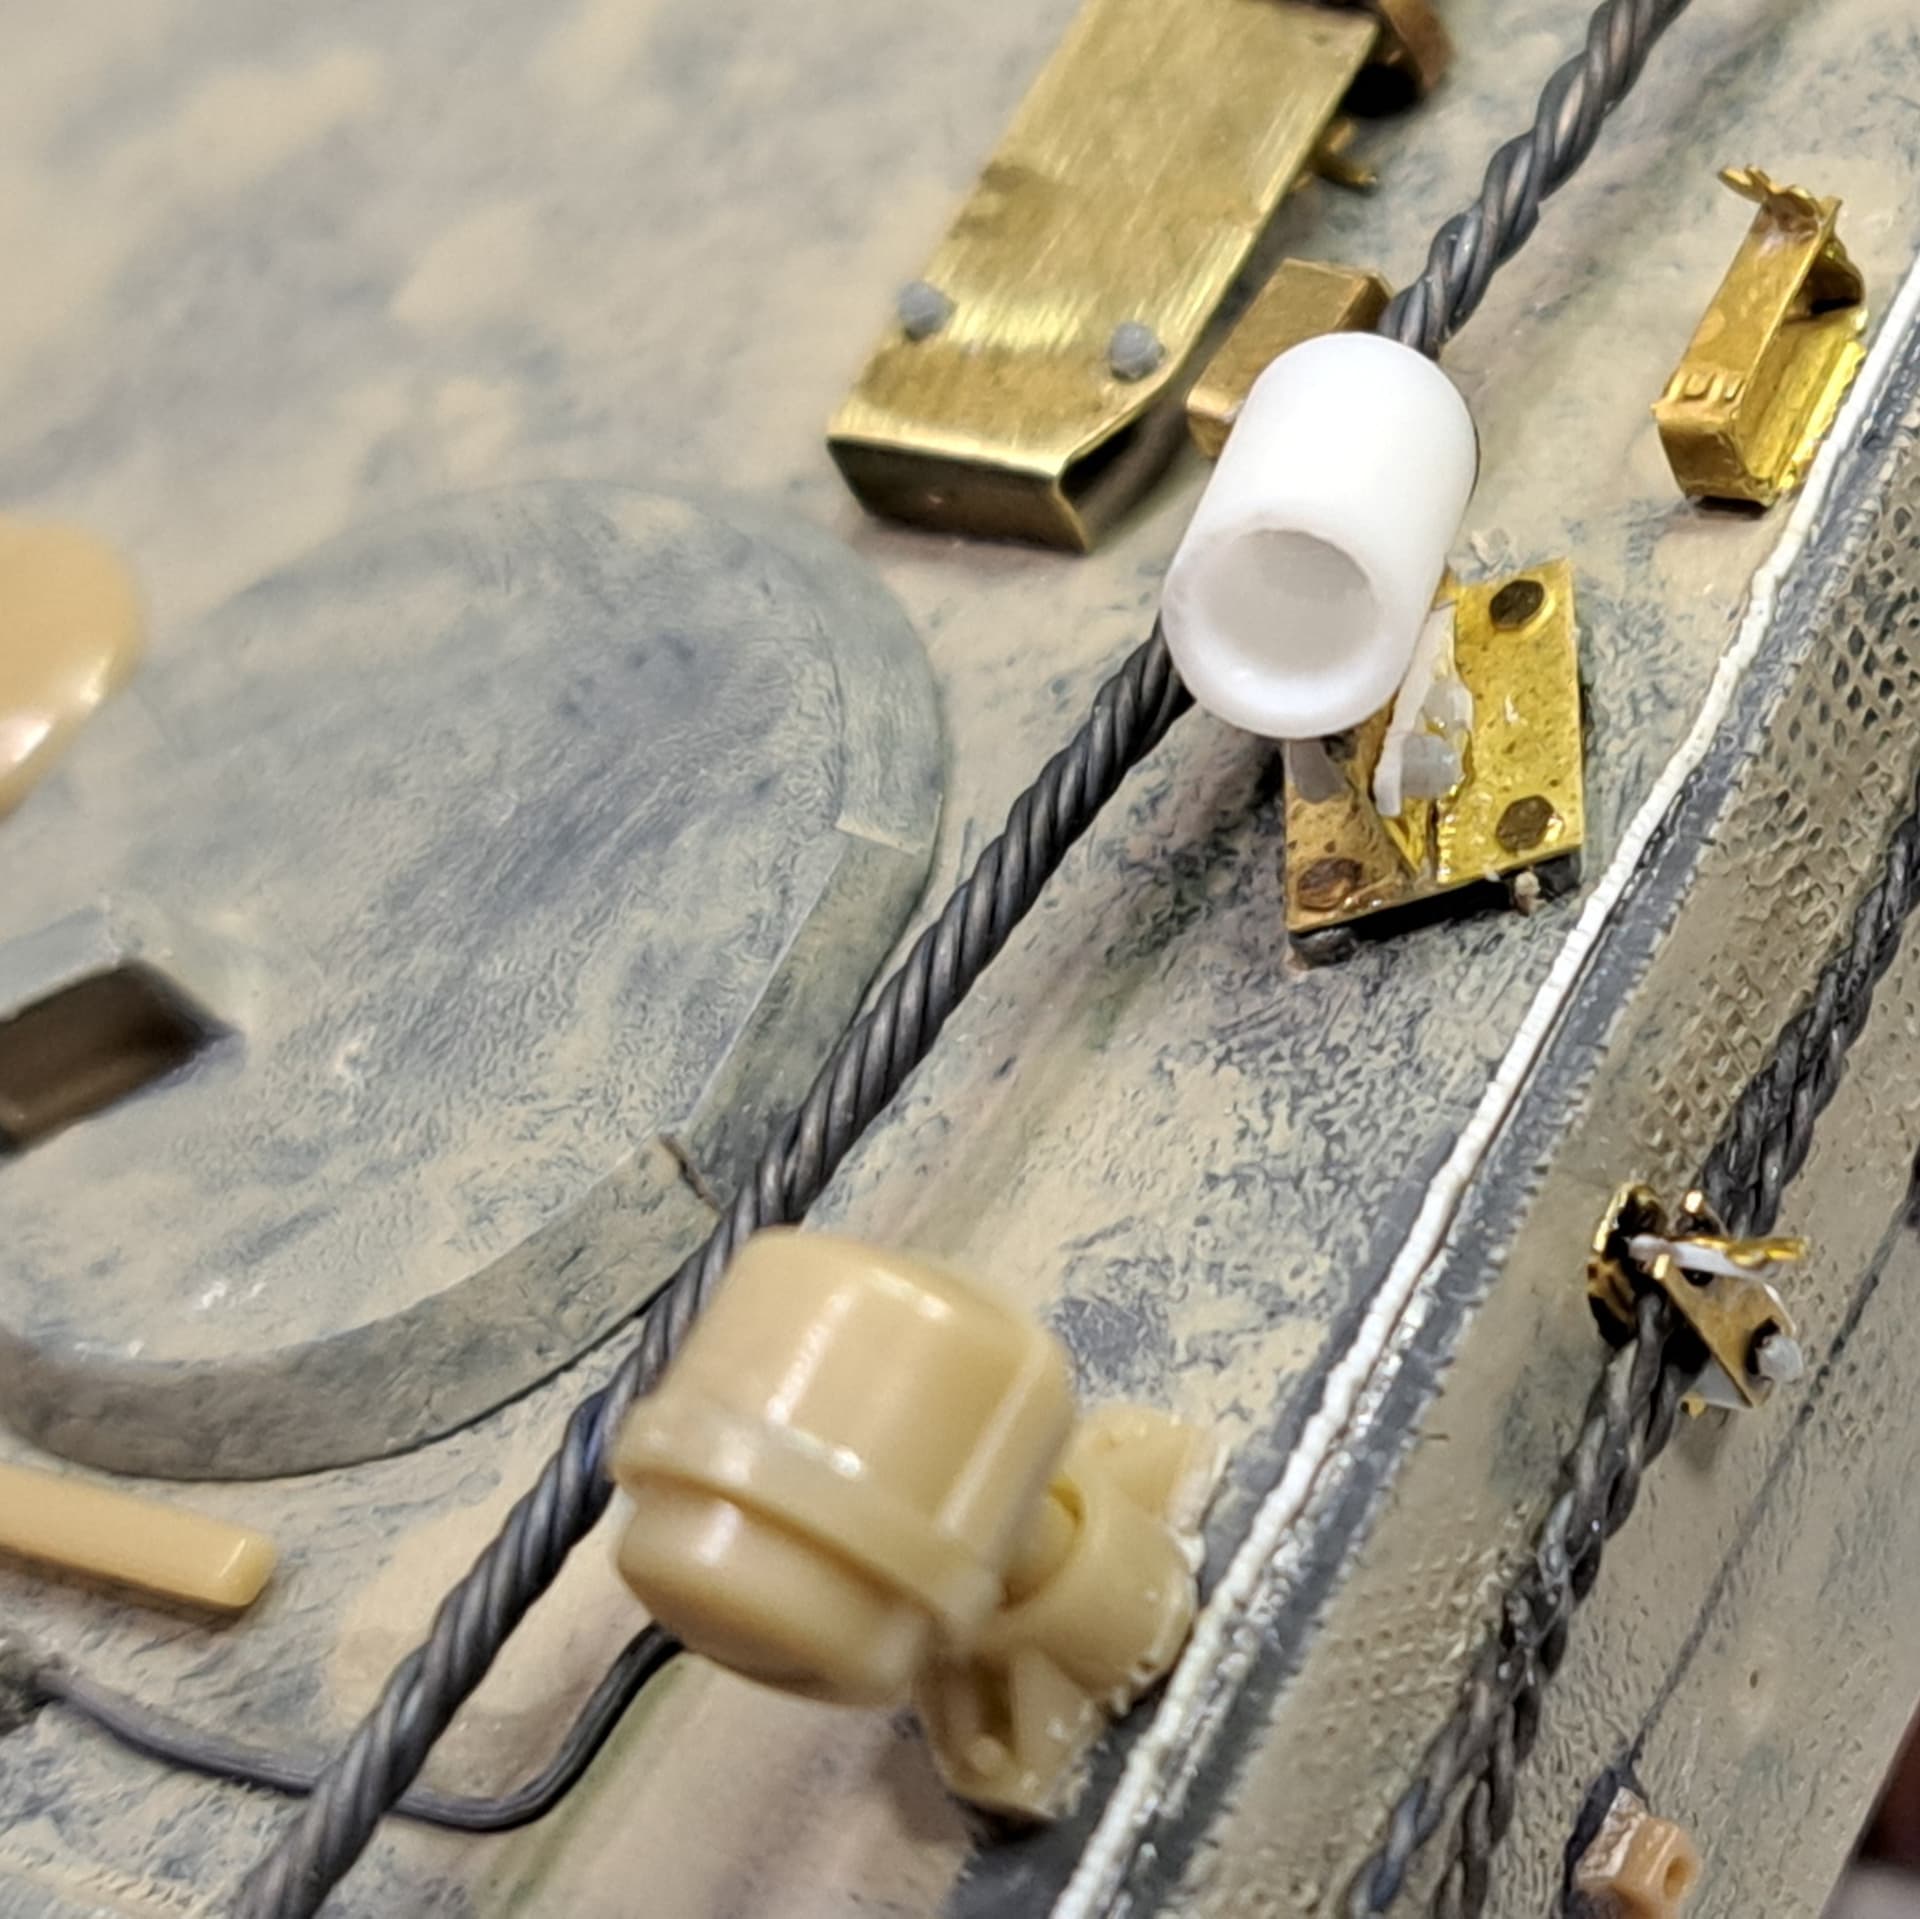
Styrene jig for parts alignment. End of file used to square alignment. These really needed to be soldered as CA for such a thin edge bond is very fragile.

Tubing chopped to acceptable size and back plate plus another jig for alignment.

So far so good…

…but I got on a tangent about those missing details and correct wiring…pure OCD/AMS/Panzer Police mode…used flipped over rivets & hex nuts to simulate details…

Caught up in the moment, I forgot about the 3rd alignment jig, I’d made to help put the top & bottom together. It required the triangle part to be flat…guess what I did…

So much for the spacer jig, its fumble fingers and eyeballs for final assembly.

2 of 5 completed without wiring.

9 Likes

Indeed.
There used to be an old wargame called Squad Leader/Cross of Iron back in the 1970’s. In our game experience, most of the WW2 close combat Infantry assaults vs tank ended in tears for the attacking player if S-mines were involved and infantry moving in open terrain. The first time that happened the look on the other player’s face was priceless as half a dozen squads were KIA’d with a few nasty dice rolls. It was game scary ![]() at least.
at least.
5 Likes
Great work on those S mine tubes Wade ![]()
5 Likes
Superdetailing at it’s finest. I’m surprised you got two done in one sitting. Outstanding work.
4 Likes
Matt & Johnny, thank you!
Thinking about the Cross of Iron game plus spare parts in case this fails, I decided to try loading one launcher. So far…
I also wanted to test consolidating related pictures and see if that looked ok.
Kali said…
7 Likes
3 installed, 3 wired, 1 loaded


There only one wire from the launcher back to the tank because the launcher was grounded to the tank. Two wires run to the fuse. At least that’s my understanding of how it set up.
Two to go…
9 Likes
Wrapped the hull. Suspension, wheels and tracks are ready. Only the turret remaining.


Discovered I’d missed two spacers for the air hoses on the rear engine deck.

Got the rear S-mine launchers in place and wired them.


Discovered, I’d missed the spare antenna case.

13 Likes
Part of me thinks, “I can’t wait to see this in paint.”
But then I wonder why would you want to cover up all this fabulous detailing done in so many different mediums?
I duuno. I’m conflicted.
4 Likes
I’ve been lurking, watching progress in awe. So far above my skill level I’m having to look through clouds!
2 Likes
The wire from the rear launchers goes under the grille, not through it.
David
4 Likes
@DByrden , David, that’s excellent information! I would love to see a wartime picture showing the specific details if you have one available you could share with us.
My references were indeterminate, only had a few pictures of S-mines on the rear.

BTW, do you know if it was common practice to reposition S-mine launchers as shown in the top photograph, with green circle?
Ultimately, I relied on this Jentz/Doyle line drawing for my guess on the wire as it doesn’t show the screens.

Thank you.
@Arch-Stanton Al, that may prove a dilemma but I think the Tiger will be fun to paint.
This Italeri Pz IV G, I haven’t been able to bring myself to paint.

@Chepster , I appreciate the kind words.
I was lucky to have a good friend Rick P guide me long ago, explaining everything is straight forward technique the typical modeler can do. With the right tools, supplies and some practice you’d reach my level and pass it pretty quickly. Most of it is just figuring out how to break the bigger task into smaller blocks.
Long ago, this was one of my early attempts at detailing. I learned from reading Shepherd Paines book, Rick and later from other armor modelers.

Cheers ![]()

No delicate GodHand’s or refined precision Zoukei-Mura’s for this sort of manly work! Xuron sledgehammer provides the desired brute force chopping power.

Oops ![]() I broke the mantlet.
I broke the mantlet.
10 Likes
Clamped a piece of sheet styrene to the back of the broken manlet and flooded with liquid cement in the hollowed out center. The Hobby Lobby mini-clothes-pins proved very useful!
Filled 85% of the void with StarBond CA plus accelerator, followed by the much thinner StarBond Black CA plus accelerator. Getting the mantlet level with the mini-clothes-pins helps level the thin Black CA before applying accelerator.

Applied a coat of thin Molak Stucco Putty over the black CA. Technically this Tiger will have a “composite armor mantlet.” (j/k)
While the Molak set, chopped the sides off of the 1989 Tamiya Tiger manlet and thinned.
Test Fitting

That wasn’t a good moment yesterday vvvv .

8 Likes