Quick & dirty: Griffin III 50mm IFV

Work being what it is, a reference-free design & print is what’s needed.

The Griffin III is a demonstrator by GDLS that was exhibited at the AUSA conference in DC in 2018. Here’s a pic I took while walking the floor.

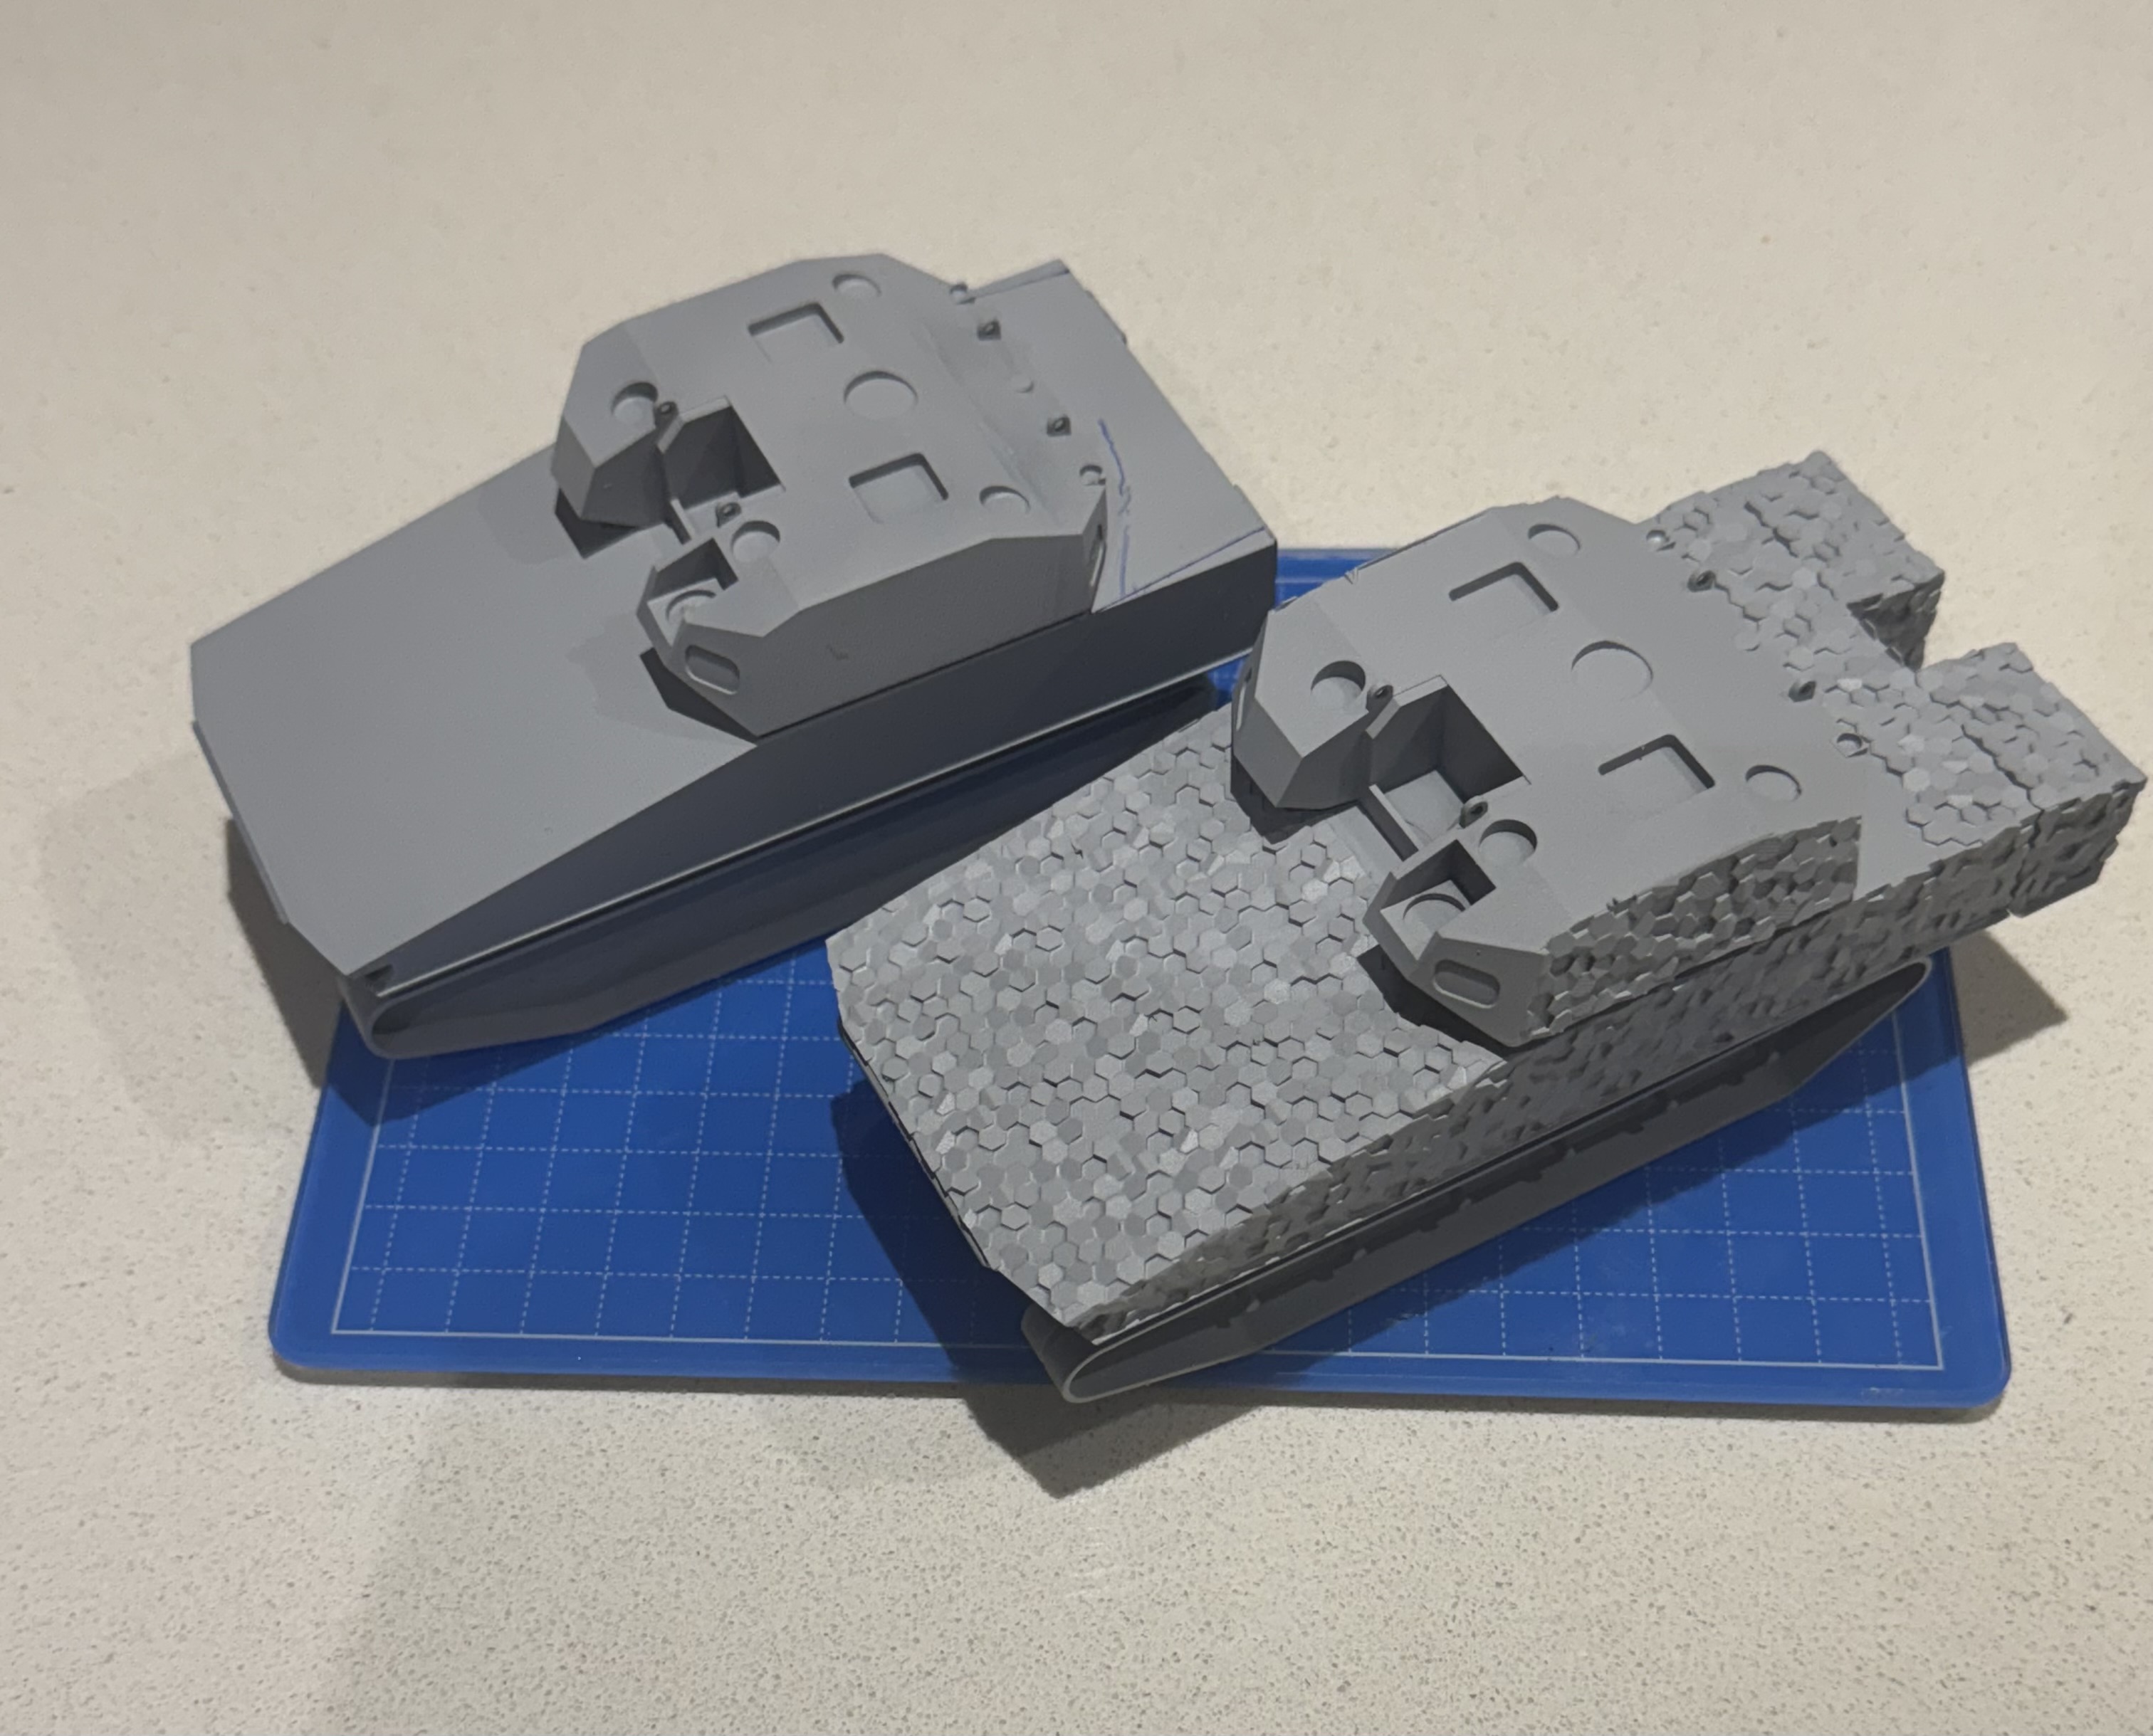
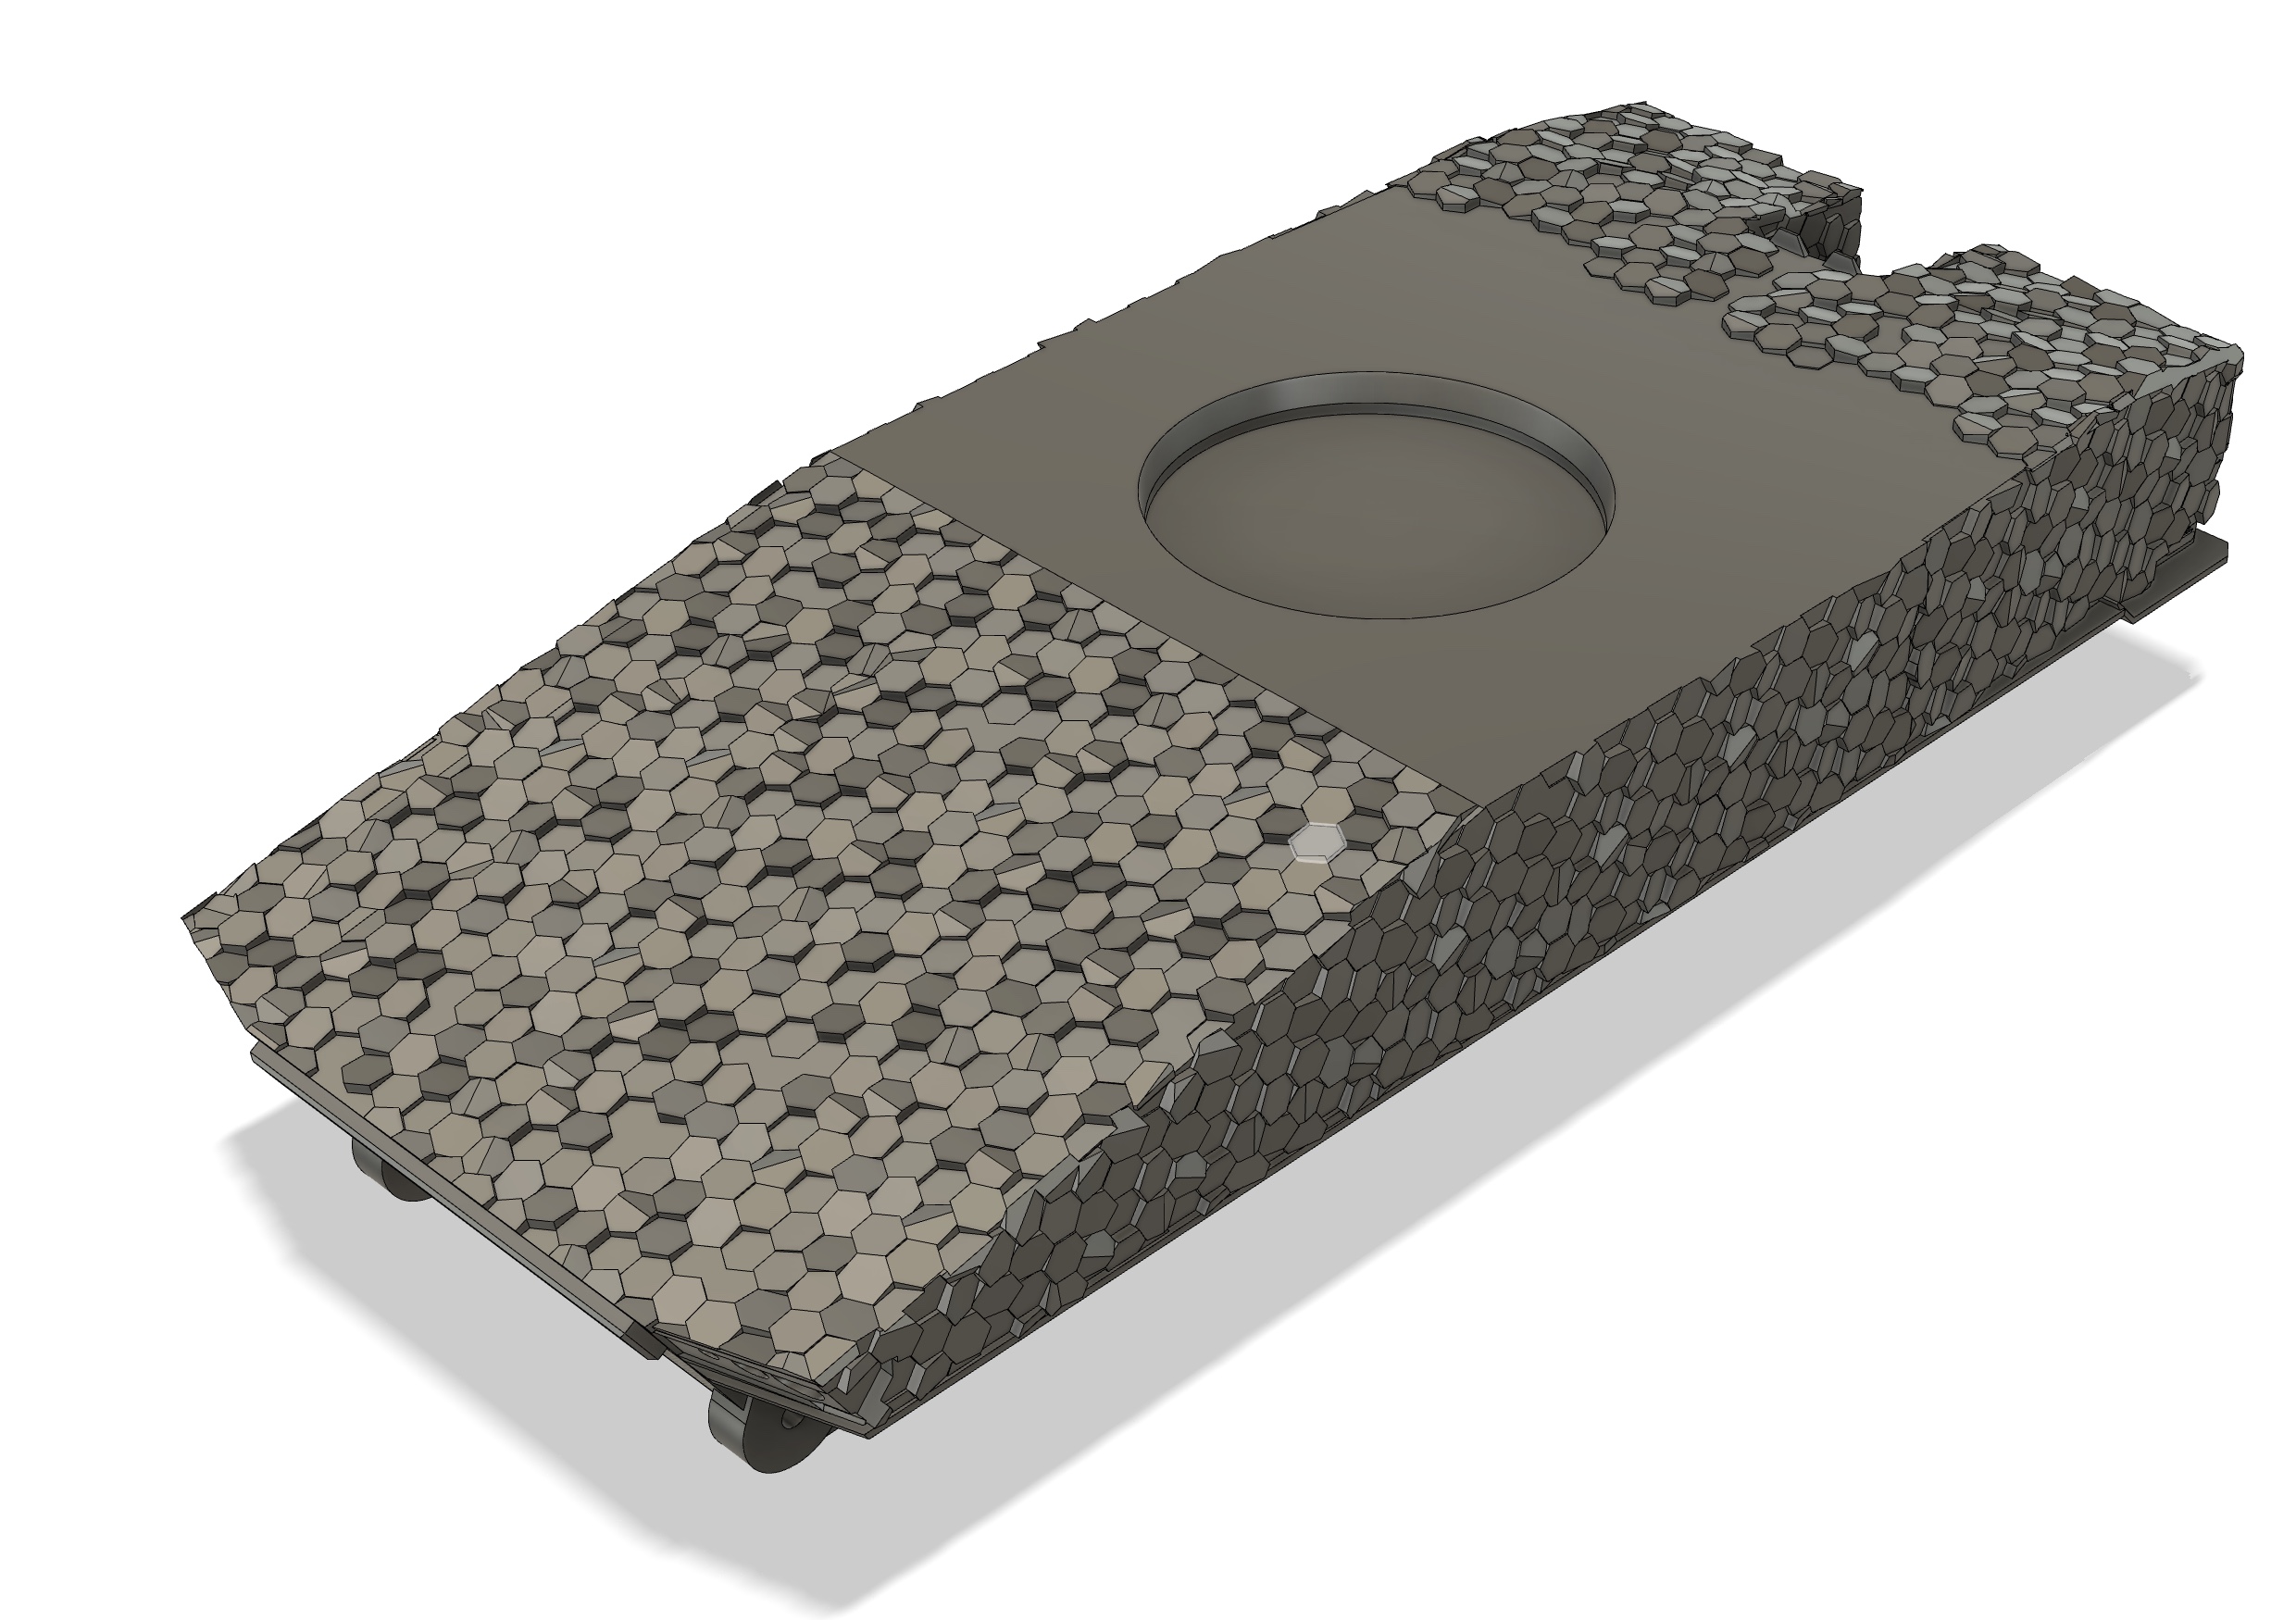
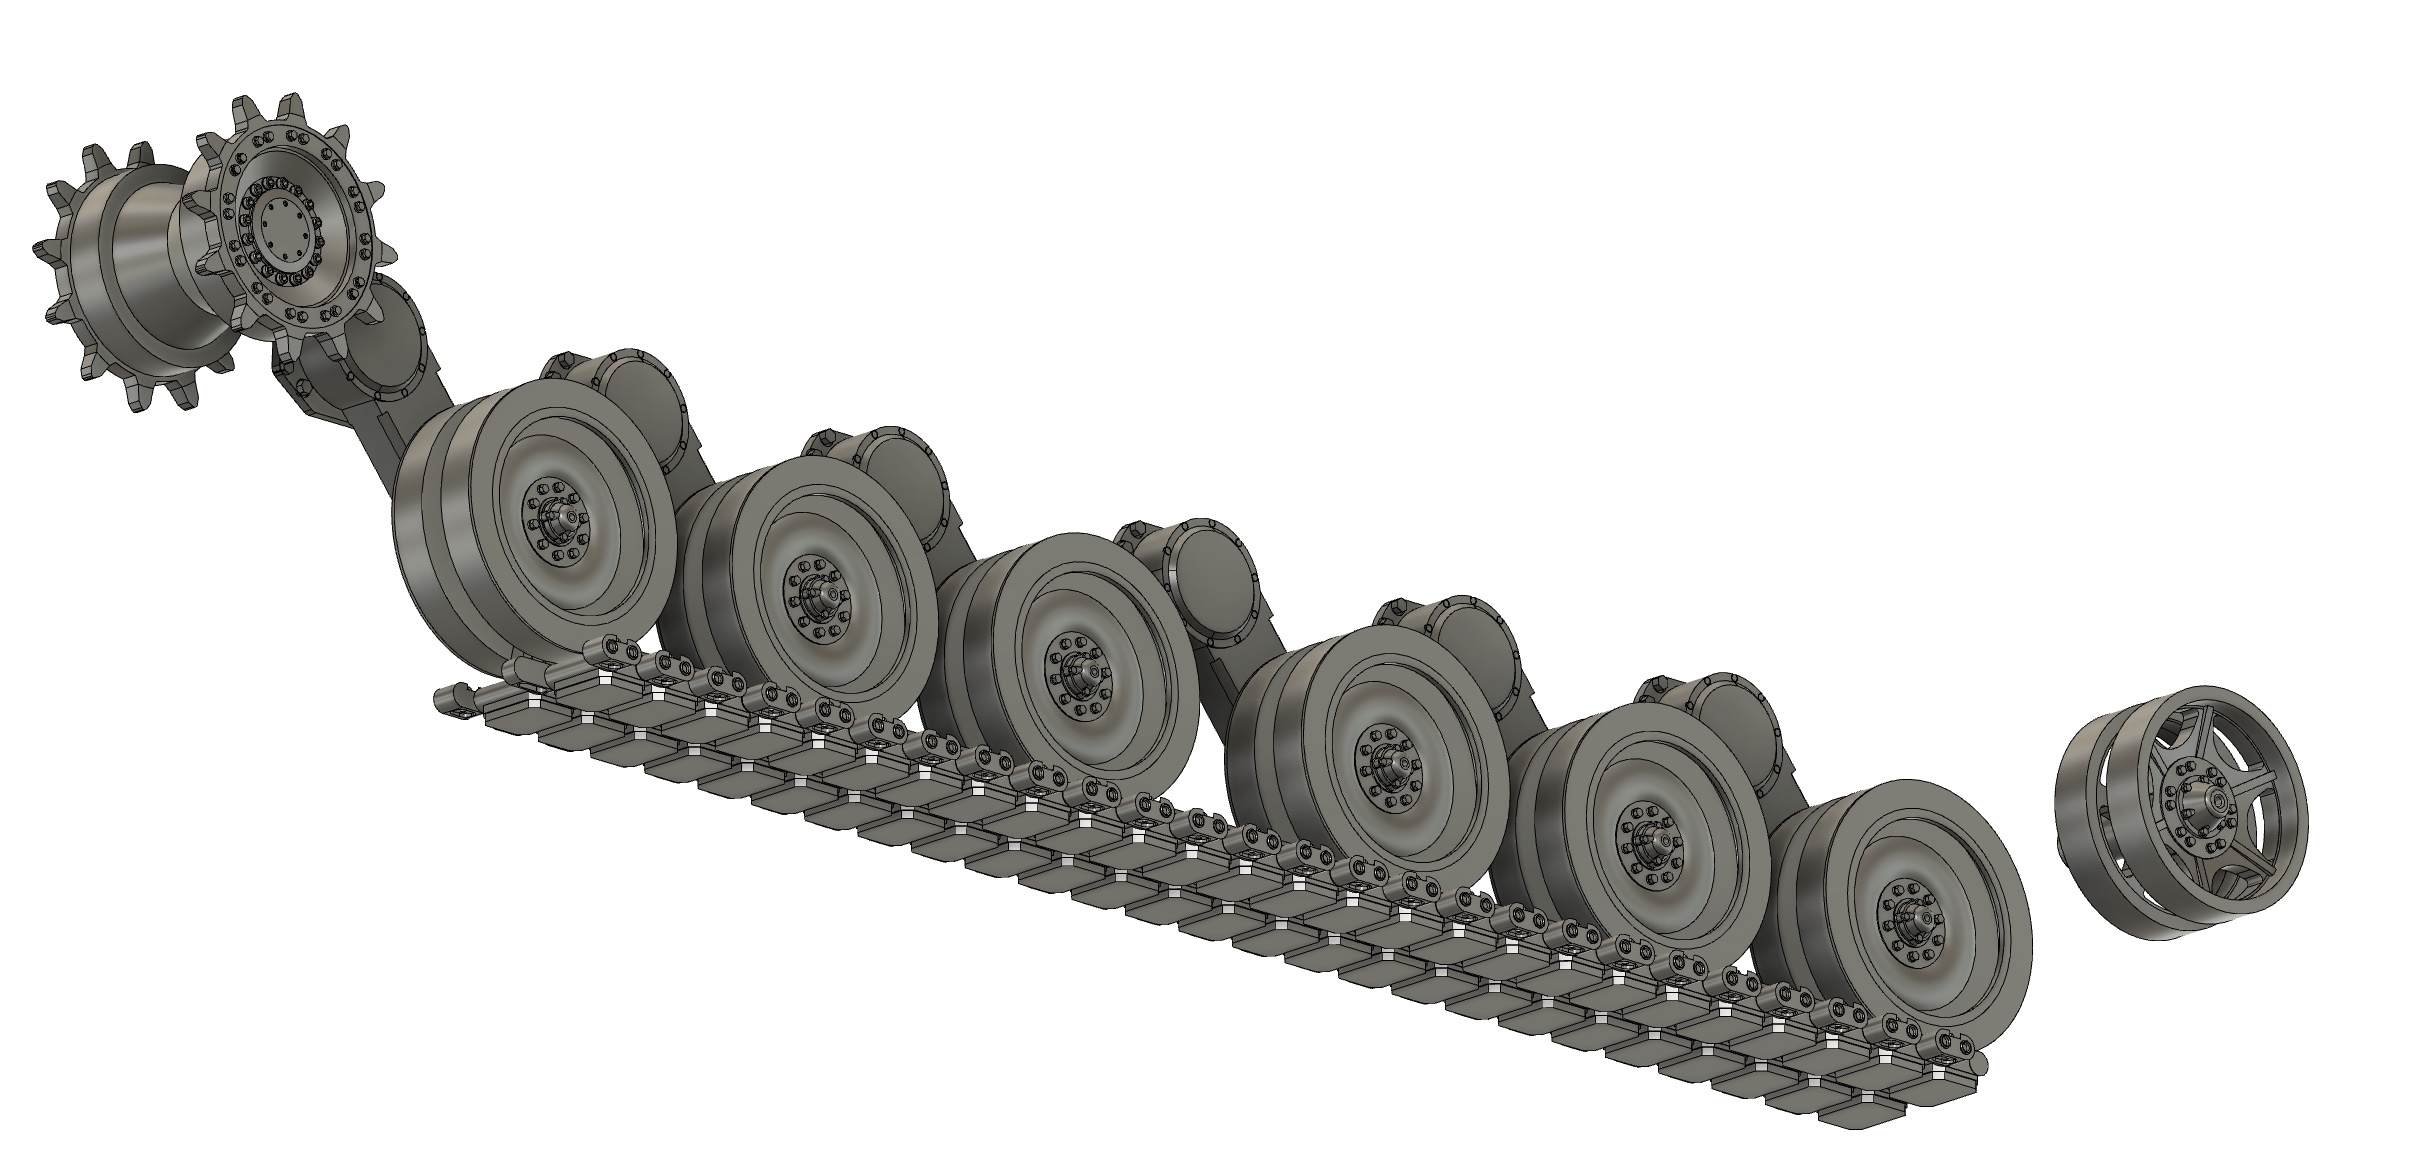
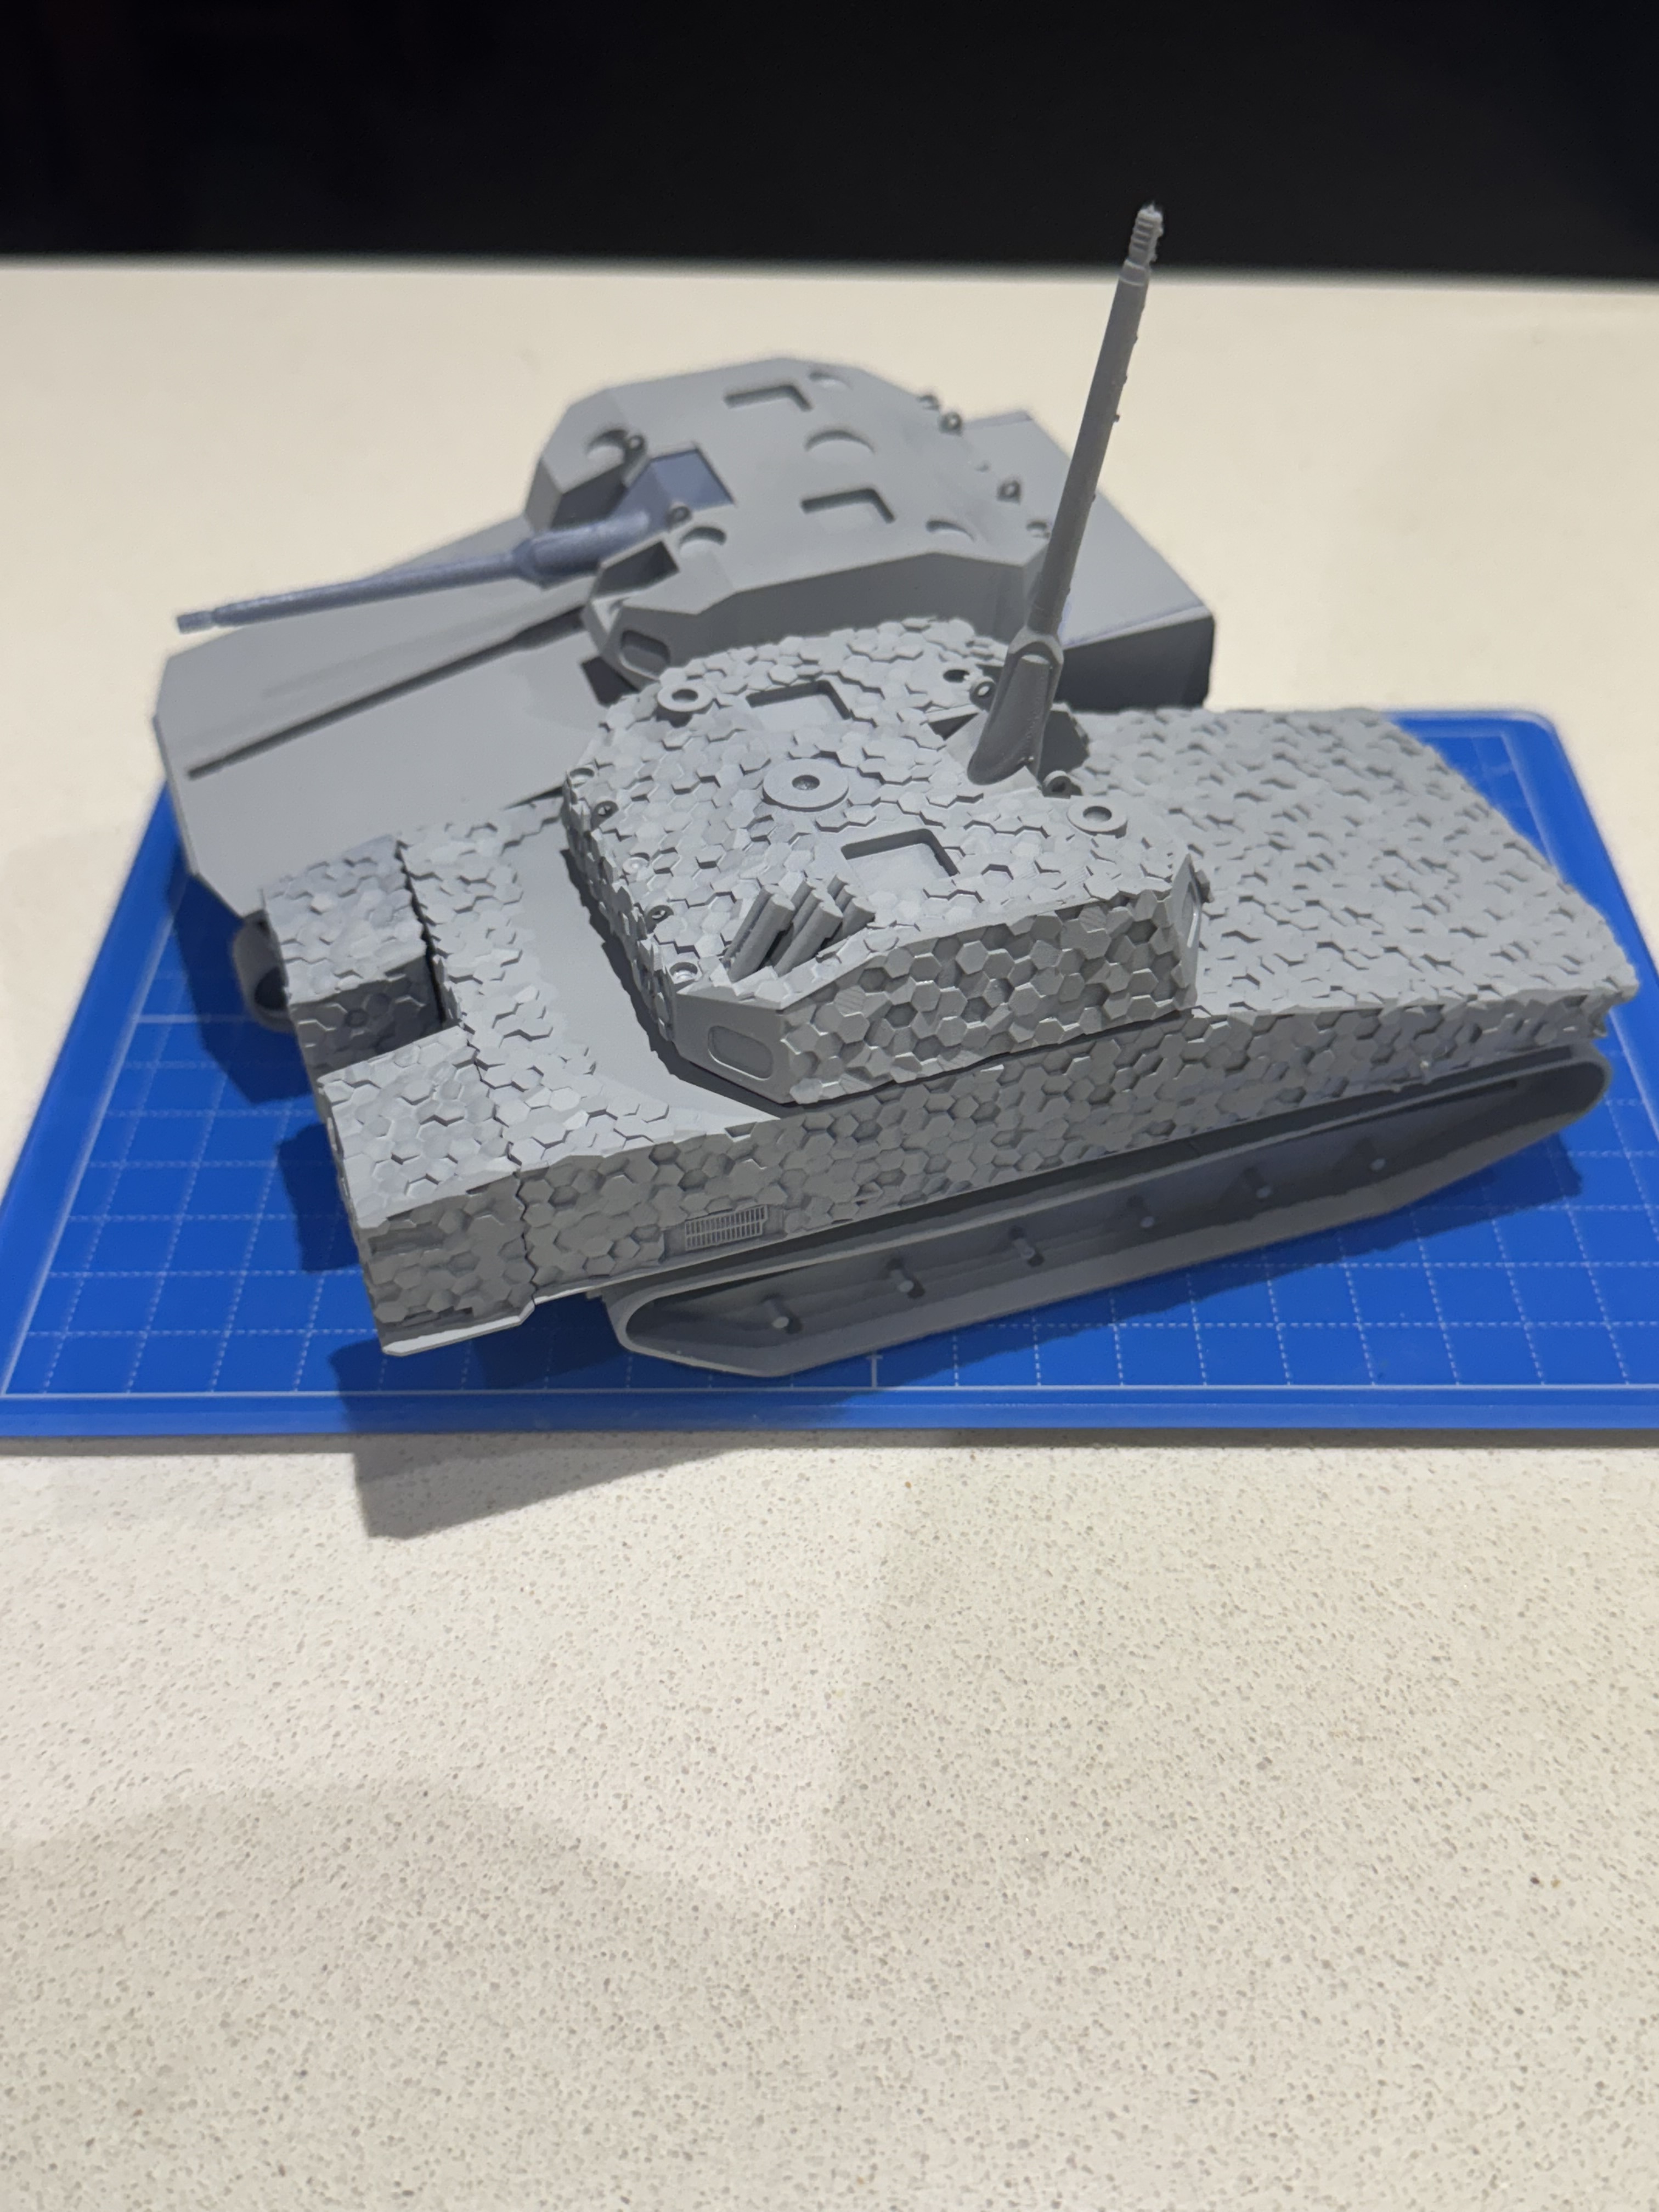
The 3D camouflage is from a company from Arizona & is super eye catching. The road wheels & track are from a Bradley, in-arm suspension from Horstmann, & the 50mm gun is the XM913, active protection is Iron Fist. That’s enough to get a start.

Being reference-free, I’m using the TLAR method.

Here’s the block fit print.

The lower hull design is more or less done.

The turret is an odd one, being “optionally crewed”, and has a RWS, APS, loitering munitions, & ECM. All the mod cons.

The rear stowage boxes are the first bits to be covered in the 3D camouflage.

The idea of this is for a representative of the subject vehicle, that looks about right.

6 Likes

The camouflaged stowage bins printed well.


Now that the hex pattern 3D camouflage panel is sorted, I moved on to texturing the hull.

Thanks for looking in.

8 Likes

Great work for now. Been wanting one of these since I saw it back in 2018. Going to follow with great interest. Maybe you will sell the files once you’ve finished?

4 Likes

Now that you have modeled it, might also be very cool to make that TactiCam 3D camouflage system for application on other vehicles.
Happy new year 2020 and our best wishes for friends readers customers and family 925 001

4 Likes

The Griffin III 50mm IFV is an IFV that I would have liked in US Army service. It’s pretty neat in what it can do, according to the demonstrator.

I look forward to your build progress. :grinning:

2 Likes

Thanks for the likes & comments. This is an interesting oddball that certainly catches the eye.

I was broadly happy with progress, especially when compared to the block test.

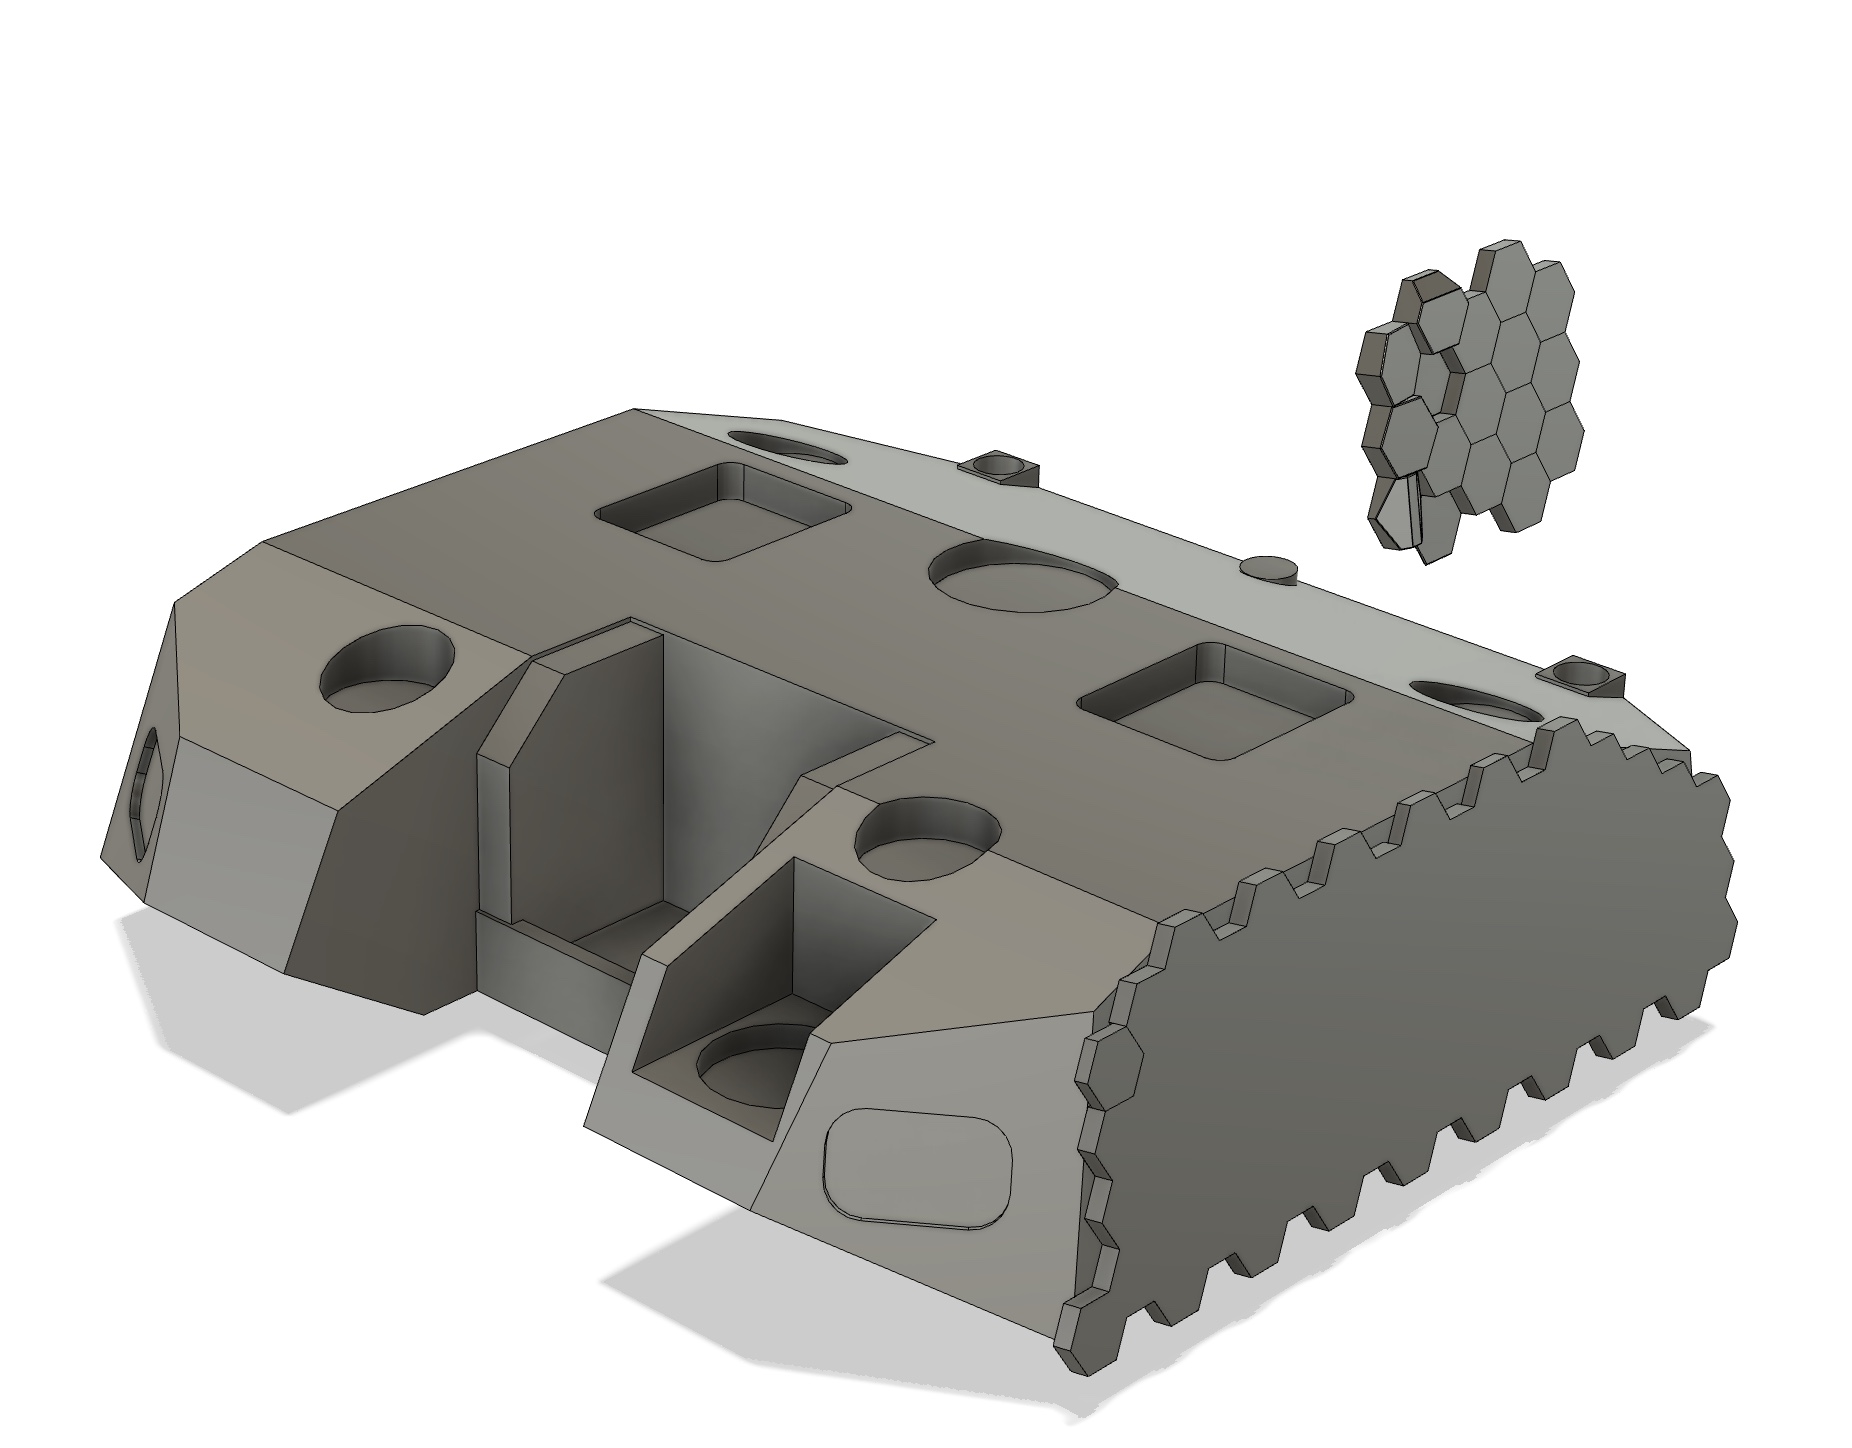
Then I realised that the sides of the hull tapered inward just to the rear of the turret ring. This symmetrical taper also affected the rear stowage bins. After a bit of rework, it was rectified.


Will be interesting to see how the print compares to the slab sided iteration.

3 Likes

With the tapered hull now reshaped, how does it compare to the original iteration?

The wedges of the taper are marked on the block-fit print in ink.

Scales to ~3”/76mm each side.

Side by side.

Much happier with the look, time to texture the turret.

2 Likes

Coming close to finishing the turret main body.

Figuring out the 9-pack of Switchblade 300 loitering munitions on the back right corner was a little tricky, but got there in the end.

As my references were a bit skinny, I originally modeled a six-pack. Oops.

Had my first exposure to a FormLabs printer this week. Incredibly capable & very fast.

Meanwhile, the integration test printing continues.

4 Likes

Coming out really nice! Keep up the good work. Getting very anxious to see the final outcome.

2 Likes

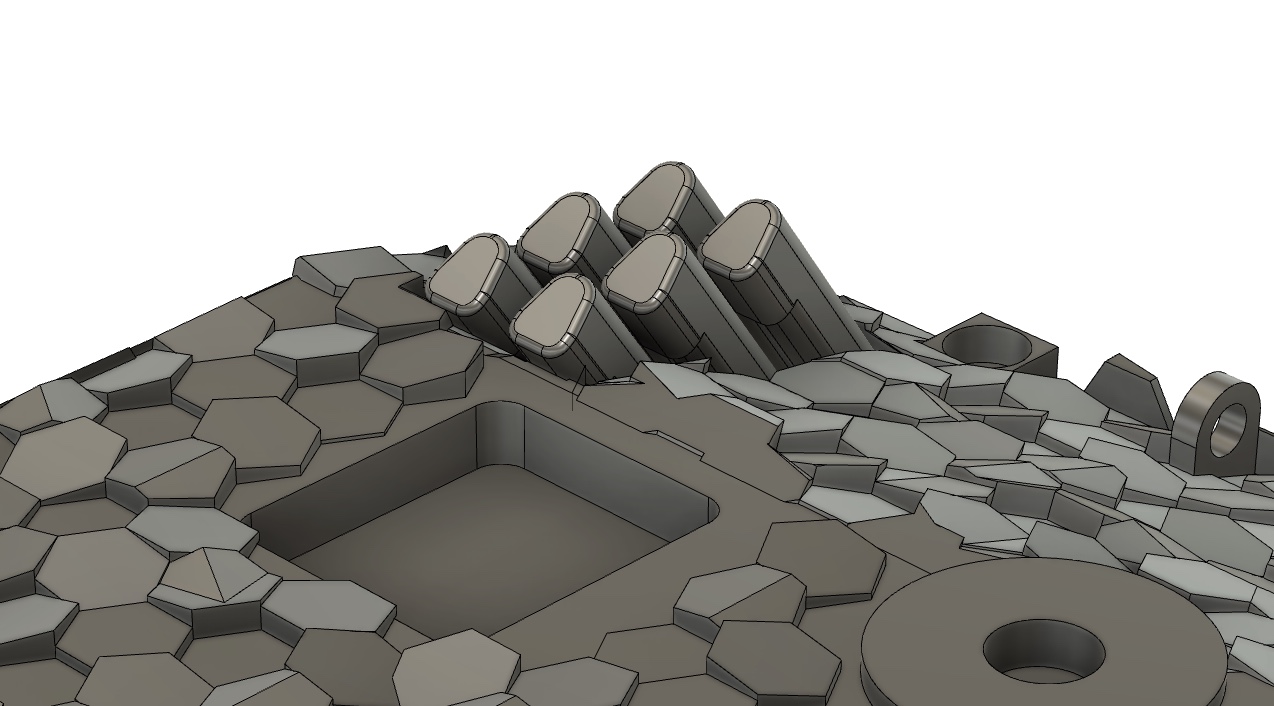
Looking at the Switchblade loitering munitions again, I can’t see how the rearmost row could realistically contain three rounds. Thus, the outboard round has been deleted.

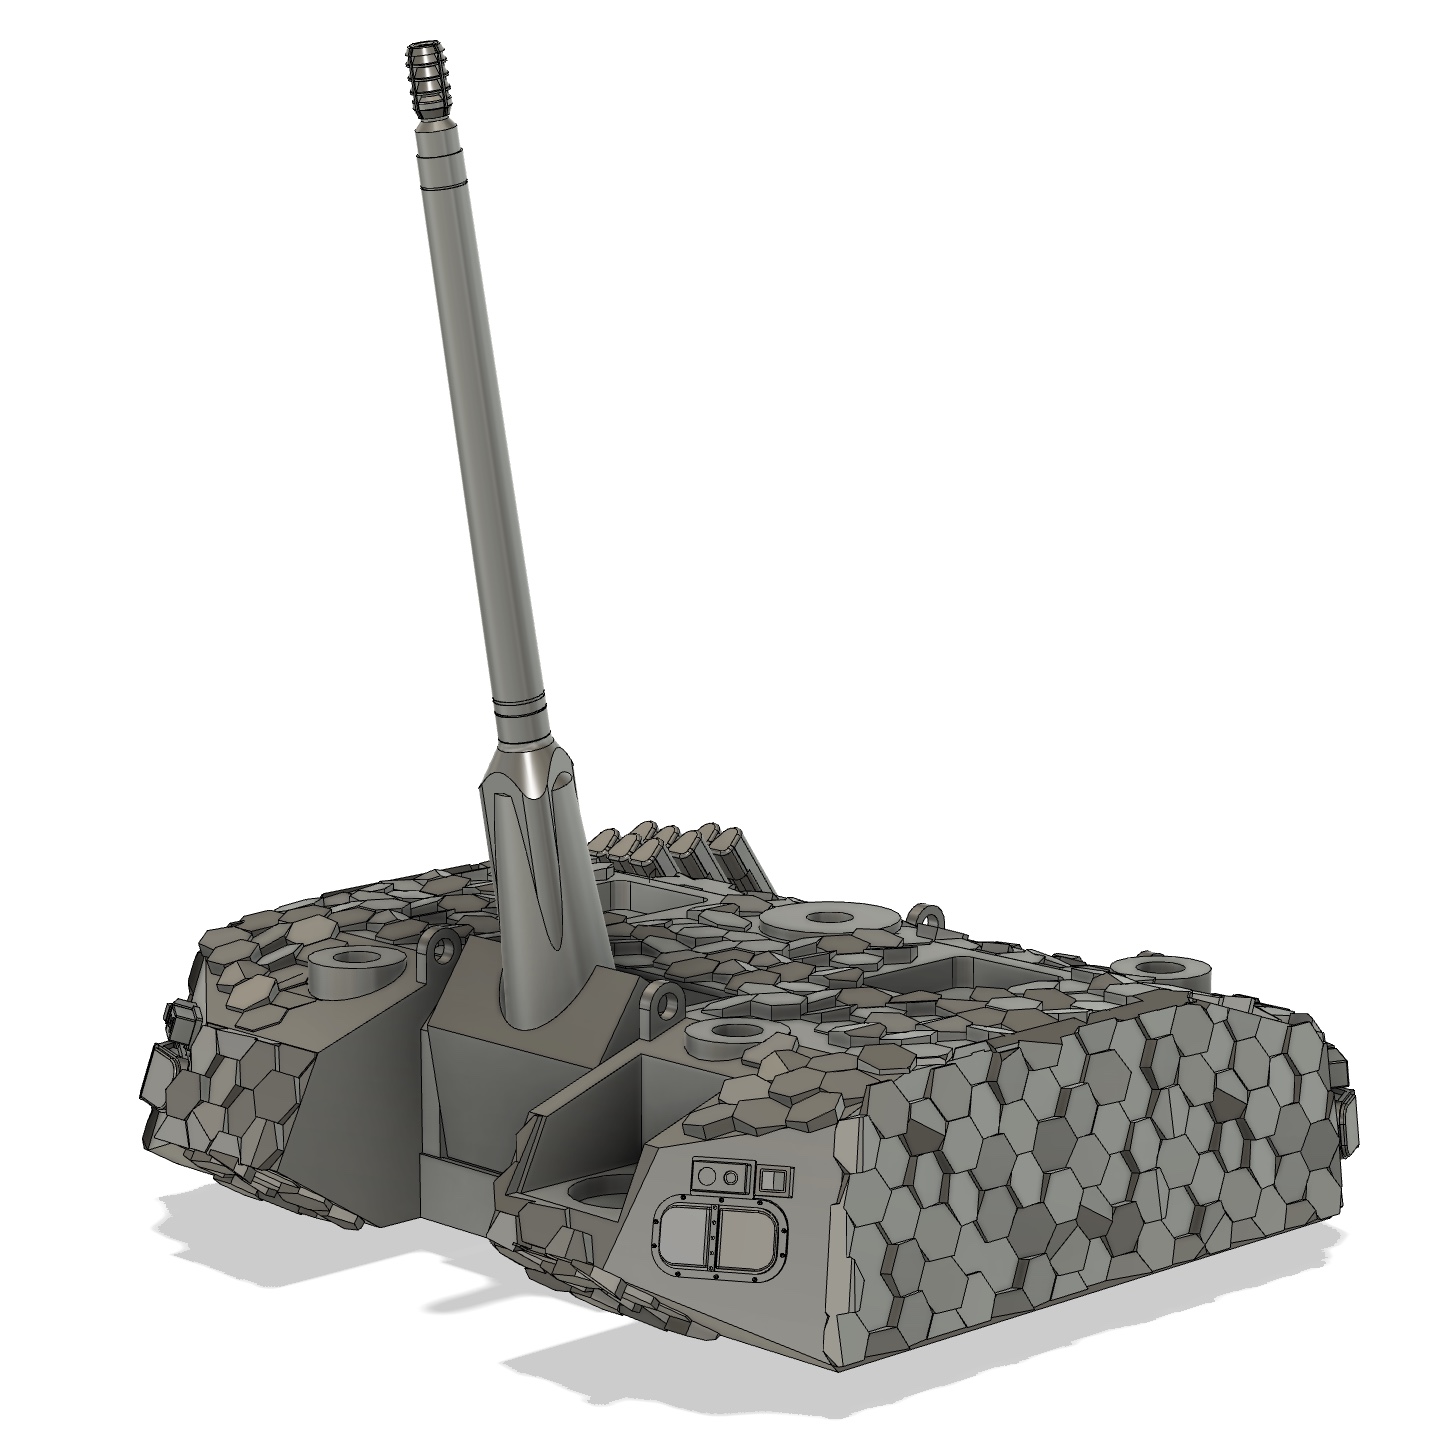
Work on the Iron Fist active protection system radars & electo-optic sensors, as well as the laser designator detectors has been done. Not convinced I got the scale correct, so I’m experimenting with printing them in various sizes.

Designing & fitting the mantlet for the XM913 50mm gun to enable +85 degree elevation was a bit tricky. Pretty sure I’ve got that sorted, once it is, the gun proper can be sorted out.

2 Likes

The main part of the turret is now done.


Gun elevation range is -5 degrees to +85 degrees. Happy with that.

3 Likes

Looks great so far, but I think that the “Iron Fist” split-face radar on the front is too small. The proportions of the radar look correct, it just needs to be enlarged, not stretched or heightened. If you look at the Griffin III photo, the laser warning receiver is almost to the top of the turret and the radar face occupies almost the entire width of the turret face.

2 Likes

Yep, agreed. I addressed that in the previous post. I’m not redrawing it, as it’s a separate part, I’m printing it slightly larger so it looks right.

2 Likes

Wow, your work looks amazing, I can imagine how long it took you to draw the relief on top of the armour, but it’s worth it. I also sometime want to do these AFV`s with 50mm cannon, I even started to draw the XM30 turret from Rheinmetall, but there decided to postpone it for later and finish other projects.

3 Likes

Am appreciating the feedback. Hopefully this project will inspire some other concept models to be scaled down.

After slogging through the turret, it’s time to return to the running gear.

Mucked up the lower hull by spacing the suspension arms equally, when the actual vehicle had a space between the third & fourth road wheels.

Ideally, each running gear assembly will be a single piece of track, sprocket, road wheels, suspension arms, return rollers, & idlers.

2 Likes

The upscaled print should do the job.

3 Likes

Sprocket, road wheels, idlers, & InArm suspension units now done & indexed.

Time for the track & full track run.

2 Likes

Looks good. You are just flying along… impressive!

2 Likes

That’s impressive.

1 Like

Thanks @CAC & @mech

Having some issues with getting the track to follow the pathway, but will get there.

Iron Fist effector is ready to print.

Planning on using magnets to mount these, the commander’s viewer, & the CROWS-LP to reduce breakages.

Nice to contrast the fit check model with the increasingly detail-populated one.

Cheers.