I have the same feelings during this operation Damian:)
2 Likes
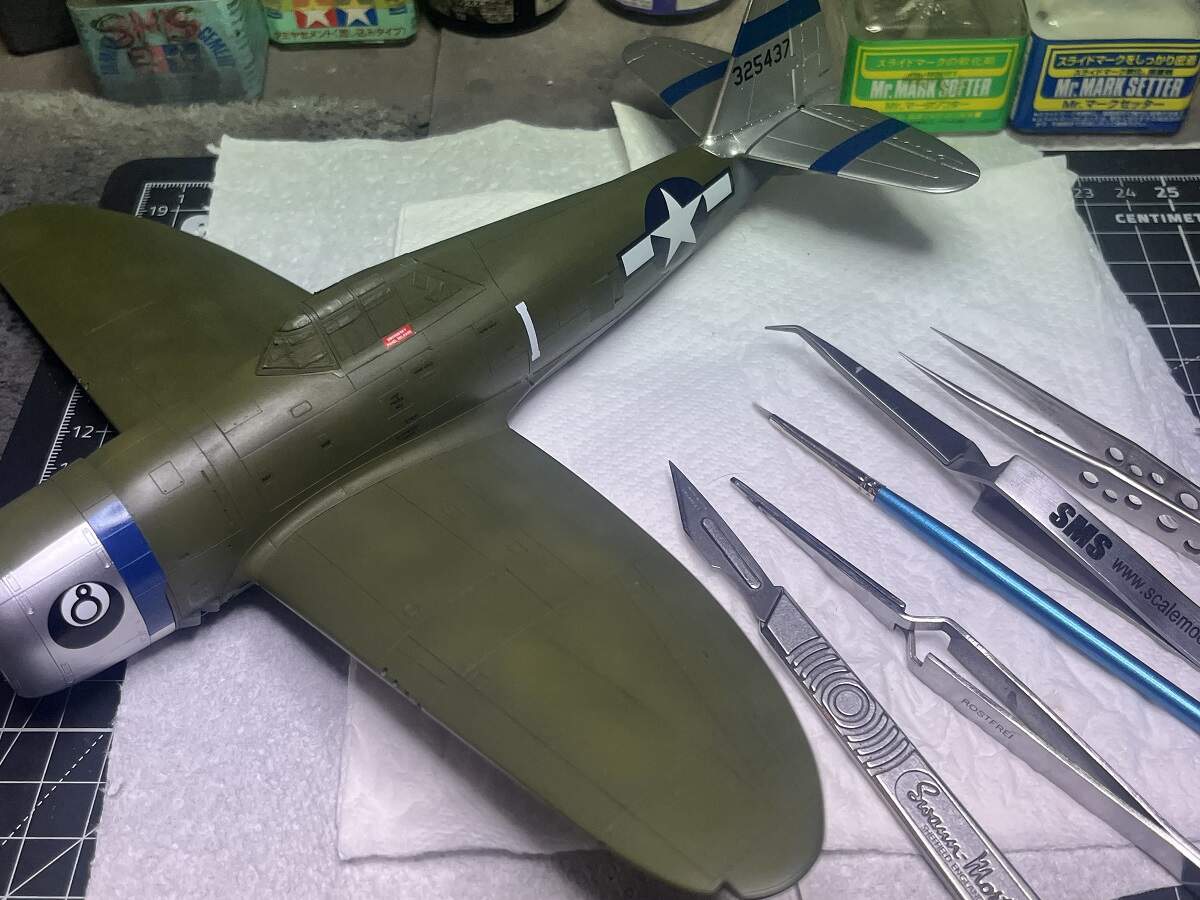
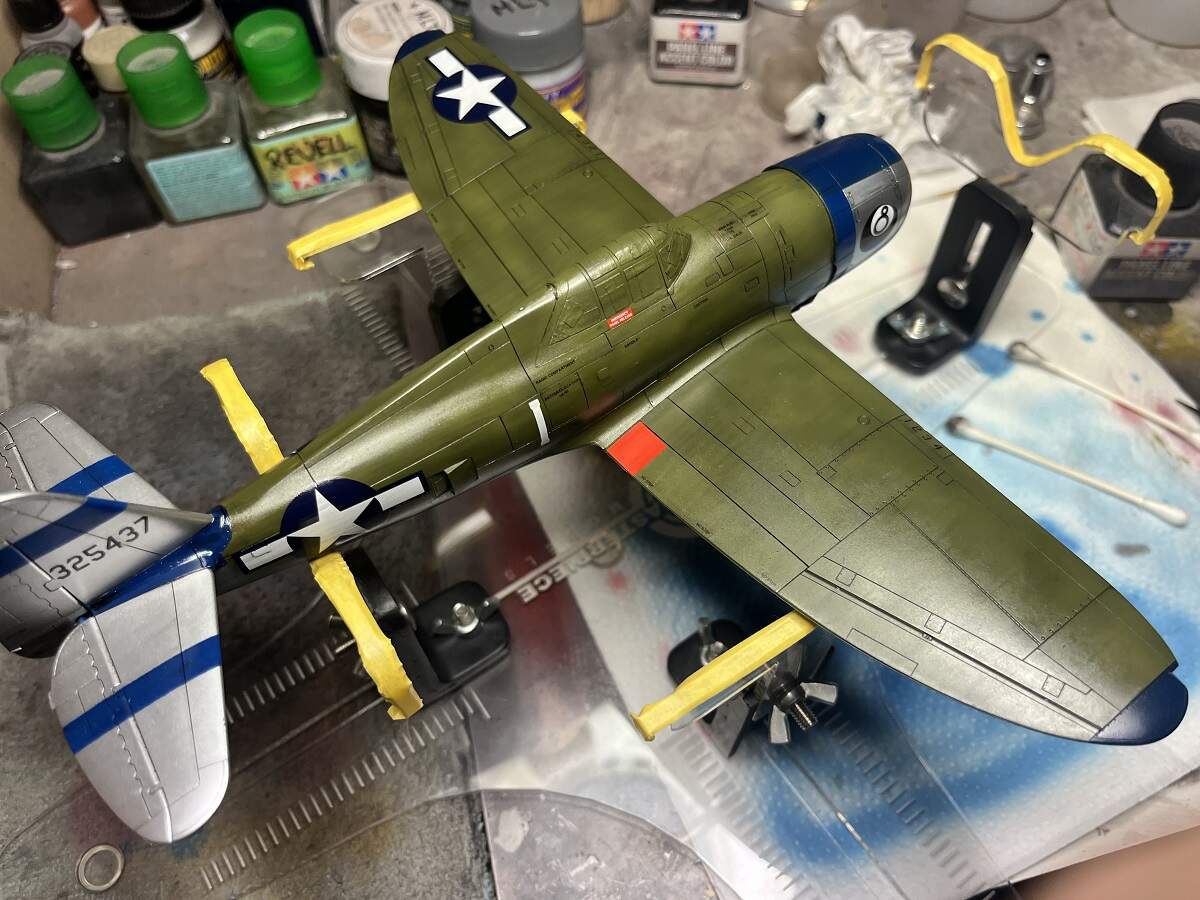
While the Mr Mark Setter was doing it’s thing on “Miss Mary Lou” I got to work on the port side decals for “8 Ball”. These Thundercals are an outstanding product, highly recommended!
Cheers, D
8 Likes
Ok folks, further decal updates!
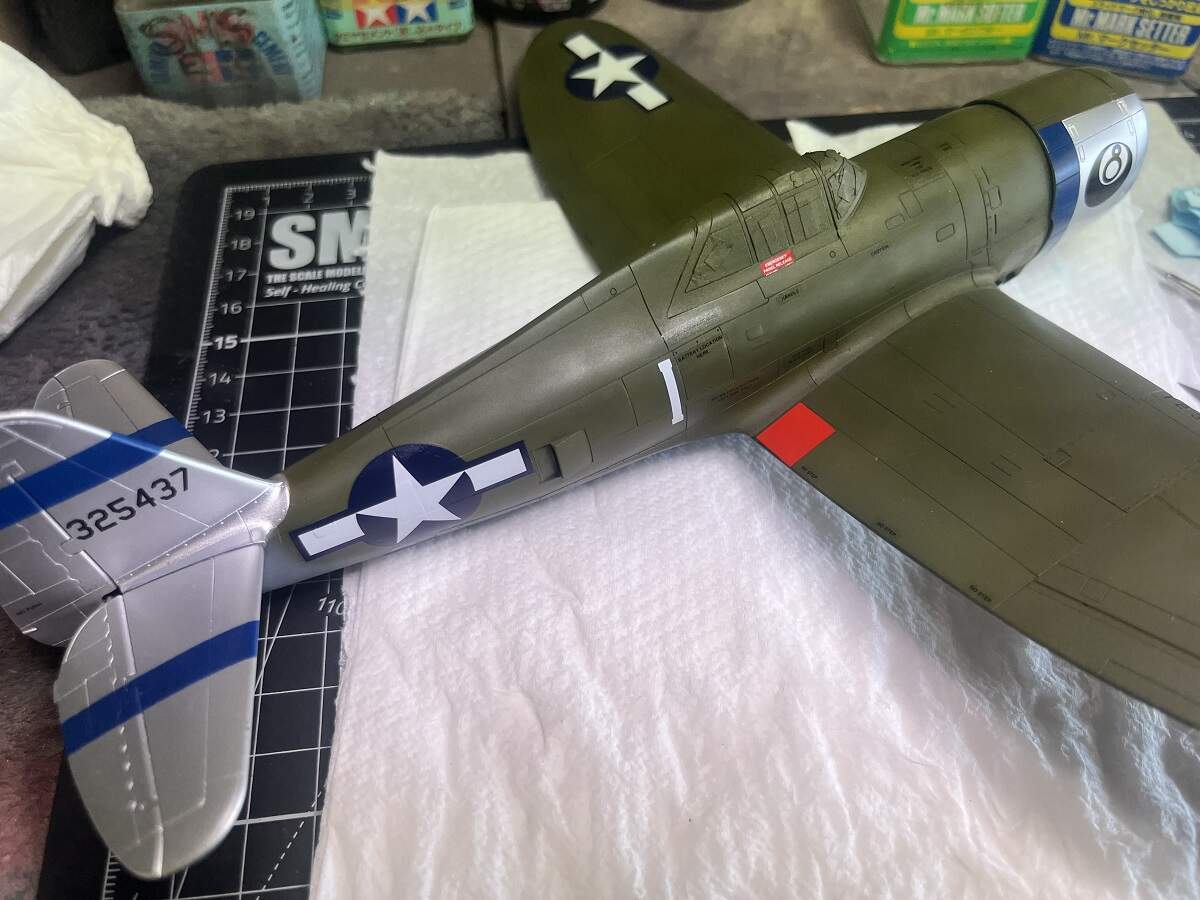
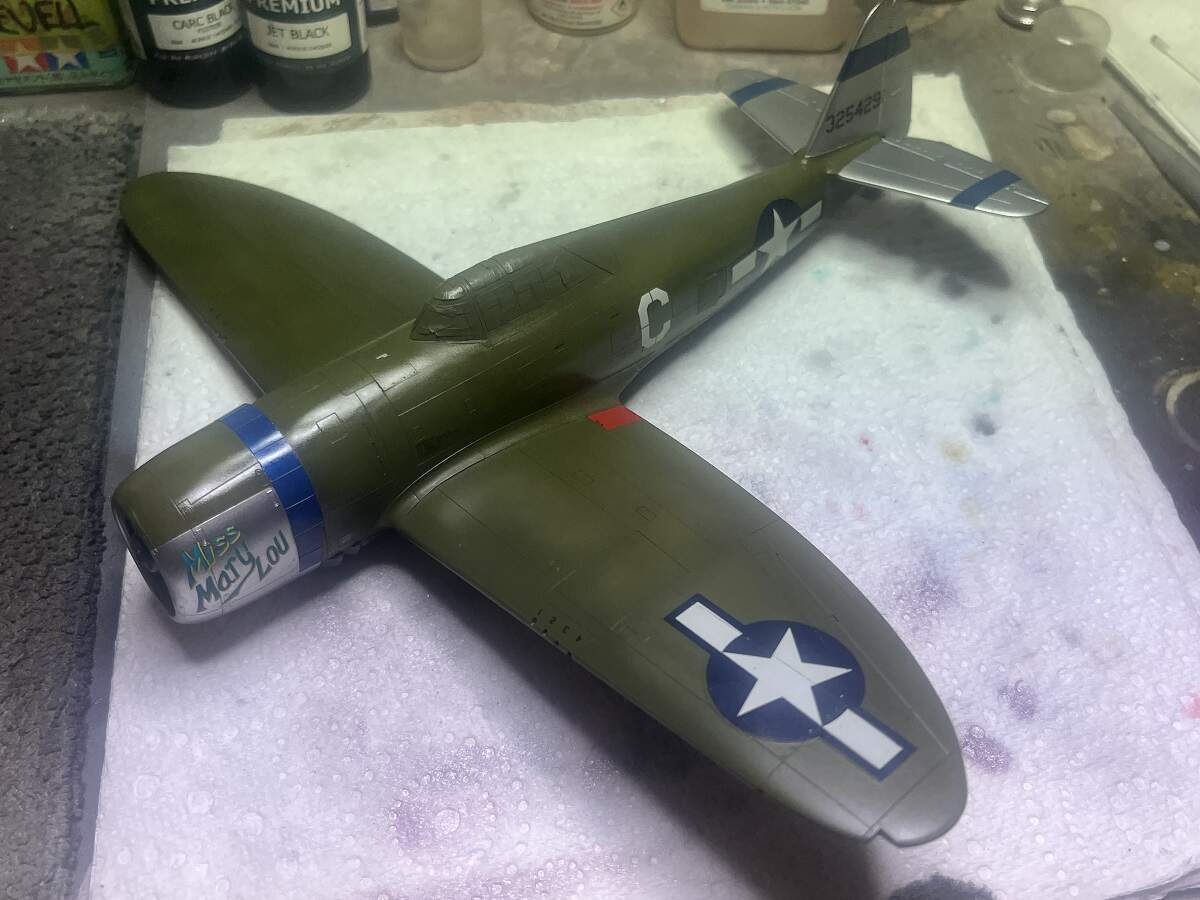
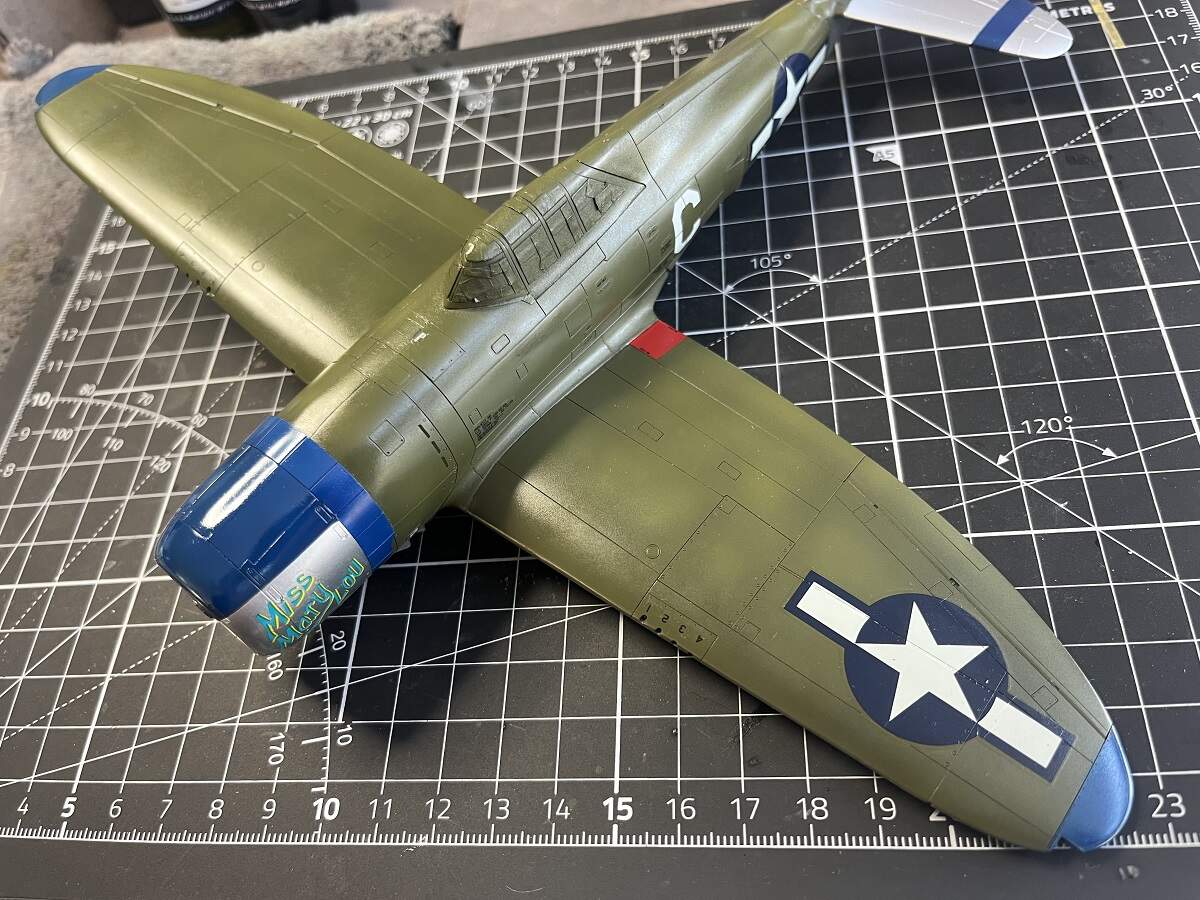
Starboard side and upper wings on “Miss Mary Lou” all done. Once again the nose art gave me a bit of grief but nothing that couldn’t be overcome. A couple of underside markings and stencils then the main assembly is ready for a satin clear.

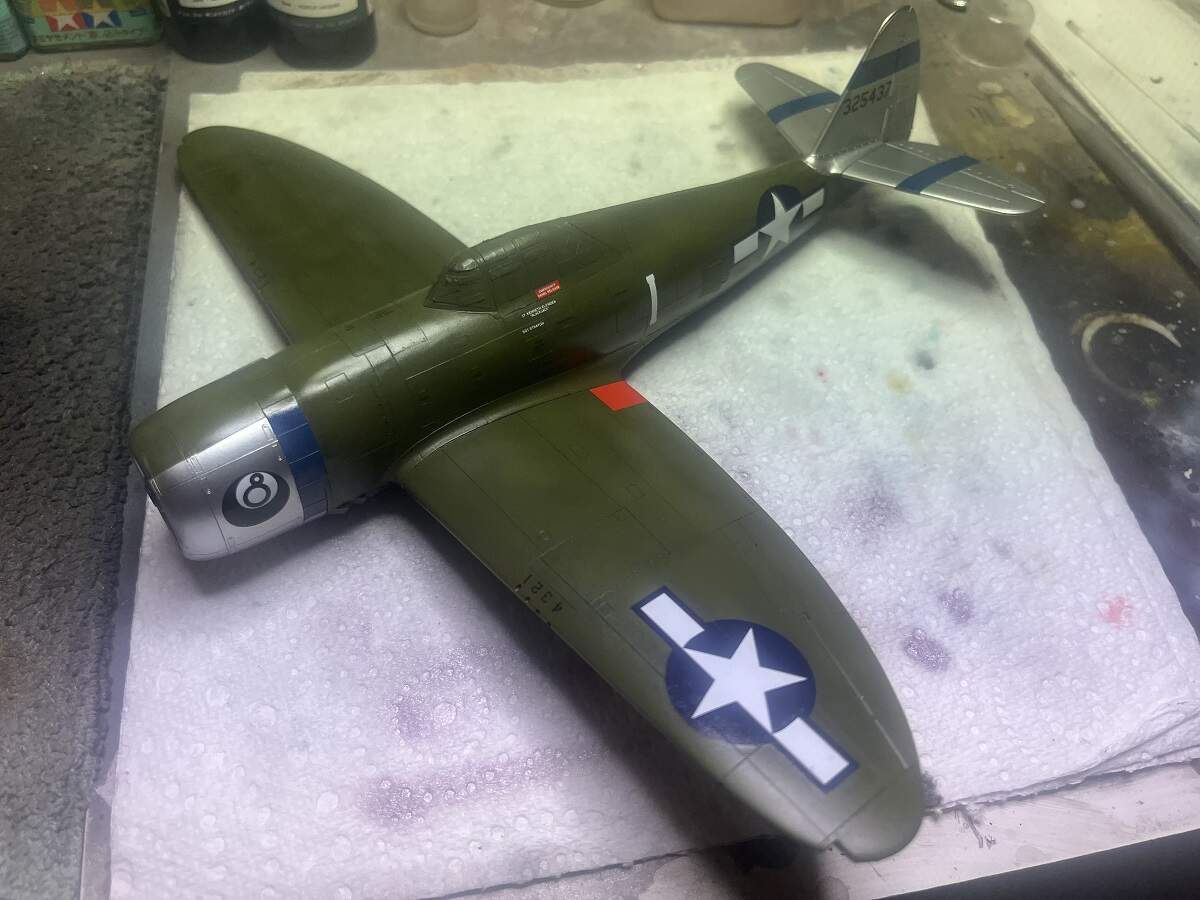
Upper wing insignia on “8 Ball” shows the quality of the Thundercals decals. Beautifully conformed to the paint surface and all surface details with just a light shot of Mr Mark Softer.

Upper wings and fuselage decals all set in place, just a couple more to add to the underside.

Cheers, D
9 Likes
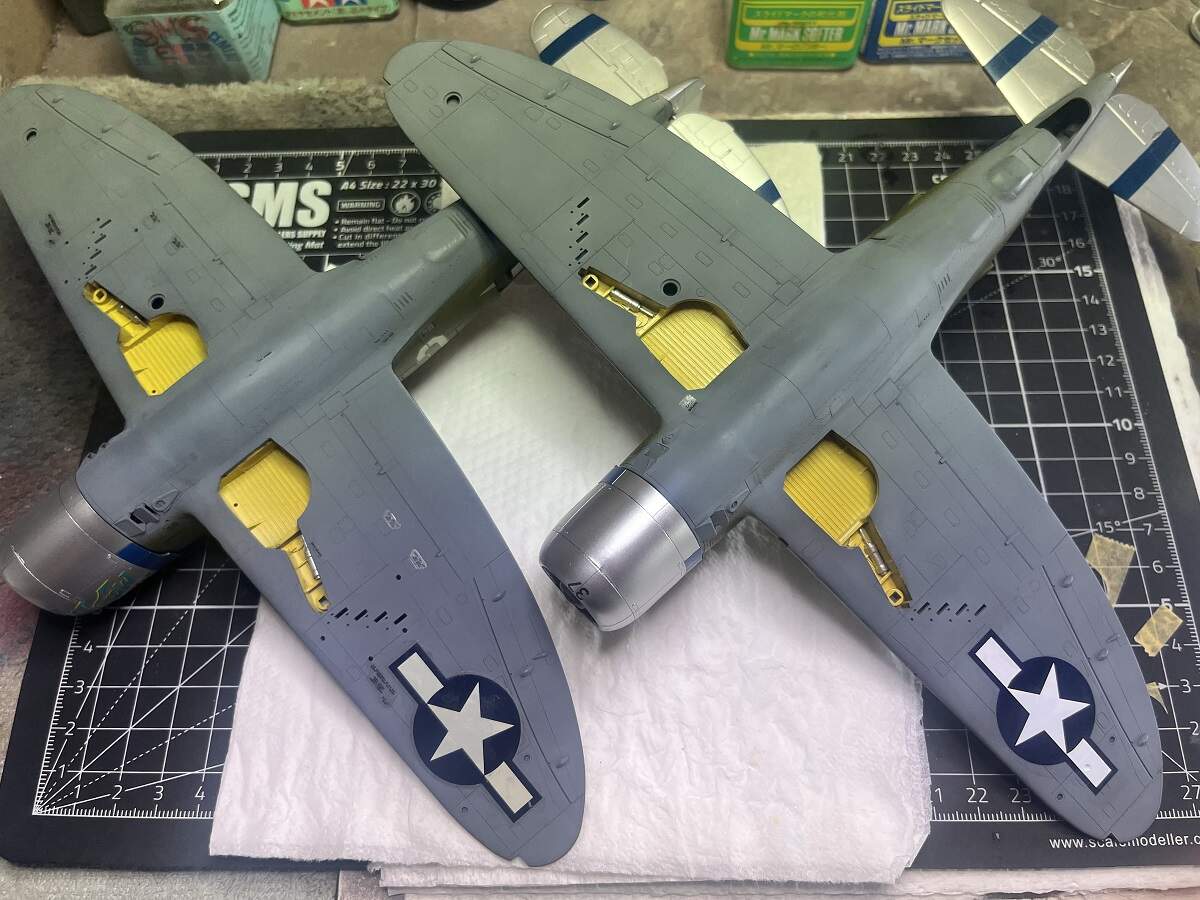
Underside decals on both are in place now.
There are a couple of persistent wrinkles on “Miss Mary Lou” insignias, even after 3 doses of Mr Mark Softer, so I need to up the game and hit them with something stronger to get them to settle down. I’m thinking a drop of Tamiya Extra Thin to melt them down might just do the trick.
Cheers, D
6 Likes
I’ve had a few days off this project while the Hasegawa kit decals got retouched, and during that time I have been having an email conversation with Norris Graser from Thundercals around the paint schemes and markings. A few things have come to light since the kit decals were produced which will mean some reworking for me.
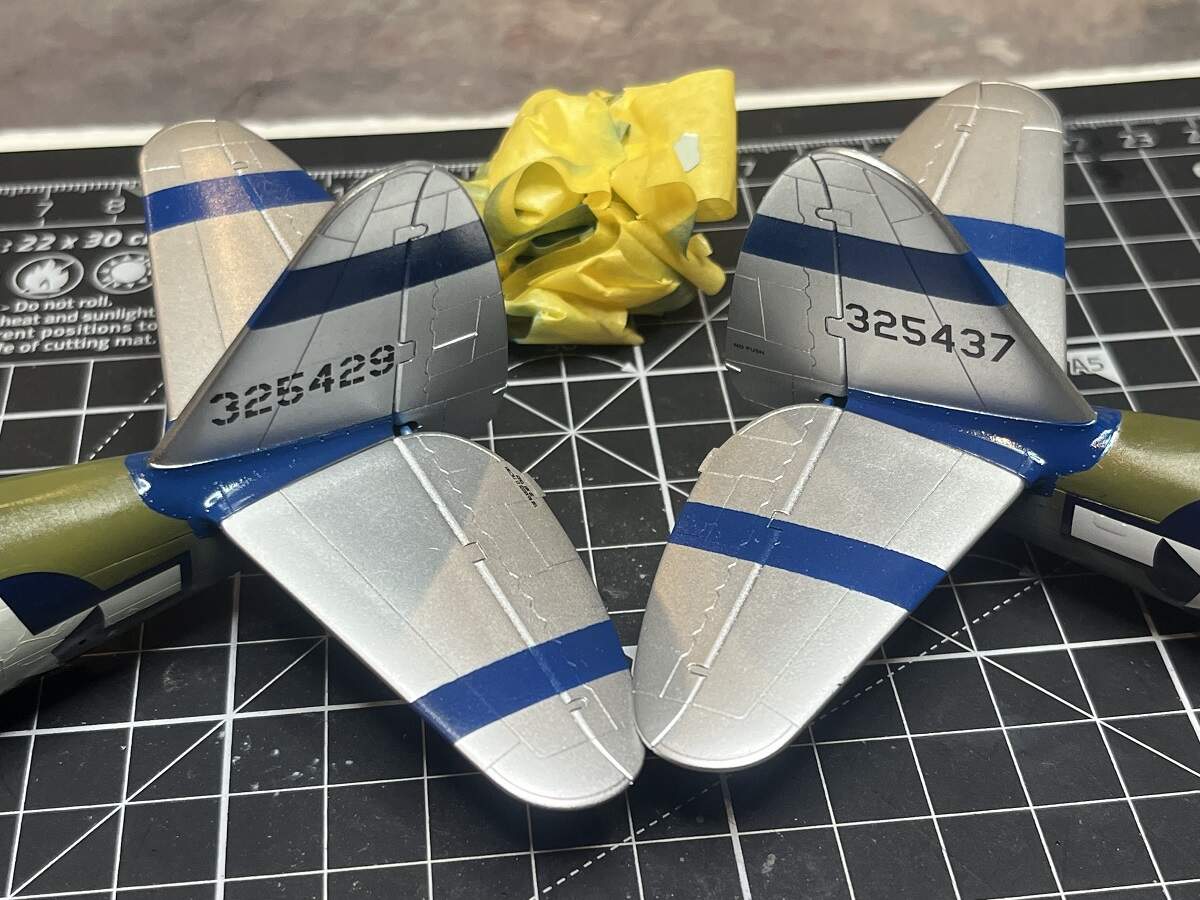
Firstly, I need to mask and repaint a couple of areas blue, namely the cowl anti-glare, wingtips and the panels between the vertical and horizontal stabilizers.
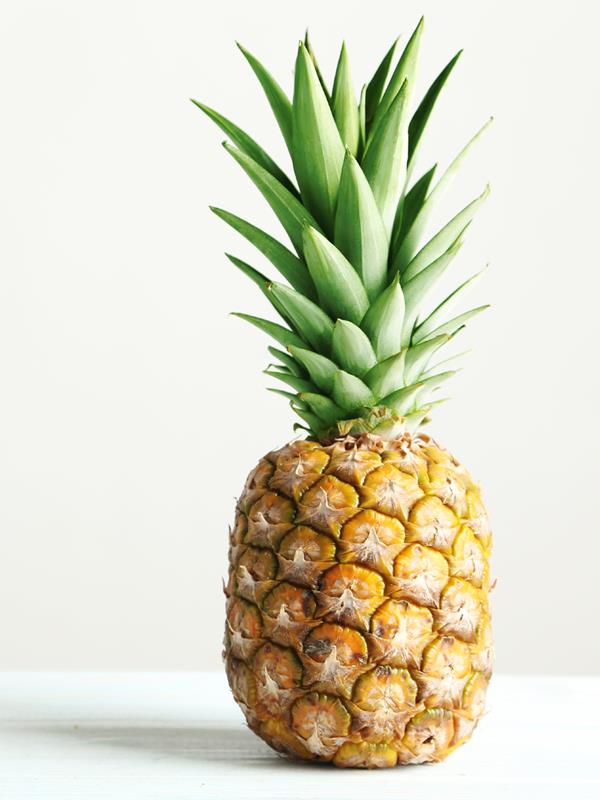
Secondly, I need to remove the kill markings from “Miss Mary Lou” and replace with Pineapples whioch Norris is kindly sending to me.
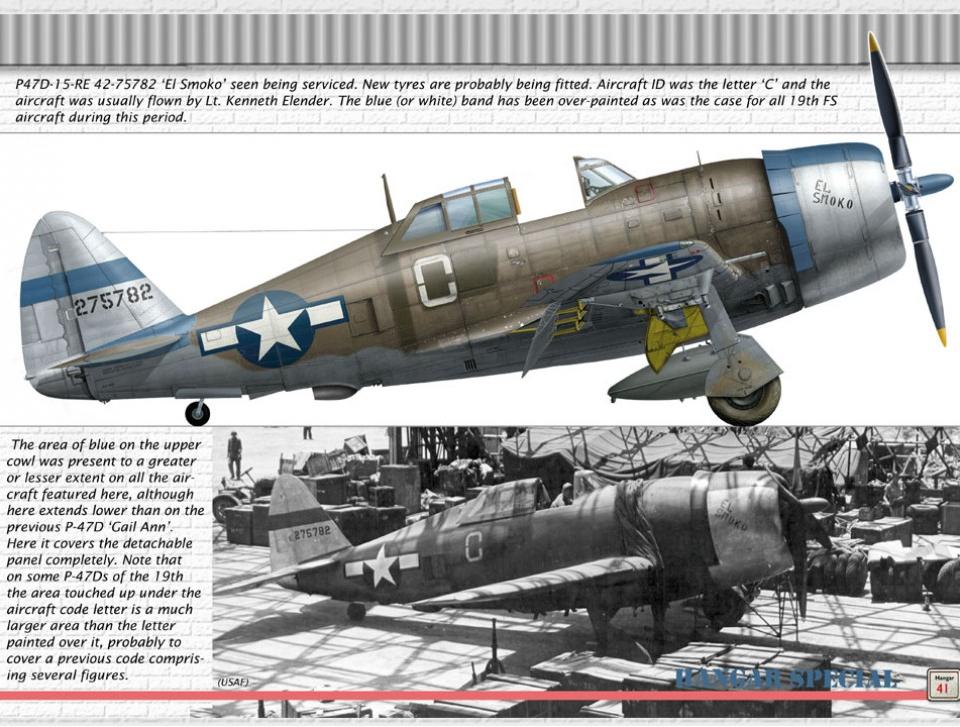
The 19th was part of the 7th Air Force, also known as the Pineapple Air Force. More than a few of the aircraft assigned to 19th pilots were so designated with the pineapples. Each pineapple represented 6 months’ time spent in the 7th Air Force. So, the pilot of Mary Lou was there for 2 years when applied to his P-47. They didn’t represent enemy aircraft shot down.
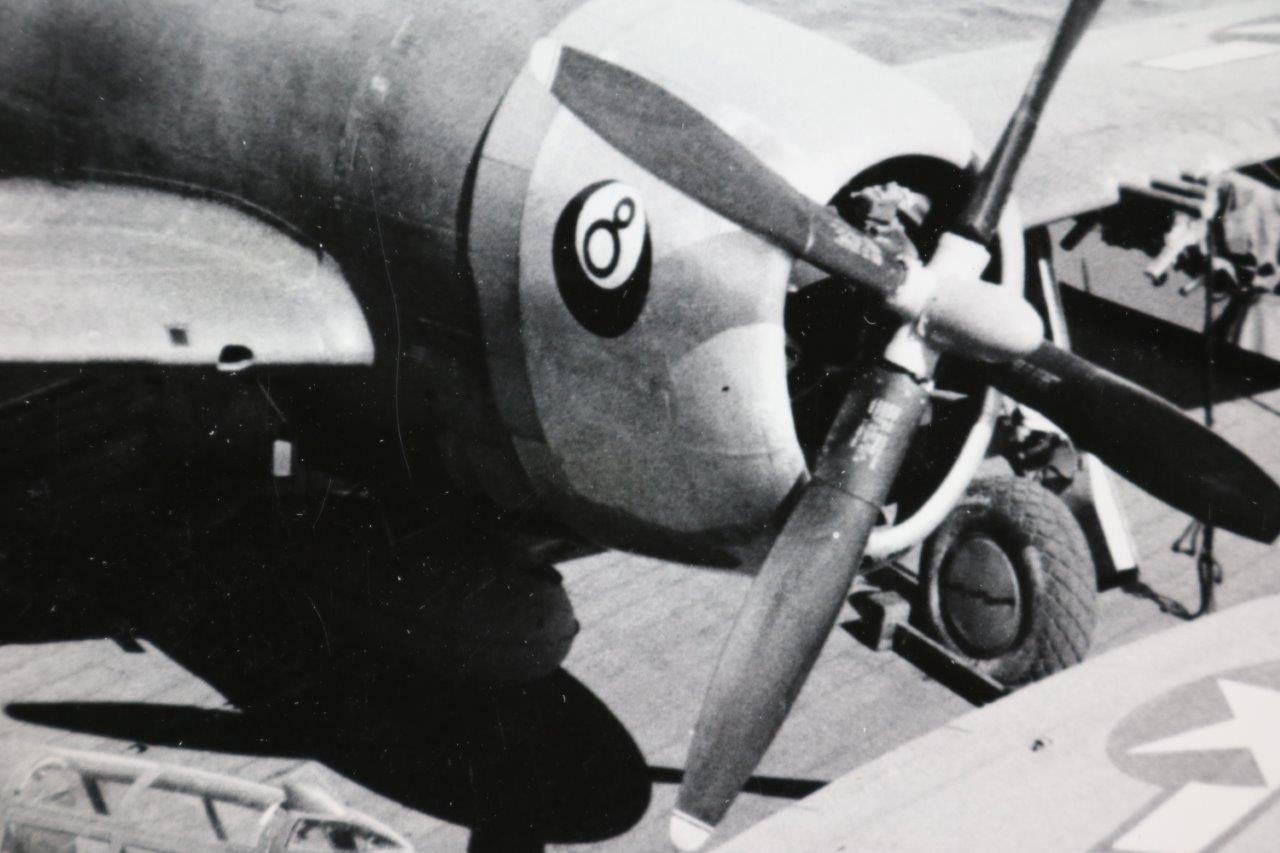
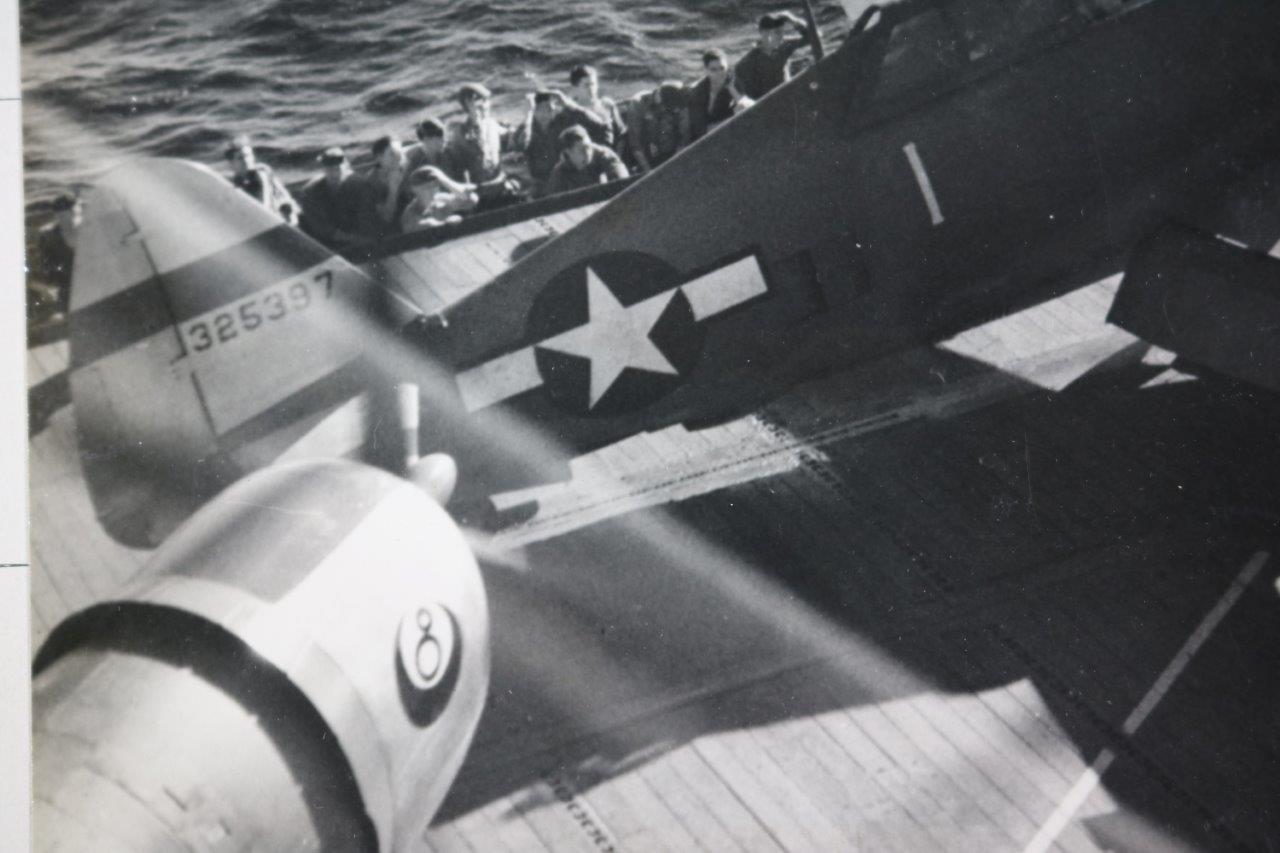
Norris also sent me a couple of images of “8 Ball” taken on a carrier on the way to Saipan which show the prop blades, and the following info.
When you get to the prop, use the kit 12’2” bladed prop, as indicated in the instructions. This was NOT a Curtiss Electric prop, though. Don’t add the C.E. logo if noted in the Hasegawa instructions.NO logo used at all. Instead, use a horizontal black stripe through the yellow tips denoting that the prop was an Aero Products set of blades.
Hugely grateful to Norris at Thundercals and it is wonderful to have a manufacturer proactively support the product and the hobby.
So, course of action now is to remove the kill markings on “Miss Mary Lou” first up, then clear coat both kits to protect the decals, then mask and paint the revised blue areas. Also noted that the Tamiya X-4 is too dark, my plan is to lighten it with some white oil paint as a dry rub to get a faded paler blue after the final flat clear is applied.
Cheers, D
9 Likes
Managed to get some Tamiya X-22 Gloss Clear on both kits today to protect the decals.
“Miss Mary Lou”
“8 Ball”
I will mask up for the Blue areas on the cowl, wing tips and tail area next.
Cheers, D
7 Likes
LOVE that diffused light effect! Seriously cool looking replica.
1 Like
Thanks for showing photos of the original, D! I only know some in a Squadron book. So now I need to get some … ![]()
2 Likes
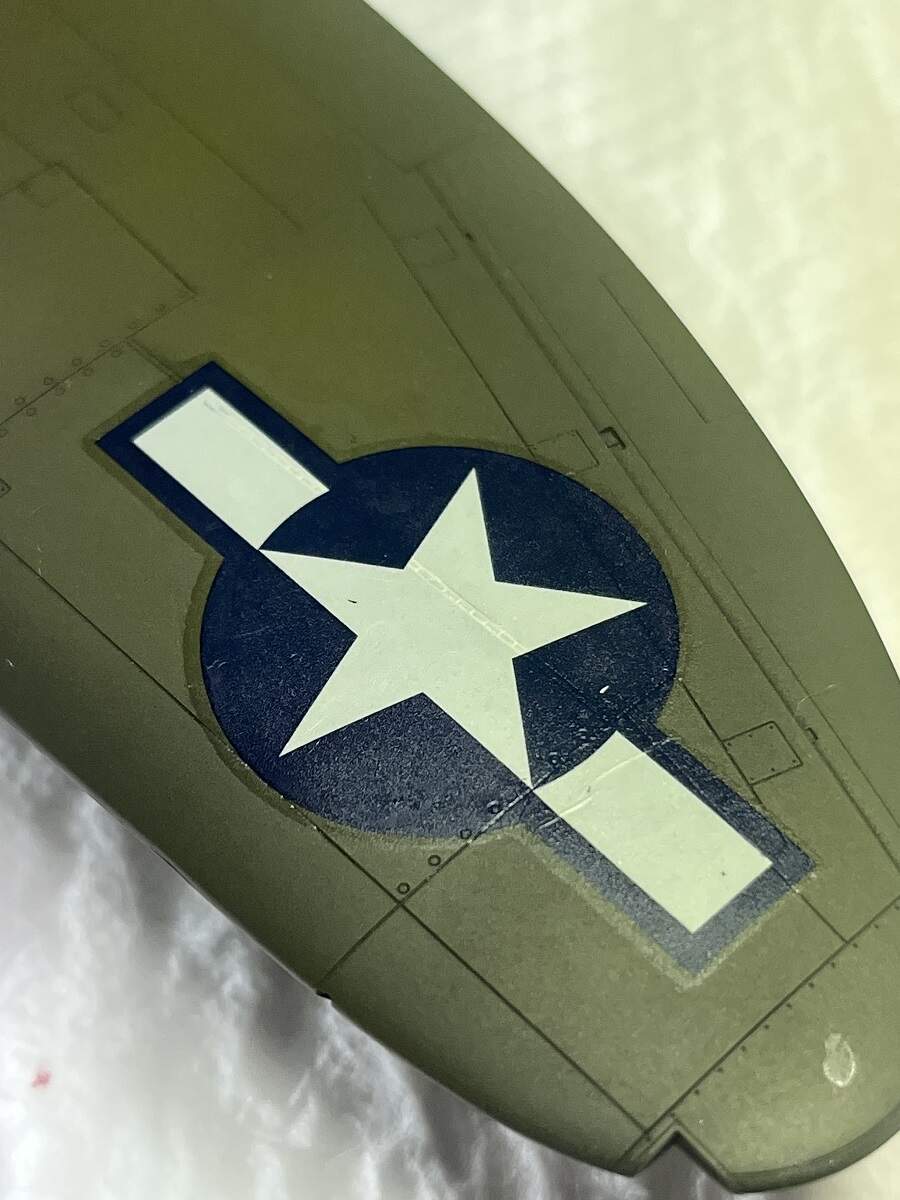
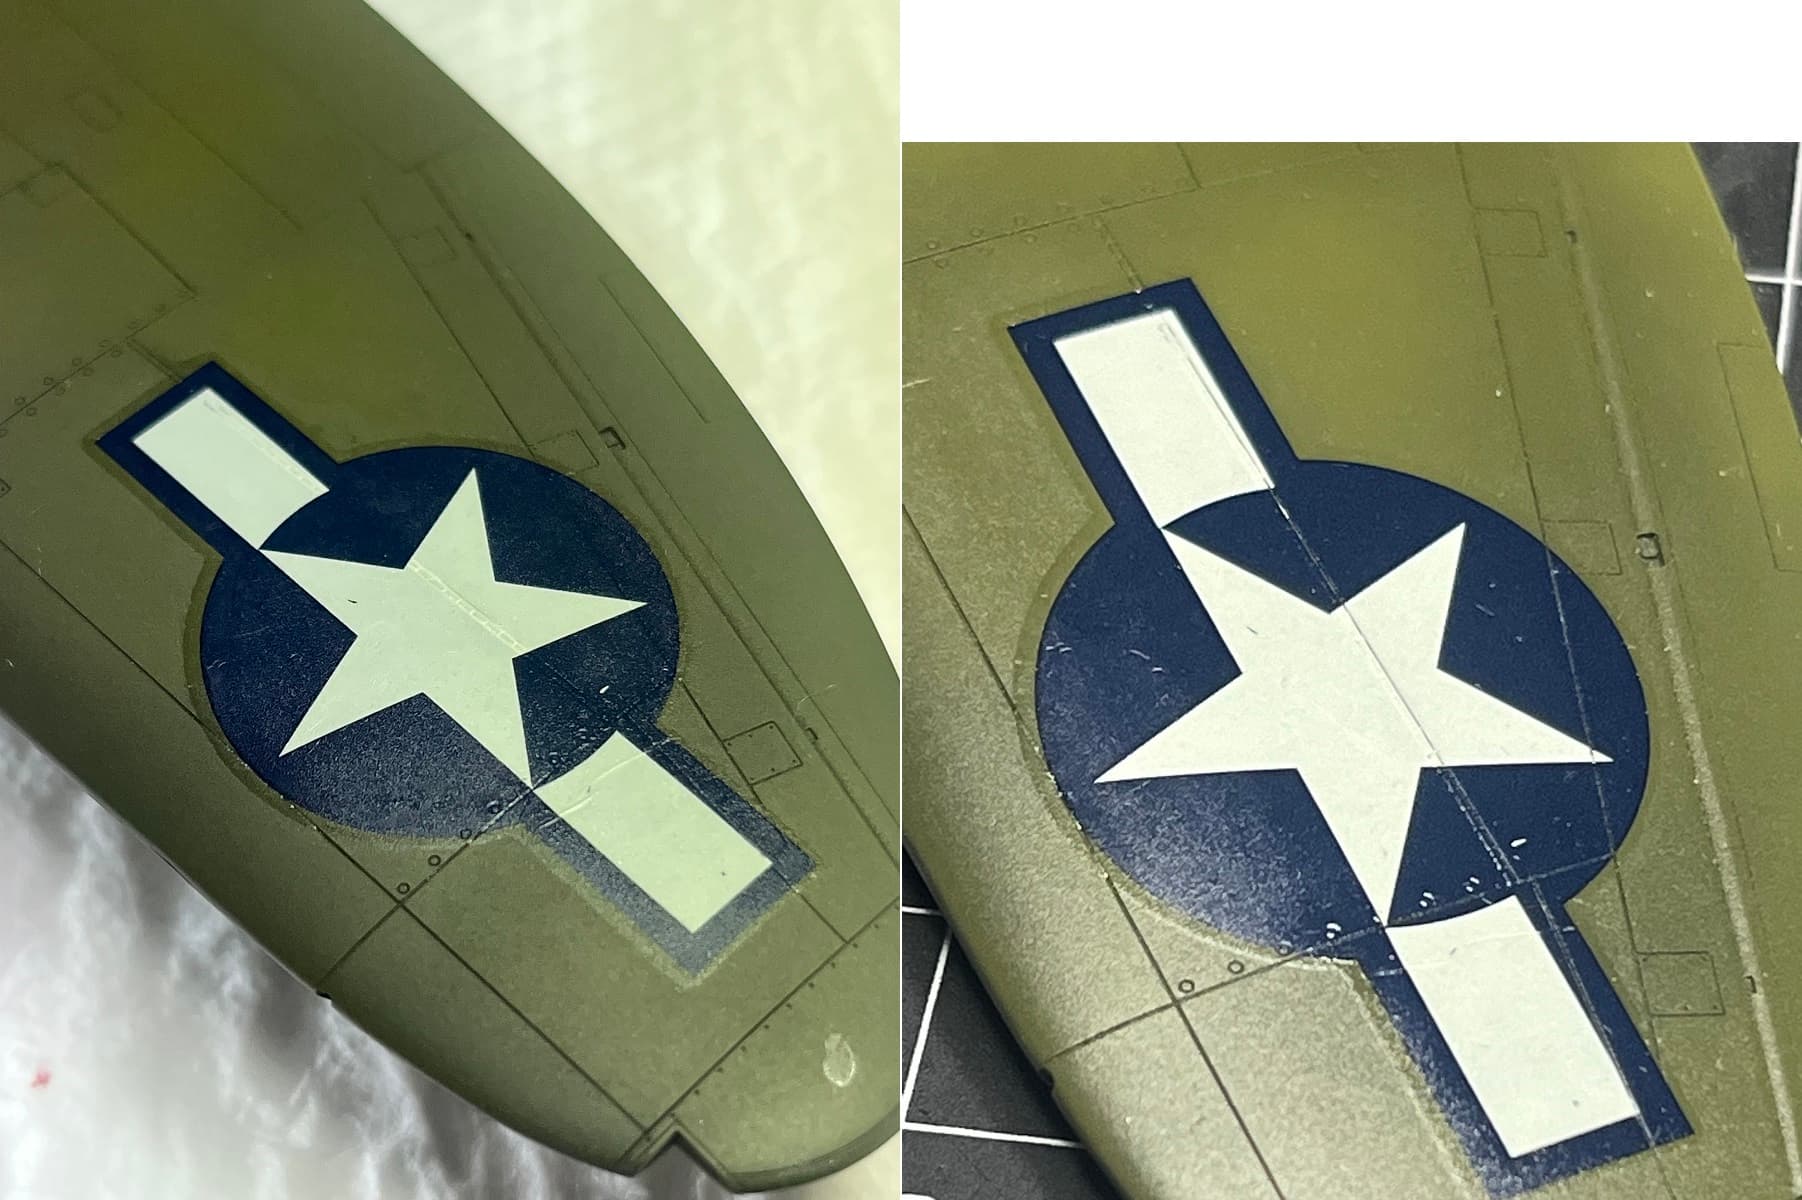
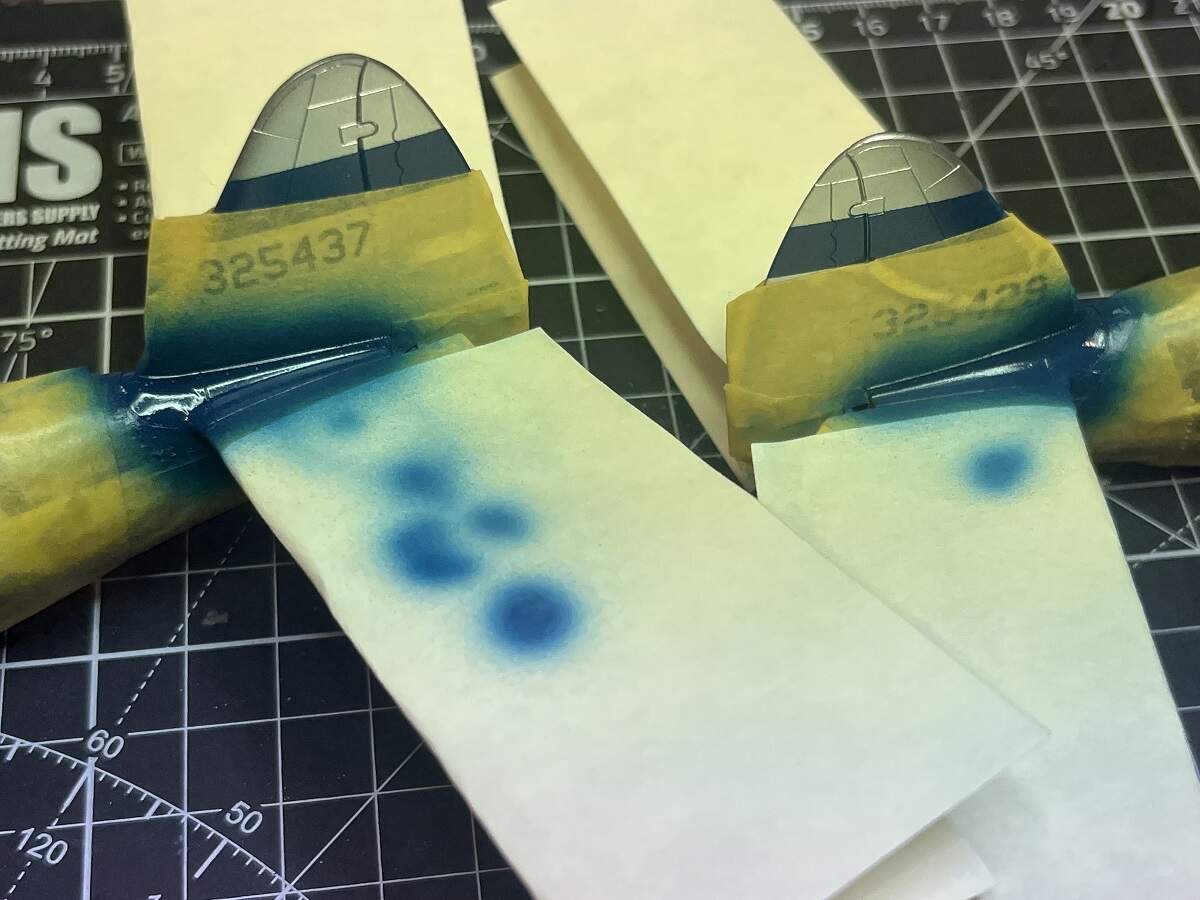
Reporting back in more detail on the Hasegawa decal shenanigans. Before and after shots. Before shot was after 3 shots of Mr Mark Softer. I did some carvery of the panel lines and wrinkles with a fresh scalpel blade and gave a 4th shot of Softer and after 24 hours a tiny drop of TET on the wrinkle. Further drying time, the decal has settled a bit better into the surface detail and the wrinkle flattened out quite a lot. Supply of cares depleted (this is supposed to be a bit of a slammer build to start the year) then a light coat of Tamiya X-22.
Cheers, D
8 Likes
Perseverance pays off D . Never heard of or thought of using Tamiya Extra Thin on stubborn decals - learned something new now .
Thanks- RT
1 Like
Thanks RT. The TET trick I picked up from a couple of Facebook groups I haunt. It’s a last resort nuclear option and needs to be done extremely sparingly. It basically melts the decal material into the surface ![]()
Thanks for checking in as always mate.
Cheers, D
1 Like
I was out of town for work last week, glad to be back and get some bench time!
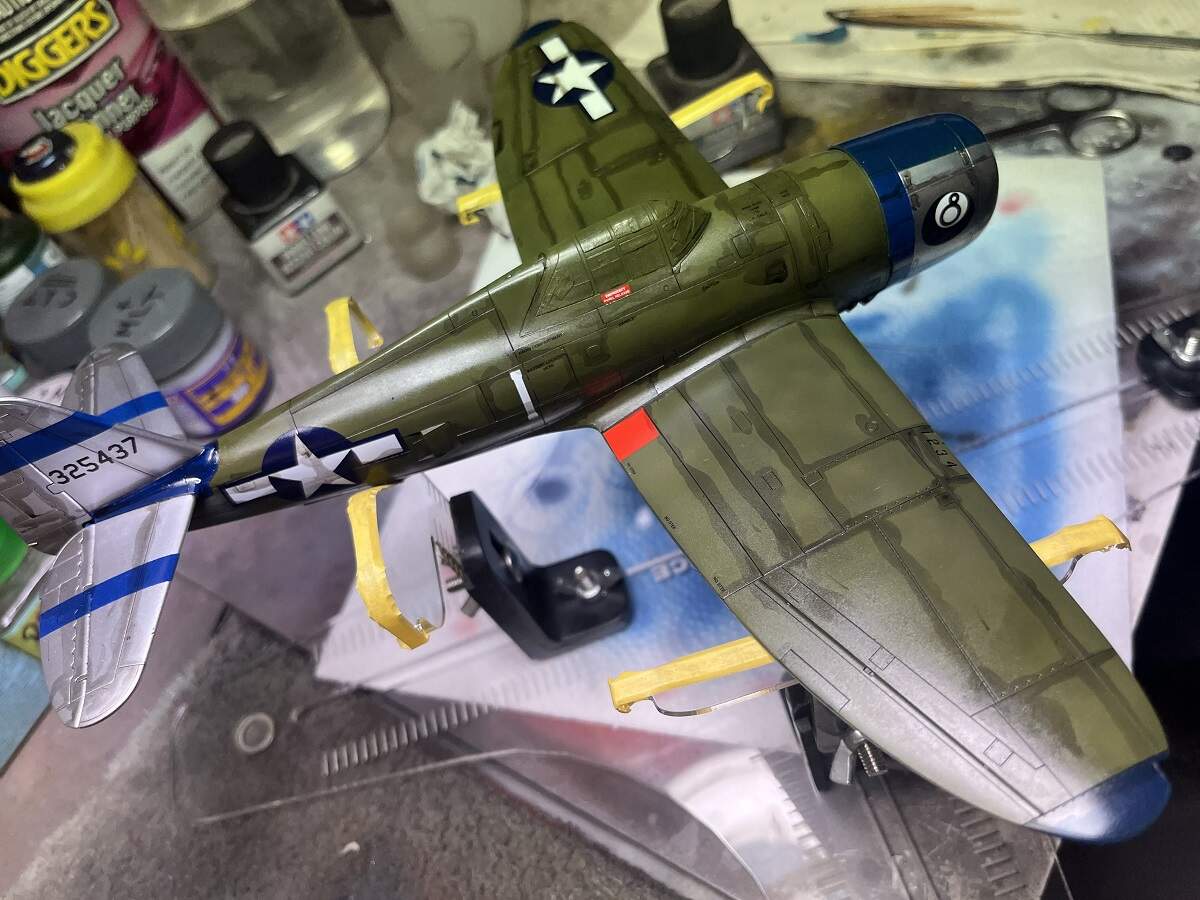
A quick session with some narrow strips of masking tape and Post-It notes to protect from overspray, and the anti-glare panels and wing tips are resprayed.

The panel between the vertical and horizontal stabilizers will take a bit more finesse with the masking, a session all to itself I think!
Cheers, D
12 Likes
Both are looking great so far, D! ![]() Close to the finish line now …
Close to the finish line now … ![]()
2 Likes
great work on these. manufacturers don’t give pacific theater army aircraft enough attention IMO especially the mustang. good to see some pto builds
i made a resin copy of the cockpit of a hasegawa bubletop to replace an inferior cockpit in a monogram razorback. i just removed the armor head rest.
Joe
2 Likes
Richard i have some additional research to add to your experiment. while decaling a current stockcar i ran into issues with decal integrity. i applied LDF as you did and applied the decal as described. my results was that the LDF caused the decal to stiffen and curl upwards slightly. the micro set did little to settle it down. i fell back on using walthers solveset and the decal conformed on it’s own. it may be dependent on the decal brand as to how well one or the other works but to me the decal film is not as responsive to the microsol.
3 Likes
That paint job is going to turn out %$#@* awesome!
1 Like
Those are looking really good Damian. Don’t know how I missed your builds until today.
2 Likes
Thanks so much for the feedback gents, always very much appreciated.
Mask and paint on the tail end, a bit ugly but sort of got the job done. A lot like yours truly I suppose ![]()
![]()
Cheers, D
10 Likes
Great binge catch up with this one. Brilliant work with the underside gaps and the paint and decals. Both look superb ![]()
2 Likes
@Johnnych01 , thanks for the kind words, glad you are enjoying my adventures!
Watching a good thin panel line wash capillary along the surface details is definitely one of my favorite parts of the whole process, and gently wiping it away to start building up the weathering and patina is just so satisfying!
Tamiya Black Panel Line Wash and AK Interactive White Spirits.
Cheers, D
11 Likes