Hello,
Does anyone have any tips on removing decals safely without damaging the underlying paint clear coat and paint?
I’m currently building the AMT Romulan Bird-of-Prey and the supplied decals are awful. They cracked and refused to conform to curves. Did my best with them, but after looking after them had dried they looked bad and needed replacing.
My usual method of using tape to pull them off hasn’t worked. They’re really stuck down!
Replacements by JT Graphics have arrived and ready to go.
Thanks
Did you try soaking them with decal softener and scrubbing with a brush? That worked for me on some small decals.
1 Like
Thanks. I’ll give it a try. Got Microsol and Set and some stuff by Gunze and Mig. Hopefully one will work.
Microsol has worked for me in the past too.
1 Like
Laying some masking tape over them and pulling it up can work well. Even when you don’t want it to! 

Maybe try this after you’ve soaked them.
Cheers, D
My decals are MicroSet on for good, so tape didn’t work for me. 
I tried the MicroSol (red label) method just now, and it eventually softened the decal enough for removal. However, the underlying acrylic paint layer came up with it. Note: This could be attributed to user error. Since I was already prepared to repaint the area, I hurried the process along — just glad to get the decal off.
Thank’s guys!
—mike
1 Like
I had a similar issue with some aftermarket decals for the Hasegawa 1/32 Hayabusa kit. The ones that came with it were trash and the ones I ordered were the only ones available on the internet, but the Hinomaru on the upper wings would not lay down no matter what I threw on them. So I guess I will try the tape method and remove them, but since I don’t have an adequate cutter for masks I don’t anticipate a good result trying to create a mask. And of course the Hinos on this kit are a different size from all my other Japanese aircraft kits so no swapping.
1 Like
You could try using one of these…great for cutting circles.
Cheers,
1 Like
I actually have one of those, but my last attempt with using it did not go well.
Try putting wide blue painters tape on a piece of waxed paper. Then, tape the edges of the waxed paper-layered tape down on a smooth wooden surface (I use a relatively um-marred table top). The compass needle needs a surface to “bite” into, but the cutter will do best across a fairly smooth surface.
Once you cut the circles out of the blue tape, they will peel off of the waxed paper pretty easily.
I use tape over a waxed paper release for all sorts of simple masks. I even slip a tape-waxed paper square into my Waldron Punch and Die to bang out tiny round masks for lights and scope lenses.
I’ll try the wax paper. I was cutting them out before on my hobby mat which likely distorted them as I peeled them up and the mat’s rubber probably didn’t keep the cutter centered firmly. I have plenty of wood scrap I can use next time.
The waxed paper works really well as release-backing material. I’ve also cut a lot of stars and other designs using PE stencils over painters tape on waxed paper.
The wood isn’t so important as is having a smooth surface that will also hold and keep the compass needle from slipping. I just use a convenient wooden table top, but I’ve also cut masks using a Formica covered bench top (my painting bench top).
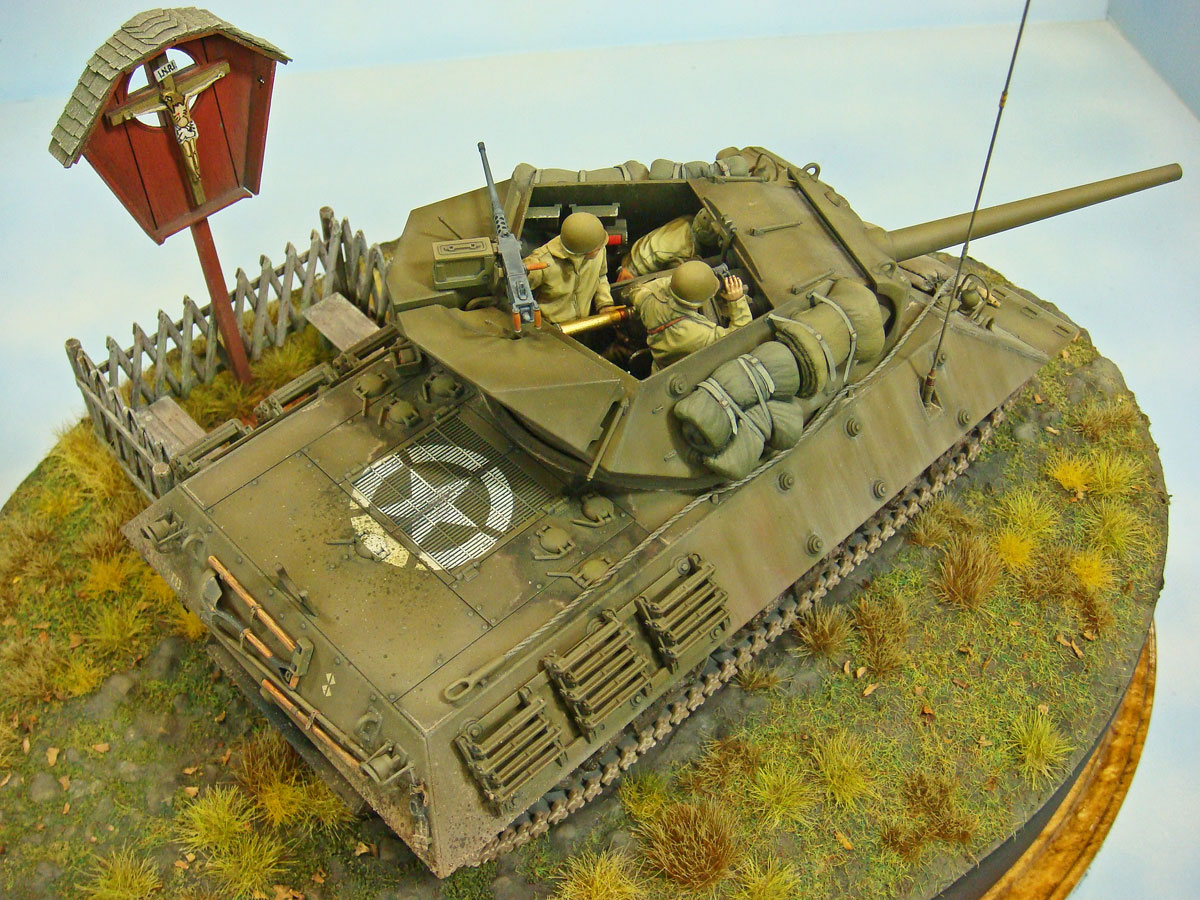
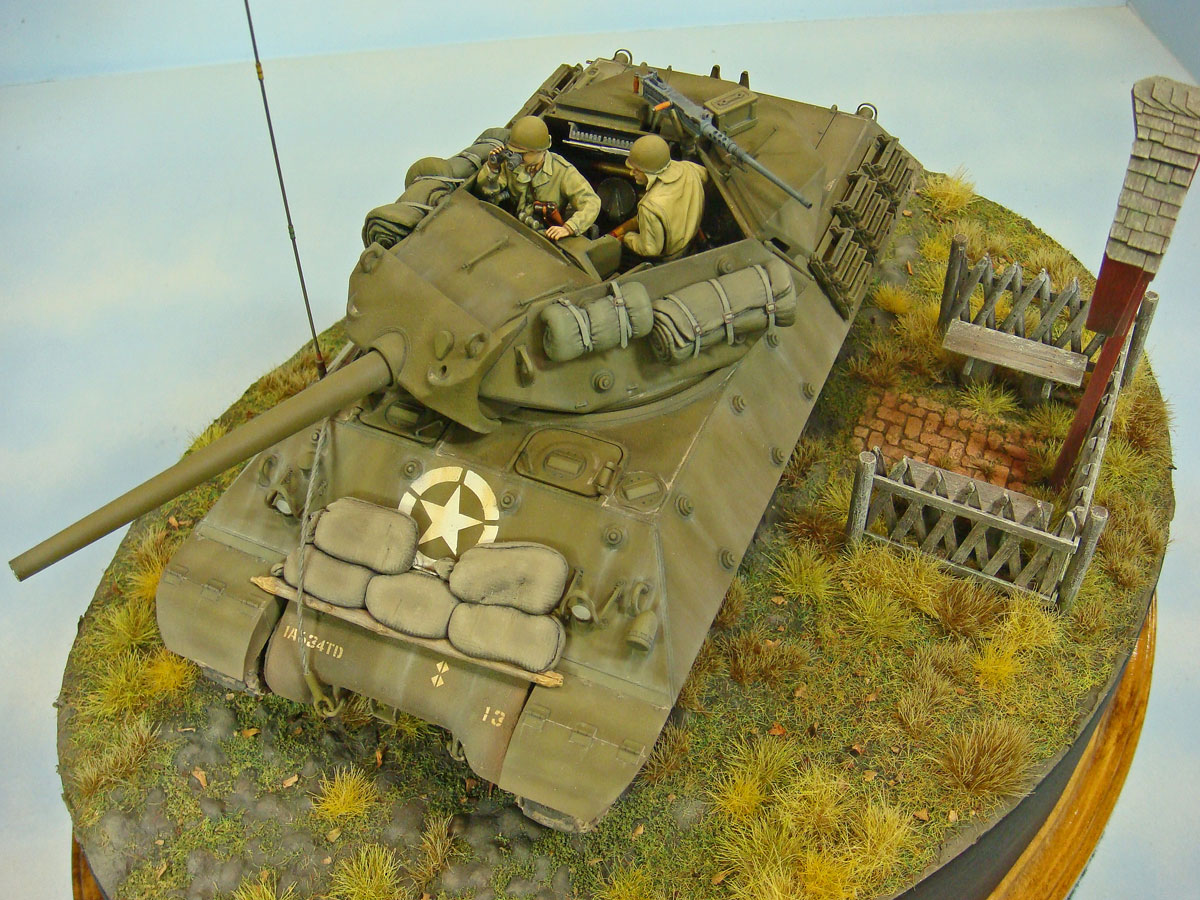
The stars on the Tamiya M10 in the photos below were cut out of painters tape on waxed paper through a PE stencil.
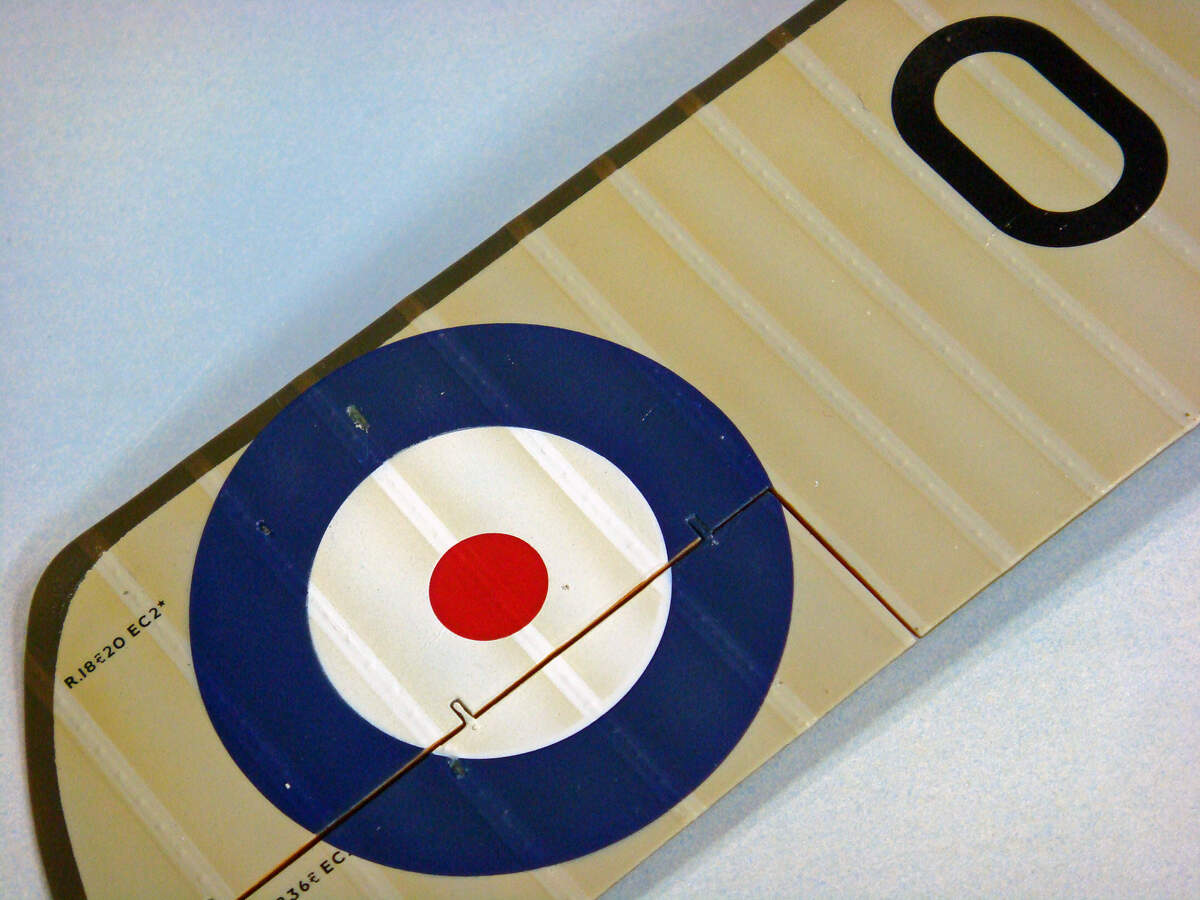
Circular stencils to mask around and over the different areas of these roundels to allow me to shade and weather them were also cut the same way. (I did use commercially available pin striping tape to mask the wing rib tapes.) The roundels were kit decals, but I wanted to shade them to match the rest of the wing colors, so masks and a whiff of airbrushing did the trick.
3 Likes