I want to add the lower part of the snorkel attached to the exhaust outlet commonly seen on some of the USMC M1A1’s.
I got the Meng M1A1 AIM snorkel and attachment plate from a friend who built his kit as the Army version so had the snorkel parts left over.
The Meng snorkel attachment plate is the same length as the RFM base plate on the exhaust but
unfortunately, the Meng part is not as high so the bolts don’t align with the RFM part.
RFM exhaust base plate on the left. Meng mounting plate on the right. You can see that the Meng part is too small.
Don’t even bother with the Dragon snorkel and base plate either as they are even smaller than the Meng parts. Dragon snorkel on the left.
Fortunately, some USMC M1A1’s used the exhaust diverter which RFM includes two of them on the “C” parts trees.
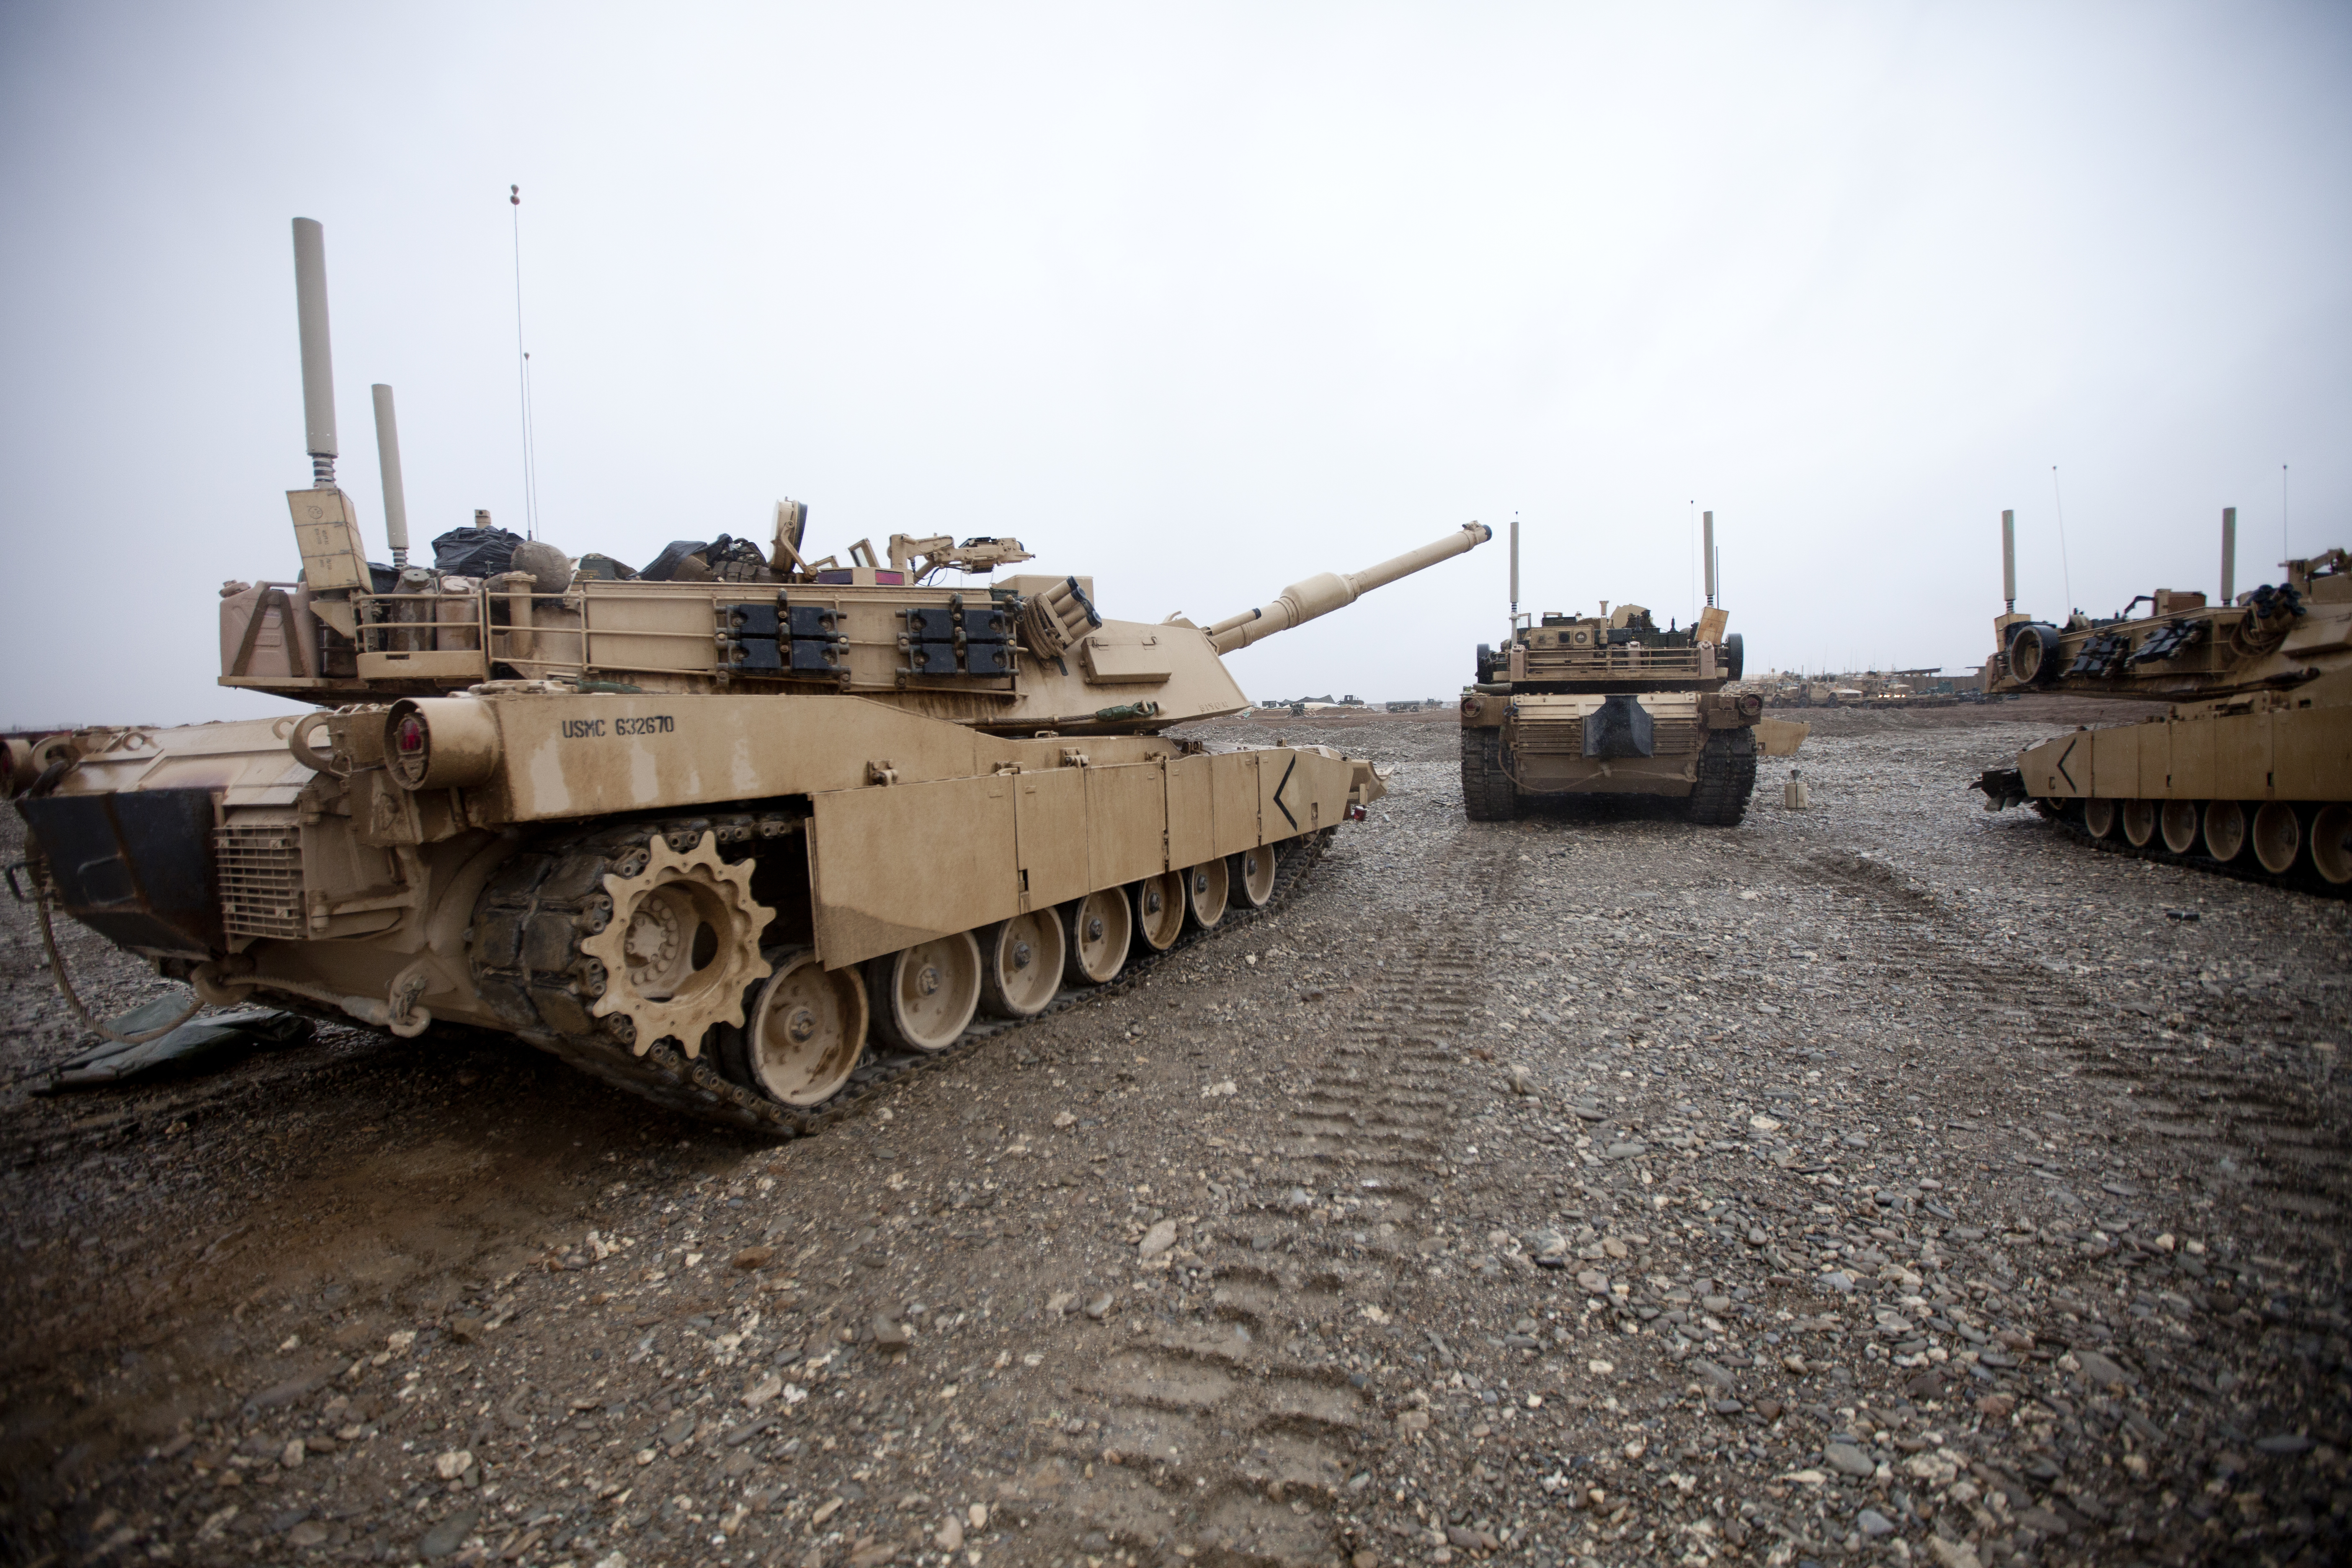
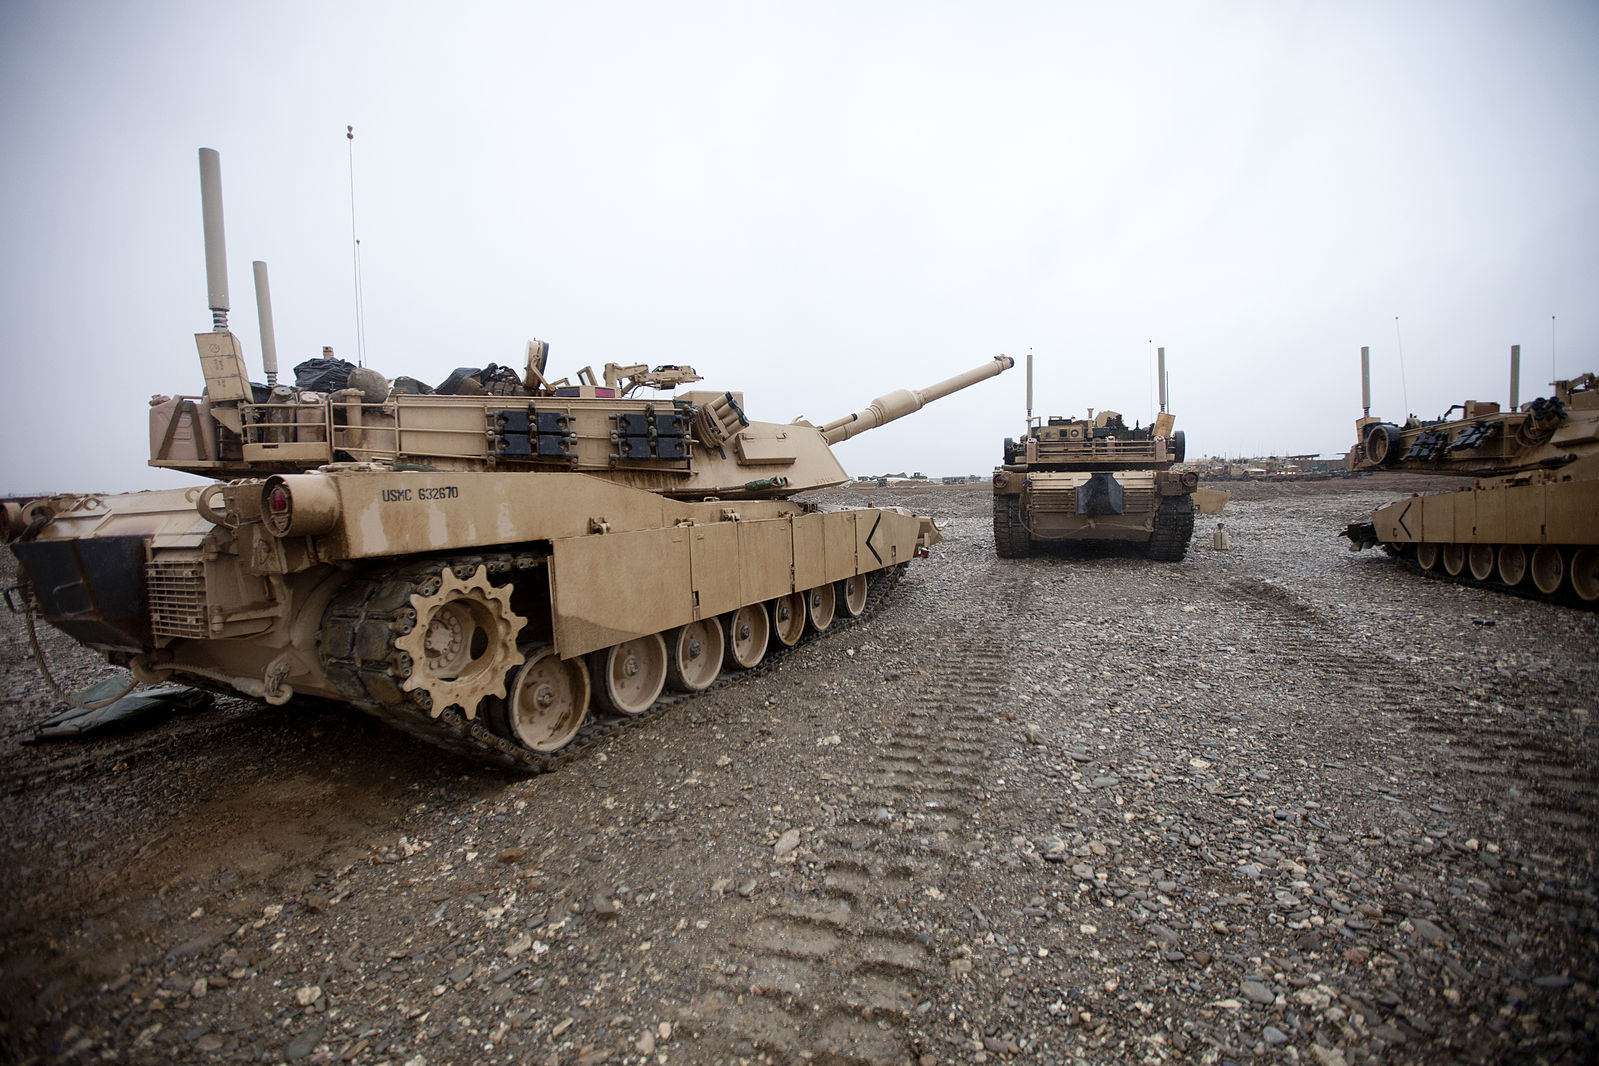
USMC M1A1 in Helmand Province with exhaust diverter and RFM part shown.
Link to this image shows the one each of the snorkel and diverter.
I only started on the lower hull and this is as far as I got. The belly armor is only dry fitted for now.
I have two of those RFM USMC M1A1 FEP kits. I plan to do one in the NATO camo with sand SCWS and dozer blade. This first one I will be doing as one deployed to Helmand Province. The particular one I would like to replicate has the M240 gun shield and blast shield as seen in the image below. I got the gun shield and blast shield parts from the RFM M1A2 SEP V2 parts tree “J”. Not sure if this one has the snorkel or exhaust diverter though.
Thanks! Yes, I saw that image already. I actually posted it above in my original post. I will more than likely just go with the exhaust deflector. I should have just gotten the Meng kit to begin with to do the one from Helmand Province. Only thing is, Meng forgot the two extra antenna mounts on the rear of the turret behind the commander’s cupola.
RFM includes them so if I do ever get the Meng kit, I can always use the RFM antenna parts on the Meng kit as I was thinking of doing a Ukrainian M1A1 SA and they don’t have those two extra antenna mounts.
Here are the RFM instructions showing the two extra antenna mounts, the “Q” parts.
My original post was pretty long so it was easy to miss.
The ones deployed to Helmand Province didn’t have the SCWS but they had everything else like the two extra antenna mounts, DUKE antennas, belly armor, M240 gun shield and some had the blast shields.
Some USMC M1A1 FEP’s with the SCWS and DUKE antennas were deployed to Kuwait in 2019.
Any help/suggestions are highly welcomed and greatly appreciated!
You aren’t slowing me down. I am actually a notoriously slow builder so if anyone is slowing me down, it is myself.
I am restricted by the weather as I can only paint outdoors. I live in a seasonal zone where the winters are long so I have a very limited window where I can actually paint. My painting season is between late spring to early summer where the temperatures are mild with very low humidity. Sometimes maybe early autumn is a good time too.
It isn’t just the weather that limits me, I am also taking care of elderly parents and have to take them to doctor visits two to three times a week and also have to do all their errands for them. I actually won’t get to work on the RFM M1A1 again until probably Wednesday next week.
There must be somewhere around 30 started kits in various stages of build sitting around in their boxes right now. I think at least 15 are already primed and waiting for their camo paint. The others are in different stages.
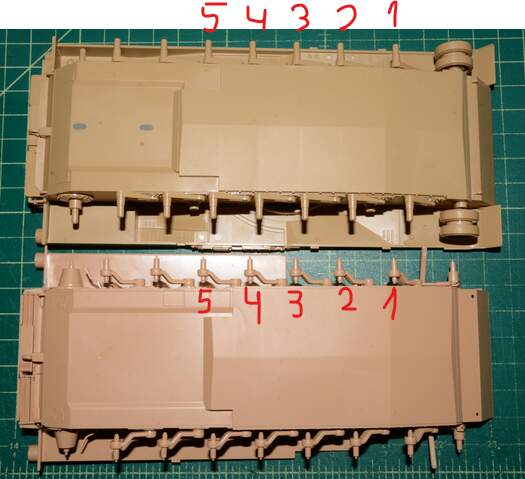
I have a Meng USMC M1A1 spare parts tree with the belly armor and am comparing it to the RFM belly armor. The Meng belly armor is longer than the RFM part. Does anyone know which is the correct length?
The Meng part is on the left. You can see that the Meng part is longer than the RFM part.
RFM belly armor shown on the RFM lower hull.
Meng belly armor shown on the RFM lower hull.
The Tamiya M1A2 SEP TUSK belly armor is roughly the same size as the Meng part. Here is the Tamiya M1A2 belly armor compared with the RFM belly armor. You can see that the Tamiya part is longer than the RFM part. Tamiya on top.
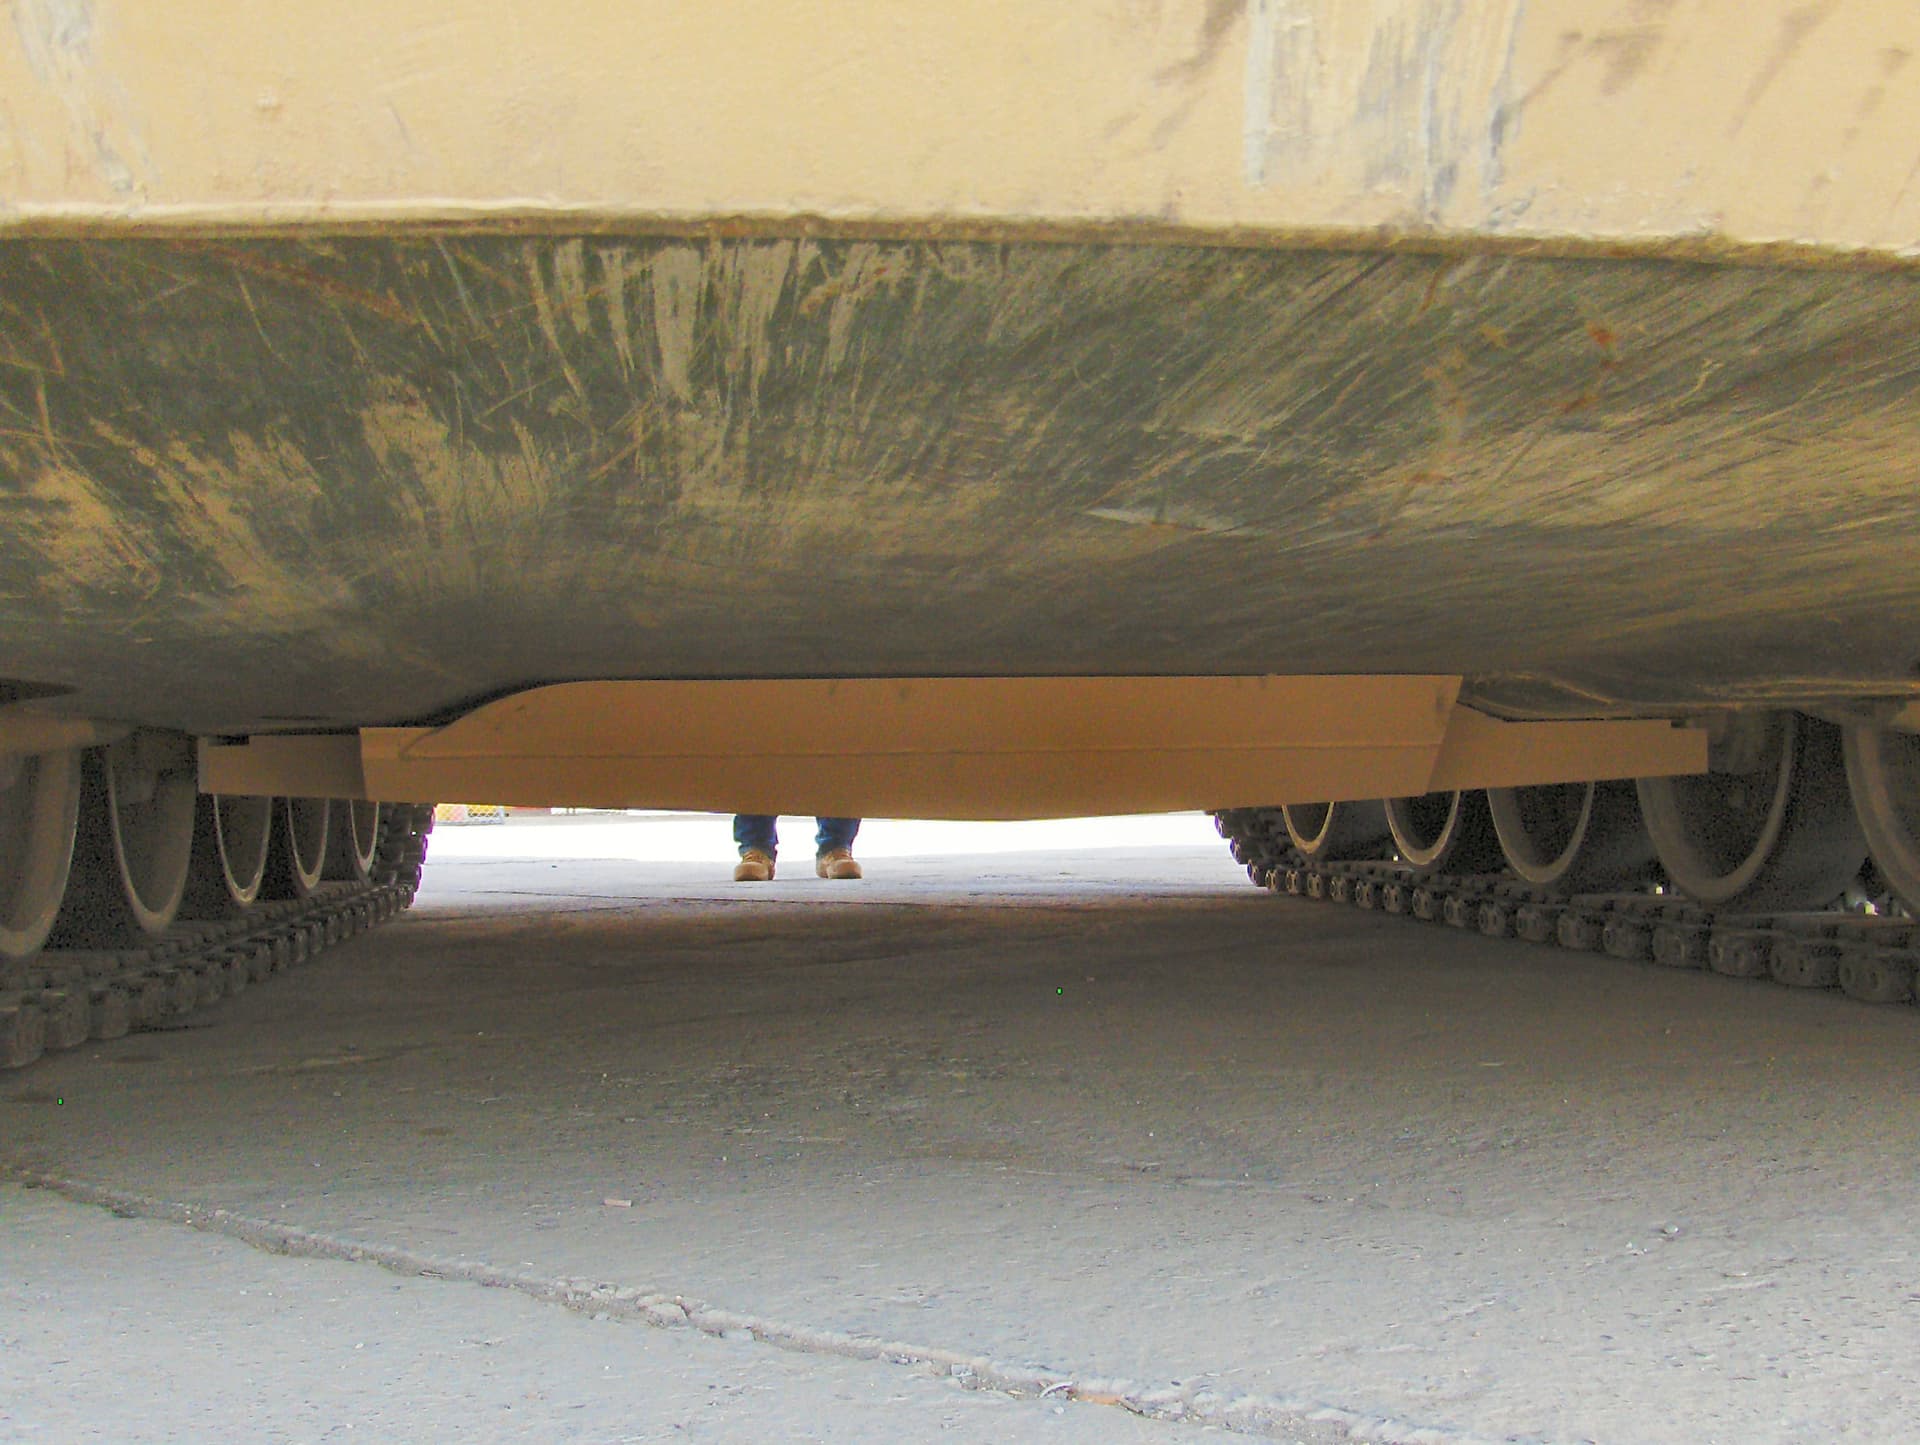
It looks like the Meng and Tamiya ones are more correct, but it is hard to tell. The belly armor is supposed to cover the crew compartment fully (under the turret).
This pic is from the rear and looks like the shorter side part goes back to around the 4th roadwheel, so maybe RFM got it right.
Back to the snorkel. I am using the Meng snorkel to fit on the RFM kit. The Meng parts are smaller than the RFM parts so I cut some sheet plastic to the same size as the RFM part.
Meng snorkel attachment on the left. RFM on the right.
I trimmed the Meng snorkel attachment part to fit inside the new sheet plastic part.
The Meng snorkel now fits to the RFM exhaust. I just need to add the bolt heads on the new sheet plastic part. I have some Meng nuts and bolts that I will be using.
I have a Cricut, and it’s a great tool - highly recommended. Great for cutting stencil and flat parts. Cutting styrene is a bit of hit and miss because it doesn’t handle cutting anything thicker than 0.15mm too well - at least my machine doesn’t.
It is much better for paper crafts, T-shirt iron-ons, etc., which has justified my purchase, and my wife is OK with it.
I got this holographic vinyl roll with sticker backing to use for the viewports. I got it from Amazon. Some of the reviews say they use their Cricut to make stickers. I don’t have a Cricut so I will be cutting it to size by hand. I hope a sharp X-Acto blade is good enough. I haven’t opened it yet to check the thickness or how sticky the adhesive backing is. I am nowhere near to the point of attaching it to the viewports yet but will test it out soon.