That cat looks to be modeling dangerous.
1 Like
I put my completed but not painted Tamiya dragon wagon in a closet with the box open. A month later went to paint the kit and parts were out of the box everywhere and the fifth wheel was missing and has never been found!
Damn cat!
2 Likes
Dem cats is no good. They’re always plotting against you. You can see it in their eyes.
2 Likes
I’ll be watching this build. I bought the RFM StuG III with interior for an excellent price with shipping. Huge box! Glad to see the fit is good. Can’t wait to start mine.

3 Likes
@MontanaHunter Chris, that’s a wonderful story! Thank you for sharing. Sounds like quite the pranksters.

LOL! Well said Dan!
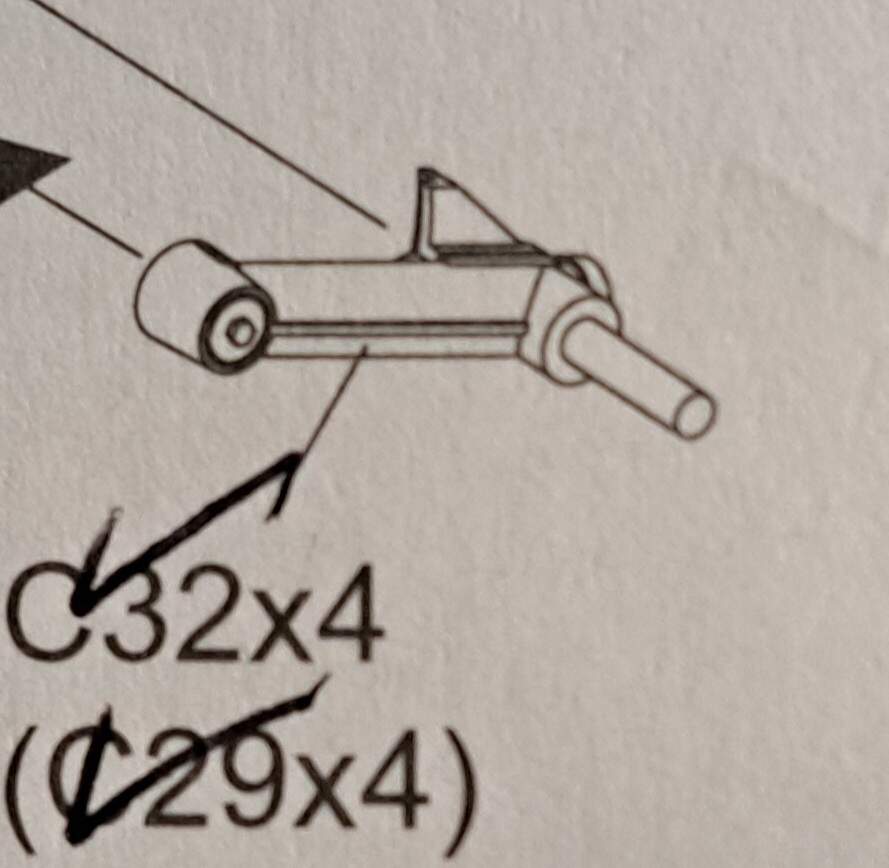
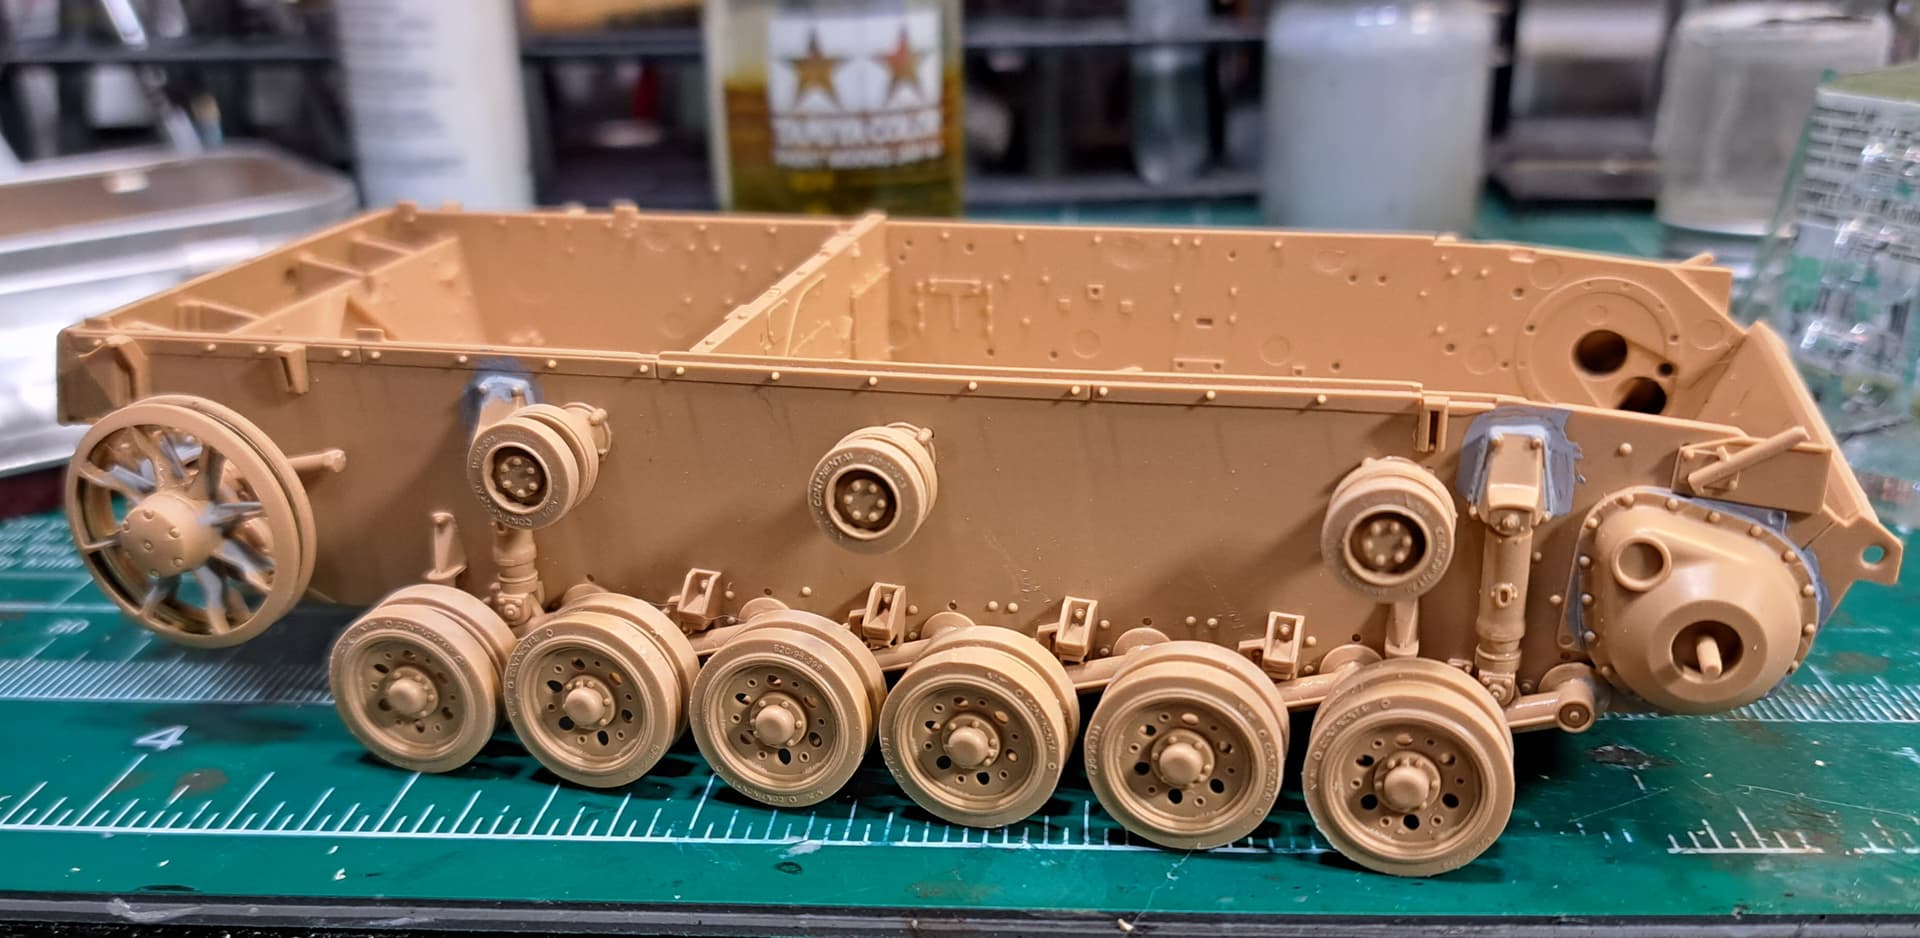
Step #5 today moved along at close to my normal slow pace. This was suspension arms, shocks & torsion bars mostly. One has the option to build a movable suspension or fixed in place. I went with fixed in place. Some optional parts for moving shocks are left over for the spares box.
This of course is a critical stage because misaligned parts usually result in a model that won’t sit level. RFM lived up to expectations with well molded parts that have a nice precision fit. Everything aligned properly based on sitting level on glass desktop and checking suspension arms with a metal straight edge.
Minor flash on the various twelve suspension arms like C29, C32, etc at the upturned triangle section needs removed. There’s also very fine hairline mold seams to remove on arms & shocks etc. However, they are trivial compared to many older kits in my experience and opinion.
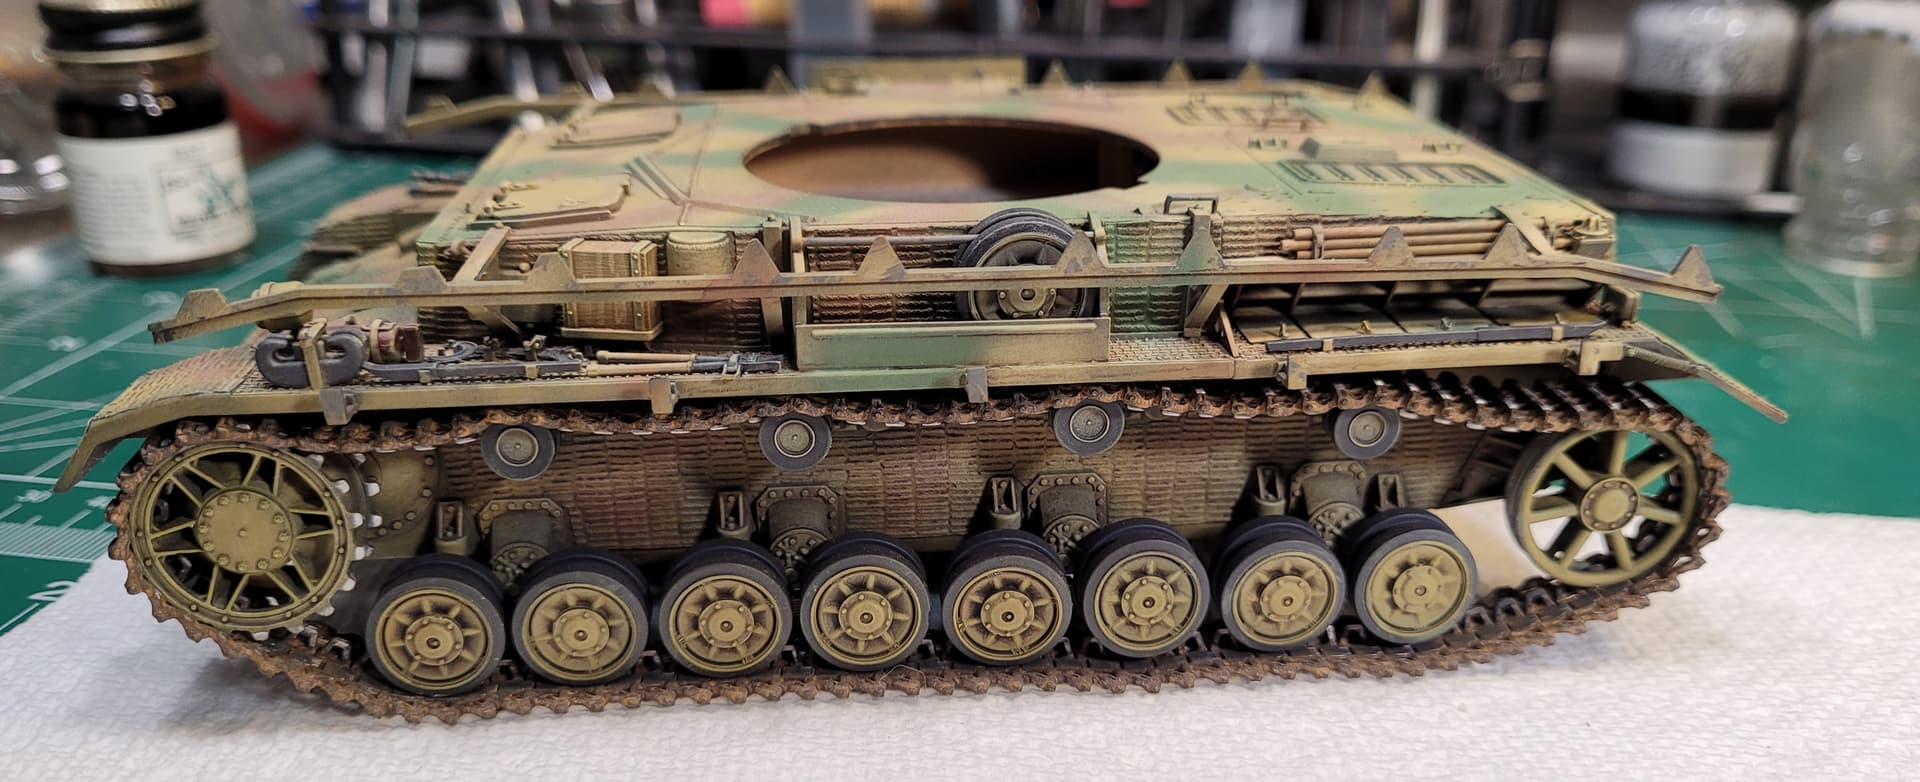
Overall the suspension was a delight to work with compared to many imprecise model kits. As for fidelity to detail for Stug III, looks great however this vehicle isn’t a primary interest of mine.

@metalhead85 Richard, welcome aboard!
I’d imagine the interior version is pretty sweet as well. There’s a few rudimentary parts of interior provided for this kit as well and they appear pretty decent.
6 Likes
That cat startled me
2 Likes
That PE holding tool is the best. I use mine all the time and get great results. I think Angel pointed me at it, but if I’m mistaken, I’m very grateful to the person who did.
3 Likes
Dan, no more worries The Lion Sleeps Tonight…this cat is set, personal cat tree in hobby room ![]()
Phil, agreed, its one of my favorites ![]()
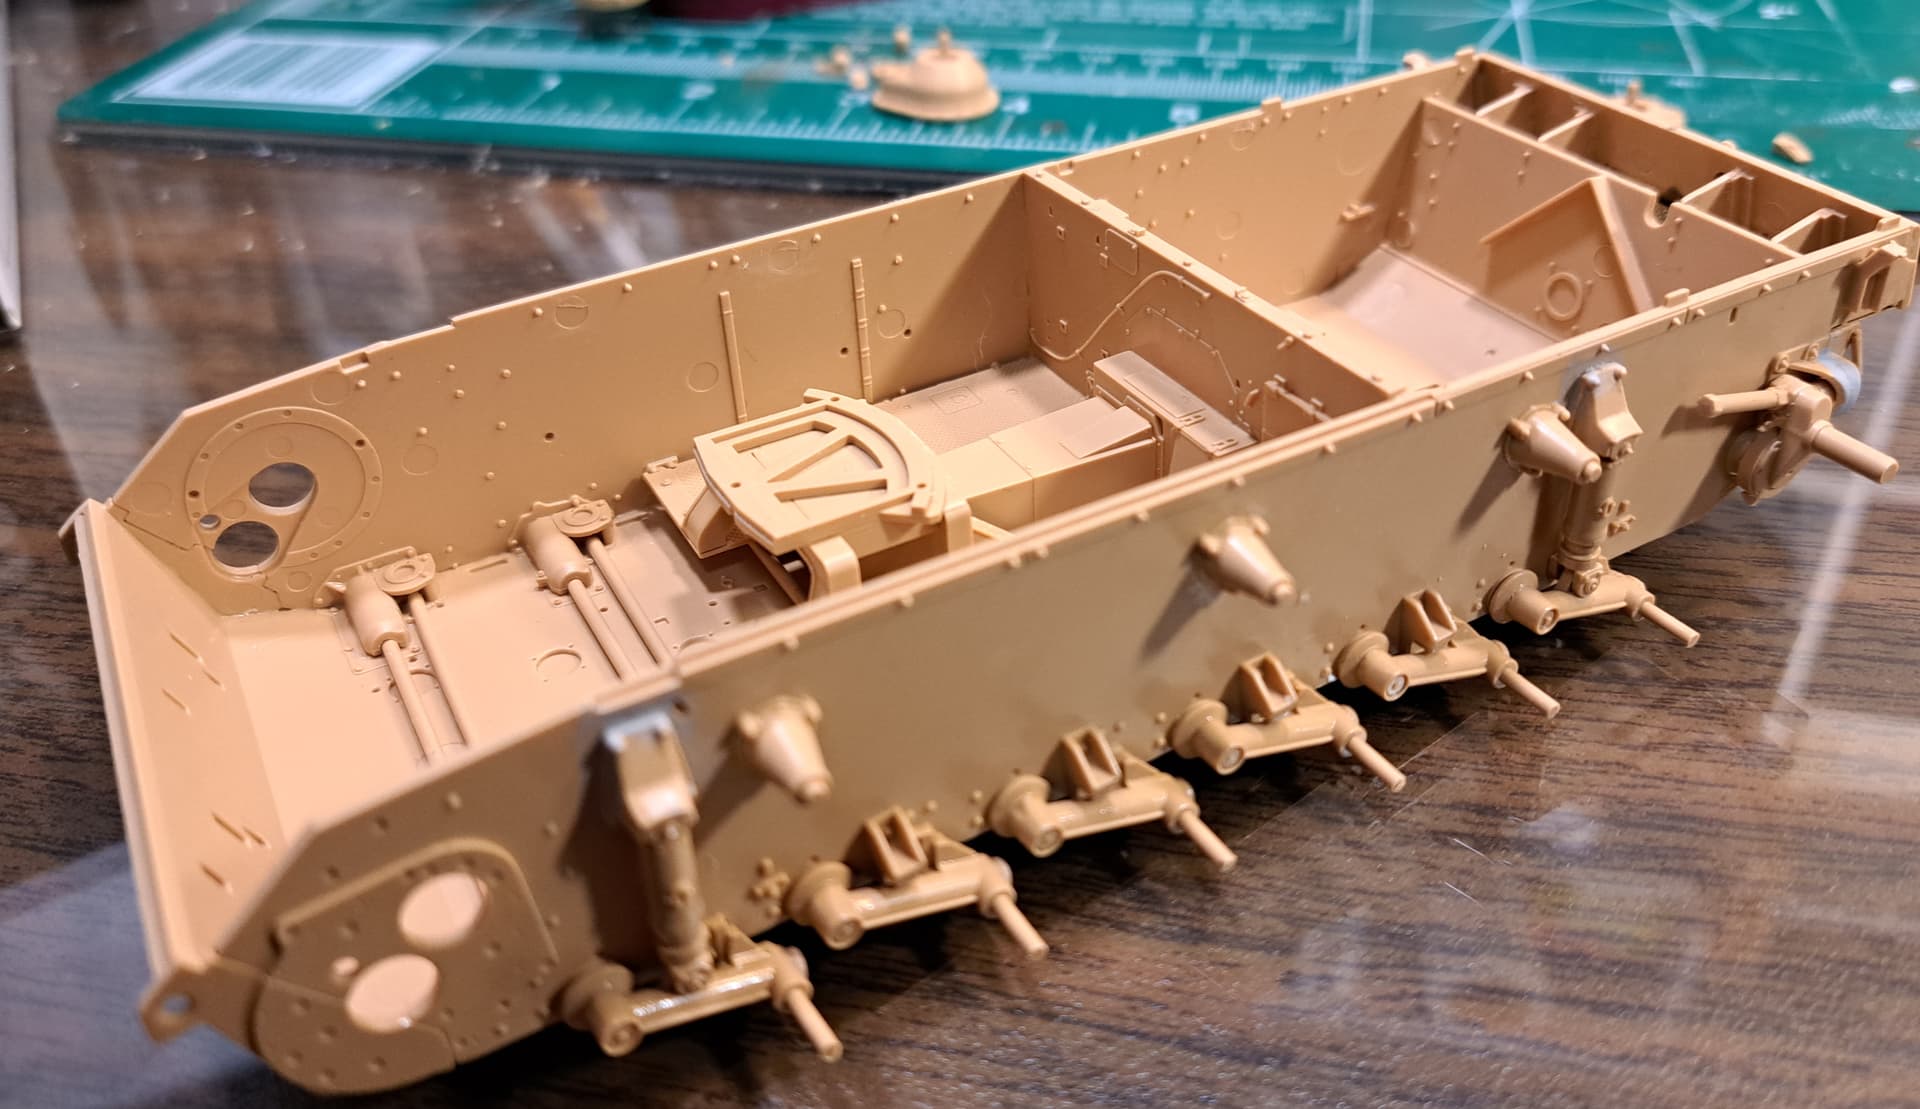
Steps A1 & A2, part of the basic internals goes together smoothly other than part J4 is nonexistent on the J tree. There’s a J4a but no J4. Based on picture appears G4 was the part intended.
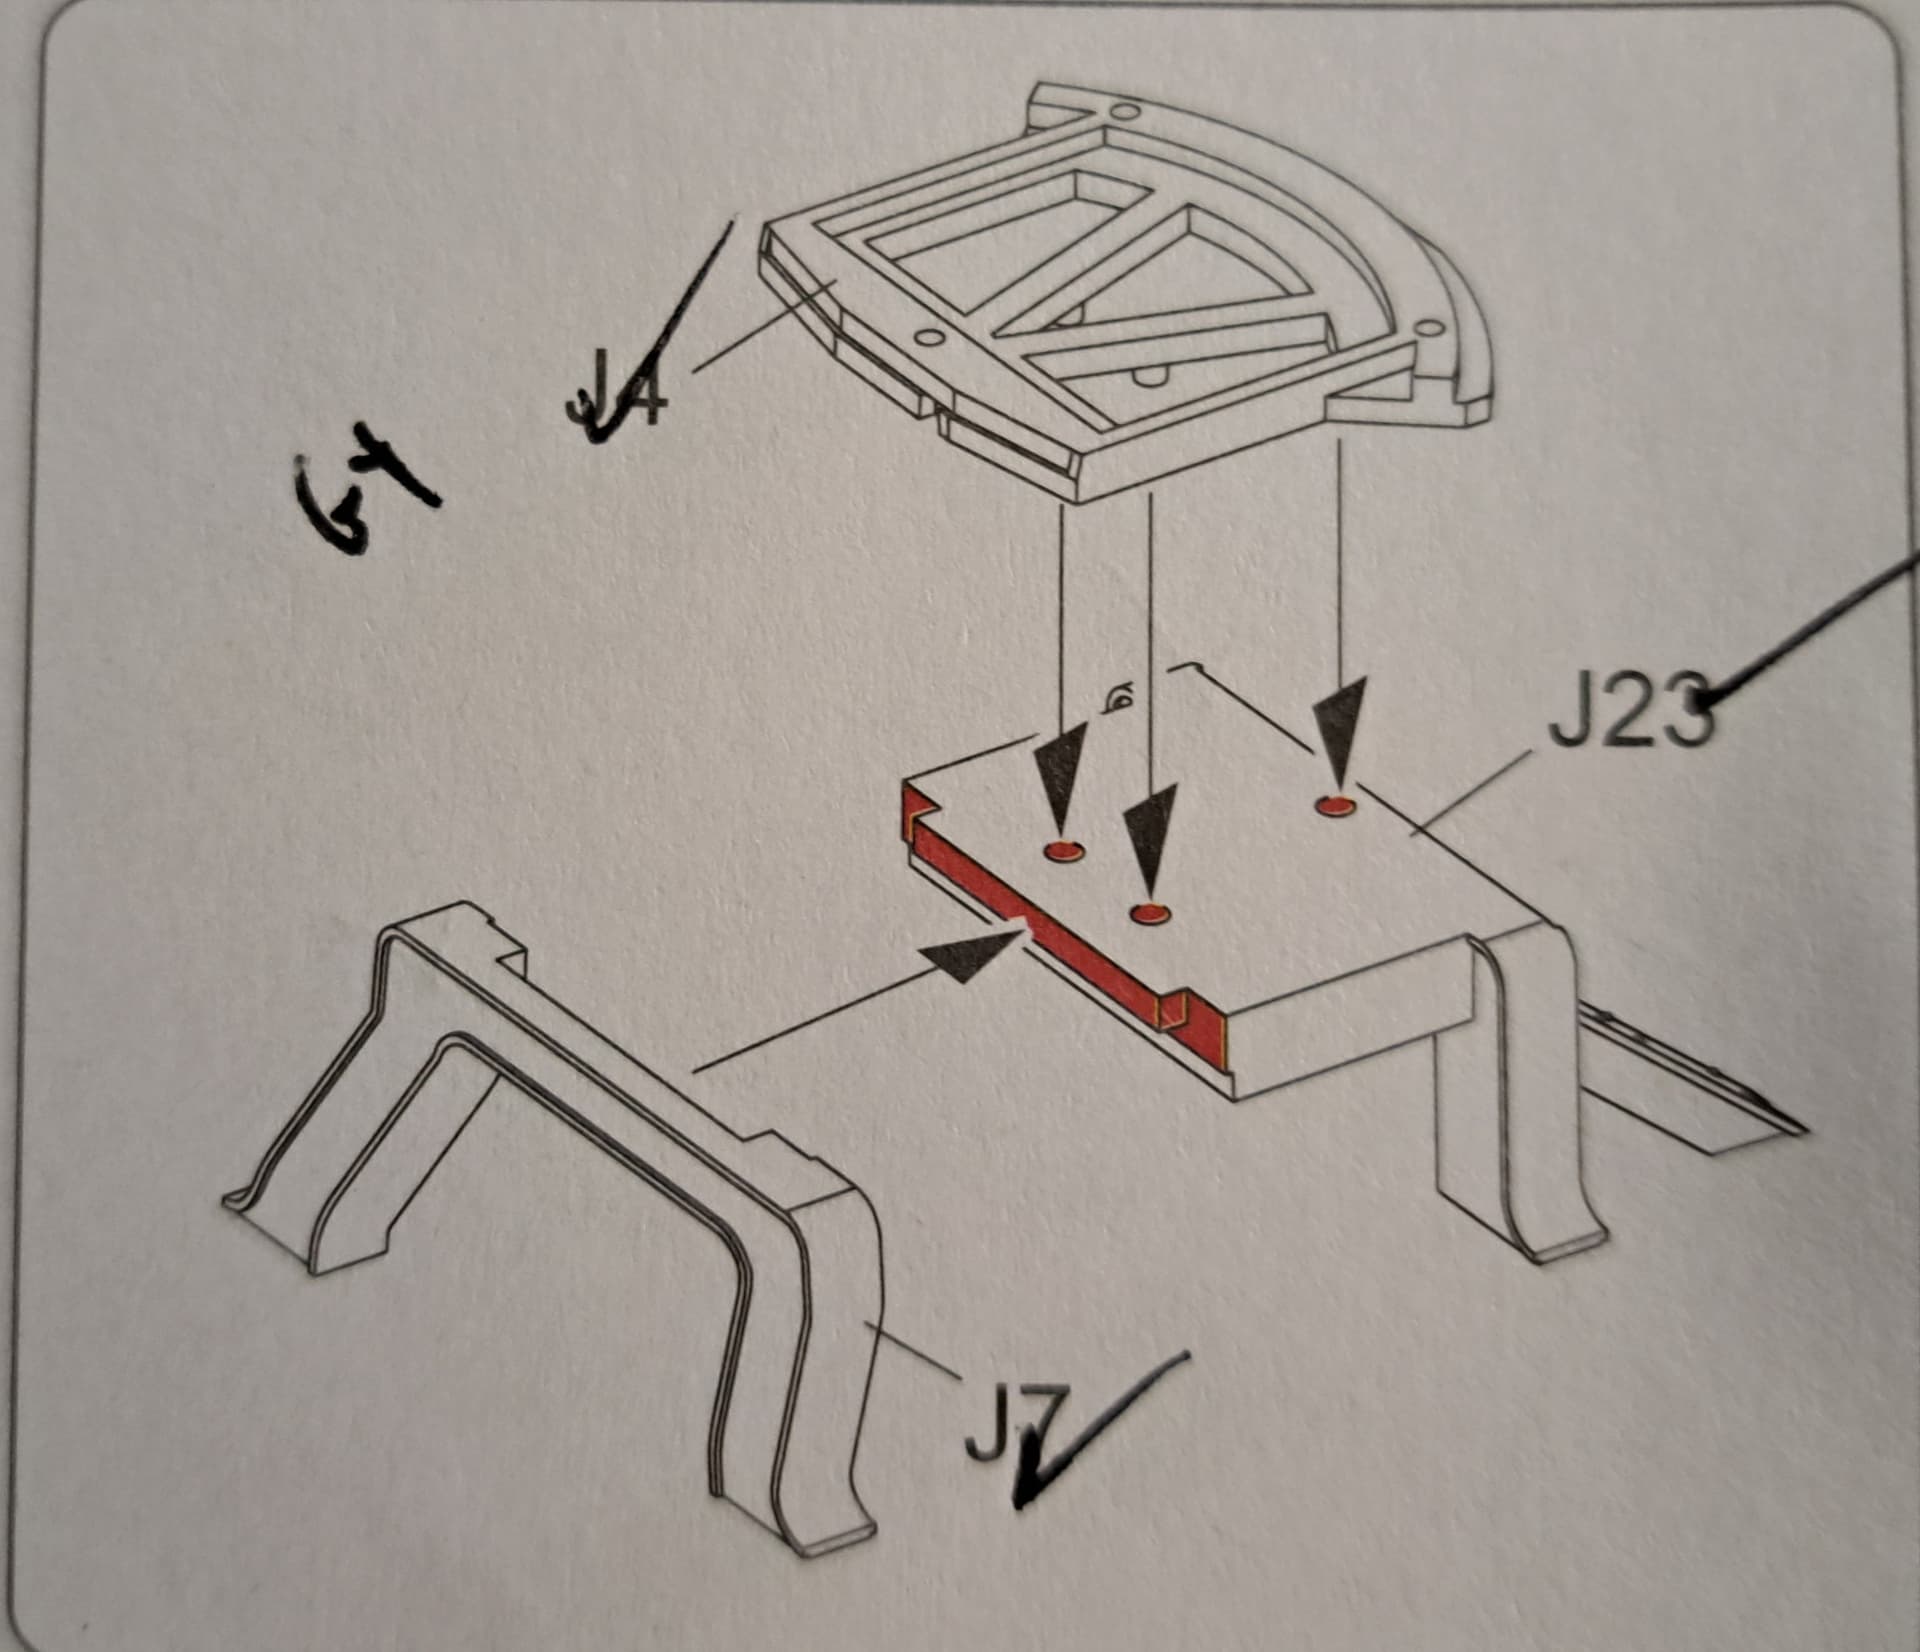
Step 6 adds various lower hull fiddle bits and sub assemblies A1 & A2
Today was a good hobby day ![]()
5 Likes
Dogs are you buddy, your friend… Cats ----- the enemy …
3 Likes
Builds shaping up very nicely Wade, glad you are back at it ![]()
2 Likes
Thank you John! It’s good to be building.
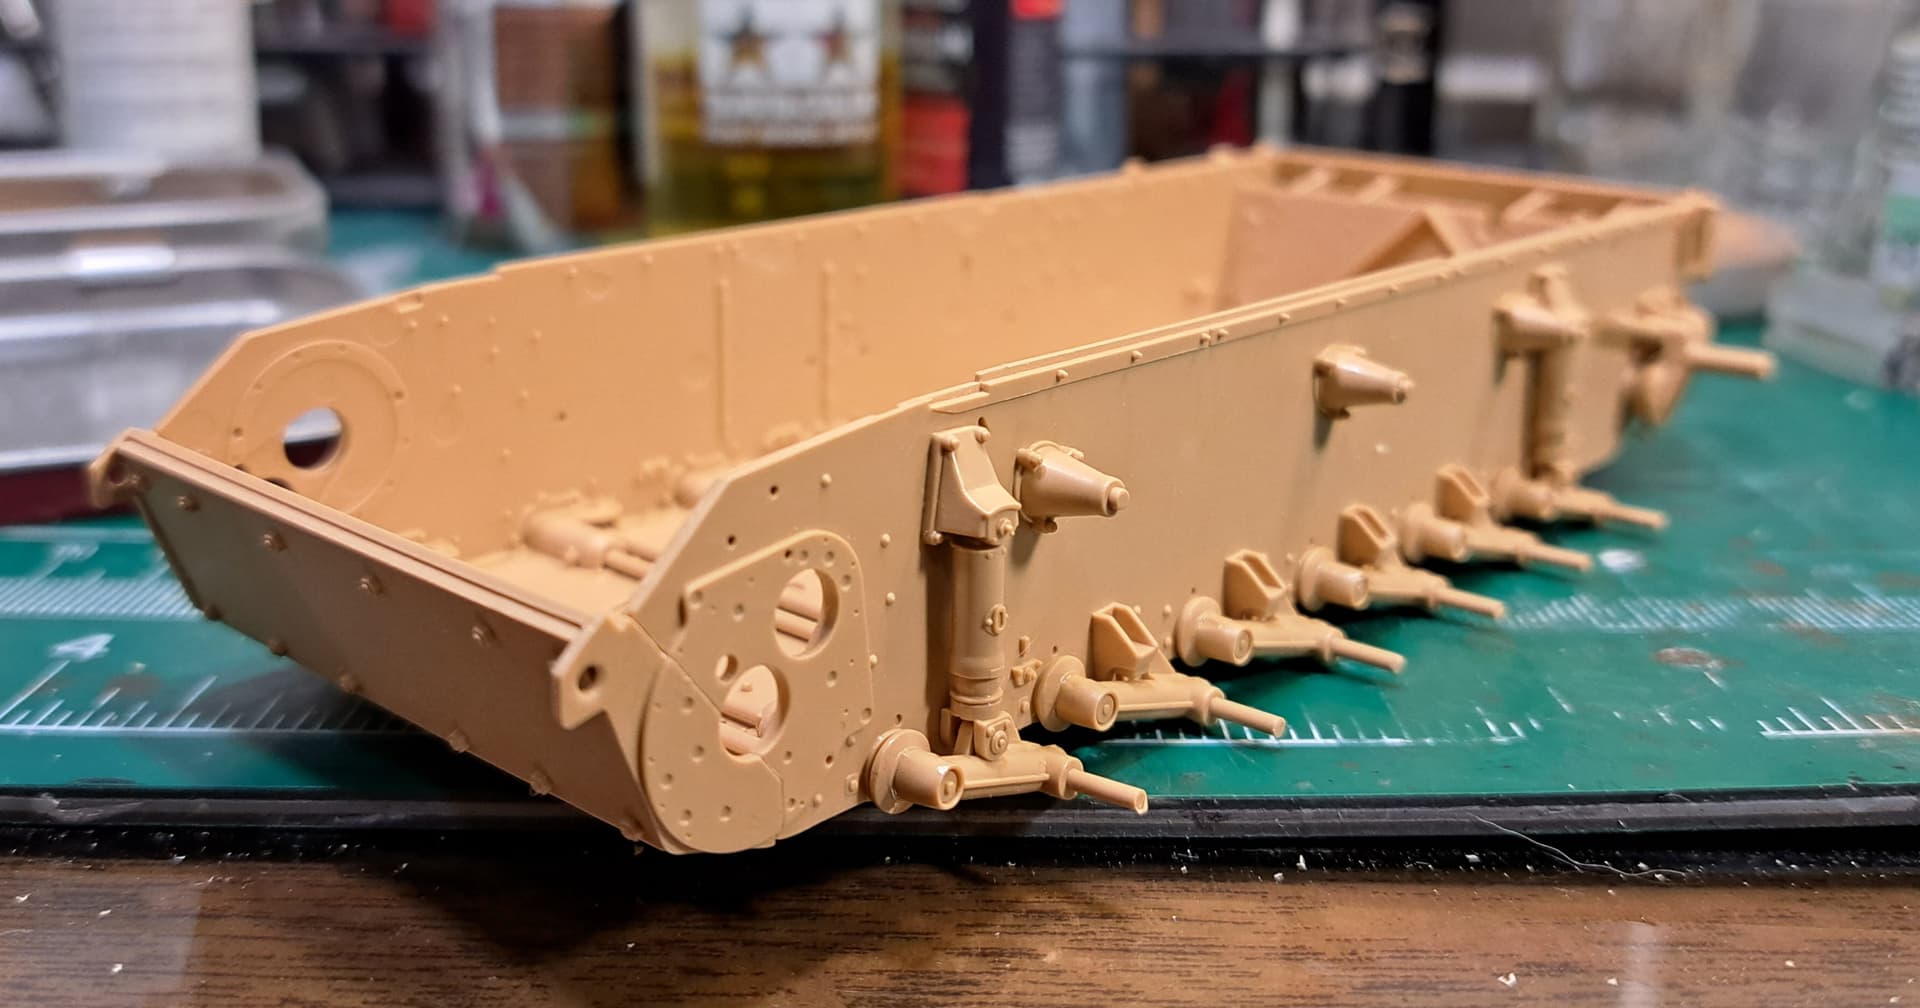
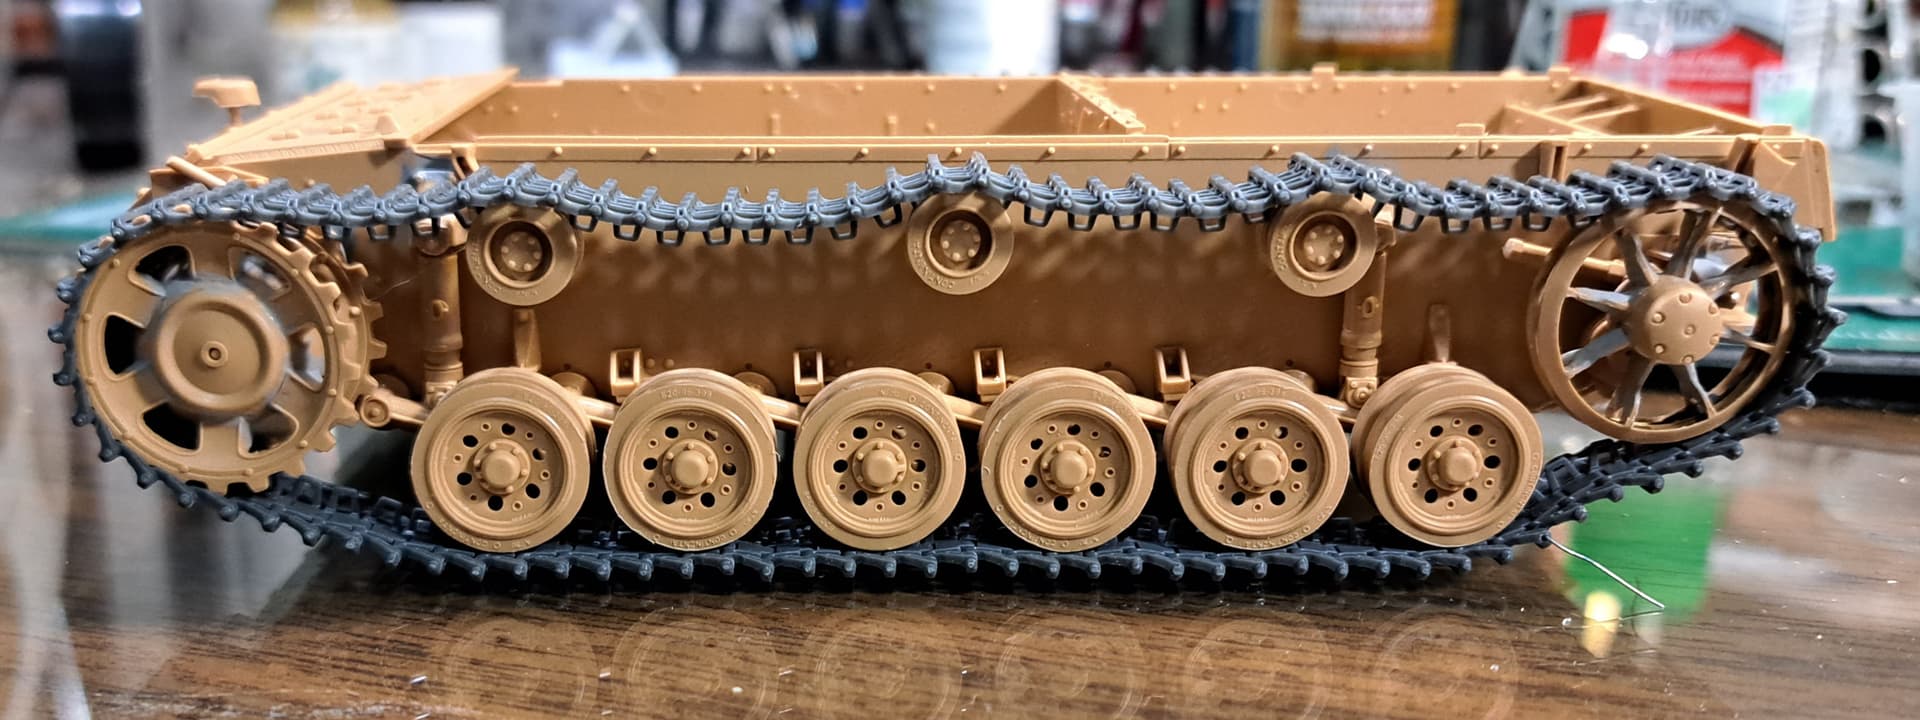
Today Step 7 Wheels, Return Rollers & Idlers
Pleasure to clean up the road wheels in this kit compared to many others.
Parts clean up put her right to sleep ![]()
5 Likes
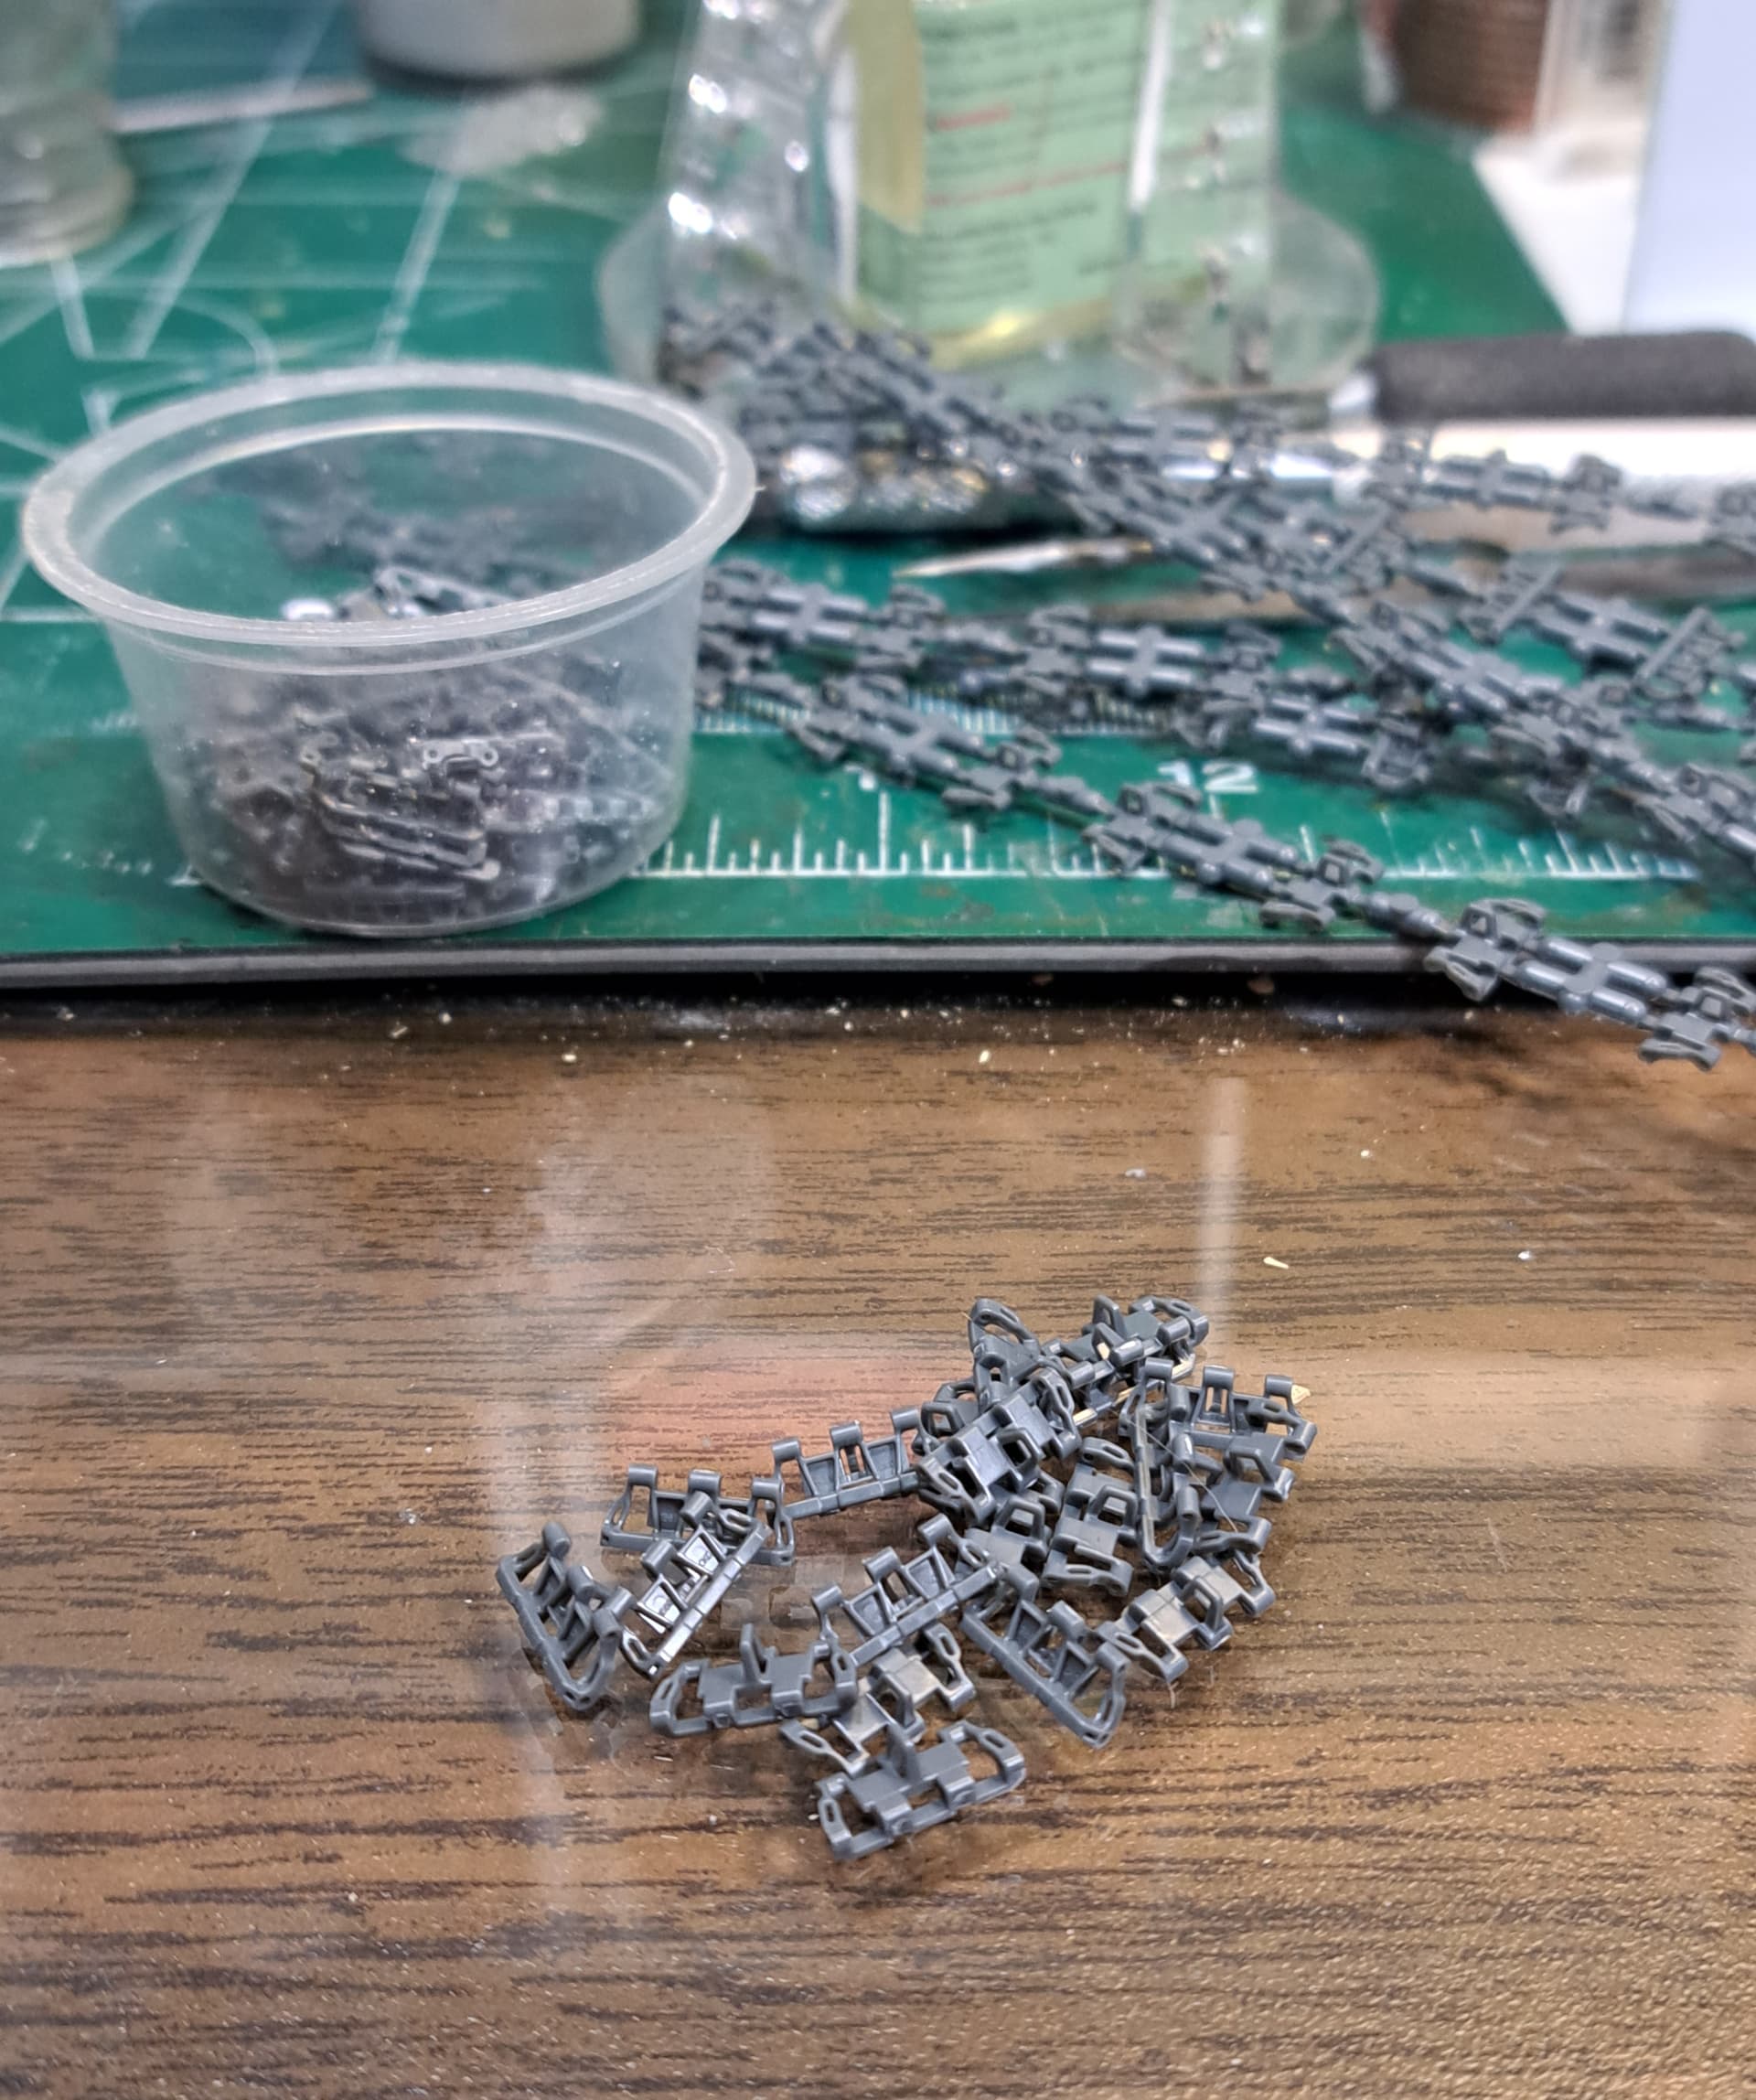
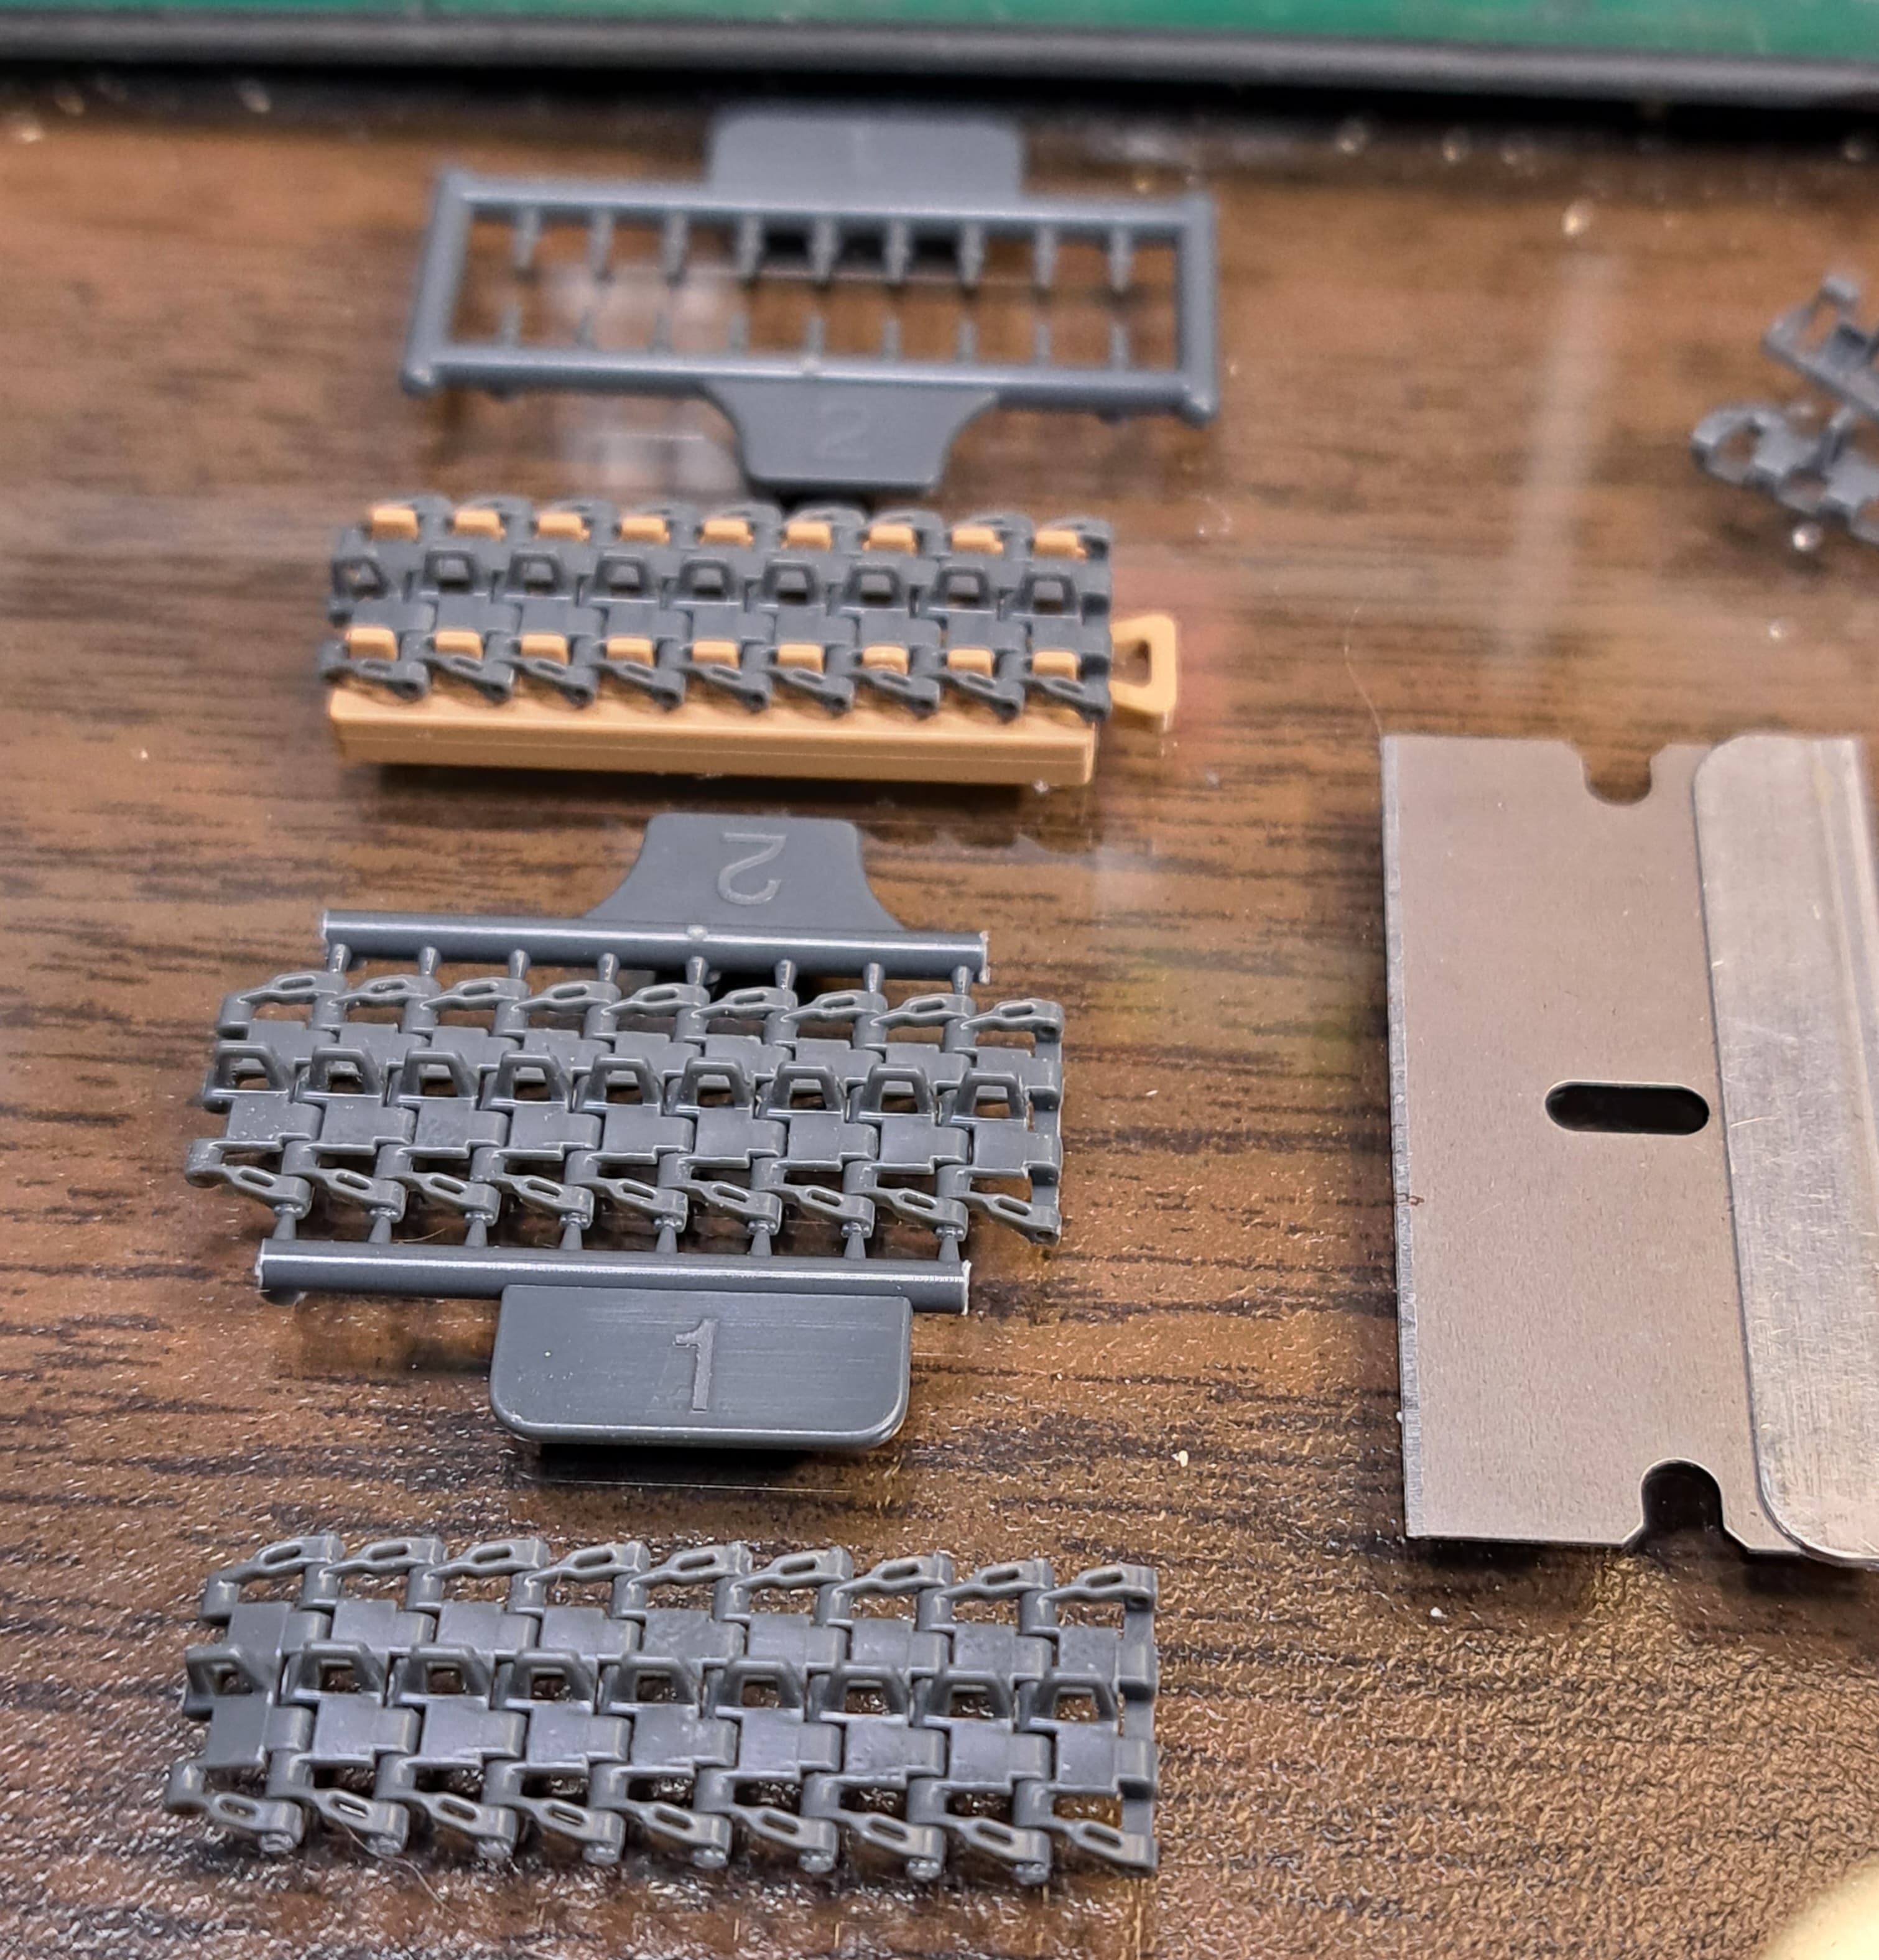
Step 8 Track Links aka The Grind
Isn’t that was doing two 91 link tracks made of 182 links with 364 track pins for a total of 546 parts is called?
I like individual link tracks that are well designed. That’s why with many kits, I’ve tossed the terribly designed kit tracks for Fruilmodel or Sector 35 over the years after evaluating the kit parts.
However, in this case, I think RFM did excellent design and engineering of the kit’s individual link tracks. Clean up goes quickly given the links are punch mark & sinkhole free. Basically snip the links free with a quality parts snippet like GodHand. Most of the time you’ll get a near perfect snip that barely needs touch up with a sanding stick.
Instead of being a monotonous drag, this is one of the most fun steps on the build so far! Probably not going to pull a set of preassembled Sector35’s out to short cut this step.
Jig, Pin, Adhesive & Razor
5 Likes
I love doing indy tracks like this! 3 parts per link - you put on some good music, get in the groove, the zen flows and you crank them out.
1 Like
That’s an excellent point Matt. Just before midnight, I was going to do a couple of 9 link runs before calling it a night. Next time I looked at my phone and discovered it was 2:30 am LOL. Working with precision made parts is joy ![]()
Side note in Step 8 it isn’t mentioned that Panzer III/IV tracks are handed. The links aren’t but the way the track pin goes in and retainer depends on which side of the vehicle they are on. The track pin heads normally point inwards toward the hull and the retainer goes to the outside. Given the 2 part pin this is easy to duplicate if one wants too. It’s also very subtle and hardly noticeable.
I was happy with both track runs. They are quite flexible and sturdy.

Couldn’t help but drill out the last connection point and use a wire for ease of install and removal. After paint etc plan to pin with kit track pin & retainer so it will look consistent.
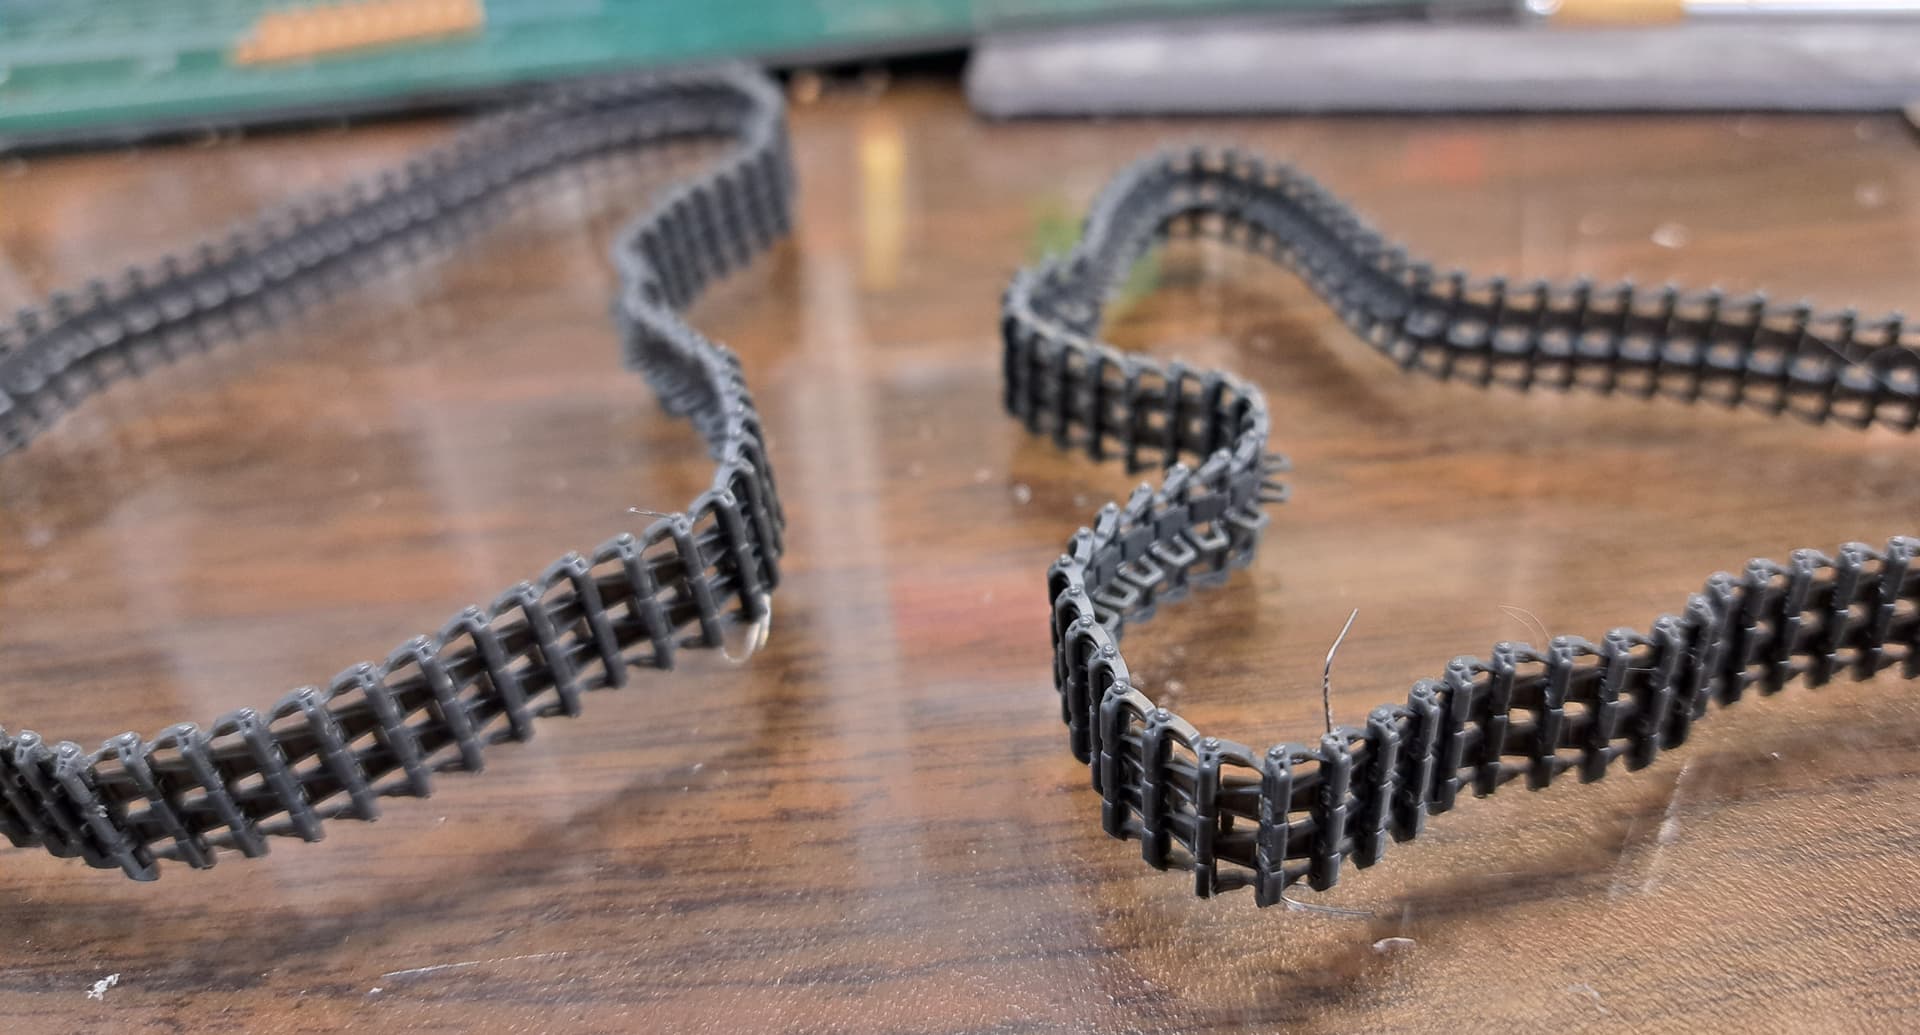
91 links is pretty snug but fits perfectly. Ryefield really nailed the suspension and tracks in this kit in my opinion.
Toying with idea of adding one extra link.
In any case, the most part intensive step is complete. I’m impressed ![]() A+ to RFM on design & engineering
A+ to RFM on design & engineering ![]()
7 Likes
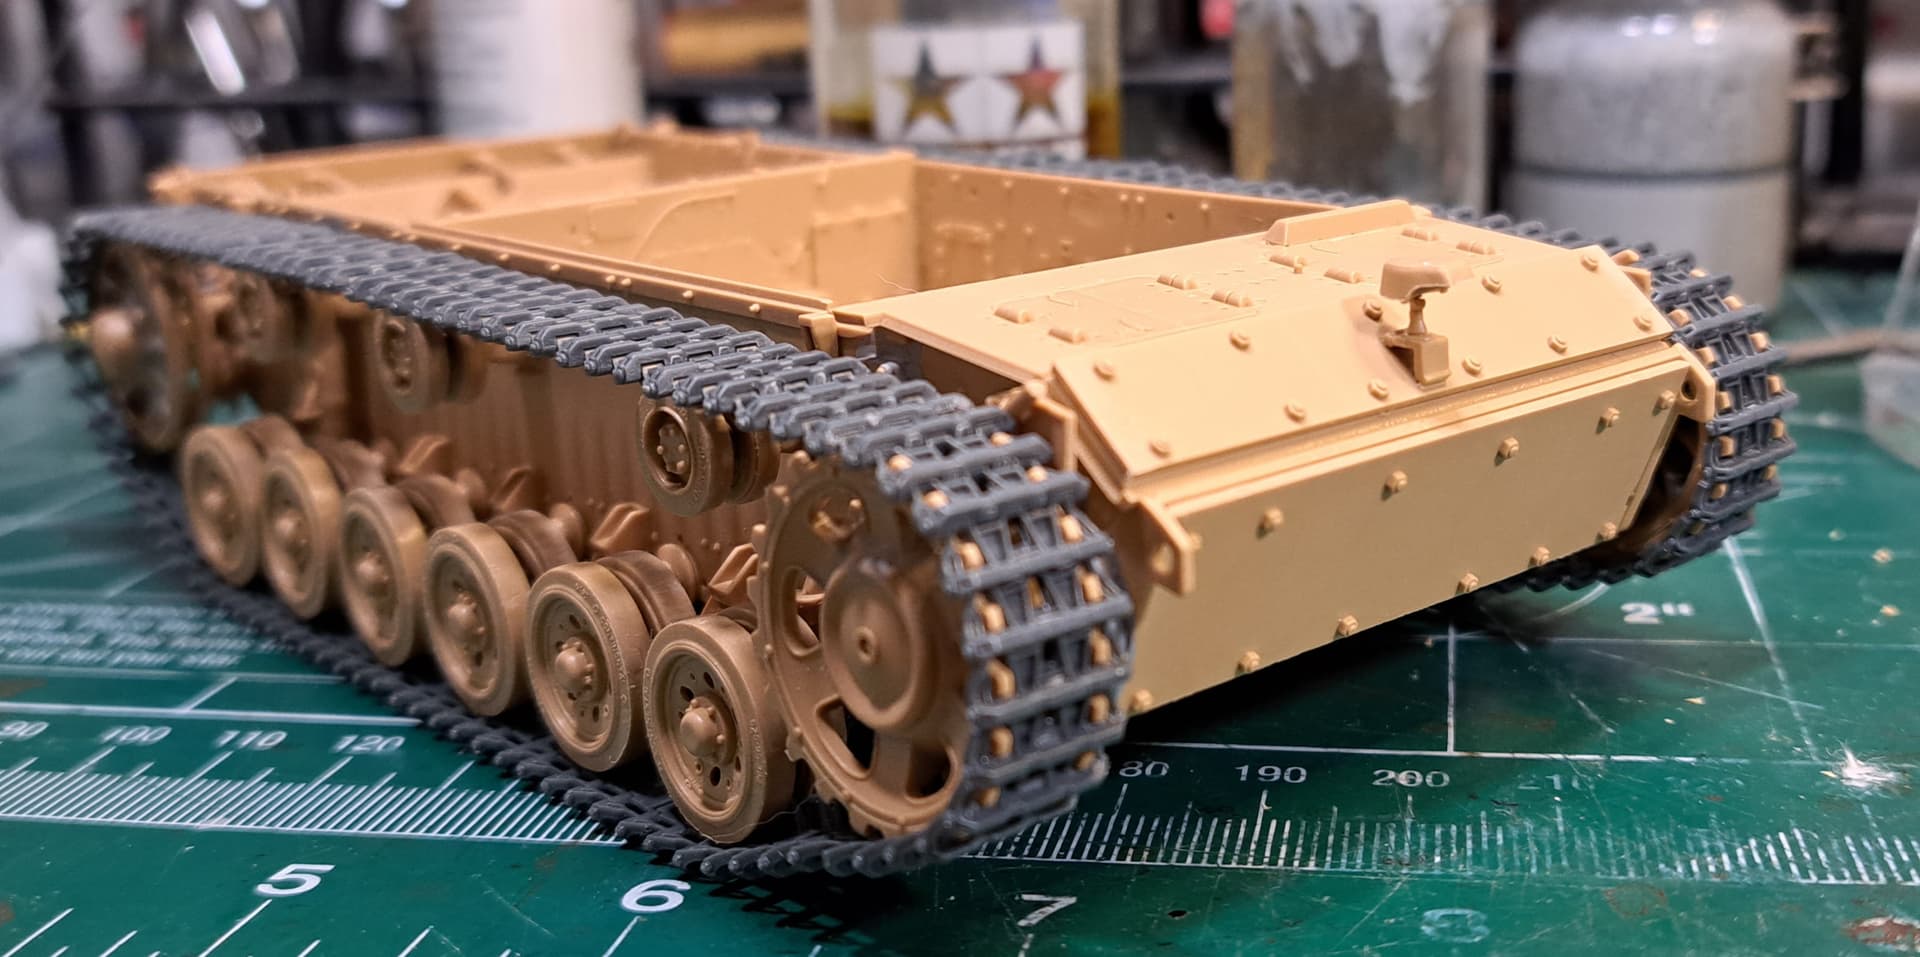
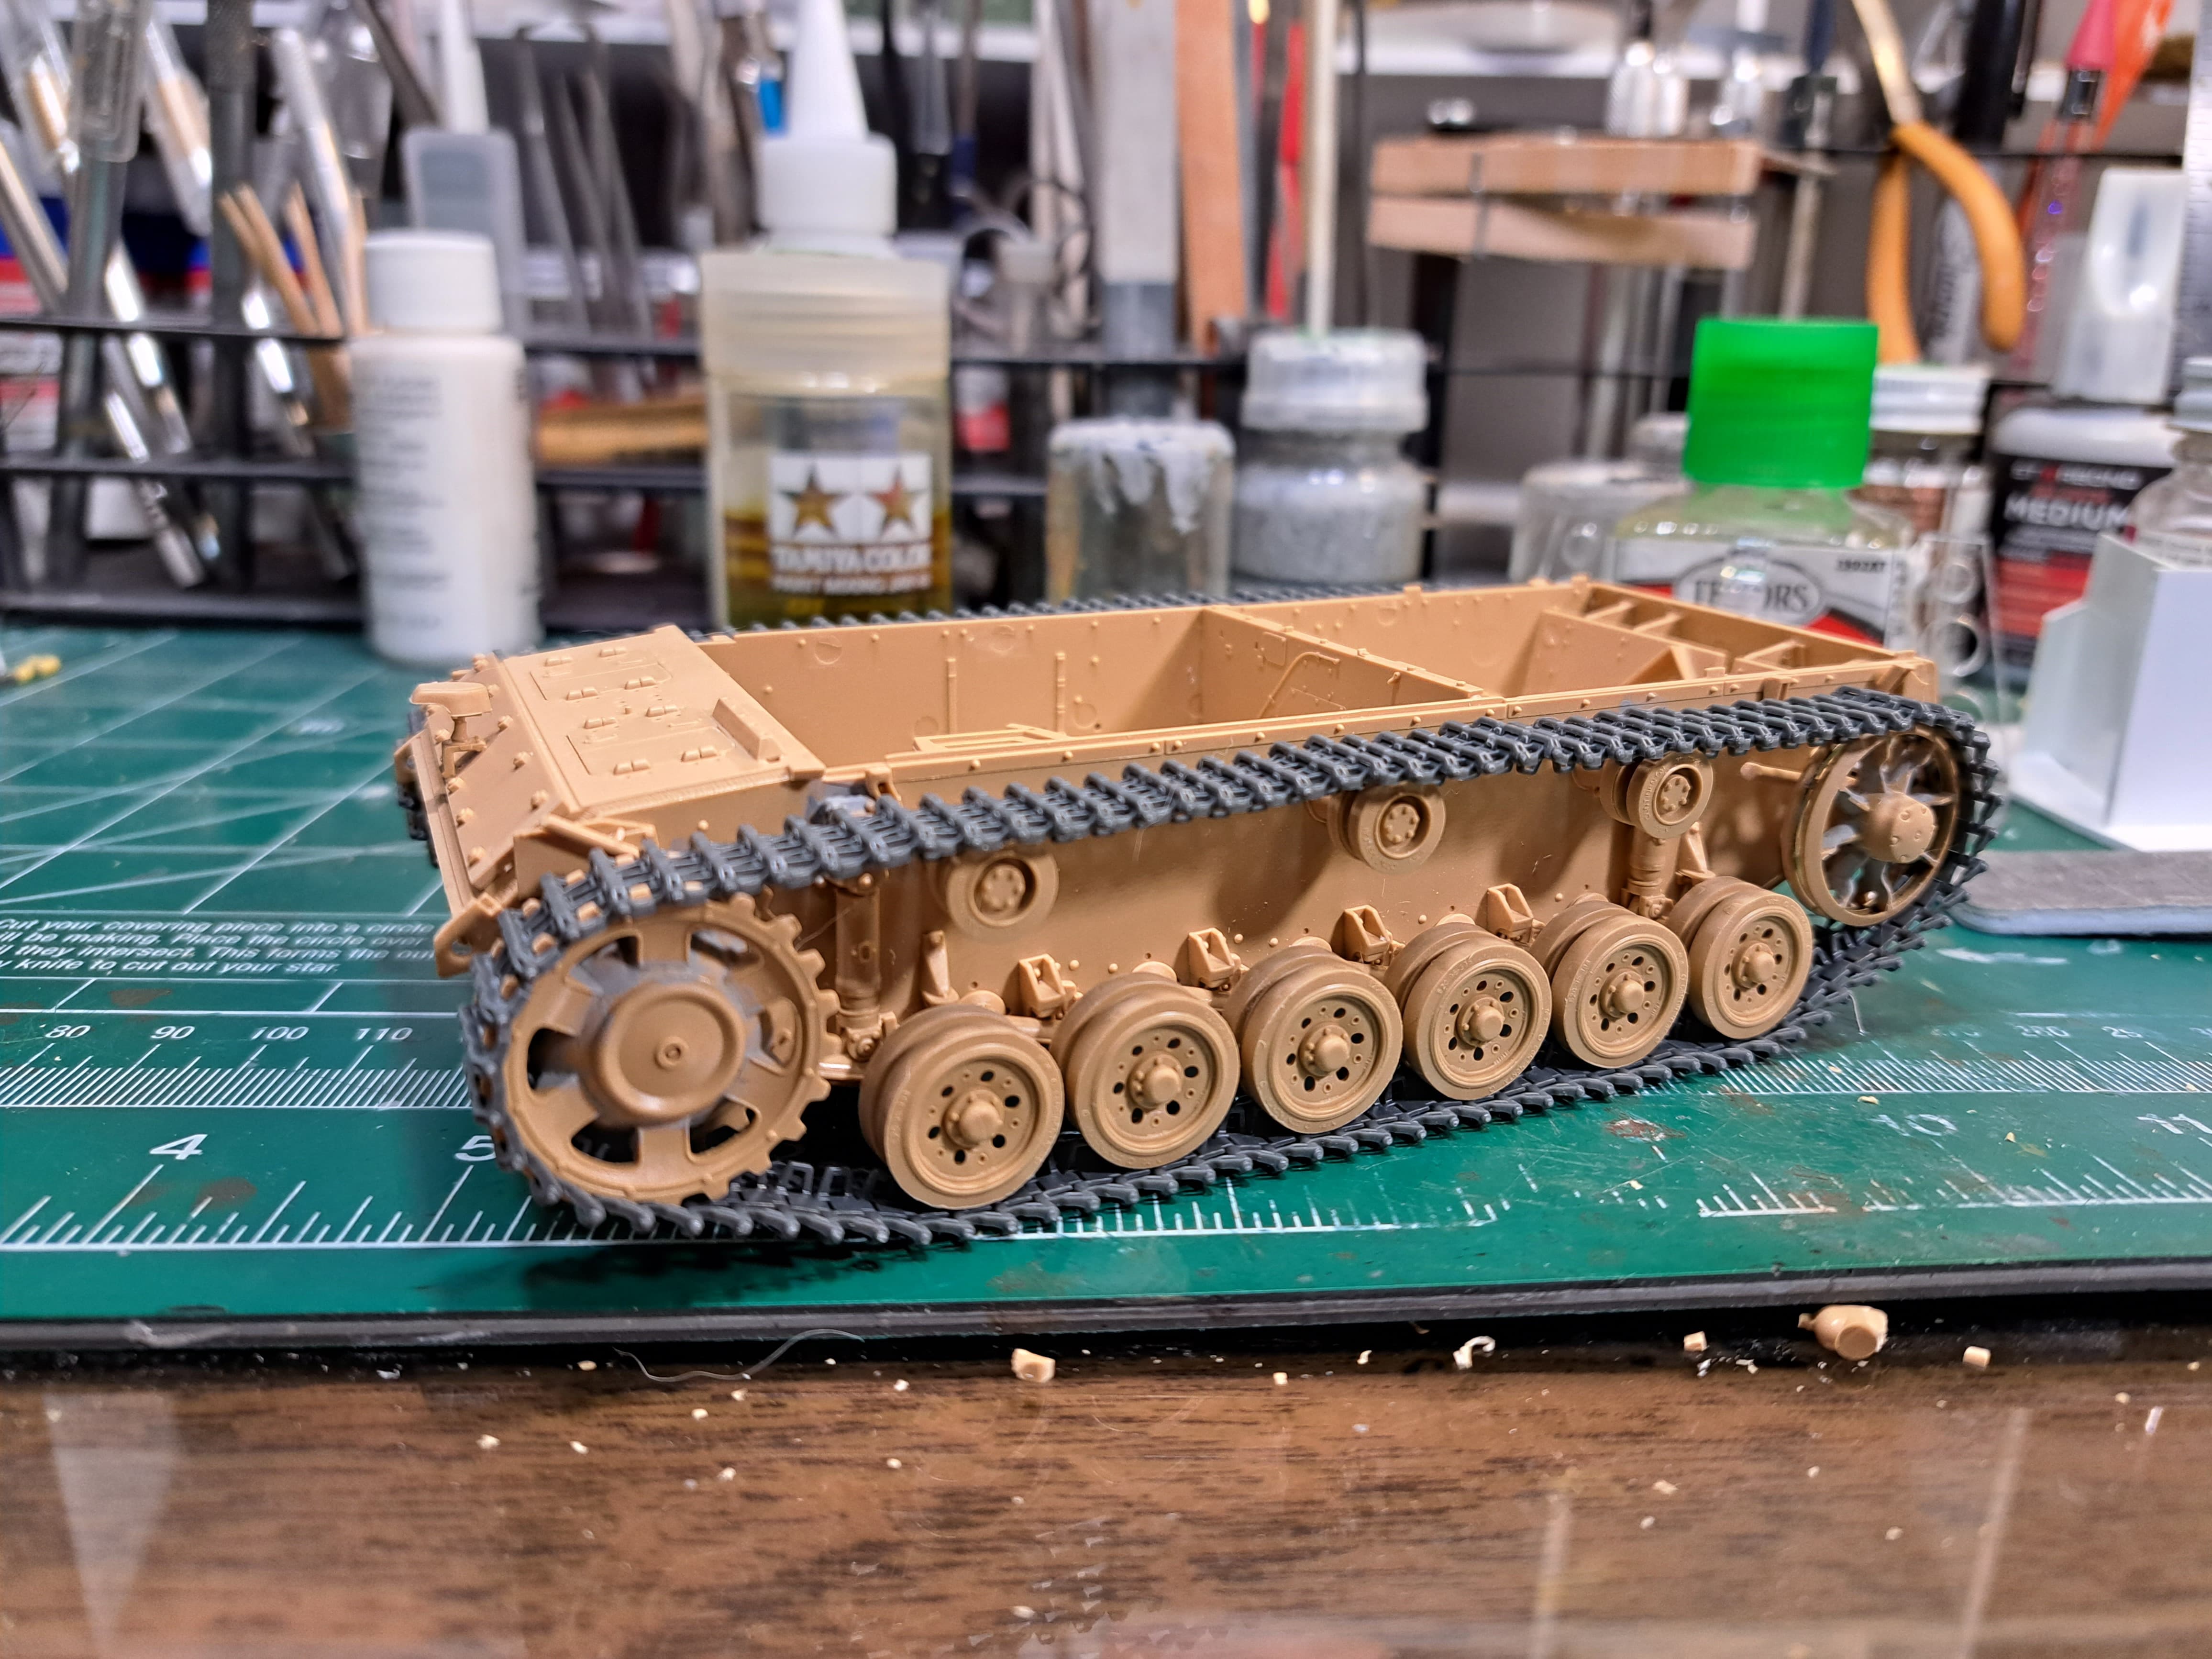
Get some sag in there!
Put the cat outside!
3 Likes
NICE tracks Wade RFM did a great job and so did you. Yeah you need to get some sag in there. I’m a big Pzkfw IV builder myself - have many IV hulled vehicles on the shelves. I did exhaustive photo research one day on the issue of Pz IV track sag and wound up with this rule - " Pz IV tracks sag to half the depth of the return roller between return rollers."
I hope this is helpful and doesn’t cause a firestorm of posters with photos of tighter tracks or whatever. That’s just the conclusion I reached after a day of looking at Pz IV photos. YMMV.
2 Likes
Matt & Dan, consulted with the cats & we all ![]()
![]() it would be a waste of quality tracks to leave the Stug with rubber band style looks. The half return roller rule of thumb seems like a good bench mark based wartime pic’s Ive seen. I’d rather have a hair too much vs none for visual impact etc…
it would be a waste of quality tracks to leave the Stug with rubber band style looks. The half return roller rule of thumb seems like a good bench mark based wartime pic’s Ive seen. I’d rather have a hair too much vs none for visual impact etc…
Ball park goal is roughly this or slightly less.
6 Likes
Roger that.
Looking great so far Wade!
1 Like