Thanks Terry and to you!
I’m so glad I’ve got to this point; the Driver is now installed and it seemed at times that how I envisaged it all was not going to pan out, but hey! Progress! Pics to follow once I get past the seasonal celebrations.
Thanks Terry and to you!
I’m so glad I’ve got to this point; the Driver is now installed and it seemed at times that how I envisaged it all was not going to pan out, but hey! Progress! Pics to follow once I get past the seasonal celebrations.
A quick update and then the Munga will be almost done!
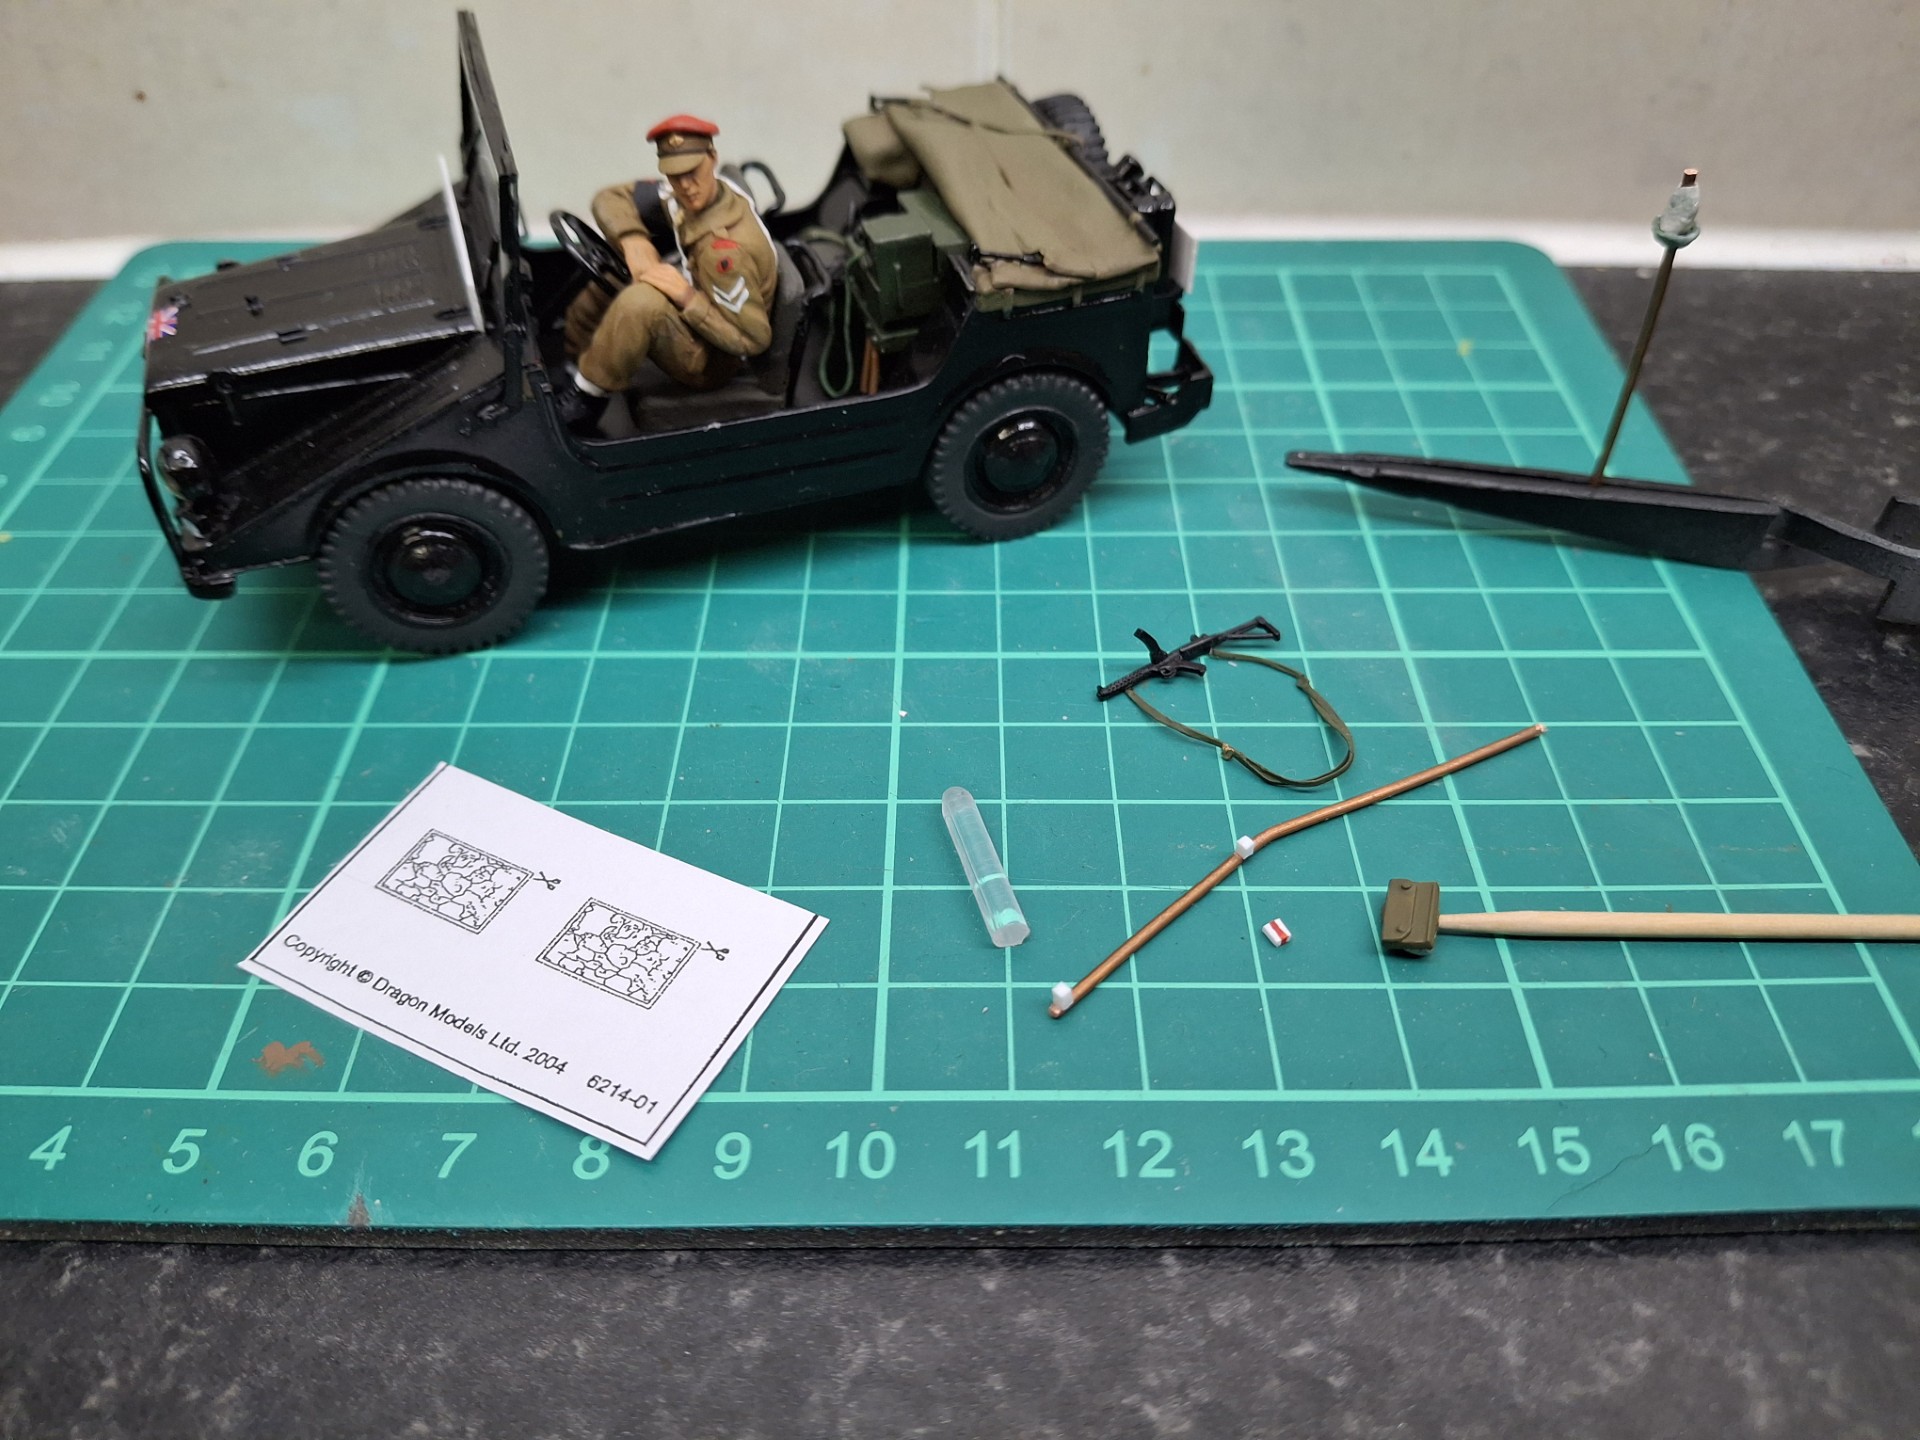
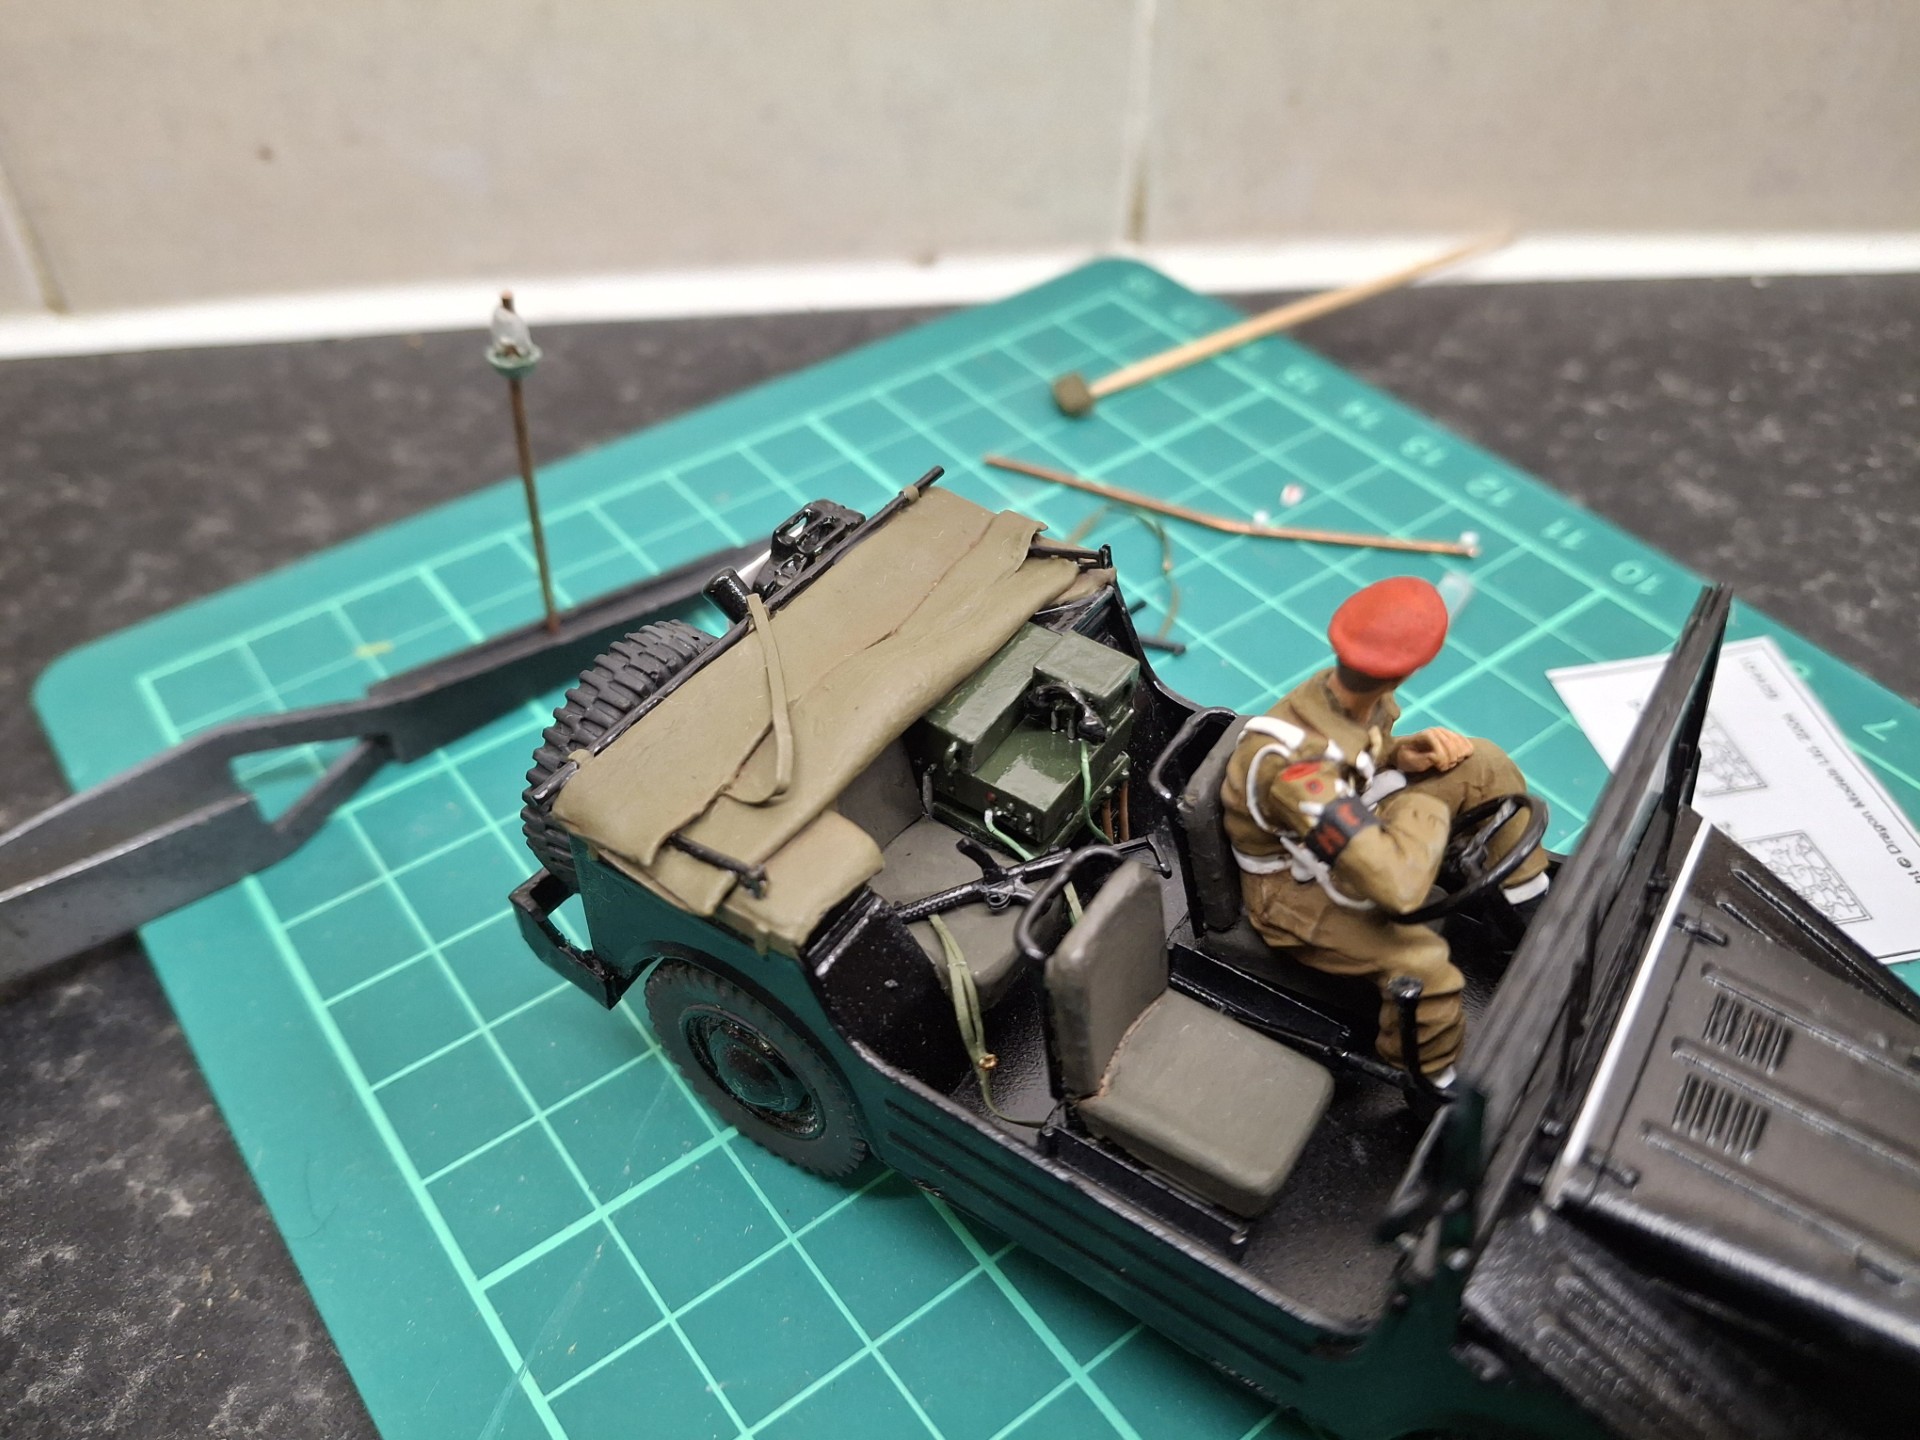
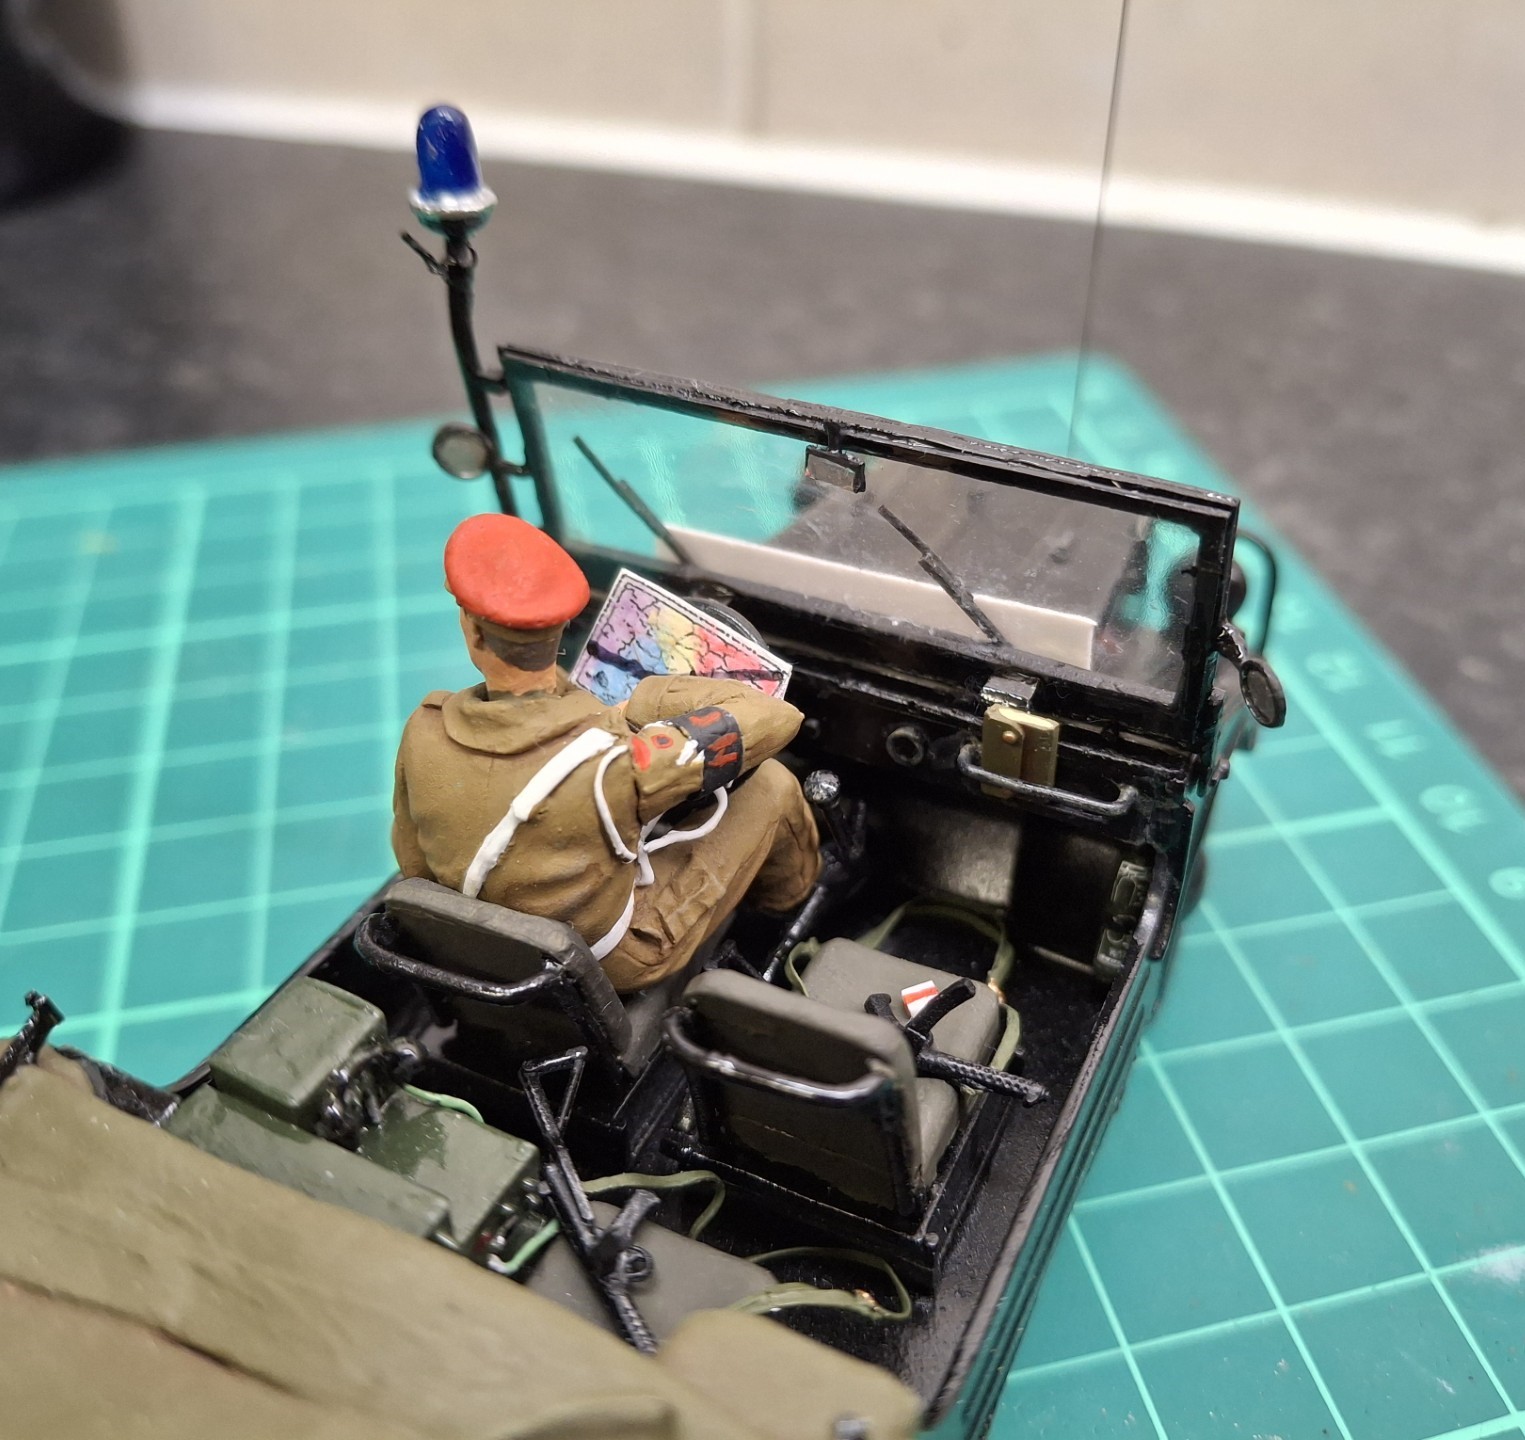
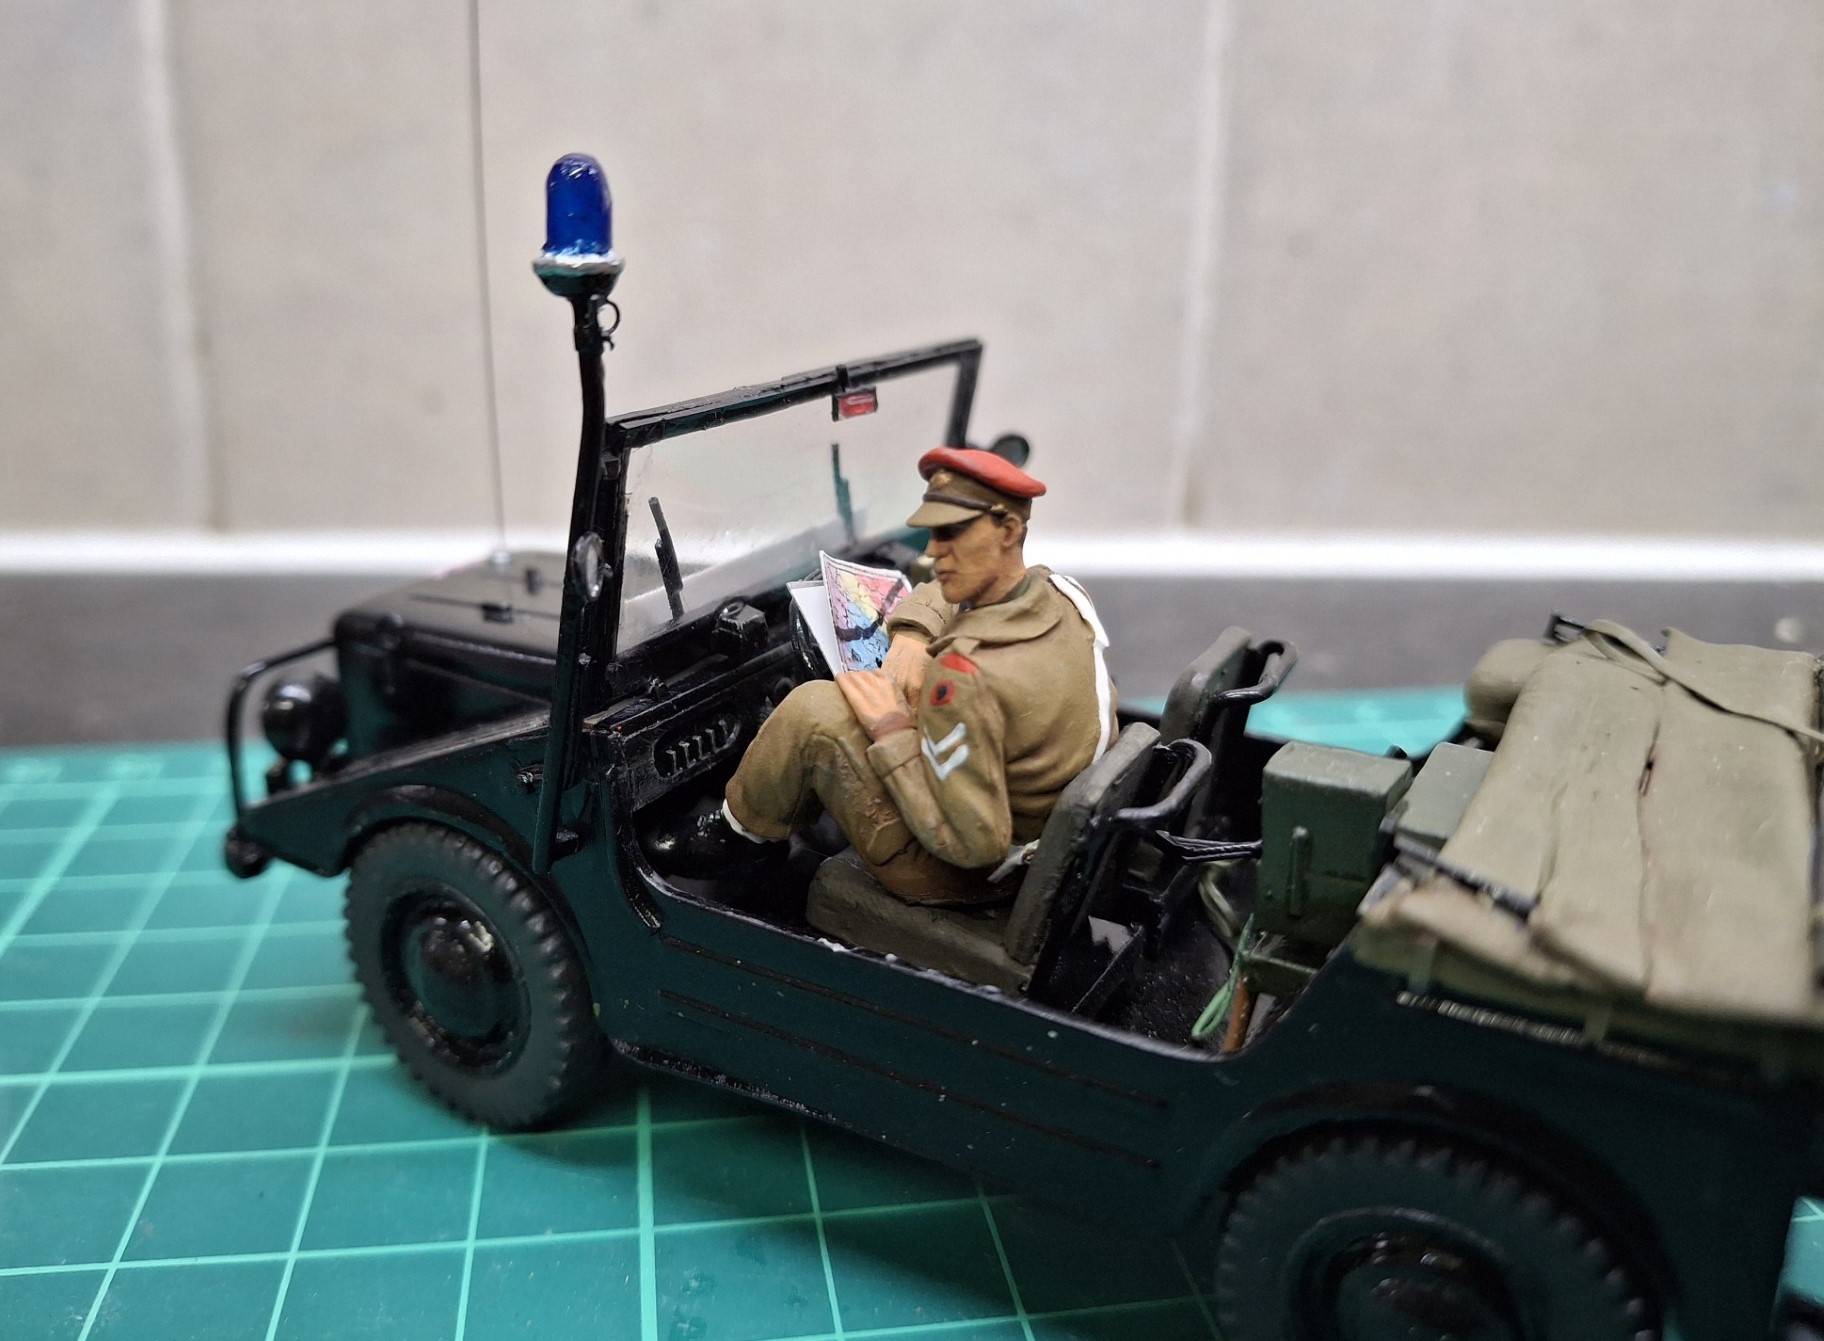
Driver installed; in the end I could not position the First Aid box in the right position for his foot, so it’s sort of hanging in mid air (the foot, not the box) but I’ll have to live with that; I don’t believe it detracts too much.
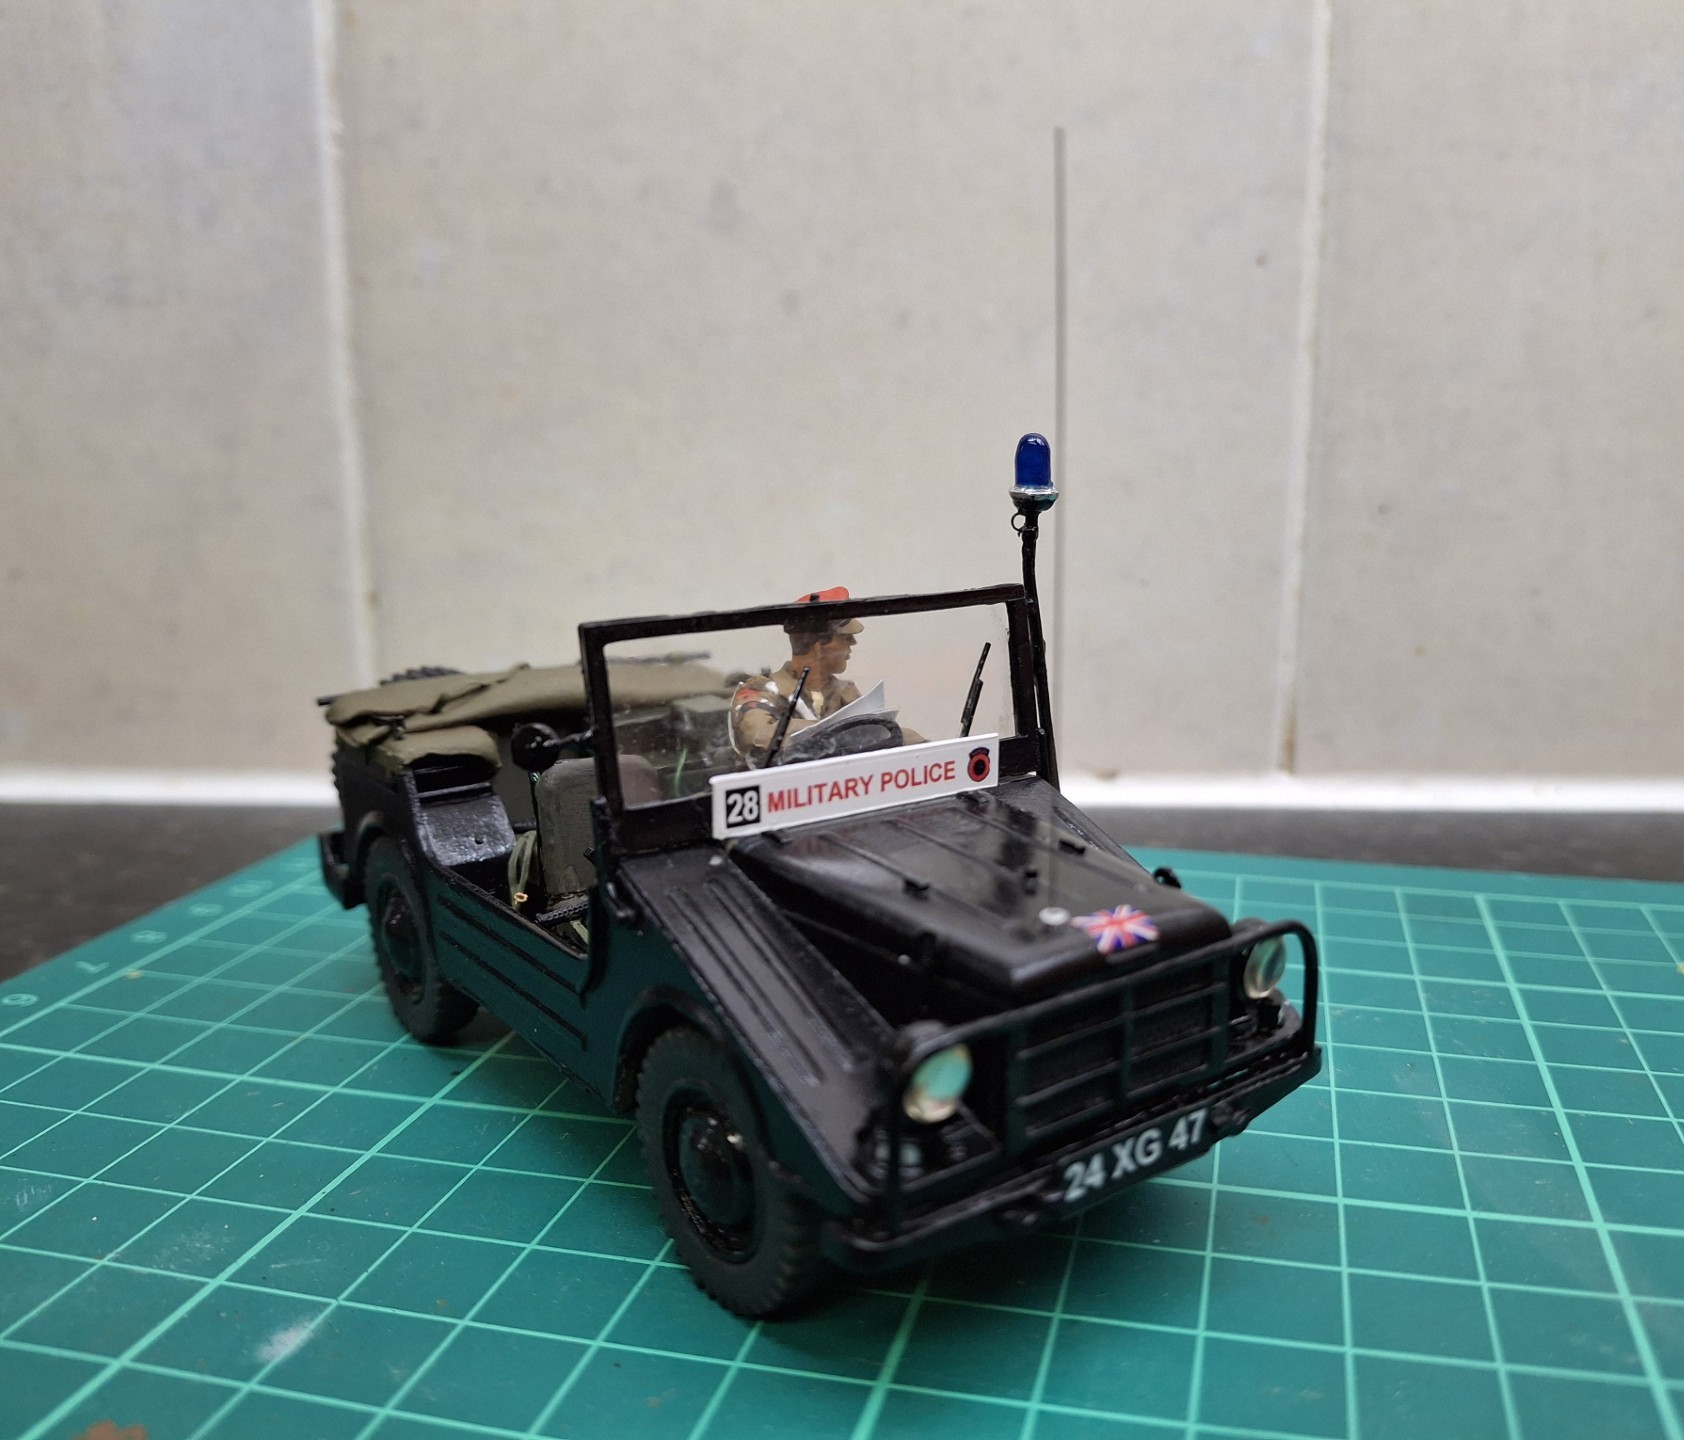
Other items shown are the blue light supporting mast. I made this from thick copper wire as I wasn’t sure I’d be able to bend anything else into the right configuration, where it adopts the vertical.
In the background of the pic is more copper wire holding the blue light mount. I made this from a 1:76 Churchill tank road wheel and need to effect a sort of cup-like item. To this end it’s been covered in Mr Dissolved Putty so I can pursue that shape and temporarily secured with Blu-Tak while I work on it.
I intend to make the light from a length of clear sprue and have started sanding one down; the answer of course, would have been to secure an Accurate Armour version while they were still in business. That said, their lights are, I recall flat-topped, and this one needs to be rounded, so I’ll pursue that as best I can.
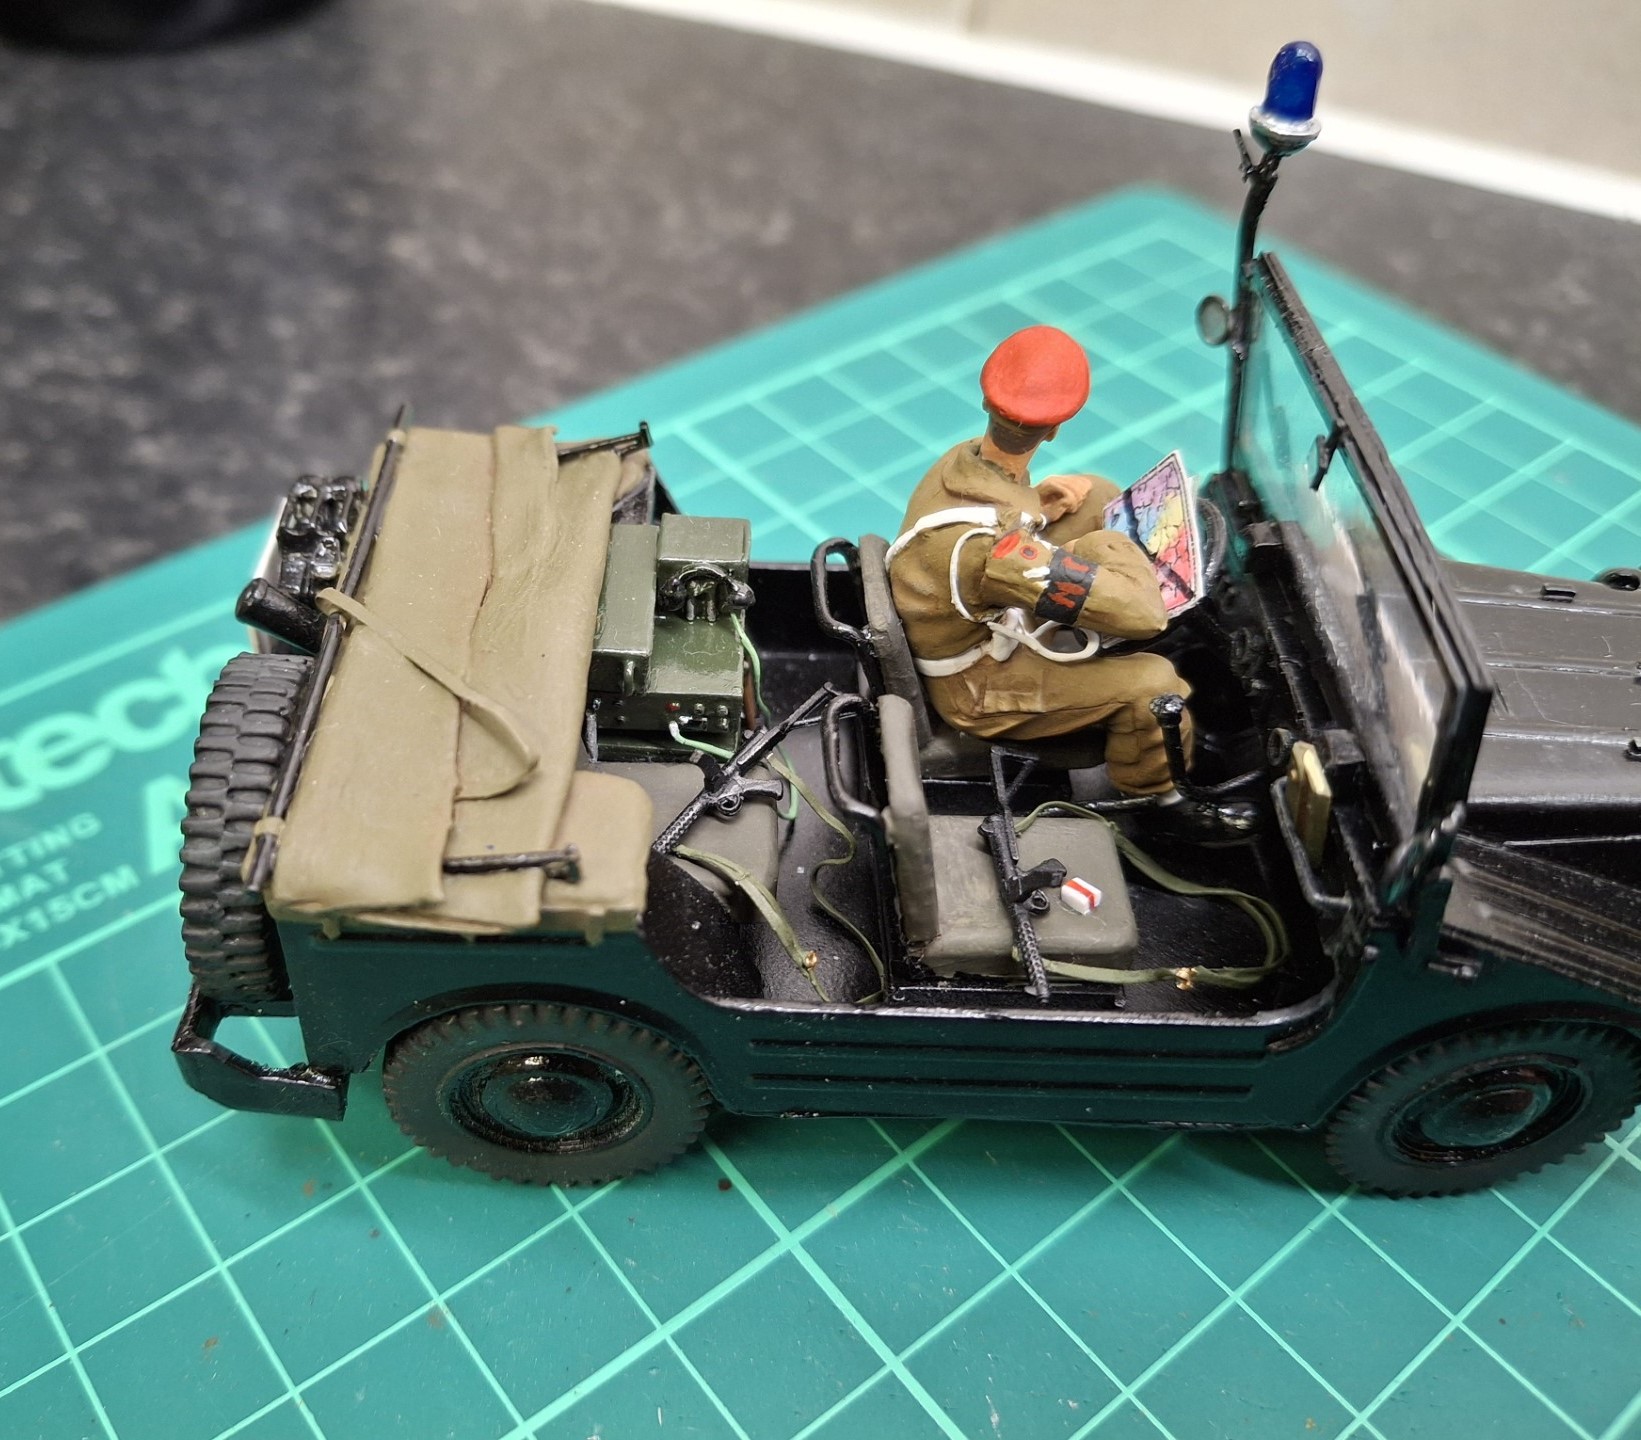
Other items are the Sub-Machine Gun, one already installed in the vehicle on the rear seat, the vehicle Work Ticket (that is the documentation authorising its use; these are produced in a canvas and wood folder secured with two brass press-studs). There is also a small printed map from Dragon, from their LAH Panzer Crew at Kursk set. I need to colour this to reflect some sort of patrol-zonal city map. This will be tucked under the driver’s arm resting on the steering wheel.
Lastly, a packet of cigarettes – the small white piece with a red stripe on – Embassy King Size since you ask.
So, nearly there folks! Beginning to look as it should perhaps.
This is really coming along …credit to your perseverance on this mate …
Thanks Terry - a bit of a challenge I must admit, but I love it (more or less) when a kit gets to the final stage of finishing. This has been a bit different as I’ve had to do more paint-as-I-go than usual, plus of course, I’ve had to scratch a fair bit, then work out the sequence, which I don’t always get right(!)
Anyway, thanks for the interest and support.
Here’s how you could also make your blue light cover:
Drill a hole of convenient diameter into a piece of styrene about 2mm thick and find a piece of acetate (bubble pack). Heat the acetate over a candle flame and when it’s floppy, push it into the hole with the round end of a drill bit that’s 1/2mm smaller in diameter than the hole. You may have to build up the drill’s end with epoxy putty for the correct curvature and, just like styrene, not all acetates are created equal: some cool down instantly, before you can come close with the drill, while others give you sufficient time to work. You’ll have to experiment - but that’s modeling.
Peter
Thanks for that Peter; I’ll go with the clear plastic sprue not least as it’s now cemented in place, but thanks for the tip.
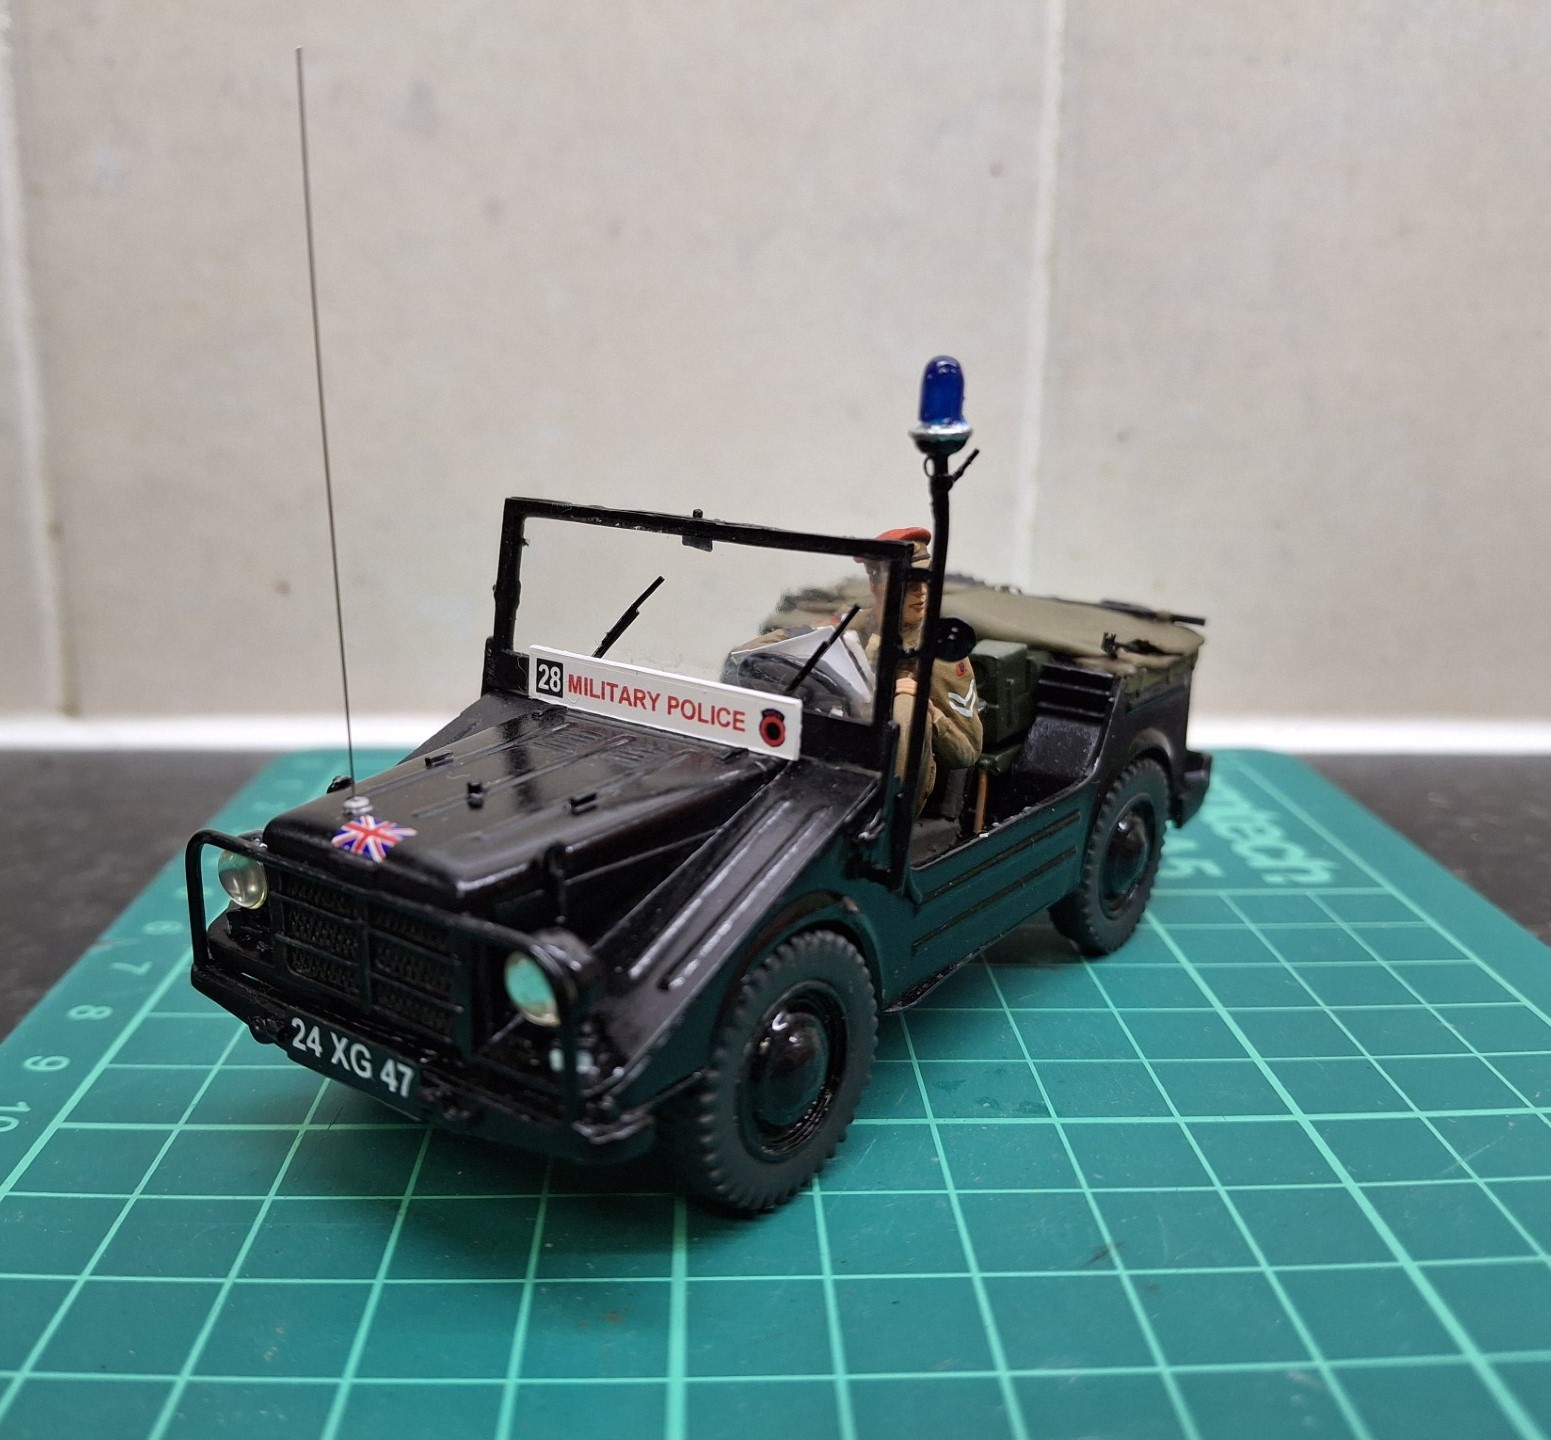
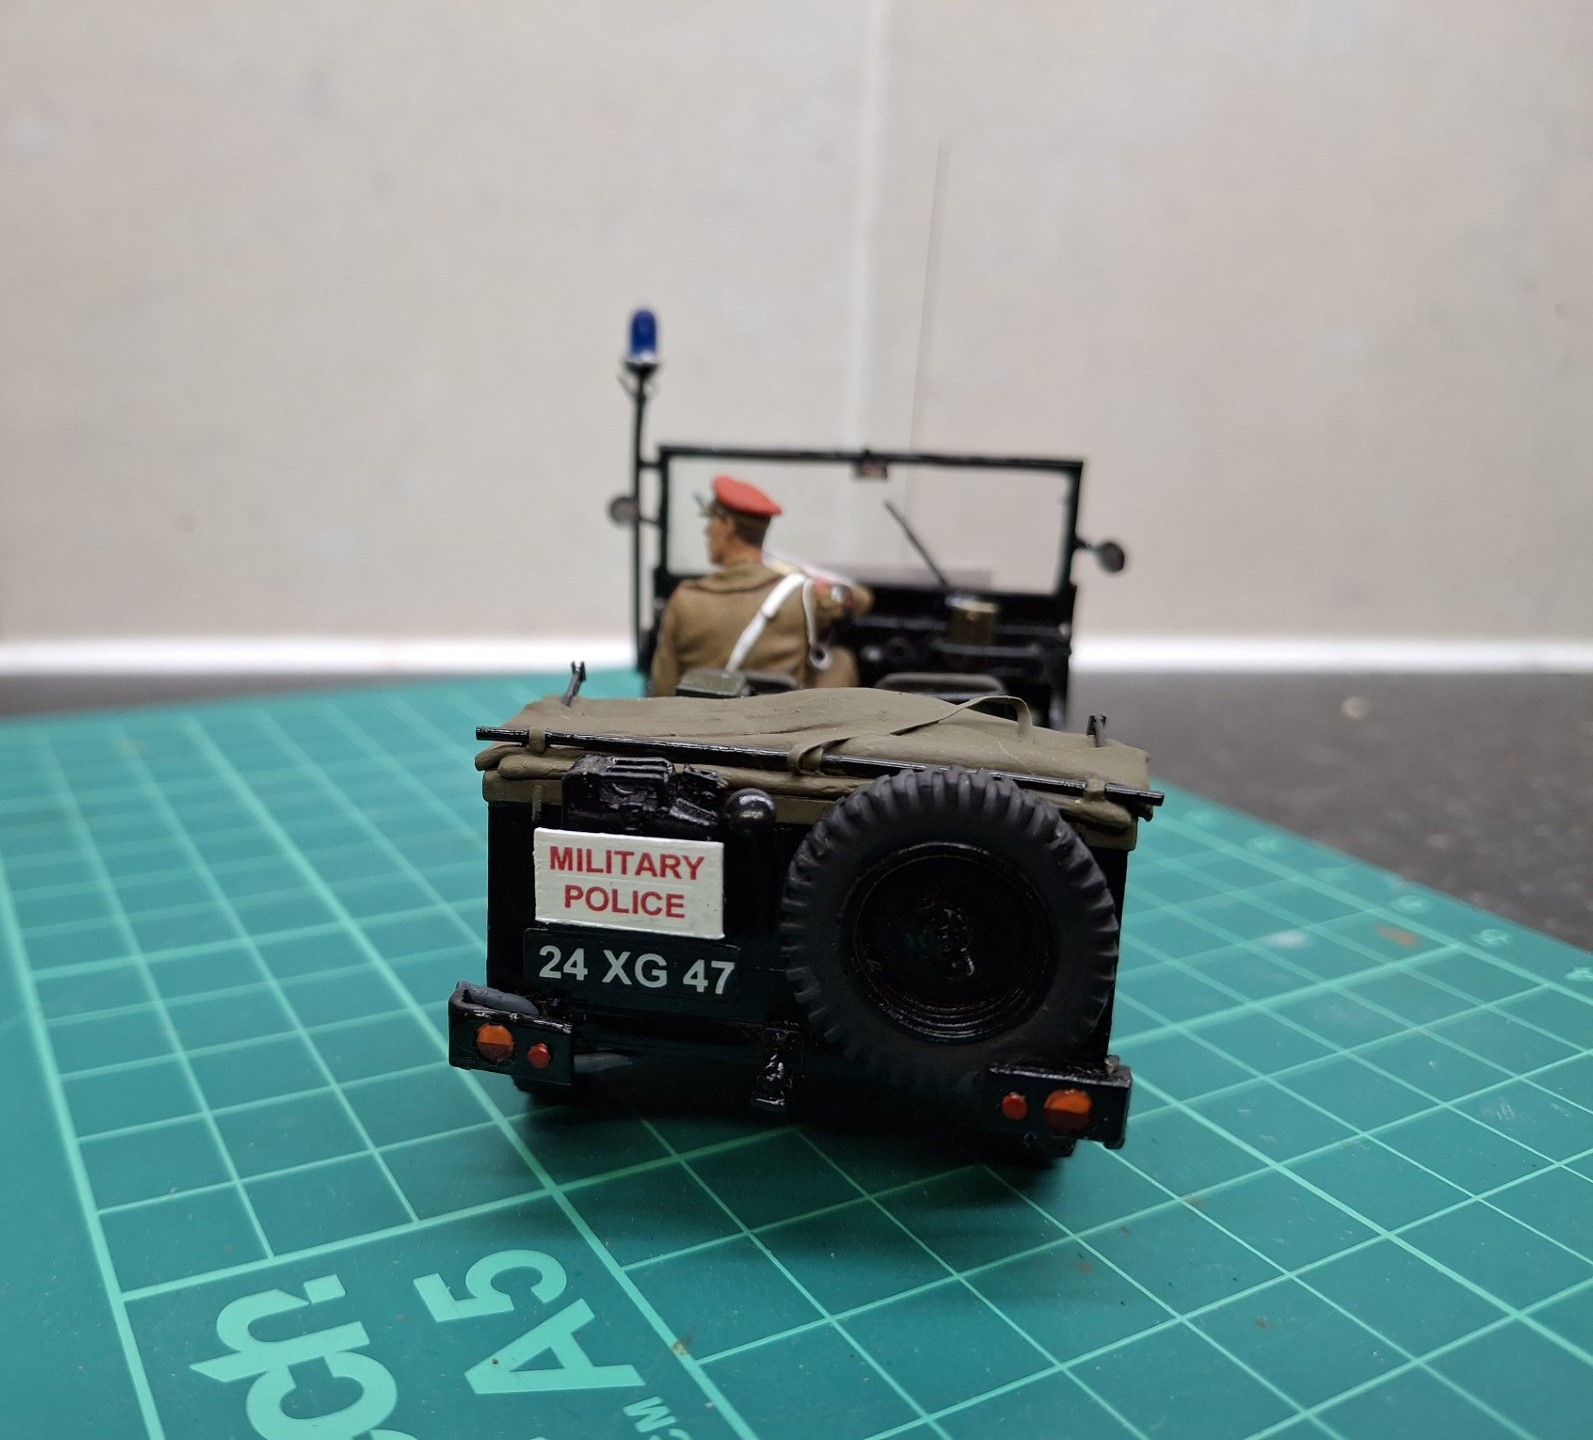
Well, I got there – somehow! A bit of a struggle I must admit – and it probably shows. It is a very fragile build, as is the nature of resin perhaps.
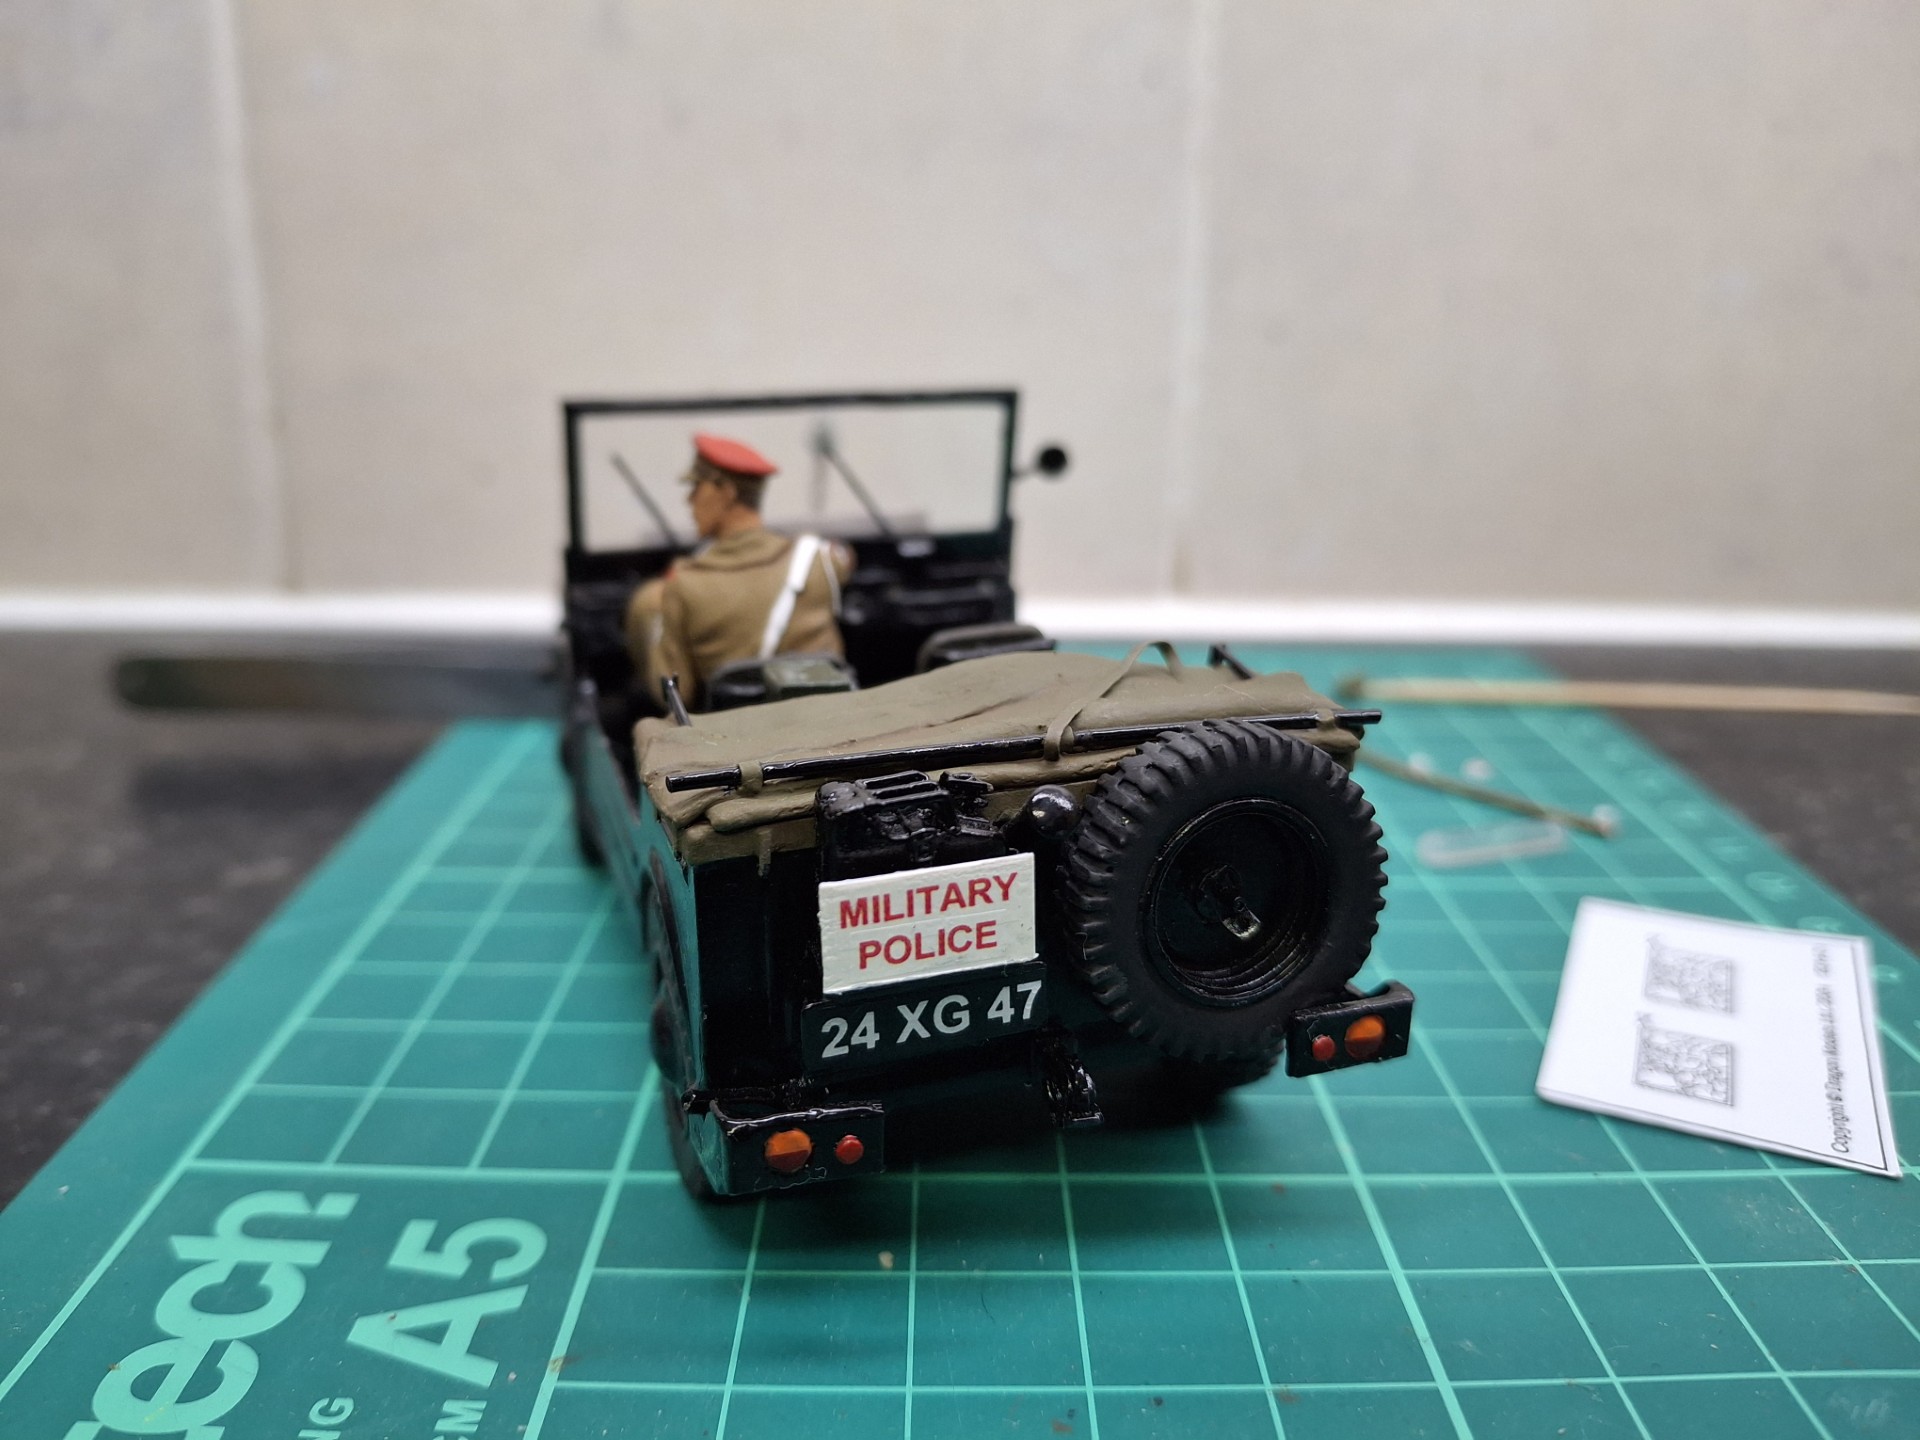
I managed to get the Driver installed though he became unglued twice. Sigh; other items within the vehicle are 2 x Sub Machine Guns, the radio, the vehicle work ticket, shown tucked into the hand-rail on the passenger side. The Driver has his patrol map, which is subject to rapid revision as the building of the Wall ensues. There is also a packet of cigarettes on the passenger seat. The radio antenna appears to be of a civilian type despite the military radios, and is the last detail I installed, using 0.45mm Nickel Silver rod. It’s so thin I’ve knocked it off twice – sometimes I do feel I’m cursed(!)
I must admit, at this stage I am tempted to portray it as per my Mini Staff Car model, from some time ago, with just the two figures:
on a small base; it sort of portrays the vehicle better, rather than on the larger base, where there’s a danger it might get lost a bit.
However, I’ve invested a lot in this project; after all, what else am I going to do with those wall sections and all that barbed wire, let alone half the East German Army (in figures that is)?
So, still a lot to do; figure hell awaits!
There could be a slight tone difference in the drab grey concrete …
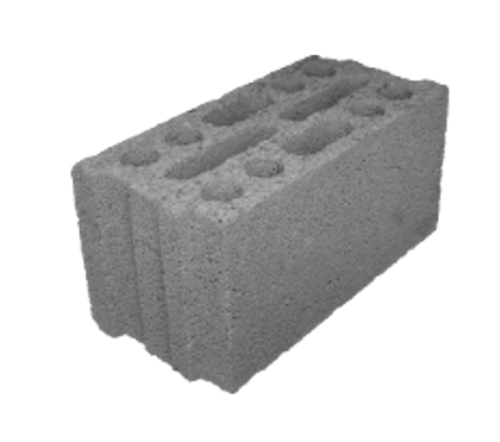
No, not so; whilst I have no extensive knowledge of the East German brick/block manufacturing industry of the 60s, there would be, I’m sure, a congruent process in which all building materials were of the same specification - including colour thereof.
Colour variations in such a scenario - ie a wall - especially within the confines of my project’s base - would be absurd.
My colour concern, for want of a better term, is that of the cobbled base being more or less, the same colour as the wall construct, hence my comment re the possibility of a “monochrome” aspect.
What I can do, and may, is to pick out certain cobbles in contrasting colours/tones. I might consider this but equally may well dismiss it. If there appears to be a sea of “grey” broken only by say, NVA Blumentarn uniforms, red/white poles, and the khaki/red/white combo of the British Military Police, let alone the gloss black of their vehicle, then so be it. After all, I’m pretty sure that life in 1960s East Berlin was grey, drab, possibly even monochrome(!)
If it doesn’t work, then I’m sure you’ll be the first to let me know!
Lovely Munga & figs! As a past student of cobblers cobbles, there’s always variations. Firstly subtle (not glaringly obvious) shade variations of individual stones, secondly ordinary dirt patches like the odd patch of oil, thirdly – maybe it rained recently? For that you’d just need to mix a dilute wash of a slightly darker shade than the cobbles, trail it all over and wait for it to settle where it will.
On top of that: cobbles do not have the same colo(u)r as concrete.
Mine do - or might(!)
I might have to rethink this project a little; the work required to convert and produce enough figures to tell the story is somewhat daunting.
I suppose the answer is to experiment with just one figure and assess how difficult – or not – it is, then take it from there.
Otherwise, I’m warming to the small base idea as described above.
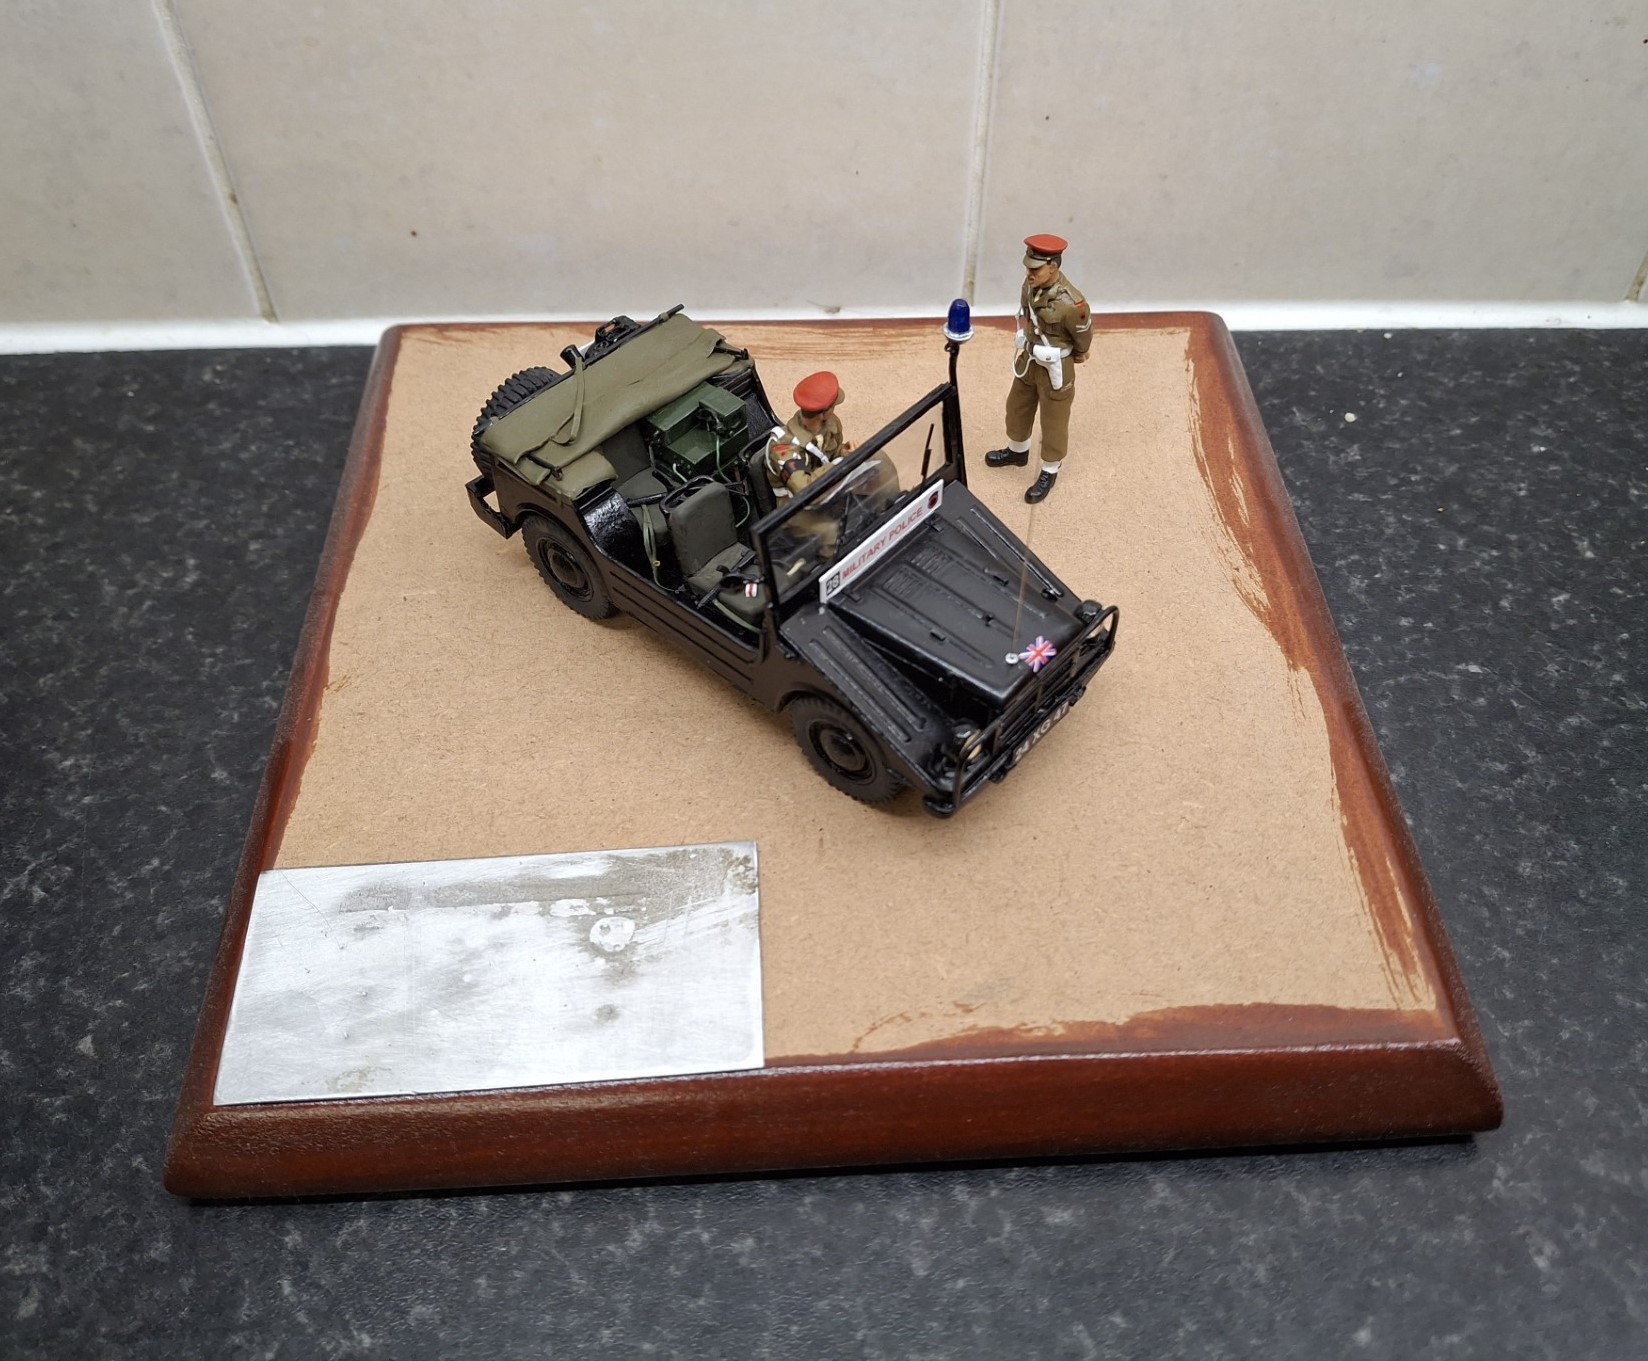
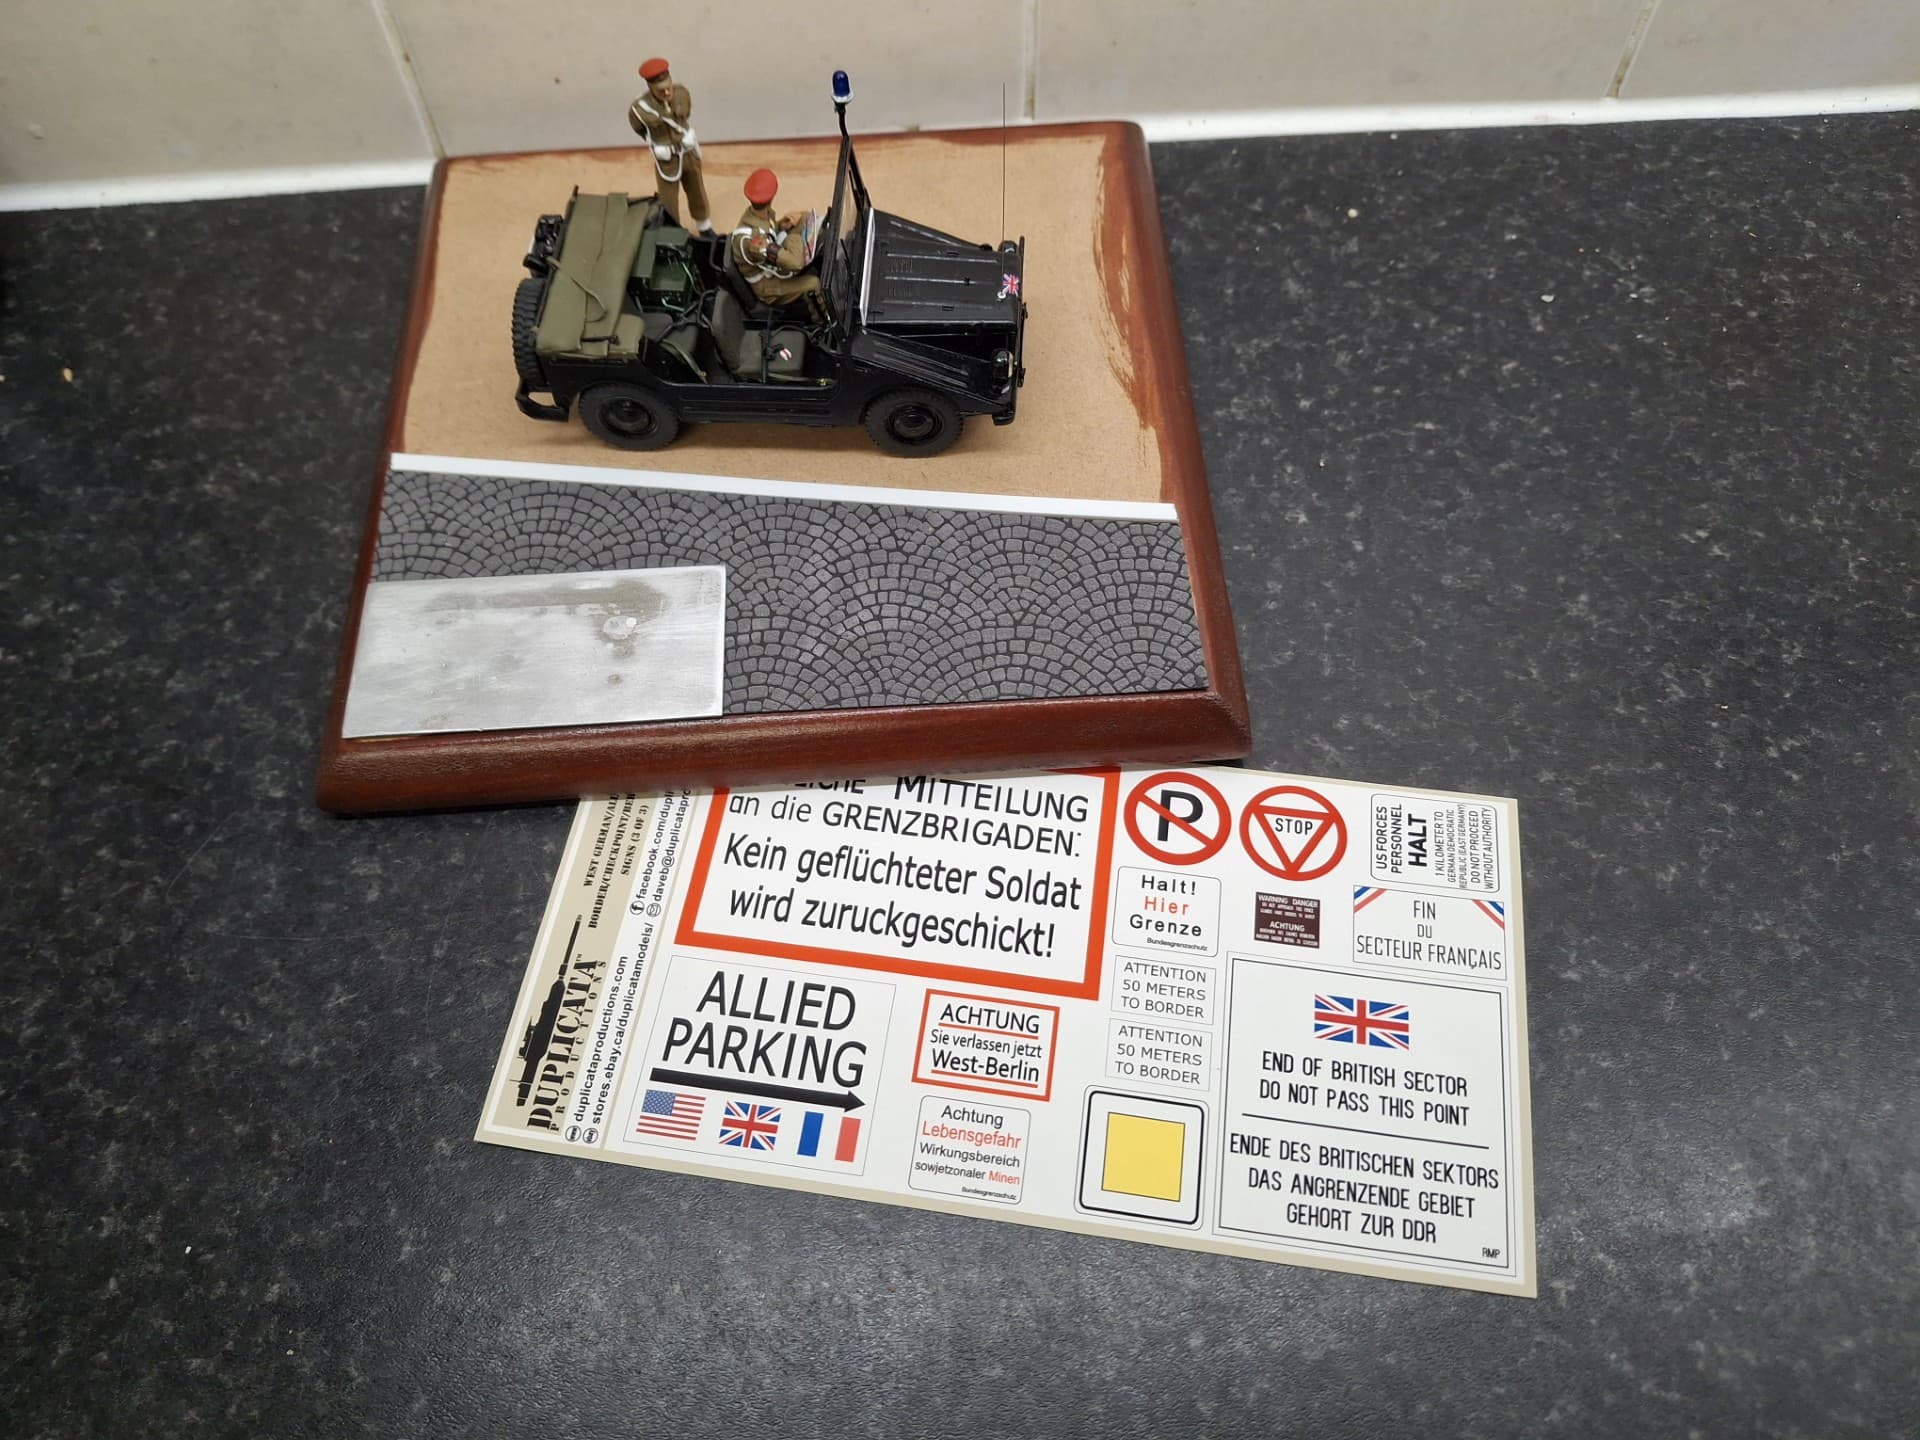
Here is the Munga in its new portrayal:
This is what I’ve been thinking of re an alternative scenario; a bit bland after the original idea, but this might be the way ahead; I’ll add the sign shown in the lower right of the sheet.
I’ll keep my options open. It will depend on how easy – or not – the NVA figures are to convert.
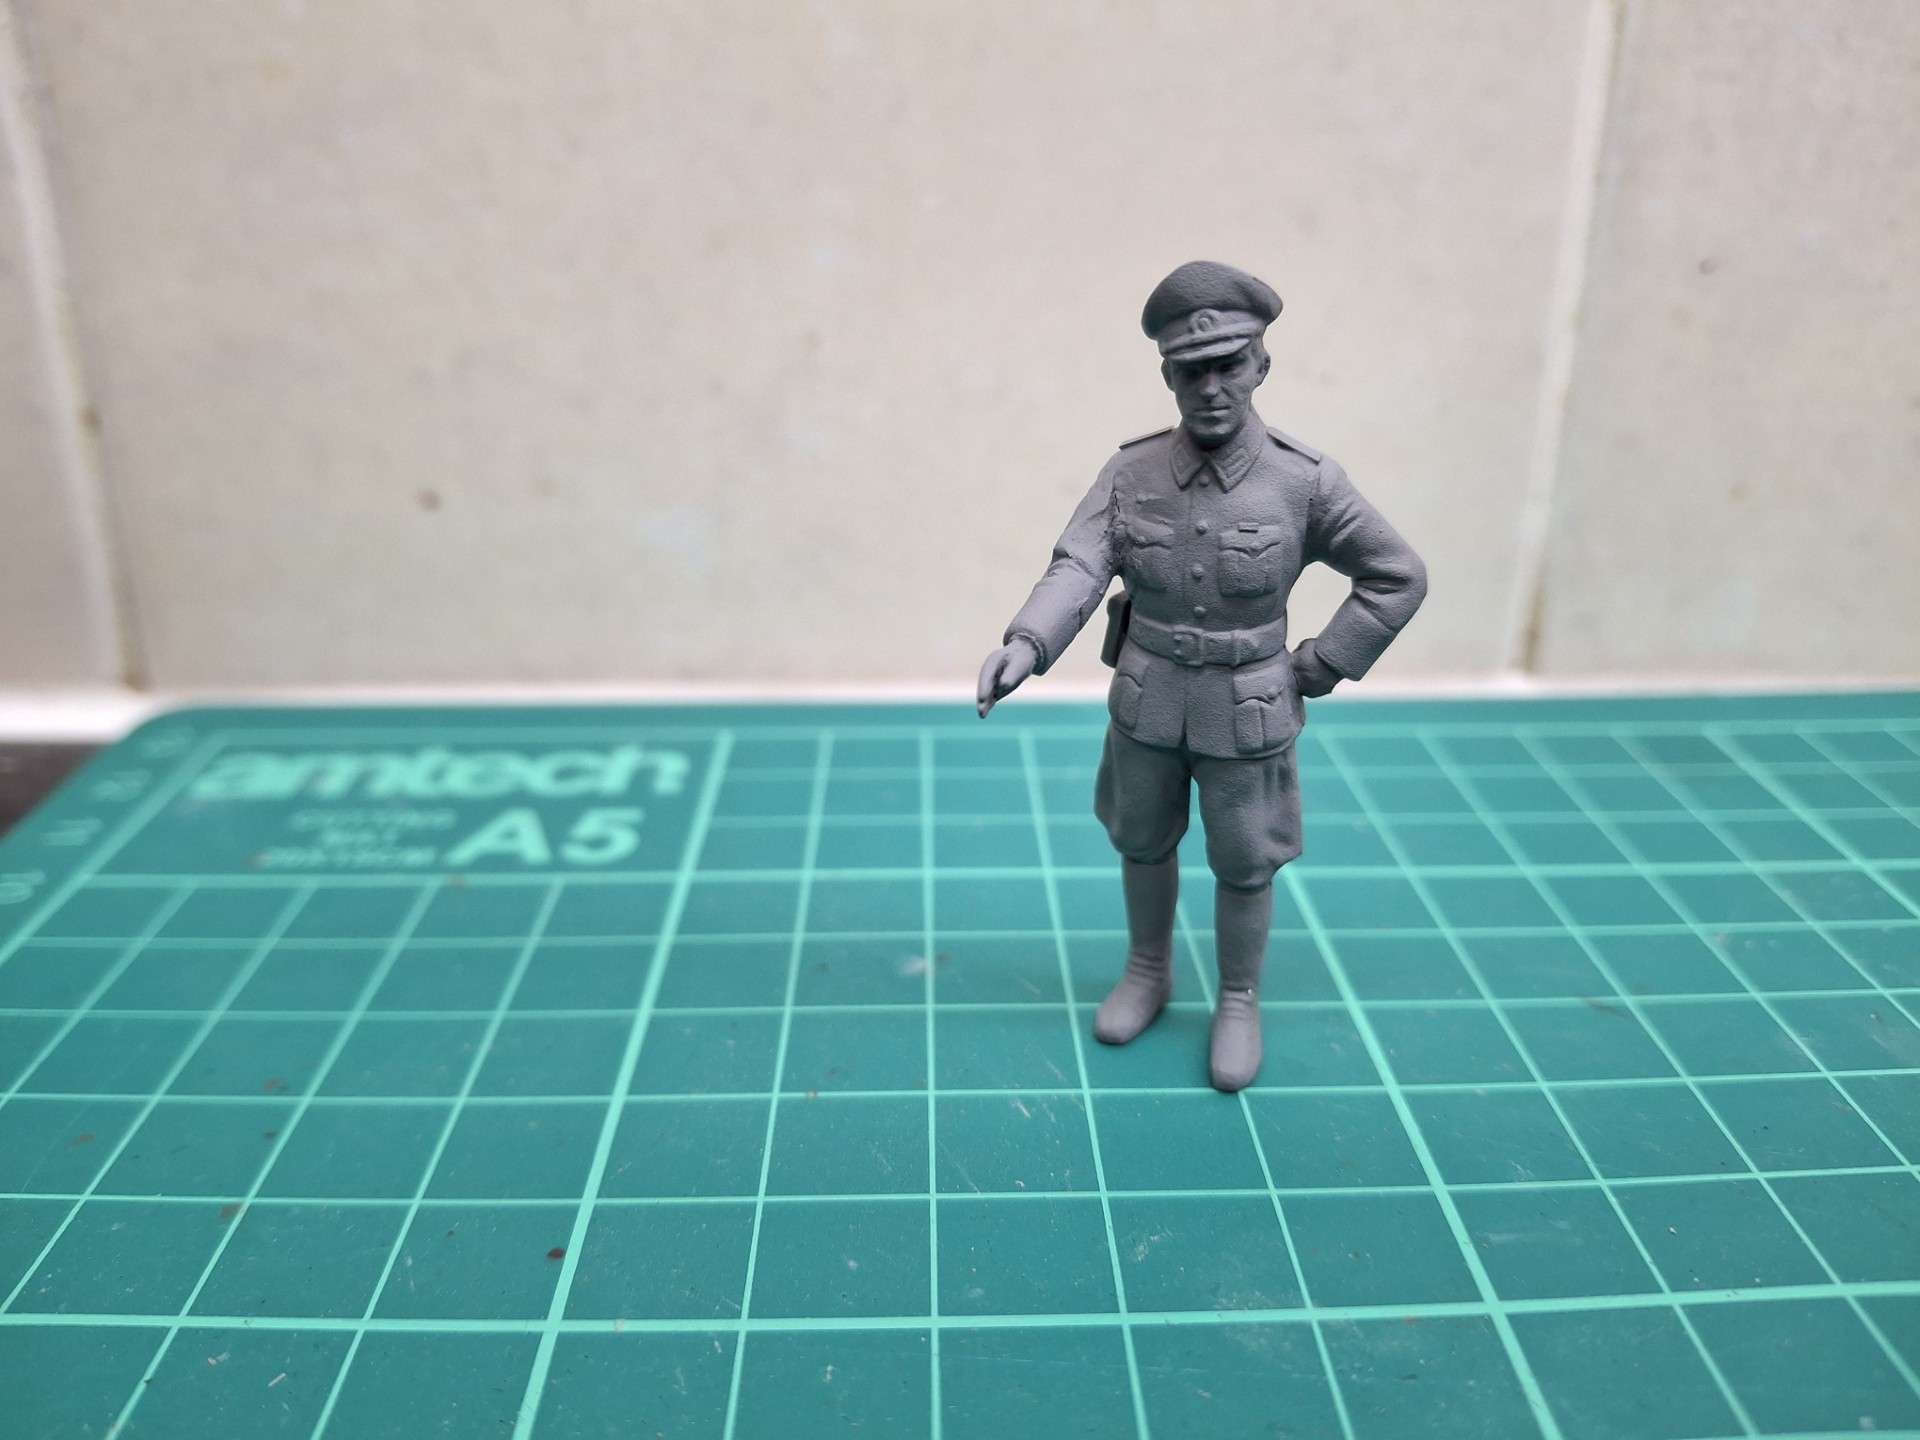
I will start though on the officer just to give myself a bit of a break:
Top pic a bit foreshortened I’m afraid, but I think he’ll do OK as an NVA officer. I hope to paint him up tomorrow.
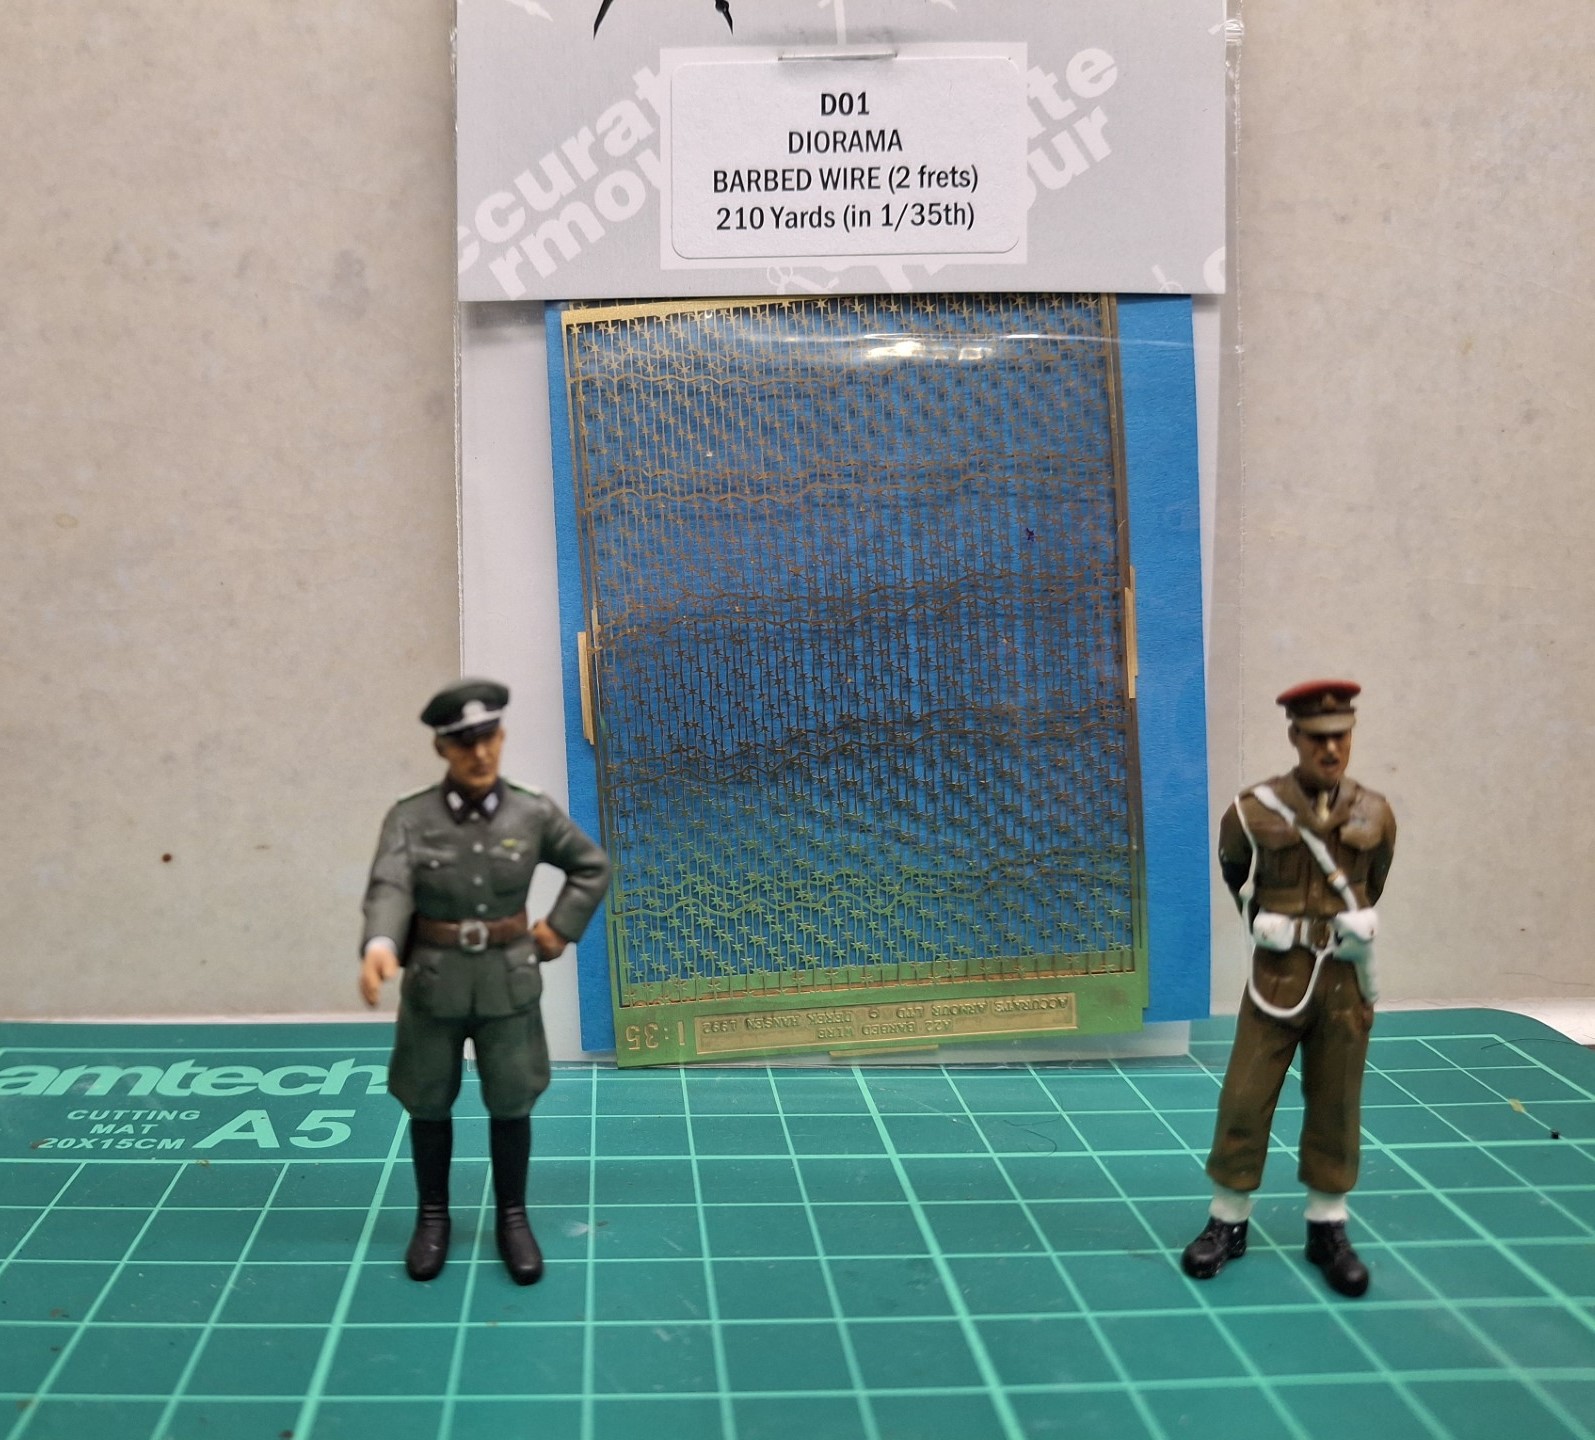
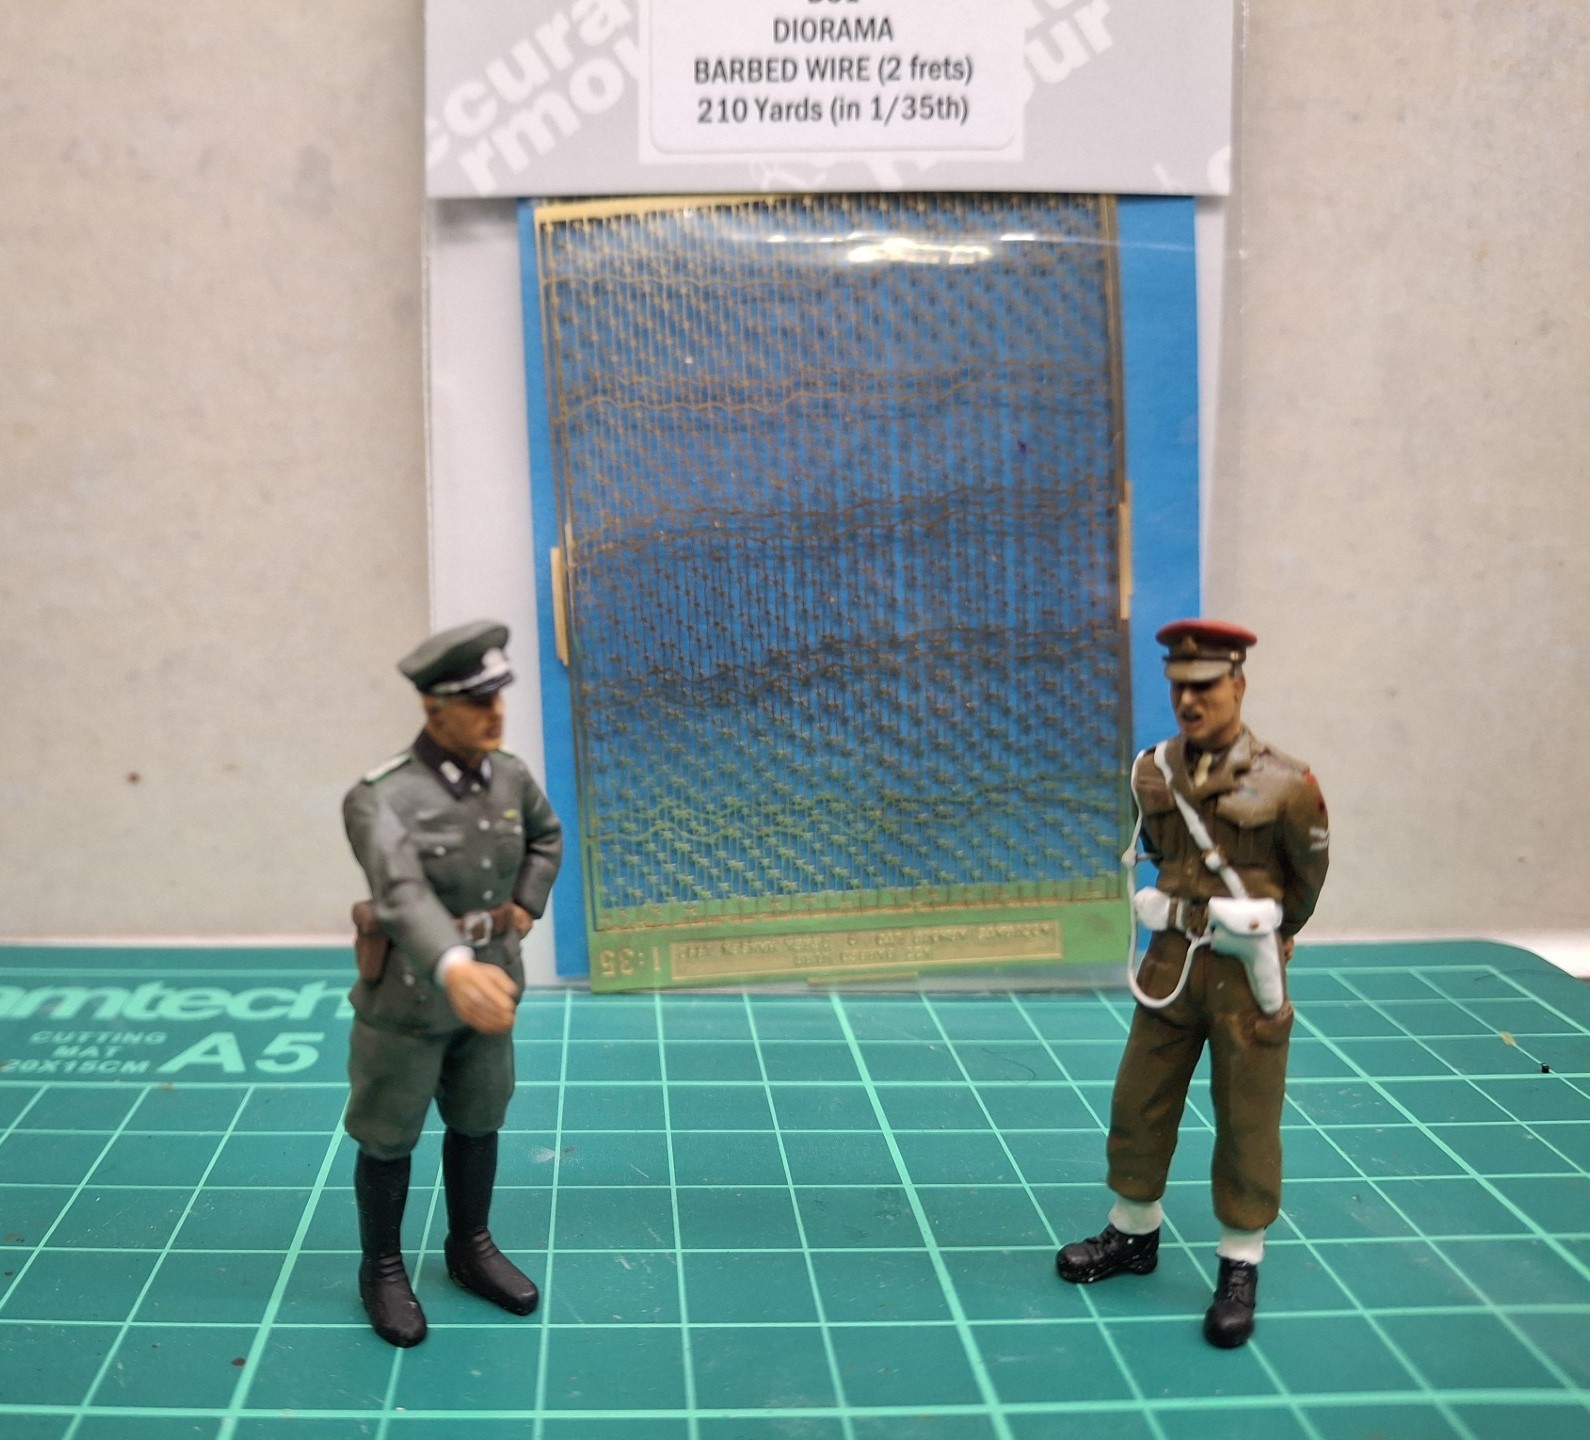
I give you the Berlin Debating Team for August 1961:
The ancient Tamiya Kubelwagen/Schwimmwagen officer figure hasn’t come up too badly perhaps, in his new guise as an officer of the NVA. Not that much more than a repaint but with his holster trimmed a bit to take a Makarov, a repositioning of the arm, removal of Wehrmacht insignia, a reduction in size of the cap crown, oh, and a medal ribbon added; the Medal for Exemplary Border Service since you ask (though I’ve positioned it too low).
I do not think that the NVA Border forces sported a green cap band at the time so have identified a “normal” NVA band of black. Of course, I’m not suggesting that it was only Border forces in Berlin at the time, I could just as easily painted him as any NVA officer; however, in a nod to the Border forces I have painted green as the underlying colour of his epaulettes.
Still a little touching up required as well as varnish
Now, to tackle the NVA soldier figures to see if the original plan is still viable.
It is my opinion that you should stick to the original idea that shows part of the wall… This puts so much more context to the scene…
Yes, having just set up another dry-run as it were, I think I will try and make a go of it. The problem will be NVA soldier figures and to see what I can make of them. I have a rough idea of how to tackle the most troublesome areas but I suspect it will be labour intensive however, as my wife put it the other day when I was bemoaning the task, “What else have you got to do?”.
Well, you could do the dishes, housework, trash, etc. An hour or so of that will put you in a much better mood for dealing with a few troublesome figures.
Ken
Well Ken, I know full well I’ll never get “Husband of the Year” but I cook Mon to Fri; housework, or sadly, as I still call it “Block Jobs” is split roughly 60/40 but that’s because she doesn’t fully trust me to do a good job. I have done nothing to dissuade her of that view, which I’m sure makes me a bad person! Trash aka Dustbins over here - I do normally put them out - and have been known to scrub them. I clean out the gutters and wash down the various outside bits of the house, or those that I can reach once a year. I also stump up for lunch out once a week as well, but I’m no Saint that’s for sure.
What is a bonus is that my wife is such a dedicated and keen gardener, that I’m banned from even mowing the lawn.
Back to the bench