I only now saw this thread. And I am loving it! I really like the Iltis & MP’s.
1 Like
Thanks for the interest Ron; please note that it’s a Munga, not an Iltis which came on the scene much later. The Brits used the Munga only in Berlin.
2 Likes
Having studied further pics from the time I may well have to revise my plans! I am using a wall that doesn’t look much like the East German efforts at all, but one has to start somewhere. It’s all turning out to be a fair bit of work but then, that’s the nature of the hobby.
1 Like
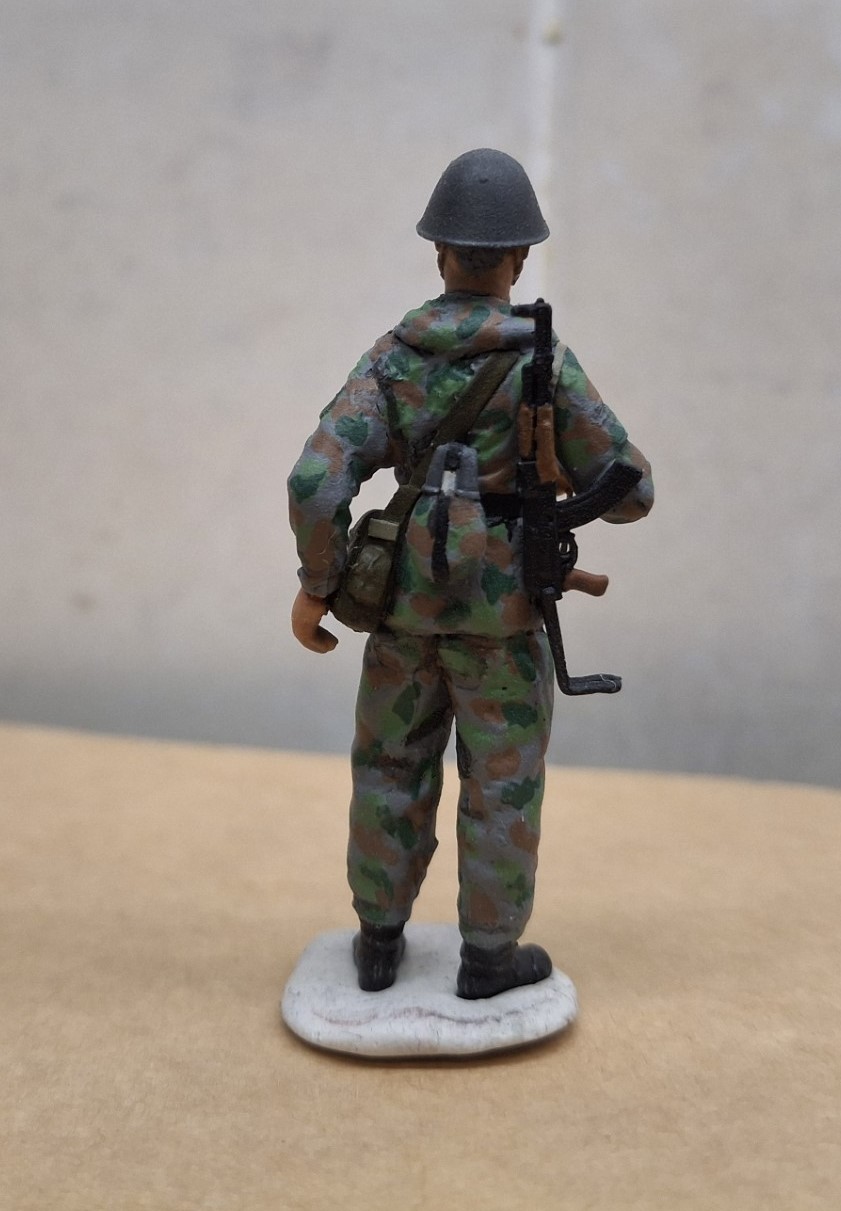
A good representation of a Grenztruppen Officer. Thankfully NVA unifoms had a big resemblance with Wehrmacht.
1 Like
Just found this short video of the opening of the border near my hometown. Brings back memories on better times.
https://www.youtube.com/watch?v=pV-HDsmqJ20&list=PLJzDhAOQ_vKcWPVE3RQVt96VqsQE70Fk3&index=8
1 Like
Thanks Hermann, it does make it relatively easy for this time-frame; the collar and tie ensemble which came later would probably defeat me.
1 Like
Do you ever get that feeling that your ambitions are getting mixed up with your ability?
This is the only way I could think of to get an appropriate stance for my NVA figures (perhaps foolishly I wanted them, more or less, all in the same position, or at least similar). Armatures and Hornet Hands; how difficult can it be? Well, it turns out very. I’m really not enjoying this(!)
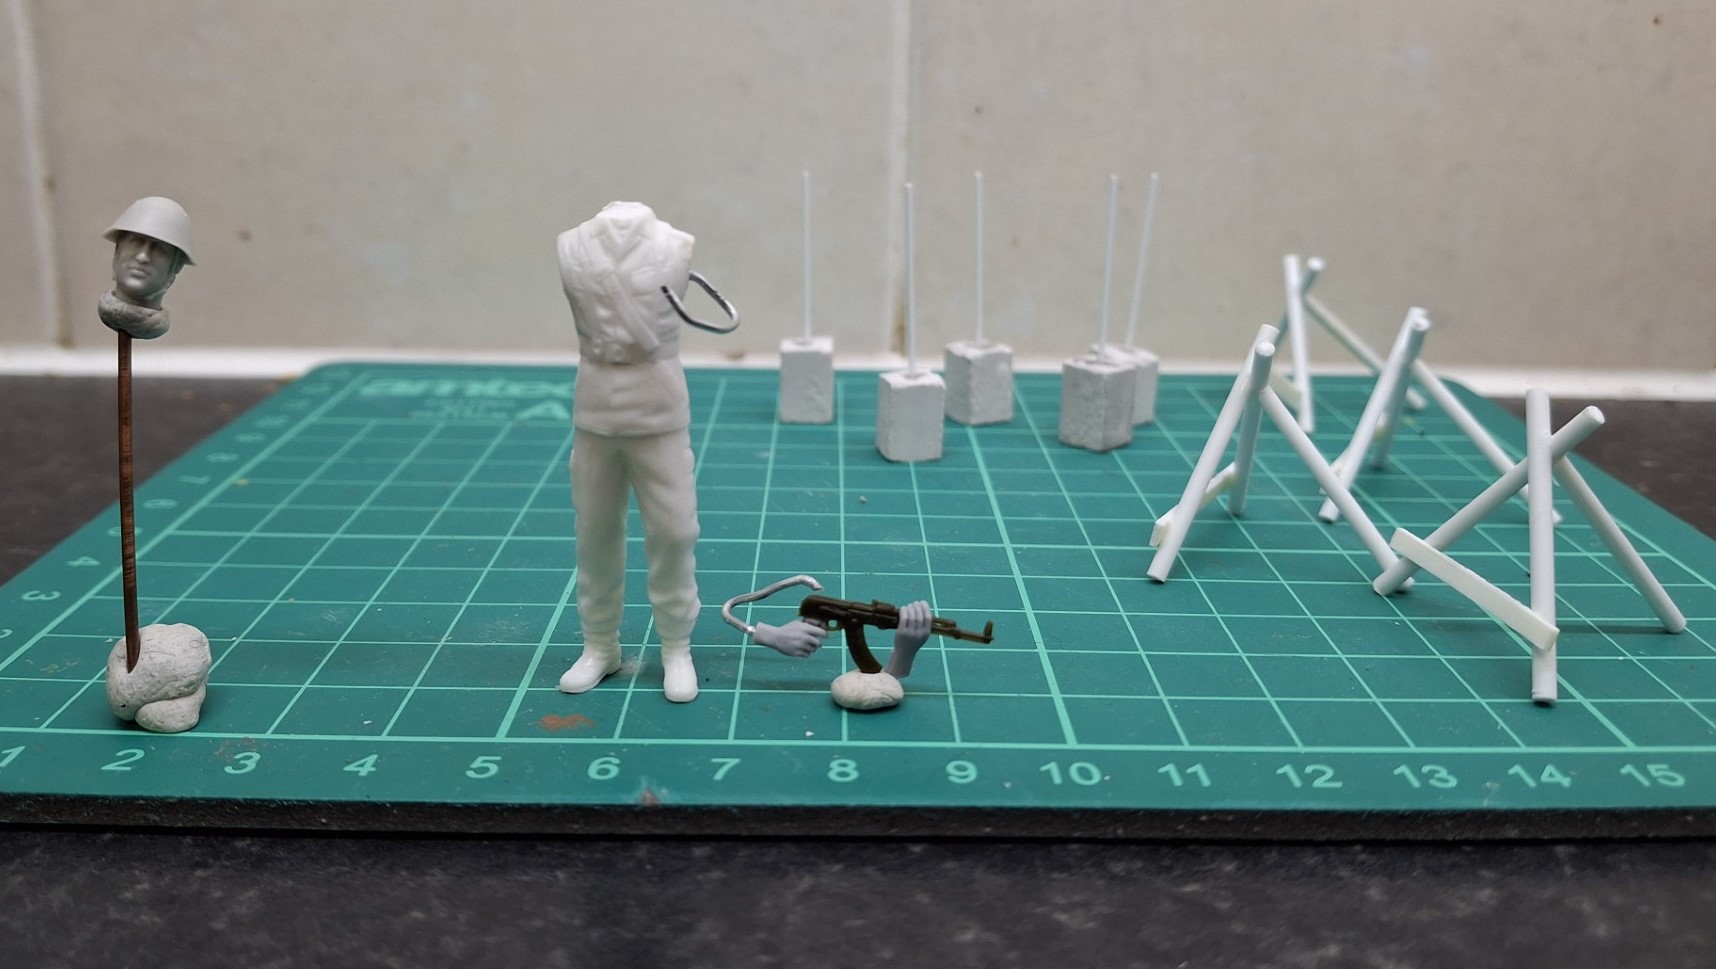
Obstacles for the scene - no problem, but figures, always figures. And yet figures are so important, well, to me at least.
I may well have reached the limit of my purported aptitude.
12 Likes
Brian I get my ability and ambitions confused all the time, one is way ahead of the other lol!
4 Likes
I think most of us have met that particular moment where ability and ambition collide in a heap of plastic, putty, glue and a liberal amount of cursing.
But pushing on usually leads to improving- noting your mistakes and trying to correct them or not make them again. Personally I think your figure is looking good- I can see where you are going with the pose. The only thing I would try and do different is to raid the spares box for arms that may more or less correspond to the shape and then shaving or cutting them down to size before using putty to flesh them out. Even using a shoulder to the elbow or elbow to cuff with a piece of wire for the remainder might be a bit easier than sculpting a whole arm on the wire armature.
6 Likes
Thanks Karl - definitely a bit of overstretch on my part; I’ll have to rethink a little. It’s not essential that I have all the troops in the same position, after all, they’re not on parade. I will rethink the positions and see what I can run with. After all, contemporary pics show troops hanging around, even smoking - shock horror!
I think as long as I get an effect, I’ll end up happy enough; tonight I tackle the modifications to the uniforms, bulking out, possibly pockets, drawstrings etc.
I should definitely have thought through the use of arms, or portions of arms - that would have helped a lot. Clearly, lateral thinking not my strong point, or rather, not these days(!)
Anyway, thanks for the interest and support.
6 Likes
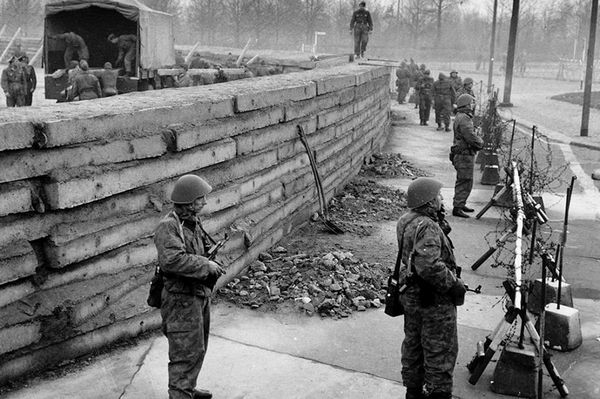
While I delay the inevitable - Magic Sculp/Milliput/figures - I’ve been working on some of the scenic items required. So, I’ve now produced some concrete/metal stanchions for the barbed wire, and some knife-rests which will also be wrapped in seemingly endless barbed wire. I note that the East German forces back then did not deploy barbed wire as perhaps we would in NATO, ie concertina-type rolls, but just seemed to amass as much of it as they could and dump it to form an obstacle. That actually is a help to the diorama builder as I don’t have to worry too much. See for example the pic above.
Anyway, progress as shown below, with the NVA officer figure:
17 Likes
Well, first of the few but I thought I’d tackle a singleton figure first to see if I can make a go of it. I’ve binned that armature idea for the moment, so this character is more or less straight as Alanger/ICM intended, or at least the pose:
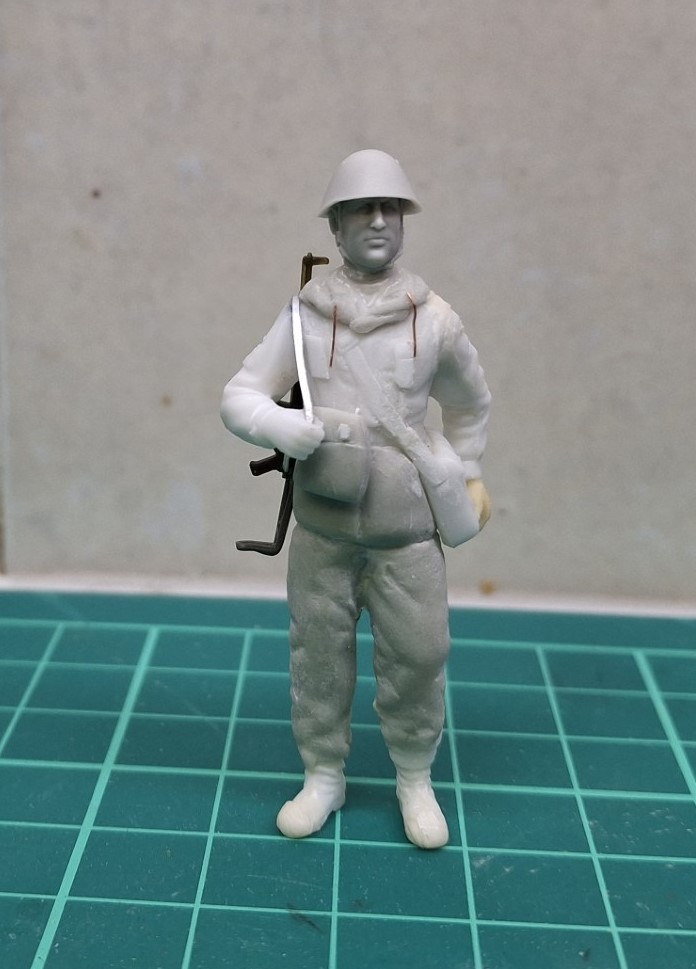

Modifications were bulking out of the smock and the trousers using Magic Sculp; vertical chest pockets from card, hood, Magic Sculp again, with drawstrings from copper wire. I used the kit’s respirator case but the straps don’t quite tie-up properly so I may have to disguise that if I can.
Water bottle from some Tamiya 3rd Reich German – sanded down to try and effect the NVA type.
Ammo pouch made from Magic Sculp; AK from Italeri with a wire stock from a Heller MAT 49 – which isn’t brilliant; I noted in all the pics of 1961 that the NVA all seemed to have the folding stock version, not the wooden butt type – which is a bit of a pain really. Sling from lead foil and plastic strip. For some reason the feet are really small so I’ve tried to bulk them up a bit using Mr Dissolved Putty.
What I haven’t mentioned is the excellent Hornet Head, but note I haven’t fitted it particularly well. All in all, quite a bit of work; if he looks OK after painting then I’ll crack on with as many as I can, but as I say, a lot of effort!
PS: I am however, looking forward to having a go portraying the Flachentarnmuster.
10 Likes
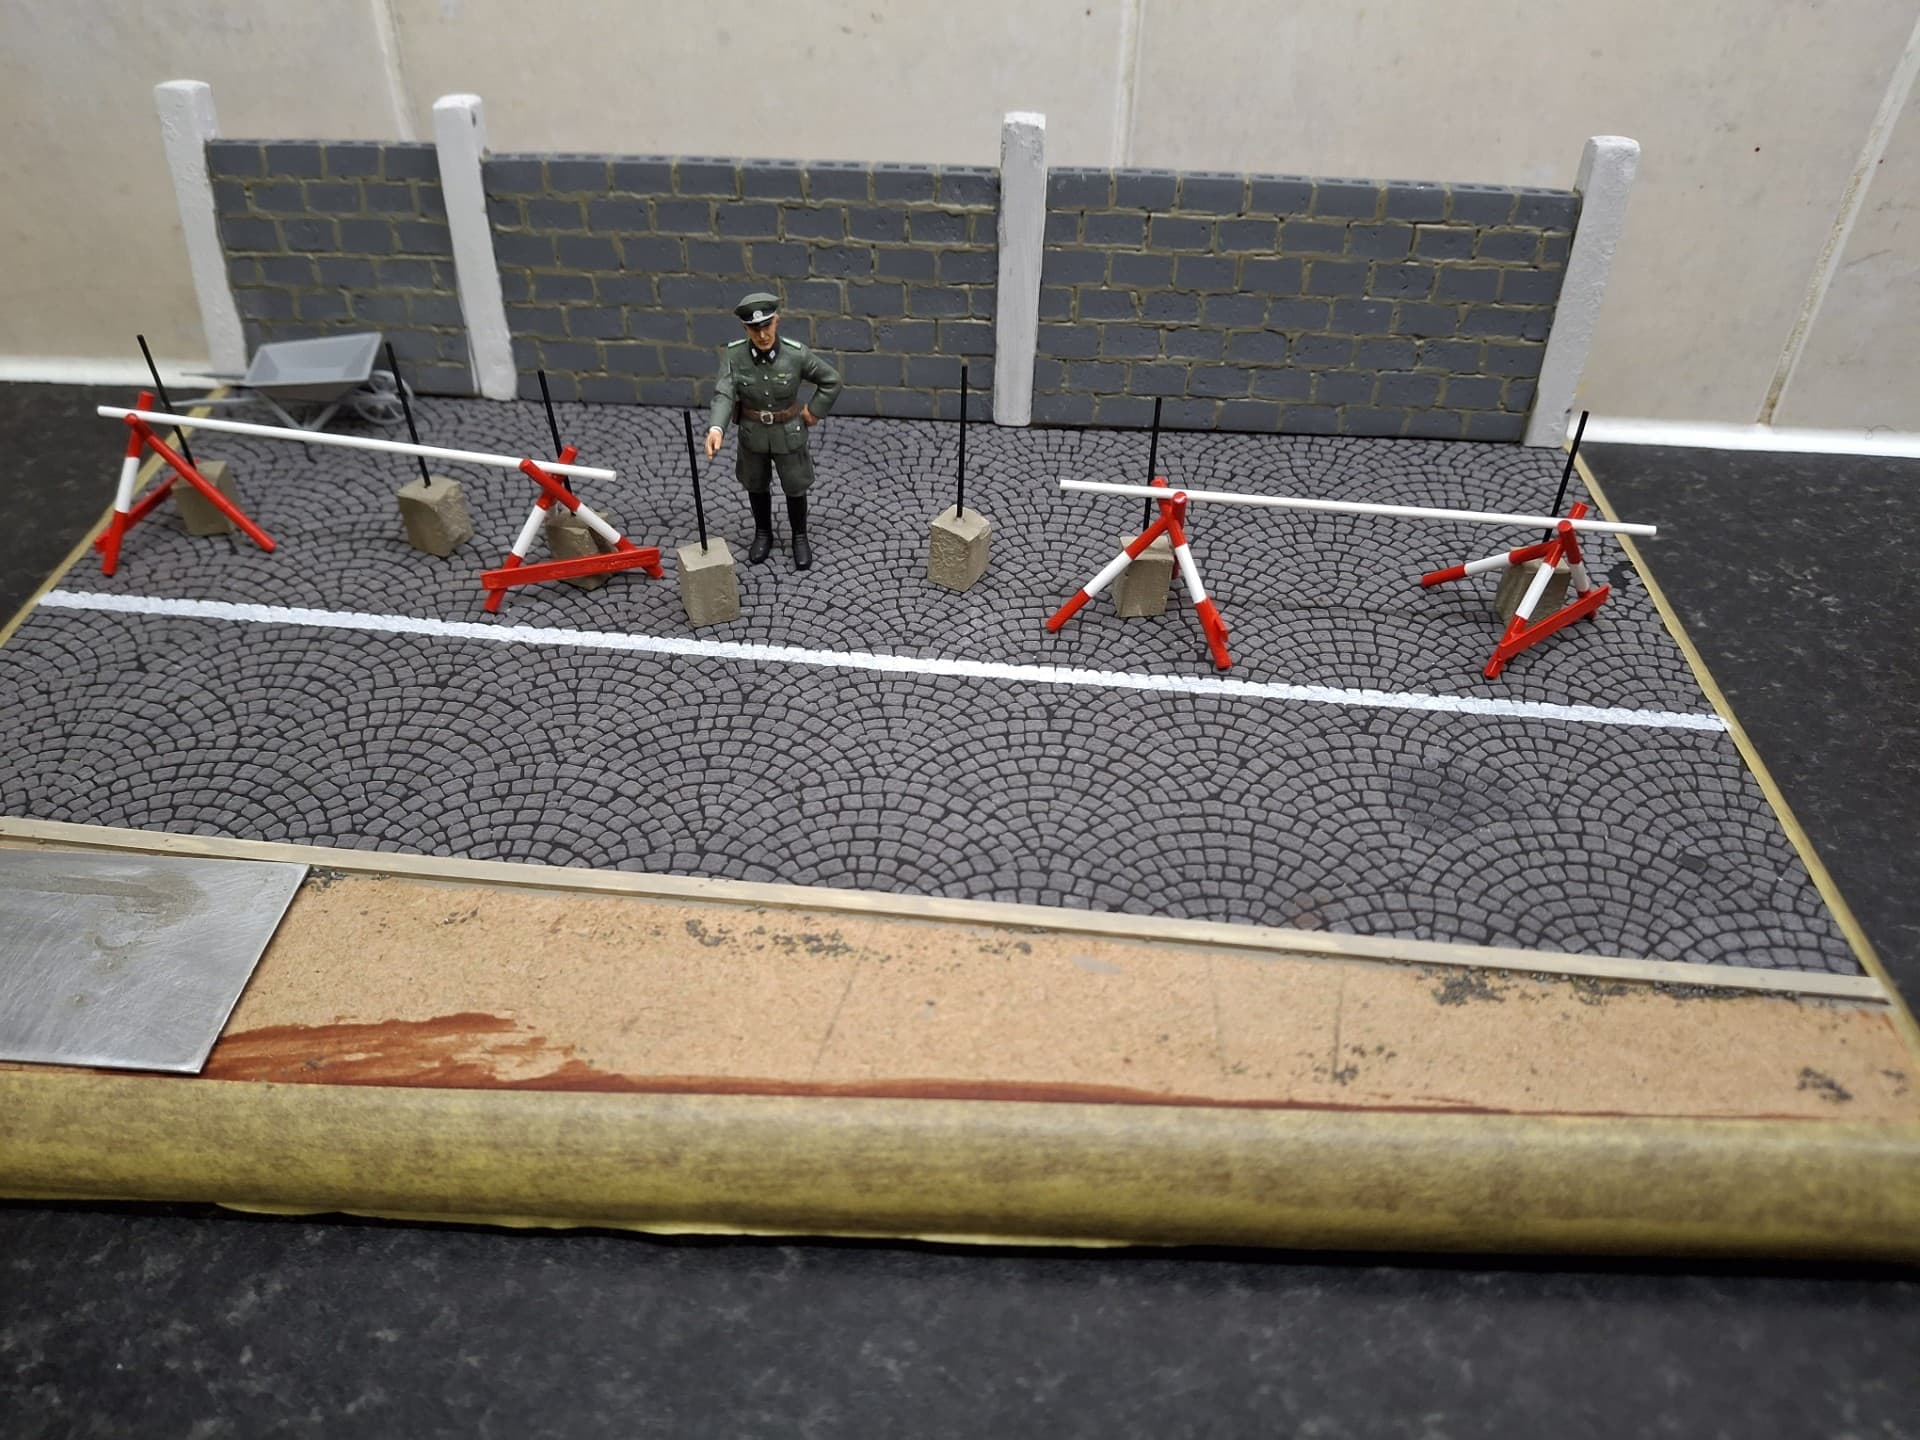
I’ll leave the NVA soldier figure to dry overnight in primer; in the meantime I’ve been experimenting with attaching wire to the obstacles, and have also produced some barbed wire stanchions for the top of the wall; I made these from thick copper wire. I don’t plan to attach any barbed wire to them but to show them installed.

Akin to these images:


9 Likes
I have been lurkin along in the background, really great work sofar, I love how you adjusted that figure ![]()
Ps maybe you should post him in the figure group build?
1 Like
Well, thanks Bert; I think I’m busy enough without thinking about a campaign(!) - but thanks for the vote of confidence. It’ll be interesting - or not - to see what I can manage when I start painting today.
1 Like
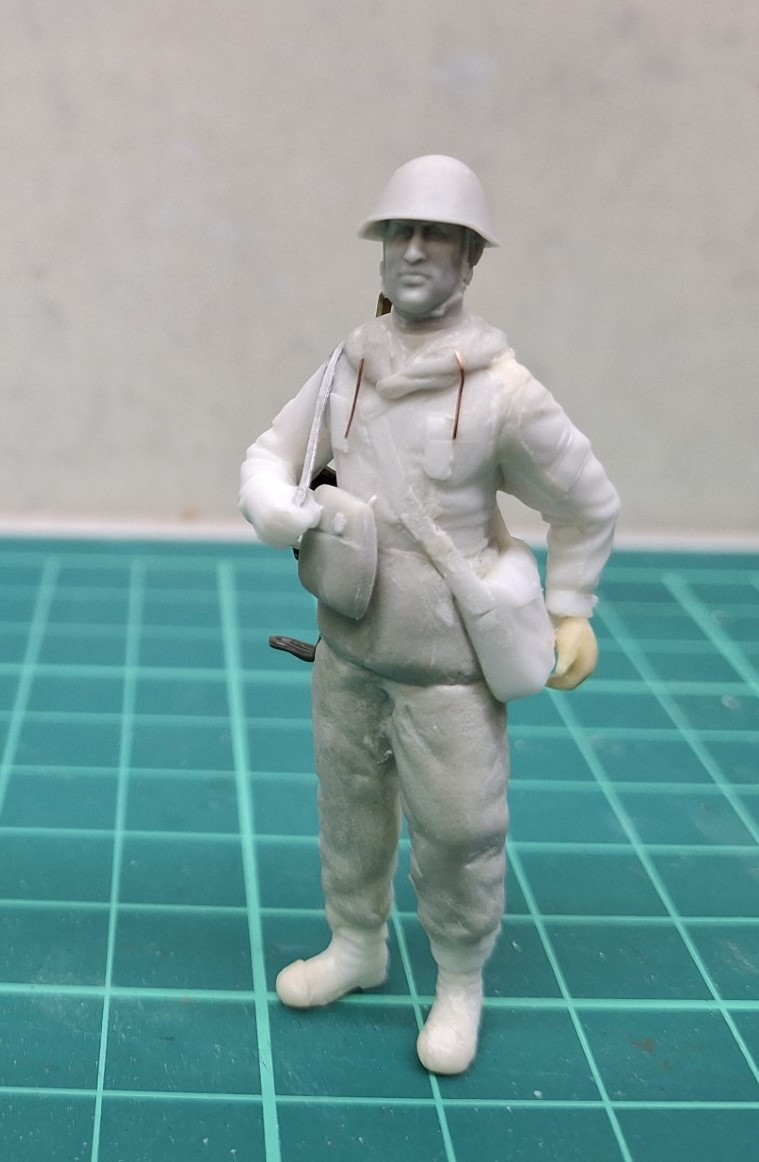
Well, here’s the test figure. Room for improvement but my sculpting skills are limited. I’ve managed to bulk out the smock and the trousers to reflect the earlier uniform. The rest is down to my less than perfect painting but I think I’m just about there:


He may well have to do; only another half dozen or so required!
This obviously means I’m going to run with the original concept.
17 Likes
Very nice job Brian.
3 Likes
It’s turned out well Brian- glad to hear you are forging ahead with more!
1 Like
Thanks Karl; I wouldn’t quite put it as “forging ahead” though to be honest; a necessary chore perhaps, but then, there’s always that phase in modeling, or at least mine(!)
3 Likes