Hi, great recovery!
where did you get the chain from? I need some, probably finer than that, but its proving hard to source.
Hi, great recovery!
where did you get the chain from? I need some, probably finer than that, but its proving hard to source.
Khouli, I think the chain came from MicroMark - miniature chain but I also found it at Tiger Model Designs in the past.
TopSmith - thank you, seemed like a few times the box had grown roots into thr shelf.
The build is looking real nice.
I really like these and they work for me.
http://umm-usa.com/onlinestore/index.php?cPath=21_145
HTH
Tank 1812, I’m definitely ordering a set of round & hex from UMM-USA. Thank you! BIG SMILE!
One of the key motivations to return to this build was the lower hull with all the wheels & ModelKasten tracks was completed and detailed except for Zimmerit. I expected adding Zimmerit to be pretty straightforward started pulling the tracks etc.
As has always been the case with this particular Pz IV J kit just when its going well - LANDMINE!
After pulling the ModelKasten Indy link tracks I noticed the model sat “funny” on the glass desk top. On one side only two road wheels touched the glass desk top. Opposite side one road wheel touched.
Wheels off placed a metal straight edge on the bogey arms. There was a variation of about 1/8 to 3mm between the four bogies on each side.
Literally felt sick realizing I’d ASSUMED my basic construction of the lower hull suspension was good. Clearly back in 1994, I hadn’t bothered to check any sort of parts alignment. Honestly, if I’d know the suspension was that jacked up, I’d have pitched this kit in the  were it belonged.
Decided maybe I could work the bogies loose and carefully align them correctly. Landmine #2 immediately detonated in my face as the first one popped loudly and broke in two places. Slow I recalled using Tenax 7R when starting this model before gojng back to Testor’s Liquid Cement after doing the individual link tracks.
Kali Kat said she couldn’t look as this build is just getting too ugly and the old Mark 4 should get tossed in the trash and something like a Panther or better yet a Tiger would make for a more interesting build.
Only divine intervention by TriStar can save the day at this point. Luckily this was in the aftermarket parts cabinet.
I feel your pain …
My process for getting the wheels straight.
Glue the bogey arm or suspension arm for one bogey or wheel on one corner in place
Let the glue/solvent harden/dry
Repeat nr 1 on the other side while making sure the tank isn’t leaning to one side.
Let step 3 dry/cure
Repeat nr 1 for one corner at the other end of the tank while making sure the tank has the correct front to rear angle.
Let step 5 cure/dry
Repeat nr 2 while make sure that the tank doesn’t rock side to side, corner to corner or front to back.
Let step 7 dry
Put some load into the tank chassis to hold it down and glue in the arms for all the other wheels. Either one side at the time or both sides at once. Use a ruler to make sure the axles are aligned in the horisontal plane. All wheels at once, one side at the time or one arm at the time doesn’t matter as long as the glue/solvent doesn’t dry/cure too fast. Using CA would mean one wheel at the time …
The actual wheels. Watch out for wheels where the axle holes are not centered. If they are off center then the wheels need to be handled in the same way, first the corners and then fill in the ones in between. Adjusting each ****** wheel individually is a pain but some kits … Use the ruler again to make sure the wheels are aligned horizontally and doesn’t toe-in or toe-out. If the wheels are double as one the Pz III and IV the ruler can be slid in between the two wheel halves.
Placing the tank on a base showing uneven ground makes this whole exercise, except aligning for toe-in/toe-out, comletely unnecessary 
Robin, that’s an outstanding procedure!
I will definitely kept it in mind going forward.
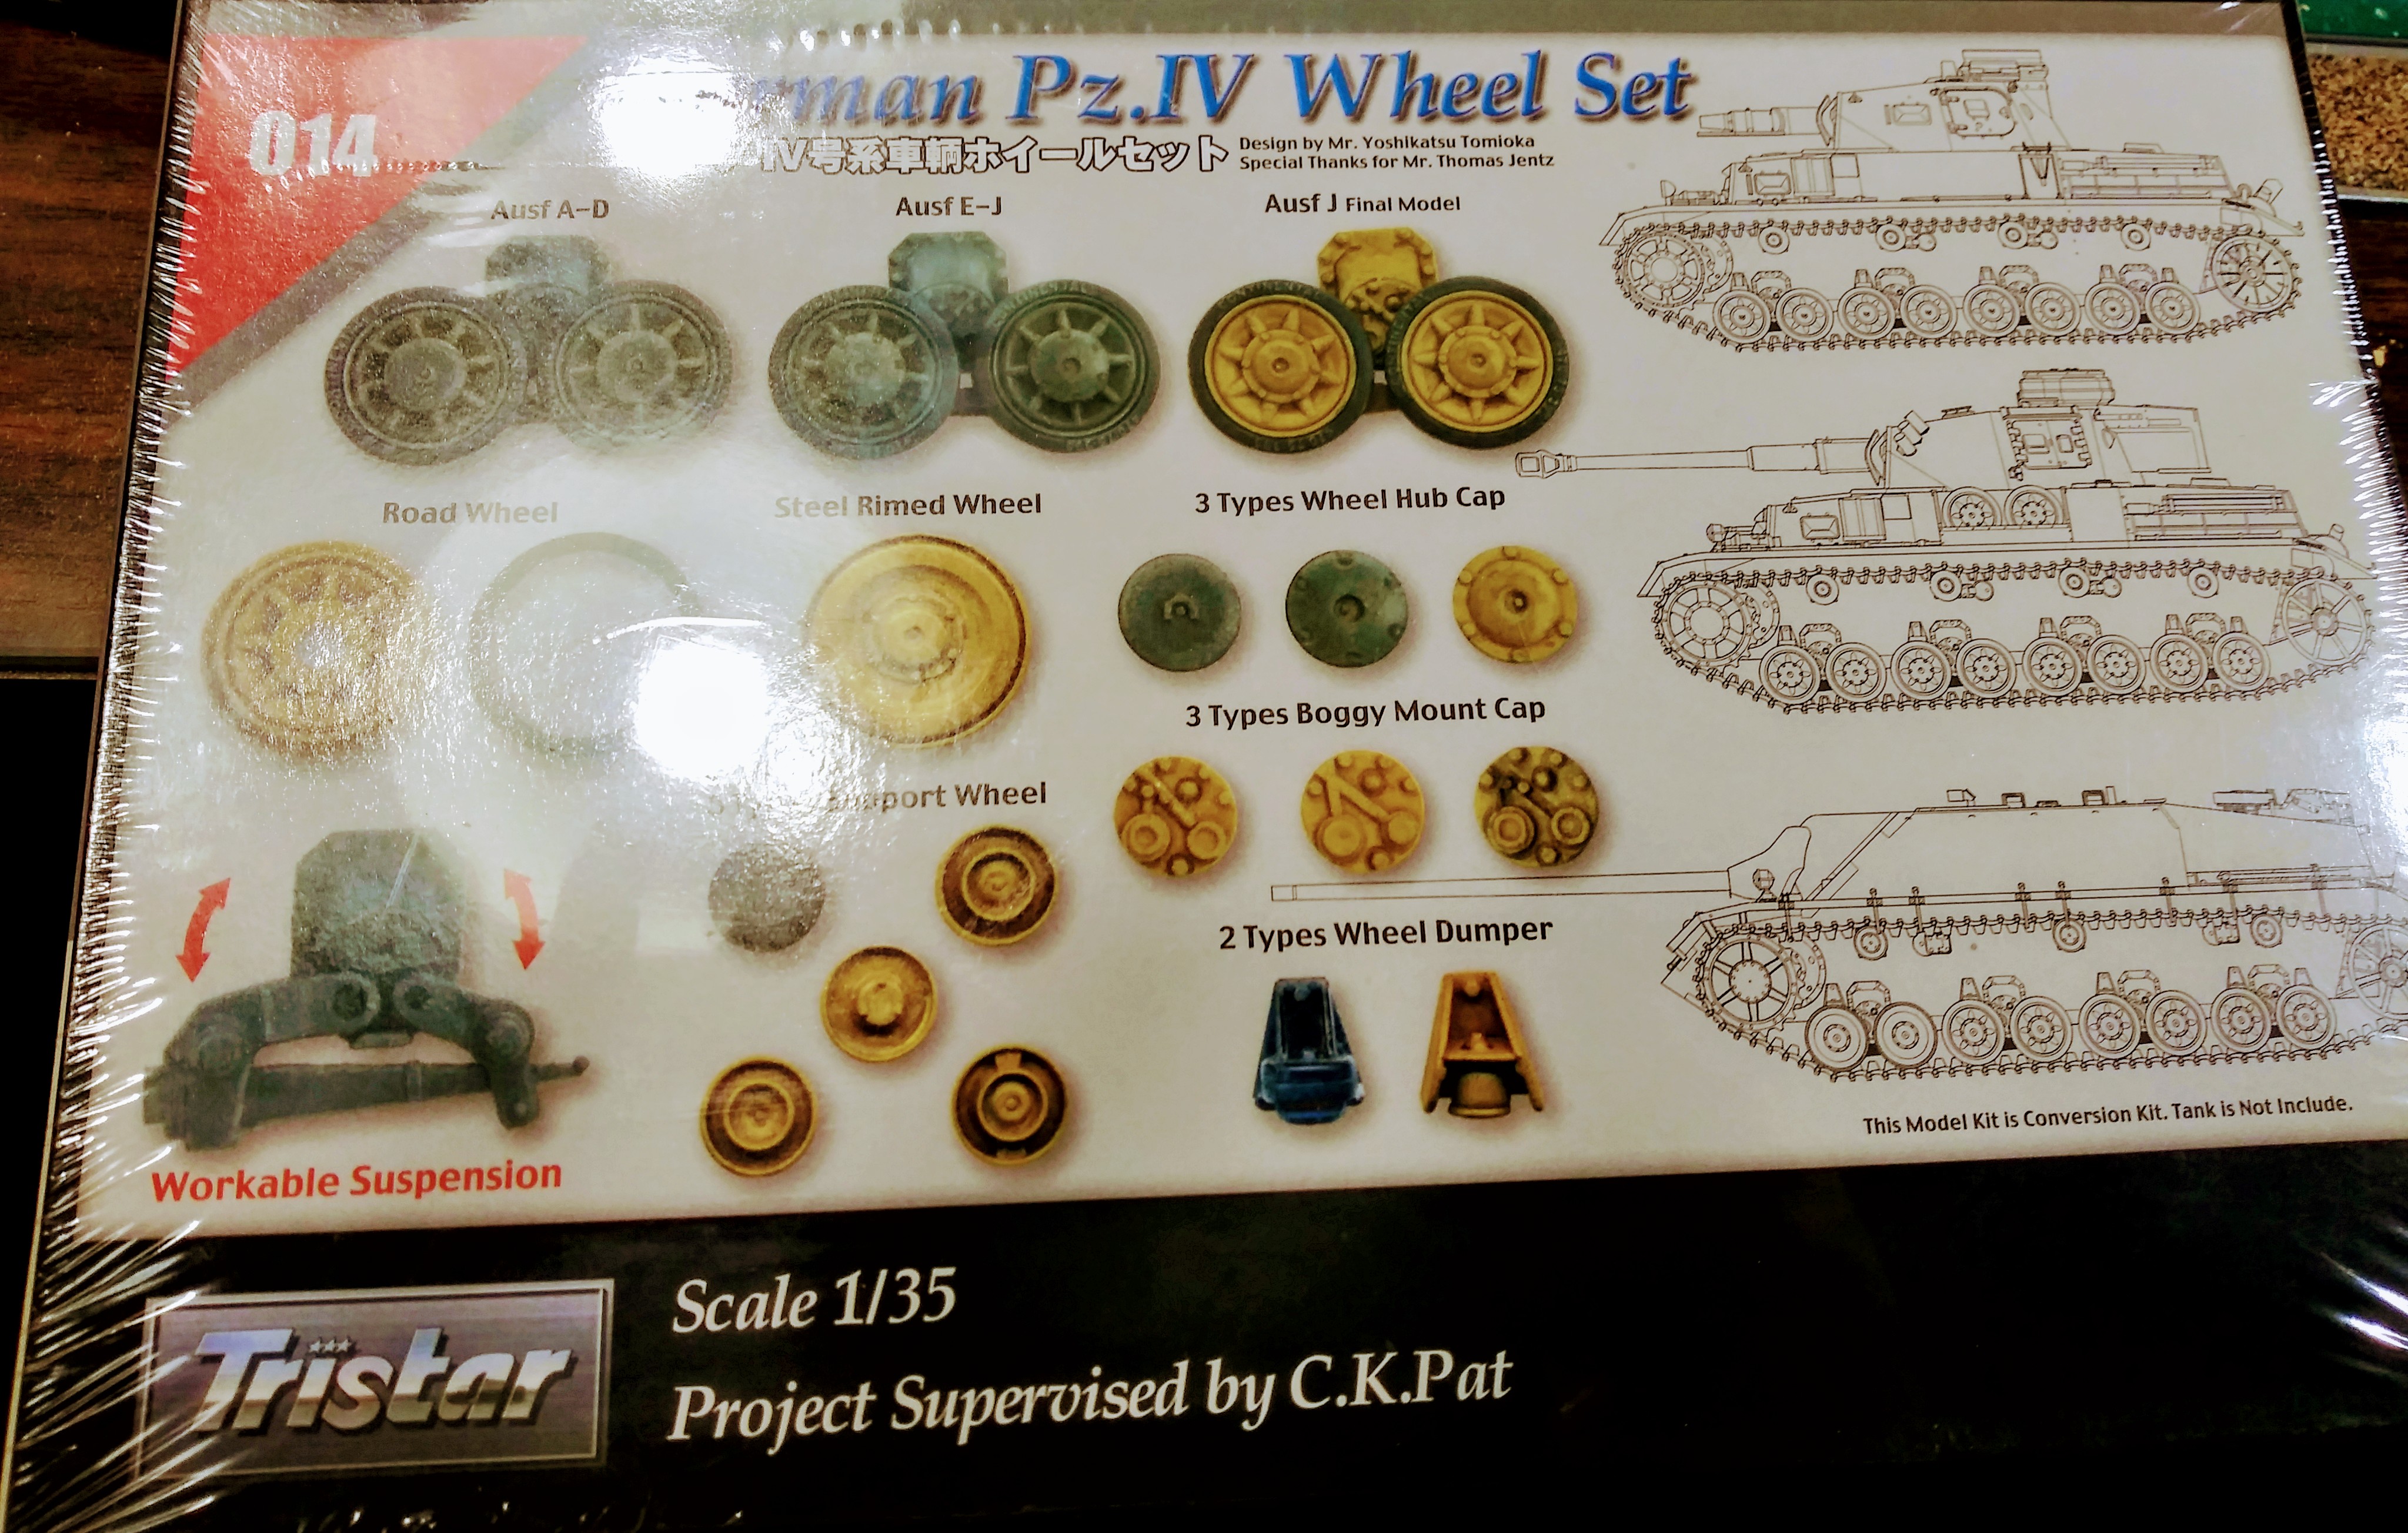
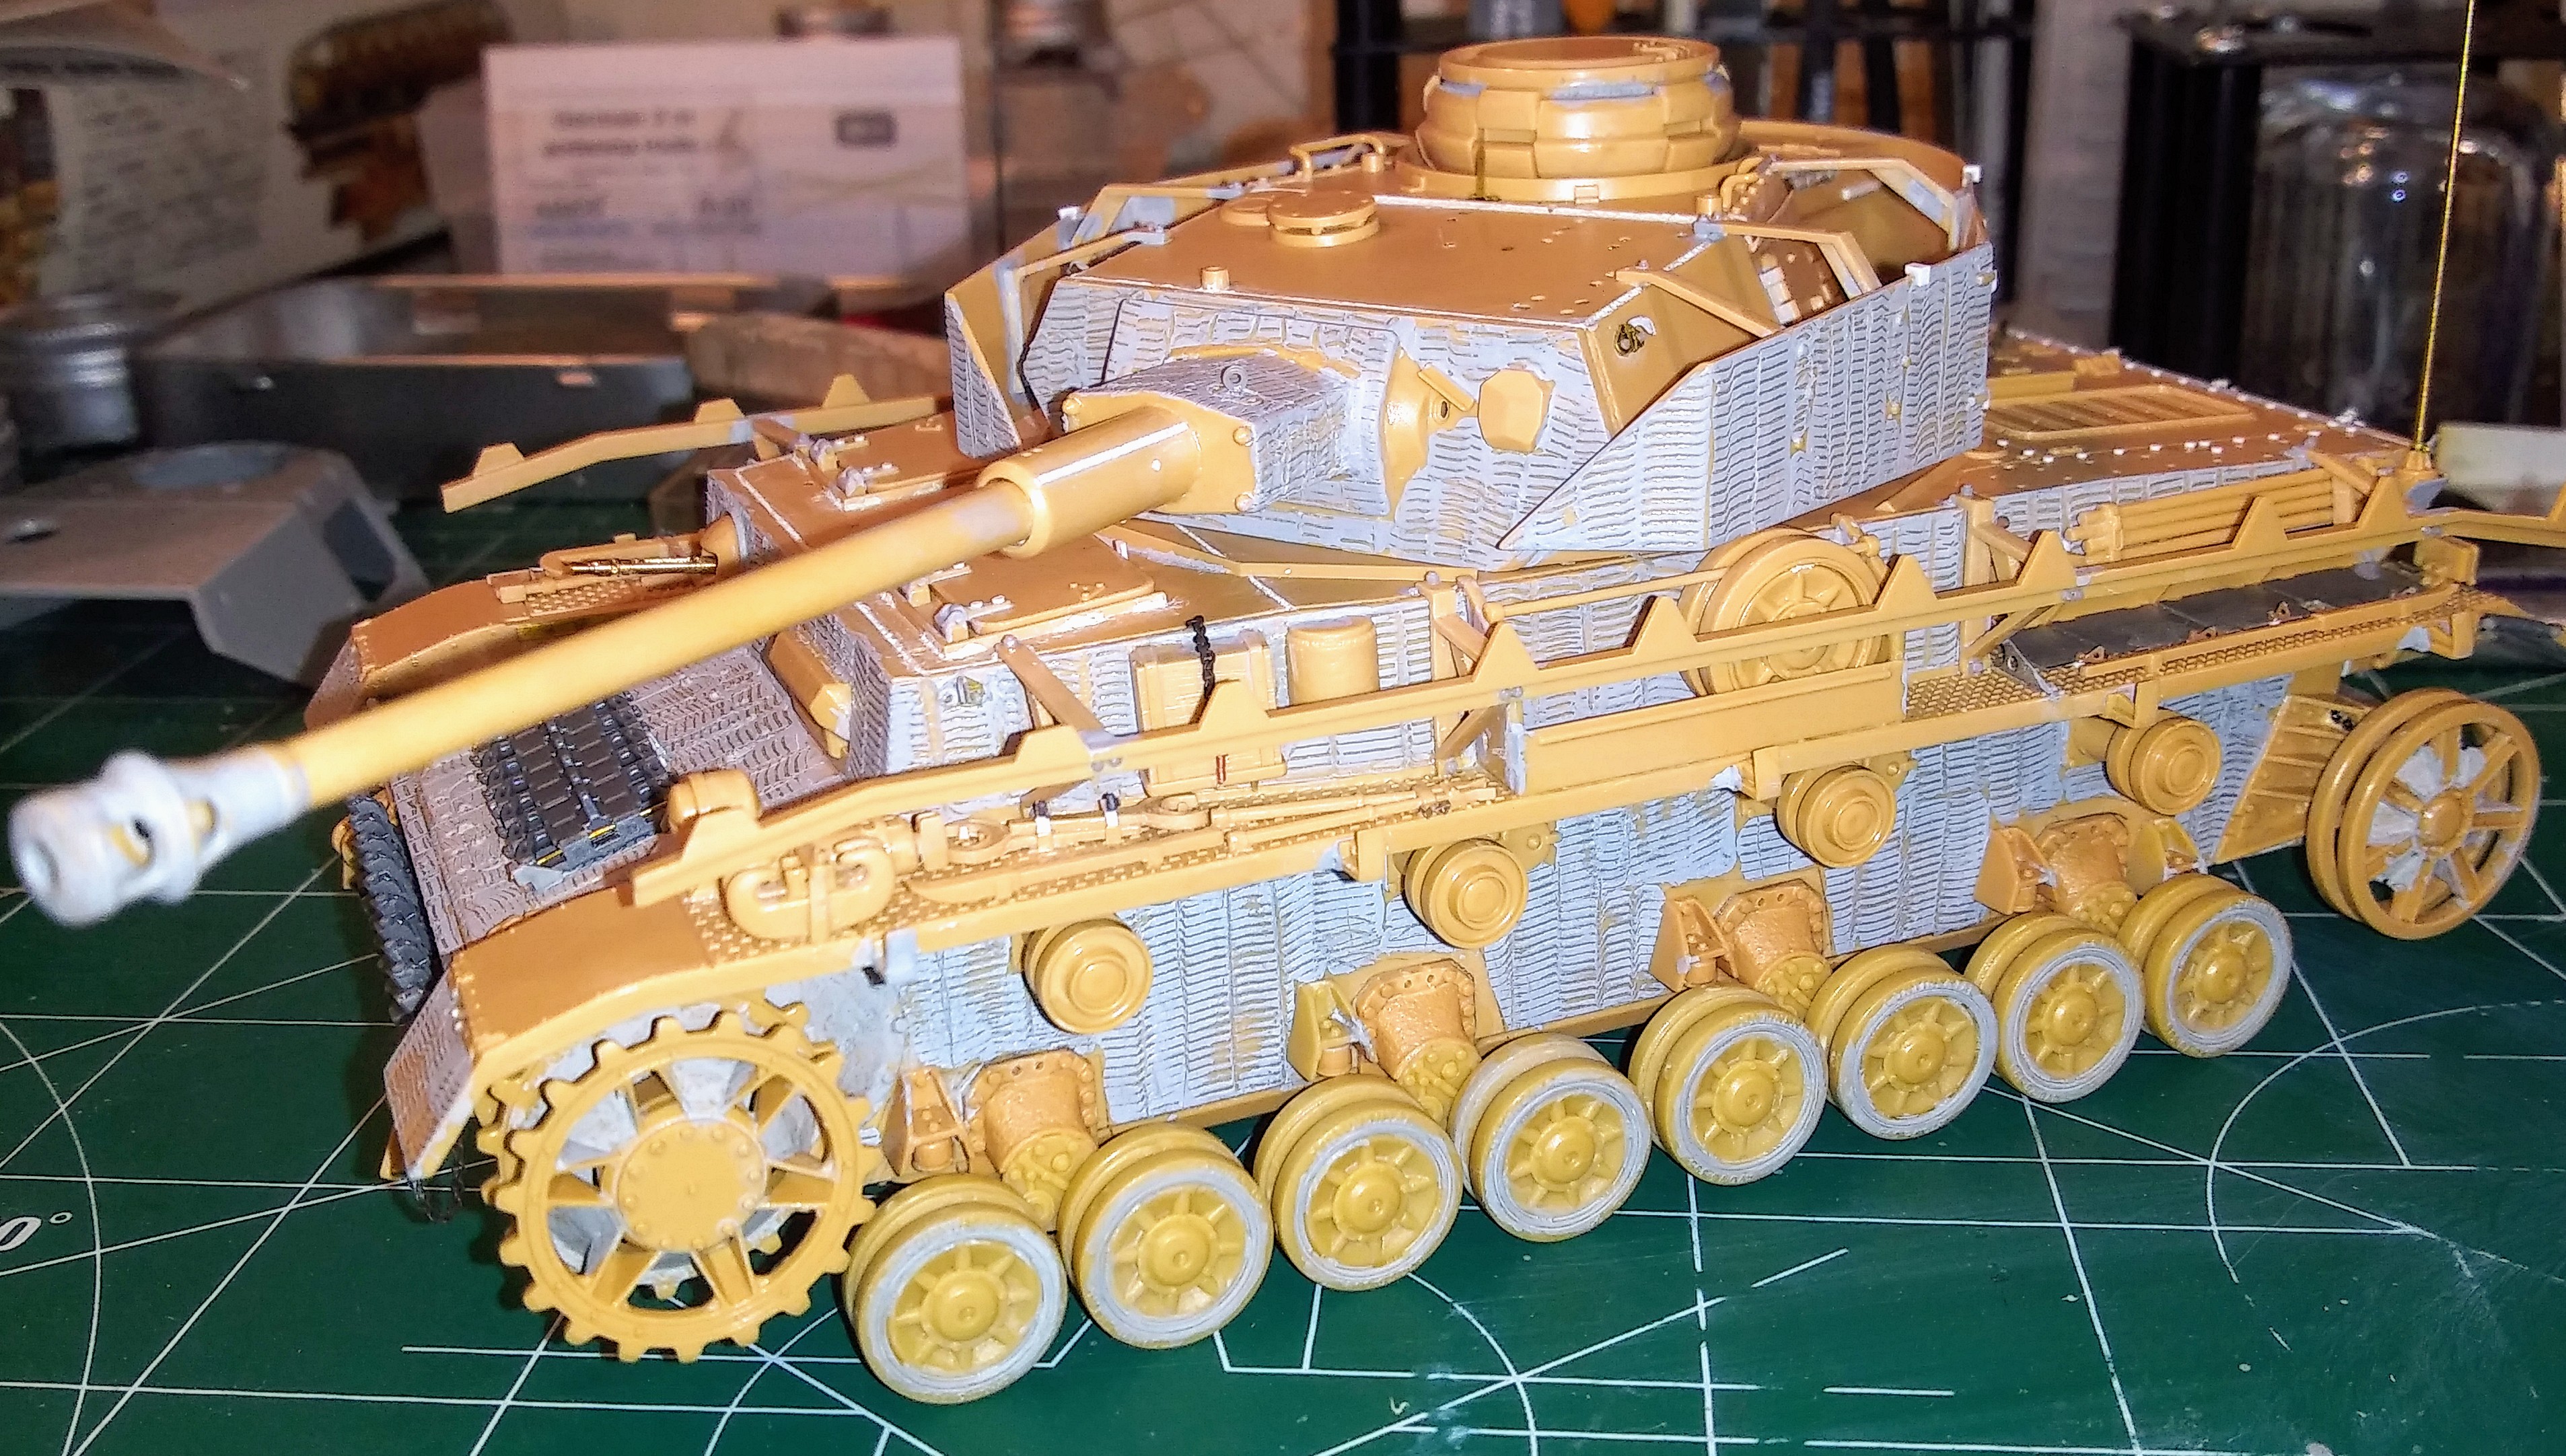
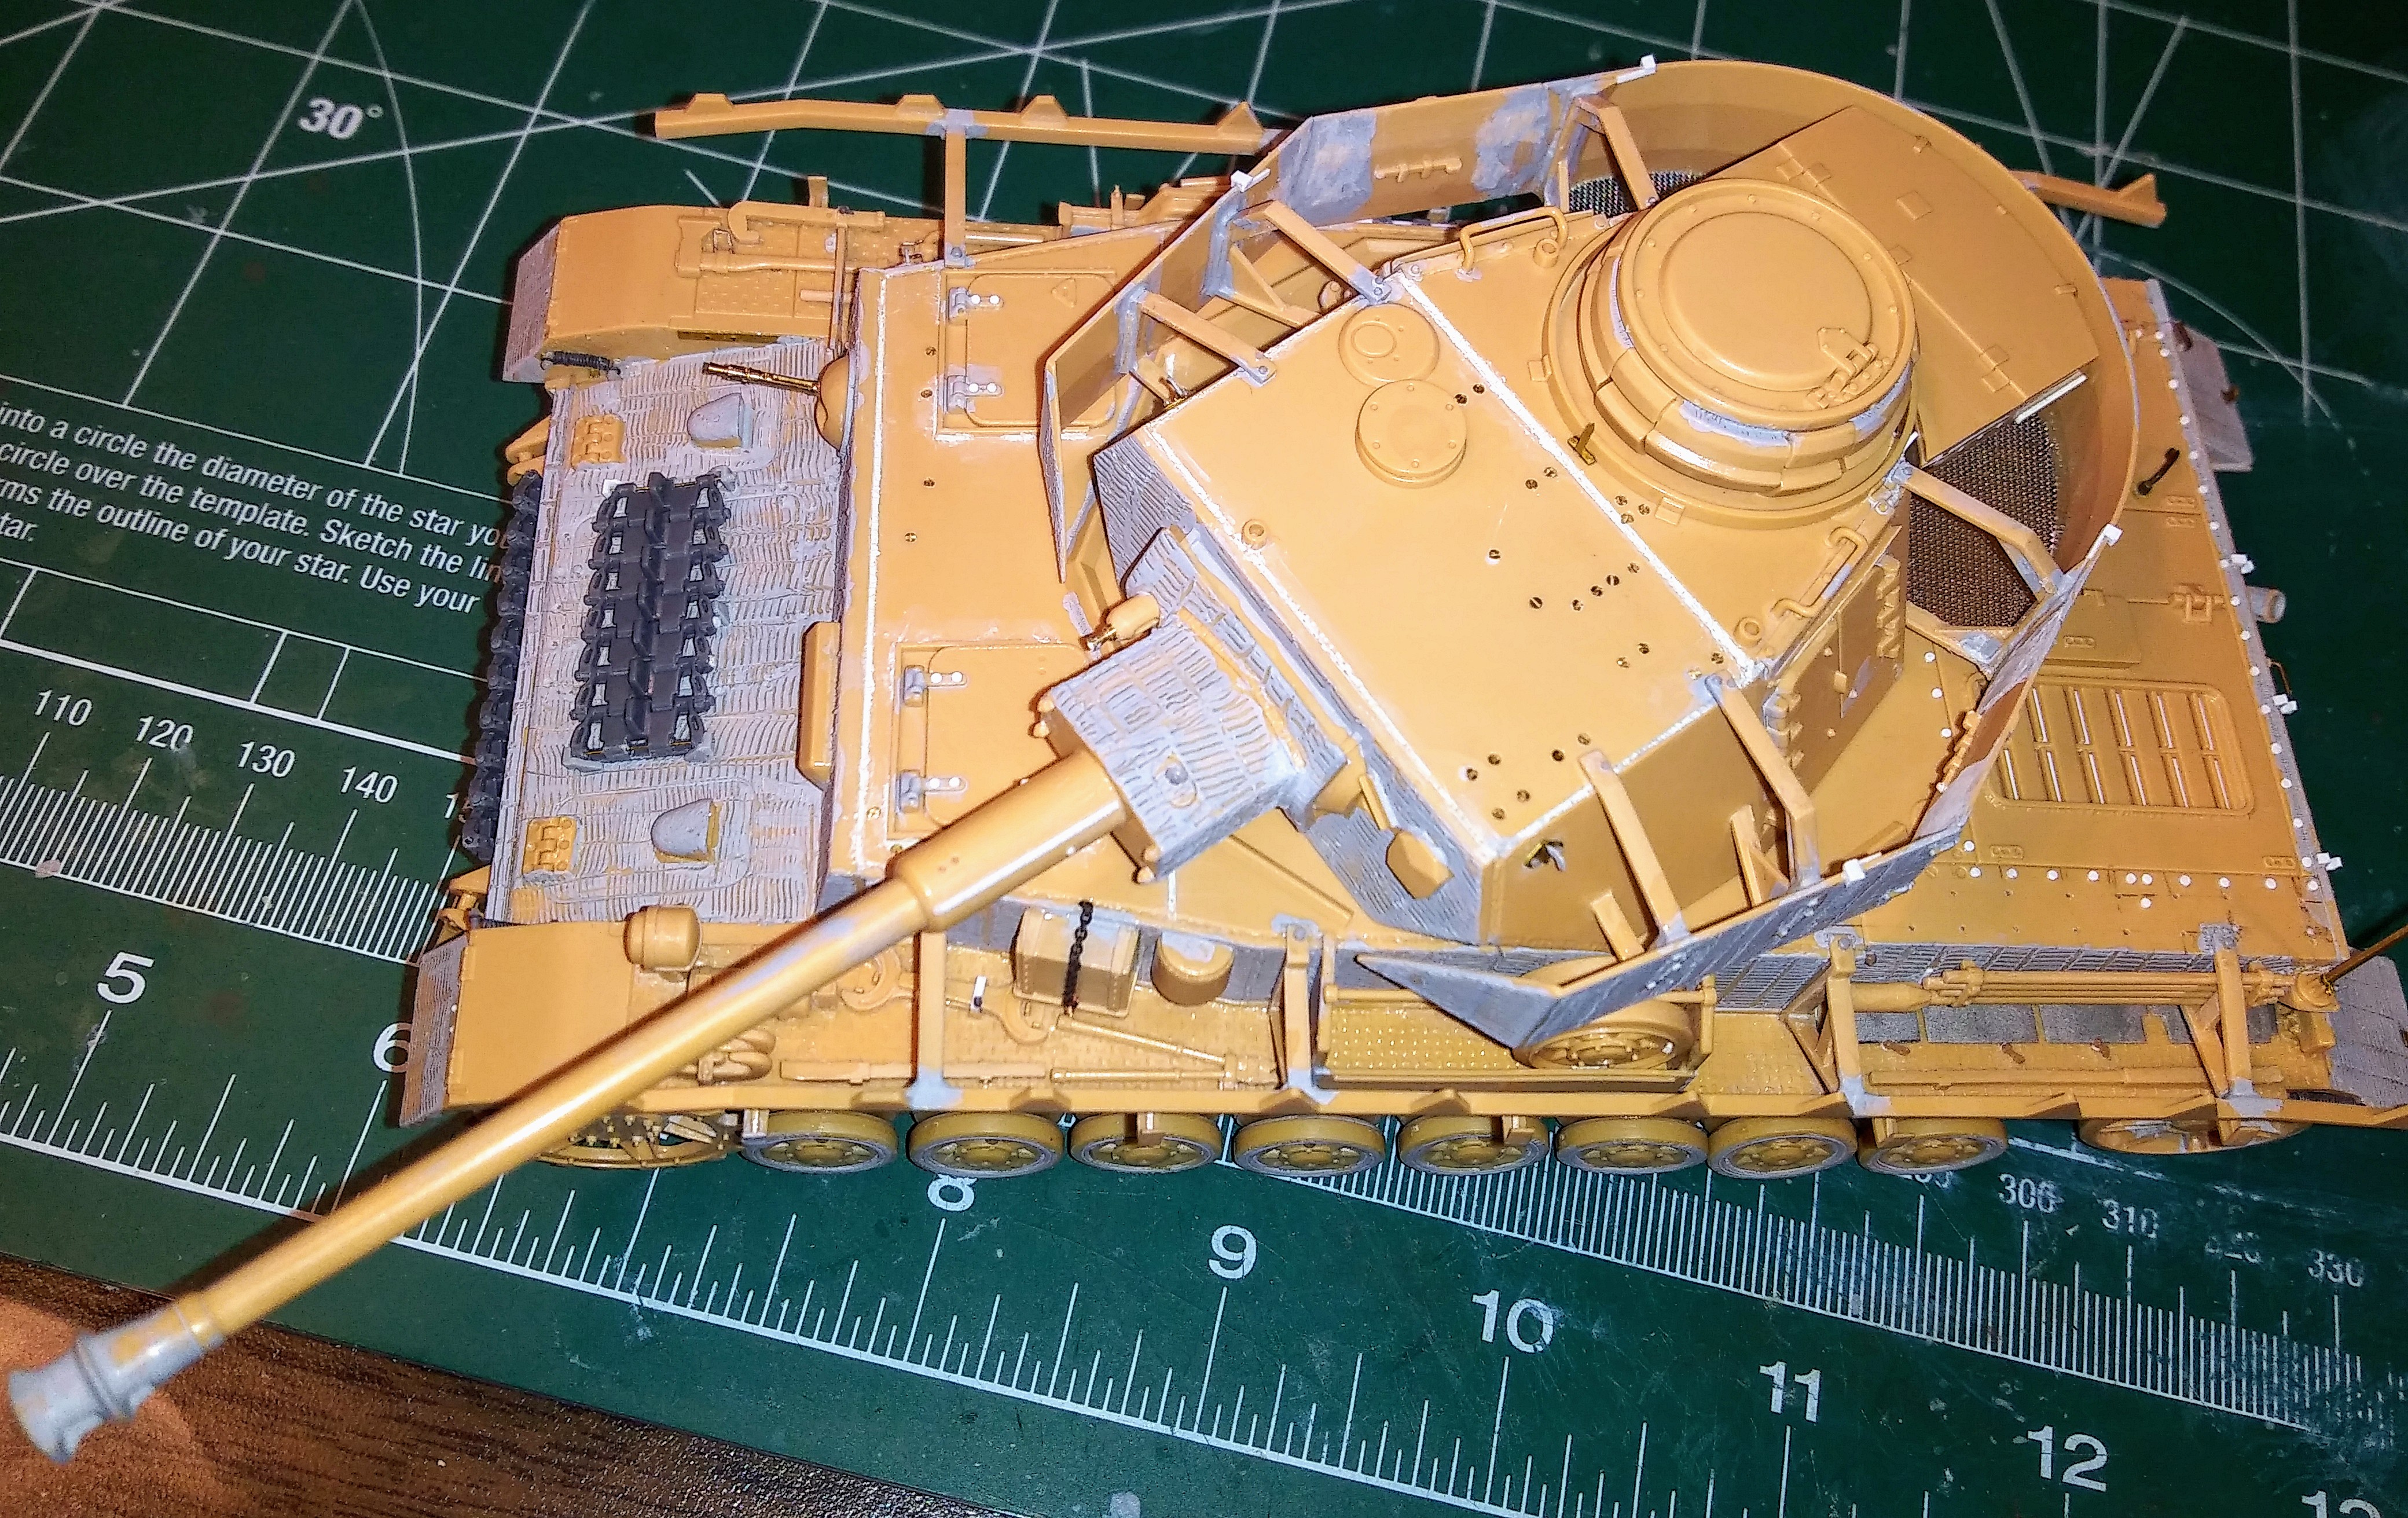
Did the Zimmerit and moved to suspension. The TriStar suspension is a little tricky. It has attachment points for Dragon & Tamiya kit. TriStar shows which alignment pins to cut off for Tamiya but has it reversed and that’s actually for Dragon. Likewise the pins the instructions show to remove to fit on Dragon are actually to fit on Tamiya.
There are a lot of options so check reference.
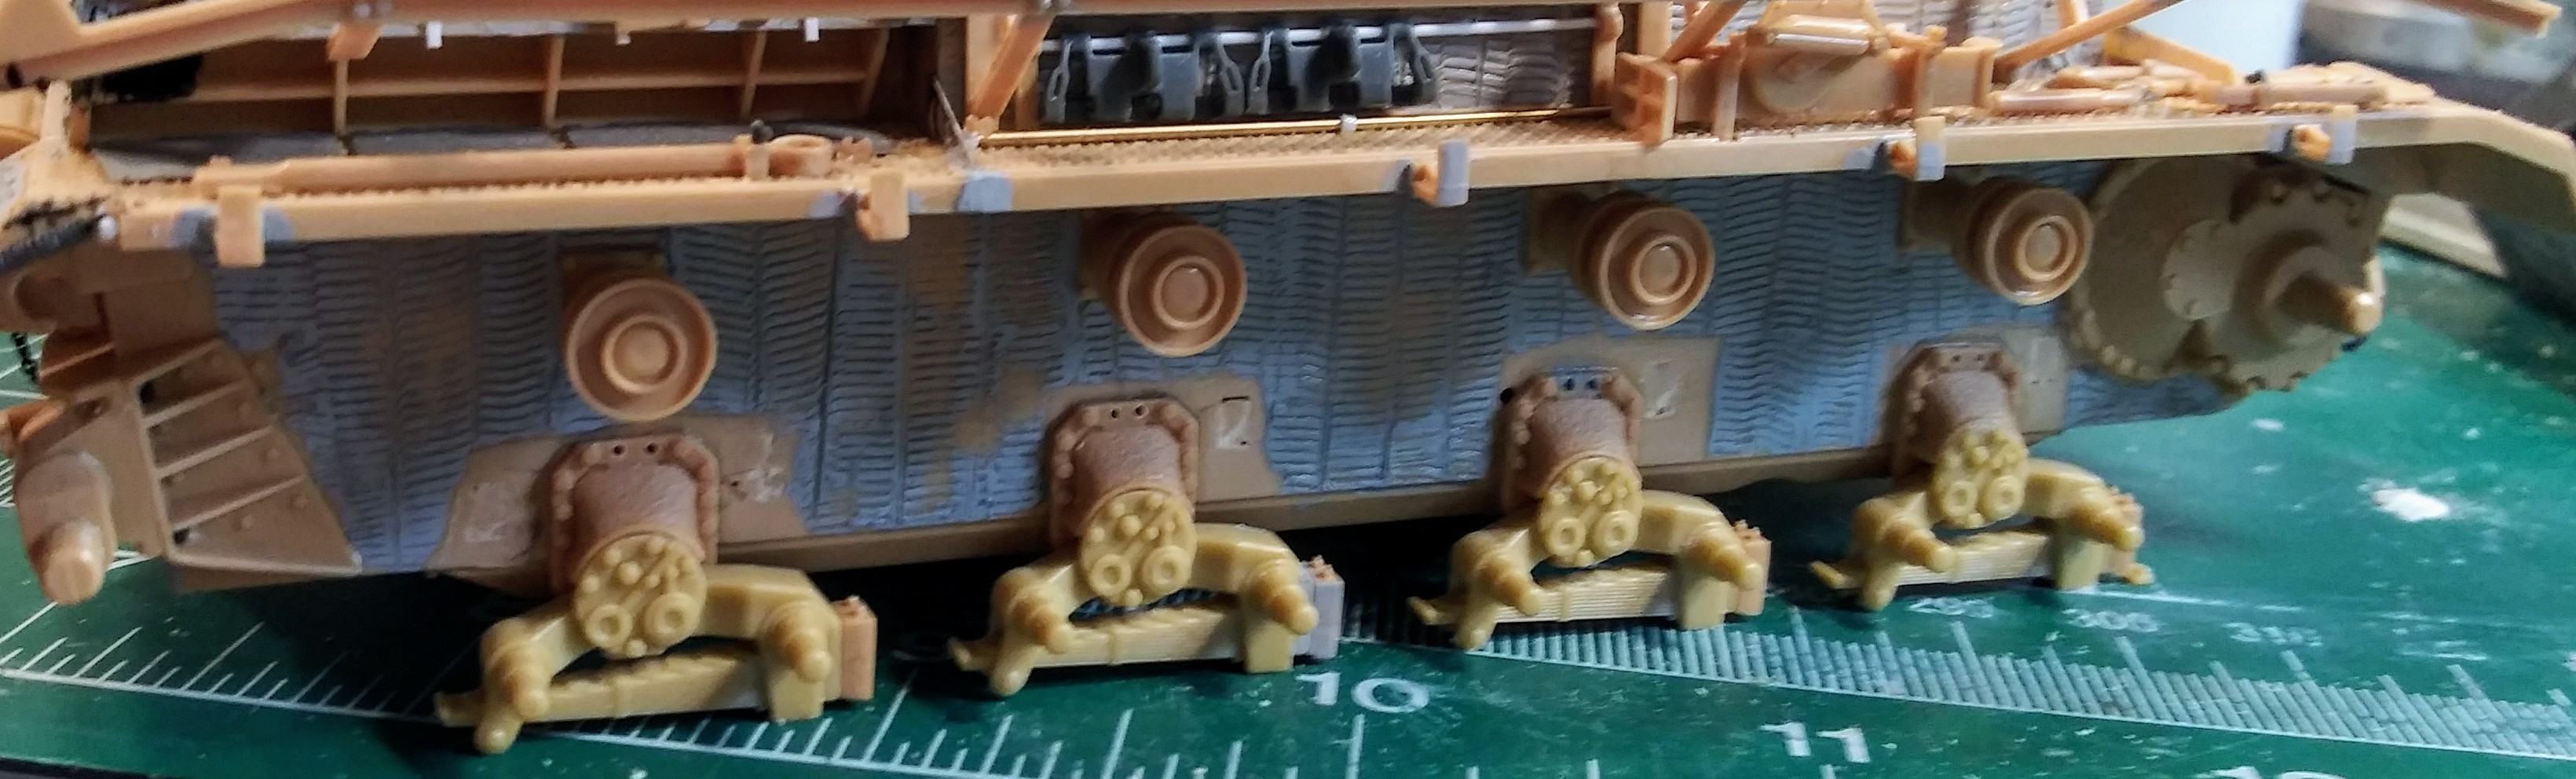
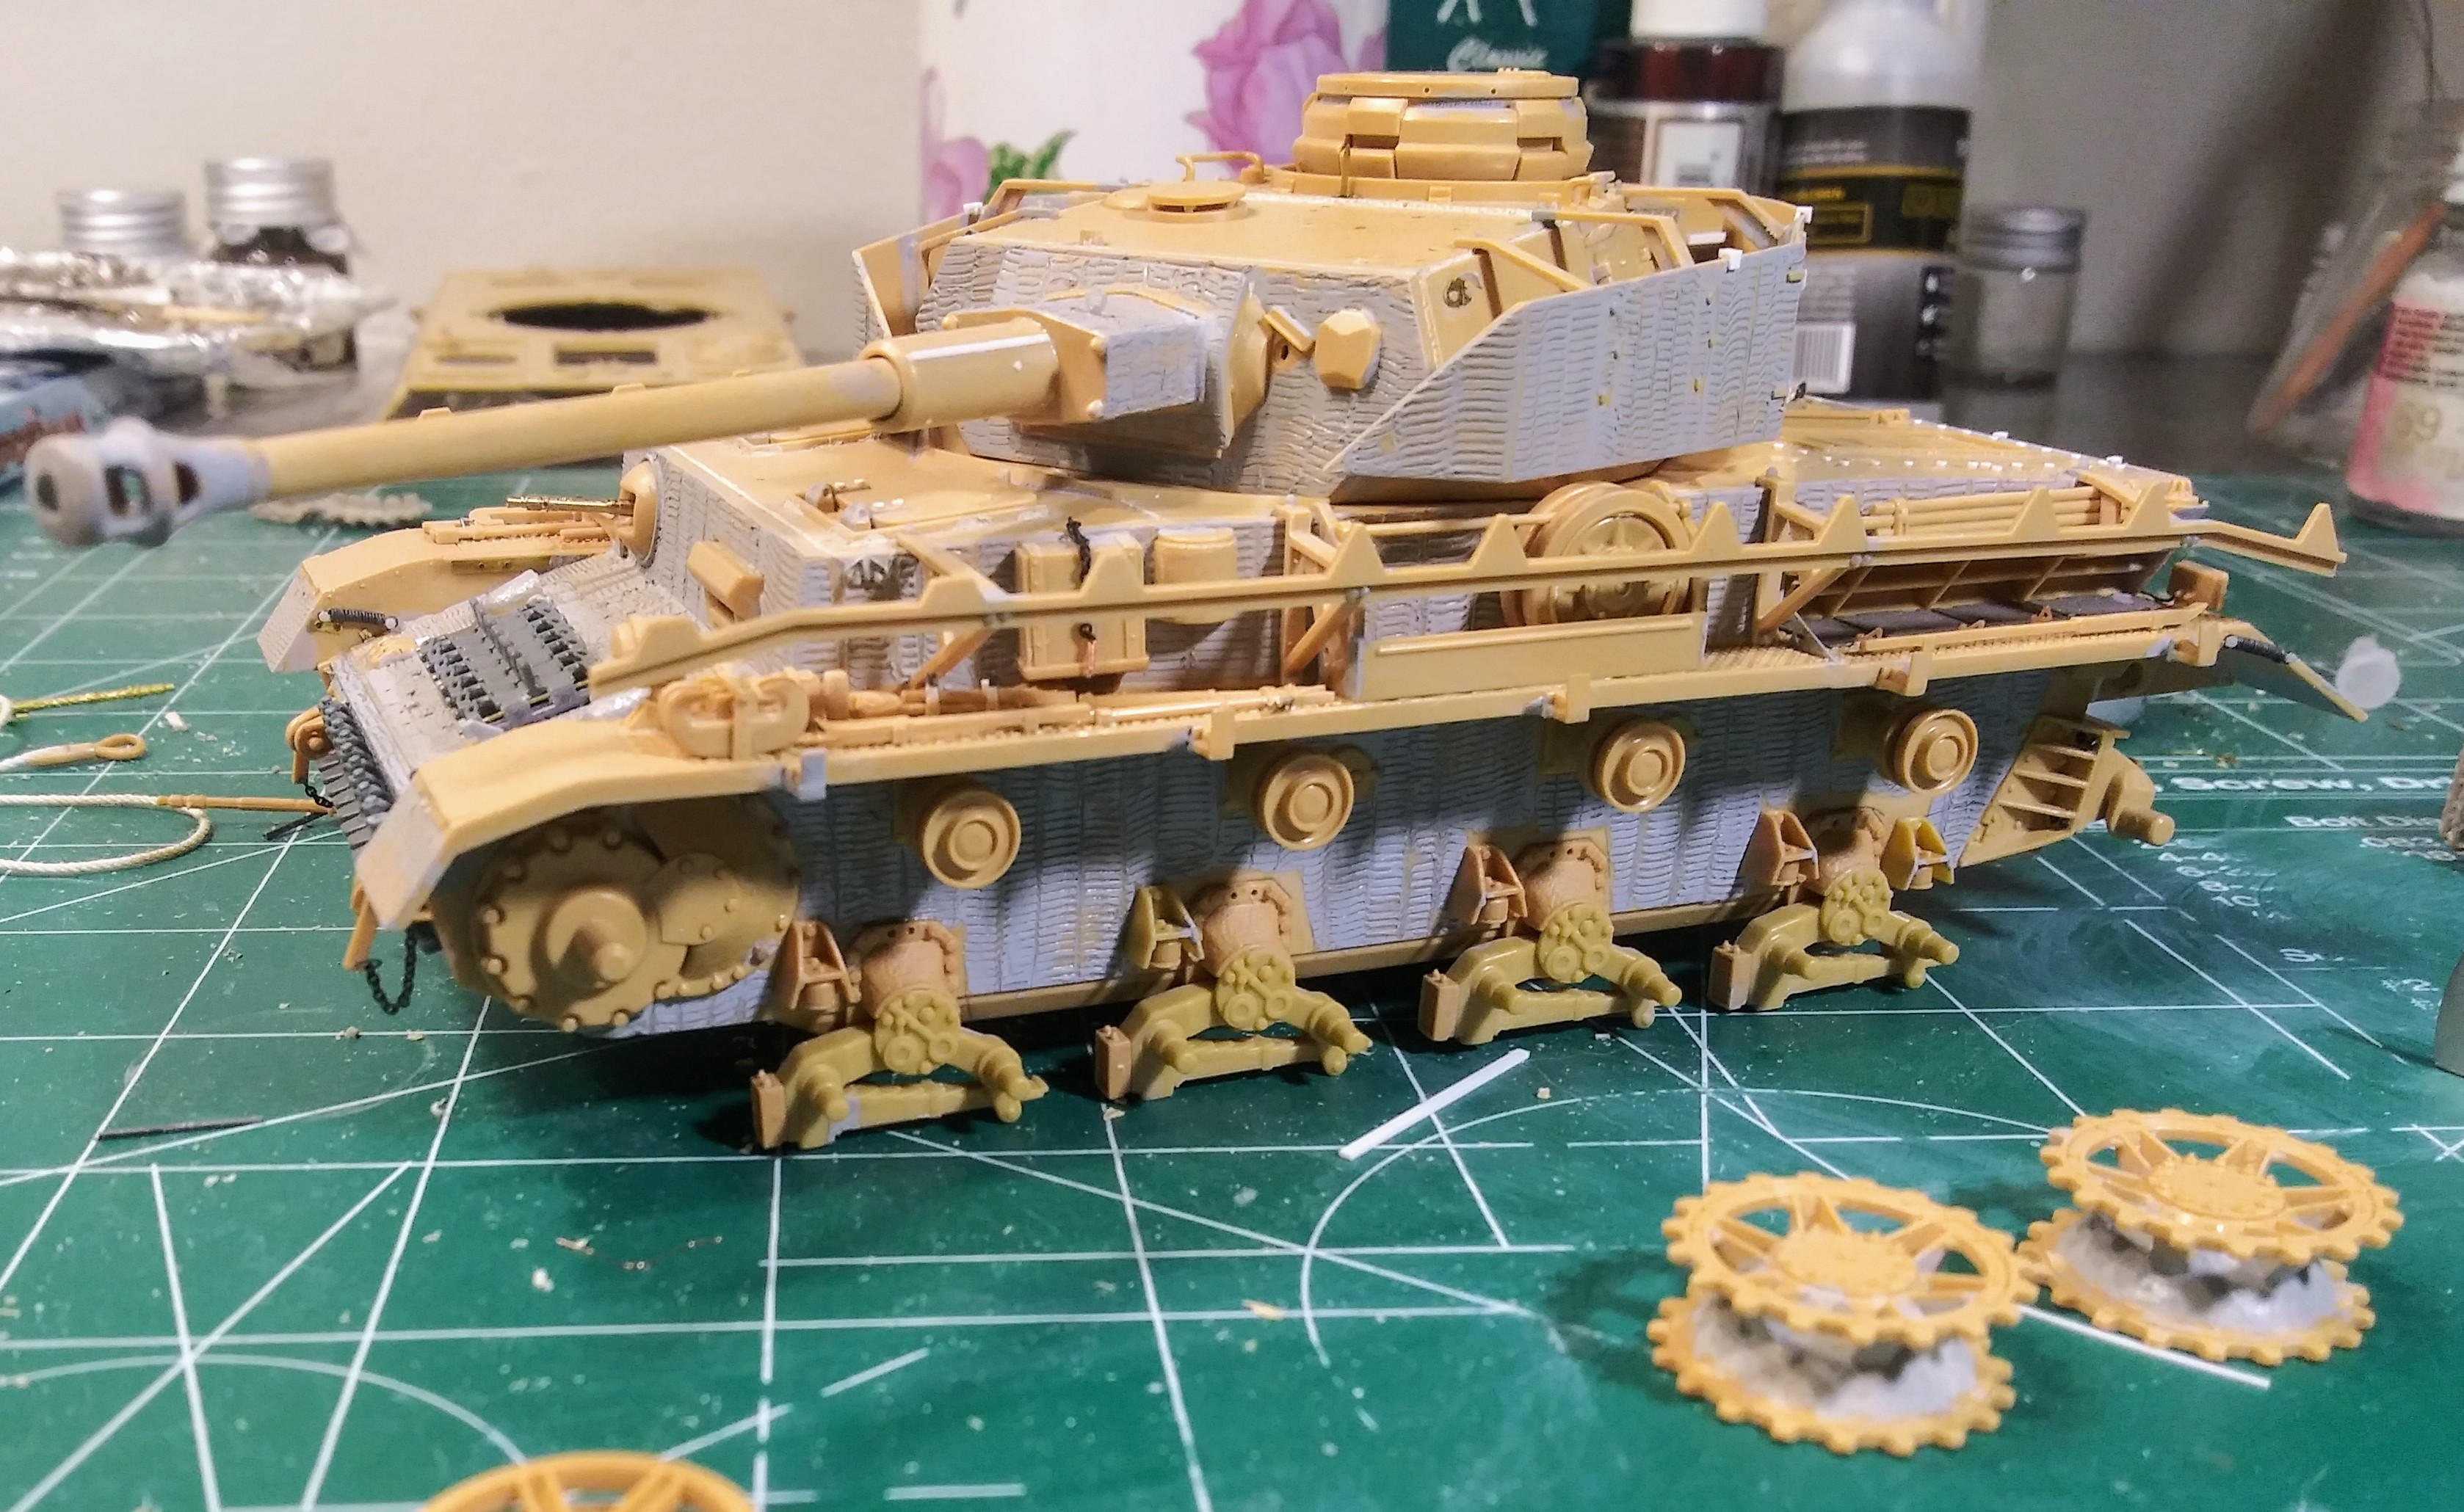
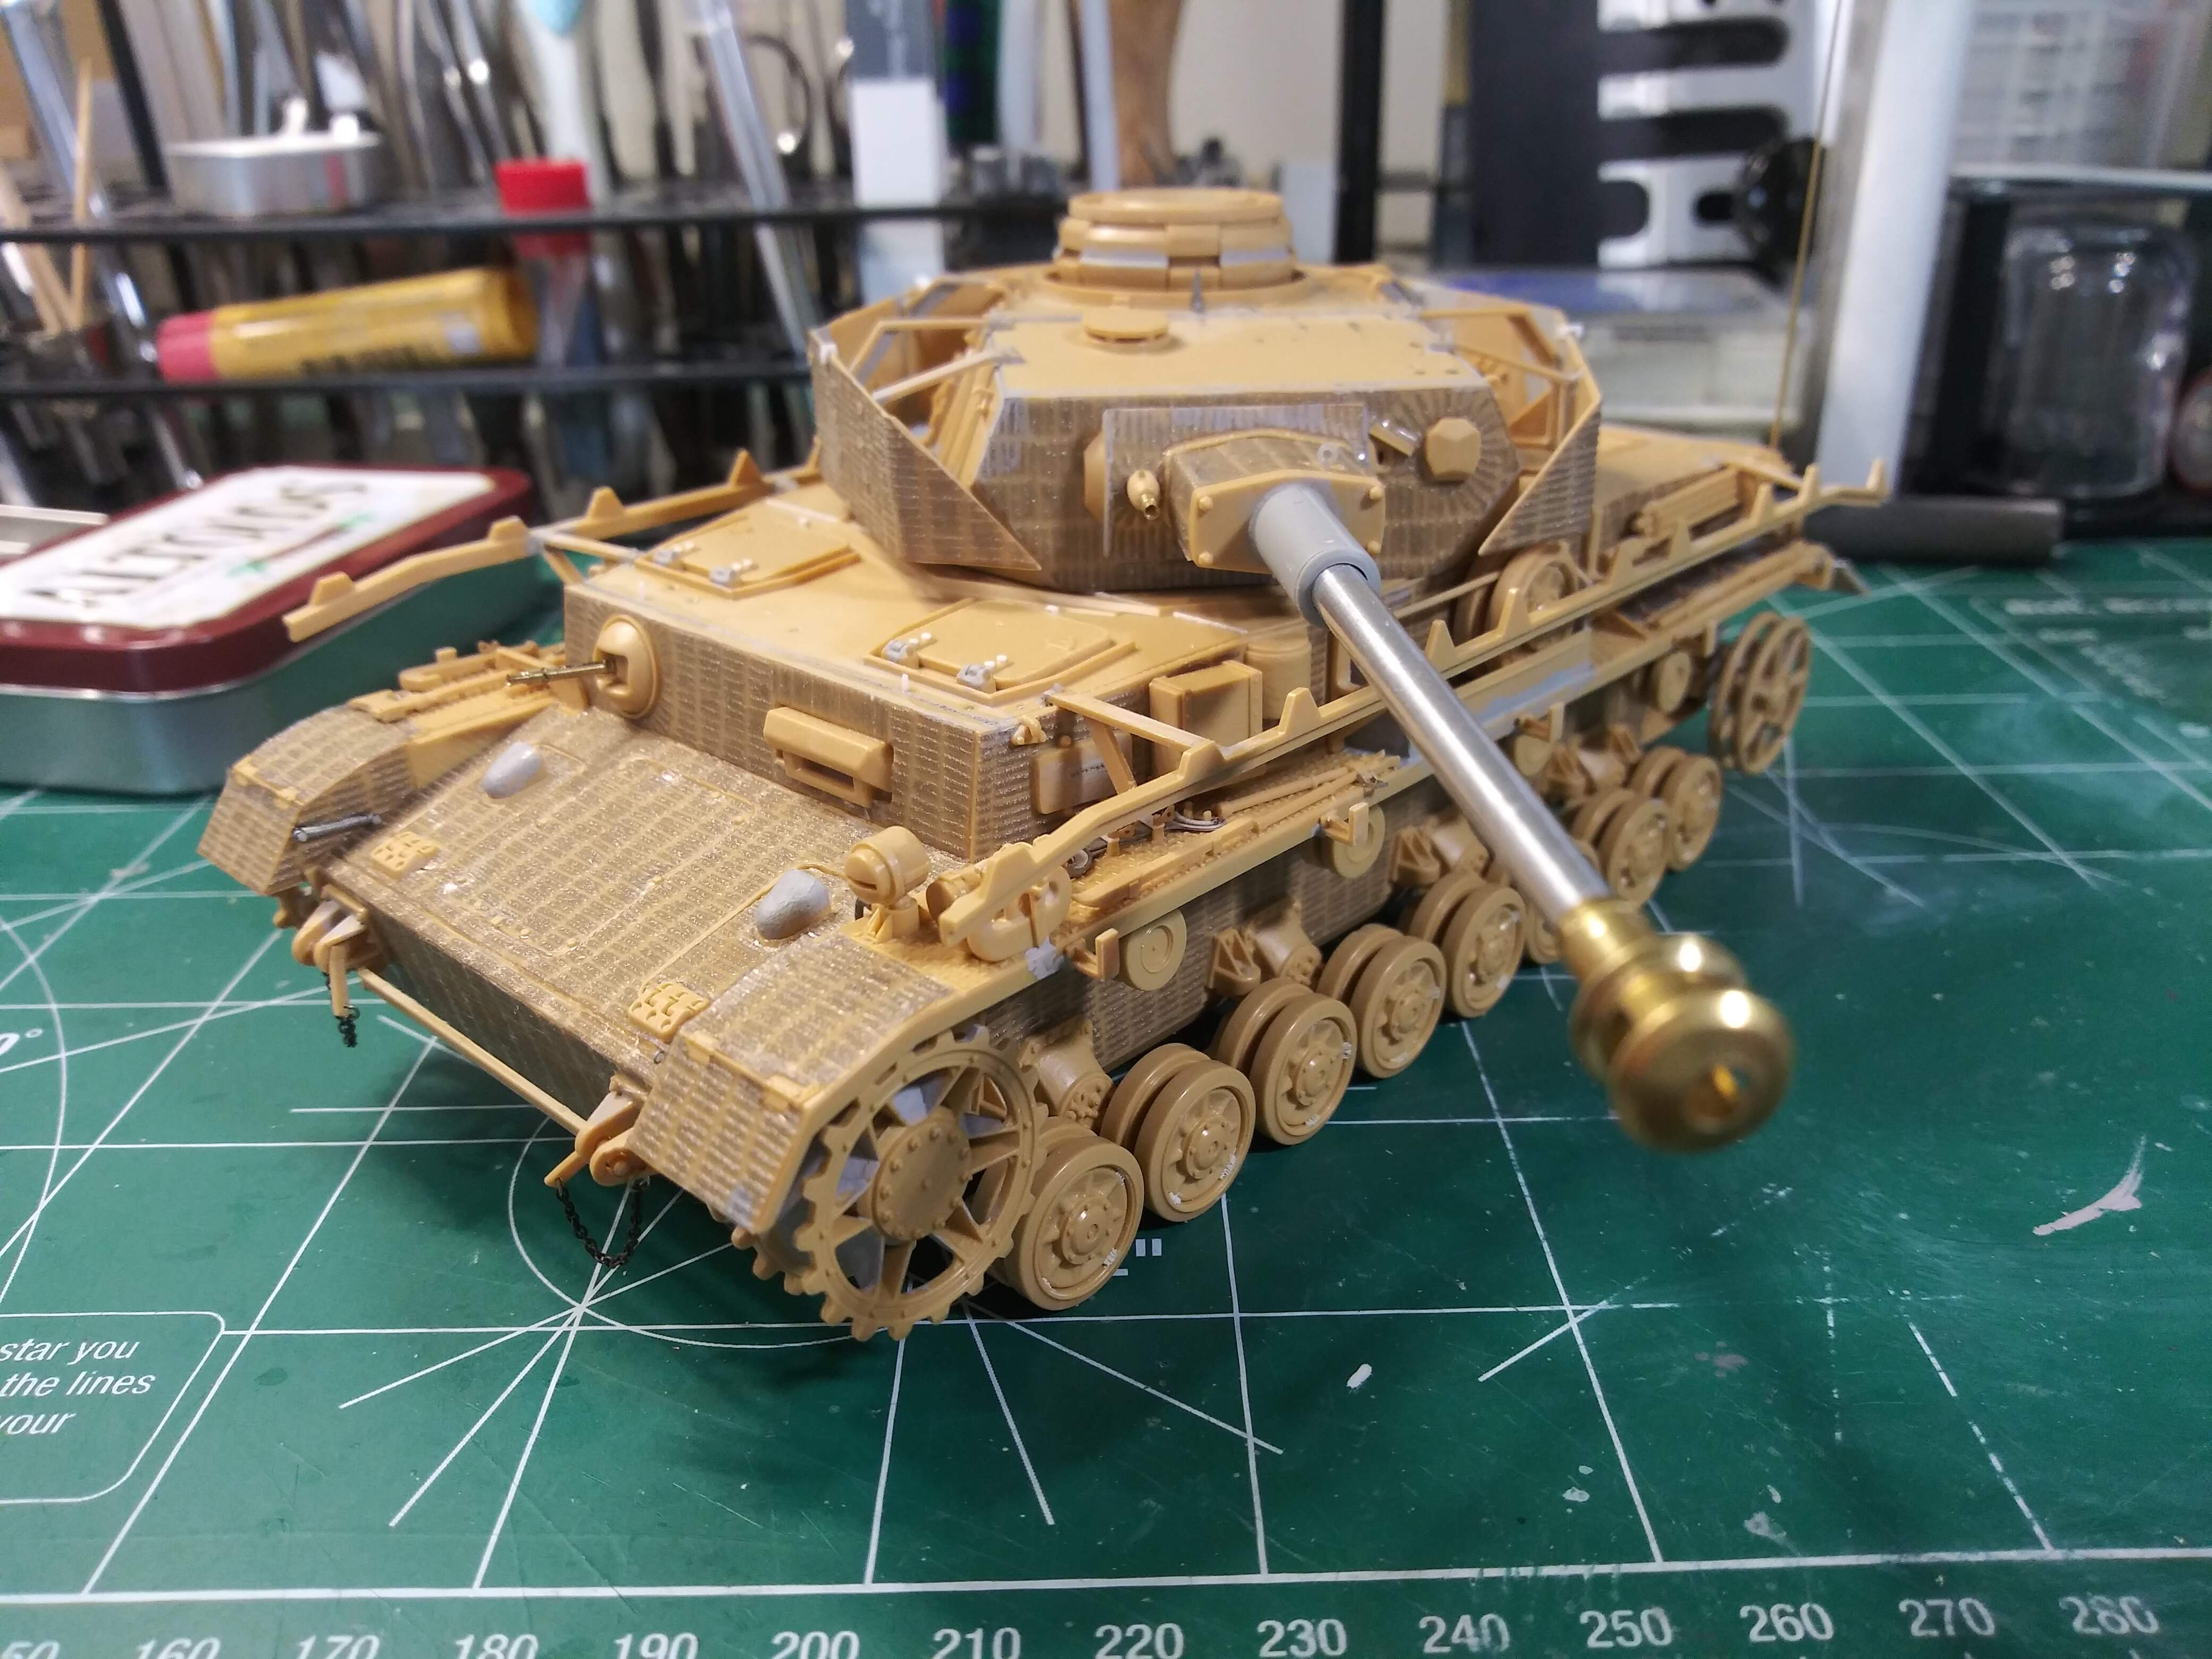
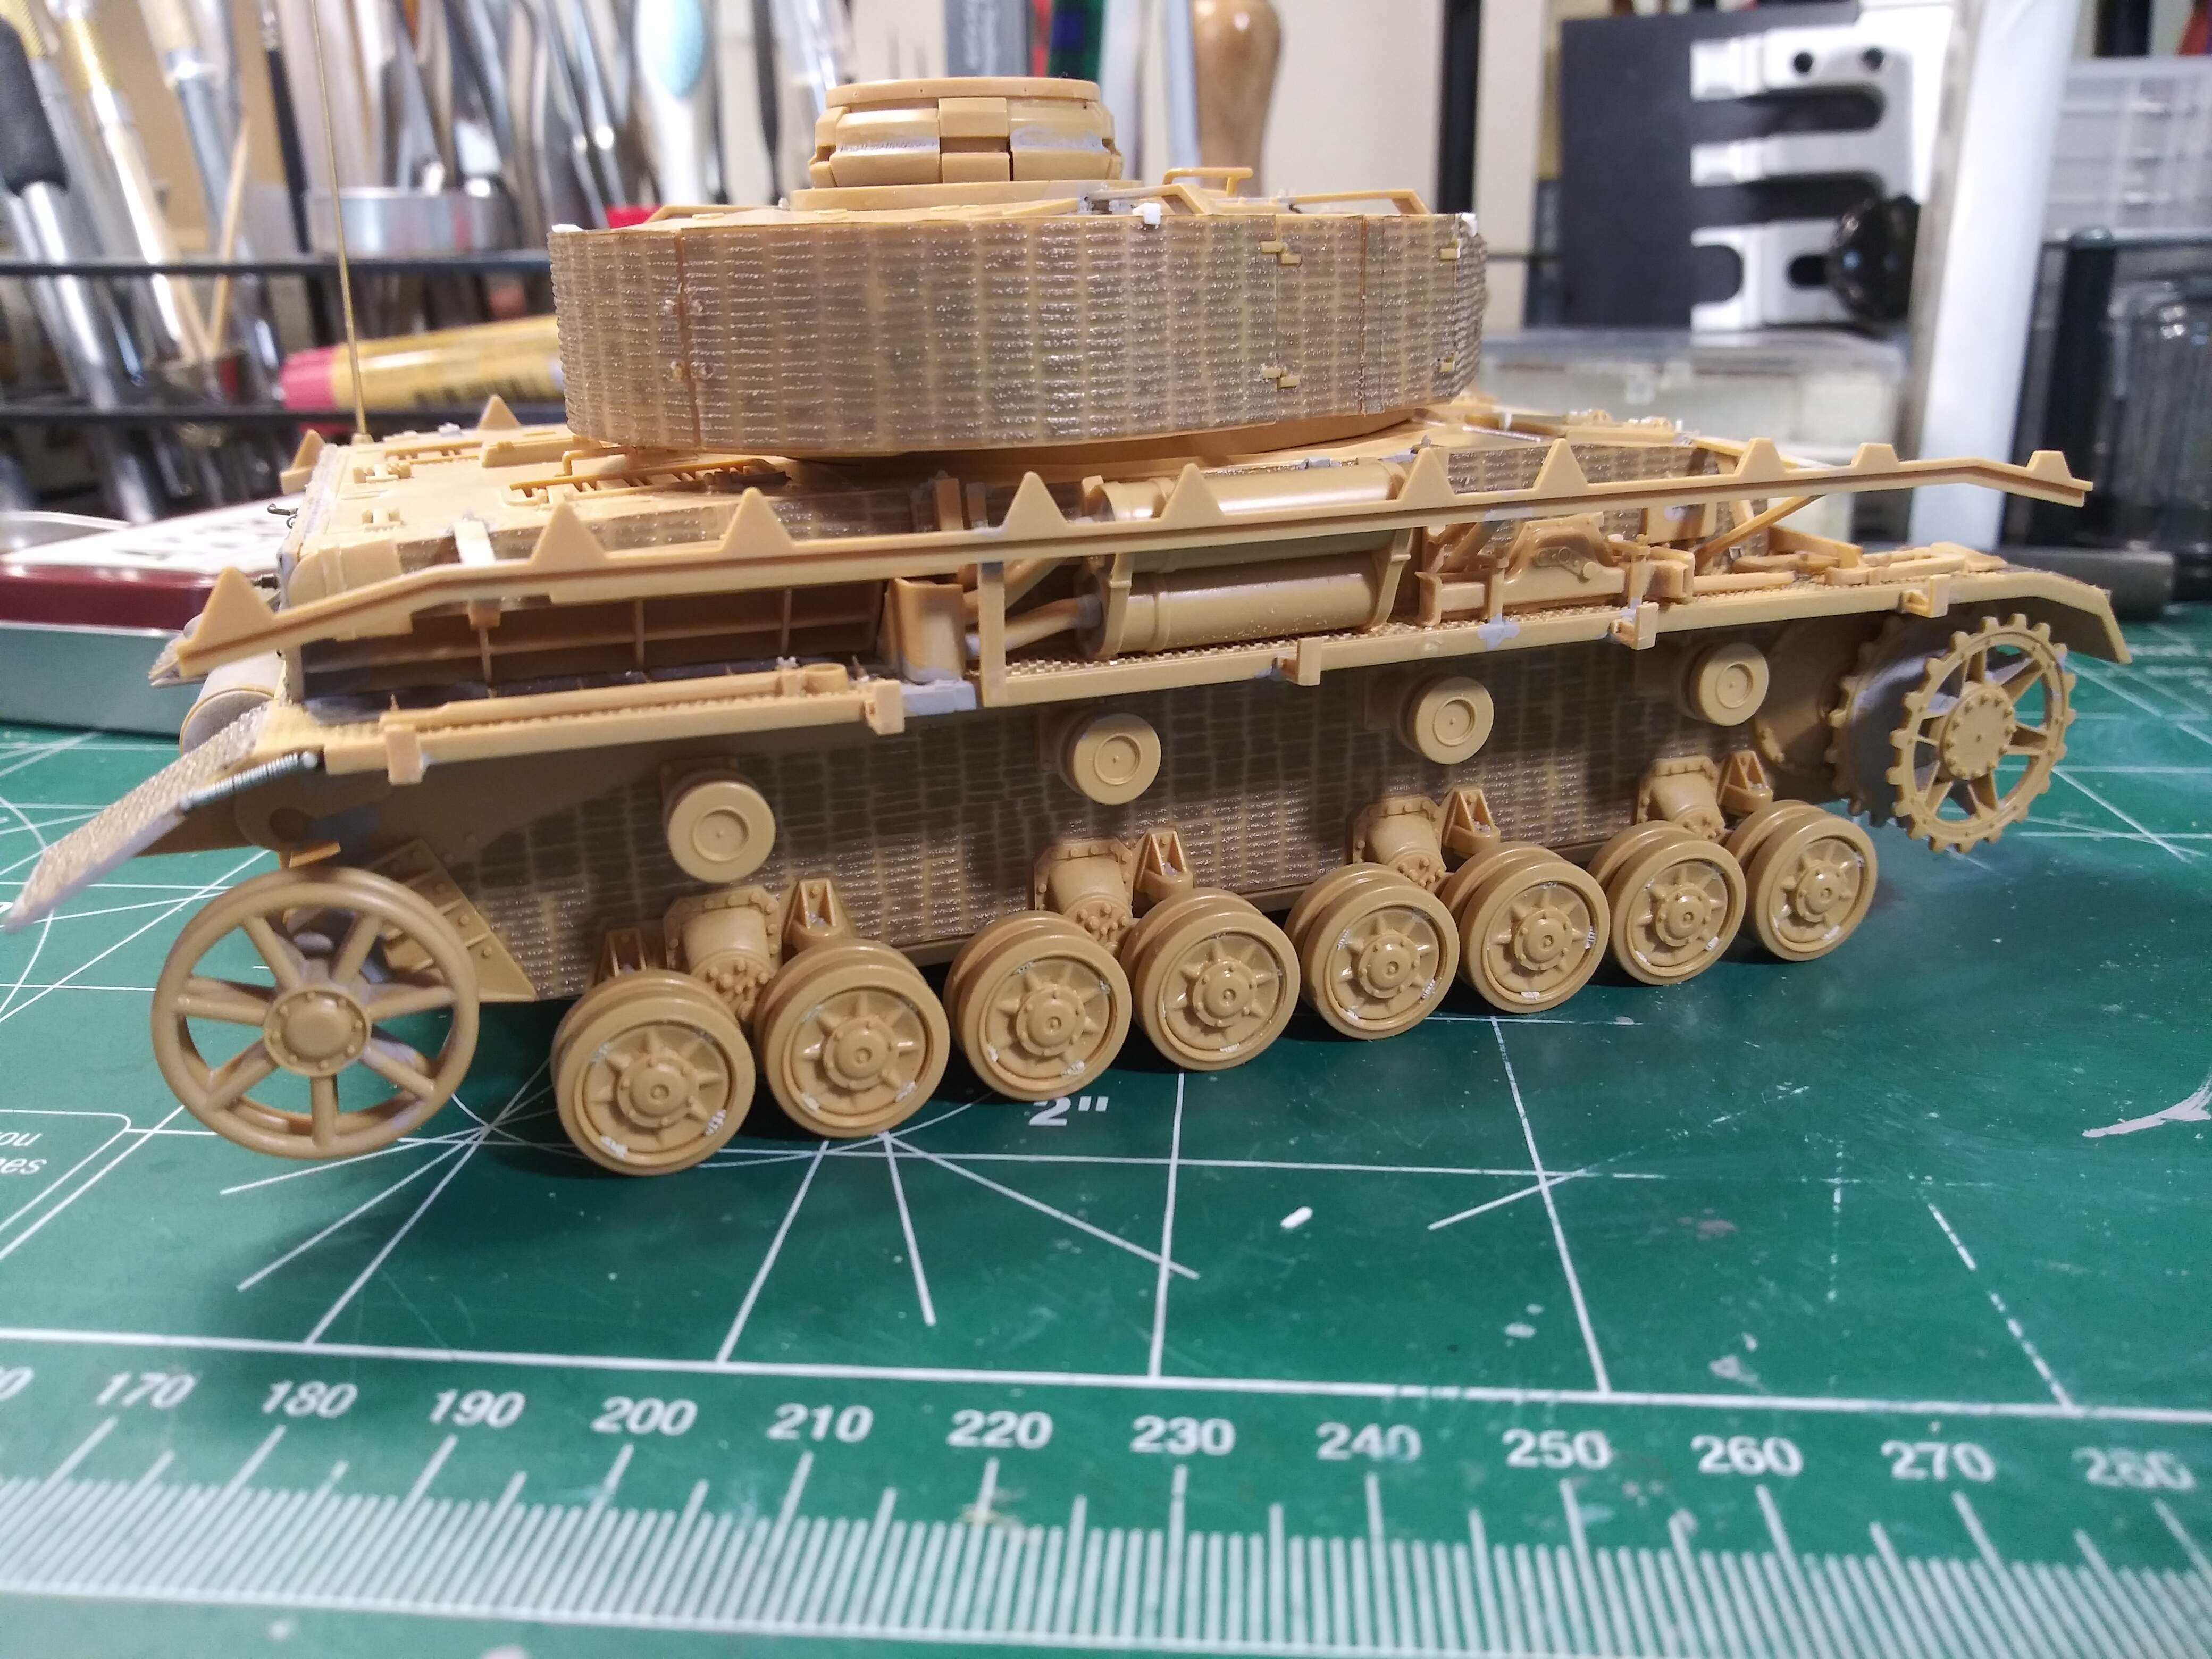
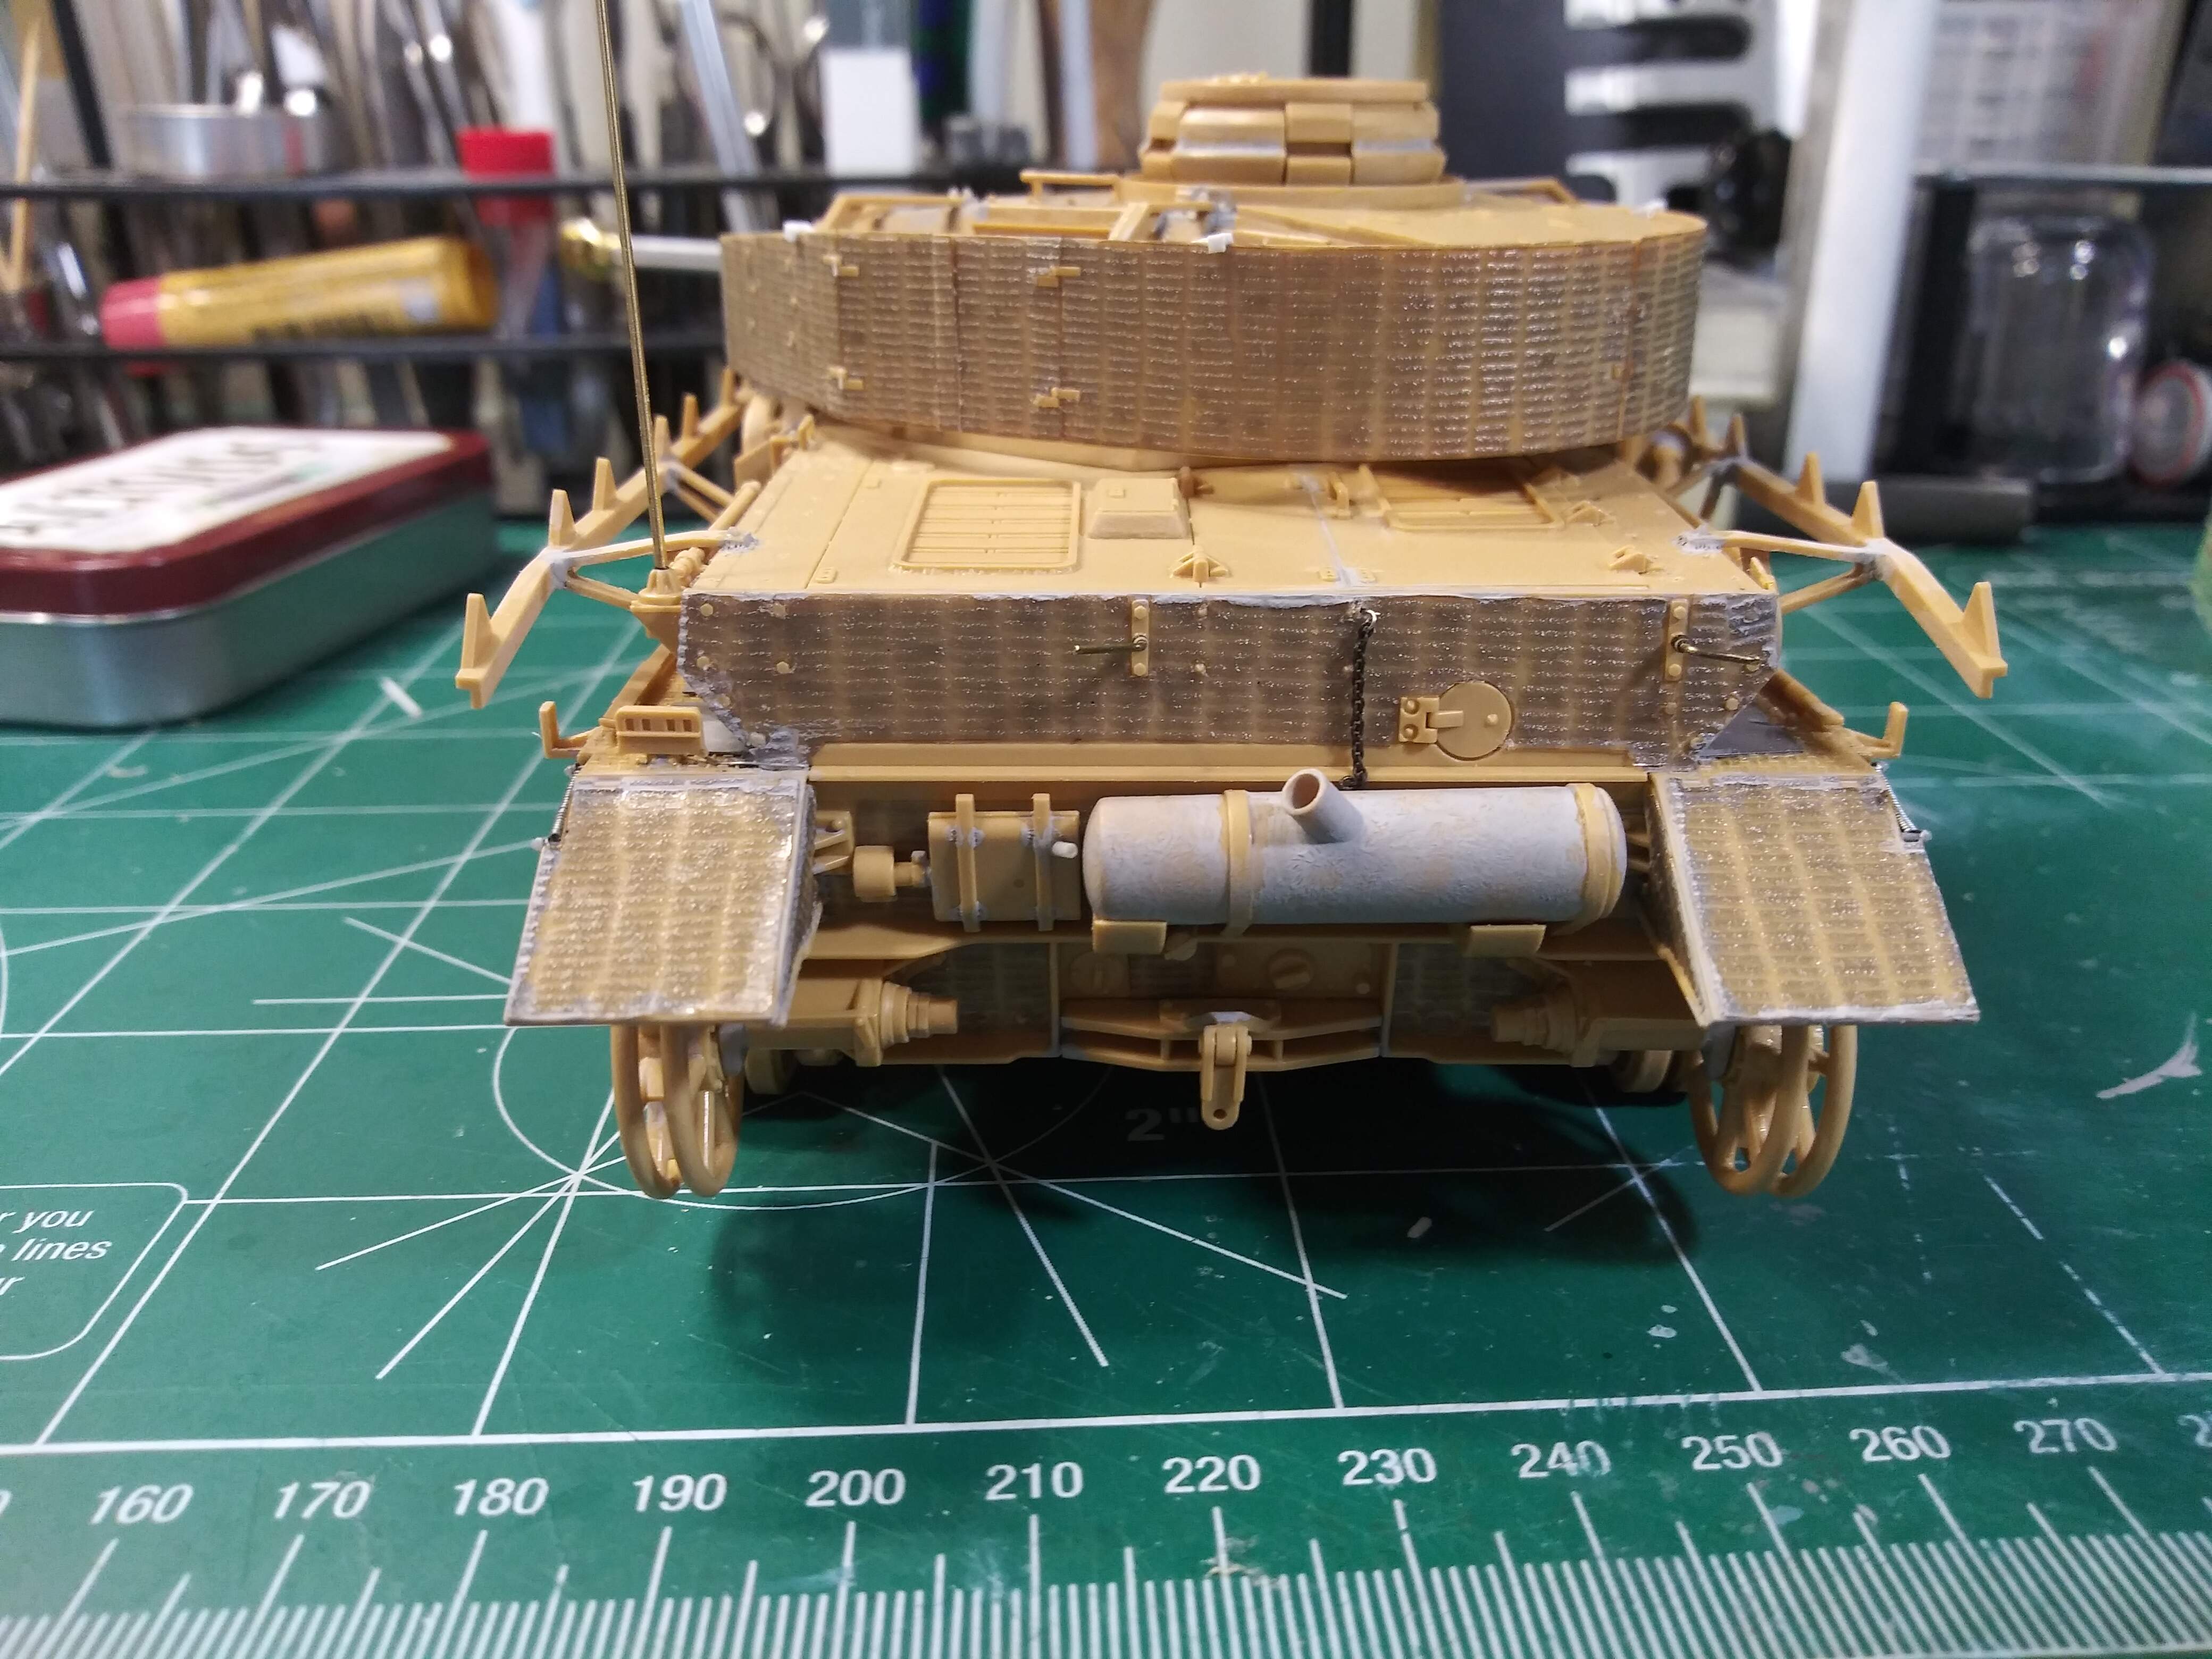
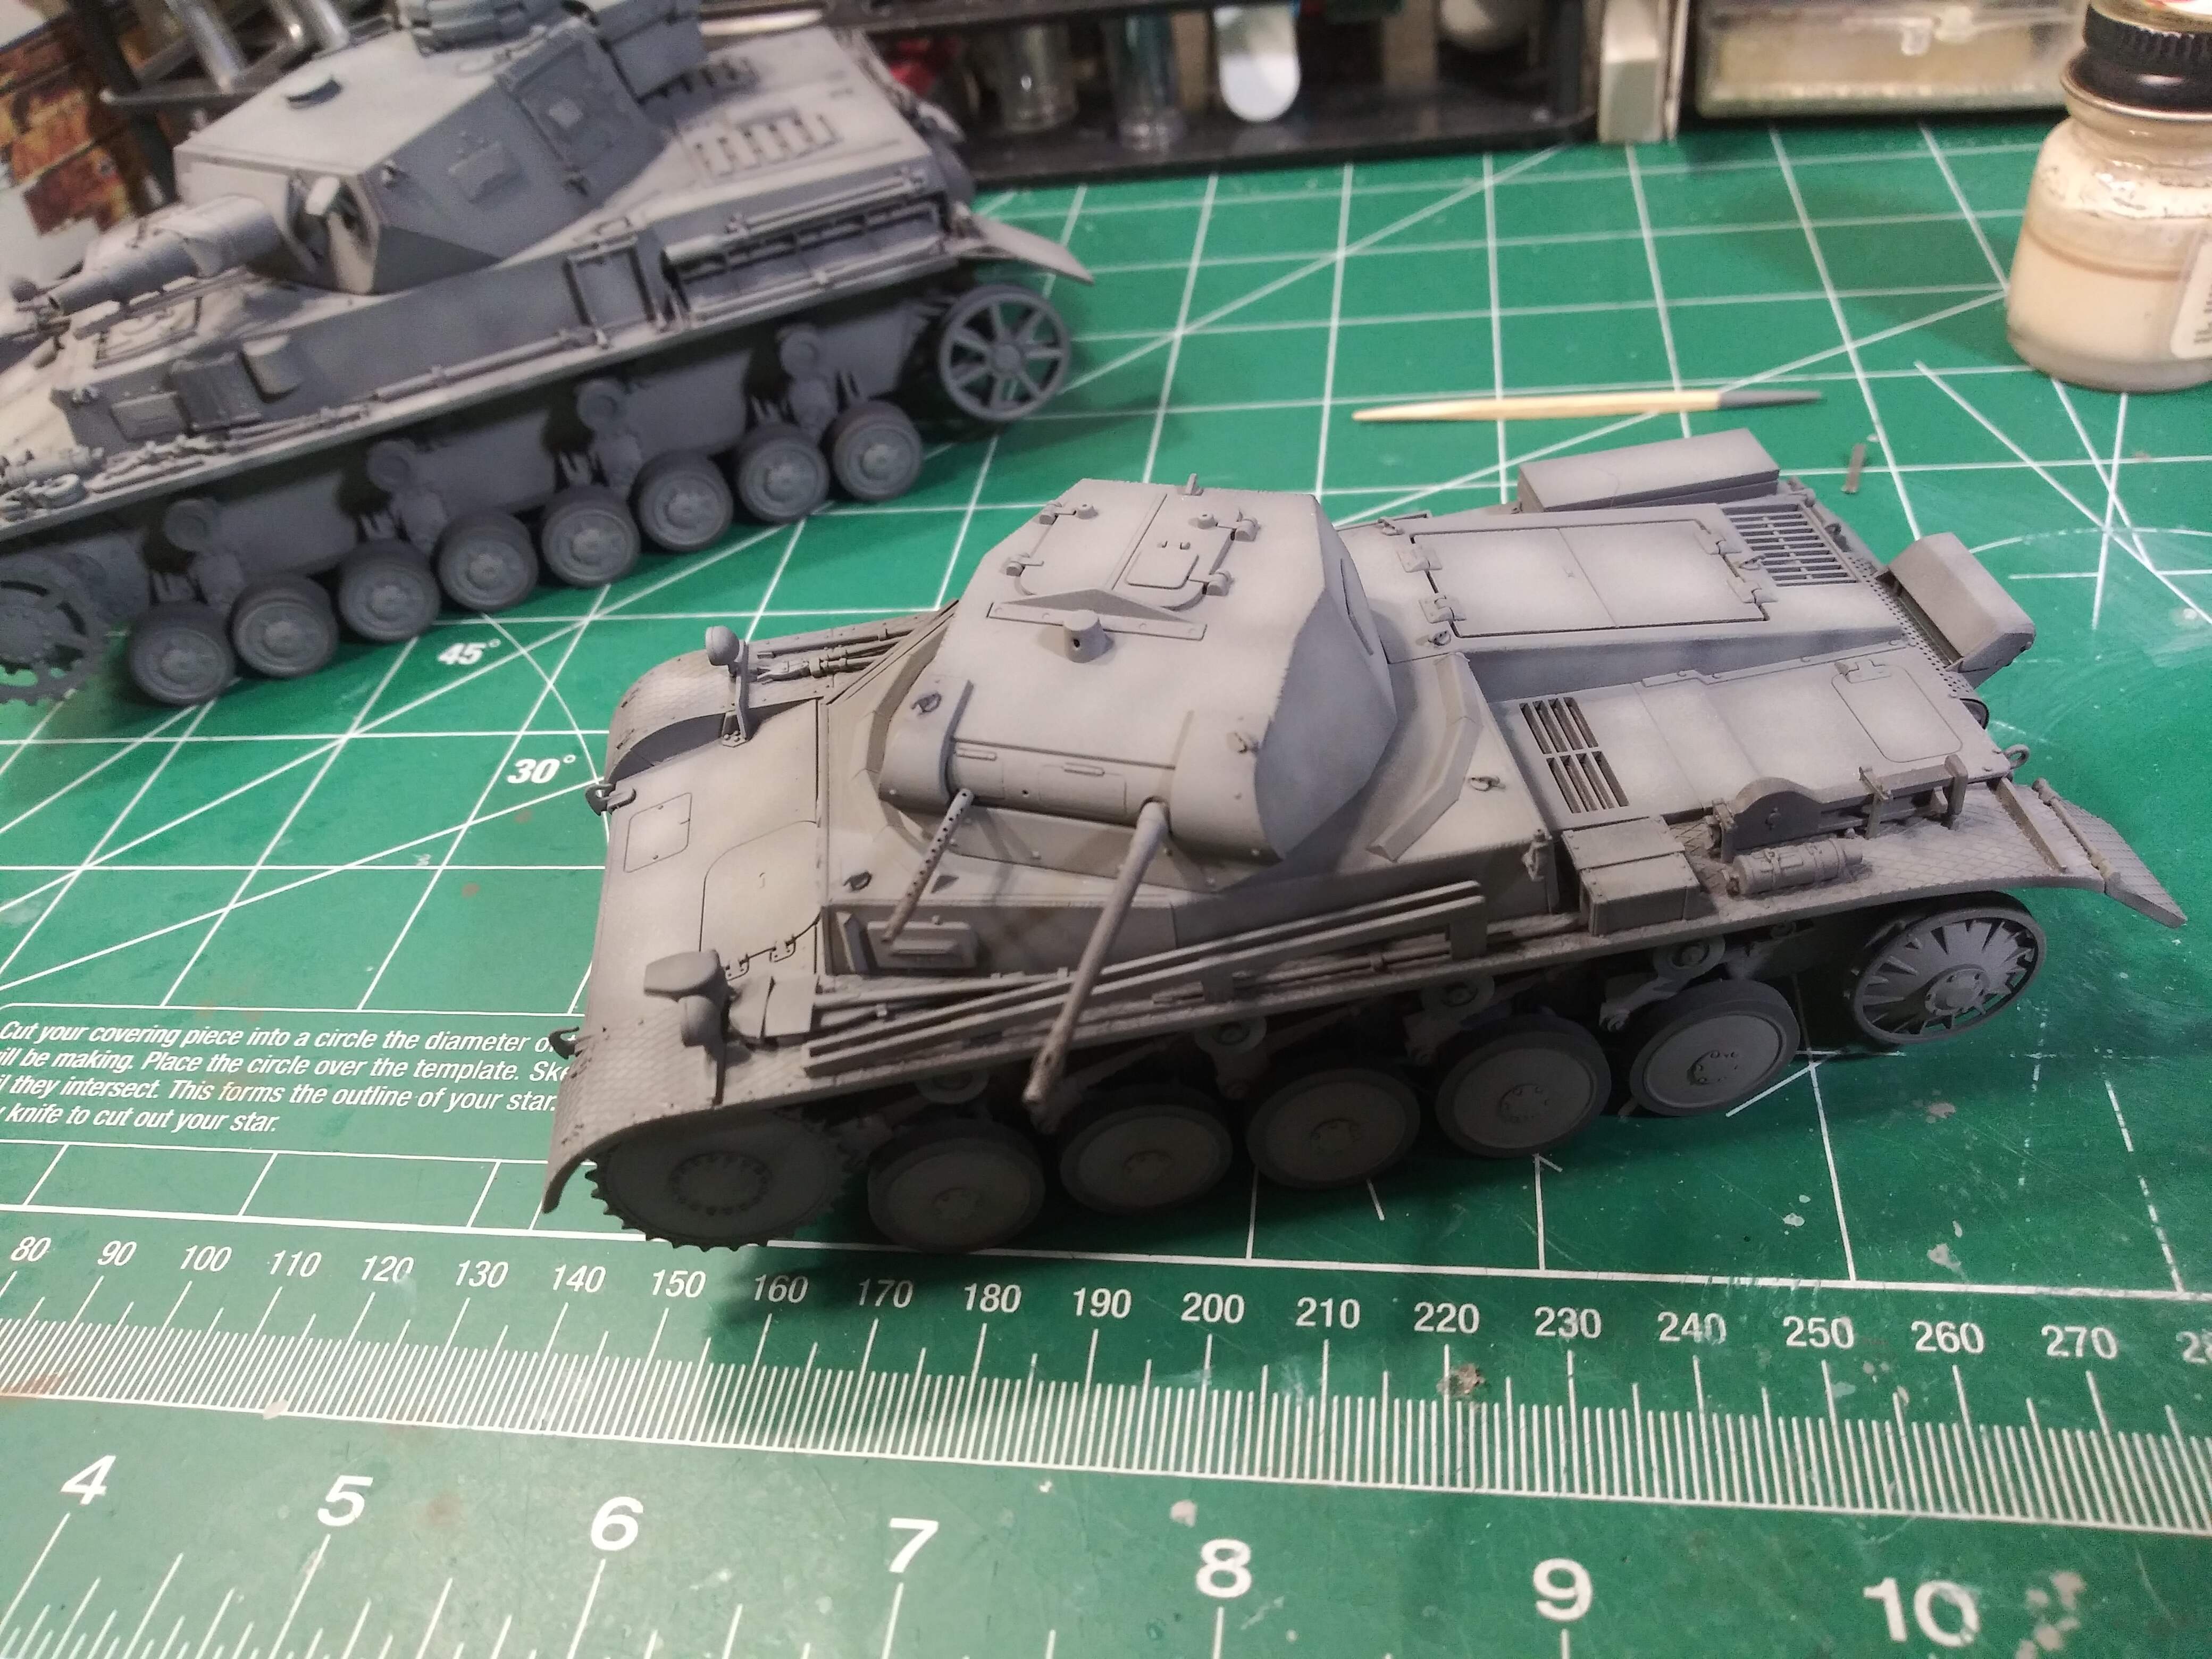
Worked on the upper & lower hull alignment. The front gap was all misaligned rear fenders and with some trimming thr J ended up like this.
The Tamiya wheels didn’t fit well on the TriStar bogies now its to the T-Star wheels.
This is getting better all the time.
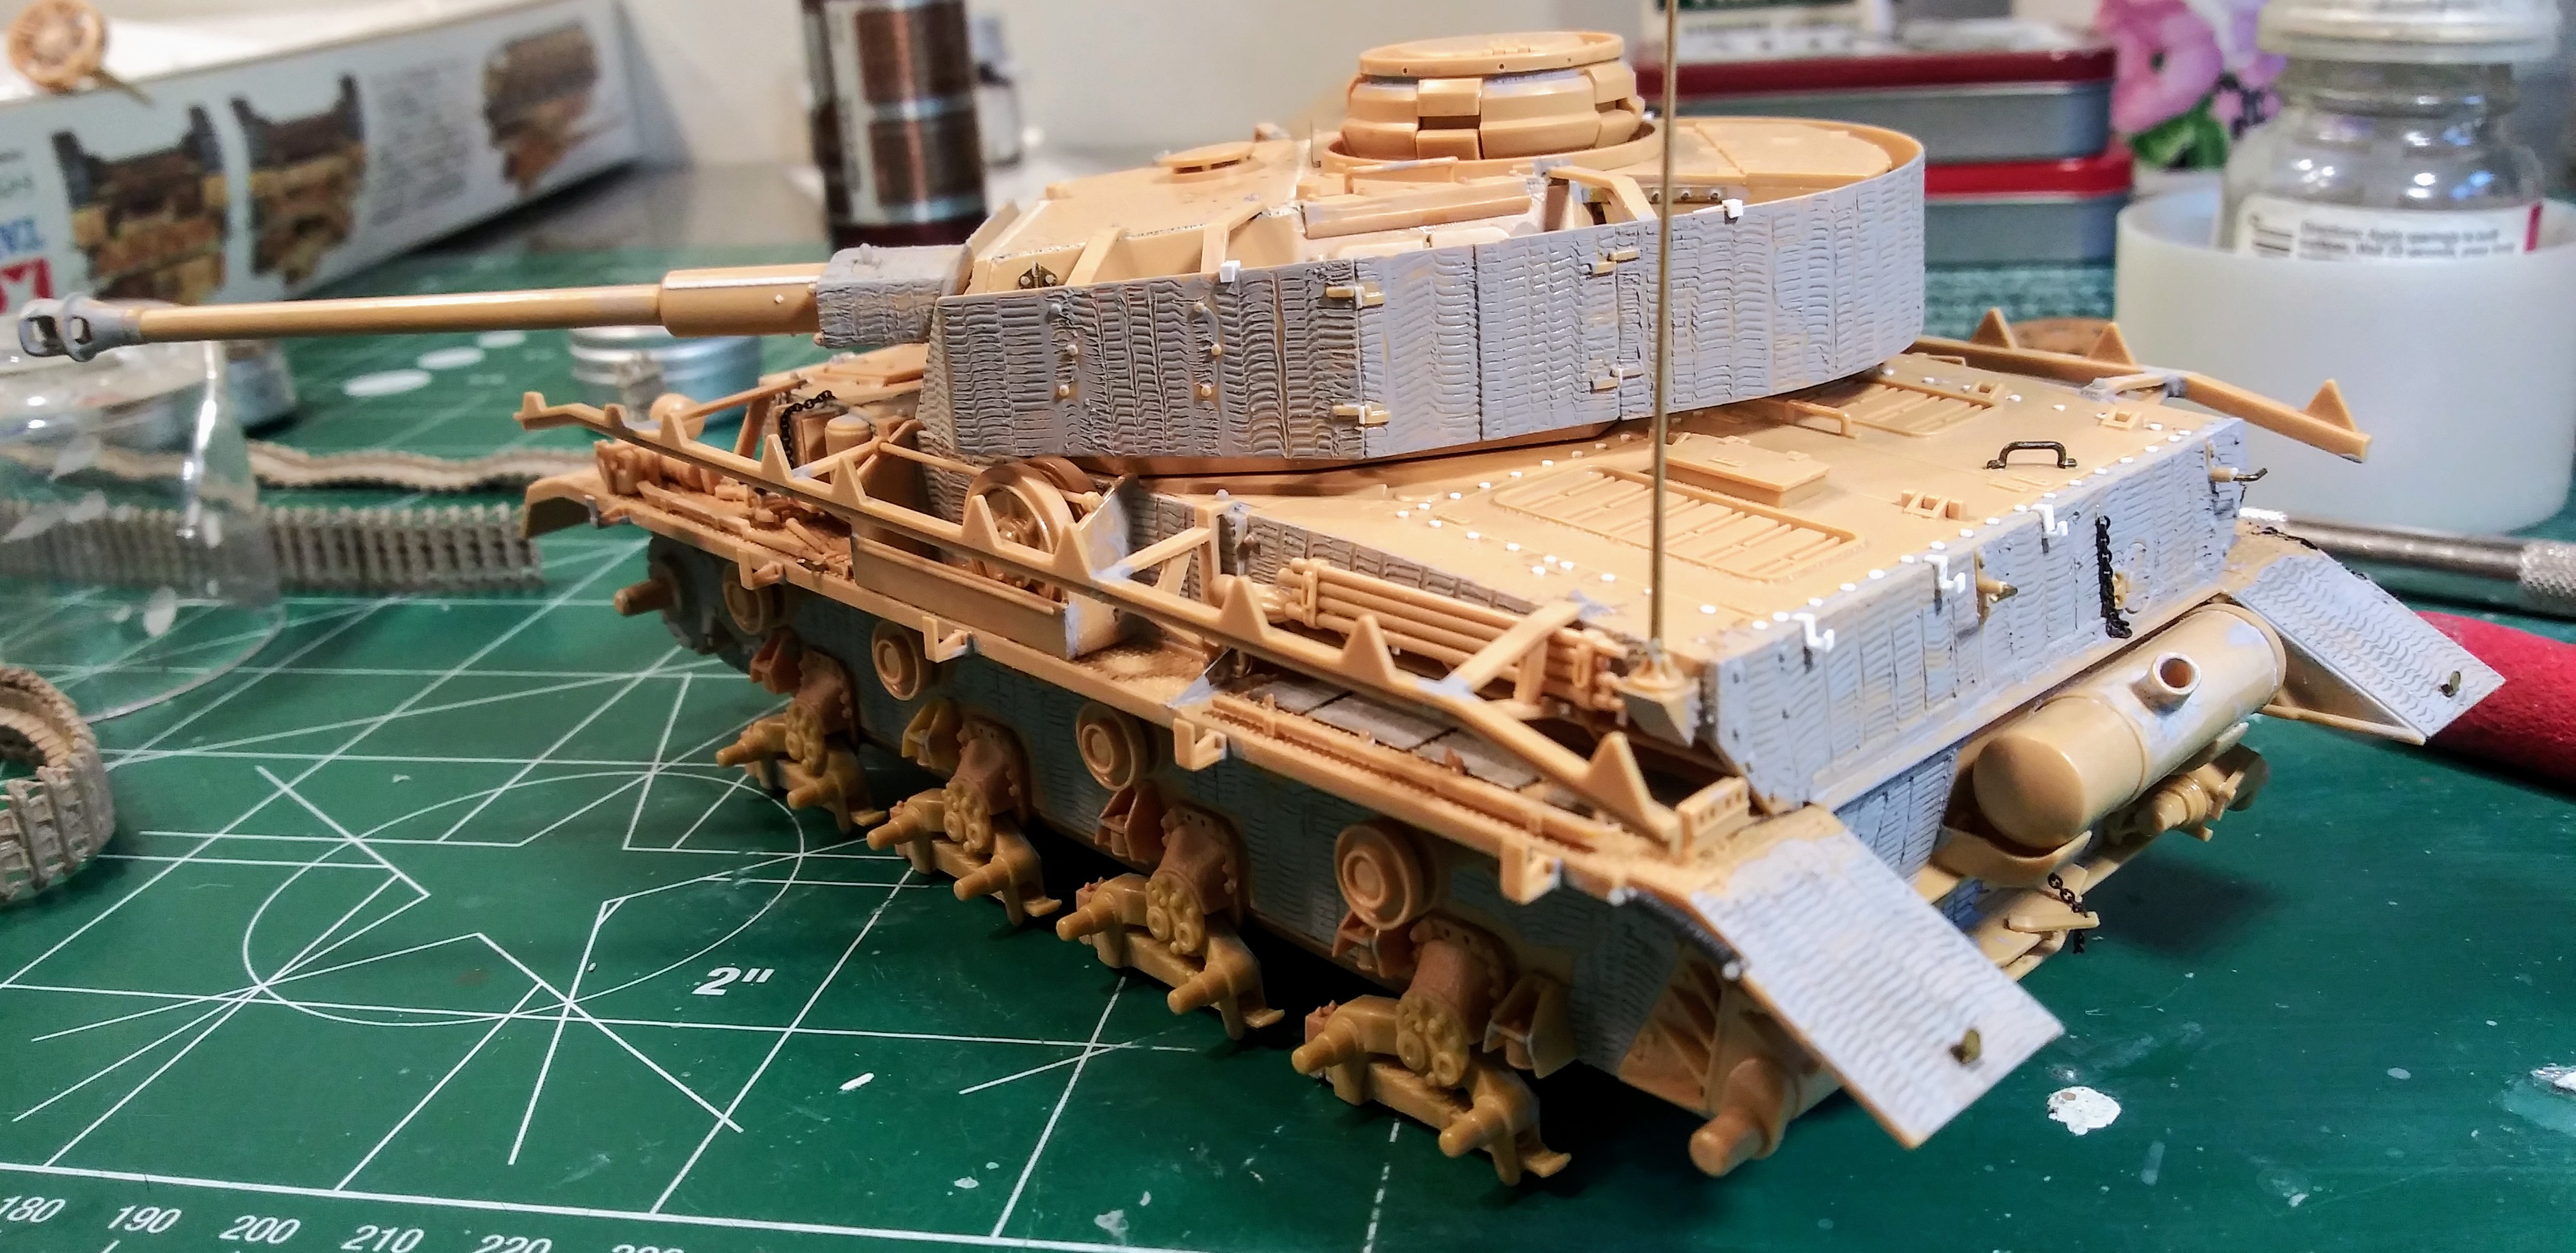
 Landmine #3:boom: - One of the ModelKasten Indy link tracks is assembled facing backwards
  Discovered when test fitting the tracks with the new TriStar wheels.
The first pair of indy link tracks I did for this model were MiniCraft/Academy and I didn’t do very well filling the like 400 punch marks in the track runs.
While do have enough spare ModelKasten links to make repairs getting good fitment with fenders in the way will be more difficult than I want to deal with. Really wish I hadn’t glued the upper & lower hull together.
Well if there’s one thing I learned from hot rodding its when things don’t work as you’d like - its time to upgrade!
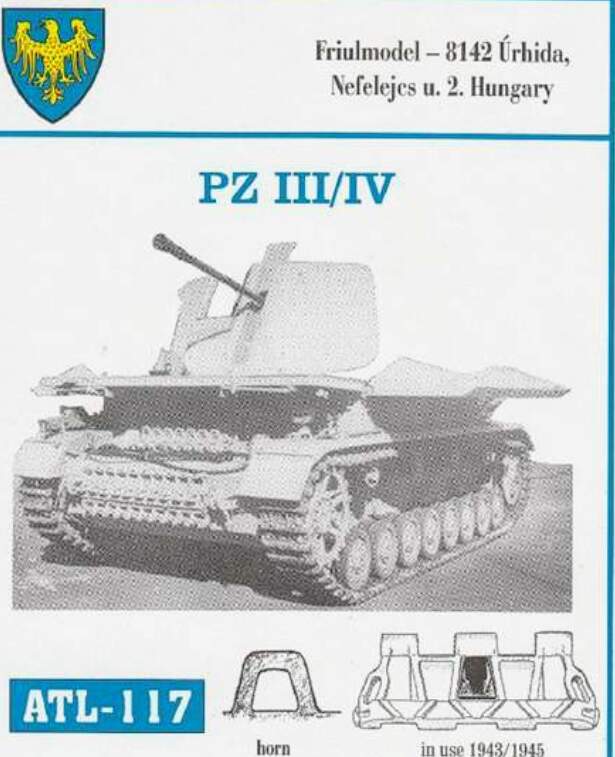
Checked the aftermarket cabinet and discovered I have every set of Fruil track links for a Pz IV - except the set I want #117.
Found one set on the interweb and ordered it from Australia. I washed the model and let it dry so its ready for painting. I think the Pz IV J is tabled & shelved again until the new tracks arrive or we get some warm days suitable for painting.
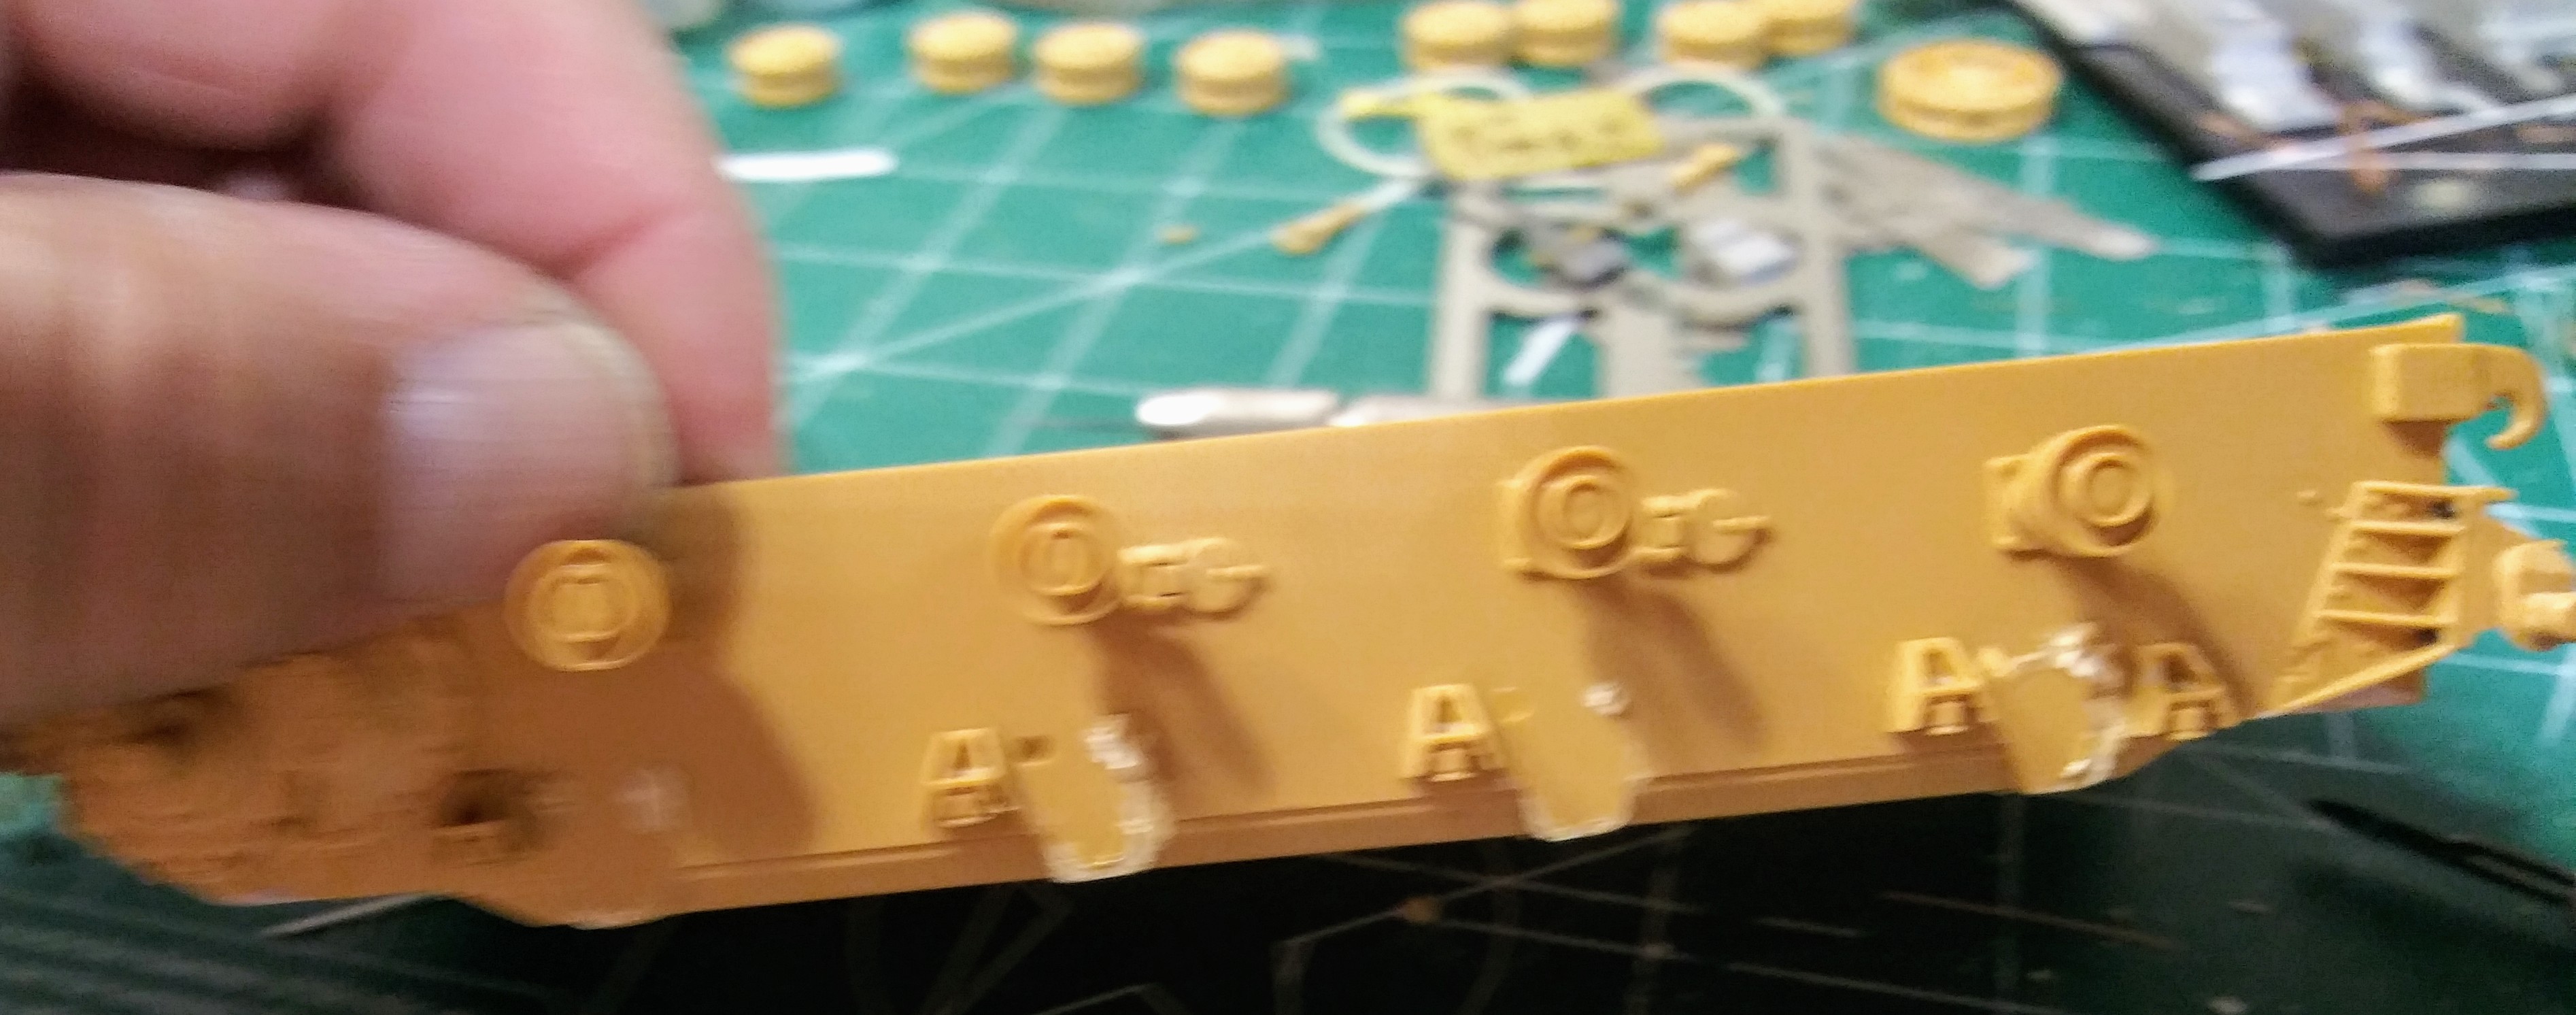
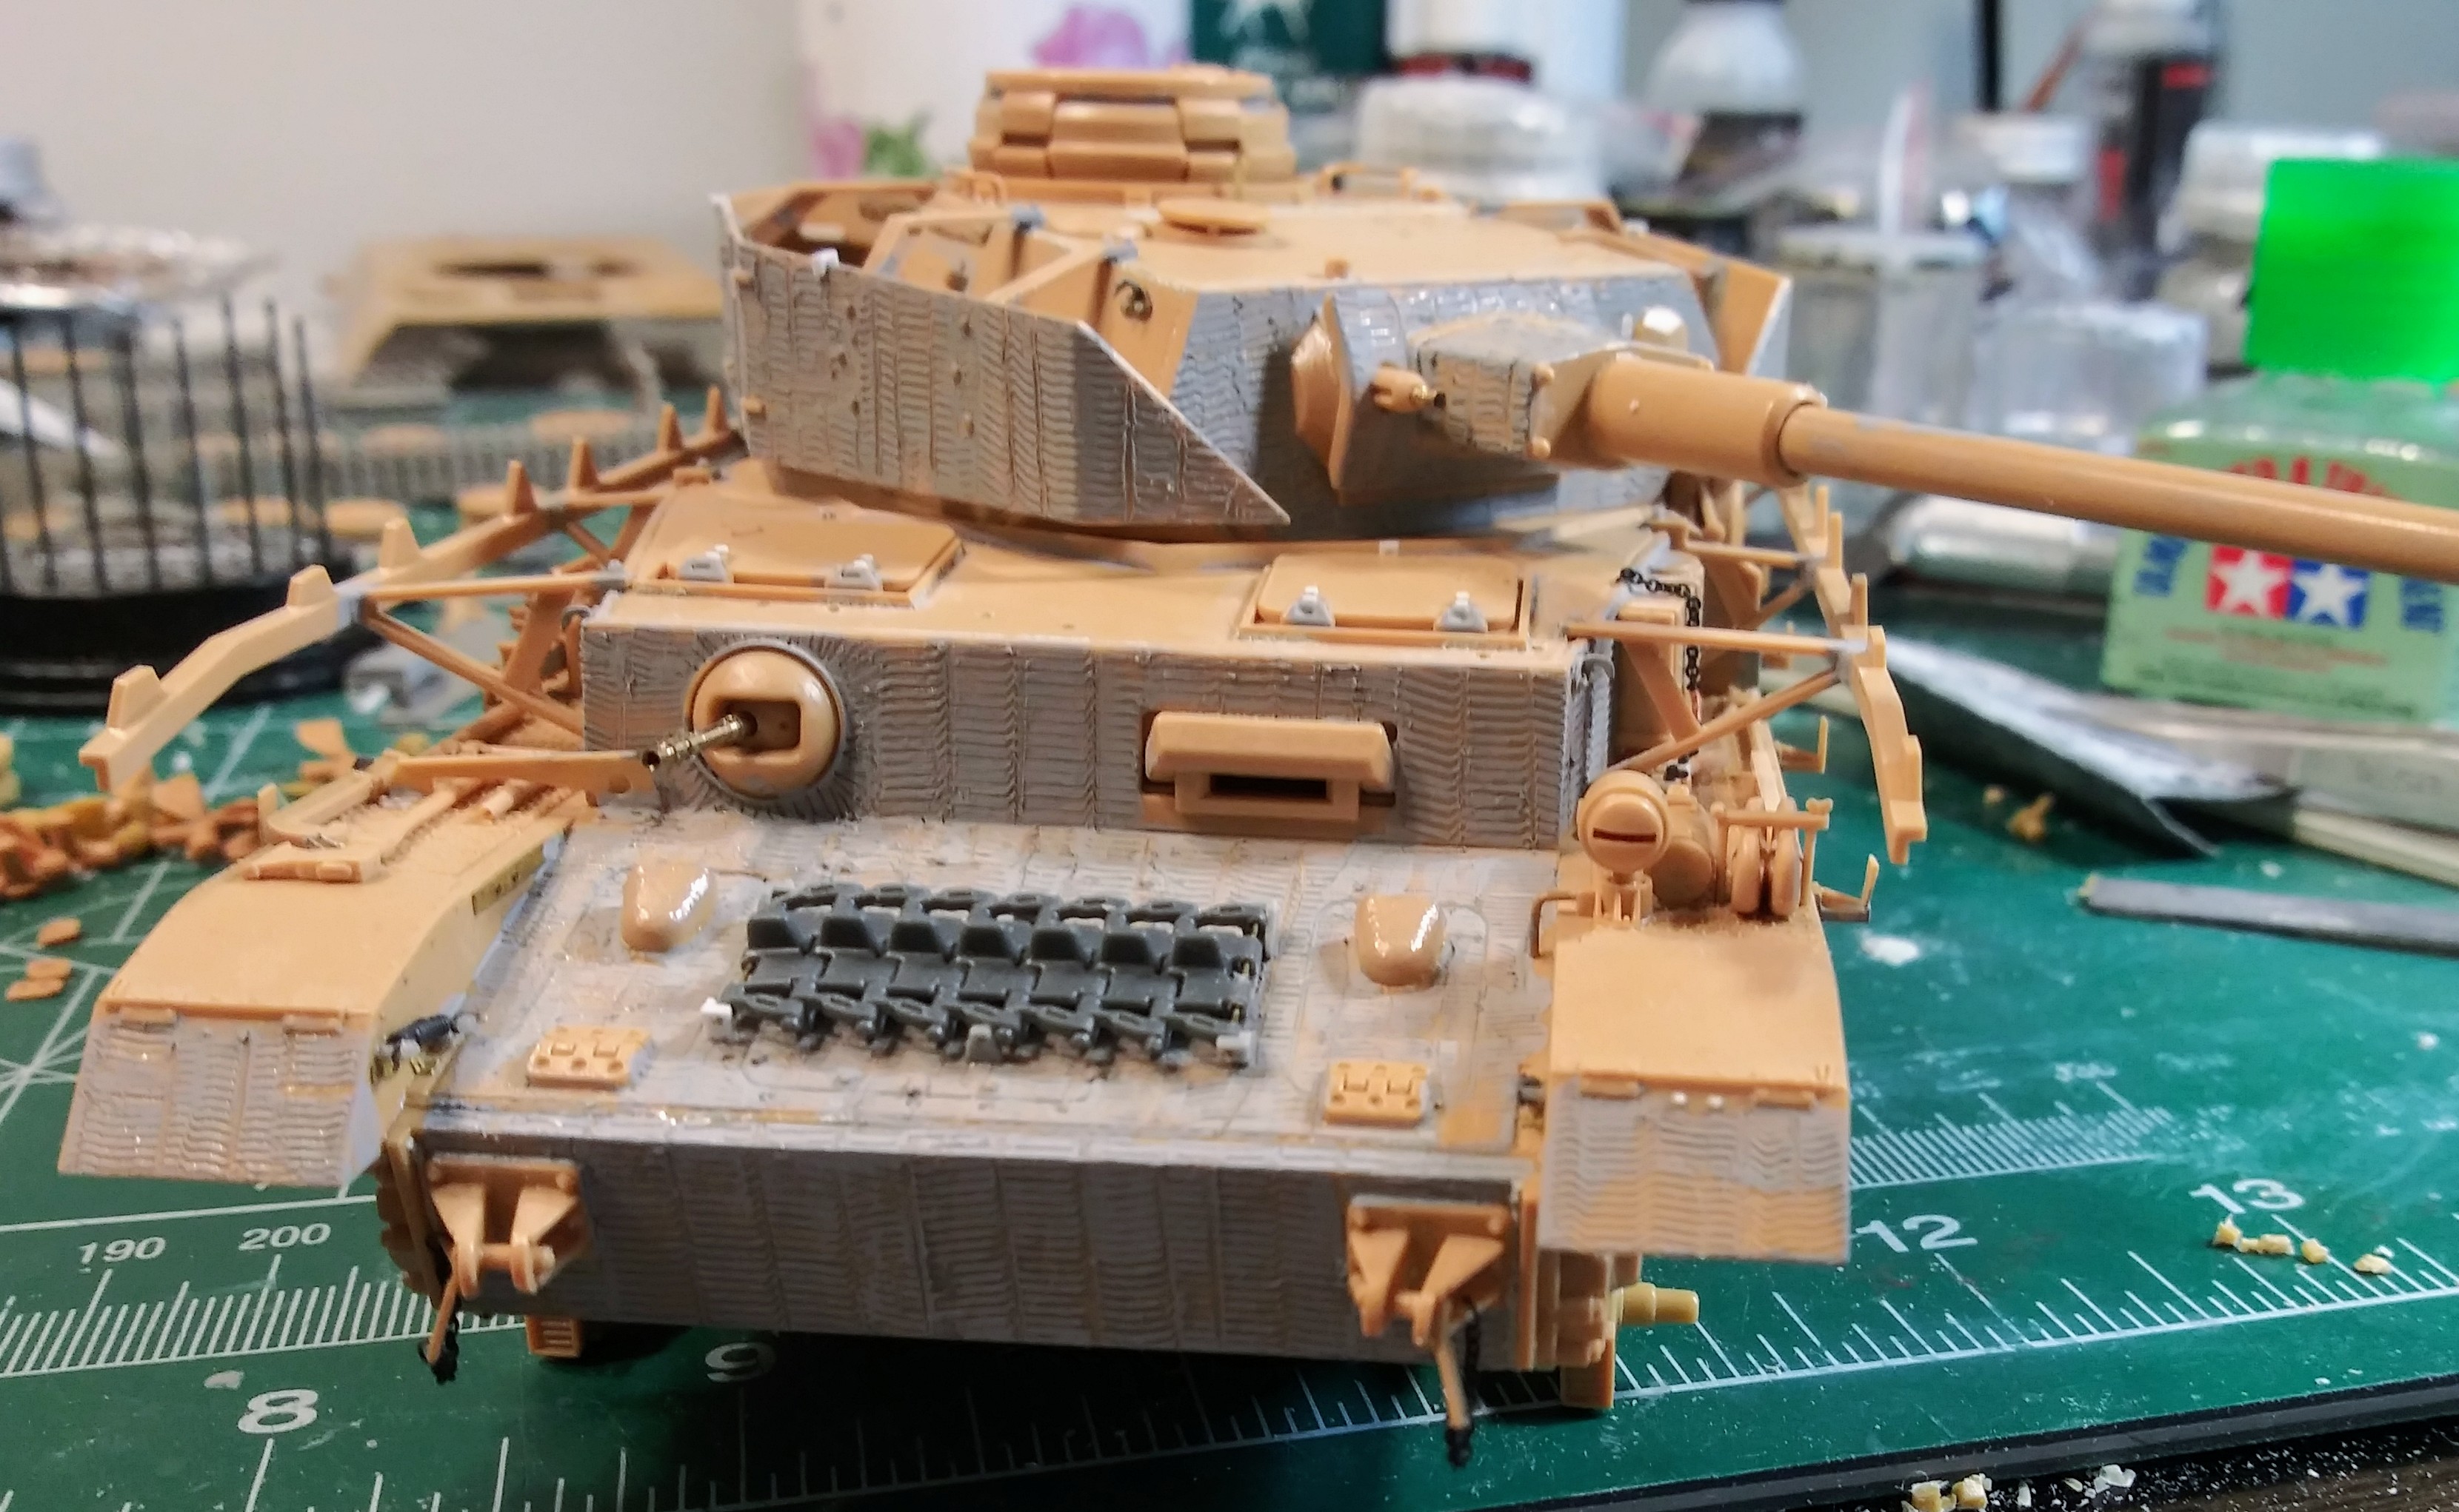
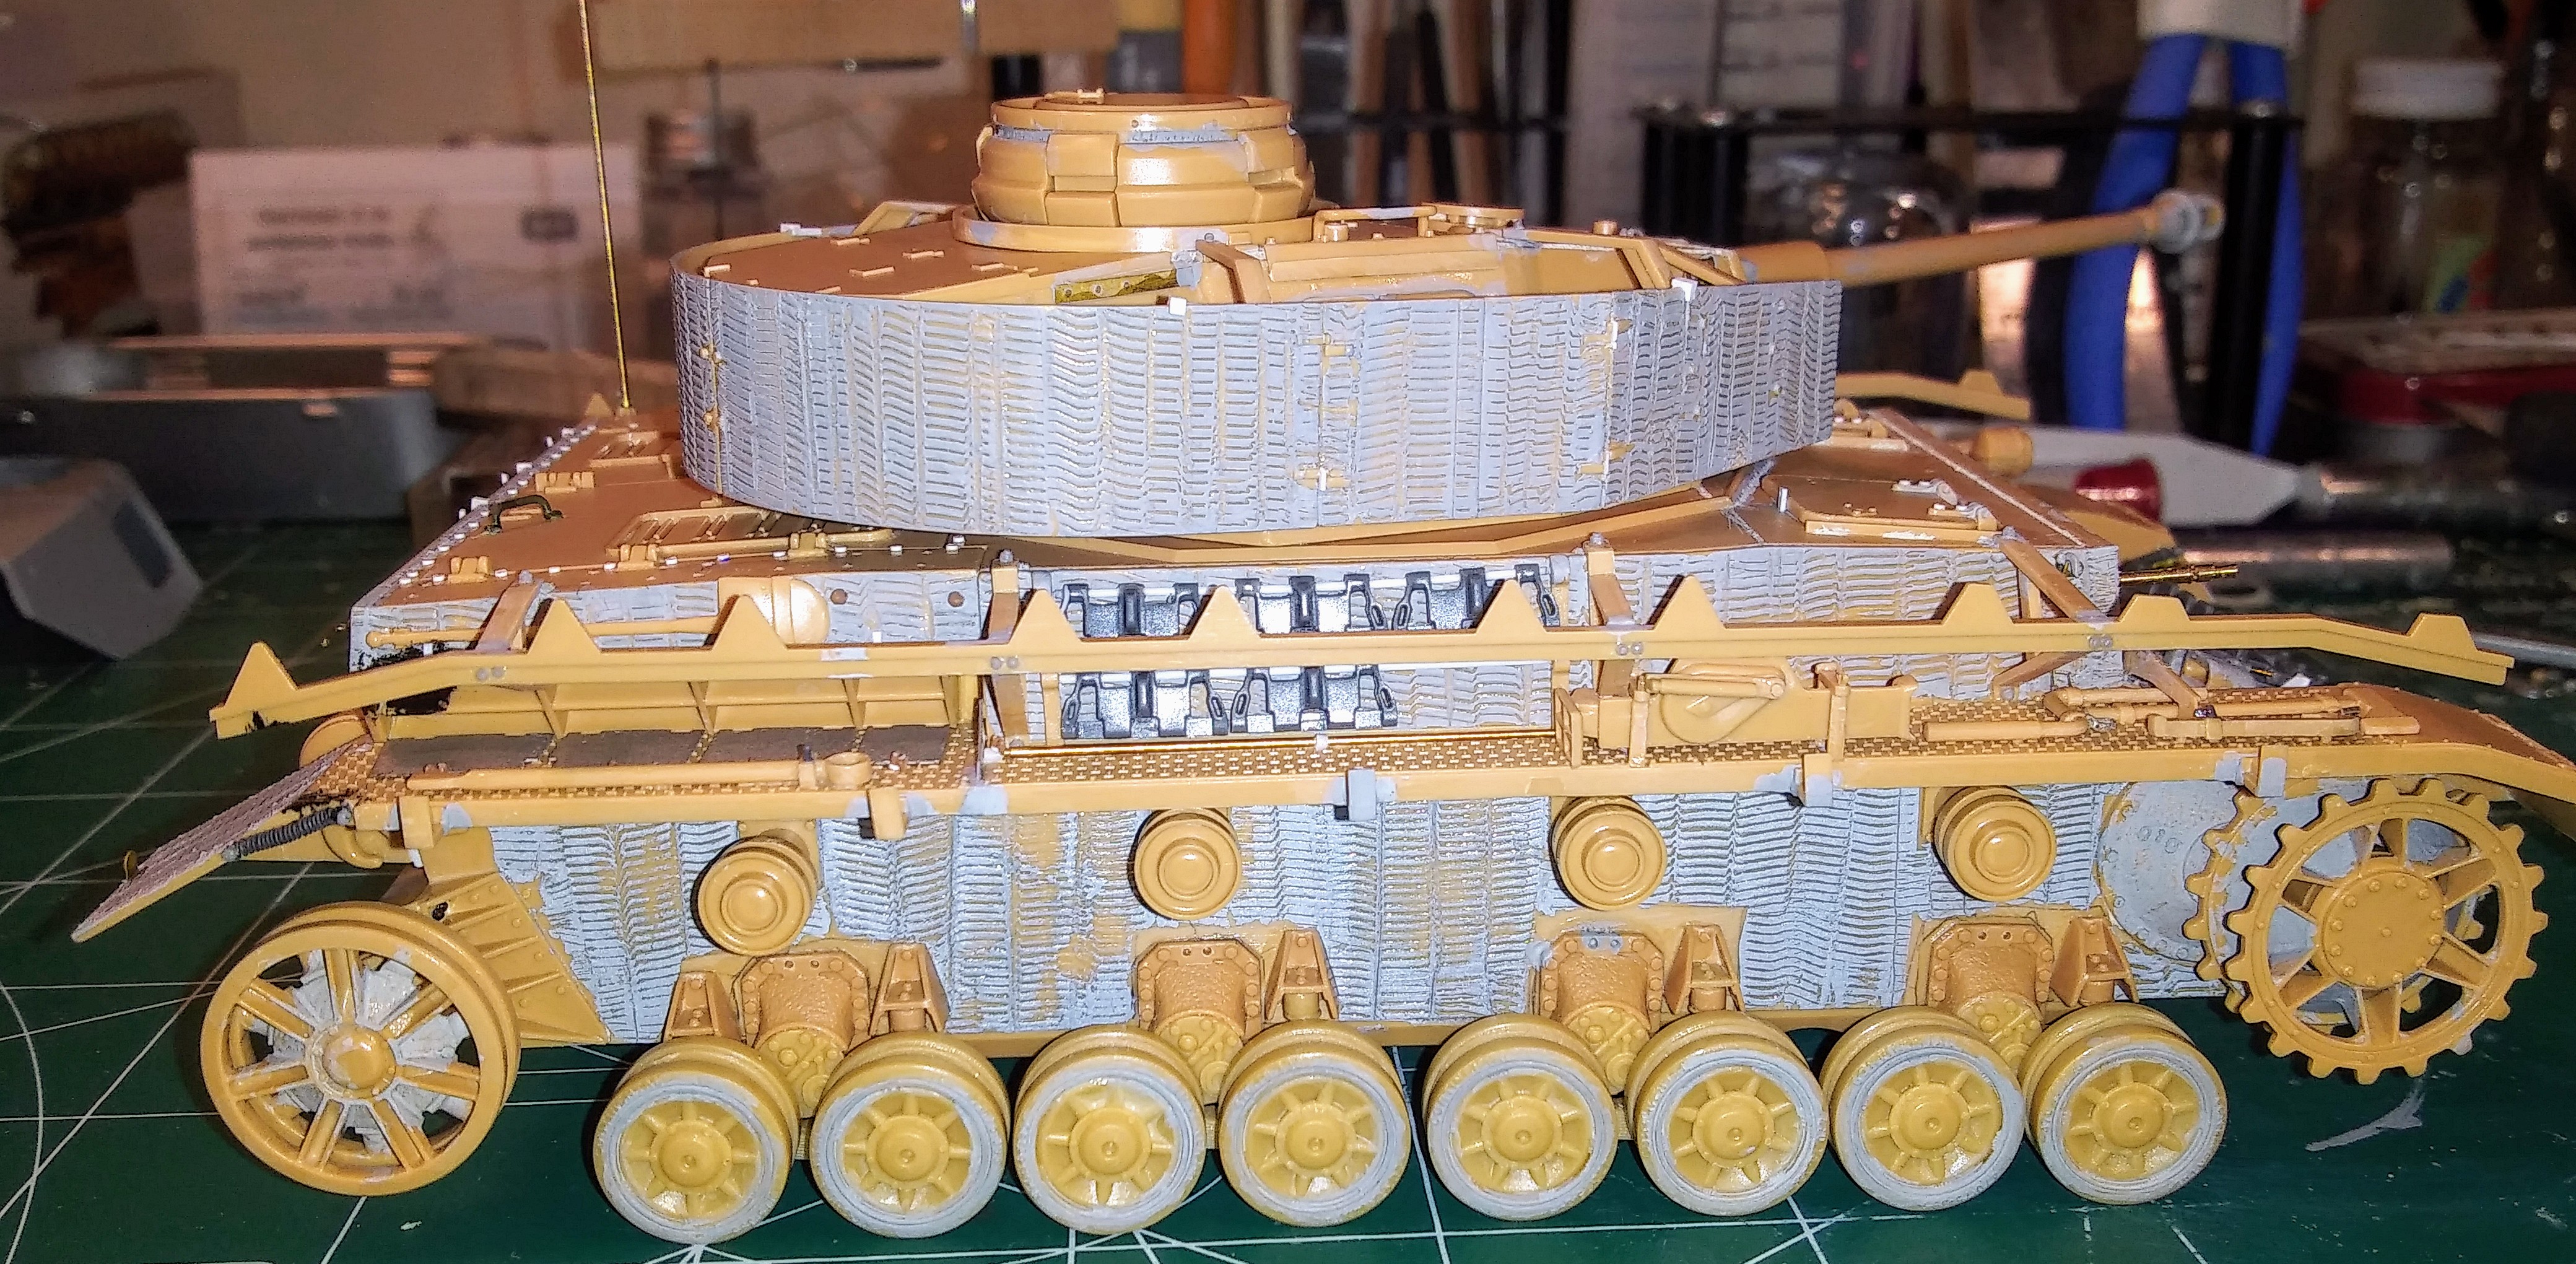
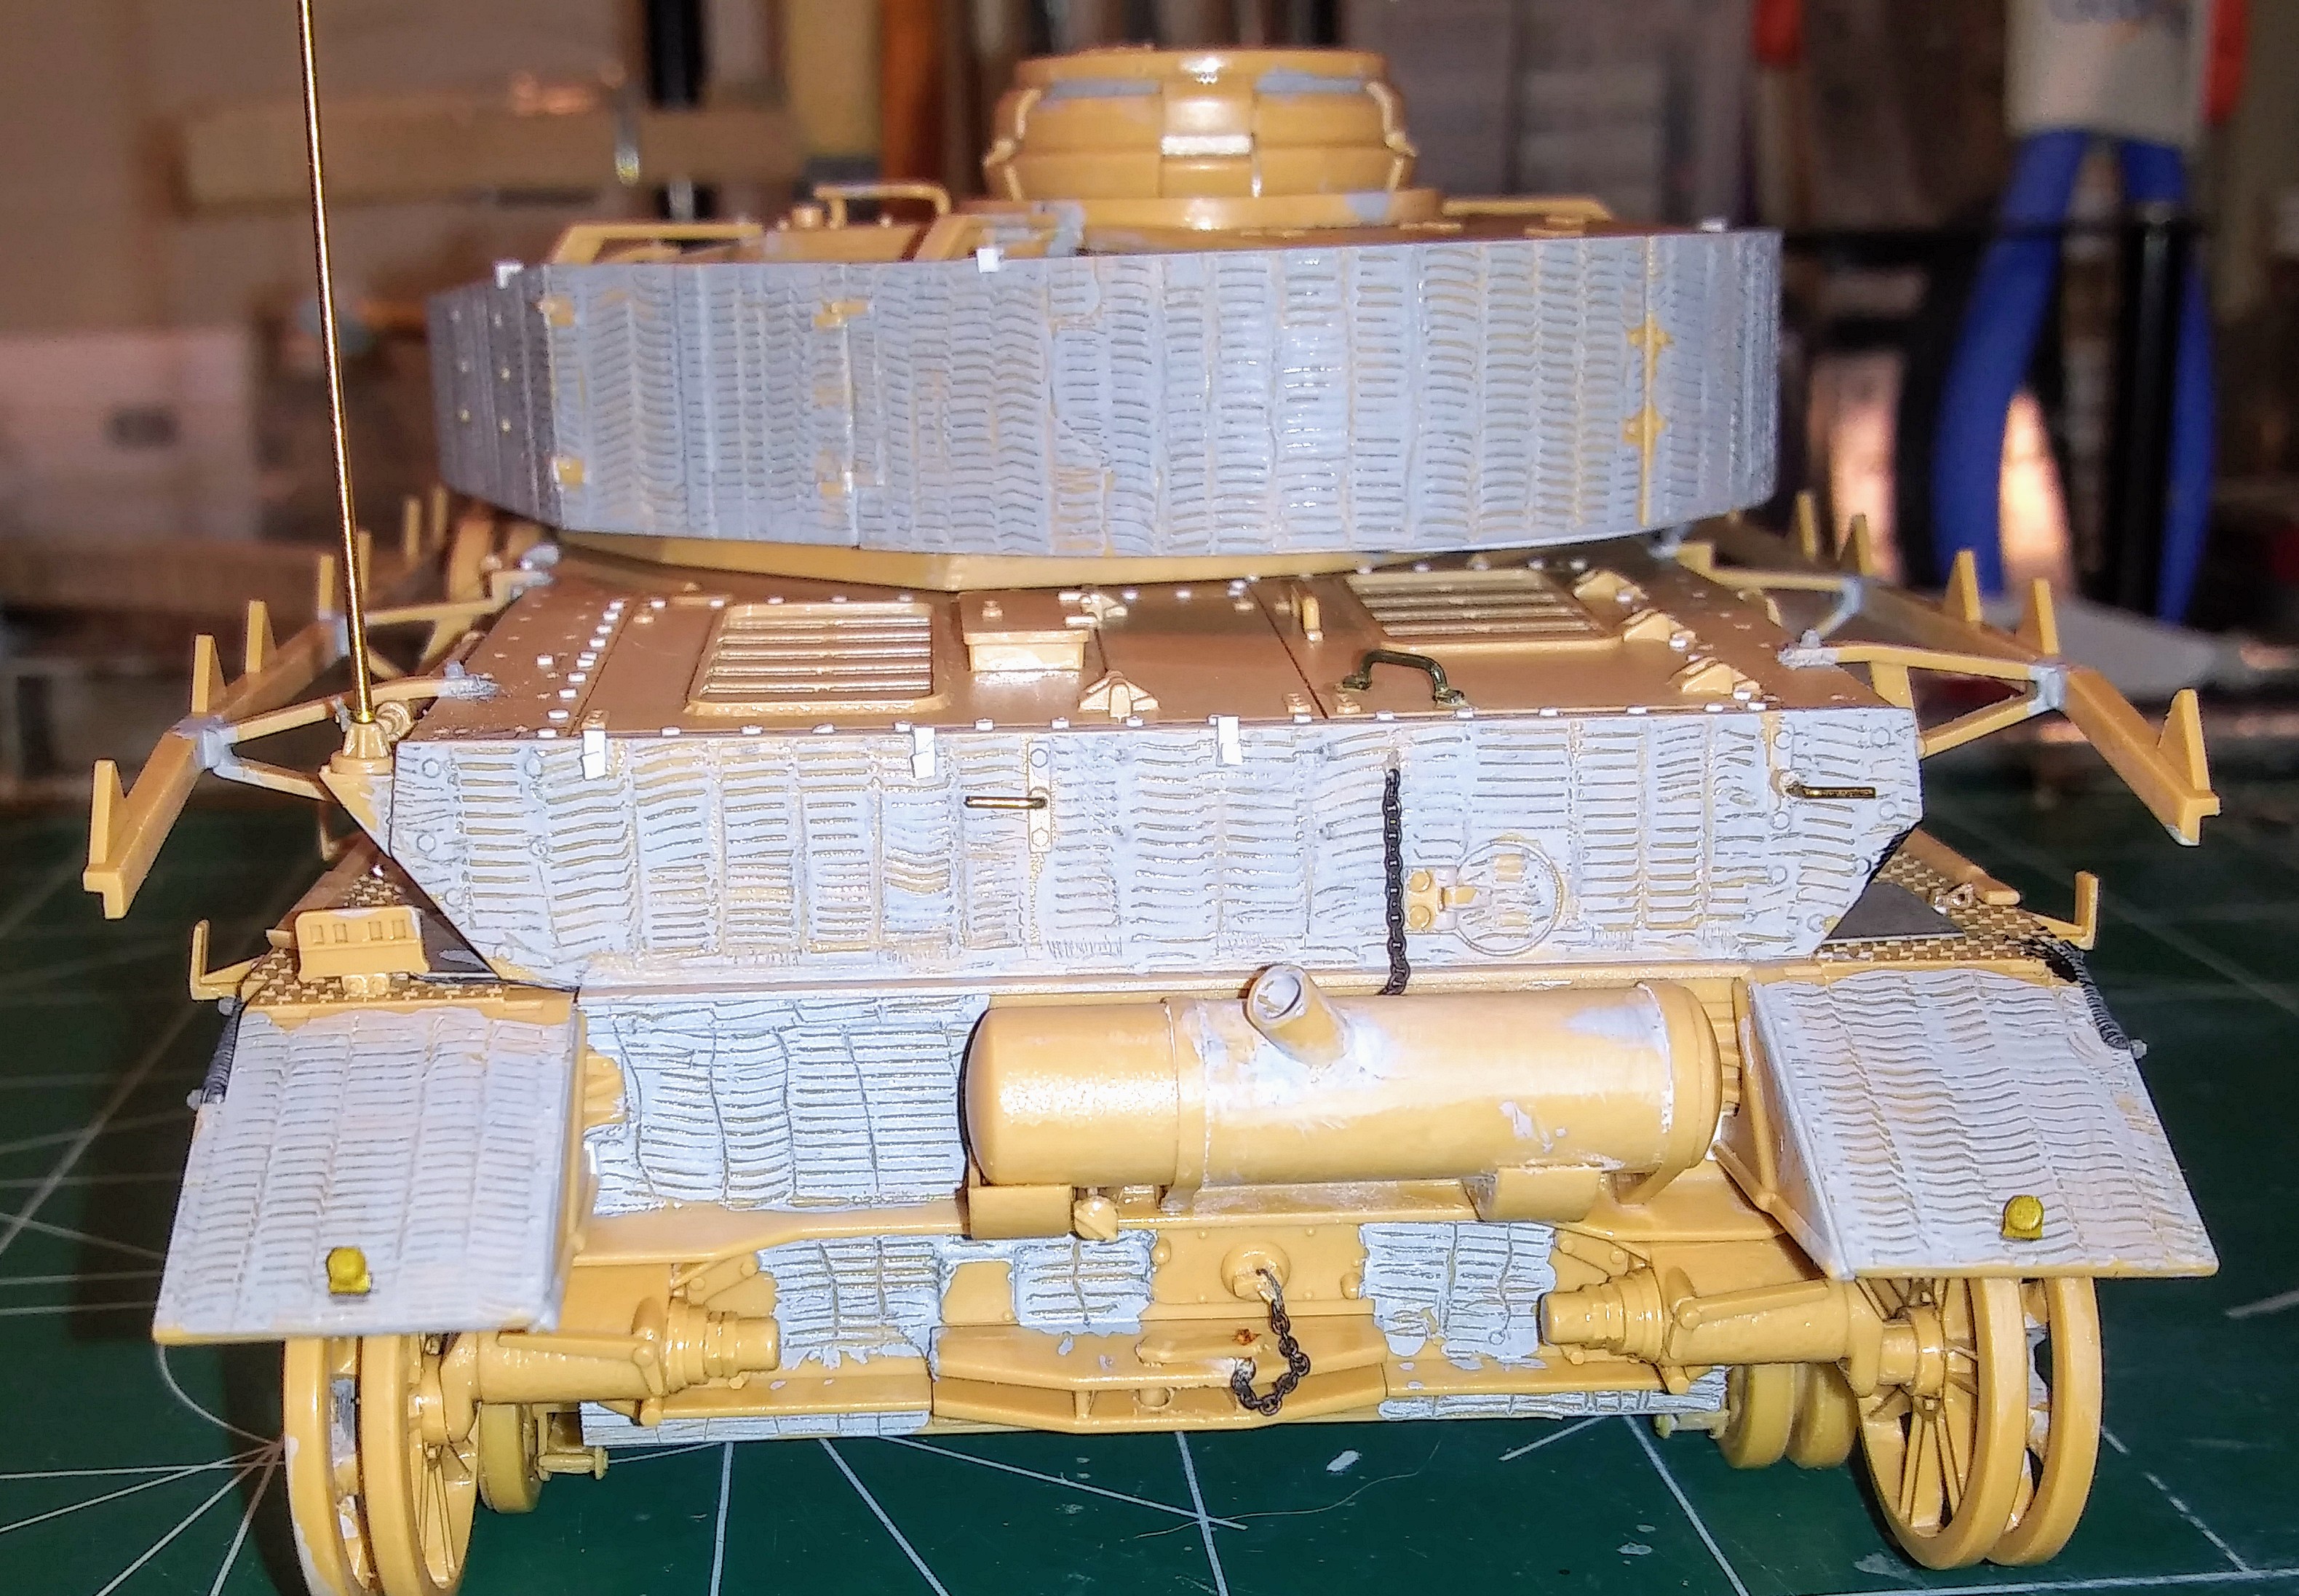
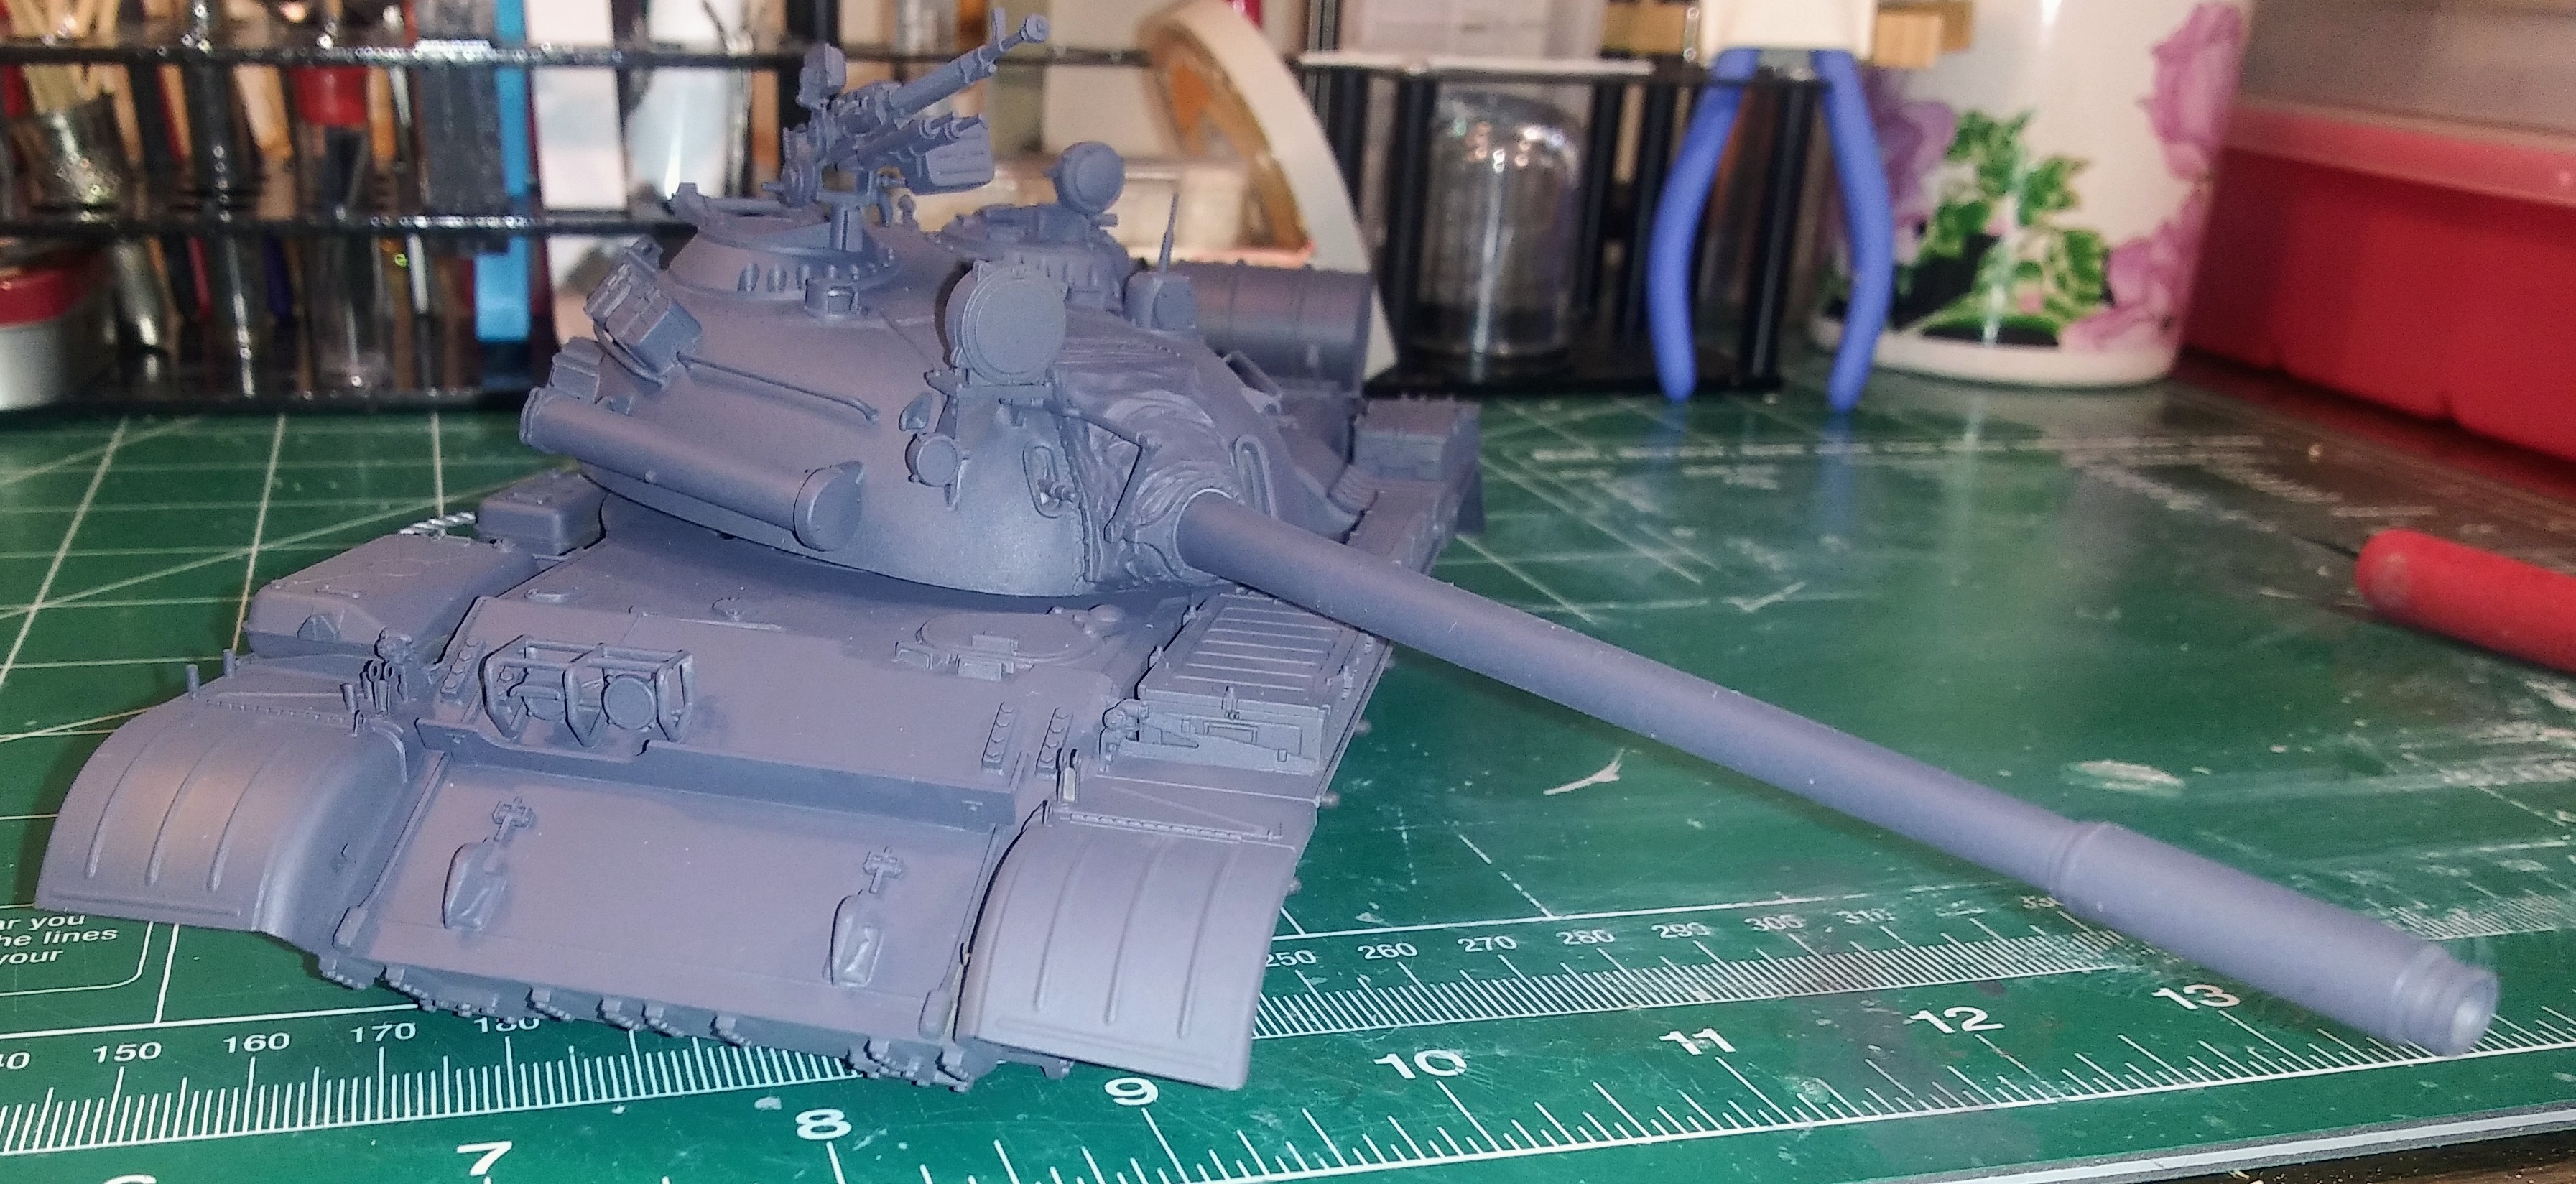
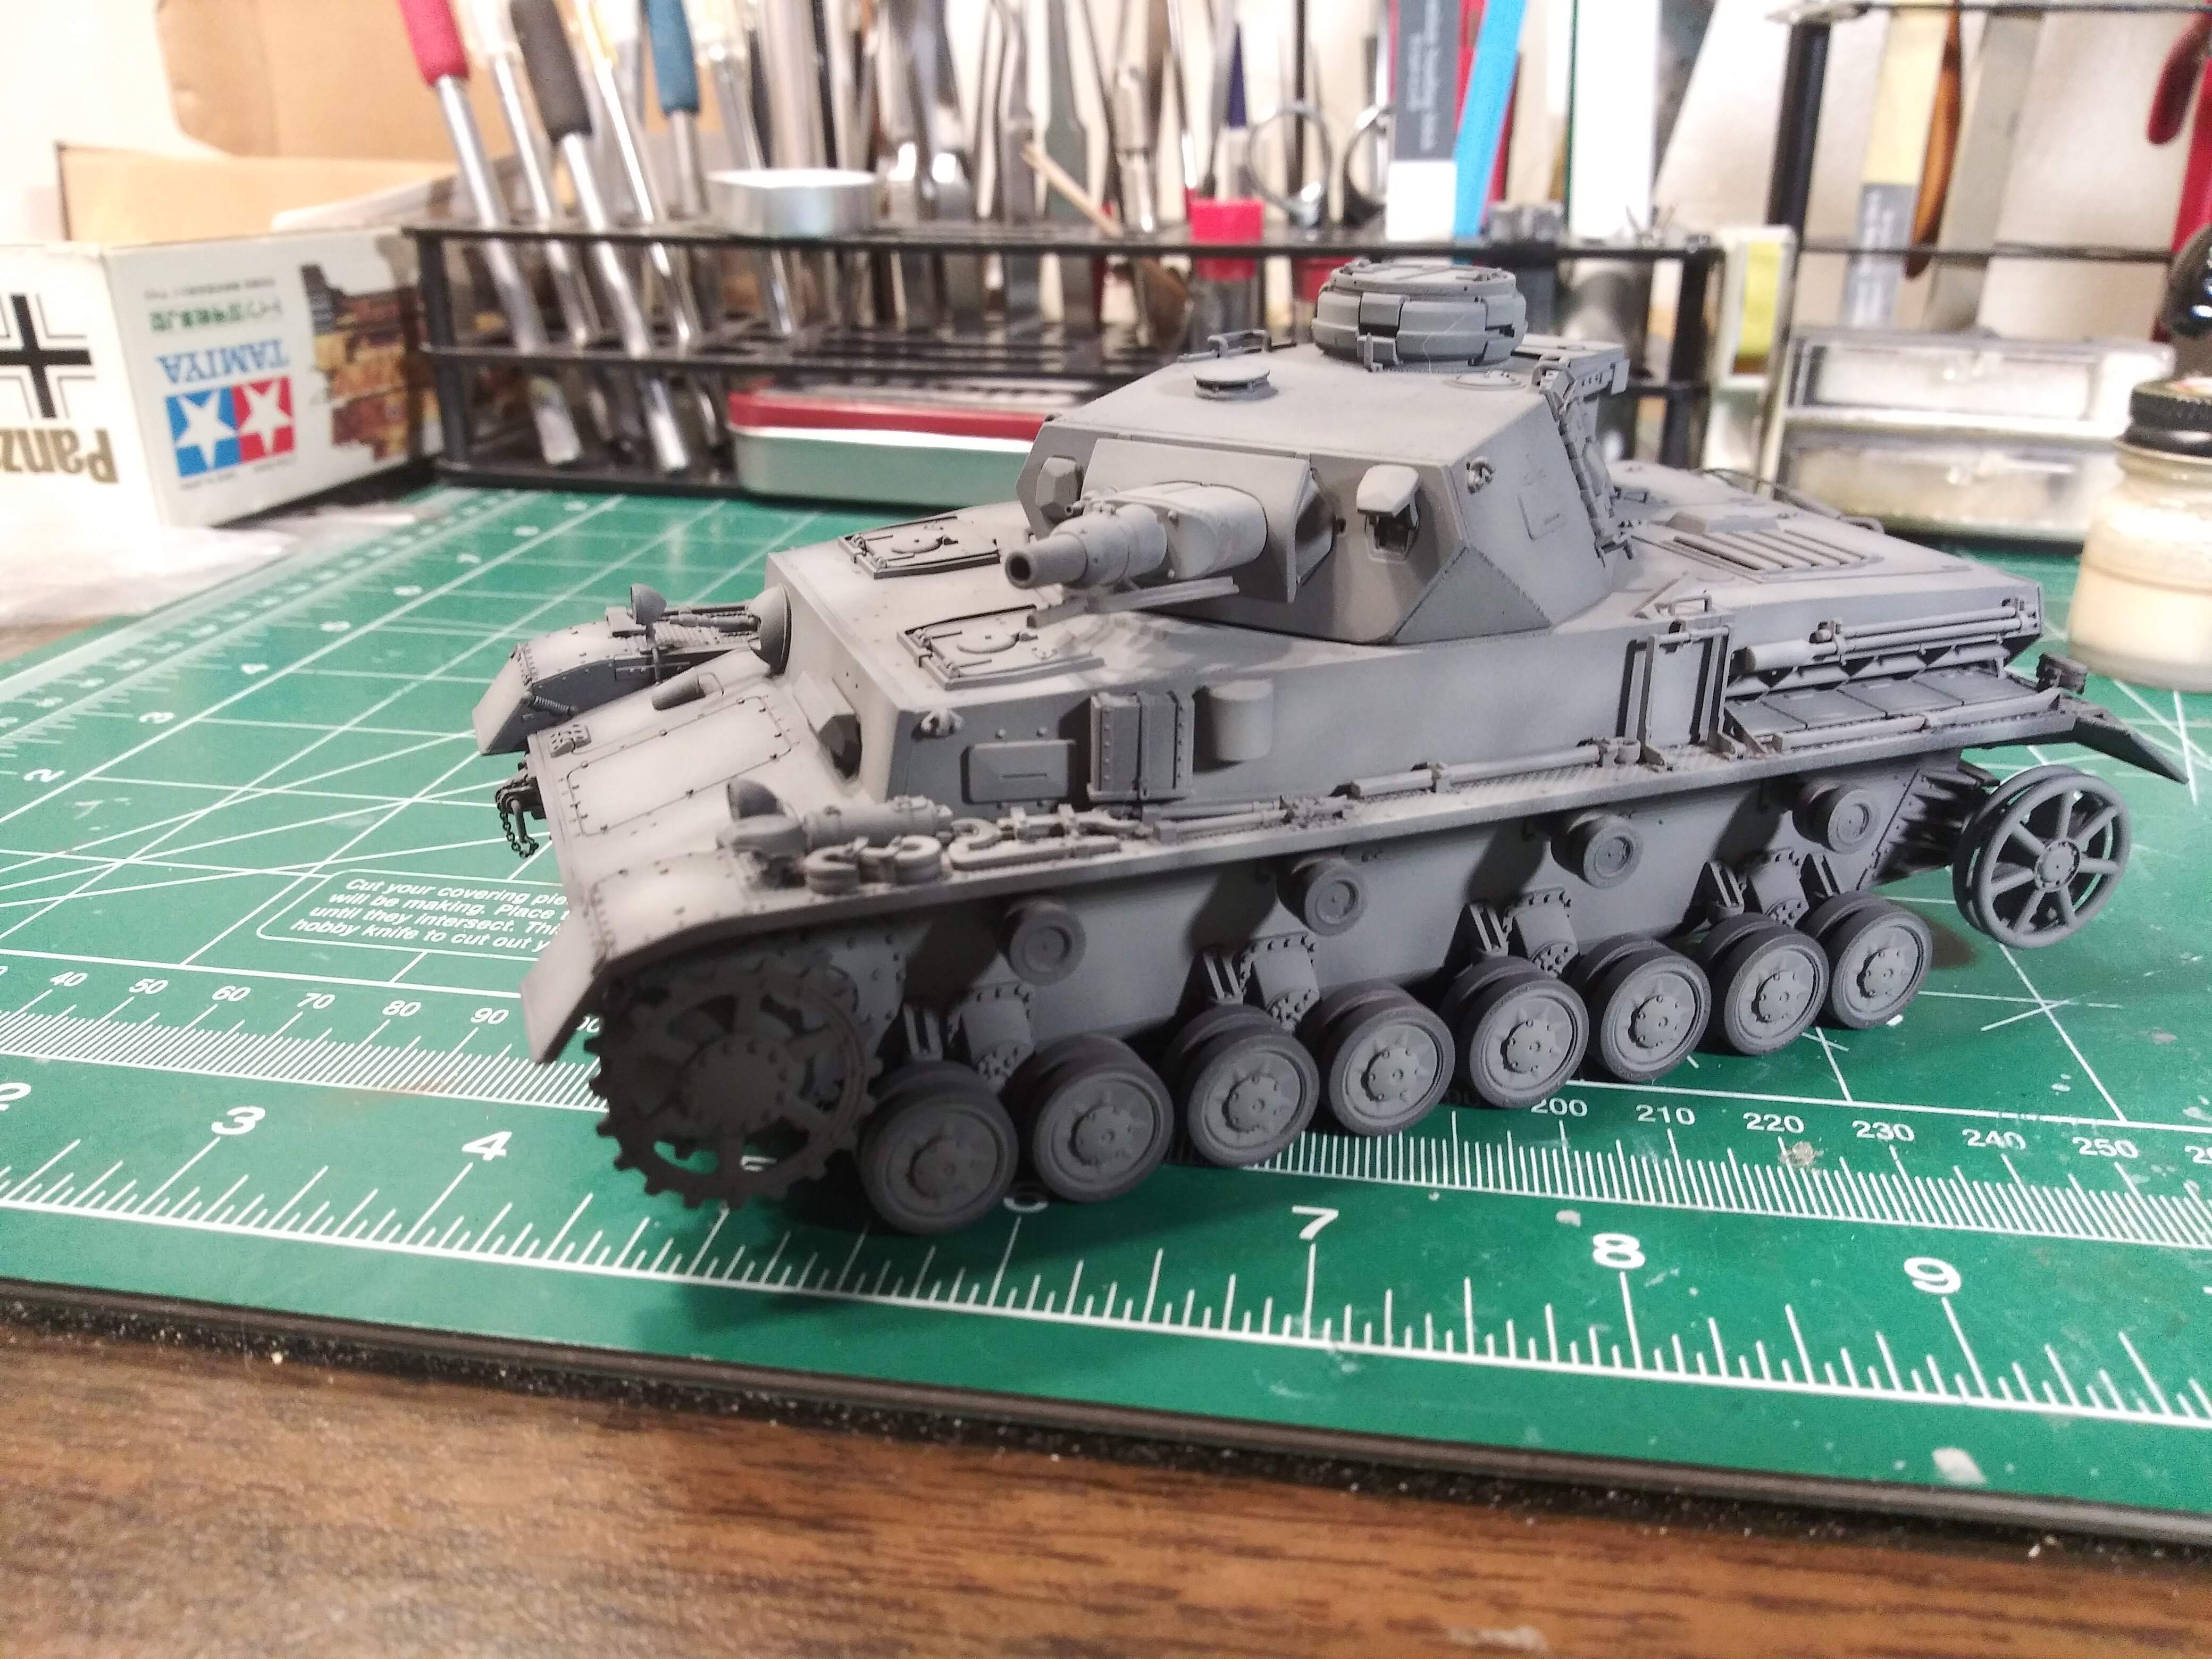
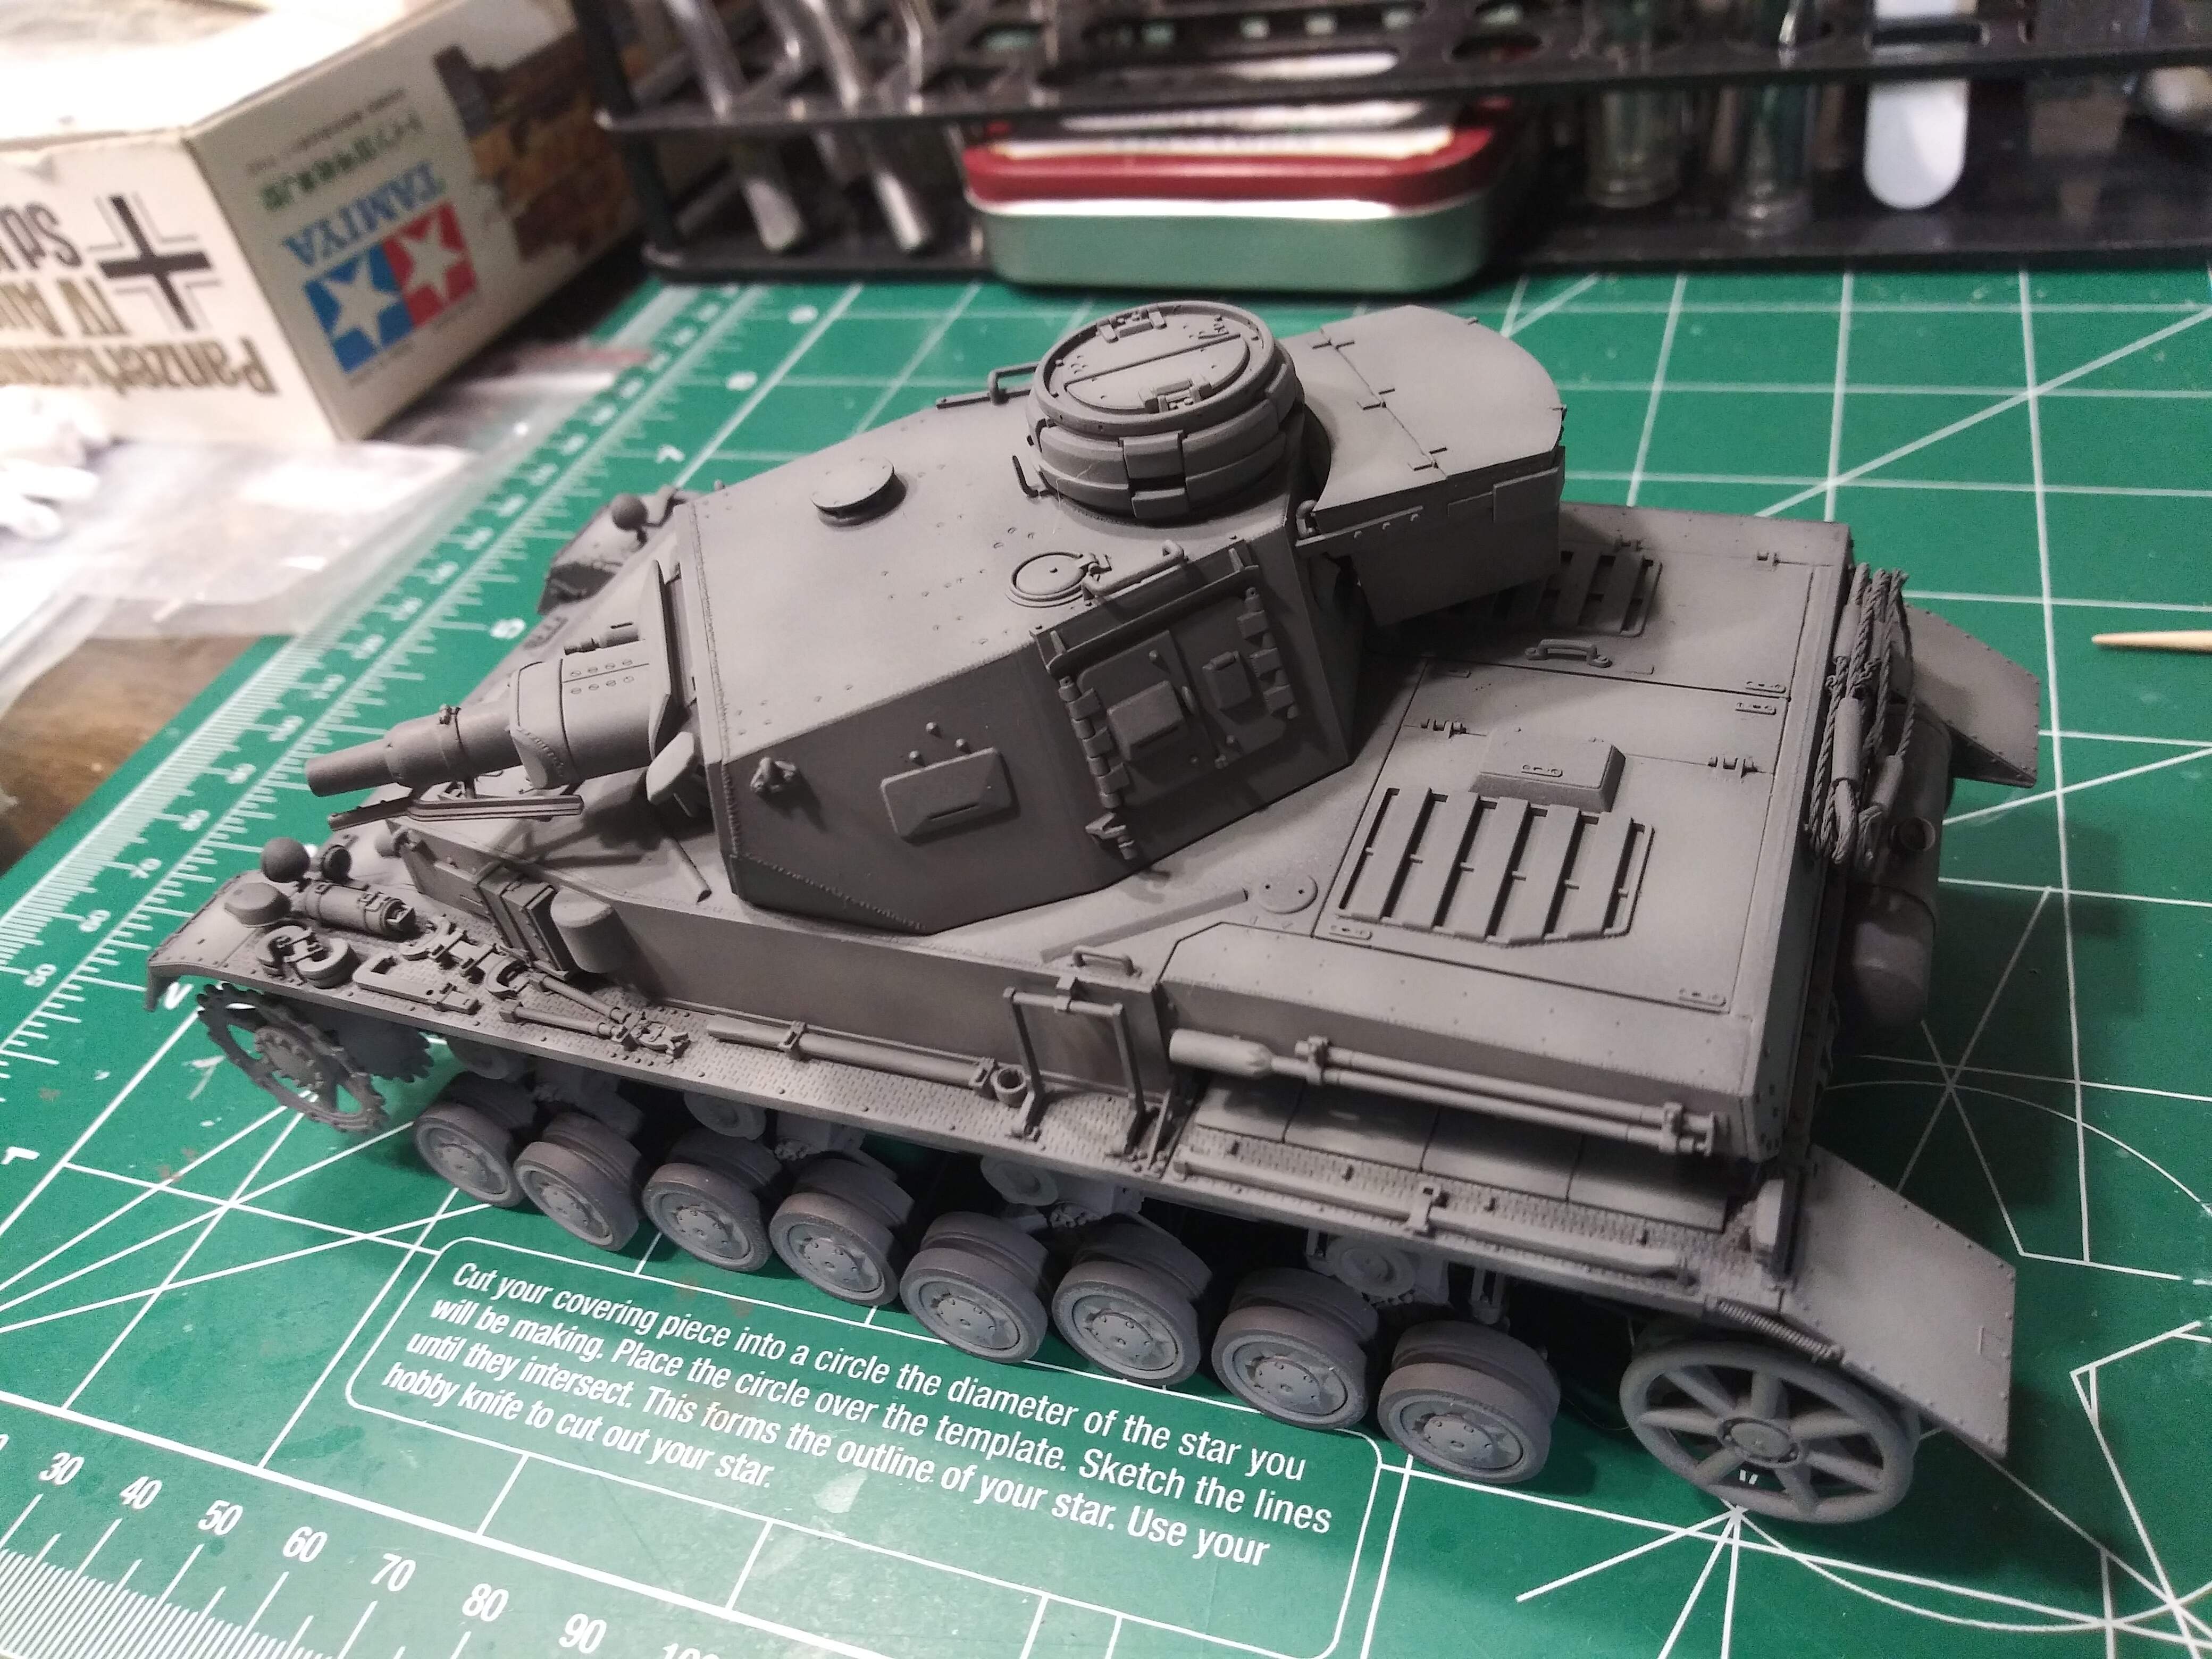
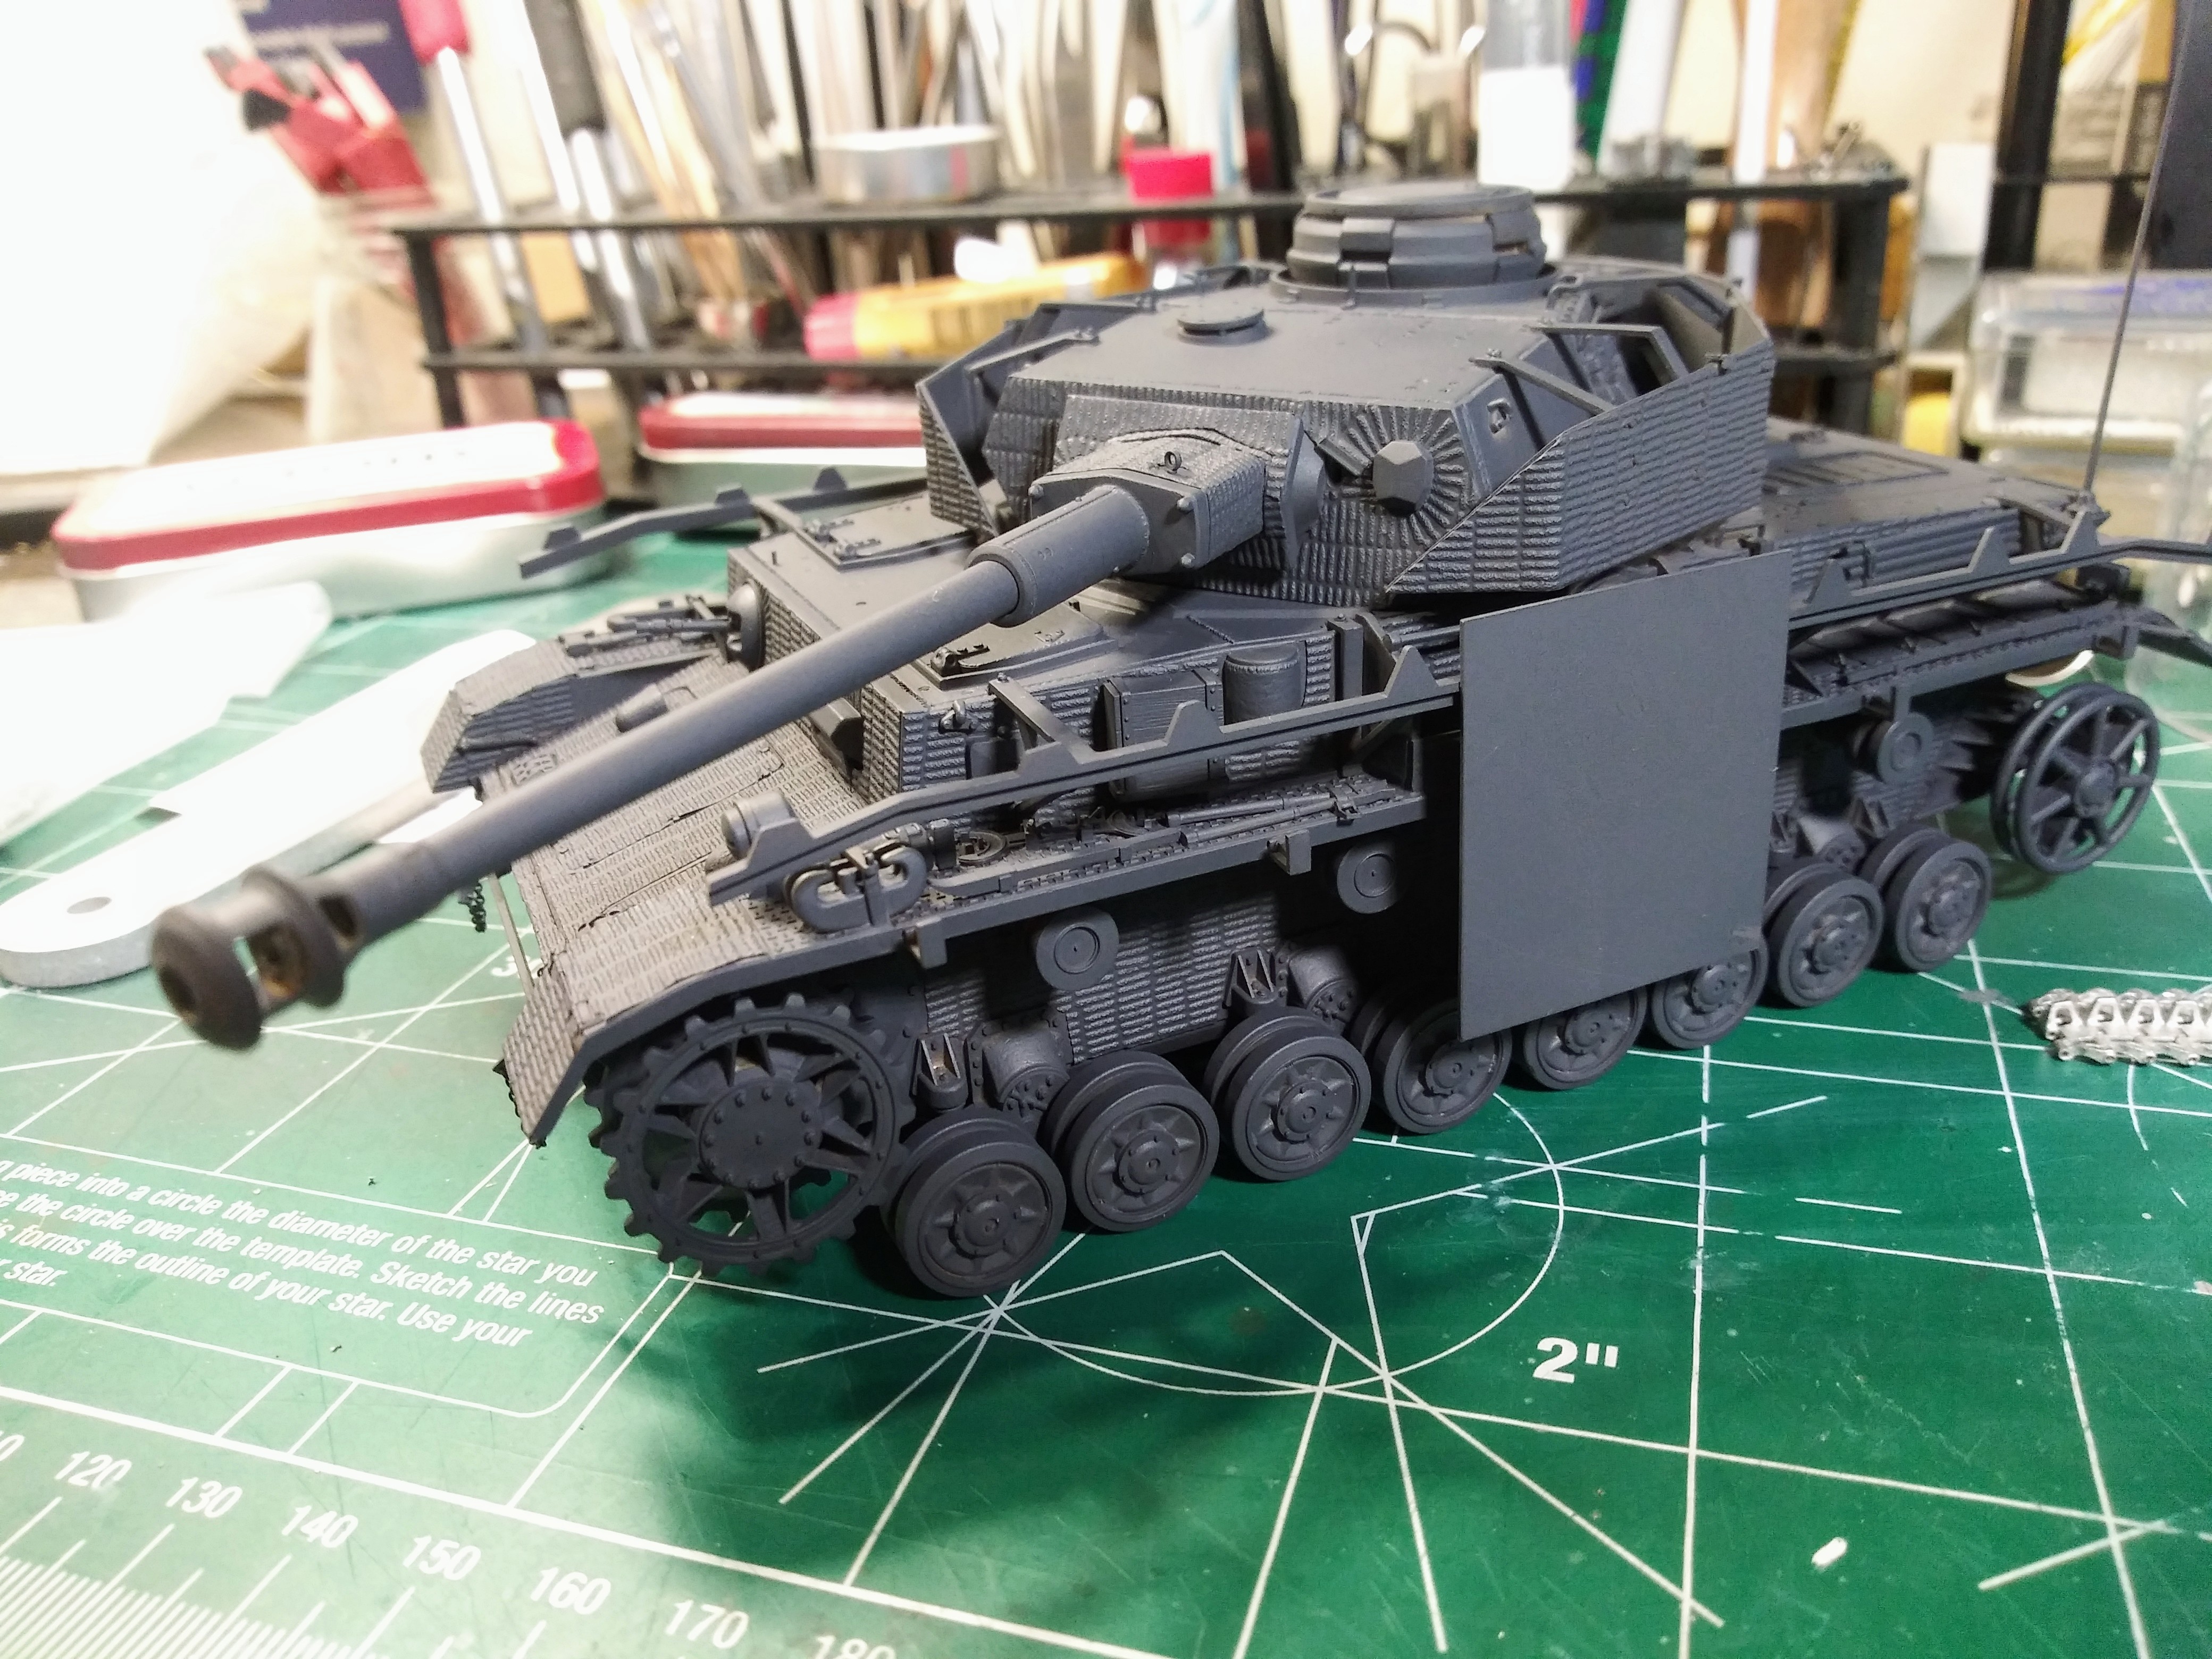
The TriStar wheels are a bit of a hassle to get sorted. I had several hair line seams that were too big and required filling with thinned Molak Stucco putty. The wheels aren’t attached just in place for the pictures below.
Please feel free to to provide constructive criticism of the Pz IV J. I’ve been away from the game for a long time and probably missed a lot of blatant error like mold seams and punch marks etc.
Thank you for your time and attention.
There’s so much left over stuff from this project that I’m tempted to start a Tamiya Pz IV H while waiting on the Fruil tracks. Painting two very similar models at the same time probably won’t be an issue.
Buff, THATS THE TRISTAR KIT THAT I USED! I don’t think they are even around any more unless they are in someone’s stash! I’d kill for one or two of those kits.
The IV is looking fantastic!
One thing I did notice, and i’m going off the top of my head here, by the time they started rolling the Ausf J, were they not using the steel road wheels on the first bogey?
Perhaps that was just on the JPIV.
Anyway, you’ve done a wonderful job with that old kit!
While Tristar isn’t around anymore, a number of their kit are being rereleased by Hobbyboss.
Scalemates had someone selling a set or two it appears.
While it shows 1001 has it listed, my spidey sense says stay away.
Awesome job you are doing on this old kit, and I am following with much interest. Best regards…Dale
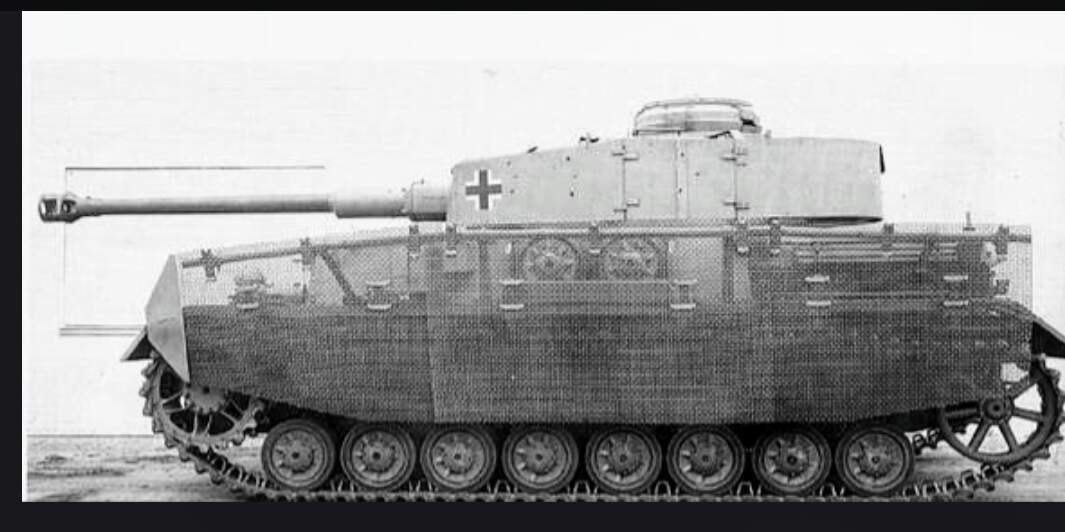
Hi Boom, thank you for the kind comments. It’s nice to see this one moving along:) The TriStar wheel sets are getting to be a challenge to find for sure. I’m unaware of any hard and fast guidelines for steel rimmed road wheels on early to mid model Pz IV J’s. There are wartime photos show Pz IV J’s with Thoma screens with all rubber rimmed road wheels. Here’s one example that’s appeared in various references.
Dale, thank you very much! Hopefully I can get some paint sprayed this weekend.
Hobby Boss has taken over the old TriStar molds and has released some under their label.
Bill
I just couldn’t start spraying on the old Pz IV J without getting back into the groove of airbrushing first. Picked a couple of built unpainted tanks from the shelf as guinea pigs. When I built them never expected to use the as sacrificial goats.
The three warm ups are a new mold Tamiya Pz 2, DML T-34-85 & Tamiya T55A.
Turns out 25 year old Folquil sprays just like brand new Folquil. Found two cans of Floquil thinner so I’m pretty happy today:)
I was nervous about airbrushing and Kept It Simple Spraying with the trusty old Paasche H airbrush for the base coat of weathered black.
Finally started to base coat the J yesterday and noticed two details had washed off the model. I have to replace a PE tool clasp & grandt line nut before painting.
Side Bar - Really felt the old OCD/AMS kick in hard yesterday. Given that Folquil is out of production, I stressed about how much paint would be required. Never used to worry about stuff like that. Took 7.5 cc’s or 7.5 ml of paint & 3 cc’s of thinner to base coat three models. Realized i was thinning closer to 35 percent than the suggested 25 percent but that seemed like what the old H wanted. I need to get one of the efficient internal mix airbrushes fired up.
SQUIRRELS! - sums up model distractions for the last week or so due to working on the model below.
Hope to be back on track painting this weekend.
Distraction #1
Slammed this Tamiya #35209 - Pz IV H together to paint along with the Pz IV J. Everything went super smooth with build for a total of 45 hours build time. Used stuff left over from J build like the Tamiya decal Zimmerit some PE, wheels, Aber gun barrel, RB muzzle brake, Aber MG’s, Aber 2m antenna and a few scratch details like chains & fender springs etc.
Distraction #2
Painted a DML Panzer IV F that had bern sitting around waiting on painting since 2012.
Distraction #3
Tamiya Pz 2 also got painted.
The weather didn’t work out this weekend so only the H got base coated. I decided to scratch build a couple of skirts for the two models and had a little airbrush issue and lost a fair amount of quality painting time.
The H in weathered black…
Minor Venting …
The weather isn’t playing nice for painting
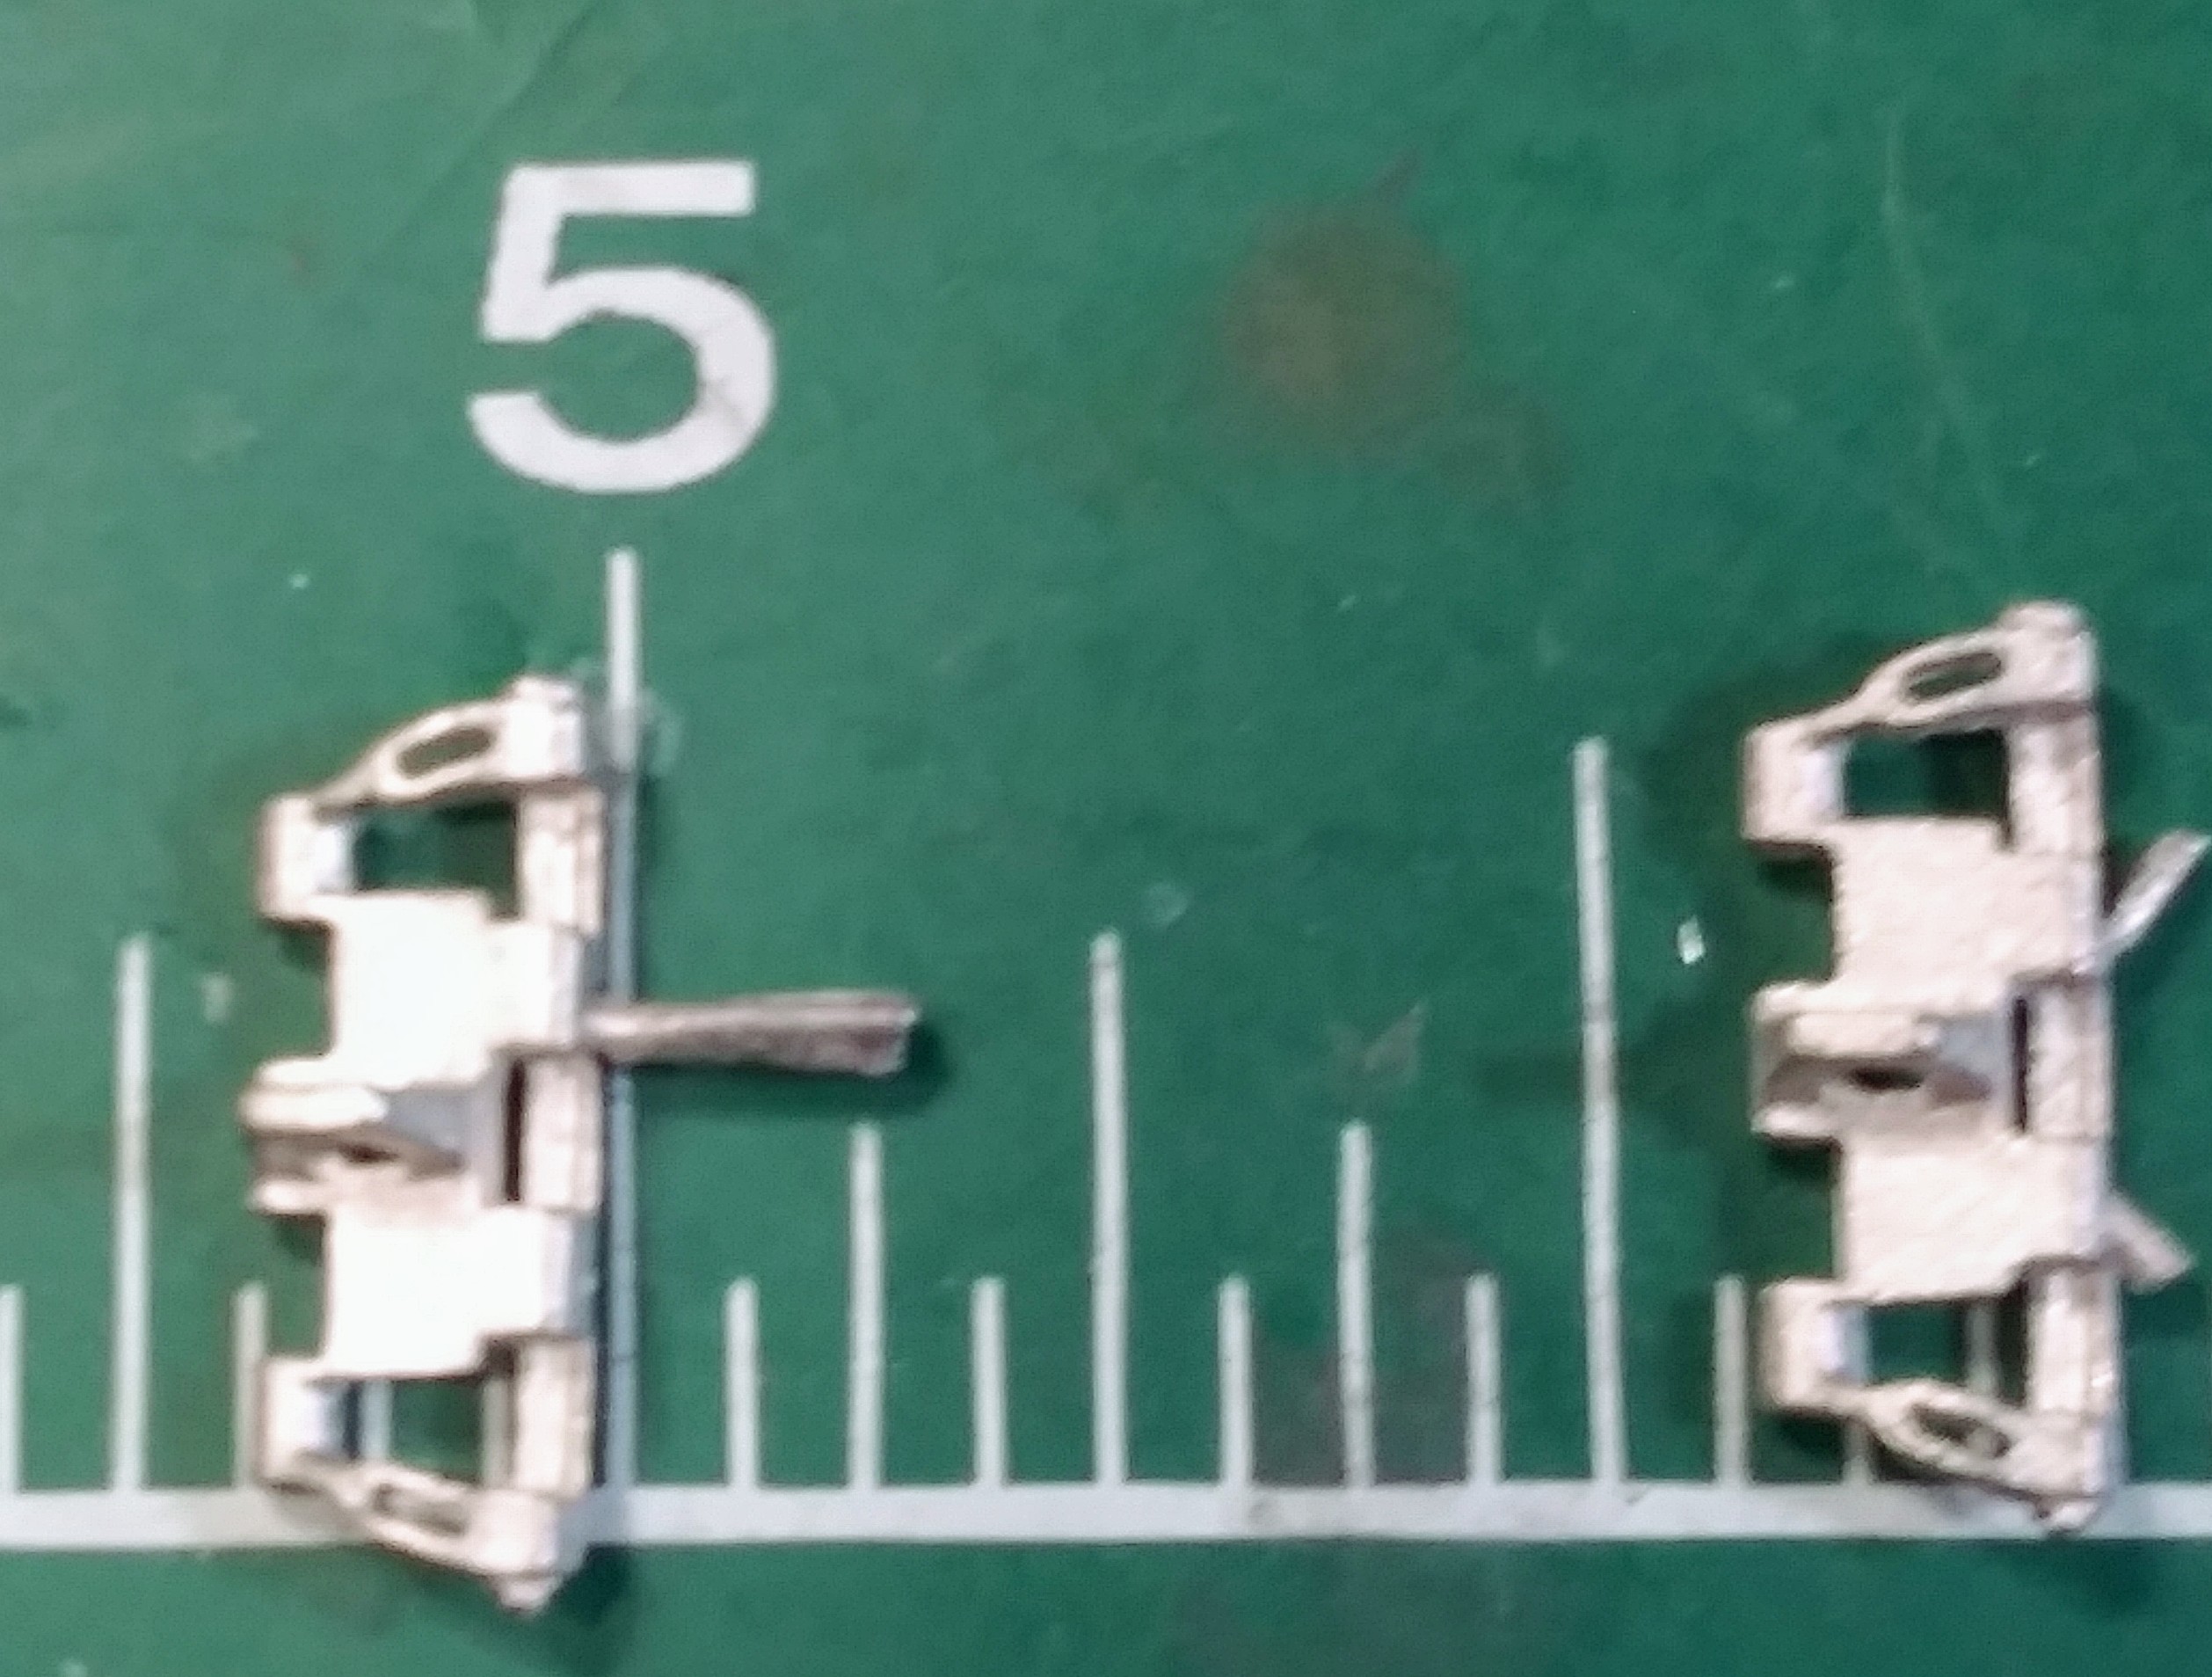
Working on the nastiest set of Fruil track track links I’ve ever seen out of the nine sets I’ve built.
Check out that 1/8 inch plus long pour plug on the left side of the picture…just one of dozens like it. The rest look like the one on the right side. Plus tons of flash in the hollow guide teeth. Probably one link out of 4 or 5 has the hollow guide tooth flashed over.
Killed two knife #1 blades already cleaning this set up.
I’ve been a Fruil fan since the mid 1990’s going back to the old thick folding clasp type of links. I’m guessing this set is an exception to Fruil’s normally minimal clean up requirements.