Sci-Fi and Alternative History Campaign IX

Thanks John. There’s another part that goes inside the nacelle that needs painting clear red. That will await final assembly.

The instructions do give you a printed paper template to mask out the aztec panels for the saucer, but that way lies madness. It can look good, but the colours have to be very subtle to avoid it looking overdone. Instead I’m going to go with an overall pale grey, with some panels picked out in other greys. You might be able to spot I’ve painted the inside section of nacelles with a light blue-grey already. It might not be completely accurate, but will add some visual interest.

3 Likes

Looking very good Stephen!
Speaking of colours, that clothespin palette is visually pleasing to the eye! :art: … Oh! That reminds me. I need to set my saucer to spin-cycle soon! :smile:

—mike

2 Likes

Signed up a little late, but better late than never! Not sure what I’ll build, but I have several Star Wars and Macross kits. Decisions, decisions…

2 Likes

Pretty, just not sure pink and green are in keeping with Starfleet colours.
Seeing the pegs around it, does make it look a lot like Zelda’s spaceship from Terrahawks. Anyone remember that one?

image

3 Likes

Very small update on the Haunebu II.

I nailed-down the boarding ramp’s geometry and thus finalized the hydraulic cylinder lengths. Then I added side rod detail to the assemblies.

—mike …:flying_saucer:

7 Likes

Hello all!

I’ve got my entry for this Group Build on the bench.

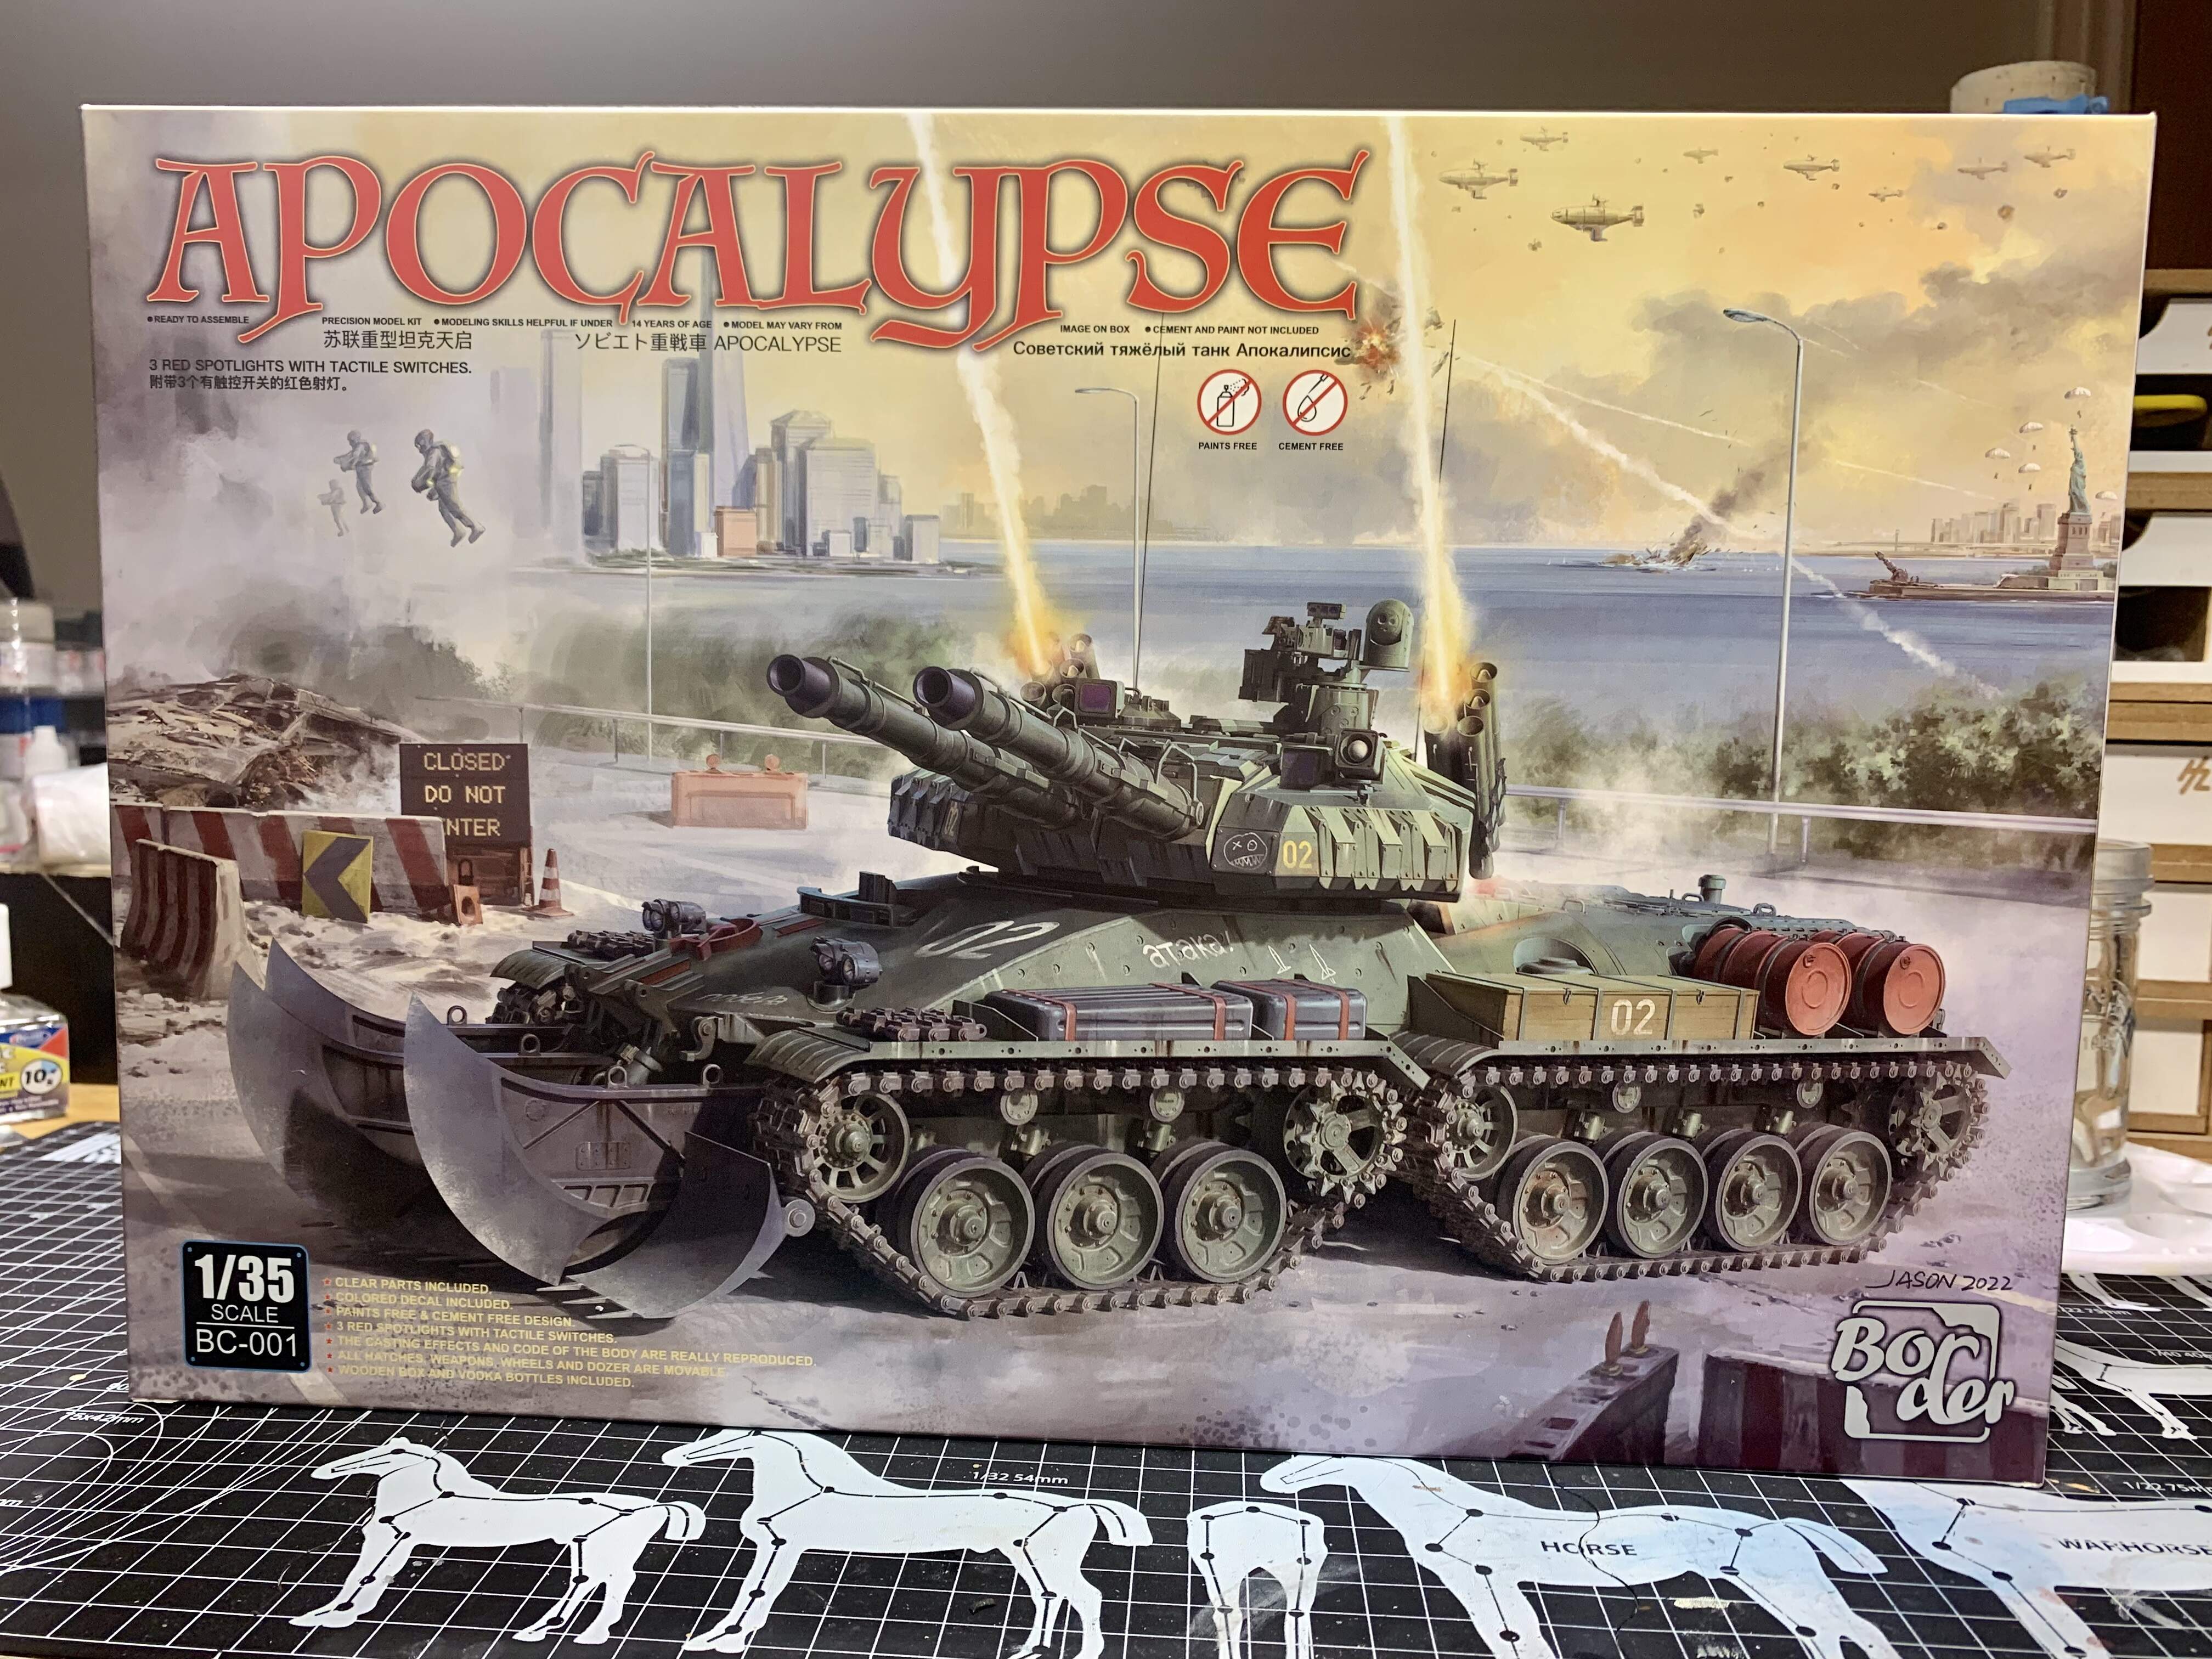
The tank is from the ‘Command and Conquer: Red Alert 2’ video game released in 2000.

In case you are interested in a wider, more in depth look at the tank and the game world it came from than I am doing a build log here on the armor section. It will allow me to keep my off-topic blether about the tank and the game from clogging up this thread!

I will be posting the actual kit construction bits here.

So far I’ve barely done anything. Of interest though is the fact this kit needs no glue or paint. The sprues are pre-coloured. You can see it built up without paint here on the box sides.

And here you can see the colors on the sprues

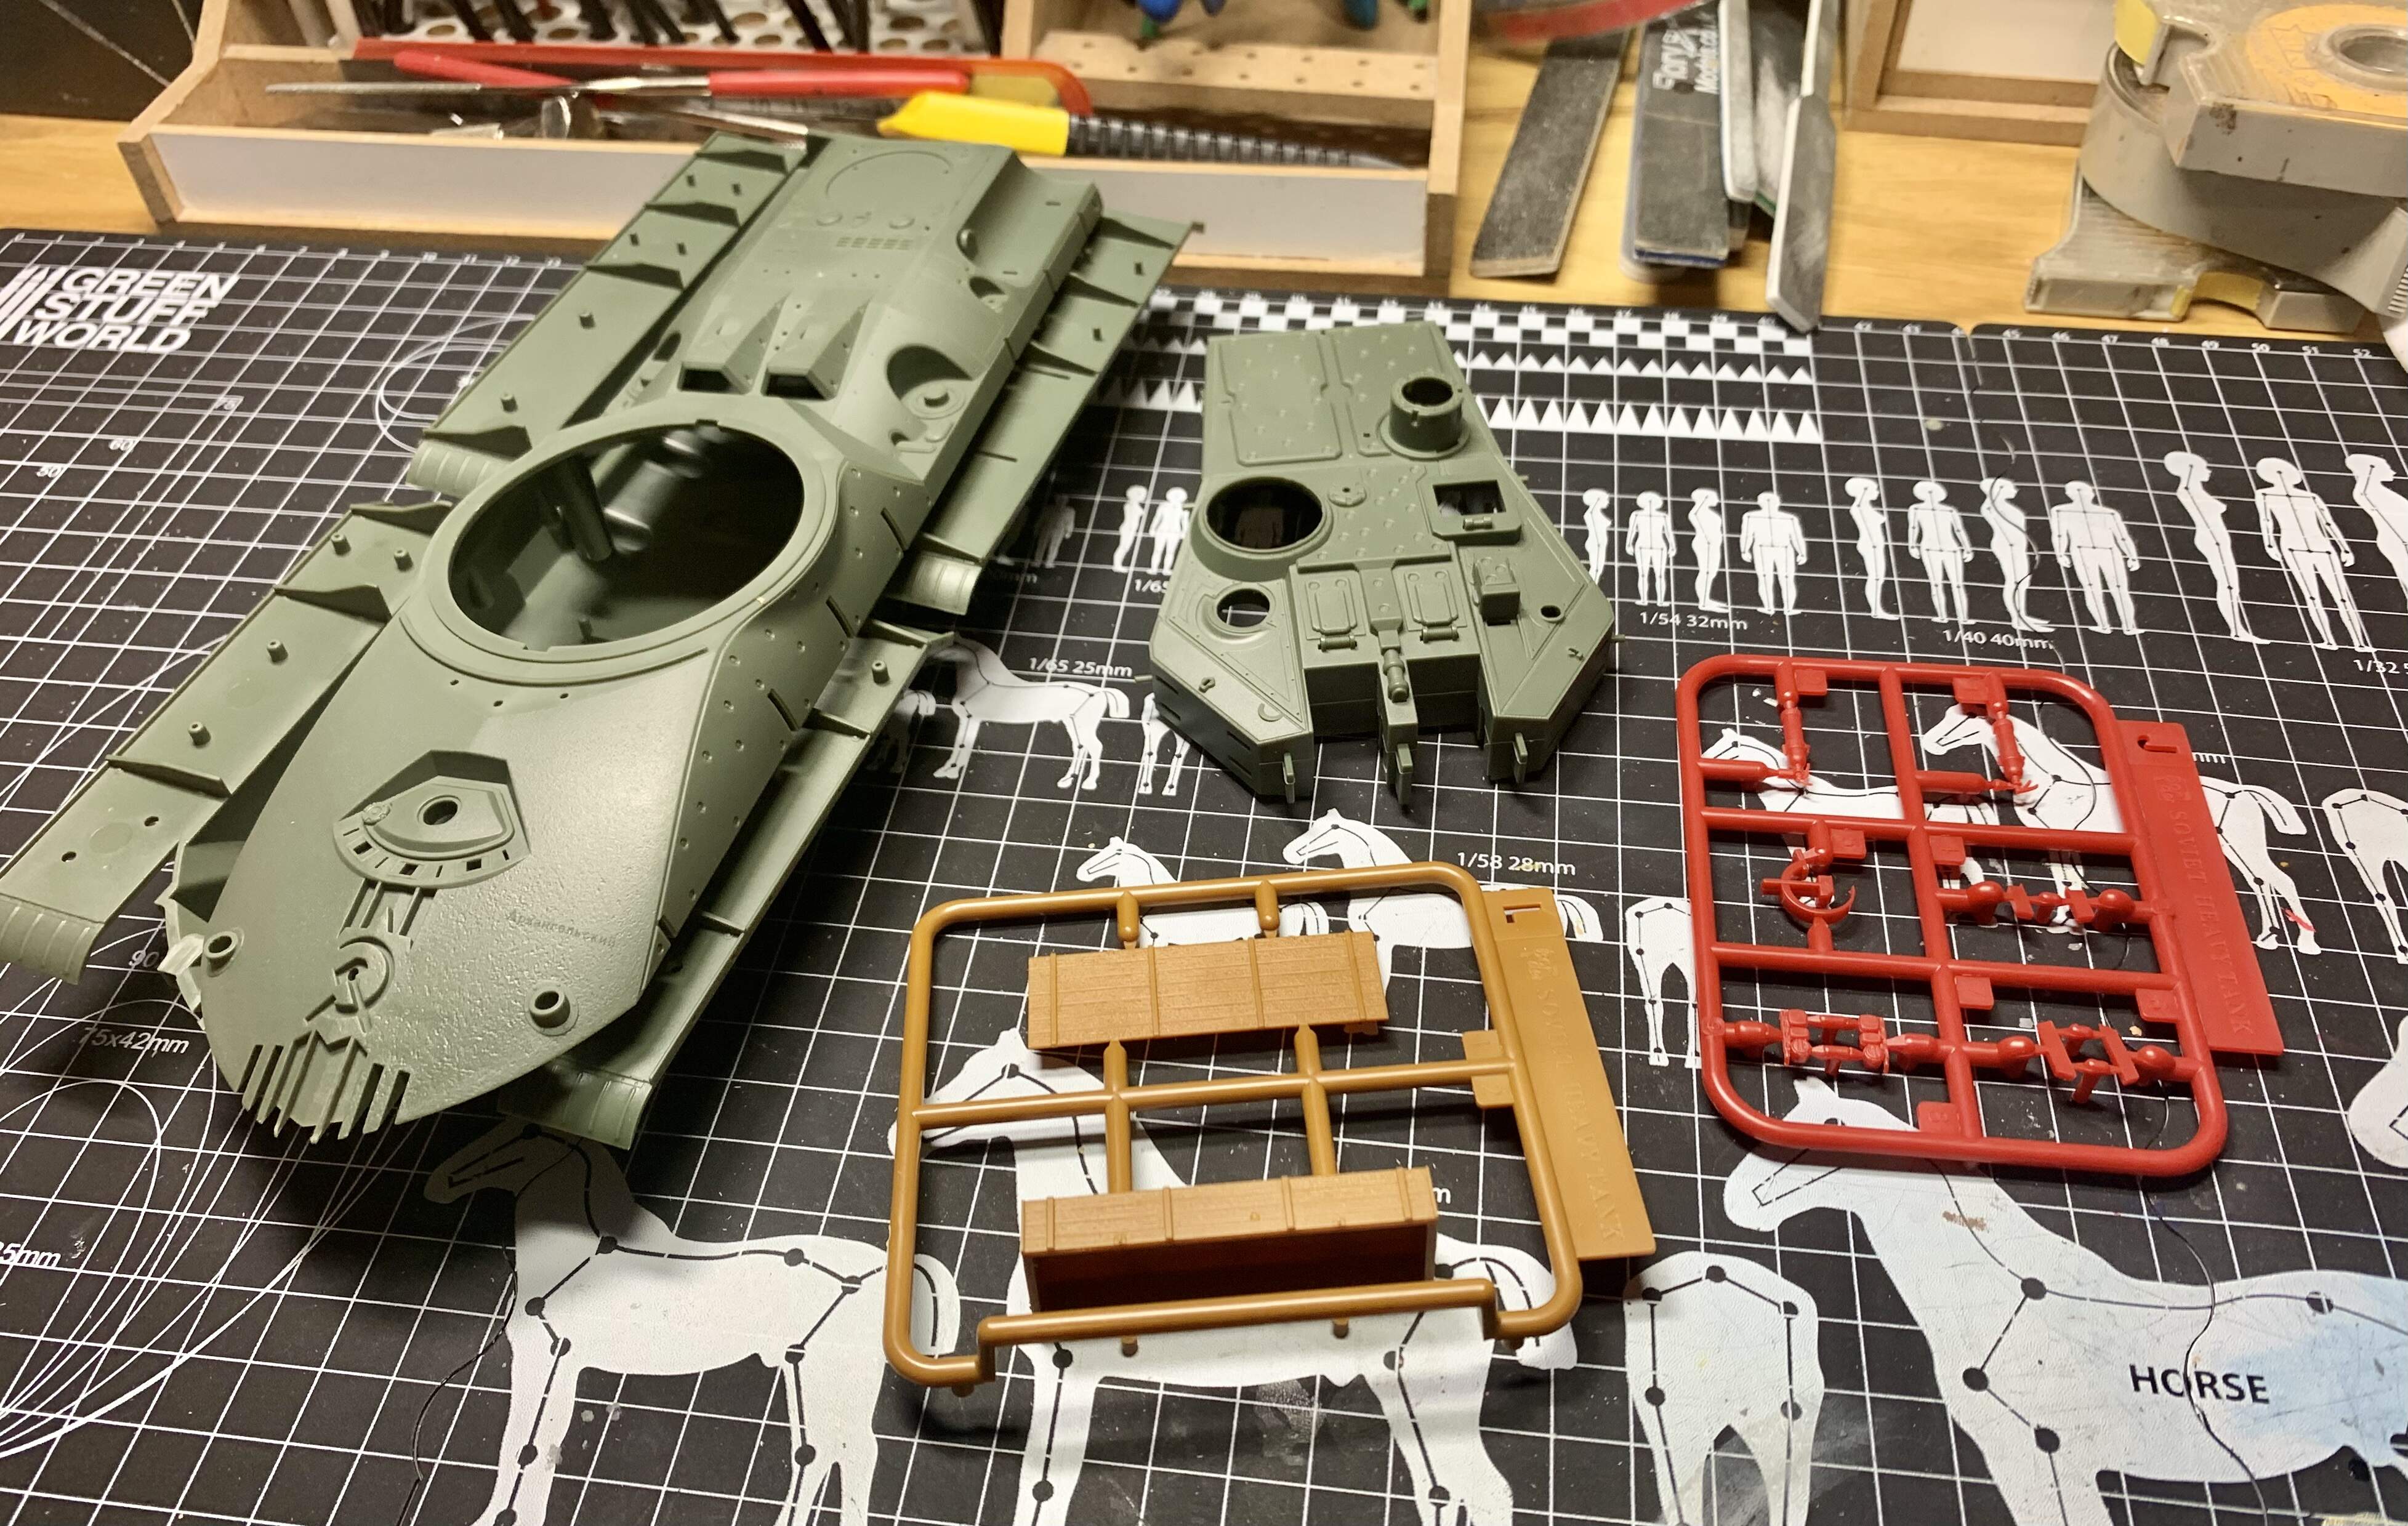
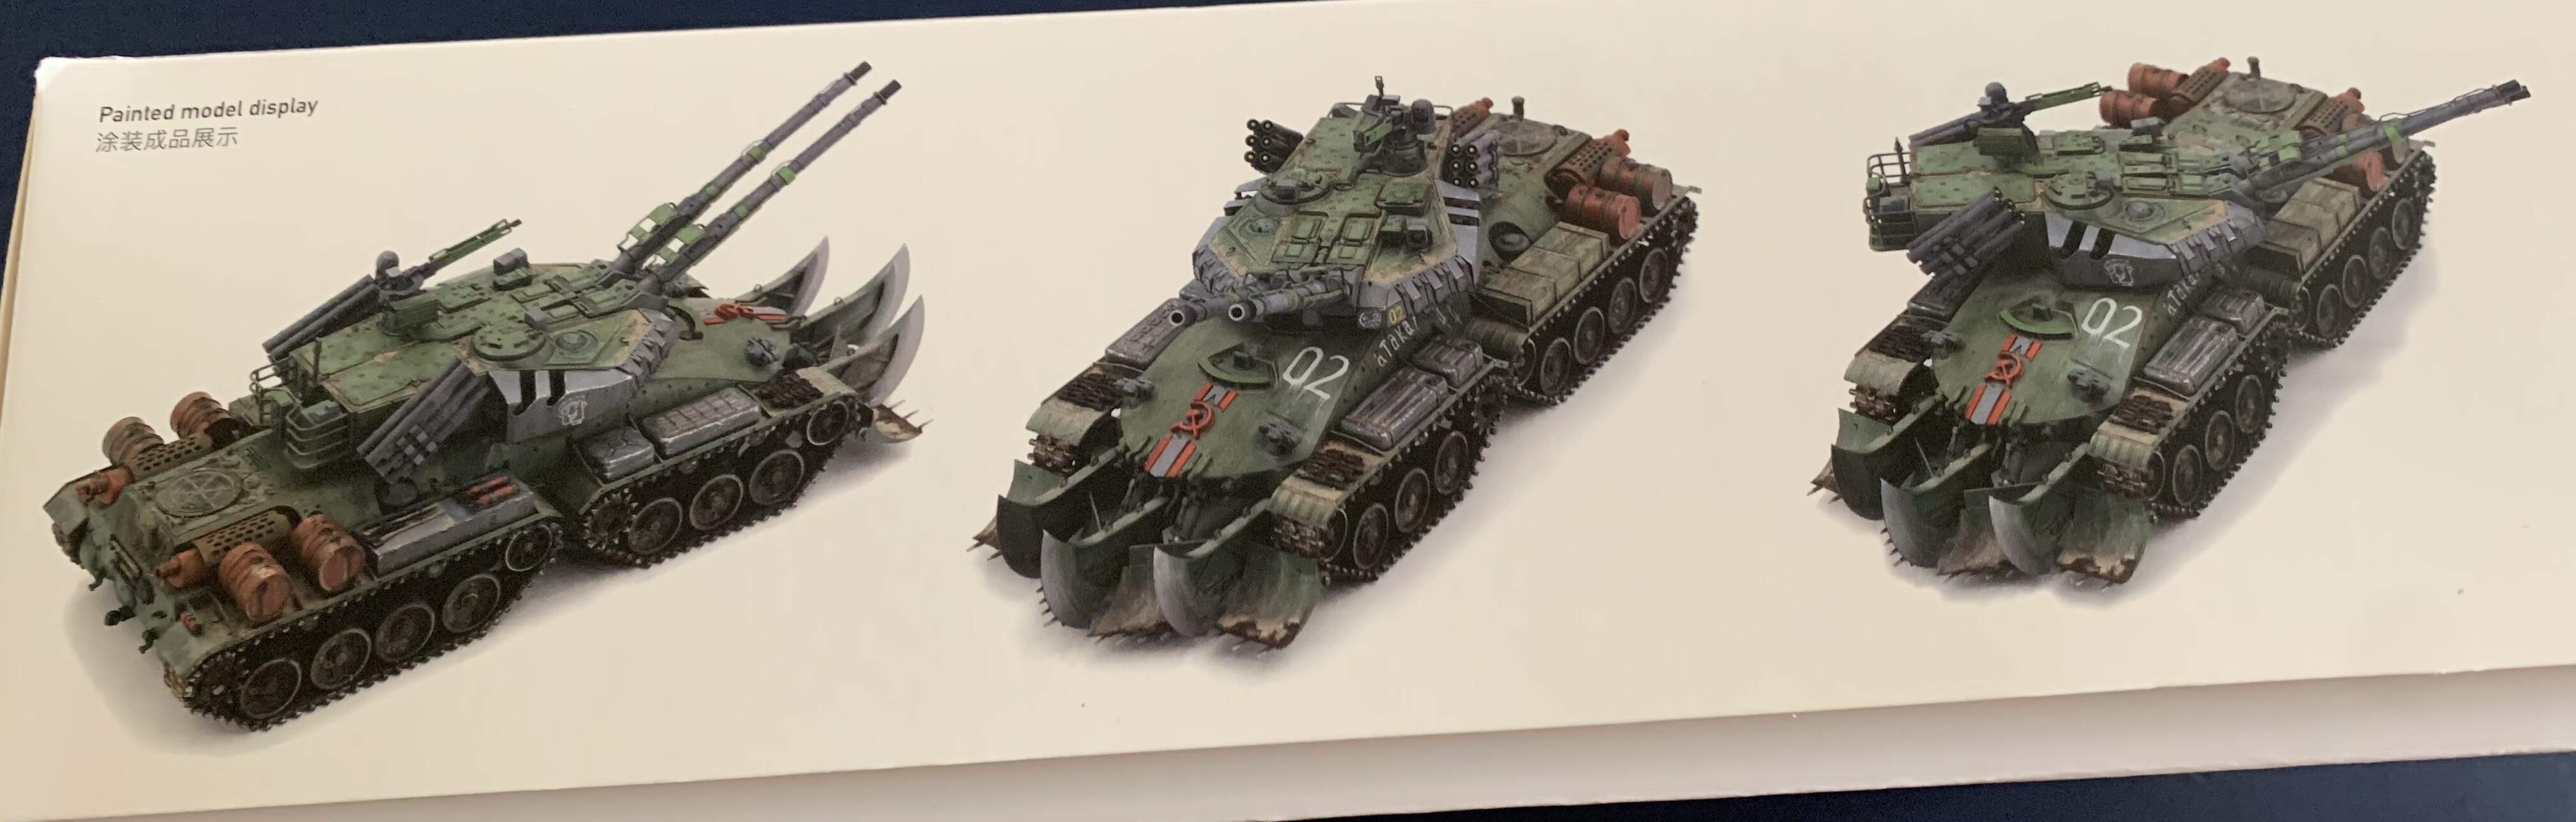
Personally I think it looks a bit too toy-like compared to the painted version.

I’ll be both painting and gluing mine.

There is also three battery powered LED’s which is cool though the instructions don’t agree what battery they need!

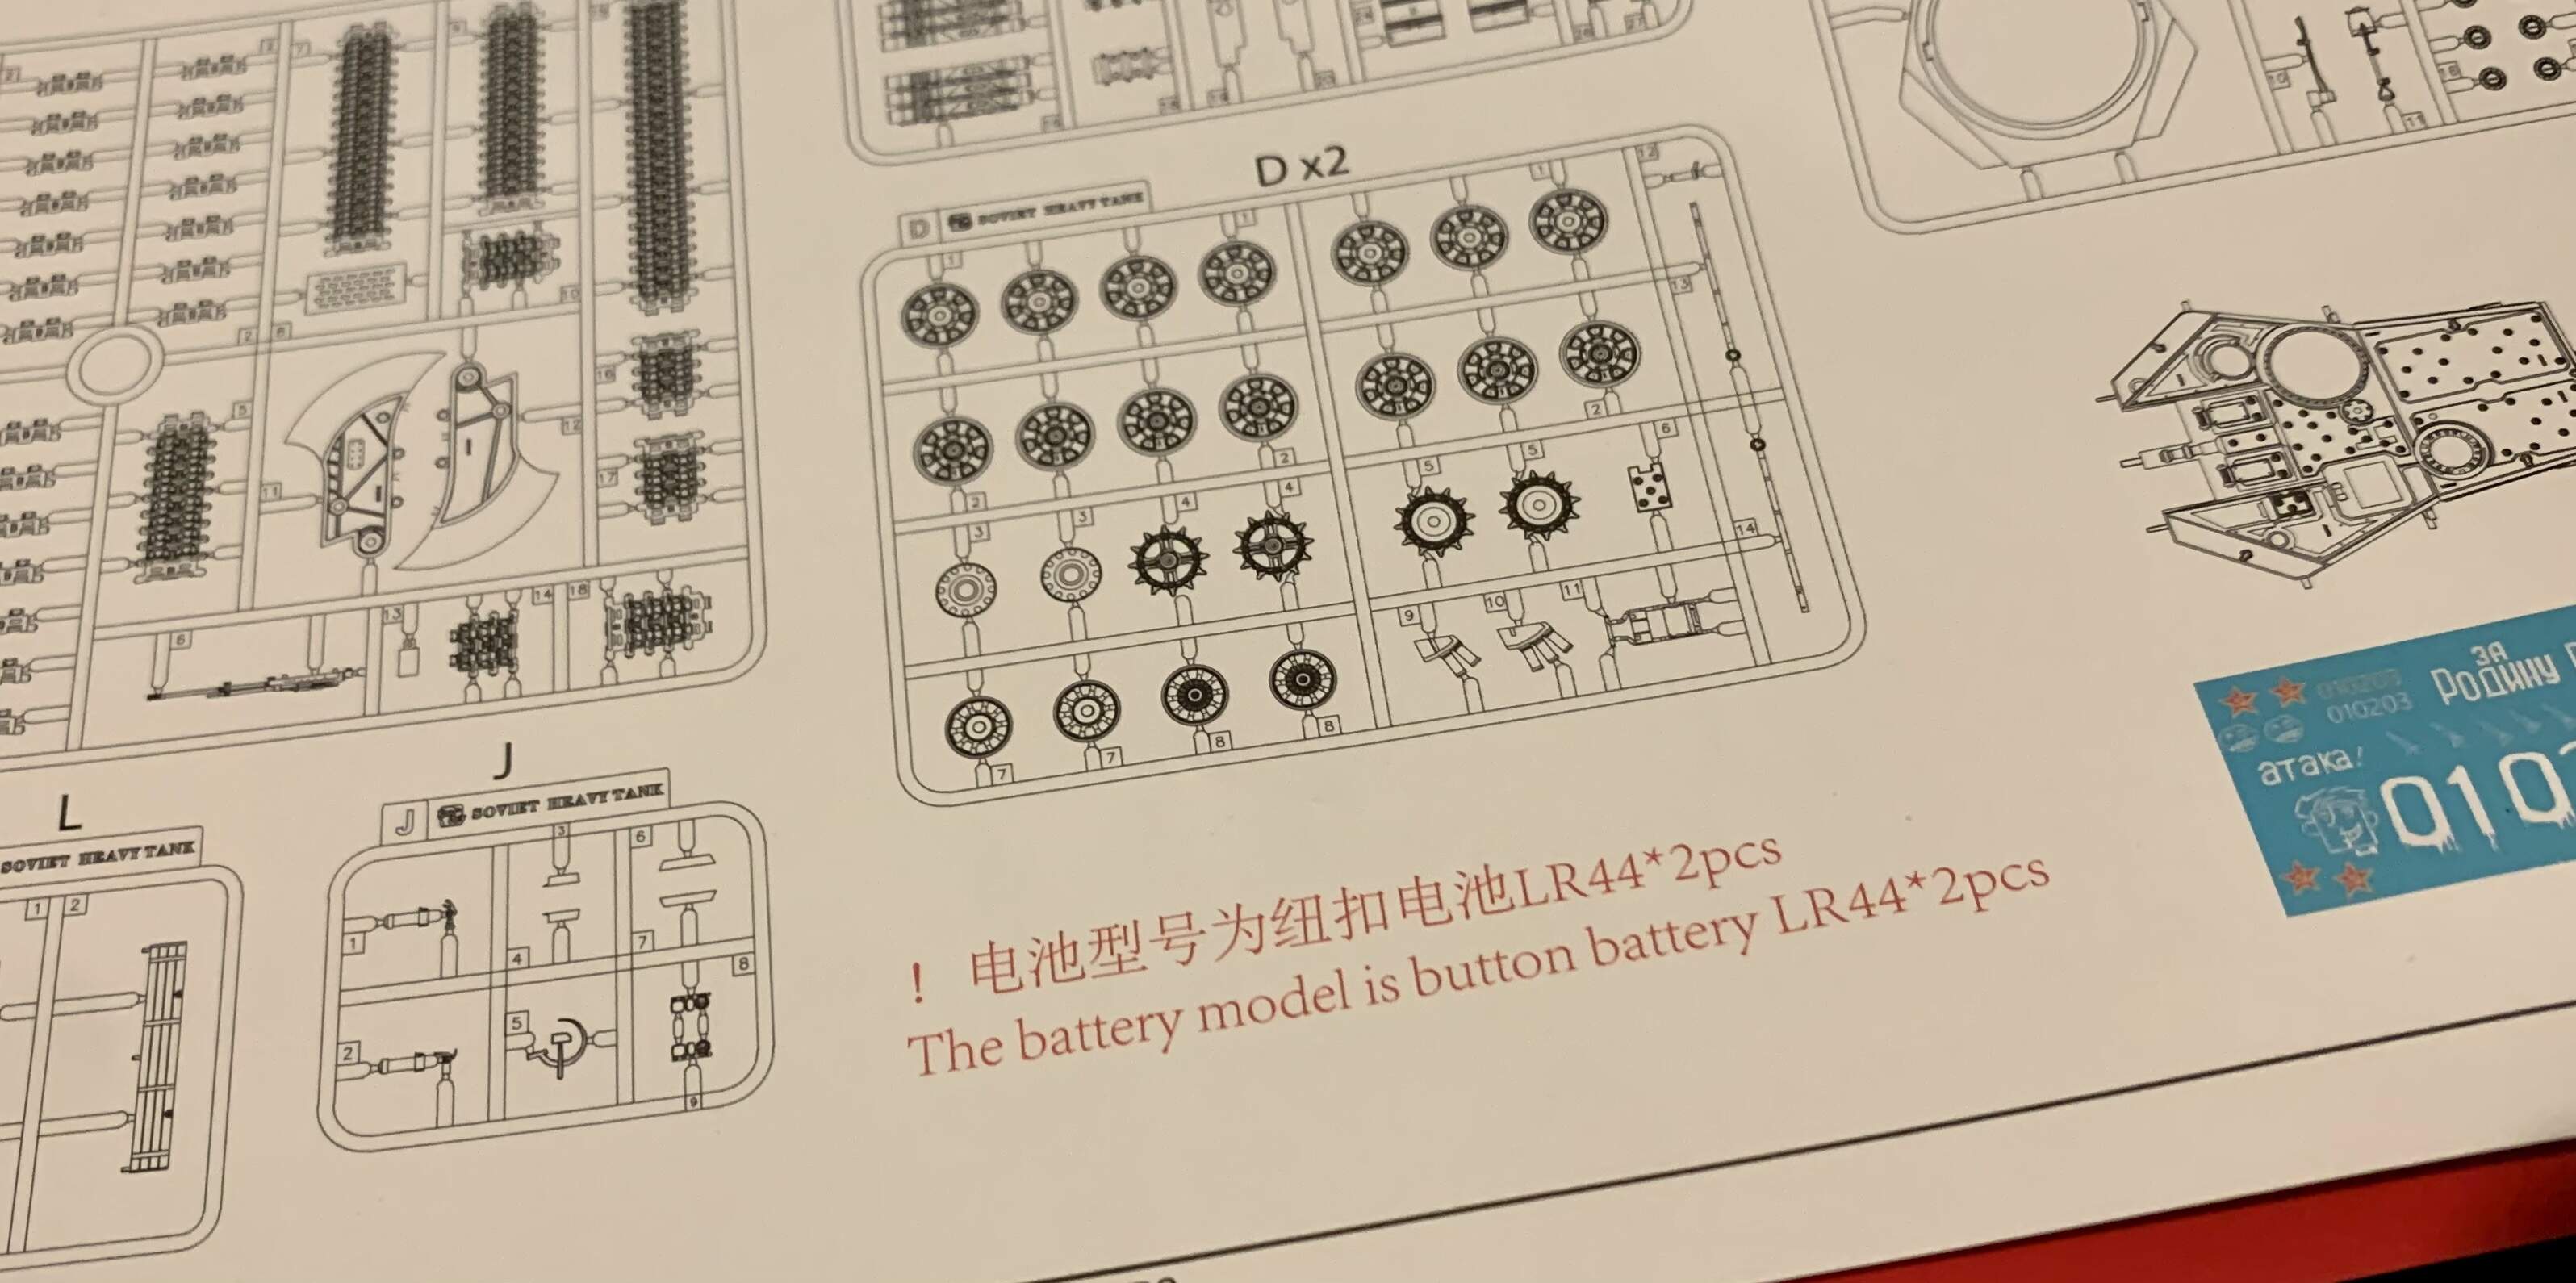
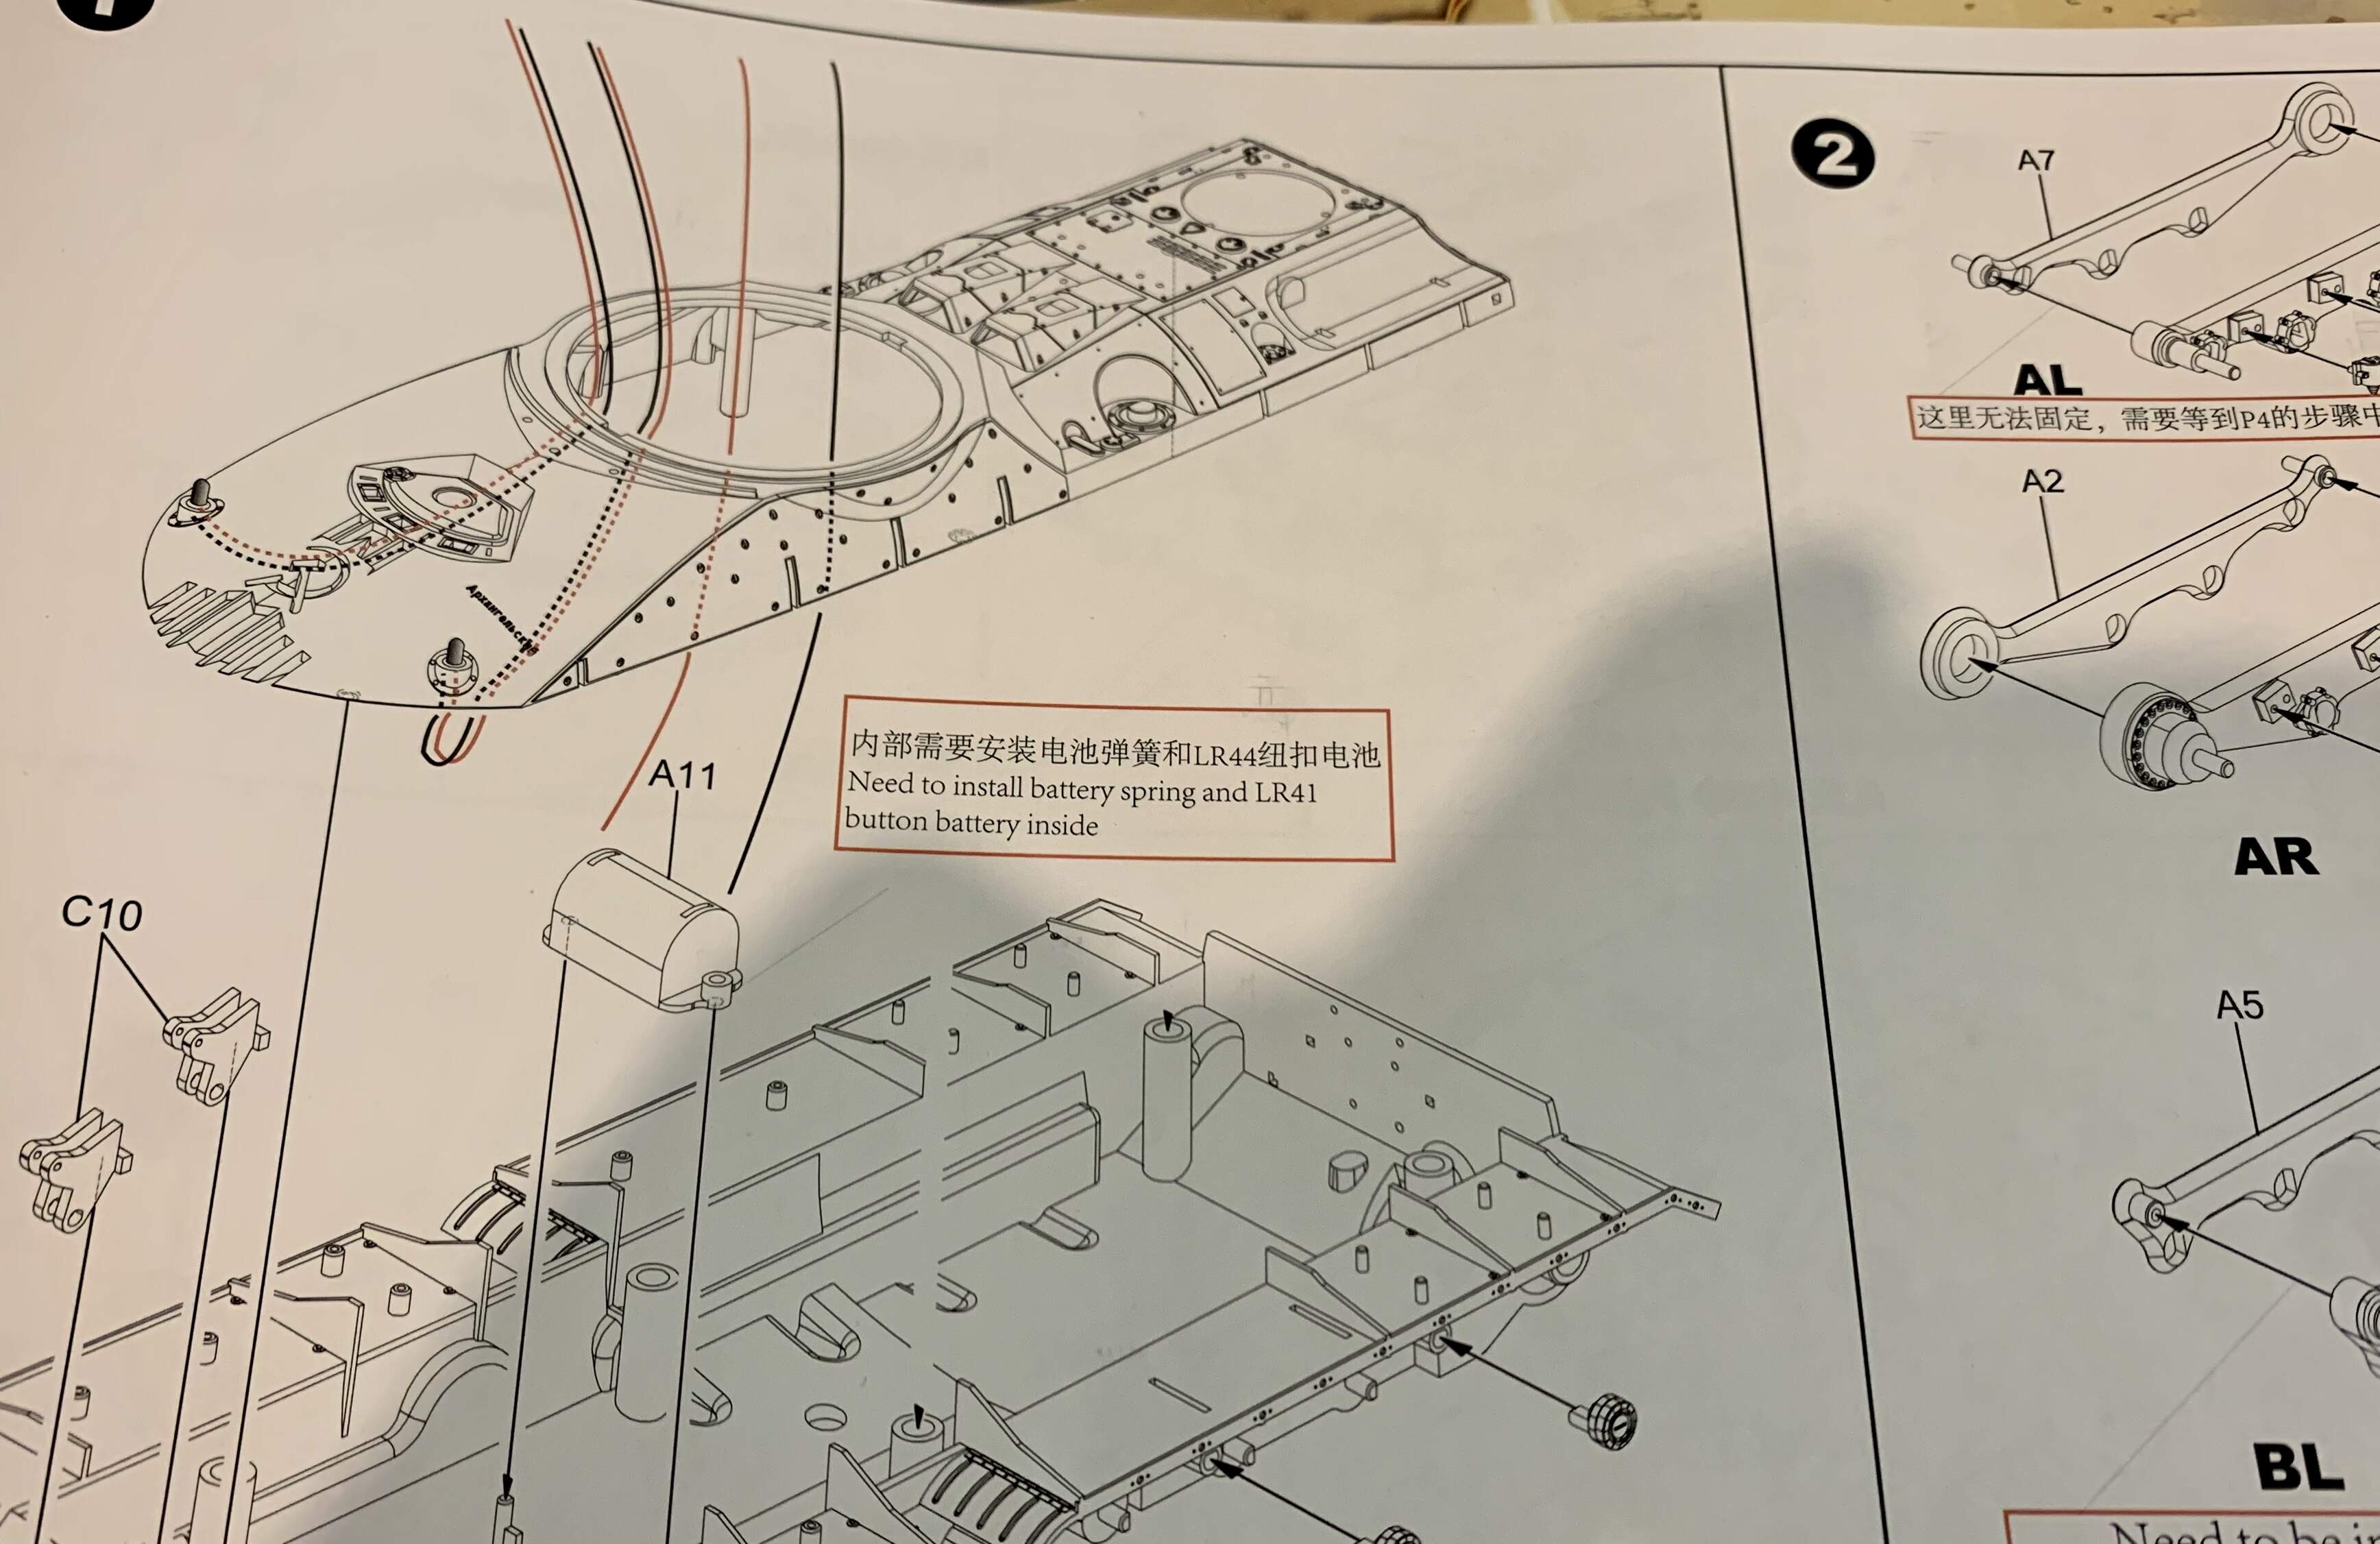
I think they are fairly similar small button batteries so I will try both types.

Not much in the way of major component assembly yet but will update when I get some more done.

Thanks for reading.

12 Likes

Great builds in this tread. Looking great, guys!

Awesome choice, Karl! Looking forward to see more as you progress.

2 Likes

CAT’s outa’ the bag!

I took a wild gamble …:game_die: :game_die: and ordered this nifty little HO scale diecast model from 3000TOYS.com
It should serve nicely as a foundation for the ‘KLAW’ Bomb Loader. :bomb::lobster:

I removed the Excavator’s chassis, drilled a hole in the saucer and was left with a very pleasant one screw (non-destructive) assembly. A good amount of lateral cab pivot and arm articulation remain functional as well. :gear:

I still might cut back the saucer’s right wall and move the cab’s pivot-point farther right. but for now, I’m tickled with how this sub-assembly is coming together! :smile:

—mike …:flying_saucer:

11 Likes

image

4 Likes

That is a damn fine addition and already looks awesome the way it comes out of the hatch!

2 Likes

One of us.

Awesome addition Mike. :+1:

3 Likes

Technically awesome and creepy, too. Excellent!

3 Likes

Thats brilliant Mike . Love it

1 Like

Thank’s to all for having a look! I had a feeling you guys would get a chuckle outa’ the ‘KLAW.’ :lobster:

—mike …:flying_saucer:

4 Likes

Come along now, Inspector… :grin:

Got quite a bit of bomb bay action done today…

• Drilled and moved the “X” Excavator’s pivot-point to the right.
• Performed major demolition to interior drywall section (right side). Machinery is now able to pivot freely, articulate, plunge, scoop, etc. Note: No belly turrets were harmed during these procedures — only their mounting rings. :axe: :carpentry_saw::clamp::hammer_and_pick::pick: :hammer_and_wrench:

Allow me to demonstrate…


Before.


After.

“Put me down, you imbecile!” :face_with_monocle:

Here’s another look from the underbelly.

Spent a good half hour looking for a small black rubber washer which fell from my apron’s crease with one final shake!

Next in line will be the addition of a monstrous ‘KLAW’ mechanism.

—mike …:flying_saucer:

9 Likes

Ingenious Mike … this was really a great idea having that there …

2 Likes

Just taken possession of a late arrival that could be a contender, superceding the Valkyrie Battleroid.
The late arrival is the impressive Tomahawk Destroid.
This was no longer available through my normal channels, so I’m mega pleased I managed to find it. Still outstanding on my wish list is the Phalanx Destroid.

6 Likes

Mike, I like the loading KLAW. Are you going to alter the cab in anyway or just repaint it?

Little update on the Kelvin. There was a slight gap around rim between the upper half and sides. I think I might have avoided this if I’d glued the top and bottom first, then the sides. You live and learn. I used thick Mr Surfacer, left overnight and then wiped over with a rag soaked with Gunze thinner. Quick and easy and avoids any sanding.

The fit of the engineering hull in comparison is flawless. Just a light sanding is all that’s needed here.

8 Likes

Thanks for the Mr. Surfacer 500 & Gunze thinner trick. I’ve used denatured alcohol with some success but the native thinner might be a better solution. :wave:

2 Likes

I think I found that tip on a YouTube video. Just got to be careful not to use too much of the thinner, or you can soften it and remove too much!

Next up, got the warp nacelle together. Again a really good fit.

And the insert for the bussard collector. Painted each half with Tamiya clear red (their clears are wonderful paints. Rich colours and dry quickly with a nice gloss finish) and stuck with Glue’N’Glaze.

And how it looks dyrfitted. It has some raised lines which will need some careful masking and painting. Not sure yet whether to go with the hull light grey or copper like on on the deflector. Again it’s an area you don’t see very well in the film, so maybe a little artistic licence is called for.

That really is it for assembly. Couple of little things, but she’s about ready for some paint. I’ve been so used to building AMT Trek kits, with all their associated crude parts and fit challenges, the rapidity and ease of the Kelvin is a really nice change. Moebius did a great job with this kit!

7 Likes