Great idea with this one, looks cool.
Interesting idea and loving the post. ![]()
Interesting project. I like the use of recycled bits to make the transmitter post.
Not as much this weekend as I would have hoped.
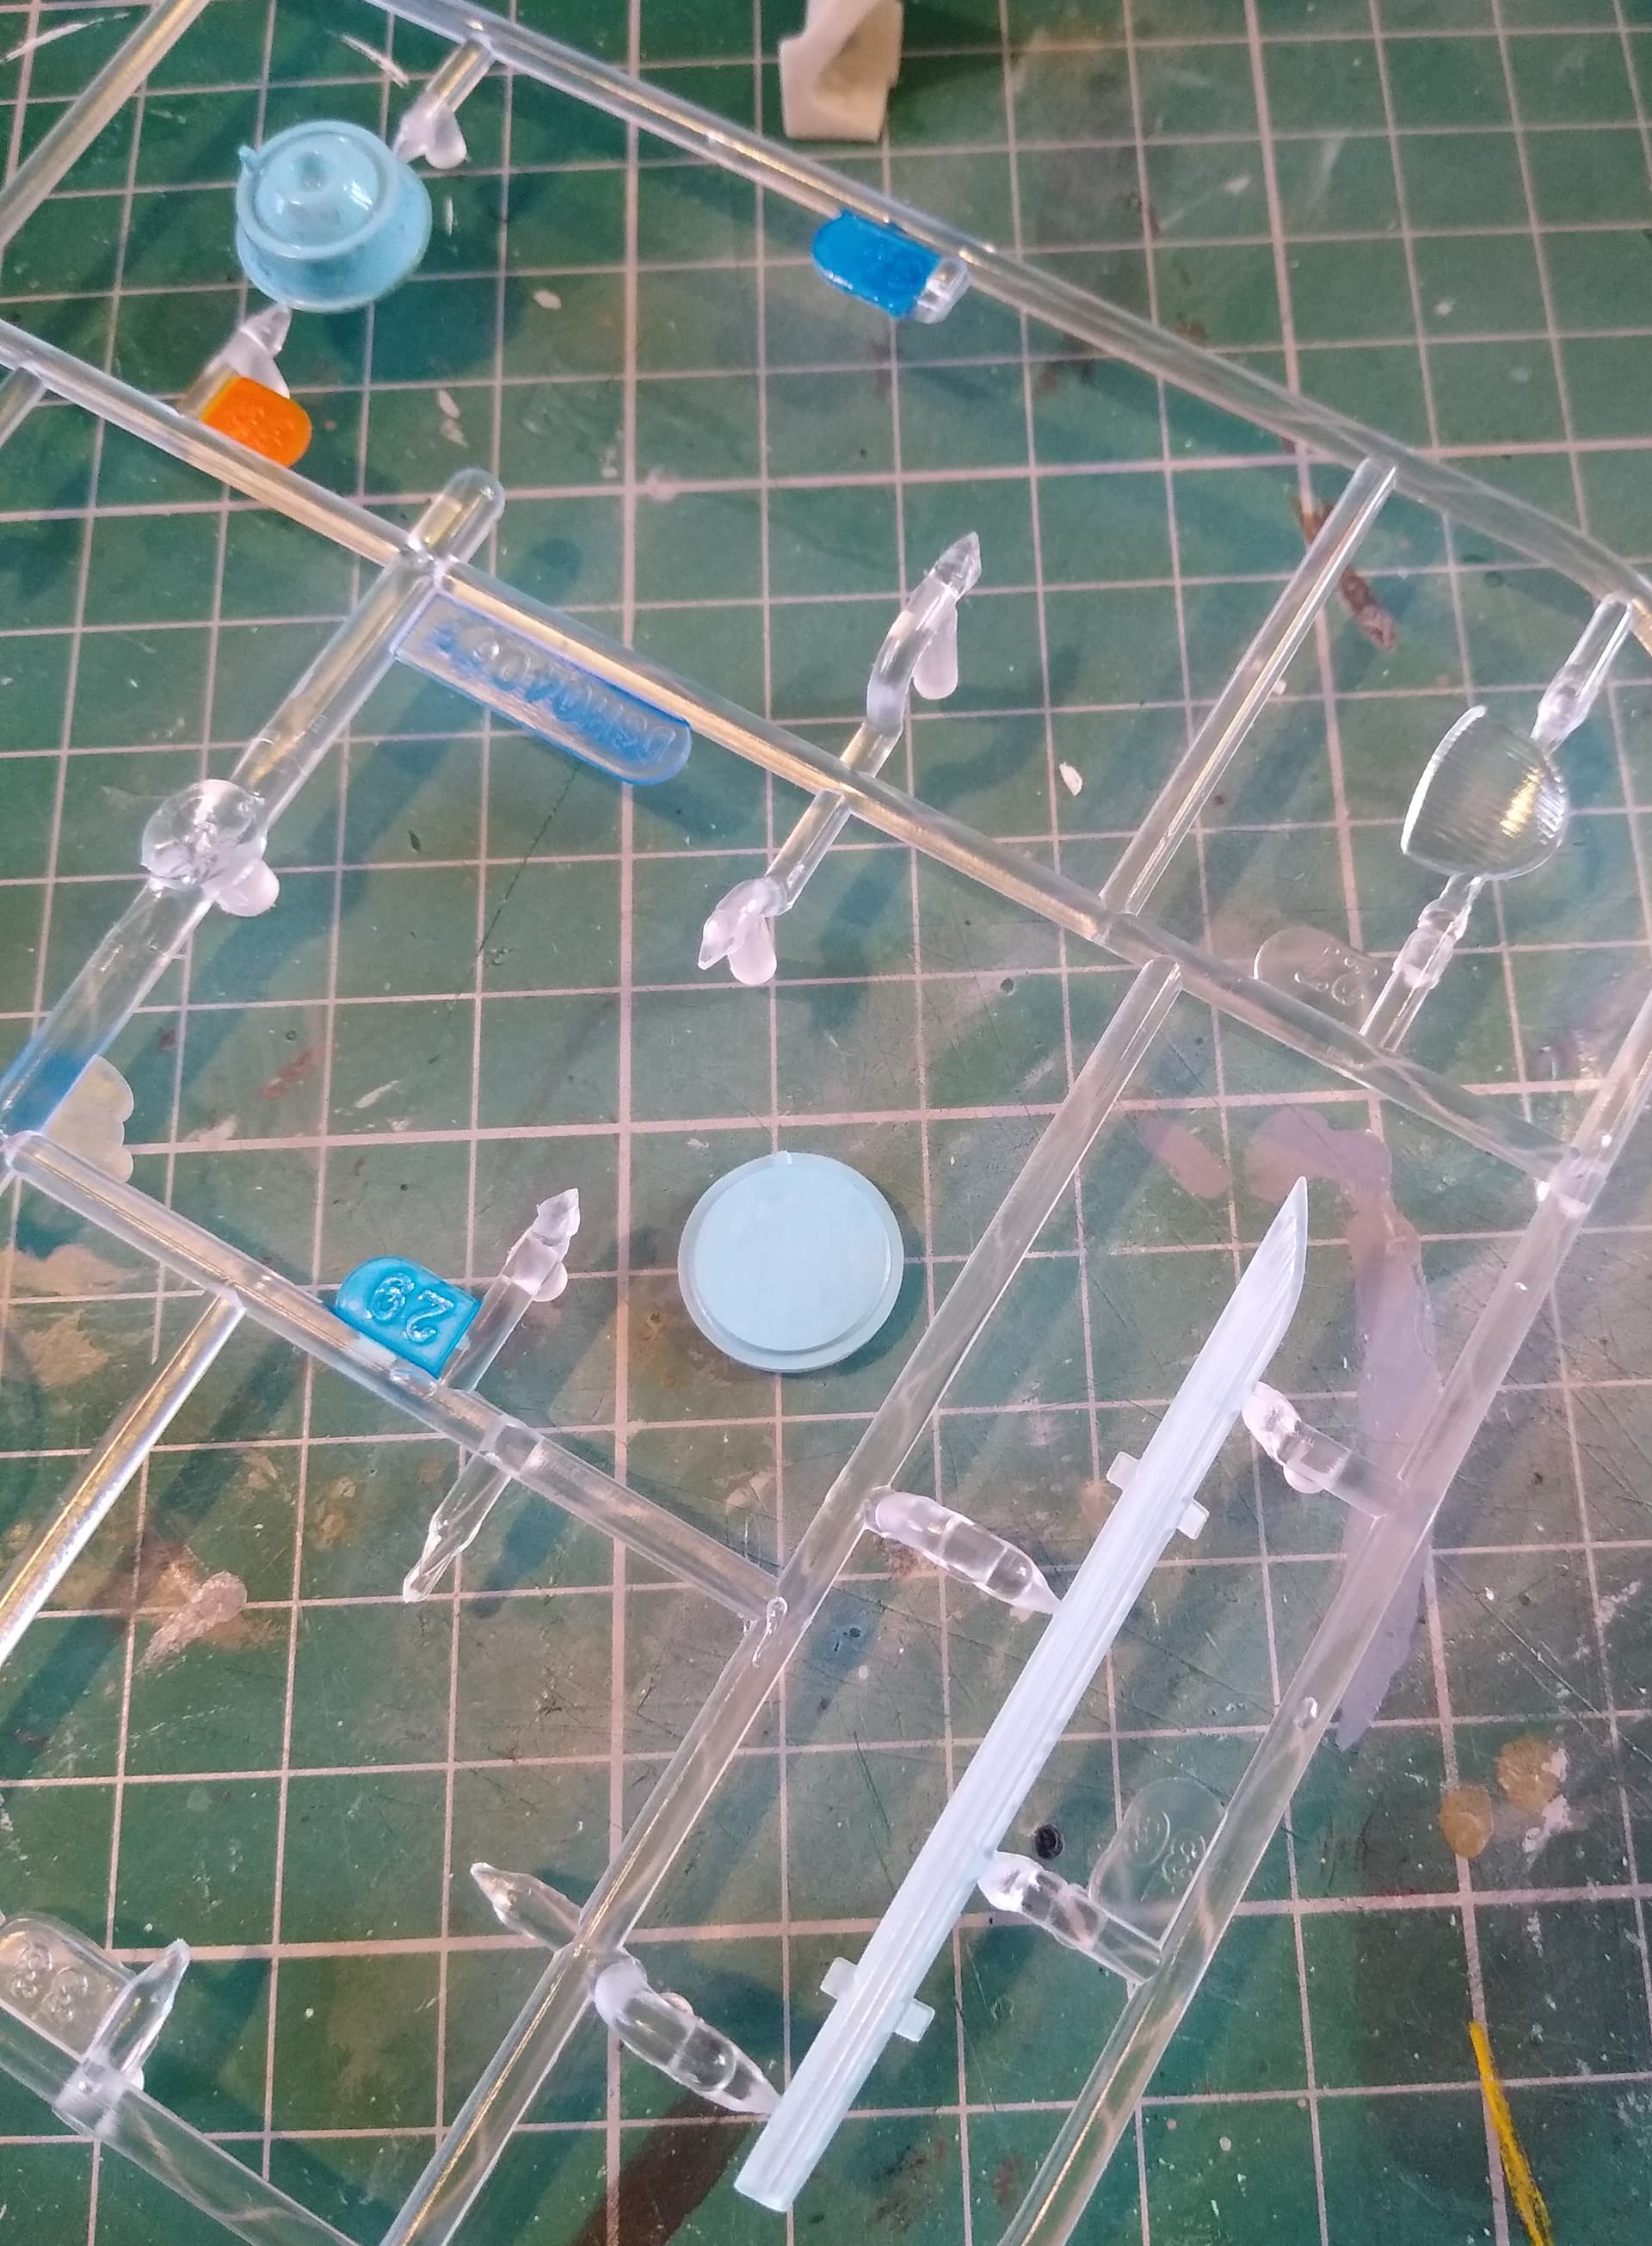
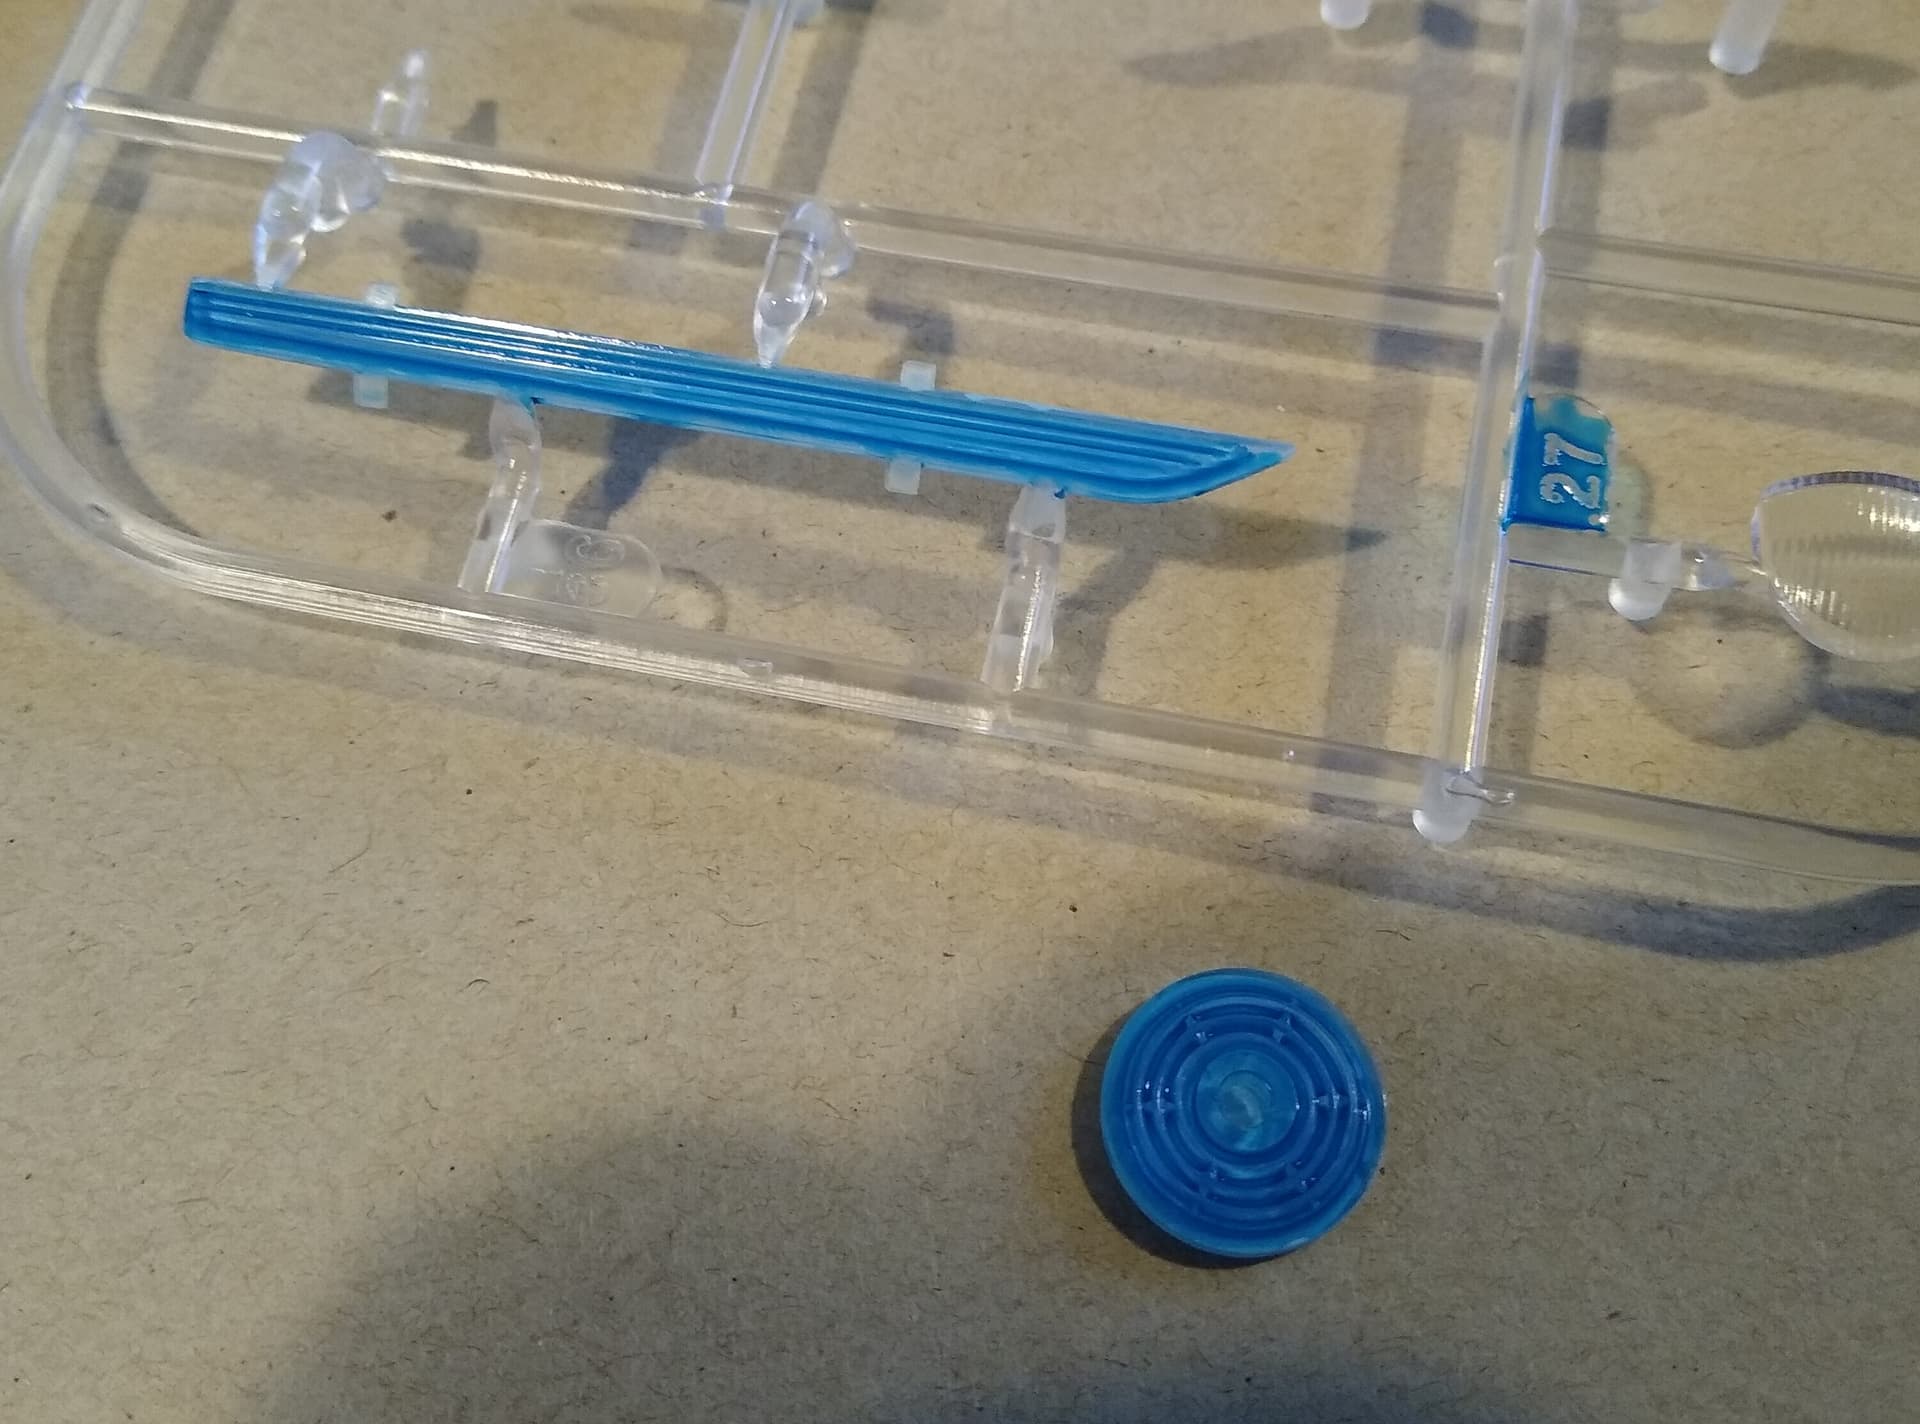
Cleaned up all of the parts for the warp nacelle and engineering hull and got them ready for assembly. And made a start on painting the parts for deflector dish and warp grills that go inside those sections.
I painted the inside of those parts with a light blue. When those are dry, the next step is to paint thinned transparent blue on the outer surface. This works like a wash and creates darker blue shadows in the recesses giving the impression of a blue glow.
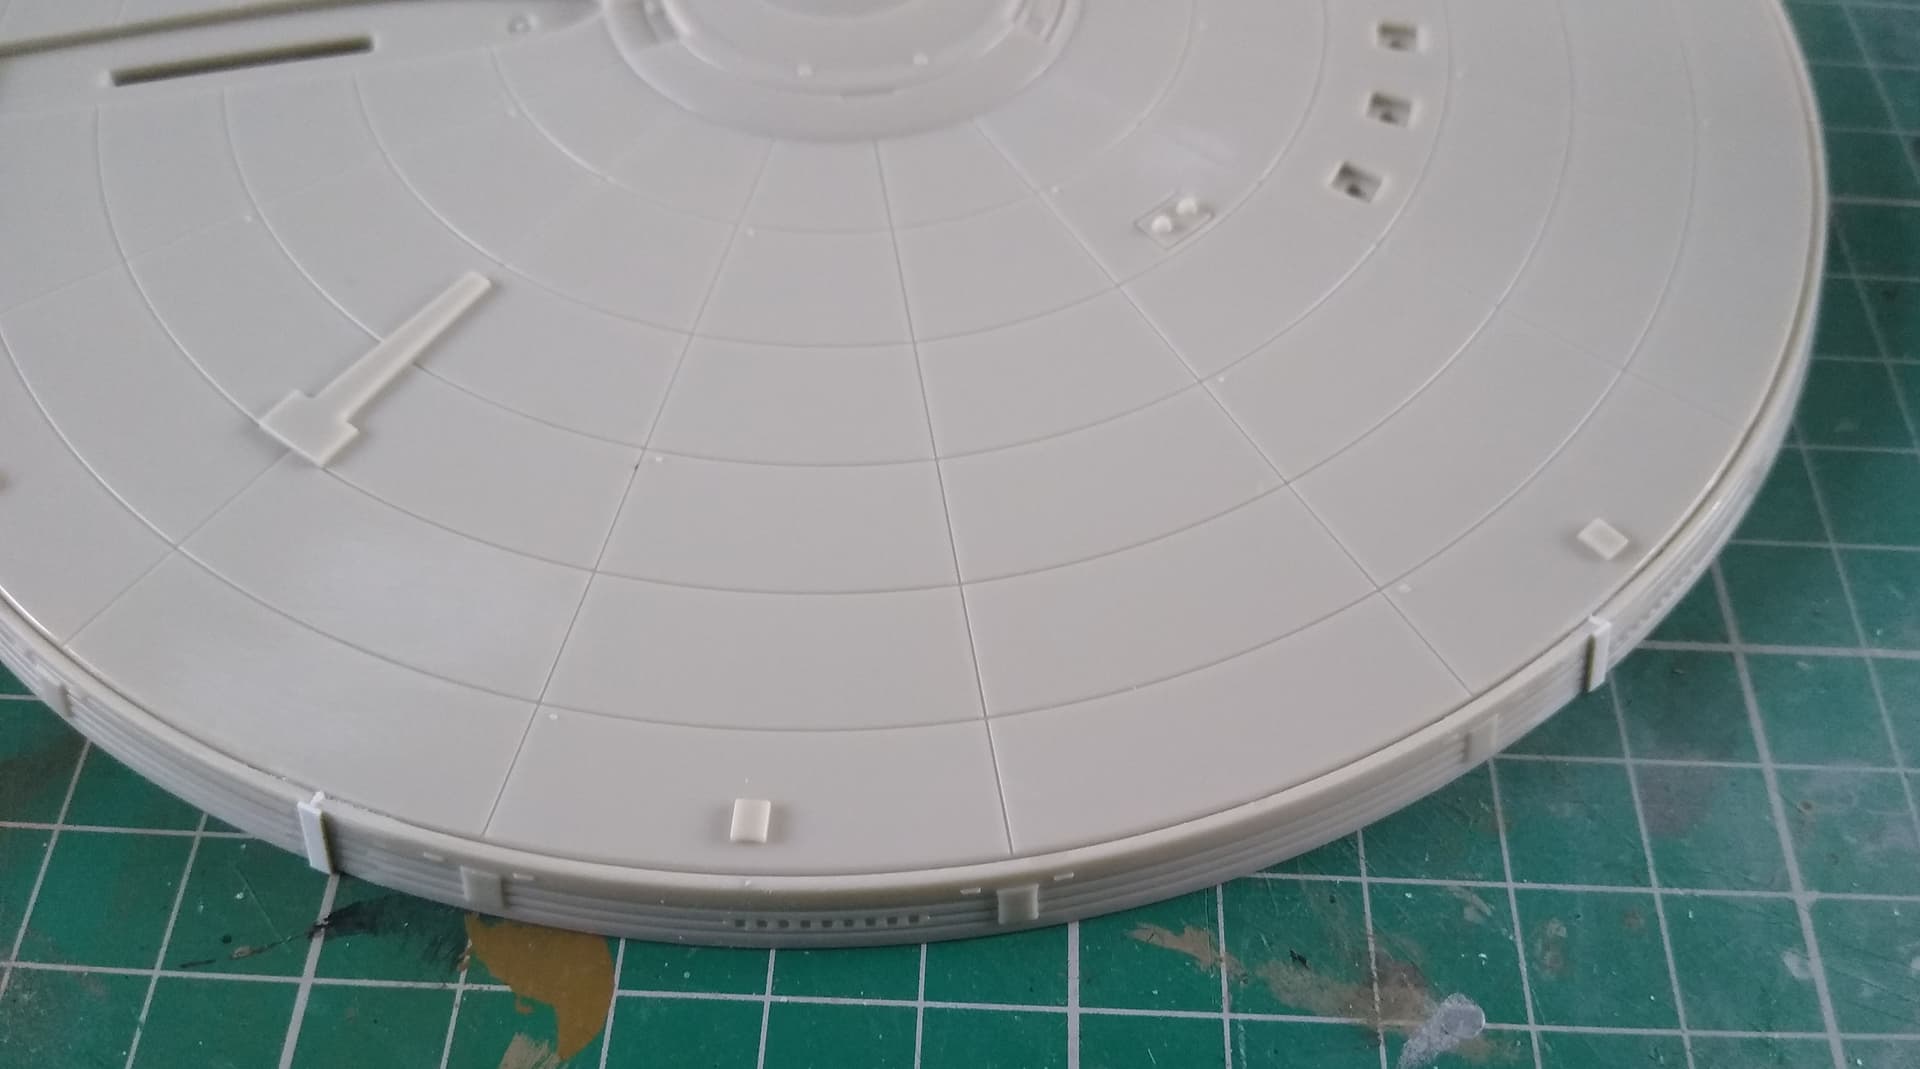
My plan to re-engrave the missing details and the joins on the saucer didn’t quite work out. So plan-B was needed, small sections of plastic strip to cover the ugly joins. Might not be entirely accurate, but given the ship had less than 5 minutes of screen time, I can live with it.
8 Likes
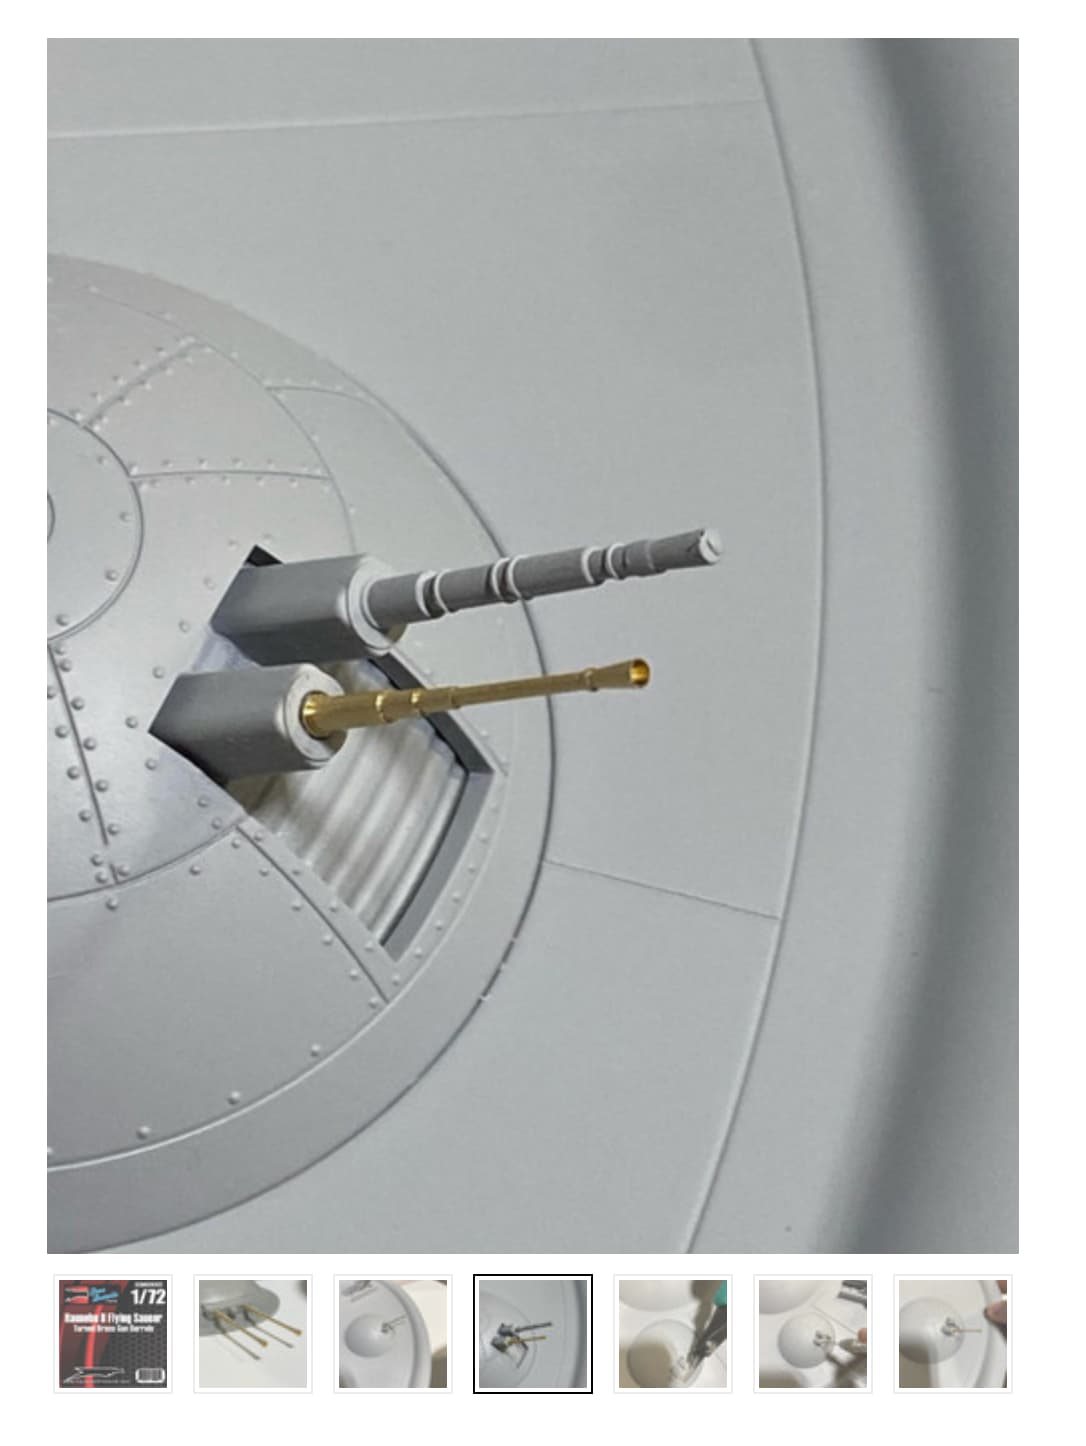
Haunebu II update.
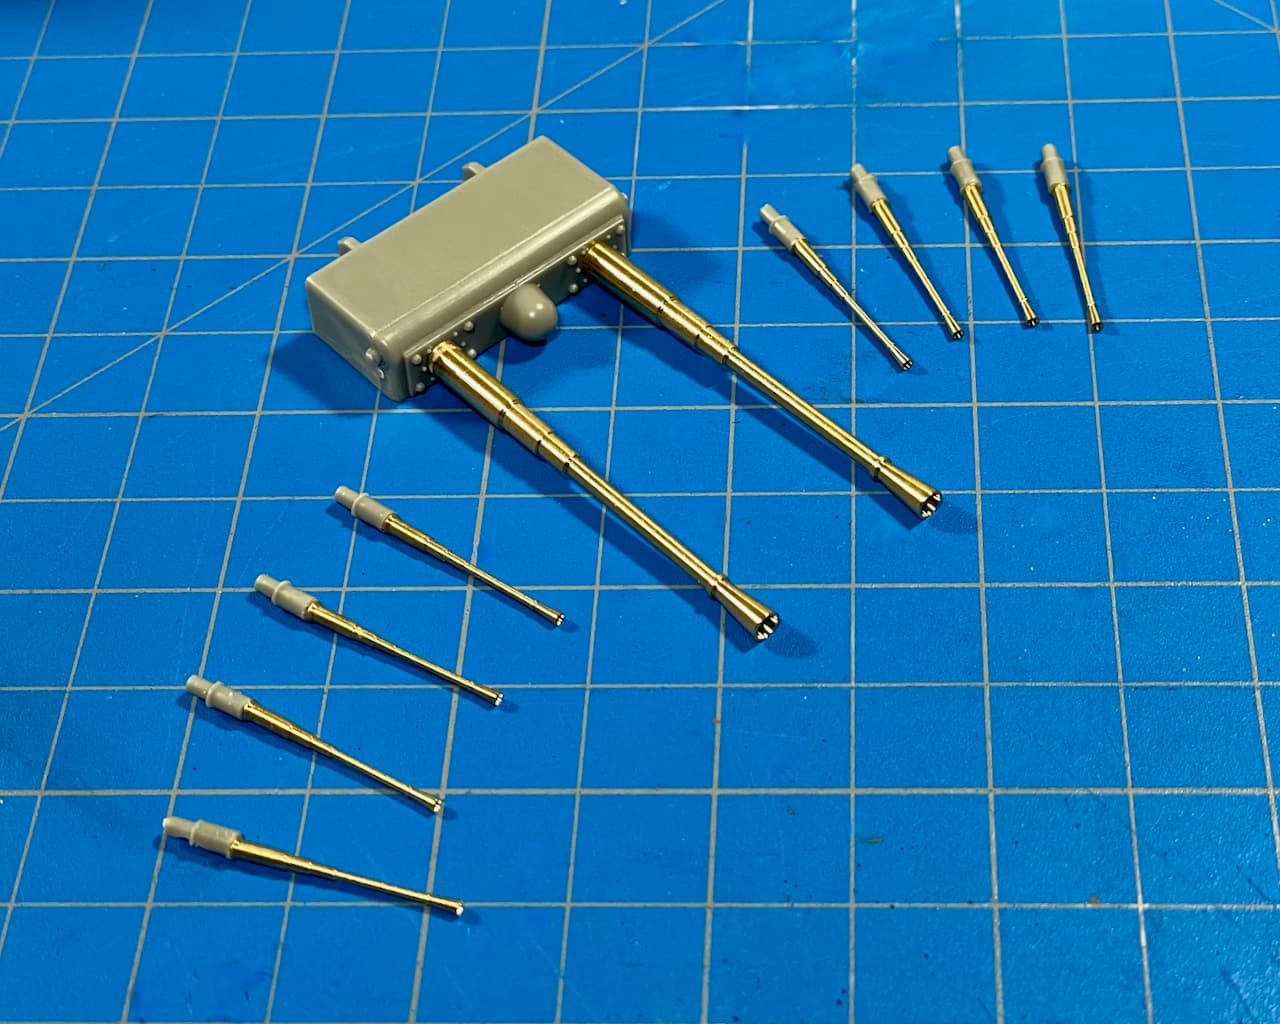
Zeroing the Main Cannons and Mini Blasters!
Squadron (SOM39005) Haunebu II Flying Saucer Turned Brass Gun Barrels.
The kit’s original eight Styrene Mini Blasters were snipped-off, drilled and replaced with the upgraded barrels.
![]()
![]()
![]()
![]()
![]()
![]()
![]()
![]()
![]()
![]()
![]()
![]()
![]()
![]()
![]()
![]()
![]()
—mike ![]()
![]()
![]()
![]()
![]() …
…![]()
9 Likes
Certainly following along Mike like the others. I bought mine when they first appeared and picked up the True Details Update Set. I am looking forward to seeing this come together.
Mike
1 Like
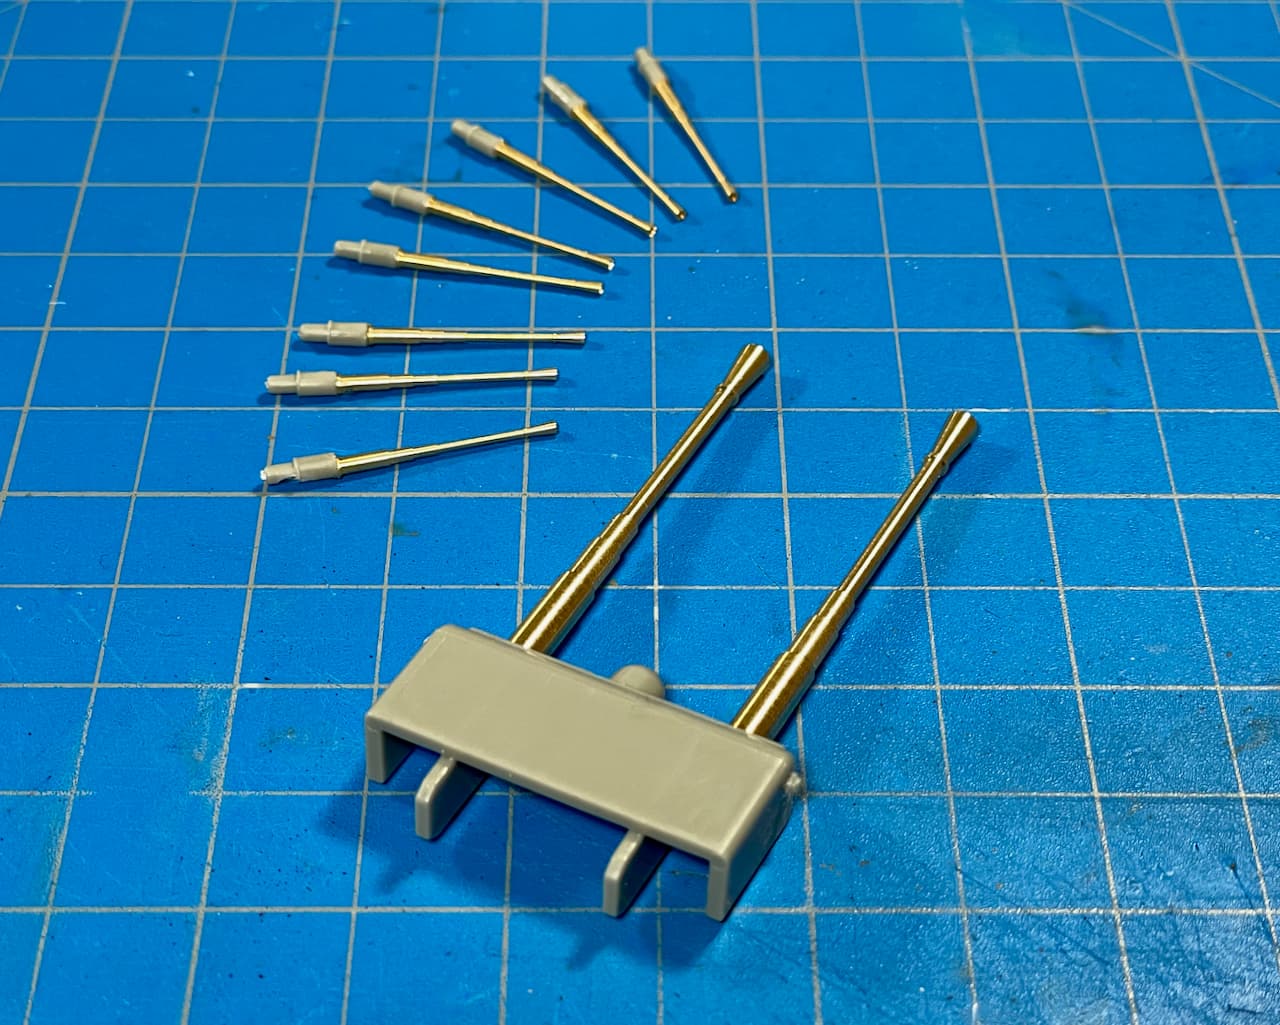
Hello Michael (TacFireGuru). The upgrade is well worth it. Just a note on that… I may have installed the small barrels incorrectly. When I went on Squadron’s link again, I realized my clip and drill method was different than what they show.
.
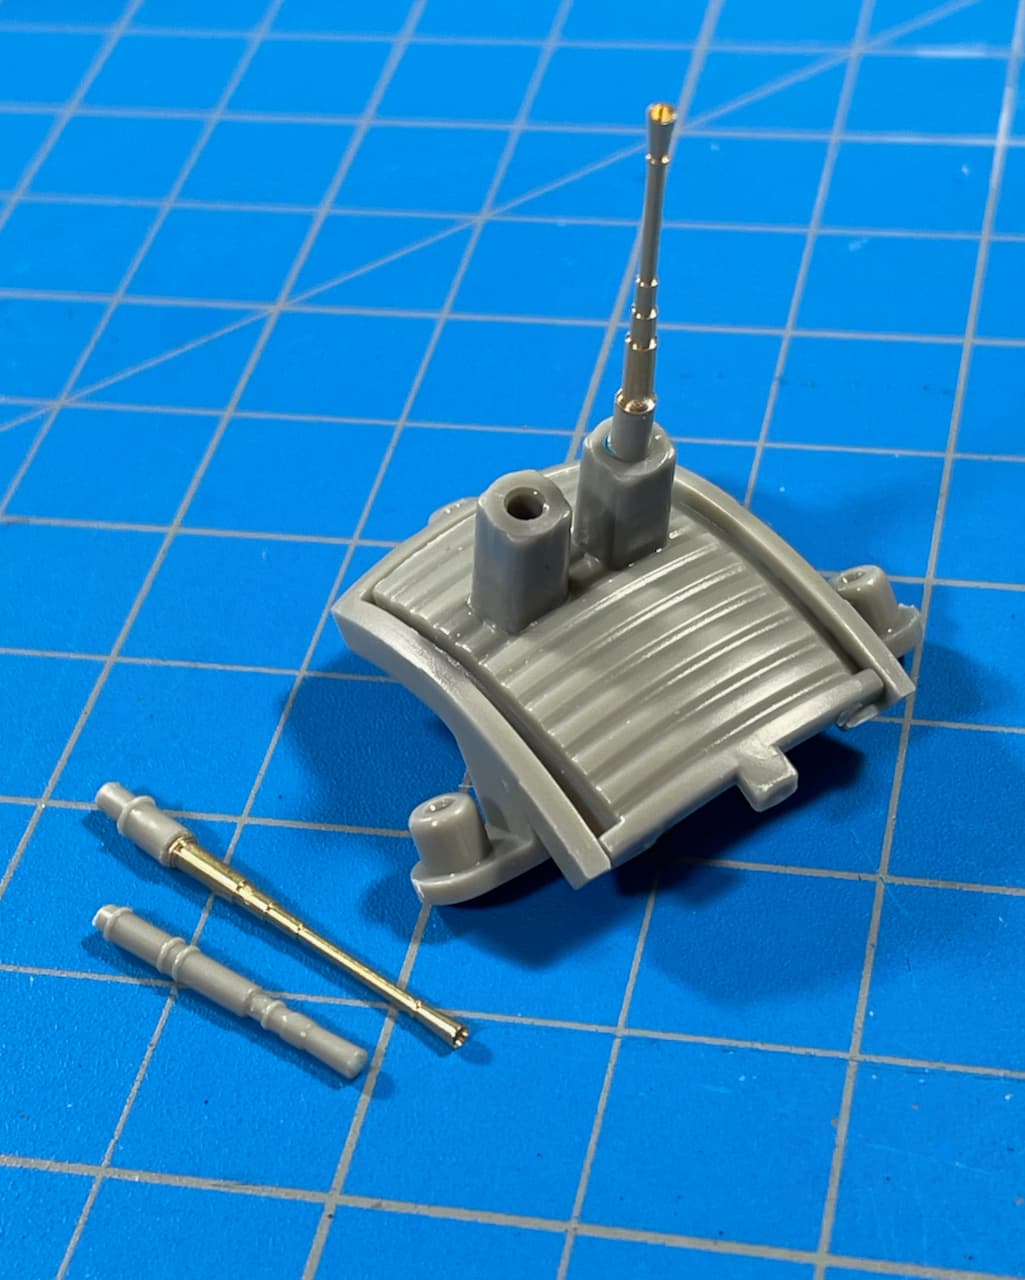
Due to the extended mount, my guns came out approx. 3mm longer than what Squadron shows — still looks okay though. HTH.
—mike …![]()
3 Likes
They look great Mike. I think mine are resin and not turned brass (True Detail’s original offering?). Depending, I may have to part with those and get the brass. Some day - a lot of others on the wait list. ![]()
Mike
1 Like
Thank’s Mike!
I didn’t know a resin version of the barrels existed — should still be better than the kit part.
I know what you mean about that “list.” I’m trying to crawl out of the spending rabbit hole this build has spiraled me into!
I come in peace. Spend more money. ﹩ ![]()
![]() ﹩
﹩
—mike …![]()
[EDIT 1]
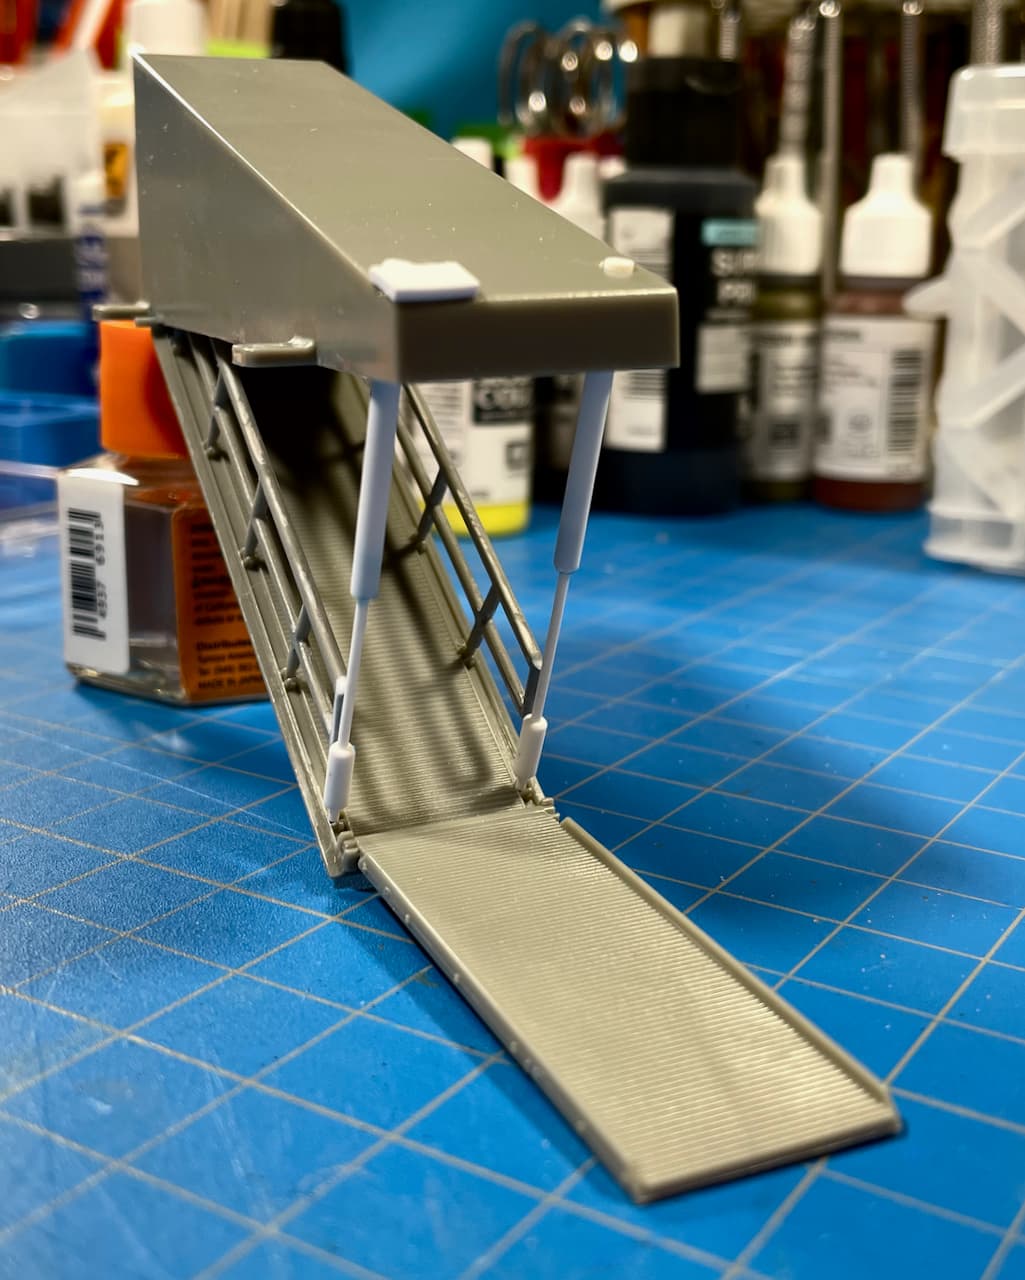
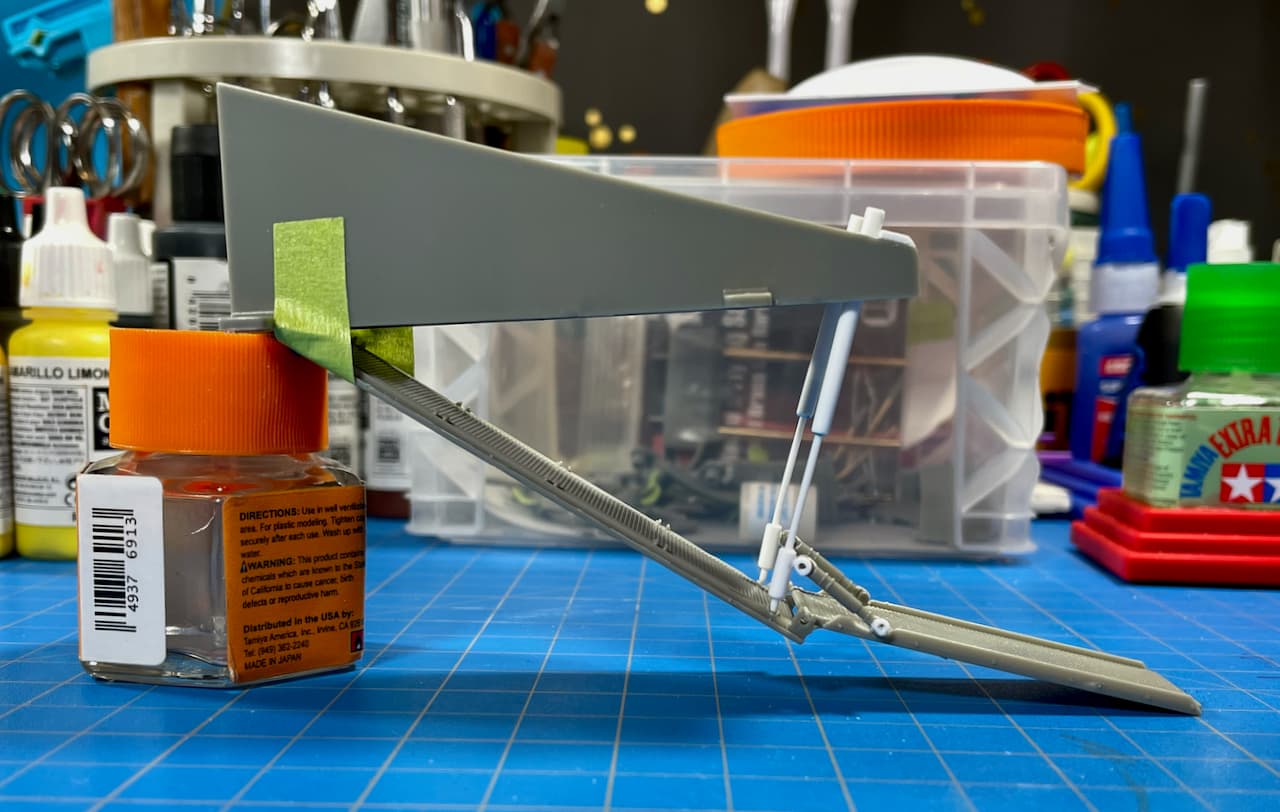
Meanwhile, the boarding ramp seemed a bit sparse, so I’ve been putzing around with a hydraulic lift system.
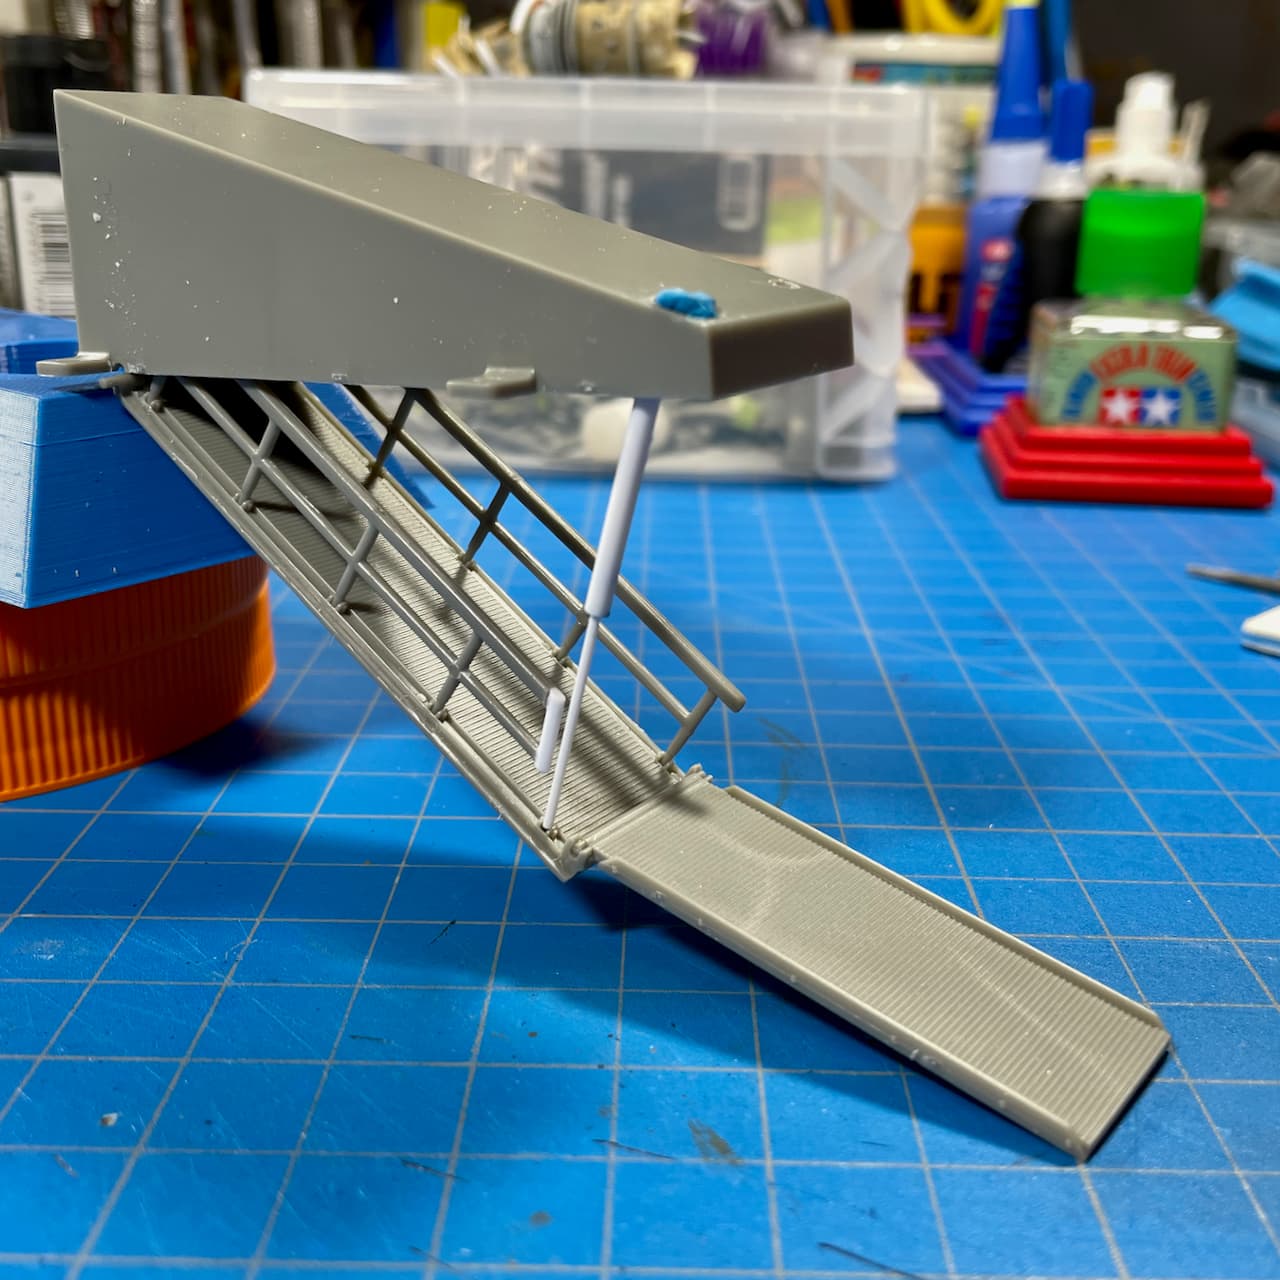
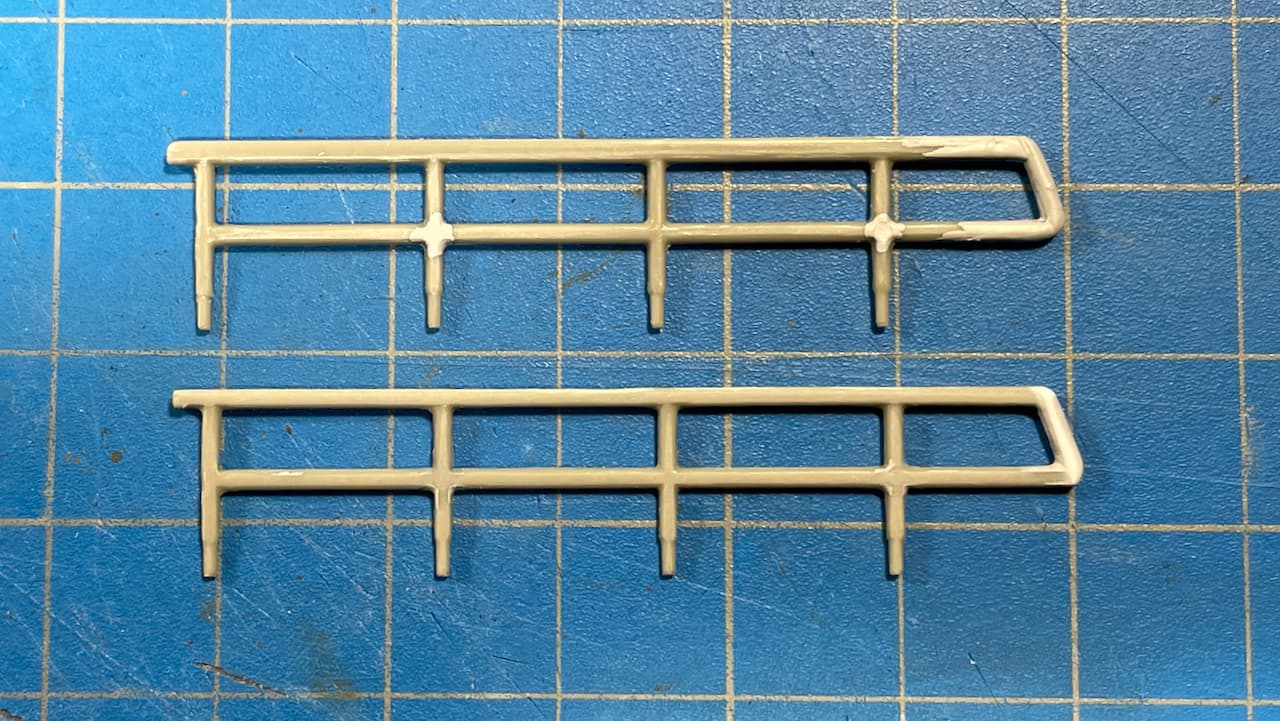
Here’s some work on the railings. I think these will look okay when painted yellow.

![]()
![]() …
…![]()
––––––––––––––––––––––––––––––––––––––––––––––––––––––––––––––
[EDIT 2]
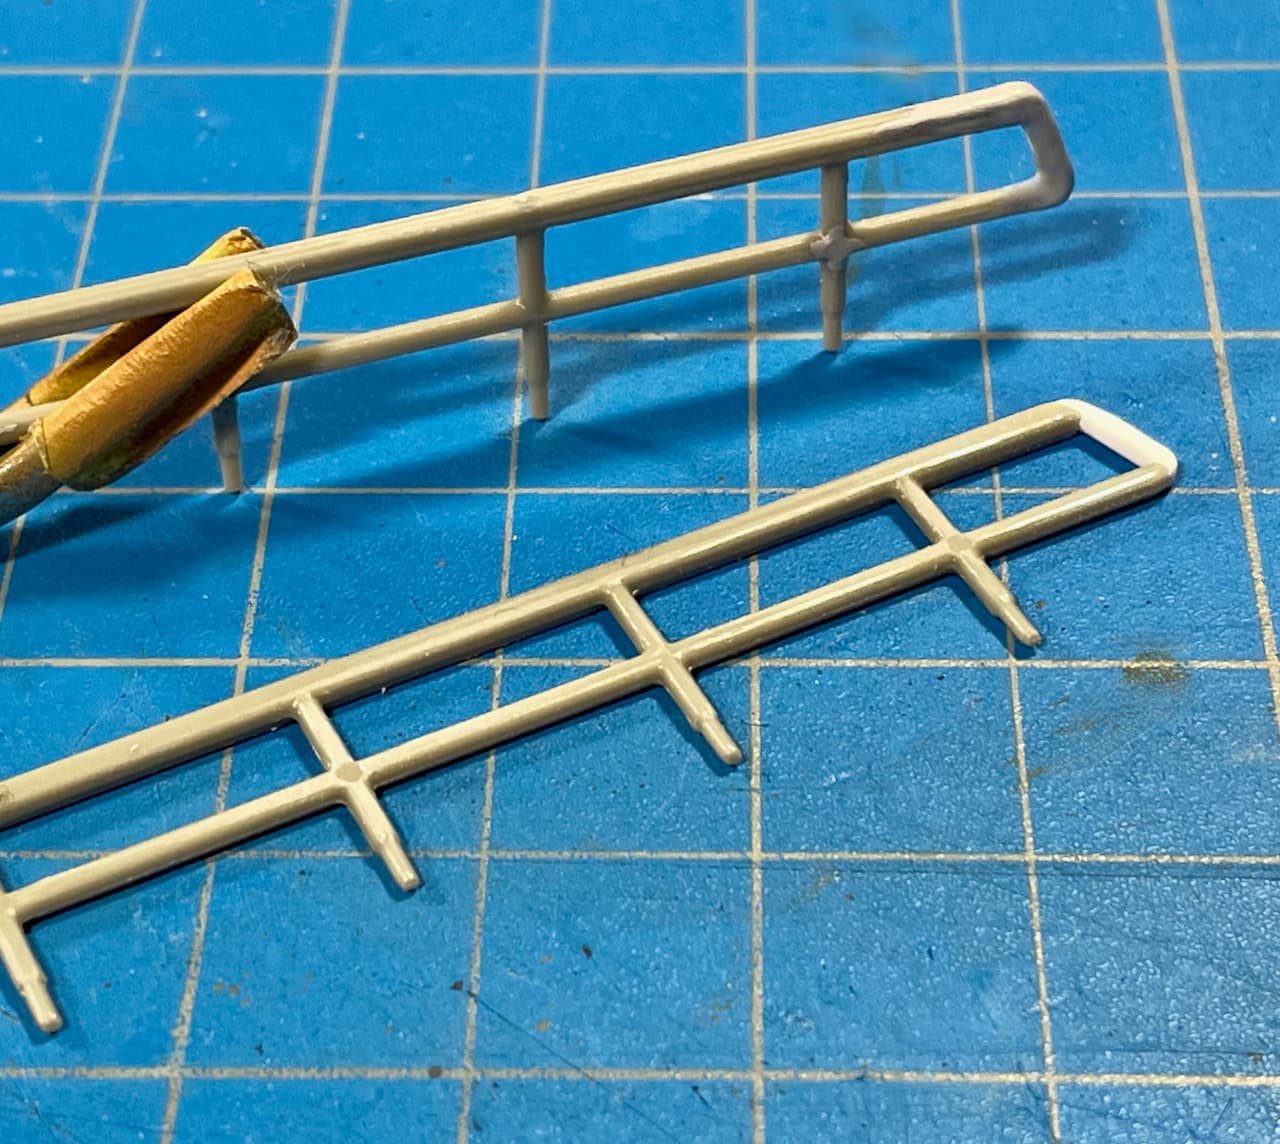
The railings were way too chunky for my liking — was driving me bonkers! ![]() So I sliced-away approx. 1mm off the top and I’m going at them with every sanding stick in my arsenal!
So I sliced-away approx. 1mm off the top and I’m going at them with every sanding stick in my arsenal! ![]()
Railing slim-down challenge (before and after)… a little better.
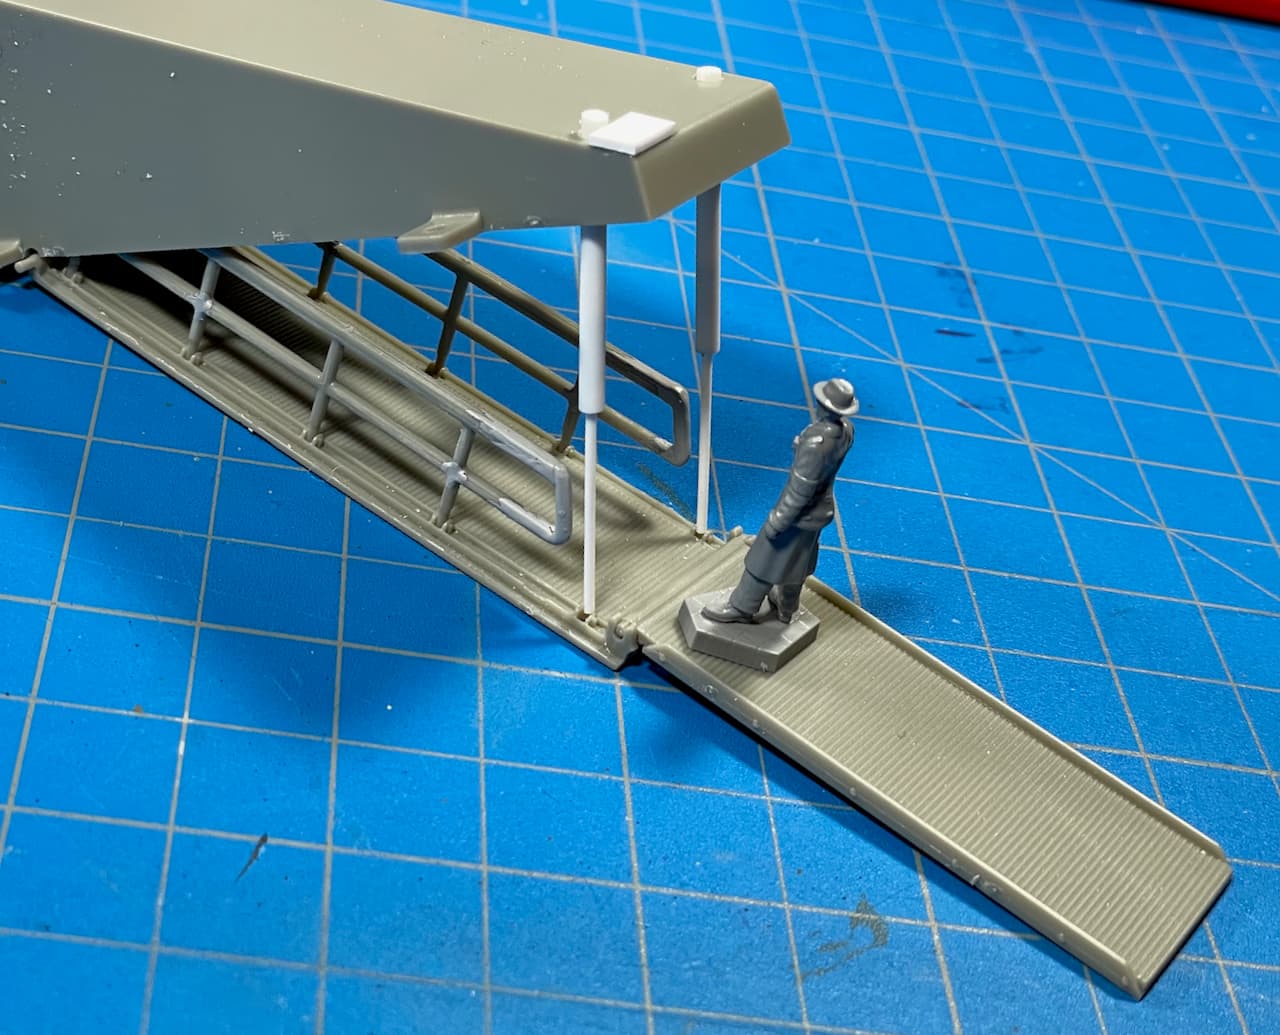
Here’s what happens when I watch ‘The Empire Strikes Back’ the night before… boarding ramp with more tubing added to the hydraulics (‘Millennium Falcon’ reference). … And I may 86 the railings altogether — not sure. ![]()
In its current Jenga state, the ramp won’t even support the Inspector! ![]()
—mike …![]()
7 Likes
Been a few days since updating, slow but steady work, but not going to meet my personal goal of finishing by Monday night since I’m going on the road for a two week work trip.
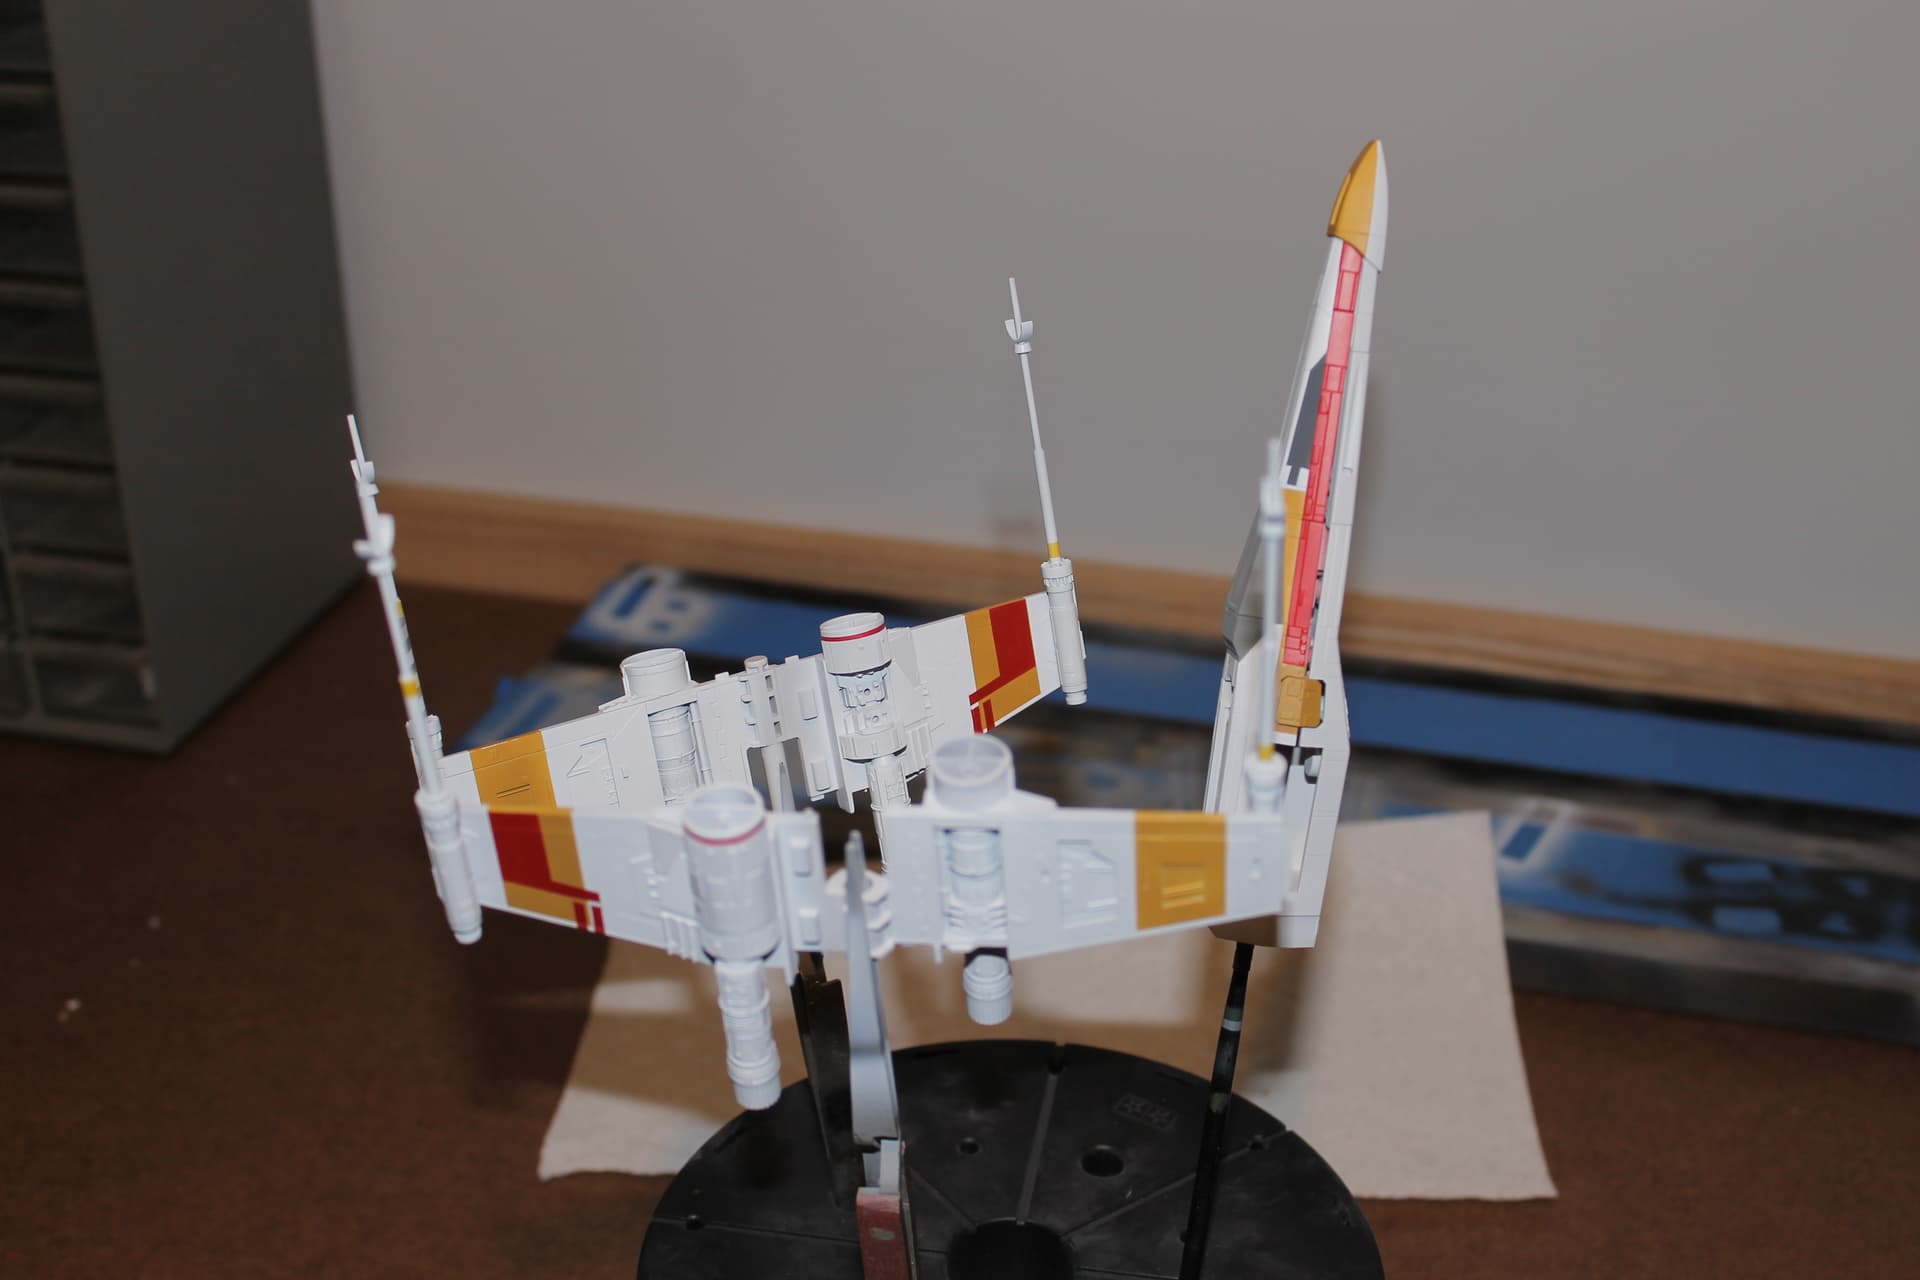
Last Sunday just before primer.
And where Red 2 stands as of today.
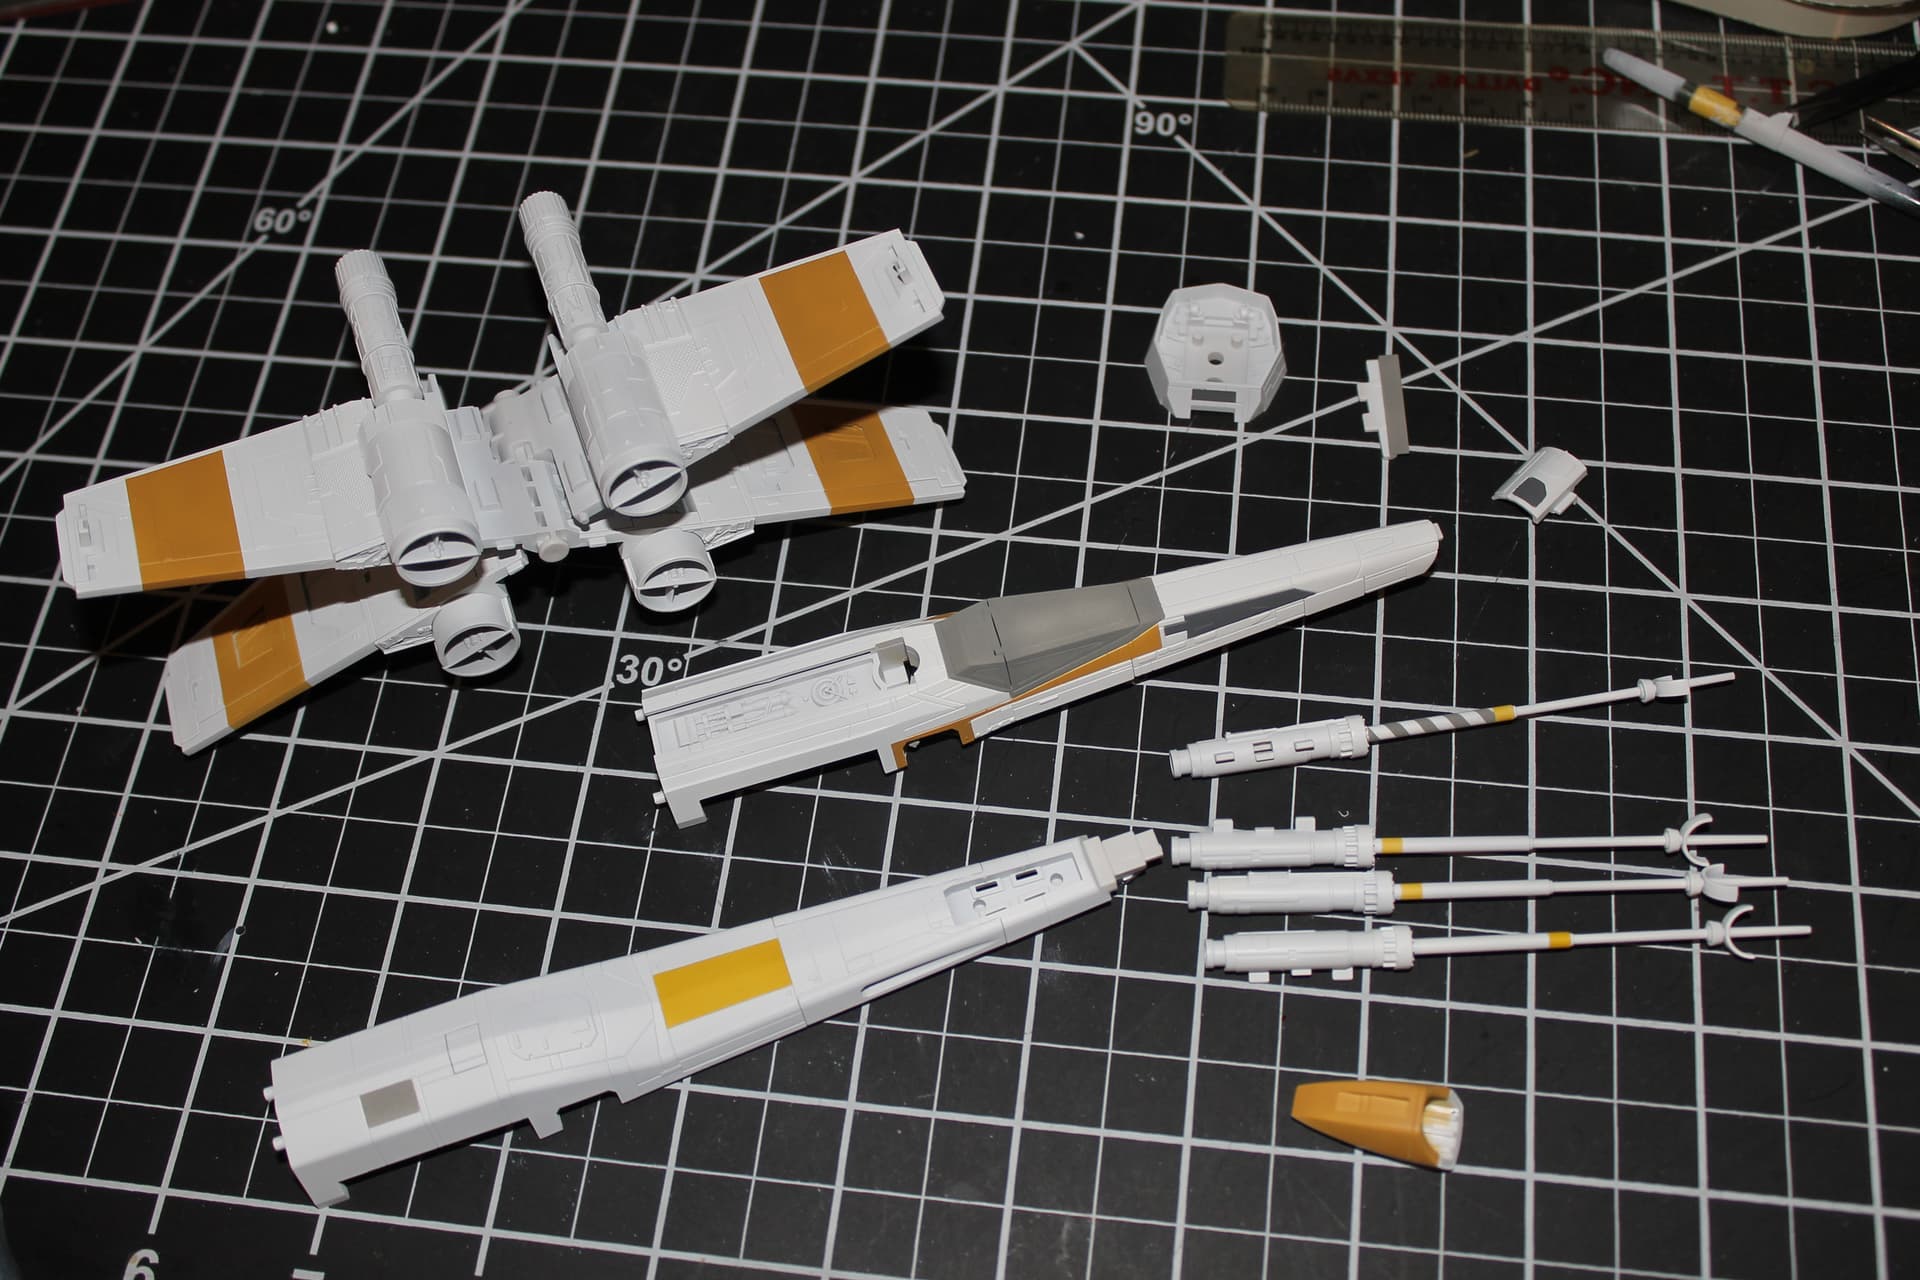
Once the red striping is on later today I’ll be drybrushing and misting on white to tone everything down tomorrow. Then, the fun starts, bringing it to life.
8 Likes
More work on the Haunebu II…
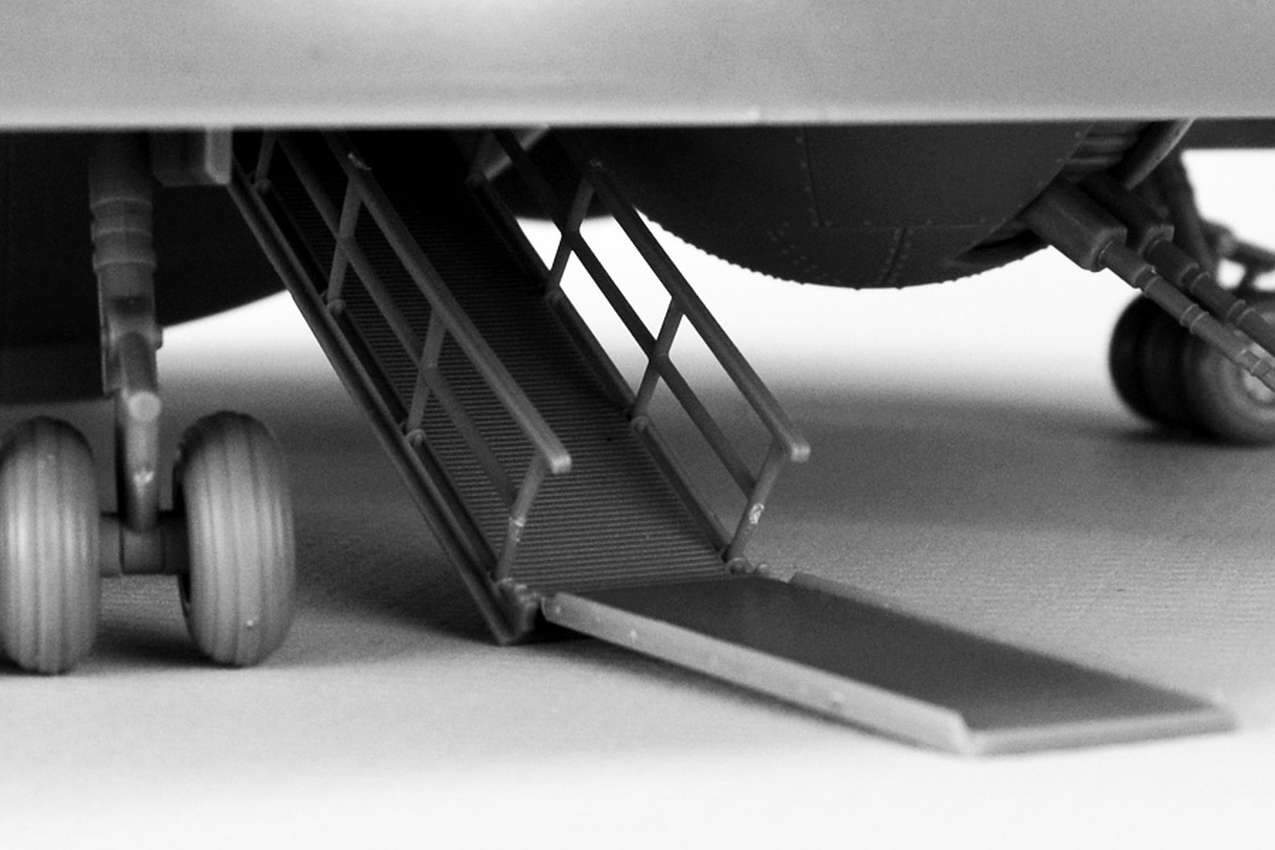
Started applying Epoxy to some of the load-bearing and heavy-handling sub-assemblies. Also did more detailing on the boarding ramp — leftover gun barrel parts.
Think I like the boarding ramp without the railings. ![]() What do you guys think?
What do you guys think?
—mike …![]()
4 Likes
Personally Mike, I think the angle of ramp part going up into the hull is to high not to have some form of simple rail… Just imagining coming down it or going up it in the wet …just my take on it though ![]() … But it looks very nice …
… But it looks very nice …
2 Likes
Thank’s John!
I thought so tooooooooooooo!!! ![]() Haha! I even reduced the angle on mine a bit.
Haha! I even reduced the angle on mine a bit.
Here’s a Squadron kit image.
I’ve been entertaining the thought of getting really skinny 3D printed railings. If the OSHA Inspector gives me any crap, they can always be added at final assembly. ![]()
![]()
—mike …![]()
5 Likes
It looks steep enough to have steps set into it, which might let you do without the rails.
4 Likes
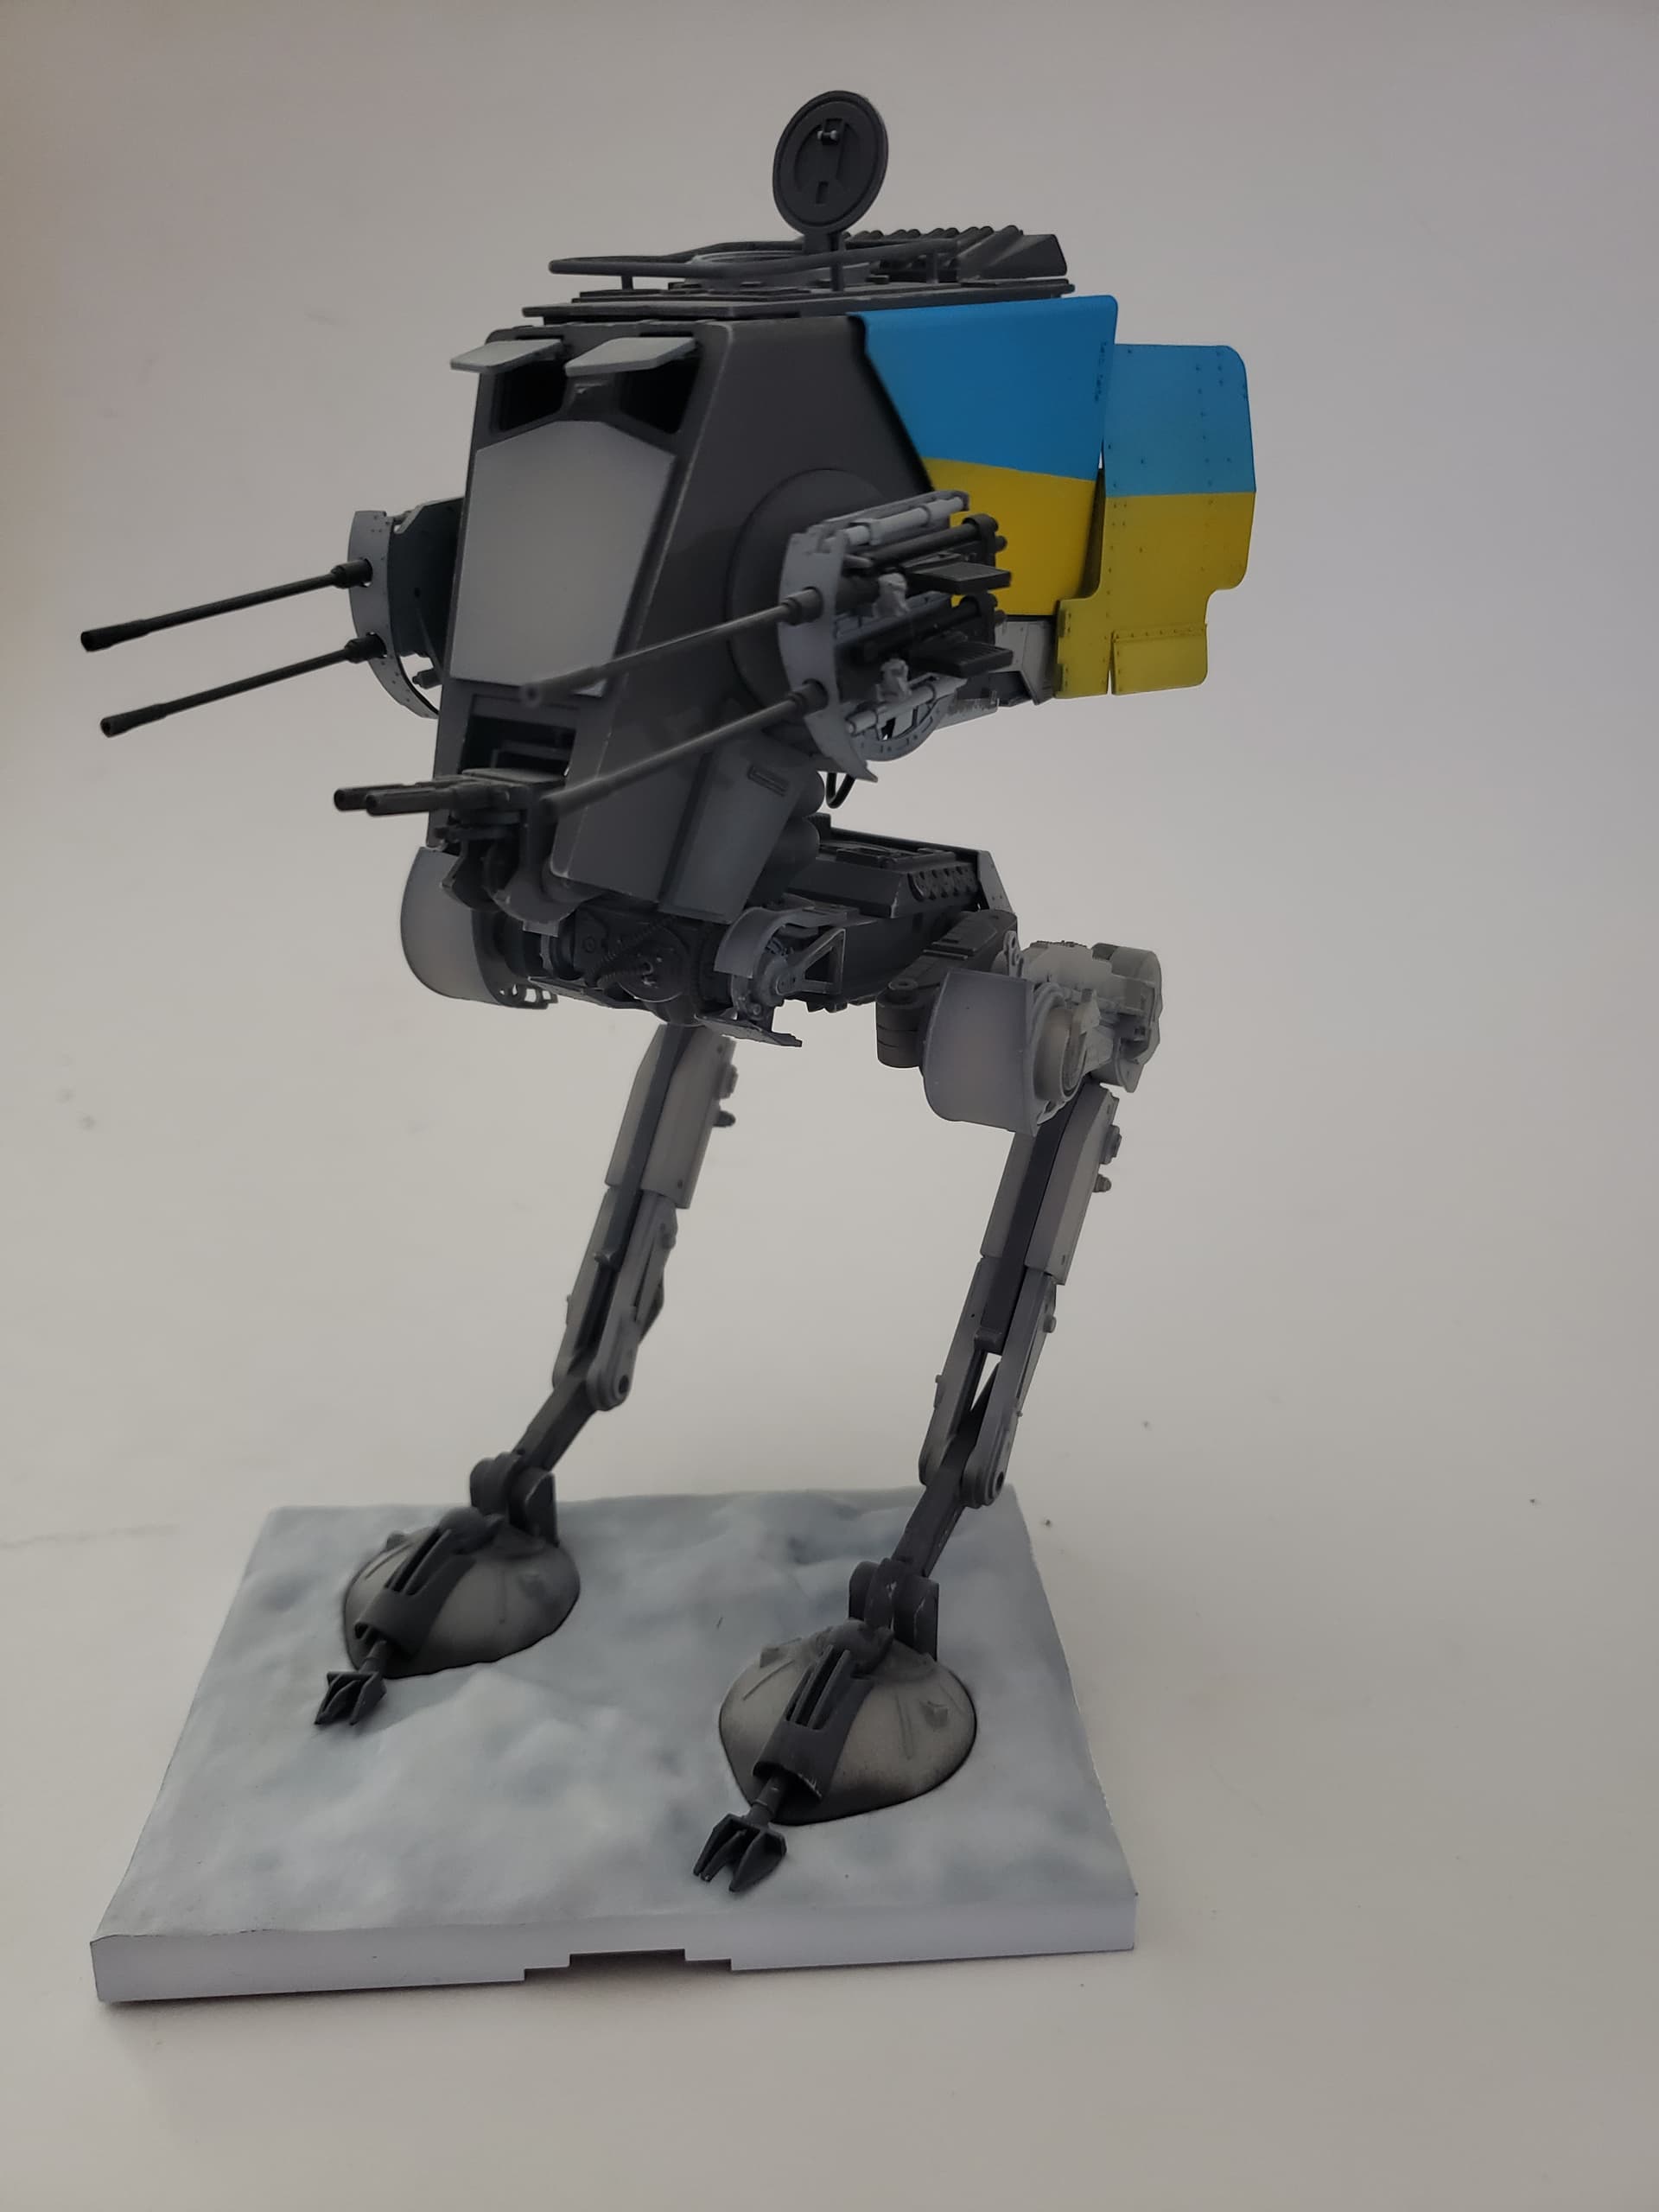
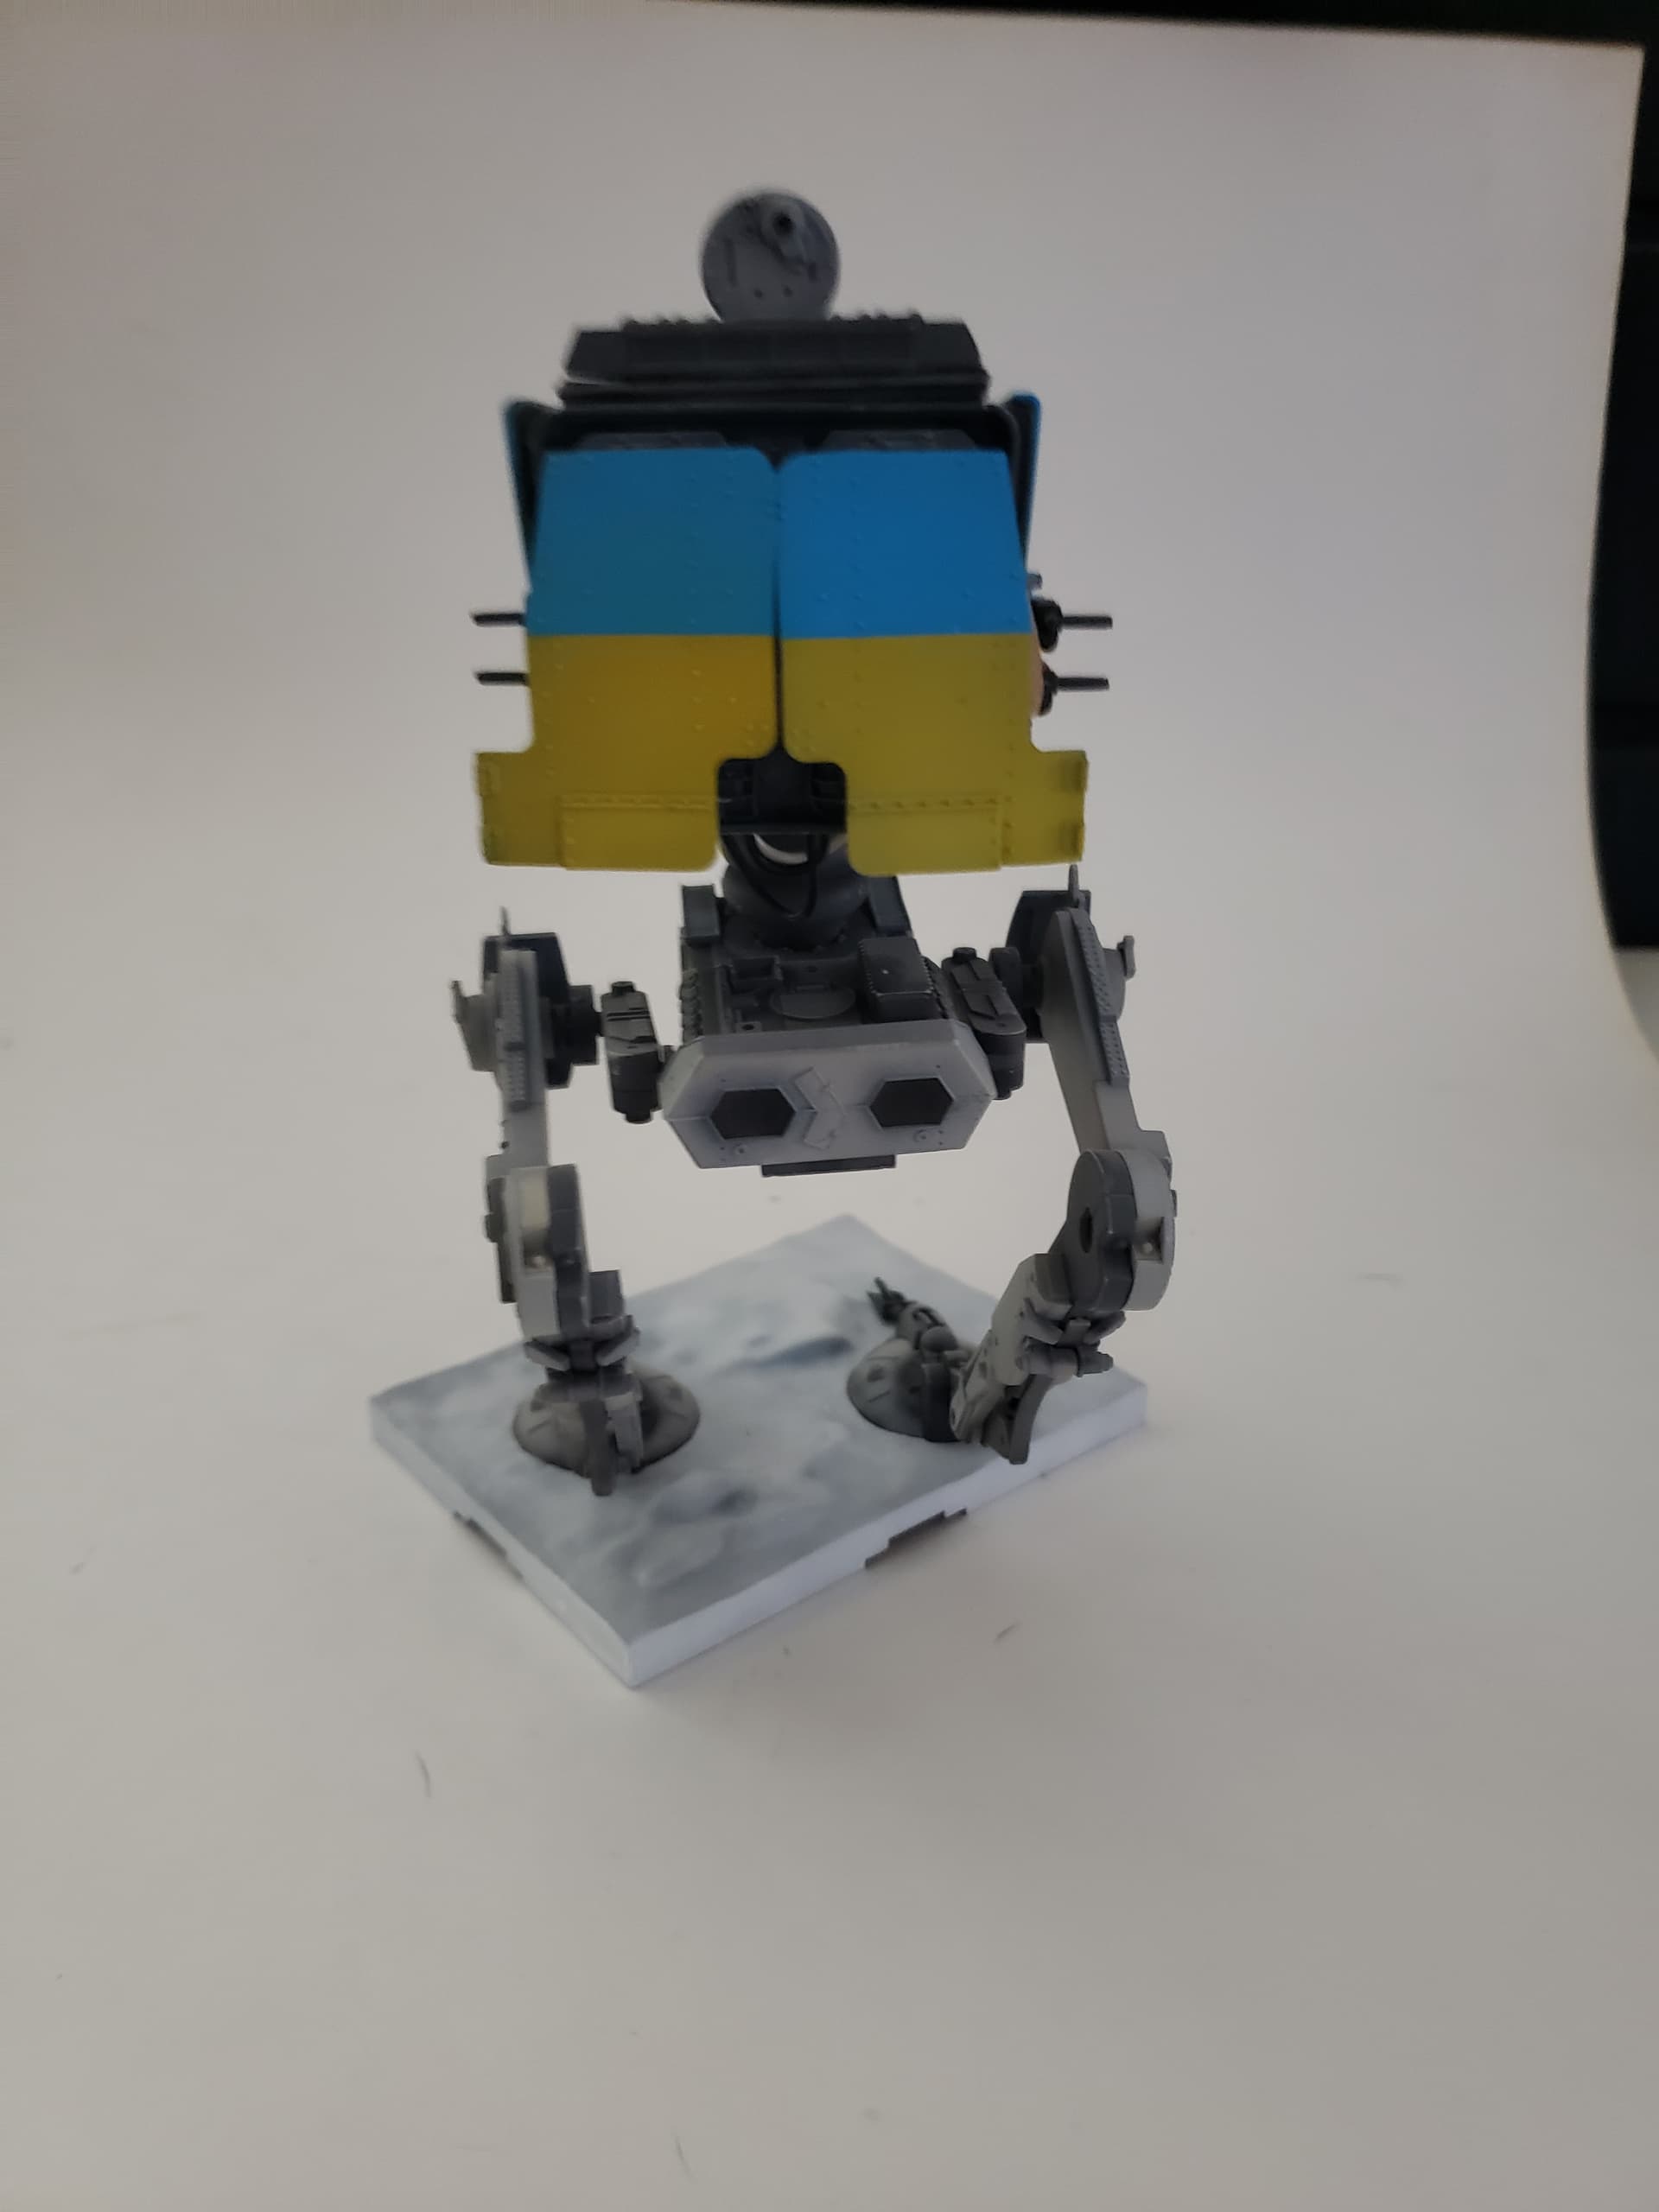
Okay, after being captured from the Galactic Donetsk Peoples Republic this AT ST has been put back into service.
It has upgraded V2 rear blast doors protection in case its used to thunder run past frontal defense and outrun its supply line. Designed to be able to work in lone missions without the past fear of rear exhaust weak points being a point of target and needing of the ground foot soldier support for its protection.
Slava Ukraine- up yours Republic

12 Likes
Nice! ![]()
![]()
![]()
![]()
![]()
Слава Україні ![]()
—mike
1 Like
What about some posts with chains? Something different. Maybe even hinged with a counter weight on the bottom one, so they lay flat when the ramp is up, but the counterweight pulls them forward when the ramp is deployed?
2 Likes
Fantastic work on your AT-ST. Cool colour scheme and the rear armoured panels make a lot of sense covering up all those vulnerable bits at the back. And definitely in keeping with the kitbashed look of the original miniatures. It looks so much like an original part, I had to look twice!
Got the warp grids and deflector painted up today. I gave each a coat of thinned Tamiya clear blue. After that, I painted the raised grille on the deflector with copper.
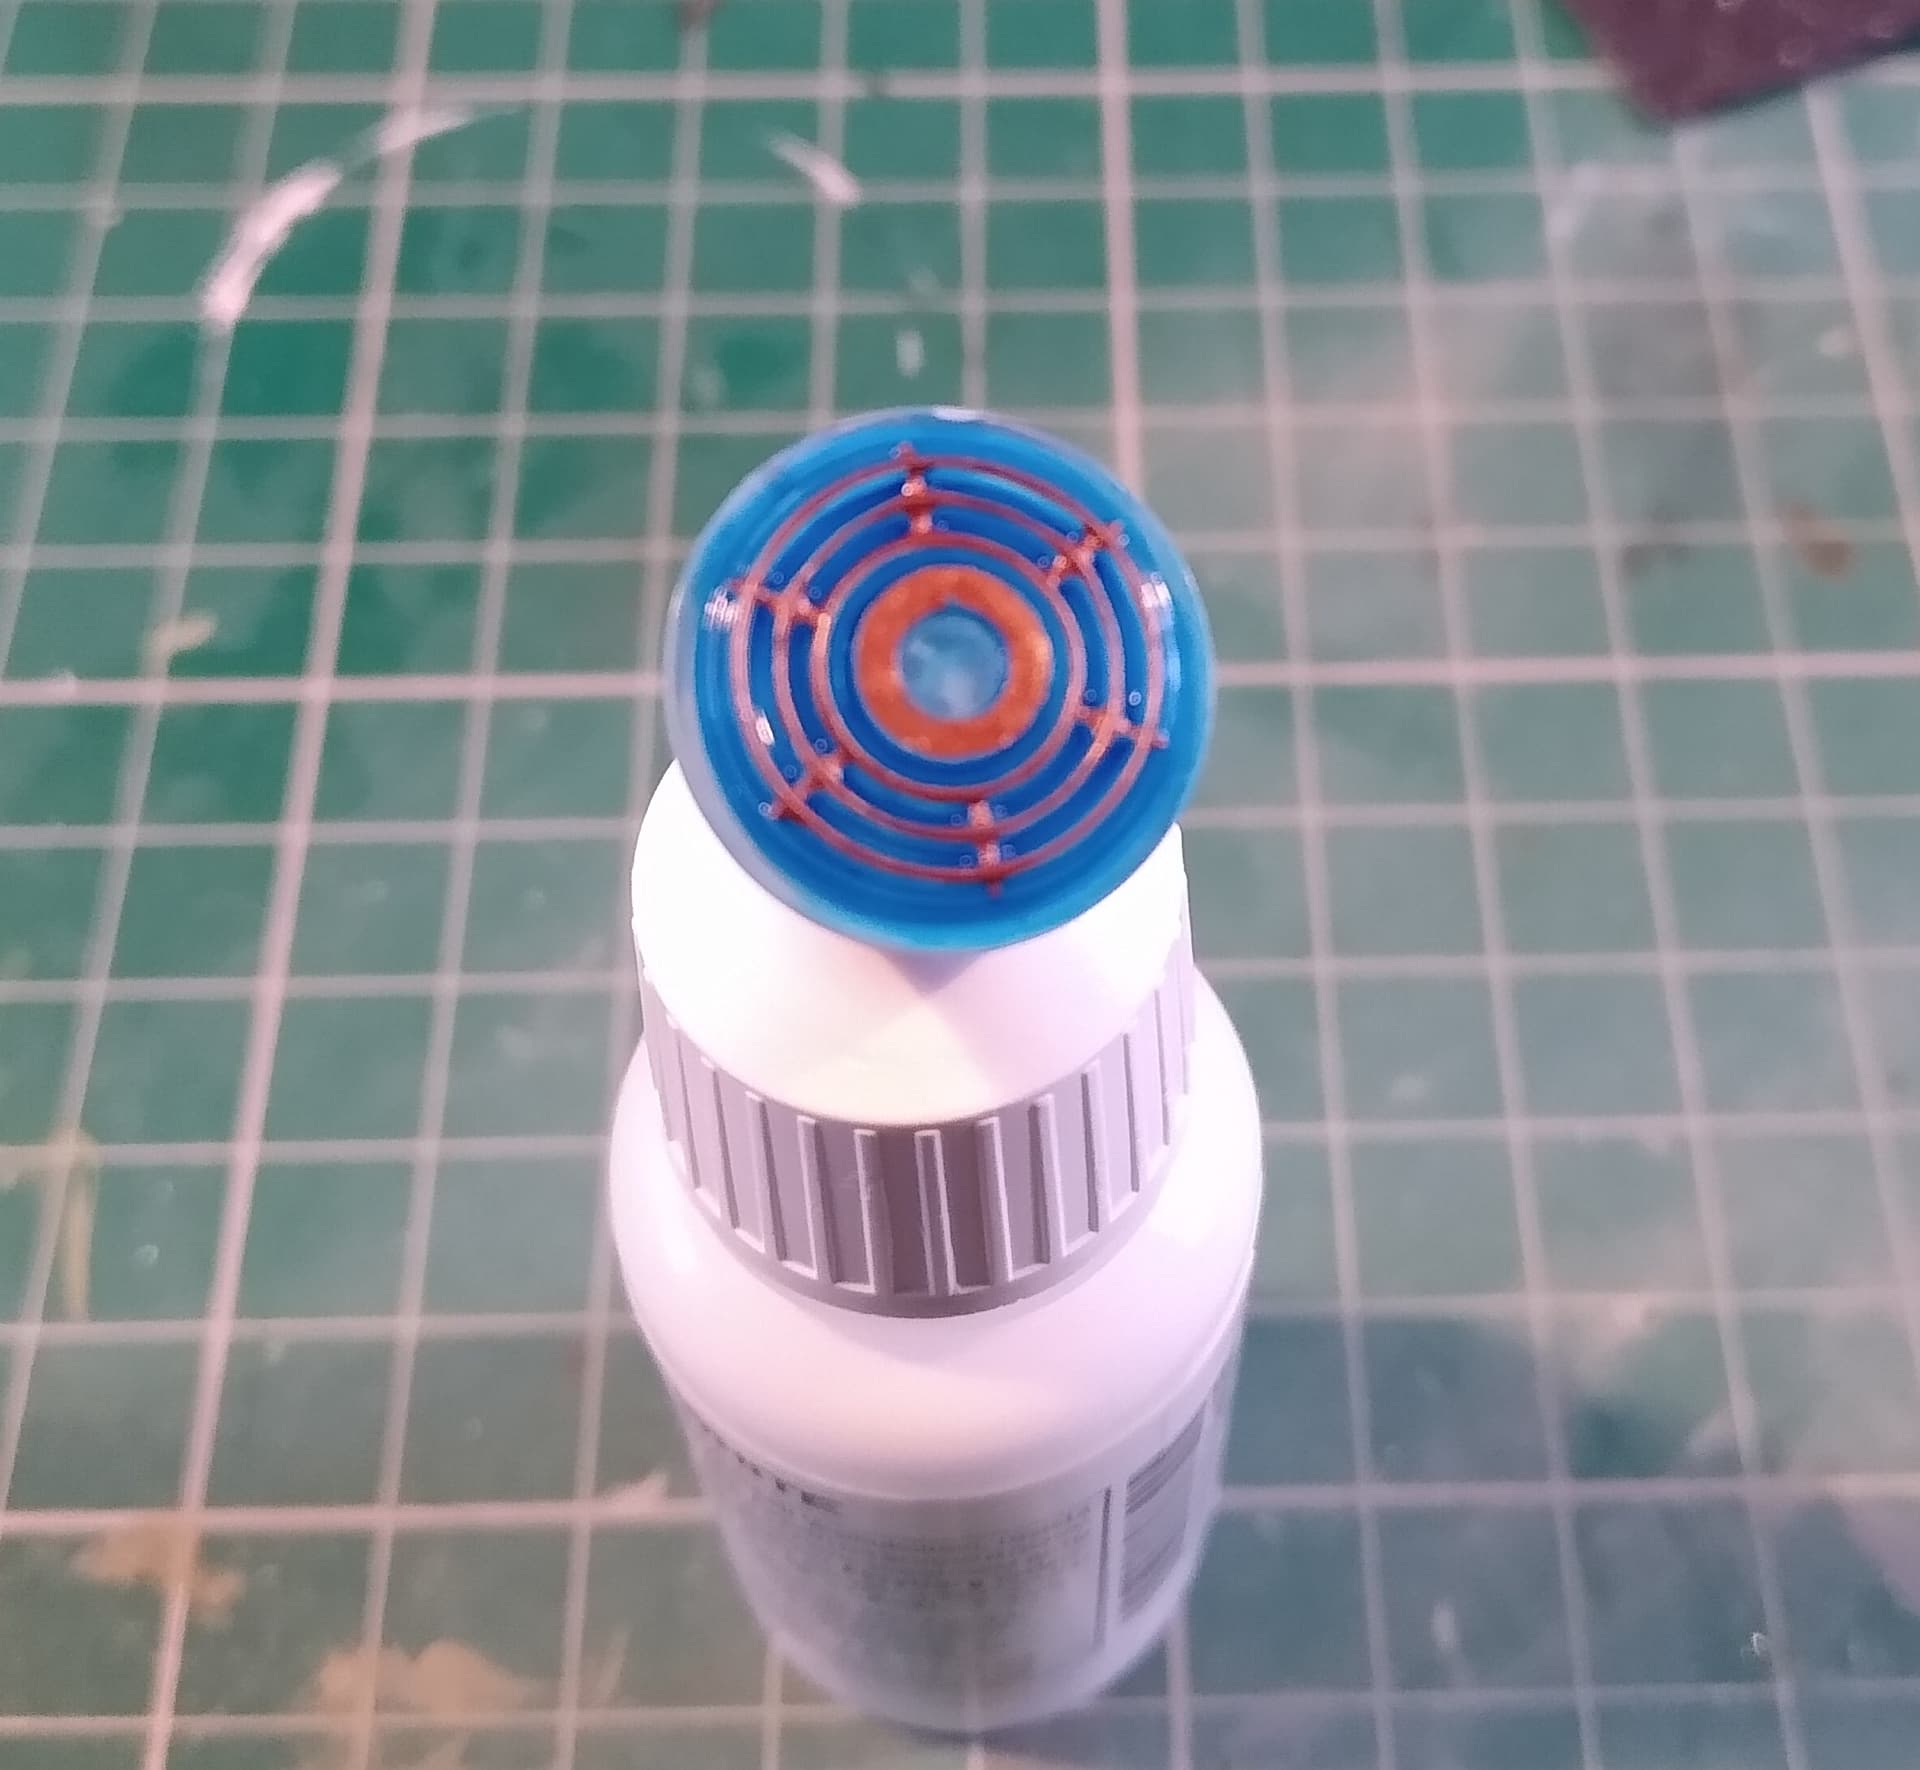
Tomorrow’s plan is to get the three main components of the ship together.
5 Likes
Thank’s for the feedback guys, much appreciated!
So here’s where I’m at:
![]() Leave the railings off: a strong maybe, easiest option. … Get a running start to board the saucer!
Leave the railings off: a strong maybe, easiest option. … Get a running start to board the saucer!
![]() Order 3D printed railings, paint them yellow and they will look cool: maybe… more money.
Order 3D printed railings, paint them yellow and they will look cool: maybe… more money.
![]() Scratch-build railings from thin Evergreen rod: guaranteed to come out looking wonky.
Scratch-build railings from thin Evergreen rod: guaranteed to come out looking wonky.
![]() Stairs: too much additional work. Note: Both ramp sections have lateral tread patterns on them.
Stairs: too much additional work. Note: Both ramp sections have lateral tread patterns on them.
![]() Folding posts and chains and counterweights: way too much work.
Folding posts and chains and counterweights: way too much work.
When I was a lot younger, I never touched handrails or went on elevators — thought they were for the weak. With old age weakness descended, and now I seek-out handrails daily. … I still avoid elevators whenever possible though.
I know it’s not the ‘Millennium Falcon,’ but I found this entire article devoted to her fictional boarding ramp.
Meanwhile, it’s back to adding Epoxy and screws to the Haunebu II’s load-bearing joints.
—mike …![]()
3 Likes
Red 2 loosely press fit in preparation for the overspray of thinned SMS White.
Final glue up will be after most of the weathering is complete. Hoping to have the overspray done this afternoon and a coat of gloss down tonight. Panel lines penciled in and Tamiya Black and Brown panel line wash are after that with a flat coat following. Final weathering will be with Tamiya weathering powders.
7 Likes
That’s a really nice, neat paint job. Almost a shame to add wear to tear!