Sci-Fi and Alternative history campaign X

Guided Missile Frigate: Day 5 (7)

Two days were lost to real life and running our of glue. It happens.

Day 5 saw the addition of catfish whiskers and the first elements of spine ribs. The original plan was to build closed box ribs along the spine. Those would use a lot of material so the new plan is to build open frame ribs. The material thus saved will go to the tokamaks.

10 Likes

Guided Missile Frigate: Day 6 (9)

I lost another day to burn out. It happens.

Day 6 was all about adding ribs and an exoskeleton to the missile box. Making large numbers of identical parts with a metal ruler and plastic sizing gauges is really challenging.

I need to find a cutting table with an integral fence and sliding ruler that locks down, allowing precise, repeat cuts to make strips and rectangles. Metal strips measuring exactly 1mm, 2mm, 3mm, and so on, across, would also be super useful for accurately setting cutting distances.

Precisely cutting multiple pieces at a specific angle is essentially impossible with my existing tools. Metal templates cut at specific angles, like architect triangles but much smaller, would also be super useful.

This morning, I drew up plans for a much improved version of this ship. While I cannot correct most problems with the current design, the tail end of the new design will mate to the front of the current ship. That work will start tomorrow.

10 Likes


12 Likes

Primed my figure…

9 Likes

Look nice Peter. Did you have a colour plan yet ?

4 Likes

Wow! Nice lights!
“My face is up here.”
Uh-oh… Nice figure stance Peter.

—mike :grin:

2 Likes

I might make the armored body suit pale pink for something different than the usual drab military colors.

I did paint a 3-D printed Sci-Fi figure darker pink for the previous Sci-Fi campaigh so I’m hoping for a brighter lighter pink.

5 Likes

I’ve spent quality, if not tedious, hours working on the landing gear and bays for the anti-gravity overlander. While not exactly speedy work, it was certainly challenging - and we have made some progress, starting in the rear:

Oh what a treat :smile: As a guy decided it would be a good idea to use giant rear tires, well, they need a place to go when folded up - and as the base kit for this is an F1 car, well, there isn’t much room there. So step one was to add to the lower hull in a convincing way. And then make up some landing bay doors that at least pretend to fit the gear and tires. And, as all/most of this can be seen easily, well, an ample amount of detail added - some hinges, ribs, and etch stiffeners - the etch courtesy of remnants from an Aber PE set for a T-55 Enigma - perfect!

I mentioned that most of what went in can be seen, well, what can’t be seen are the two extra hydraulic rams added to each gear set…perfect :smile:

The doors added to the front are not as obvious or robust as the rear, and were a bit stressful to install, but they look pretty clean -

So, progress is being made. I’m currently struggling with the interior - slowly but surely! :smile:

Cheers
Nick

13 Likes

Really cool idea … and looks great as well.

1 Like

Guided Missile Frigate: Day 8 (11)

Days 7 and 8 were spent detailing the spine area, adding doors to the missile magazine, and replacing the rock tumbler with a new crew section.

Little measurement errors continue to complicate construction. Two tenths of a millimeter is enough to cause serious problems. I am learning to build things with enough slop that sanding back will result in a good fit.

The new crew section is a good design accept for overly tight spacing. This only became apparent after the first test fit. Tomorrow, I will pull apart the crew section, lengthen the core, and put it back together with wide spacers.

12 Likes

Its a great idea and really building up nicely.

3 Likes

Hi Nick

Yes, it is perfect! :+1:t2:

2 Likes

Thanks for letting me know!

I have kept after this, working on the interior and adding the anti-gravity thrusters (?) to the front.

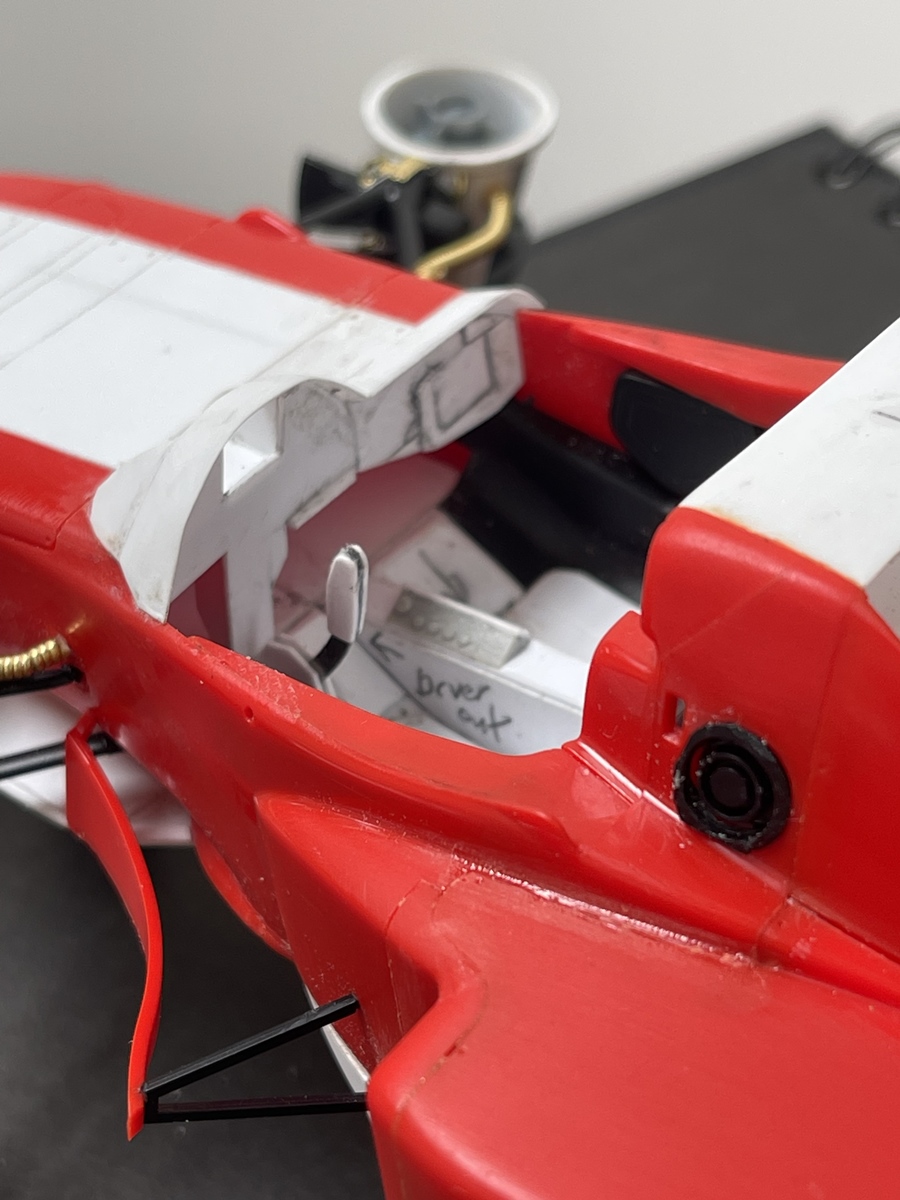
Starting with the interior:

Because I made this into a two seater, I was able to make up a pilot and copilot instrument panel, and a stick for the pilot. Even though I made this a lot wider than the donor kit was, it is still pretty tight in there, so, there was plenty of cutting, filing and testing to make all of this fit! There are very few straight lines.

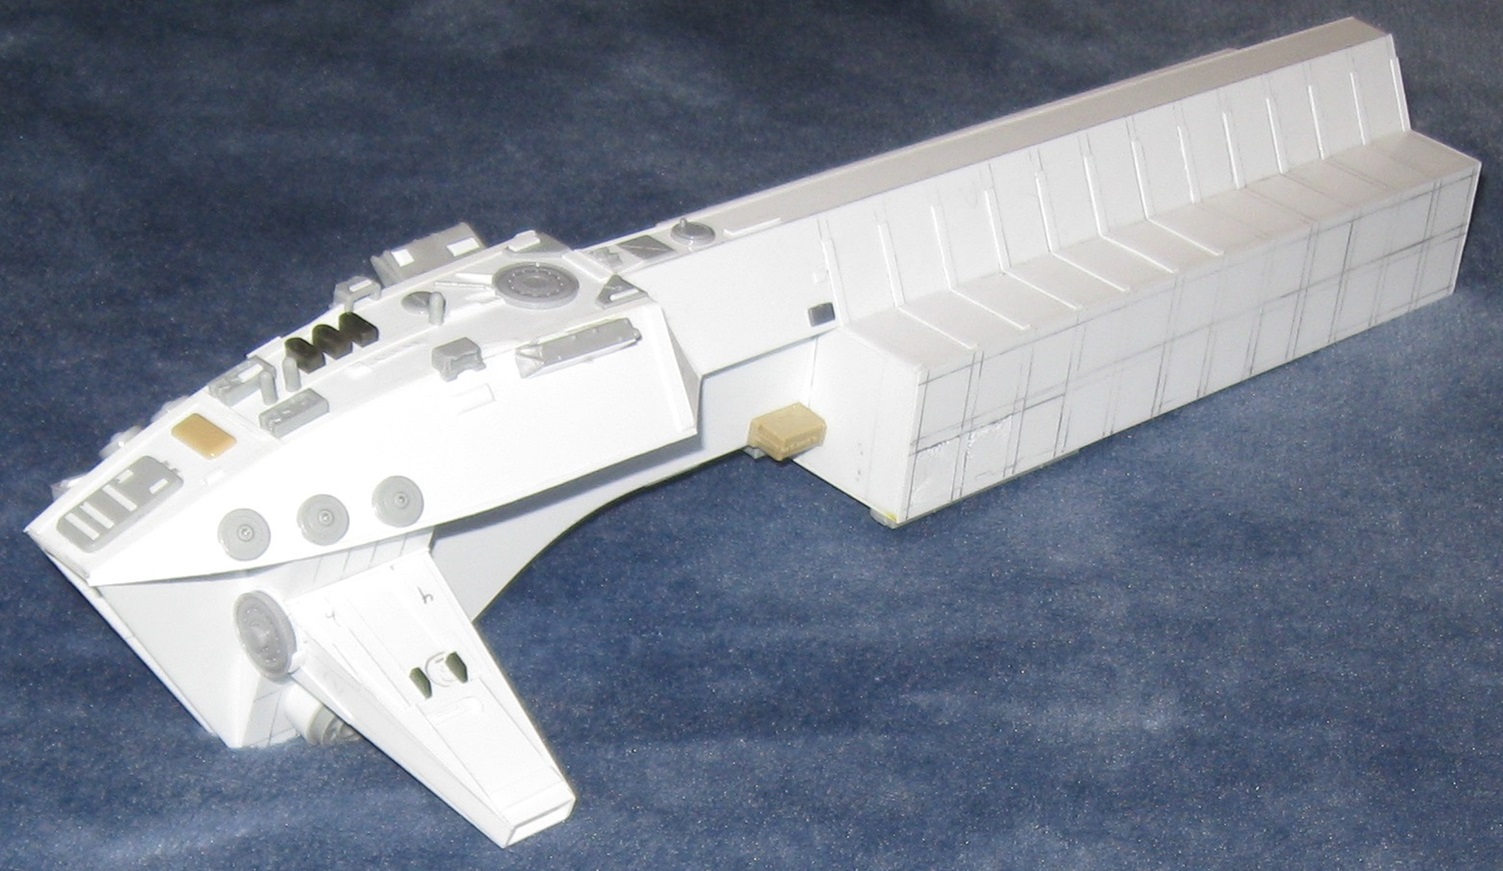
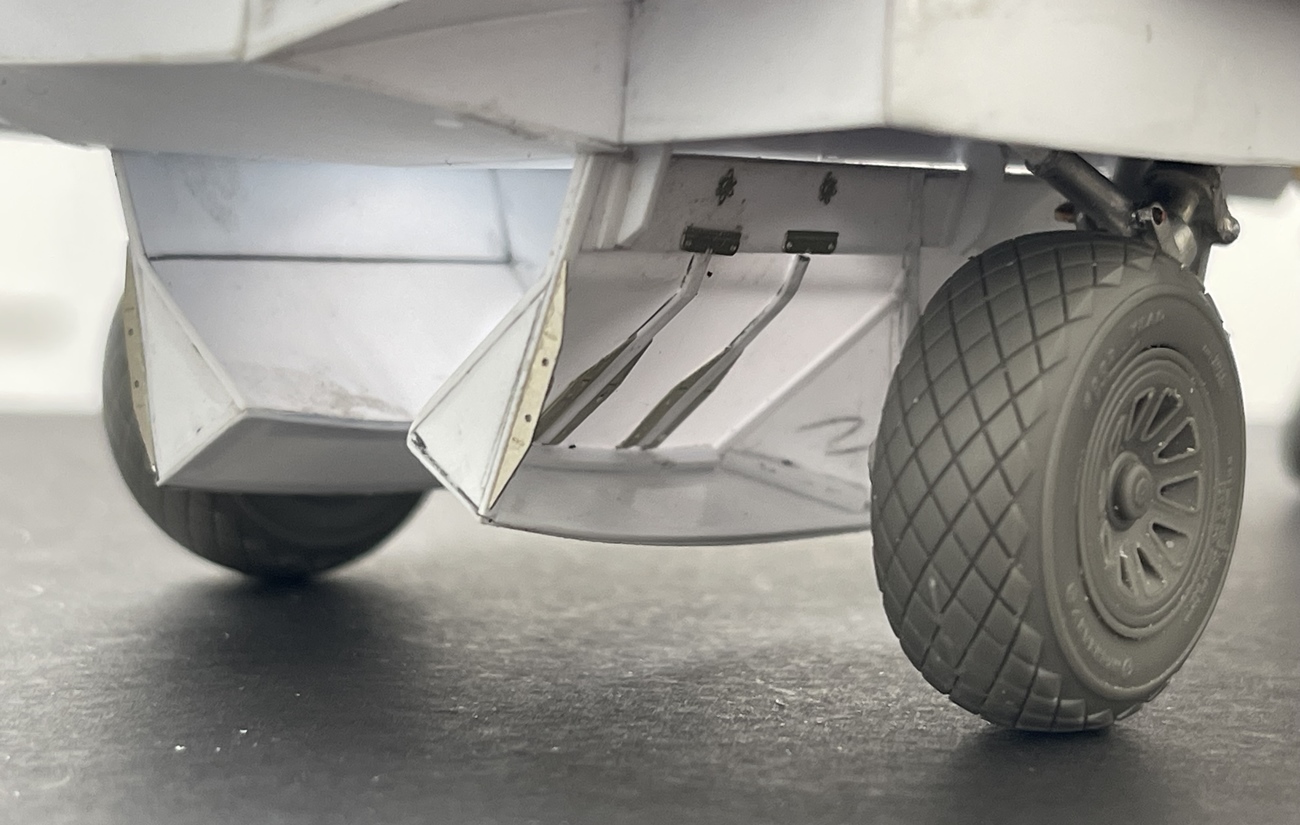
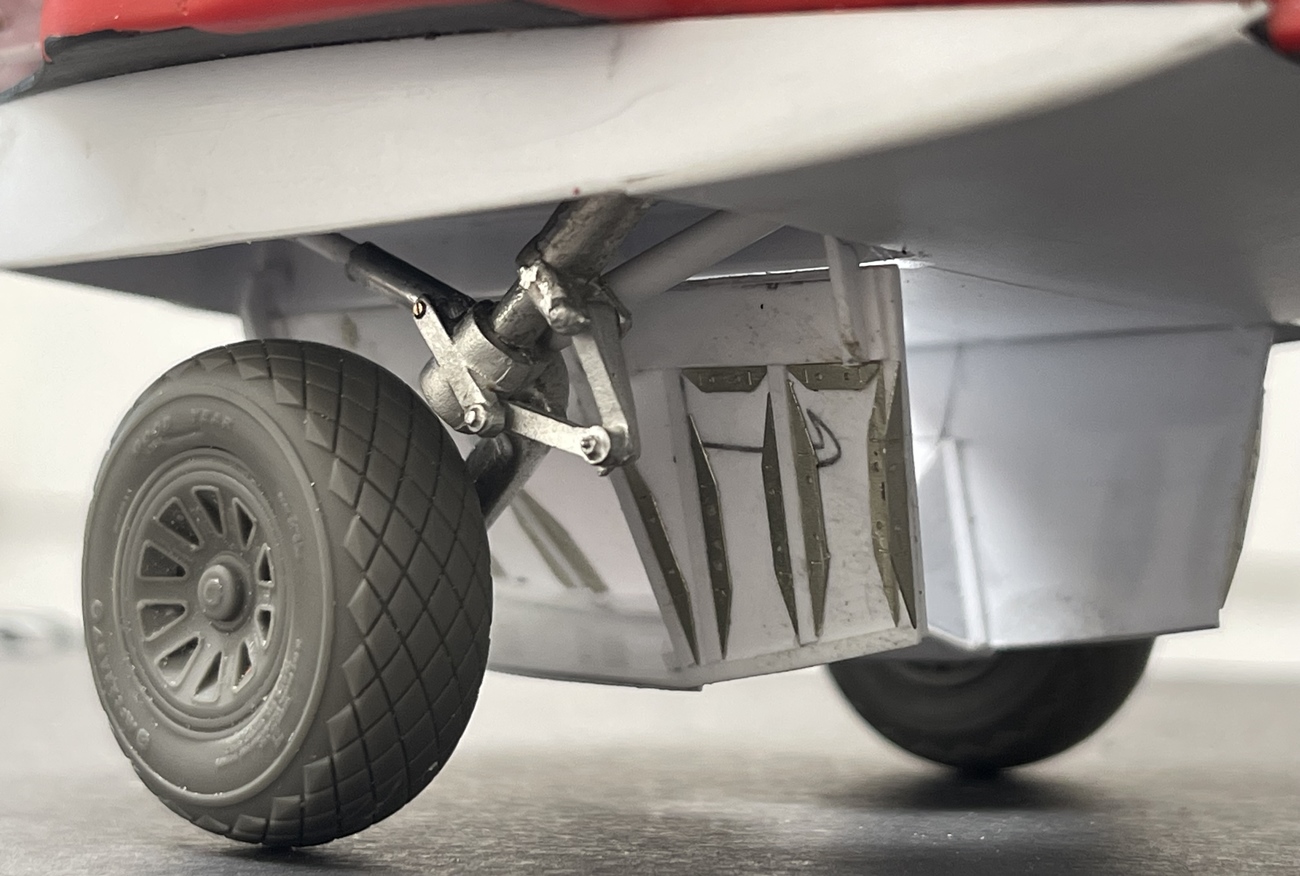
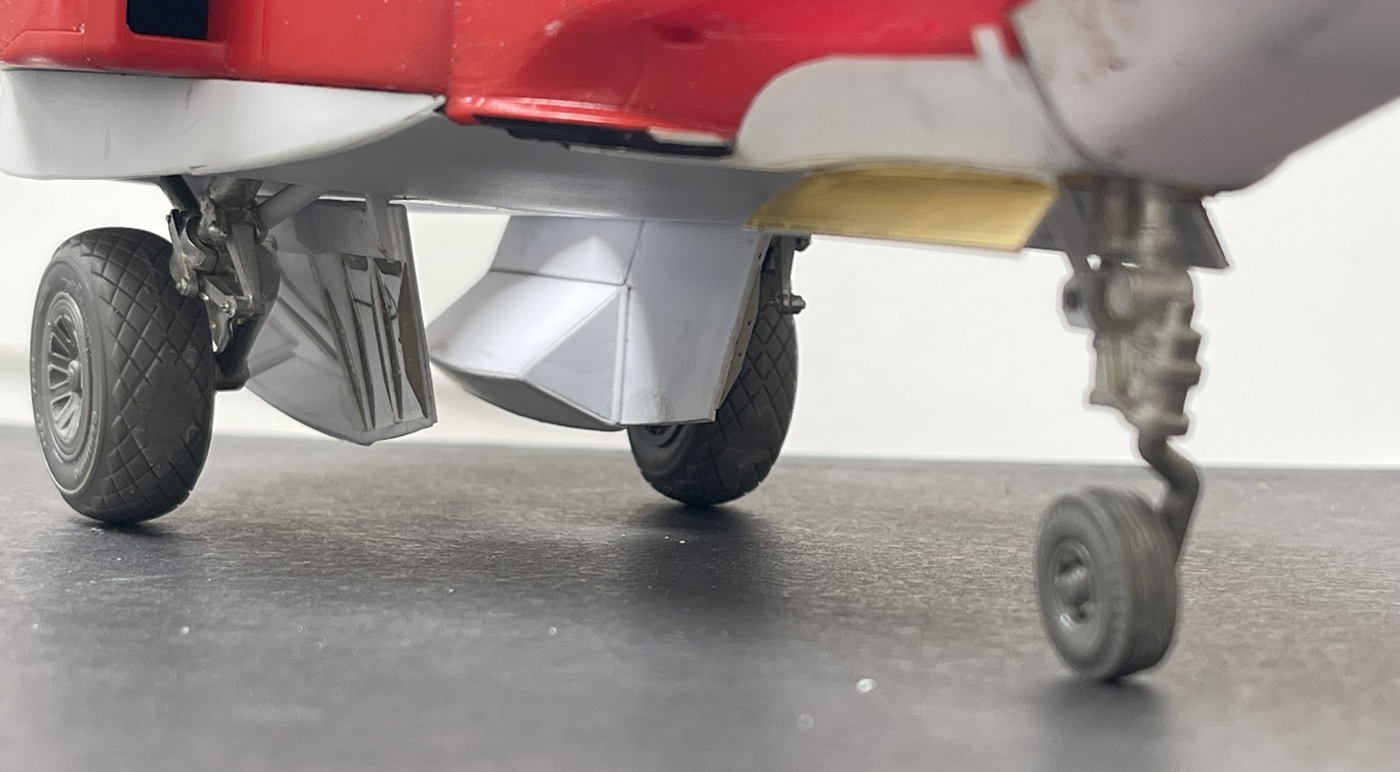
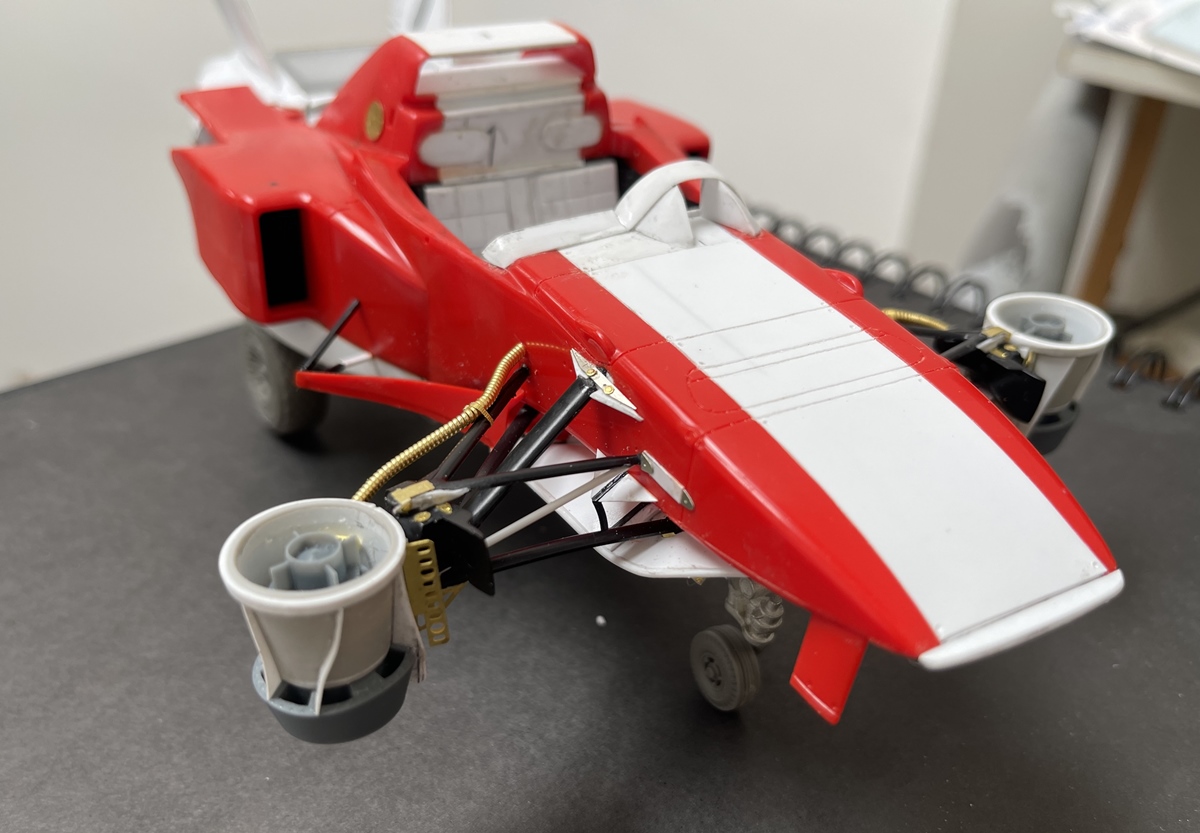
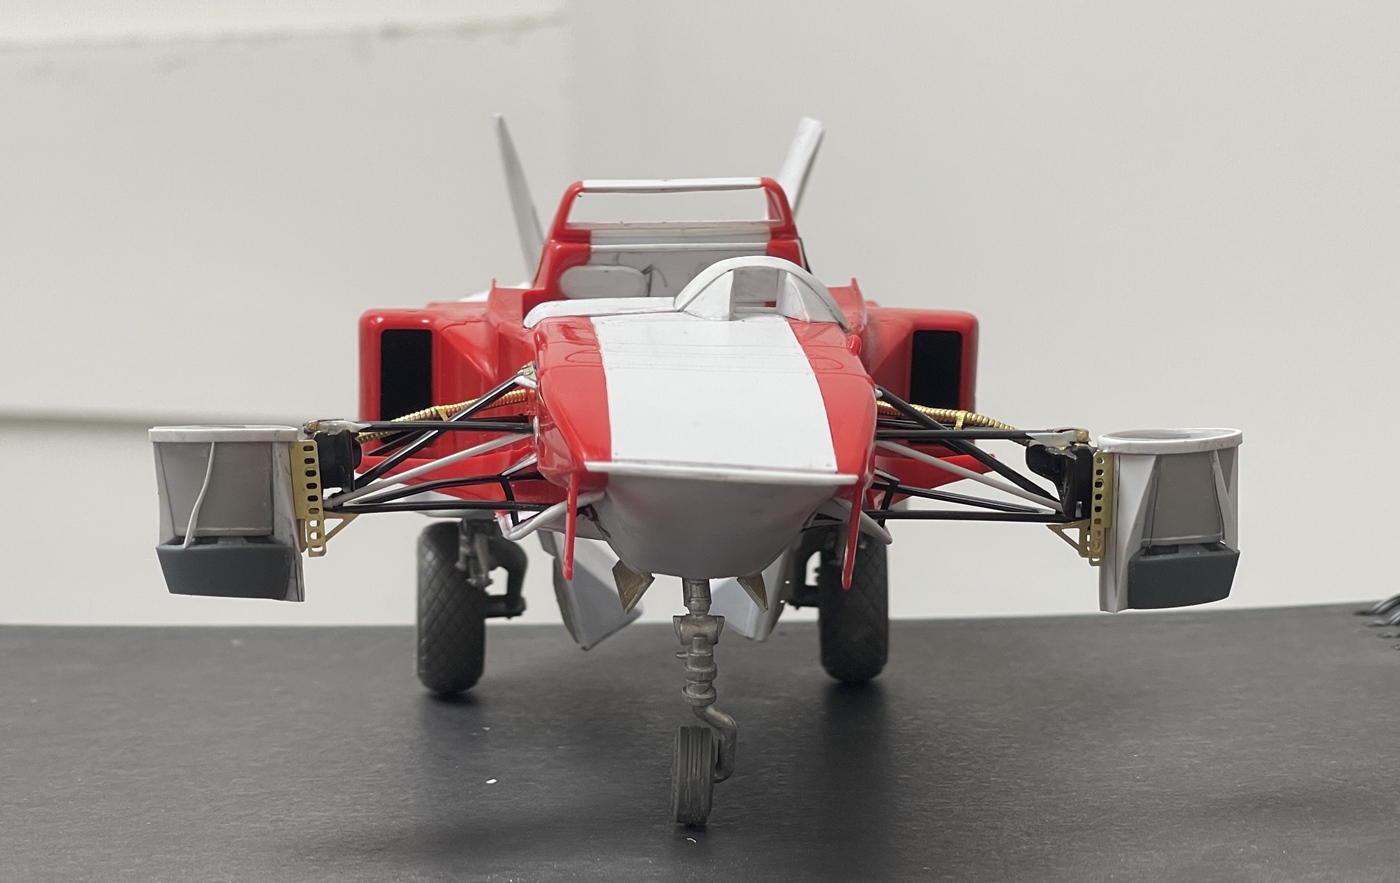
And, a bit trickier, the front thrusters:

Right, well, these took some head scratching, and I’m not sure I am done with them. As forward movement for this would be powered by two engines in the rear, I located them outward of the fuselage, keeping an open sight line of the intakes - in order to allow uninterrupted air flow. As of posting, this is how it looks - but, I’m not convinced this is how it will stay - :thinking:

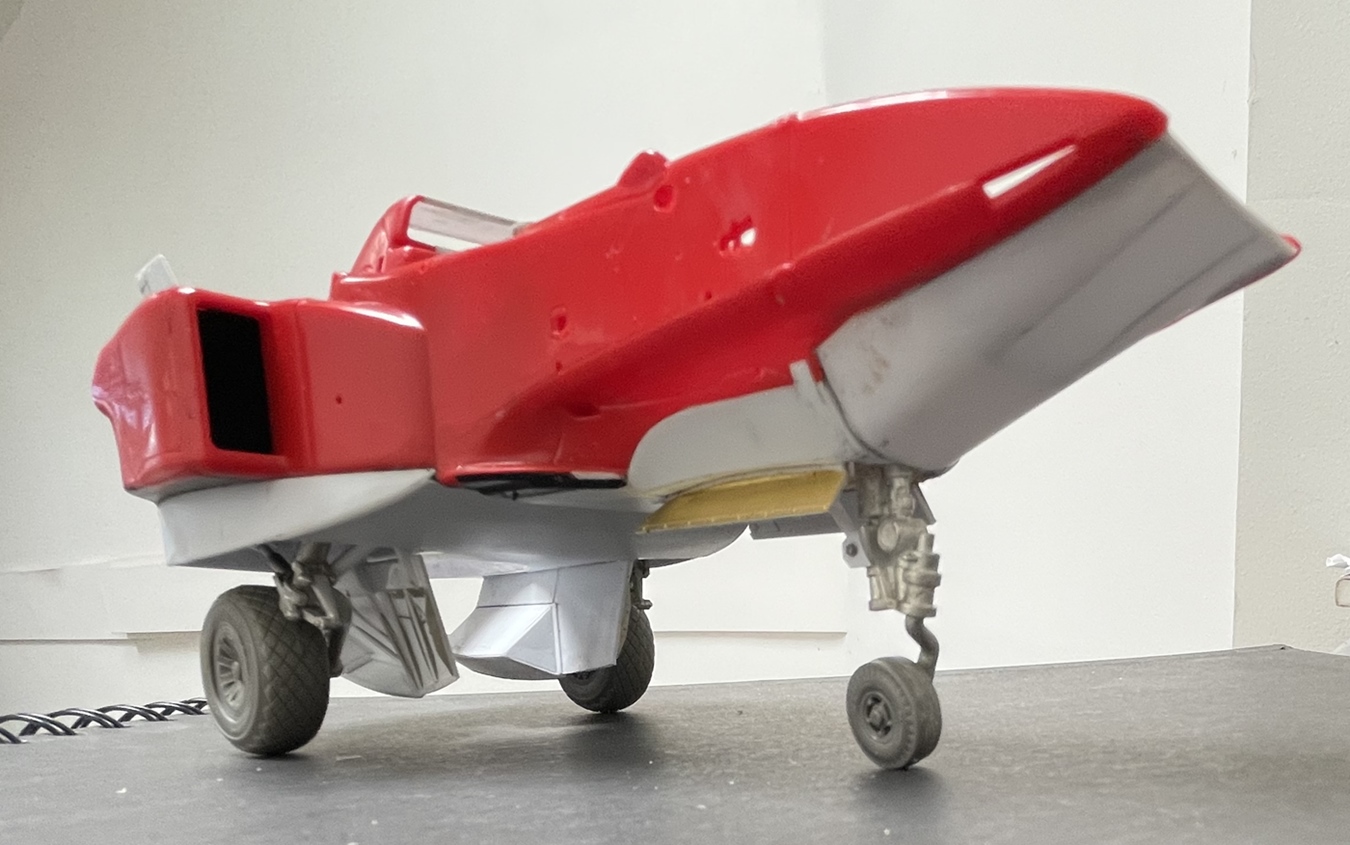
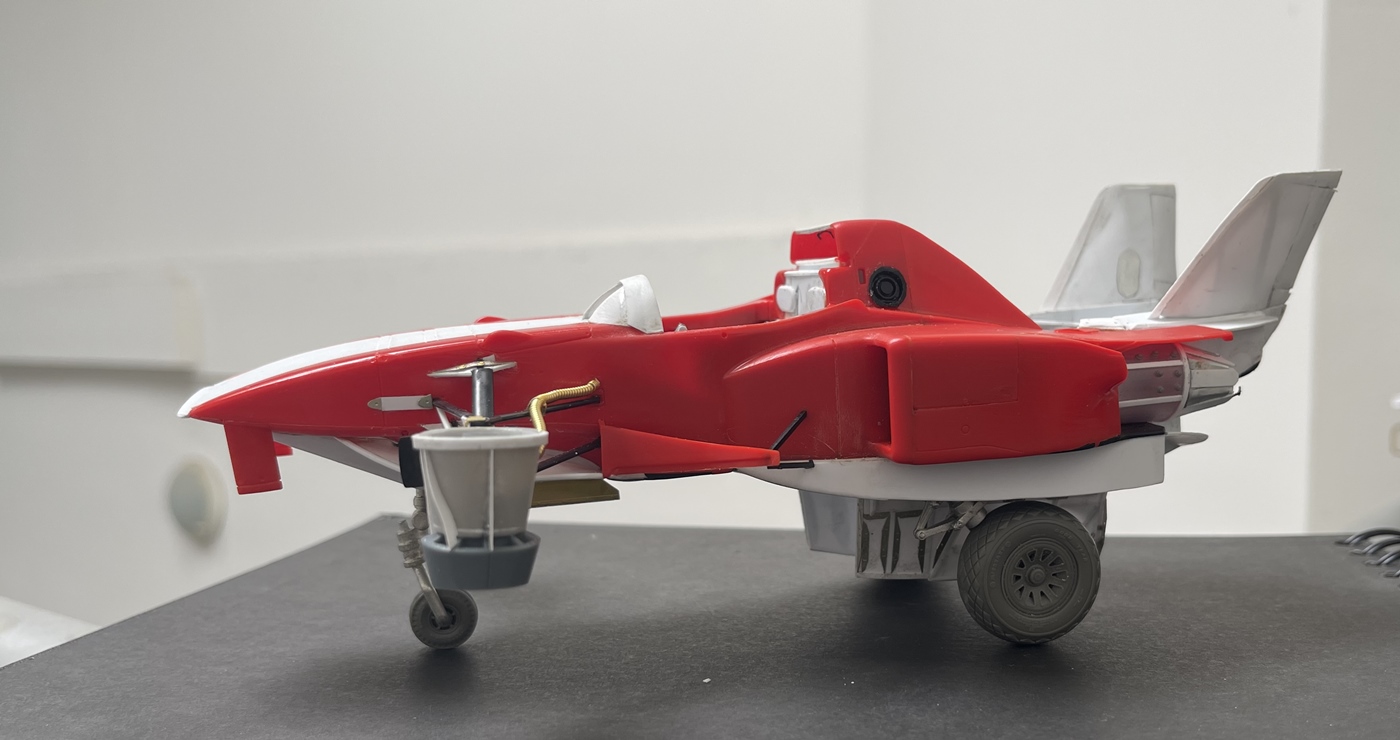
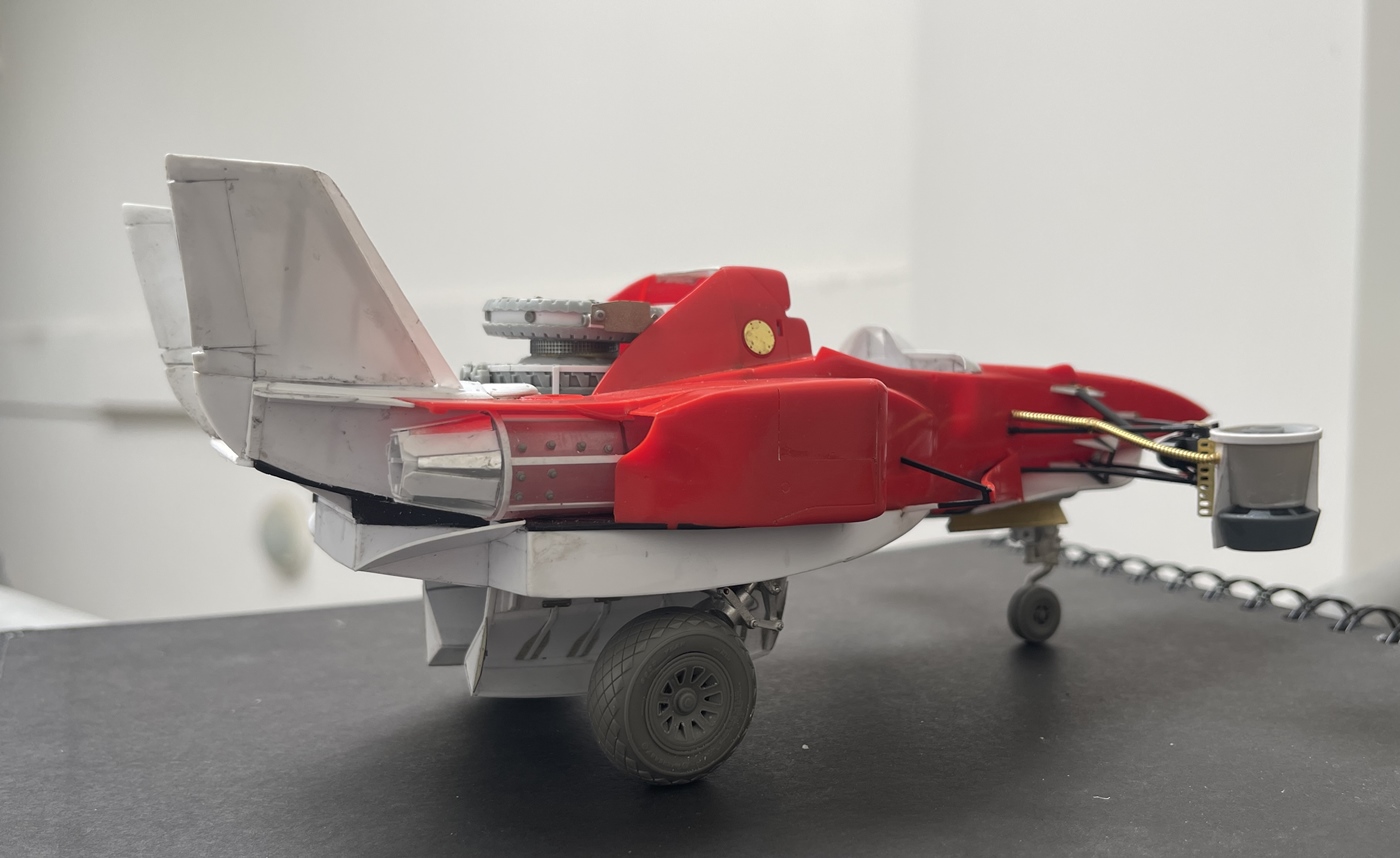
Making the tails…what a treat. I went ahead and made a frame with ribs for each, then added .010" sheet styrene for skin. They are tilted outward 20 degrees - the good news is that despite a very fiddly process, they look about right. I scribed lines on each to at least look like rudders. I’m glad they are done.

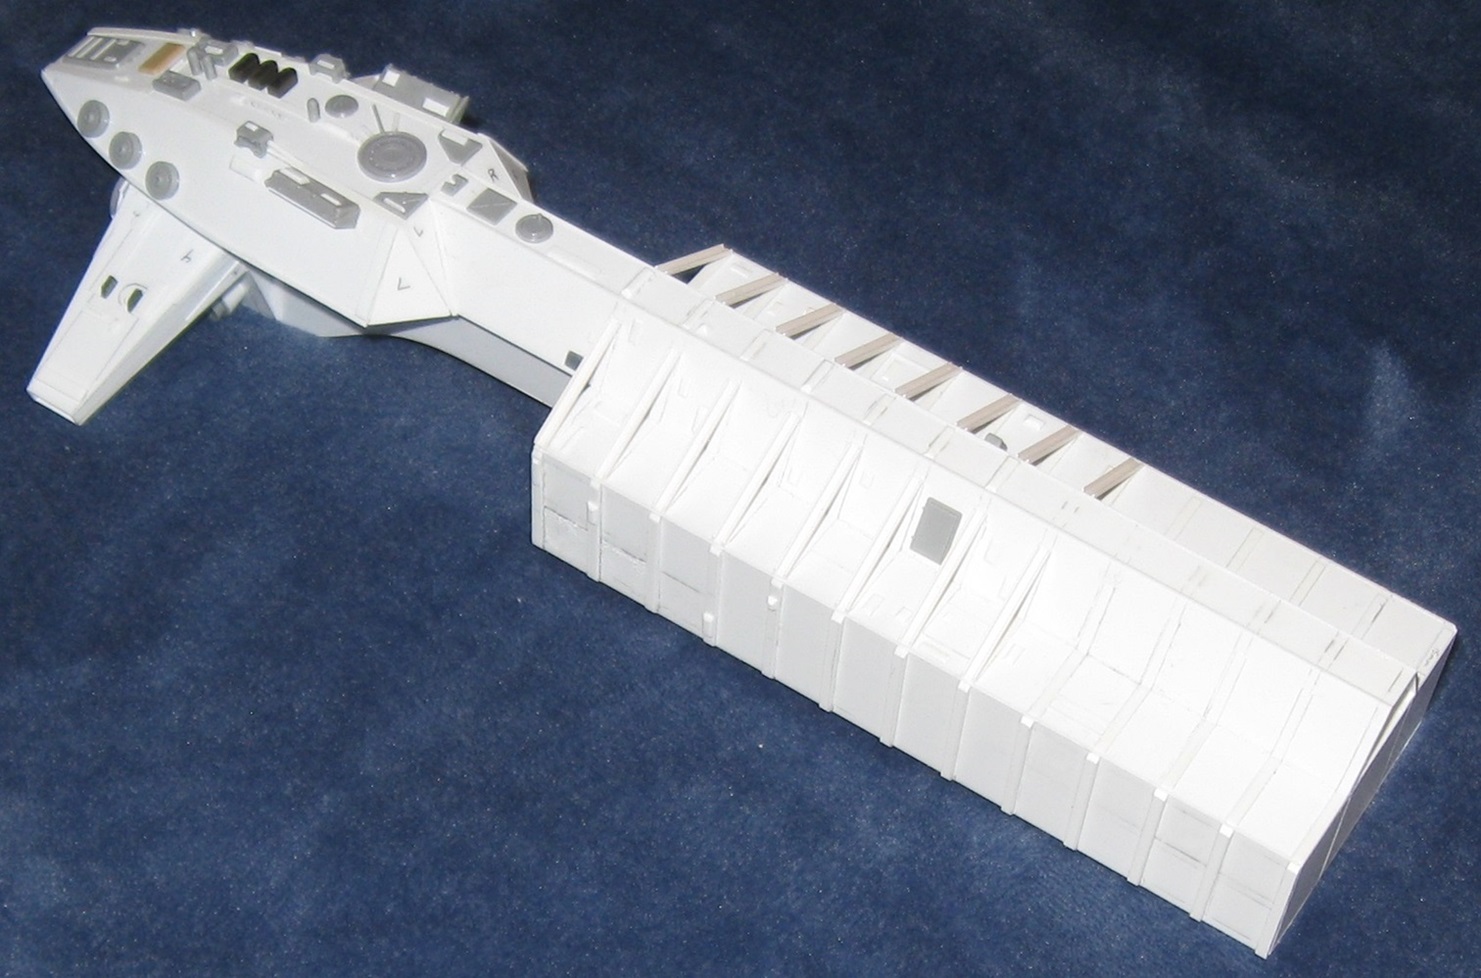
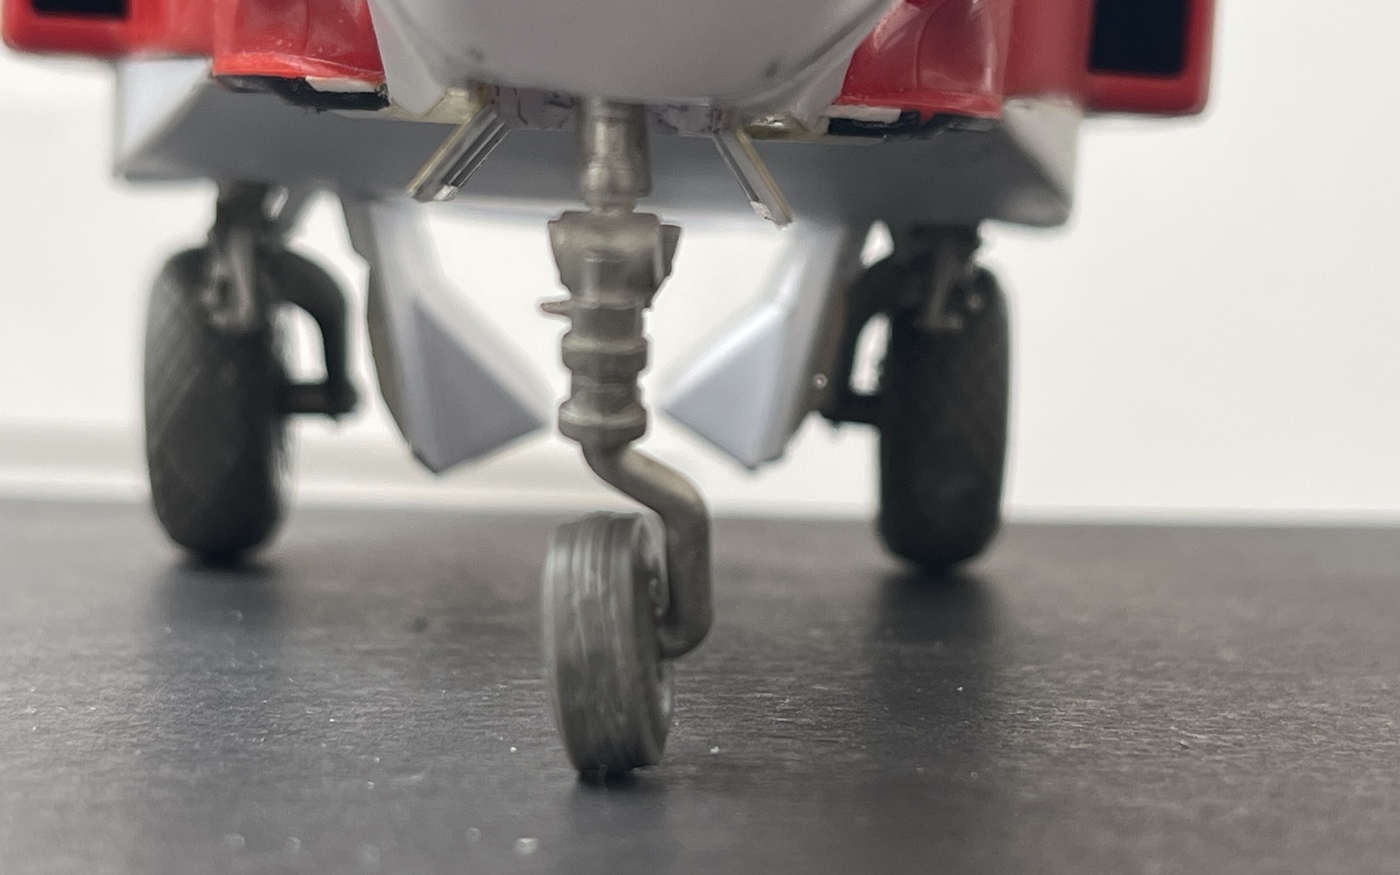
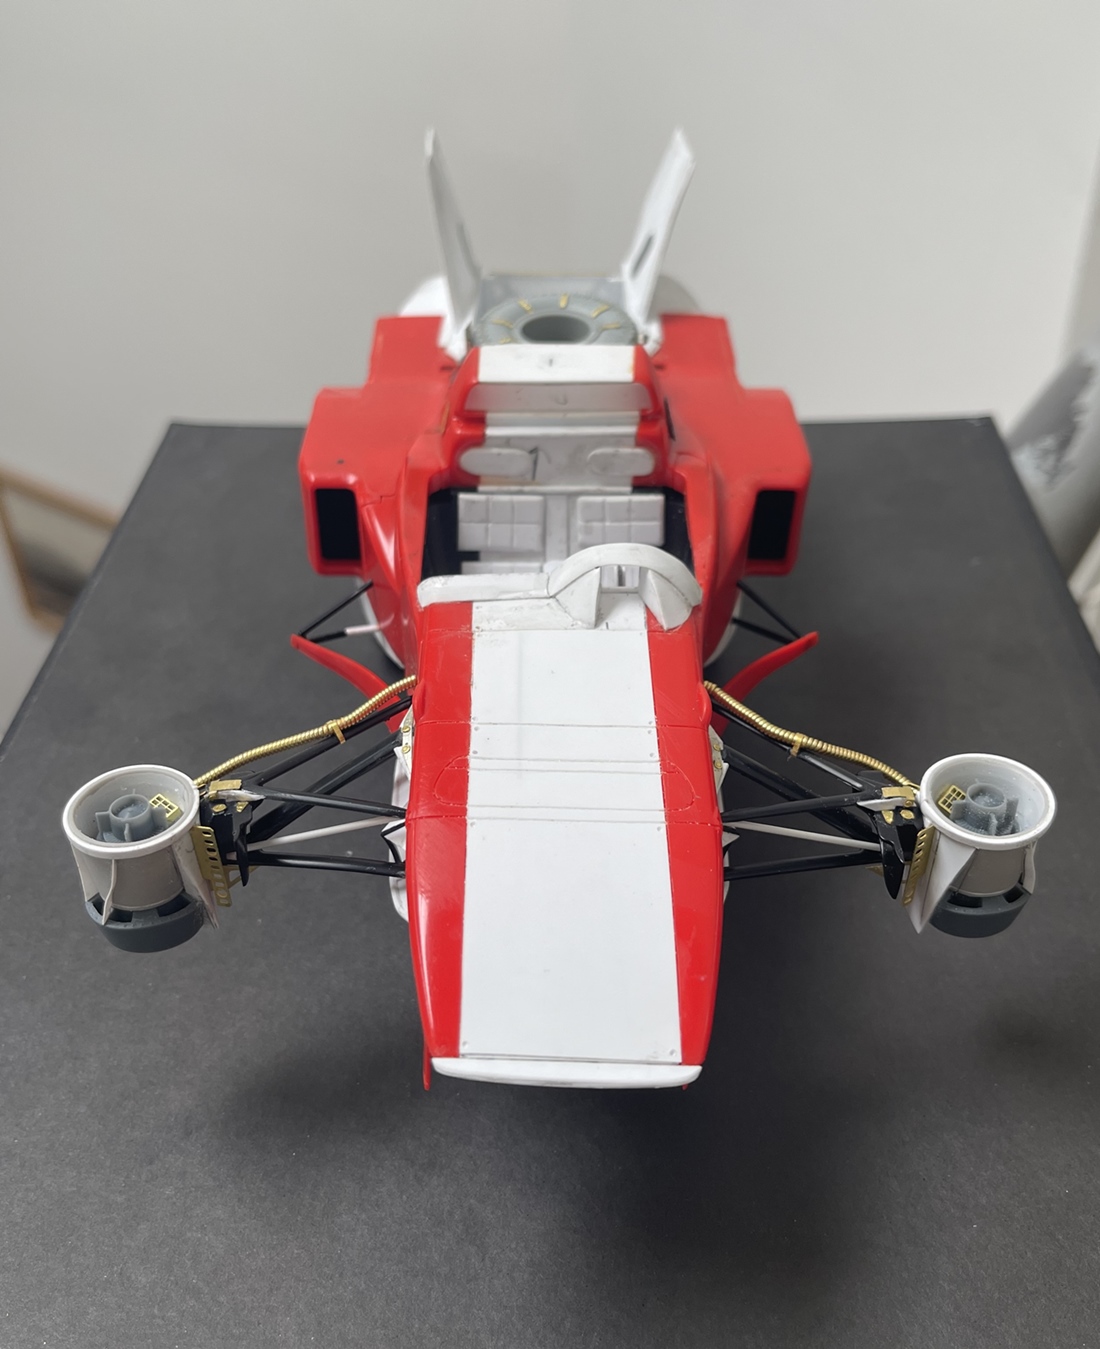
In the last picture, you can see the layout of the anti-g thrusters - two smaller units in front, and one larger behind the cockpit.

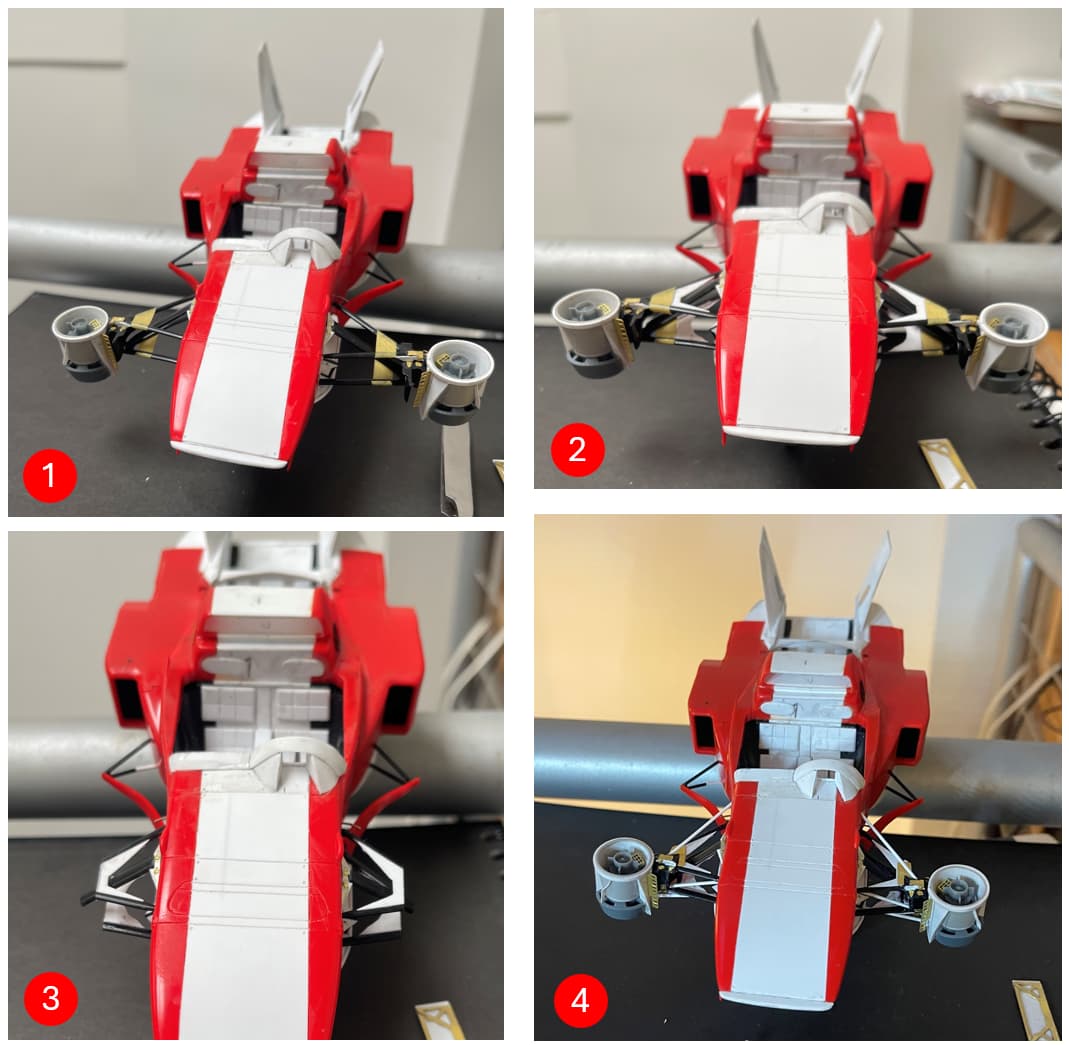
At this point, I’ll say the basic framework is in place, but won’t call it done. It’s funny, when taking, sizing and posting photos, I usually find myself either being convinced we’re good to go, or, it still needs work - and for now, I’m leaning toward the latter.

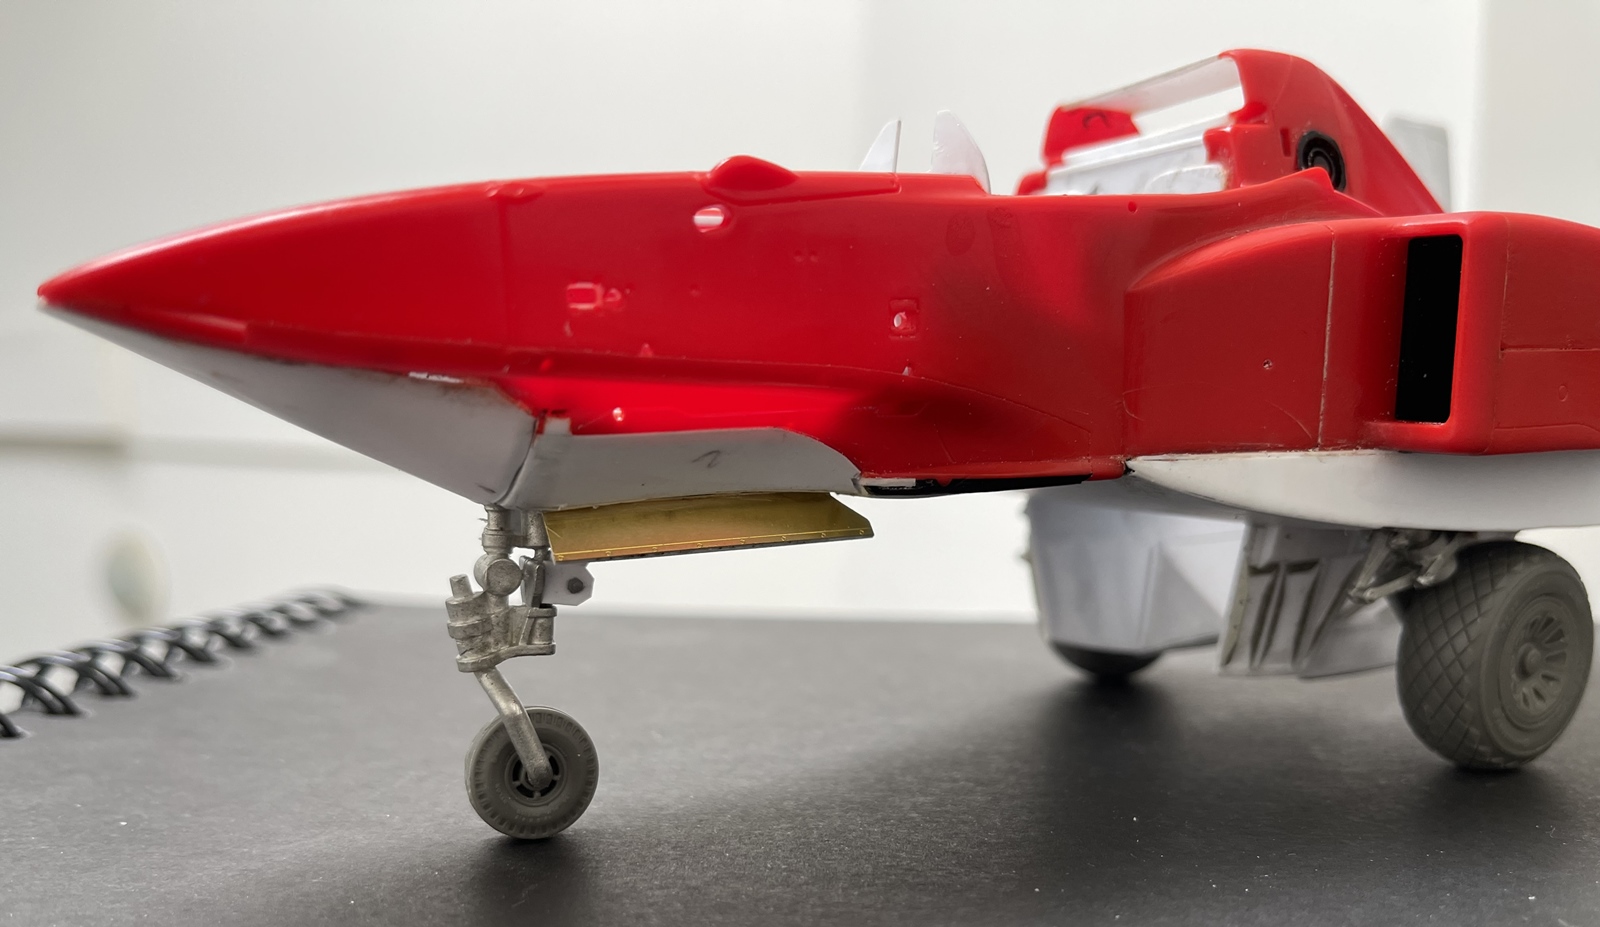
I’ve thought about narrowing the front thrusters, that is relocating them closer to the fuselage, but I’m, really not sure on this. I’ve added a few struts and panels, which is ok - I might add another few? or not :smile:

Next, the rear - it just needs some help - likely needing more body work, but only a panel or two, and not a rebuild.

Having said all of that, I can also report that with all that is going on, it is getting more difficult to hold this and not break parts off :man_facepalming:, and naturally I’ve dropped it at least twice…perfect -

OK gents, happy weekend -

Cheers
NIck

17 Likes

Nice! :+1::rocket:

—mike …:flying_saucer:

1 Like

Very neat … love how you plan, test and make then adjust … said it before, its a very clever concept … I was thinking … would it require stubby side wings under the intakes at the rear for a bit more aerodynamics ? (BTW, I have no idea either way :grin:)

3 Likes

I was thinking the same thing… only for artistic license purposes. :hammer_and_wrench: :identification_card:

—mike …:flying_saucer:

2 Likes

Looking great, Nick! Have you thought of a weapons load? Maybe on the wings suggested by Johnny?

1 Like

Hello gents,

thanks very much - this is coming along, but, also requires some changes!

@Johnnych01 thanks! you know, somewhere along the threshold of “why not?” set in, as in, well, I’m making up, or trying to copy what I see in photos, and it eventually occurred to me that if I could get this far, why not go back a few steps and try and get whatever it is closer to what it is supposed to be? That said, the first cut can be tough! :smile:

@Johnnych01 and @justsendit, well, now you’ve got me thinking about that!

@SGTJKJ, funny you’d ask about that, I had pondered sticking some auto cannon barrels out of the nose! don’t know why I didn’t do it?? maybe I’ll try and add them - :thinking:

But, shortly after posting, a guy went ahead and cut off the front anti-g thrusters - the proportions just didn’t look right to me; they seemed flimsy - so:

So, if you follow the numbers - 1) as posted; 2) added some gussets at cutoff marks; 3) cut off the parts; and 4, reinstalled! but about 1/2" narrower in total, which I think looks better!

Cheers,
Nick

12 Likes

Nice improvement, Nick! Looks better now :+1:t2::slightly_smiling_face:

2 Likes


chief and clone trooper

8 Likes