Great work with the tracks, looks really authentic… ![]()
1 Like
That looks fantastic👌
I must admit to having the same trouble with the suspension arms on mine,with the AA interior and metal tracks I actually had to pin them because of the weight.
2 Likes
Cheers Johnny, I seriously hope I never have to do Friuls again. They were nearly the end of me. I’ve glued both the idlers and sprockets Jacko, hopefully they will be enough to handle the weight of the top run of track..
3 Likes
The suspension arms on my Warrior kit cracked and broke off from the Turpenoid \ Oil paint wash I did on it! I had to CA glue every one of them. Weird plastic. They are fragile things!
3 Likes
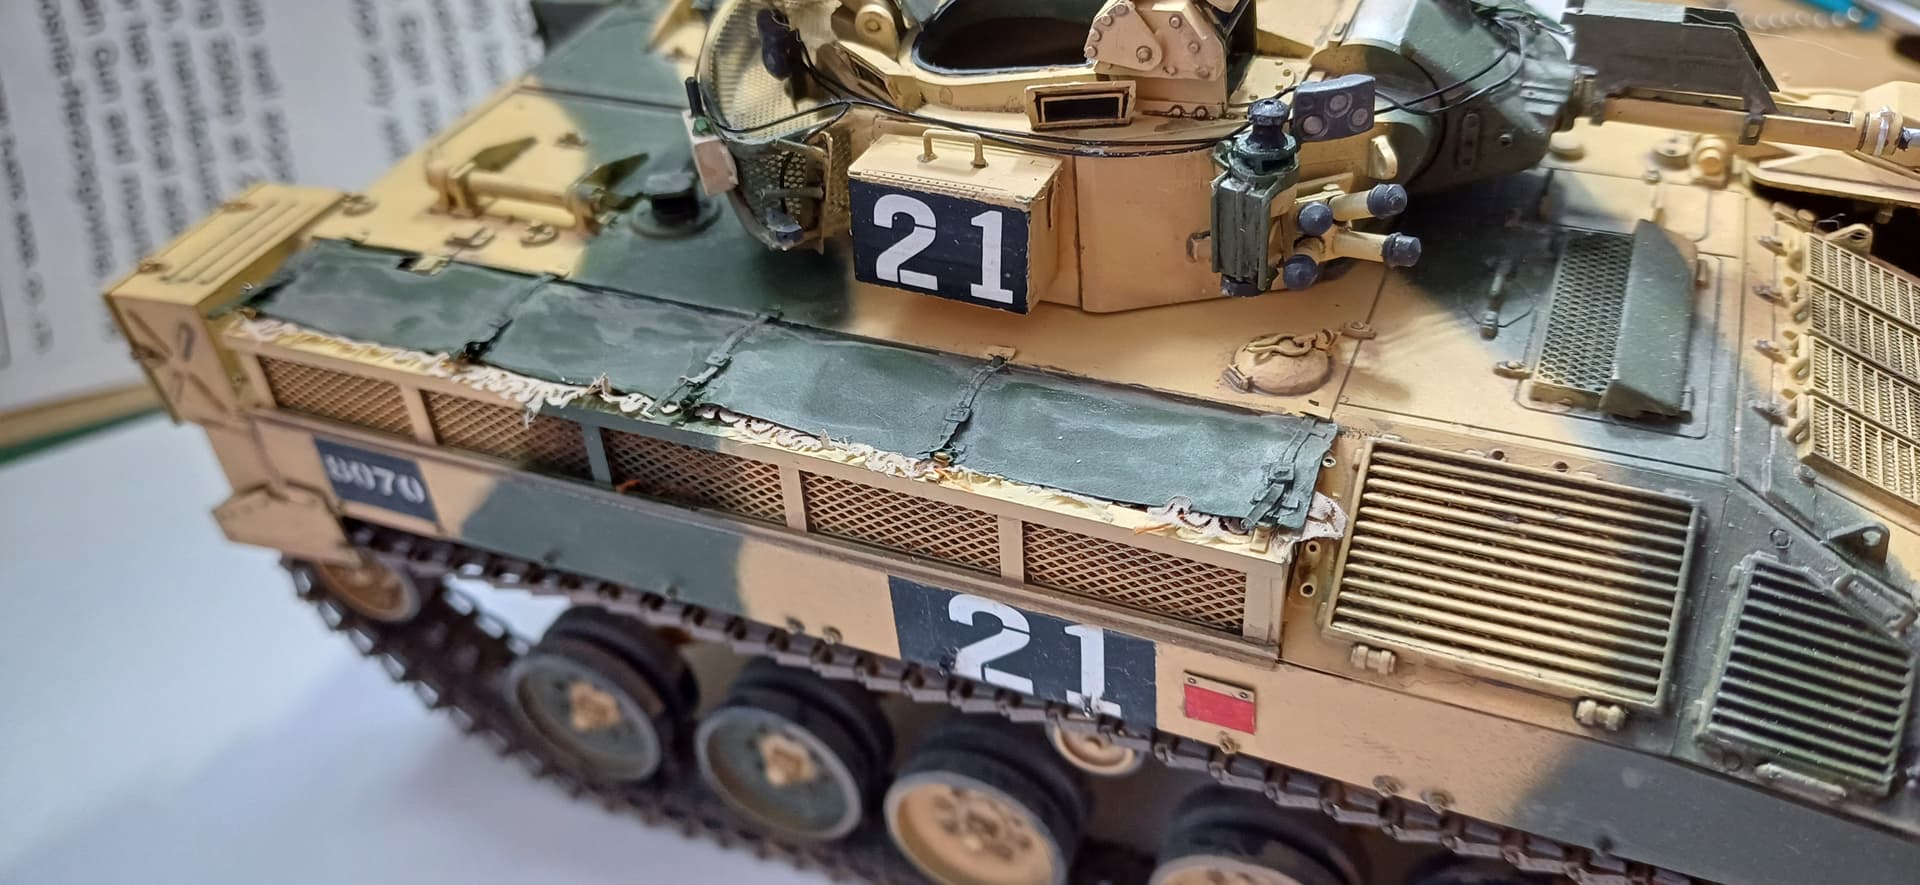
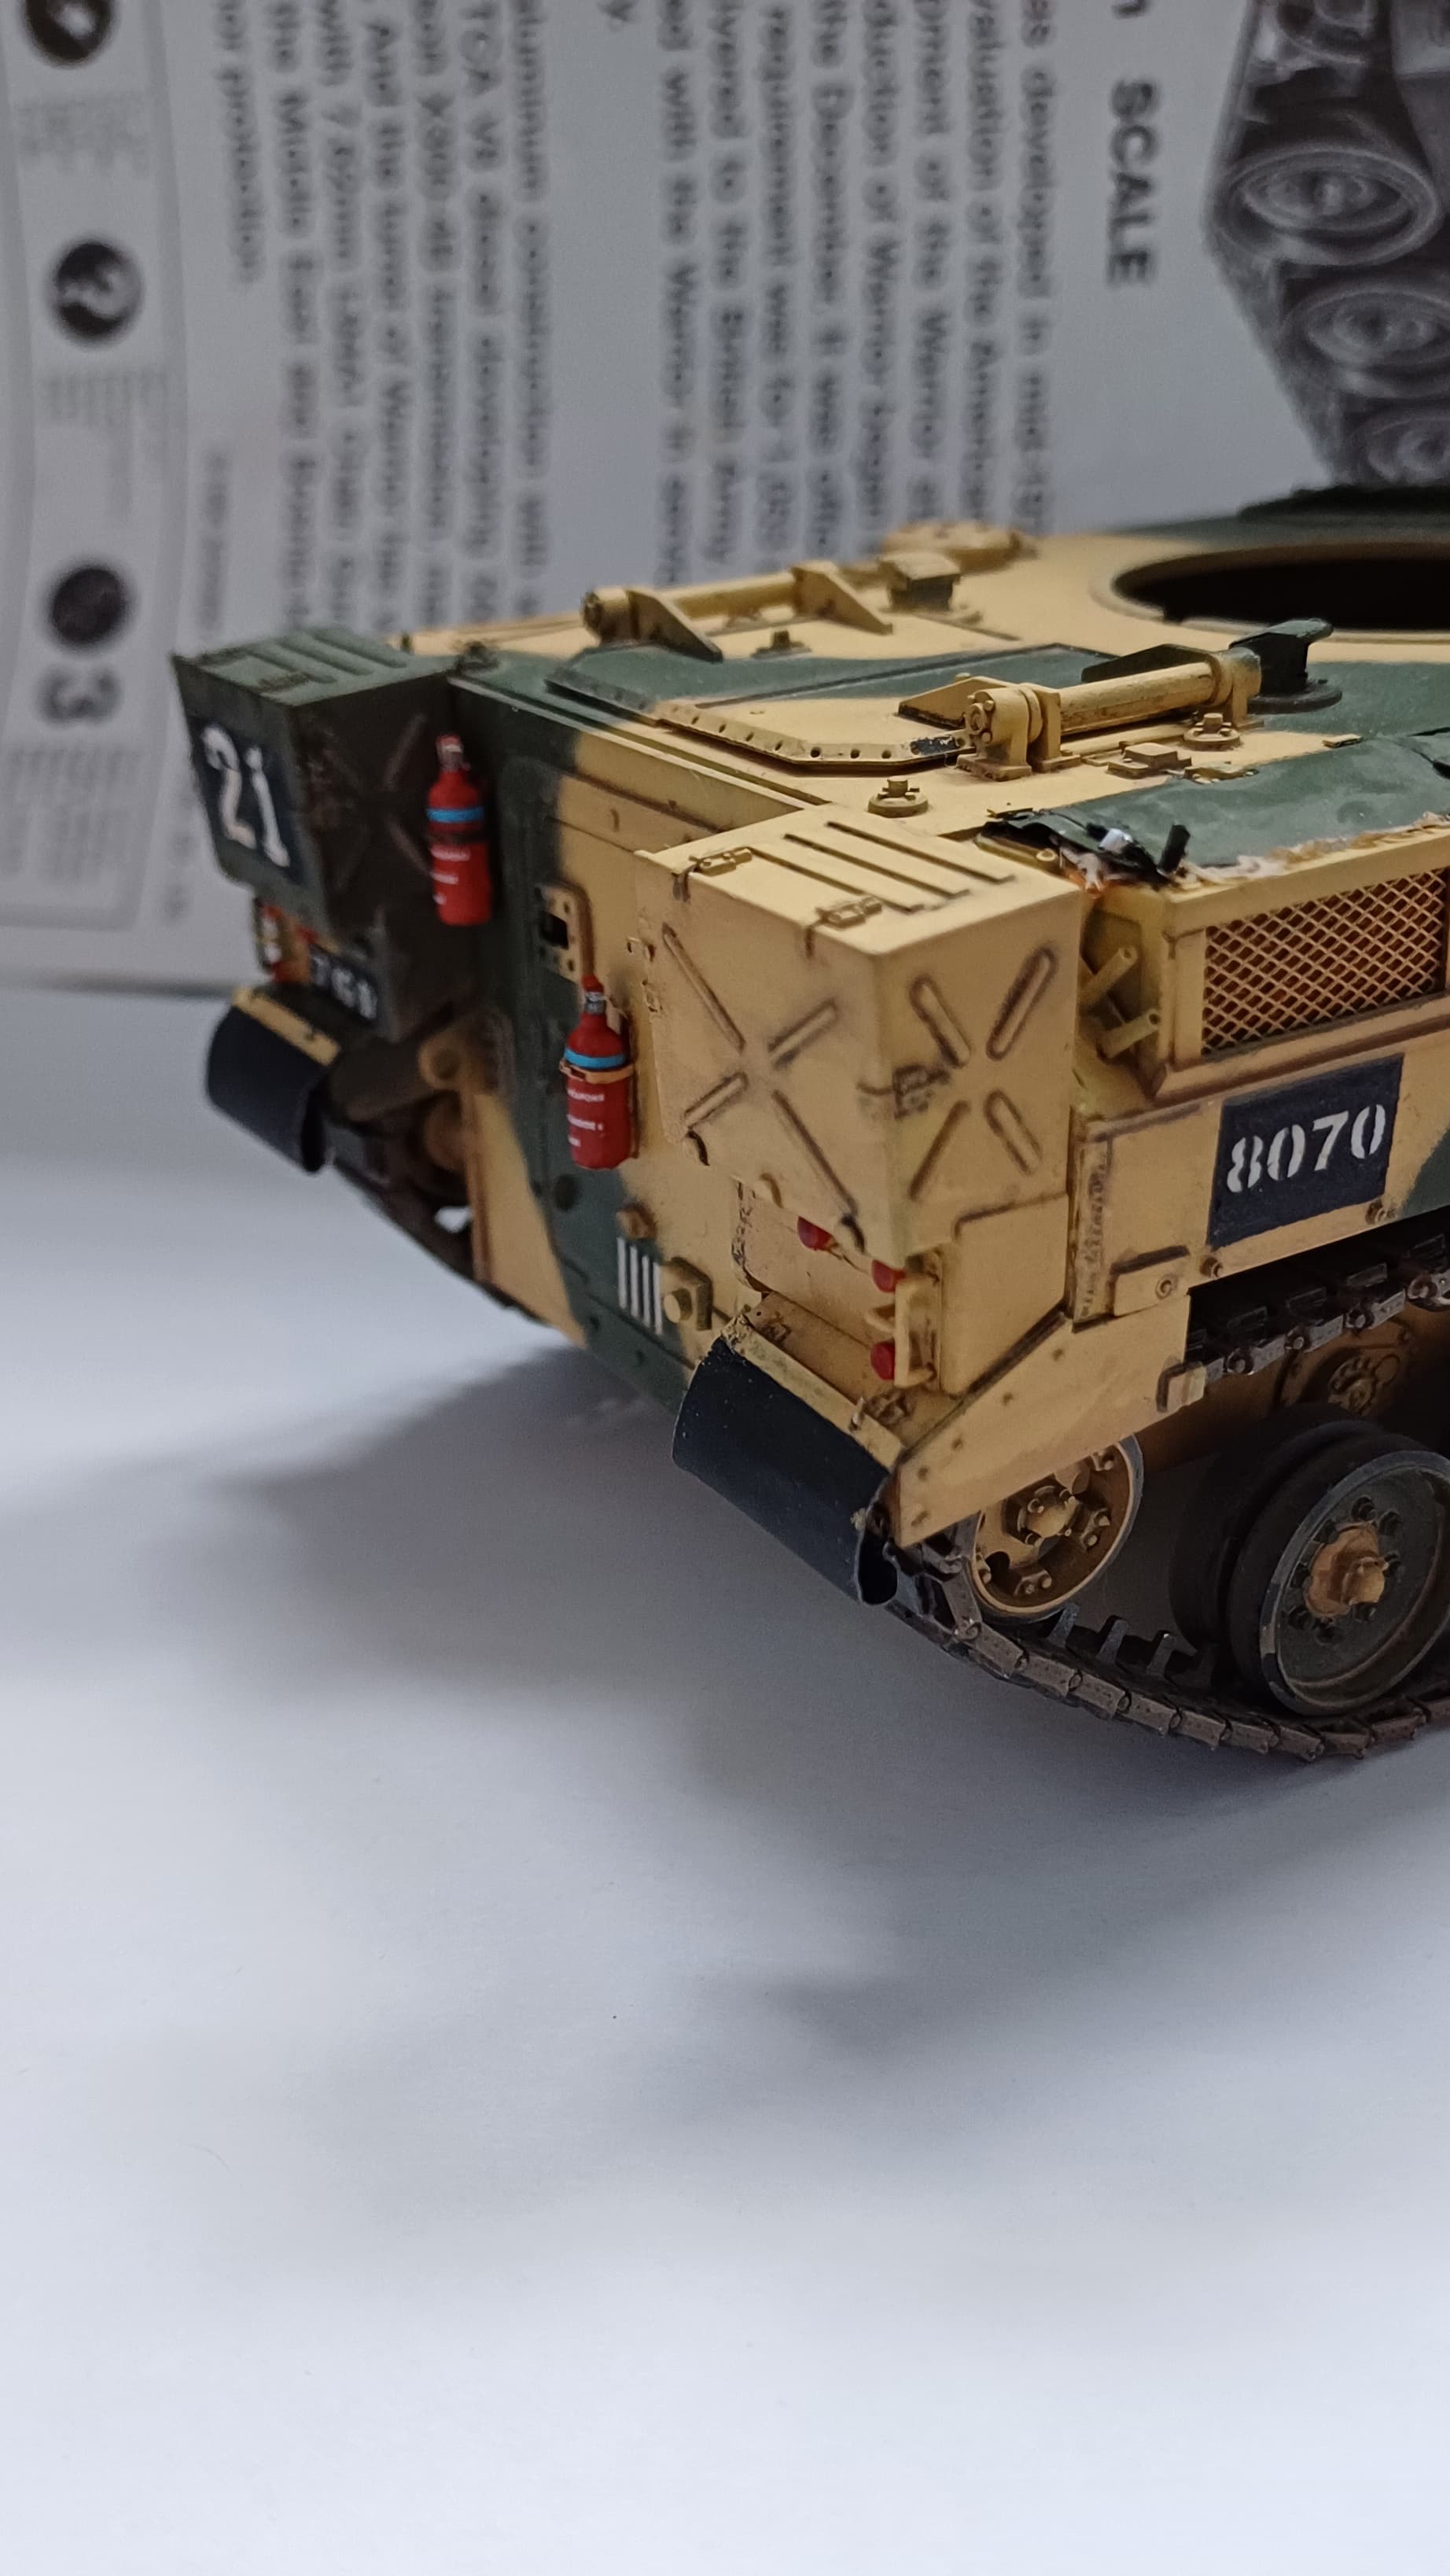
Well I’ve finally got the cover on the basket and painted. The cover is silver foil from a wine bottle with etch scrap hooks on the basket. Small D rings made from fine copper wire secures the cover to the basket edge, just like the real thing. I used some of the AK cam net to simulate the rolled up net in the basket pushing out of the side. I wanted to get it done and painted but now realise that I haven’t done the buckles or strap ends for tightening it up. I’ll have to have a look at how to do those 'cos they will be ridiculously small and I don’t want to ruin the work already done. It also needs gloss coating and a pin wash done on the straps and some shading.

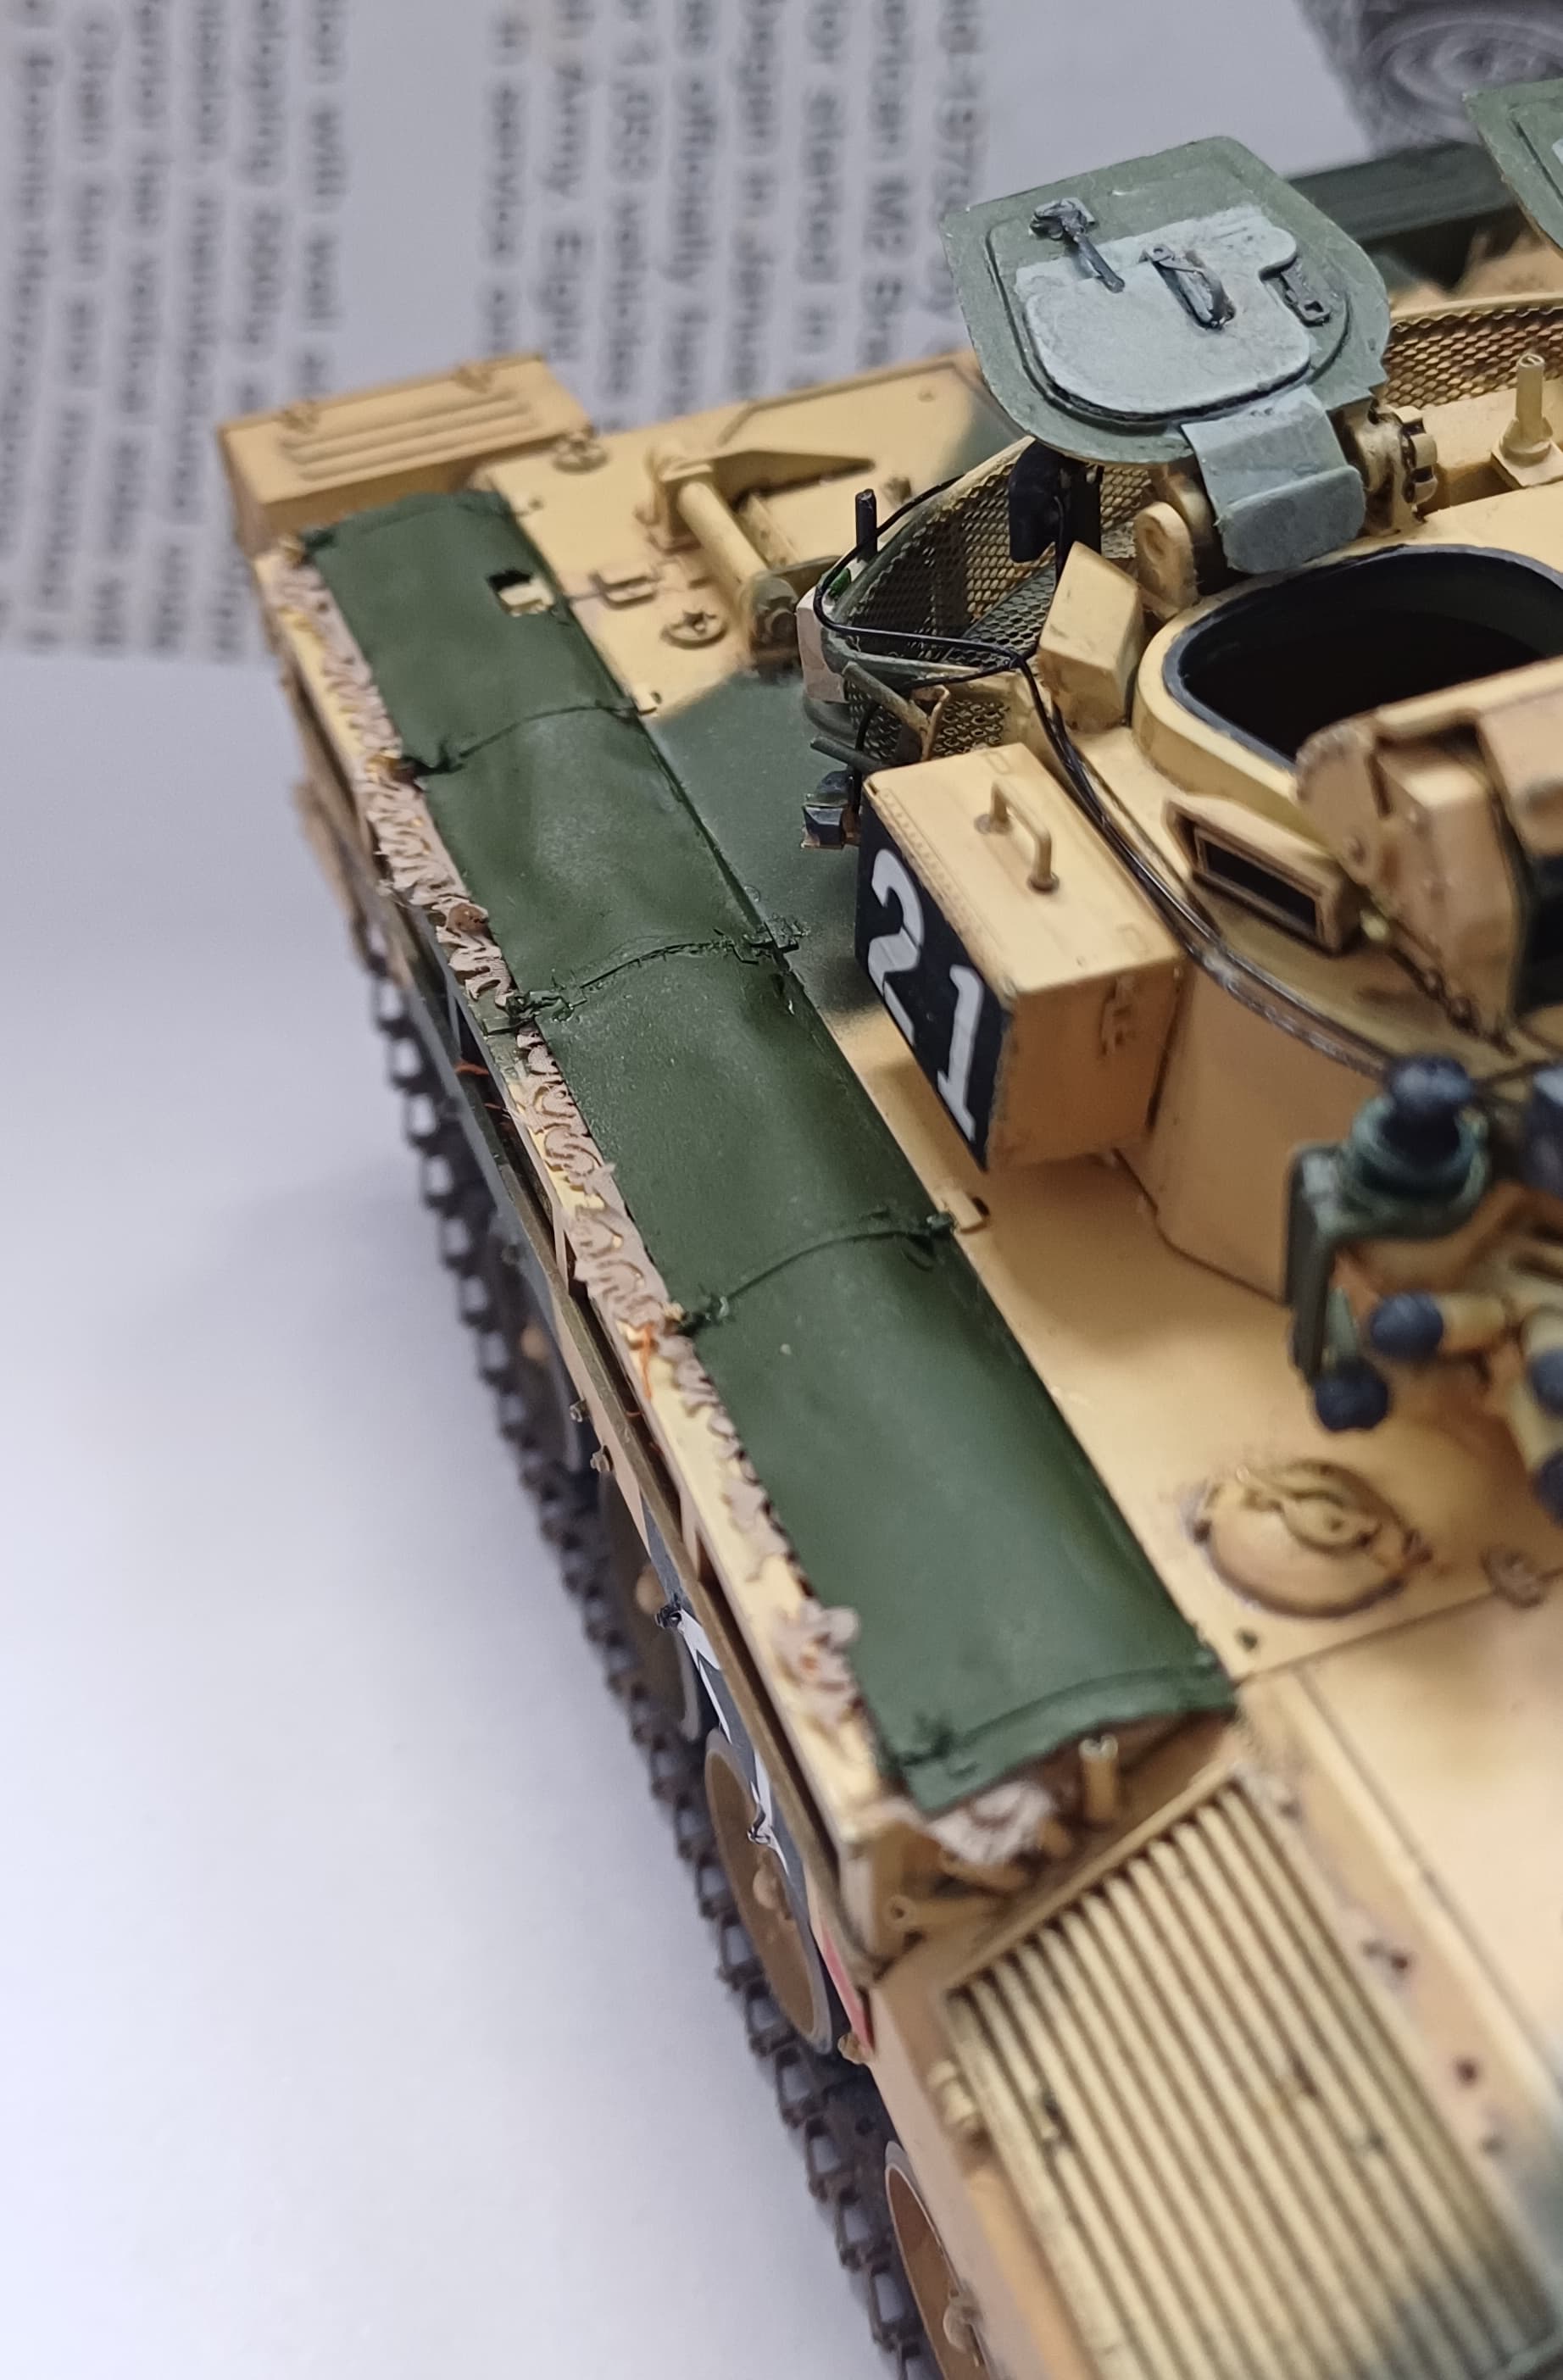
8 Likes
Accurate-Armour are still selling these on their site:
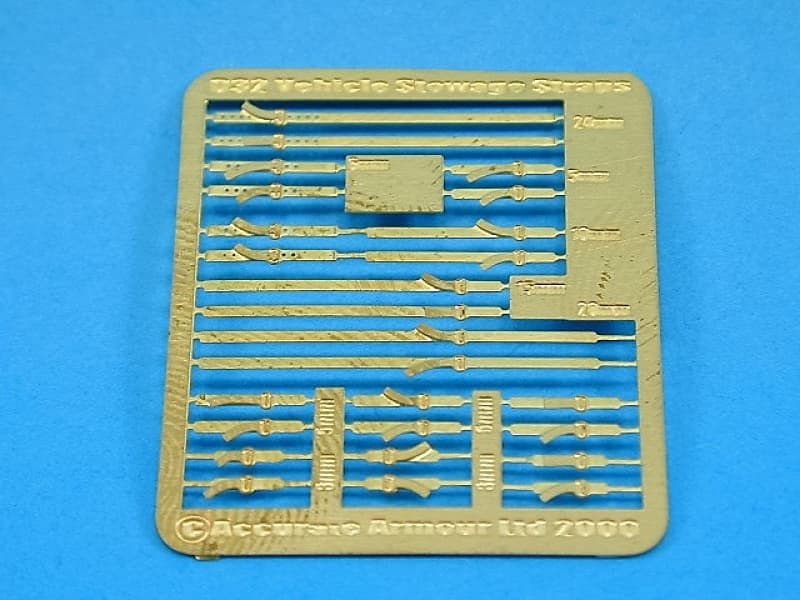
I have a different set of theirs that just has the buckle and loose end of the strap. I don’t see them on their site any more though.
Of course back in the day everything was scratched:

I find this product in various widths to be extremely useful:

1 Like
That pic reminded me that there are some straps on the etch set that I won’t be using. Not exact but the scope for trashing my work goes down immeasurably.

1 Like
Those look like Bradley tie downs. Let me know if you need more.
1 Like
Really nice job on the basket cover, that looks spot on and the tiny bit of cam net showing works so well. Definitely the nicest Warrior I’ve seen built up.
1 Like
Thanks guys, luckily there are five buckles and straps on the etch set so got enough thanks.
1 Like
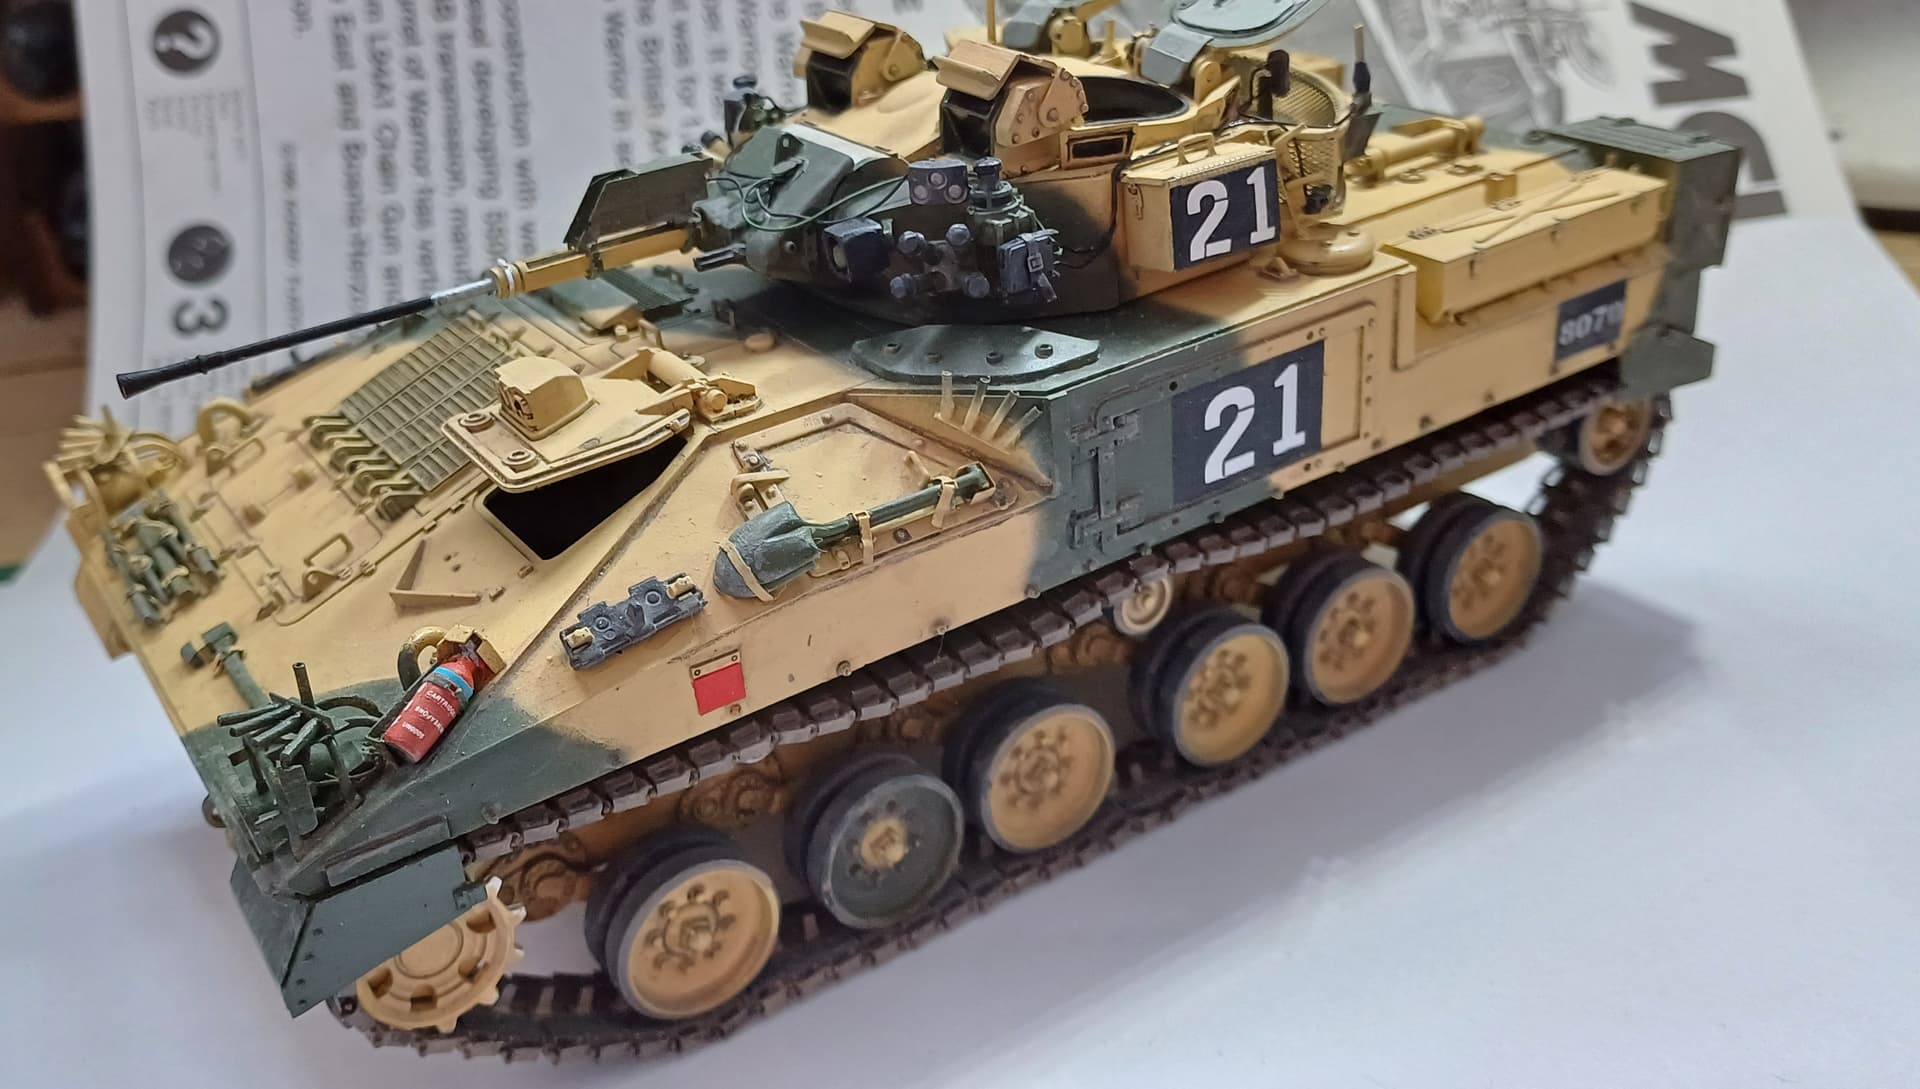
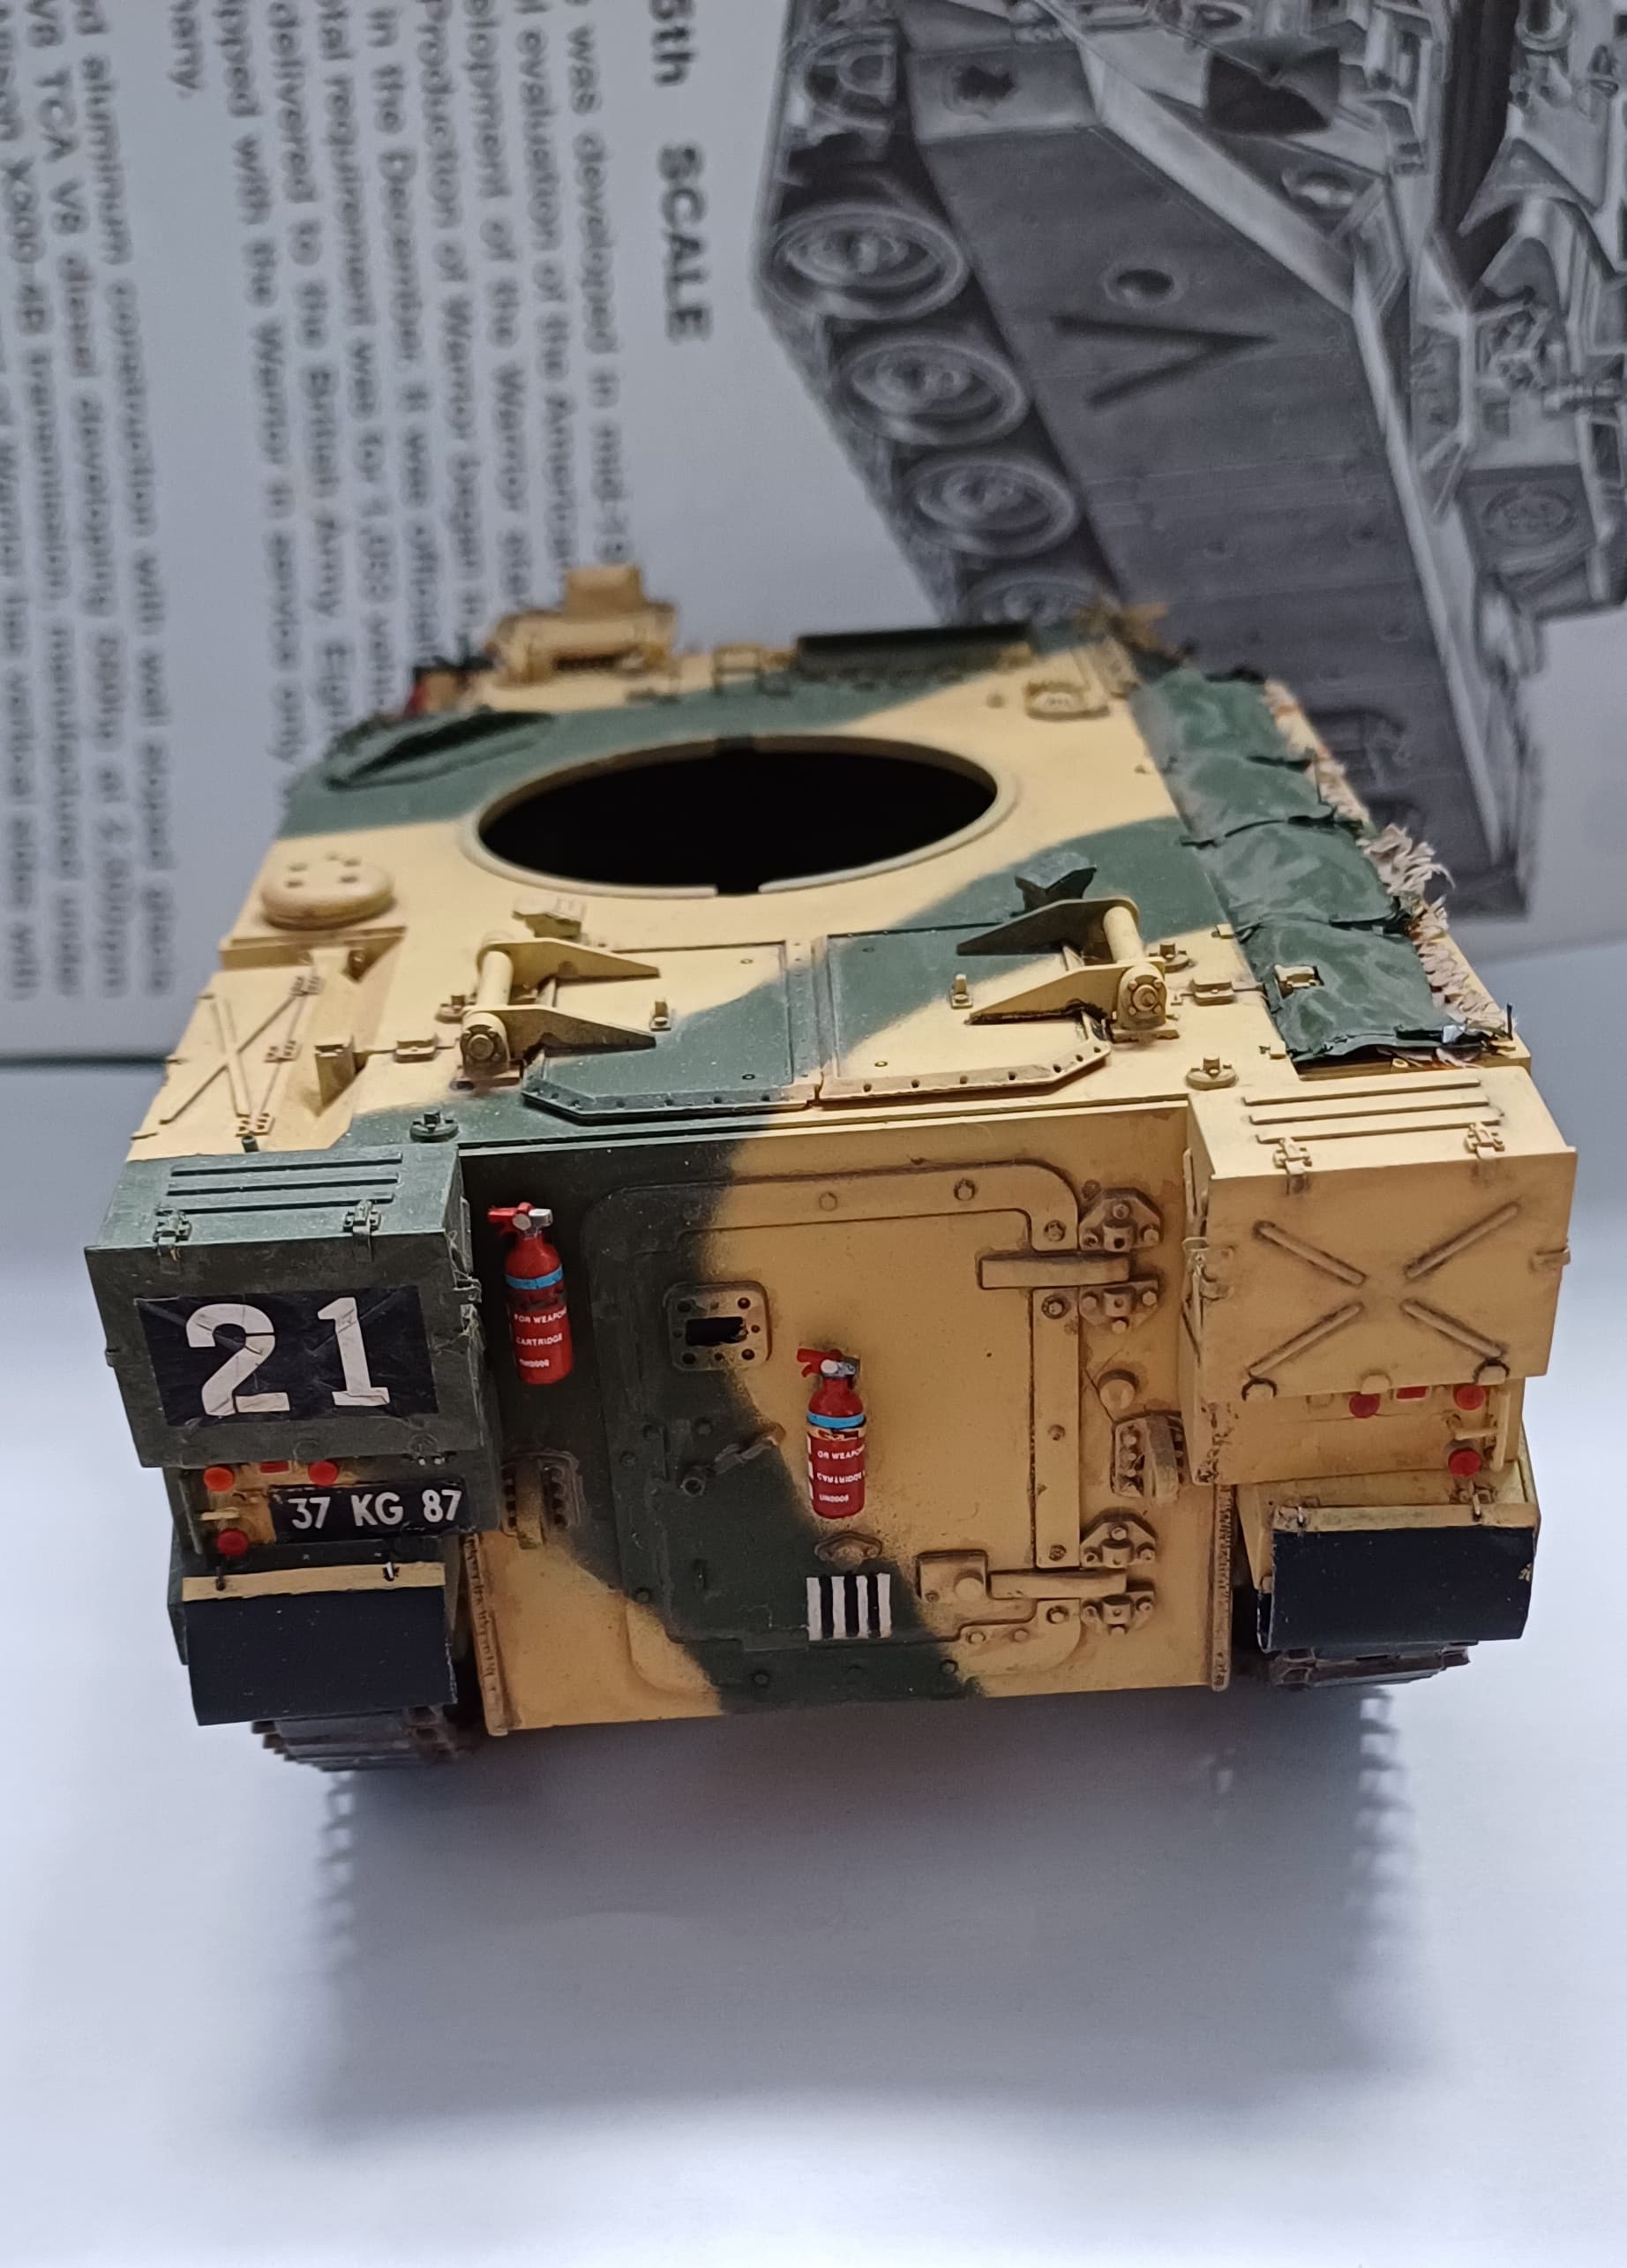
After a couple of weeks of lunacy at work I managed to get the basket cover completed and weathered a little. I have the gear to go in the basket but that won’t be much as generally you don’t see wagons in Batus too loaded up. Also a few items for on top of the turret, map etc. and then the various antennas to go on.
14 Likes
Weathering looks good ![]()
2 Likes
That is really top top work,it looks great👌
Cheers fellas, it’s coming to the end now, just a few things to do. I’m going to build something OOB next time as things tend to become bigger than Ben Hur with older kits.
3 Likes
Very impressive mate it’s turning into marvellous looking model
1 Like
Excellent build and finish- great camo job!
2 Likes
Tackled the rear mudflaps. It would have been easier to just let them dangle, however I’d made the effort to put hooks on the read mudguards so I just had to use them. They are lead foil with paper edges drilled to accept the hooks. I had to clean the foil using petrol as there was an extremely stubborn adhesive coating on it which would not come off using anything else. Primed and painted using Vallejo black grey and fitted before fully dry so the paint didn’t flake. They need a touch up here and there where the paint scrubbed off, however I am quietly pleased with how they have turned out.
8 Likes
Nice, I did contemplate doing that on the AS90 as the PE came with the hooks and holes already in the flaps, but once I had stuck them on, I couldn’t be bothered with the faff of bending it all and trying to get the hooks through the holes… Yours looks really good though.
2 Likes
Oh I’m a complete buffoon to myself, if it’s hard to do but will look good I’ll crack on until it looks semi presentable.
3 Likes
They look about right.
1 Like