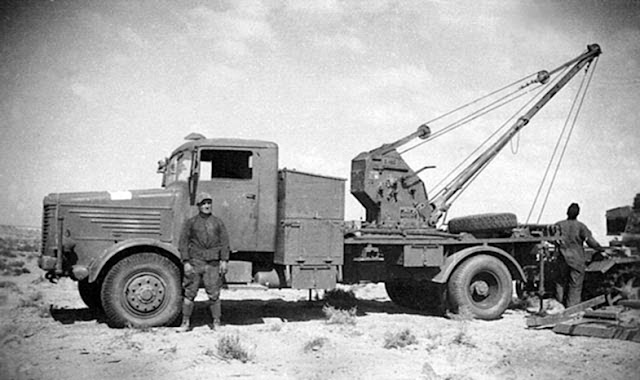
Another head end photo of the 115 showing these various equipment cranking points and controls:
(Note mixed tire tread patterns.)
Another head end photo of the 115 showing these various equipment cranking points and controls:
(Note mixed tire tread patterns.)
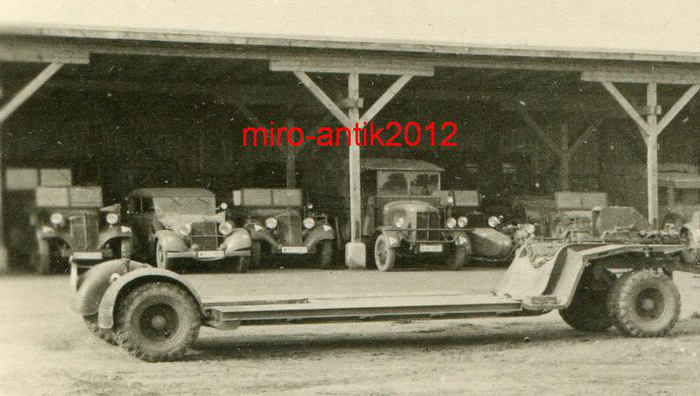
Top photo - yes 10 ton missing front end deck ramps.
Middle photo - 10 ton version also missing deck ramps.
Bottom Photo - 8 ton (note curved front step risers) WITH deck ramps.
Thanks for sharing MORE reference!
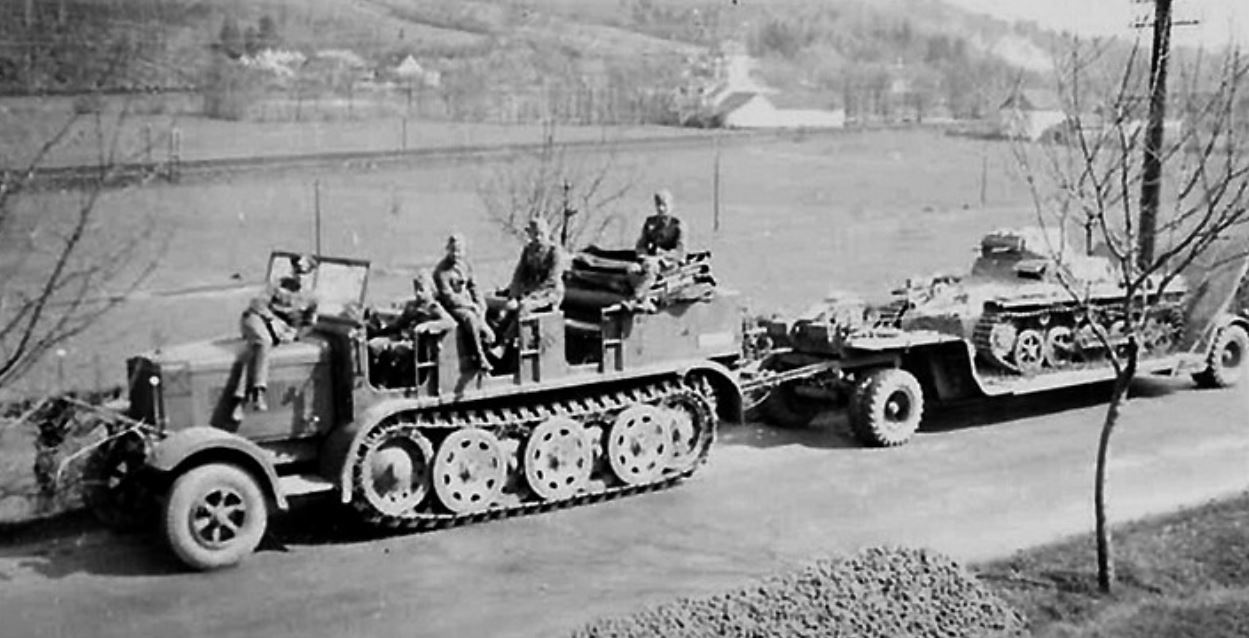
Here is a photo I believe to be the 8 ton version of the 115. Note curved/sloped step risers, vertically mounted manual winch and interesting dual spare tire placement.
Also I don’t believe these early trailers had any sort of adjustable deck ramps as on the 10 ton.

(Photo Credit odkryijca.pl)
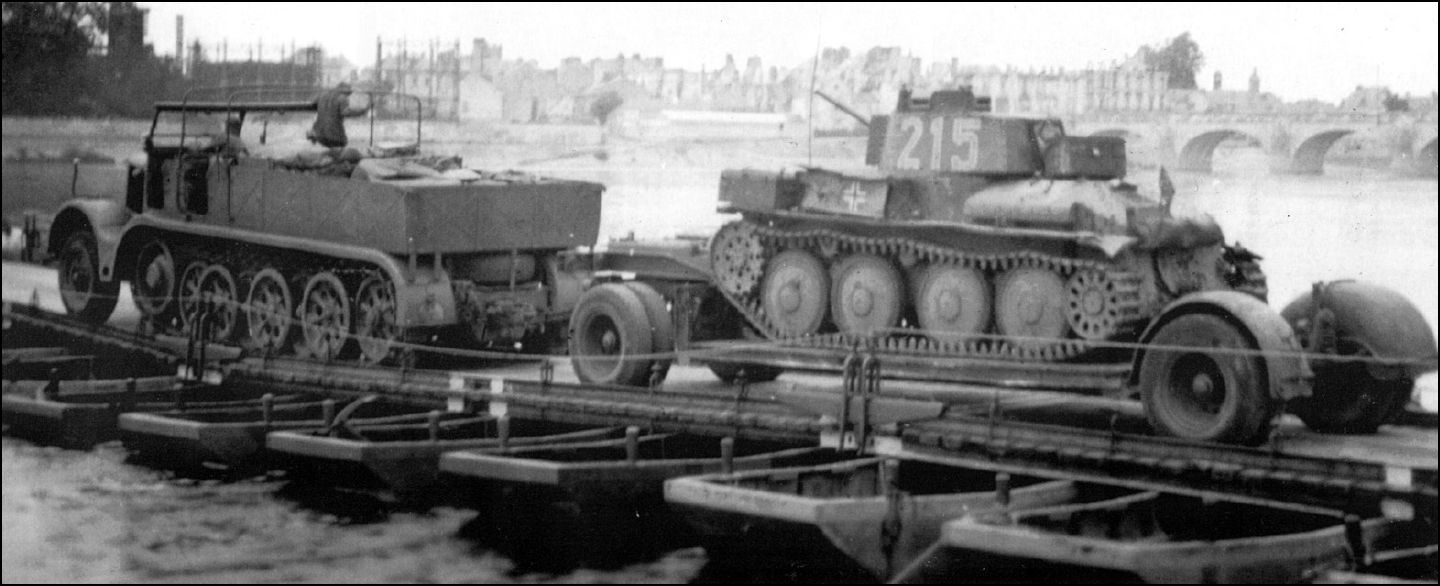
Hummmm . . . . another of Frenchy’s very fine historical photographs!
Maybe it is time for me to buy the really well done AFV Club Bussing-Nag with the 3 ton Bilstein crane to pull this trailer? That would make for a rather attractive recovery pair; the 3 ton crane plus the 10 ton flatbed trailer!
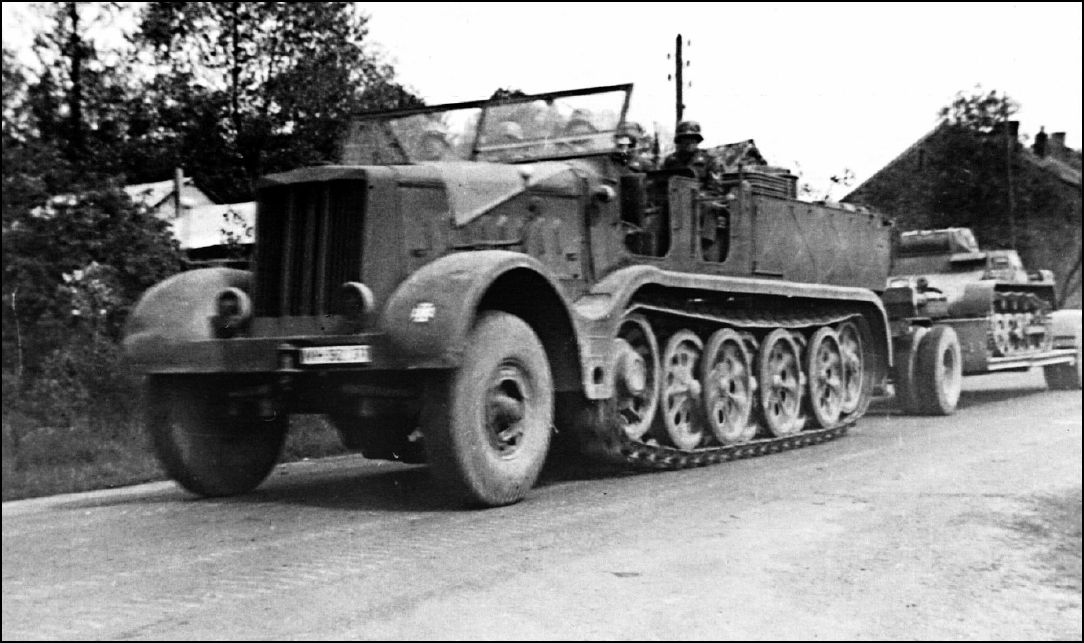
I was going to use one of my Sd.Kfz. 7s to pull my 115 but I may have to rethink that plan - besides the 7s all have guns to tow!
Hey Mike long time eh? Yep fires out, floods in, spouse better, first name still Tim, generally OK & hope the same for you! Just for newbies who wouldn’t know, a blast from four years ago (can you believe that?) when this amazingly multi-skilled guy bailed me out of several problems with his photoshoppery skills…
(Yeah I can still count, we worked on those images originally in 2017) Quality project in progress here, more power to you ![]()
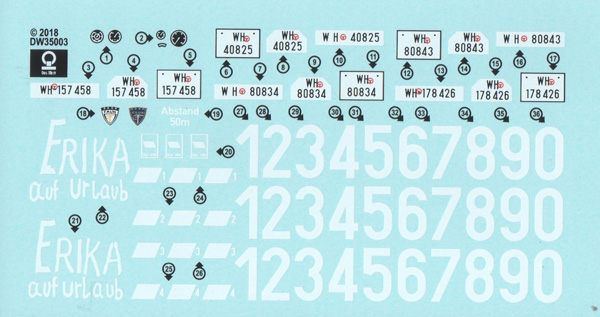
As to decals; Das Werk includes the entire decal sheet from the combined 115 & Faun combo kit even when just buying the trailer.
All you will need from the sheet is one large vehicle white number, the unit marking and a rectangular license plate for your trailer.
(So lots of license plates left over!)
I must say I am highly impressed here that DW went to the trouble of printing a 3 color decal sheet: white for the background, black for the numerals and red to represent the German Wehrmacht Censor/Approval/Authorization stamp on the license!
These many very cool and colorful license plates included on this sheet will soon adorn a number of my German wartime vehicles.
Edit - New Photos Added Here
My Horch Cabriolet now sporting its’ brand new license plates:
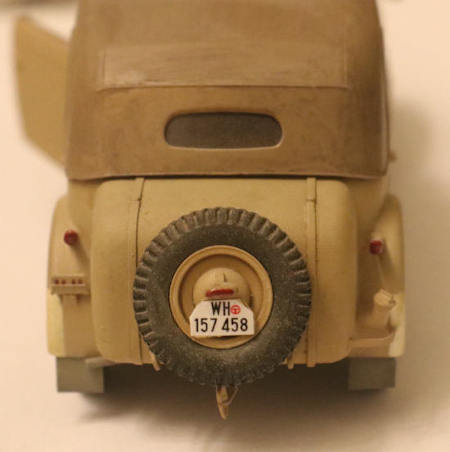
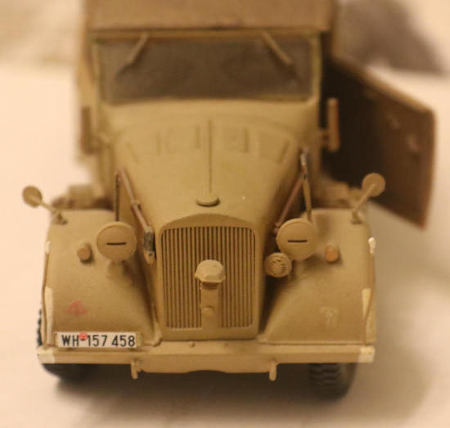
Danke schön Das Werk!
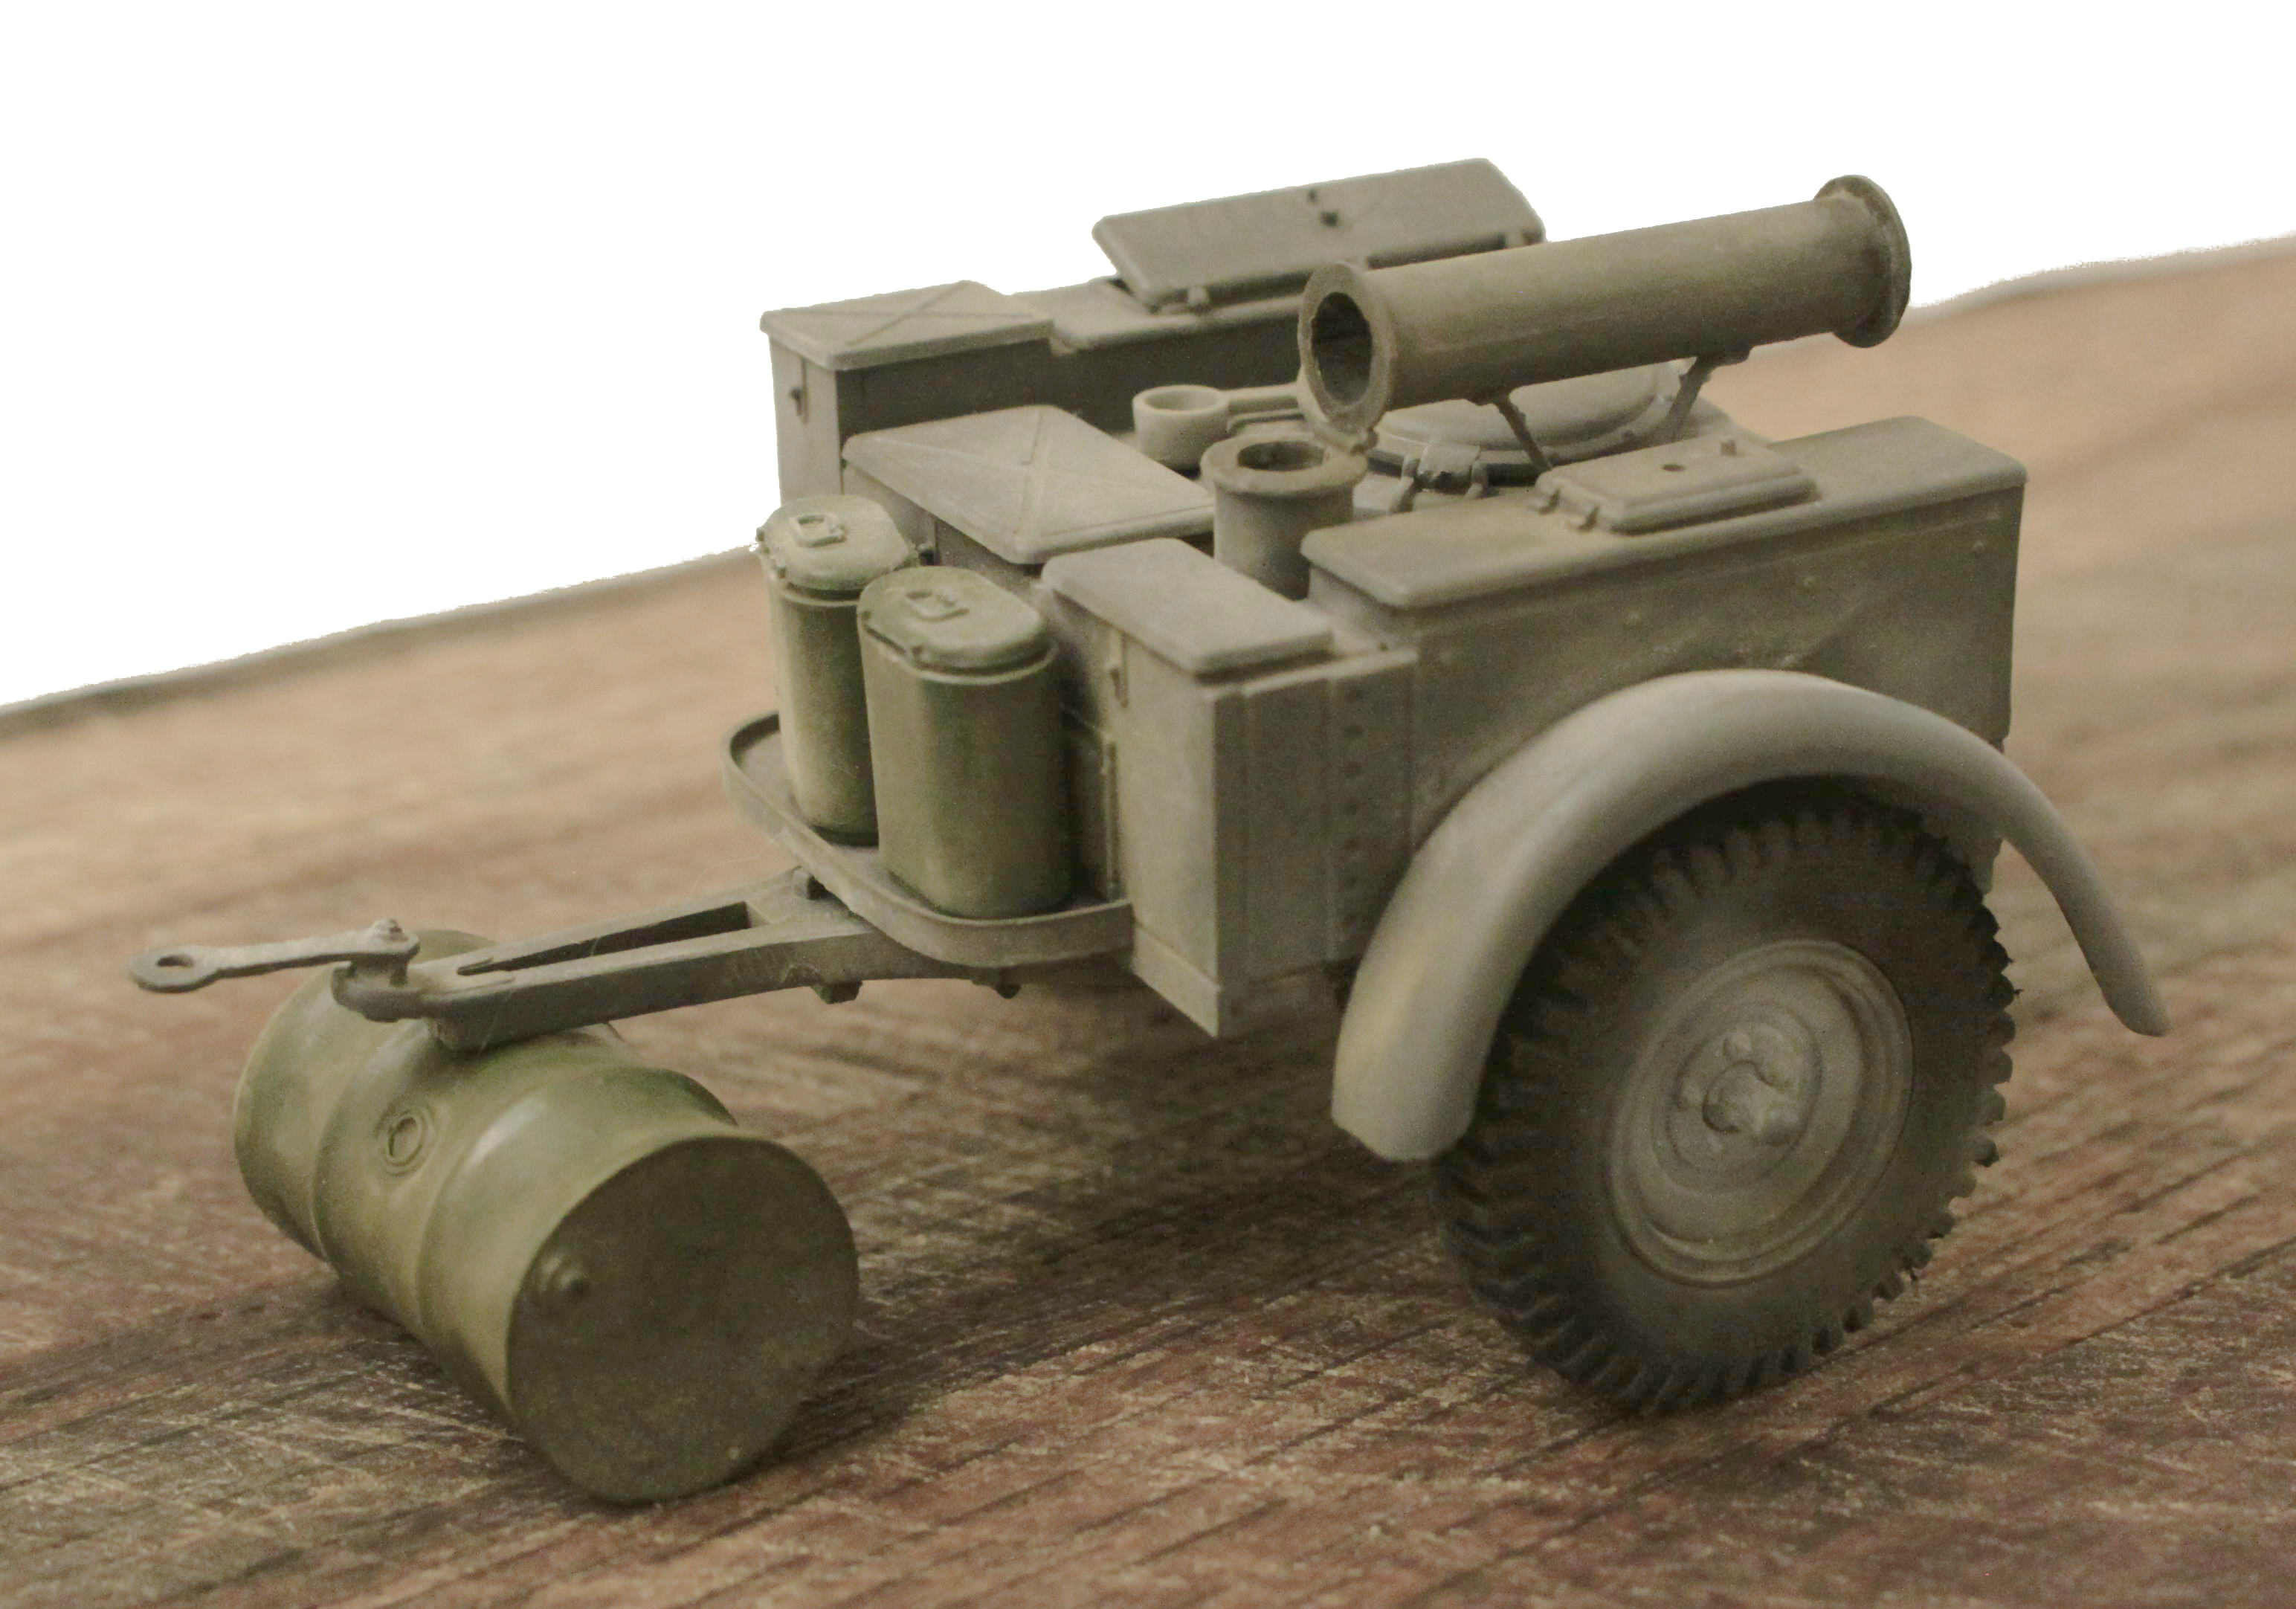
More Potential Detailing Overkill:
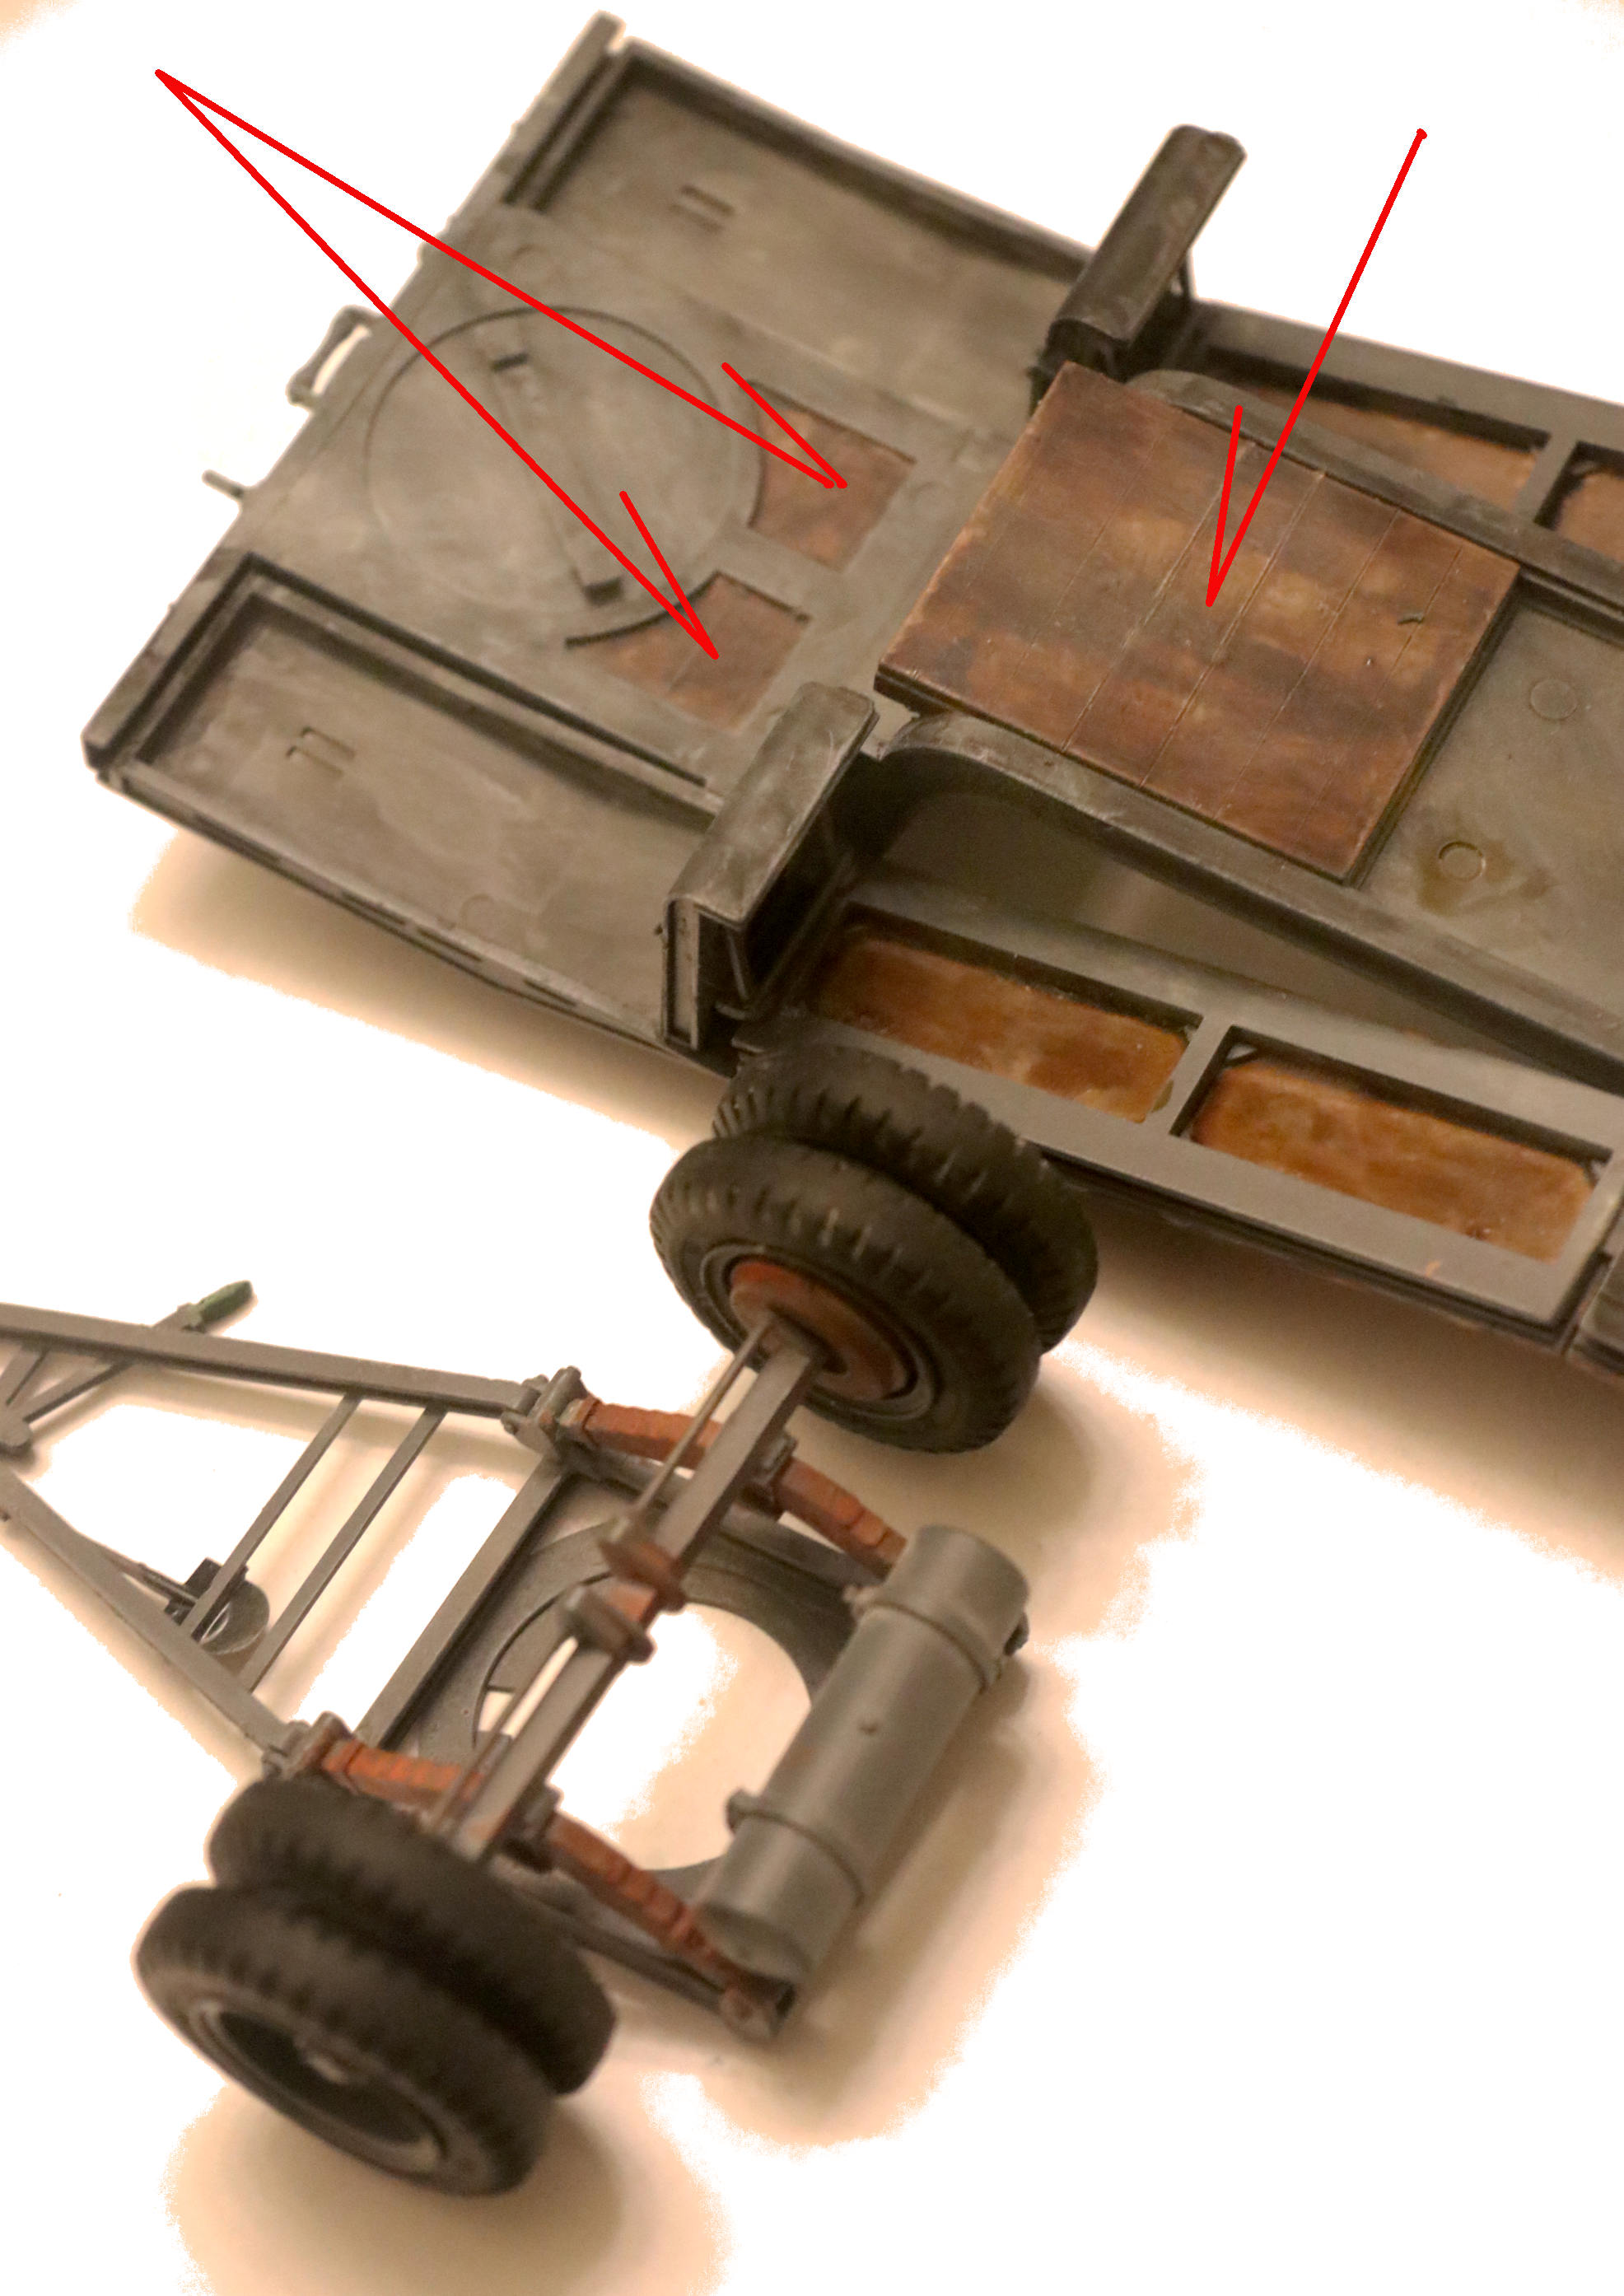
I scribed these underside wood areas with divisions matching the wood decking boards above and then painted, stained and heavily weathered these areas that would have shown through as being wooden on the underside of the real trailer.
FYI - I continue to update all earlier past posts and photos in this thread where applicable.
Just a word to those who might be interested in scrolling up to check. – 165thspc
Off Topic
And another trailer kit-bash:
Rubber tired Fieldkuche; These trailers could be towed behind a fast moving vehicle whereas the older “wagon wheeled” cook stoves were required (by official field directive) to be loaded into the motorized vehicle. (The wooden wagon wheels couldn’t take the speed or abuse.)
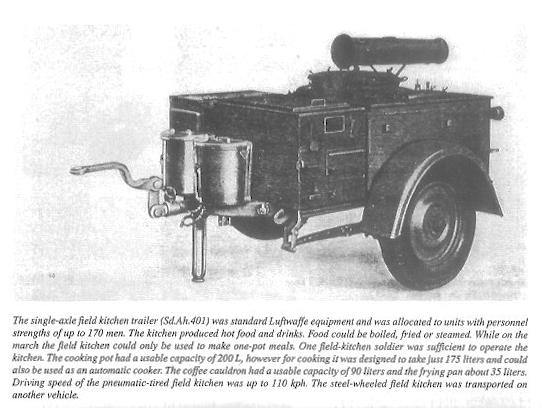
(Bottom photo from Schiffer Publishing’s book “German Military Trailers and Towed Equipment”. Shown here for discussion purposes ONLY.)
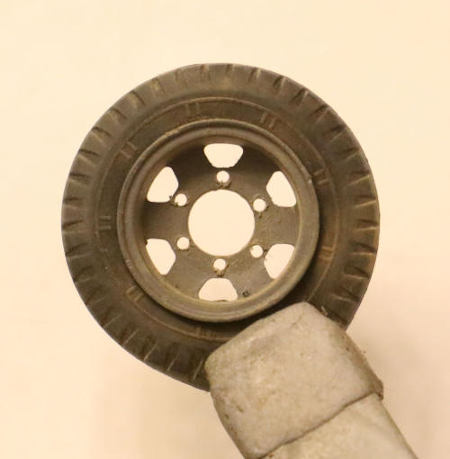
Detailing Hint: Need to remember to drill out the lug nuts present on the “spare” tire.
(It’s a spare tire, the lug nuts don’t belong there/would not be there!)
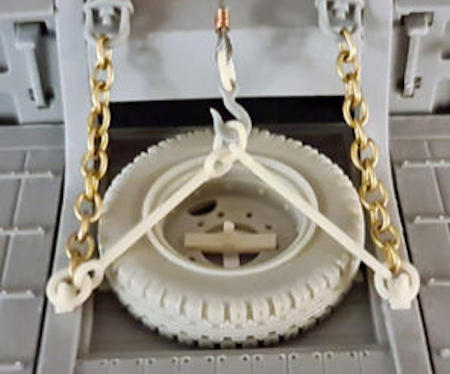
For comparison: Below is shown the spare tire that comes in the
after-market Custom Scale 115 resin detailing set.
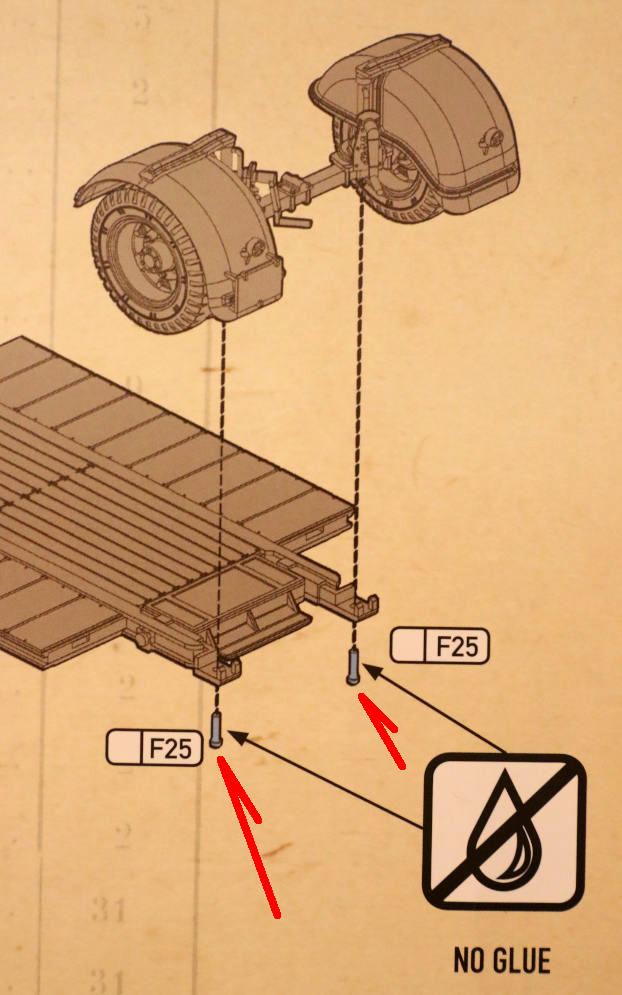
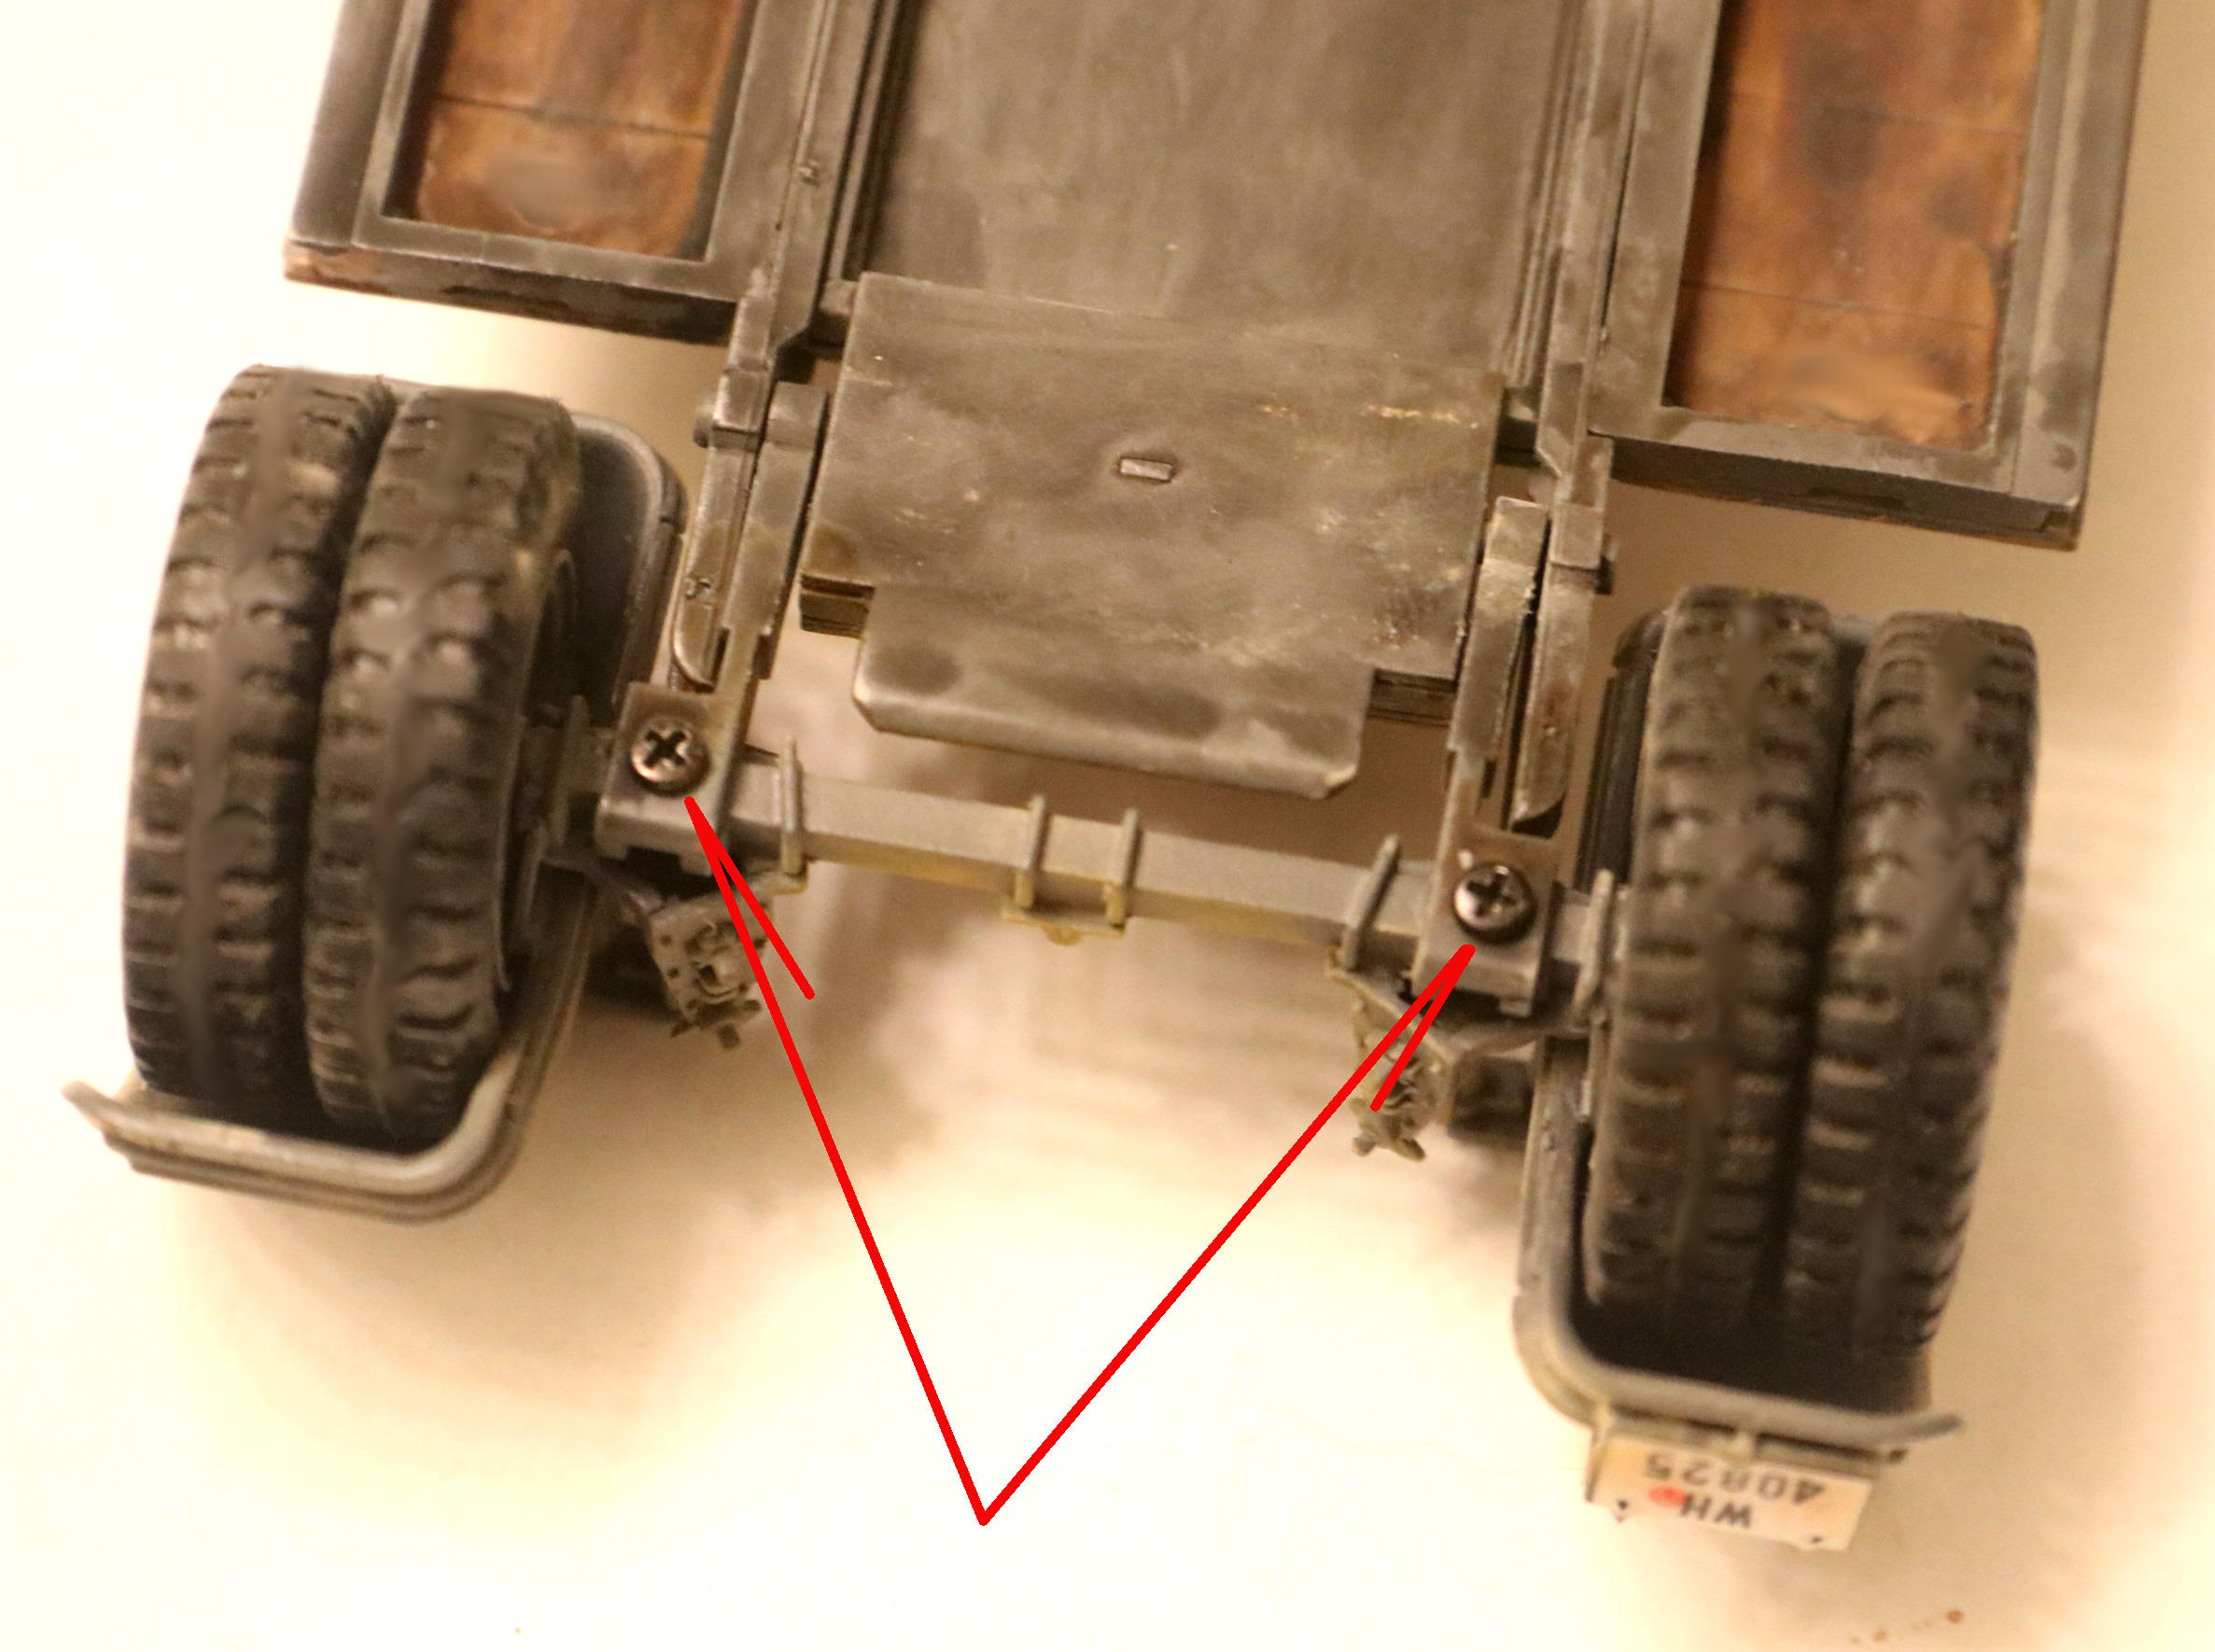
Did not care at all for the “non-glue” mounting scheme Das Werk provided for making the rear axle removable. It depends on a gravity defying friction fit of those two small plastic pins.
(Also I can see them dropping out and getting lost over time, or just breaking off with use.)
So . . . . A quick visit to the local “All Trains” Hobbyshop to mooch a couple of tiny machine screws.
With a careful selection of drill bit sizes you can enlarge those rear axle mounting points just enough to allow you to thread in a couple of machine screws. (I hold the drill bit in my fingers to work this soft plastic, I do not use a pin vise or drill to hold it, and then I roll (turn) the bit between my fingers to slowly and carefully drill and enlarge the holes - no motorized drill here or you will crack/break the plastic.) Careful, slow insertion of the screws when tapping in hole the first time* and they will cut their own threads into the soft plastic to make for a solid connection.
*- When cutting threads into a hole such as this always slowly turn the screw a turn or two and then back it out and blow out any tiny scraps. Not doing this can cause the threads to bind, to get messed up or even crack the plastic.
Machinists do exactly the same thing when threading new screw holes on large machines!
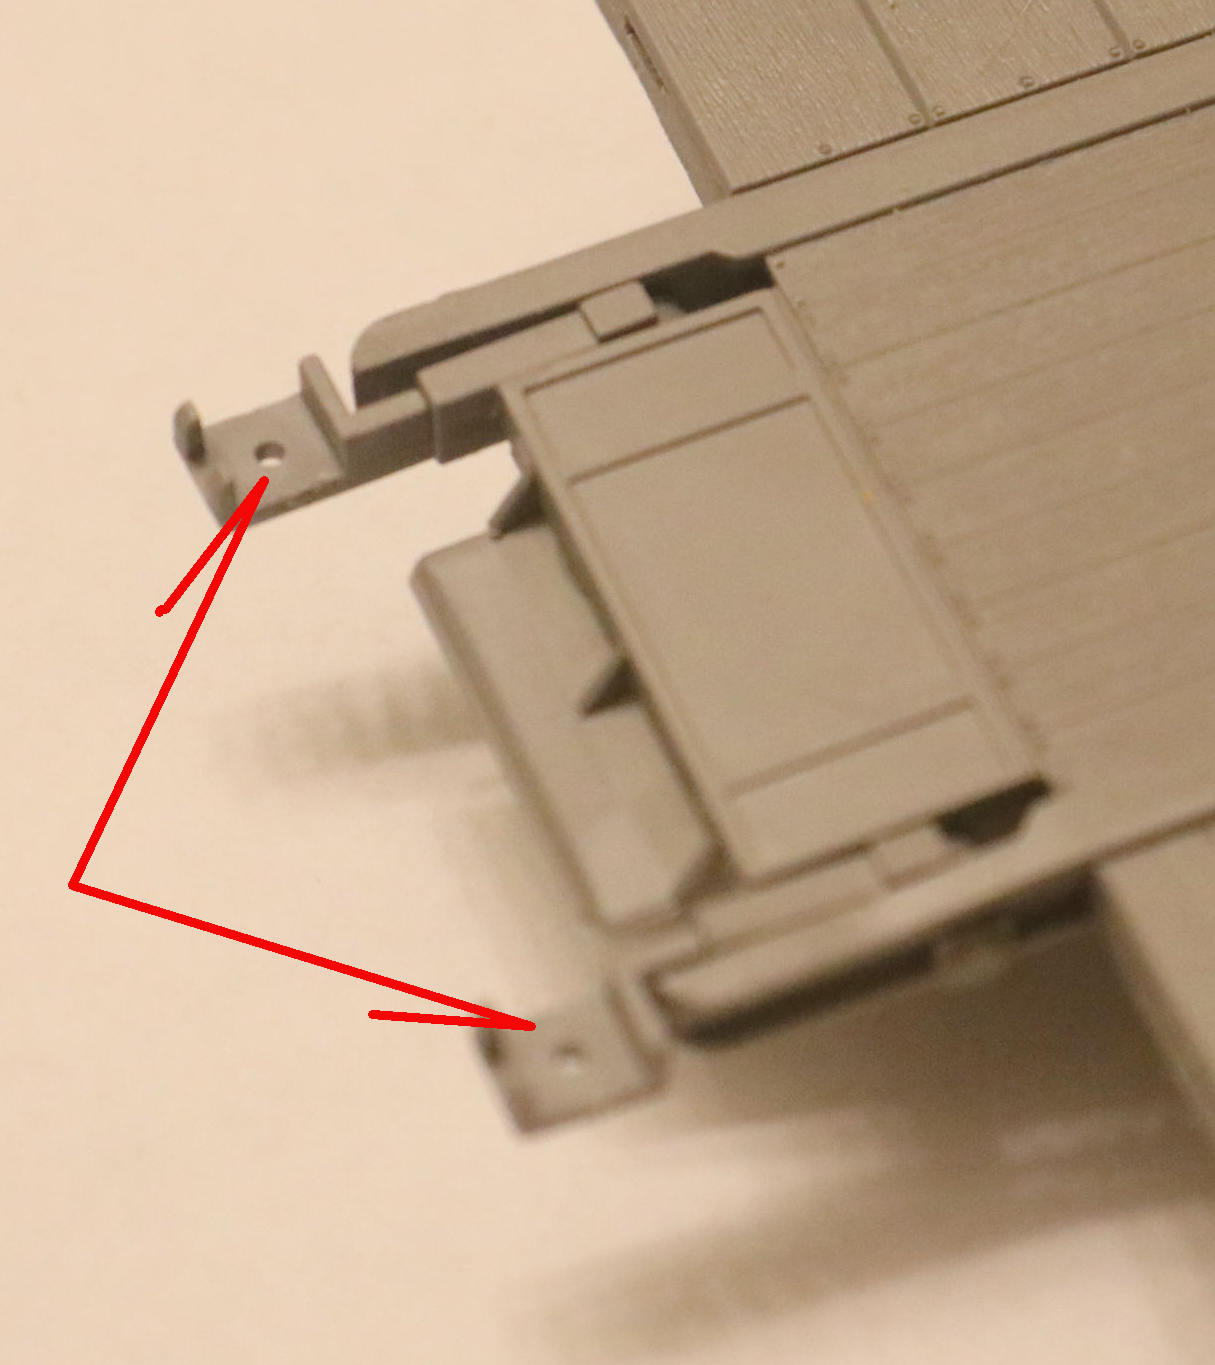
Edit - New Photo Below:
These two holes in the deck suspension will have to be enlarged to clear the new screws.
The screws will tap into the rear axle beam.
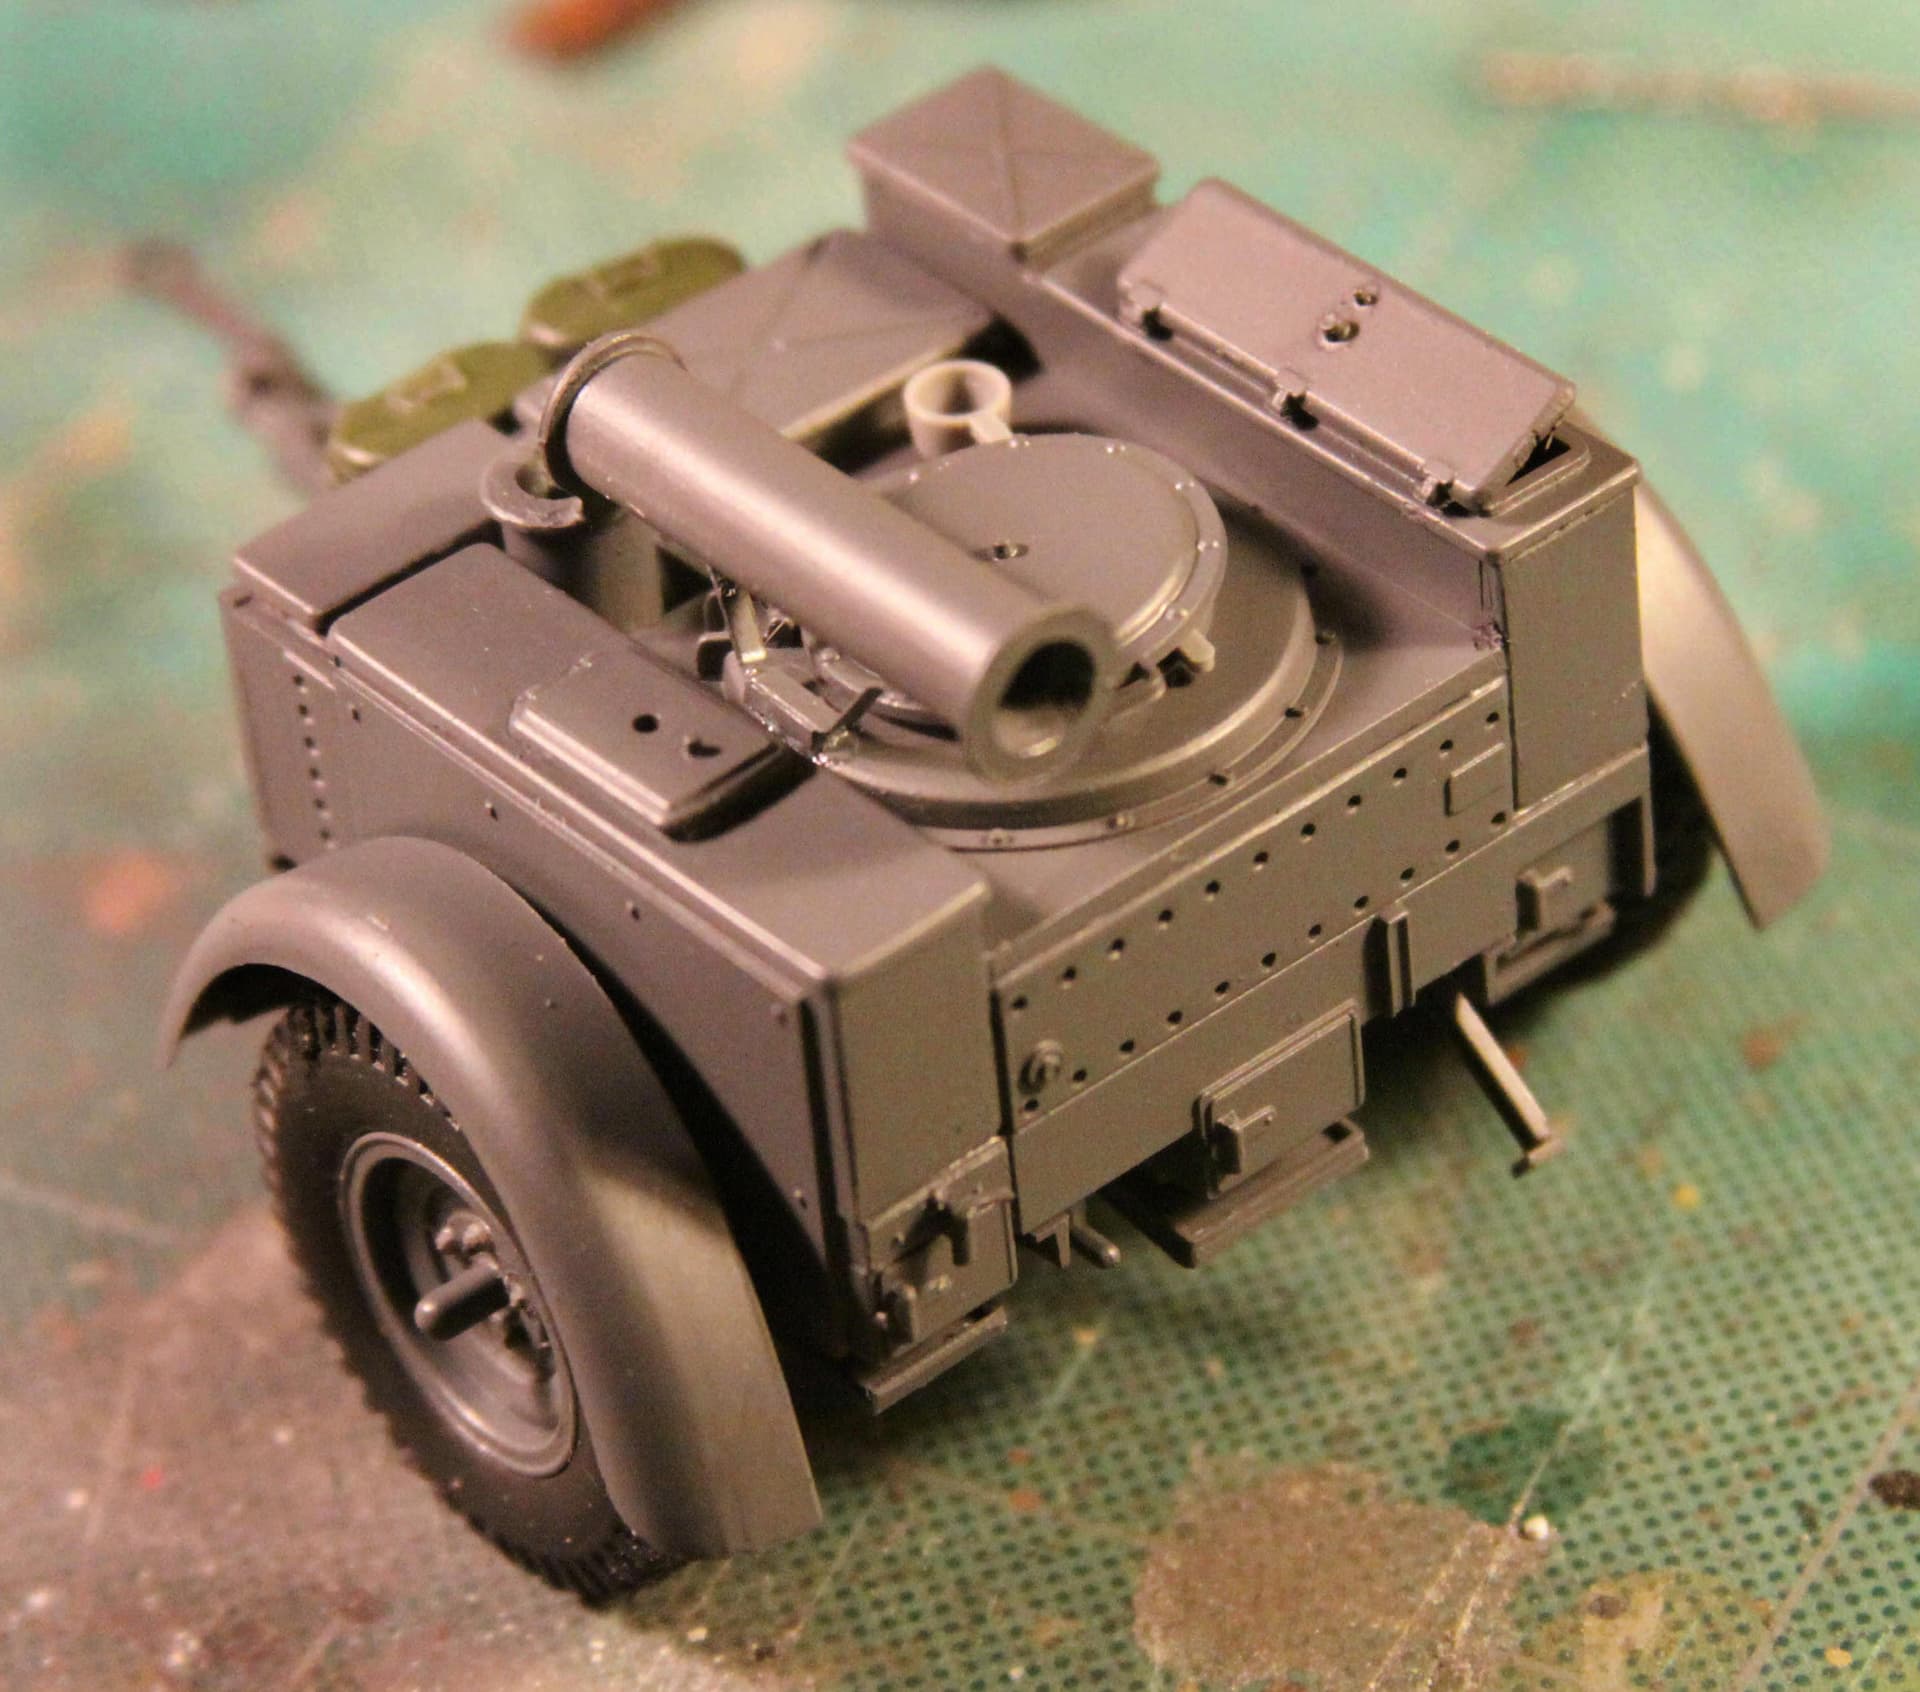
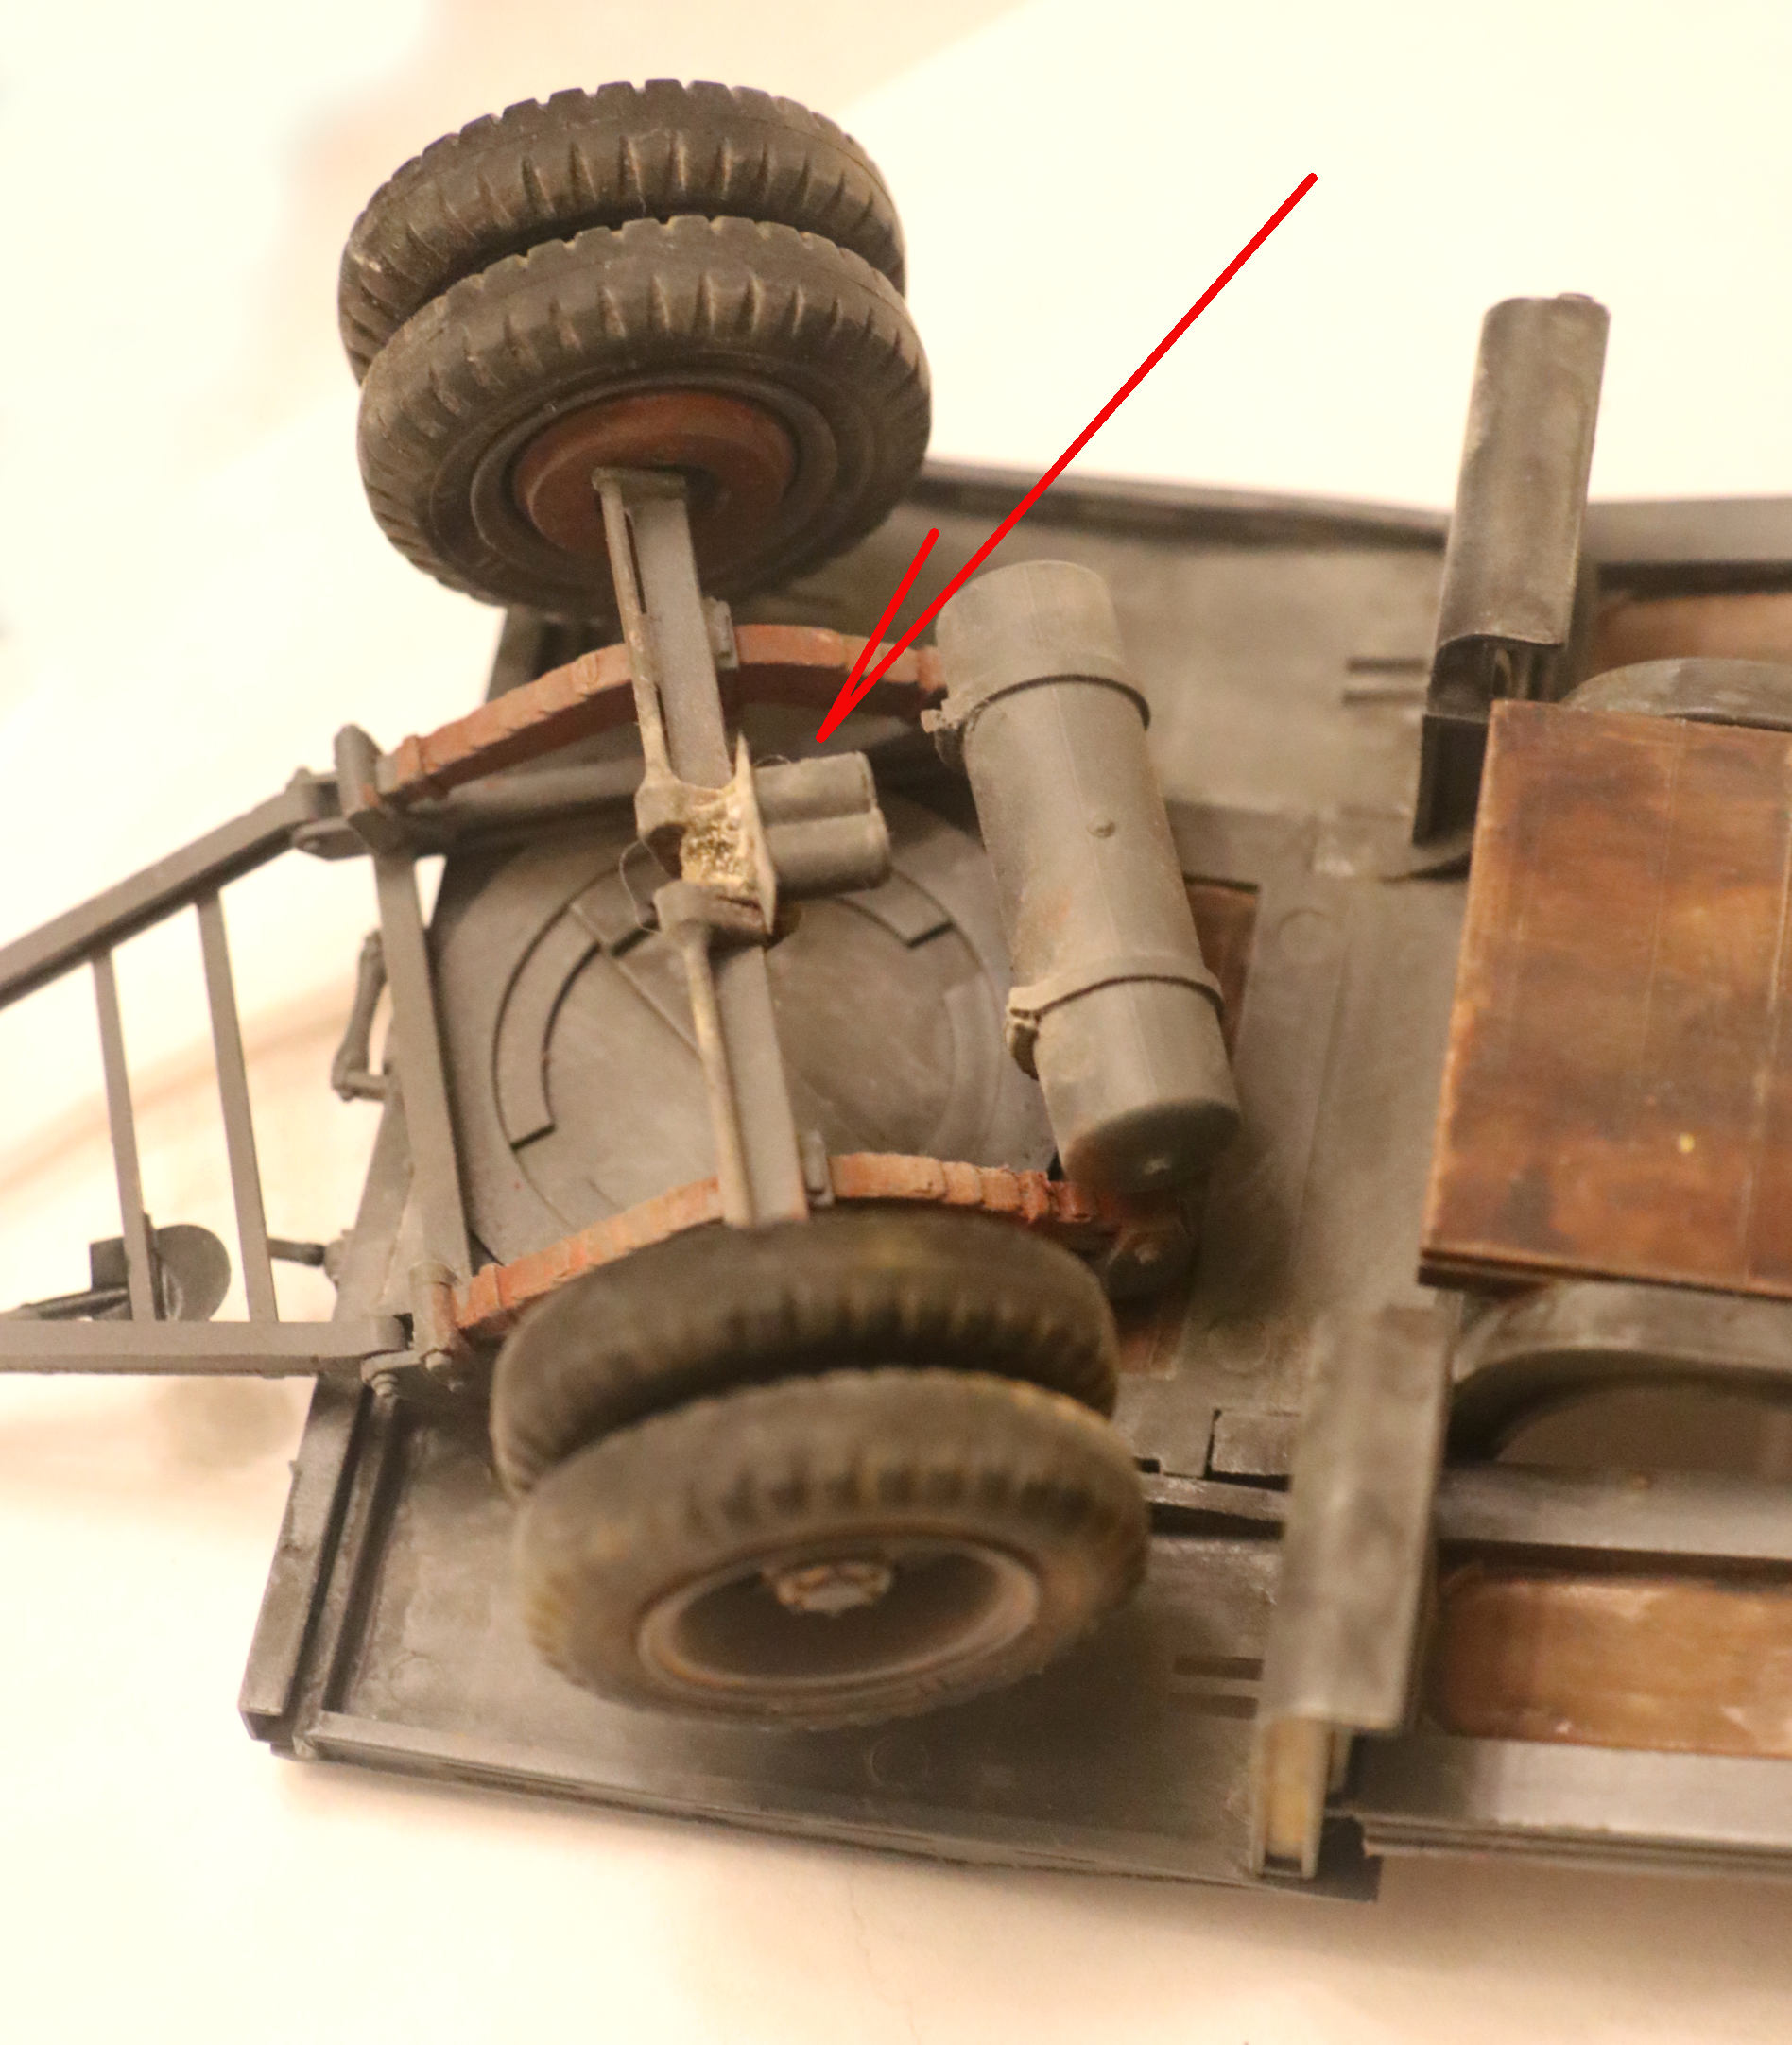
Another nice little bit of added detail:
Last night’s contribution was to build and install the air hydraulic brake actuators/cylinders.
Edit - Revision of Earlier Post Here
I just created an entirely new post back at reply #11 regarding a possible assembly problem in the instructions.
I am reprinting that new post here for those that may not care to scroll all the way back up to the review the earlier conversation.
_______________________
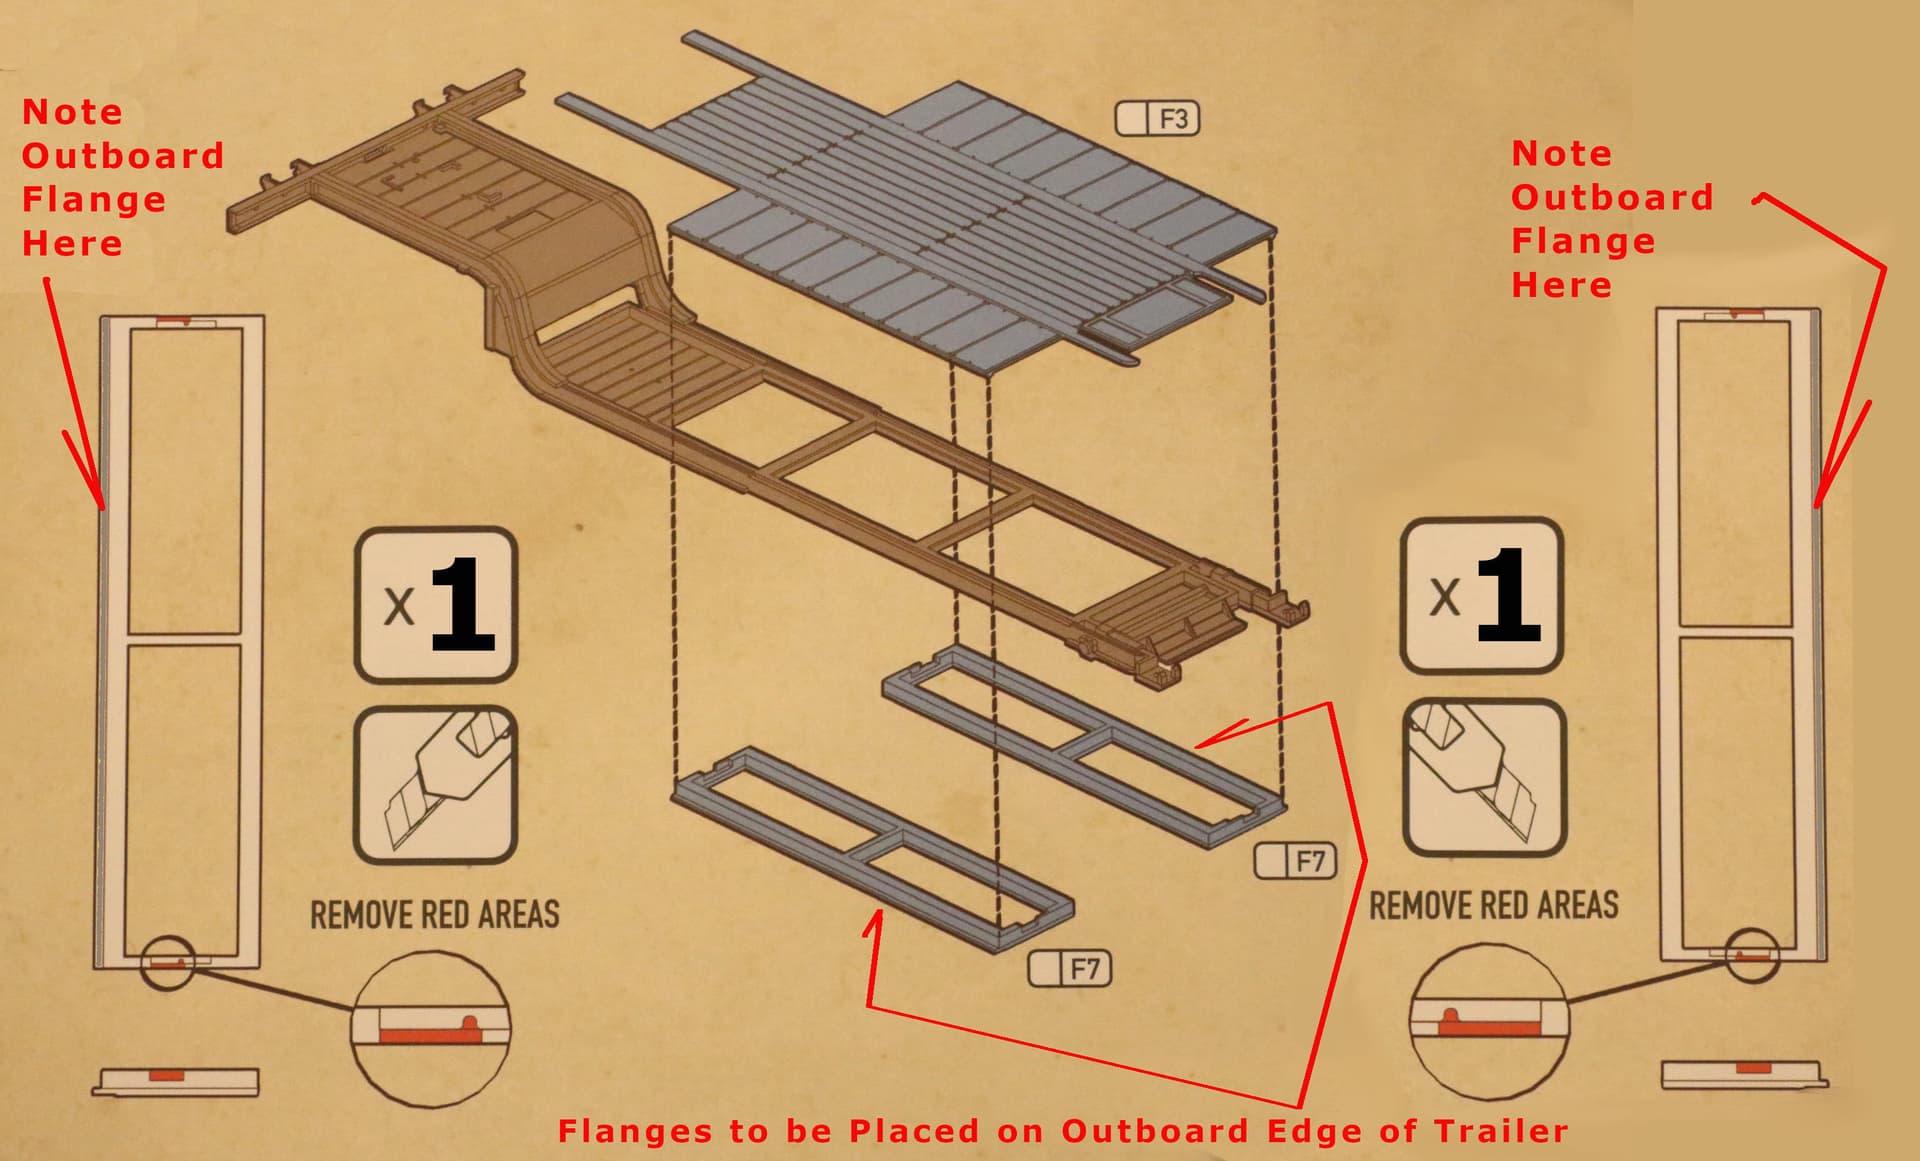
Possible Assembly Problem:
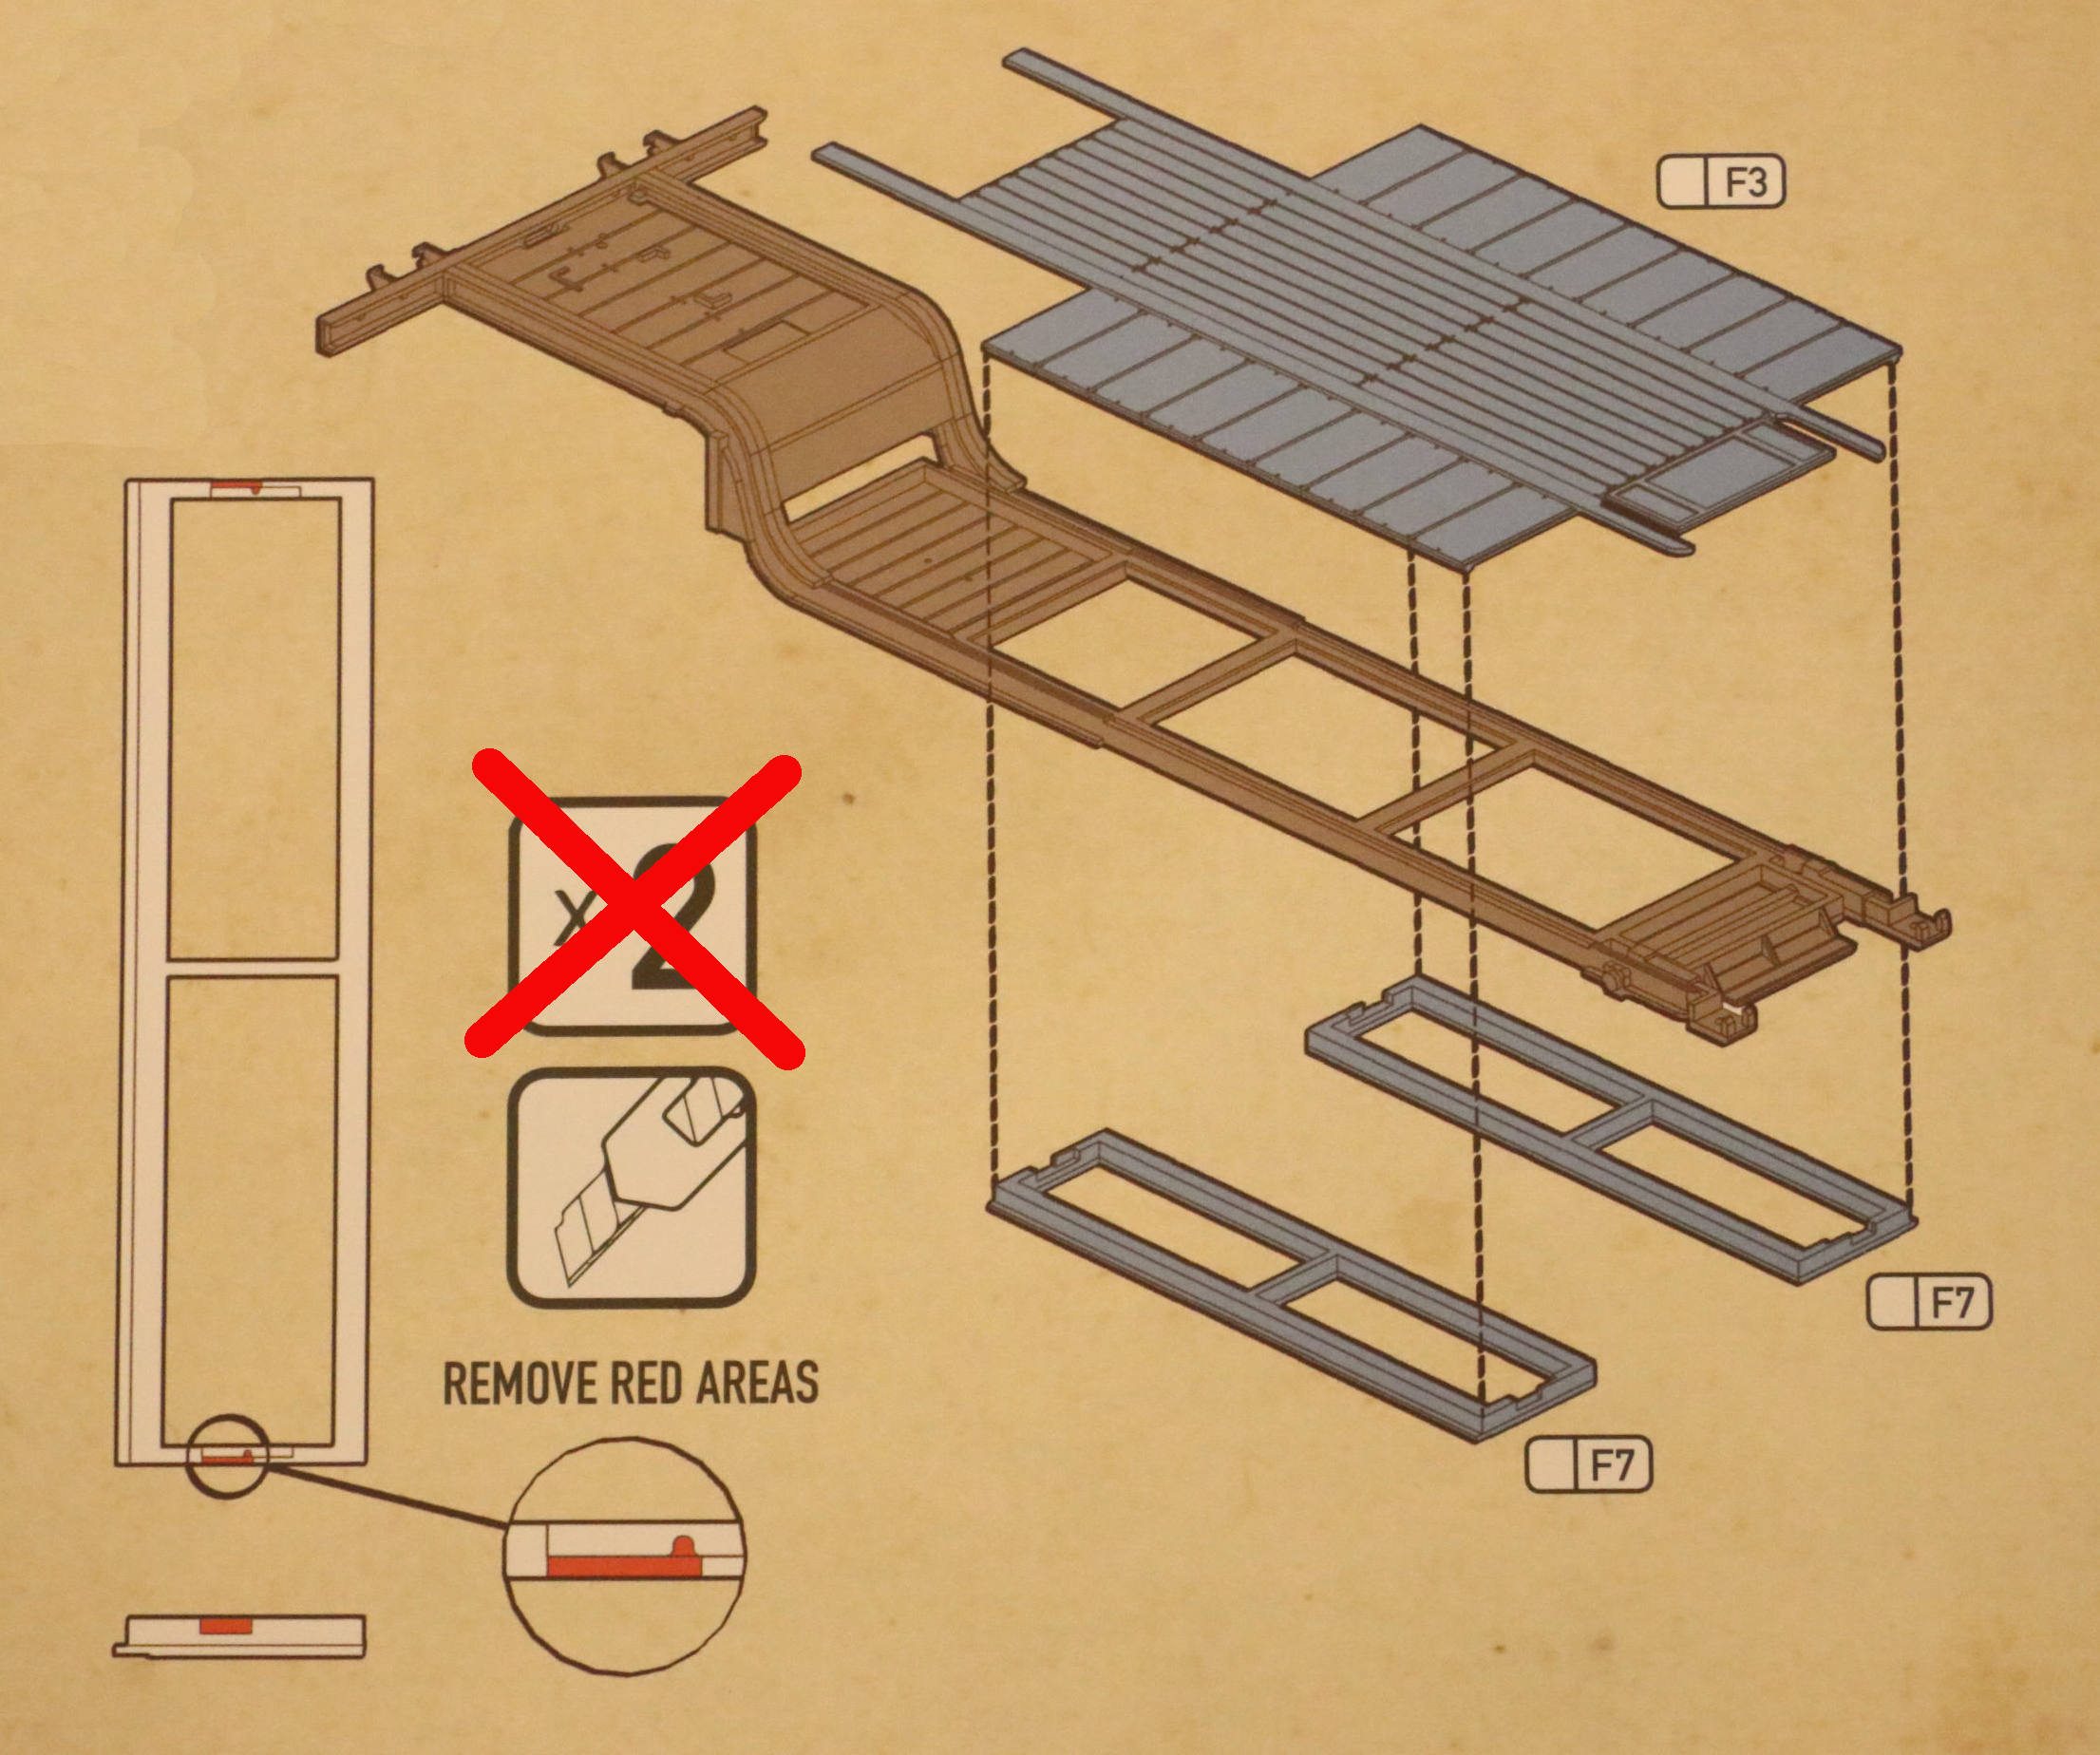
I may be overly simple minded here but I think the Das Werk instructions get a bit confusing at this point: They indicate to modify these two identical parts (F7) into a left hand and right hand version but I don’t think they are clear enough here and someone building this model could go wrong.
As it currently appears in the 115 Assembly Instructions:
They don’t tell you; #1 - these parts are completely interchangeable left to right. And #2 - the long side with the extra flange goes to the outboard side of the trailer deck.
(My first thought was that they were totally interchangeable with NO differences and I almost glued the part facing the wrong way onto the trailer deck.)
Again I may be a simpleton here but, for just a moment, I started to glue these underbody deck braces on the wrong way. I also confused the cuts I was supposed to make and now there is unnecessary play in those hinged ramp slots on my model. ~ Just a word to the wise.
- Perhaps the instructions should read more like this: -
Thanks to all for your comments and responses.
I wonder why these trailers seem to never mount a convoy taillight???
I want to add one but I can’t find any reference for them to be mounted on the 115.
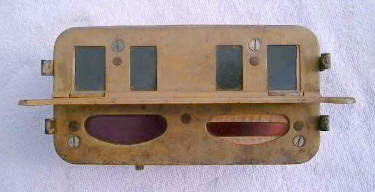
Standard German NOTEK convey taillight.
The Allies had something similar.
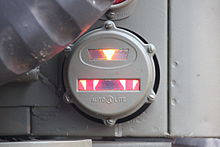
Shown here is a post-war US/NATO taillight - the design is slightly different than the WWII US version but the concept is the same.
AND ONCE AGAIN . . . THANK YOU FRENCHY!
Yea!, I can now have my NOTEK convoy taillight !!!!!!!!!! ._ (Oops that last guy tripped but not to worry, he’s OK. - He must have been following too close!)