I guess they’ve not made up their mind yet about the one to choose… 
H.P.
I guess they’ve not made up their mind yet about the one to choose…
H.P.
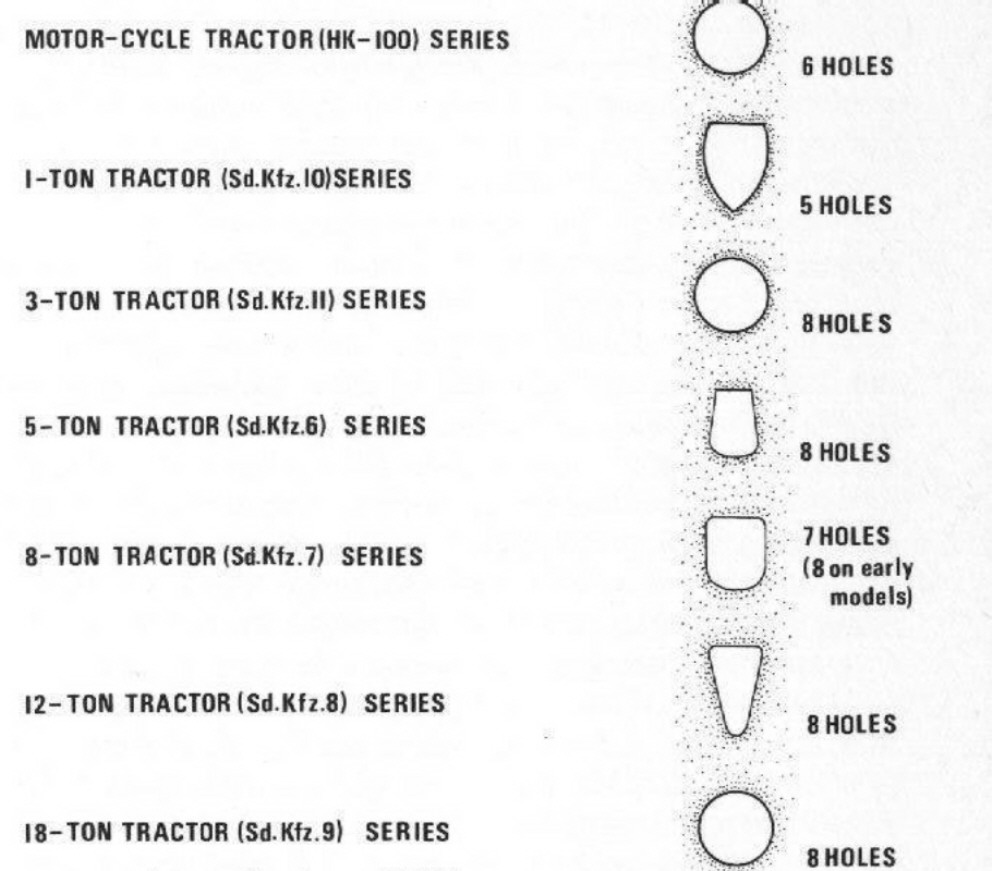
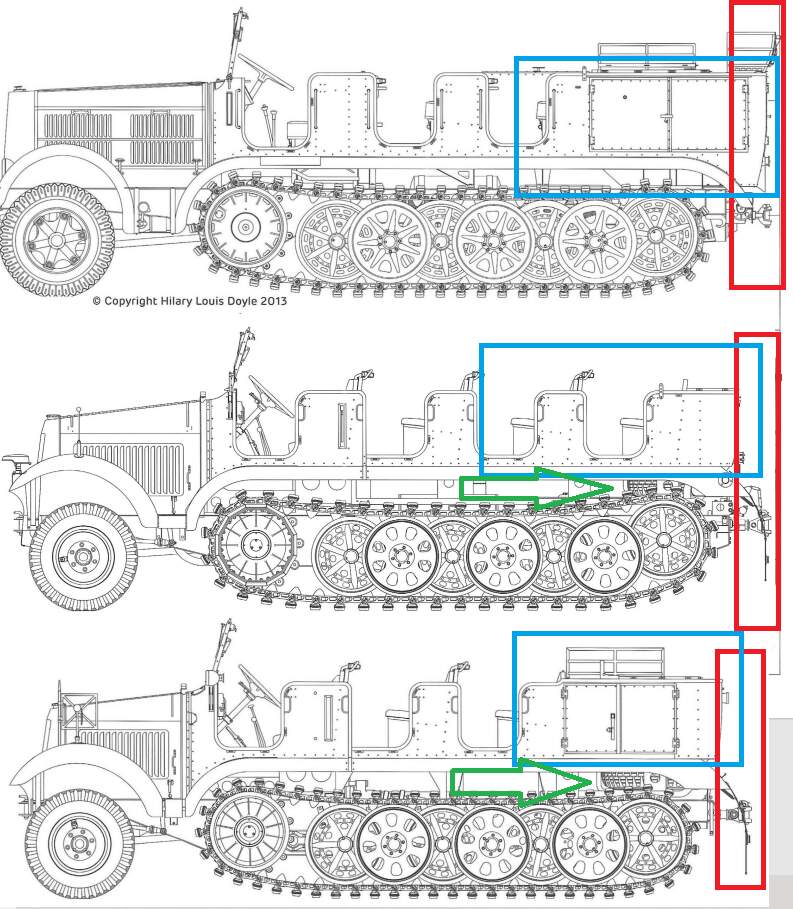
Several ways really, even when comparing the early 7 to the early 6 and so forth. The SdKfz 7 has a much higher rear end in the cargo area with the spare wheel usually hidden behind a door. The SdKfz 6 has a shorter rear cab area with the spare wheel being open to view. The rear doors on the 7 split in the middle and open out sideways, on the 6 the rear door is one piece that swings down.
The 7 has the rear compartment hanging much further out over the rear cross member, whereas the 6 is close to being in line, and the pintle therefore sticks out more. The side access doors on the rear compartment on the 7 are wider horizontally, the 6 vertically larger. The slope on the hood is shallower on the latter 7, horizontal on the early ones when compared to the 6.
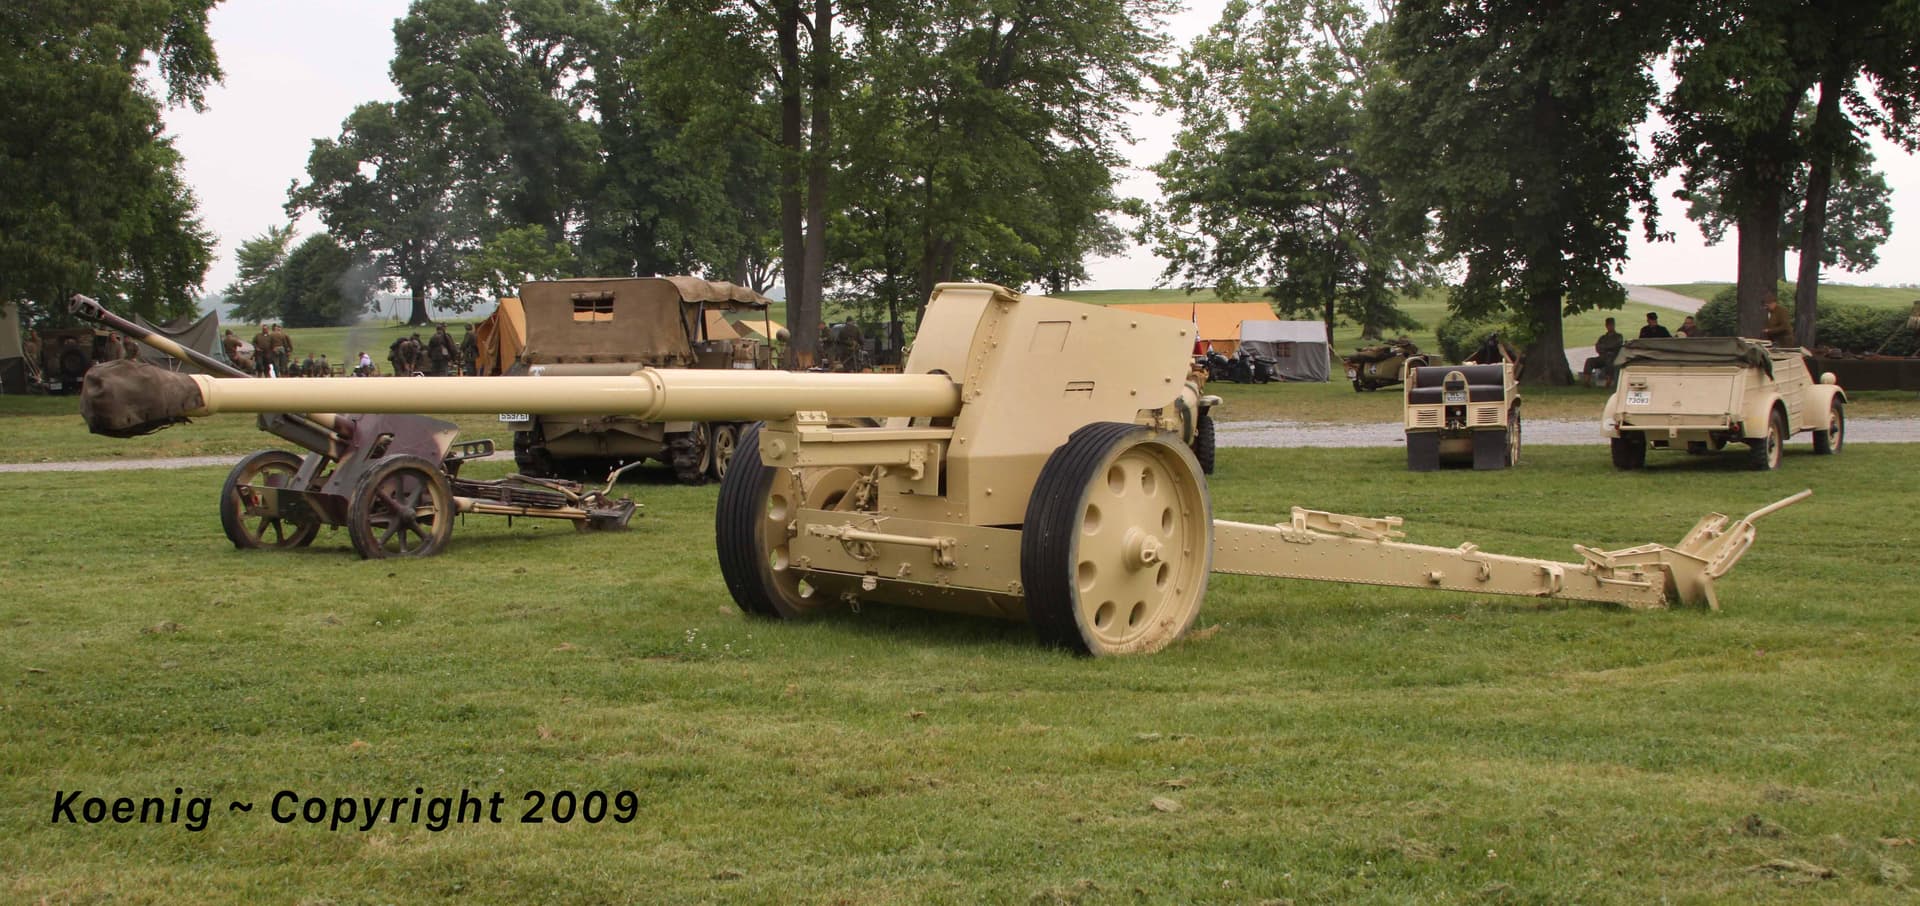
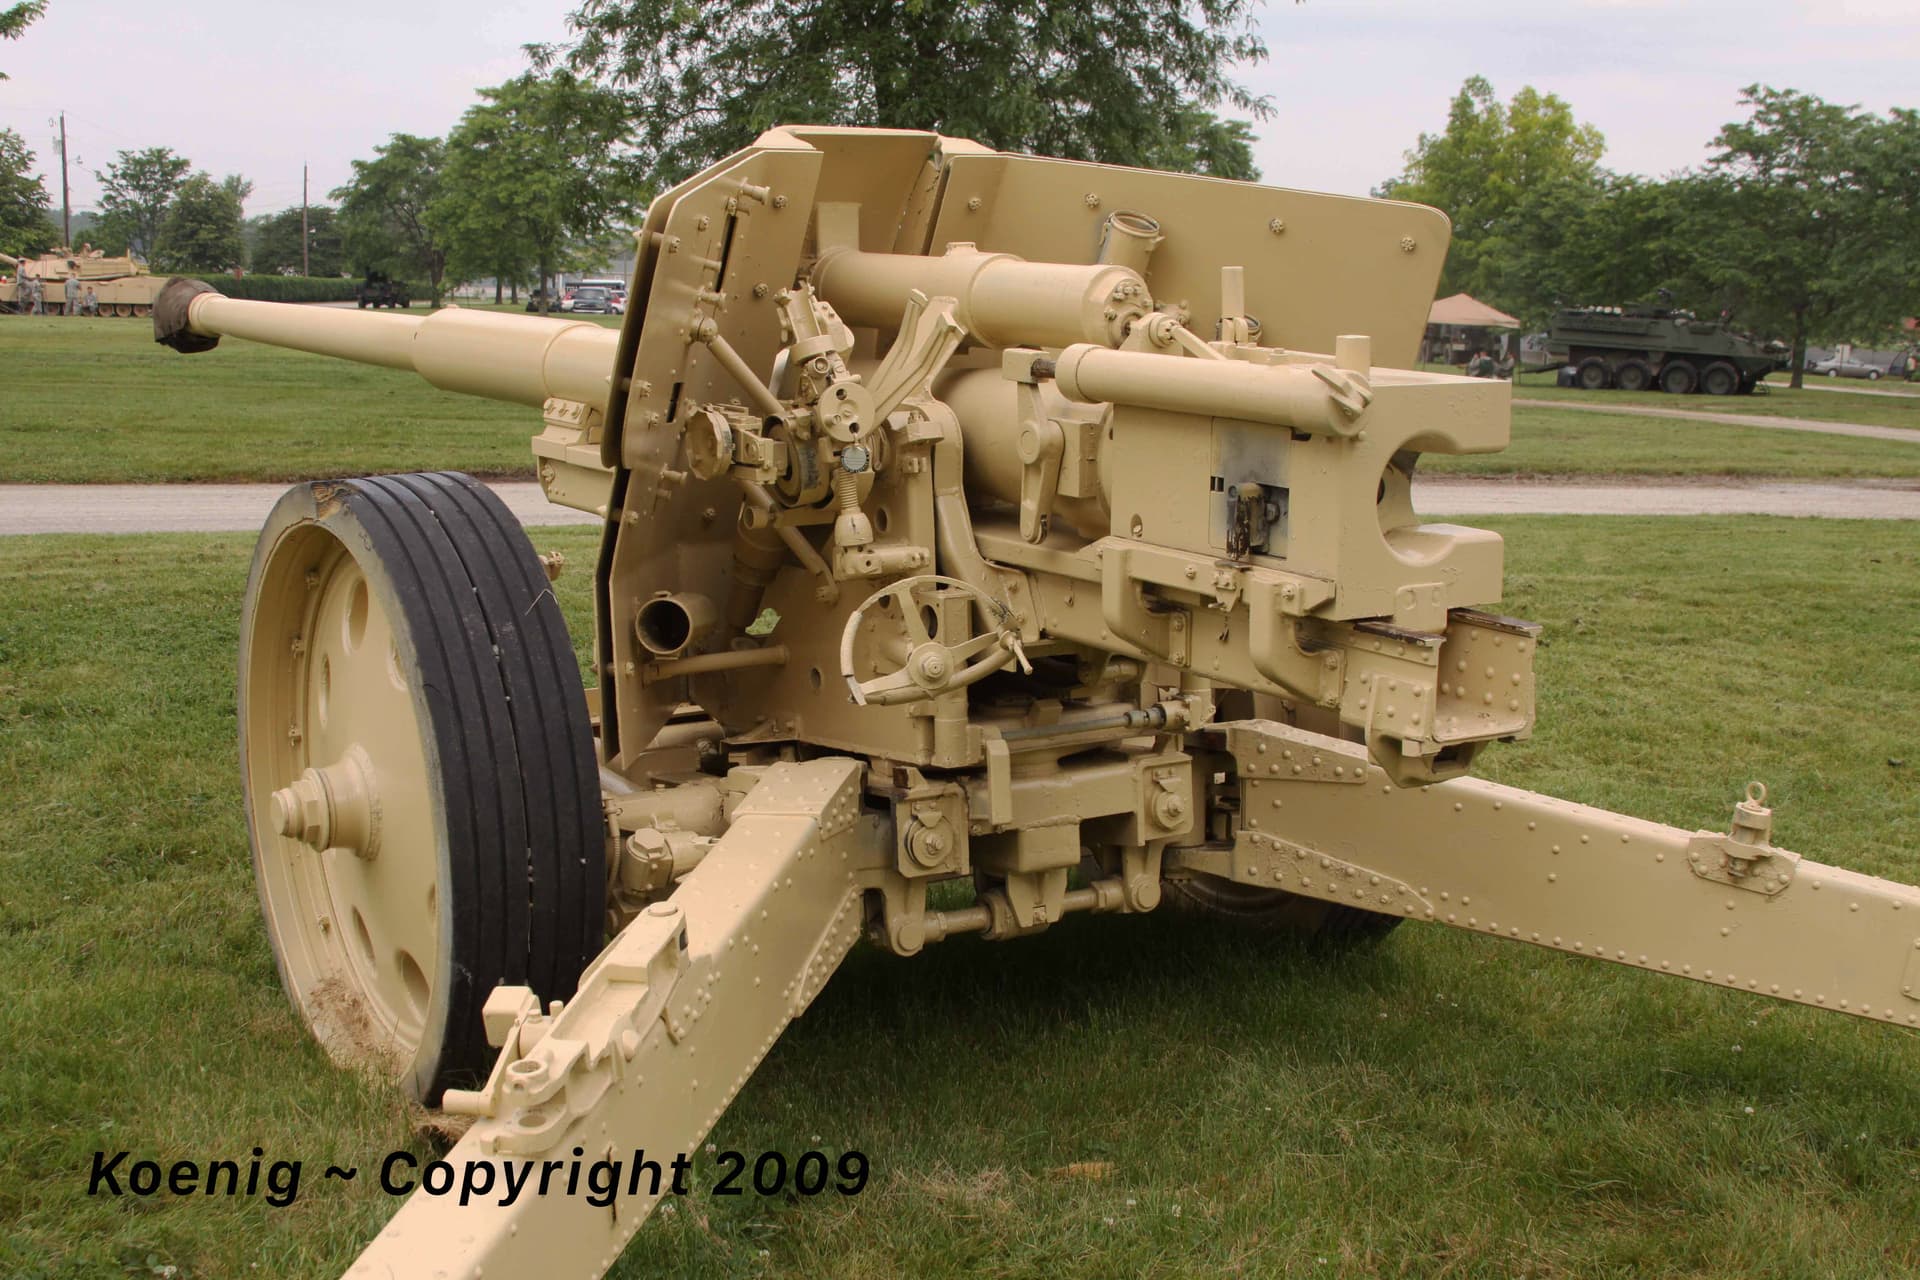
Just tossing in this towed 88mm L46 gun for grins and giggles!
Thanks everyone. Much appreciated. Since moving into this 1/35 scale stuff I’ve found the research just as interesting as the model building.
bruce
Trick question. 
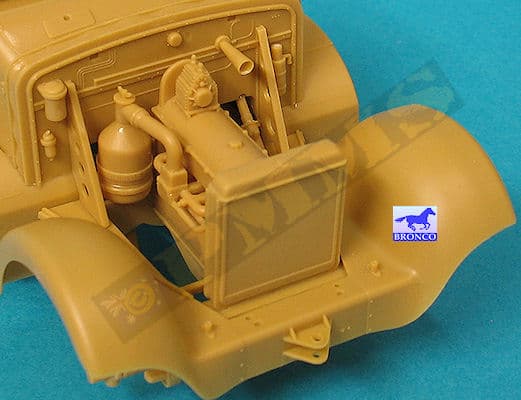
I read the reviews on the Trumpeter kit and knew its ‘flaws’. No radiator in the kit. (Why? Ask Trumpeter). I thought I may have a go at scratch building one. Now the trick question is where would I find a photograph?
thanks
Bruce
You will see very little through the grill and the engine and gearbox is wrong - just a balck painted piece of styrene is basically all you need as long as you don’t plan on showing off the engine with the hood panels off. If you are planning that, be warned the engine and gearbox are wrong for the type.
If you do want to build one, search for pics of the Bronco SdKfz 6/2 kit like this one on PMMS:
Sd.Kfz.6/2 3.7cm FlaK36 kit comparison (perthmilitarymodelling.com)
Thanks Peter. Yeah it was a silly question really. I read the PMMS info. As I said above the Trumpeter kit has some flaws. But it was all I could get at the time. I was going to see what I can also do about the grill. Thus the need for a radiator. The strange thing is that the Trumpeter kit has the hoses going to the radiator that is missing. Strange.
edit - just to be clear. There is a radiator cowling but no radiator. I have ambitions of grinding out the back of the grill so it’s see through. We will see!!
bruce
Id check the trees carefully as it might be there but not mentioned in the directions
Dan I’ve looked and found nothing. There is a fan shroud that I guess they concede has a radiator behind it so they never made one.
Just a comment re Trumpeter kit/s. I’ve not assembled one before. It has been enjoyable so far but at times frustrating. Whilst much simpler than the likes of RFM and MiniArt it still has its challenges. I think it will make a fine build in the end but I’m glad I didn’t pick a Trumpeter kit to start with. For instance there are 2 fuel tanks. 3 locating pins on each fuel tank. 3 holes on each side for those pins. Now my guess is that someone was holding their measuring stick upside down when they located either the holes or the pins. Nothing lines up. Oh yes I’ve checked a zillion times for user error. No matter how I hold my tongue those pins weren’t going into the holes. I used a bigger hammer.
bruce
Par for the course with Trumpeter. I have even had to cut off all pins to make two parts fit properly. If it was easy it wouldn’t be a hobby…
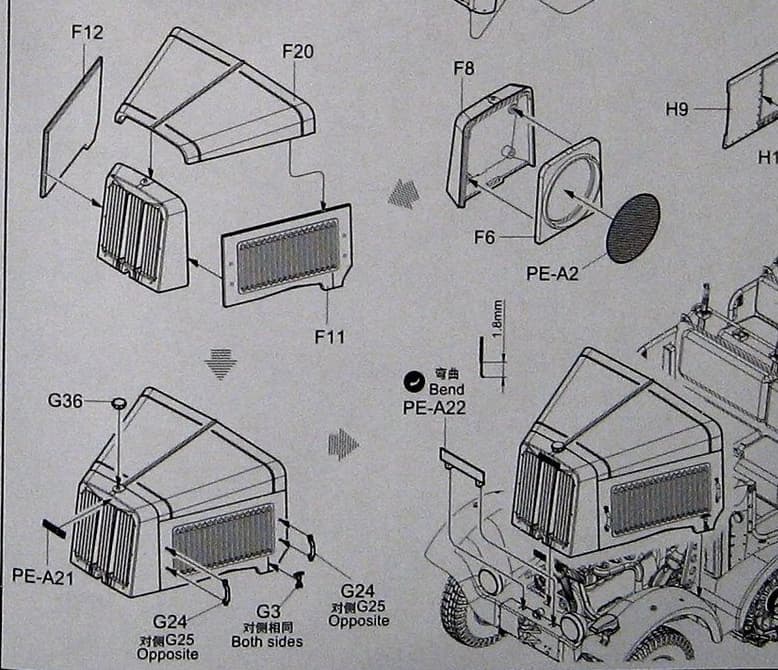
Also the part may not be just a single piece molding. If they went for a high quality representation it might be on the sprues as a front, back, top and bottom moldings - in 4 pieces.
Sprue images and the instructions are here:
if someone wants to check
I think Bruce found part F6 given the comment:
“There is a fan shroud that I guess they concede has a radiator behind it so they never made one.”
So I assume the mesh that is supposed to represent the back of the radiator will be in his kit too. However, he wants to open up the slots in the grill so you can see in, so he is looking for a radiator front that will be seen after opening. There is nothing in the kit for that.
Thanks guys. I guess I’m expecting to much. After all the parts in MiniArt and RFM Trumpeter is a ‘simple’ kit!
bruce
OK a quick update. I’ve been crook for a few days. (Australian slang for sick). So not much done.
Nothing real exciting. Apart from some pins that don’t line up with holes no real issues. Like most kits the instructions are somewhat vague. Read ahead and read ahead.
The tracks are easy. Er well the links are. They just snap together. The pads are very fiddly and need gluing. The odds of gluing them all on without some glue getting into the pins is remote. They are very stiff. I’ve filed and sanded a few yet I can’t figure out what is binding. Never mind. I will be gluing them on anyway. At least they give you some extras. Unless I counted wrong!!
Almost ready to start priming.
It’s not a MinArt or RFM kit but it has been enjoyable so far.
bruce
I want to make a front end wrecked version of a half track to load on my brand new Sd.Ah. 115 recovery trailer so I guess I will have to be making a radiator for mine as well.
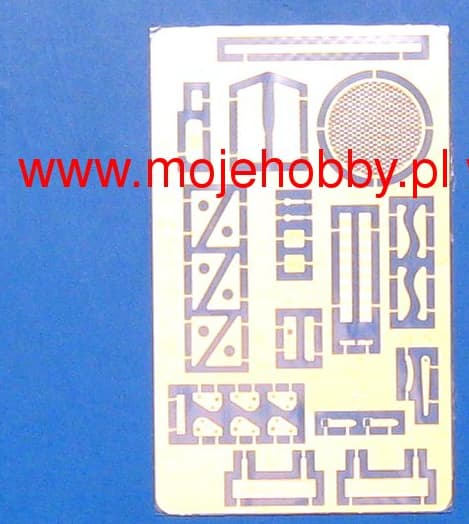
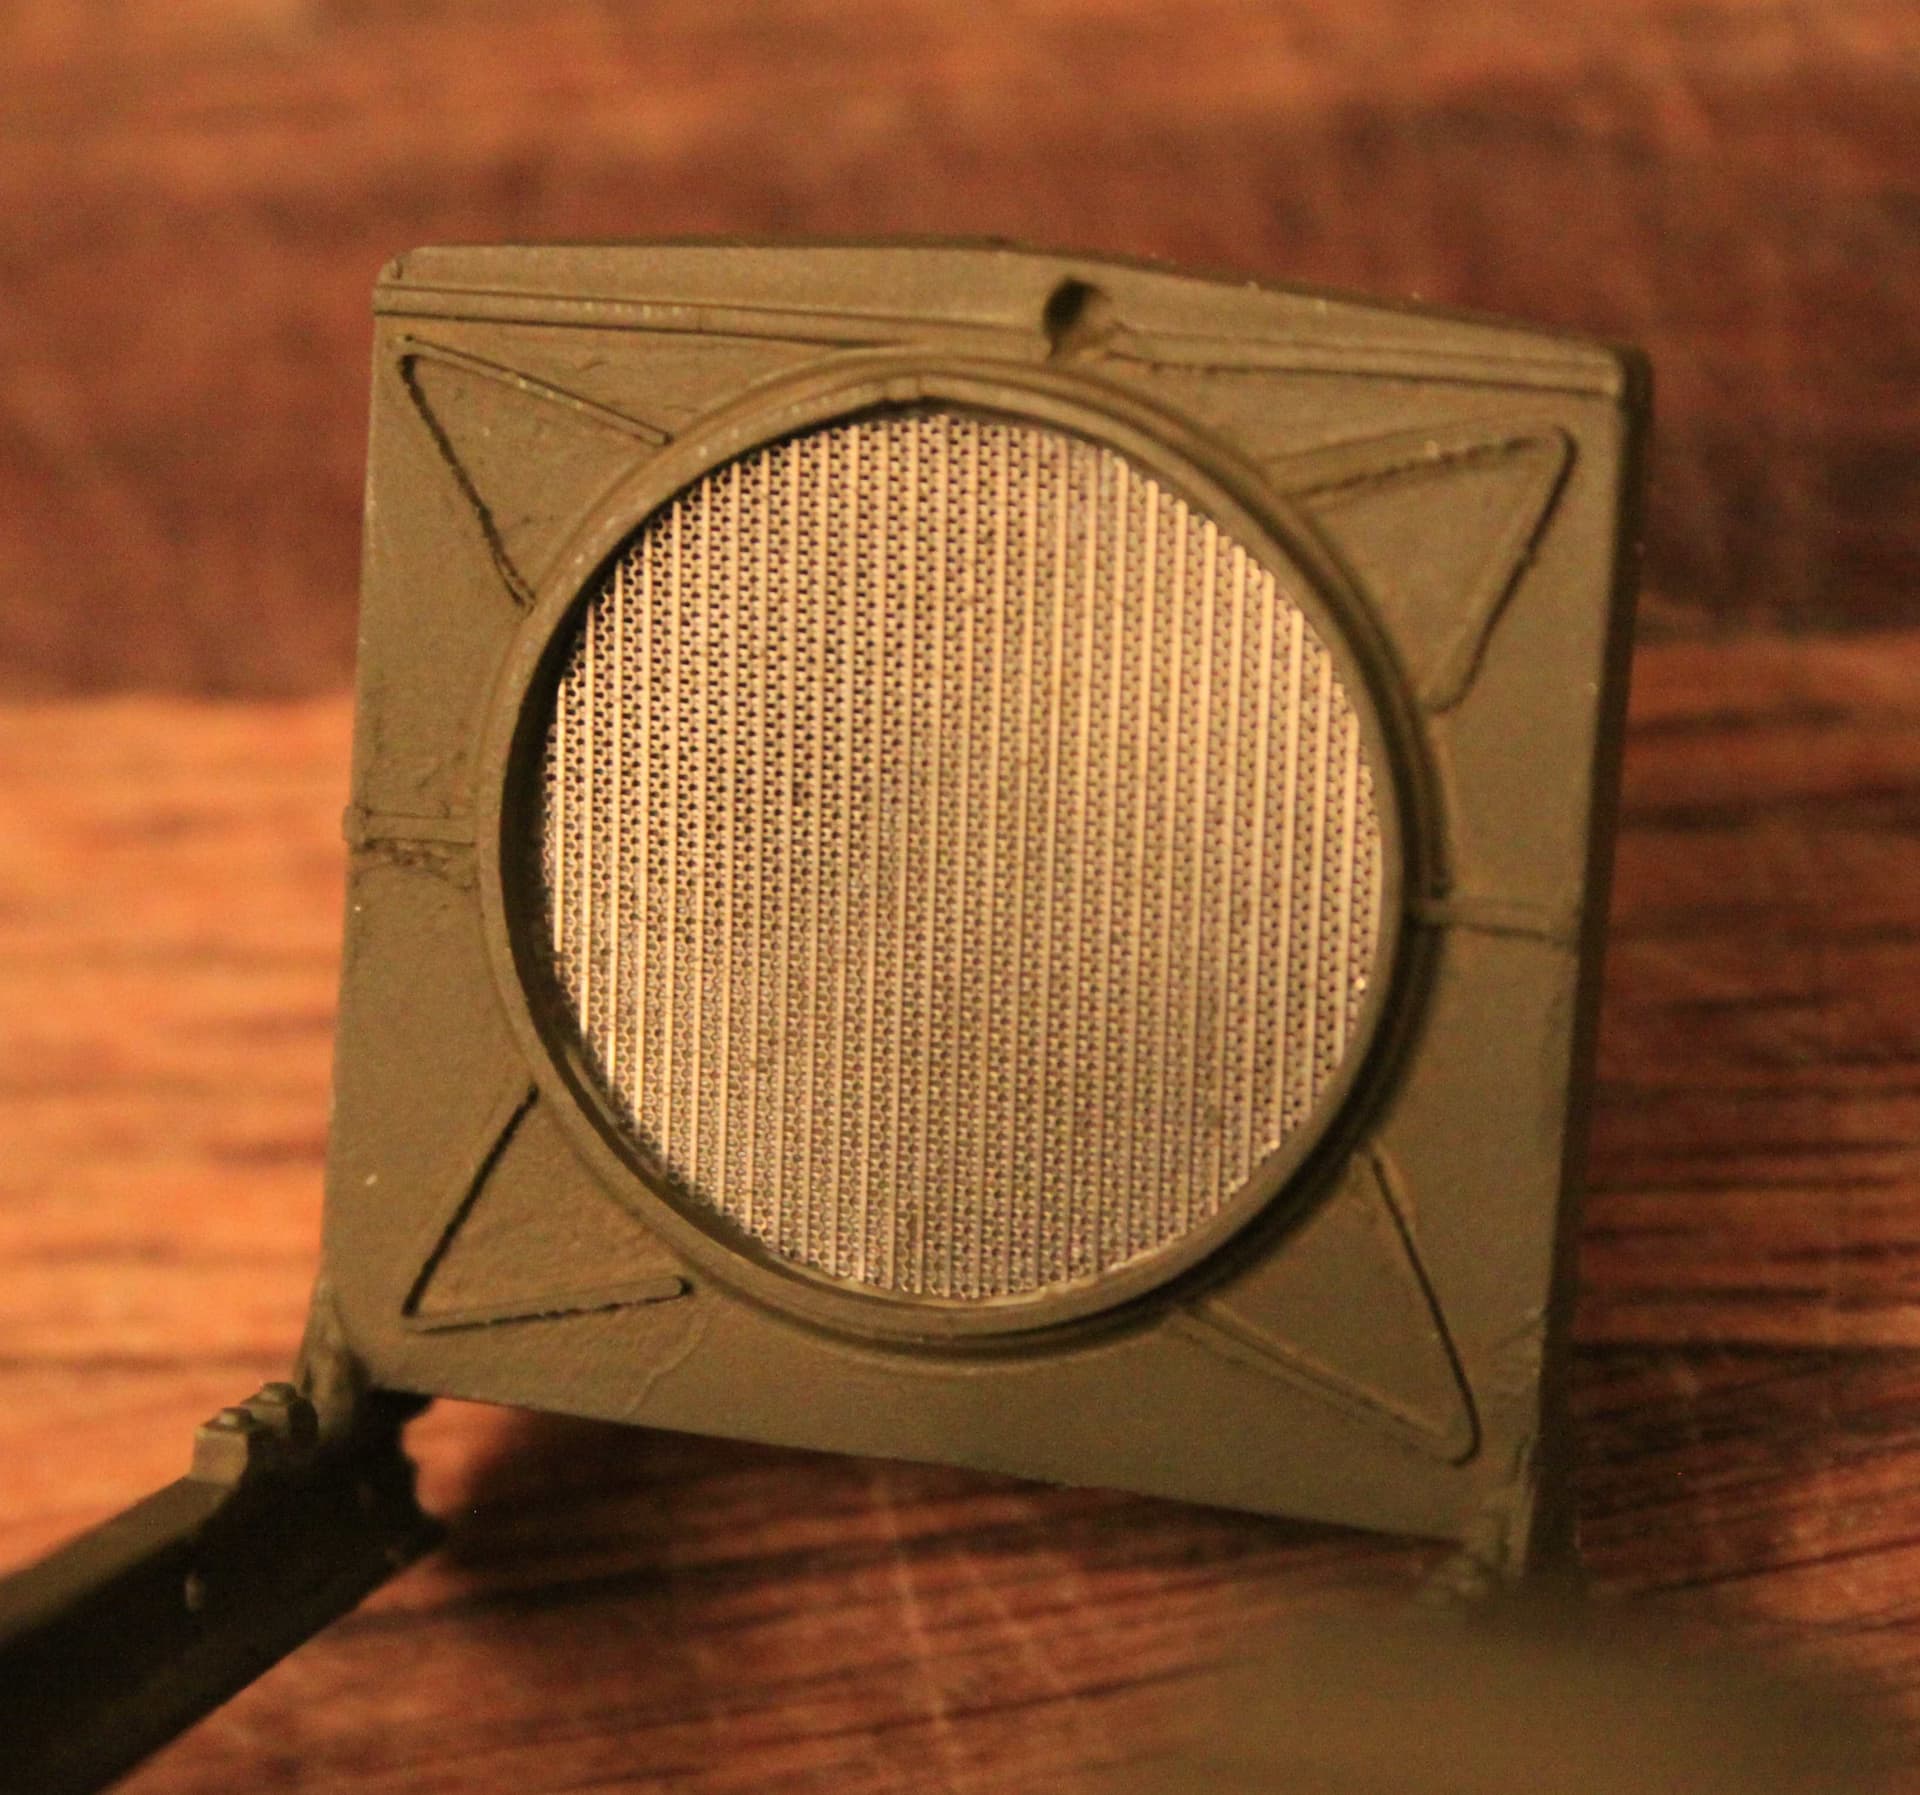
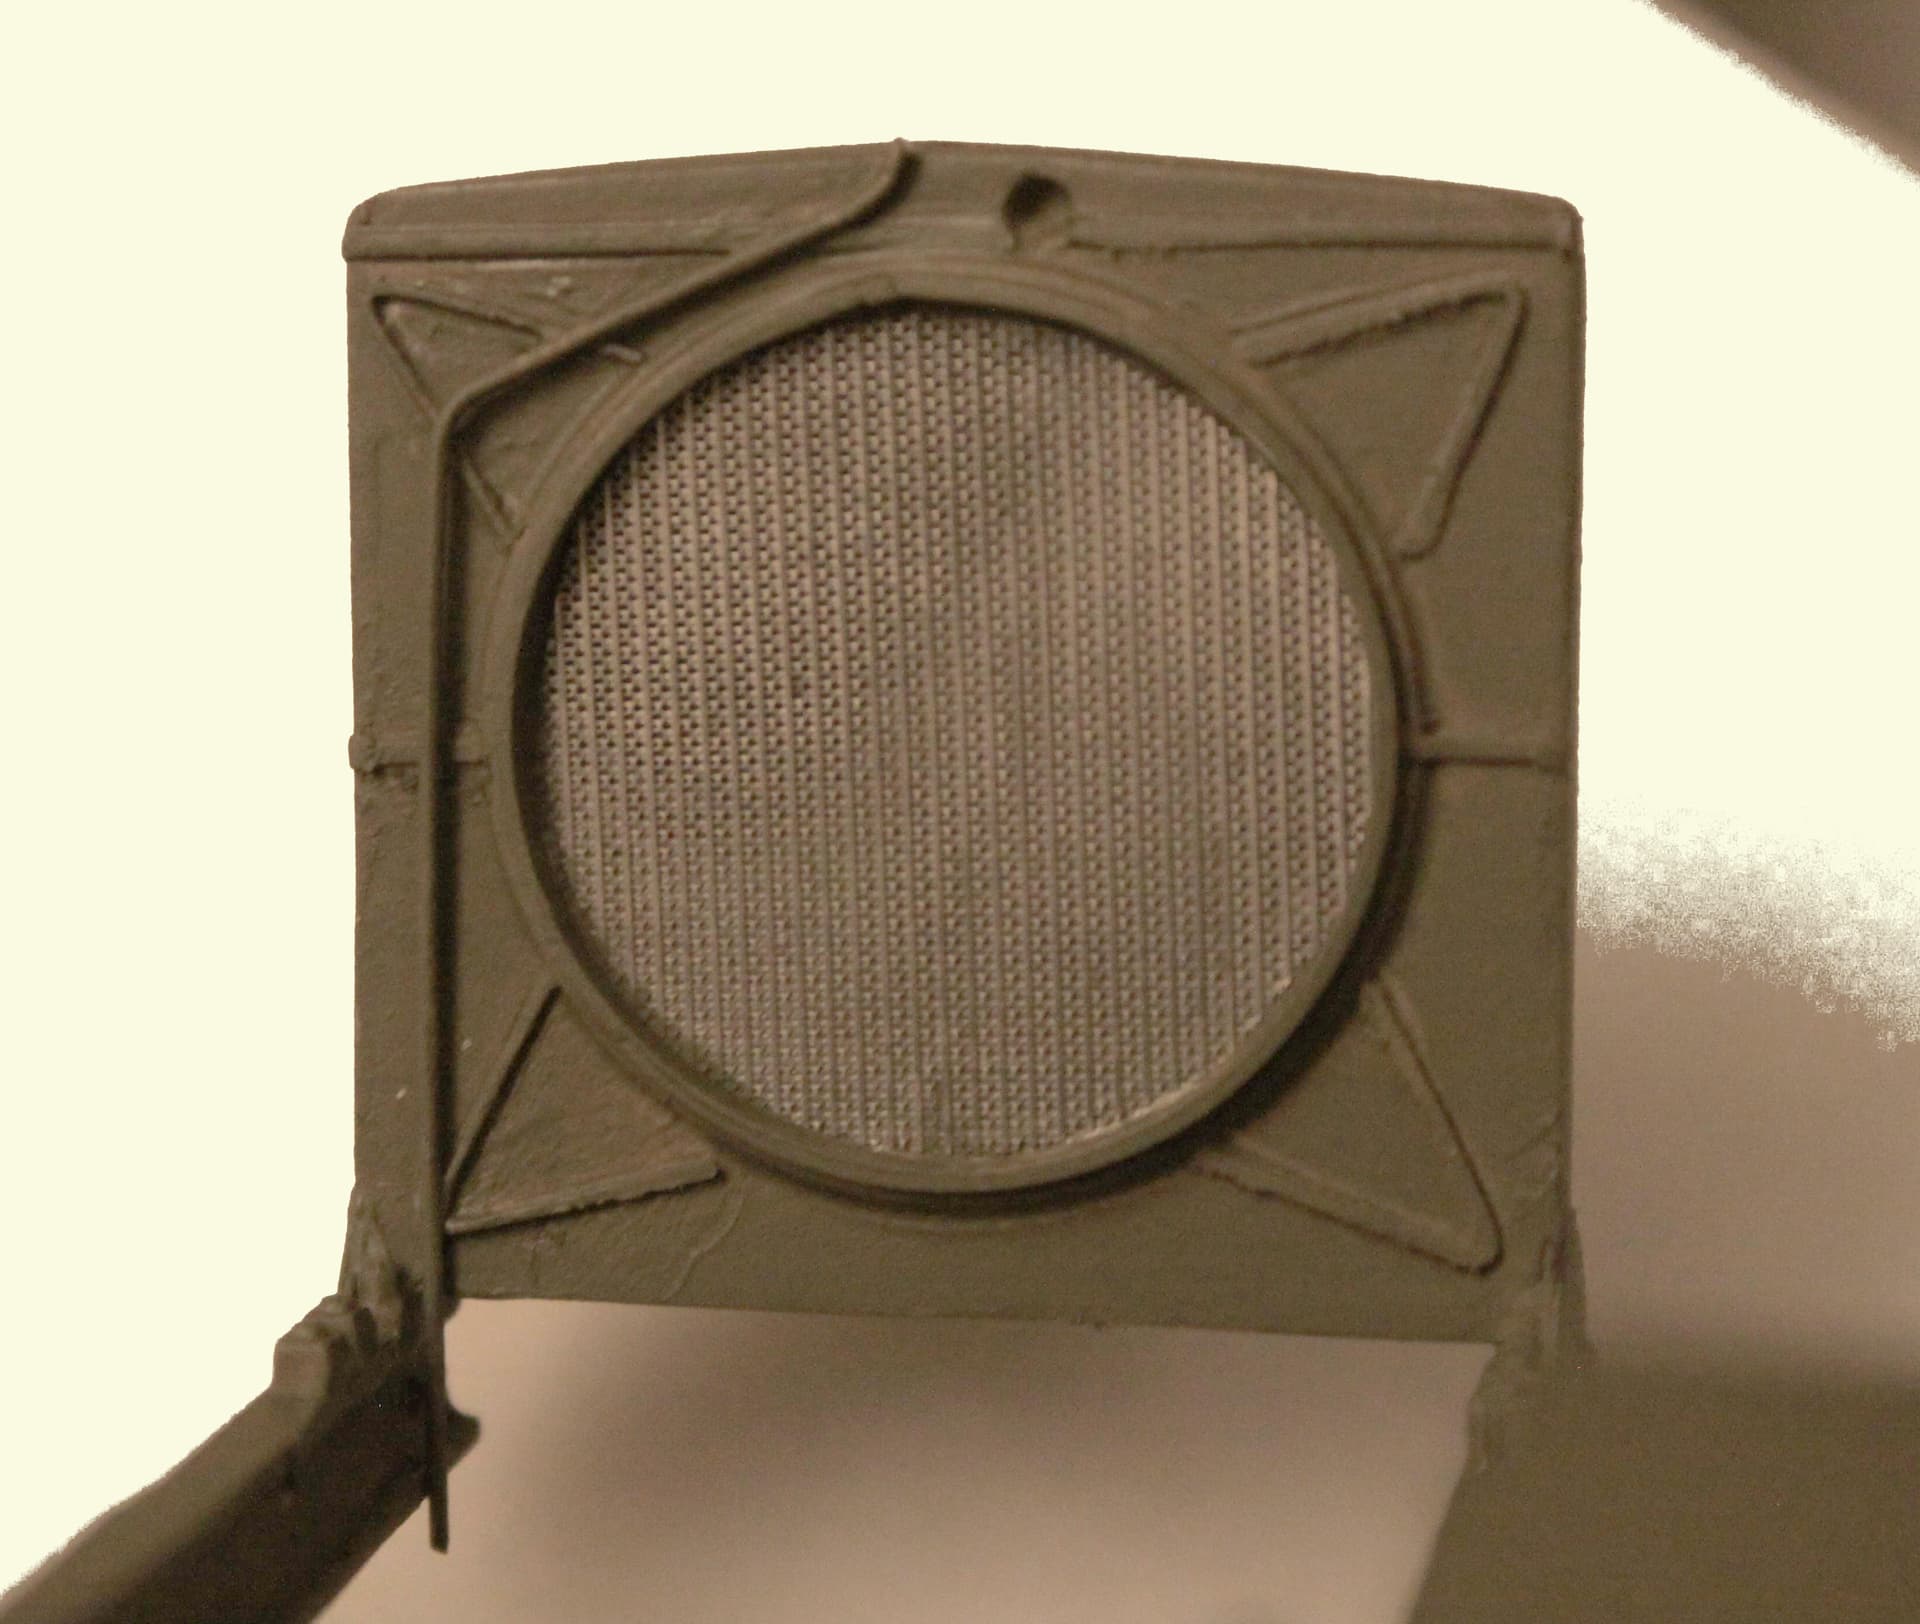
Someone makes a very nice etched “radiator mesh” and I have some. (I will try to look up who it is that offers it.) With that product all one needs to do is build a solid block to form the radiator core, cover it with the mesh and make a header and a sump tank and you will have your radiator.
Here is the radiator core mesh in use on the Mirror Models Caterpiller Bulldozer:
Mike,
RB Productions offered a variety of radiator meshes and I’m sure yours is one of theirs( because you highly recommended it to me some years ago and I followed suit buying it).
Unfortunately, RB Productions seems to have gone out of business last autumn or this spring…
Although anywhere near what RB Production offered, an Eduard mesh(# 00108) is also suitable for representing radiator mesh.
Cheers,
Angel
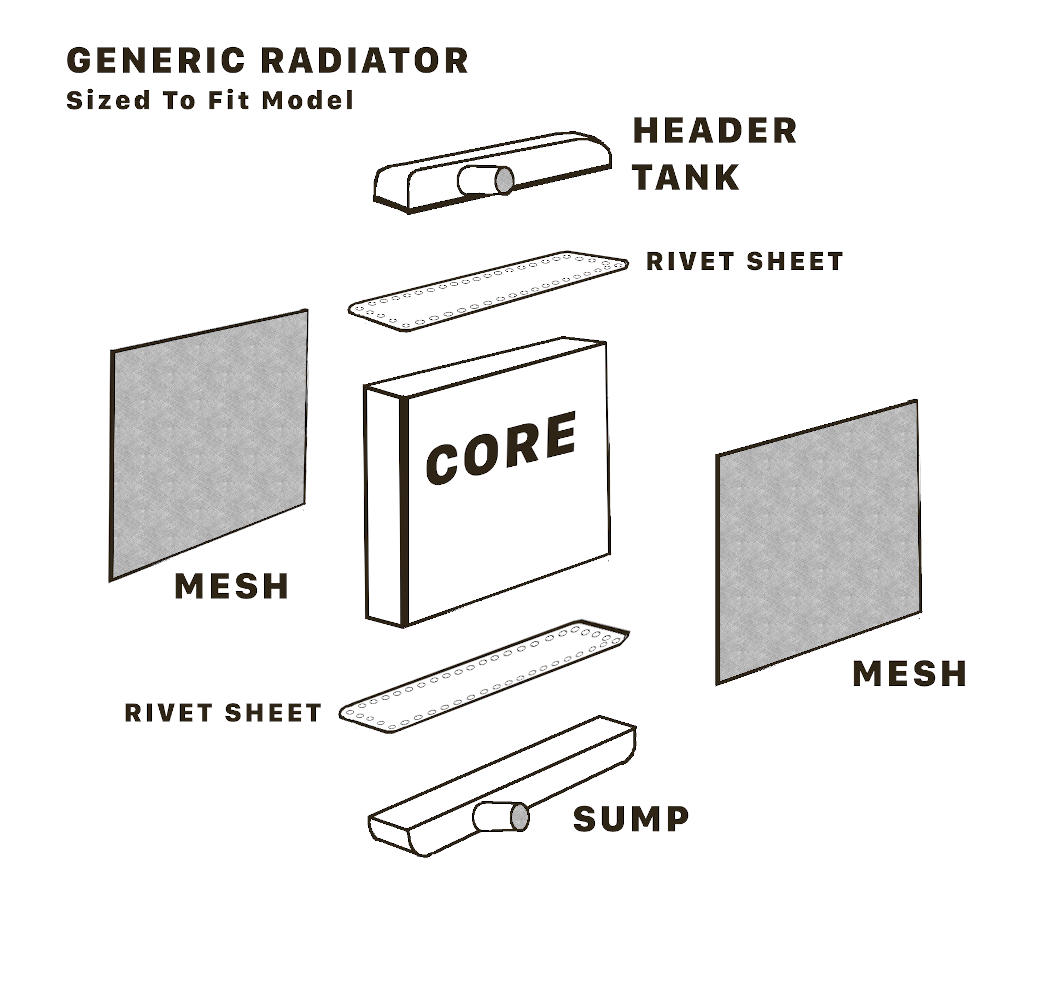
Plan for Generic Scratch Built Radiator; Size to fit Model
If the rivet detail is too much or deemed unnecessary then delete rivets.
(The rivet sheet as shown is made using thin sheet plastic and a sharp compass point to form the rivet “dimples”.)
p.s. - I have also made radiators without the mesh, just simply scribing a cross-hatch pattern across the face of the core to give some hint of texture. I do this when the core is not going to be easily seen on the model.
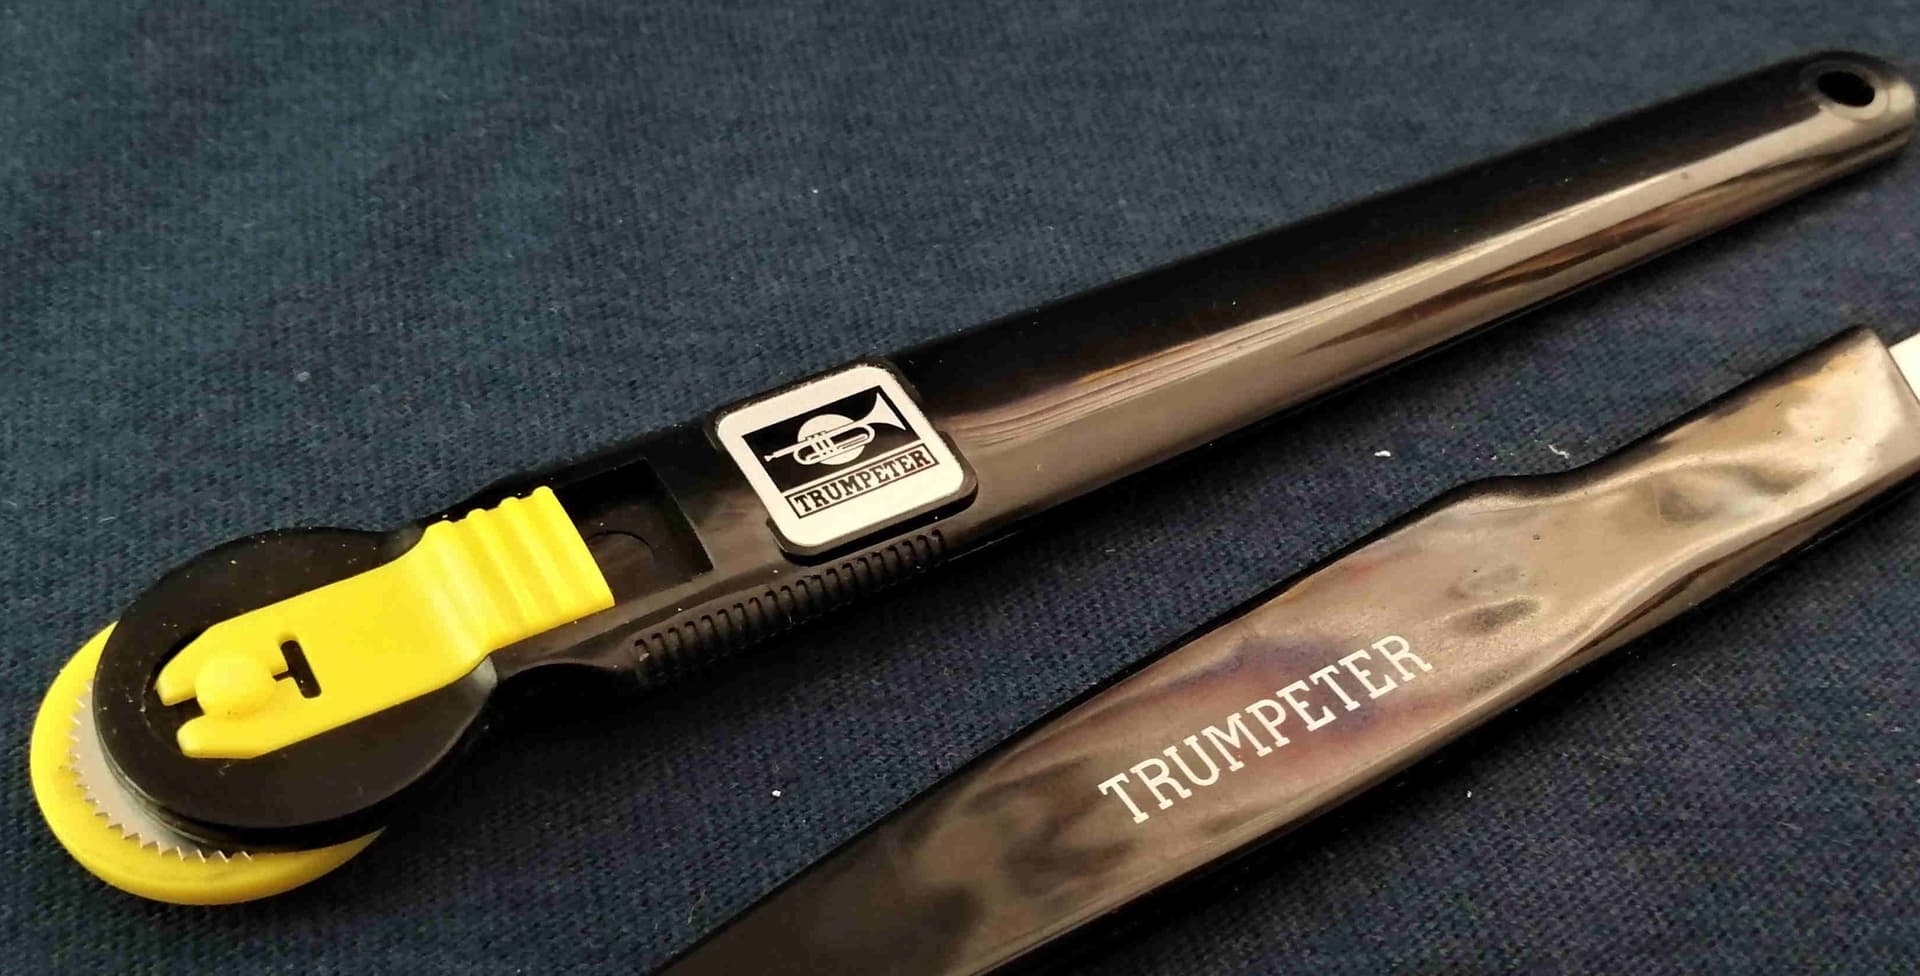
Another option is to use some rivet maker tool- like the cheap Rivet Maker of Trumpeter:
Running the tool on thin styrene sheet(like 0,3 mm) gives a nice row of equally spaced rivets on the backside of the sheet.
The Rivet Maker comes with 4 wheels, so 4 sizes of rivet spacing are easily achieved.
Cheers,
Angel