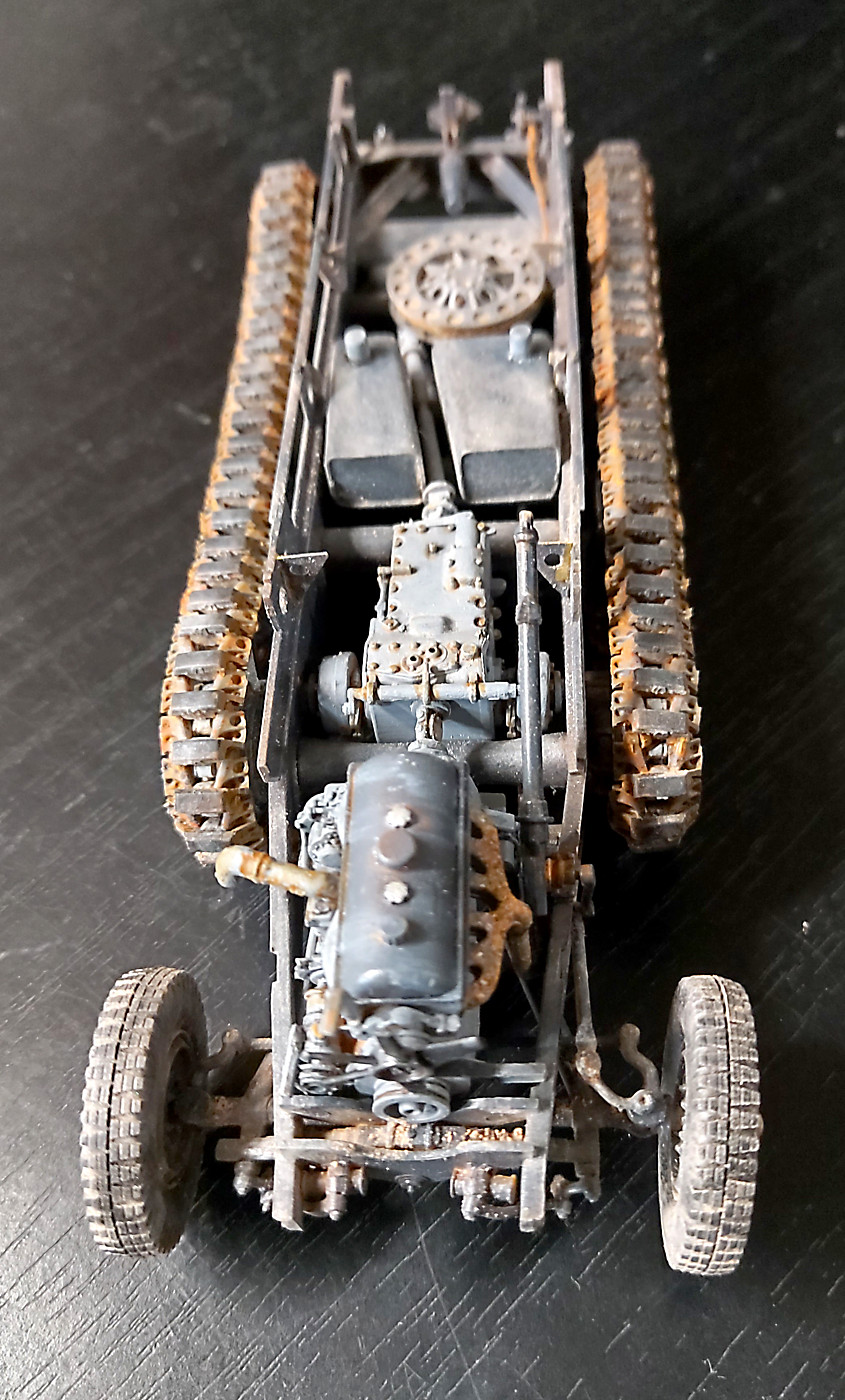
I’ve stalled on my radiator. I have the cowling with some mess. So from the back I’m fine. But Trumpeter’s grill is a solid block. So I’m procrastinating on how to grind out the back to make it see through. Or maybe a complete rebuild! Tomorrow.
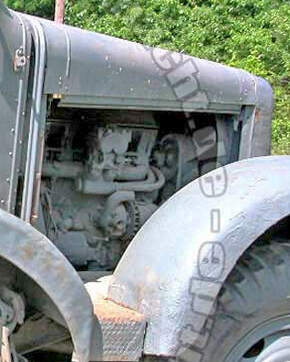
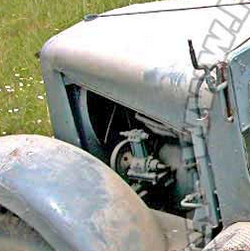
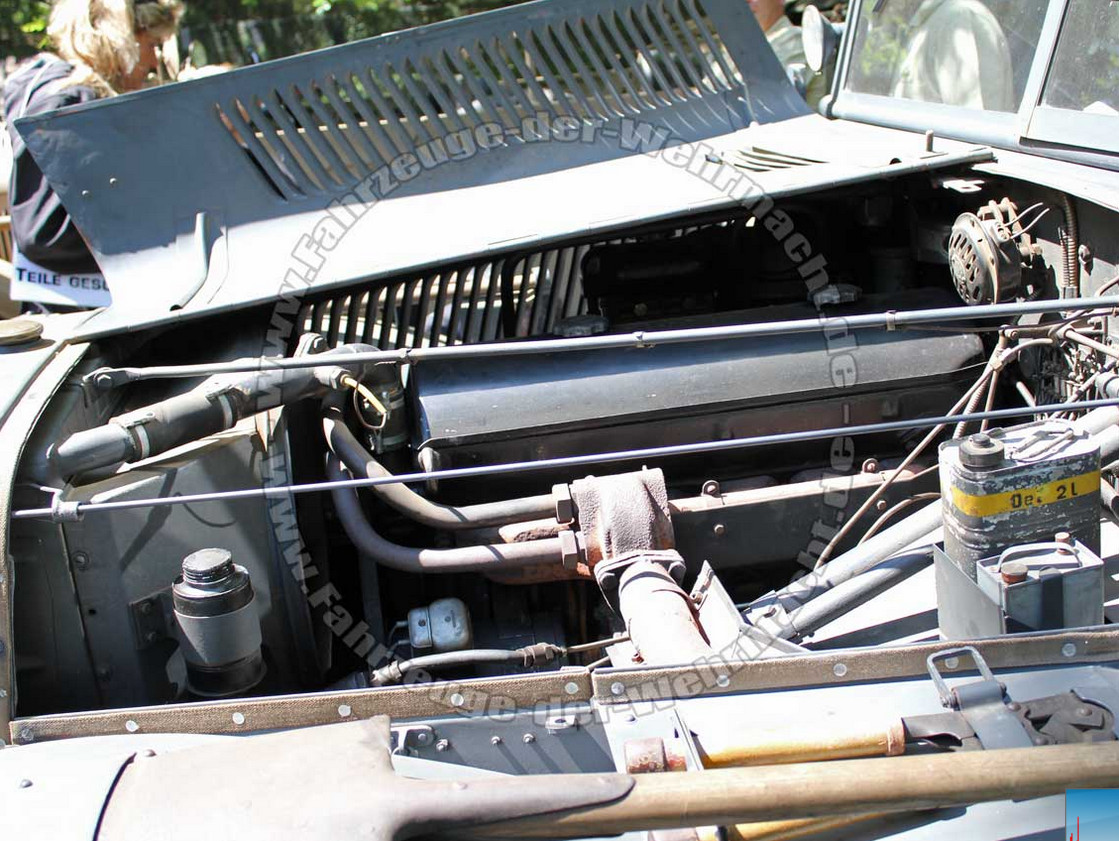
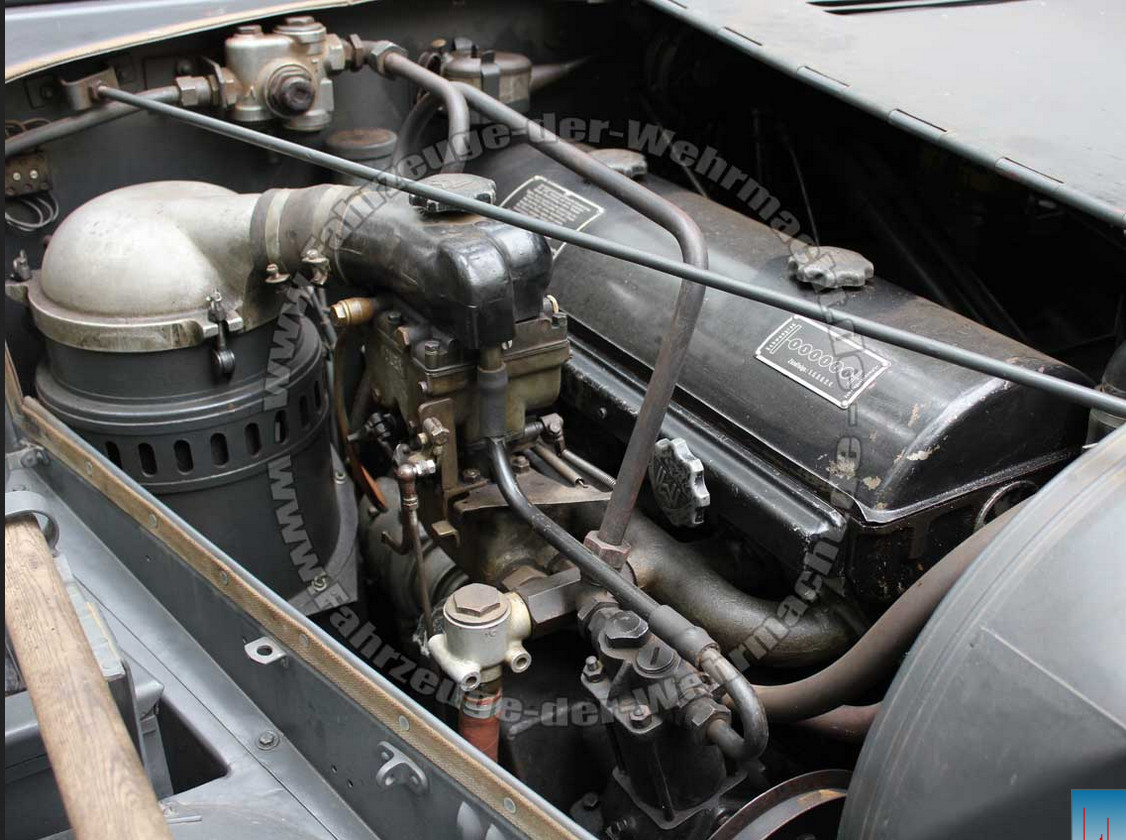
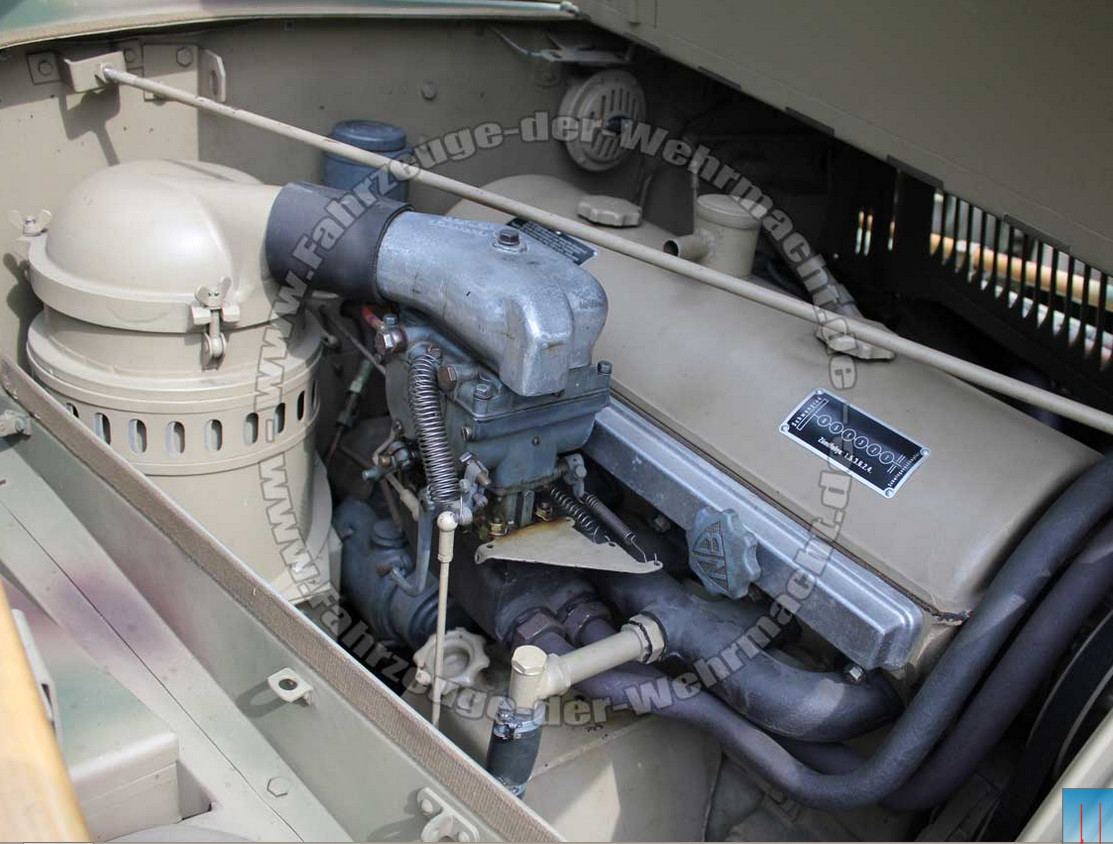
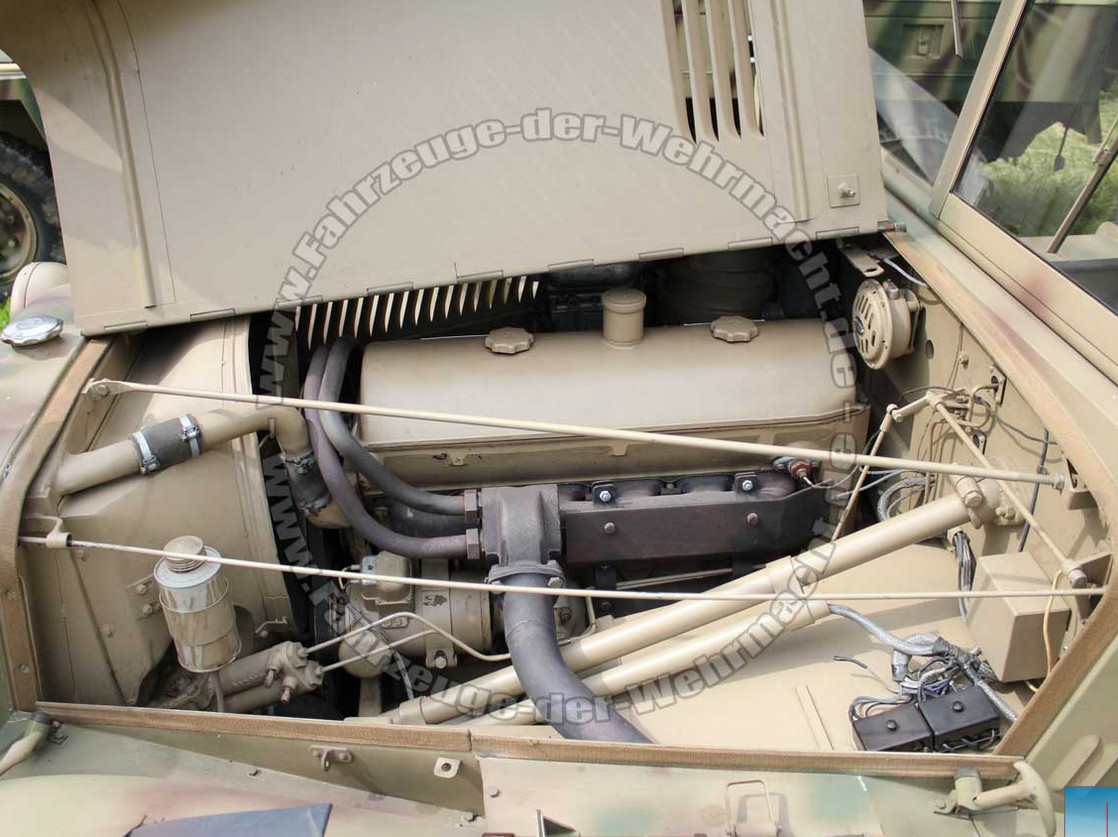
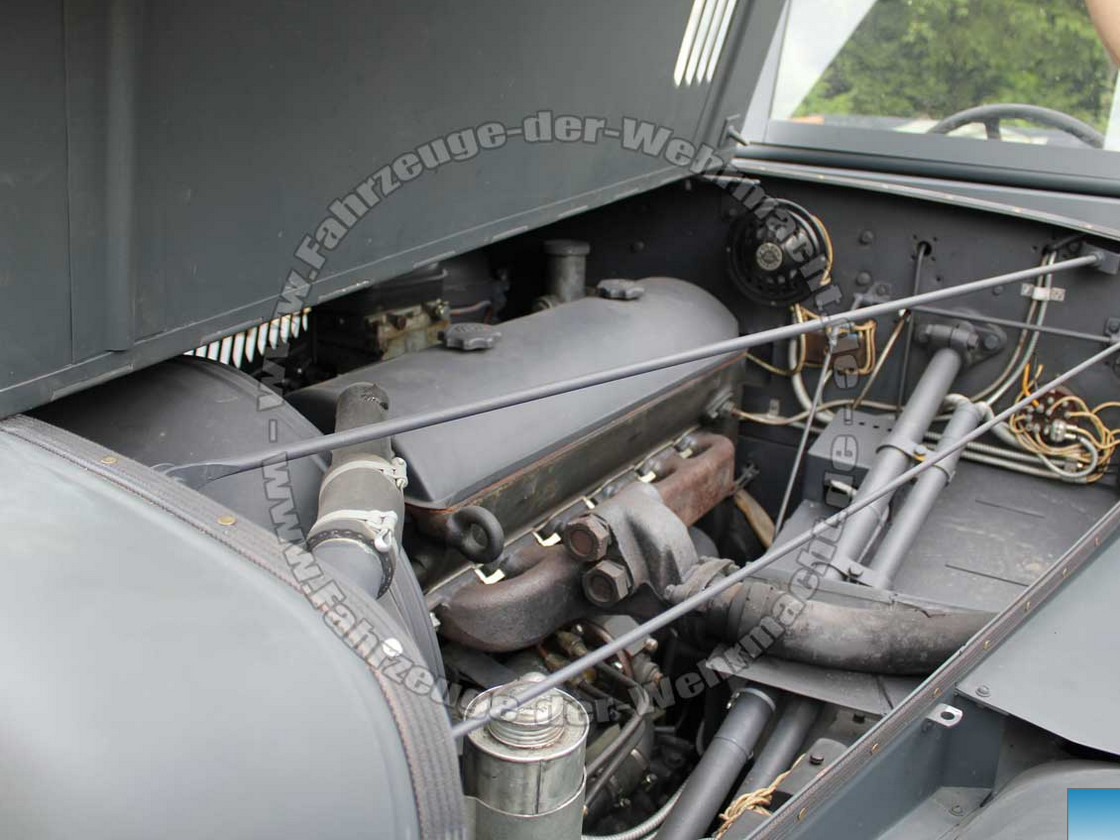
I have only these 2 images to go by. I’m hoping someone may have better ones. (These are a crop of larger images I found on the web. Copy right Chun-Lun. For discussion only). I’ve cropped a lot and details get lost with pixalisation.
The Sd.kfz.6 had a Maybach HL54TUKRM engine. I can only find black and white images and a few colour images. All the colour images I have show the engine to be grey. Can anyone tell me what the original colour was? I have this site but no mention of original colours. https://en.wikipedia.org/wiki/List_of_WWII_Maybach_engines
The one thing I CAN say is that the big arched valve cover on the Maybachs were usually semi-gloss black as where the star shaped lock-down knobs retaining that valve cover.
A lot of good info for wiring the engine. Yes I know the kit has the wrong engine but I won’t say anything if you don’t.
The why? The grill and side louvers aren’t see through on the kit. So I thought I would leave the hood sides off. If asked about the engine I would point at the dummkopf over by the tree and his field engineering.
bruce
See my problem? All colours and which is correct? Or closest to being correct?
Slightly off-topic but I have the Dragon Sdkfz 7 8 ton half-track (early) and as many have noted, this does not come with decals for the dashboard.
I have the Archer Prints for the dashboard, but there appear to be two sets of decals (assume that the dashboard may have been different for early v late versions).
So, I seem to recall that someone posted images of the correct dasboard visualisation - maybe it was on here? Anybody recall that?
Have you ever had one of those days when learning to play the piano seemed a better hobby?
Got out all the spray gear. Started to prime with Mig Ammo OneShot Primer. Brown oxide. Makes a great colour for hairspray chipping. Now I’ve used this primer a few times before. It’s a PITA for me. Clogs. Dry tip. Dries in the airbrush. But last time it worked fine. Oh no, not today. What a circus. I had to stop priming and drop the whole gun in my ultrasonic cleaner. The amount of dry primer inside was unbelievable. So cleaned it all up and started again. Started fine. But within a few minutes back to it’s PITA status. Enough. I had primed what I need. So cleaned up again. After awhile I was ready to spray on the Mig Ammo Dunkelgrau. Worked a dream. Nice job. Patted myself on the back for a job well done. Went off and dropped the gun in the ultraonic cleaner. Cleaned up and put away.
AAAAAAAAAAHHHHHHHHHHH. After clean up I came back to find the hairspray looking all coy on my desk. Yup forgot the hairspray.
Sometimes Bruce the planets are not all in alignment, the moon is not in the 7th house, and the muses have all farted in your general direction. There is nothing you can do but wait for another more auspicious day. Even the most experienced (lucky) among us have days where only 2 passes of the Iwata are allowed before there is a blockage in the forward body of the airbrush, rendering it worse than useless, because now it requires a complete teardown and that perfect paint mix is wasted.
Now what awaits you is the Windex dip. It is not advised to add 3 more layers of paint on the model so you must strip it clean in a tub of Windex, rinse with water, dry, and start fresh. Maybe check your horoscope and make yourself a list this time, too.
Thanks guys. I have an ‘excuse’. Yeah don’t we all? I’m a chronic migraine sufferer. In and out of hospital. On medication all the time. 2 - 3 days a week in and out of bed. I should know better than to start a job when I’m not well. But this modeling is a great distraction so it has some down days but it has a lot of good days that out weigh the bad days.
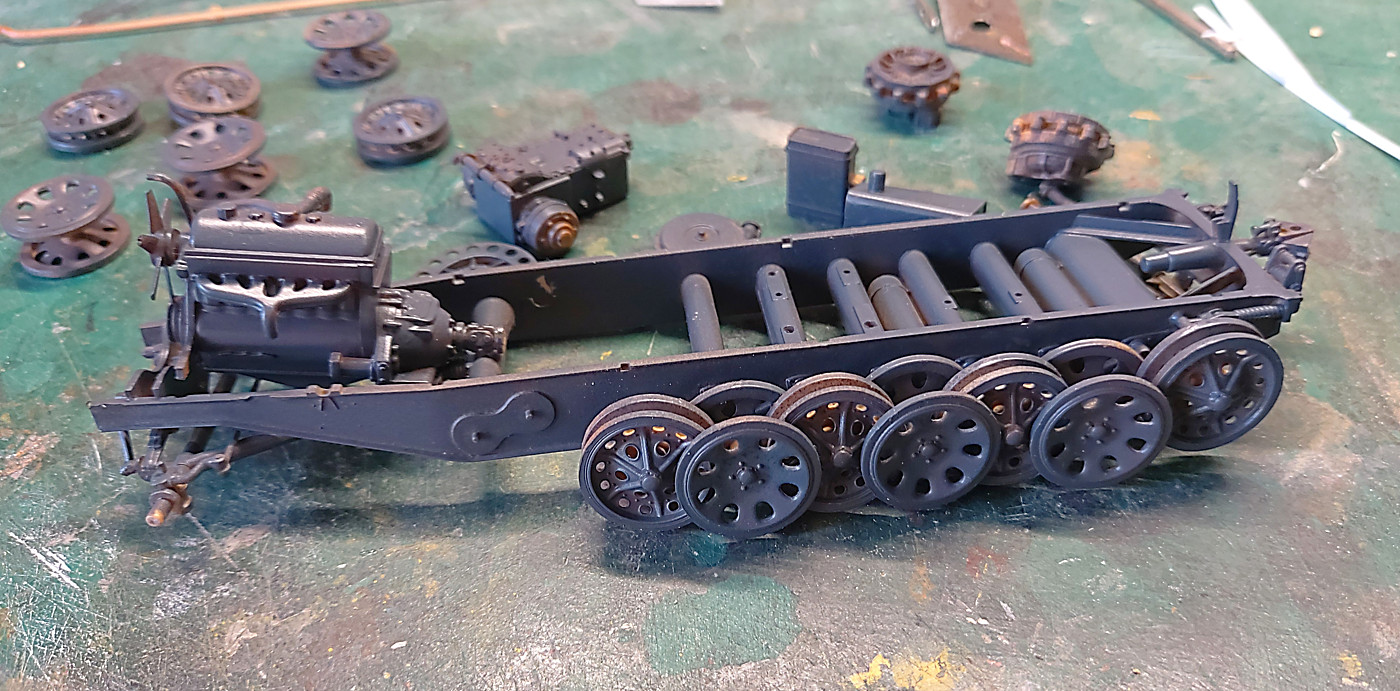
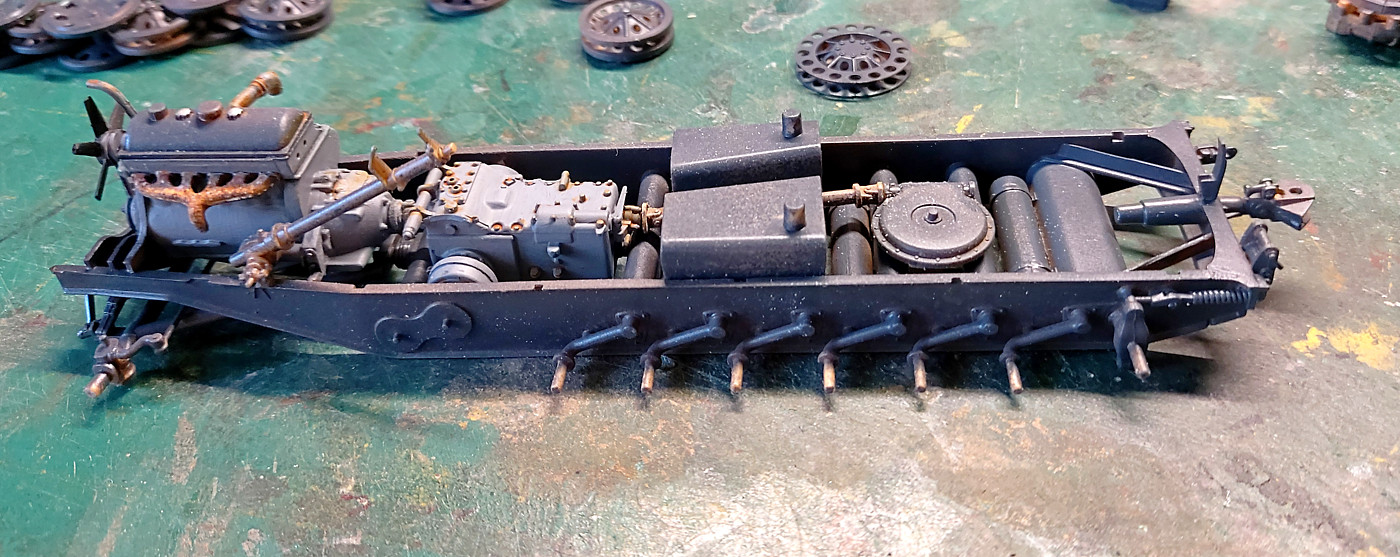
Anyway the Sd.kfz.6 actually looks ok in dunkeldgrau. Just needs some weathering. LOTS of weathering.
Here’s a quick snap. Yes it’s ‘dark’. I read in my research that these things had more paint schemes than almost any other German vehicle. The writer even said there were some specially painted for the Spanish conflict. Just saying!!!
I painted the engine and gear box a lighter shade of grey. Although the images doesn’t show it well.
I think Trumpeter lost the plot while doing this kit. Maybe it was a Friday. No radiator as noted above. I went o paint the fan belts. Yup no fan belts. Fuel tank pins never lined up with the locating holes.
Finaly a note to those contemplating this kit. They ask you to install the steering column. No worries there’s a hole. But you have to guess if the angle is right to go through the fire wall. Note to myself. "you have already cursed this so don’t bother again’.
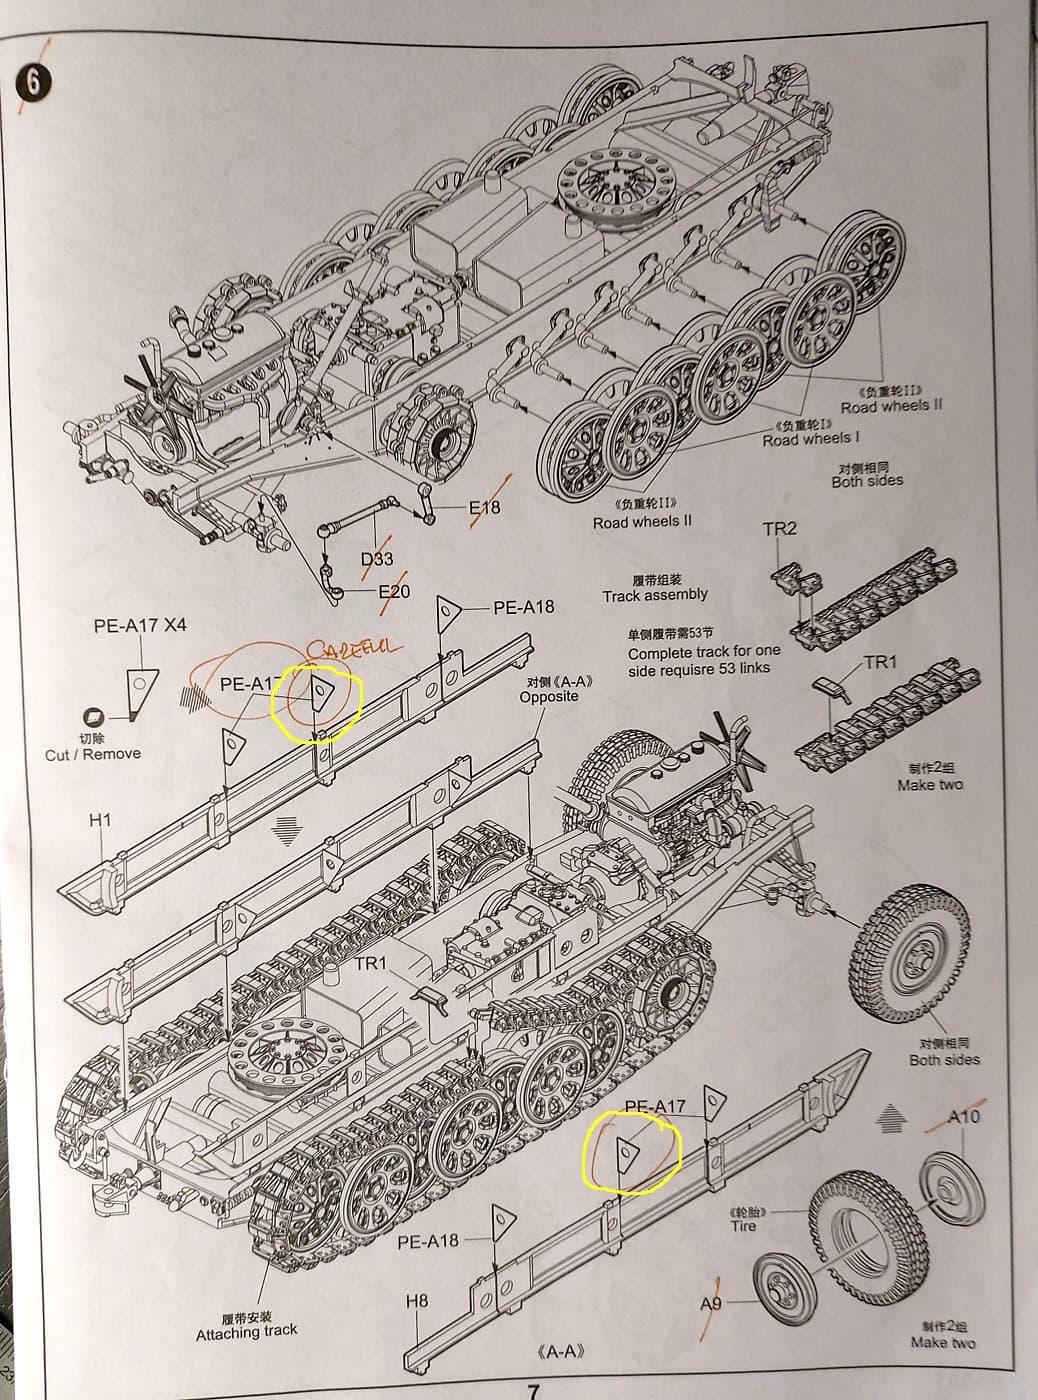
Some cautions for those contemplating this kit. Trumpeter obvious made the kit but no one there has actually built it!!
First image. The yellow circles. Don’t bother trying to install them. They simply wont fit because they hit the fuel tanks. And a word of caution. Be careful of their orientation. They say to remove a corner of each PE. Remove more than you think you should. Don’t ask how I know.
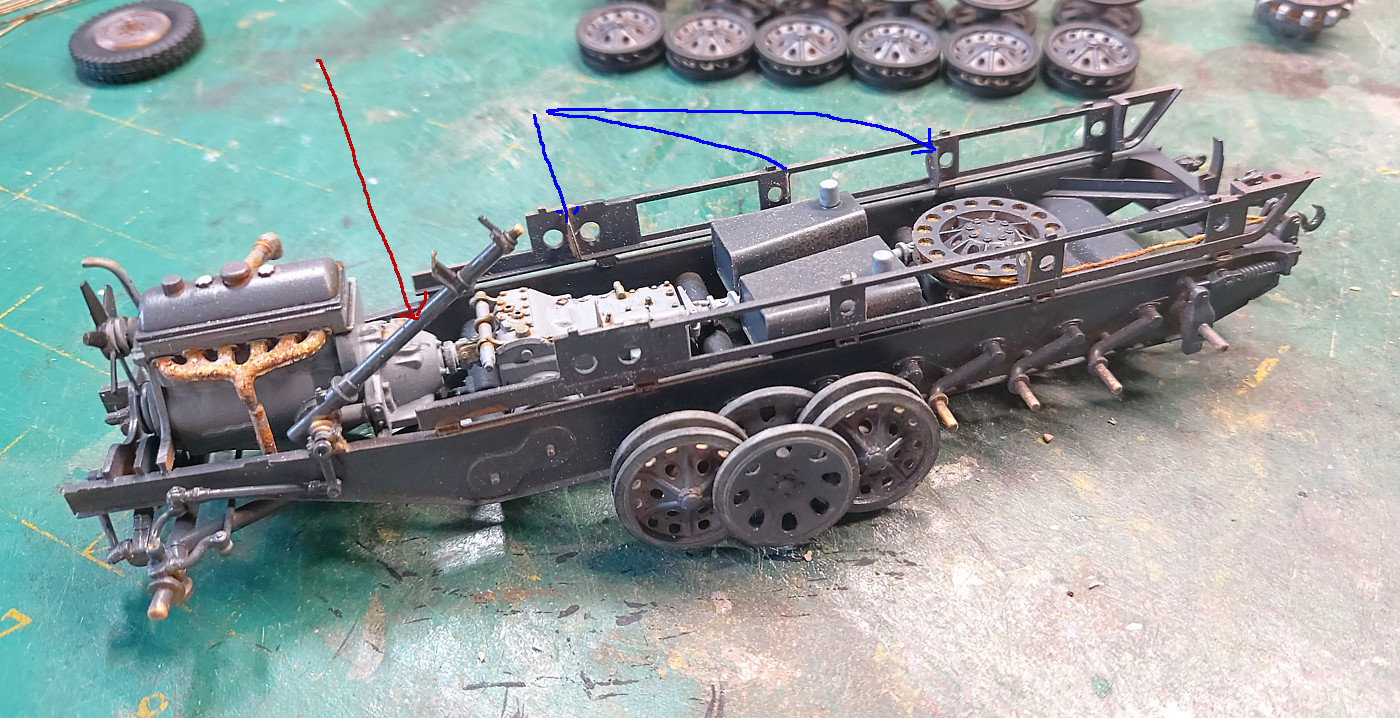
Second image. The blue arrows show the above mentioned PE. The middle one will hit the fuel tanks if you try to install it. The red arrow! Steering column. Well they give you no clue on its correct angle. You need to leave it off and dry fit part F19 in step 7 to get the angle right.
Apart from that it has been an enjoyable build so far.
varanusk the instructions call for field grey. Anyway it is what it is.
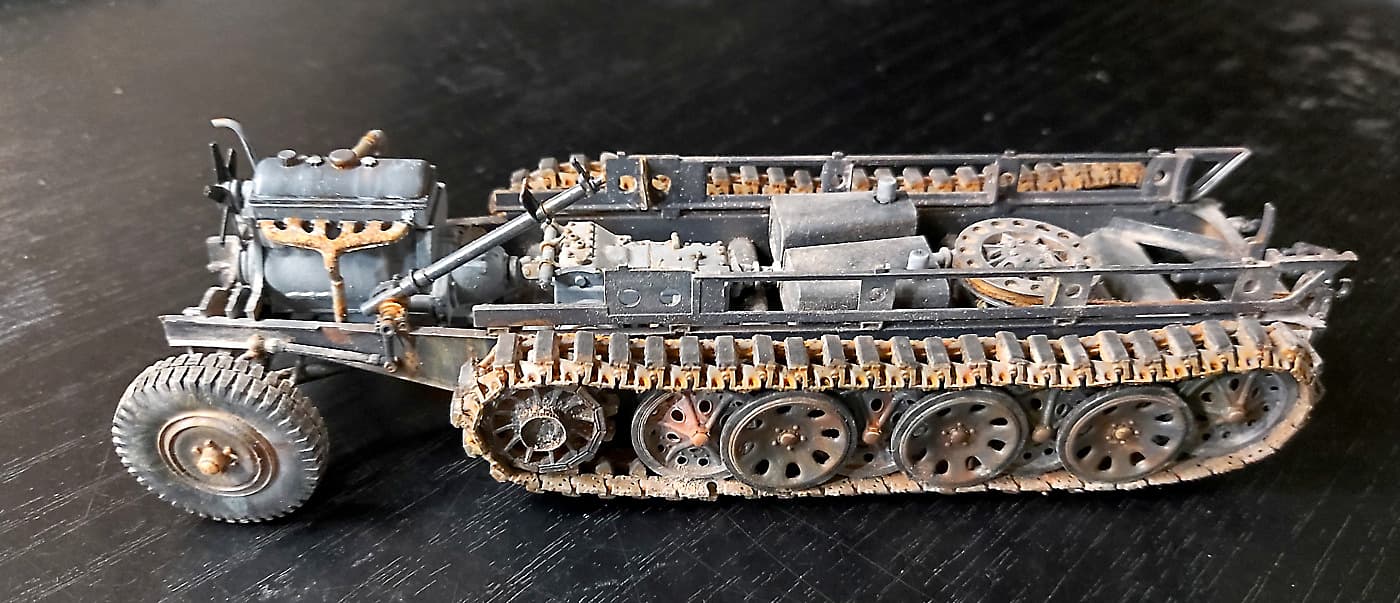
A bit of work this afternoon. I had no issues building the tracks. But as soon as I tried installing them they decided to fall to pieces. Good thing I had intended to glue them in place. (There’s no provision for working tracks in the kit). Warning! - the teeth on the drive sprocket have to be filed down for them to fit into the tracks. File all 4 surfaces.
Carlos is correct. The majority of these vehicles were painted RAL 7021. There are some that refer to the colour as Field Grey, but is not to be confused with the distinct light greenish grey of the early German uniform that is a completely different colour. The colour is most often referred to as Schwartzgrau or Dunkelgrau. It is also incorrectly referred to as Panzer Grey, which is really a nickname of sorts.
RAL 7021 was the standard paint colour until 1943 when Dunkelgelb (dark yellow) was introduced so only the last batches of SdKfz 6 would have been Gelb from the factory.
The only variation to RAL 7021 being the base colour are those vehicles used in North Africa which were repainted as per desert Colour requirements.


 After clean up I came back to find the hairspray looking all coy on my desk. Yup forgot the hairspray.