SD. Kfz. 9 FAMO

Latest progress

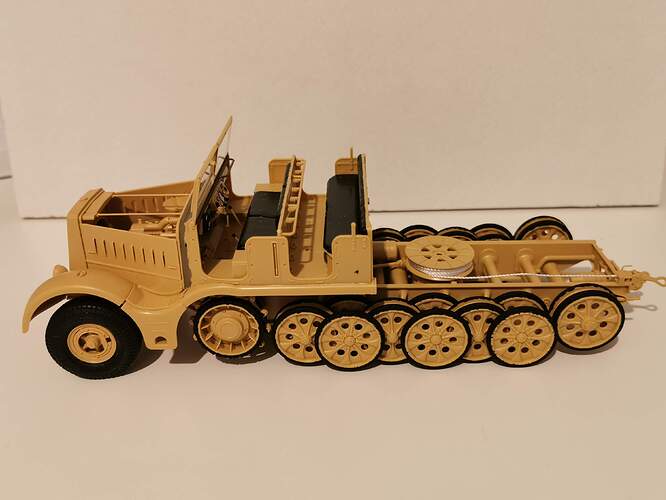
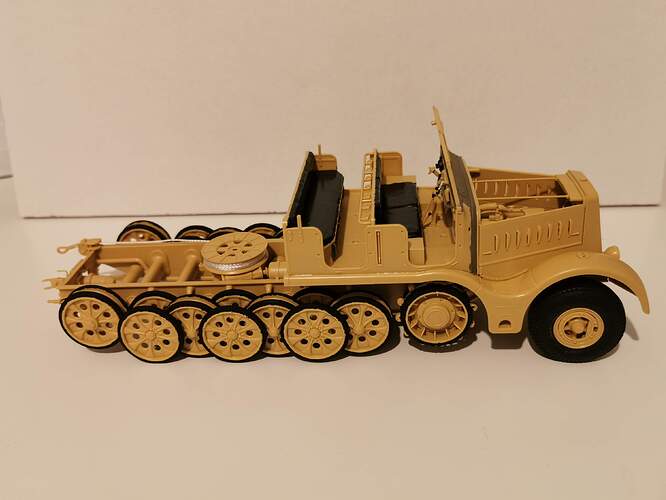
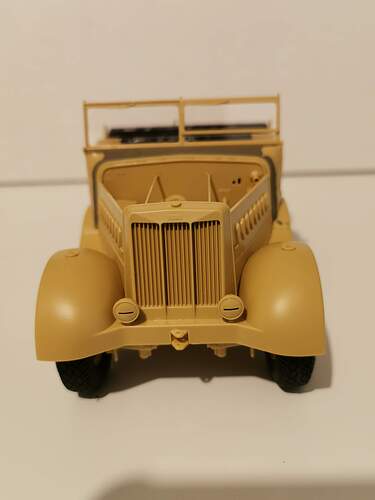
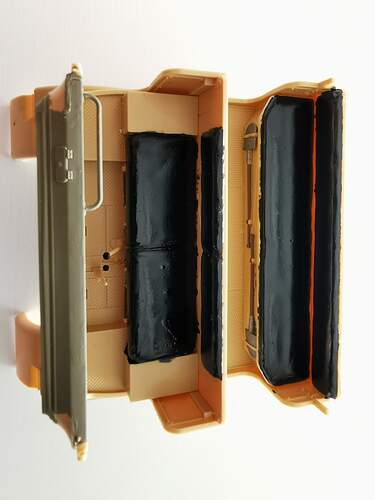
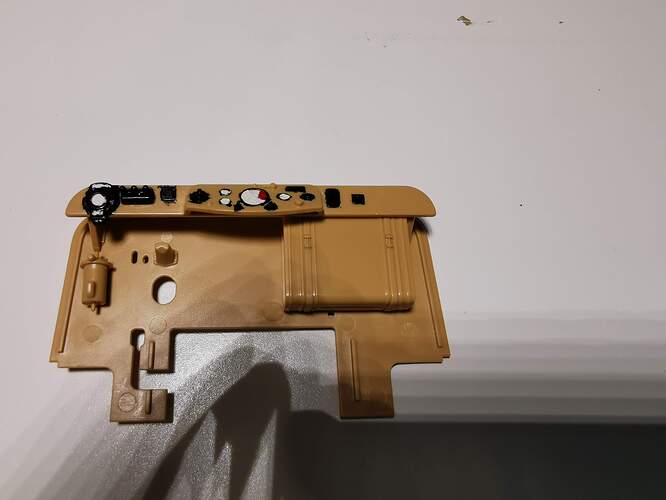
I have done part 2 of the assembly of the cabin where the crew will be sitting.

It took some time to do this and all is painted by hand as you may already tell from the photo.
I’m wanting to do these kinds of painting with my airbrush, as it is faster and easier to do I believe.
Especially painting when I’m working on the build itself.
And to paint larger areas quicker and easier.

2 Likes

If I understand you correctly, you’ll need to mask-off areas you don’t want to airbrush — in and of itself another skill. When hand-painting parts on the model, I find that using good-quality brushes really helps.

—mike

1 Like

I was thinking of that possibility as well.
Currently I really like the brush set for figures from Ammo by Mig Jimenez.
I also have a set of brushes from the Action in my country, but I don’t really like them that well.
To stiff brushes.
I just don’t like them.
But I don’t know what to do with them when not using them anymore.

Regarding the masking of part, I have camouflage putty from AK Interactive.
I thought I would try that out.
Otherwise, I could just spray one color and the other next.
For example first panzer grey on the one part and X-18 for example on the other part next.

Thanks anyway for the reply.

Sounds like the type of brushes you’re using may be part of the issue — no need to spend a fortune though. The type of paint and thinning may factor in as well. I don’t have a definitive answer except to say… always clean them properly. There are some archived threads regarding brushes on the old site. I’ll try to link something later. In the meantime, if you post a new topic regarding brushes, I’m certain that the experts will chime-in.

As they say… The right tool for the right job… So don’t give up on the “hairy stick” just yet. :art:

—mike

As promised… There’s a wealth of information about brushes on the old Armorama. HTH.

1 Like

Thank you for the source of information.
I read something right away and something probably later.
As I don’t have much time left at the moment to do this.

Latest update on the project

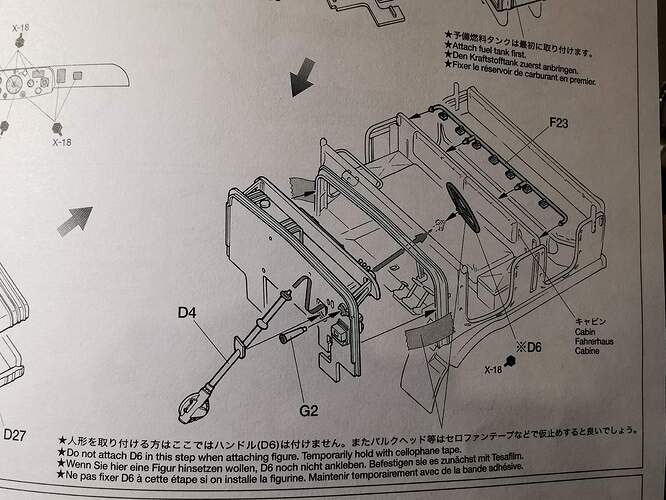
I’ve worked on the ‘Bulkhead’.

I’m not fully understanding this step of the process.
It says with a symbol next to the steering wheel that I don’t have to glue it yet if I’m going to attach figures.
And that I have to hold the piece temporarily with tape.
But the ‘bulkhead’ is shown with tape on the sides as well, which confuses me a little.
Do I only have to hold the steering wheel temporarily with tape and glue the ‘bulkhead’?
Or do I have to keep both of these temporarily in place with tape?
Or just the ‘bulkhead’?
Please give me a hand in this matter so I may continue later on with the building process.

Thank you in advance.

1 Like

Try shopping for brushes at stores that cater to “fine” arts supplies. Good paint brushes are not “mysterious” nor are they hard to find. Having said that, really good brushes are also not cheap. You will pay for quality. Still, if they’re well maintained and not abused, good brushes will also last for a number of years. Your investment is not so bad if that’s considered.

Using the right brush for the right job with the kind of paint it is intended to be used with is also important. Learning to work with your chosen type(s) of paint is critical. Different kinds of paints have their own working qualities and characteristics, and those may require different kinds of brushes even for the same job. The difference in the kind of paint can change the kind of brush that’s needed. There’s more to hand brushing paint than simply dipping the brush into the bottle and spreading it around on the surface.

Start your search for a brushe by first deciding on the type of paint that you will be using it with. Brushes for water based acrylic paints are different from brushes made to paint oils or enamels. Soft water color brushes may or may not be good for other water based paints depending on how you want to apply that particular paint.
Brushes made to work with thick tube paints (either water based acrylics or artists oils) are different than brushes made to handle thin paints. Natural bristle brushes, like squirrel or sable, have different properties than brushes made with nylon bristles, although you may find brushes with each type of bristle material made for the same kind of paint.

There’s also a reason why brushes come in so many different shapes and sizes. Spend a little time studying and learning the purposes or intended uses for these. You might have to use some imagination to translate the “intended” brush design into a relatable “model painting” use or purpose.

For instance, I use sable liner brushes for the vast majority of my water based acrylic painting. Liner brushes are designed and intended for sign painters and artists drawing thin lines. Their points are made to create a small “chisel” shape in one direction or a fine point when turned 90* from the “chisel.” Liner brushes also have very long bristles compared to other types of brushes. These long bristles will hold a larger volume of thin paint than the same number sized round brush.

I also use liner brushes for pin-washes made from diluted artist oil paints. However, liner brushes will not work really well for actually painting artist oil paints (which I use on my figures). The long bristles are too flexible to move and brush out the thick oil paints. Brushes with short bristles have a stronger, more “springy” brushing action, so I use regular sable round brushes for most of this kind of painting.

Ultra small brushes might seem to be the perfect thing for painting figures. However, if you’re painting with water based acrylics, most really small brushes don’t actually hold enough paint to be practical. On the other hand, they might be just right for applying a very small dot or line of paint.

Don’t abuse your “good” brushes by using them for rough jobs like dry brushing or harsh scrubbing to blend colors. Use old brushes that have started to lose their shape and bristles.

Finally, take care to clean your brushes properly and thoroughly. It takes more time and effort than just swishing your brush around in a jar of thinners to clean it. There are a number of proprietary brush cleaners and restorers available. I personally use a combination of Windsor & Newton brush cleaner (which is very harsh but will remove any paint - to include the paint on the handle, if you’re not careful!) followed by The Masters brush cleaner and restorer which I leave in the bristles after reforming the tip shape.

Clean your brushes as soon as you’re done using them. Don’t just drop them into a jar of thinners and leave them there for hours (or even worse, overnight or for days). Leaving them in thinners until you’re done for the session is usually OK, but no longer than that, please…

A good tip is to dip your brush in thinners (water for water based paints or mineral spirits for oils or enamels) BEFORE you start painting. This fills the bristles where they are bundled into the ferrule and helps to prevent paint build up in that area. Doing this makes the brushes easier to clean later.

Learning to hand brush is a skill that takes time and effort to master. There is no substitute for practice. The more you paint, the better you will become.
3 Likes

The text says: “Do not attach D6 in this step when attaching figure”
The tape on the other parts is only there to hold them in place while the glue sets.

I would leave the steering wheel (D6) on the sprue until the driver has been glued to his seat.
The reason for this is that it will be difficult to get the driver into his seat with the steering wheel glued in position.

4 Likes

Thank you for your very information richt answer.

From what I understand from your reading is that there is more behind the technique of brush painting then I first thought.
There is a lot of knowledge and study behind this.
And it gives me the idea to do some study on the internet about this.

In general I think I will be more in front of my computer just for the scale modeling hobby I have.
There is so much I want to learn and want to know.
And your really high quality answers you give me are very high in value, because they teach me so much.
And also help me to do things and take action on my own.

Not to long ago I had bought a set of Ammo by Mig Jimenez brushes for figure painting.
I believe because the current brushes were not suited to painting figures.
And it became more frequent I had to paint figures, so that was the reason why I decided to buy such a set.
It wasn’t cheap, but I really love them.
They are so good in my opinion.

Your answer is giving me the idea to review my current ‘arsenal’ of brushes that I’m currently owning.
And spend some time and money on them.
To get the ‘arsenal’ that suits my personal needs.
And makes me happy again to brush paint and to not give most up entirely to airbrushing.
Which I do like.
But is a bit more complicated for me, I’m not doing it for very long now.
And there is a lot to learn for me and I have encountered some serious problems.
But that would be for another topic.

I also must say that when I was reading through your answer, that I began to think that the brushes I currently own.
Most of them are from a set from the Action in my country.
That they are designed for artist paint.
The kind of paint you use on a painting canvas if you call it like that.
To make paintings.
And that it isn’t particularly well suited for the purpose of the scale modeling.
On the brushes is the name ‘vanEyck’.

Anyway, thank you for the reply and I’m gald you are keeping an eye on my topic.
And that you are giving me such high quality reply’s.
Until next time.

3 Likes

Okay, I will leave the steering wheel of then till the end.
When I’m ready for the figures.
I’m also not having the tracks in place yet, because they are usually left to the last.
When the painting process is done.

I think the figures will be left until the last as well, as if I would attach them before the painting process.
It would be complicating the painting process.
I have that experienced with an earlier model I have made, the ISU-152 from Tamiya.
It complicated things and didn’t deliver the nicest result as a consequence of it.

Also, thank you for making clear of the other tape that is shown in the drawing of the instruction.
This will help me to with the project.

Thanks again for your answer and thank you for keeping an eye on my topic.
And helping me out with your constructive feedback and tips.

Until next time.

1 Like


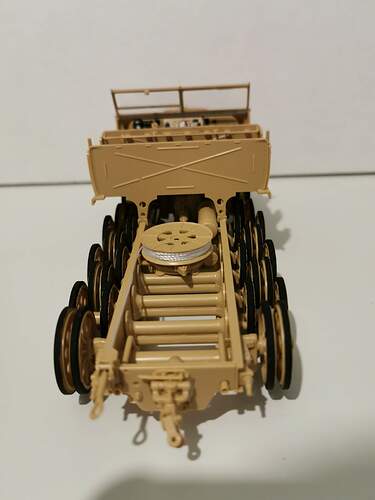
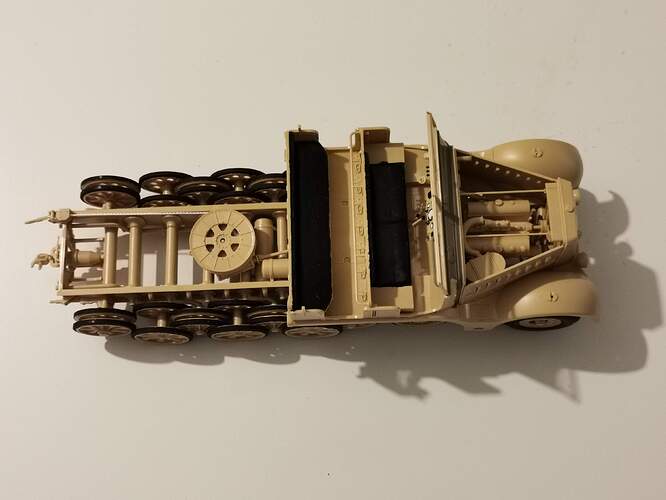
This is what I have done recently on the project of the Sd. Kfz. 9 Famo.

Also worth noting is that I’m studying the Famo with books and references that I have also aquired from the forums here.
So thanks for the people that have helped me out with my study of the Famo.

5 Likes

Keep at it!

The single most important thing that anyone can do to improve their modeling is to build and COMPLETE more models, and the only way you can build more models is to finish the one you’re working on right now.

Every build is a learning experience, and every next build will be better than the last one as long as you put the lessons you learned to use.

2 Likes

The Tamiya FAMO is a blast to build; tons of parts that all fit and look good without being impossible to handle, and it comes out as a really impressive model in the end even if you don’t pile on the aftermarket parts. It’s what happens when Tamiya flexes all their engineering muscles at once.

2 Likes

I didn’t come to the part yet that I was able to update on my project.
In the time that has passed now, I have assembled the flatbed where the cargo loads go for the Famo.

Tomorrow I will be working on the last assembly step, mounting hand grips and that kind of stuff.
The plan is also to paint the model.
However, much work needs to be done.

I hope I’m able to post updates on the project.

Yes that center seam on the silver air intake pipe should be removed though I believe this was cast in aluminum and there may have been some evidence remaining where the maker ground off that seam line.

Those two tiny hold down handles actually should be identical size and shape to the star shaped hold down handles on the valve covers! (Since they were literally the same part and were interchangeable.)

Some PE sets will have those star handles present but you may have to dip them in heavy paint or white glue to better “round them out”.

Sorry for my horrible typing last night. Read this passage today and it was almost illegible!

1 Like

One point of note: (Probably too late to help here.)

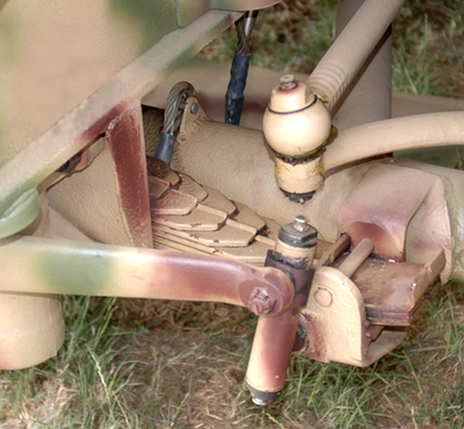
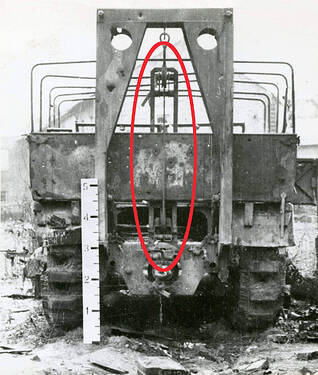
There appears to be a mold seam down the middle of the front transverse leaf spring on the Tamiya Famo. This SHOULD NOT sanded off as it is actually seen on the real vehicle.

Instead of using the more common “C” clamps to keep the spring leaves aligned, as per usual, the Germans over engineered this too. The individual spring leaves have a raised “bead roll” down their center which keeps everything in line without the use of clamps. (I would think this would be extremely difficult to manufacture. As the bead roll would have to be pressed into the spring stock while it was still mild, untempered steel. Only then would this raw stock be run through a special bender - with a cut out to clear the bead roll and then cut to length and tempered to create spring steel.)

Front Famo transverse leave spring as seen here in this detail photo.
This is the Wheatcroft restored Sd.Kfz. 9 now in the UK:

WheatcroftFAMO
Photo Credit Unknown

2 Likes

Additional note:

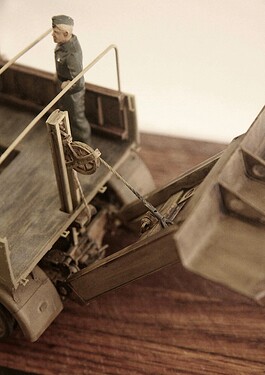
If you are considering adding the recovery spade offered as AM by Tamiya. Please let me know now because the Tamiya accessory is really only half the actual spade structure. I have the necessary research data on this subject should anyone need it. The additional missing parts are really not that hard to construct with the help of some Evergreen “C” channel.

. .

(That large pulley on my model is only temporary and there is a reason to use it for the moment. Also the tailgate WILL be installed shortly.)

I may end up doing a New Topic just on correcting the Famo Spade. Please let me know if anyone is interested.

3 Likes

I have the spade set, so I am interested.

1 Like

brek ~ look for a dedicated new topic thread in the very near future in the Axis WWII forum


Link to New Topic now posted:

1 Like

I will hope that I get to planning finishing the project, didn’t come to that yet. I’m just know checking my notifications. Lot of things going on in daily life…

2 Likes