Nice progress. You are really adding all the details.
Cheers,
Ralph
Nice progress. You are really adding all the details.
Cheers,
Ralph
Thanks ![]() Now I kind of really need to stop doing all the other (non-modelling) stuff that’s taking up my time and finish this one … Though with the setback of the tracks I bought, I’ll have to look for another solution, like wait for Gecko to release theirs …
Now I kind of really need to stop doing all the other (non-modelling) stuff that’s taking up my time and finish this one … Though with the setback of the tracks I bought, I’ll have to look for another solution, like wait for Gecko to release theirs …
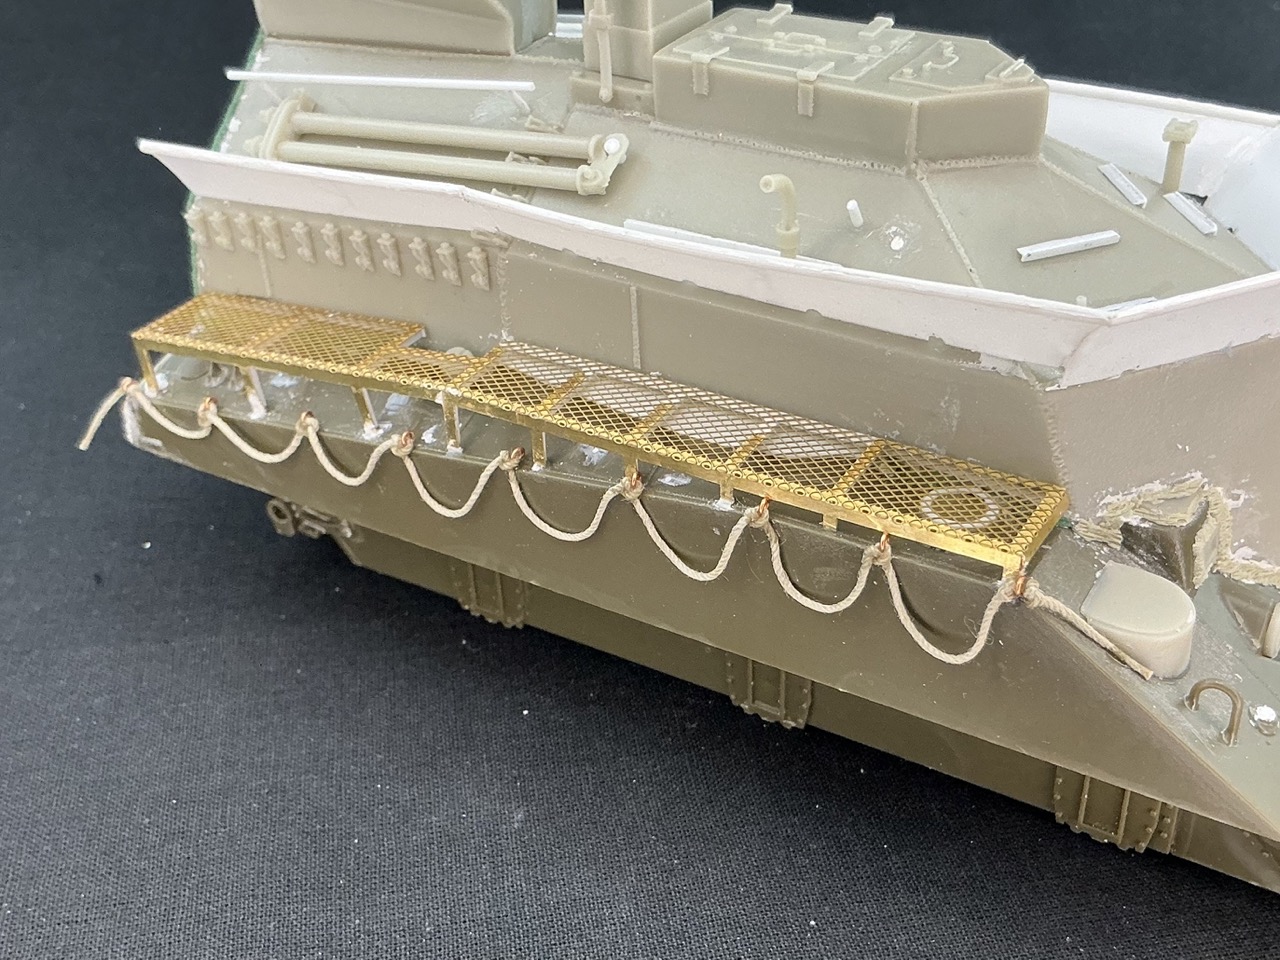
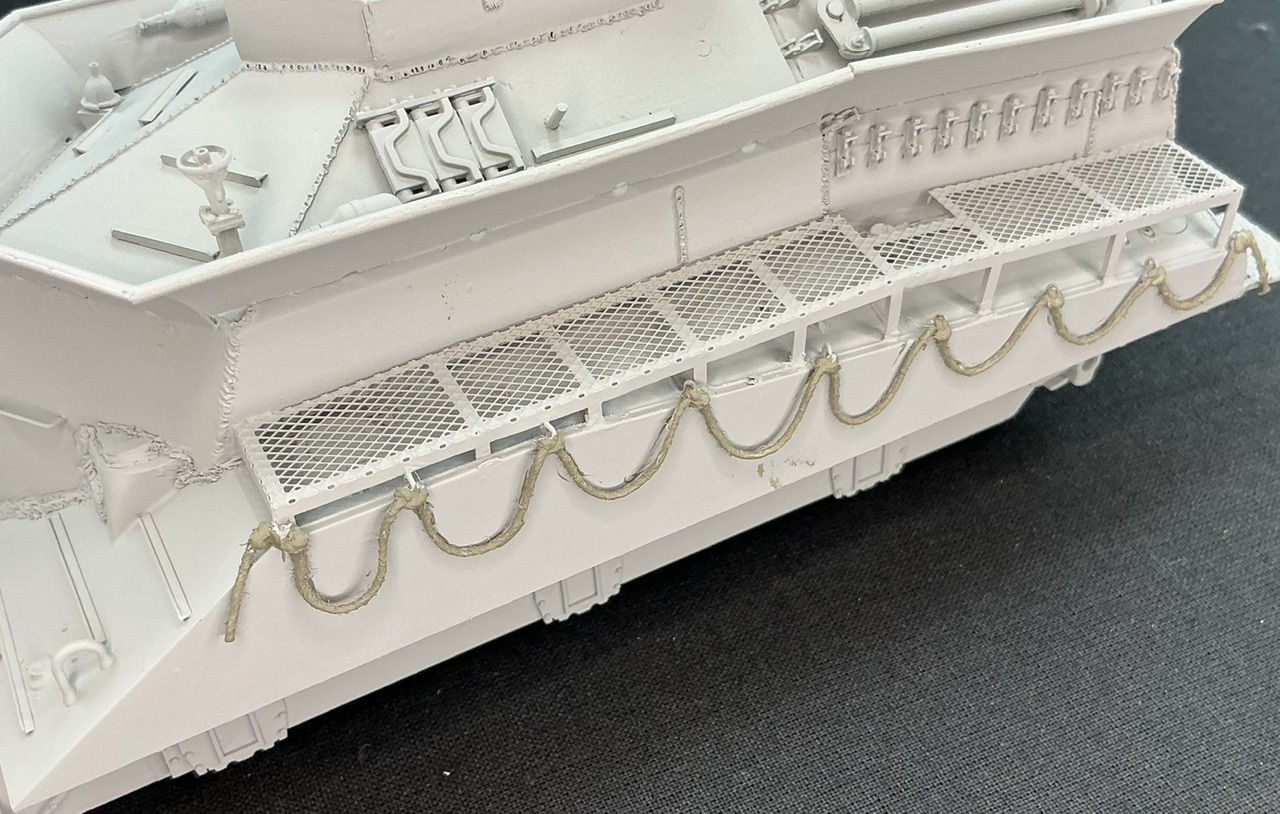
Slowly creeping forward … I started on the ropes along the sides, which the conversion set gives you resin rings for, but I thought they were a bit small so I made some myself:
Copper wire wrapped around a drill bit, cut into rings, and then pressed flat with the back of the knife handle. I had to do the cutting on a hard surface (the glazed tile they’re on) with a pointed knife, and it still wasn’t very easy, but I’ve got plenty for both sides — this is slightly over half I made, so including some spare.
I then superglued them to the right side of the hull, but because I’m afraid they’ll break off easily, I continued with the rope once the glue had set:
This because I can then glue the rope to the hull, or at least the knots in it, which will protect the rings better from breaking off.
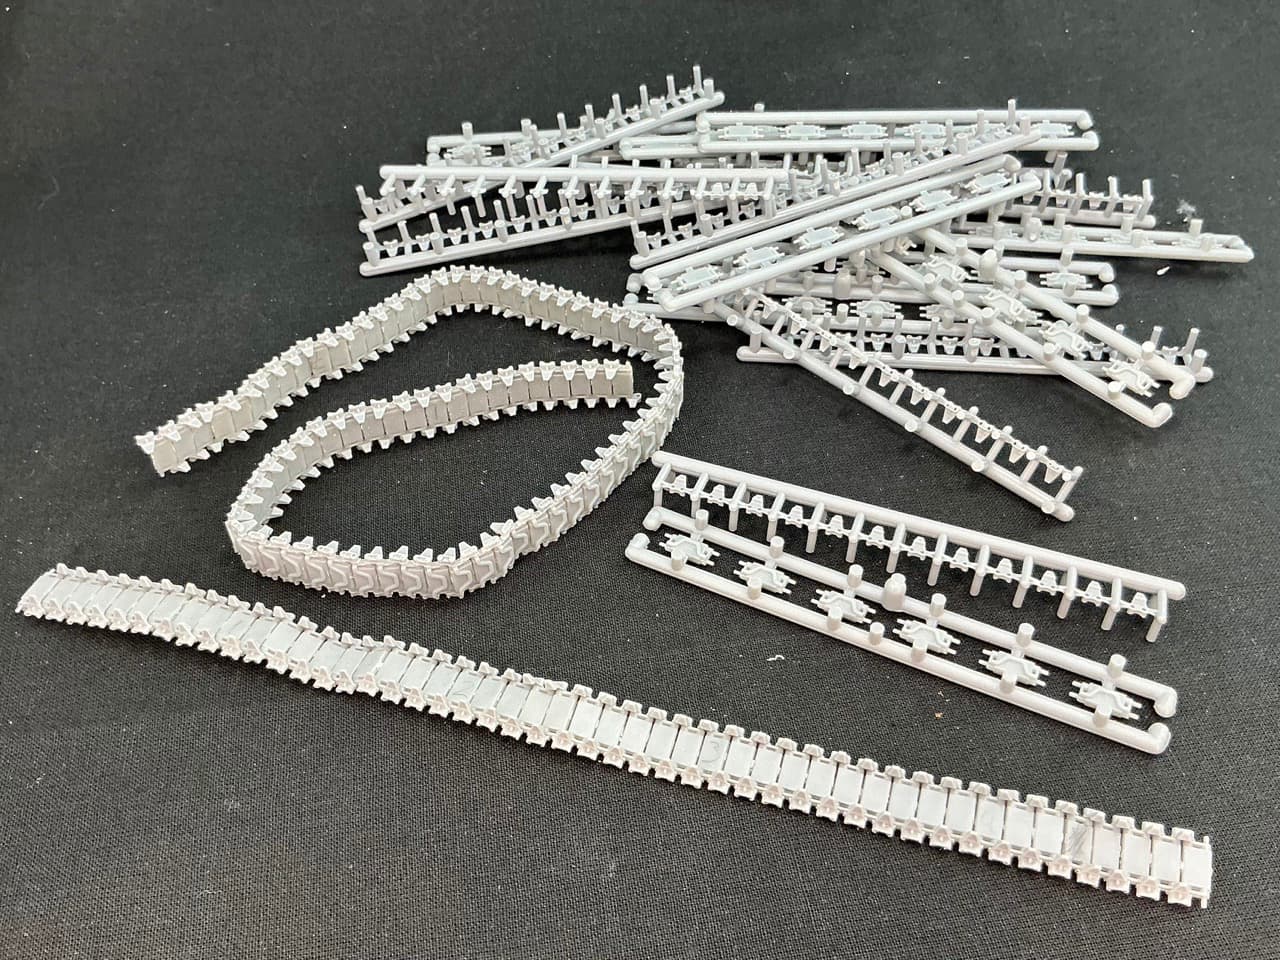
After the deception of the 3D-printed tracks, I remembered that I should have a half-built set of T54E1s by the recently gone-under Panda Plastics, somewhere, for a model that I never finished. And indeed:
One track and a half, that I can easily finish sometime soon. For the other model, I’ll buy that upcoming set from Gecko at some point.
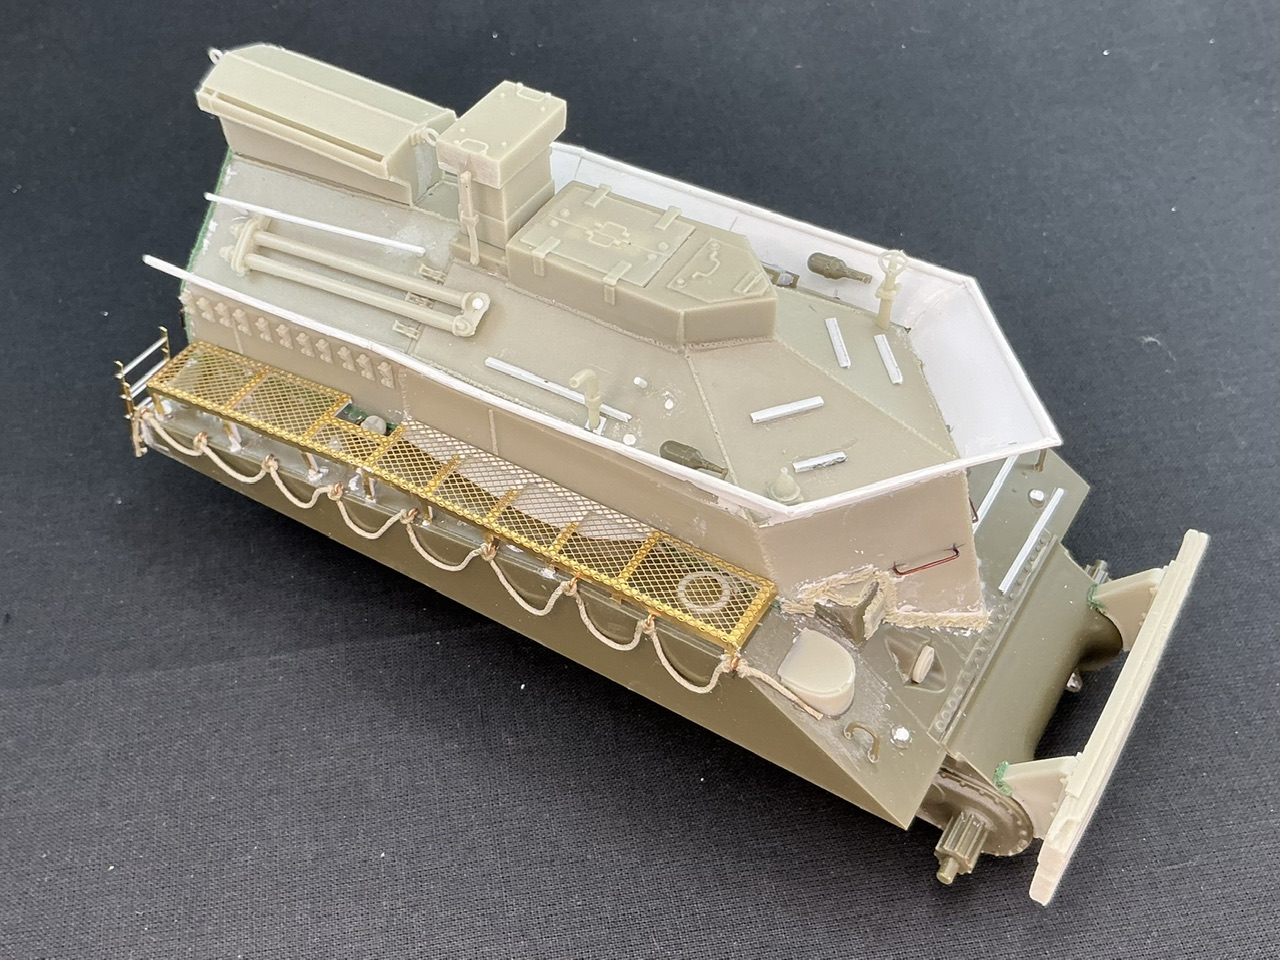
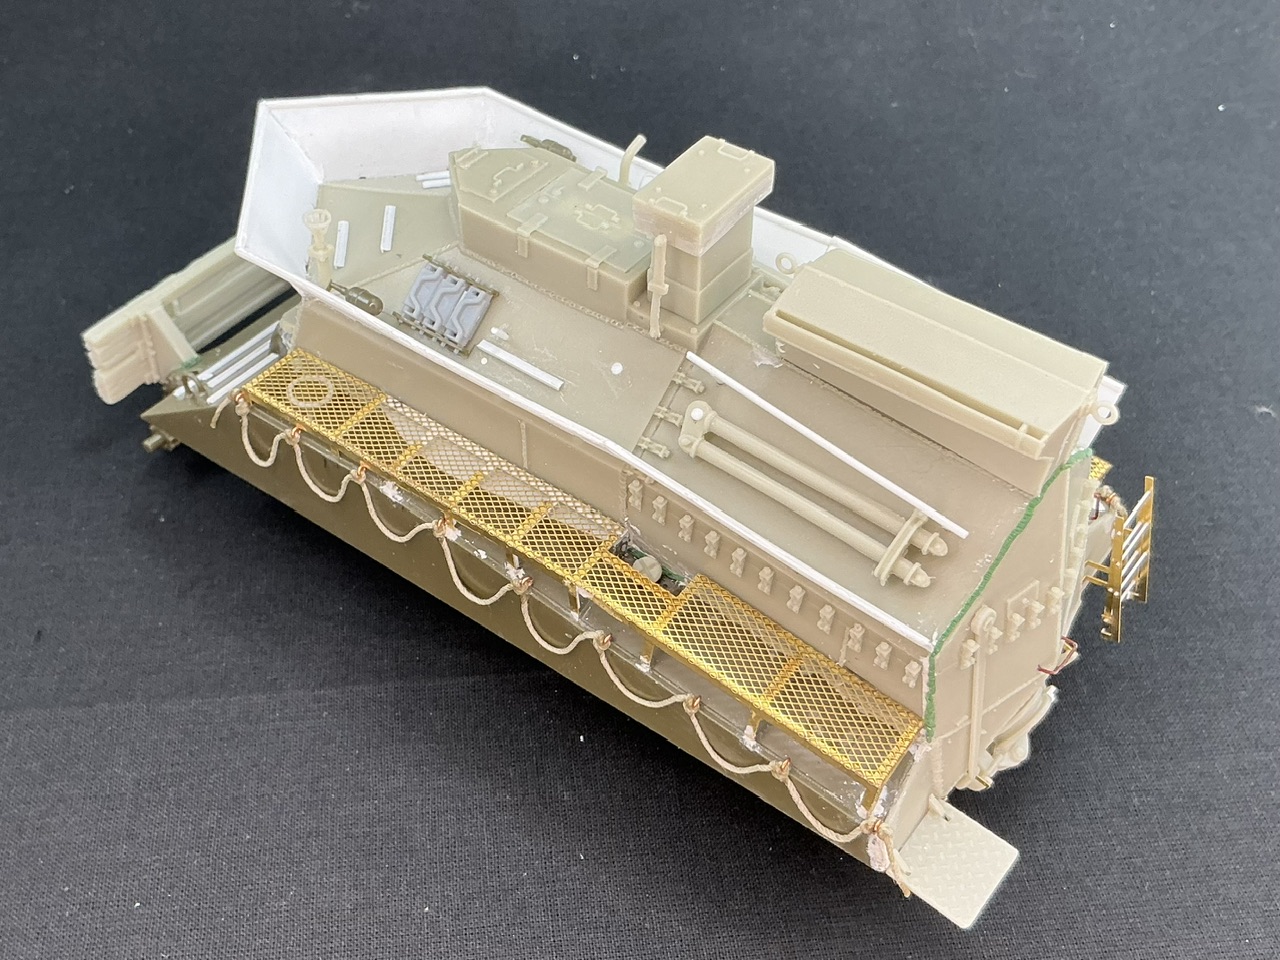
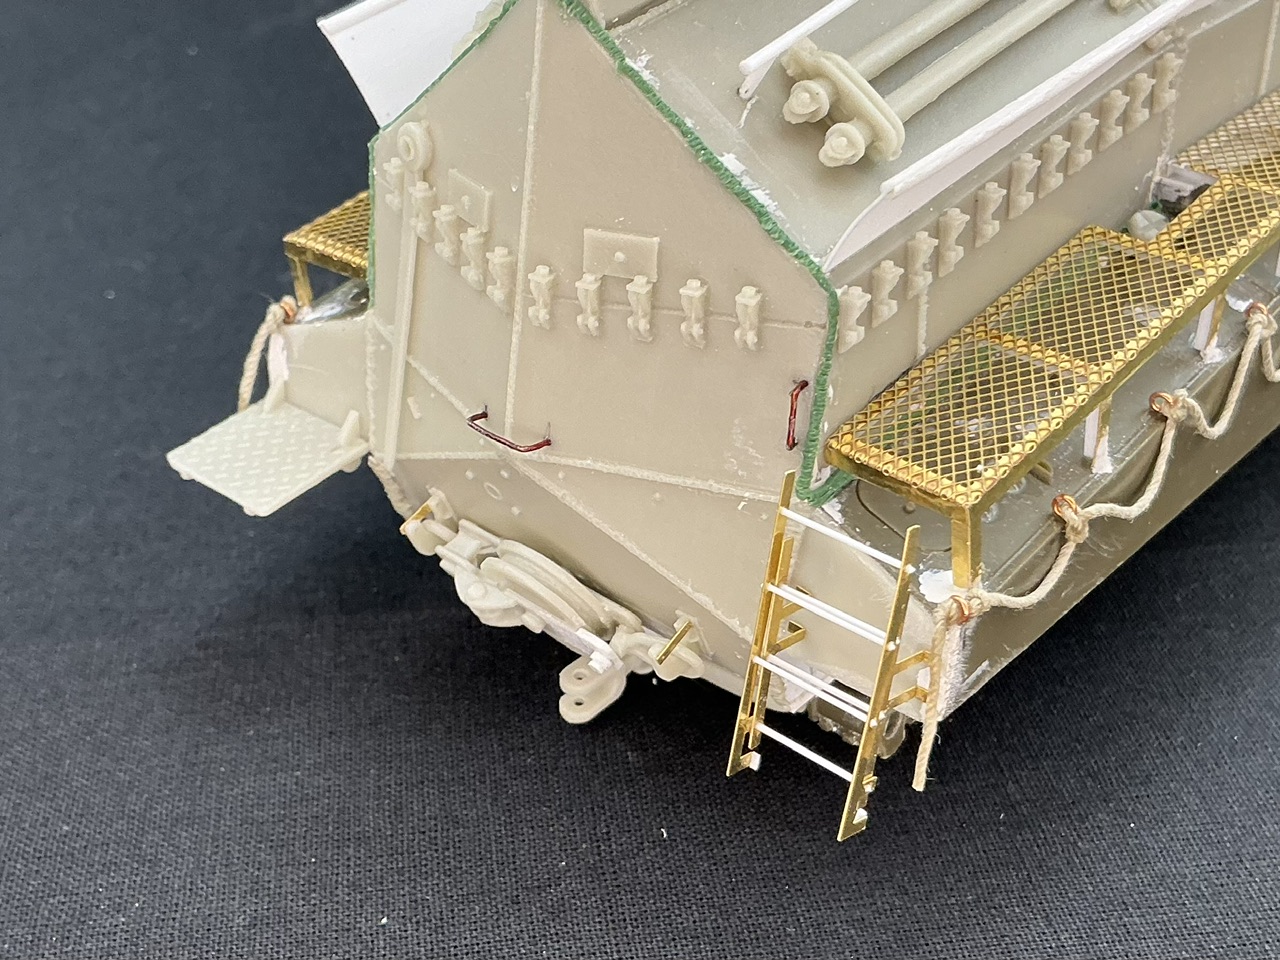
I added the remaining small details:
Here, chiefly the stuff on the forward superstructure roof, like the aerial mounts, the fire extinguishers, the spare tracks, etc. The conversion kit gives you extinguishers, spare track links, and the rack to put them in, but I used different ones. The resin extinguishers are simply to big both in length and diameter, so I used Asuka ones, which are slightly too short (but not as much as the Resicast ones are too long) but the correct diameter. The track links you get are a different type than I’ll fit, else I wouldn’t have replaced them, and the plastic rack is just a bit finer.
At the back, I added the folding plate with tread pattern (oddly, you don’t get a part to build it in the up position) and the ladder, for which you get the etched parts but have to find the plastic rod for the steps yourself. I also added two tiny bits of strip as stops, else the ladder could not realistically fold down (but I just realised I got them wrong …). Also, I had to build a replacement bit to the snatch block, because it turned out that if you glue the two rings to the block, you can’t fit it over its stowage hooks — the real one has swivelling rings, of course, so that probably did fit easily enough. I had glued the rings on first, and the hooks to the model, and only then discovered this … Trying to cut the large ring free, part of the block broke off and went flying into oblivion. I heard to tick a couple of times against things in my hobby room, but couldn’t find it anymore ![]() Also, the handholds from copper wire glued into holes I drilled (and at the front as well).
Also, the handholds from copper wire glued into holes I drilled (and at the front as well).
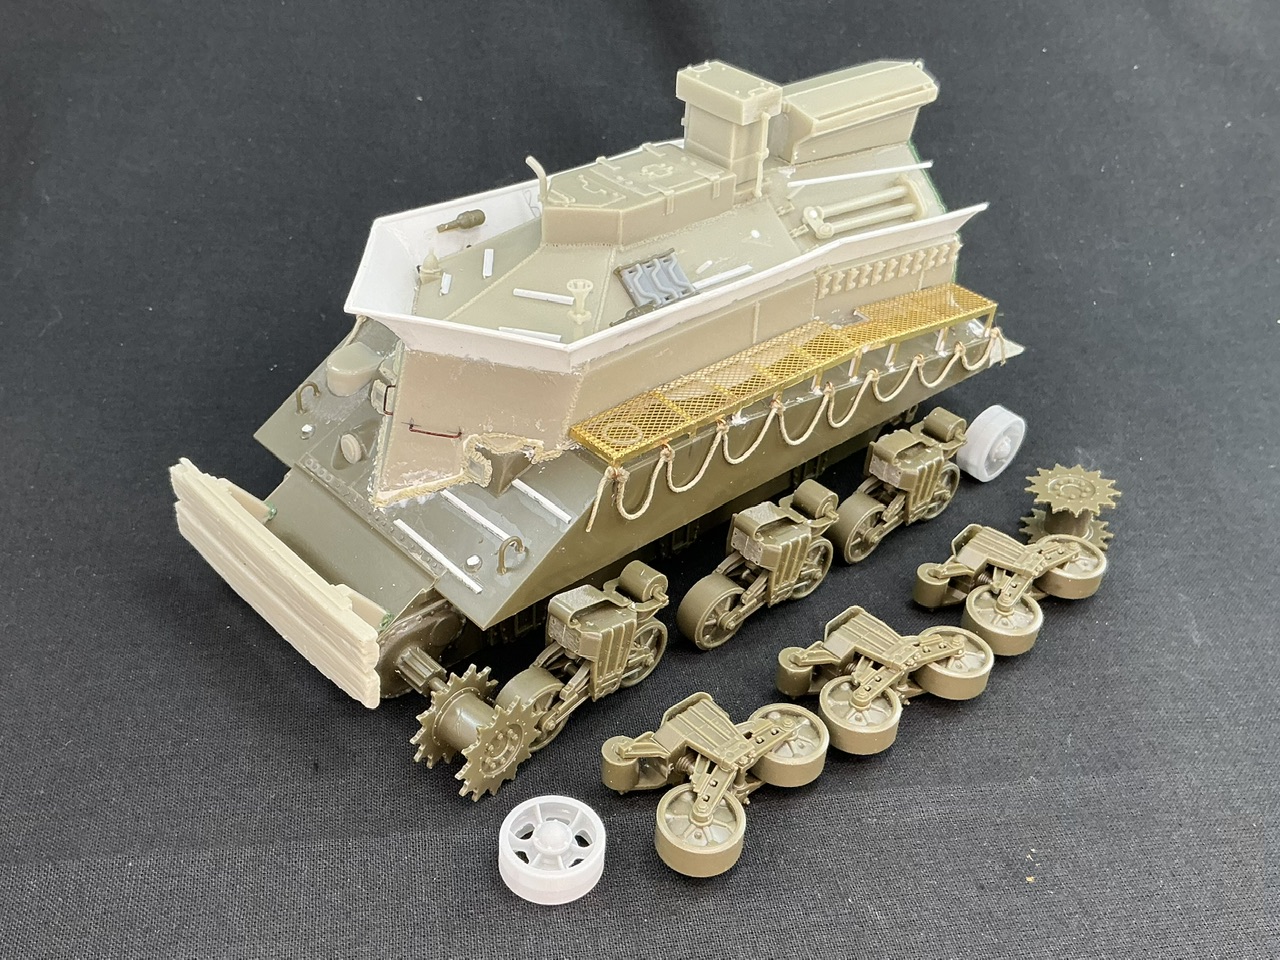
And with that, I think the build is finished:
Other than the tracks, but I’ll only finish those after I’ve glued the bogies to the hull, else it’ll be hard to judge the correct length.
Love it. Nicely done
Thanks ![]()
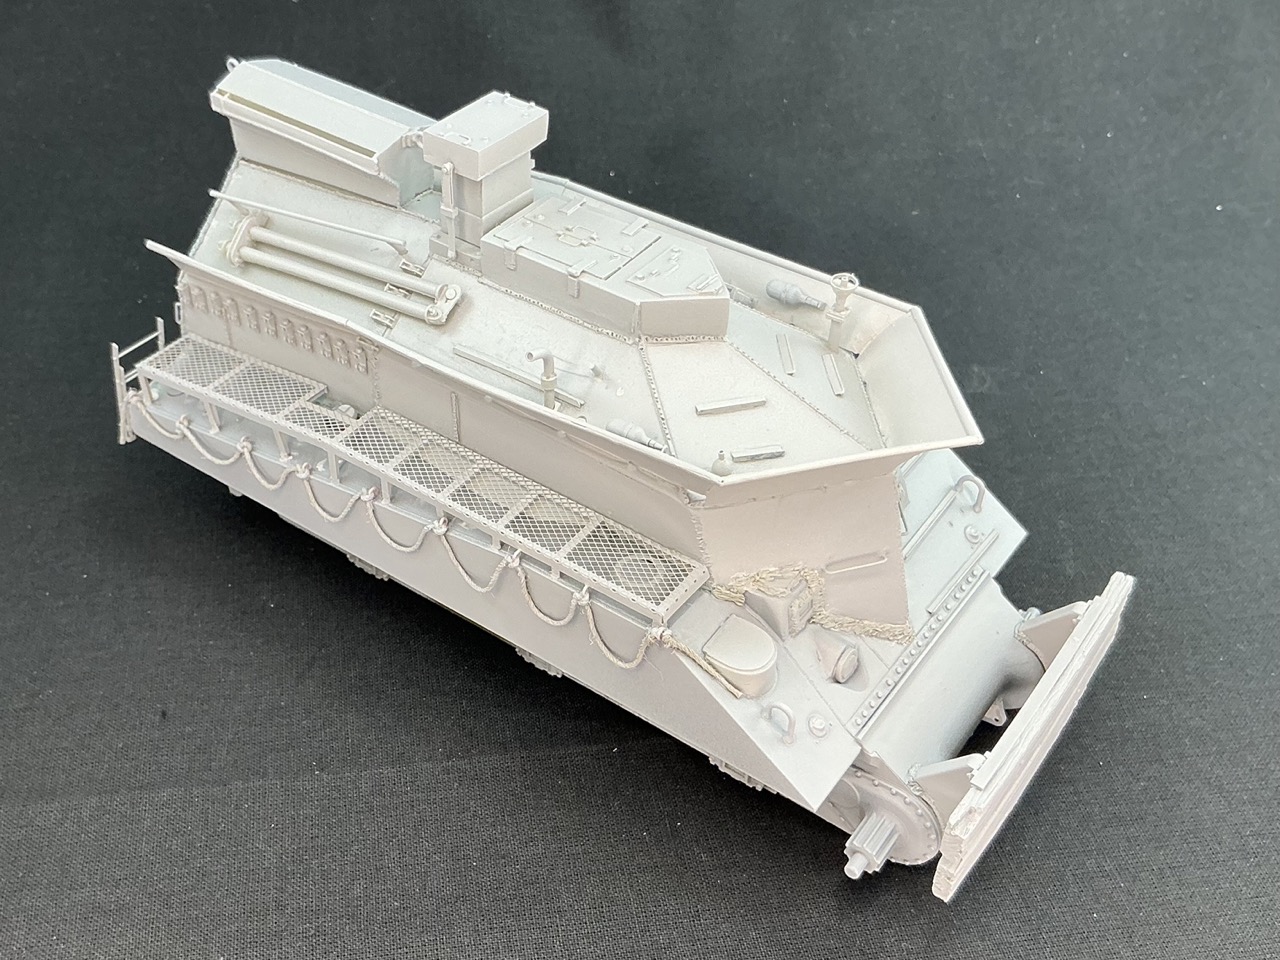
I’ve by now sprayed the whole of the resin and metal bits with Mr. Primer Surfacer 1000 from an aerosol can:
Not the plastic — other than overspray — because next will be a coat of Tamiya acrylics for the actual colour, and that sticks well enough to plastic that you don’t need to prime it.
I fully agree with you Mine is just in a box on the the table.
It was pointed out to me that I had forgotten a thingie on the left-hand side, under the catwalk:
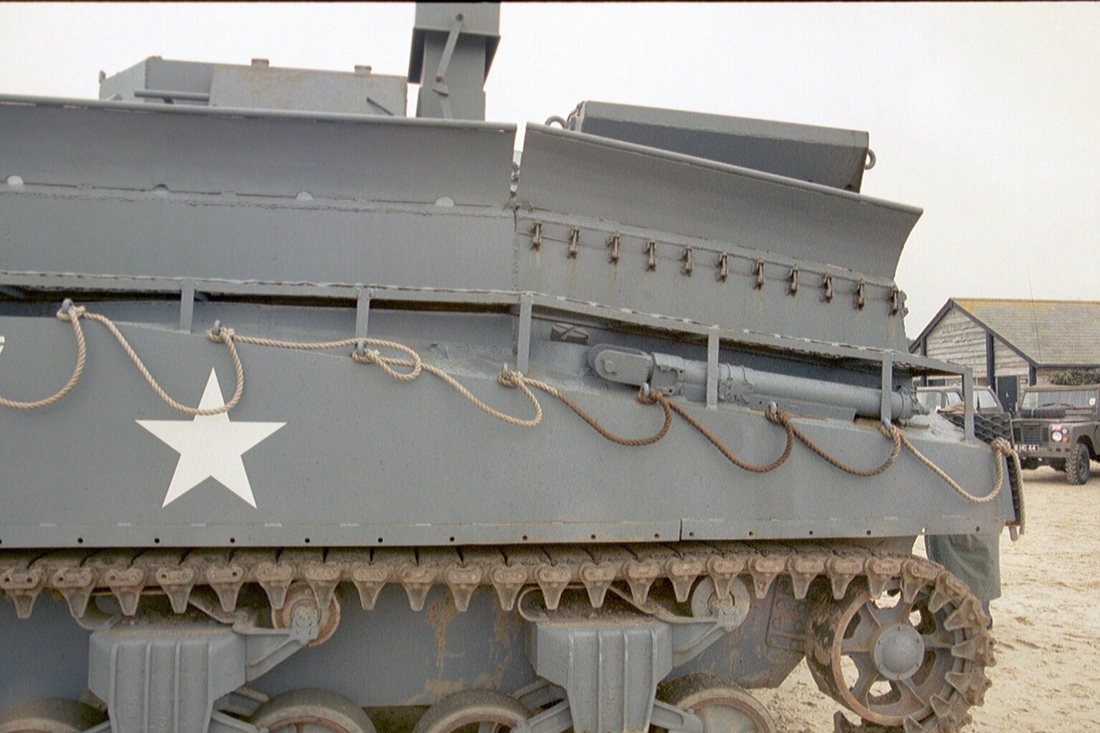
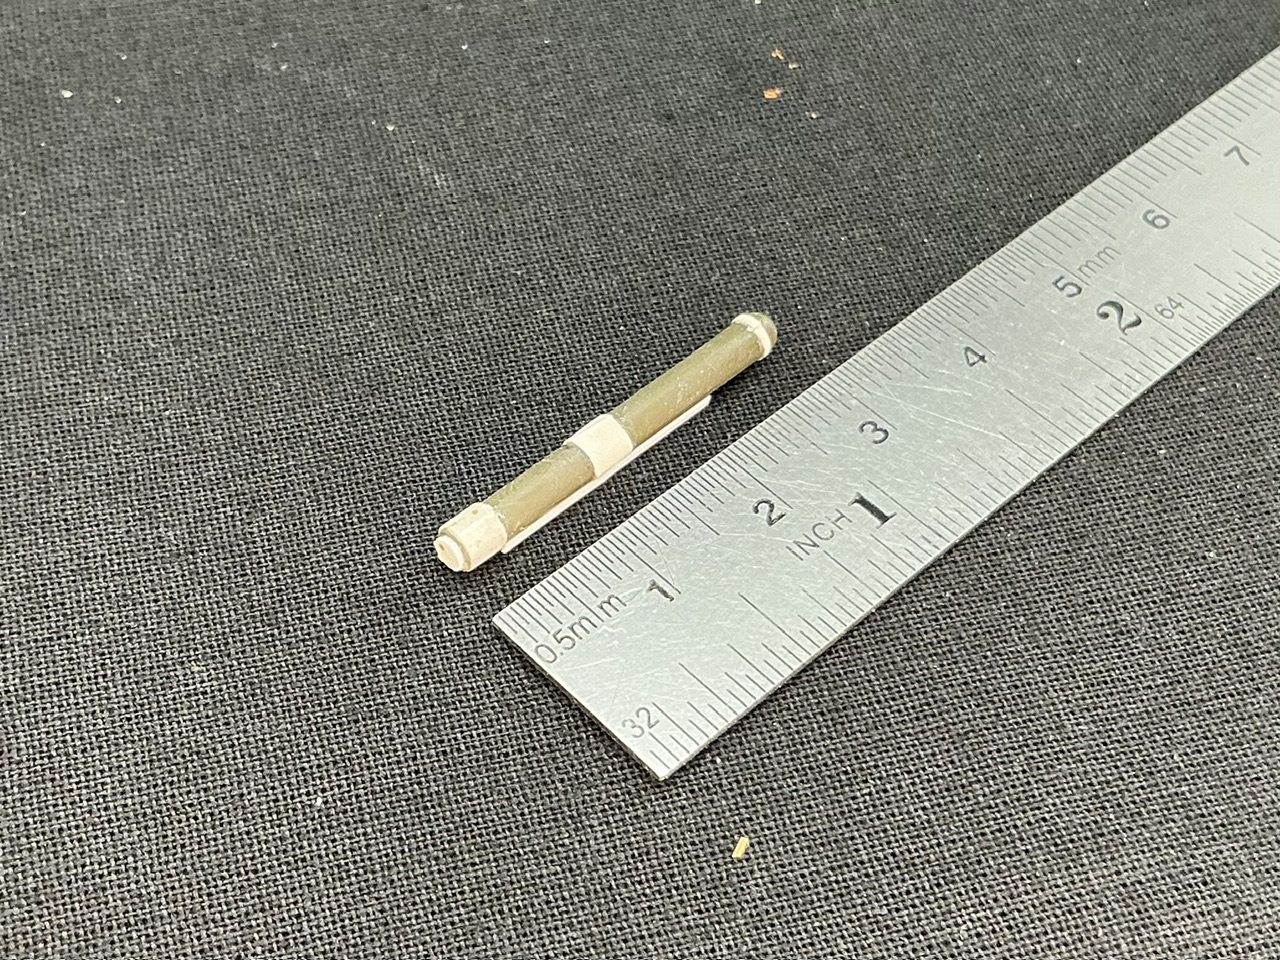
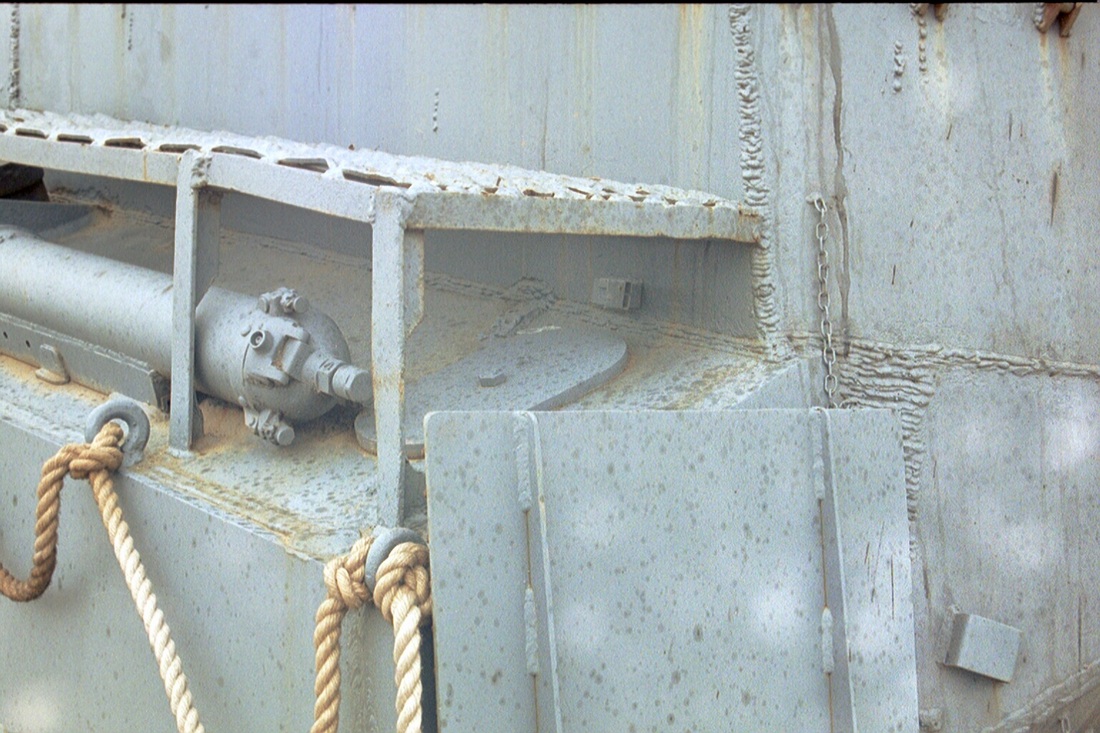
And indeed, I had noticed that it wasn’t in the conversion set, but it had completely slipped my mind to make it — whatever it is. It looks like a hydraulic cylinder, but what is it for? And how was it operated? Anyway, I’ve started making what I see in the photos. Here’s the basic shape that still needs the details added:
It’s a piece of sprue from the Sherman kit, with a rounded end to it, and bits of very thin plastic card glued around it, to bits of strip and a punched disc on the non-flat end. Now I need to finish it ![]()
I also began painting the ropes:
Even before I added the ropes, I decided it would be best to do that before painting, because as you can see, I’ve got trouble getting the paint only on thin details like these. By painting them now, after putting the base colour on the tank but before I continue work on that, I can easily touch up the grey without it being apparent later on.
It looks like part of a tow bar set.
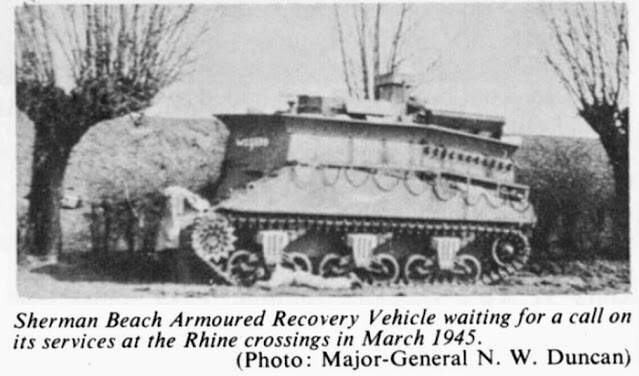
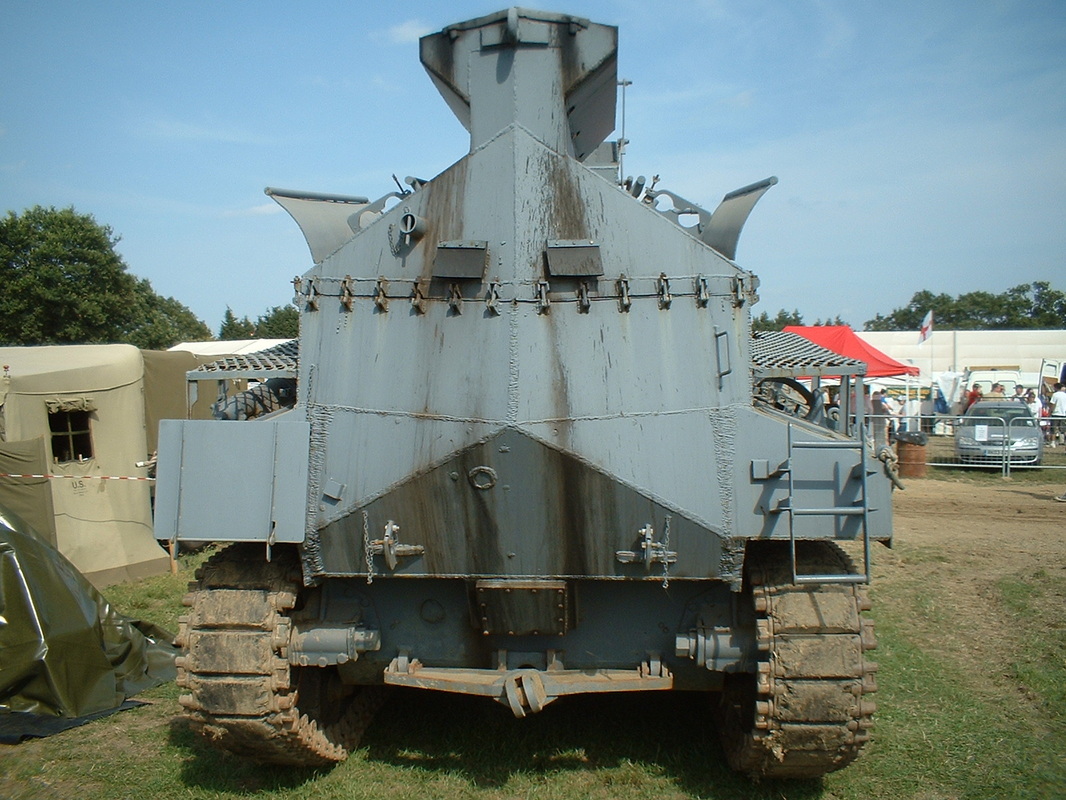
I’m almost completely certain that it’s the cradle of a 6-pounder antitank gun, but I can’t for the life of me work out why they would be carrying this on a recovery vehicle. I am wondering now, though, if this same thing was also on BARVs during the war, or if this particular bit is something a restorer put on because he had it and it looks like the thing that was there. The problem is finding a wartime photo that actually shows this area clearly. However, it looks like the one in the Portsmouth museum has exactly the same thing as the running one, so it probably was an original piece of equipment.
For ref only
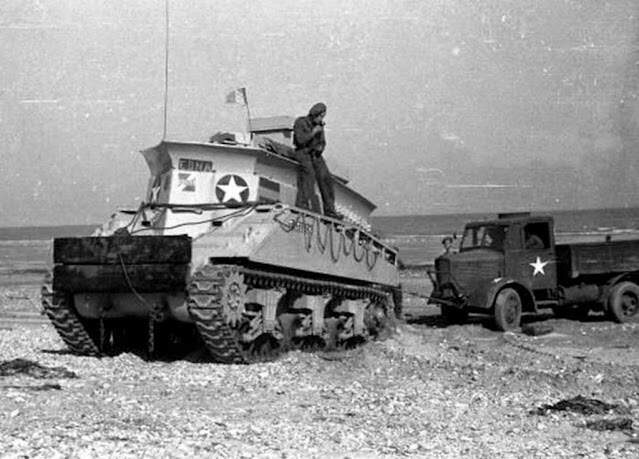
These seem to have something of a very similar shape and length in the same place, but it is not in every image you can find …
From what I can find, it looks like an attachment for towing. And it looks like it might be a recycled recoil cylinder from a gun, using the internal spring as a shock absorber? It’s definitely welded onto the hull.
Exactly, and I had found all of those pictures and a few more, but no wartime photos yet that actually show the thing properly ![]()
It pretty much can’t be anything else than the cradle of a 6-pounder antitank gun, but not the late variant that had webs between the recoil cylinder and the rails, if you ask me. And I know I have an Italeri one of those on a gun I broke up for parts thirty years ago, if not more, but I can’t find it anymore despite extensively searching for it tonight.
Could that thing be welded to that specific vehicle for display purposes?
Yeah, I would not assume that because it is welded in place on a restored display vehicle that it was configured the same on an operational vehicle. I’m onboard with the idea that it’s a tow (or more precisely, push?) bar. Also possible that on the restored vehicle, the closest thing the owners could find to recreate a missing part might have been a gun carriage they had access to. So again, may or may not have been that on the original.
If any of that makes sense.
![]()
Possibly, but it’s hard to say from the sample we have available. I would love to see a good wartime photo of it, but I doubt I ever will.
That had occurred to me as well, but it’s not just on the running BARV pictured on the Leicester modelling society web site, but also on the ones in the Portsmouth and Ahmednagar museums. My conclusion is that — whatever the purpose of this thing was — it really is a (cut-down?) 6-pounder anti-tank gun cradle.
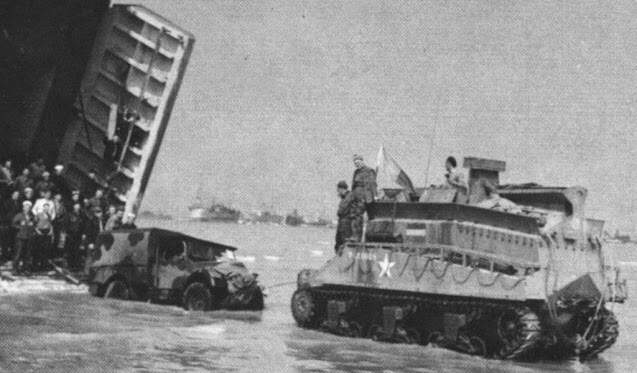
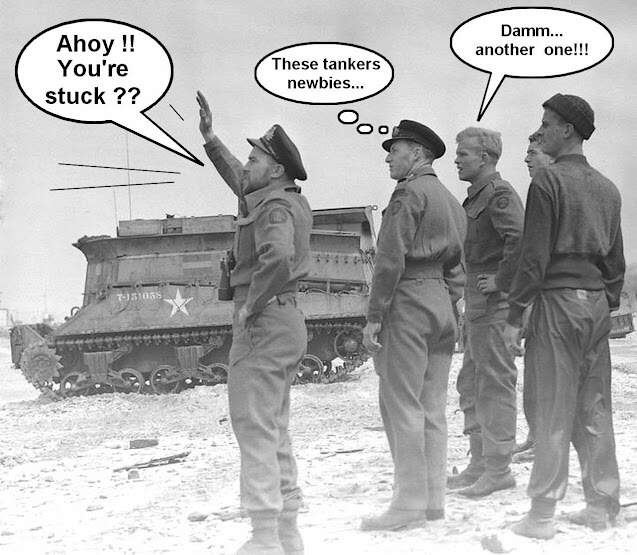
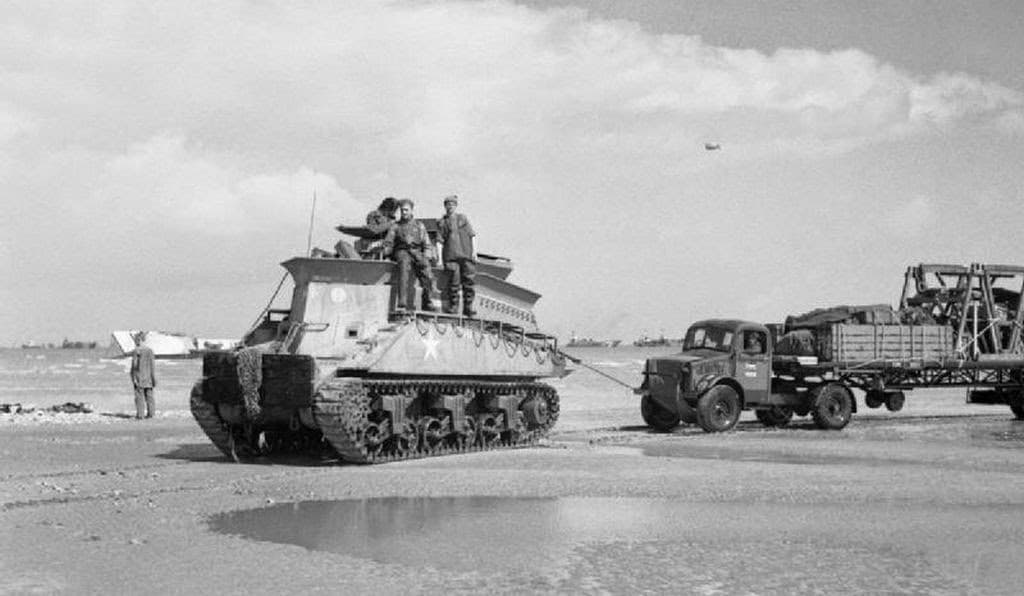
Looking at this photo, copied from above, it does appear that a tow rope/cable is connected between the truck and the object mounted on the BARV, whatever it is.
Ken
Well spotted, I hadn’t noticed that yet. Of course, that does now make me wonder how it would be attached there … Not to the tank’s left rear lifting eye, because it seems that was cut off to make the gadget fit.
I wonder if the cylinder on the restored one is fitted the wrong way round? The forward end seems to have a decent bar for attaching cables with a shackle…


.jpg)