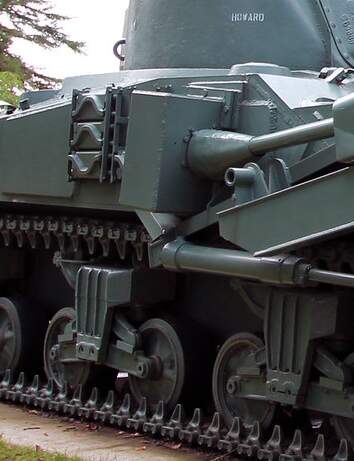
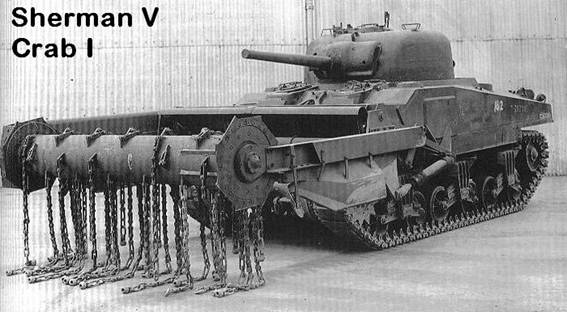
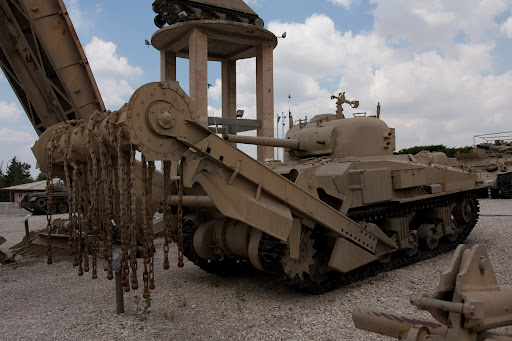
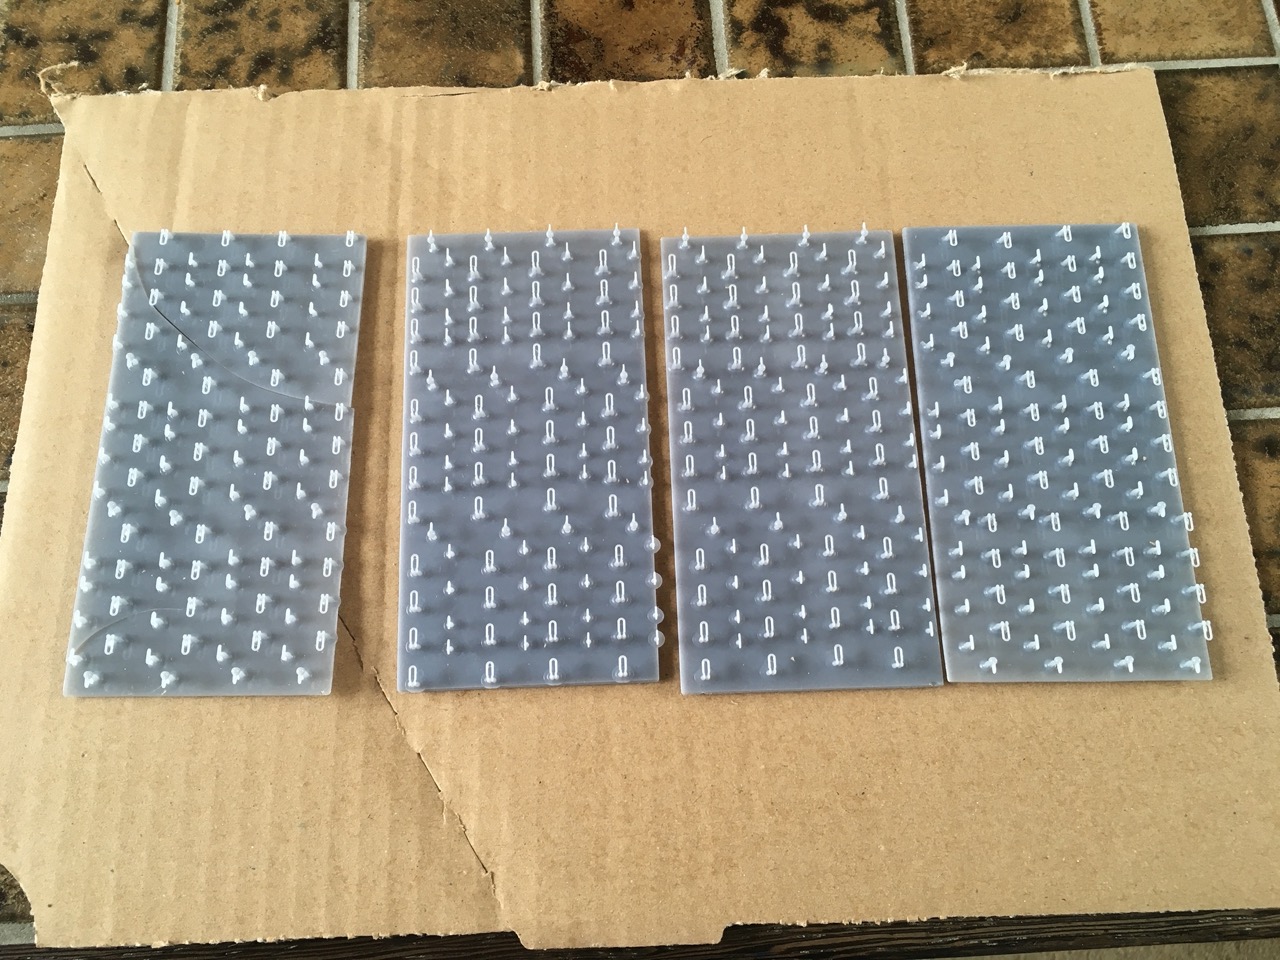
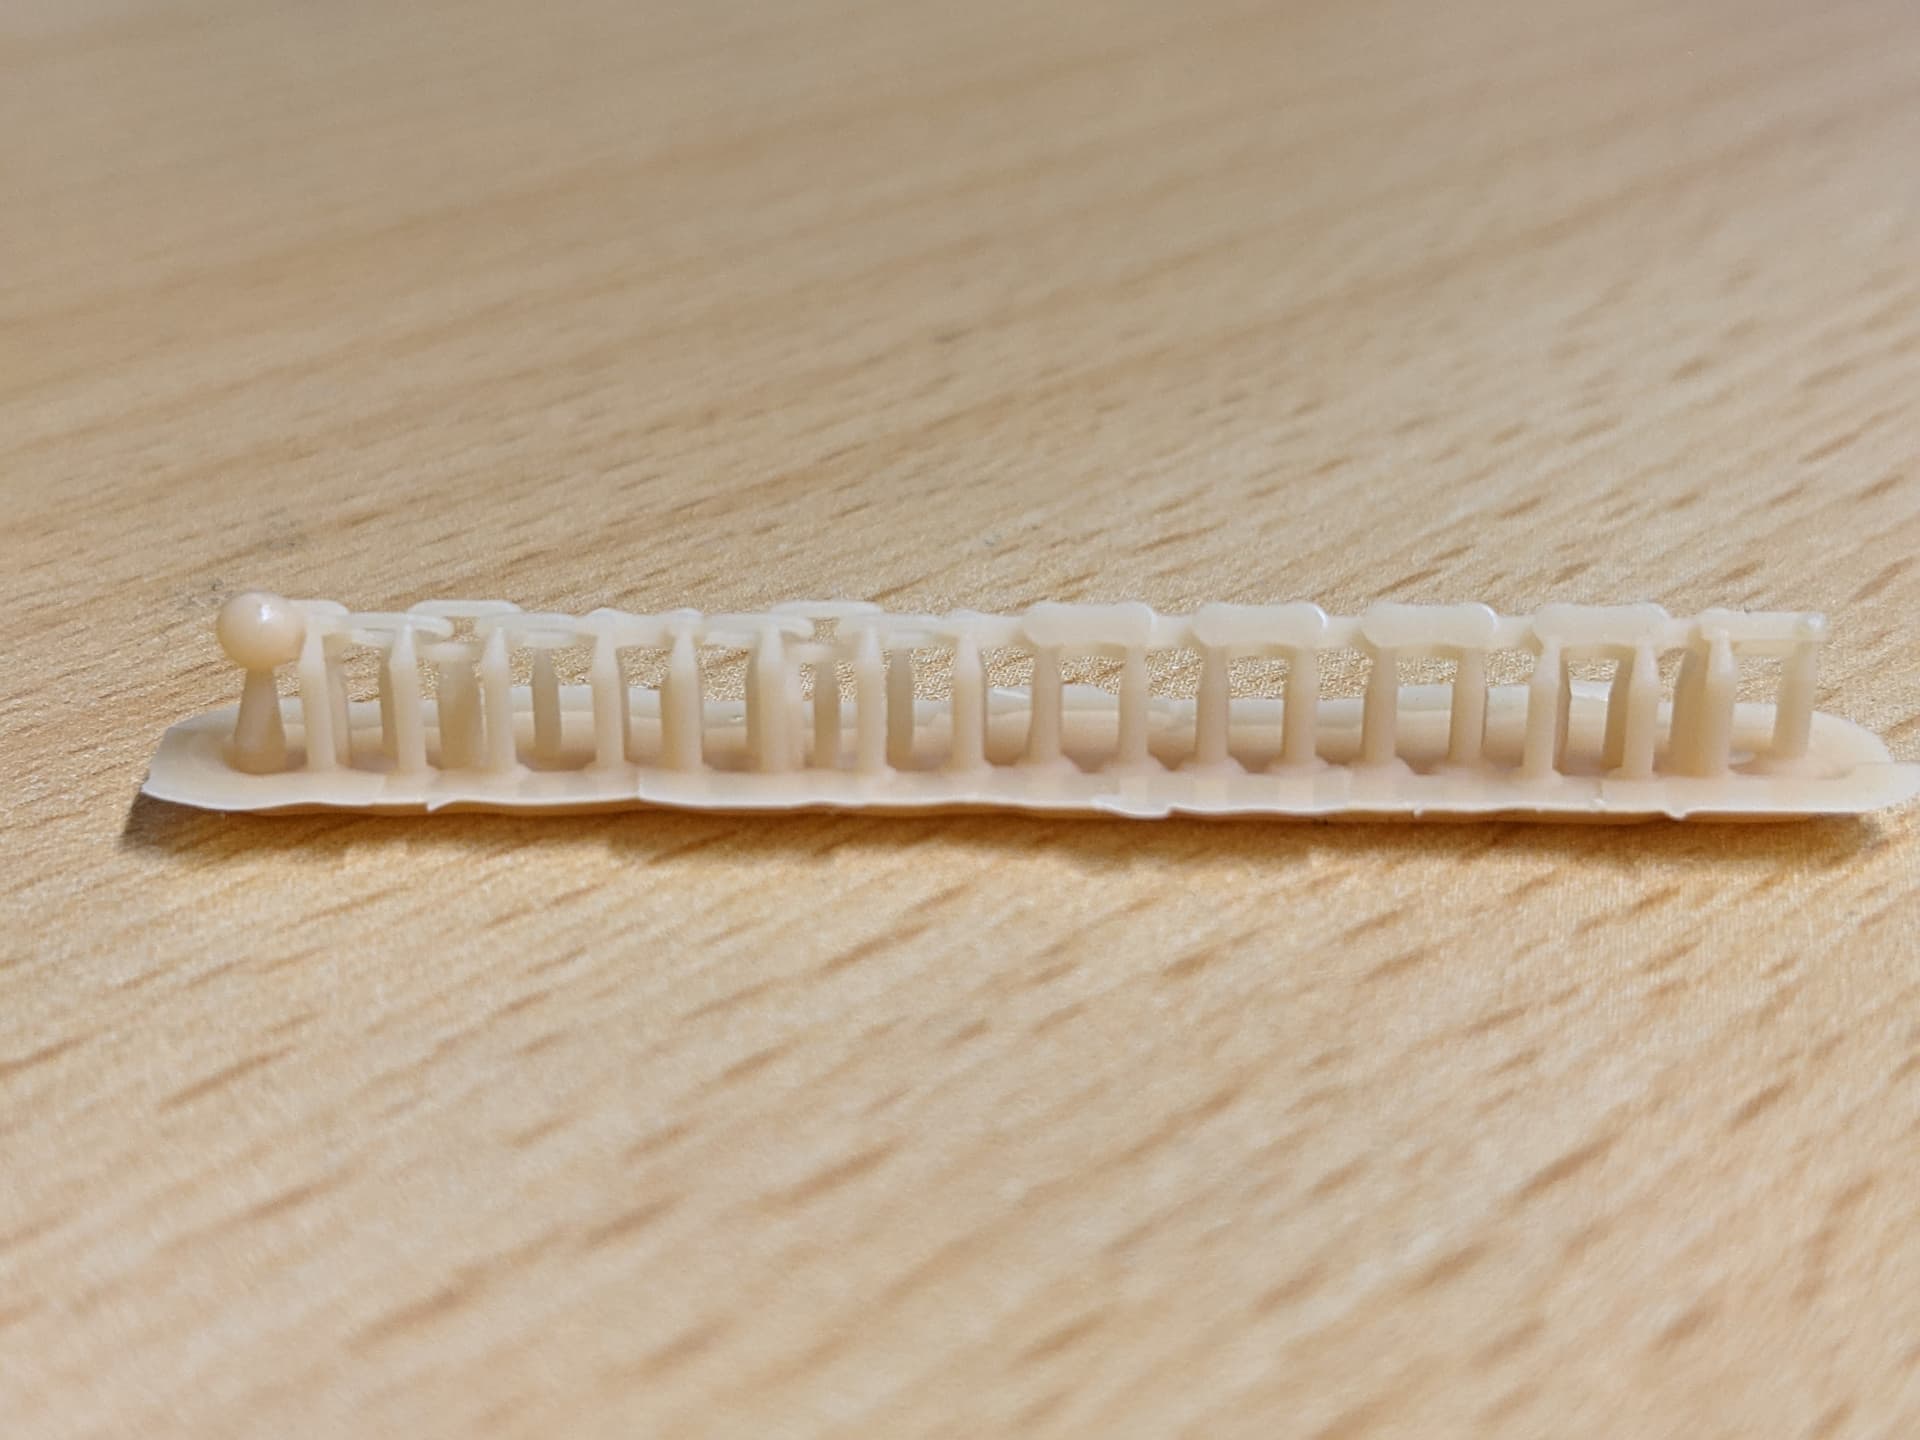
Sherman Flail tank accessory by Lanmo Model

Sorry, but no :slight_smile: All Crab chains were specialised types, as @petbat showed in a post above, and none used regular chain except perhaps as an emergency substitute. The only picture I can recall offhand with normal, everyday chain is a well-known one of a Crab in American service. The most common type seems to have been a complicated affair that looks like a bicycle chain for the “top” half while the rest then consists of elongated D-clasps, chain-type links and flat plates in a particular sequence.

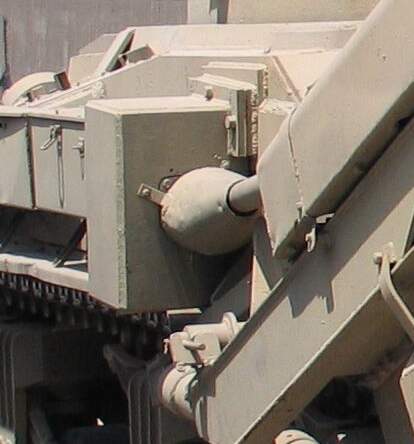
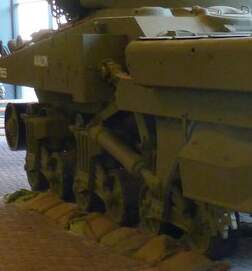
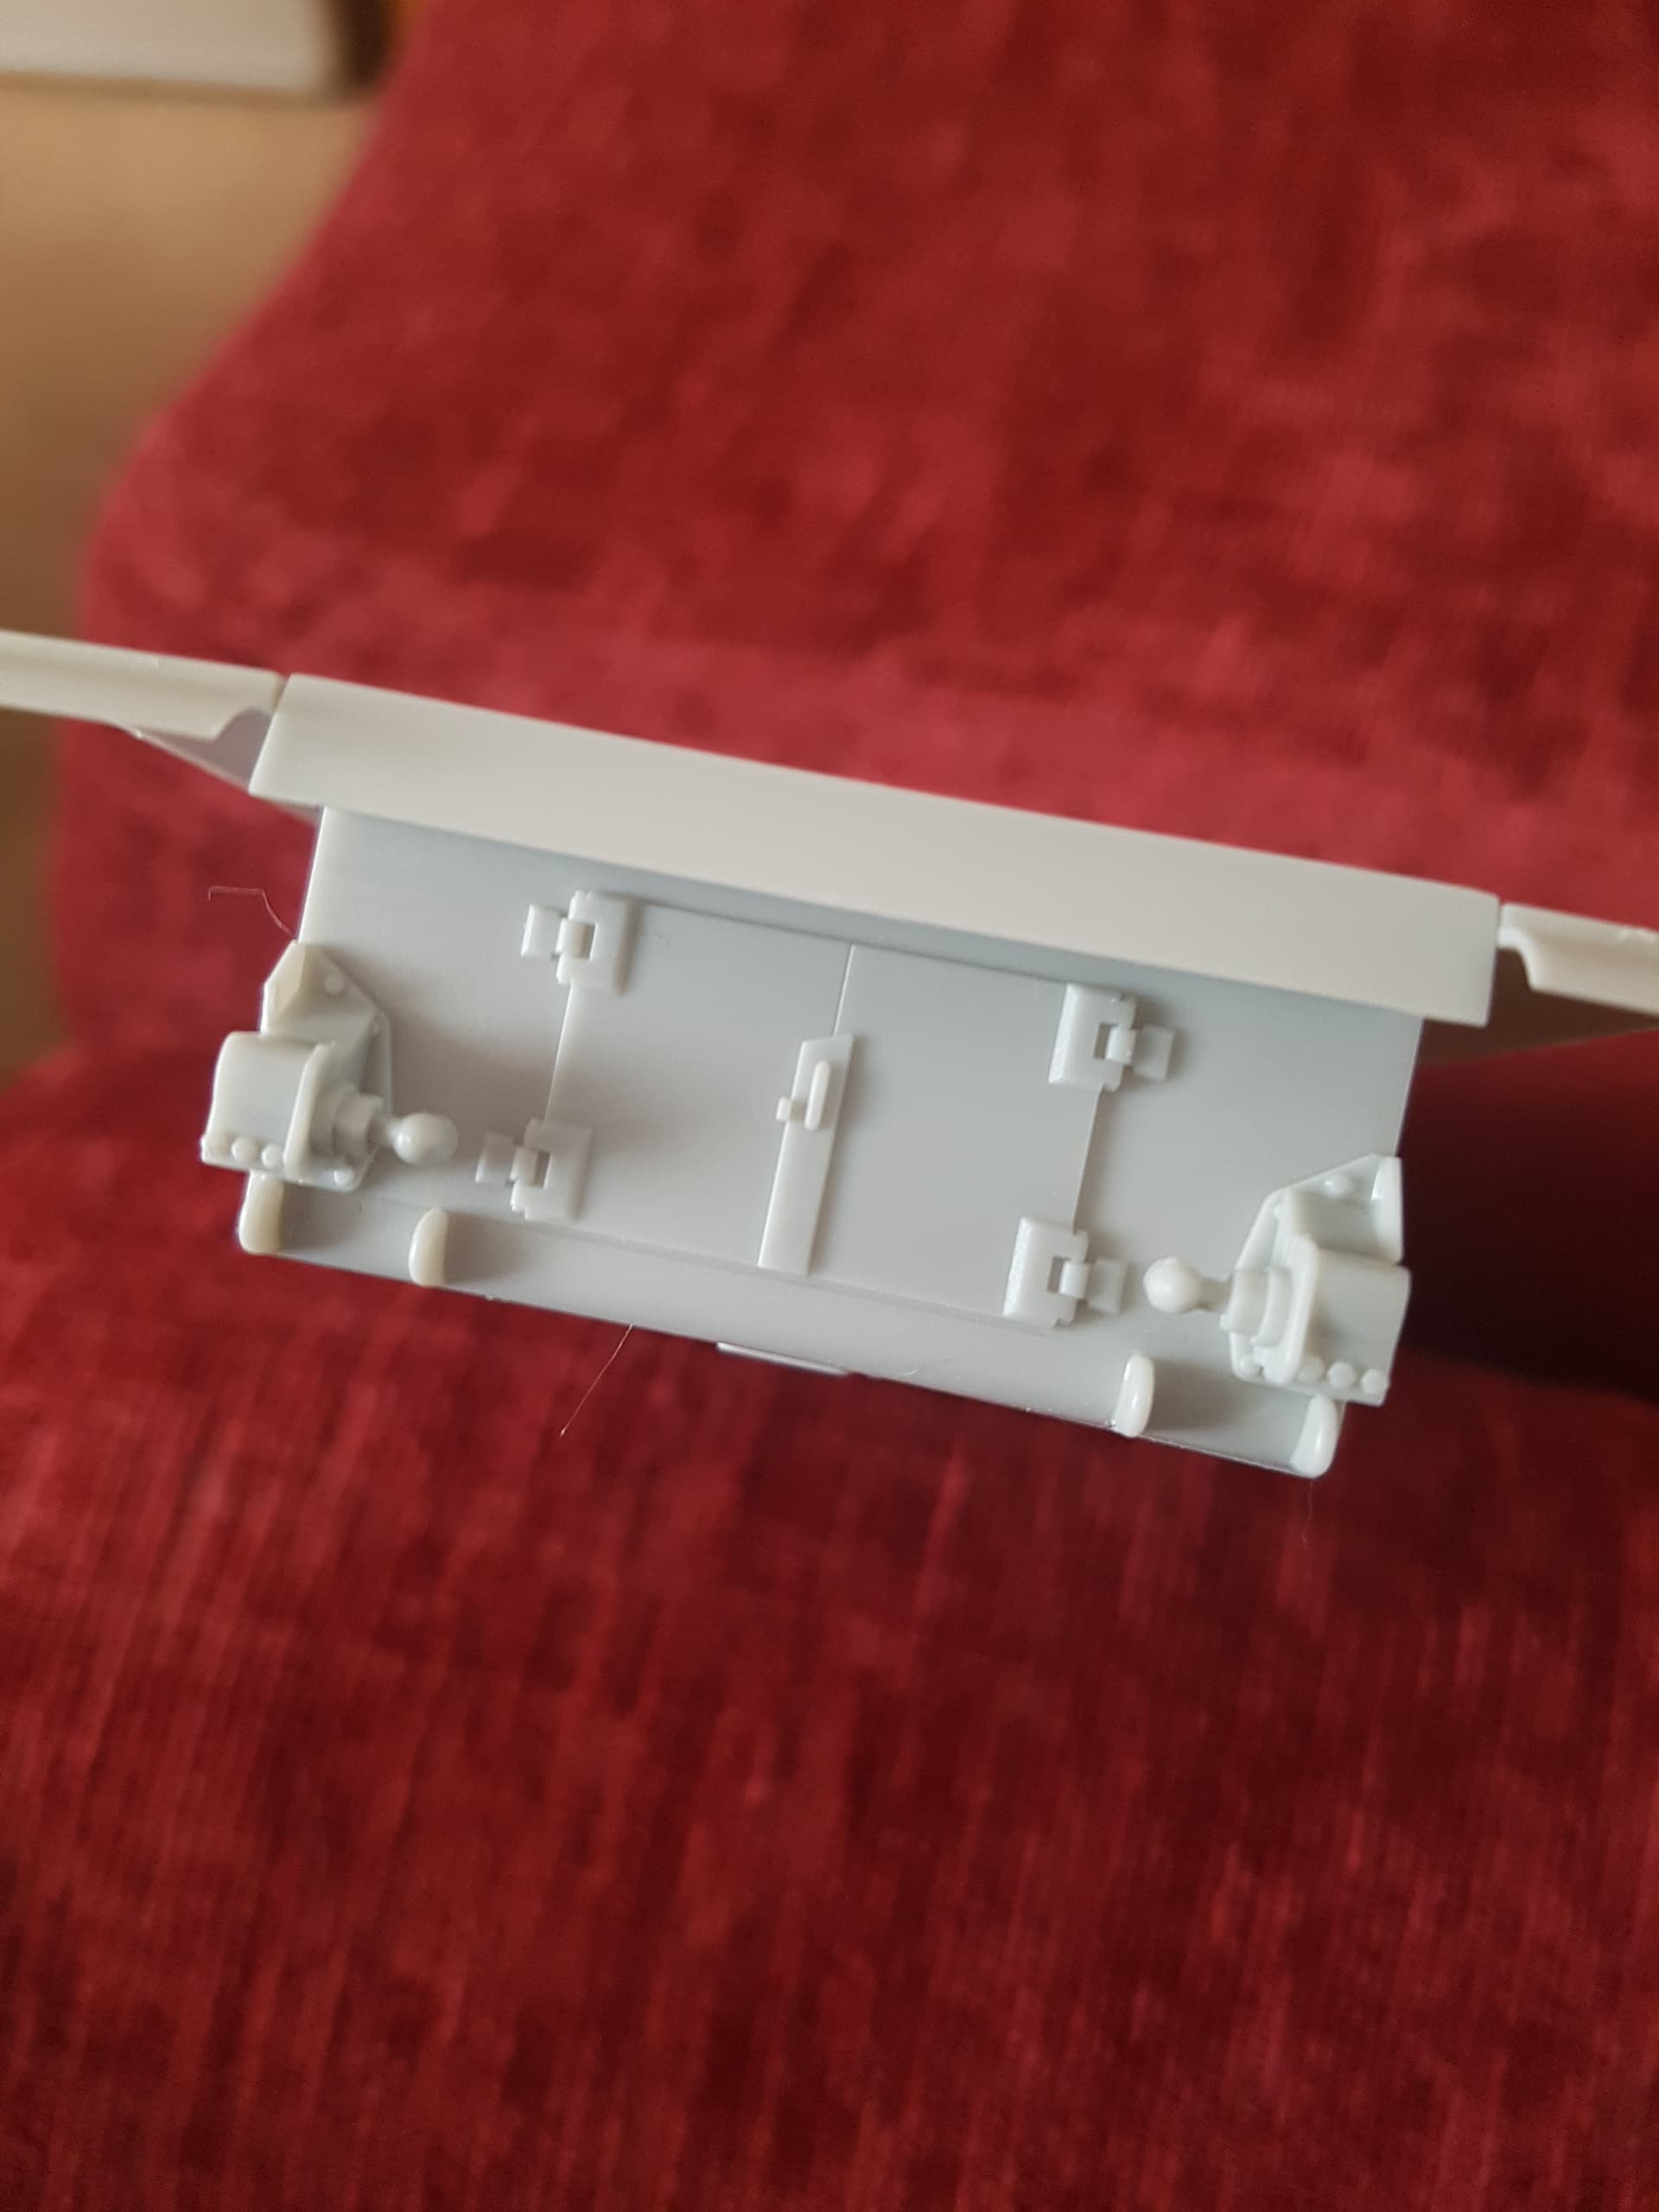
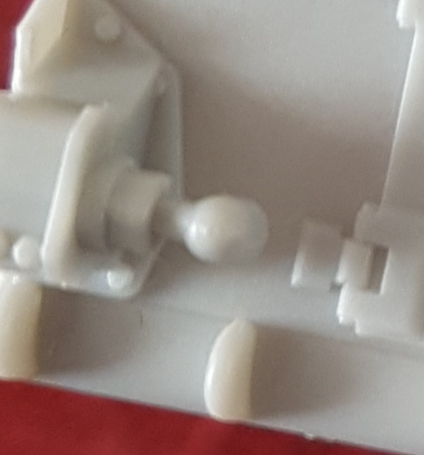
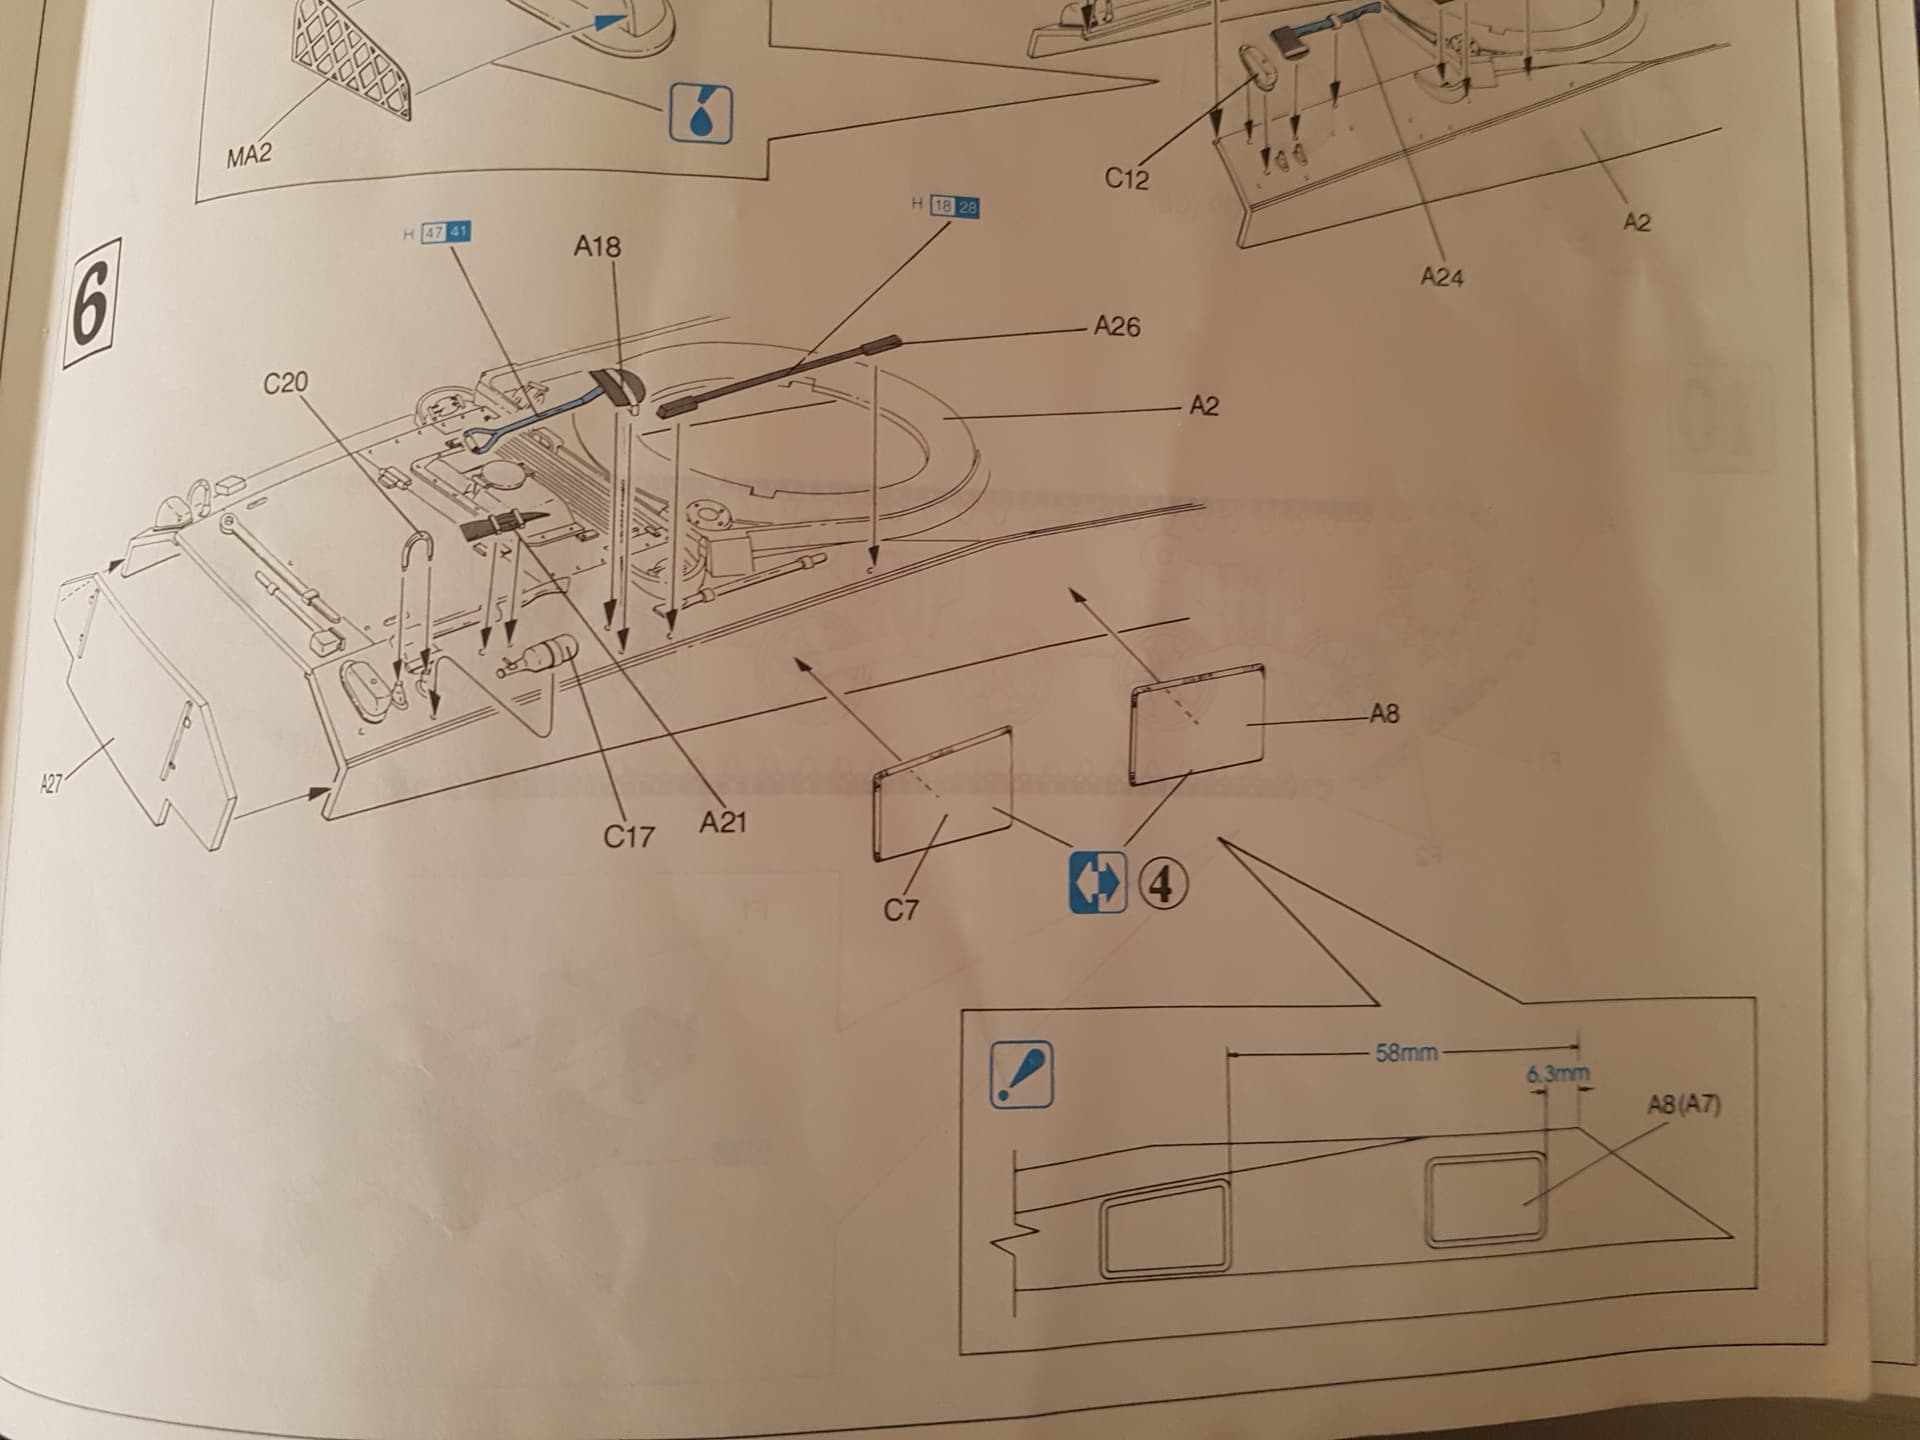
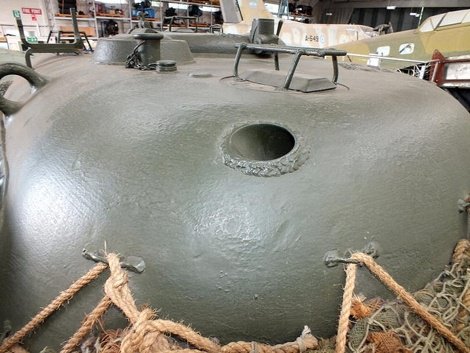
Except that Crab gear almost certainly wouldn’t fit on a tank with appliquĂ© armour plates, because that makes the hull there 5 cm wider. The right-hand plate would also make it more difficult to do this:
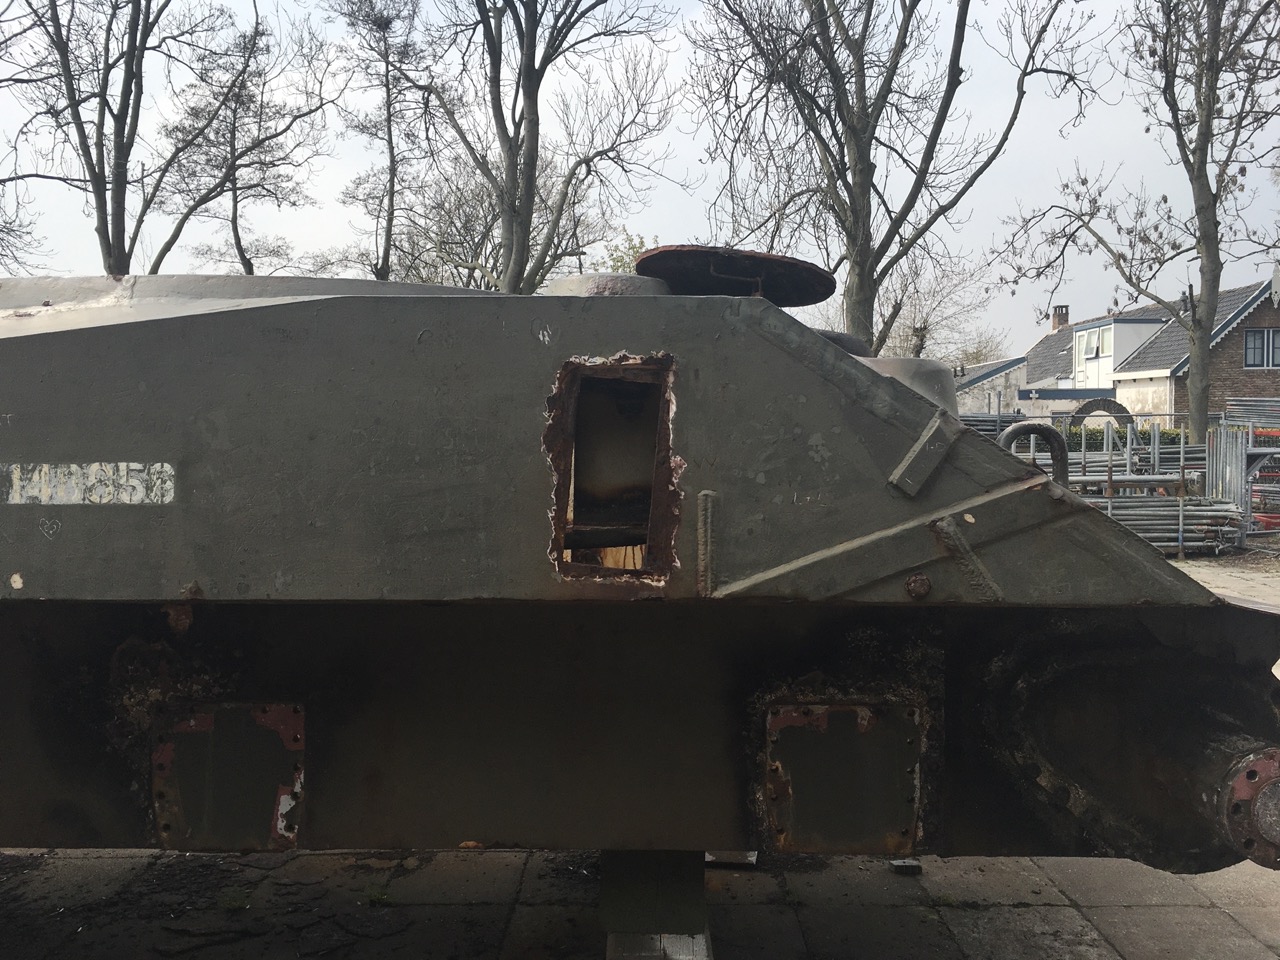
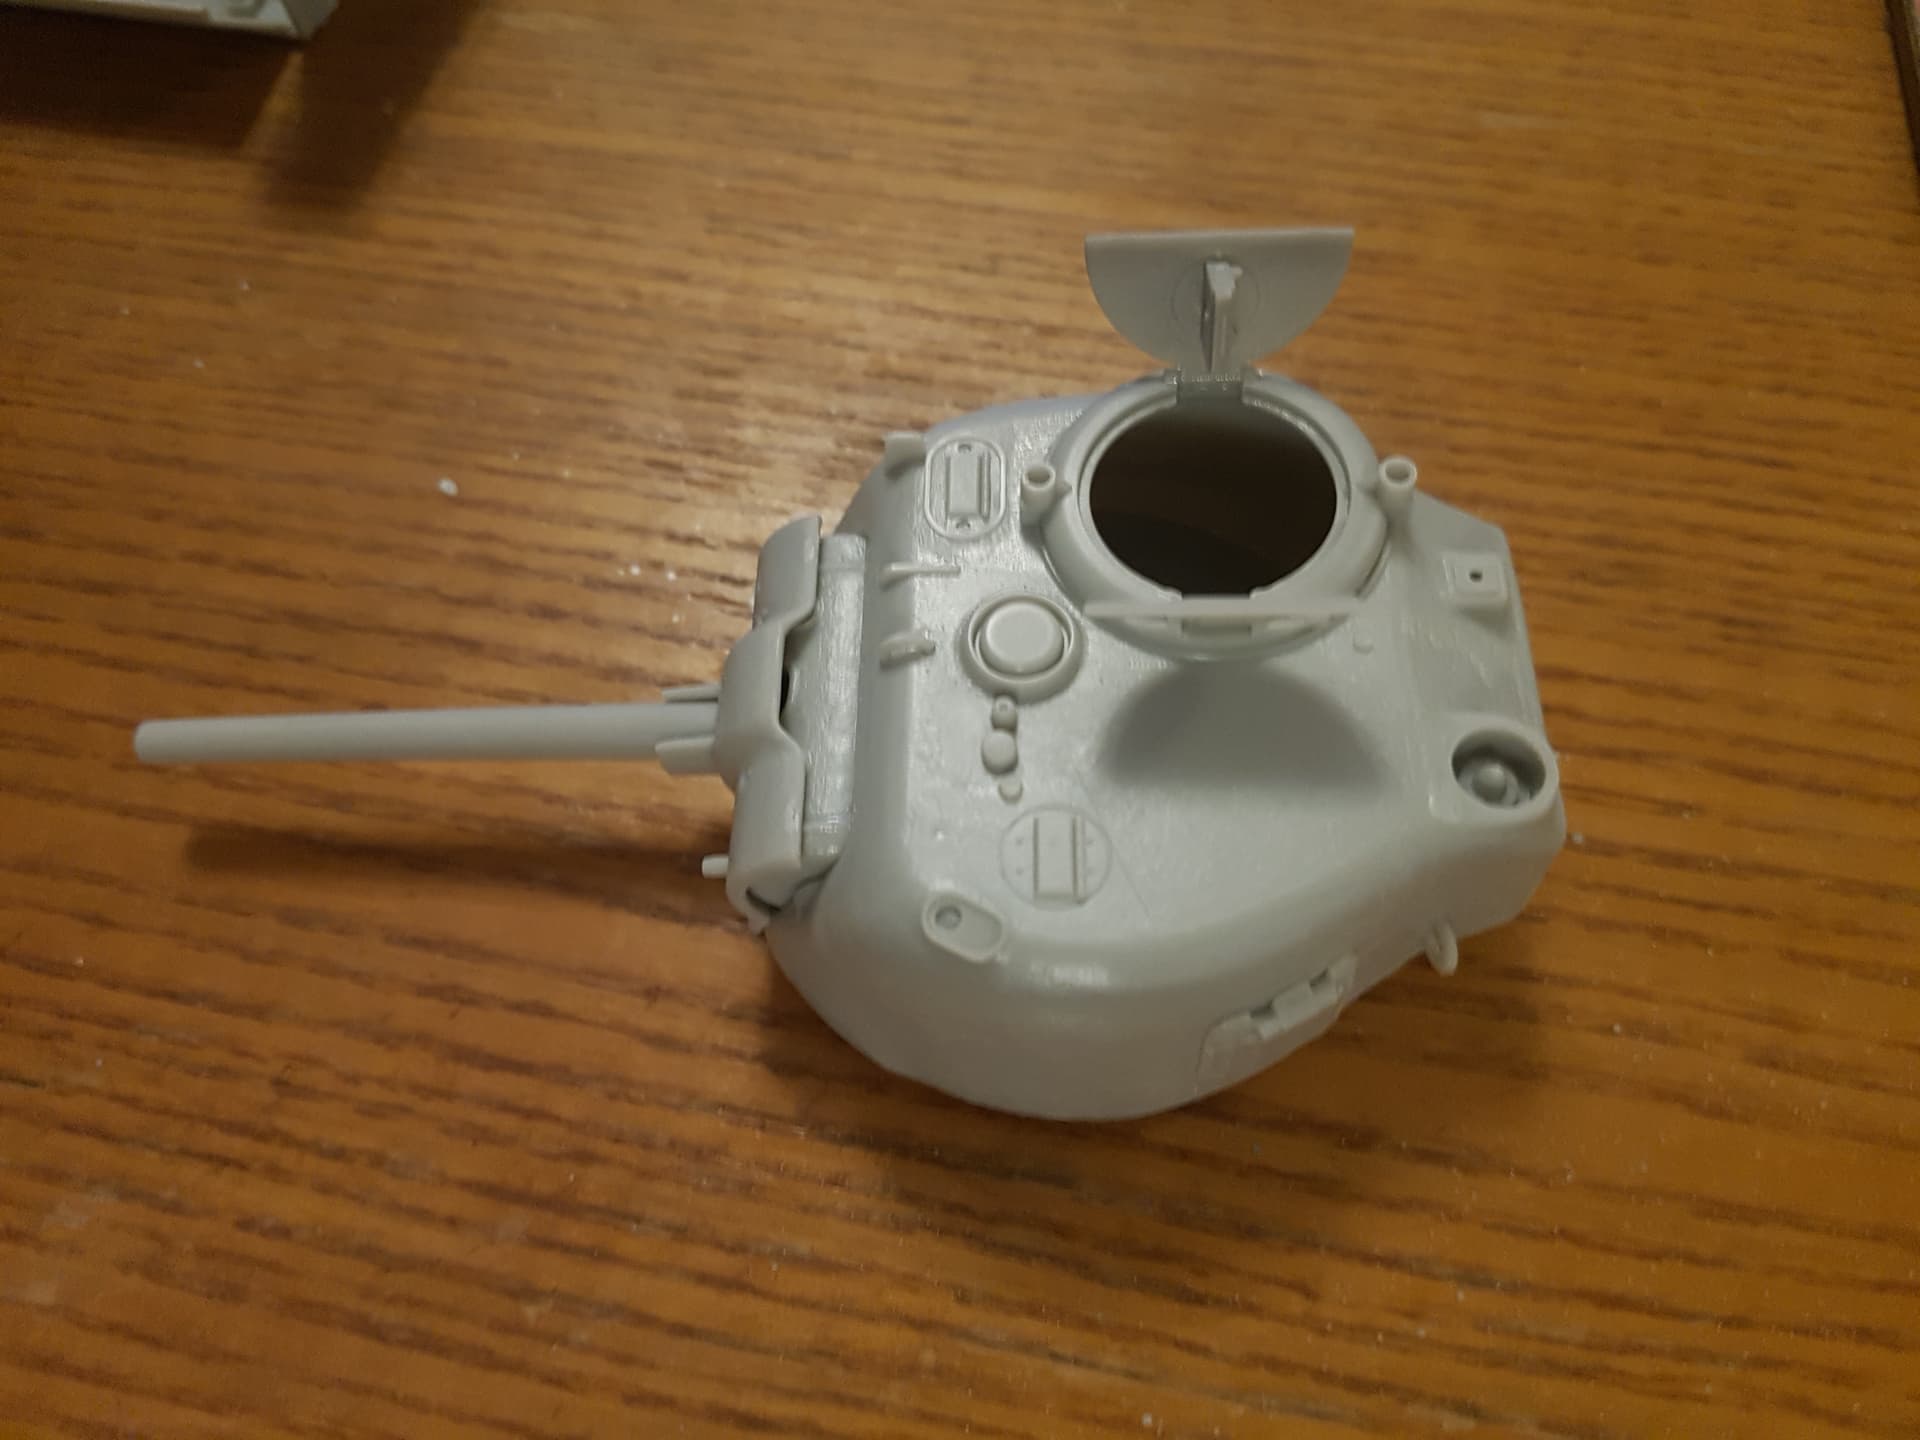

 which is necessary for the flail gear, because this is the hole through which the chain that drives the flail, exits the hull.

Note the hole isn’t vertical, but angled forward slightly. This is because the chain was at 90° to the drive shaft, and therefore, so was the chain case that protected the crew from the spinning chain. The armoured housing on the outside of the tank, that the flail drive shaft runs forward from, is therefore also angled forward by the same amount. (I mention this because a lot of people building Crab models install it at right angles to the sponson floor.)

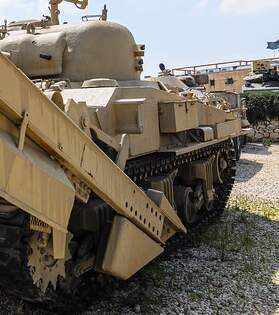
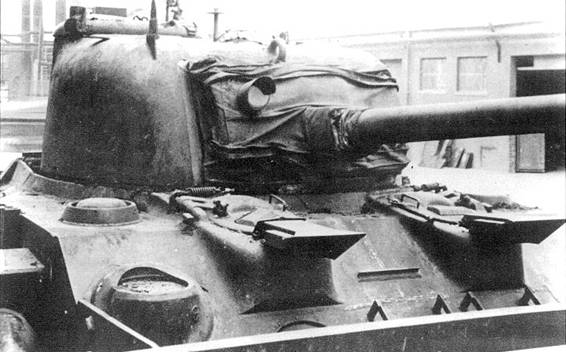
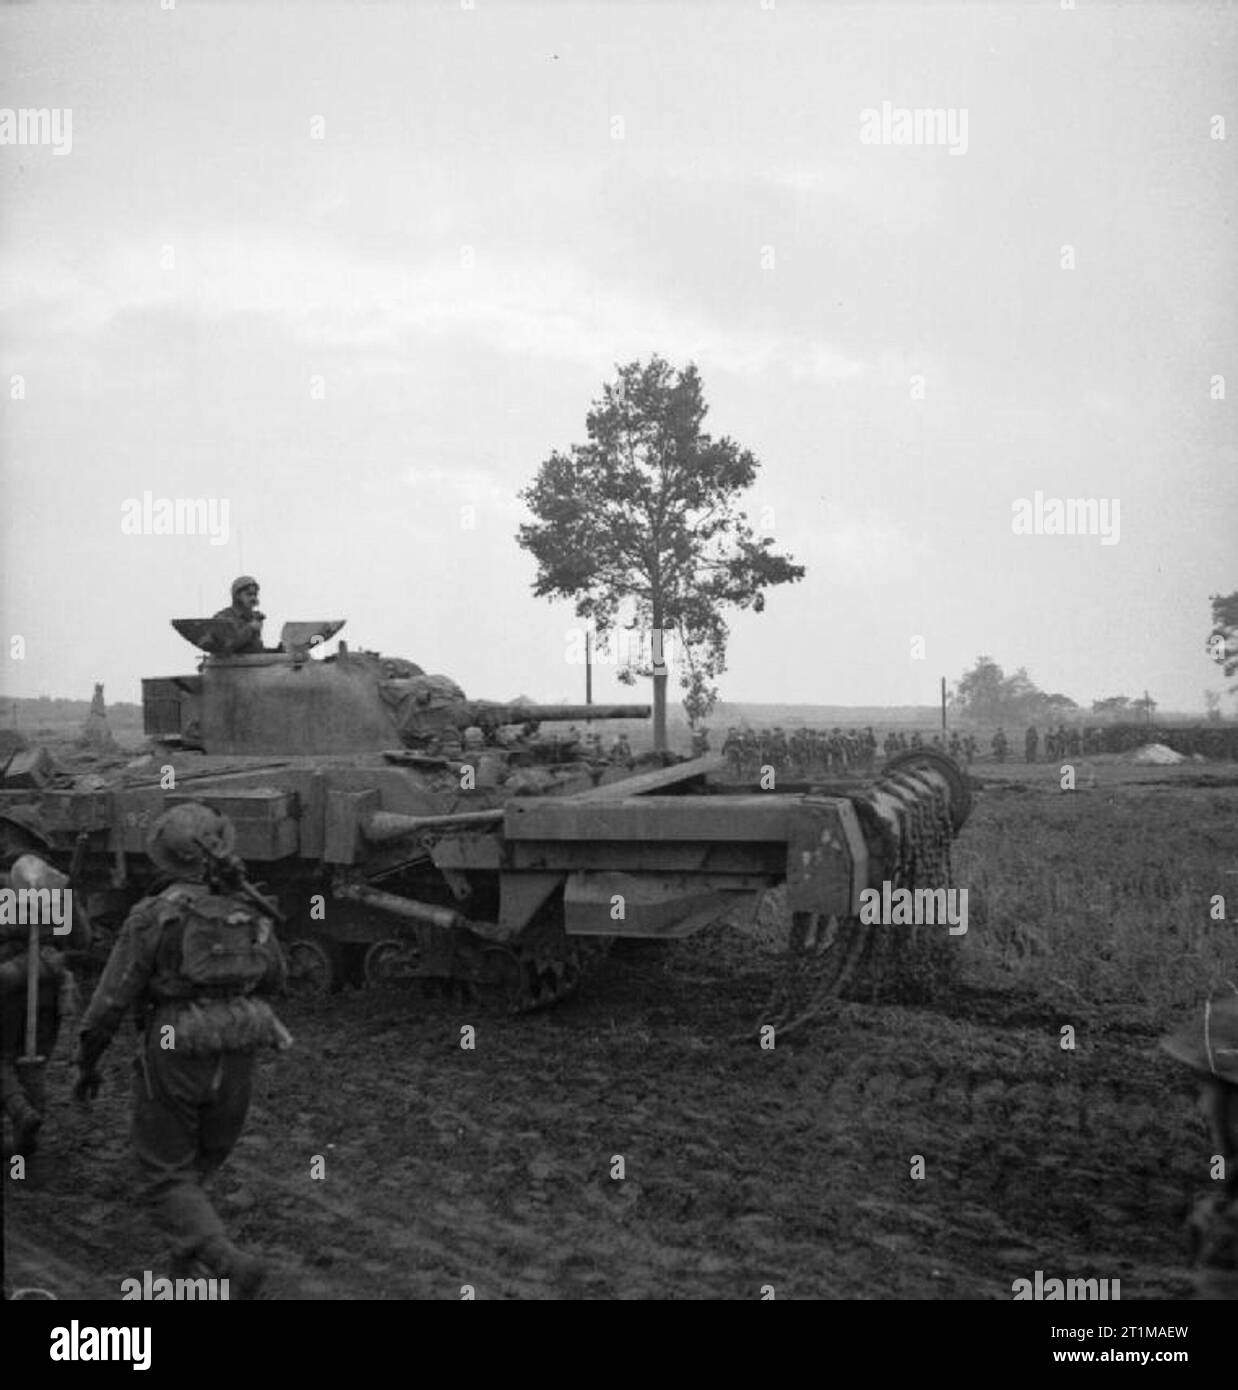
The tank in that photo, BTW, is this one:

As in that exact tank, only about 75 years later when it was being restored in April 2021 before being put back in its normal location as a memorial.

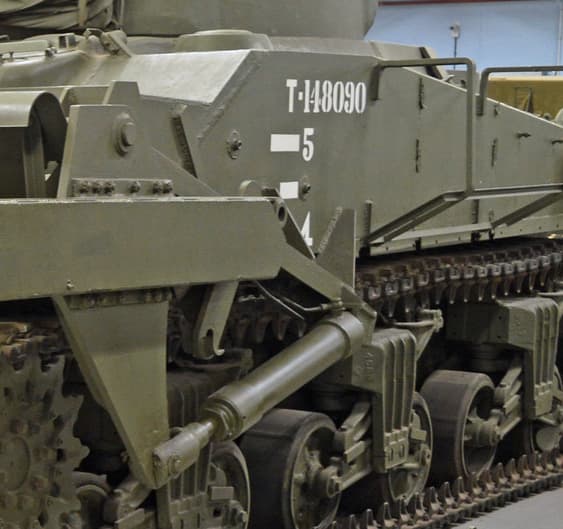
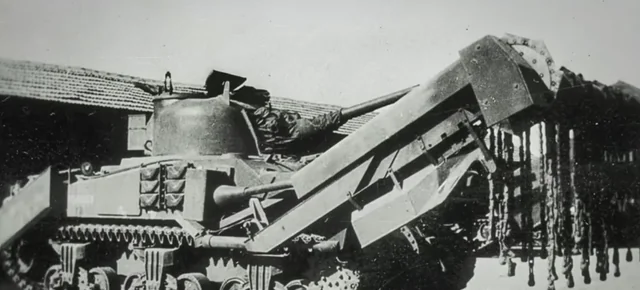
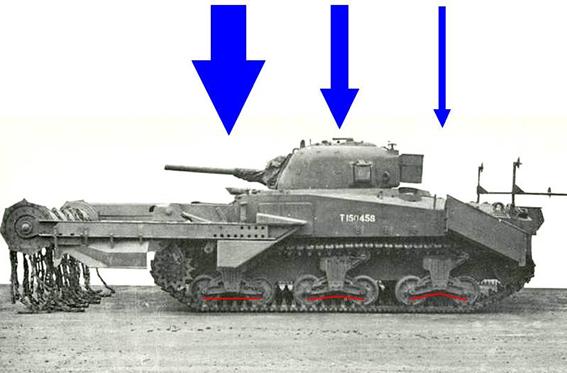
Yes, it is, but that’s because this particular tank had stood outside in a village street for almost three years when that picture was taken. The No. 5 roadwheel arm is held up by a length of chain to prevent it jamming into the track, because that photo was (is my assessment) taken very shortly before this one:

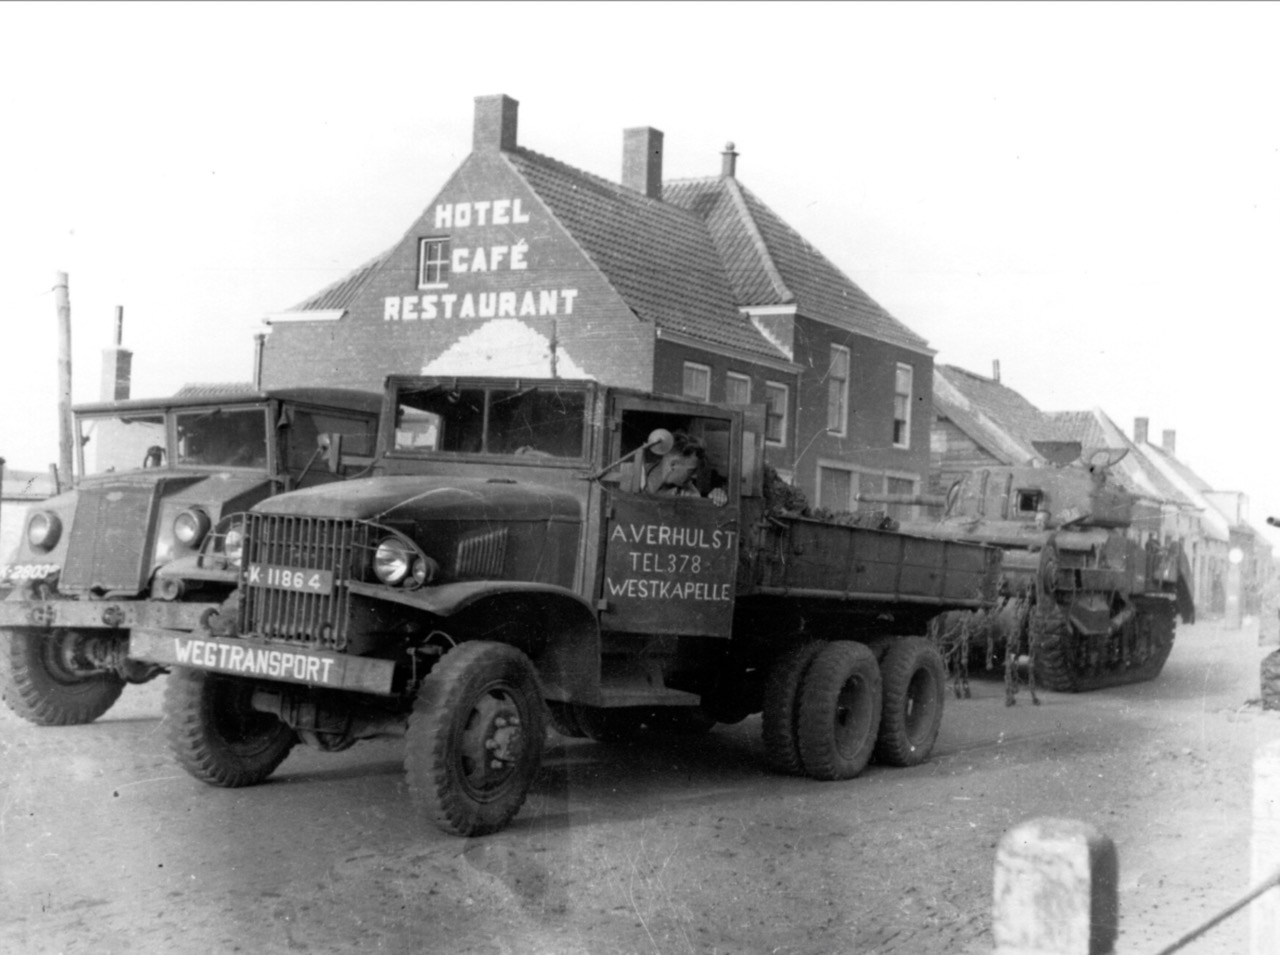
The CMP is almost certainly the one whose roof is visible in the picture of the same tank by the houses.

3 Likes

The Lanmo resin parts seem to have been designed for this extra width.
Howard ??
With applique armour
image
I presume this is the left side of Howard
image

image025
image026
Same tank, oblique view from left rear, also in “postcard” below


Better view of “postcard” beauty:

Sherman Crab in Latrun, welder has gone wild with plates added to plates
image
image
unnamed

Without applique armour
image


image

Crabbing towards Venray somewhere in NW Europe

Some sort of plate ?? but it looks too thin to be applique armour 

image029

Mounting plate instead of applique armour (to add the required width???)
2wo5ajv1qbp41

@Klaus-Adler
David, reference photo of those light contraptions at the rear end. The one on the left side seems to have been subjected to some GBH 


Two more photos (Australia???)
Right side
Left side

Illustrating the overloading of the front end:
image036

Summary: With or without, both options possible.

I do think, but this is just a thought that I can not prove in any way whatsoever, that mounting plates were sometimes added to fill out the width when applique armour was not present (i.e. on wet stowage hulls). The images above should allow a model builder to procede with or without applique armour.

Could there have been two slightly different Crab sets? One for wet stowage and one for dry stowage hulls?

2 Likes

Yes, you are correct and I chose my words poorly. What I should have said was chain that was “more akin” to standard chain in 1/35 then the bicycle style chain used on the later version. While by no means perfect, using regular chain in 1/35 is close to the D-link style chain used, as opposed to the bicycle style chain that needs to be cast in some fashion (resin, white metal, 3D printed) as Resicast has done.

2 Likes

It’s impossible to tell from the right-hand side, AFAIK, but nearly all of the ones you post that show the left-hand side, are Crabs Mk. II. They’re easy to spot because of the triangular counterweight at the rear of the jib (and the absence of a hydraulic cylinder). I don’t know, but it could be the design of that was altered slightly to take into account the extra width of the armour plate as well? Or perhaps the whole thing was flexible enough to accommodate it anyway, for all I know.

Crabs were all built on the Sherman V (M4A4), because of the higher power available. There were no wet-stowage M4A4s :slight_smile:

Probably, yes. The only real alternative I found is this:


 and I would not recommend it :slight_smile: The top half is from the Resicast chains, which are the “all-bicycle-link” type because, as Graham Sellar confirmed when I asked him last year, the other types would not have been possible to cast. The other parts are 3D prints somebody made for me after he measured up the chains on the Overloon Crab.

Once I got the hang of it, each of those chains took me about two minutes to put together, after I had cleaned up all of the parts, that is. Luckily I didn’t have to make any spares to stow in the hull and turret racks, else I would have needed twice as many, if not more.

3 Likes

Yes, except this one:
image025

Applique armour was applied to both sides of dry stowage hulls, one plate on the left side, two plates on the right side, and since there were no wet stovage Sherman V / M4A4 


2 Likes

Accurate Armour and Resicast did various versions with the lowered / defrocked screens.
I think Resicast did one with the raised screen, but is out of production.

Best Reference I could find right now: resicast sherman dd - Scale Modeling Search*

And I forgot I’ve actually got this one


2 Likes

i will have look on the AA site and see if it is still there.

i think i left some casting lugs on the two parts on the rear of the tank but can someone confirm this please.


20240415_155407

1 Like

It isn’t, I checked before posting about the Resicast kit 


2 Likes

I would say ‘remove’
Rear end of Howard, no little balls by the nuts. Also more views of those indicators.

1 Like

That’s why I said almost all :slight_smile: I don’t recall offhand any in-service photos of Crabs Mk. I with appliquĂ© armour, but that doesn’t mean they never existed. Please note here that I’m not out to prove you wrong or force you on the defensive — I’m just giving information based mainly on knowledge gained from the research I did to build the Resicast Crab kit, and from close contact with the remains of a Crab-minus-its-flail being restored for preservation.

3 Likes

Well, there is obviously Mk I Crabs with and without applique armour.
I haven’t got the slightest idea about the numbers of each type (Mk I with, Mk I without, Mk II with and possibly also Mk II without apllique armour).

From: M4A4 Sherman production variants

I find it plausible that some Mk I flails got mounted on M4A4s upgraded with applique armour,
most Mk I’s probably went to M4A4’s who had not been produced or remanufactured with
applique armour. The Mk II flail was a product improvement to make it follow ground contours
to dig out the mines from depressions in the ground, later design and more likely to be on
later or remanufactured M4A4s.

It would be nice to have Mk II flail kit or conversion 


2 Likes

Most M4A4s with appliquĂ© armour would have received that as a refit, part of the Quick-Fix programme — according to Son of Sherman, Chrysler only introduced the plates to the production line in August 1943, and the last M4A4 was made in September. This would mean the vast majority of Sherman Vs at hand for conversion to Crabs probably would not have been upgraded when production started around that same time.

Again, this doesn’t rule out that upgraded tanks were used for conversion to Crabs, but they appear to have been very rare in the field. IMHO, if you want to be safe with your model, leave off the extra armour.

4 Likes

good news the decals have arrived from Sweden!

5 Likes

BTW, today I came across this:

1:35 scale Crab flail chain to 3D print yourself, if you happen to have a resin printer (which I don’t) but it’s in one piece, which should save a ton of work compared to how I made them.

3 Likes

well folks, i have skipped the upper hull section for the moment and started work on the turret. i am using the kit barrel as it went together reasonably well, i just need to add a grab near the commander’s hatch and the construction there is done.
was there any additional storage added to the rear of the turret as there are two holes that need filling there otherwise?

i know you guys have been discussing the extra side armour on this kit and thankfully it’s optional and for the time being it’s easier to leave it off and if needed, csn be installed later rather than doing it the other way round.

one issue i am not looking forward to is the separate link tracks, i was hoping there were rubber band tracks in the box ( yes i know I’m a heretic and some of you are reaching for your pitch forks but i don’t mind them so much
oh such blasphemy!) so if anyone has suggestions on how to assemble the i.e. being drunk or sobber whilst putting them together can you let me know.

1 Like

AFV Club makes a set of vinyl T62 tracks for ‘long chassis’ (M4A4) Shermans. I have never used a set of vinyl tracks from AFV Club but perhaps these would fit your model, offering an alternative to the individual link tracks in the kit.

1 Like

Crabs would have had the usual British stowage bin on the rear of the turret, unless equipped for deep wading — the bin got in the way of the air intake duct, so it was removed for that.

One thing to note about your turret is that Crabs normally had a canvas cover over the gun shield, because flailing threw up a ton of dust and dirt. There were metal strip fittings on the turret around the outside of the gun shield to accommodate it, as well as a short piece of pipe over the gunner’s telescopic sight opening. These are not normally visible in photos because of the canvas cover, though.

Here’s my interpretation of them:

(I had already begun painting my model when I discovered this feature, so I had to scrape the paint off to add the strips and tube, as well as the “pitched” style of periscope covers that I noticed too late were on the tank I was building a model of — which is to say, the one with the missing roadwheel.)

BTW, the opening for the 2-inch smoke mortar on your turret is in the wrong place and at a strange angle :slight_smile: You could just remove it entirely, Crabs weren’t necessarily fitted with it.

2 Likes

sorry im not familiar with the smoke mortar or it’s location, could you high light it for me please.

The top front left on the turret in front of the periscope, if sitting in the hatch and gun pointed forward of you.
IMG_1424

For the tracks, sober is your friend. Remove all parts (pads and connectors). Making a simple jig might help. Work in sections of 5 or 6 pads. Take one pad and add one connector on right side at the bottom of the curve. Then connect take pad to the next. This ensure the pads all face the same direction. Then add the connectors to left side. After you have those sections completed. Use the same method to connect the sections. You can work on one section before building one or two bogies and then one section after. Spreads out the work effort and you will be done before you know it and your liver mostly intact.

That is how I built these but did it in one night. YMMV.

3 Likes

Thank you Ryan, i will have a look at the kit instructions to see if i have missed anything that goes on top of the turret, if it’s all there then i will grind off that mortar location and then drill a 3mm hole if needed.

The rear stowage box on the the back of the turret is an interesting problem as many pictures show it not being there but they could have been taken Pre D-Day whilst pictures showing it being attached many have been taken months after D-Day so it’s all hard to say ay the moment.

2 Likes