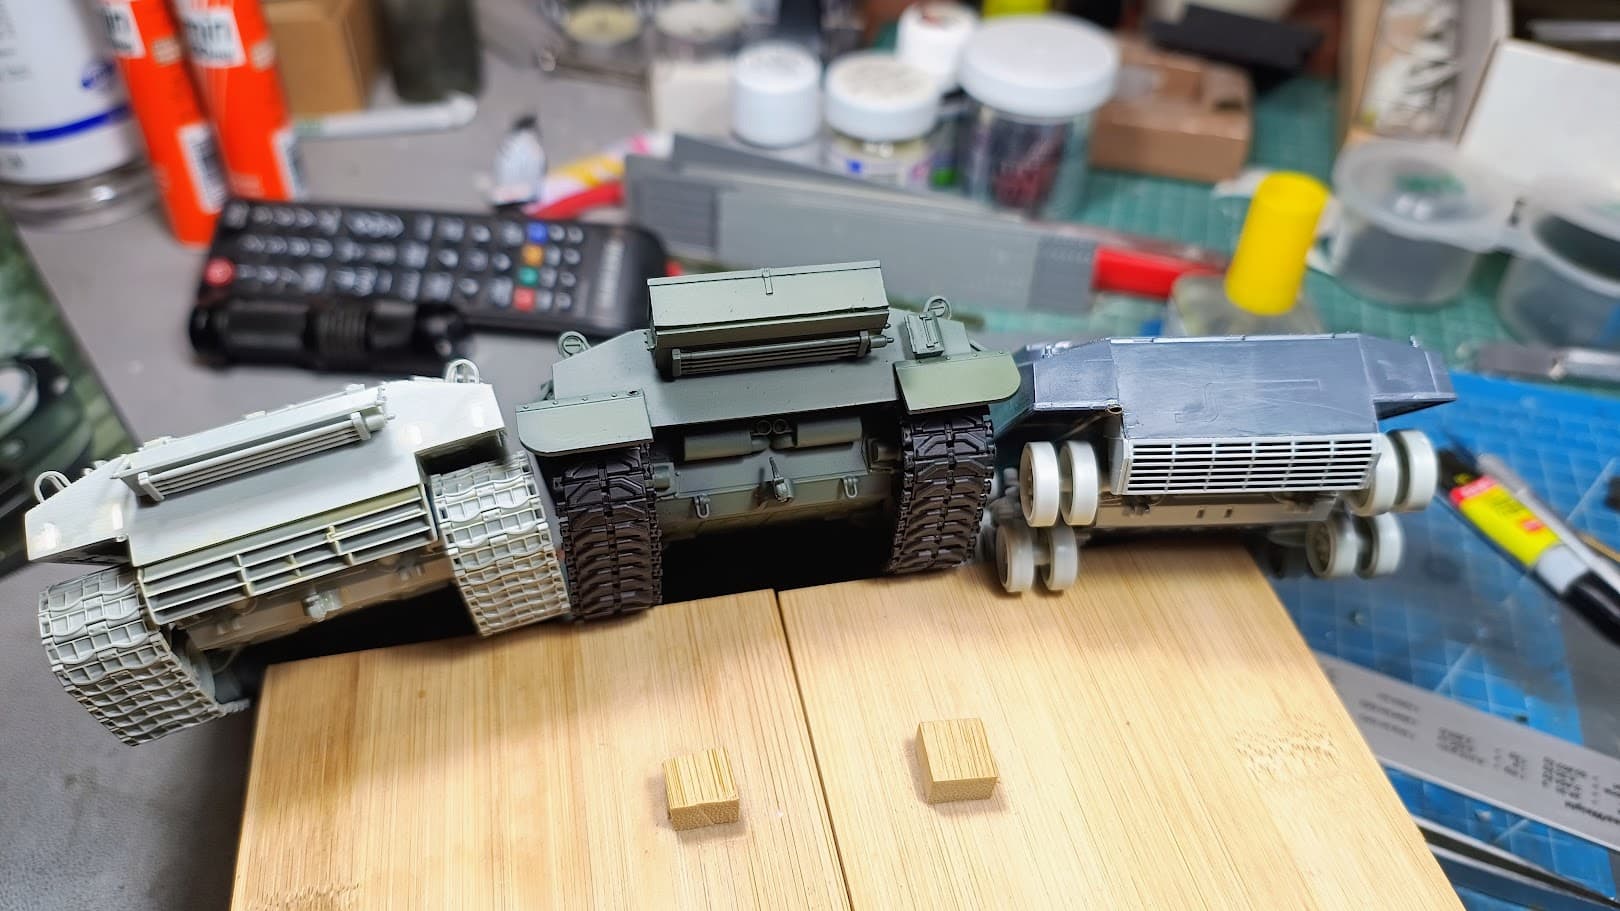
Got my wood plank armor from Value Actual yesterday. As always, great stuff, he also throws some extras for dunnage, which is always welcomed. I should get my Asuka M4A2 “Caesar” on Monday.
4 Likes
Thanks, Nikos! That’s perfect.
Michael ![]()
![]()
3 Likes
I used to think that this was a late/post WWII addition but after researching it a bit more I found out that all Shermans had it. So I went ahead and added it on most of my Shermans, working on the rest (including the Tarawa one that has been primed)
3 Likes
Pretty much the same here. The Sibiran cold has lastet for a while. I´m really looking forward to a proper Norwegian summer which is basically three weeks of bad skiing…
5 Likes
It’s only -8 F here in Colorado, so I guess we’re pikers. Still, wind chill warning for down to -30. Cold enough for me!
Michael ![]()
![]()
3 Likes
Was -5 F/-20 C in Terre Haute, Indiana - a heat wave by comparison.
2 Likes
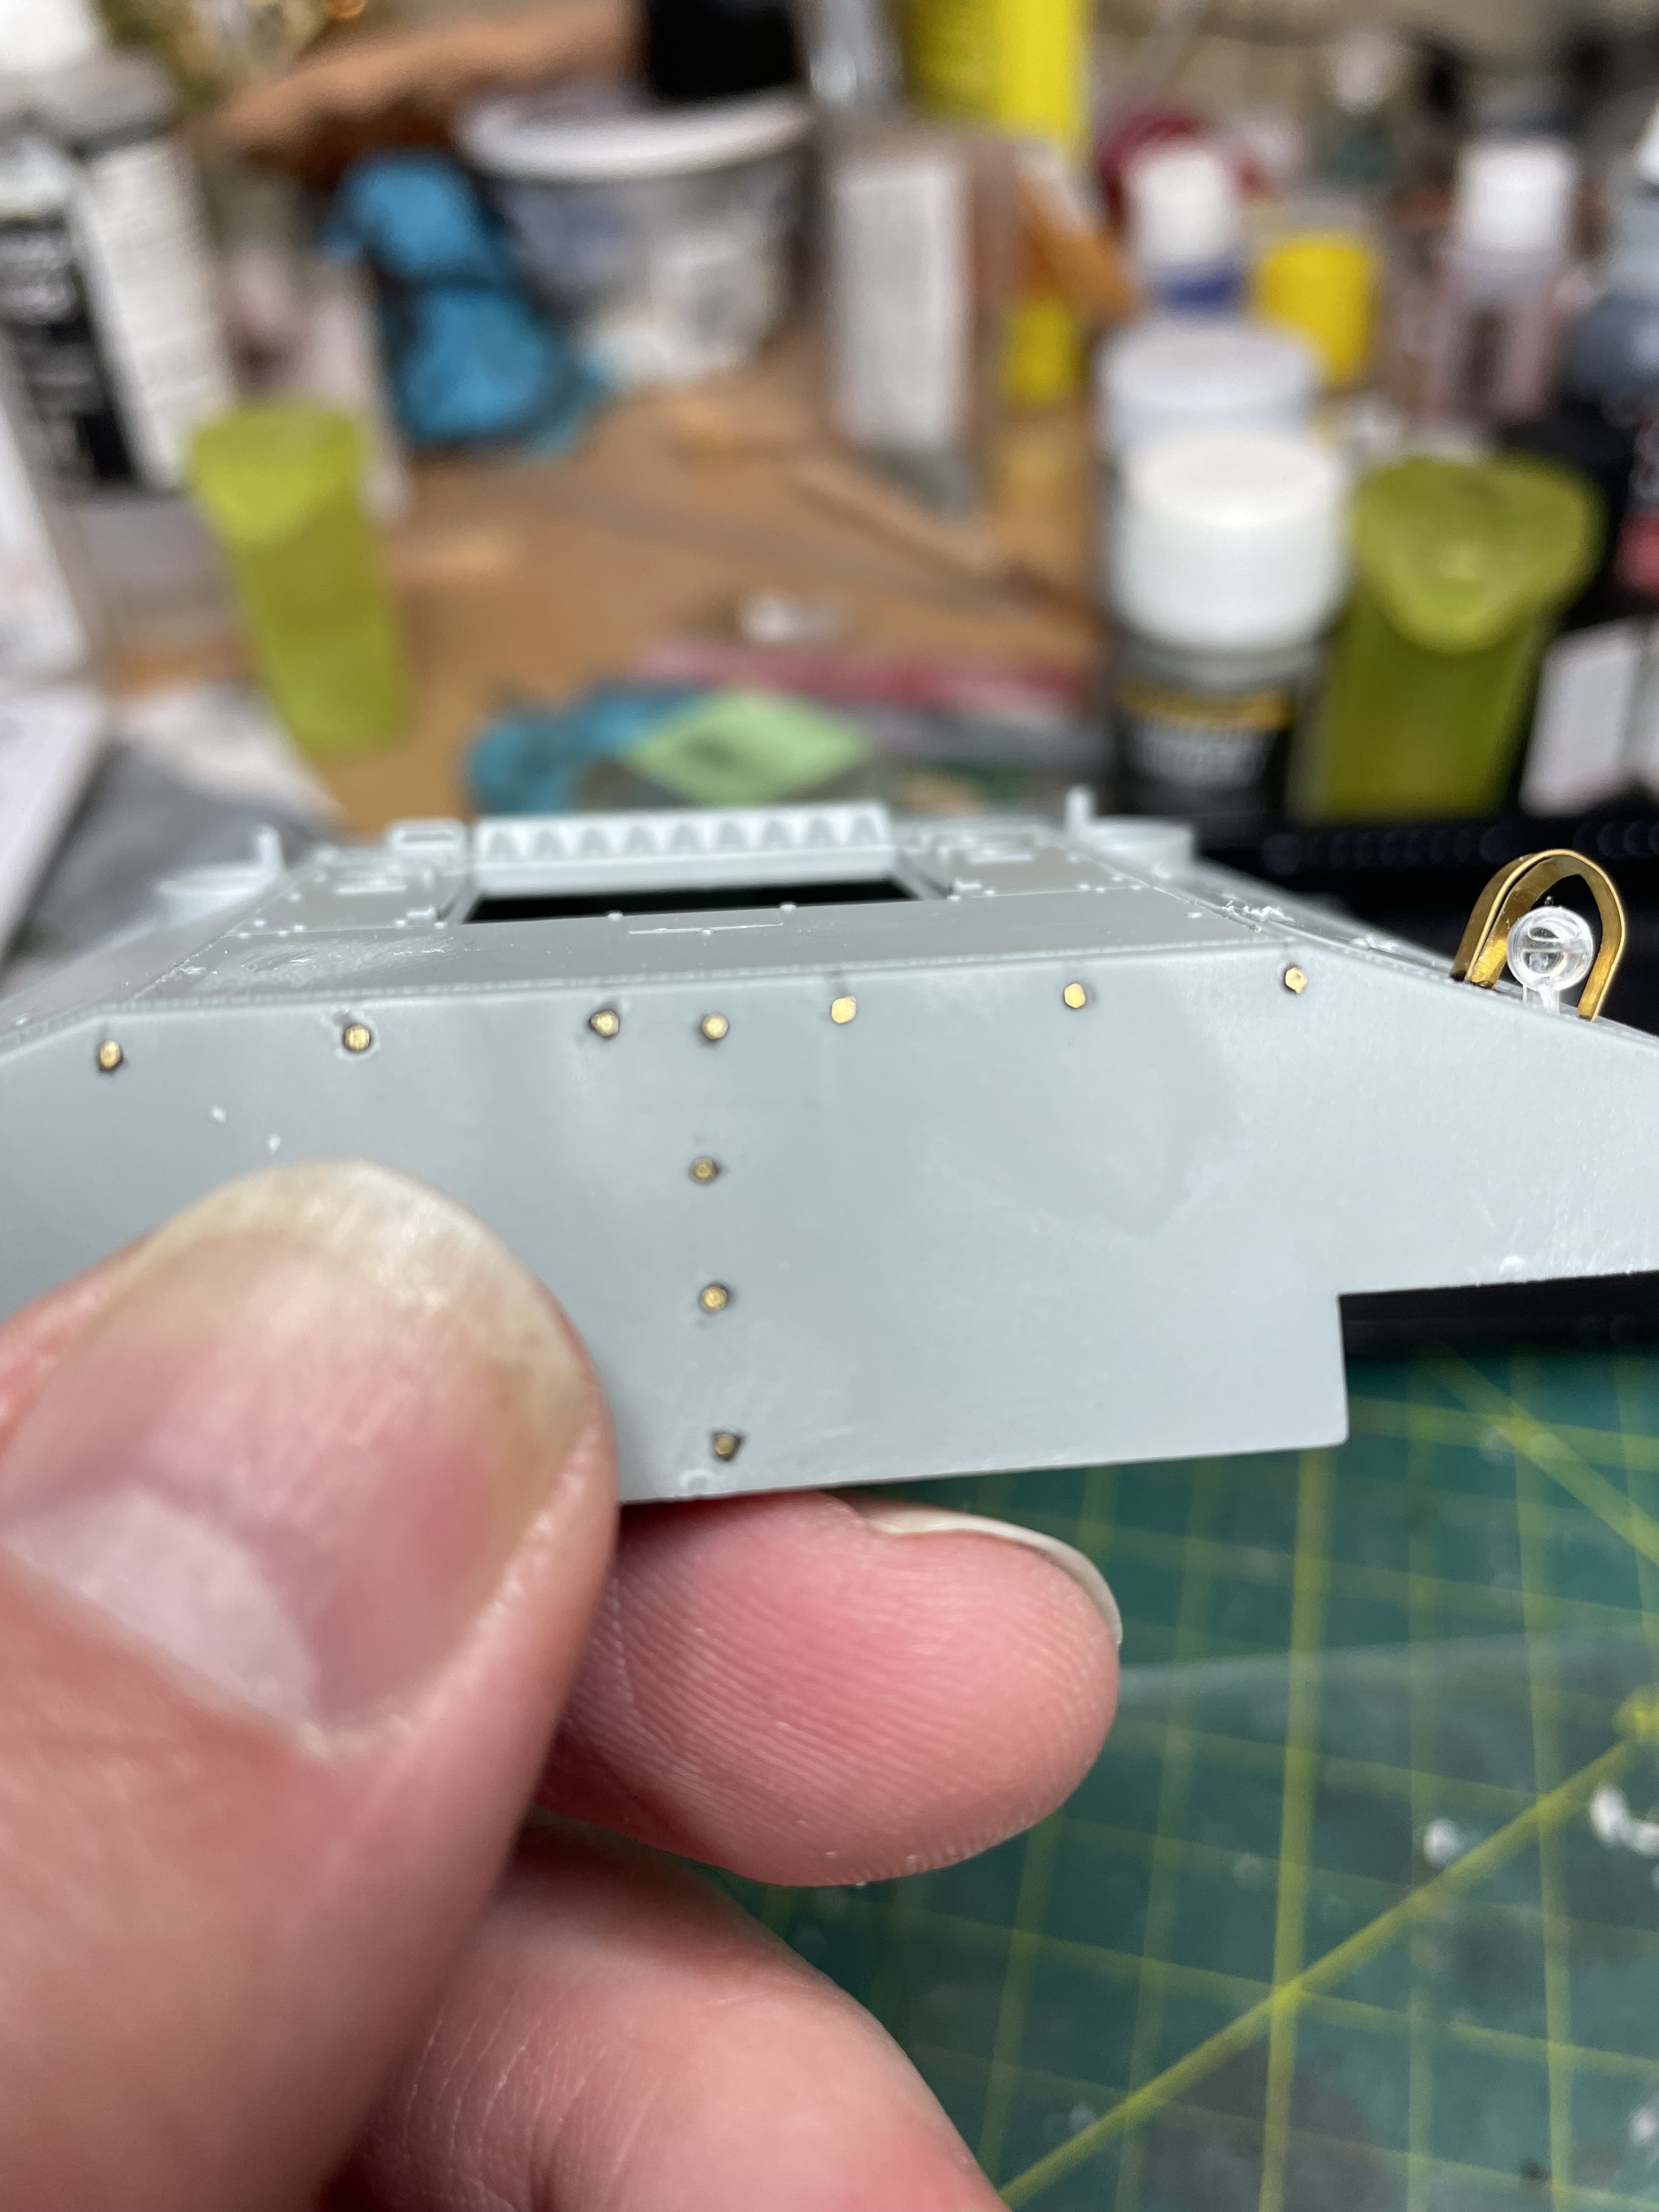
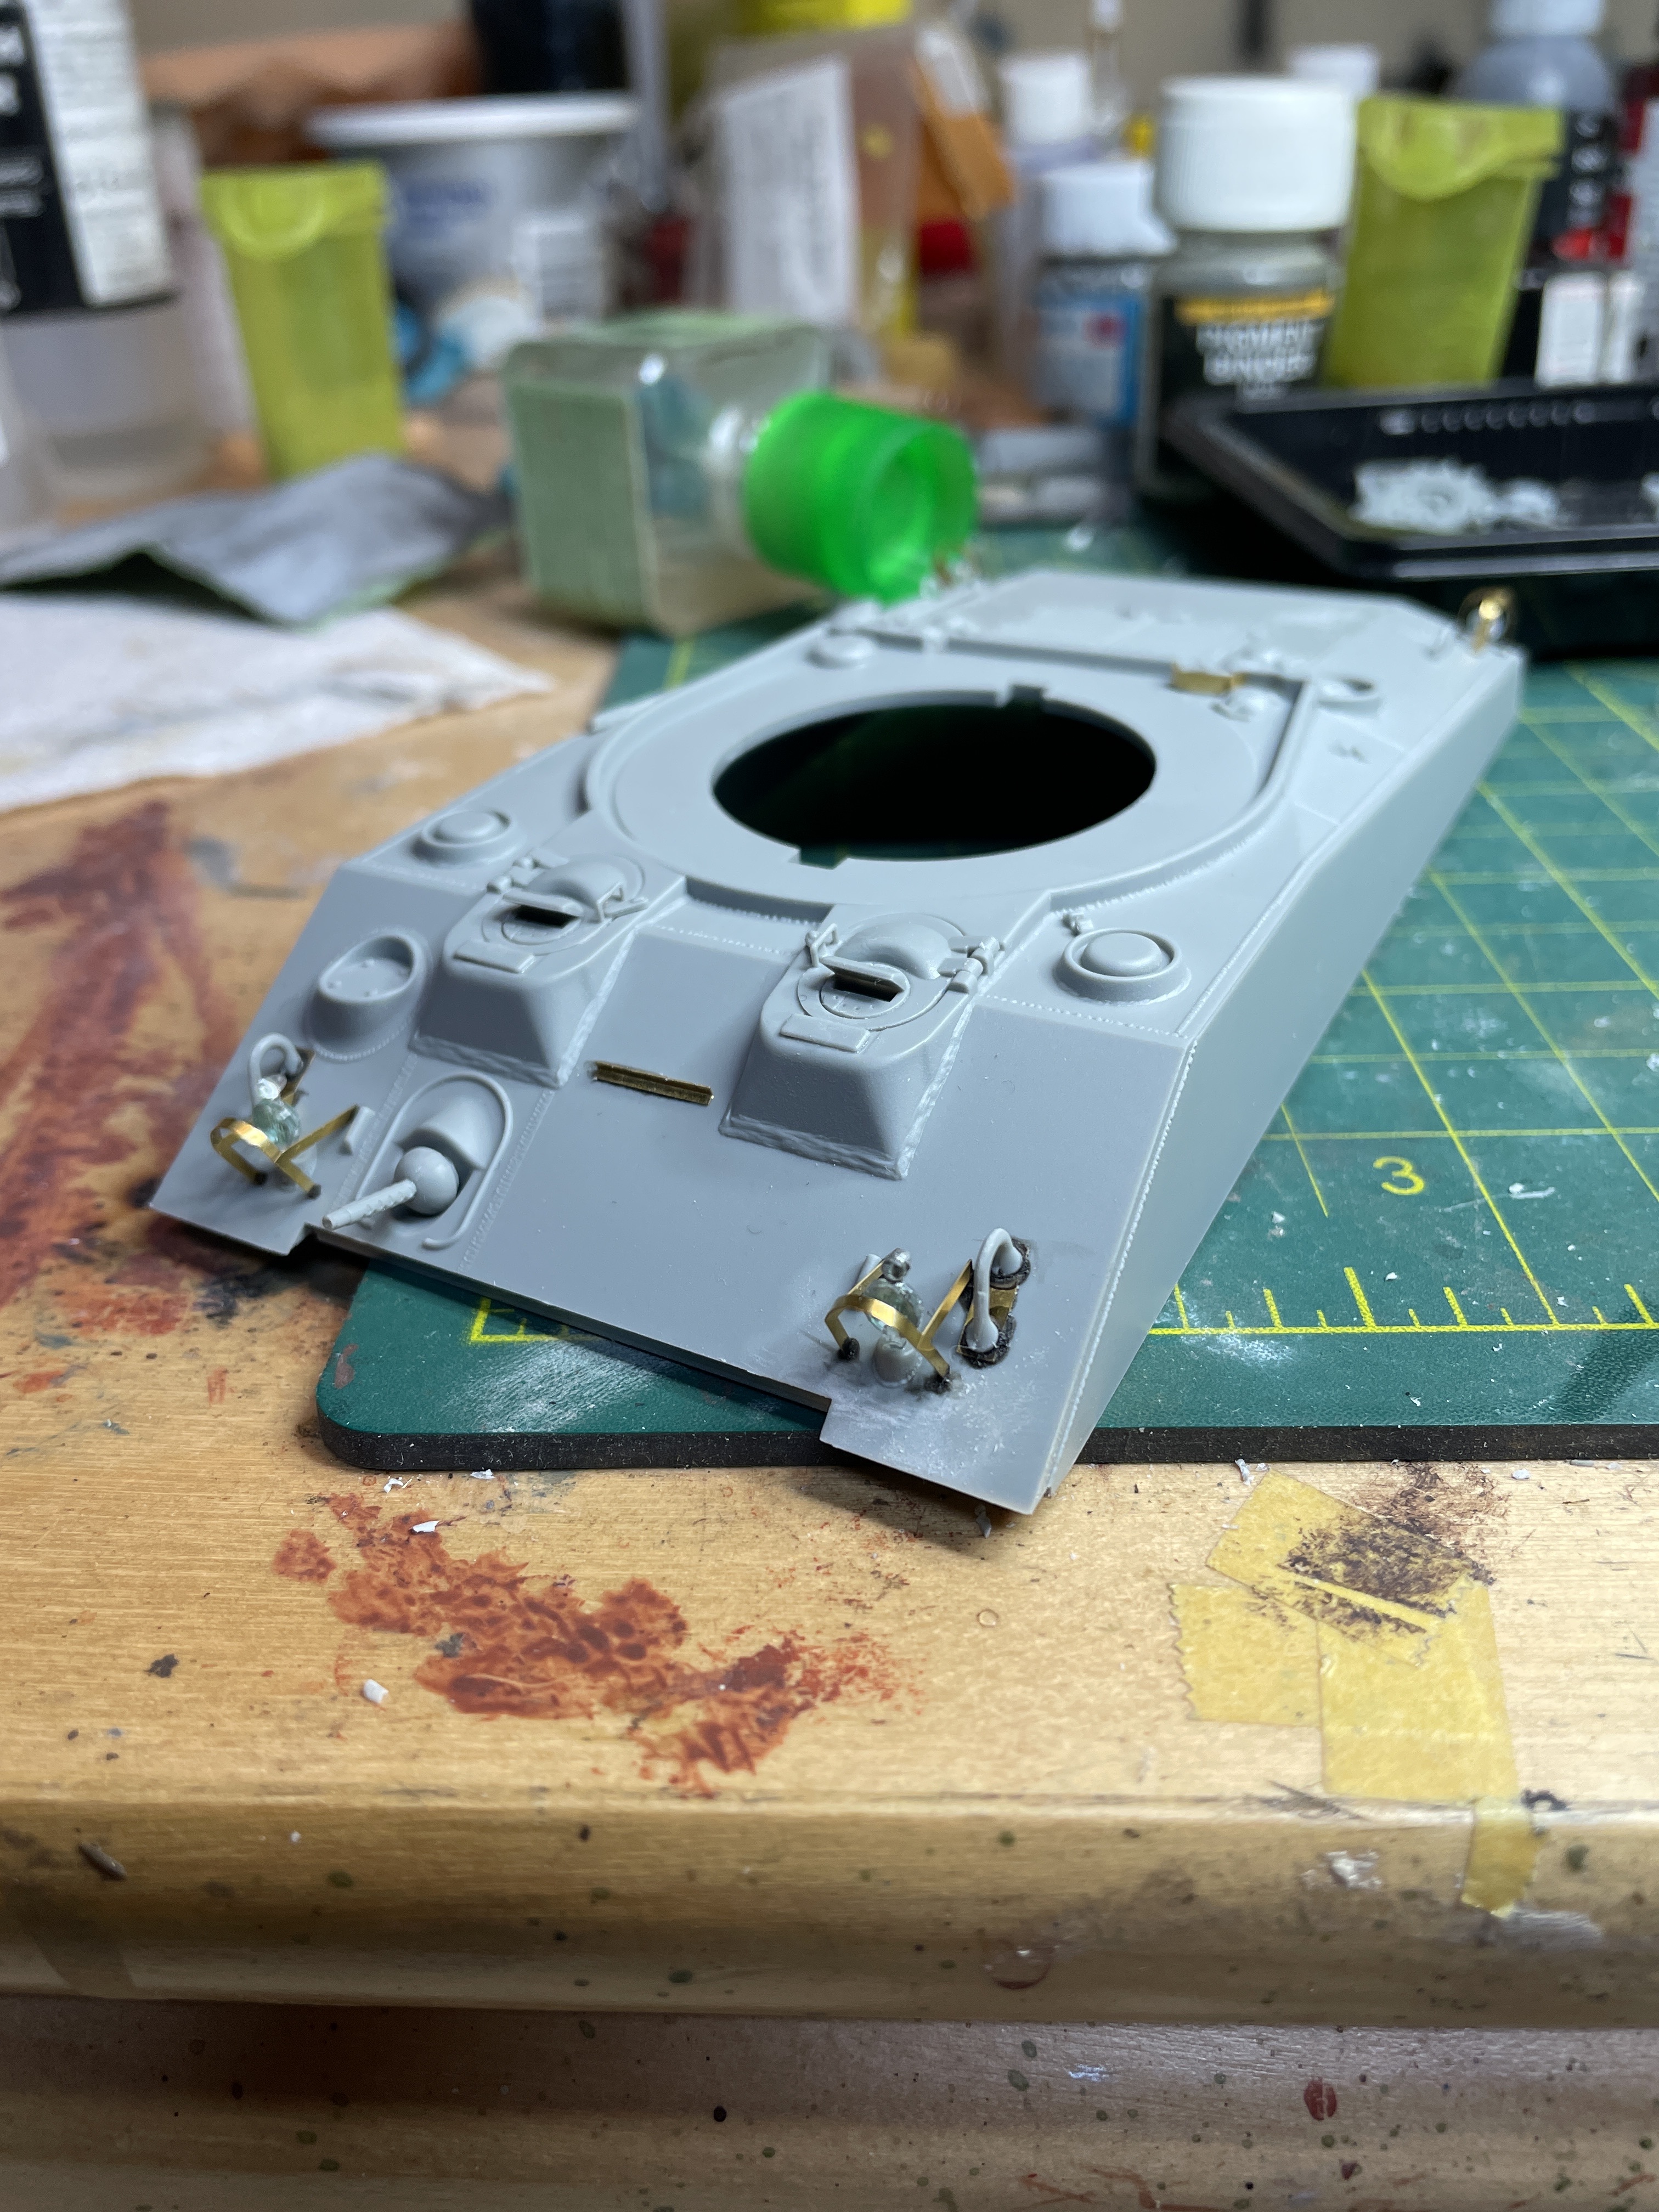
Itty bitty photo etch bolt heads test my patience and my eyesight…and I think I gotta go back and adjust one!
8 Likes
I used Meng bolts instead, they are way better.
2 Likes
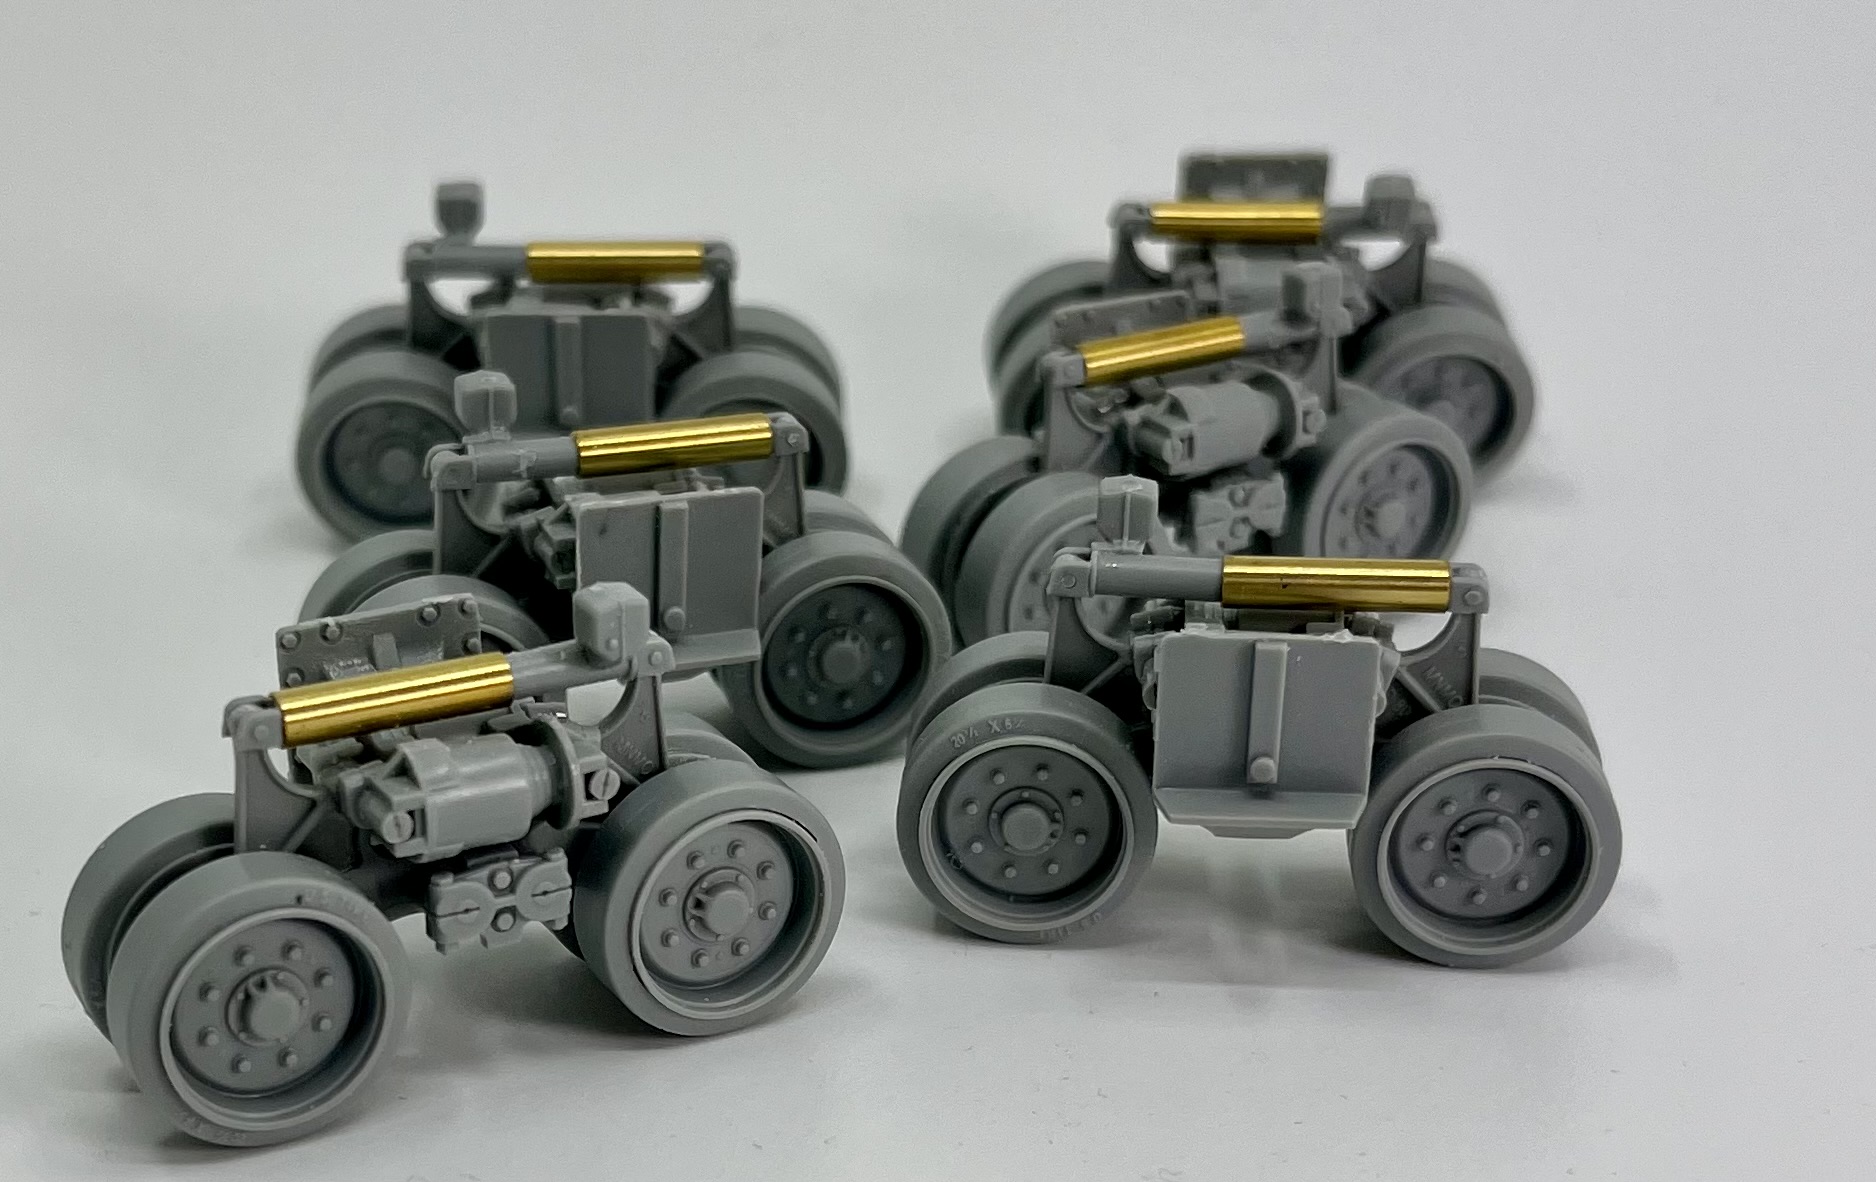
28 parts pr bogie… that is a total of 168 parts. I have several kits with less part. I have to say they are a bit over engineered, but they were fun to build. They had the right amount of fidgety. However, they are very time consuming and I´m not sure if they are any better than Tamiya or Academy.
14 Likes
That sweet spot between simplicity and too fiddly is good when you find it. Either way those bogeys look great and level of detail ![]()
4 Likes
For once it has been a pretty good day at the bench with nothing to disturb me. After putting together the bogies I got motivated to do something with the TC´s machine gun. The Dragon .50 cal is pretty good, but the ammo box is more or less a lump of plastic. Raiding my spare parts I found a old PE set for a M-113 with all the parts for a HMG still present. It might not be exactly what the Israelis used, but it looks way better than the original plastic.
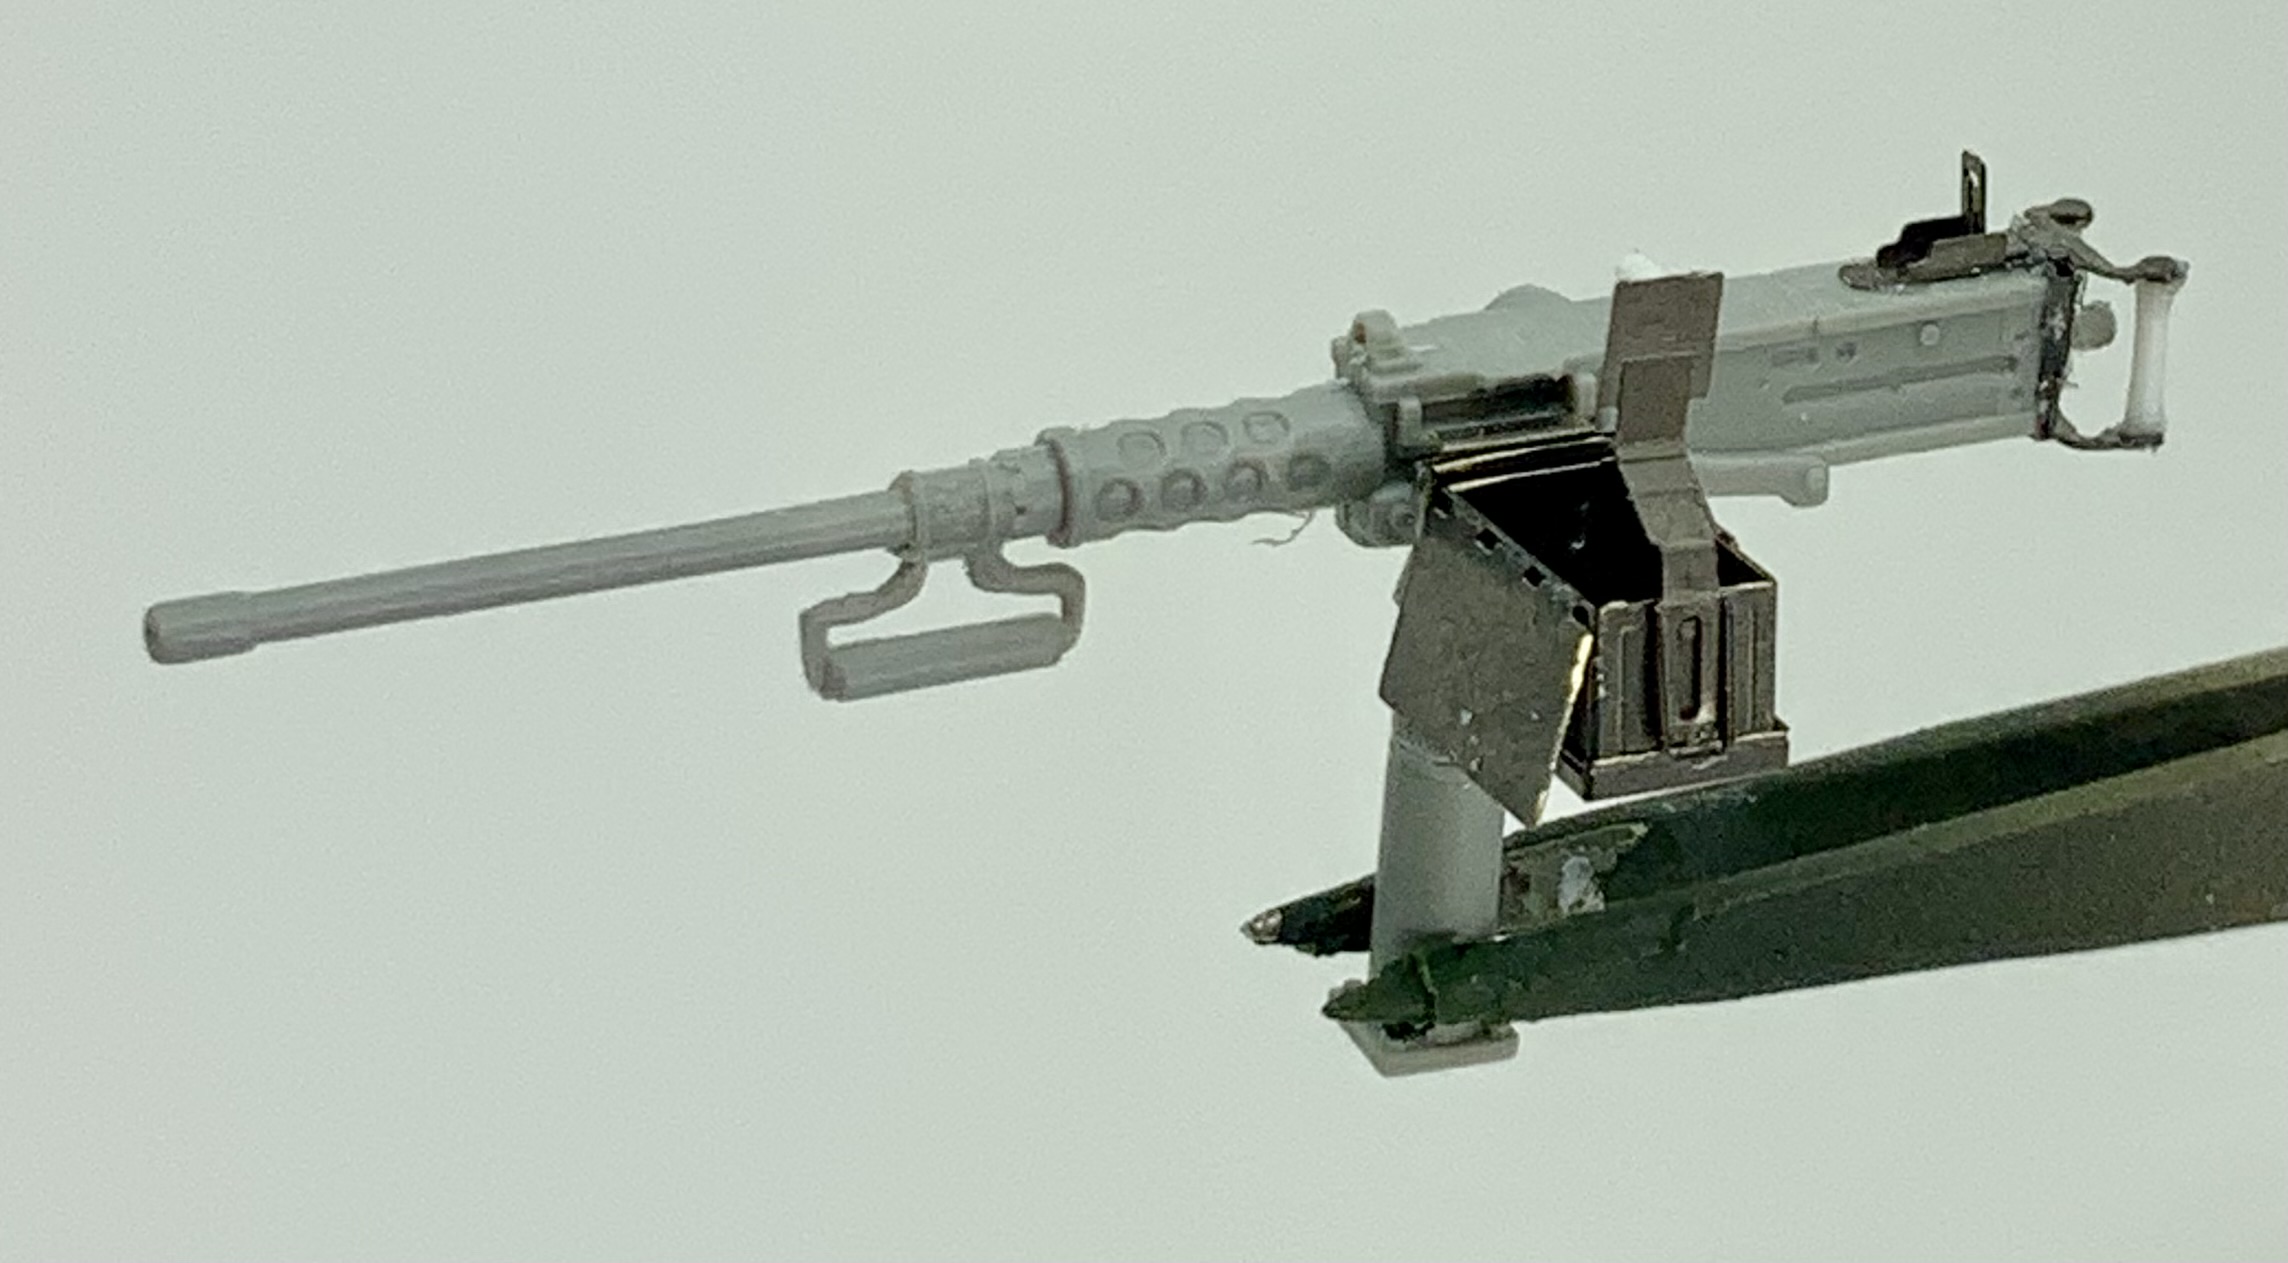
I guess my OOB plan did not last long…
13 Likes
I found a couple of useful sites that may be of interest to anyone on this campaign build:
Sherman minutia and the Sherman tank site: https://www.theshermantank.com/
plus the more well known:
5 Likes
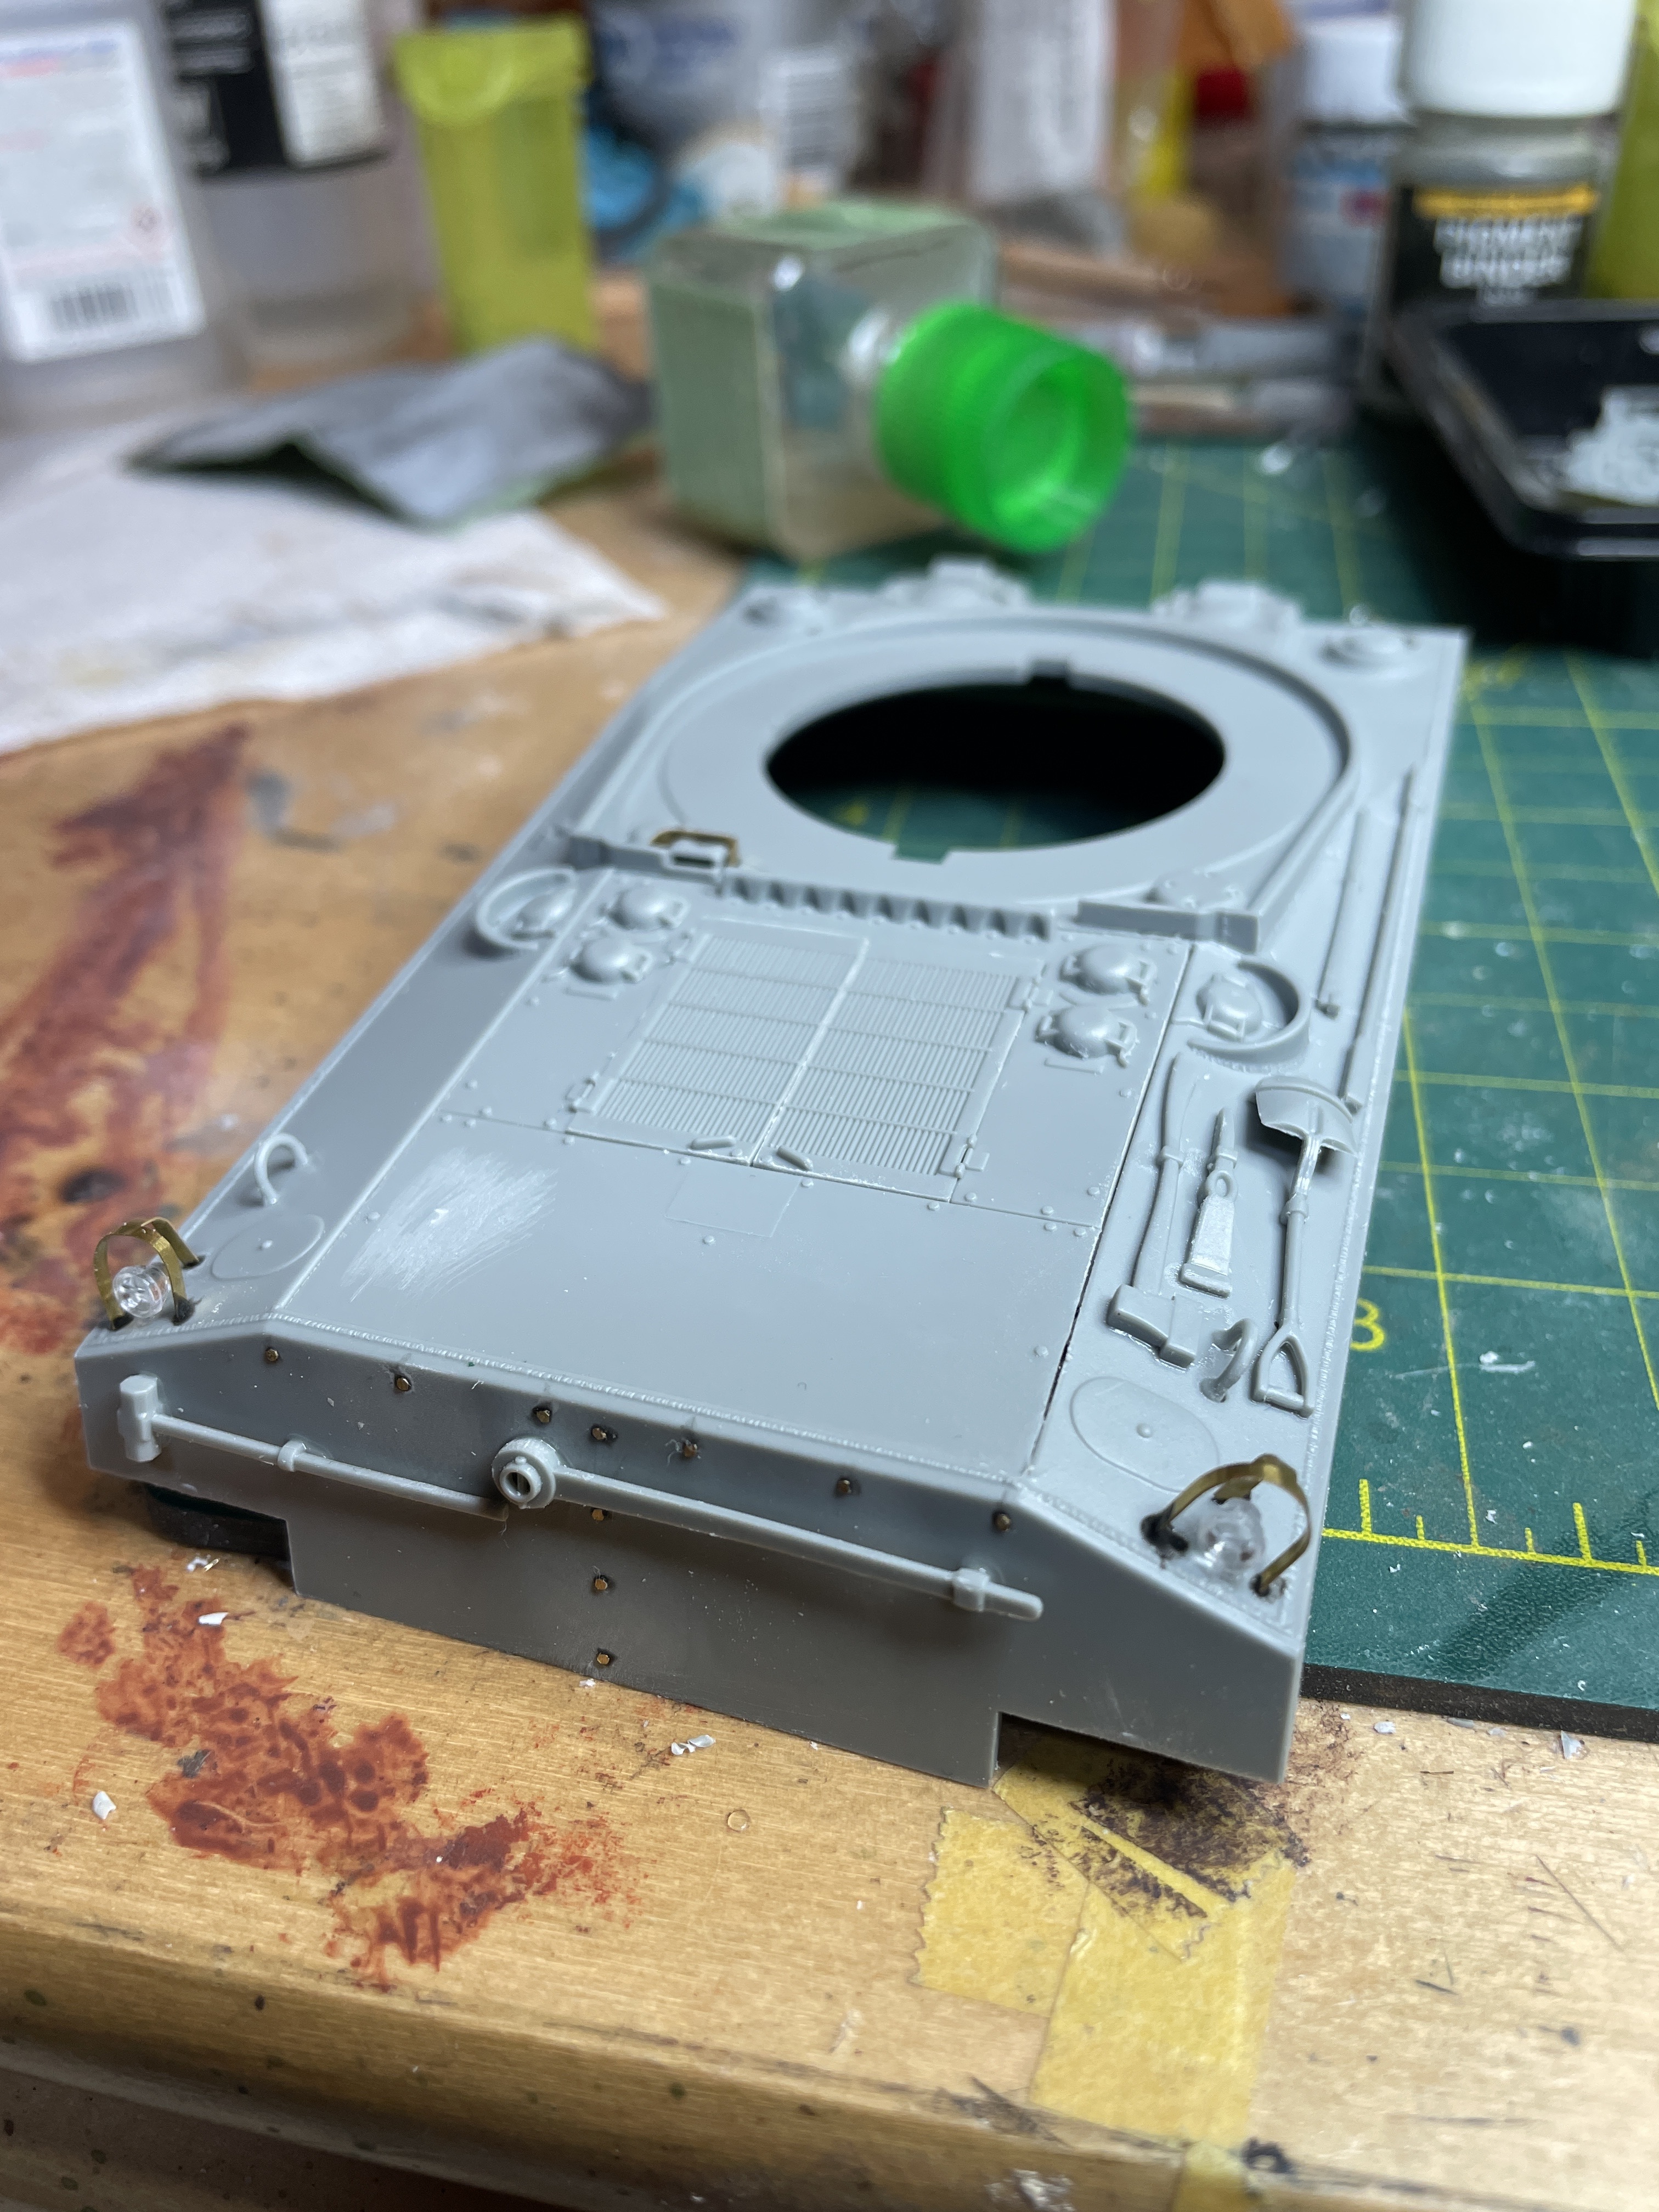
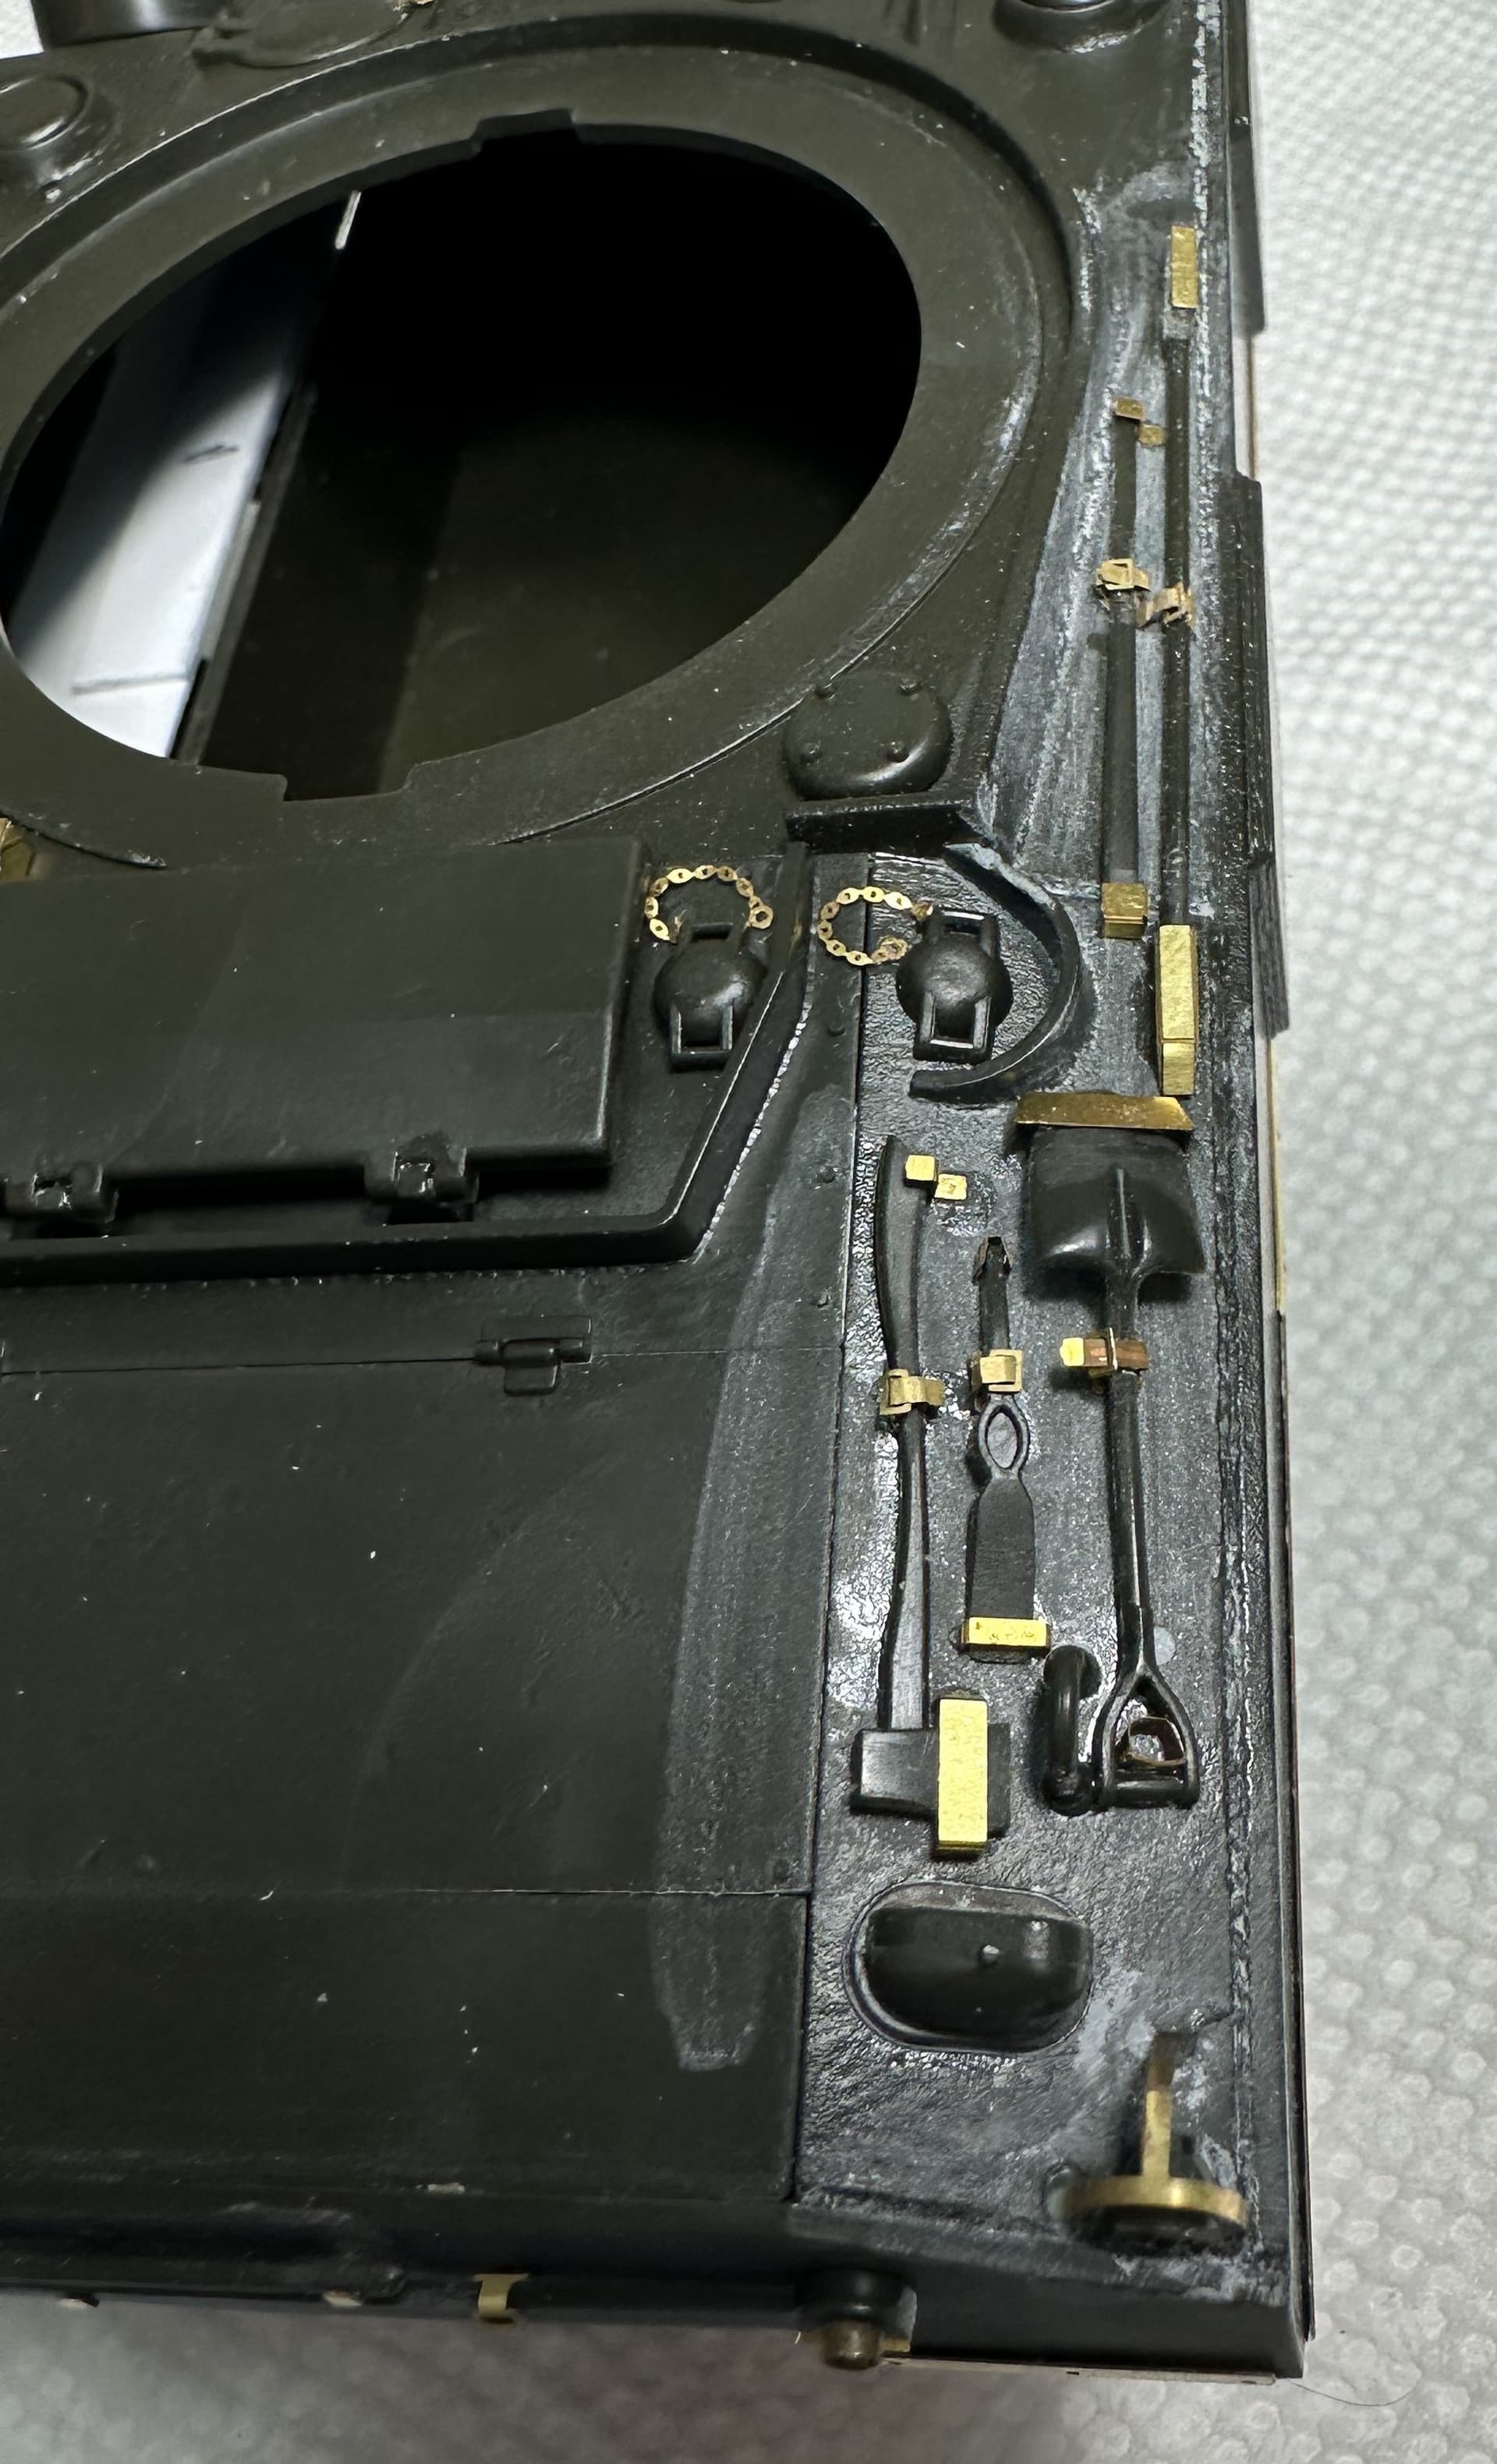
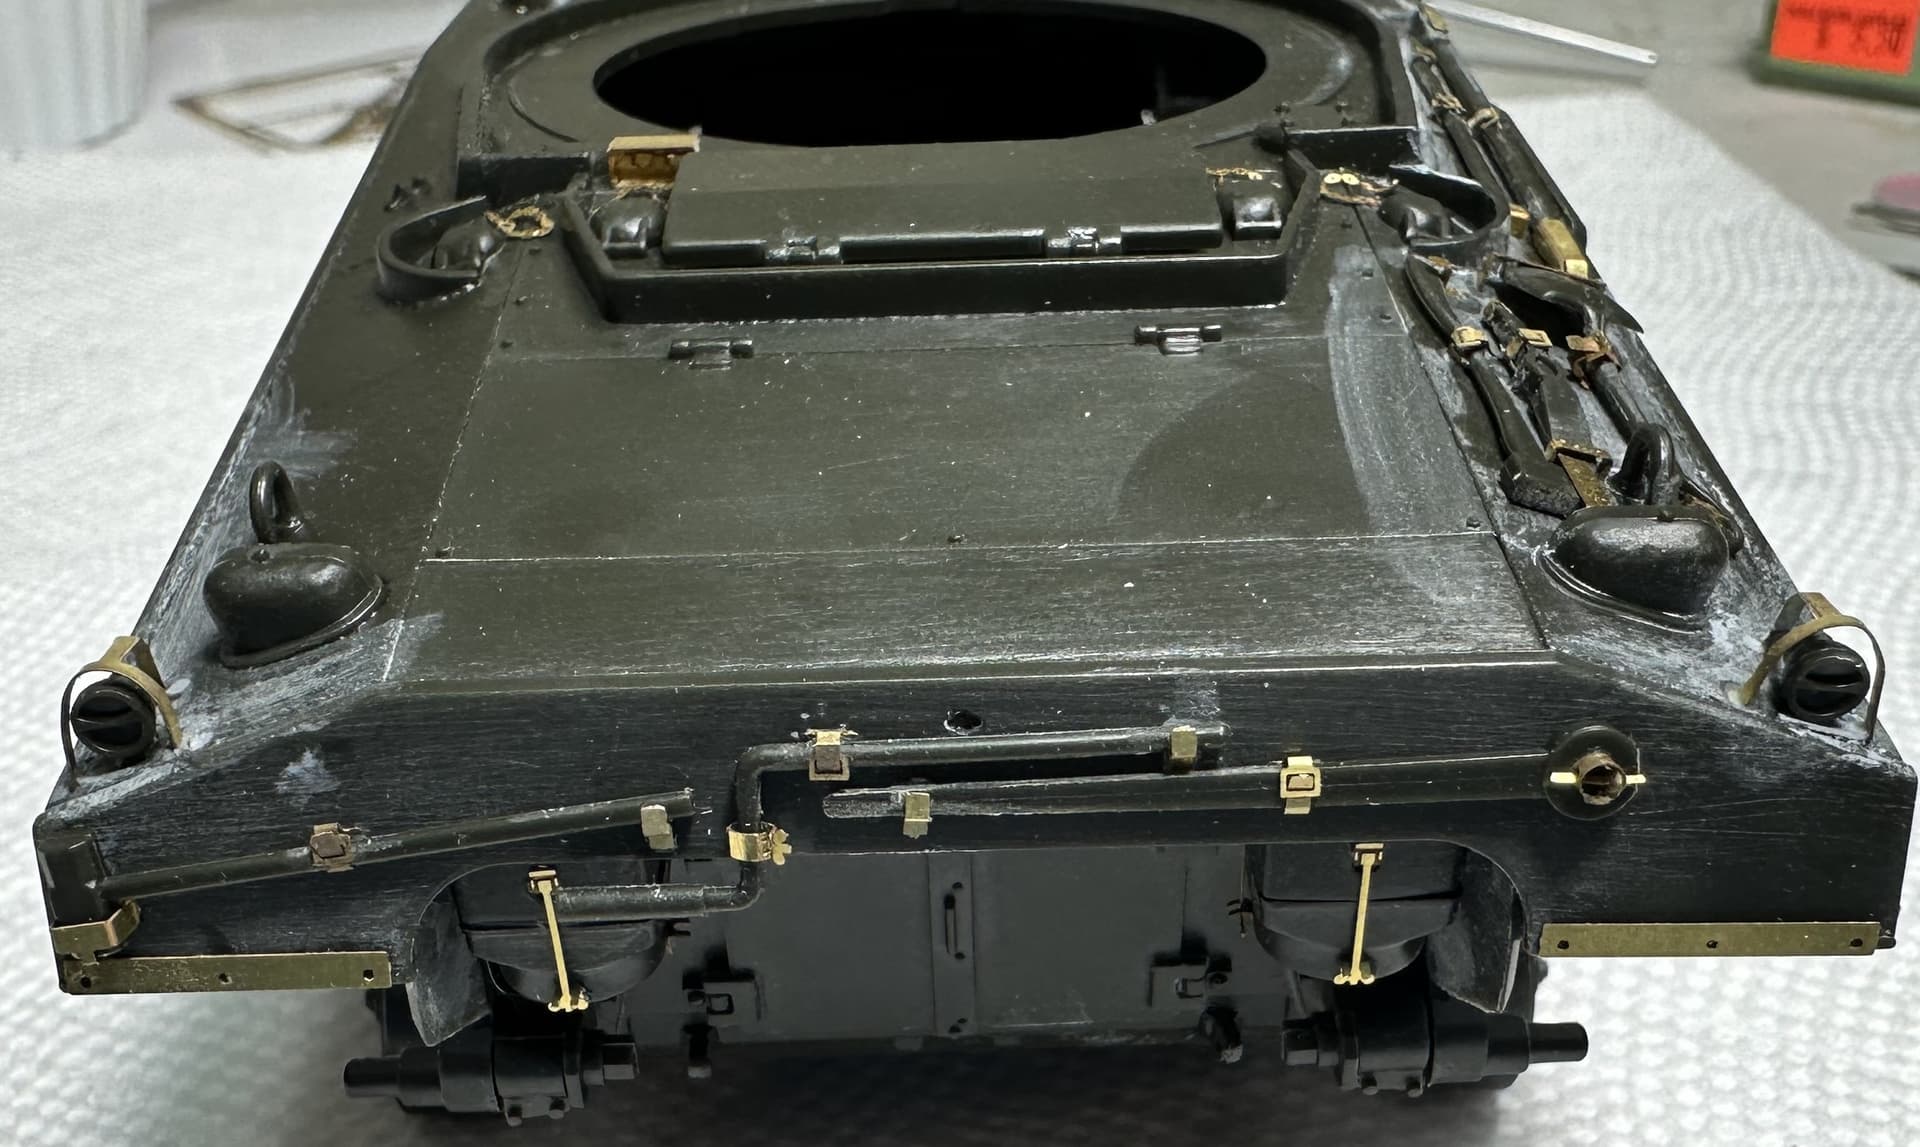
Hull /chassis finished. Ready for cleaning and black primer. Tools are Cal Scale Brass (oldies but goodies).
12 Likes
More work completed on my Tamiya M4. PE fenders added, turned 75mm barrel installed and all the tool clamp and brush guard placement holes filled in anticipation for PE replacements.
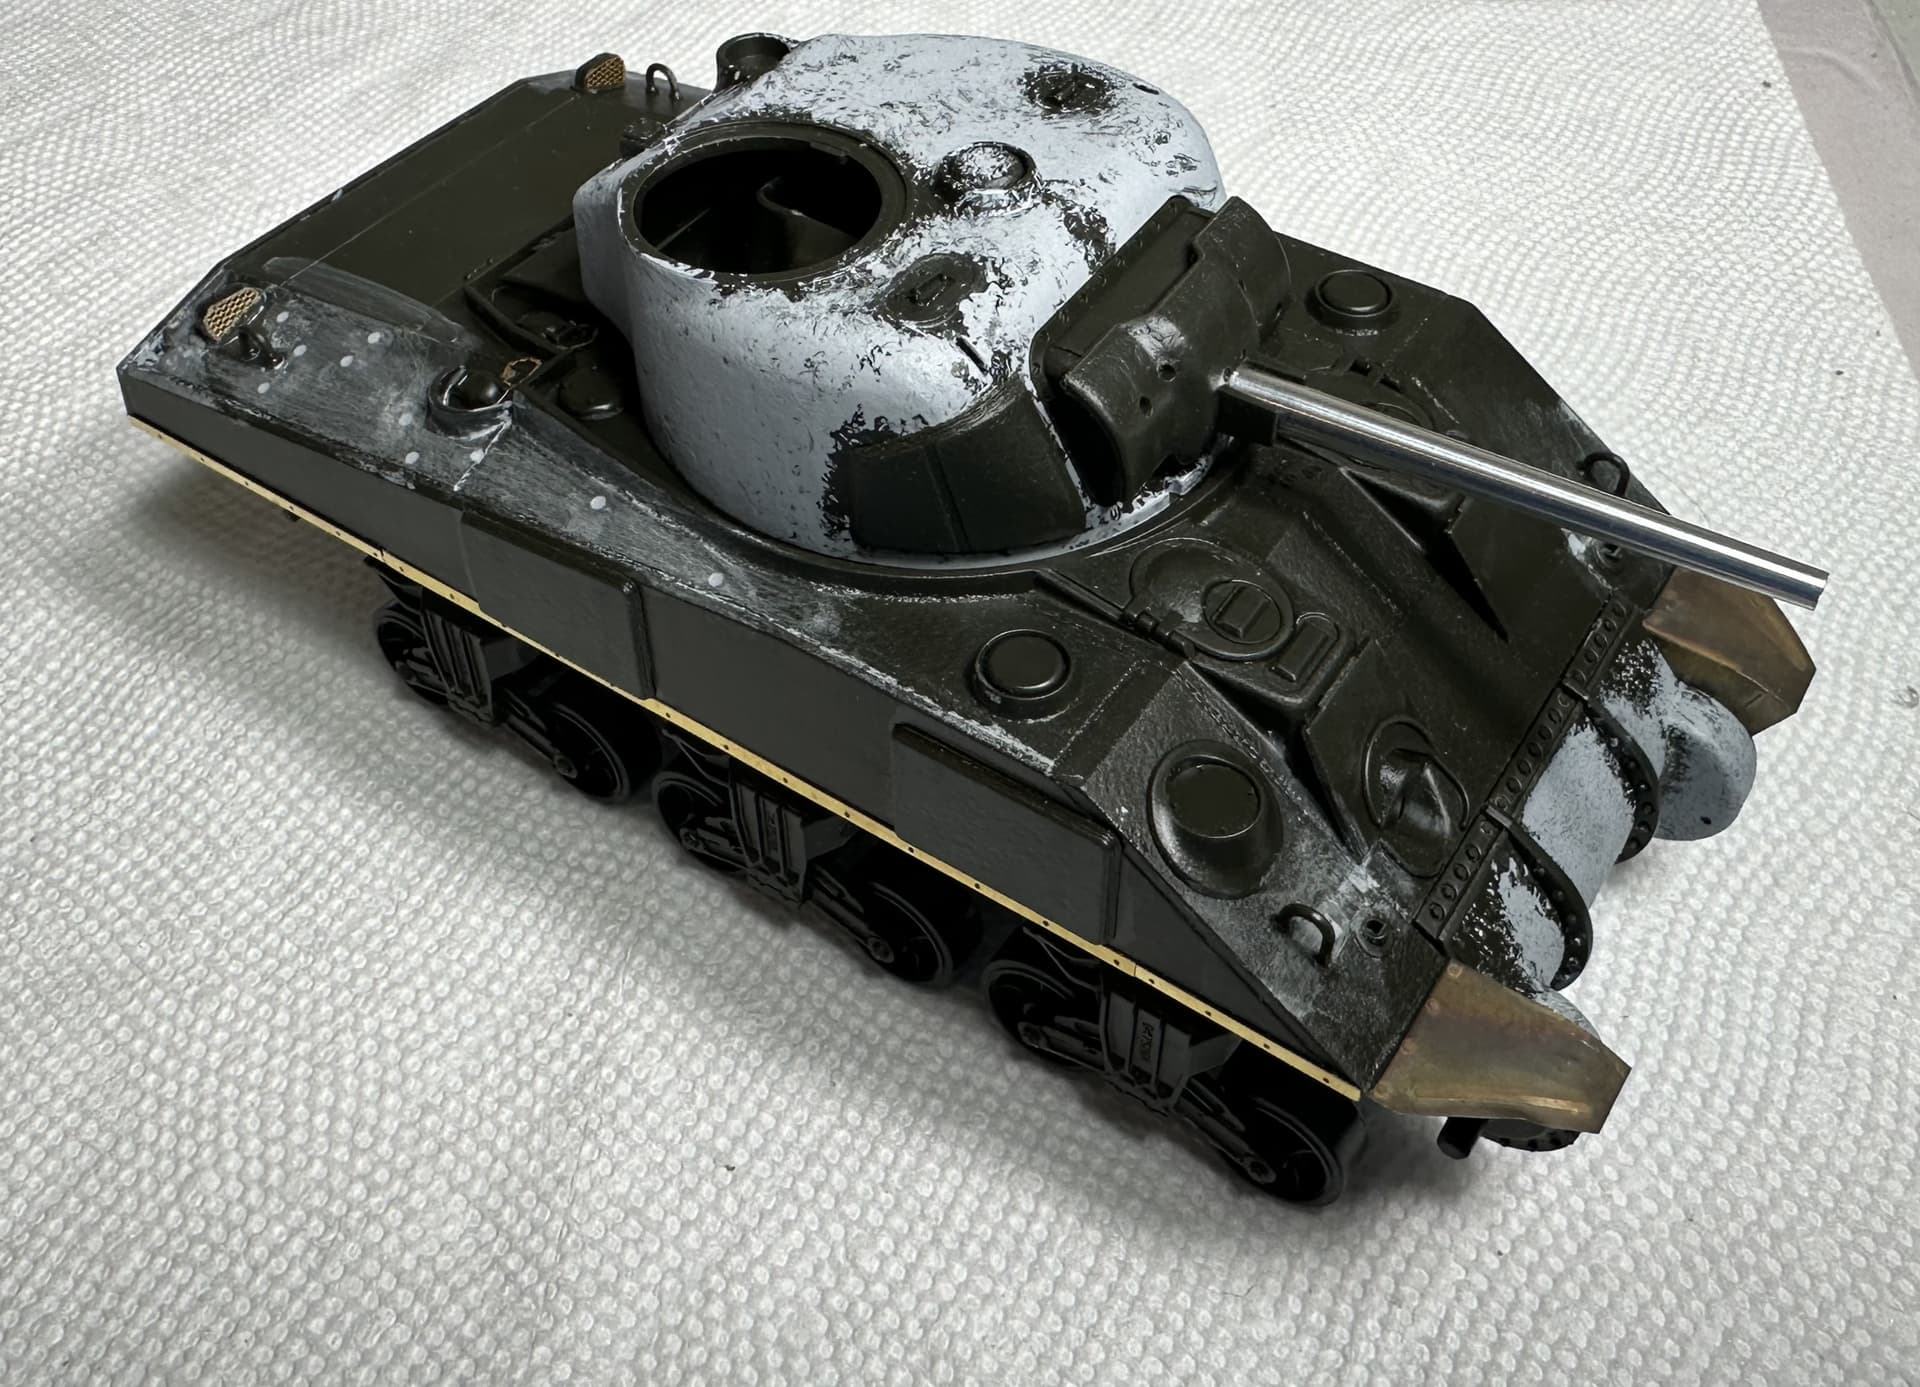
Like most Tamiya kits this is just falling together beautifully.
9 Likes
First set of decals applied based on photo:
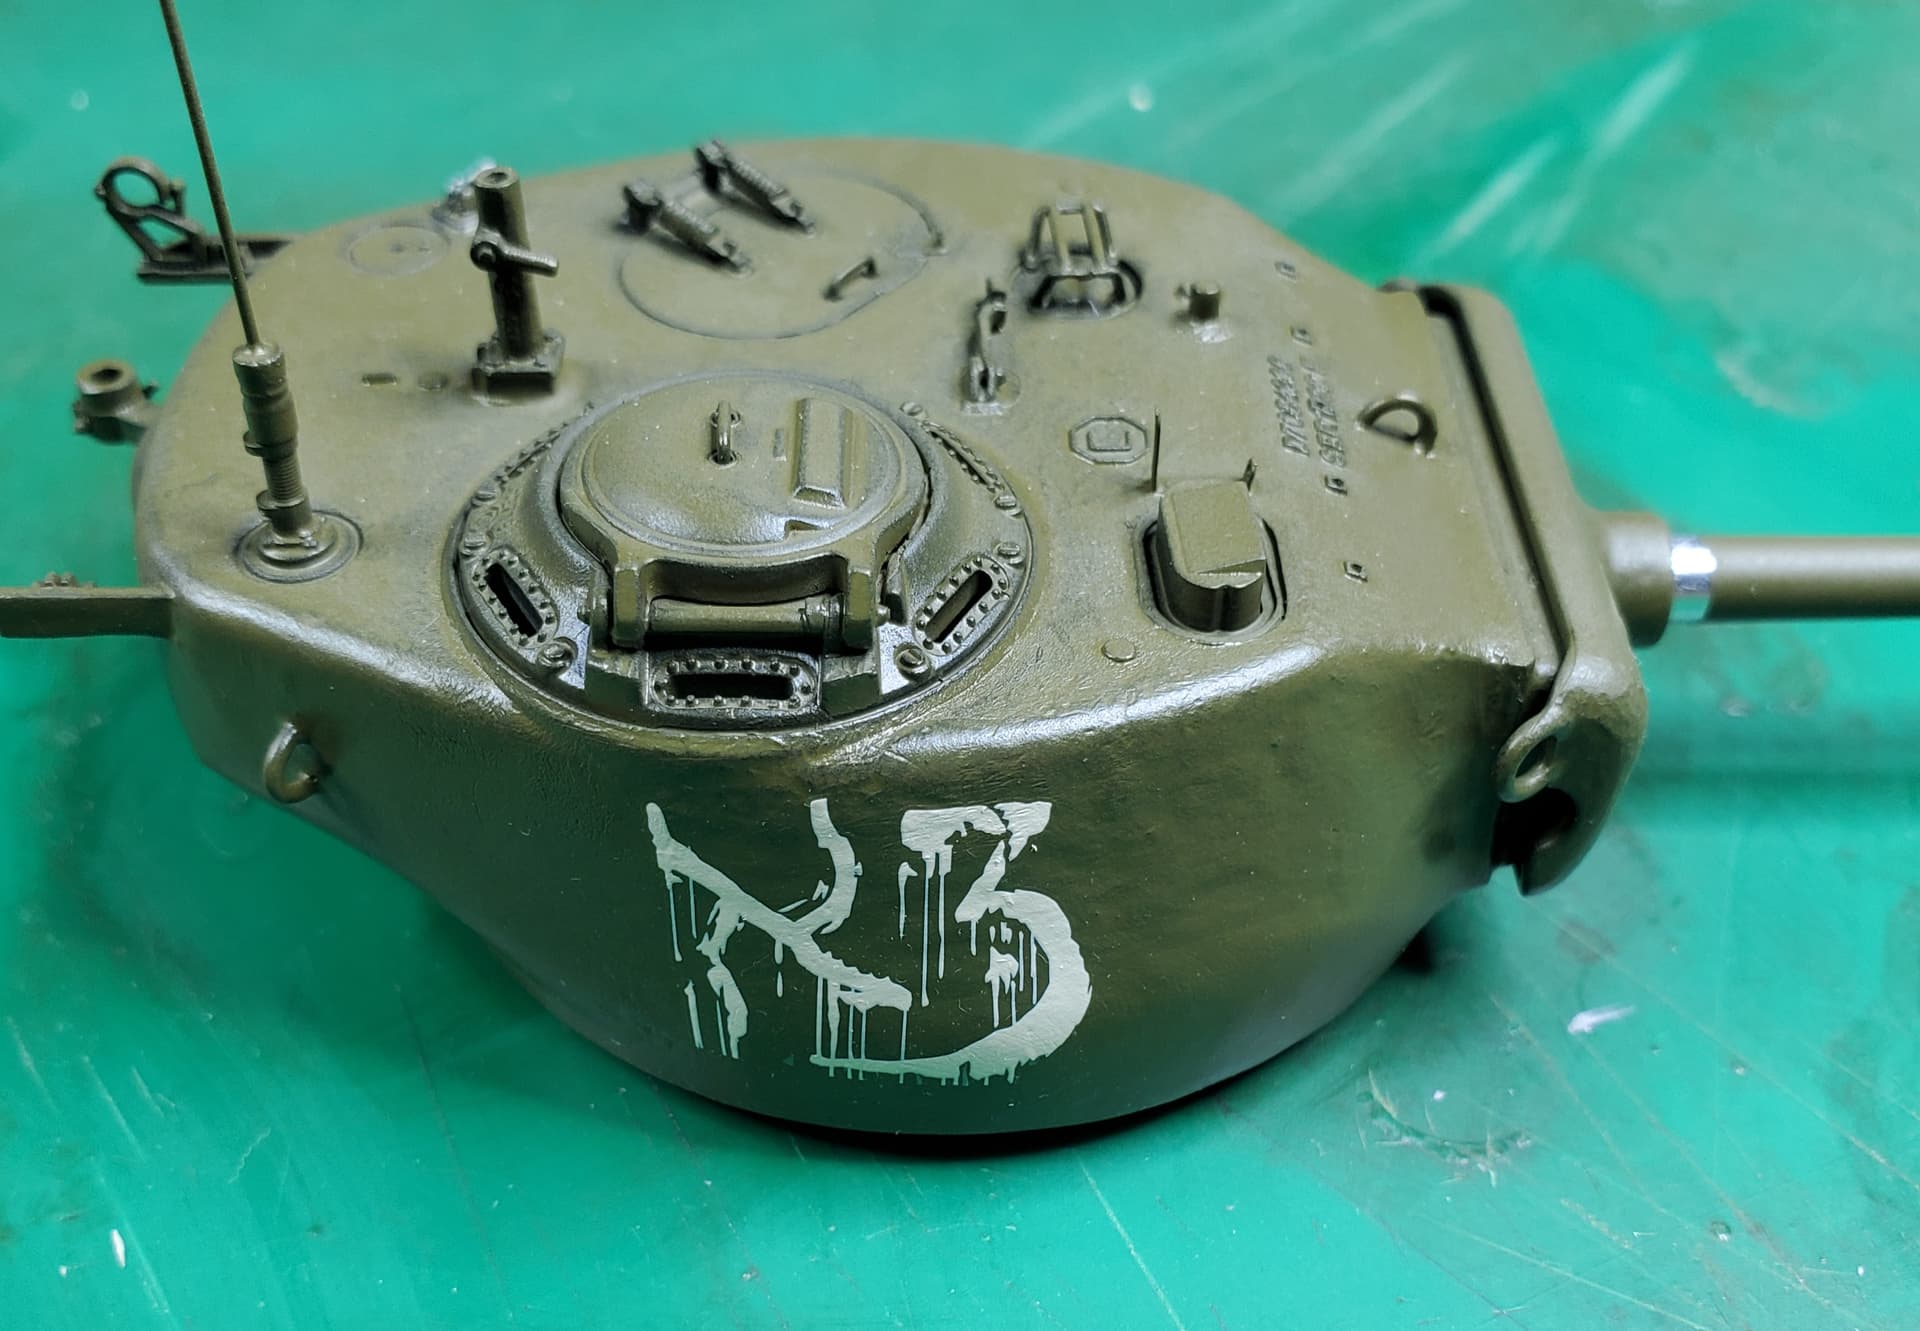
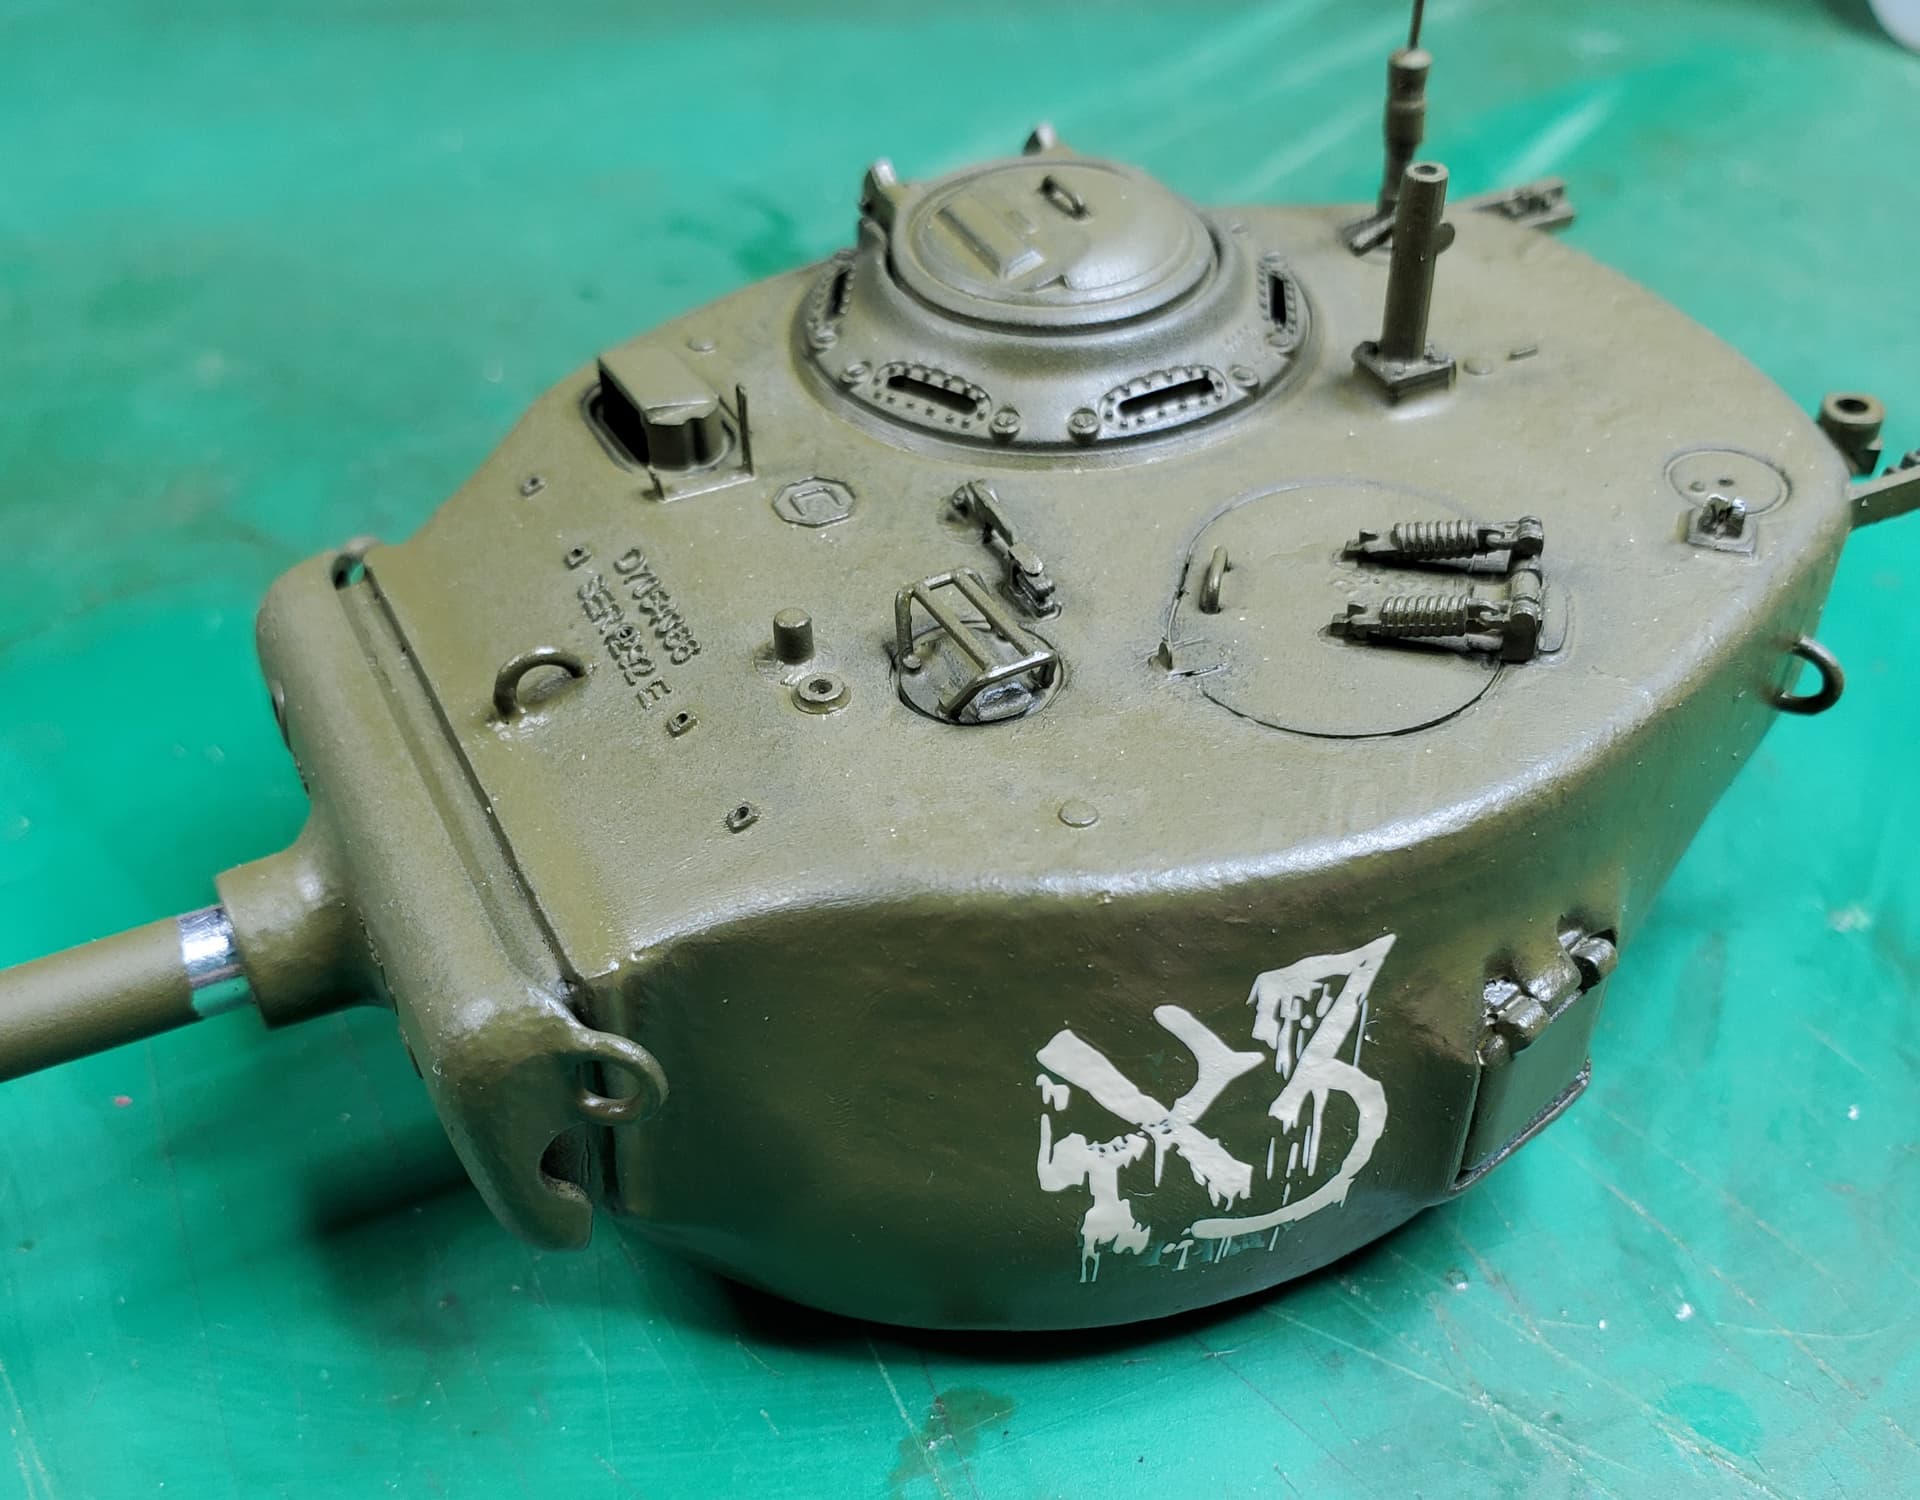
However, the decals will have the first set of weathering to fade them up a bit. That means a spray of dullcoat, get the vision blocks glued in, then fading.
11 Likes
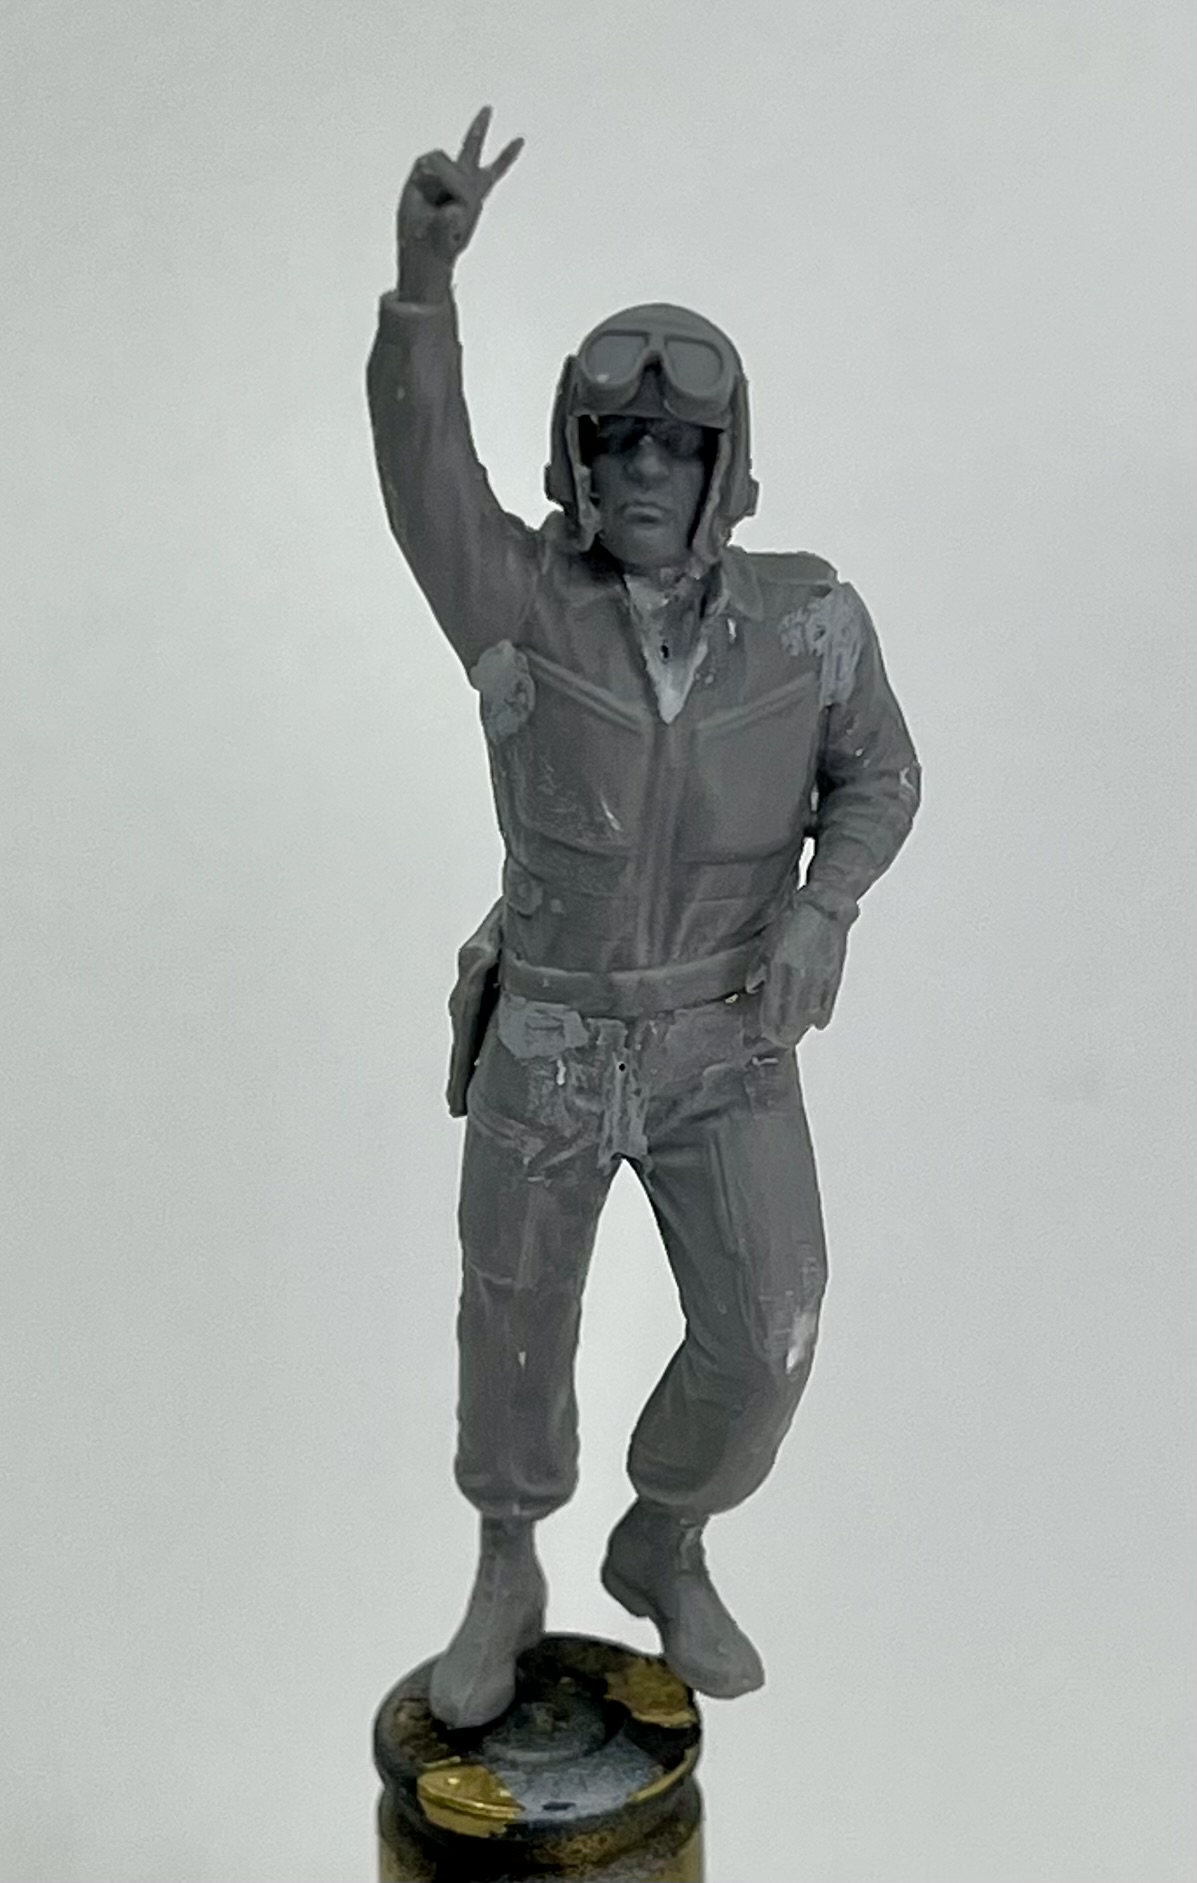
I converted a Miniart Yom Kippur tanker a bit, to represent a 6 day war tanker by switching the head to a more timely helmet. This is still work in progress. I´m planning with at least three crew members for the M-51.
10 Likes
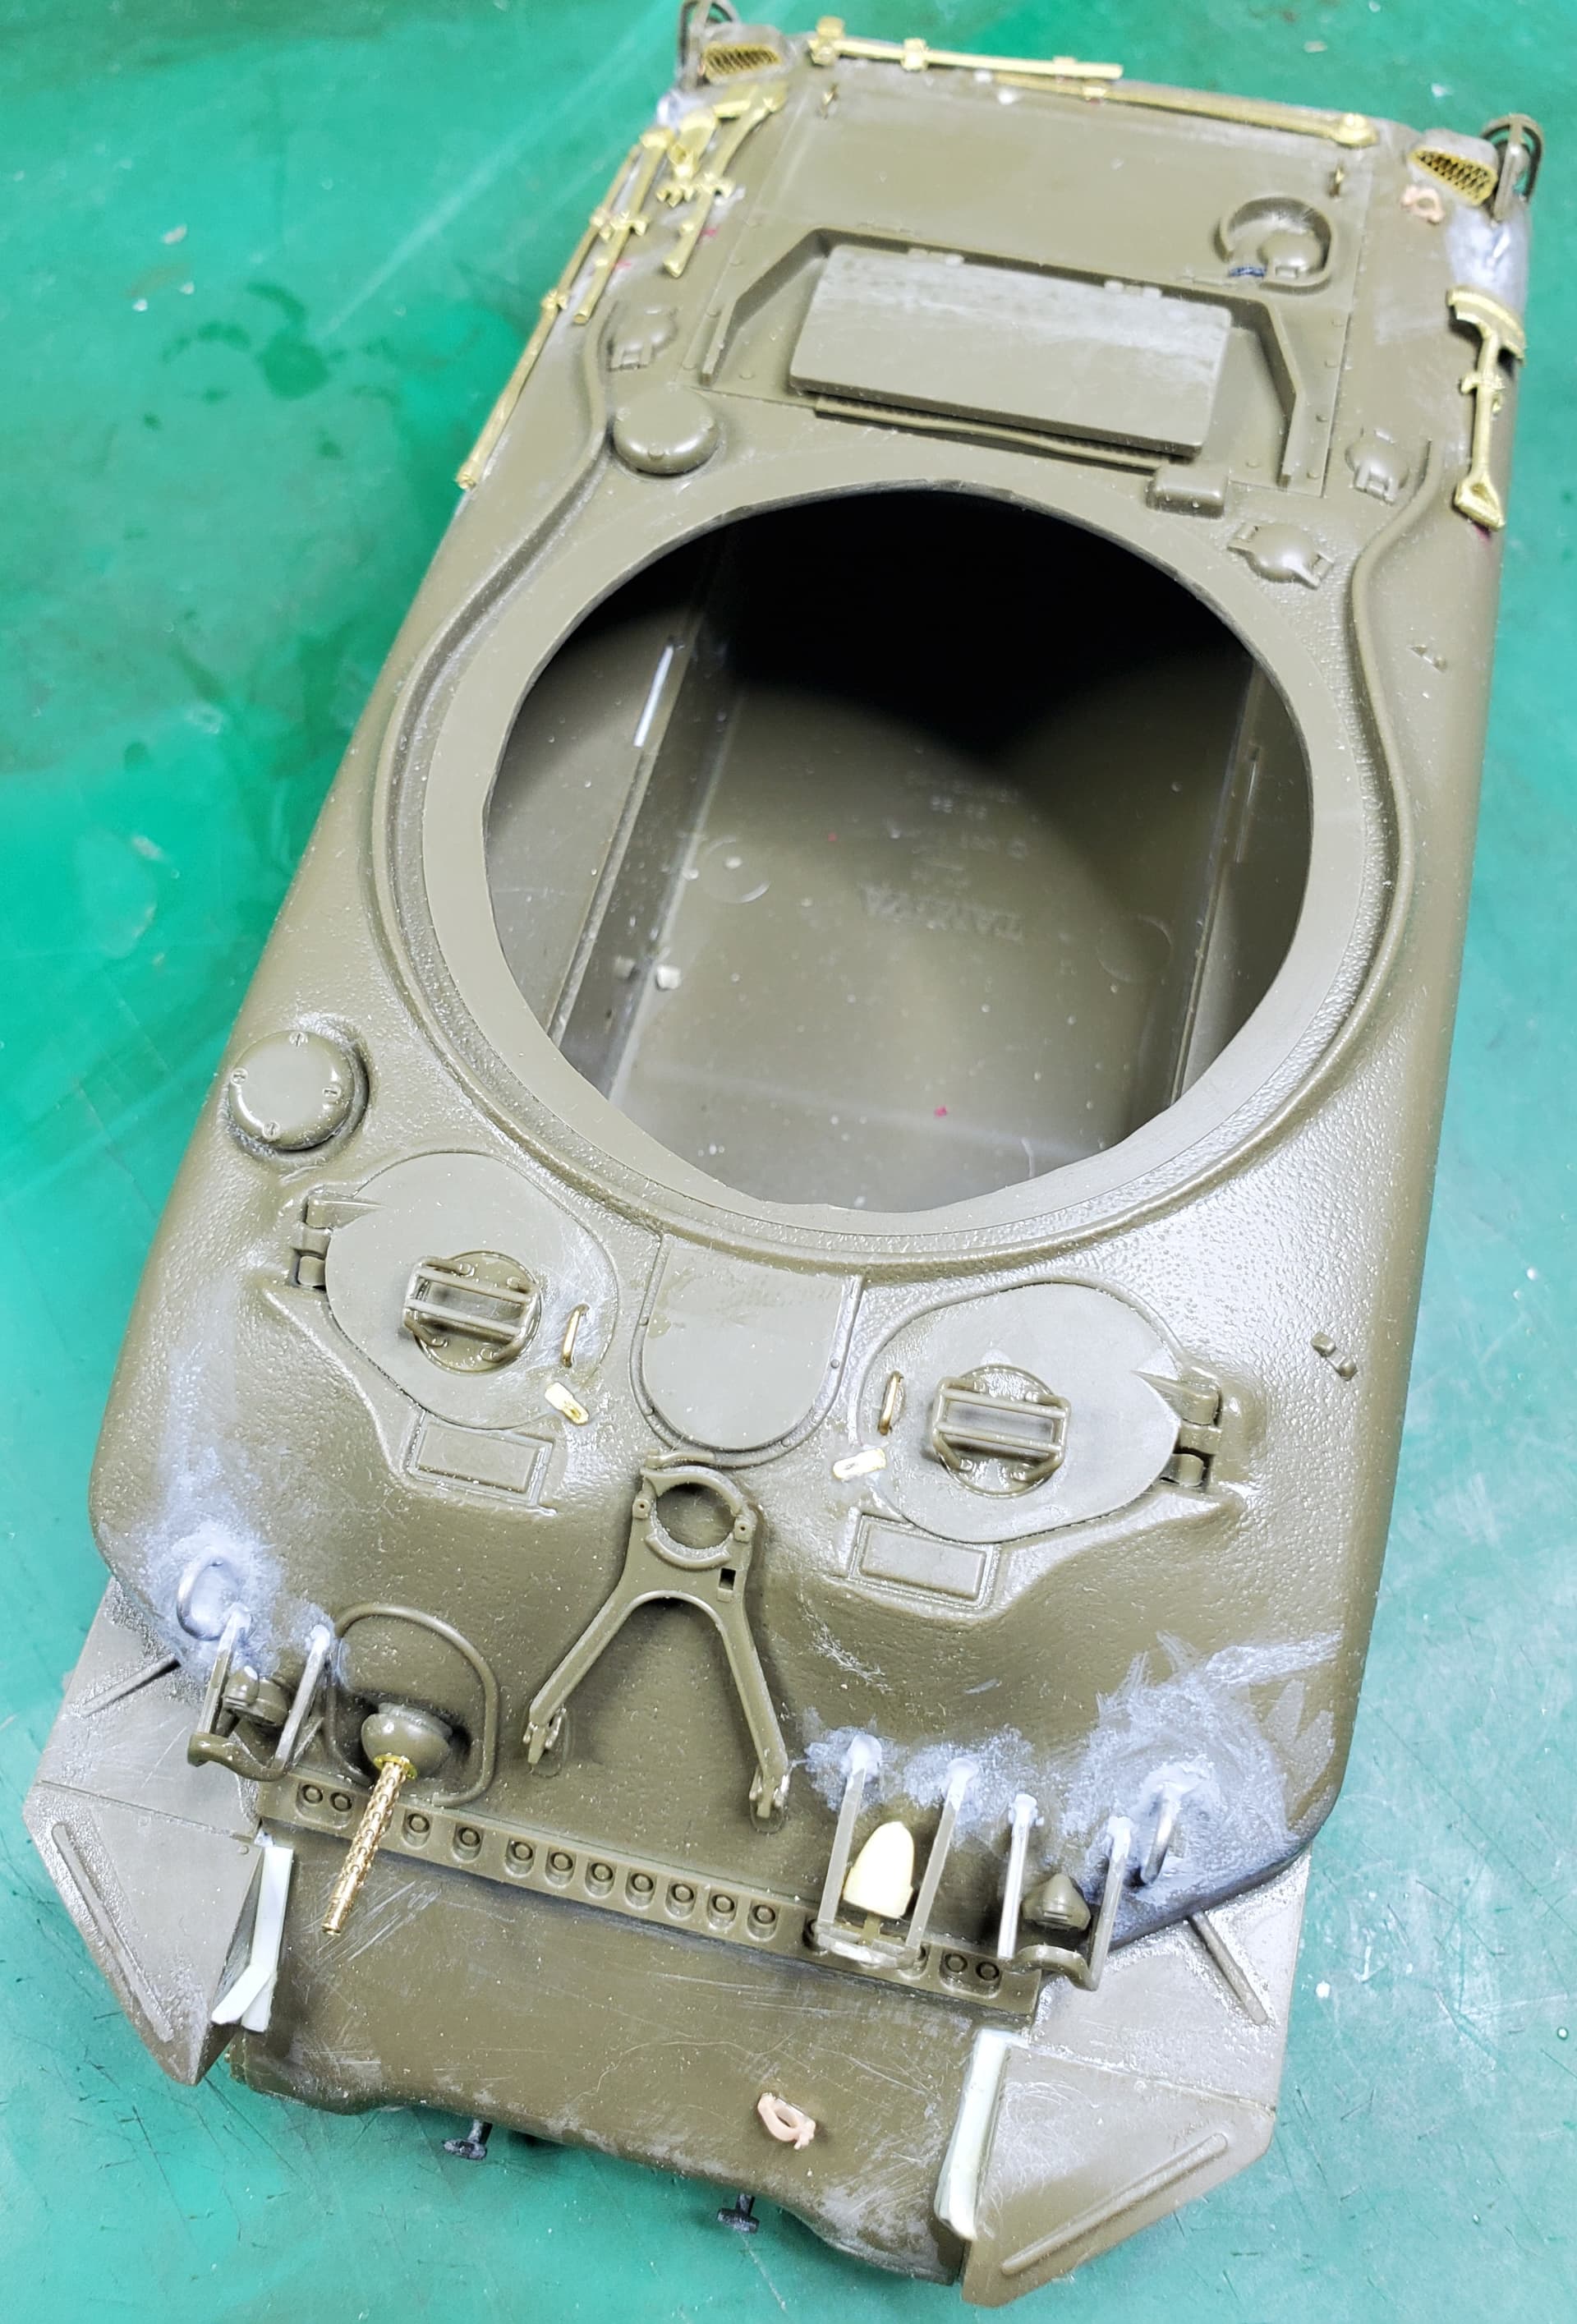
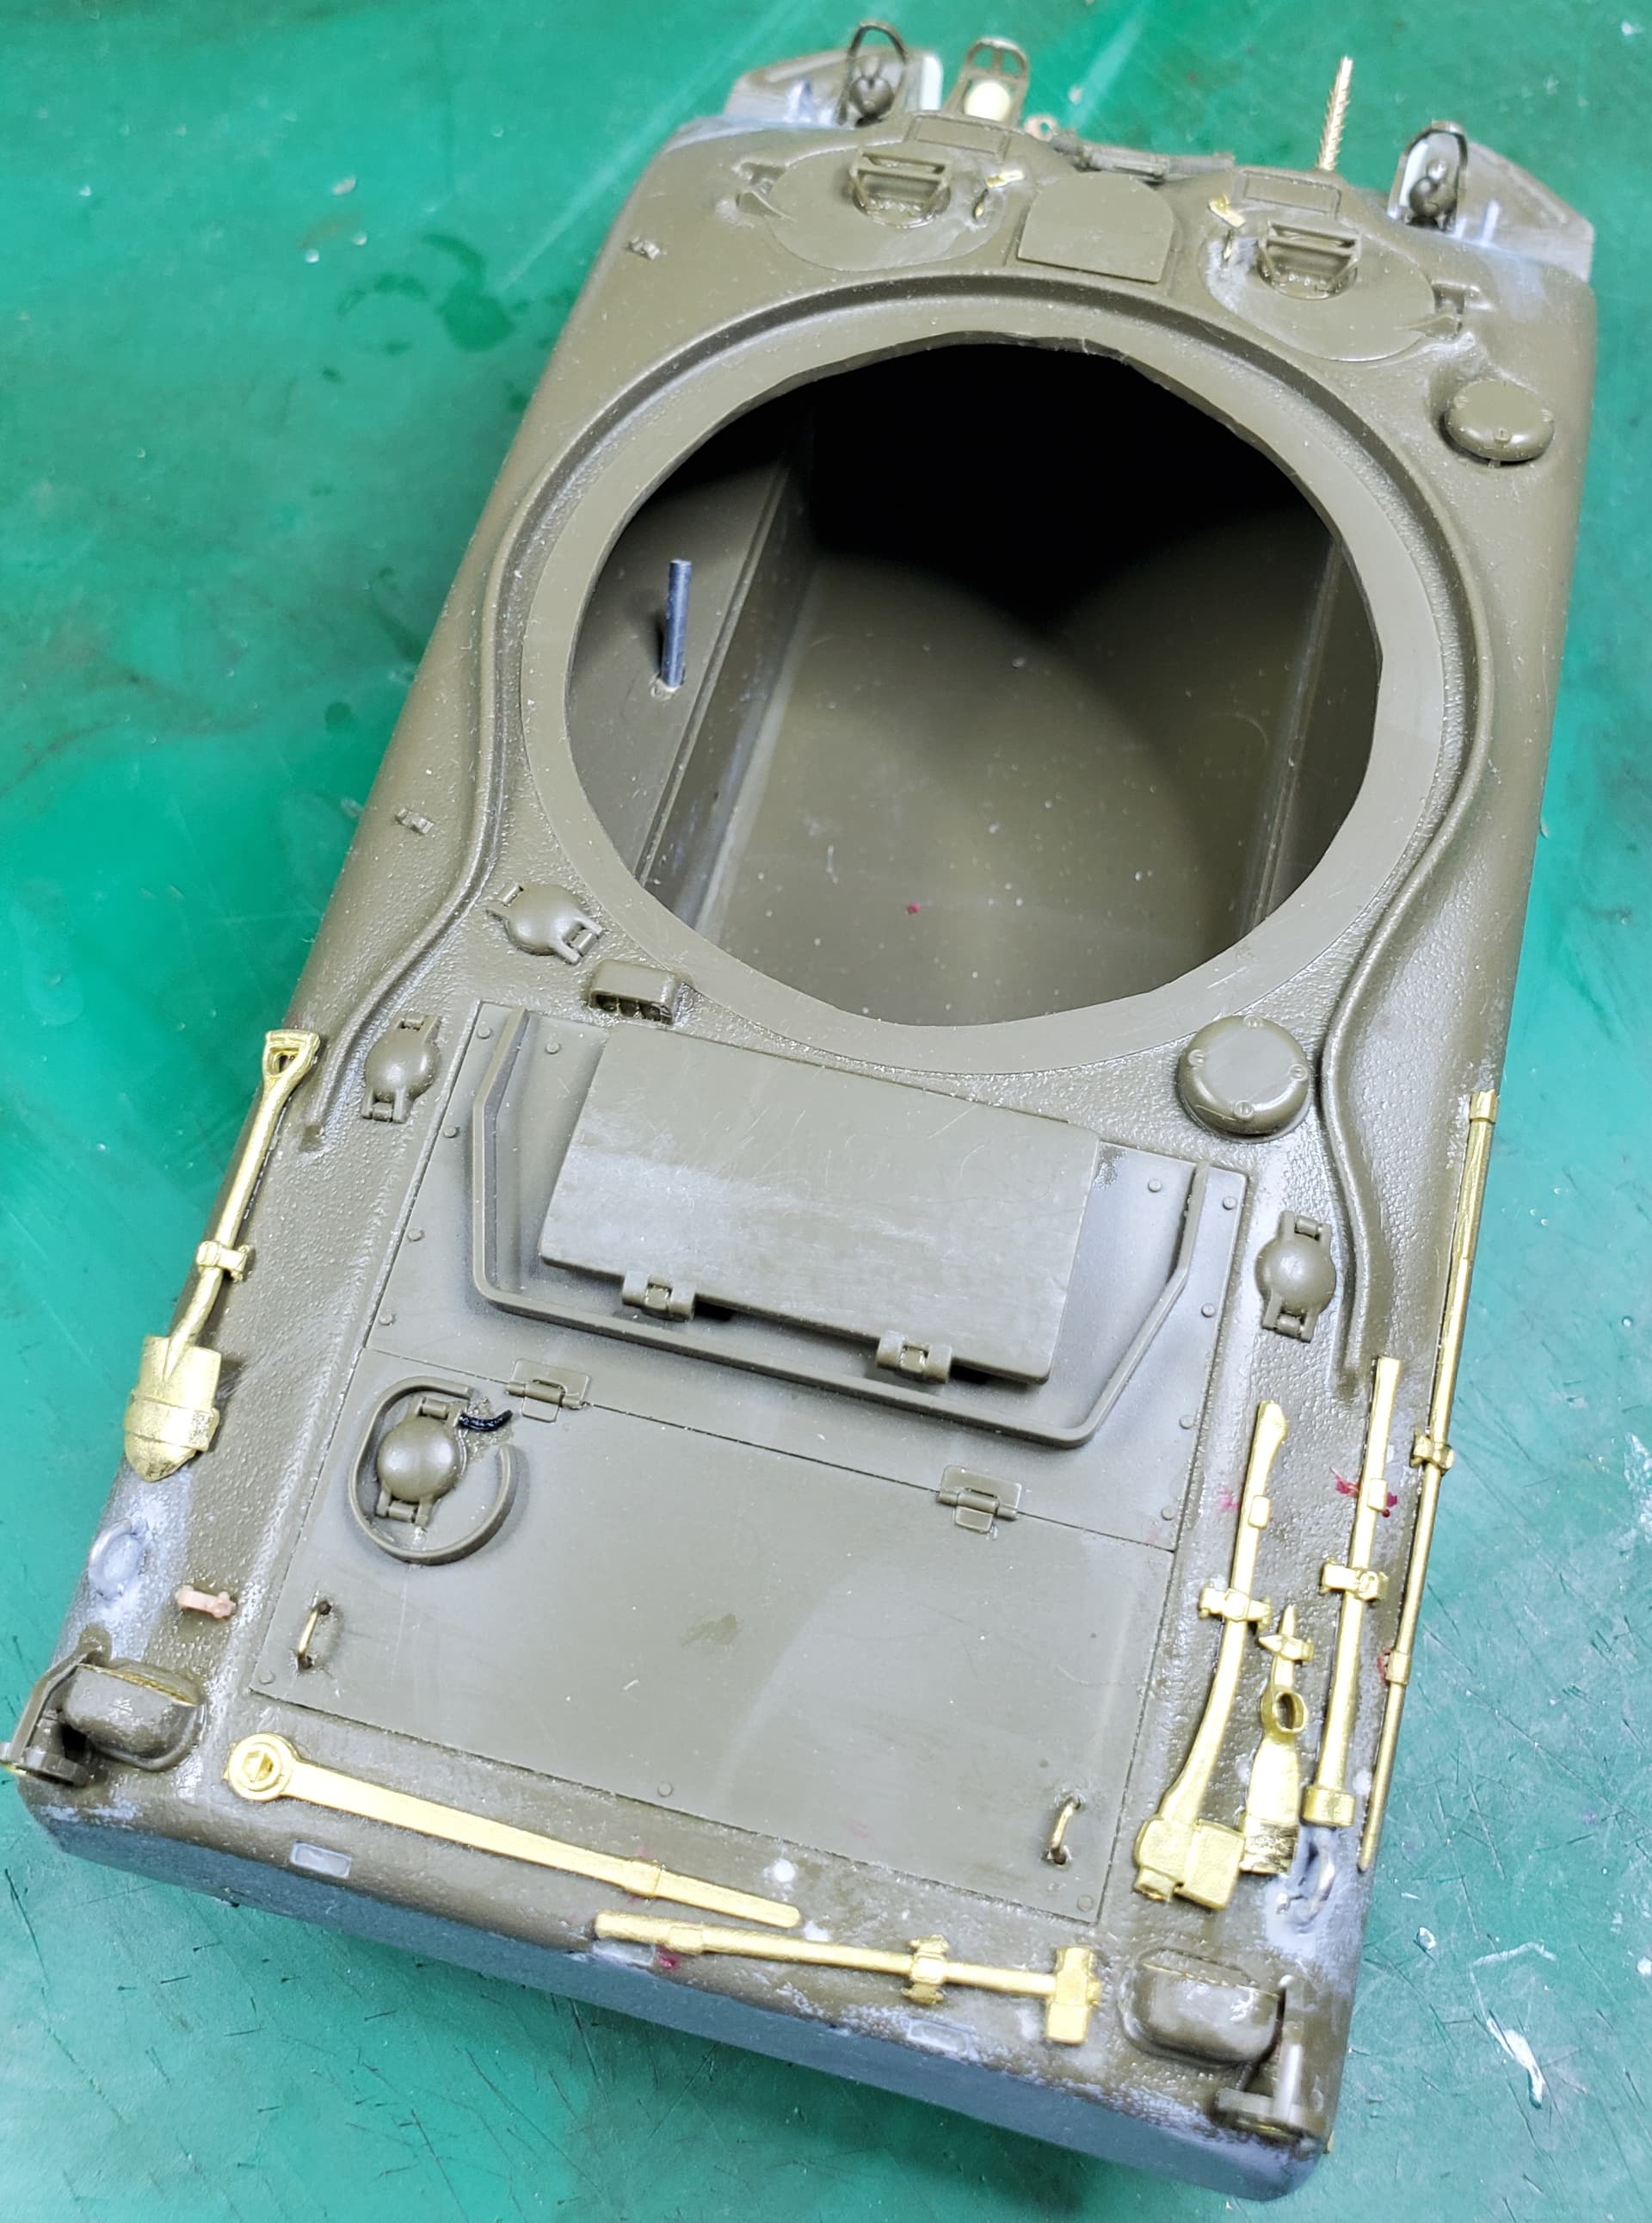
All PE is now installed on the body. I swear the clean up and install of the tool clamps, belts etc took as long as the rest of the hull combined.

10 Likes
Nice clean work overall!
2 Likes
I have mine on the way Asuka cast hull M4A1 early type hoping to profile it as an American in Nth Africa or perhaps Italy but not sure on the configuration until I get the kit in my sweaty mitts.
The idea of a bright yellow turret top and markings does appeal but I don’t know a great deal about earlier Shermans to be honest so will be calling for help from those who are far more knowledgeable than I.
One thing I noticed from downloading the instructions from Scalemates is the option of square or round cannister airfilters.
So soon I’ll be posting something at least and not just lurking
Keith
3 Likes