“The MDO (maneuver damage officer) writes up the destruction of a civil memorial and marker. But wait: no tea?”
2 Likes
May I ask when you started the kit?
Michael ![]()
![]()
1 Like
“Can’t you ever do something right the first time?” If I looked more closely at photos, perhaps … I noticed that Churchill had bogies with “short” bolts on the underside, which is normal for relatively early ones, so I cut them down on the kit parts. Before on the left, after on the right:
And then I noticed something else: Churchill also had early roadwheel arms, without holes in them for the bolts that hold the rubbing plates on top of the arms — on M3 mediums and early Shermans, those were attached by screws through the top rather than with bolts from underneath, as they were later on, OK, so how to solve that? One option is to cut away the bolts and putty the holes closed, but is a lot of work because it’s all in a hard to reach spot.
I then recalled that I have a full set of bogies from a Takom M3 mediums, which someone gave me because the whole undercarriage of the Vargas M2A1 medium resembles nothing from reality. And because the M2A1’s wheels were narrower than those of the M3, I won’t need the wheel arms for that once I get round to building it. And what do you know? The Takom arms fit the Asuka bogies, although you need to shorten the axle pins slightly because the holes for them are slightly less deep in the Takom parts.

On the left a Takom wheel arm, in the middle one with the central rod cut away, because Churchill didn’t have those: if it had, there would have been a bolt head visible on the outside, and those aren’t in the photos of Churchill except on the spare wheel — compare them to see what I mean. On the right, both sides of the wheel arm with a wheel glued between them. The wheel is from MiniArt because it’s better than the Takom ones:
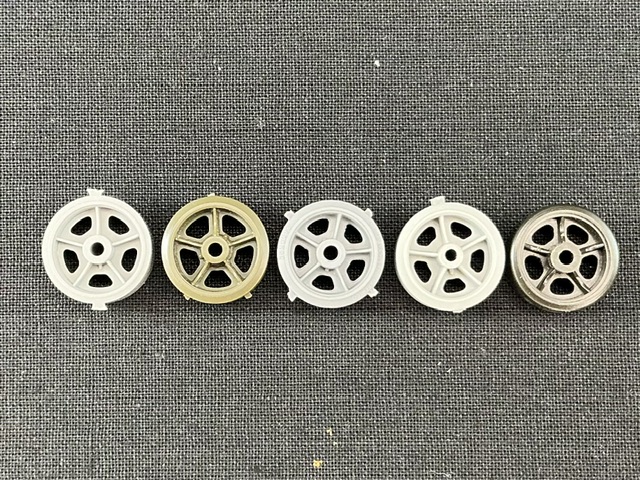
Left to right Takom, Asuka, Miniart, Dragon and Italeri. The holes in the Takom wheels are clearly too small, if you ask me, and the sides of the tyre are vertical instead of sloping inward slightly. Vertical sides are correct for early wheels, but I don’t think Churchill had those.
Before and after:
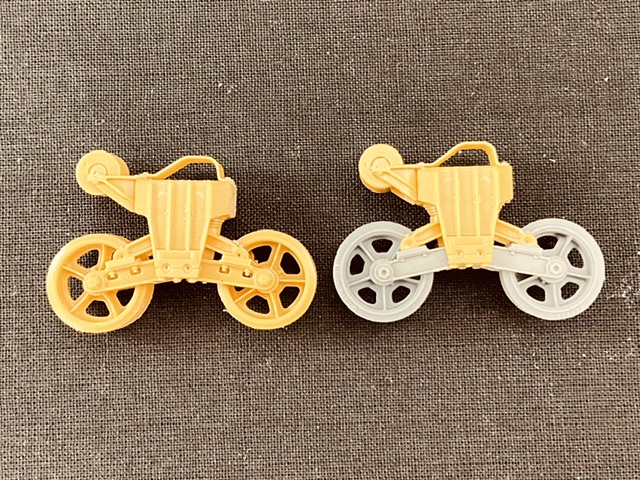
Happily, I only glue the wheel arms into place on Shermans once the bogies are on the tank ![]() The only snag is that I couldn’t keep the wheels as revolving here, because MiniArt’s are a fraction wider than Takom’s, because of which the inner arm didn’t quite reach the axle. Only by glueing the three parts together do they stay in position as they should.
The only snag is that I couldn’t keep the wheels as revolving here, because MiniArt’s are a fraction wider than Takom’s, because of which the inner arm didn’t quite reach the axle. Only by glueing the three parts together do they stay in position as they should.
All together now:
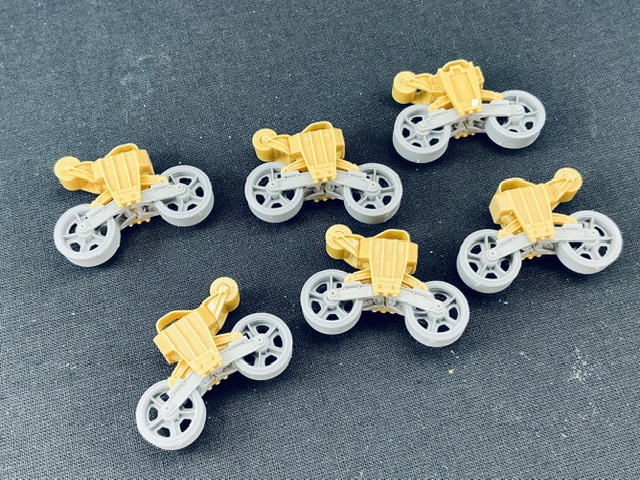
And in the spirit of “Also show your mistakes”: the bogie at top right. I had cut the axle down too far by accident, allowing the wheel arm to just slip out. By drilling a hole in the bogie and enlarging that in the wheel arm, I could just a bit of plastic rod in as a replacement axle. I do still need to cut it down because the bogie doesn’t fit against the hull like this.
7 Likes
Amazing work.
2 Likes
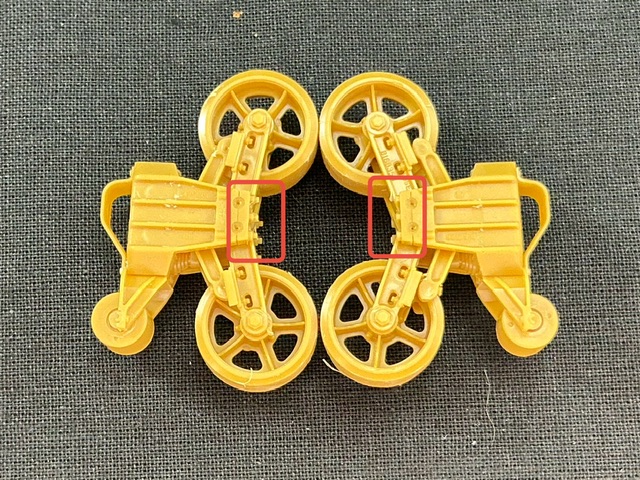
It seems weird to count four right-side bogie assemblies and two left side assemblies.
Help me Obi-Wan?!!
2 Likes
I was wondering what was odd in that pic!
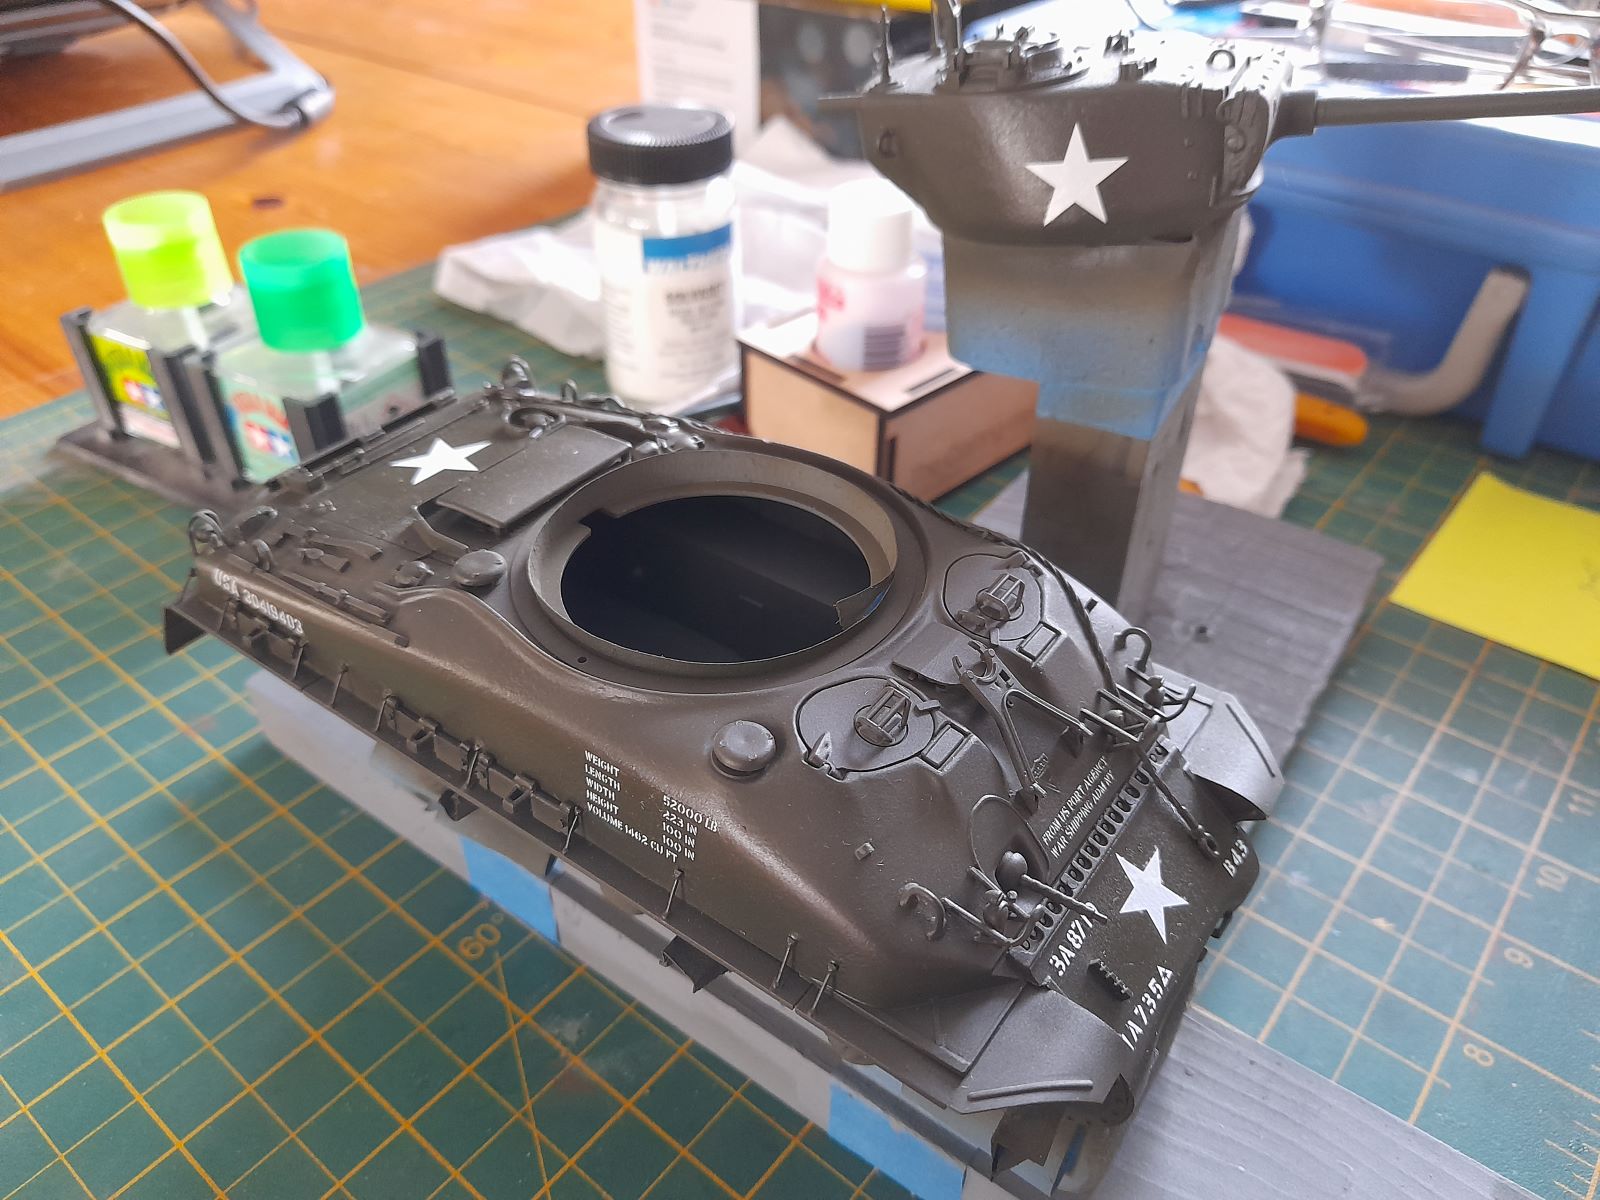
Speaking of Shermans, I spent a little time yesterday evening putting decals on my M4A1E8 as I was in need of stress relief. They are a mix from the spares box, and the bumper codes are individual characters cut from an Archer set! The two different unit codes seems odd, but as I based it on a photo somebody else posted on a forum, it had to be real. The 735th Independent Tank Battalion arrived in Normany supporting 3rd AD infantry units, then was transferred to the 1st AD at Bastogne, then back to 3rd AD in the latter months of the war where it was attached to 87th Infantry Division, so that kinda makes sense. But I always thought the old codes would be removed when new ones were added? At least it adds interest!
And the stars will get painted out. First I’ll add some black paint to represent the par-al-ketone waterproofing on the turret base and around the hatches (this will hide the top and bottom points of the turret stars), then I’ll use OD on a brush to “paint out” the rest of the white on the stars (just as they did in real life), and then add some gentle weathering. This was a new toy in spring of '45 so should still be clean-ish!

8 Likes
Look more closely ![]() One is “inside-out” to show the axle fix.
One is “inside-out” to show the axle fix.
1 Like
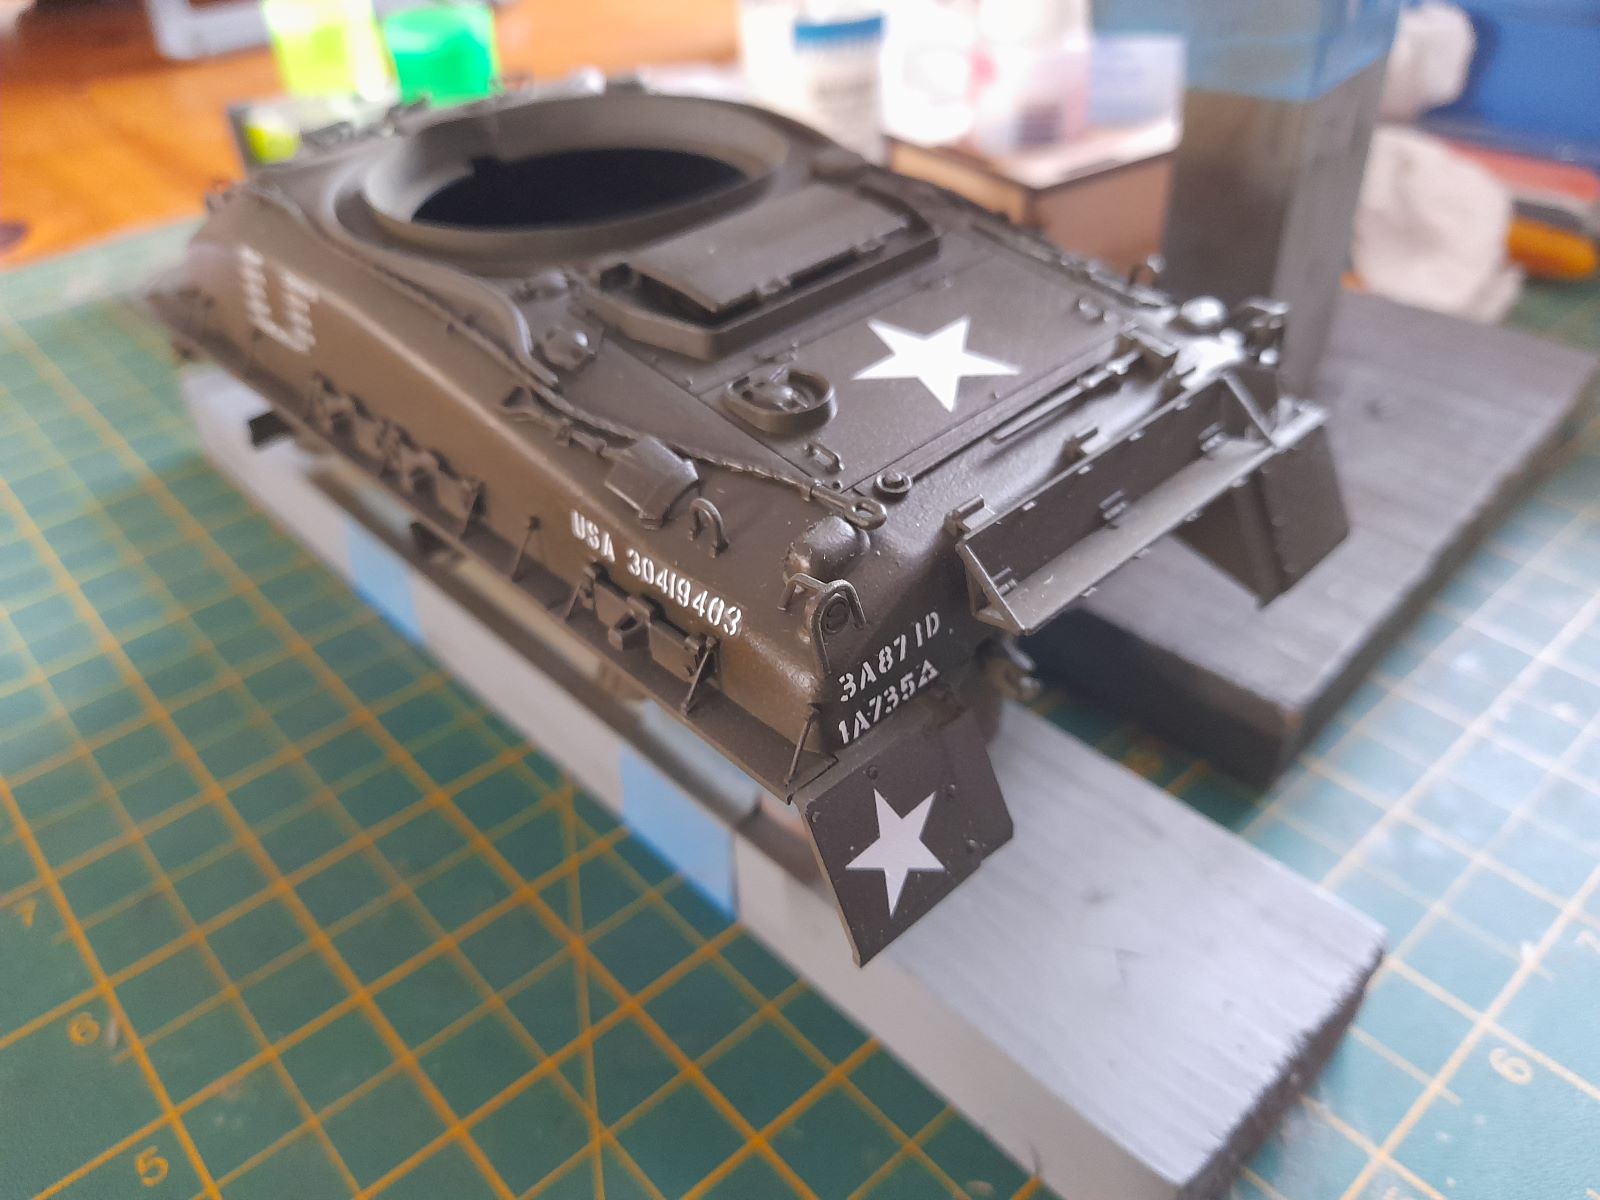
The whole area inside the turret splash ring was taped off before the par-al-ketone was sprayed on, so on the turret the black would have a sharp edge along its underside, while on the hull there would be one along the top. The hatches were similarly taped over entirely (other than handles and periscope protectors) before that stuff got sprayed over them.
4 Likes
Hi Jakko, that’s what I’m aiming for, minus the tape of course! The curvy A1 hull has slightly different lines, but you can see how it all impacts the white stars. The PAK was supposed to be cleaned off before tanks were issued, but photos prove that didn’t always (or ever?) happen…
Still, I’ve got a few more days of repeated Mirco Sol applications to make sure the decals really do snuggle down before any more painting!
4 Likes
Deceptive operations! like the old Soviet double layers of ERA bricks… ![]()
3 Likes
Man, you guys have this stuff down!
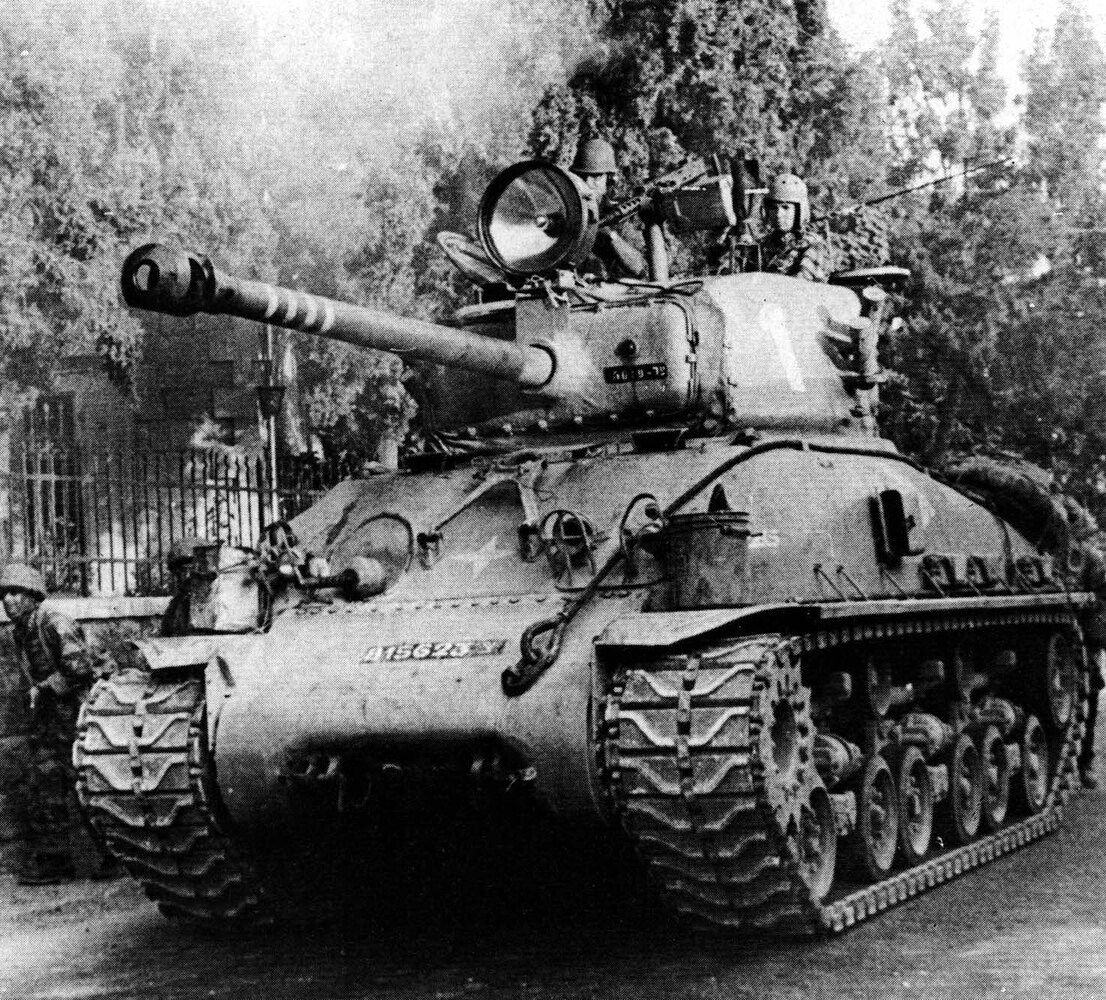
As I prepare to the started on the Takom M1, the Star Decals sheet having arrived, here’s my first question. Does anyone have any pictures/diagrams/whatever showing how the searchlight was wired on IDF Shermans? Takom has it just sitting there, but I’m guessing there was some sort of cable back to the turret somewhere.
Michael ![]()
![]()
1 Like
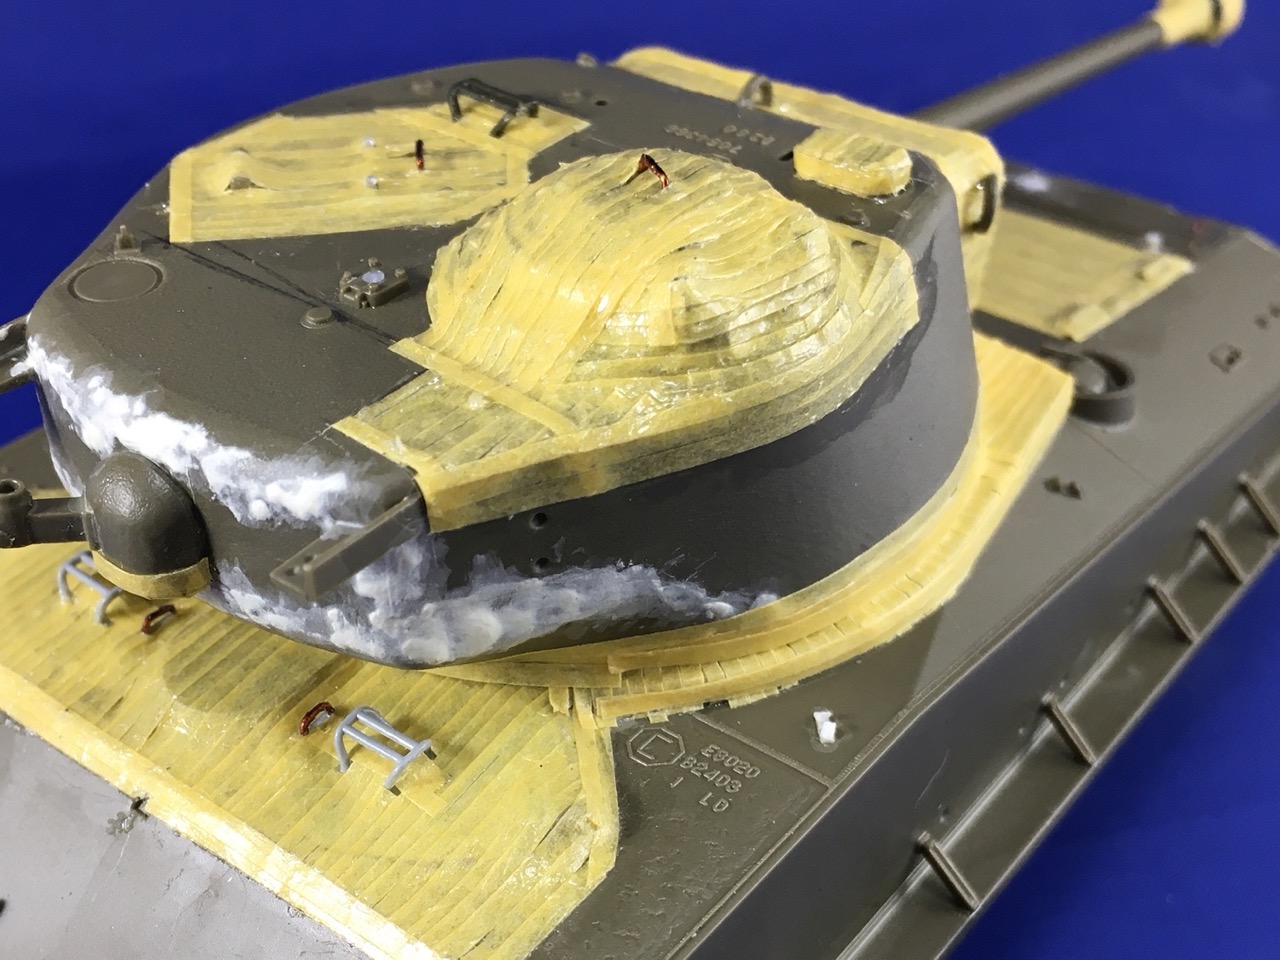
Take it from me: without tape is the way to go ![]() Man, that was a chore, cutting all of that masking tape into strips and sticking all of it on. And then finding that not only does it want to come loose a little, but paint also doesn’t stick well to it. Which, with hindsight, I should have realised beforehand, of course — it’s masking tape
Man, that was a chore, cutting all of that masking tape into strips and sticking all of it on. And then finding that not only does it want to come loose a little, but paint also doesn’t stick well to it. Which, with hindsight, I should have realised beforehand, of course — it’s masking tape ![]() So I then smeared superglue all over it, which also helped to tone down the edges. But in the end I arrived at what I was after:
So I then smeared superglue all over it, which also helped to tone down the edges. But in the end I arrived at what I was after:

11 Likes
That makes sense, thanks! I’m guessing it runs from directly behind the bulb on the light itself.
Michael ![]()
![]()
1 Like
Time for my next question (told you I’d have a few). Looking at my, again, slender resources, it looks like the IDF repositioned that turret .50 cal. on pretty much every vehicle. So I’m gonna have to give it a try. From what I can see, it’s in front of the loader’s hatch, to the left of the periscope. Am I looking at that right?
Thanks again for any help!
Michael ![]()
![]()
1 Like
Nice one. ![]()
![]()
1 Like
Hi, Yes of course. About 6/8 weeks ago, but I can go back and check on the original thread I posted before I saw the campaign.
1 Like
Hi again, I posted the first picts on Aug 9 so I would have started the build about two/three weeks before that.Hope that helps. ![]()
1 Like
OK, if you didn’t start your build until July, you’re well within the campaign time frames. So have at it, and welcome!
Michael ![]()
![]()
1 Like
Thanks Michael.