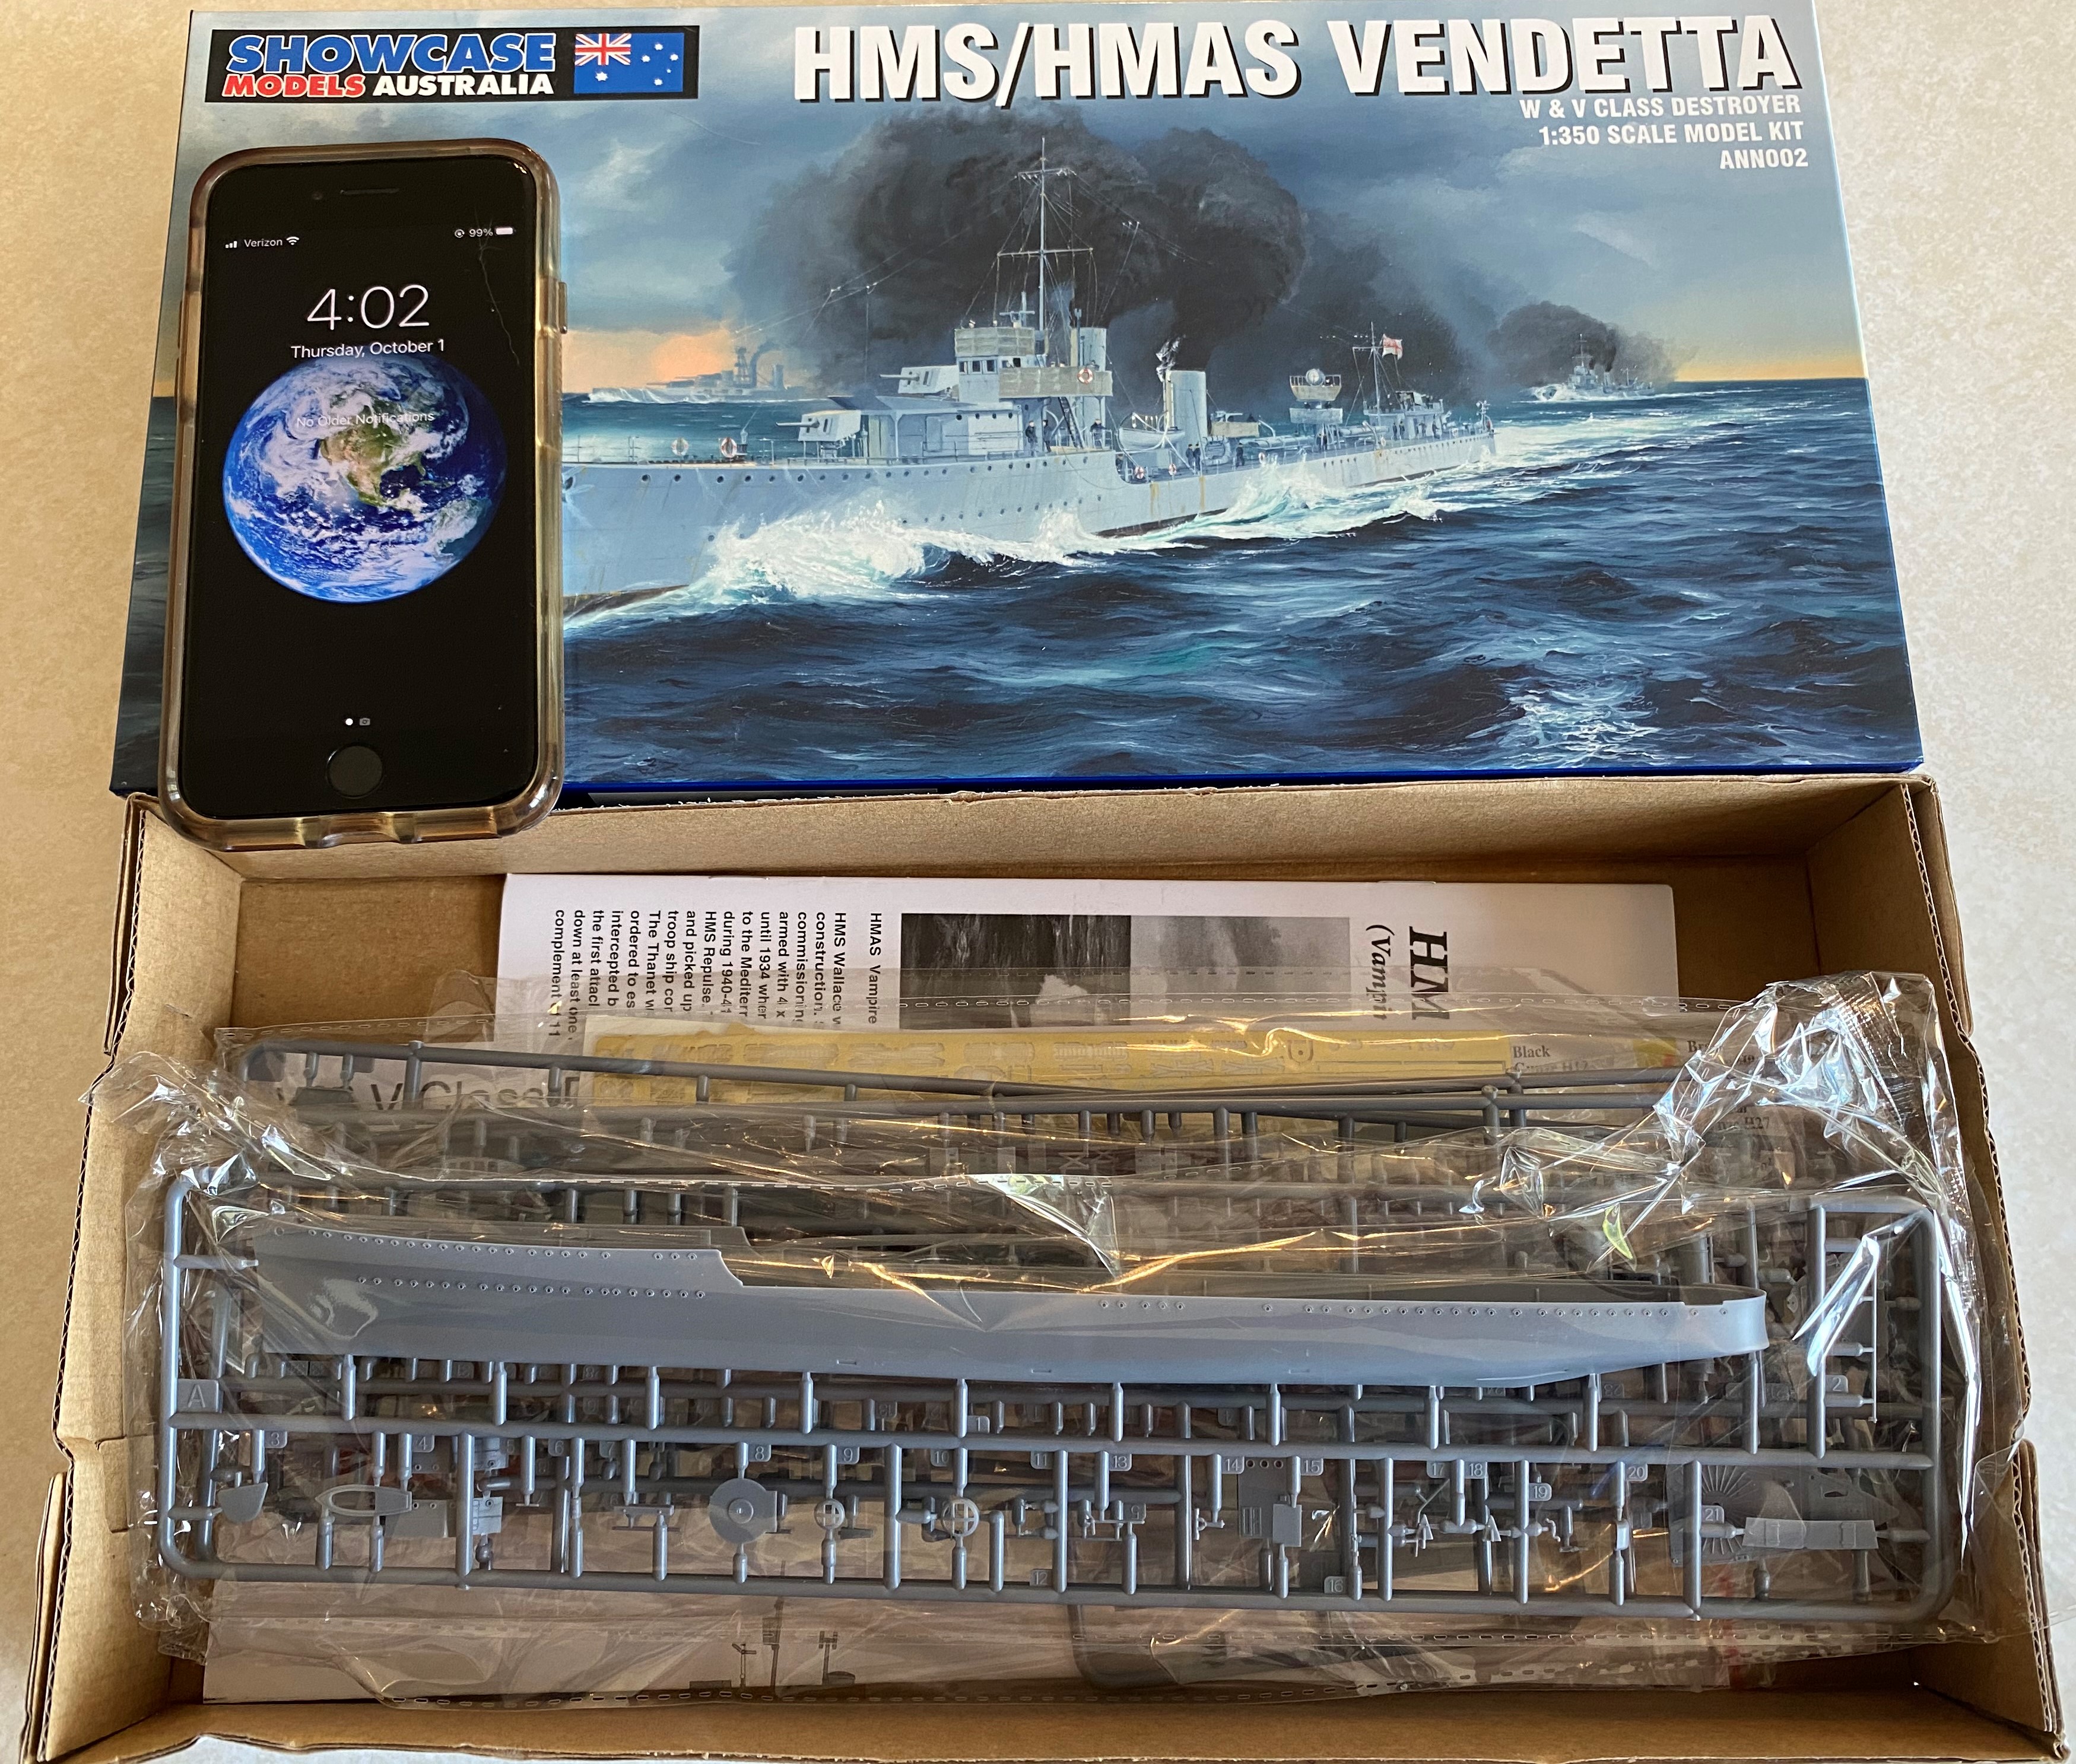
Since the slipways are reopen I will be working on my HMS Vendetta from Showcase Models. I believe the company is now defunct so I am not sure for how much longer this kit will be available. (I did a quick search and you can still get it on ebay).
The kit can be painted as either HMS Vendetta or HMAS Vendetta. I am doing her in her WW1 RN colours and will be building her completely OOB. Hopefully this will be a longer build log than my HMS Zulu.
I started this kit in October 2020 but after building the basic hull I lost my ship mojo and moved onto some armor builds.
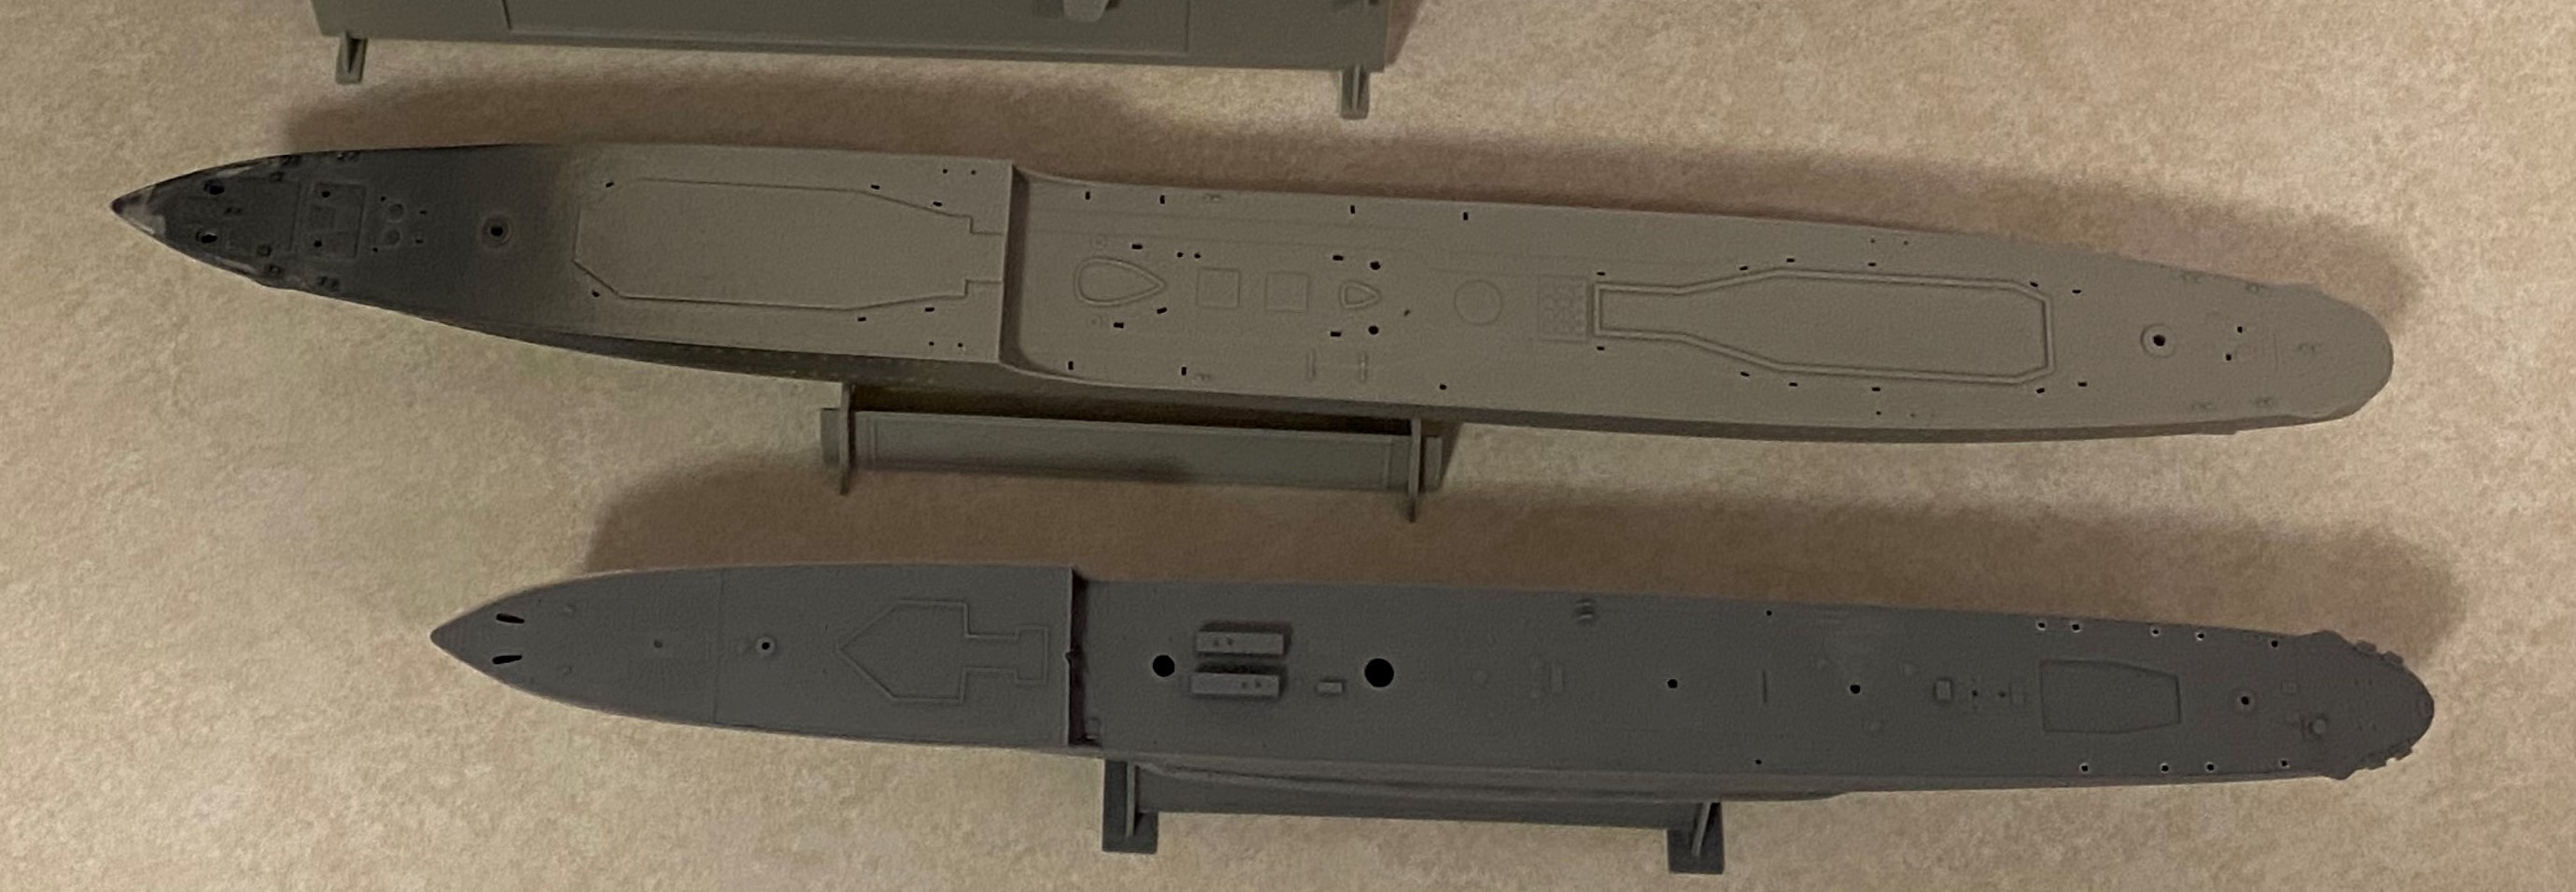
Comparing her to the Tribal class hull you can see that this is a small ship. Roughly 1090 tons standard displacement.
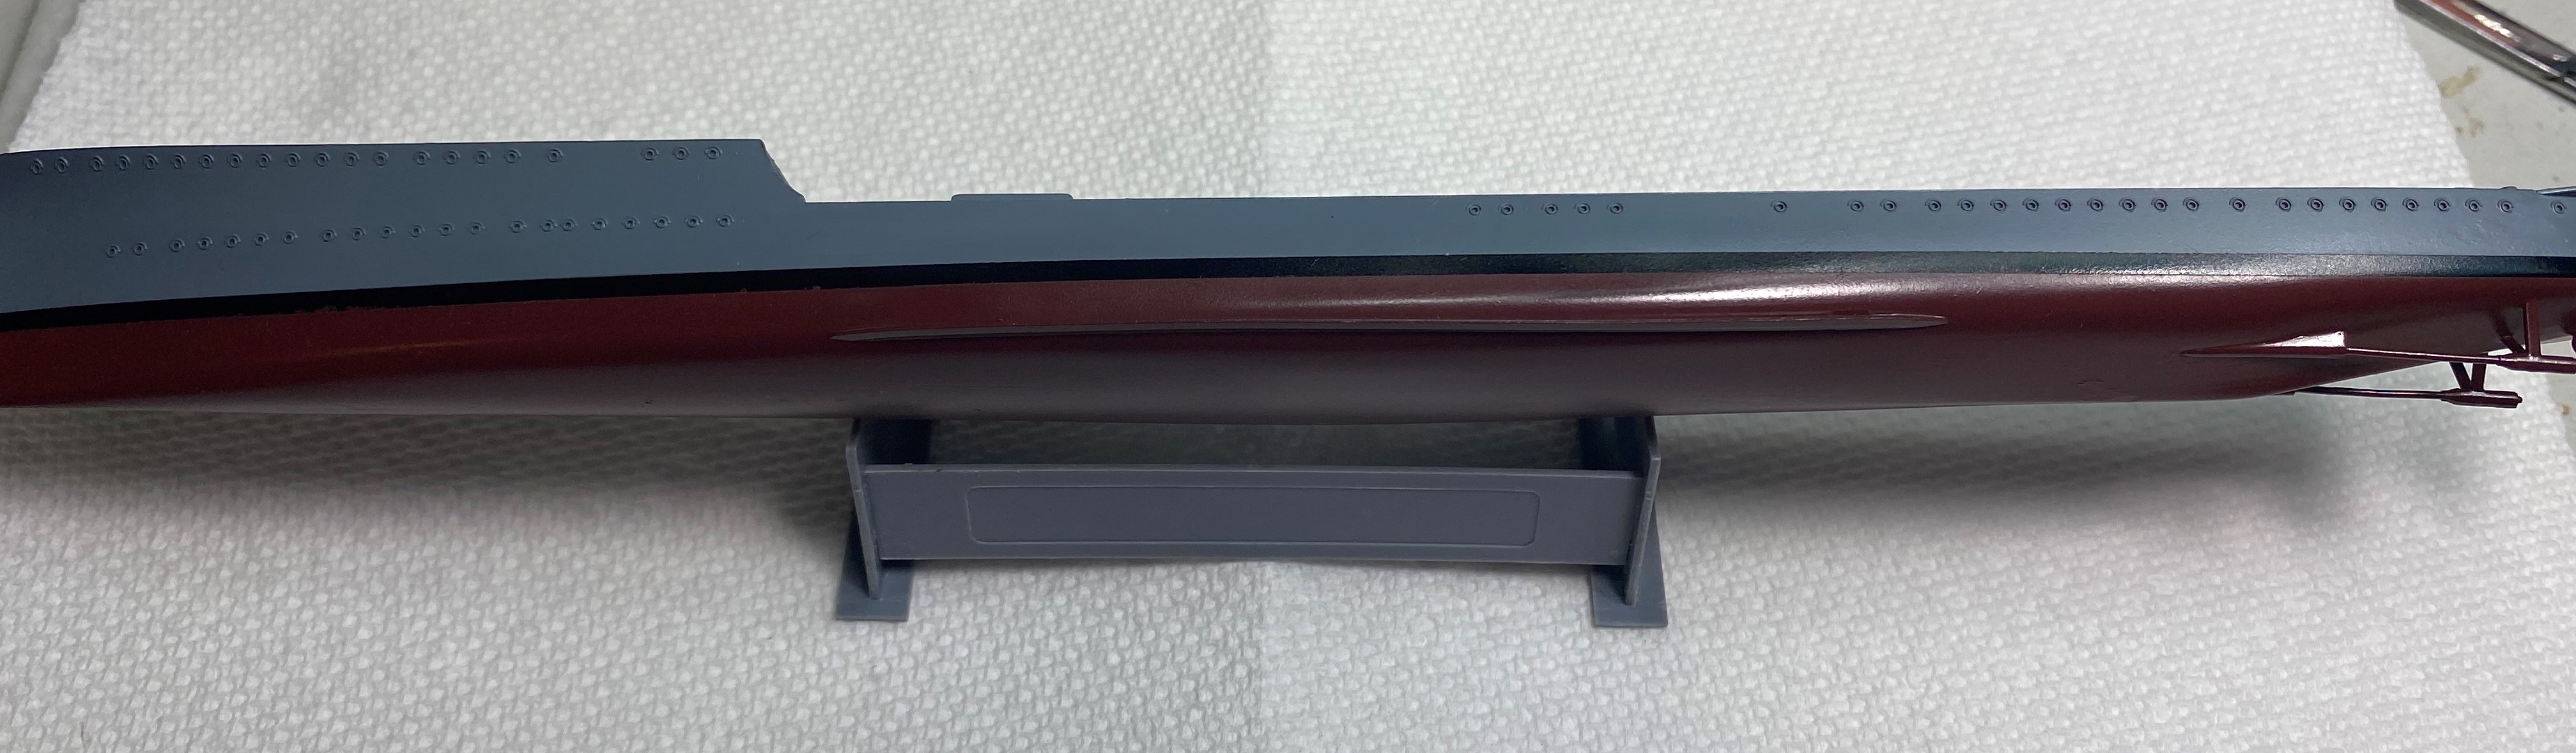
This week I got to painting her hull in preparation for continuing the build.
Hull went smoothly.
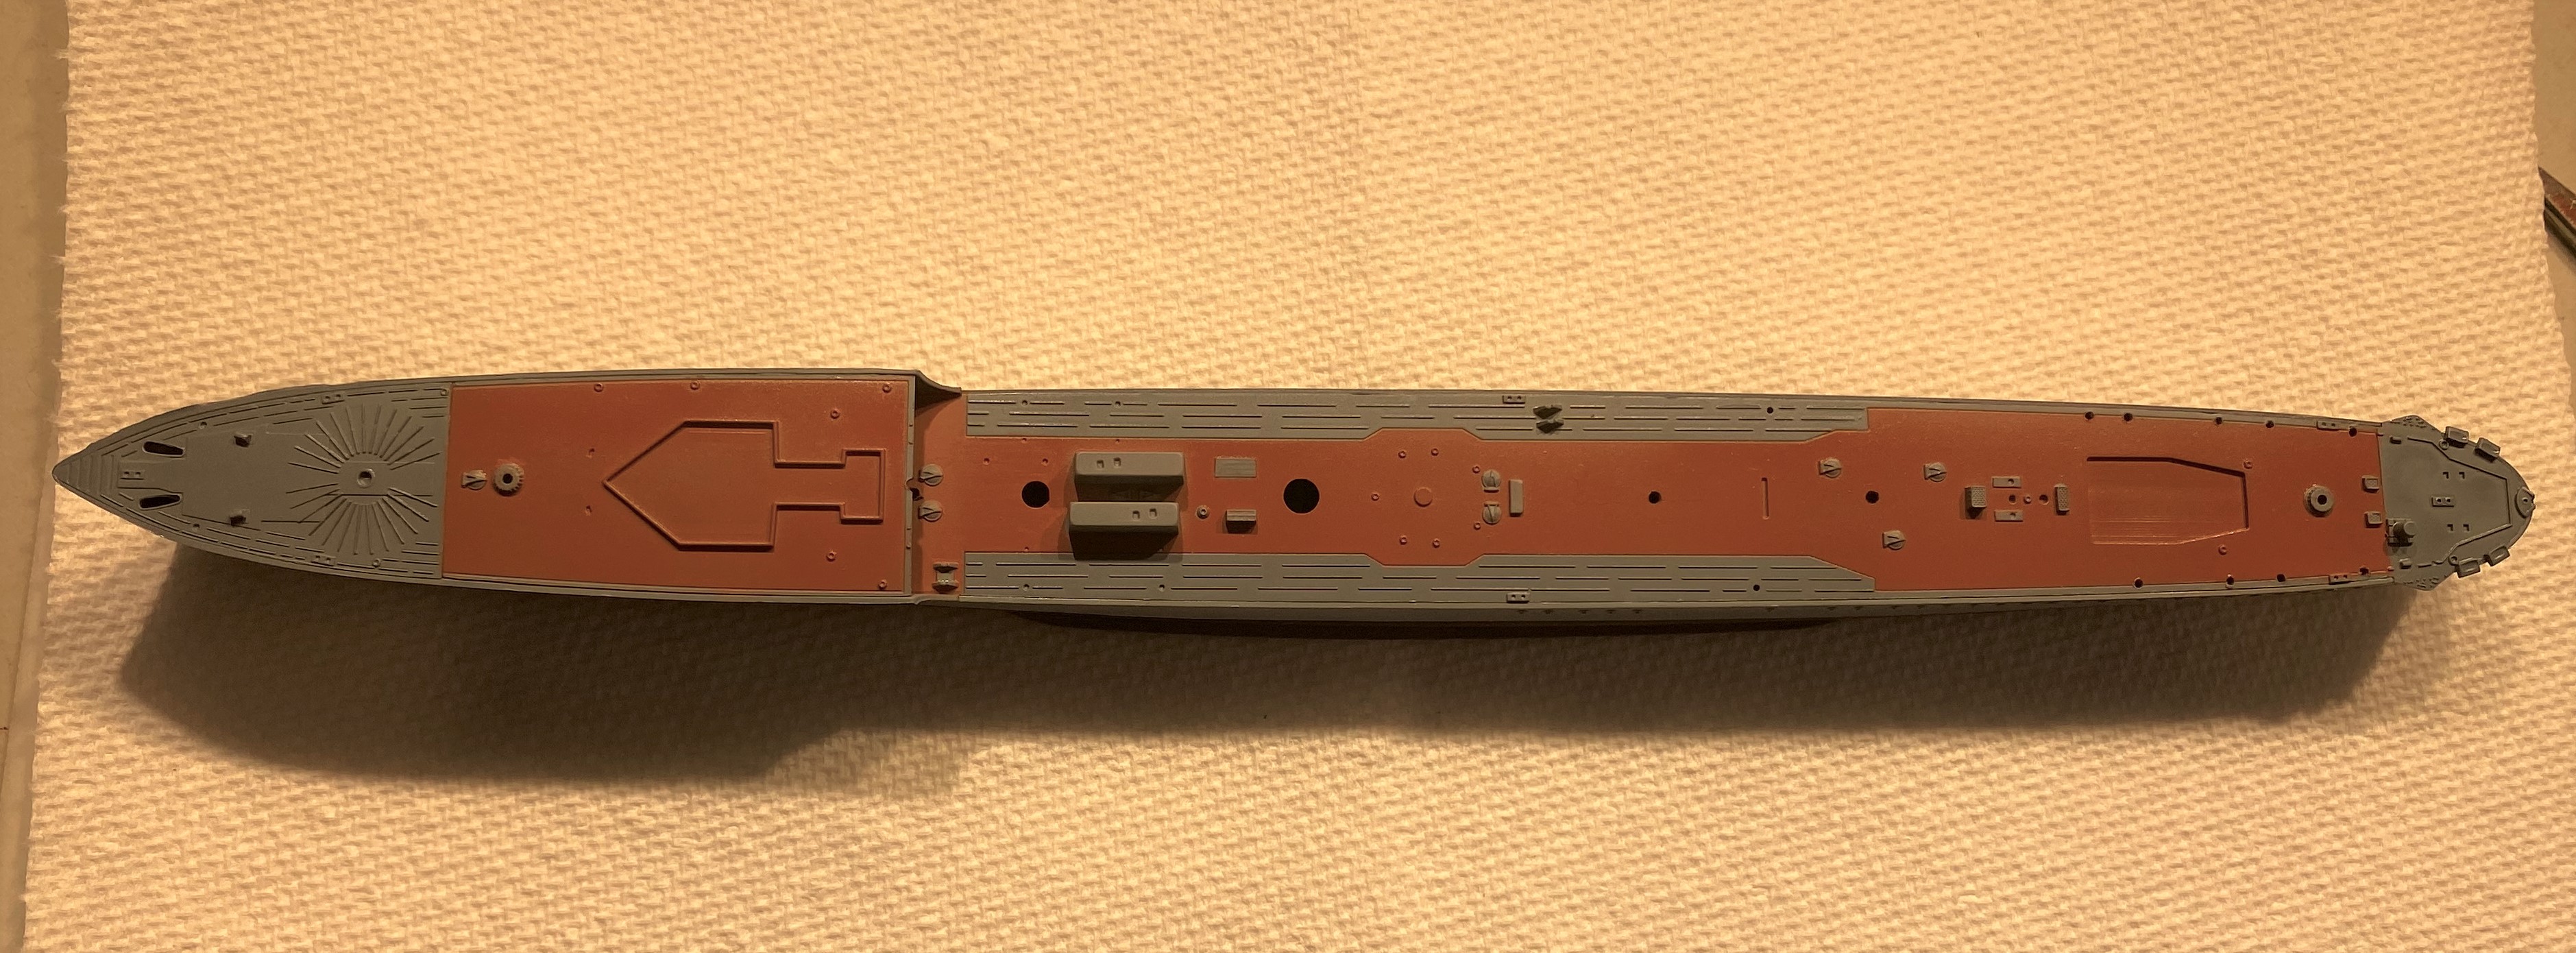
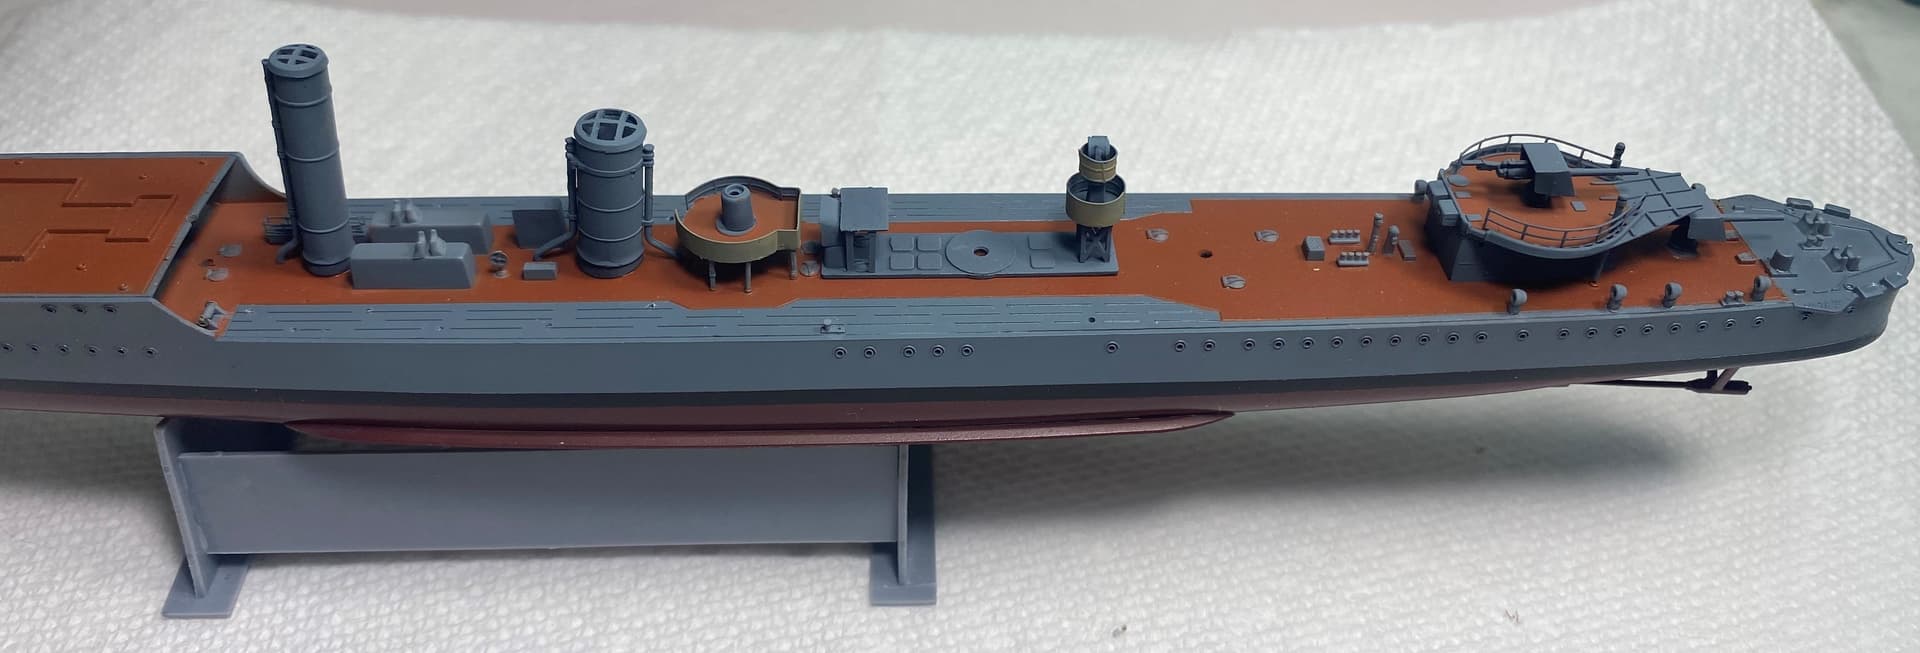
The deck has linoleum or semtex on it. I am not 100% sure which but the colour callout is a reddish brown. I had to do some masking to cover the steel deck parts.
Tape came off and I have to say I am very happy with the result.
6 Likes
I am jealous, I was not able to locate that model in Germany for a reasonable price. I love the straight forward design of the V&W’s!
Should be linoleum, Semtex seems to used only since the 30’s
Cheers
Tom
Cool! I don’t know how many WW1 era destroyers are available in plastic. Happy to see you build this one!
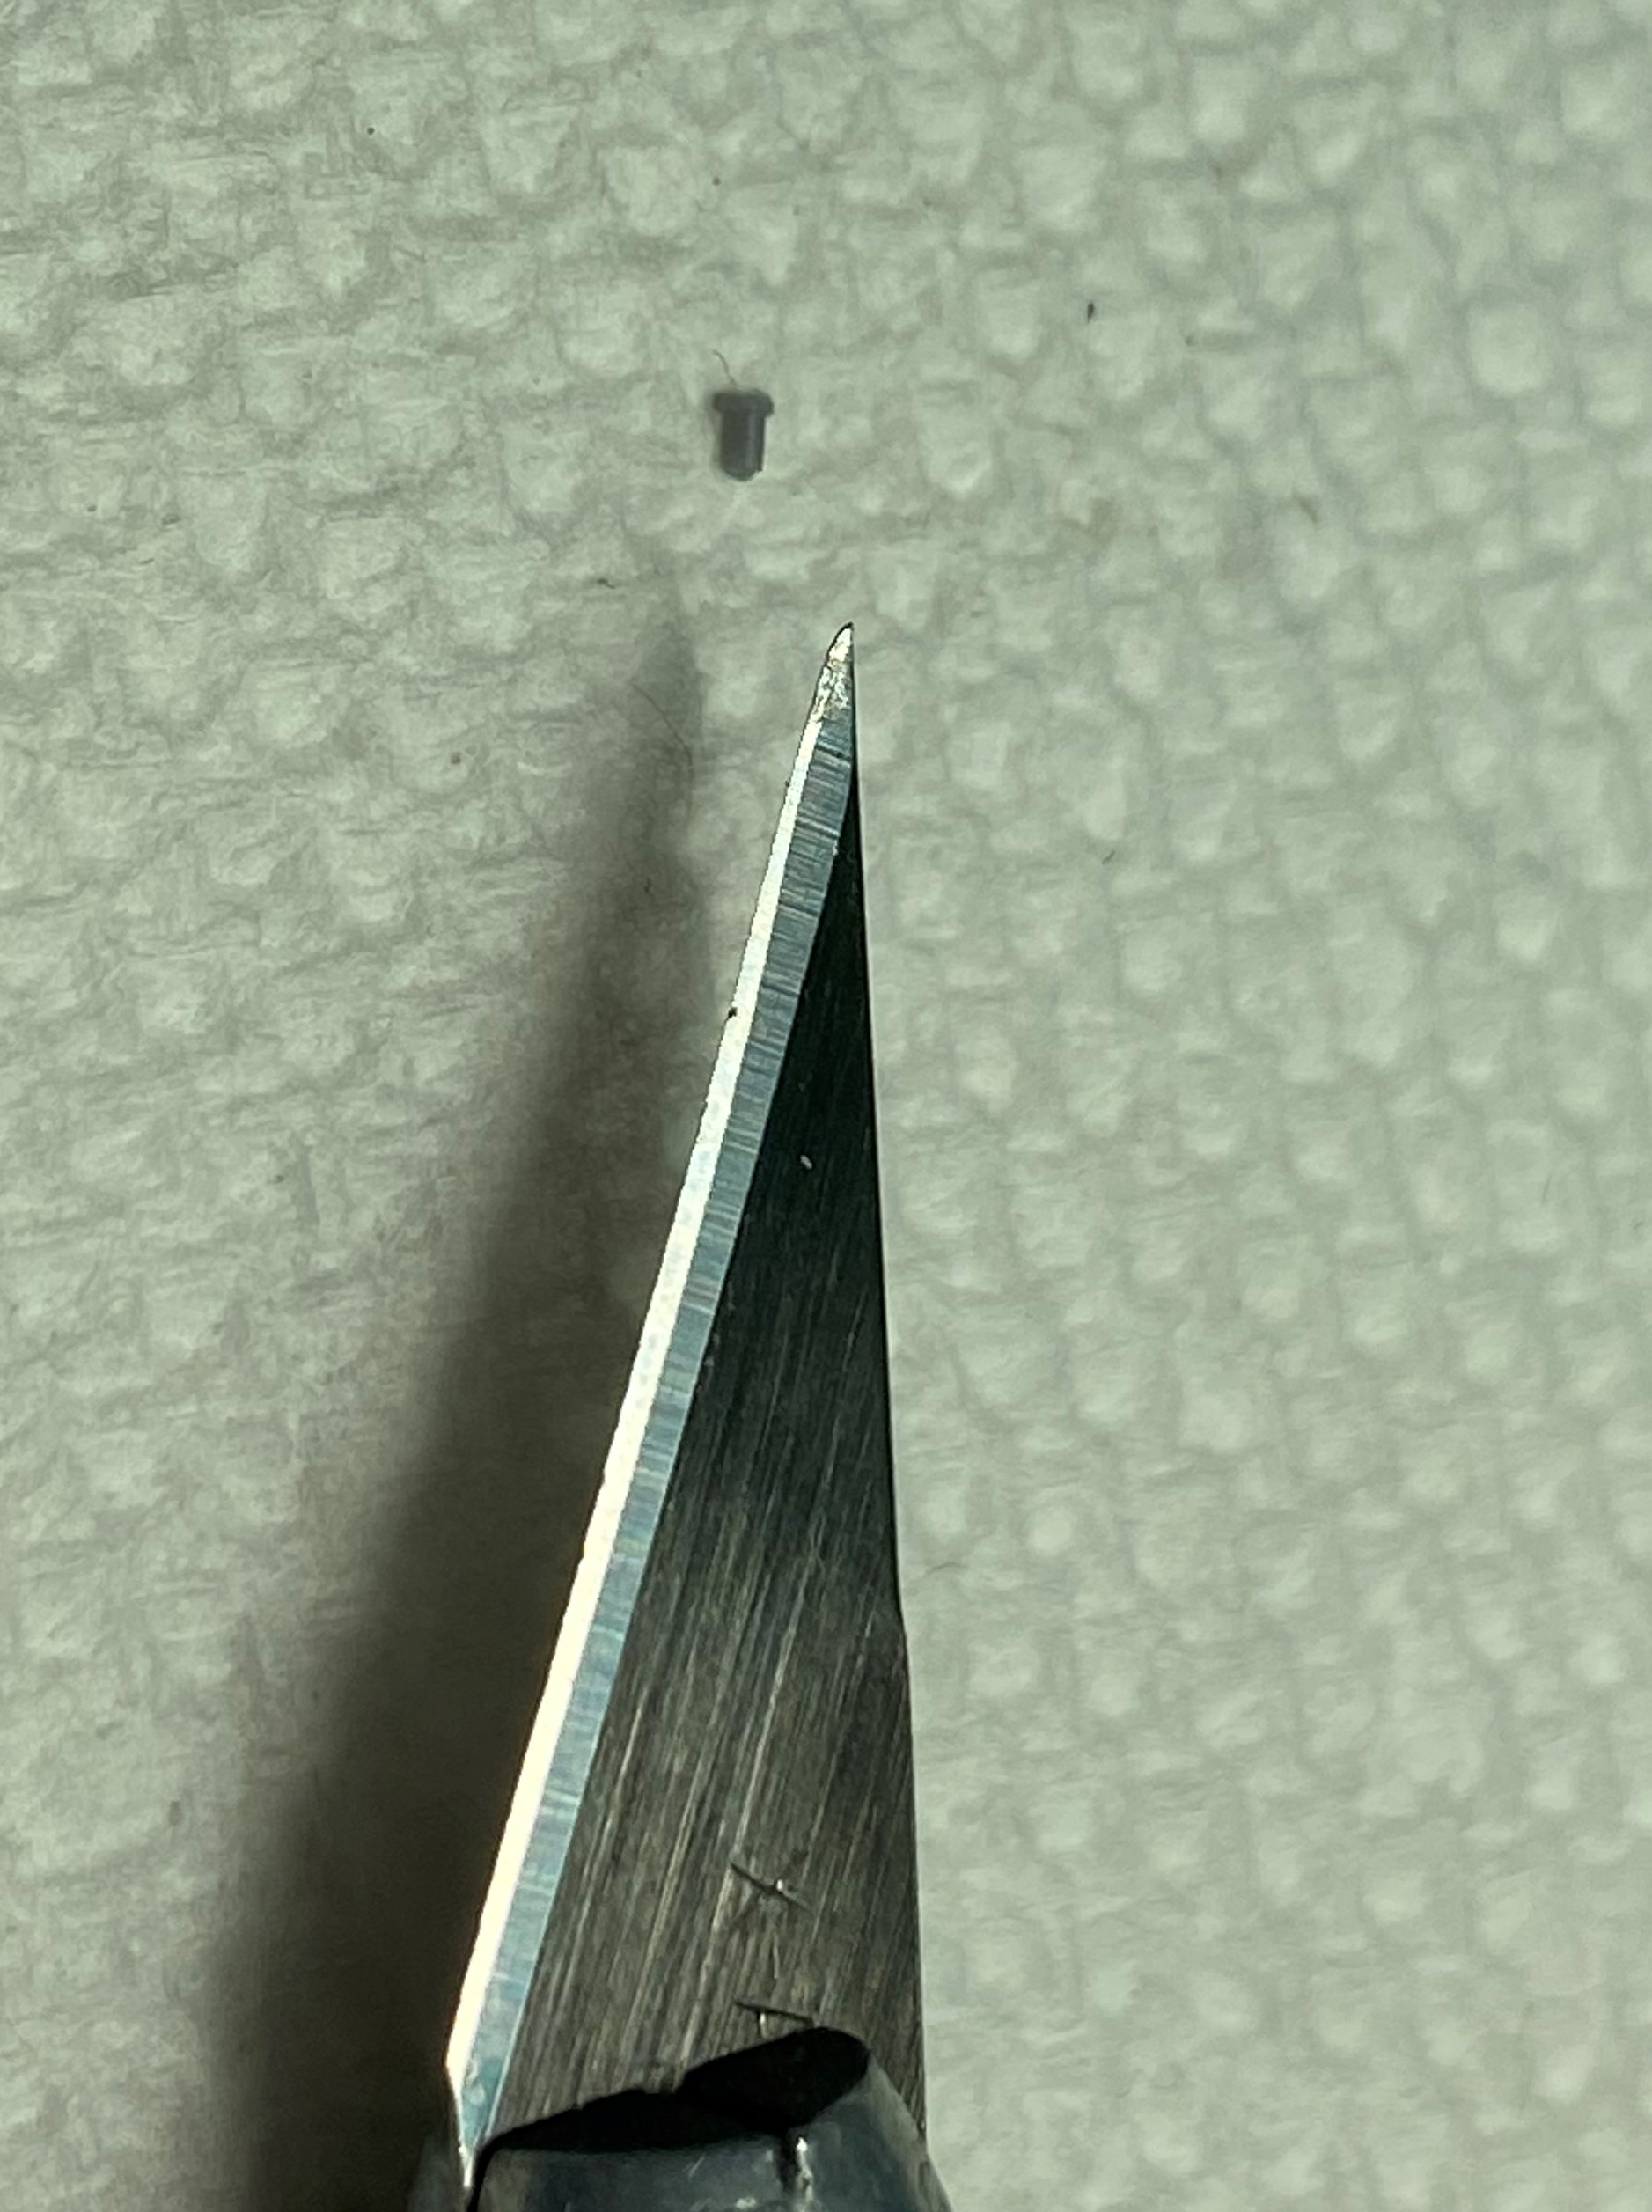
In todays adventures of very small plastic parts I had to deal with the bollards. How fun!
That is the tip of my #11 X-Acto blade. My plan is to wait for them to dry solid to the kit and very gently sand the top smooth as thats where it joined the sprue. Thank god for my Tamiya cutters which give a nice clean cut.
I wanted to do more today but dealing with those tiny parts that took the wind from my sails. Luckily, as of now I have them all installed with no loses. Which is good since they don’t give you any spares.
2 Likes
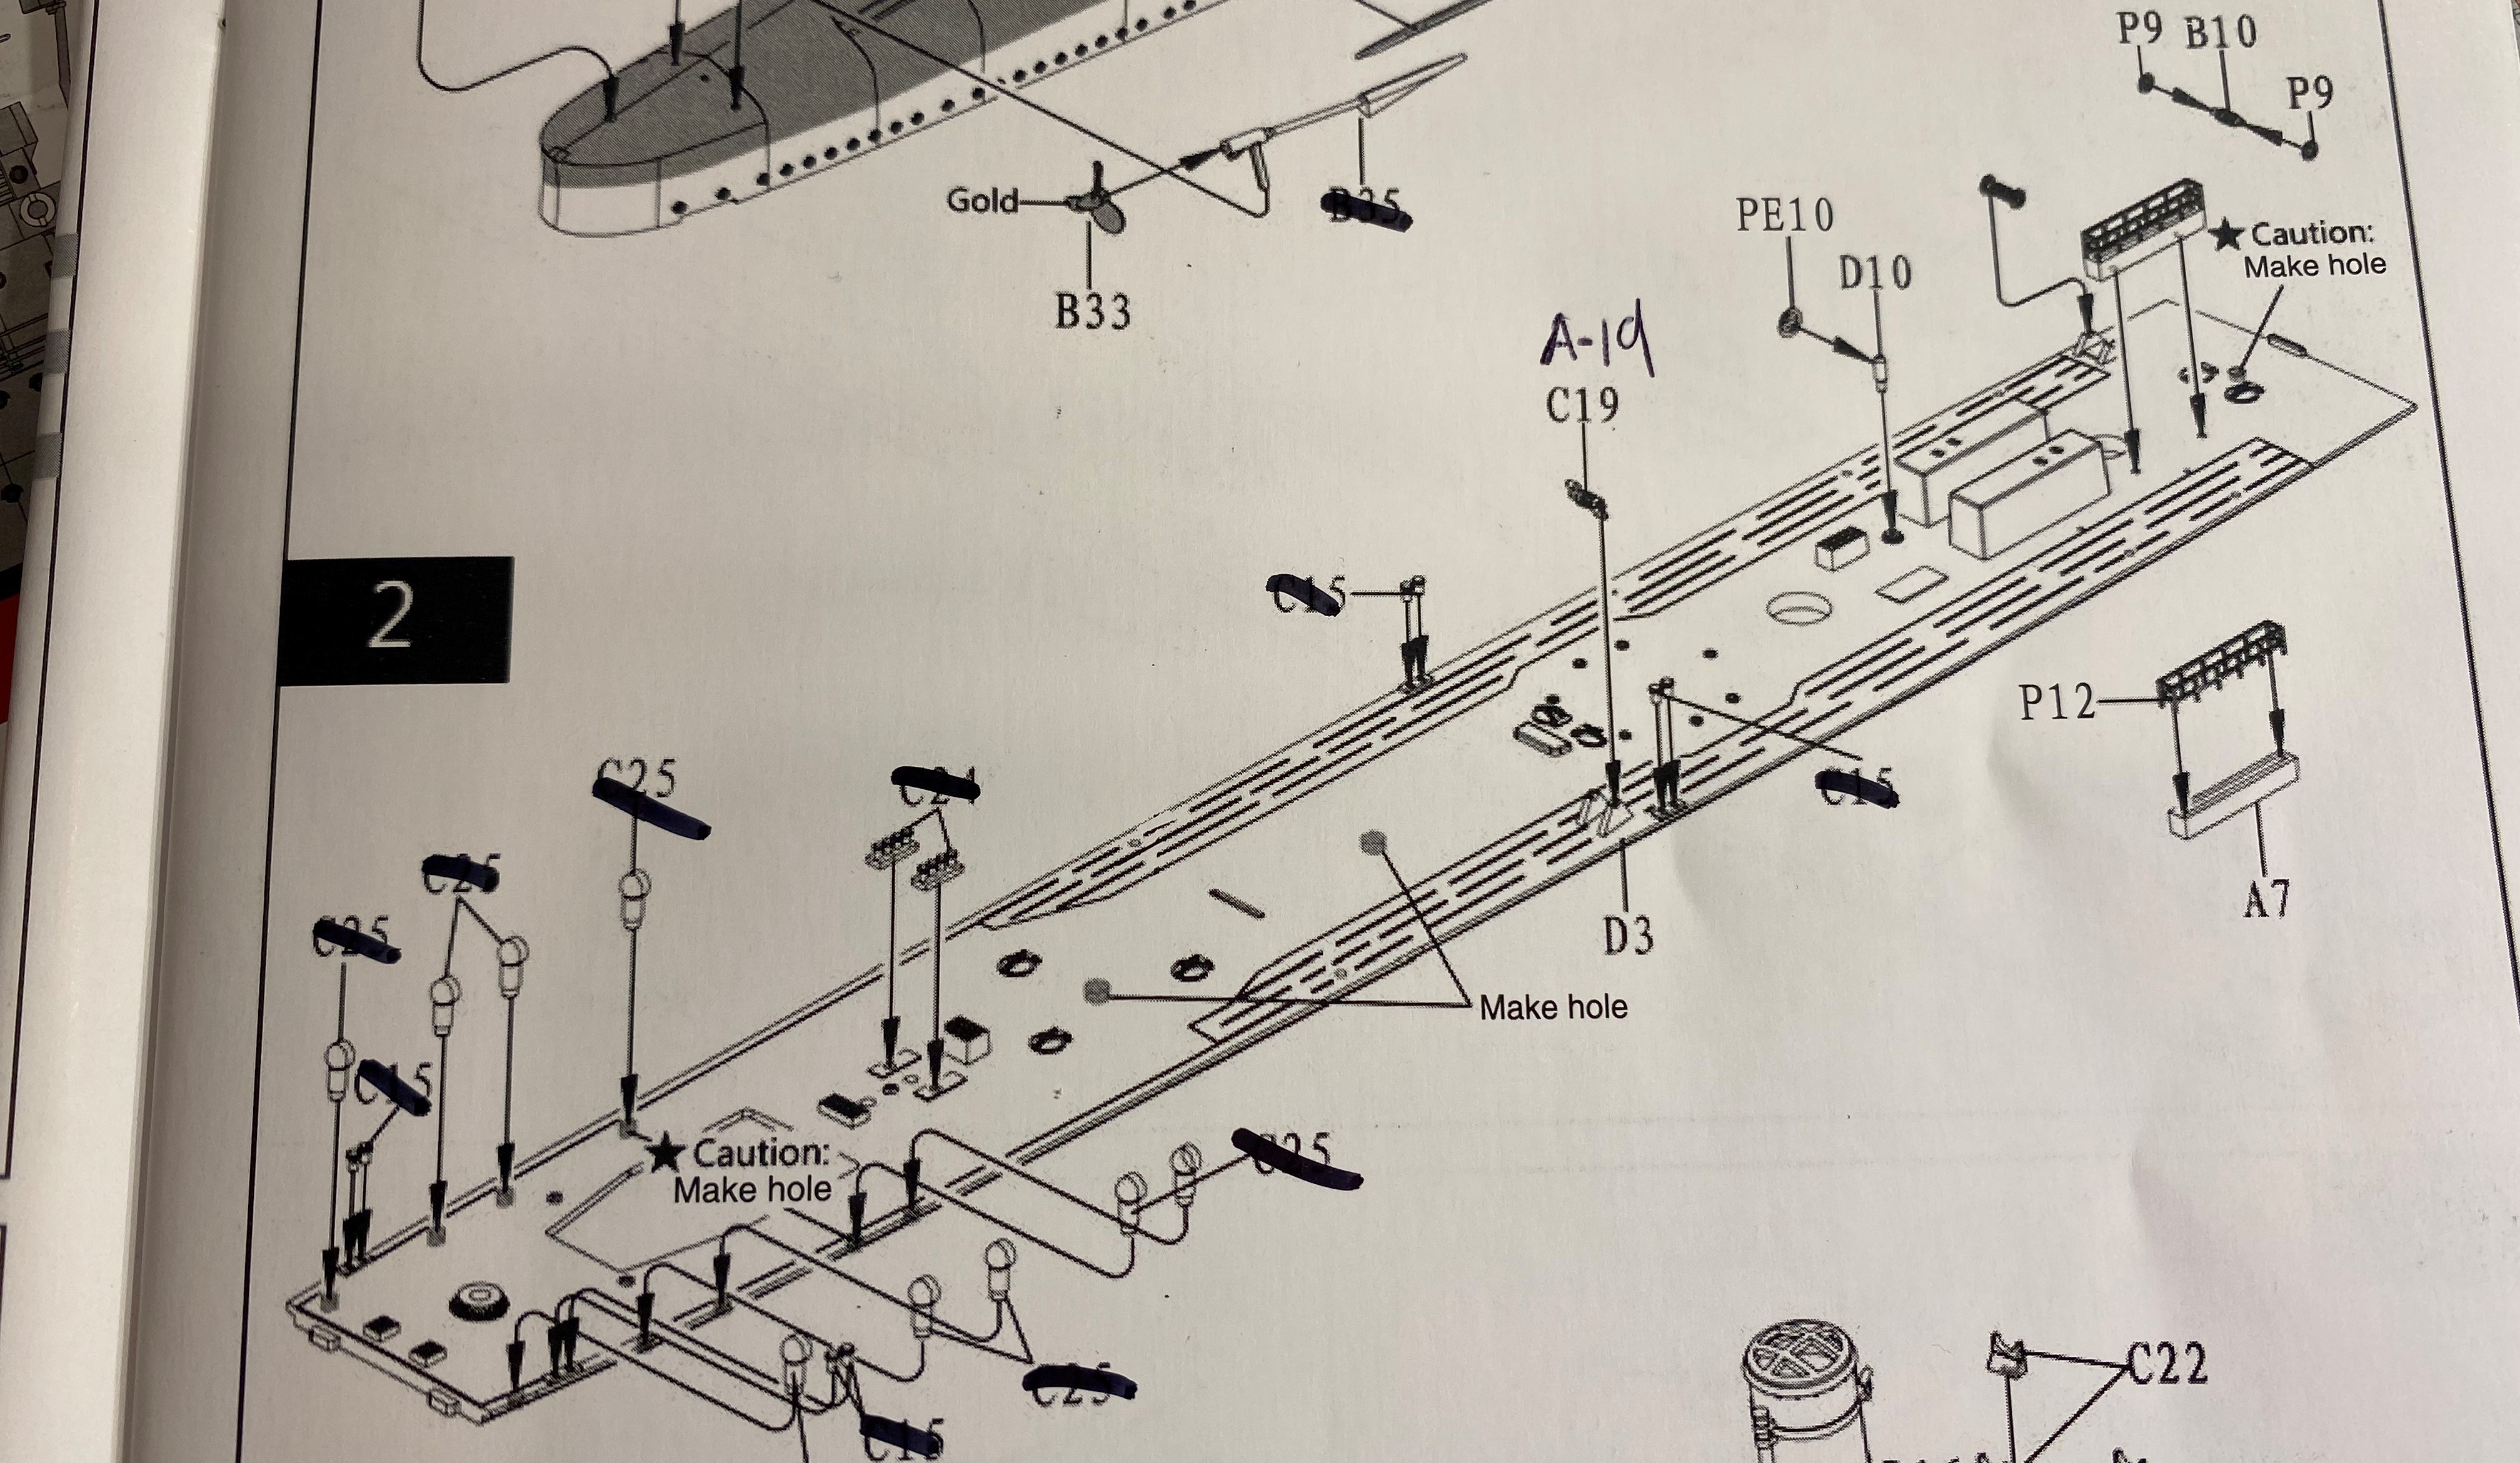
Working through and adding the various gribblies to the deck and found an error in the instructions. In part 2 they ask you to use C19 to complete a deck winch. This is incorrect and should be A19. I will continue to document errors as I find them.
3 Likes
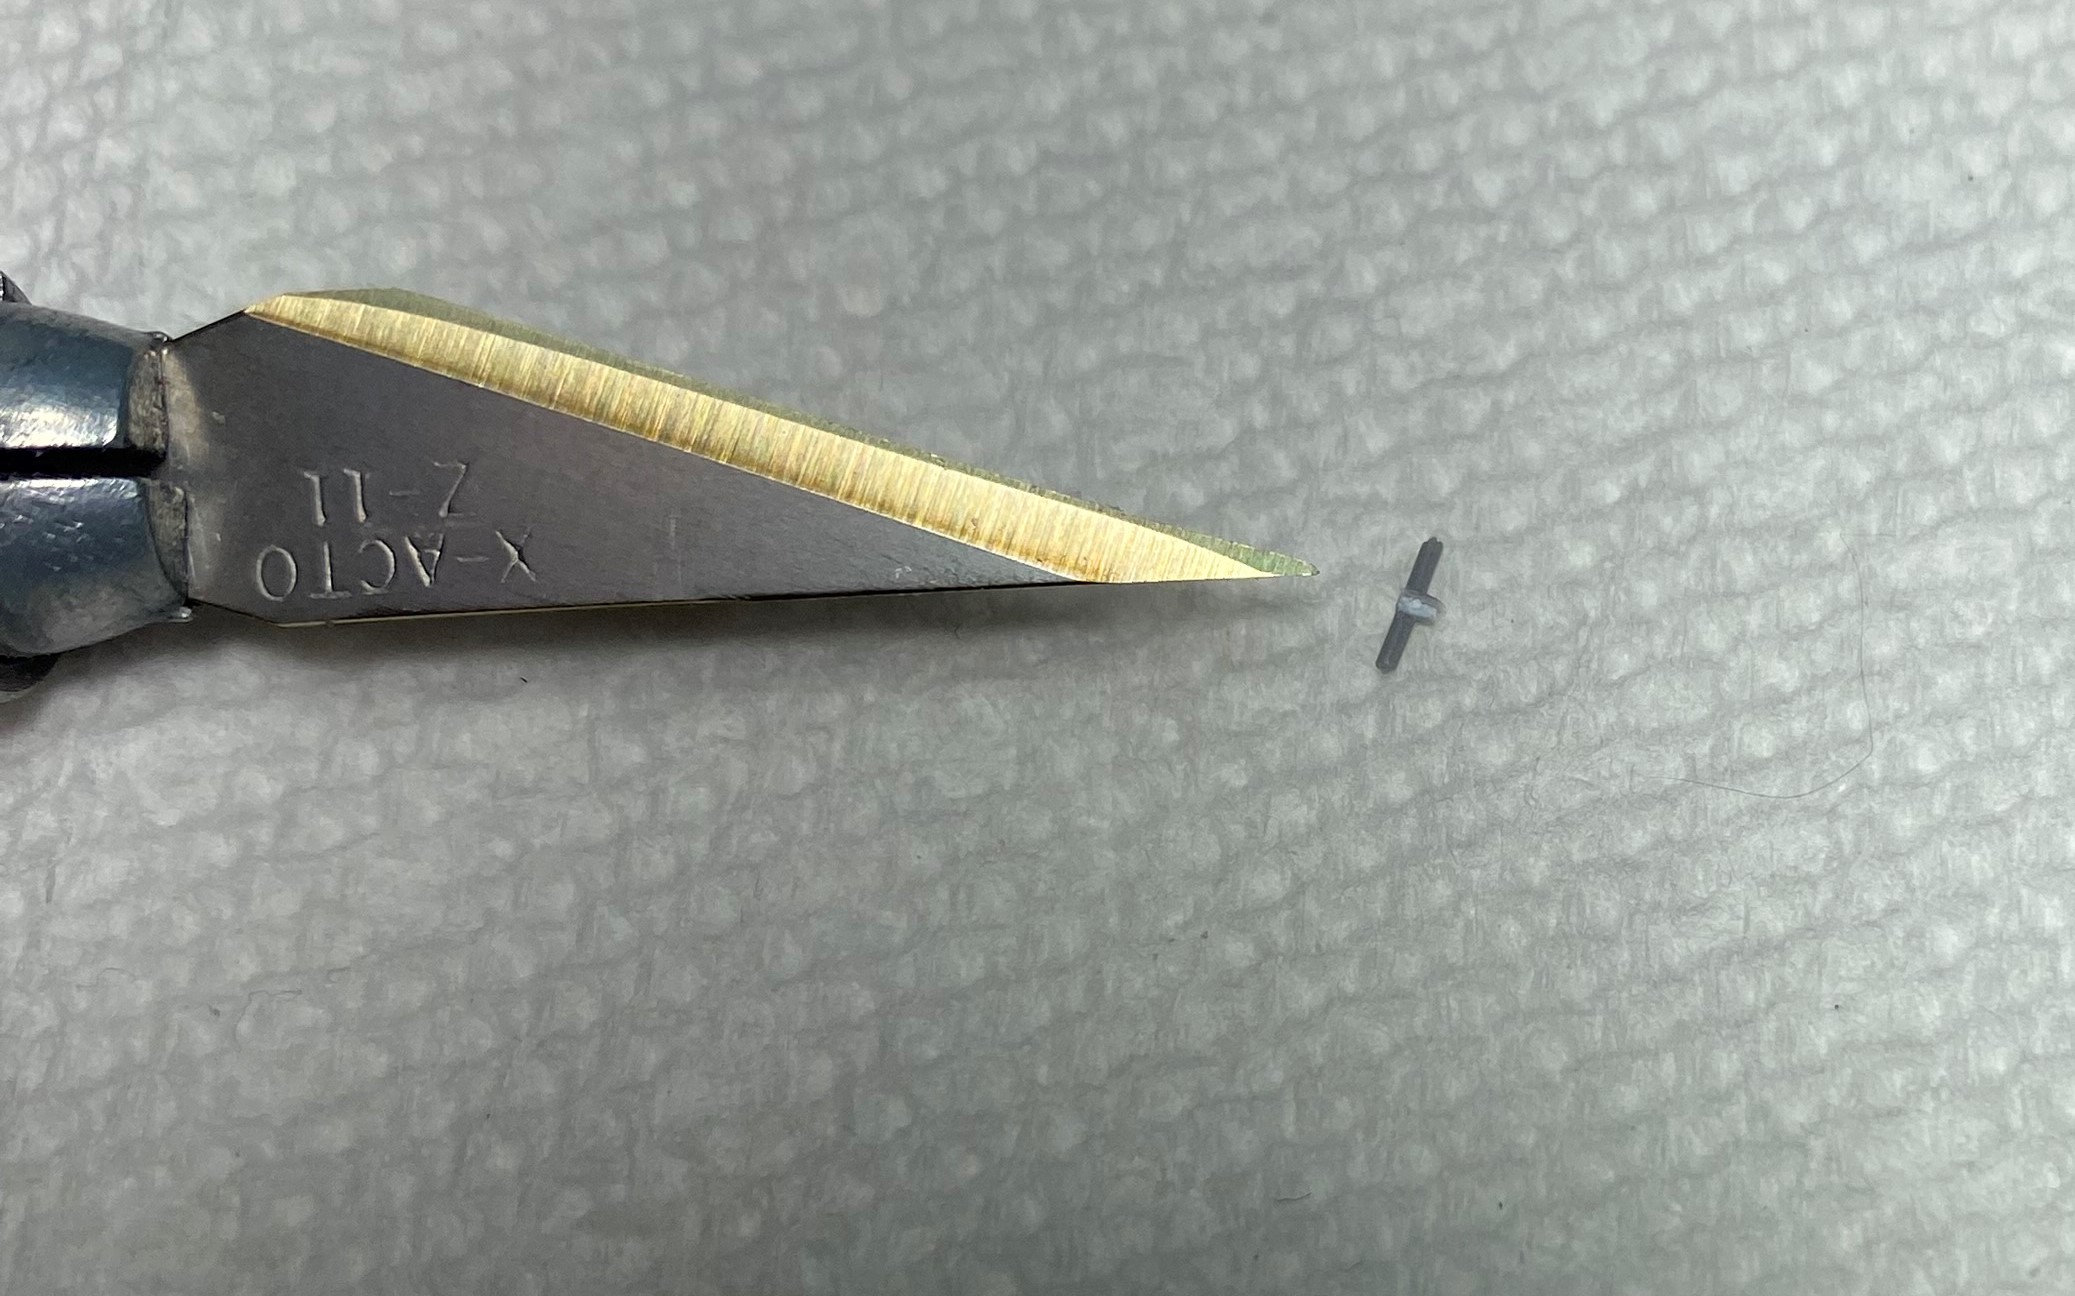
Recently, when I’m handling very small parts like these that I KNOW I will drop and probably lose, I remove them along with a small portion of the sprue they are attached to. I use that small portion of sprue as a handle so I don’t lose the small part. Once the part is firmly glued and set in place I trim off the “handle” and clean up the part. Of course, this method doesn’t work in all circumstances, but when it does, it works well.

I like that the bollards are separate. I always damage them when sanding deck or hull 
If they add a few spares should be ok  But I completely agree, they are VERY tiny in a destroyer. Still betther than have to repair them with wire.
Cheers
Tom
That’s a great technique and not one I had thought of. I will definitely be using it in the future.
I am practicing some threadromancy here!
Now that Musashi is done I have decided to return to my HMS Vendetta. I have chosen her over USS Arizona because her hull has been sitting since on the shelf since May 2021 and its her turn for some love.
She is only ‘fractionally’ smaller than Musashi so I should have no issues seeing small parts etc 
I have worked on some of her upper deck “stuff” so progress has been made.
3 Likes
What a dramatic contrast! I look forward to watching her come together. 
I had forgotten the challenges of this build. Instructions look simple enough but everything is so small that it takes much longer to get things done. Does not help the sprue gates are quite large.
Case in point. I had to clean up 7 supports for one of the gun platforms. Sounds easy enough until you look at the size. Had to go very slowly to avoid breaking or feeding the carpet monster.
4 Likes
Did some work over the weekend. Its been very slow going due to the size of the parts.
This is not an easy build. There are some major (to me) issues with the parts and the instructions and some decisions that have left me scratching my head. While I understand this was a limited run kit from a company with very few kits produced, I really think it needed more development. I suspect the owner/designer was a modeller enthusiast first and a designer second. Wall of text inwards.
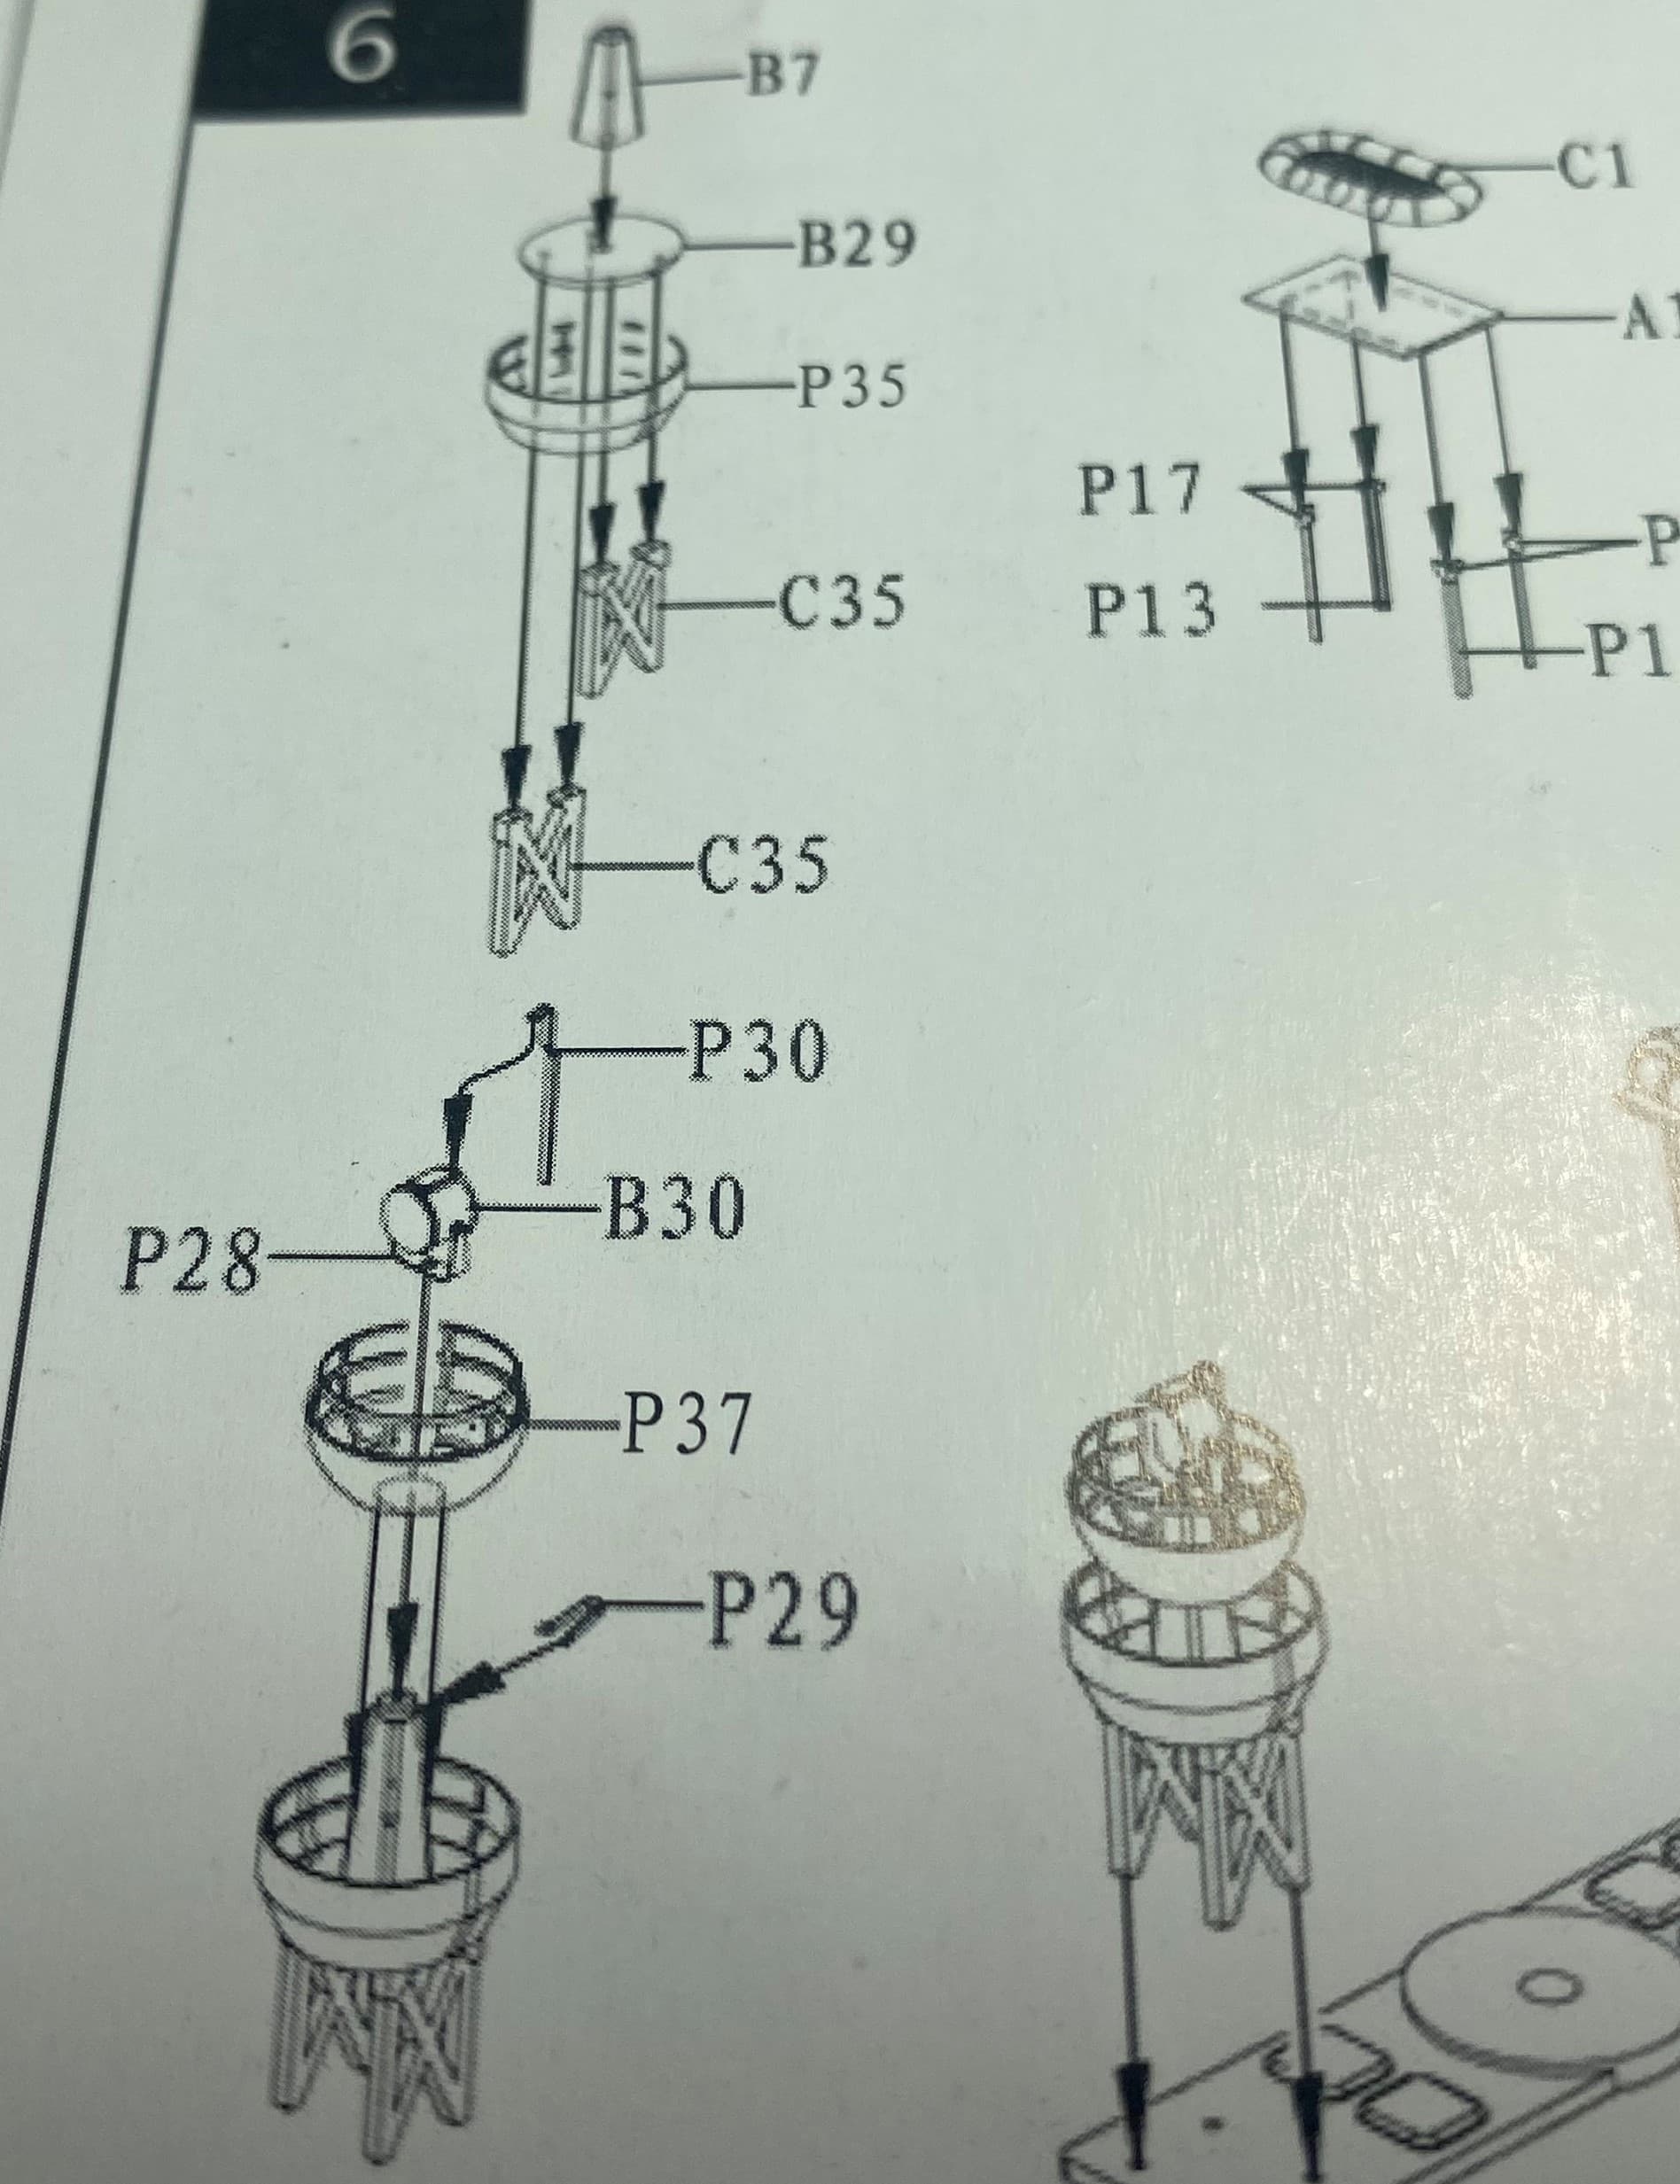
For instance. If you look at the below, P35 and P37 are shown to be domed inwards. The issues I have with that are A: I have no idea how to bend PE like that and B: The pieces are straight rectangular shapes. When you bend a rectangle into a circle and dome the bottom, the circumference of the lower egde decreases. I could think of no way to make this work without reshaping the PE which I shouldnt have to do. In the end I just ignored the doming and had it straight up and down as can be seen in the top picture. This obviously had knock on effects so the spotlight is no longer tall enough. Also, pay attention to the interior ribbing on those parts.
Interior ribbing visible here as well as the adjustments made.
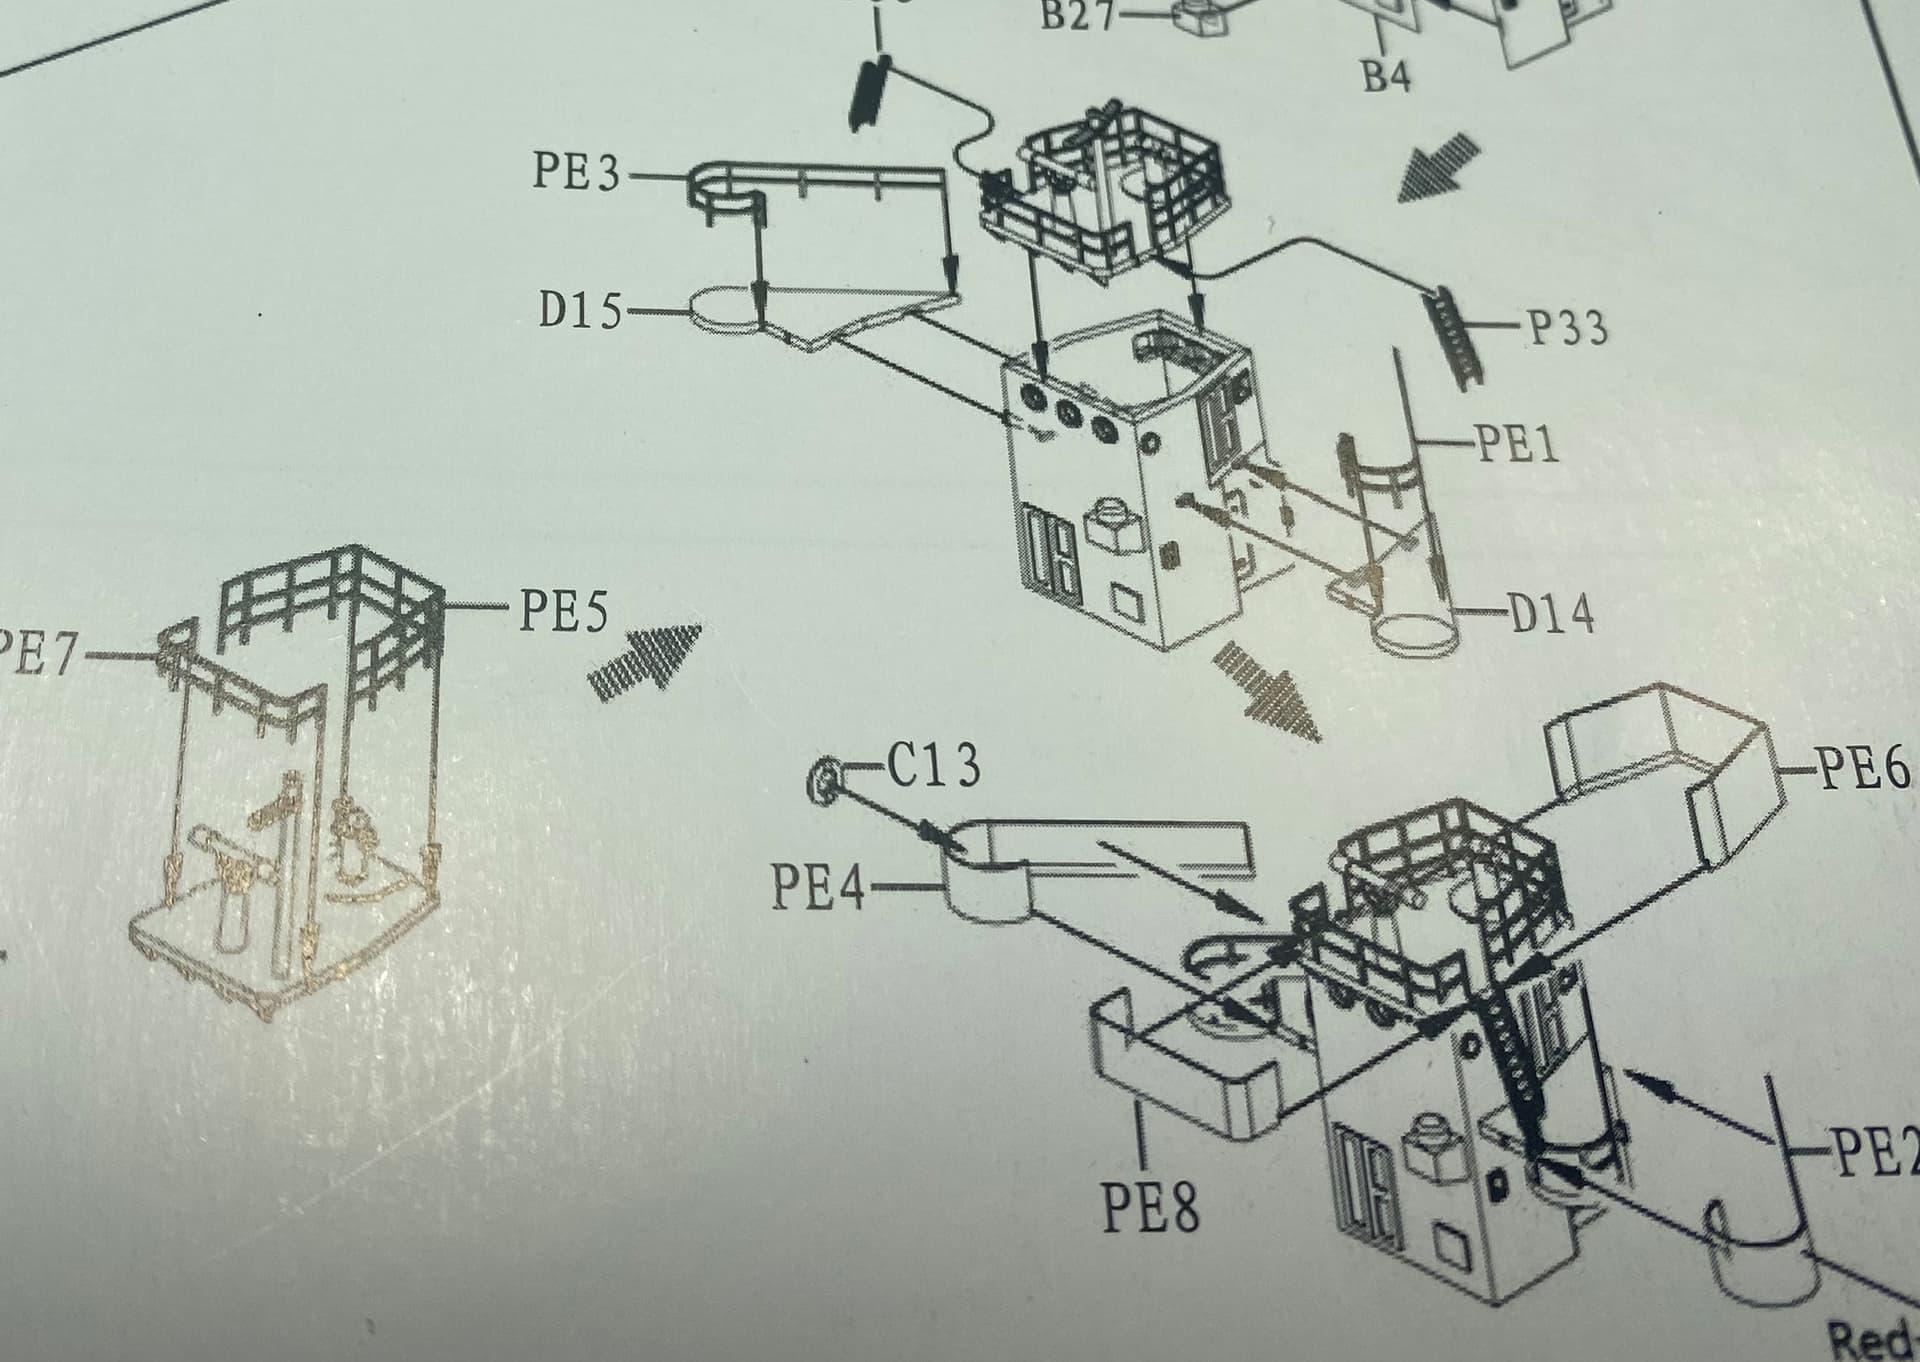
Next issue (Haven’t gotten this far yet) is the railing on the bridge.
You can see how the railing is added first and then, flat pieces of PE are added outwards of it. This is, I assume, to simulate fabric over railing but since the PE is completely flat, all you end up with is flat parts. Why was the fabric covered cloth in a single piece earlier around the platforms but 2 parts on the bridge. And why, earlier was the ribbing inwards? You can see on the search light platform where I accidently bent it the wrong way and it looks way more like fabric covered railing that the platform below it.
And my last big gripe with this kit is the PE. While I am not a Photo etch master, I have worked with it a lot and some of this etch just defies me.
Help me understand how I would even get that off the fret and cleaned up of the inevitable burr. They are just so small.
Currently undecided if I am actually enjoying this build. I know it can be done as I have seen some wonderful built up examples online. I do know its frustrating thus far. More to follow after Thanksgiving.
2 Likes
You can see how the railing is added first and then, flat pieces of PE are added outwards of it. This is, I assume, to simulate fabric over railing but since the PE is completely flat, all you end up with is flat parts. Why was the fabric covered cloth in a single piece earlier around the platforms but 2 parts on the bridge. And why, earlier was the ribbing inwards? You can see on the search light platform where I accidently bent it the wrong way and it looks way more like fabric covered railing that the platform below it.
…Currently undecided if I am actually enjoying this build. I know it can be done…
Hey Rory, I hear ya!
This looks to be a challenging build! A workaround for canvas-covered railing can be to use ordinary etched railing painted over with Micro Mask, as I did in this 1/700 destroyer:

The mask film shrinks over the railing as it dries and can then be painted. Much easier than fighting with solid etch! 
2 Likes
OMG Rory… I think that’s a case of the CAD designer seeeing it writ large on the screen, but in reality it’s an impossibility! I think I’d write them off, to be honest!
Have a good Thanksgiving mate! 
Well it’s been over a year since I last touched this ship. Shes been languishing long enough and now that I have my mojo back I decided to return to her.
First time attempting stays for the funnels and werent they just so much fun to do. Learned a lot for the next kit.
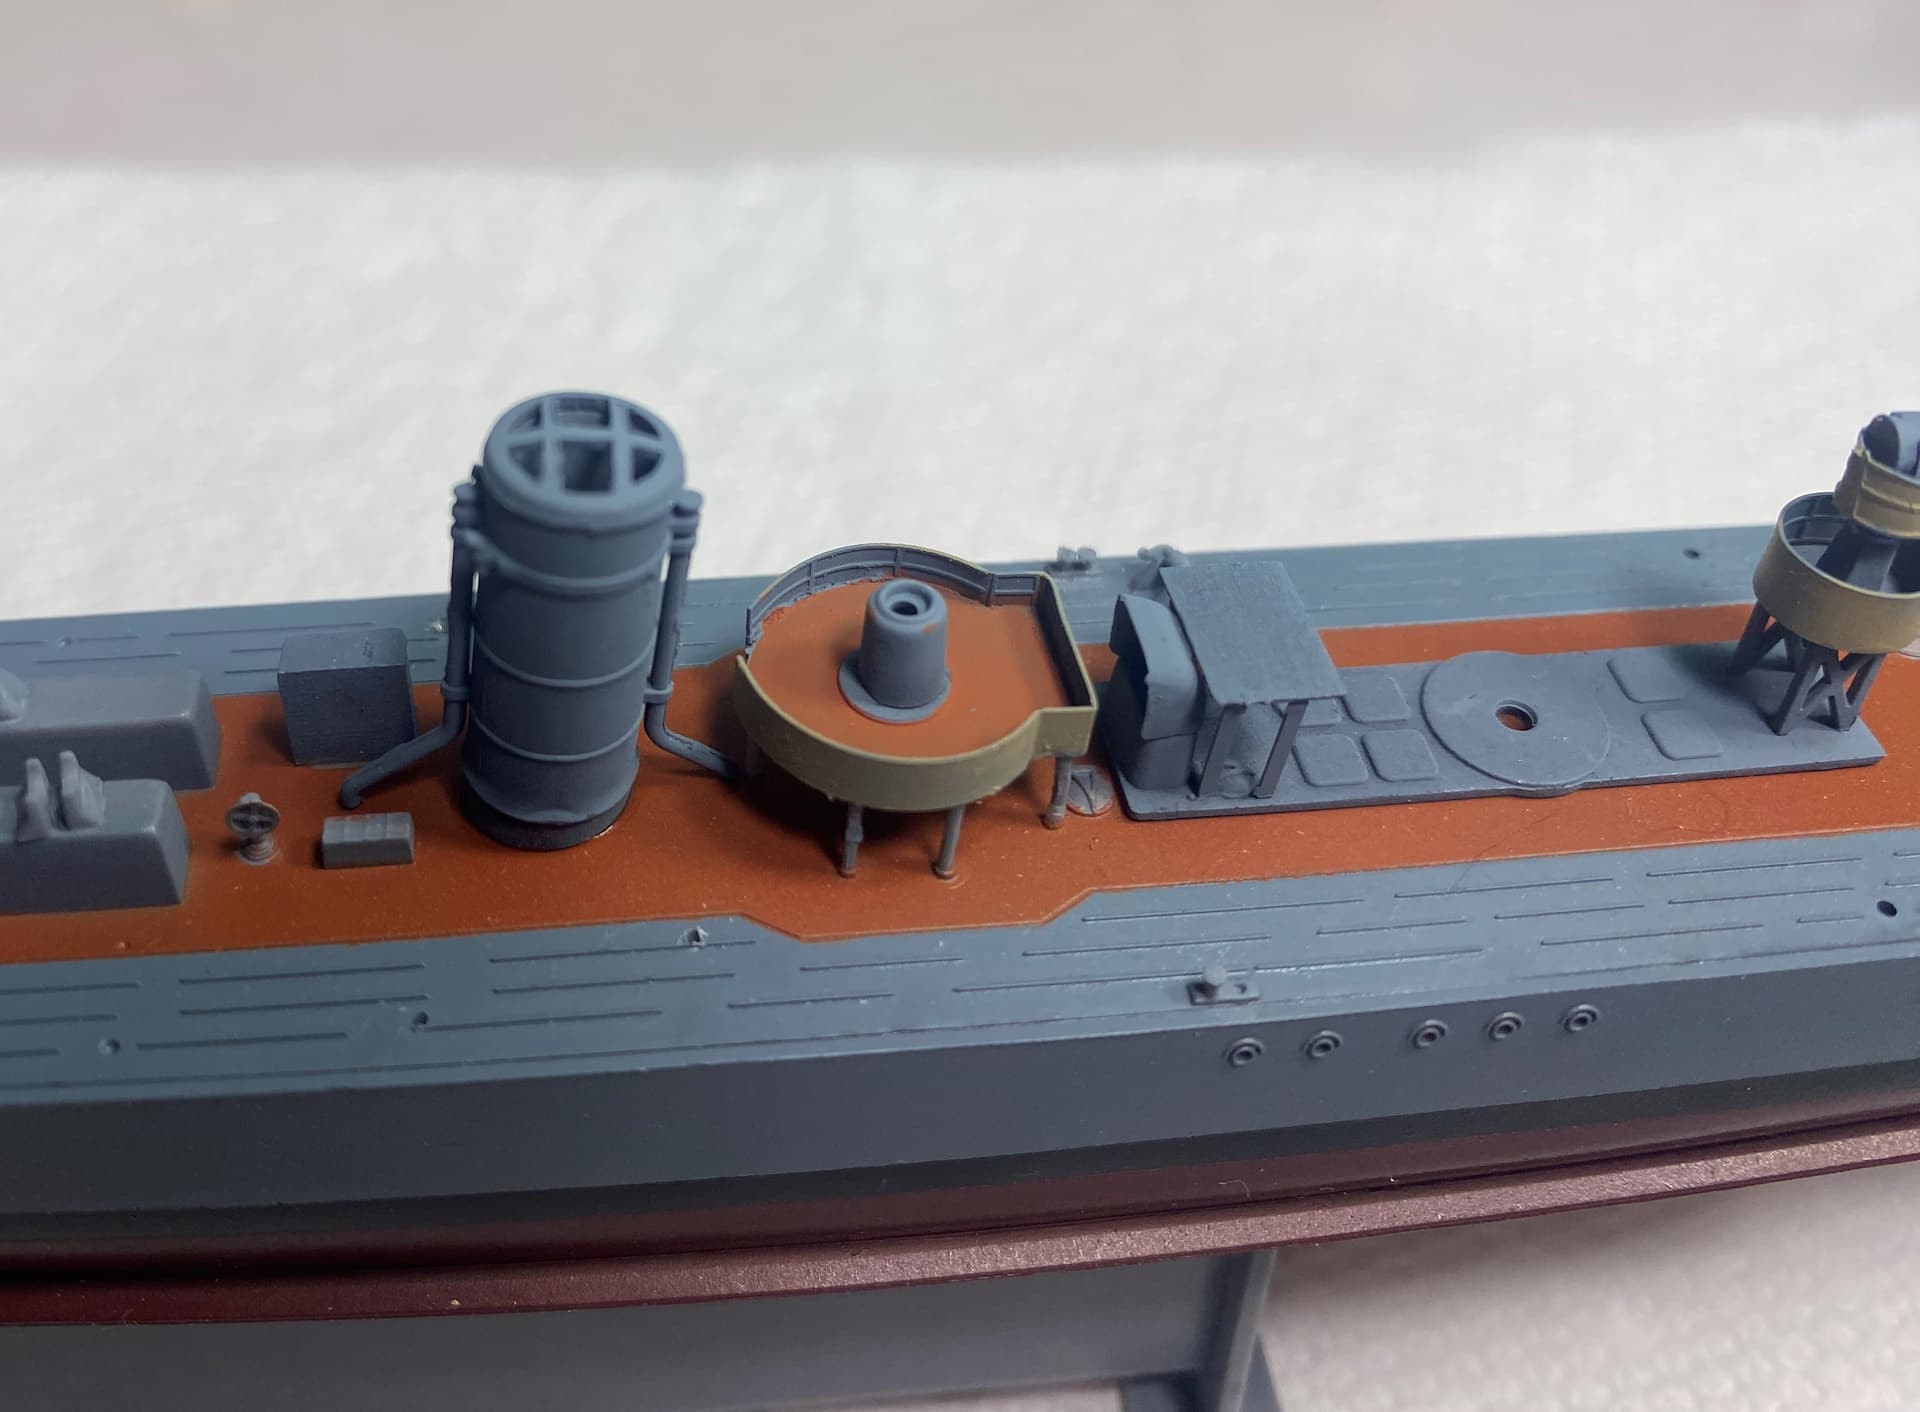
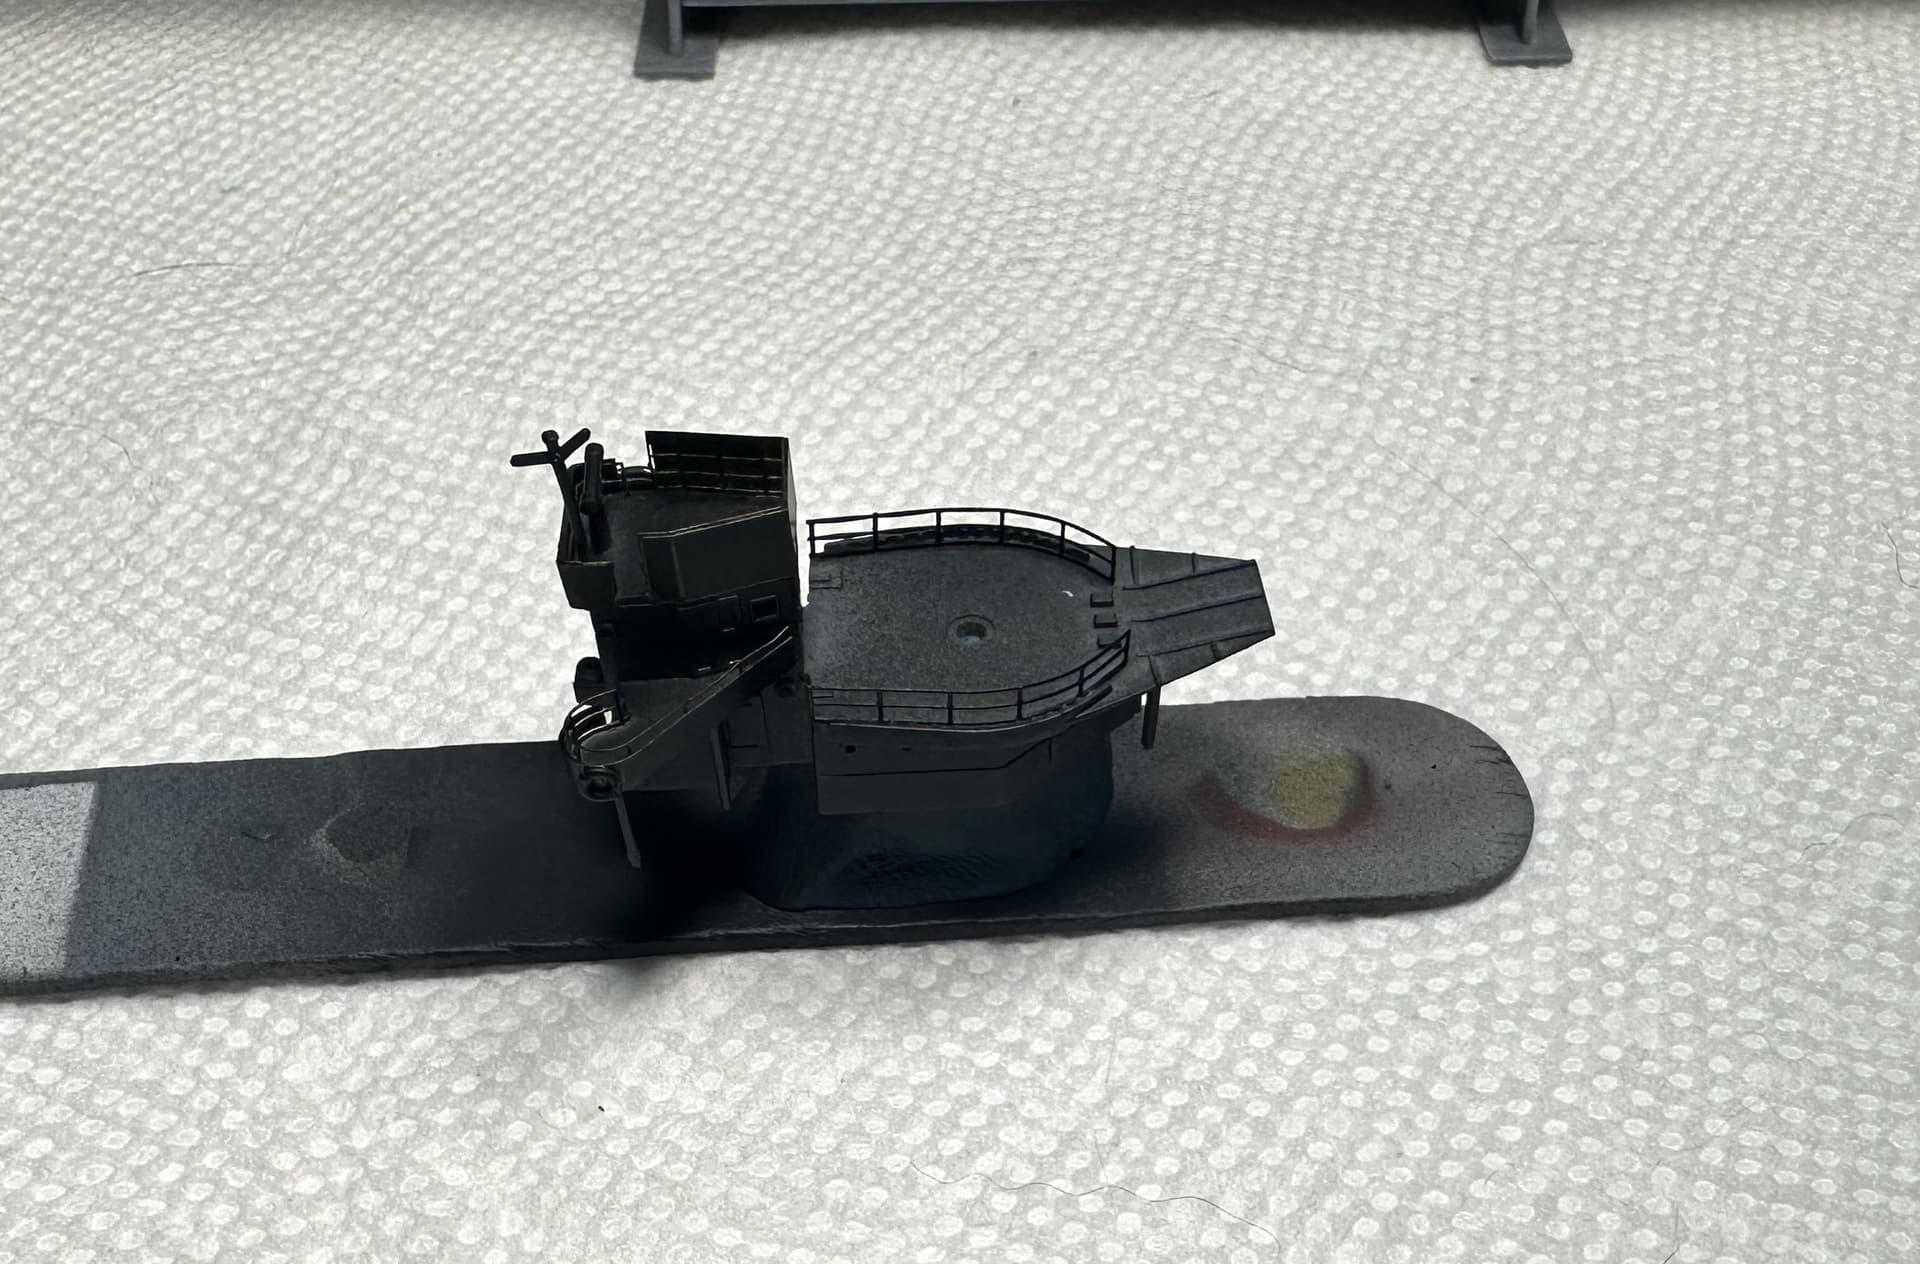
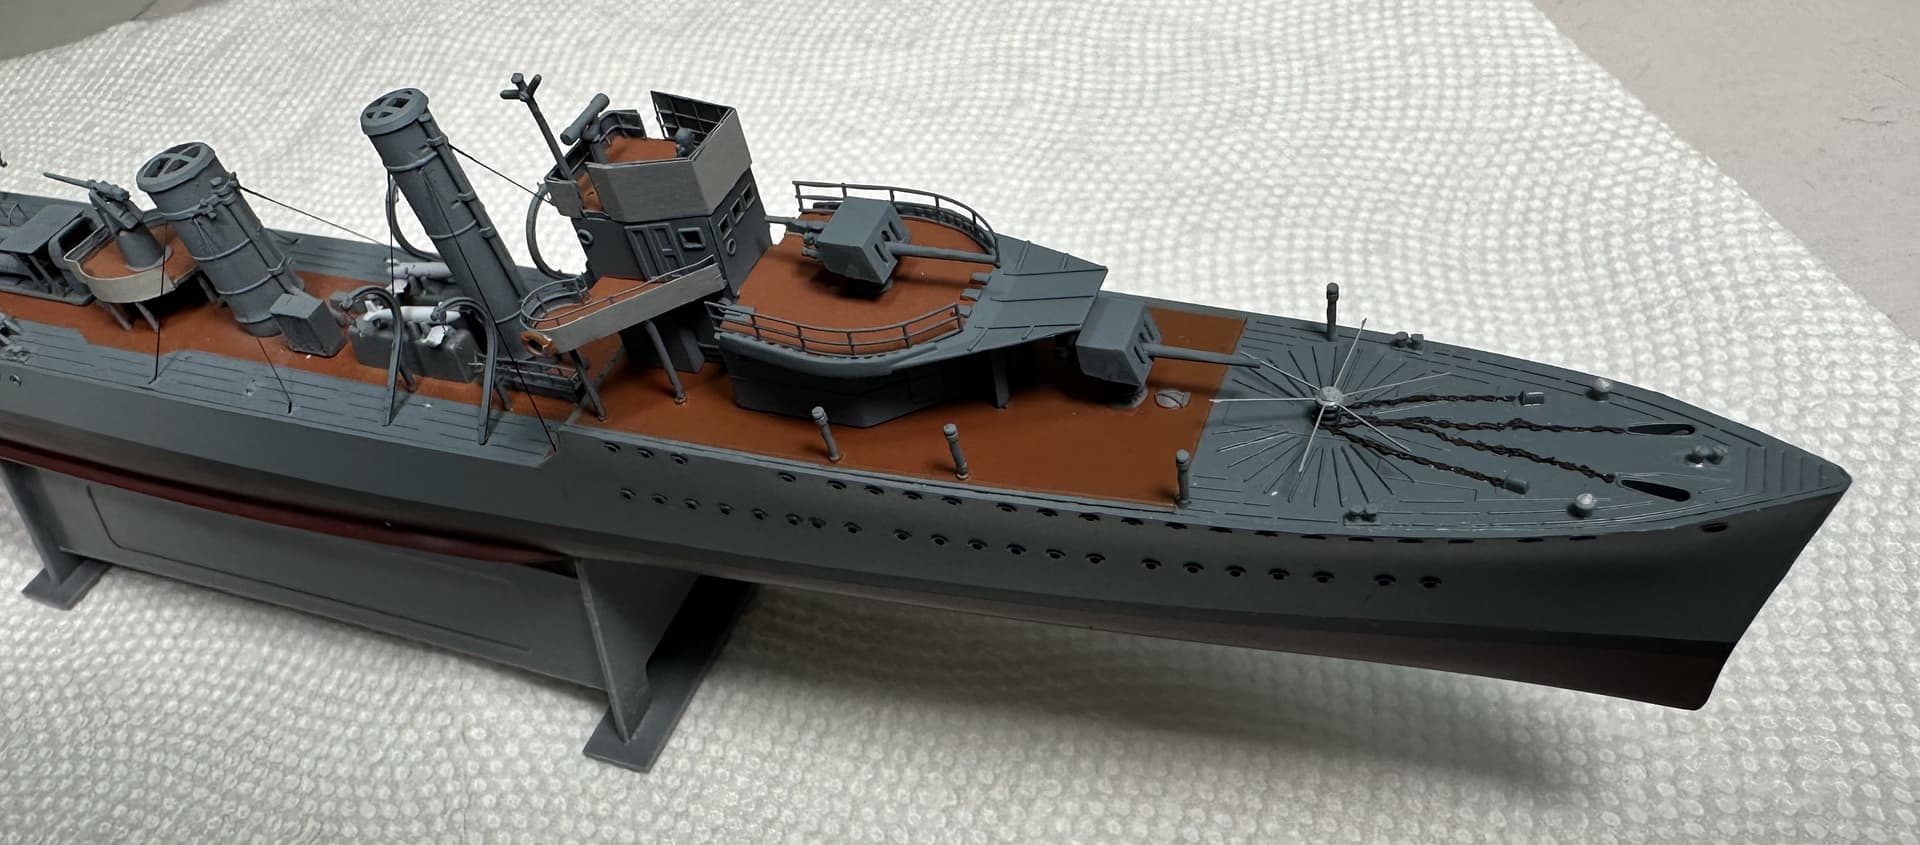
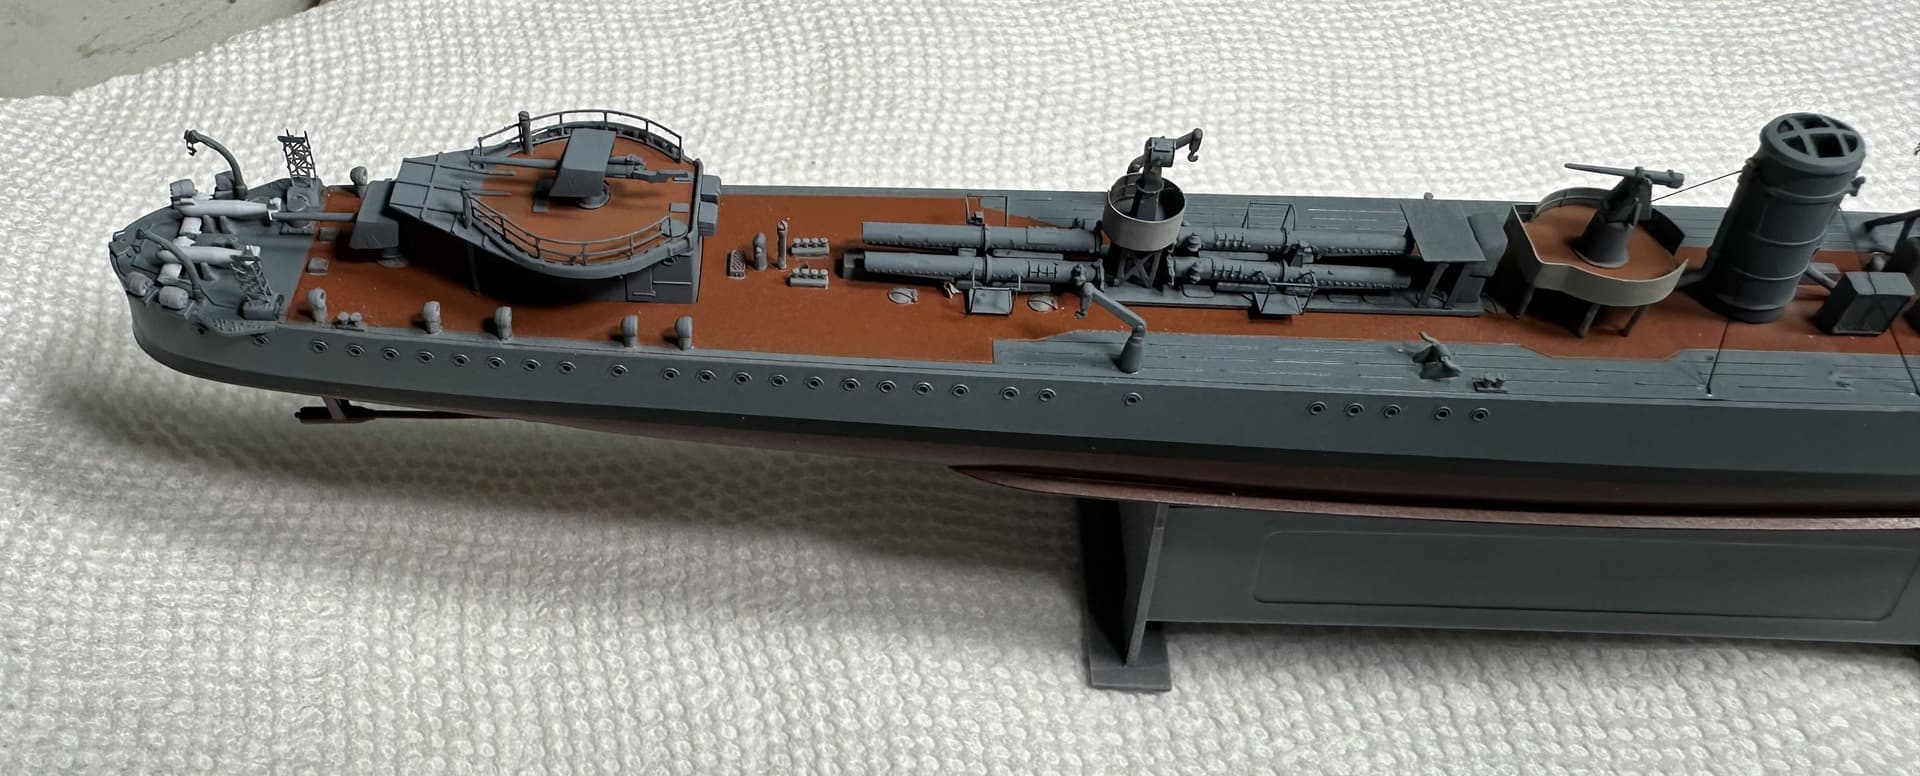
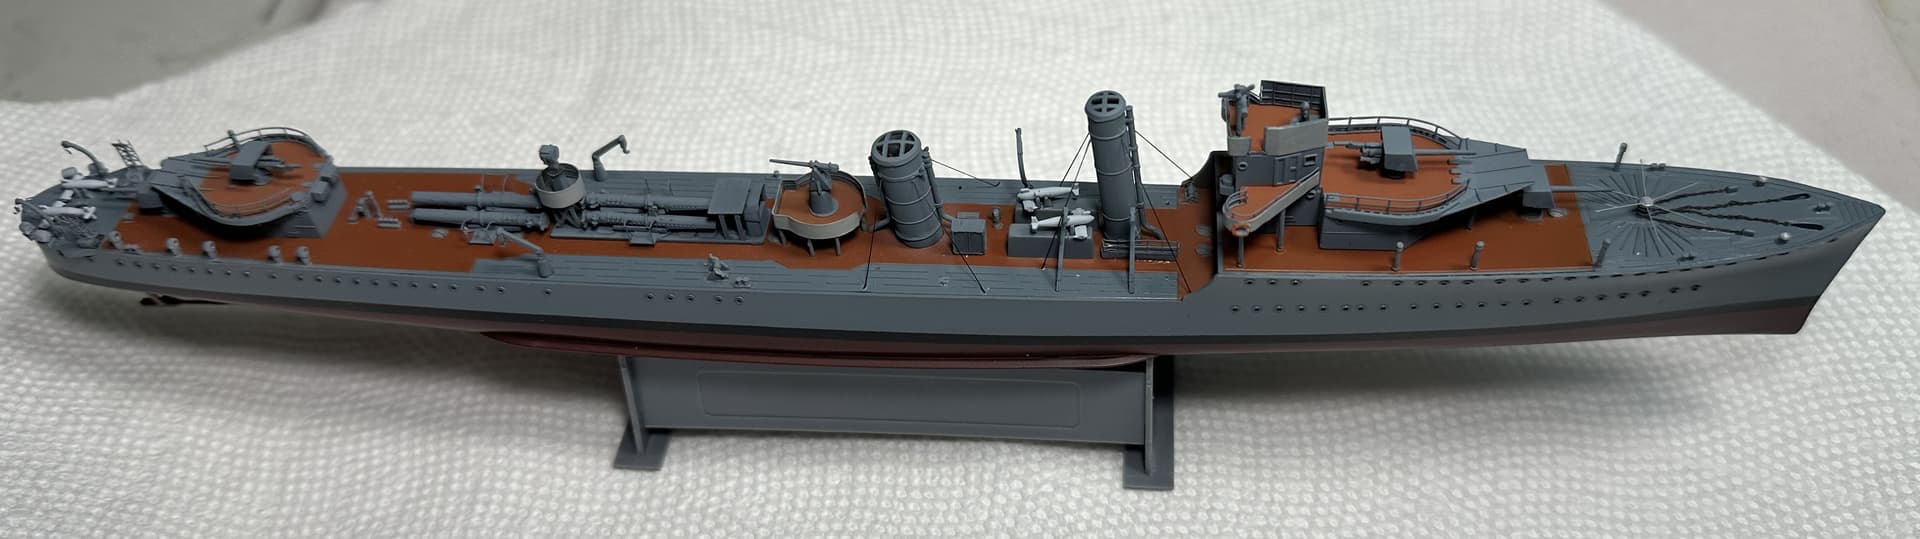
Forward superstructure. Hard to see due to the primer but went together much easier than I thought.
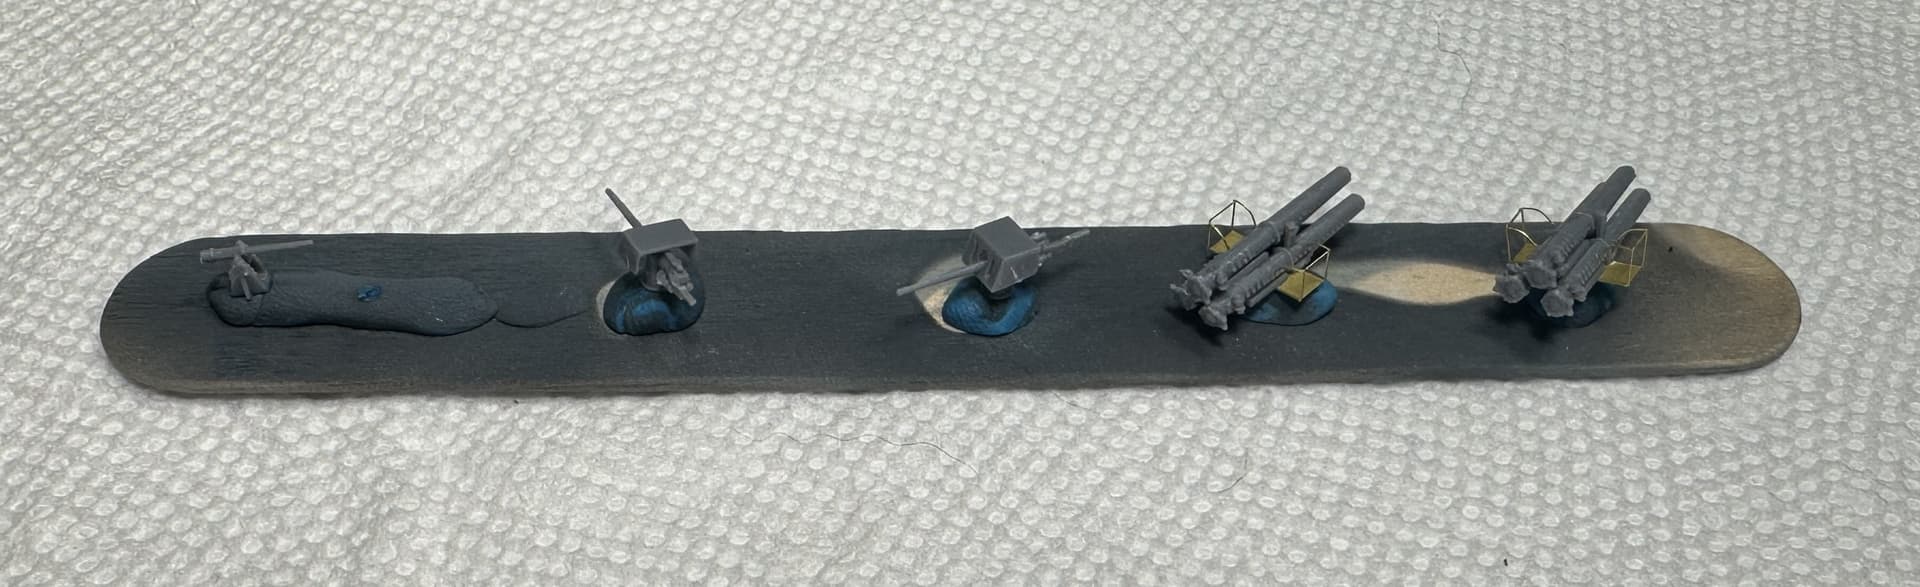
The last two 4inch guns, triple 21 inch torpedo tubes and a single 2lb pom pom. The torpedo tubes were very finicky to build.
6 Likes
A bit of airbrushing and some glueing later and things are looking good 
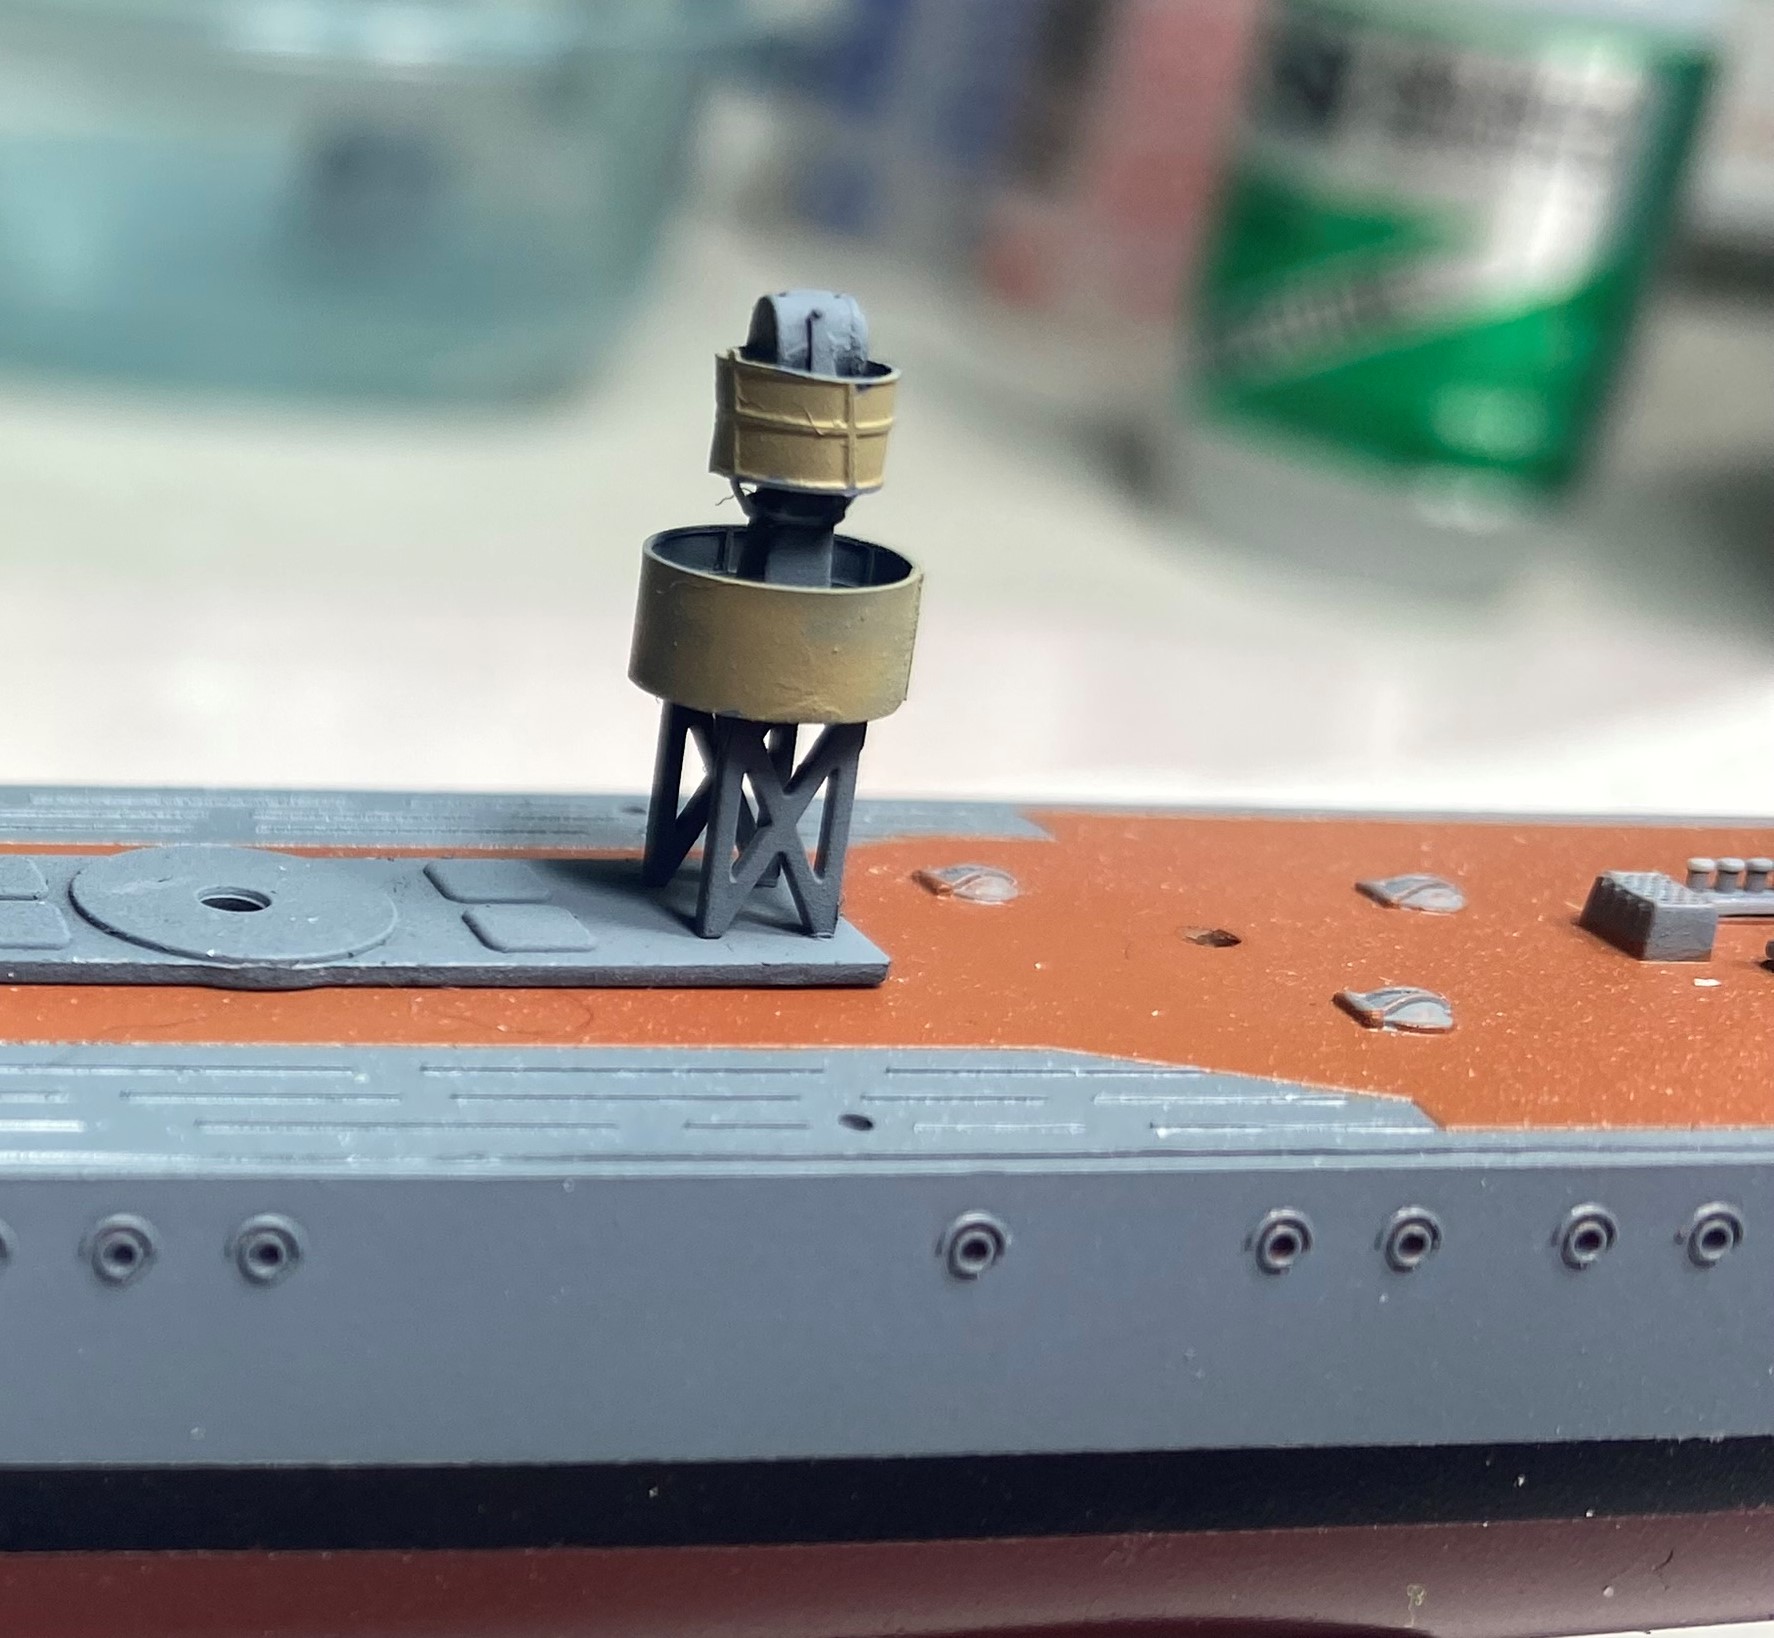
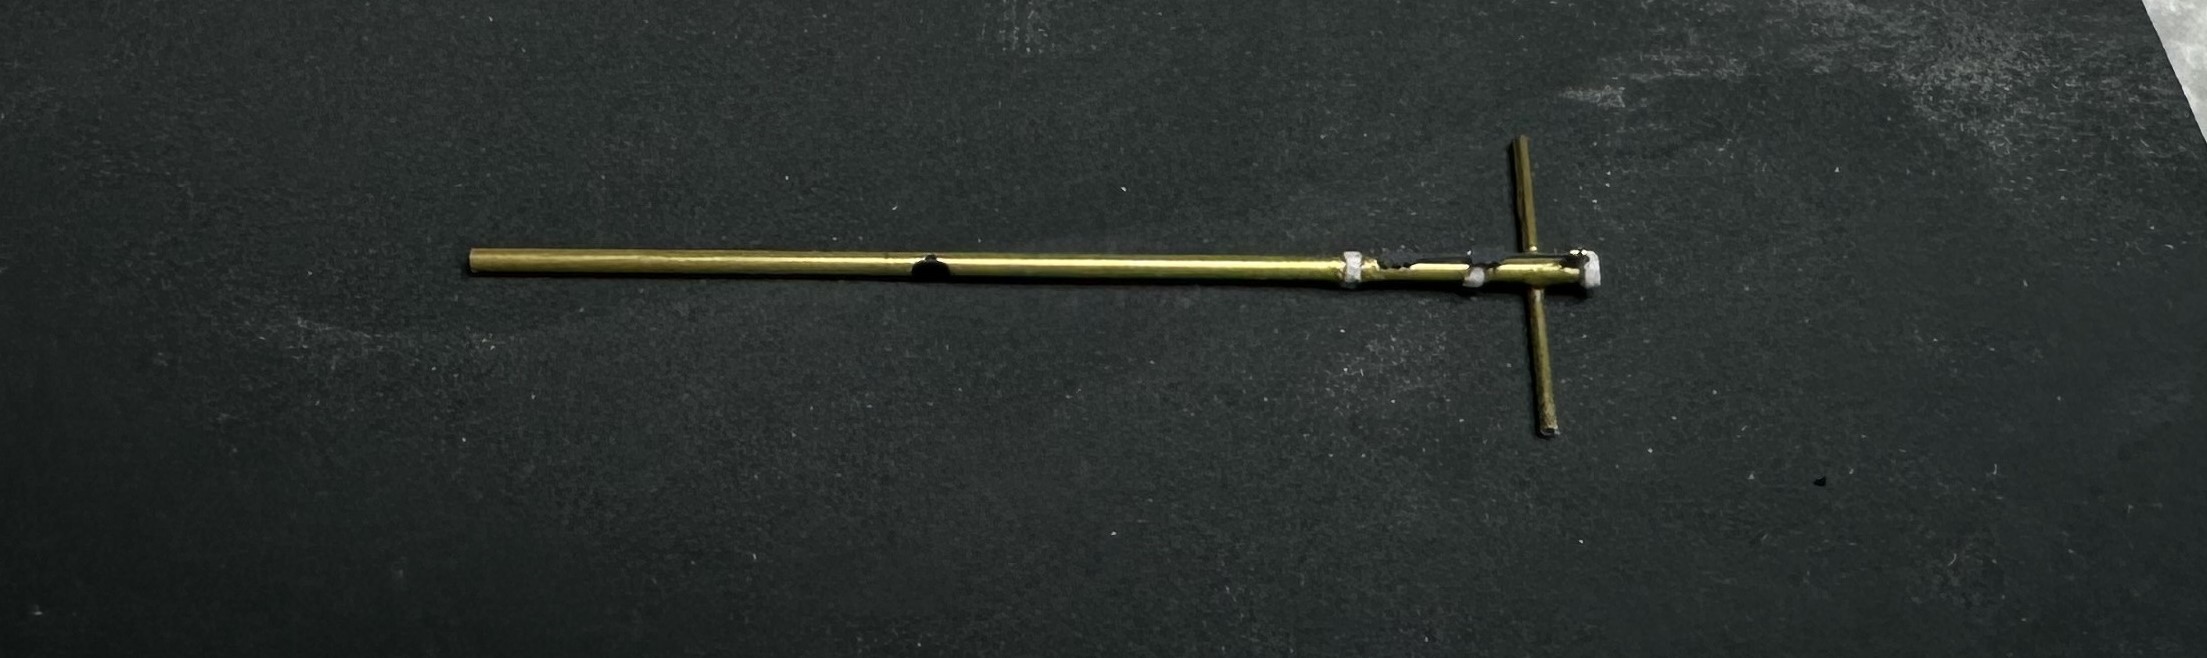
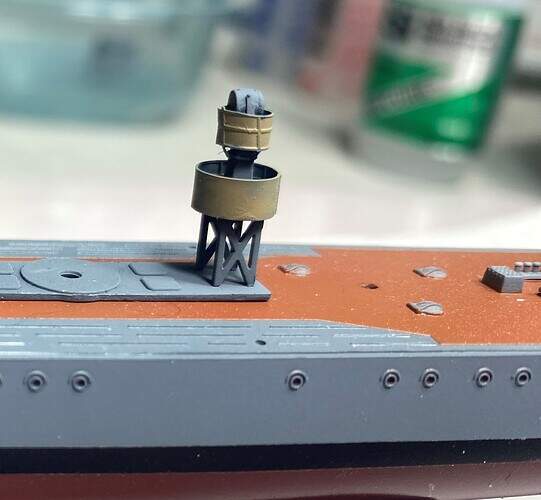
Started working on the masts and I have decided to completely rebuild them out of brass rod. The plastic parts were so flimsy that they literally bend under their own weight. Luckily its a WW1 boat so not super complicated masts.
0.9 and 0.6mm rod and I used 0.5mm tape do add definition. Should be way stronger.
7 Likes
Funnel stays are easier (in 1/350) if you use something rigid like very fine brass wire. Drill a tiny hole in the deck at the base of the stay, and cut the wire stay just slightly longer than necessary. You can also use stretched sprue.


I agree with Leo about the rigid funnel stays - they can work really well. Another approach I’ve come to favor is to use stretchy stuff like EZ Line of the Uschi van der Rosen “Rig That Thing” flexible line which can be stretched taut but is more forgiving if you later bump it!
Thats what I ended up using. My first attempt was with wire but it didn’t look as neat as I wanted.