Yeah, but did he bring enough for all of us? ![]()
2 Likes
Ken & Tom, I’d share but that Cheese Cake didn’t survive past dinner!
Steps 5 & 6
Go both well enough. I doubt much of either will be visible when the model is complete.
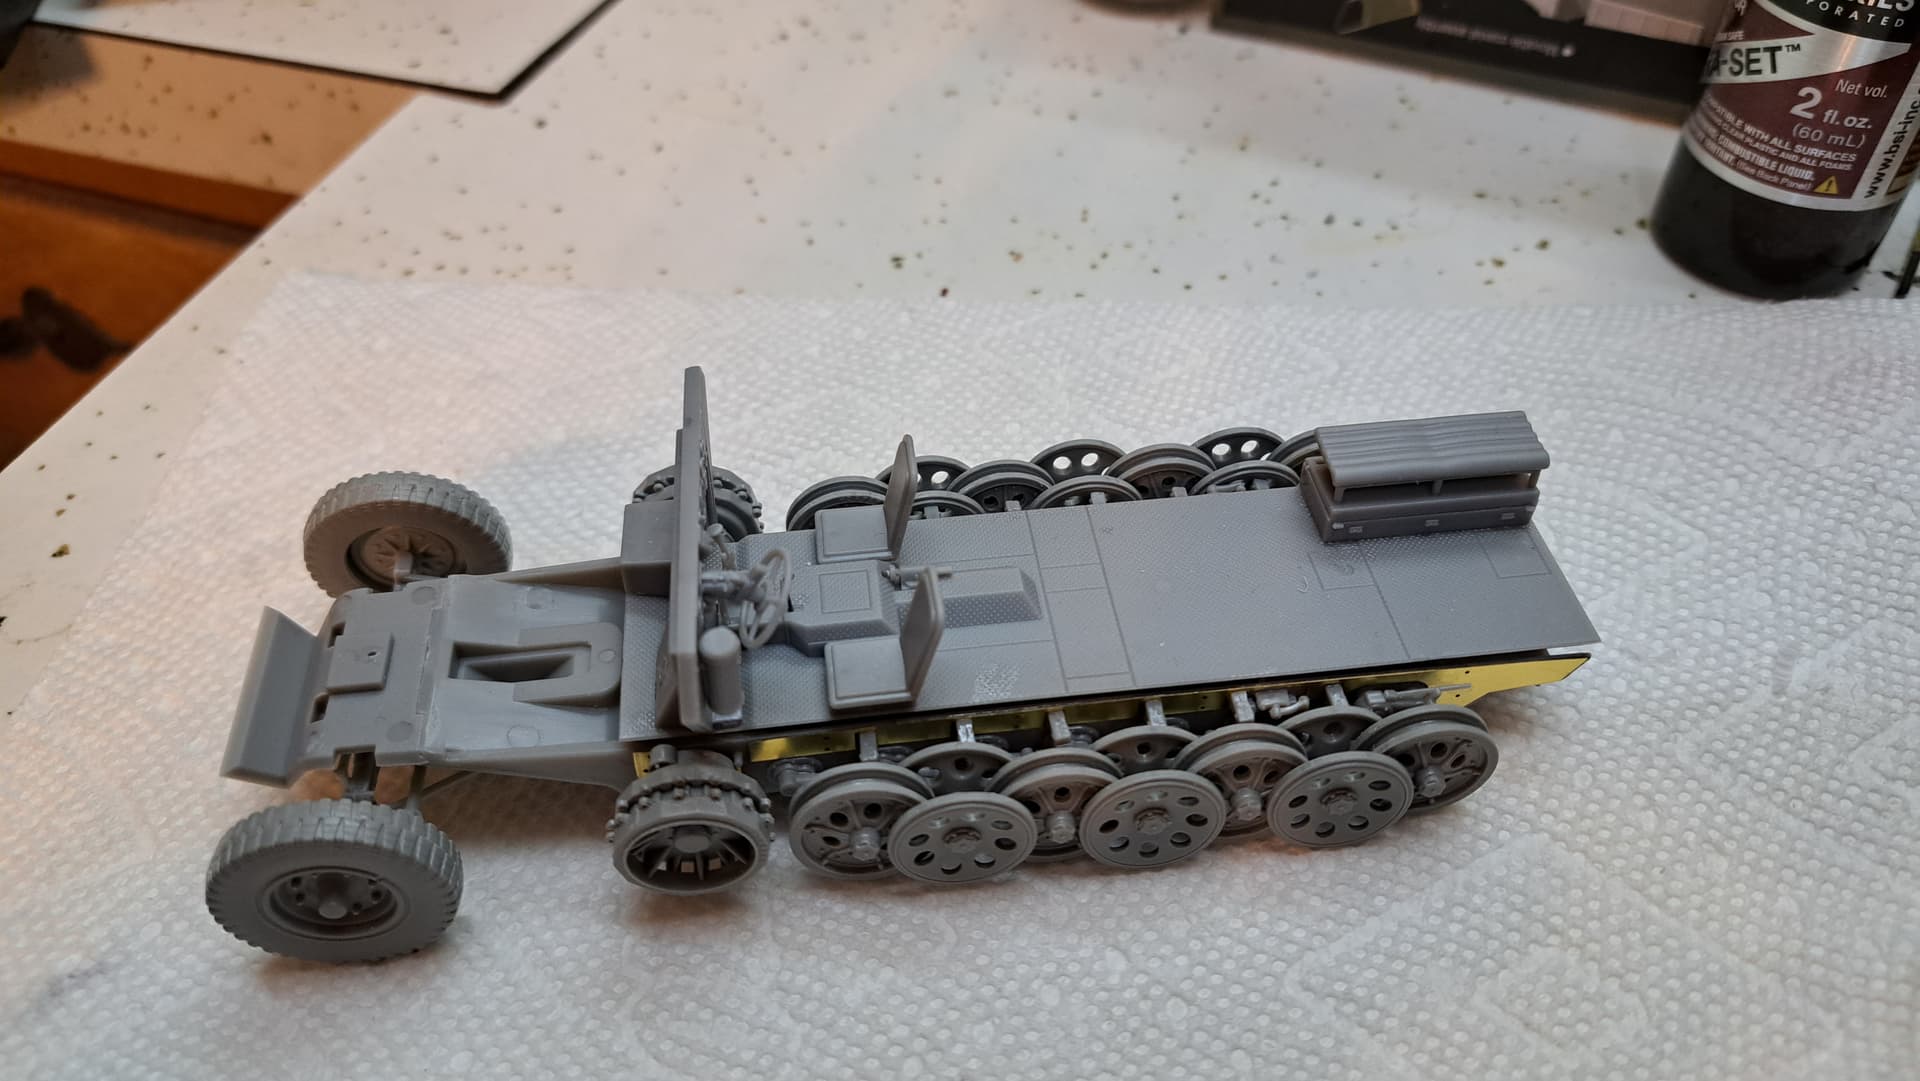

Did a test fit with the lower hull sides and both seemed to fit OK… so far…![]()
6 Likes
Regular readers of Wade’s World shenanigans maybe surprised, six steps into a Dragon kit, Wade hasn’t spewed any vitriol at Dragon for lousy instructions, low quality molding or overall poor kit design.
The honeymoon is over, thanks to step 7.
Harmony ended when parts labeled WA were actually on WC. Minor but annoying. That’s going to become a theme in step 7.

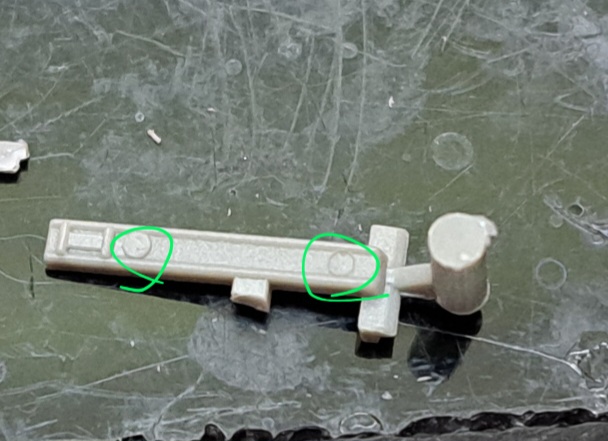
There’s a lot of little punch parts scattered through out the interior on various parts on their outside face. Here’s one of several examples that had to be fixed.
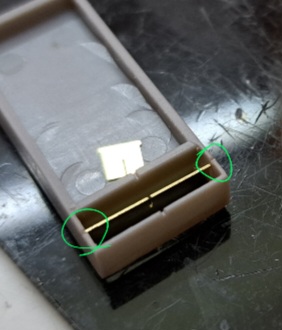
Moving right along with the theme of Dragon can’t do instructions, two 20mm ammo racks are plainly called for with the 2x. However, parts are only provided for one. Easy enough to figure out but annoying.

The PE parts for the rack are nice but of course they are under sized and dont actually fit. Easy to fix with a little sprue glued under each side of the shelf so it can rest on top. The other under size PE part is then located. Minor annoyance.
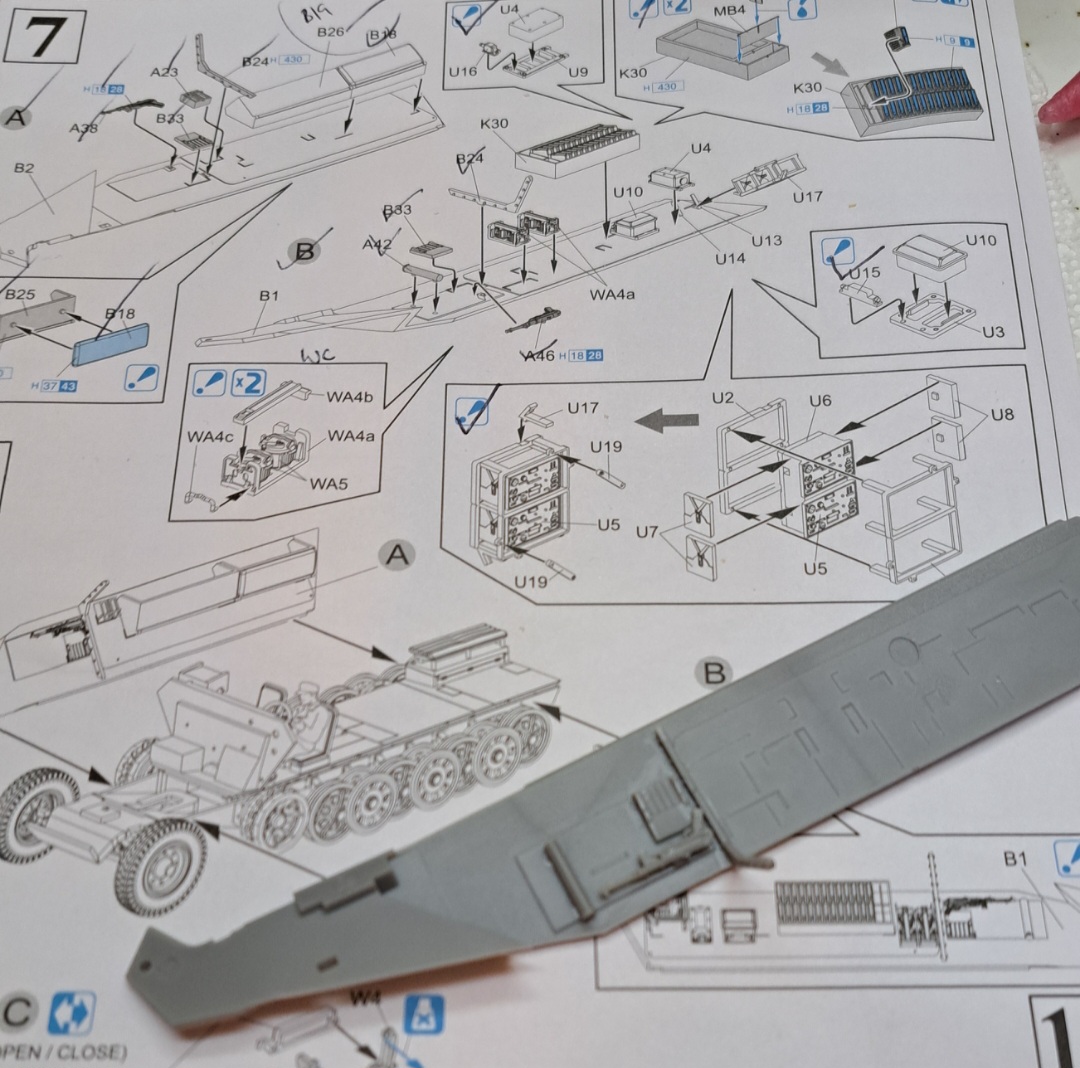
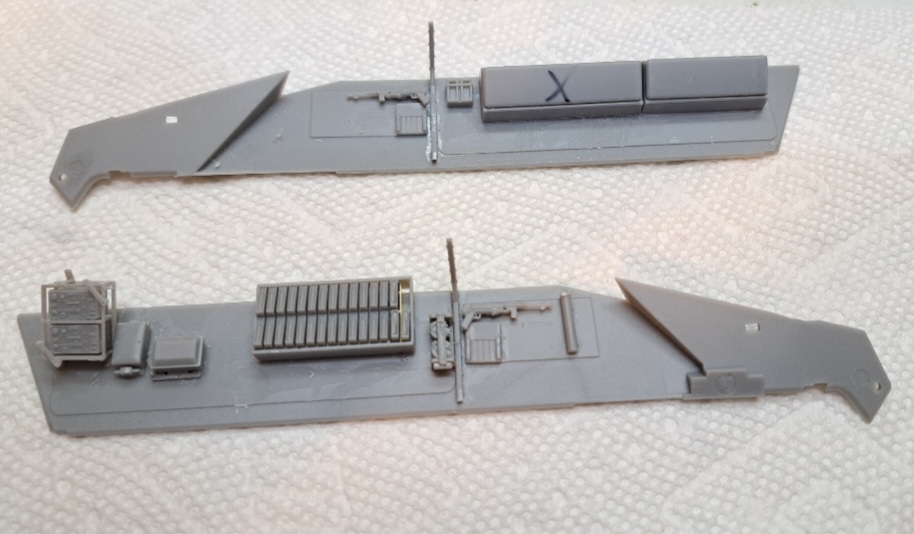
There’s several subassemblies for the driver side. It’s the most complex of the two so naturally Dragon does what Dragon does, help you out by having the driver’s side upside down in the instructions ![]()
Building a Dragon kit is barely an inconvenience! I think that should be printed on the box ![]()
Anyway, the radio is very nice and almost a little kit unto itself. The other subassemblies are good as well. The only issue, guessing where to install them!
There’s a dozen plus location lines molded into the sides of the fighting compartment for parts placement. A few them are even relevant to the 251/23. The rest not so much, so scrap those away!
Dragon does provide an extra sketch to help and it all works out if you’re careful.
I wasn’t careful enough.
Jumped to step 10 for an upper hull test fit to the sides. Thankfully the subassemblies hadn’t cured to the sides yet. God Bless Testor’s and their slow Liquid Cement.

The ammo rack was too high by 1 mm. The delicate radio was angled wrong and likewise high. Revised placements

Step 8
Putting the sides on is a recipe for disaster if one isn’t very careful. After much praying, consulting with psychics, a phone call to Tom Cruise & Oprah Winfrey plus test fitting, they were glued into place.
I aligned each side front, rear, bulkhead, fighting compartment floor and exterior as best I could and let the Tamiya Extra Thin Cement flow. I wanted fast and hot LC, holding this things nose together, in alignment (or what’s passing for alignment) until the cement set wasn’t fun.


Deep down, I think something will be very badly misaligned in the convoluted assembly sequence.
I should have built a basic Dragon 251/1 half track previously. I don’t think this would be too bad with a 251/1. The experience would help with the /23.
Test Fit Fun

Never mind the finesse, The Force is my ally and a powerful ally it is.
The Force as in a big fat pair of C-Clamps.
7 Likes
I always do the big parts first so that the necessary ‘applied force’ is not hindered by fragile details.
The only exception is when there is no way in a very hot place that I could assemble the small parts afterwards.
3 Likes
Ah….the Dragon your momma warned you about is arriving and starting to show her crazy side.
5 Likes
That model is much better than the Dragon 250/1 on my production line.
I am somewhat surprised you are assembling the entire interior without painting anything in advance.
4 Likes
@Tank_1812 Ryan, exactly! ![]()
![]()
![]() Well said!
Well said!
@Uncle-Heavy Robin, that’s an excellent approach and I like it. I had a difficult time figuring out what went where with the sides exposed. So roll the dice accordingly & paid the price.
@Damraska Doug, that’s good to know about the 250, there’s a 250/9 in the stash. Will keep that in mind.
Initial painting decision was easy since I didn’t have any with me on the road. Hoping Sprue Brother’s will deliver it by Friday.
There’s also a couple of other factors.
-
I dislike painting & building concurrently being the key one. I’ll do it…grudgingly.
-
I don’t think hardly any interior will be visible. Technically it’s an open top but really only the top of the turret is open. The hull would have a top on this version. Pretty much nothing forward or aft will be visible with the top in place is my guess.

- There’s a fair amount of clutter & stuff with the open top turret with the main gun, seats, MG and PE screen top that helps obscure everything below. I will paint under the turret to some degree.

The lazy man’s calculated risk. If it goes wrong…Schadenfreude Entertainment?
5 Likes
That would make a great meme. “When things go FUBAR - Schadenfreude!”
4 Likes
Thank you for the explanation, Wade. I forgot this vehicle is mostly closed top. Now it makes more sense.
That turret is much busier than the one on an old Tamiya Sd.Kfz. 222.
Will you replace the top plate with one cut from sheet plastic?
3 Likes
This is making me want to finish my own 251… Which has a misaligned top hull thanks to two separate sessions at the workbench instead of one… I already have two other projects on the bench… Dadgummit Wade! ![]() Looking good, however! Are you planning on adding any other extra additions (i.e. scratched stuff, PE, etc.)?
Looking good, however! Are you planning on adding any other extra additions (i.e. scratched stuff, PE, etc.)?
2 Likes
Doug, I’d like to use the PE top if the fit is good. I’ll have to do test fitting to see what we have. My luck with Dragon kits, the whole PE top will .1 mm to narrow and fall into the interior ![]()
Colin, other than aftermarket tracks plus a couple of tool clasps, this one will probably be 99.9 out of the box. There’s some excellent gear on kit like slide molded MG42’s that are very nice. There’s a couple of different headlights, I think one of them has sinkmarks in the face. If that part is needed, it will be replaced.
I’m not familiar with the 251 as my only reference worthy of the name is a 1st ed print of this book.

It’s a jewel but the pages were cut and bound wrong so a lot of my copy is in the wrong sequence page wise. This fubar mess was fixed as not all copies have the issue. Nearly ~ 28 years later, I still get angry my stupid expensive 251 book ![]() is a jumbled up mess so it stays on the shelf.
is a jumbled up mess so it stays on the shelf.
Last Ryton anything I ever purchased…exhaling… ![]()
Briefly, I kicked around an idea of adding a Stug III cupola over the radio operator’s position since this is a paper panzer. Ideally, with scissor scope so it could act as an artillery observation vehicle in addition to scouting etc. Quickly realized the Stug III cupola was too big to do that.
5 Likes
Steps 9 & 10
Given the closed top all of parts behind the red line are saved for an old Tamiya 251/D with open top. Two B28’s are needed one for each side. Dragon doesn’t bother to mention the second one.
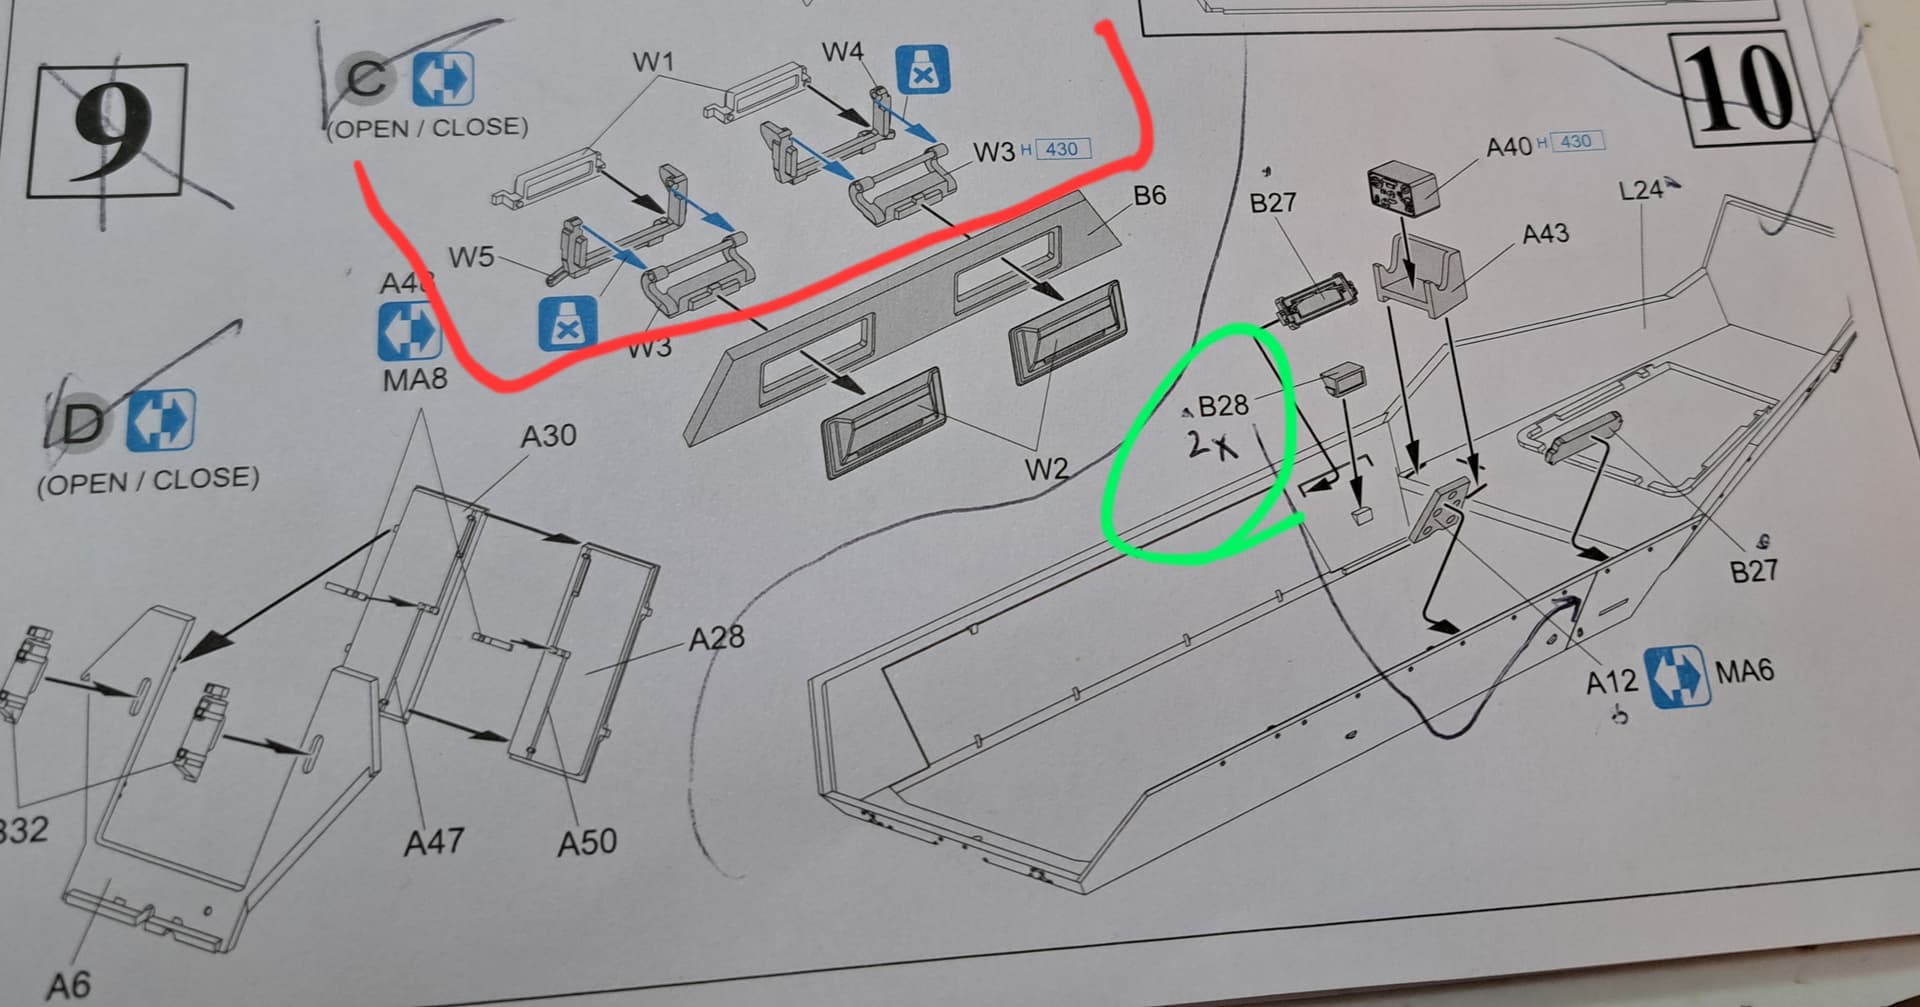
While looking for various parts, noticed these. Looks like a Dragon molding from the 1980’s.

I just love the way Dragon lets part of the gates ride up the outside face of this part.

Assembled.

Step 11 is make or break for this kit as the upper and lower hull go together plus the top, nose and rear plates go on.
Test Fitting showed the PE top drops through the fighting compartment. There’s four small thin PE parts, supposedly the brackets that hold the top up. This will definitely be tweaked for durability because it’s just to fragile for my clumsy handling of the model during painting.
5 Likes
I learned the hard way …
2 Likes
Not much of an update, despite several hours in the work shop.
Keeping Robin’s sound advice in mind, during step 11, I test fitted the turret base into the PE top and got a very nasty surprise.
The turret base didn’t fit in the PE top.
In hindsight, the smart choice for me would have been make a sheet styrene top and cut out the appropriate size hole for the turret base.
Things quickly escalated from light 800 grit sanding, to medium grit sanding to aggressive 400 grit for the PE top & plastic turret base. Yes, I buggered the fragile PE top but it was salvageable. Aggressive sanding of the turret base’s ring followed.
Naturally, the two parts still refused to go together.

Only one thing to do…

…single edge razor blade party time…or dancing with the devil by the half moonlight…because your just asking to get cut scraping down an awkward to hold round surface for 360 degrees and 75 passes of the blade…yes, I counted, did 1/6 or one side and then moved to the next…had to count to ensure roughly the same amount of material was removed around the ring…

…the turret base fits now…
The roof proved annoying to fit but nothing super glue and accelerator couldn’t address.
Slapping the top & bottom together of the 251 went pretty well. Pretty happy with the nose and I think the sides will be ok. However, due to an error in my assembly the rear plate is extremely jacked up.
At the rear the left bottom side creeped up about .5 mm from its slot. I should have held it in place longer for the LC to set better. This goof/blunder has created a mess at the rear.

In this case, Testor’s Liquid Cement & Tamiya Basic Gray plus sand paper may save the day otherwise this one will be going in the bin due to builder carelessness.
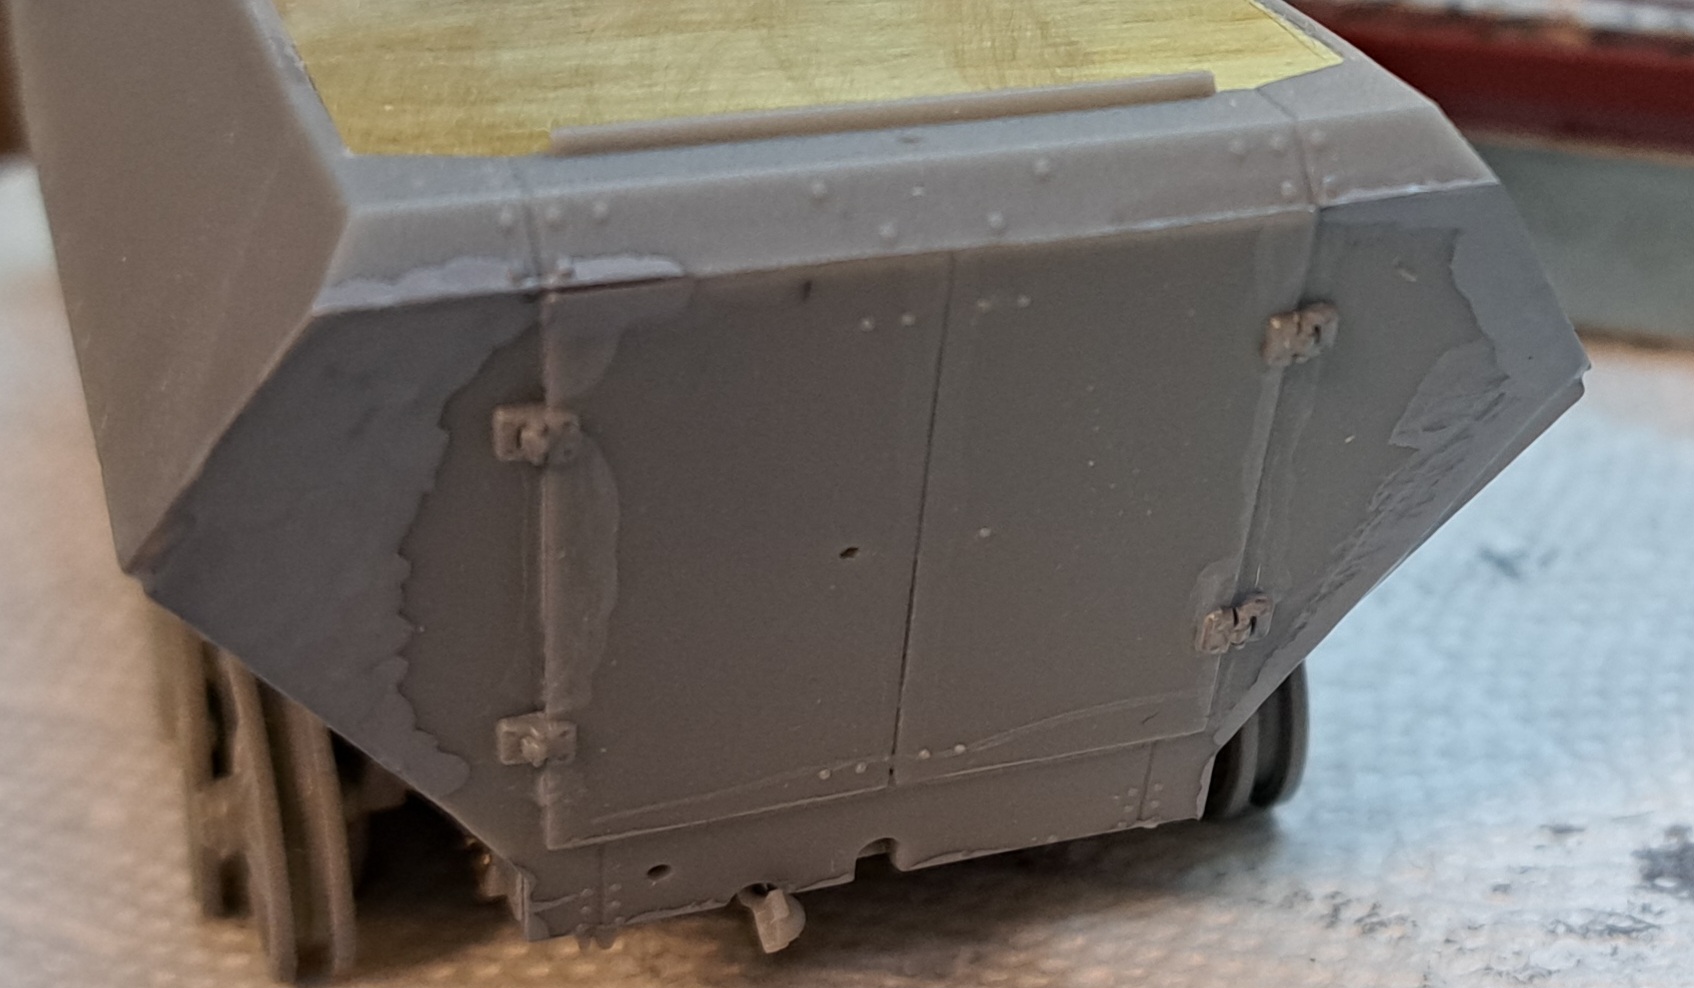
I’d rather sort this mess with my pet favorite Molak Stucco Putty but that’s all back home.
Joey cat says…

6 Likes
C’mon Wade! You can save that easy!
4 Likes
um-hum …
![]()
In far too many cases the resin or PE-parts are best used as templates …
5 Likes
OSHA suggests using other tools. Cutting edges isn’t the cutting edge of model building technology.
My thumbs and fingertips told me that 20 - 25 years ago. I quit wasting cash on band-aids and bought me some needle files instead.
Needle files?
Forgot them back home?
3 Likes
Robin, in general I agree with you completely. There’s many alternative tools that are excellent and I’ve updated many of my tools.
Yet for ~40+ years, the single edge razor blade has had a place in my tool kit. It remains a favorite when getting down to the brass tacks of model building. Razor in hand, means super serious modeling task to me.
The jack of all trades part helps as well. Lifting PE parts in the PE bender, chopping, scribing, trimming, shaving parts thin, to making grid lines in zimmerit, ultra clean cuts taking parts off the tree, opening boxes etc.
4 Likes
Starting to think the patient will live…

Two low spots remaining.

My first real acid test of a new DSPIAE sanding block like this one. Made the whole task much easier than my old way with sanding sticks or metal straight edge wrapped in sanding paper.

Definitely a win for a new tool.
5 Likes
Looks like the Mariana Trench on both sides and this is after filling four times.

Obviously, I had a devil of a time with the storage compartments. They fit perfectly except they wouldn’t slide up flush as they should. Trimmed the tops and still didn’t get a satisfactory resolution. I don’t know why this occured. Other Dragon 251 builds don’t have the problem.
I can’t measure the two upper hulls and compare or test fit at this point as one is bonded in place with the lockers. In any case, regardless of cause which was probably something I missed, this is the status of my 251 build.
StarBond Black CA prep. Damn! That’s Ugly!

After StarBond Black CA, Leveling, Accelerator, removed tape & debonder clean up. Total time ~5 minutes per side.


Needs retaped and sanded etc.
It’s jacked up for sure but probably still worthy of completion.
4 Likes