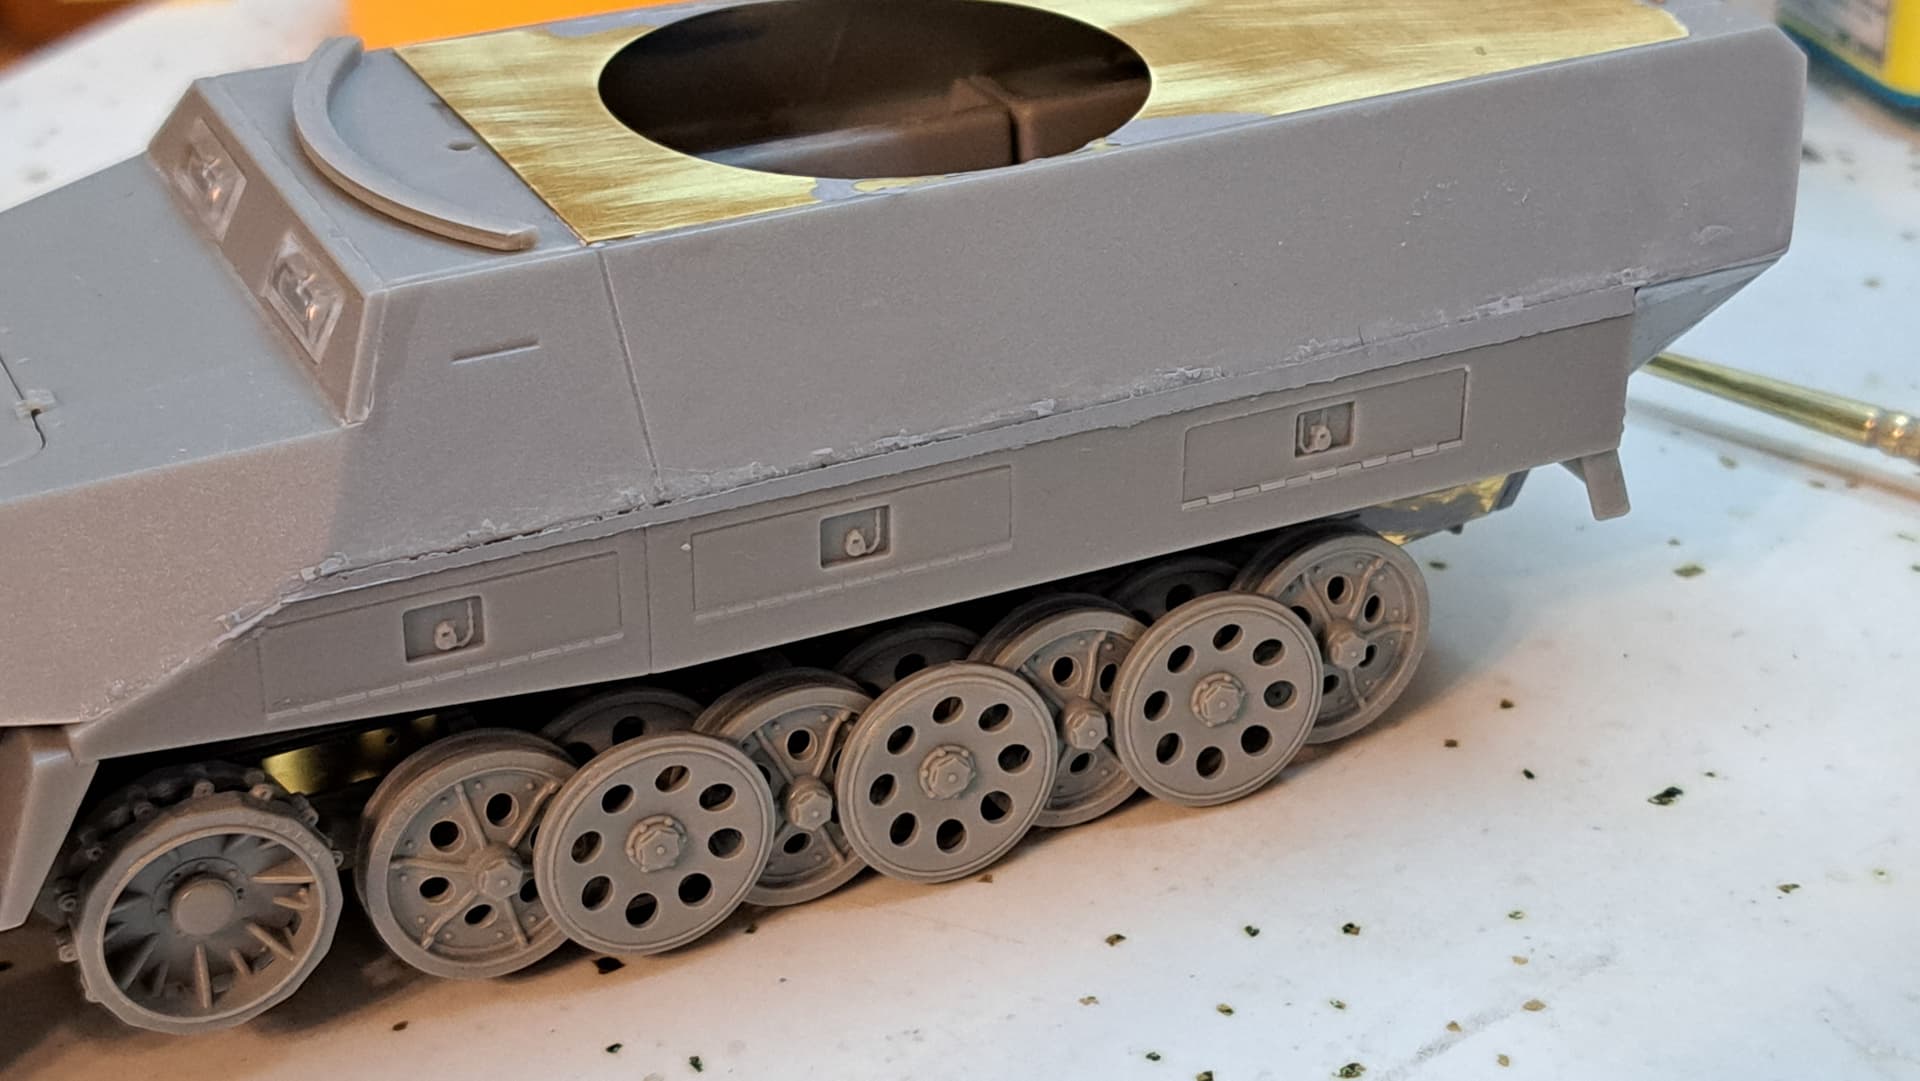
Did the top slide too far back or did the storage compartments slide too far forward?
This gap should not be there:

3 Likes
Probably the stowage compartments are too far forward from me pushing them upwards during assembly.
3 Likes
Fugly’s Status with a coat of thinned Tamiya Basic Gray to check for low spots and fill blemishes in the CA etc.
Letting this dry overnight and will sand tomorrow.
4 Likes
That is a shame. Really curious as to what happened as I have built several Dragon 251’s and not had them gap like that.
3 Likes
Did the 251’s you built use the part A upper hull or the part L upper hull?
They look very similar but they aren’t exactly the same.
The 251/23 uses the L upper hull. It also has one piece hood for that opens from the front
The standard 251/1 use the A upper hull which as the 2 piece hood that opens to the side.
I’m not saying that’s the issue but the two different upper hulls are a variable. If L upper hull is slightly narrower than upper A, I could see that creating this issue.
I also could have missed something silly despite due diligence and experience etc.
In any case that’s probably the worst gap in parts assembly I’ve ever had.
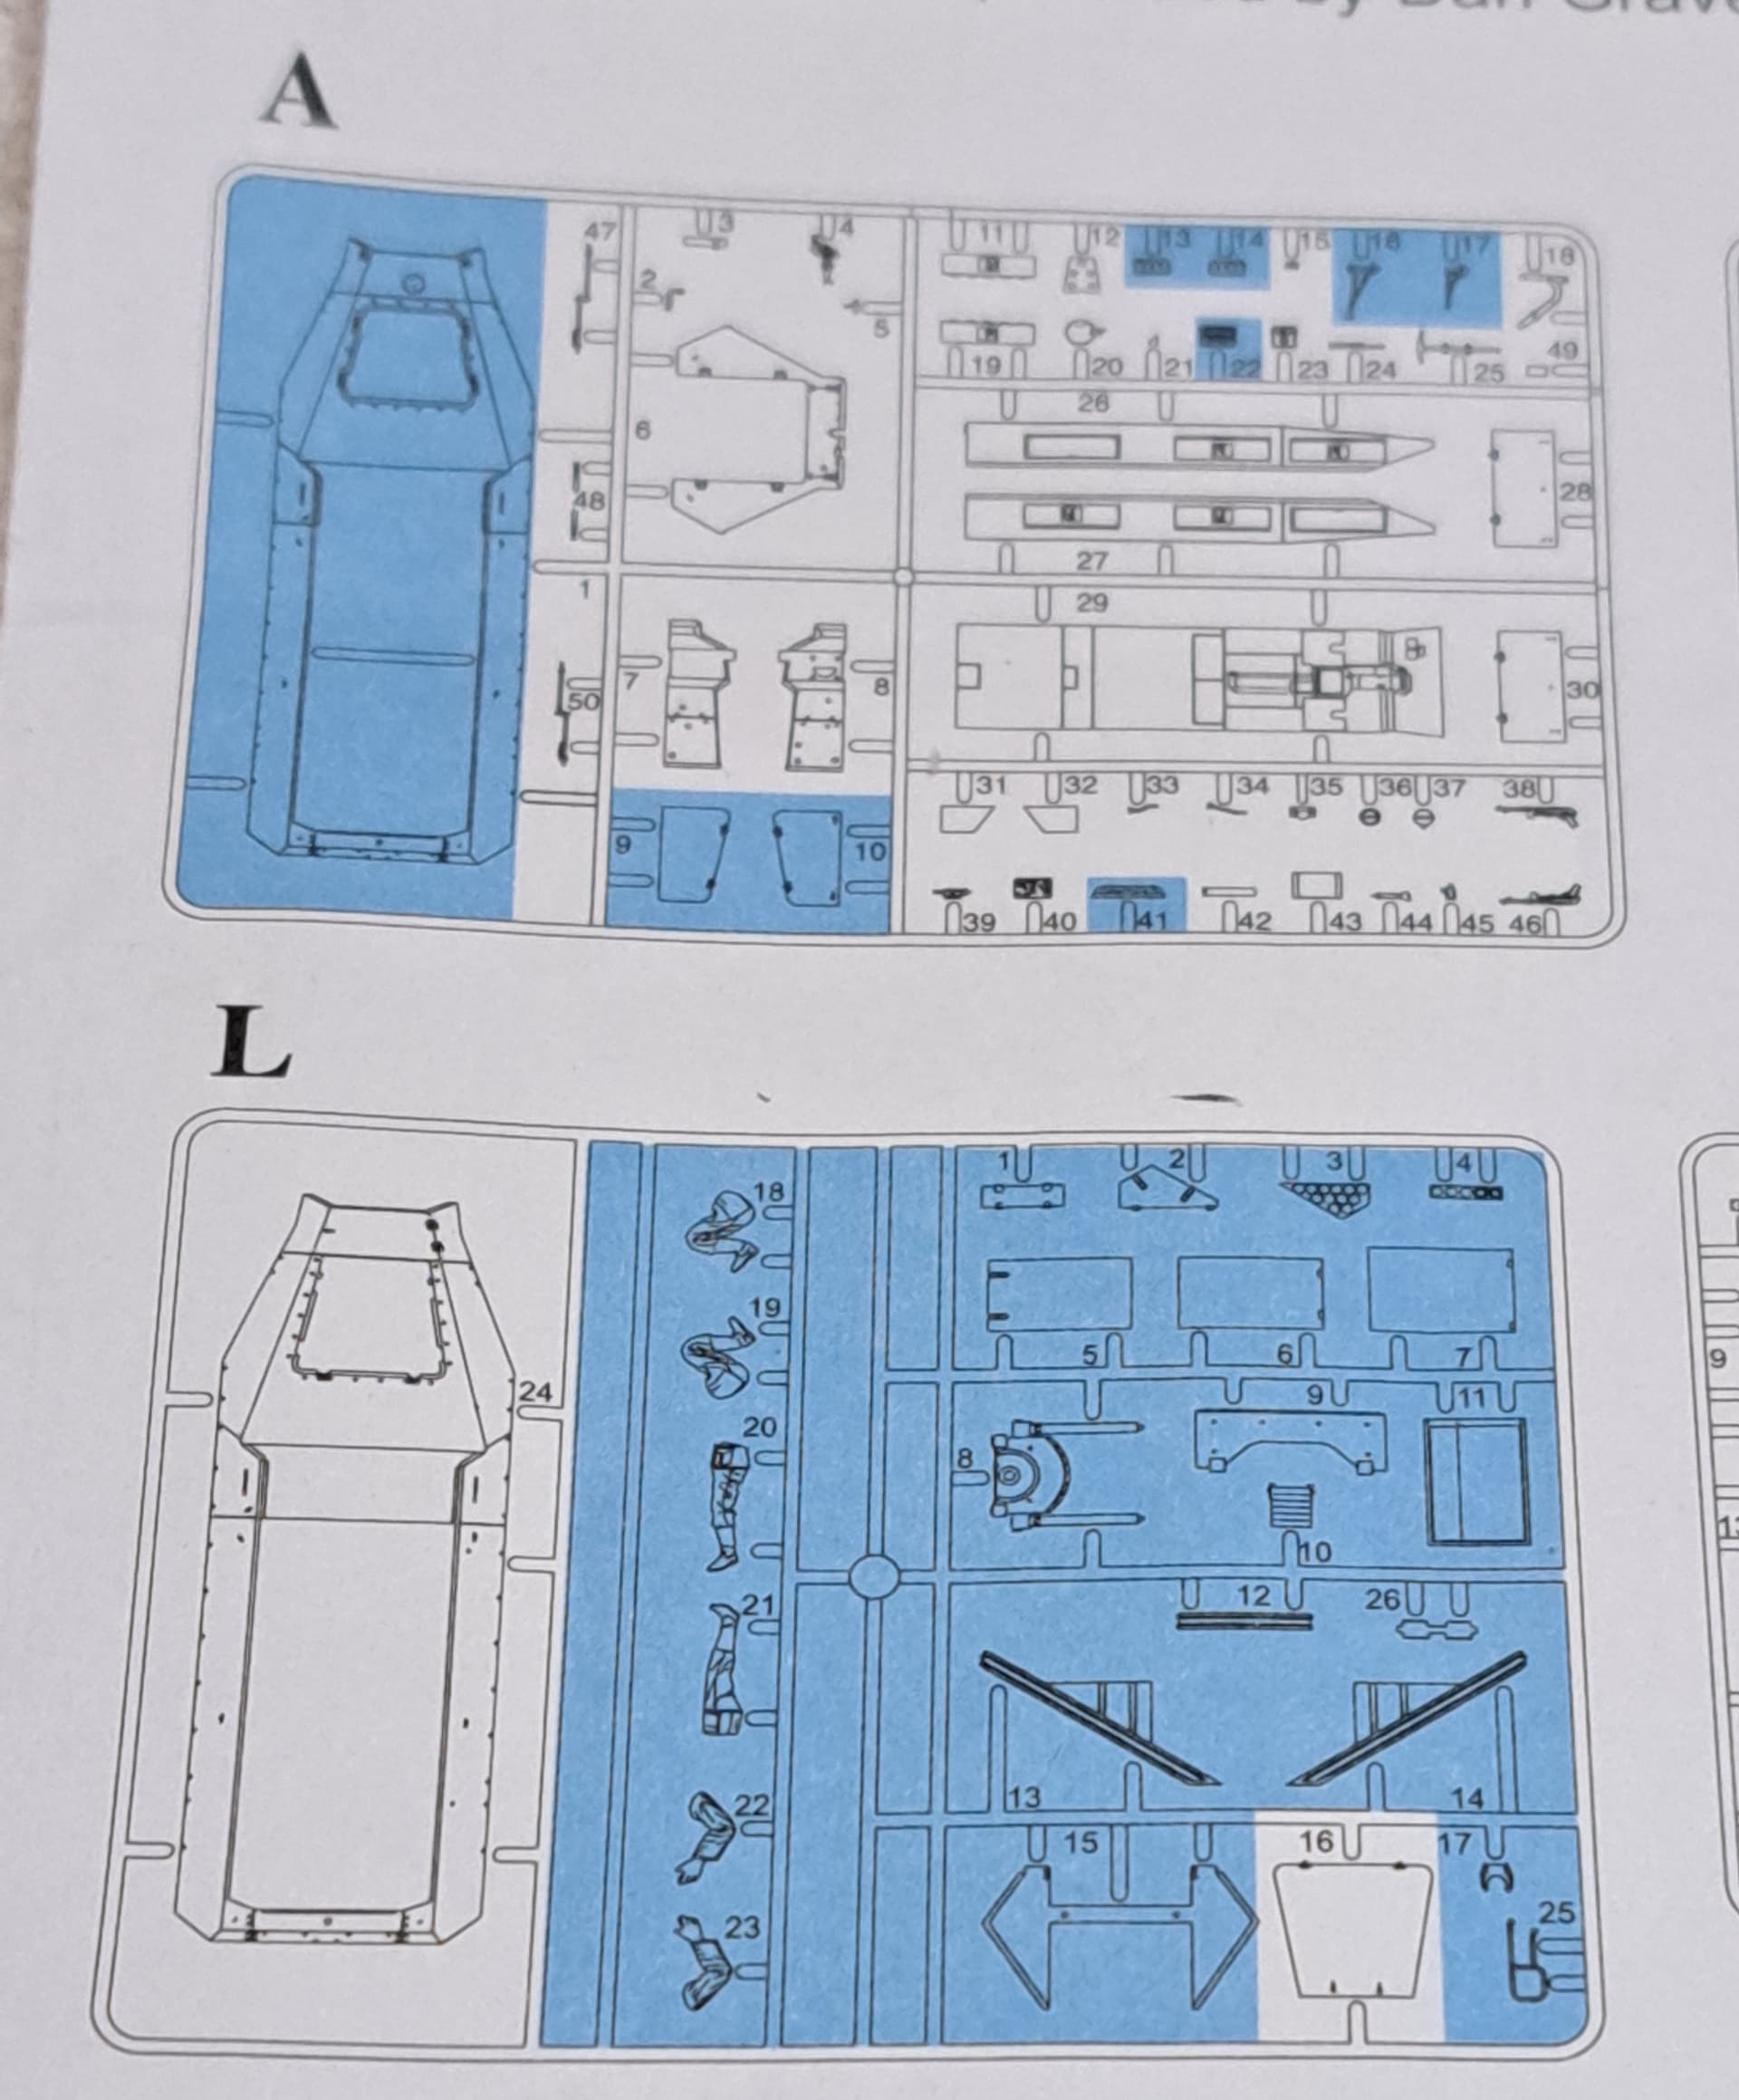
Confirmed L is correct one per instructions.

It’s an interesting question etc but my main task is to try to salvage a model out of this mishap…
The Sequel, Reboot/remake/Next Generation brought to you by…
Schadenfreude Entertainment Inc.

Should be here in a couple of days from Sprue Brothers.
4 Likes
I don’t recall off the top of my head as I built those a while back, so I’d have to dig out the paperwork. I have 7 Dragon 251s of differing vintage which is half the total, with AFV being 3 of the other 7 kits I have.
3 Likes
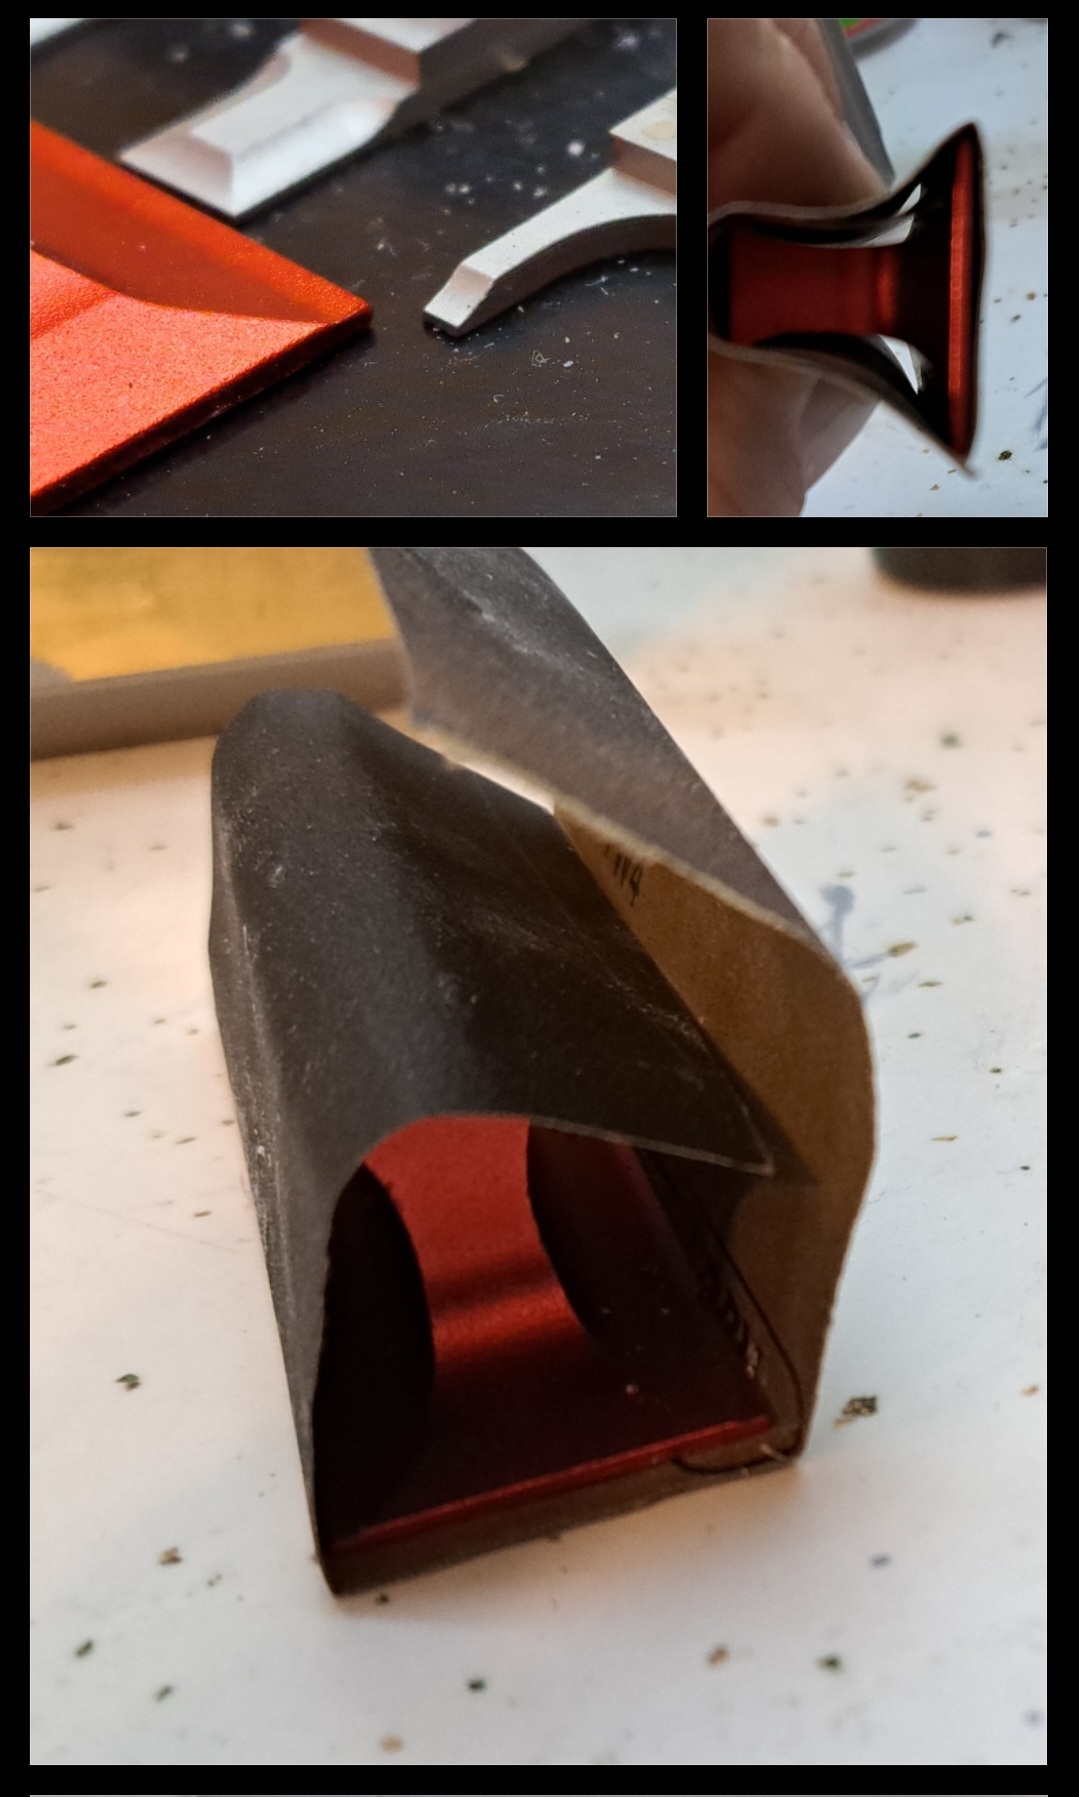
How is the sheet of sandpaper retained on the Dspiae sanding block ?
3 Likes
I cut the sanding paper long enough to wrap around to the sides of the handle and squeeze tight against the block. Works great wet sanding.
One could use double sided tape to secure etc if one wanted.
2 Likes
Cool, thanks. Those thin edges look handy for getting into tight spots. Maybe also as a photo etch bending break ?
2 Likes
I’ve found the thin side edge of the block very useful sanding. I think for small PE or wire the side edge could be useful for bending.
It’s one of those tools that for the cost is well worth it in my experience.
4 Likes
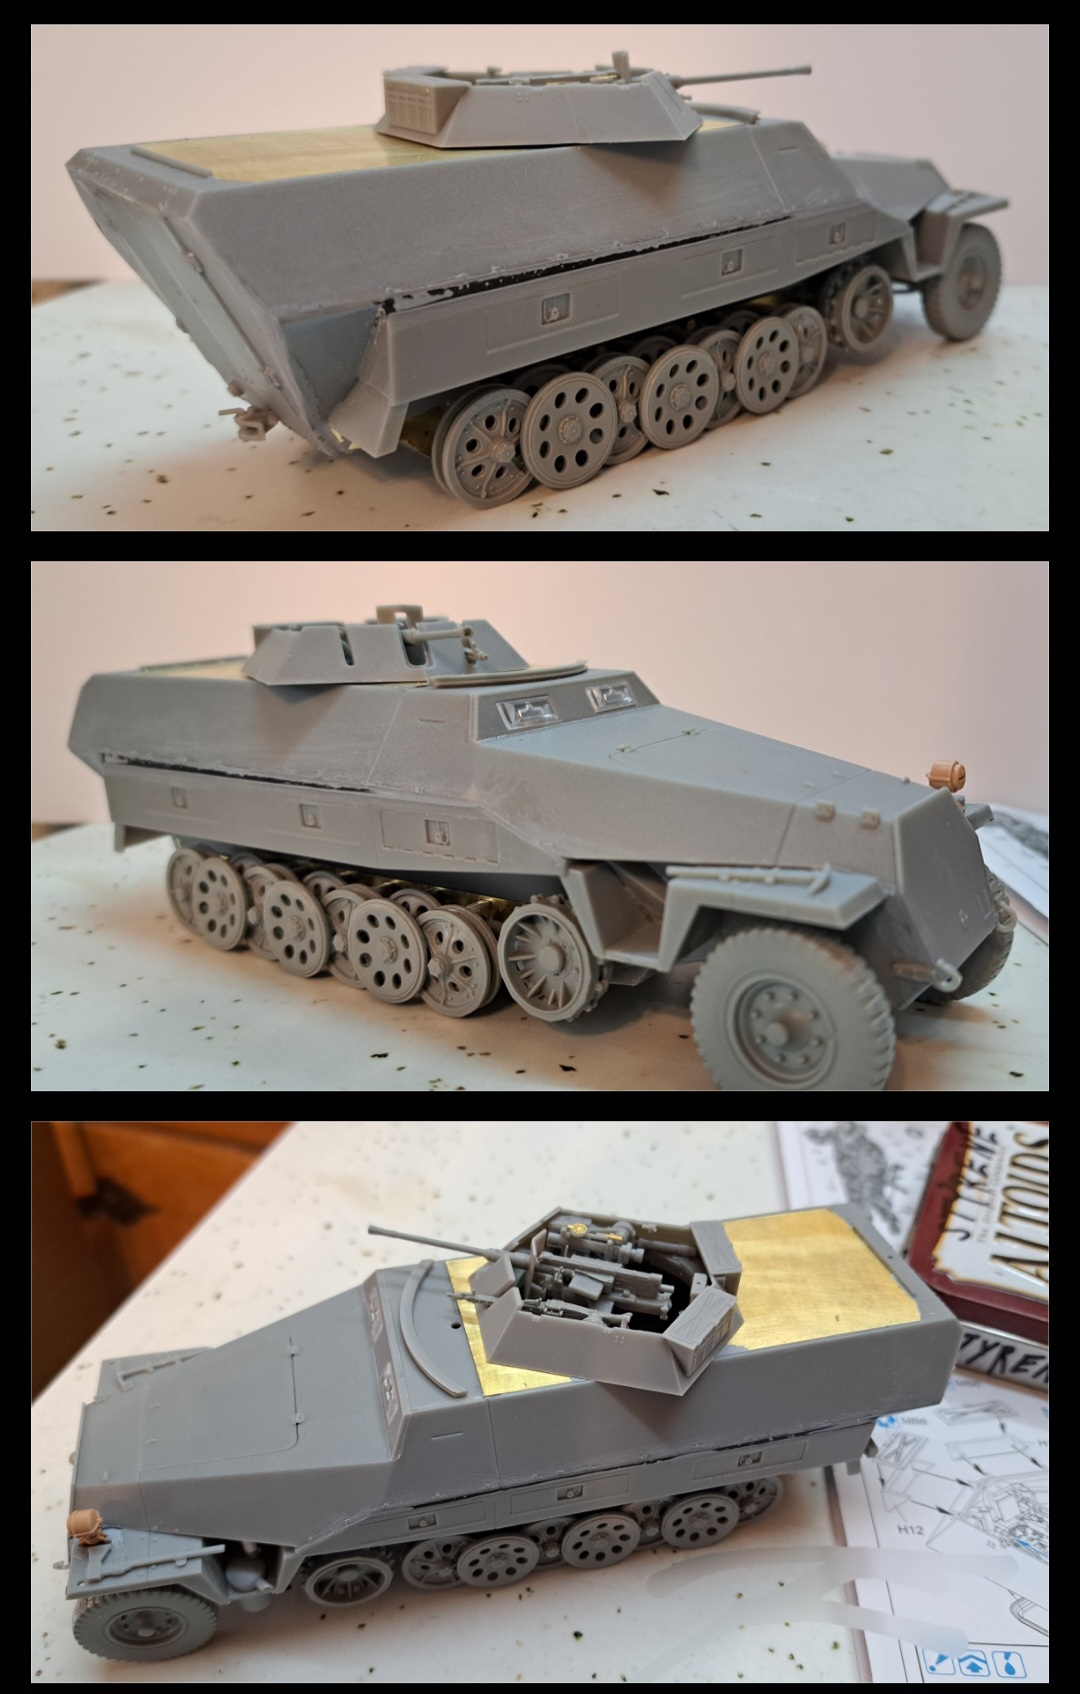
Steps 11 to 13 wrapped except for fragile fiddle bits that will go on after priming base coat.
Dragon calls for parts in the instructions that don’t appear to be included in the kit, F parts for antenna mount & base.

No F tree is listed.

I’ve looked through all of the trees twice and didn’t see the appropriate parts. Something will be cobbled as antenna base. Dragon certainly needed to do better with the F parts.
Mislabeled? Not Included? No idea, it’s just the status quo Dragon.
While I’m beating my dead Dragon, check out how the instructions wrongly show the assembly of the muffler & exhaust parts. A3 goes on top of A20, not under it as show in step 12. It’s show correctly assembled in step 13.
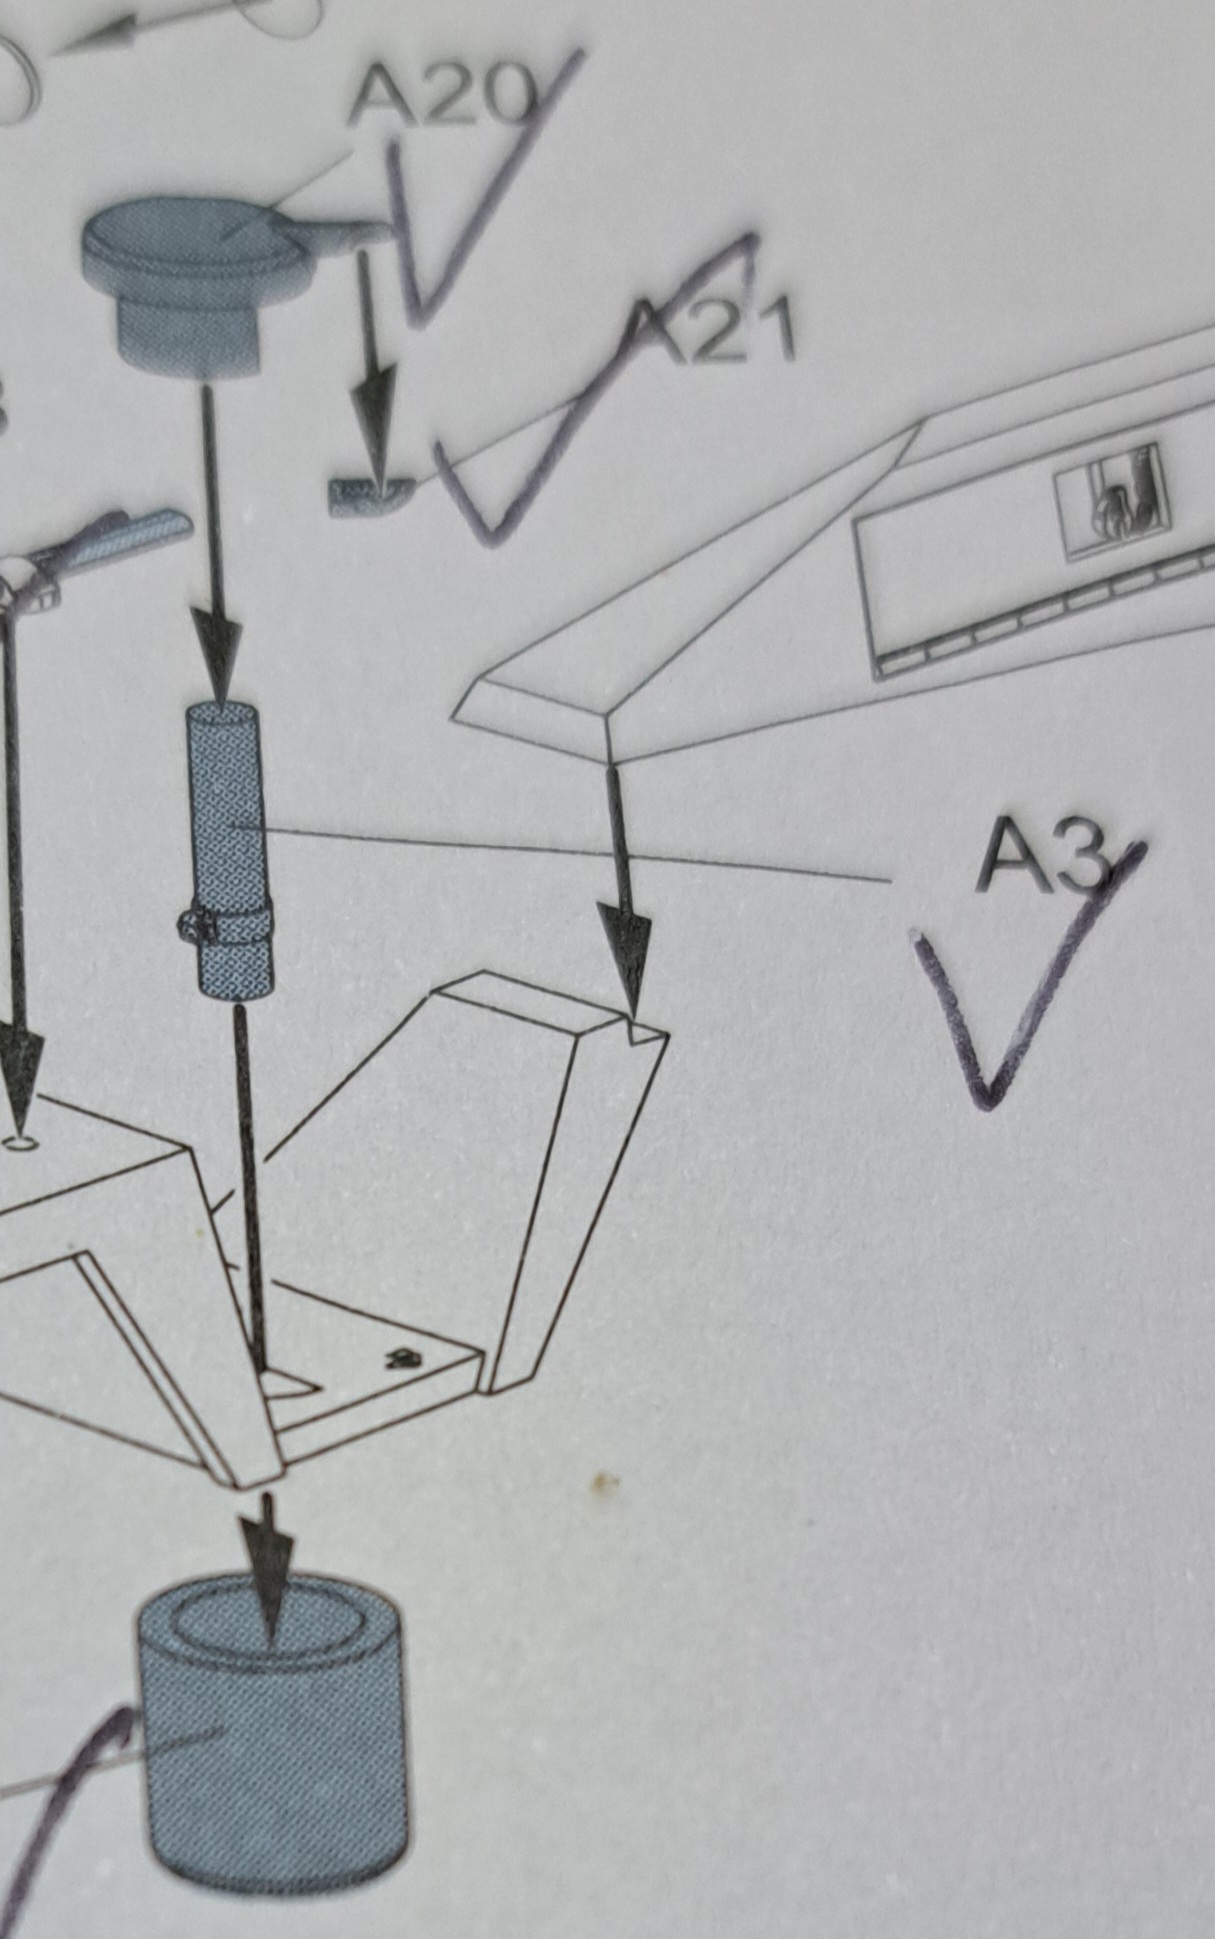
Added a 3D printed Heavy Hobby headlight instead of the era 1990’s looking kit parts.


7 Likes
Not only their A team, but neither their B or C teams were available for drafting the kit instructions.
4 Likes
Given how other 1/35 AFV manufacturers like Tamiya, Italeri, AFV Club, Academy, Takom, Ryefield Model’s etc all have far superior quality instructions, one would think Dragon might decide to stop consistently being the bottom of the barrel.
Skipped the figures at this time. They look decent to me.
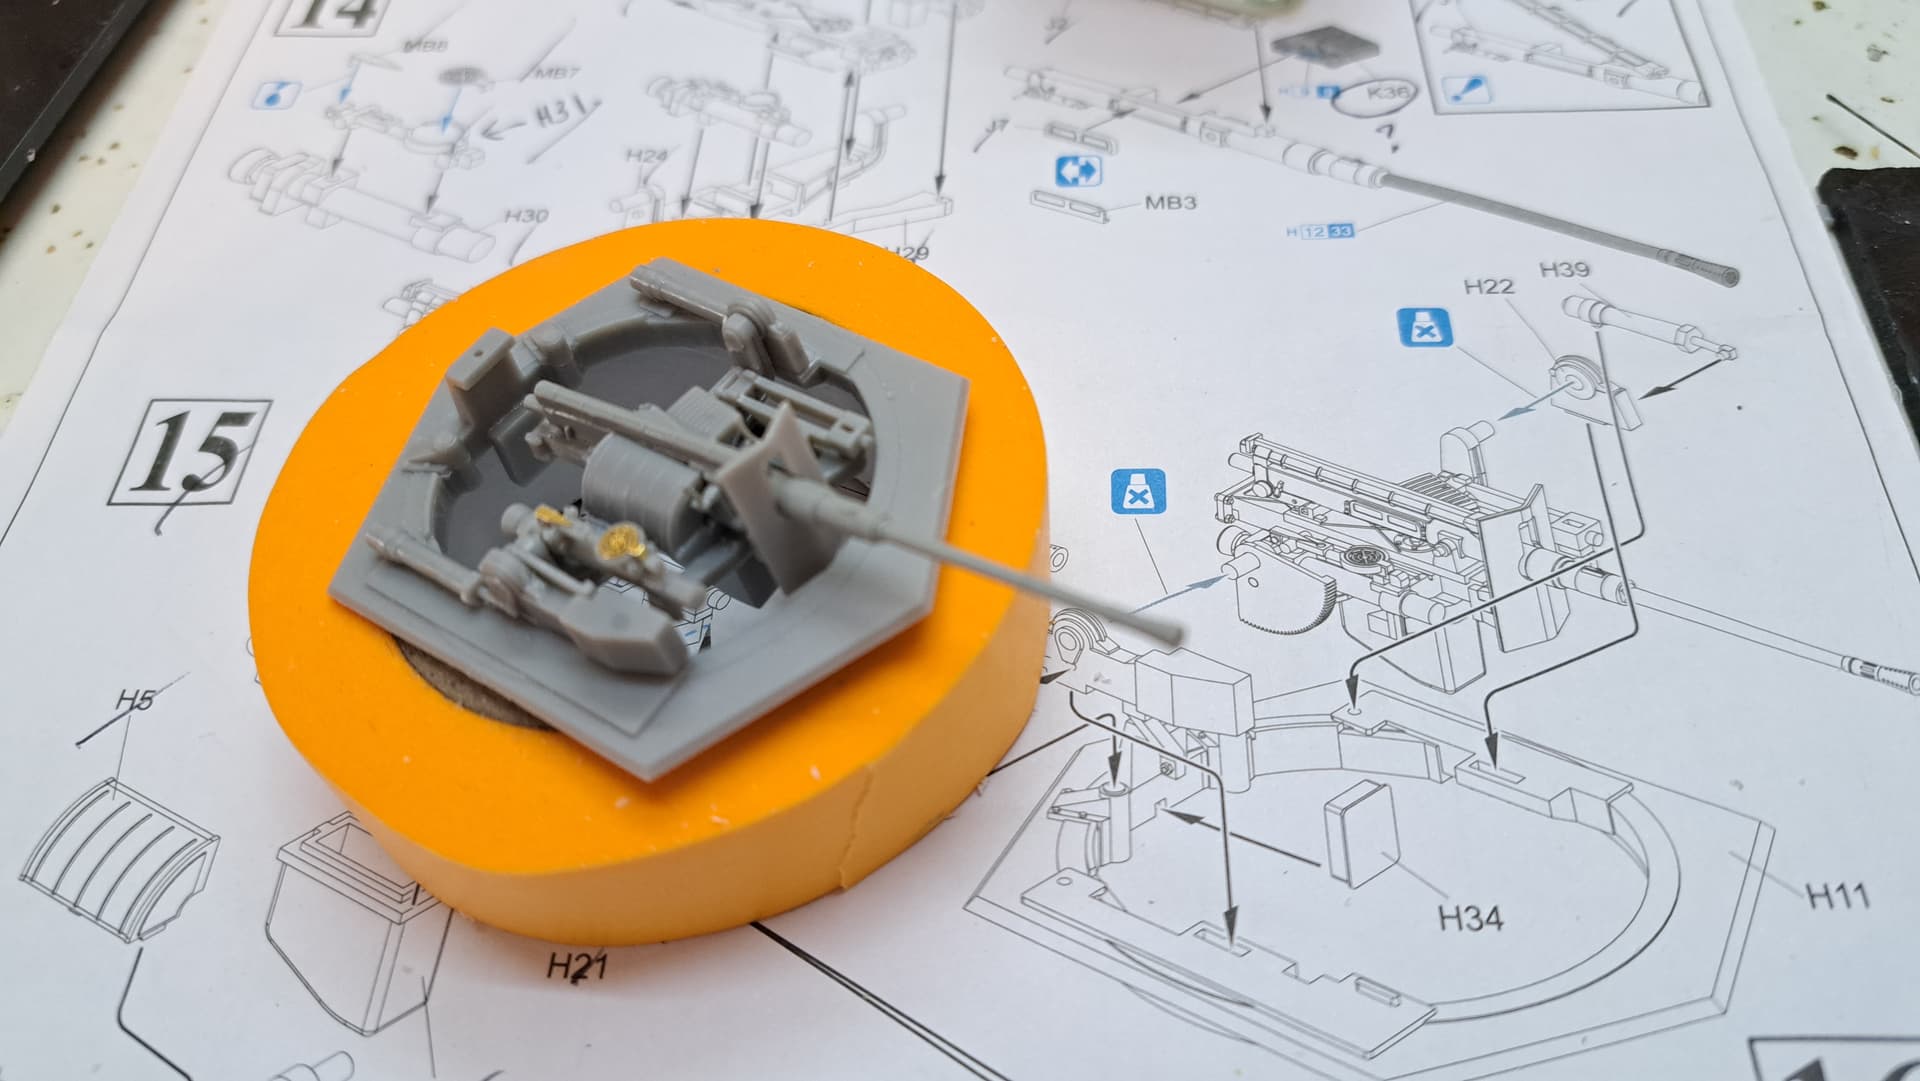
Steps 14-16
Here we go again…
- The part (red) isn’t labeled on the instruction sheet. It appears to be H31.
Building a Dragon kit is barely an inconvenience!
- Magazines(orange) H7 and K36 should occupy the same place per instructions. H7 doesn’t fit however K36 fits perfectly.
All together repeat…Building a Dragon kit is barely an inconvenience!

Yes, this subassembly was incorrectly assembled. I’m positive I wasn’t distracted or annoyed by anything in the instructions in the prior step.
Building a Dragon kit is barely an inconvenience!
Disassembled & fixed.
The rest of the assembly goes smoothly. Over all the quality of molding seemed better on the H tree parts. The gun assembly is fun to build and makes a good chance of pace.


7 Likes
I know everyone likes to pile on Dragon and their instructions, but I have found about as many mistakes among the companies from Dragon’s era. The newer guys like Das Werk, Takom, and Meng are doing better but the Bronco Panzer II D’s I am working on have misnumbered several parts and don’t clearly indicate where some parts need to go requiring me to try and visualize several steps ahead to see if what I am doing now will line up two pages from now because I can’t check the fit beforehand. I’ve had issues with proper markings on old Tamiya kits but I can chalk that up to lack of good info in the 70s.
I also tended to ignore early ICM and CMK because of issues with the order of steps resulting in things not fitting because the prior step put something in the way. One Alan kit was enough.
Ultimately, I don’t trust anyone’s instructions OOB until I read through them at least once and study what’s going where while looking at the sprues. I think I would have done so with Wingnut Wings and I’ve heard nothing but high praise for their paperwork.
6 Likes
Haven’t built a Das Werks, Bronco or ICM so I can’t comment on their instructions. Out of the ~220 kits I’ve built Dragon had the lions share of instruction errors probably by a factor of 7 to 1 or so.
True enough not to be too trusting in the instructions of any of them.
2 Likes
Wrapped steps 17 & 18
The MG42 is darned impressive! The MG34 that’s included an optional part is just as sharp. Both are superior to nearly all aftermarket options I’ve seen. Home run by Dragon on this detail. Even some of the MG 42 internals like recoil spring etc are detailed!
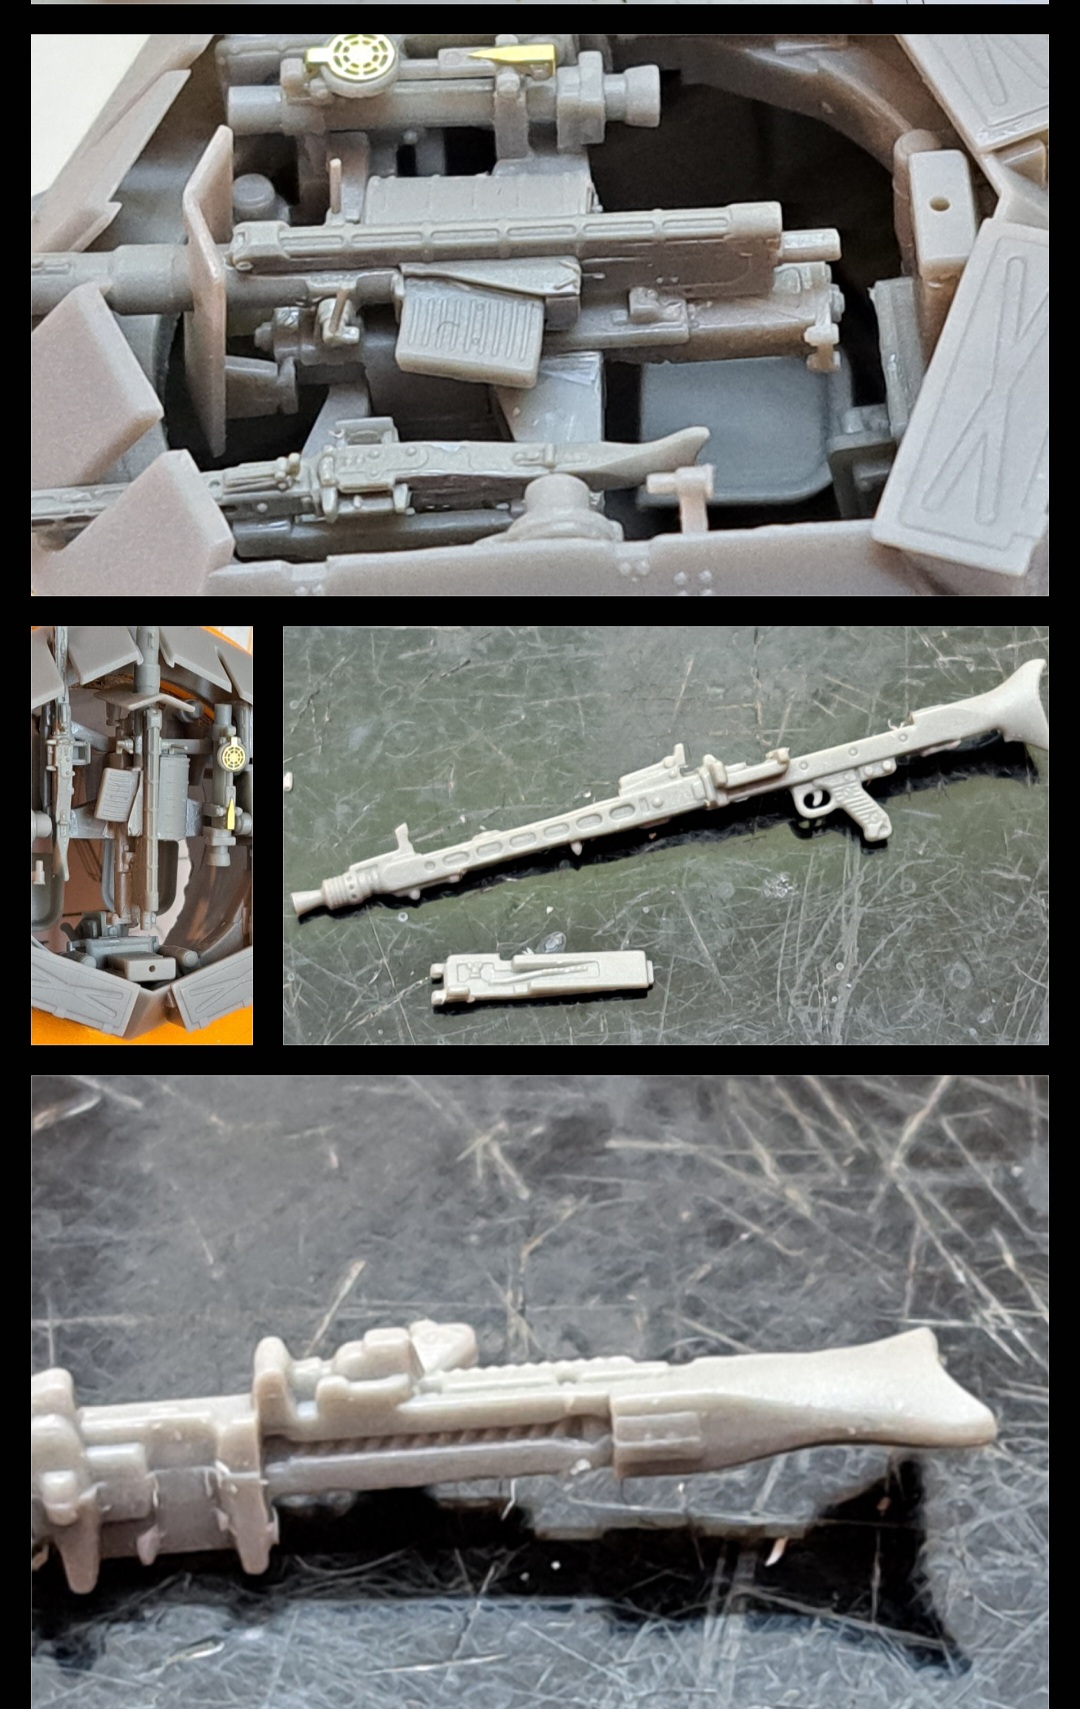
The antennas and anti grenade screens remain in step 19.

Build Review & Rating
This of course is my opinion based on experience gained with a kit purchased out of pocket. Others can and will have different opinions and experience so everyone’s mileage may vary.
4 Price - Cost $43 via Cyber-Hobby slow boat order and $75 via Sprue Brother’s for my two copies of the kit
2 Instructions - Lot’s of mistakes by Dragon. It’s a pity in my opinion Dragon doesn’t address this consistent weakness with some basic quality checks.
4 Mold Quality - Uneven, some is outstanding state of the art like the MG42 and some is lackluster. Overall is pretty good. I’m happy with this aspect of the kit.
5 Plastic Quality - Excellent, high-quality, holds up to Tamiya Extra Thin and easy enough to clean up.
4 Parts Clean Up - Lots of nubs meant less punch marks on parts. Overall pretty good.
3 Ease of build - The PE roof plate was annoying as hell to securely fit in my experience.
Hull assembly is complex. Good part clean up is critical. Add interior parts plus a turret and interior, this makes for a fairly complex halftrack kit to my eyes. It all comes together reasonably well. Overall, PE is only used when it’s needed and that’s very good in my opinion.
The stowage locker issue was my own fault and had no bearing on the rating.
5 Accuracy - While a paper panzer etc for all practical purposes seems very good.
4 Fit - Due to complexity of subassemblies that make up the hull. Every thing fits well enough if due diligence is taken in parts clean up and assembly there shouldn’t be major issues.
5 Doesn’t Require Aftermarket - All of the parts in the box are perfectly suitable for most modelers and useable. The headlight is weakest link in this chain in my opinion.
4 Details built Out of the Box - tool clamps level detail is sometimes missing. Overall excellent.
**40 out 50 possible **
Highly Recommended, most especially if the modeler has something like an old Tamiya 251D halftrack in the stash as this kit has many potential hand me down extra parts. Example seats, squad, squad weapons, entire extra set of tracks etc.
8 Likes
Step 19 - Antennas, Mesh & Final
The driver & radio operator roof plate has a big fat hole in it for the standard 251/1’s MG 34/42. Should have filled this previously. Stuck a tapered bit of sprue in and sliced flush plus a coat of thinned putty. The star antenna base was scratch built. The fragile kit antenna rod coated in StarBond Black to help improve strength in the thinner areas.

The mesh screens nearly made the equipment in the turret invisible. So I decided to place them in this position that allows elevation of the gun to make the turret interior is more visible. Added a spare antenna from the kit for the turret radio.


Using Sector35 tracks so I’m calling the construction completed other than the width indicators. They’ll go on later as they are fragile and I’ll break them airbrushing.


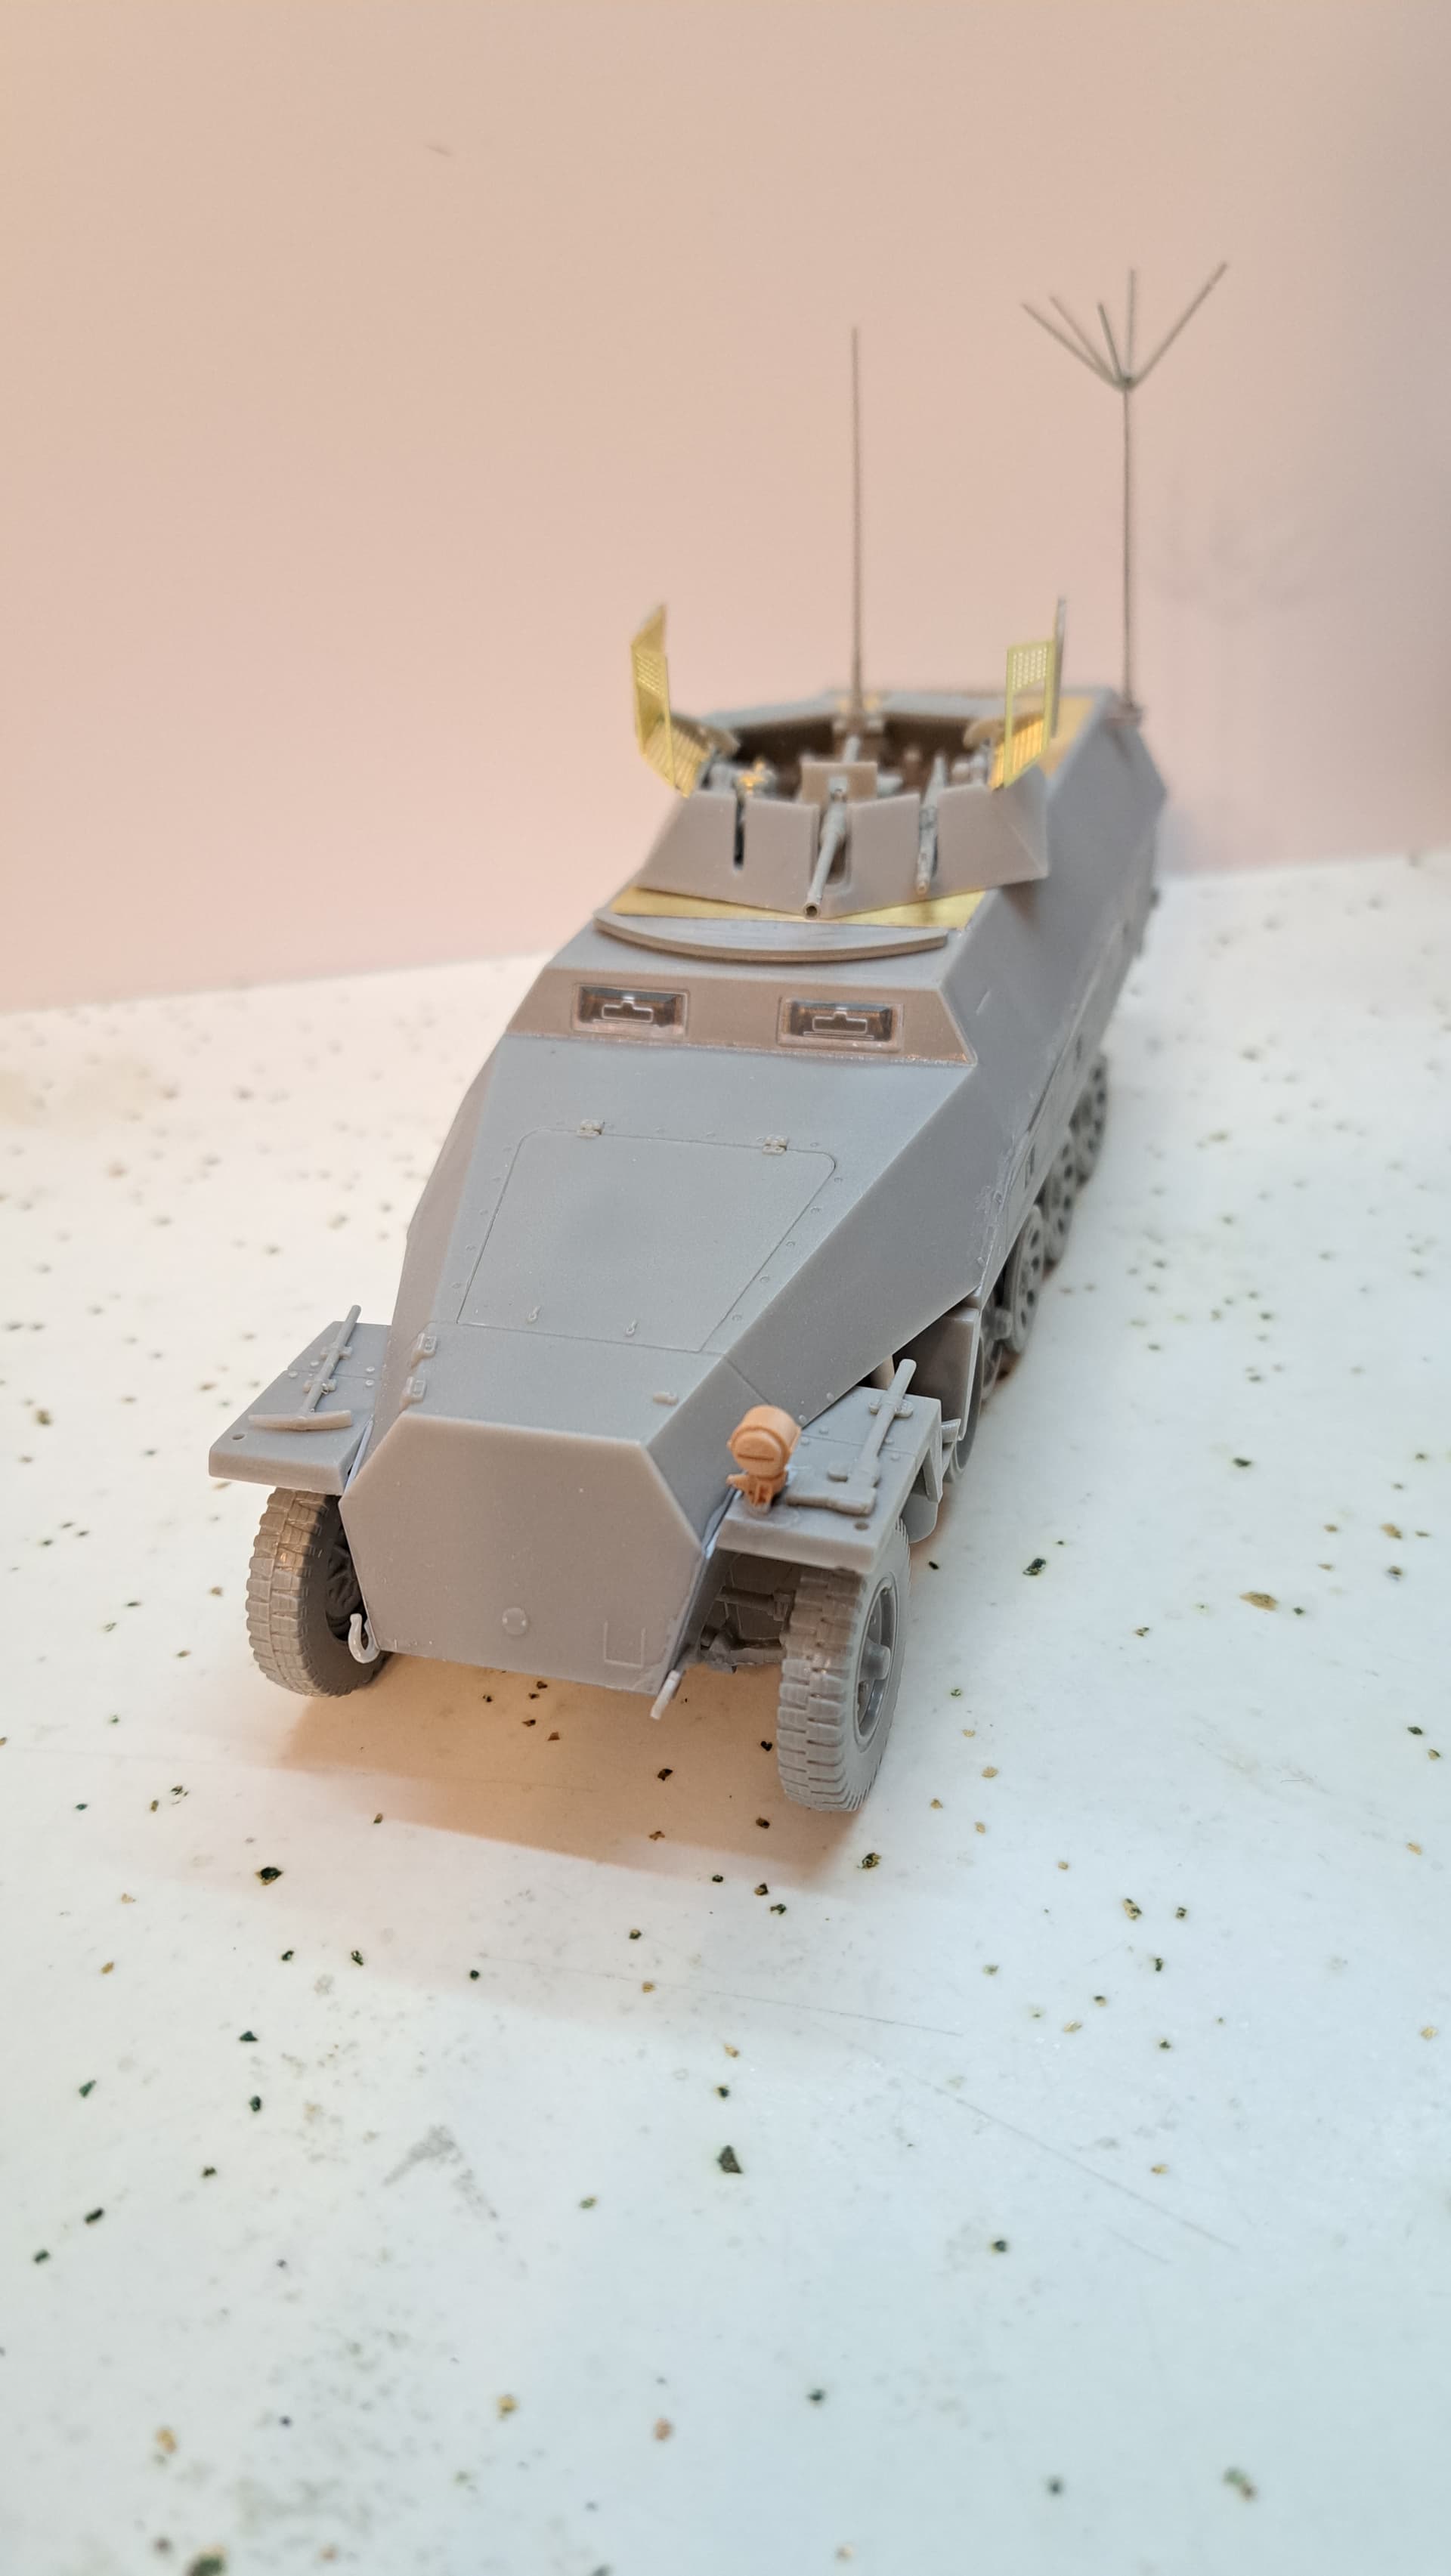

12 Likes
Nice solid build Wade and you handled all the speed bumps along the way with grace and speed. Looks ready for paint.
2 Likes
Thank you, Matt.
My 251/23 struggled but StarBond Black CA proved an ace in the hole.
Goal for today, set up outside and airbrush when the temperature hits the mid 50’s. Hopefully, a good base coat of Mr. Surfacer 1500 Black is in the cards.
4 Likes
Assembled paint cart & stool from Harbor Freight today.
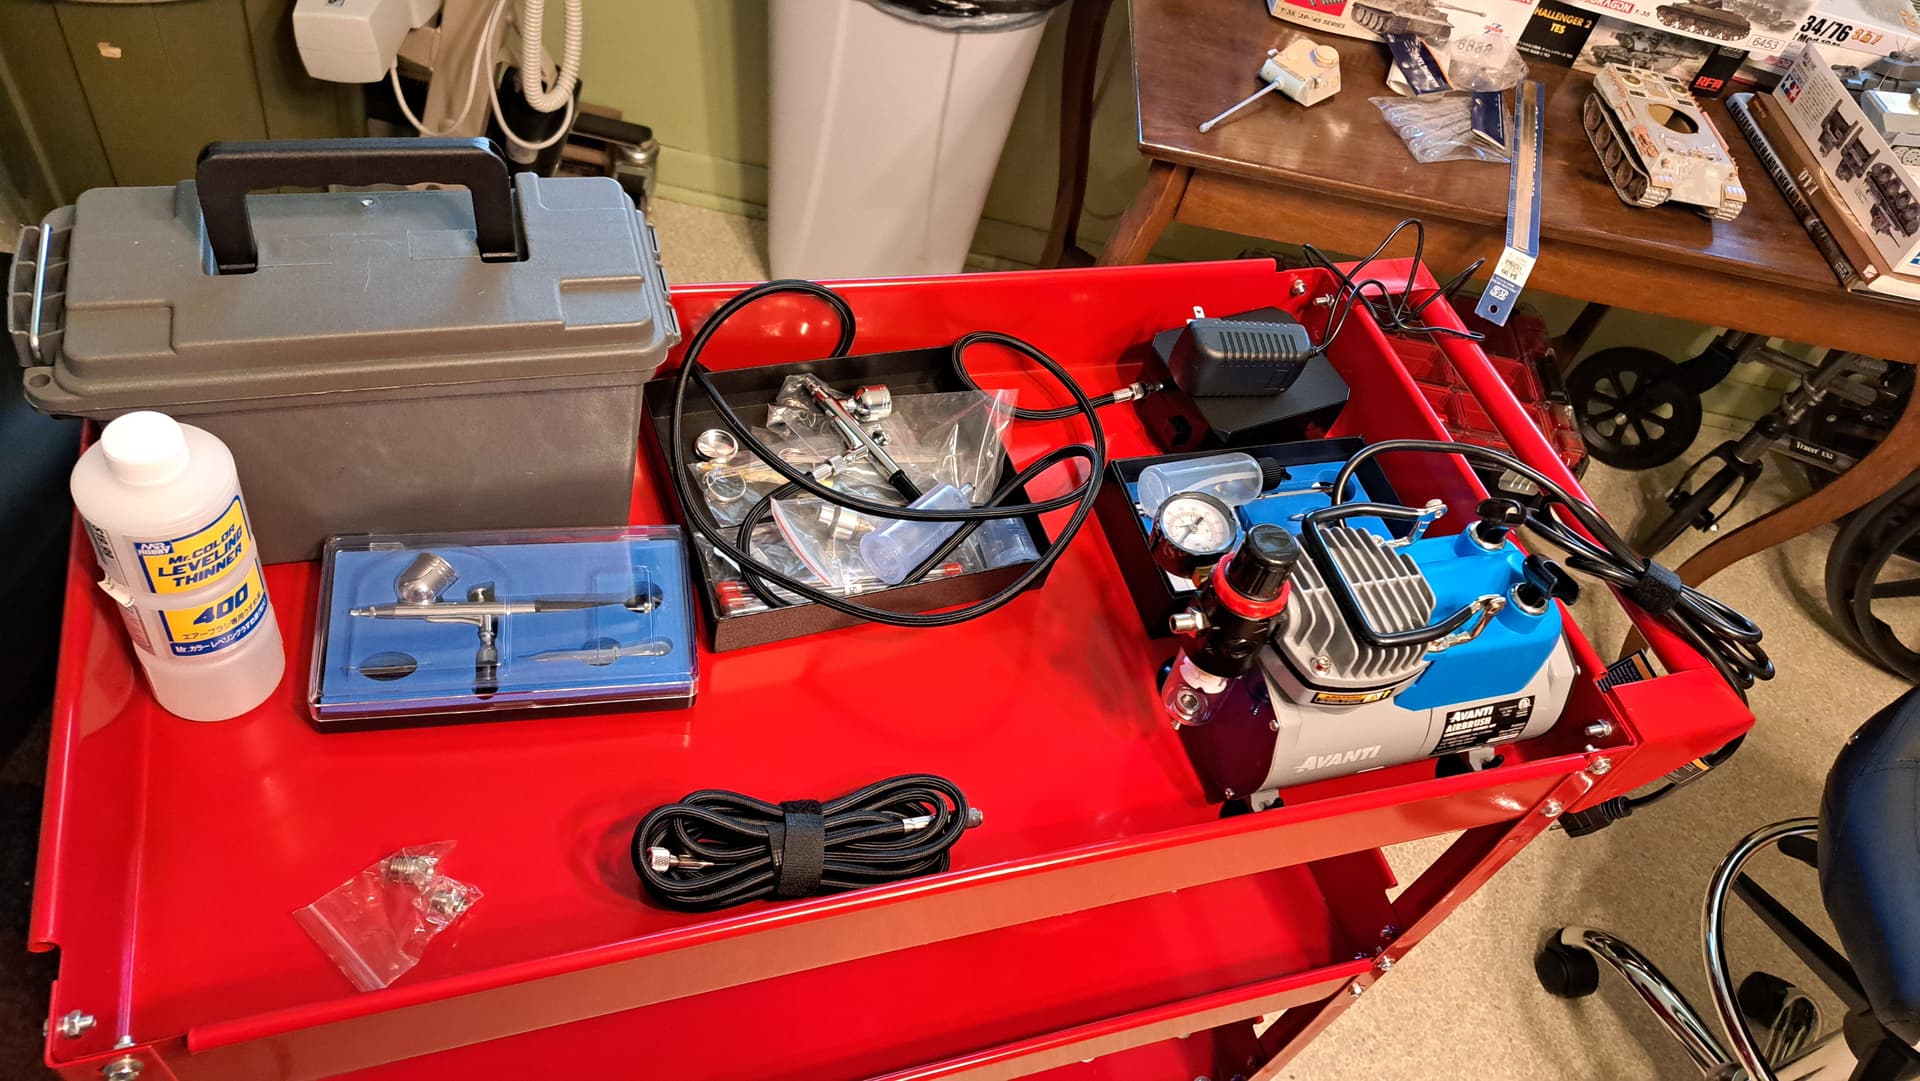
Ready to paint tomorrow. Being a person that favors excess in all things to moderation couldn’t pass up an inexpensive Harbor Freight Avanti compressor & cheapo bottom dollar airbrush.
Why buy more airbrushes? I want to see how well special mix of Testor’s Liquid Cement & Molak Stucco Putty sprays…or doesn’t spray…

Nothing like an exercise in creative idiocy to entertain oneself.
7 Likes