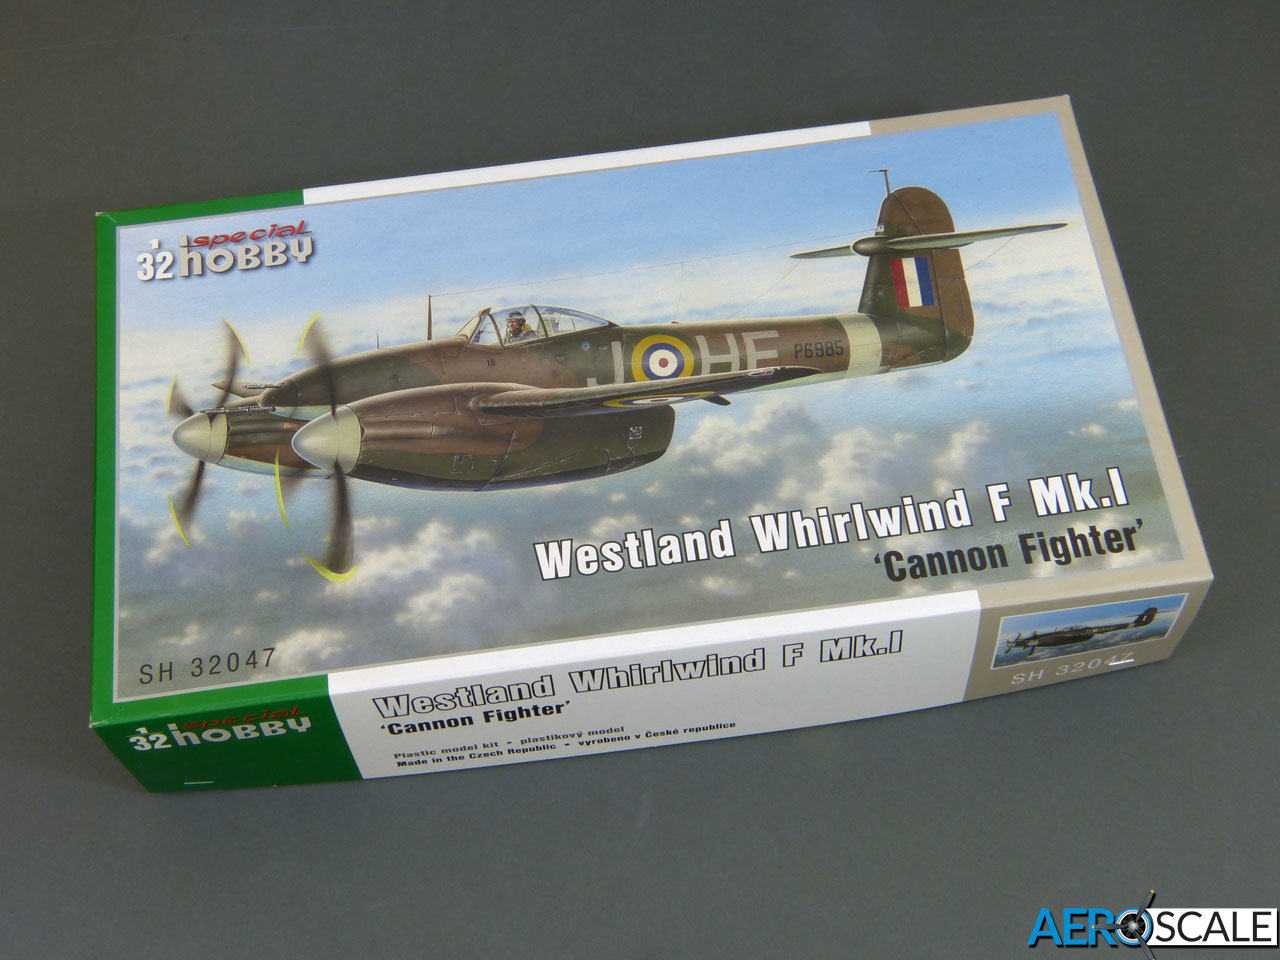
Special Hobby have very kindly sent us a sample of their new 1:32 kit of the Westland Whirlwind fighter.
I’ve taken photos for an in-box review which I’ll publish as soon as I can, and I’ll try to get this build of the beauty underway this week.
First impressions are very positive - masses of detail and a really delicate panel lines and embossed rivets on the exterior.
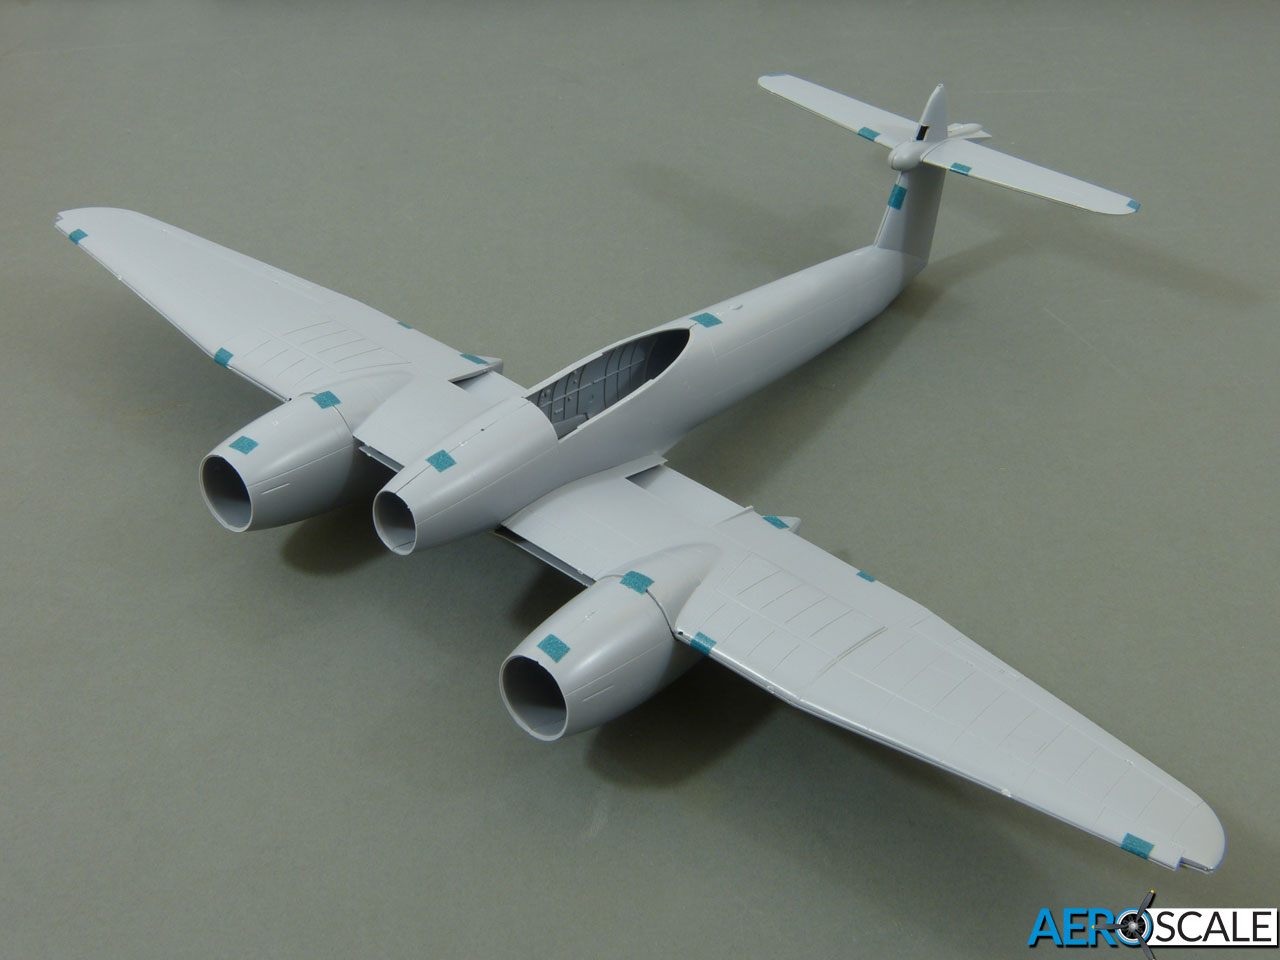
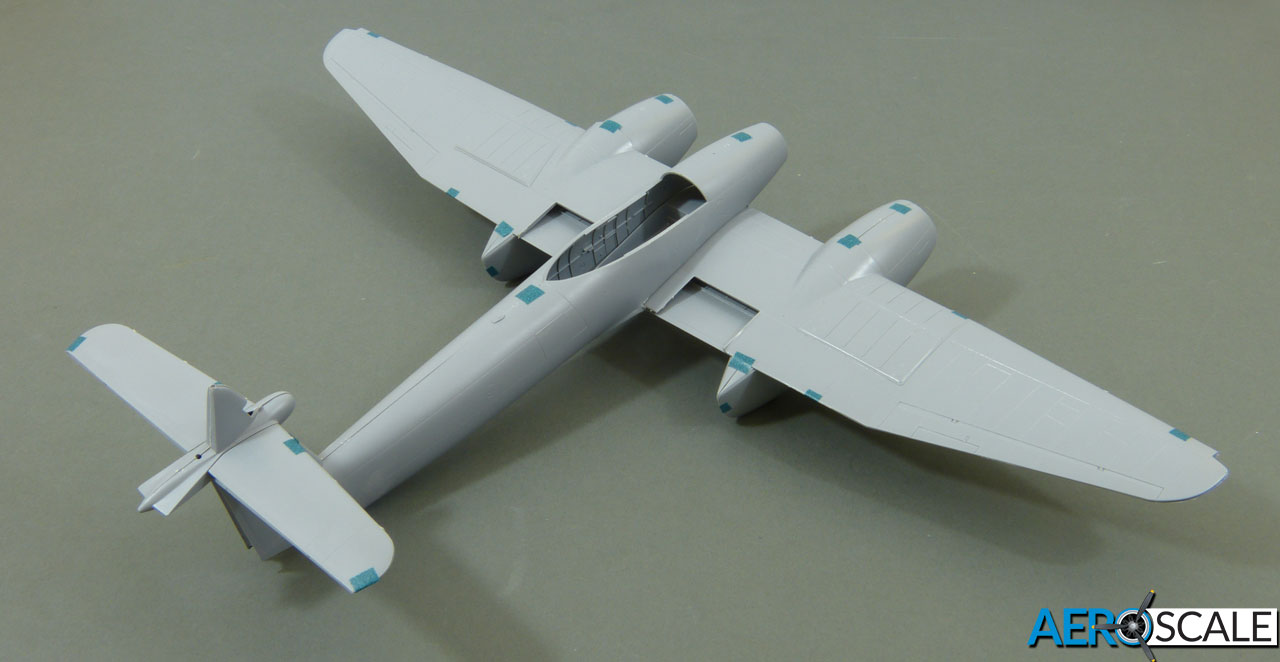
A quick test-fit of the major parts shows it should go together well too:
The apparent gaps on the nacelles are simply due to the weight of the parts being greater than the kabuki tape could support - the fit is actually very good. The horizontal tail is a bit loose in its slots - I’ve given it a little help to stay in place.
More very soon.
All the best
Rowan 
11 Likes
I can see one and maybe two showing up on my door step
gary
2 Likes
Cheers Gary and Russell
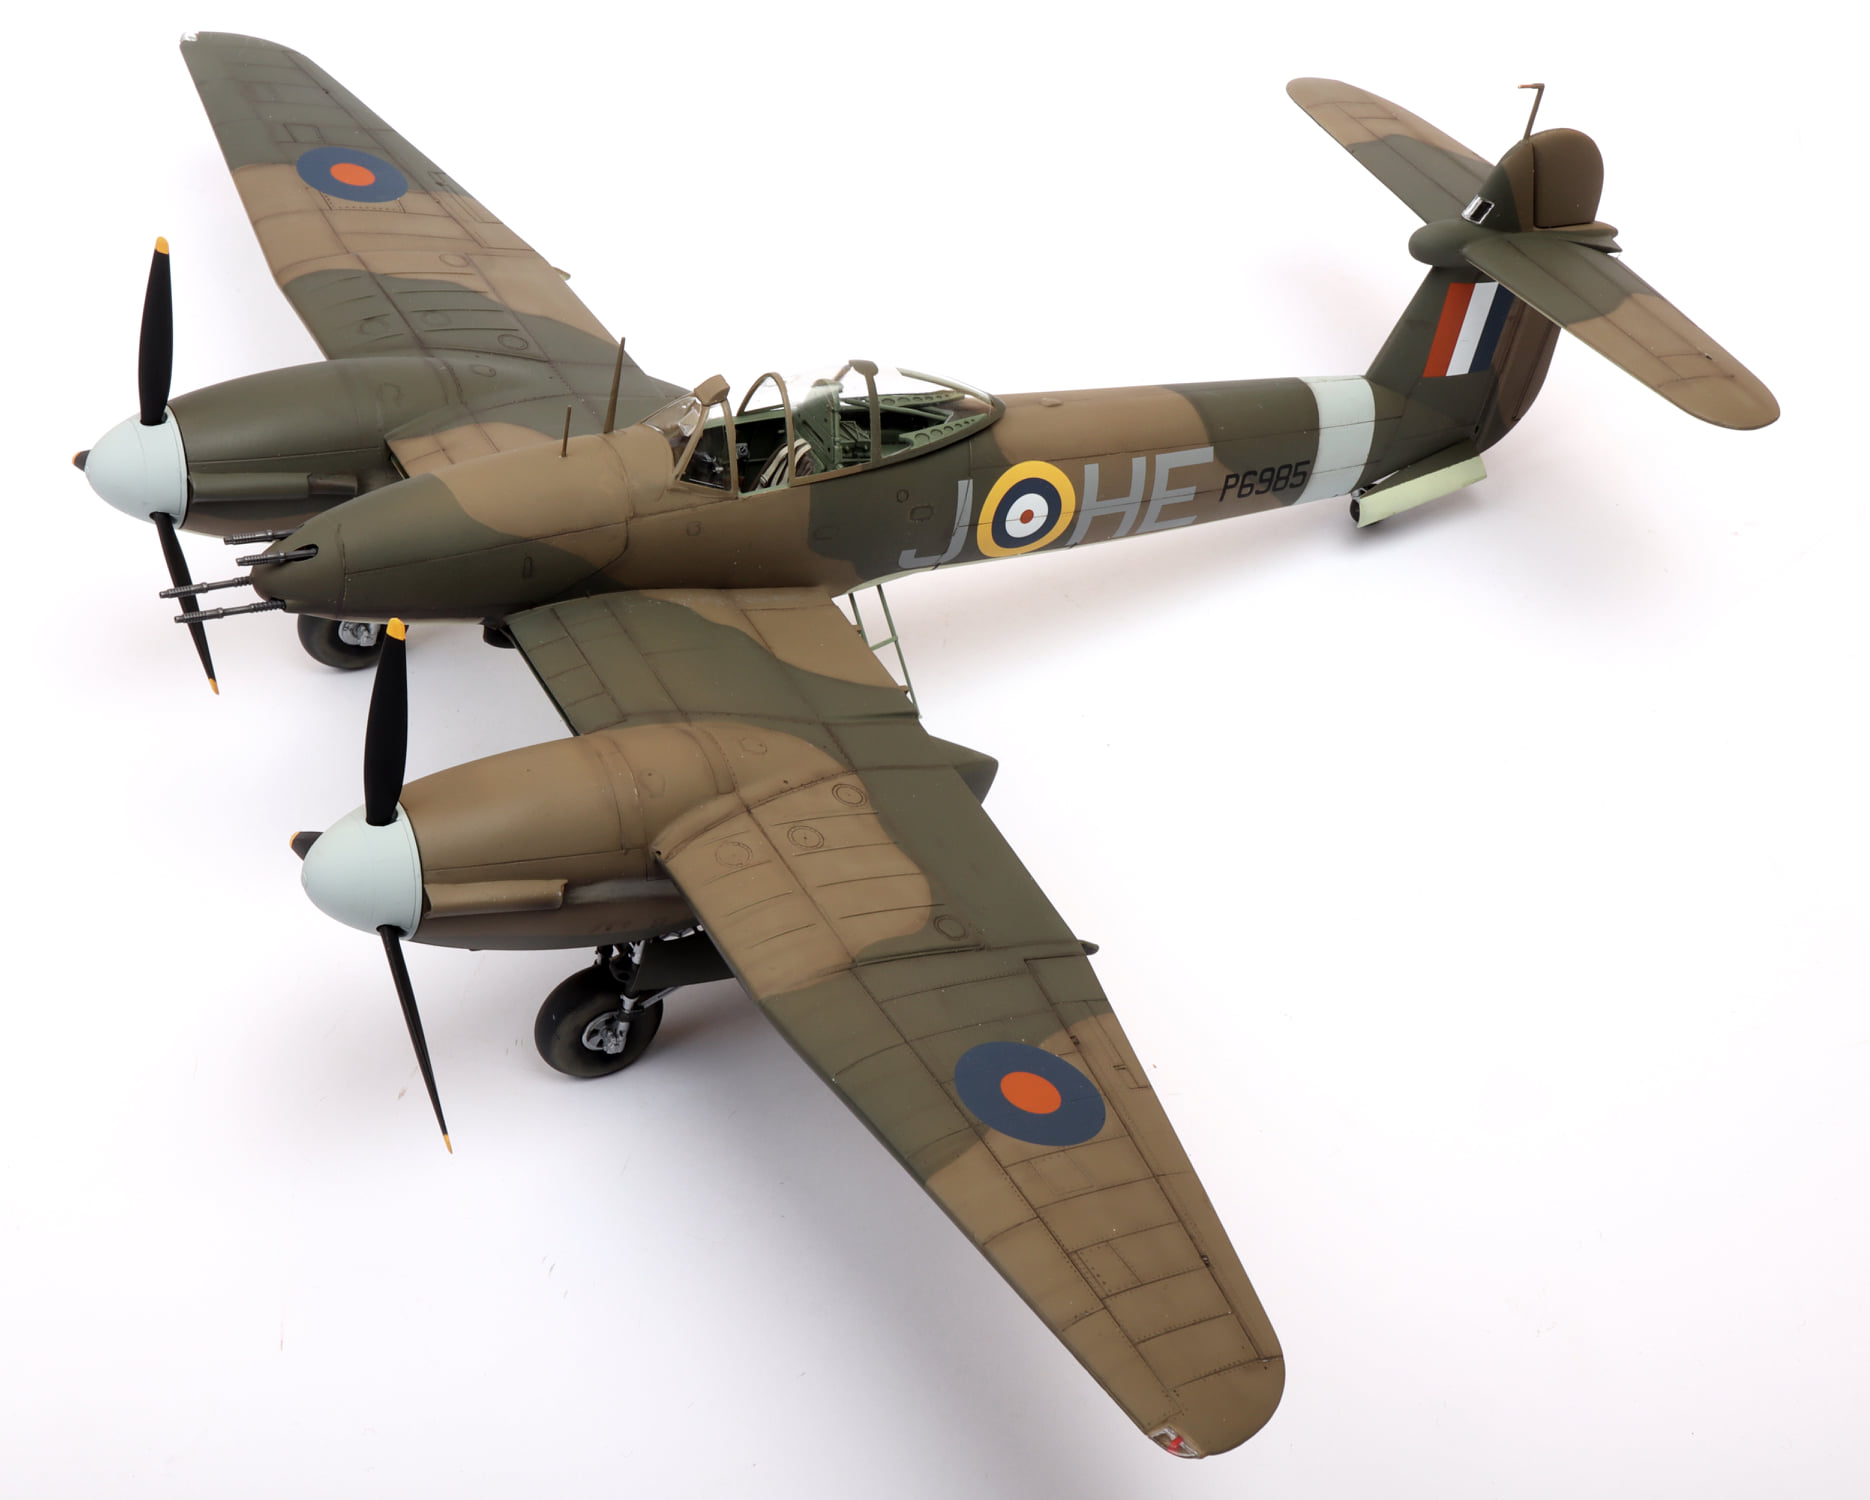
I’ve got the review done - Westland Whirlwind | AeroScale - so I’ll start the build on Sunday. 
All the best
Rowan 
2 Likes
Love the twin-spinner fighters, can’t wait to see this one progressing Rowan.
Cheers, D
2 Likes
Cheers Damian
I’m itching to get started! I’ve loved the Whirlwind ever since I got the original Airfix kit back in the mid-60s and I’ve built several in various scales over the years. But, while the aircraft has consistently scored highly on modellers’ wish-lists, I honestly never thought I’d see a high quality 1:32 injection moulded kit like this. 
I really hope Special Hobby scale it down to 1:48, because I’m sure there’s a market for an accurate new-tool Whirlwind in that scale after Trumpeter’s flawed effort.
All the best
Rowan
3 Likes
“I really hope Special Hobby scale it down to 1:72”
There, fixed that for you 

Considering the bulk of their catalog, the most likely outcome.
Hi Russell
1:72 would be awesome too! 
All the best
Rowan
1 Like
Hi again
No pics to show yet, but I’ve been working on the cockpit and radiators today and everything’s slotting together very neatly. The cockpit parts are very crisply moulded and really well detailed, while the contoured wing ribs that form the sides of the radiator ducts are cleverly designed and fit very well.
I’ll aim to post a full progress report later this week.
All the best
Rowan
2 Likes
Hi again
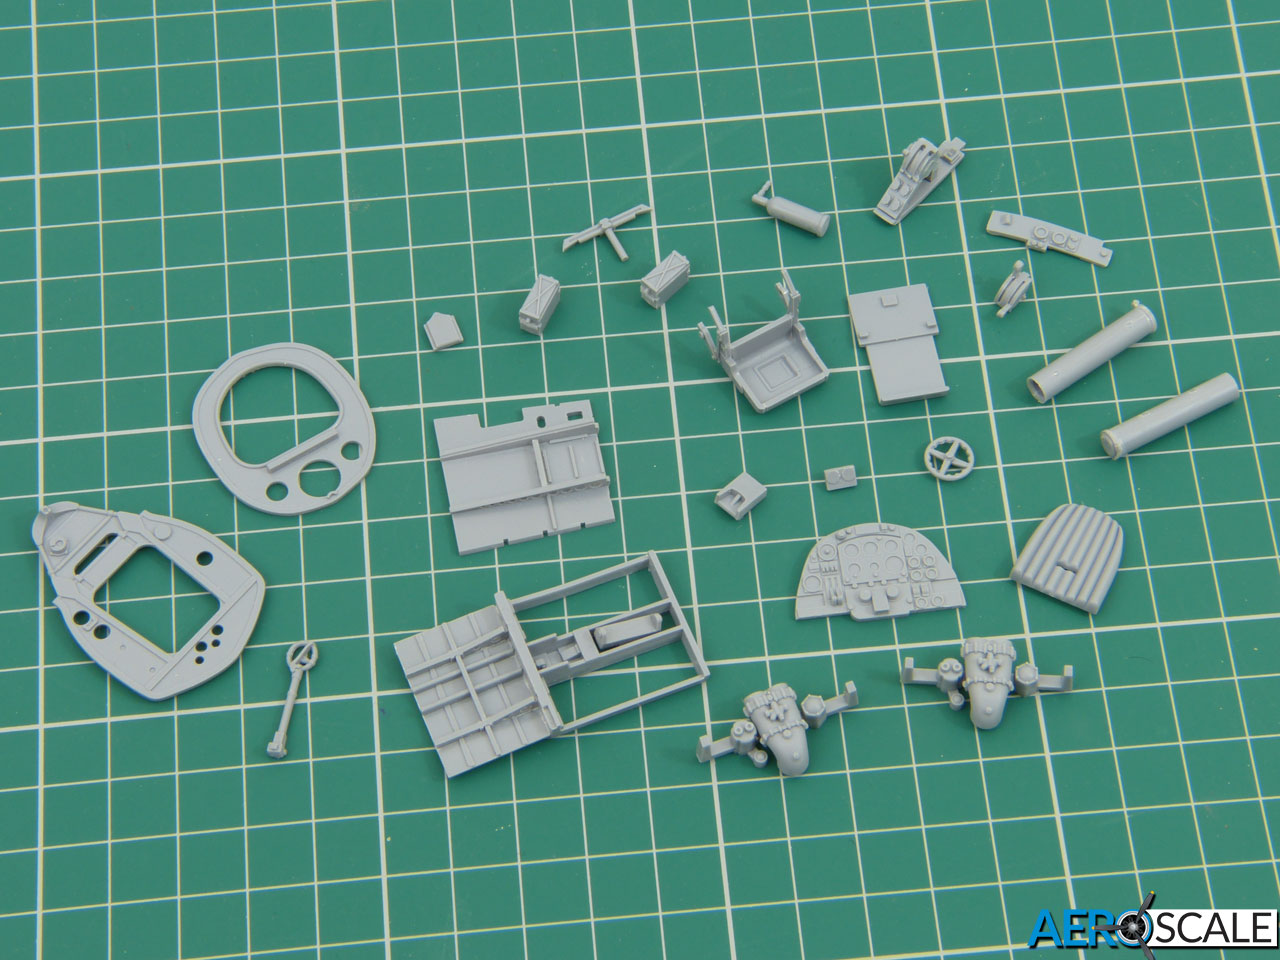
Just a quick update to show that things really are underway. I’ve been preparing interior parts when I’ve had a few free moments and have a little collection now ready to start throwing some paint at:
I wrote in the review that Special Hobby had kept ejector pin marks out of sight. Well, that’s basically correct, but I found a couple (one on each side of the cockpit) that are only partly hidden by the fuselage frame that covers them. You could probably get away with leaving them alone (they are low down on the sides and will probably also be further hidden by the pilot’s seat, but I’ve filled them to be on the safe side:
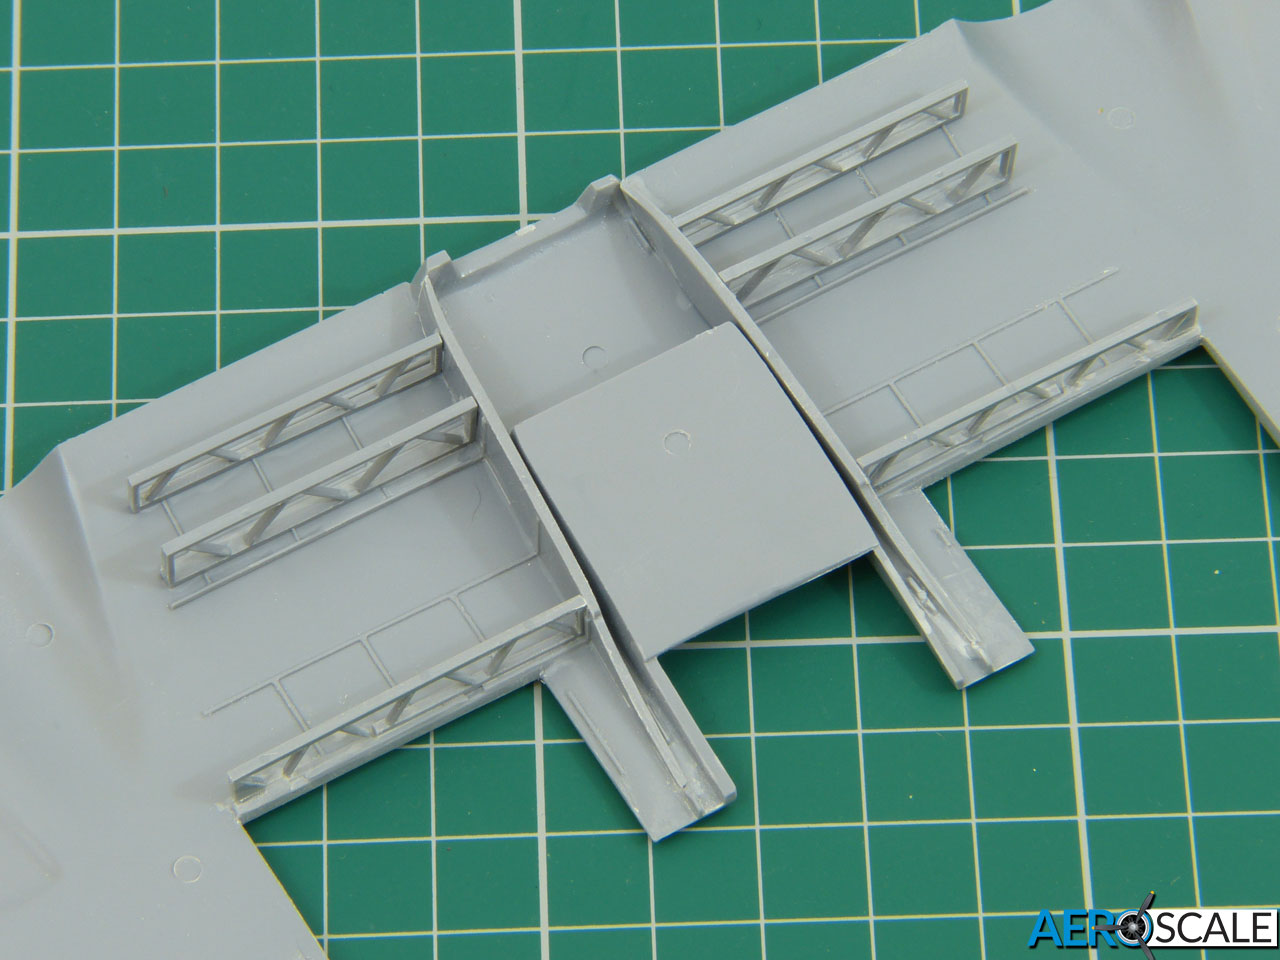
I’ve also fitted the Warren truss sections in the radiator bays. They fit neatly and the wing halves close tightly around them:
All the best
Rowan
7 Likes
Some seriously nice detail in there Rowan.
Hi HG
Yep - it’ll look pretty good straight from the box and will make a great basis for superdetailers to get stuck into. As this is a review build, apart from adding a seat harness, I’ll restrict myself to adding a few cables and thinning down the overly thick rim of the seat pan.
Going back to the point I made in the review, having had a bit of a tinker with the parts, I’m not overly keen on fitting the seat and control column as late Special Hobby suggest in the instructions. I’ll obviously do a proper test to ensure that fitting them earlier (and more conventionally) doesn’t mean things snag when you attach the fuselage to the wings.
All the best
Rowan
1 Like
Hi again
Sorry for the apparent lack of progress, but it’s just been one of those weeks where I haven’t been able to get time for a proper session at the workbench. I have continued to tinker, though, preparing more subassemblies.
I’ve filled the sink mark which I mentioned in the review that runs down the fin ahead of the rudder line. Stupidly, I forgot to take a photo of it before starting work, but the result is very good after filling it with “Gloop” (my name for scrap styrene dissolved in liquid cement). I always find it a very useful filler for jobs like this, because you can apply it so precisely and the solvent in it means it literally melts into the plastic and blends in perfectly when it’s sanded. The only downside is that it takes a while to cure - but that isn’t a problem if you’re not in a hurry.
All being well, I should have a half-day free tomorrow, so I’ll aim to get some painting done at last. Touch wood, things should start to get a bit of momentum after that.
All the best
Rowan
1 Like
Hi again
Well, Friday didn’t turn out the way I’d hoped, and I ended up working from home instead of getting much free time. But tomorrow’s Sunday, so I’ll definitely get the painting started!
I forgot to post a comparison shot of the seat with the rim of the pan thinned down a bit. It seemed quite a dramatic improvement to the naked eye, but looking at the photo, I’ll do another pass before painting.
All the best
Rowan
2 Likes
Nice work so far Rowan, that seat definitely needs some weight loss!
My Facebook feed threw this at me today, Brett Green has completed his build on the Hyperscale and Missing-Lynx page.
Such an elegant looking airframe.
Cheers, D
1 Like
Hi Damian
Thanks for the reminder of how little time I get at the workbench!
I’m way behind Brett on this one - but I’ll get there in the end…
All the best
Rowan
I received my kit yesterday and started it straight away. Not much done but the detail is very good and I am looking forward to building this.
I’m intrigued as to how you thinned out the seat? It looks to have been well done as it’s nice and smooth but clearly done on the inside. So how? 
And I have just looked at the seat and see that the sides are separate! So the stupid question is answered! 
Hi Mal
I actually built the seat before thinning the rim so that I could do a before and after comparison. In some ways that makes it easier to do anyway, because you want to avoid sharp corners at the front of the seat pan - the real seat was slightly rounded there. It’s very straightforward to do - I just ran a scalpel with a #15 blade around the inside edge to give the effect that the sides are thinner.
All the best
Rowan