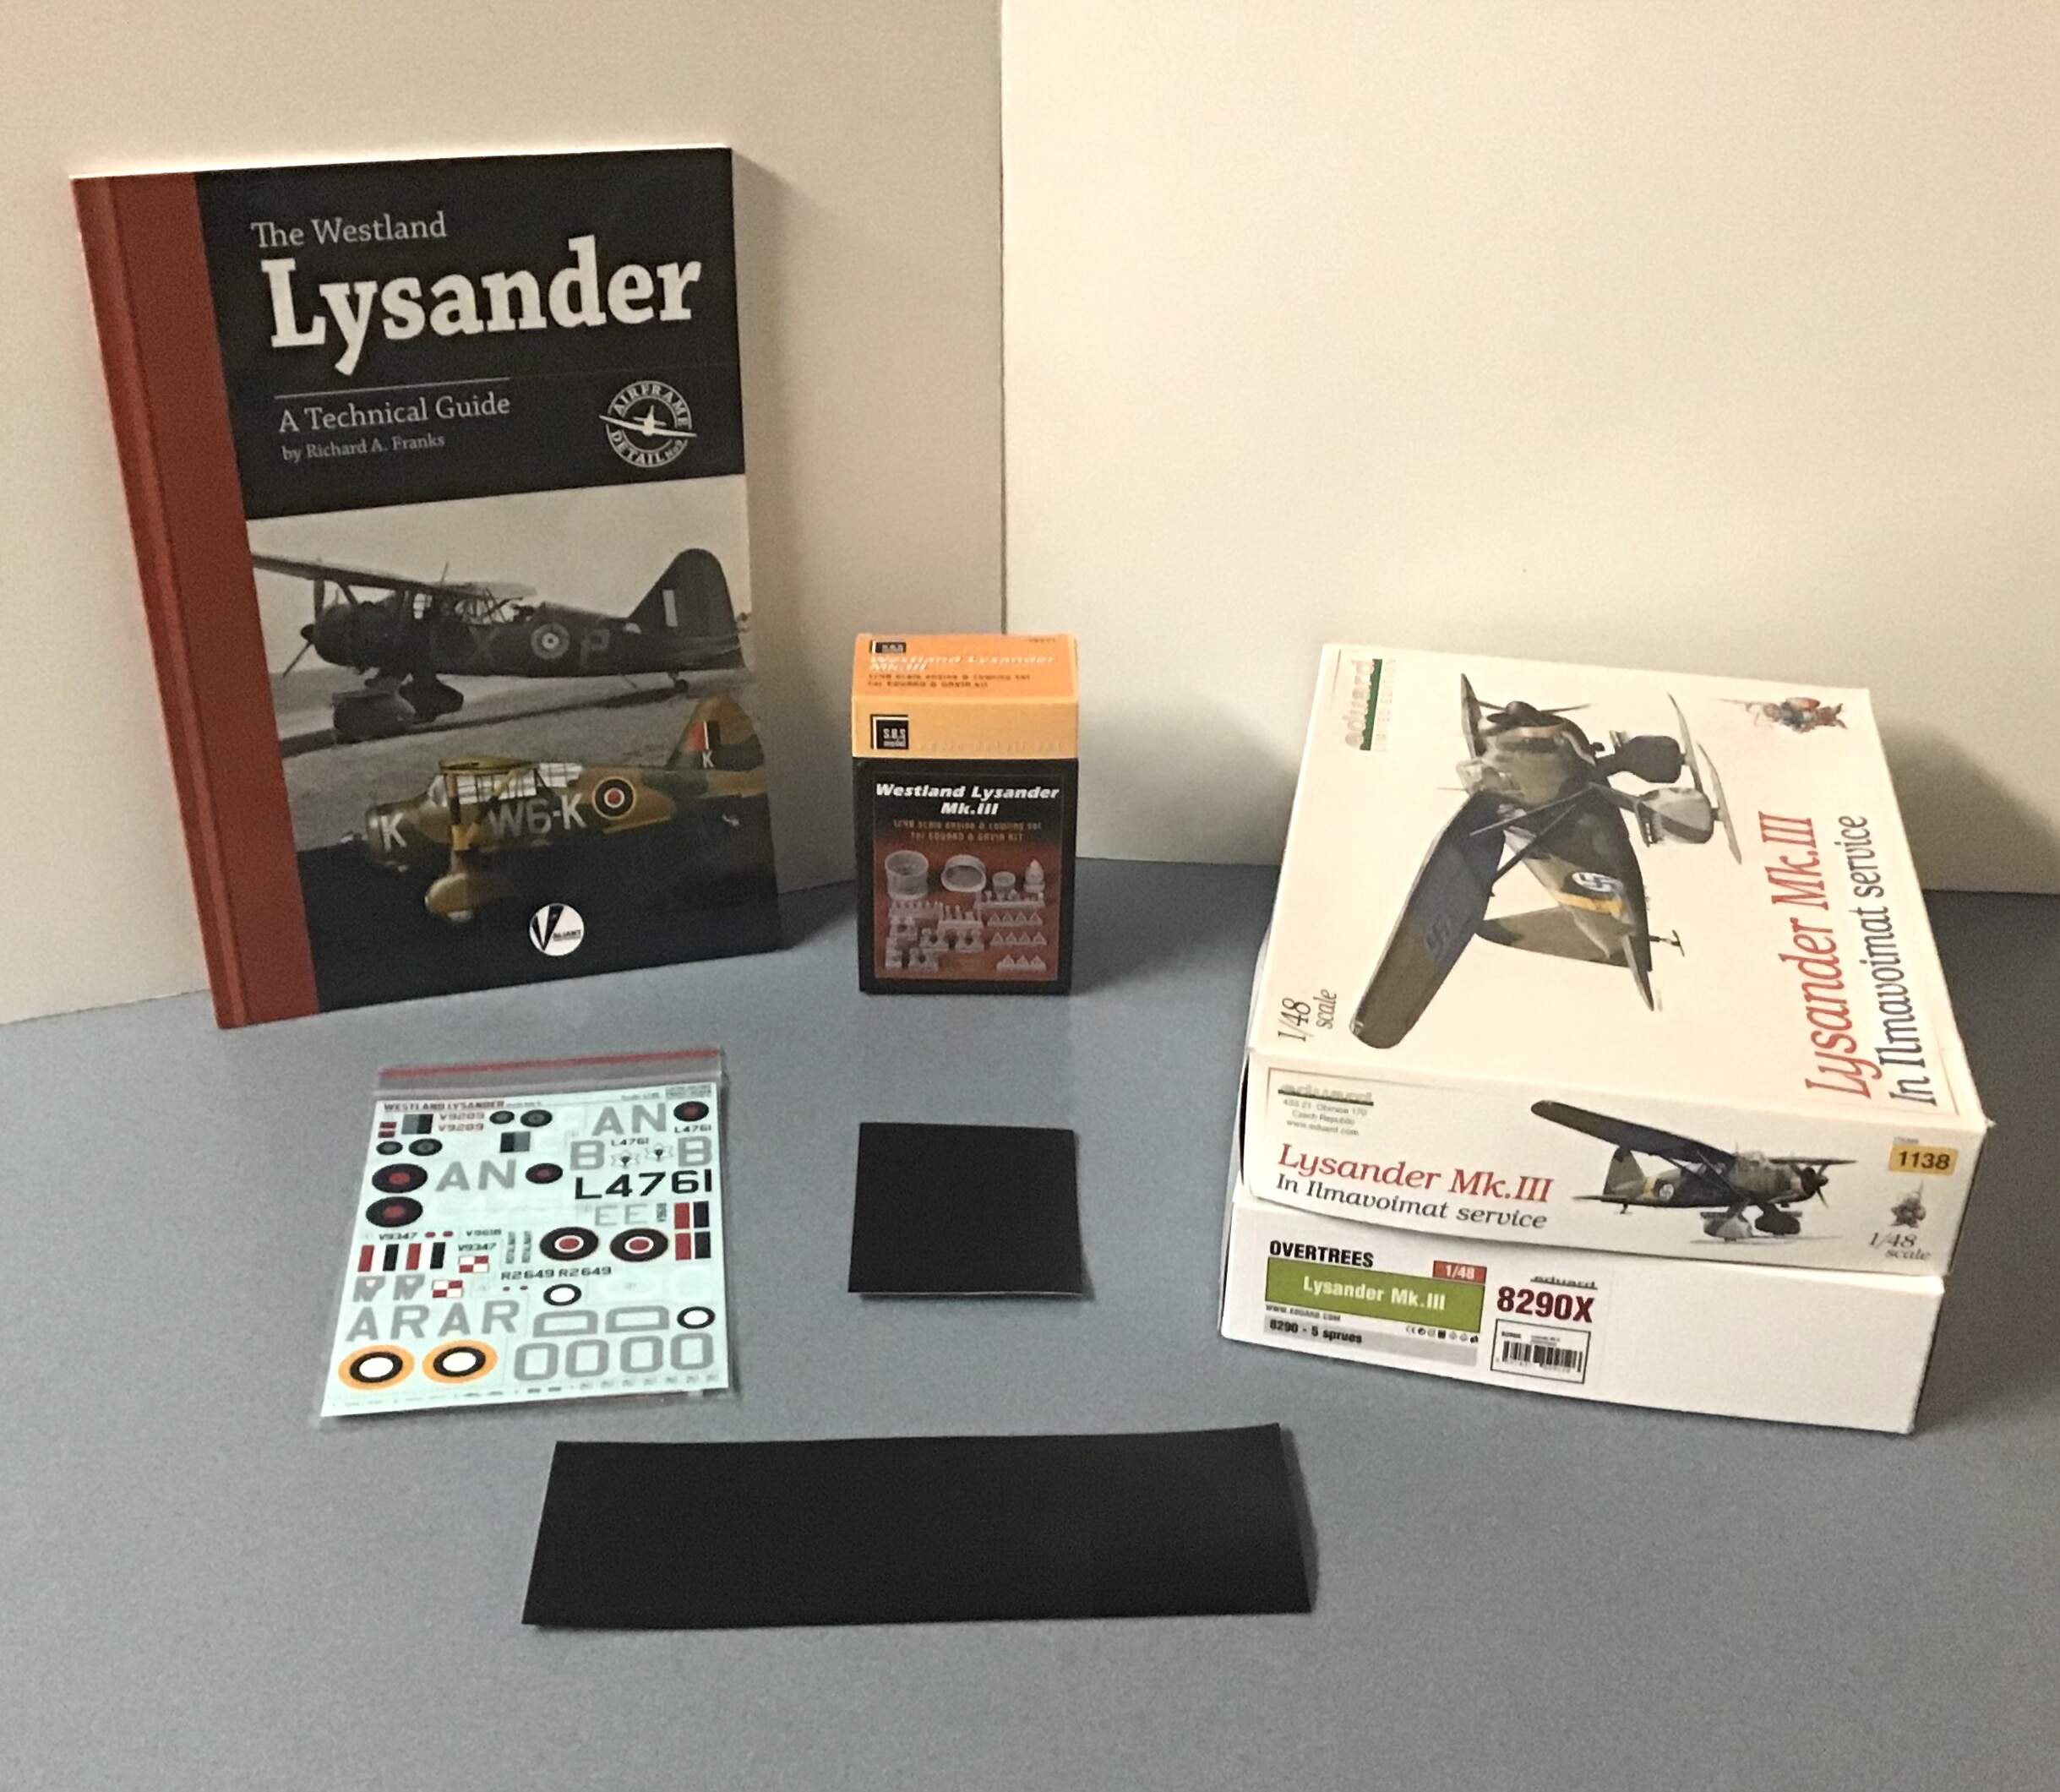
Hi all - Starting a new build shortly - will be doing Eduard’s 1/48 Lysander . Eduard have released this kit ( ex Gavia) in many versions over the years . I have had the Ilmavoimat boxing in my stash for a while now but it does not include the sprue which contains the central inboard fuel tank , external fuel tank and the boarding ladder which are prominent on the Special Operations aircraft so I purchased the Overtrees boxing as well. I plan on doing it in the markings of the aircraft in the NASM Udvar-Hazy Center.
I will be using the excellent resin cowling/engine set from SBS model , aftermarket decals from Print Scale as well as custom made masks for the squadron codes and serial codes.
Please get on board !
Thanks for following D . Should be pretty straightforward. The kit is very nice but needs some tweaking in the fabric areas among others .
Cheers - Richard
Hi Gary - The book is excellent and highly recommended. Many period photos as well as shots of existing aircraft , lots of detail shots and details from original tech manuals . Likely the best reference available and only recently published.
Cheers -Richard
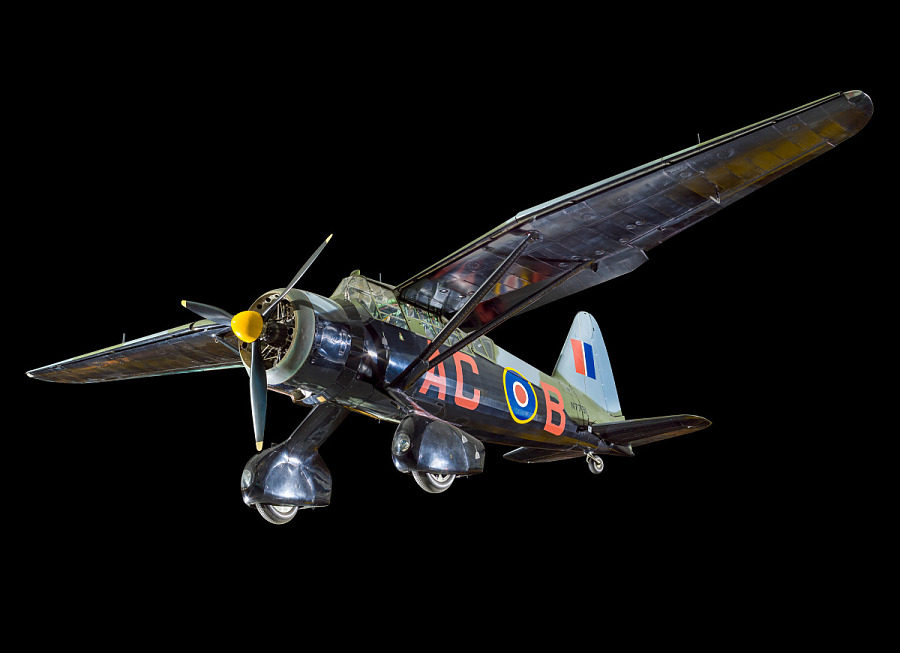
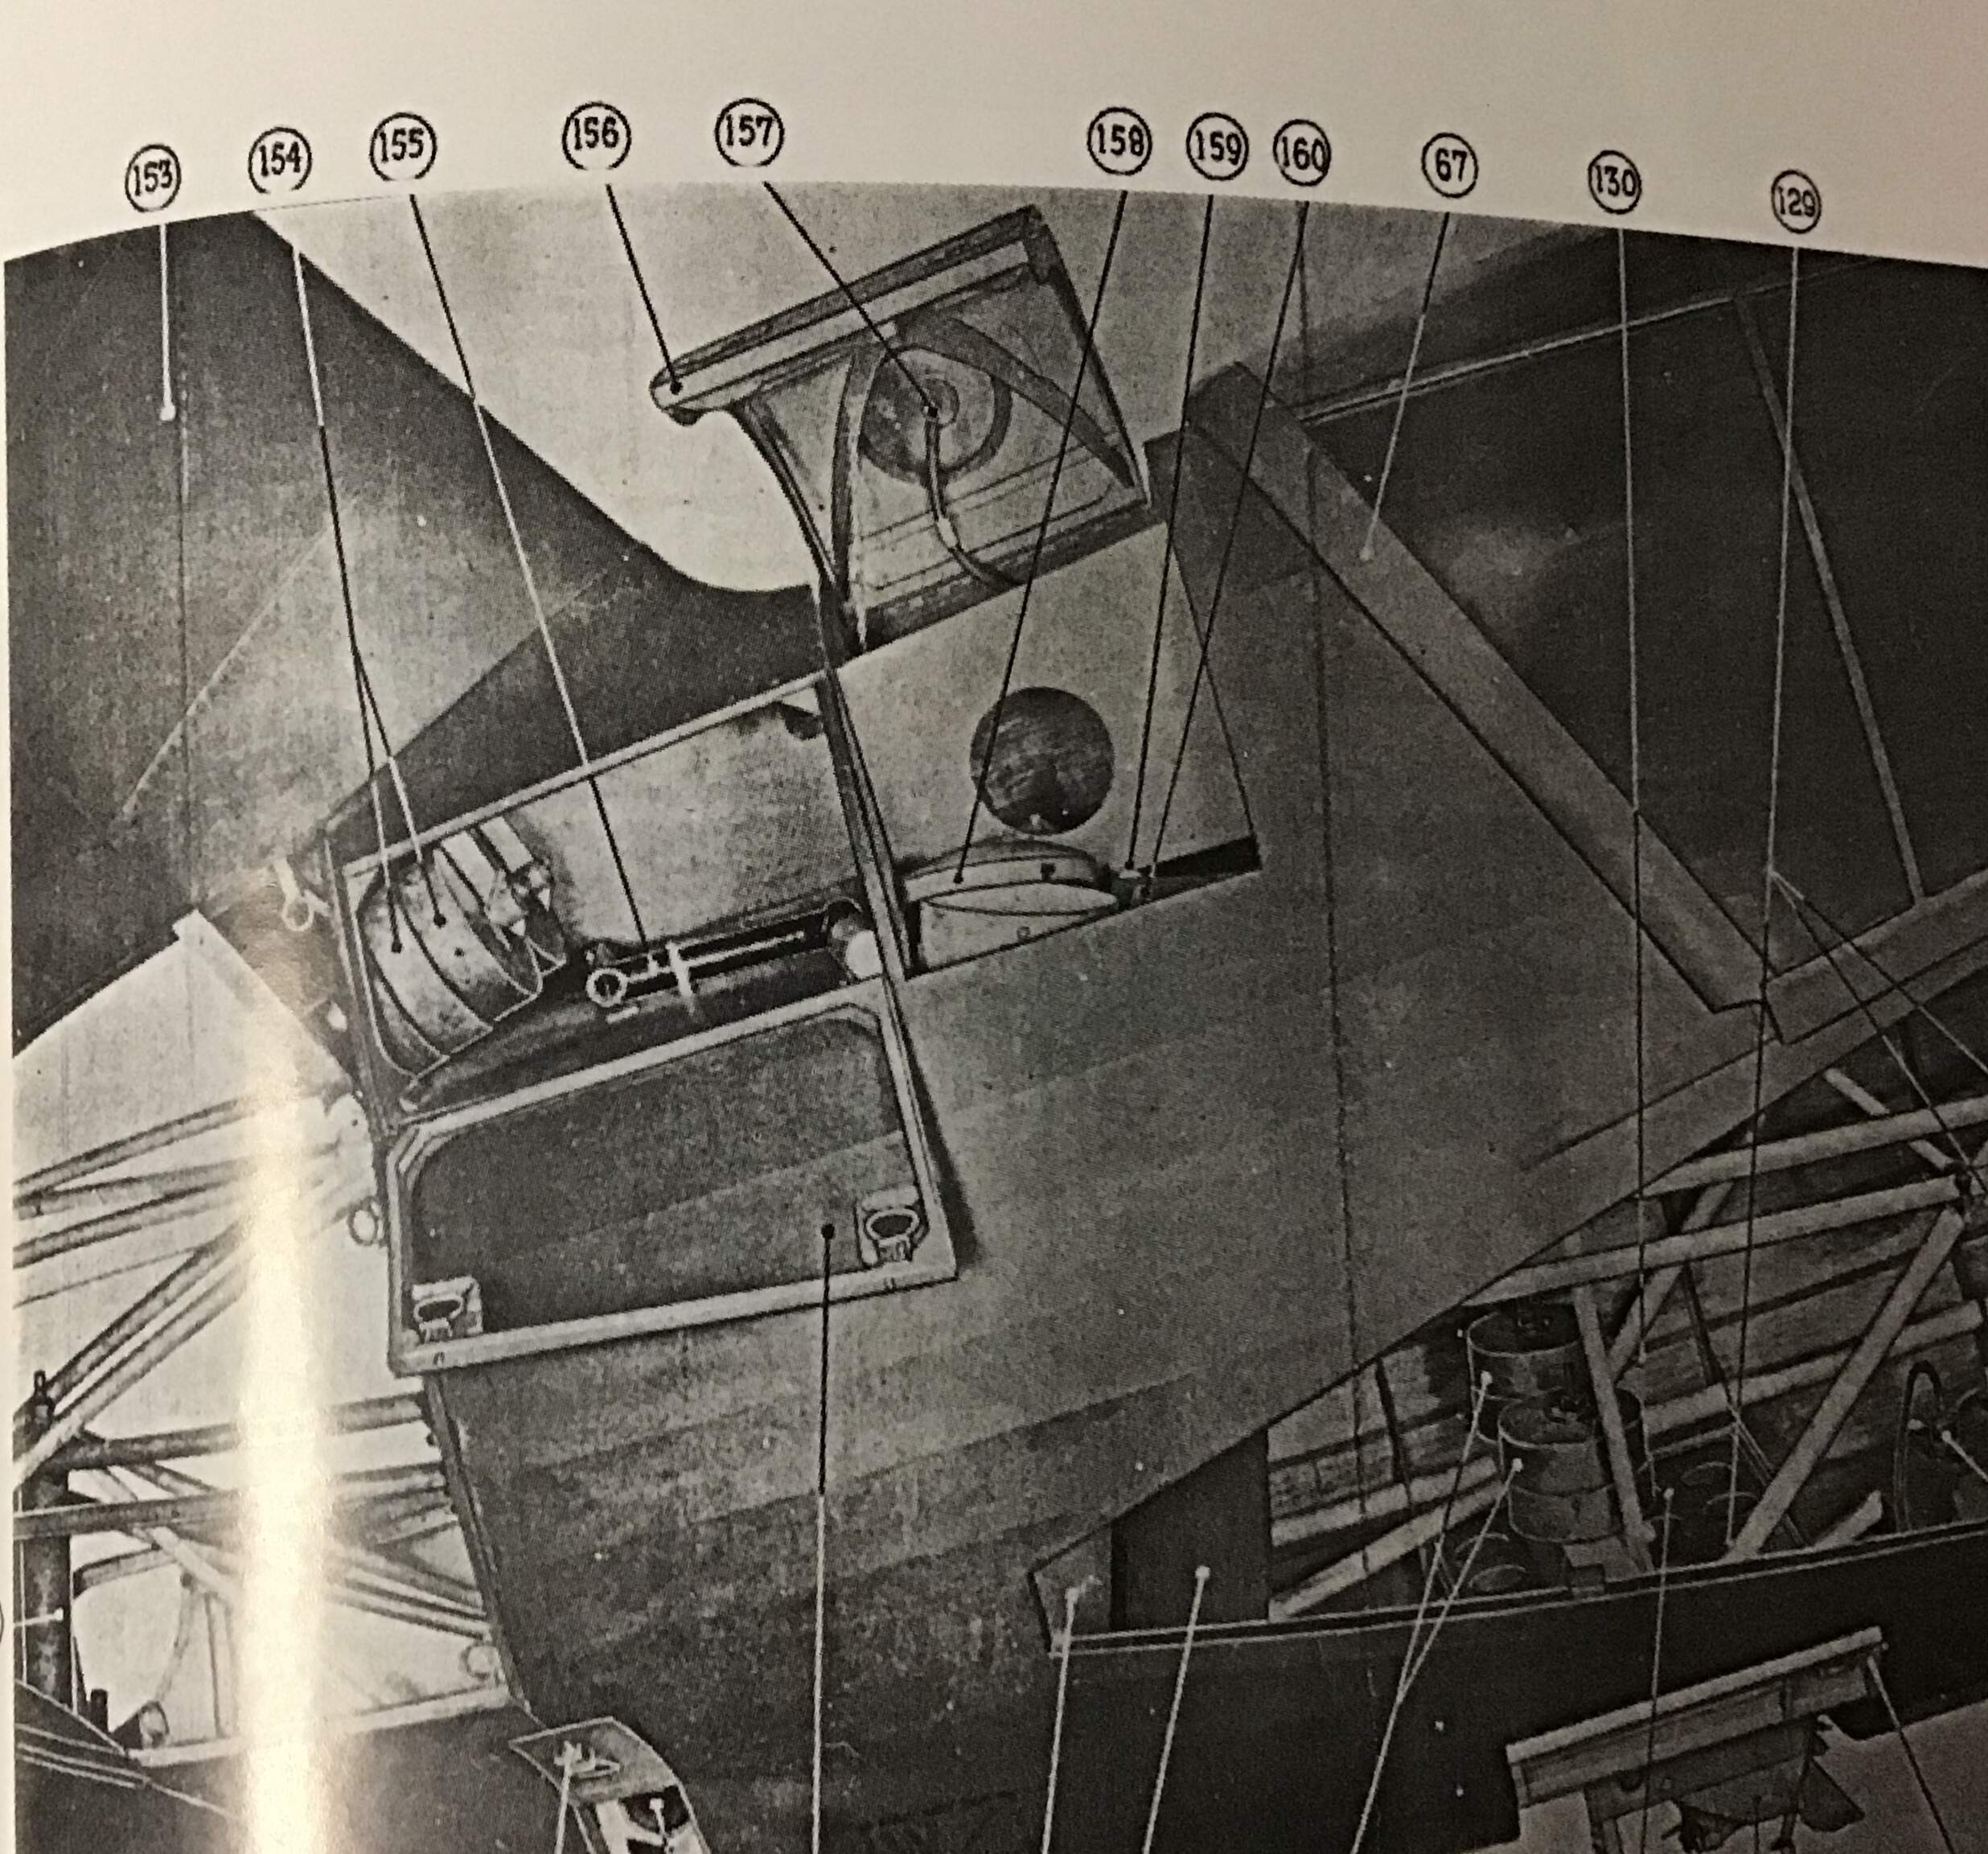
Yes indeed - photos of internal auxiliary fuel tank between cockpits and photos of rear cockpit seat arrangement which was a simple wooden bench with bi folding lid to clear plumbing on auxiliary fuel tank . The rear gunners seat and guns were removed on the SD aircraft - range was the priority and so consequently weight savings was paramount.
I will be scratch building the rear seat , etc and will include pics in this thread .
Cheers - Richard
I’ll order that book soon! Always loved the double ugly Lysander, and for what it did. Also a big fan of the Fi156 Storch. Have one Revell kit in my stash, and forgot about even owning it. Now want another one as well. Revell stated a couple years back they were going to re-issue it and the he162 kits, but we’re still waiting.
As for the Lysander, I’d swear I looked over one in Dayton Ohio years back. Remember it being much bigger than I thought it would be
gary
I’ve made a start albeit a small one .
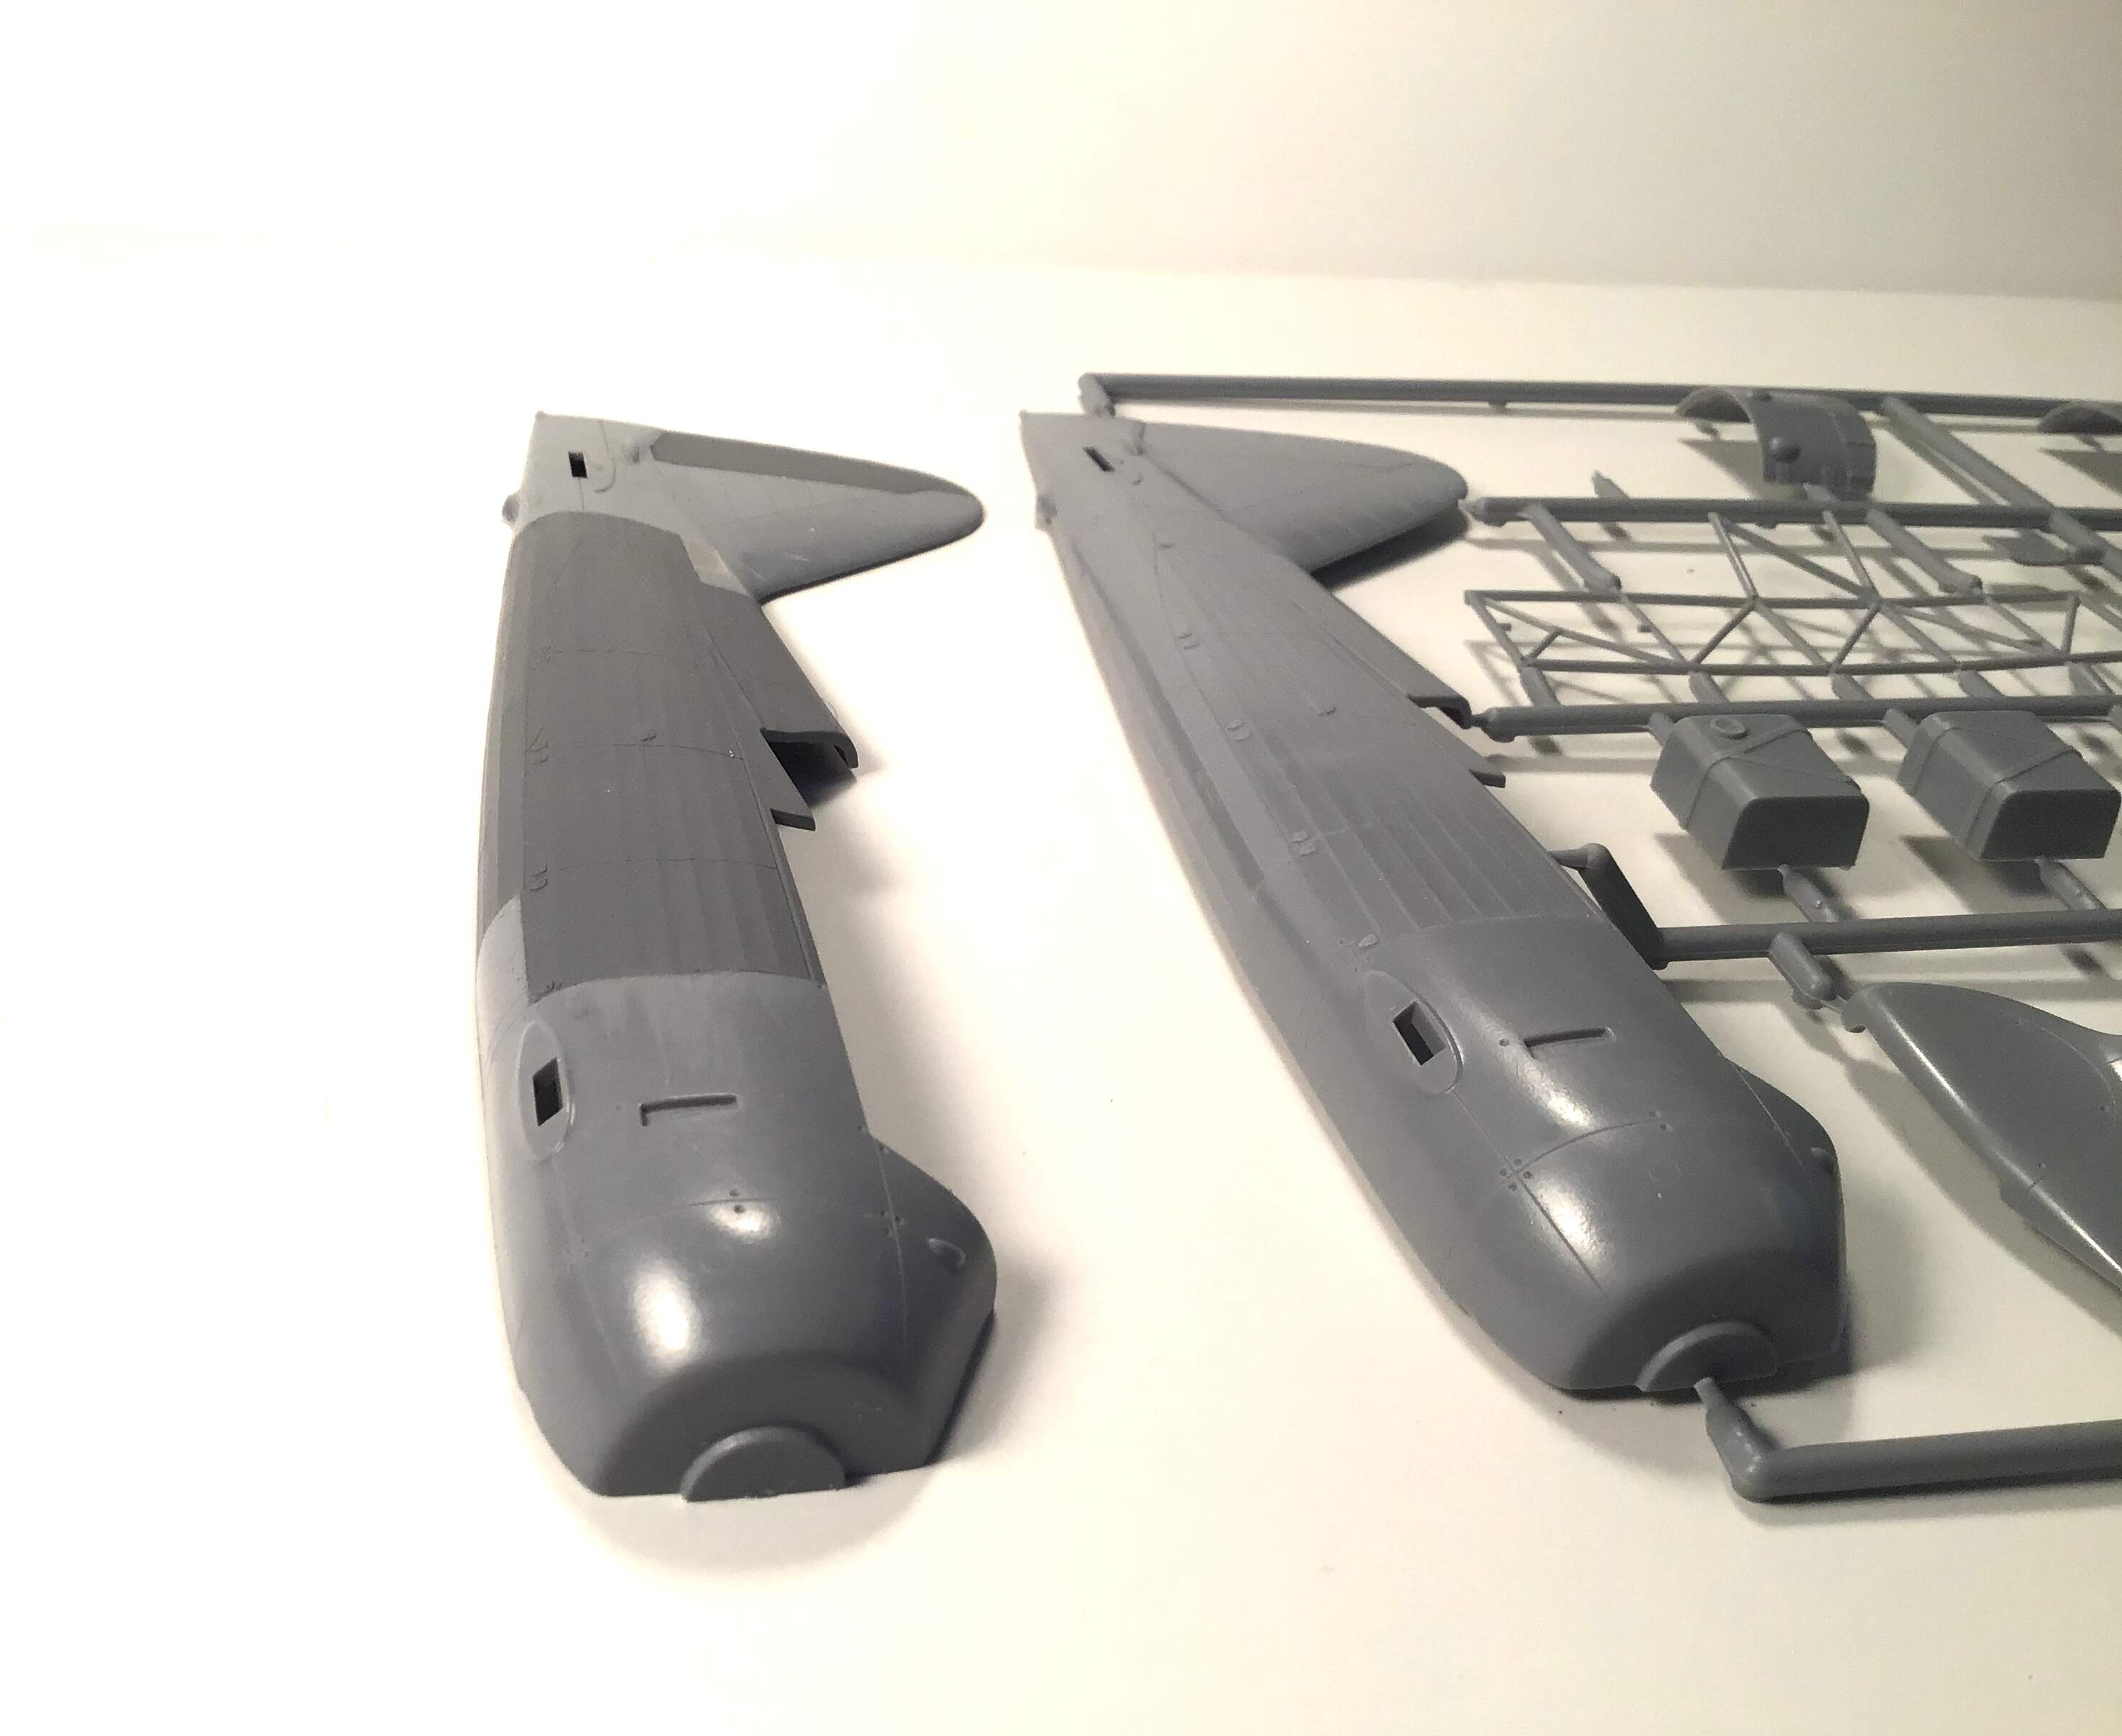
The first order of business is dealing with the overdone fabric areas on the fuselage.
In the central fuselage area the fabric is represented by raised areas not unlike rib tapes along the longerons. The actual aircraft either has none or they are so indistinct that they can’t be seen .
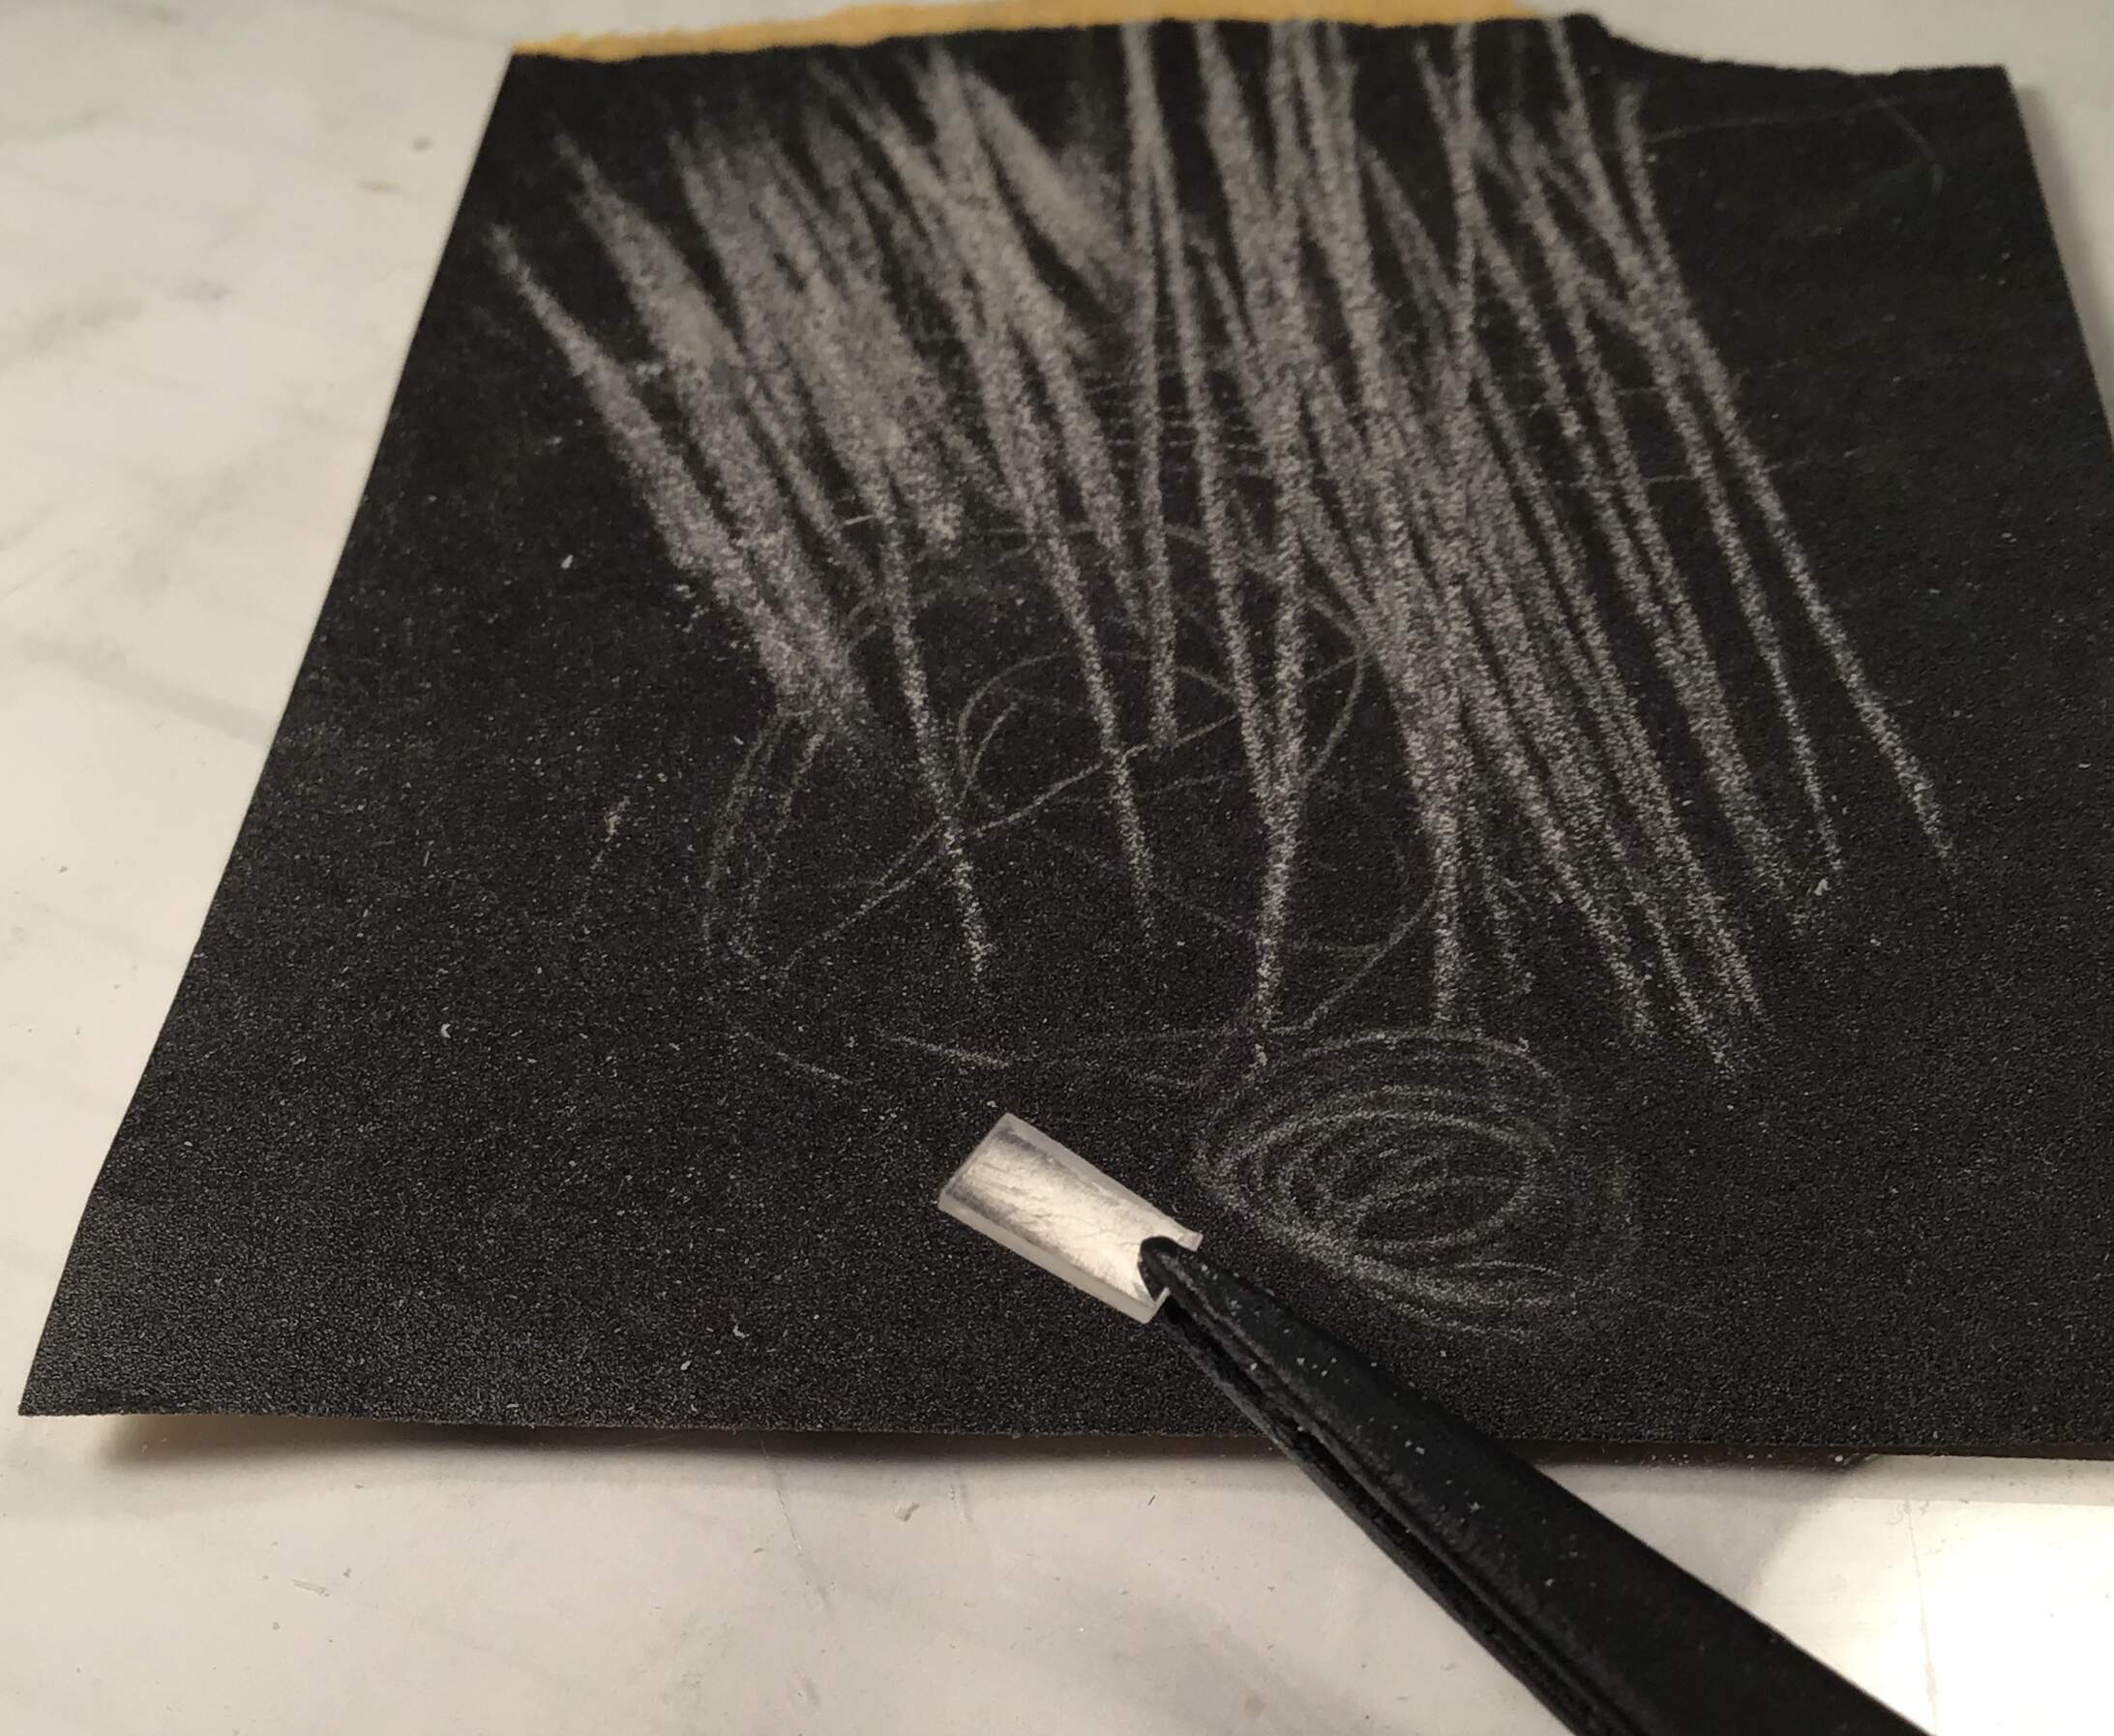
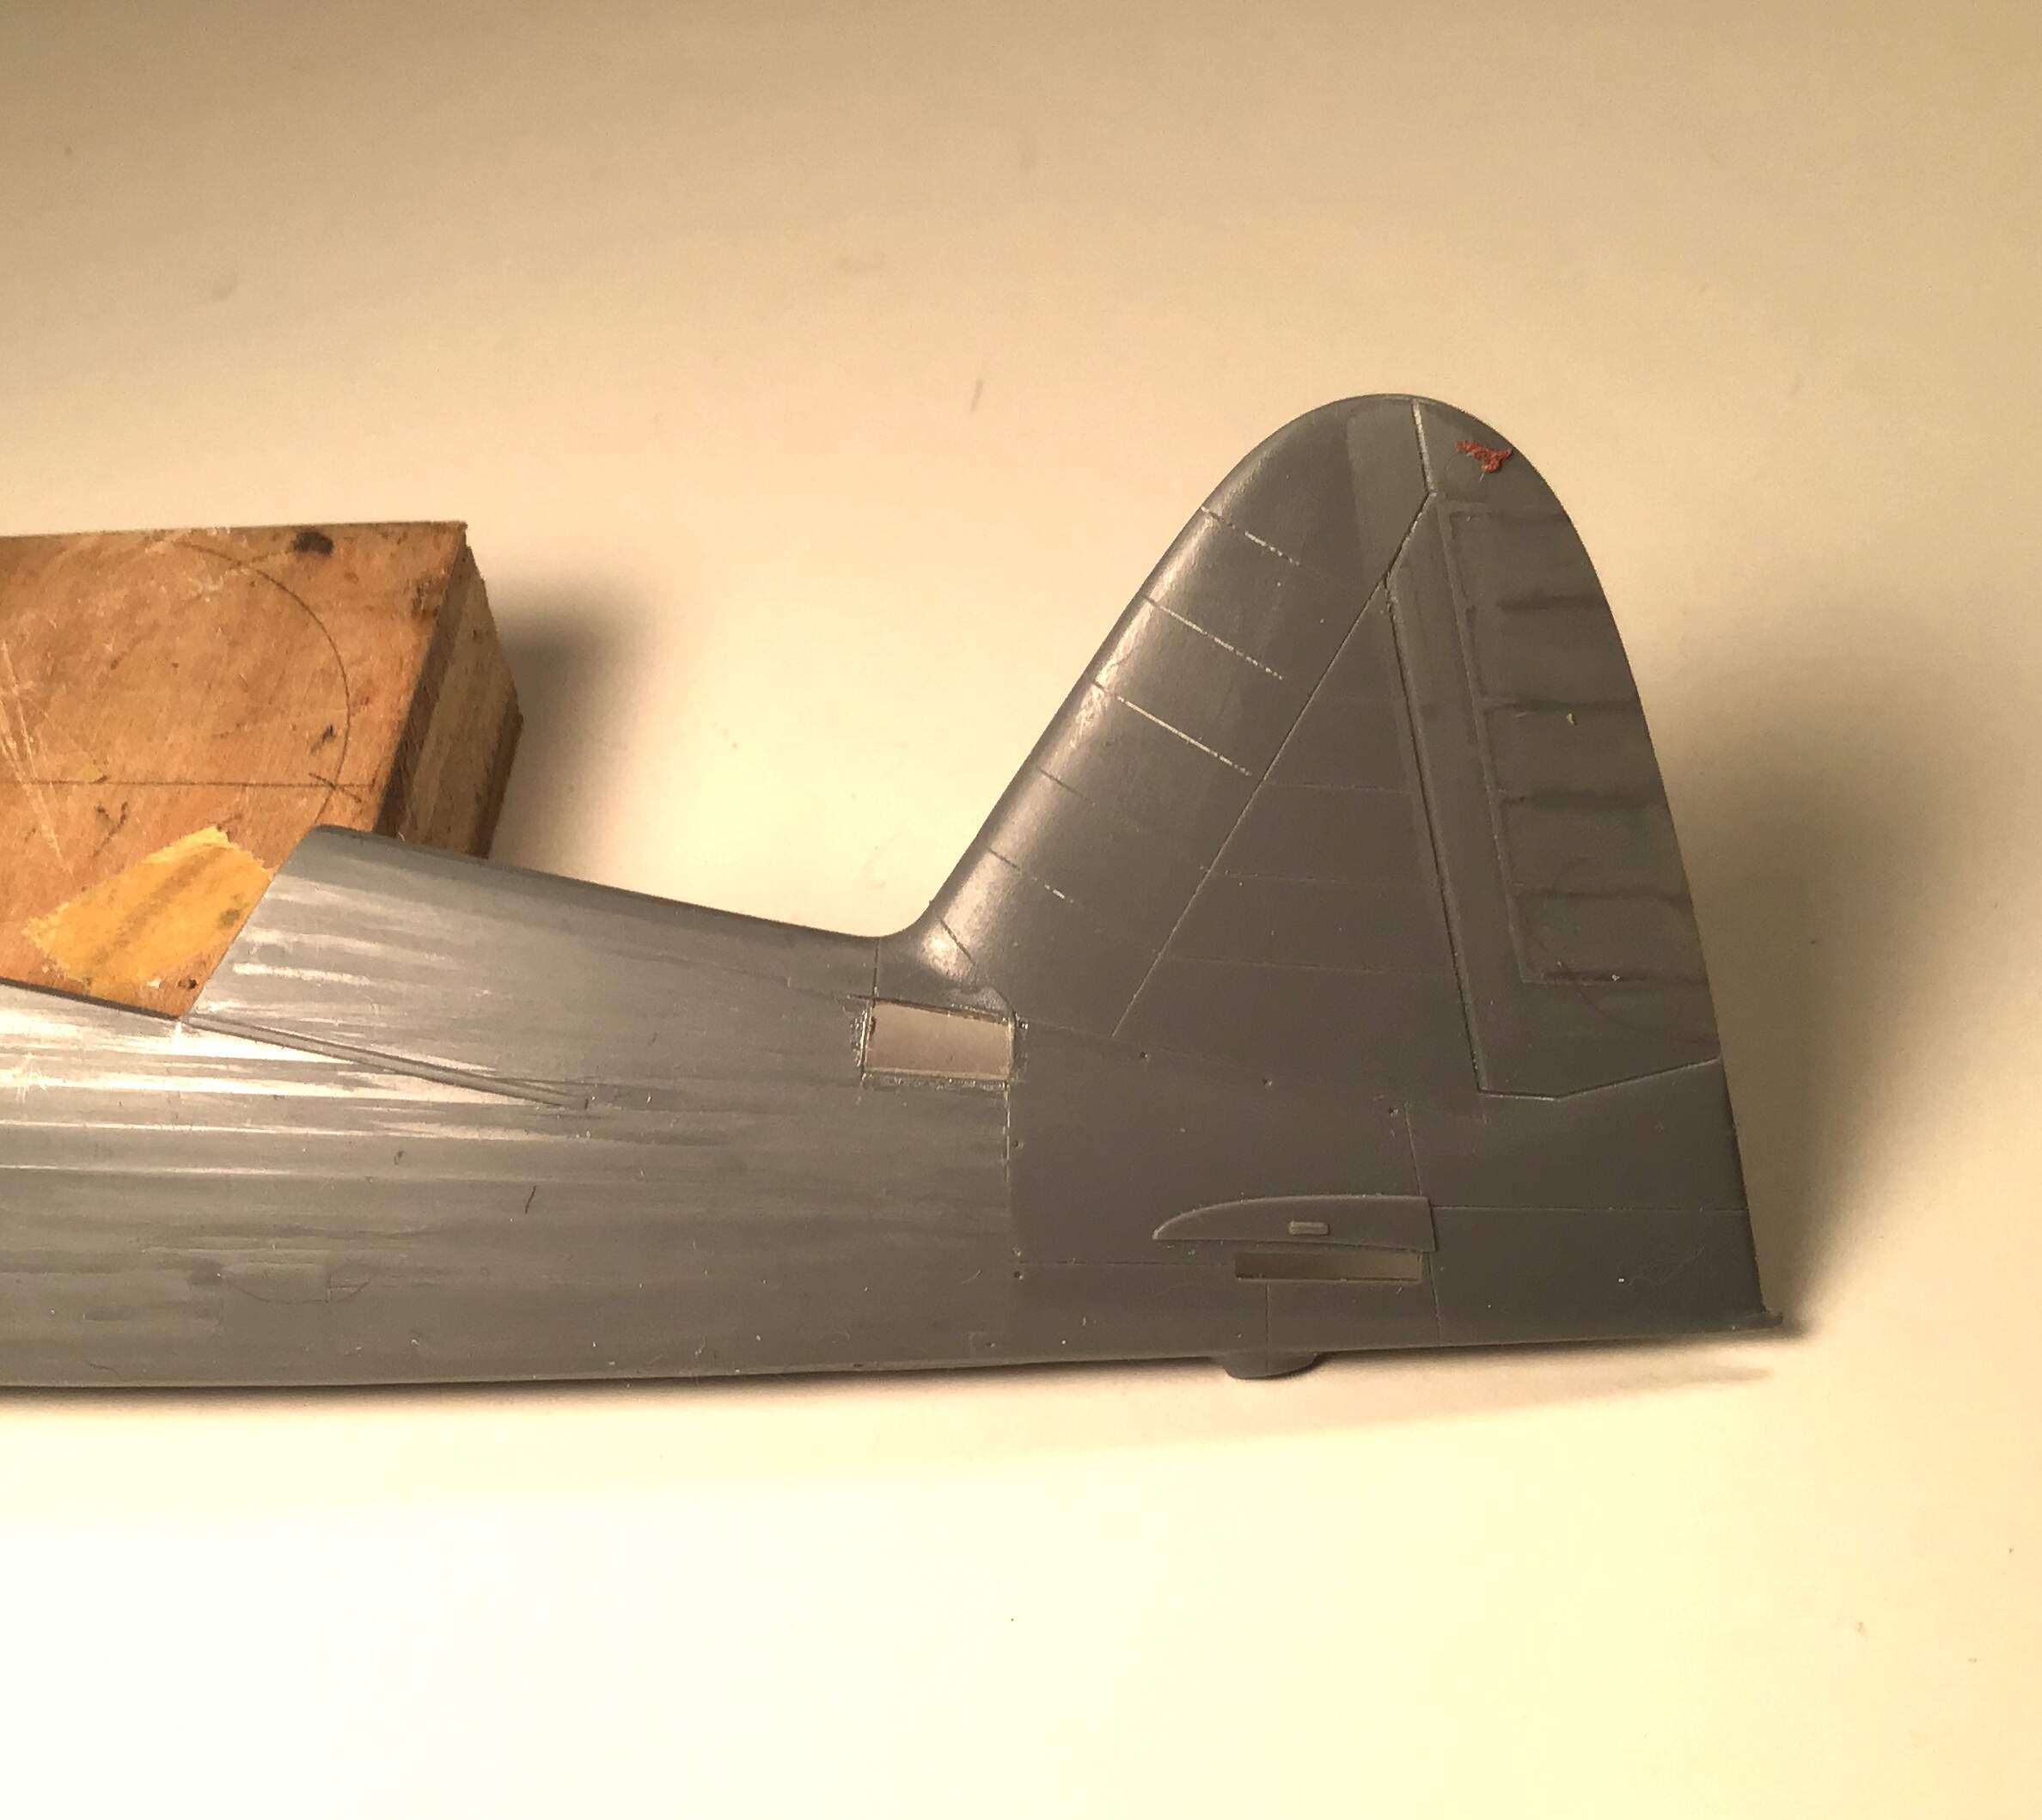
I began with very careful scraping along the longerons spanning two at once to create a series of flats running along the fuselage followed by careful sanding with 1500 grit , again being careful to only go along the fuselage so as to not round off the corners of each flat . Left Fuselage half done in this image while the right half is as supplied.
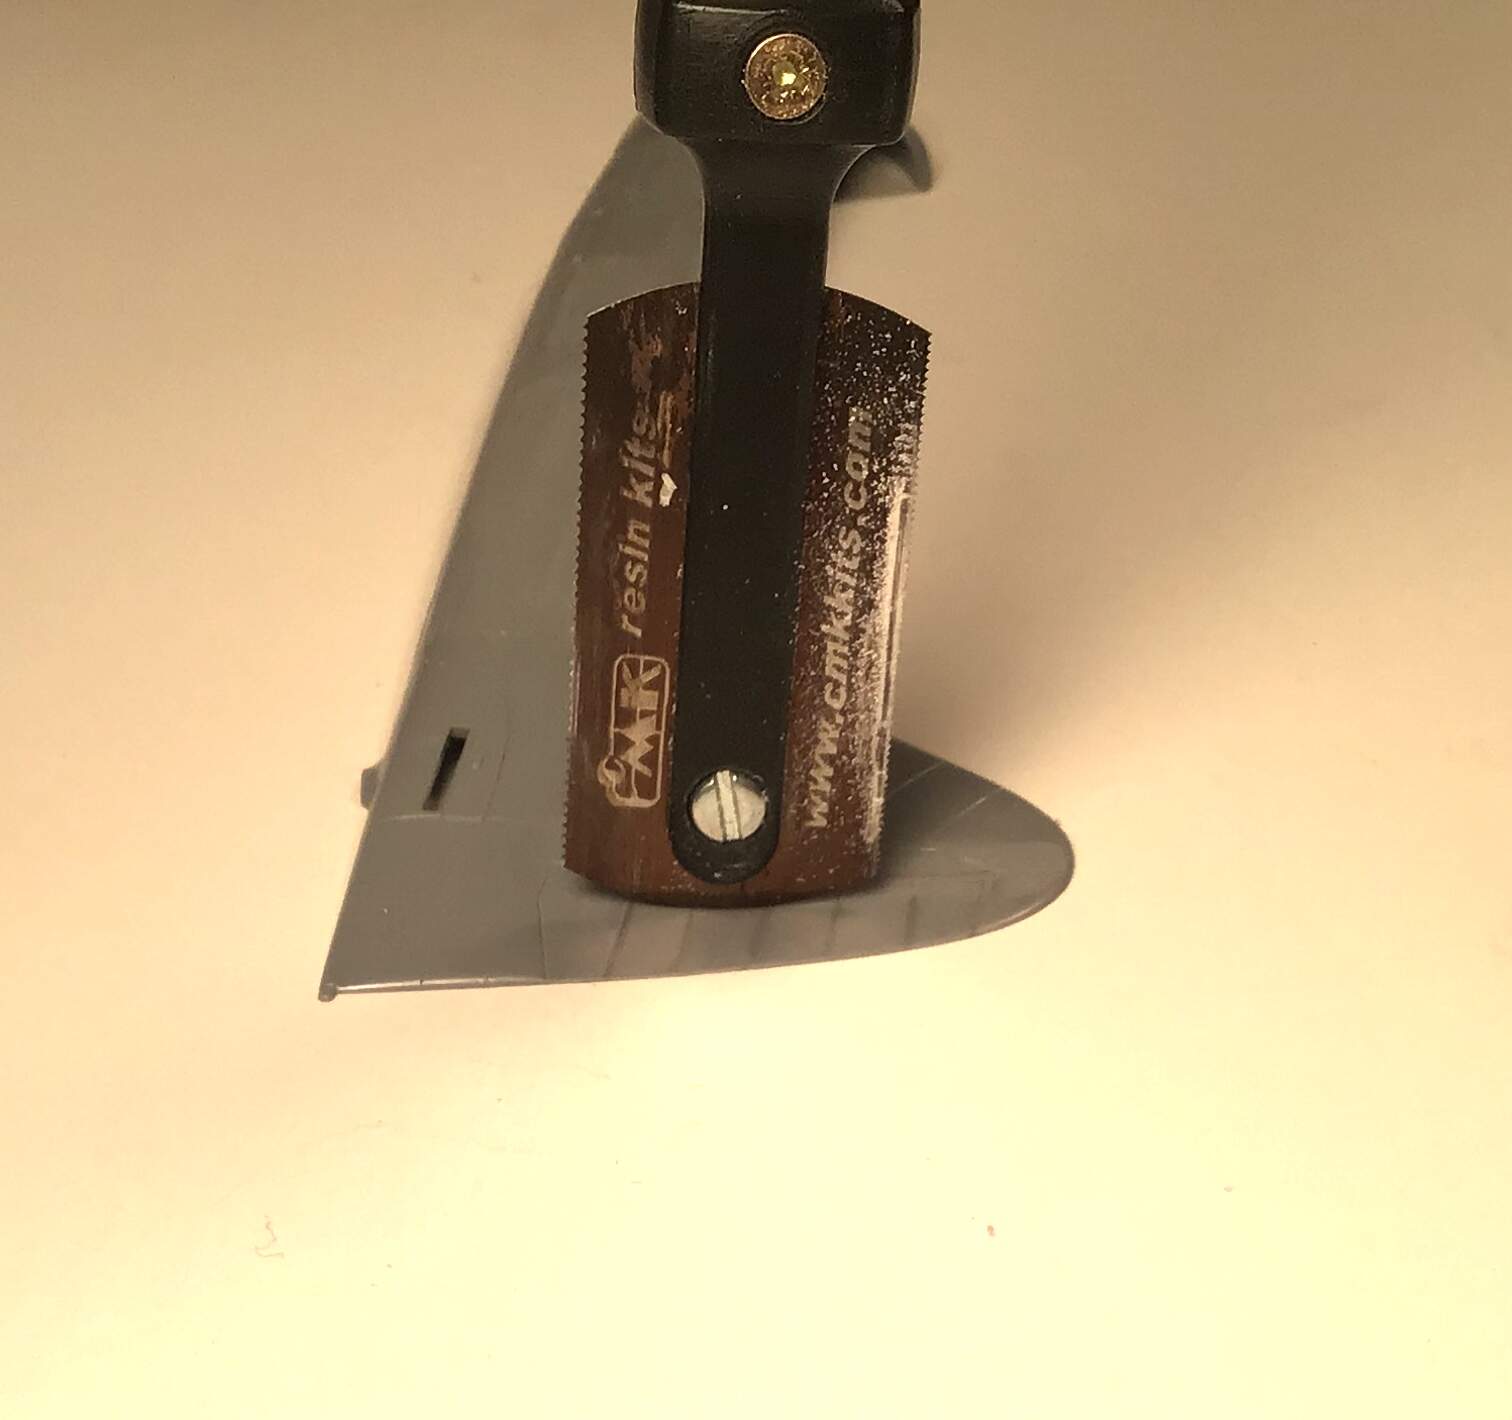
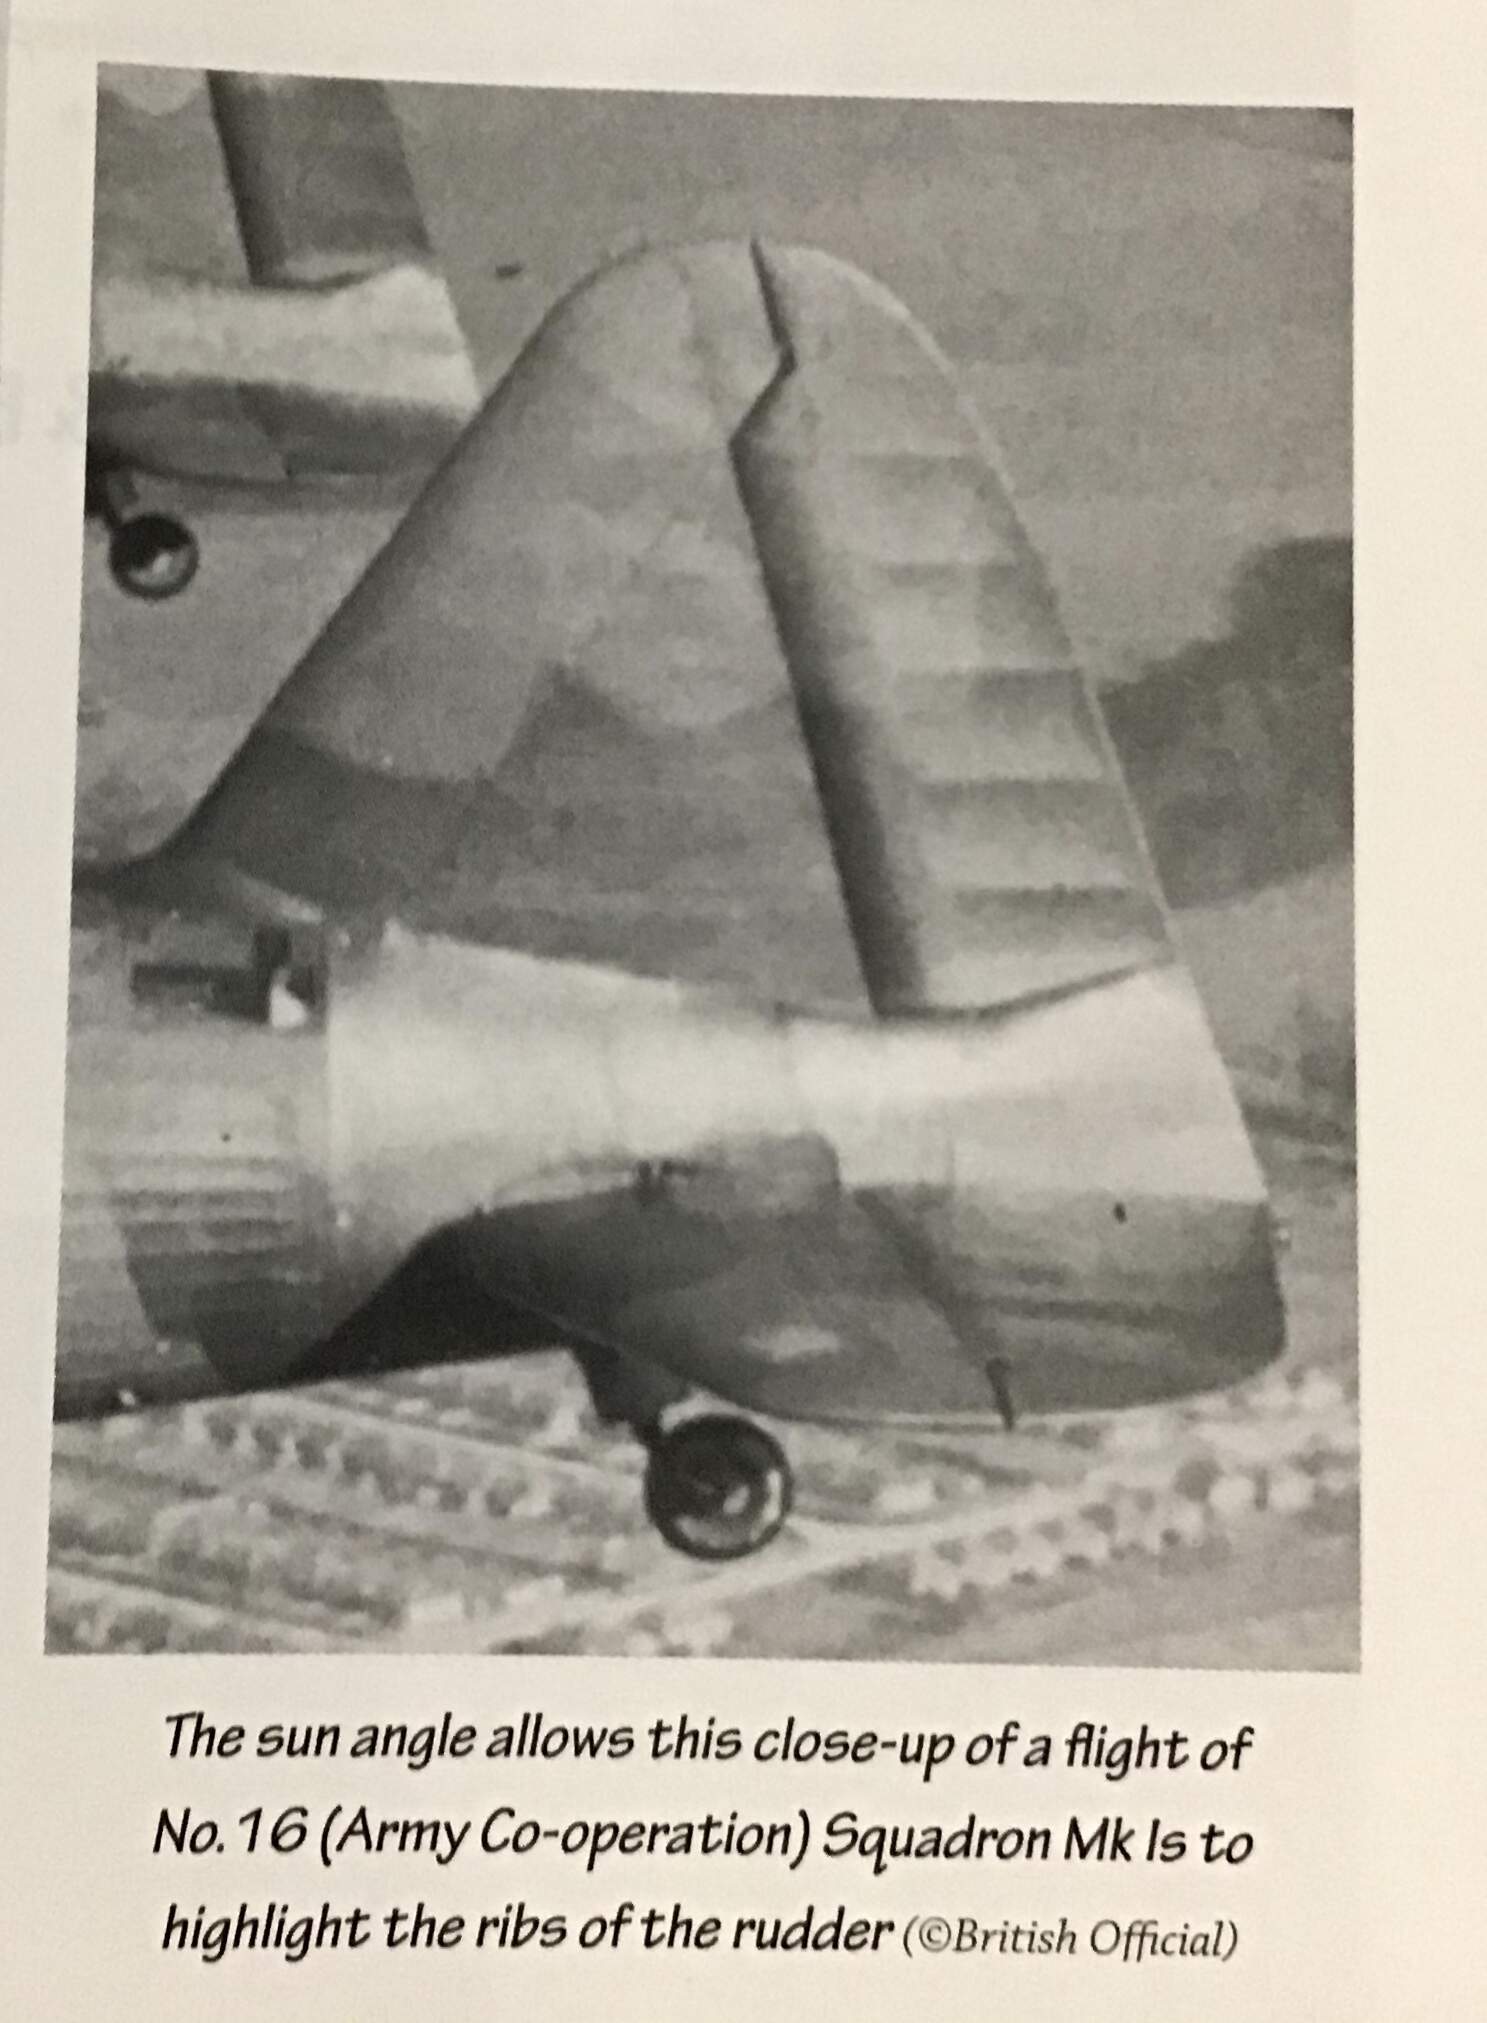
Next comes the rudder - same issue here in that the ribs are represented by rib tapes . While we often see overdone “scalloped “ bays between the ribs on older kits , that is not the case here . The rudder showed no scalloping or dishing between the ribs . The end of a CMK razor saw has an appropriate radius for scraping in just a little dish.
The next item is creating the clear inspection window in the door to the after balance weight bay . This area also provided storage for the engine starter crank ( presumably an inertia type starter ).
I carefully cut out the door and fitted piece of clear scrounged from the spares box - by fortunate accident the side curtain windows from Hasegawa’s 1/48 Isuzu trucks had almost exactly the same radius as the fuselage sides in this area .
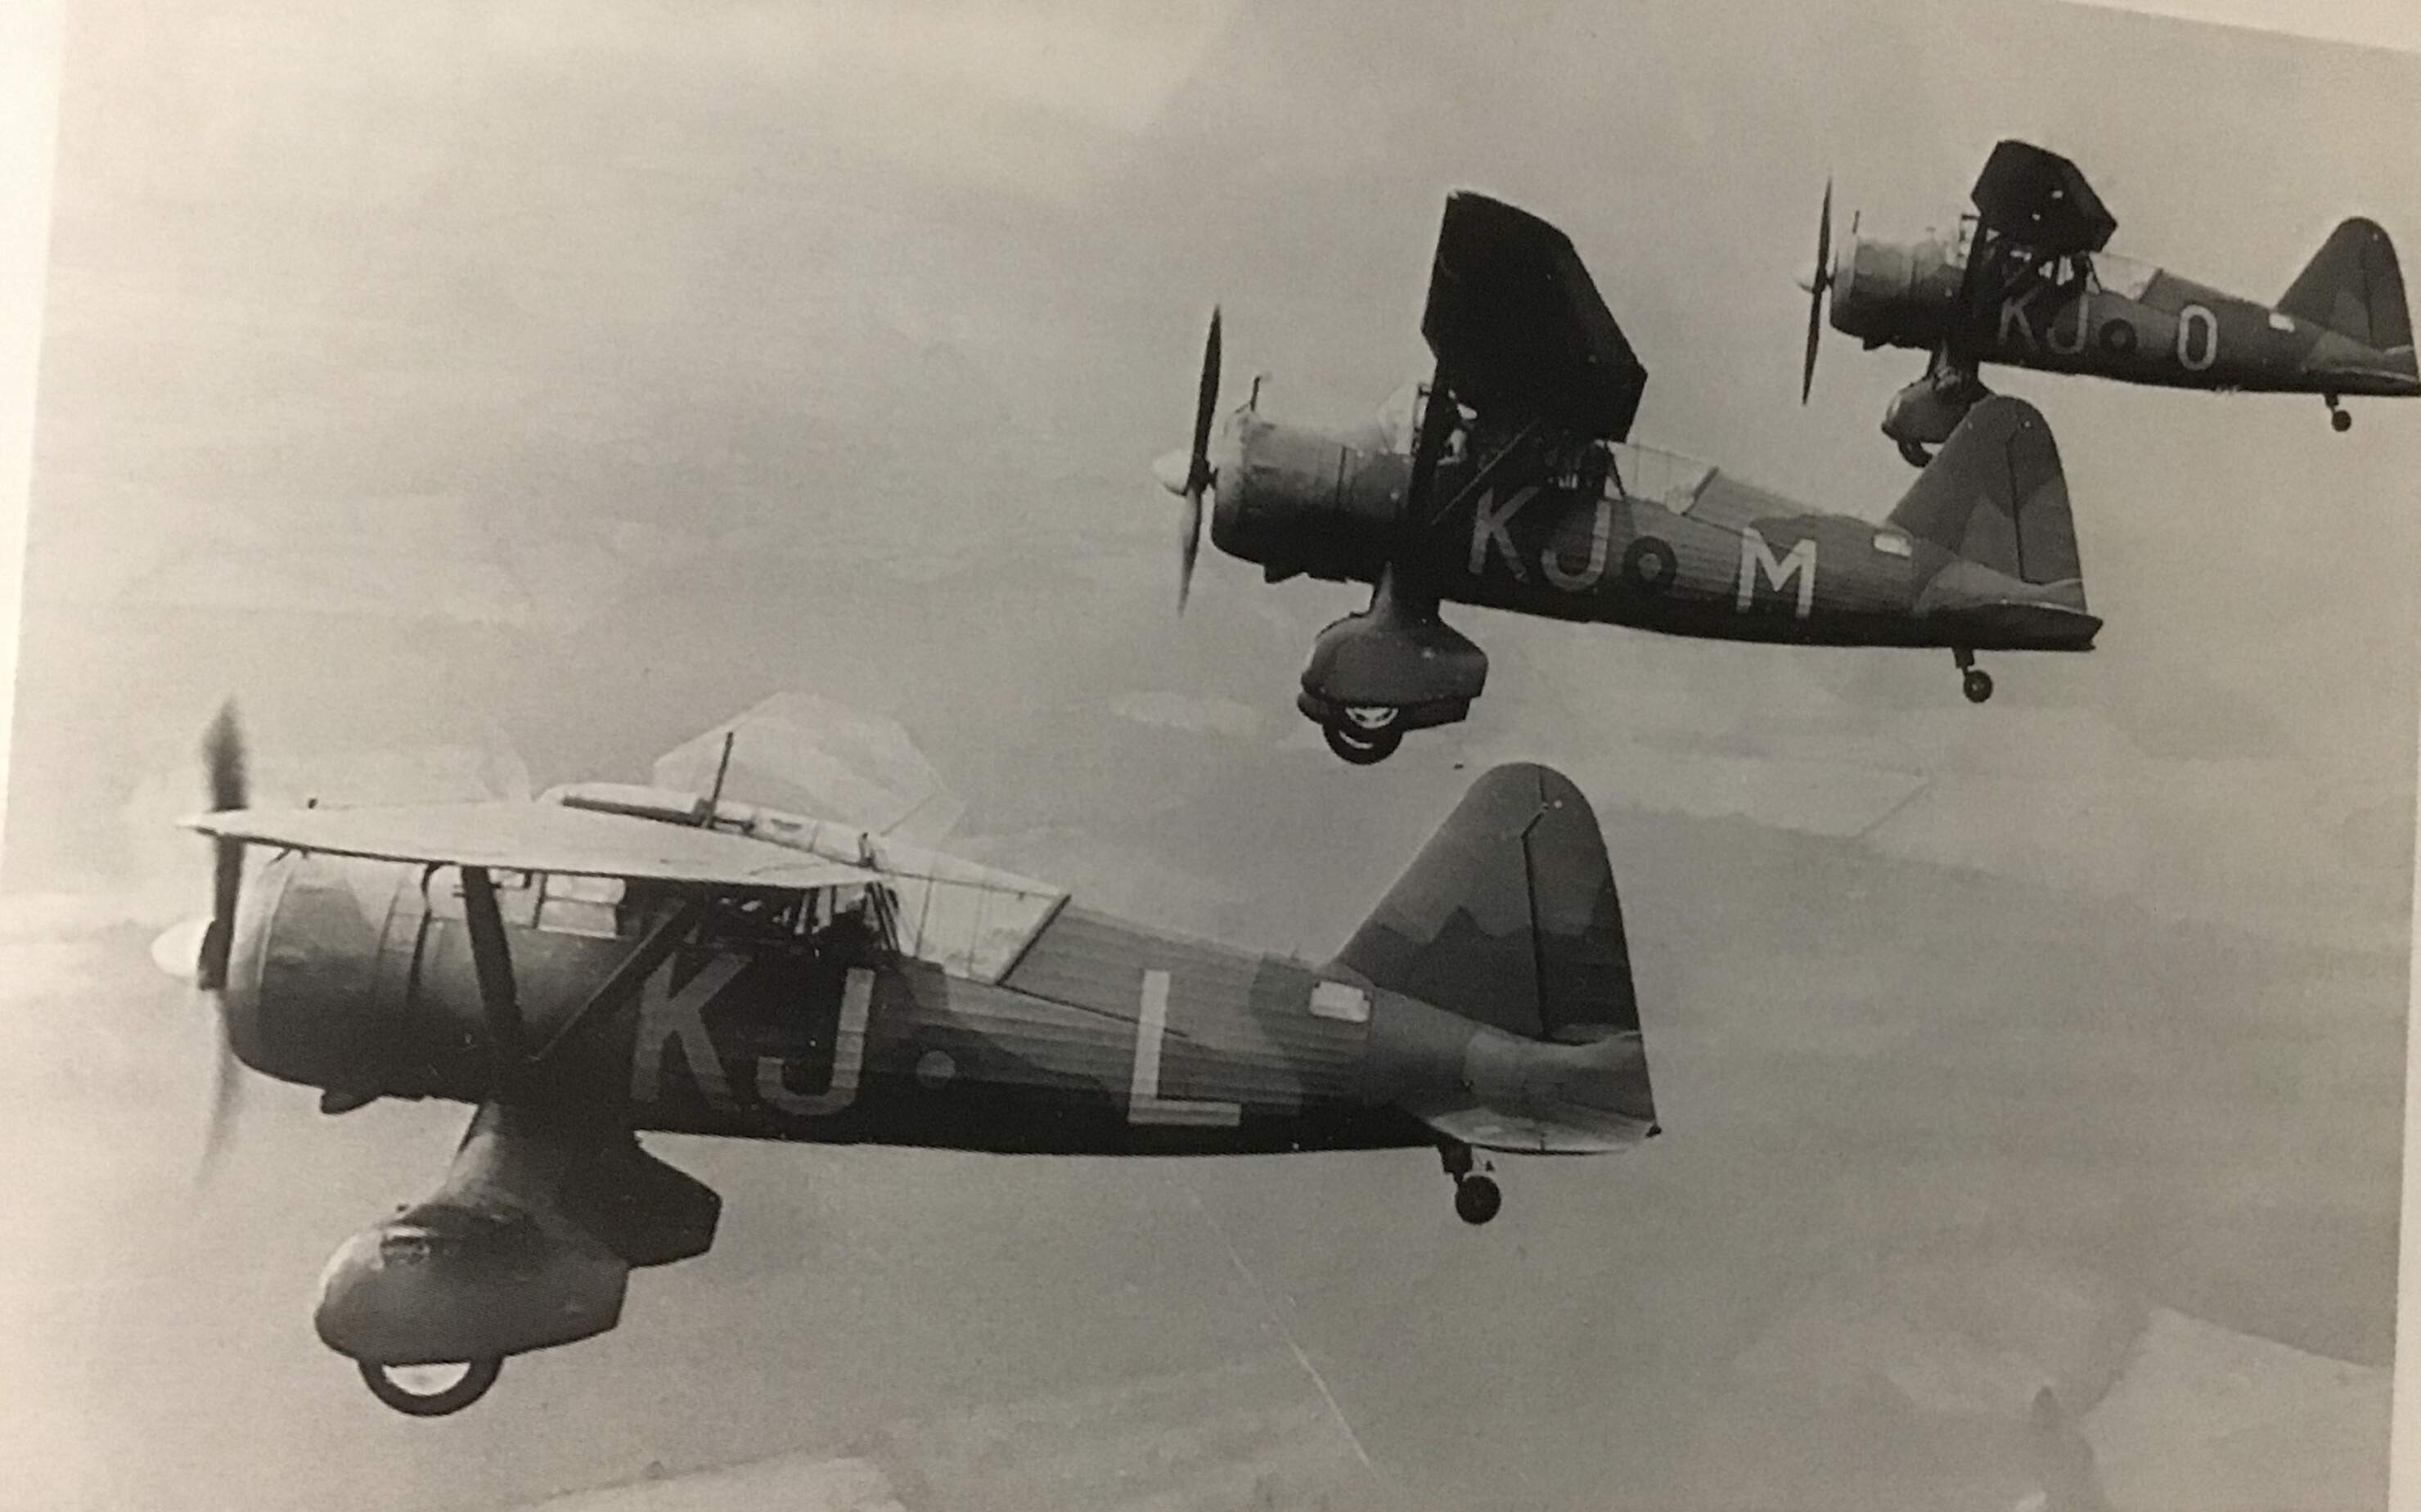
All photos of actual aircraft are credited to Valiant Wings Publishing and are from their excellent new book “ The Westland Lysander “ - No. 9 in their Airframe Detail series . I highly recommend this book for anyone interested in the “Lizzie “
Thanks for looking in and as always, all comments welcome.
Cheers- Richard
Just a little progress to show to keep this thread alive. Bench time has been minimal because I am in the middle of remodeling our kitchen. Someone in the household with more authority than I thinks having a functioning place to prepare meals is more important than building models … can’t understand how some people order their priorities. Strange .
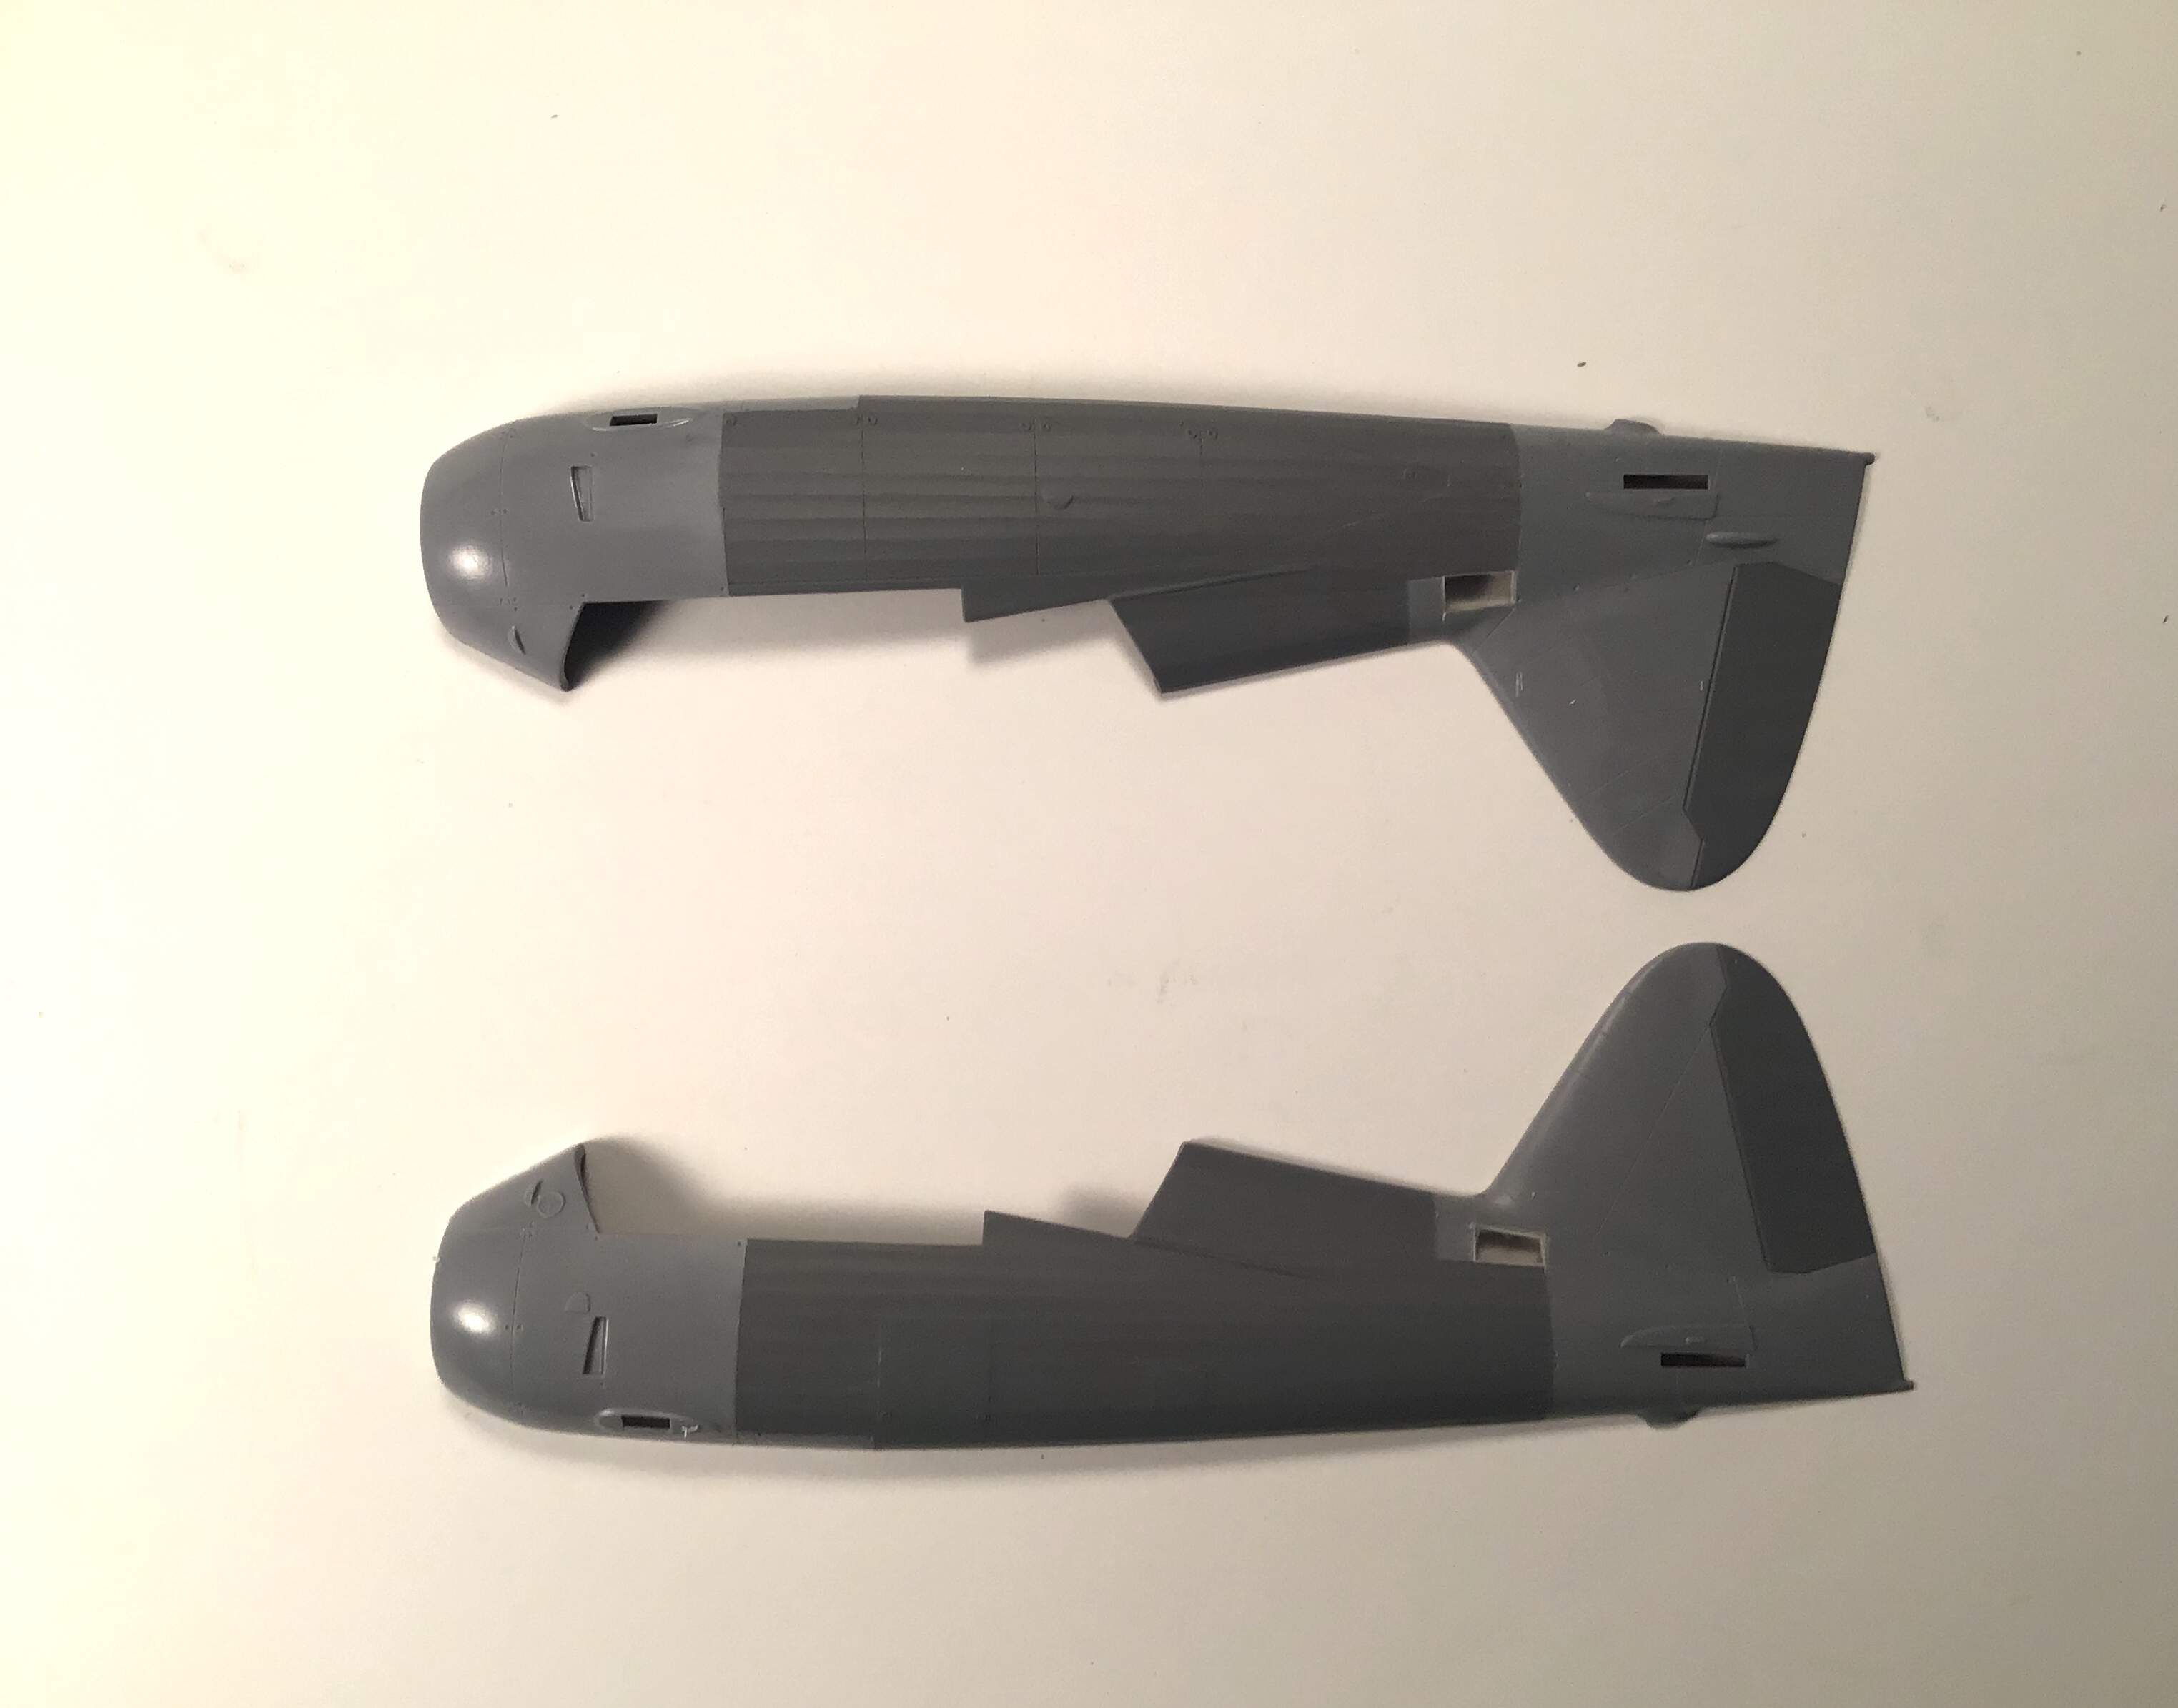
Anyway, I am done with the modifications to the fabric areas of both fuselage and rudder halves .
Several sessions of hitting modified areas with Stynylrez Grey primer to reveal flaws , correcting with Tamiya surfacer, sanding, re-prime etc.
Here are both halves done and one half compared to an unmodified half …
Eating?!? You inform THAT authority about what happens the next day after eating. Do you see that happen in the hobby room? Well… maybe a few times HA HA.