That’s too bad, I did not know that we had lost Steffen. I enjoyed reading his posts. I suspect that we disagreed on the ratio for the “One True Scale”, but I’ll let that slide this time. I do have a few 1/48 mistakes in the stash, I’d be glad to build one in his memory. Perhaps the Otaki F3F-3, the Revell F4U-4 or an RM F-117A. 

1 Like
Made a little start on my A-20 this afternoon.
Painted the interior parts with Humbrol 150. Seems about the closest I have to the more olive shade of interior green in the USAF Museums example.

Not sure what I’m going to do with the bomb bay yet. What AMT included is basic to say the least!
And a reference book arrived this morning. Some useful photos.
The cover art reminds me that somewhere I have Matchbox’s kit with the Green Hornet markings!
2 Likes
Hi Mark
It’s great to have you aboard.  I love your joke about “1/48 mistakes”!
Don’t worry - you’re definitely not alone - Steffen often despaired over the way I would turn my back on his “One True Scale” and tackle other stuff with equal enthusiasm too. 
All the best
Rowan
Hi Stephen
You’re well underway!
I’ve got to say my “gut feeling” is that colour’s pretty dark for Interior Green, so it might be worth doing a comparison test against whatever you’re using for the exterior Olive Drab before you go too much further, just to make sure you’ve got enough contrast.
All the best
Rowan
I think it’s looking darker in the photo than it really is. Light wasn’t great at the time.
My plan is to dry brush with 226 Interior Green, which is much brighter, so the 150 will act as shadow. At least that’s the plan.
I’m building it buttoned up so I don’t think much will be seen through the canopy. Thought about doing the cockpit open, but there’s little to hold the hatch in place and I don’t want it breaking off.
Hi Stephen
That sounds good. I did wonder if it photographed darker than it looks to the naked eye.
All the best
Rowan
1 Like
Hi again
Right - my main entries for the campaign arrived today, courtesy of Eduard via Andy.
I need to work on reviews for both of them before starting construction but, as you can see, this promises to be an epic build for me!
More soon.
All the best
Rowan
1 Like
I did start to worry myself about it, so took your advice and tested it against the OD paint I’ll be using. No problems with either. I think the dry brush of the lighter green should work to tone it down.
Nice one Stephen
It looks like you’re all set to go. 
All the best
Rowan
Well I hope this mistake isn’t more than I can handle.  I checked out the Otaki F6F-3, I picked it up cheap at a show. It was unboxed, and the last owner trimmed most of the parts off of the tree. Only one part was damaged, a wheel chock. The decals look good, they had been cut between some major decals to fit in the baggie. Full instructions, including Otaki’s color plate for 2 of the 3 decal options. There was even a Waldron placard set with a 12 page instruction sheet for super detailing a Hellcat cockpit in 1/48. 1/32 and 1/24 scales.
  Don’t know what vintage this kit is, late 70’s - early 80’s?, raised panel lines, but detail seems about right for the era. The big challenge is that it has 3 canopies, an injection molded F6F-5 flavor, a vac F6F-3 with the rear windows trimmed off and the back 2/3 of an injection molded F6F-3. It has the sliding portion and the rear windows, but the windscreen is missing, sawn off? Fits look OK so the canopy is the real challenge.
Very nice catch there, Rowan! I guess, the Do 17 is originally from ICM? I have that kit here and it will become an Ilmavoimat bomber one day …
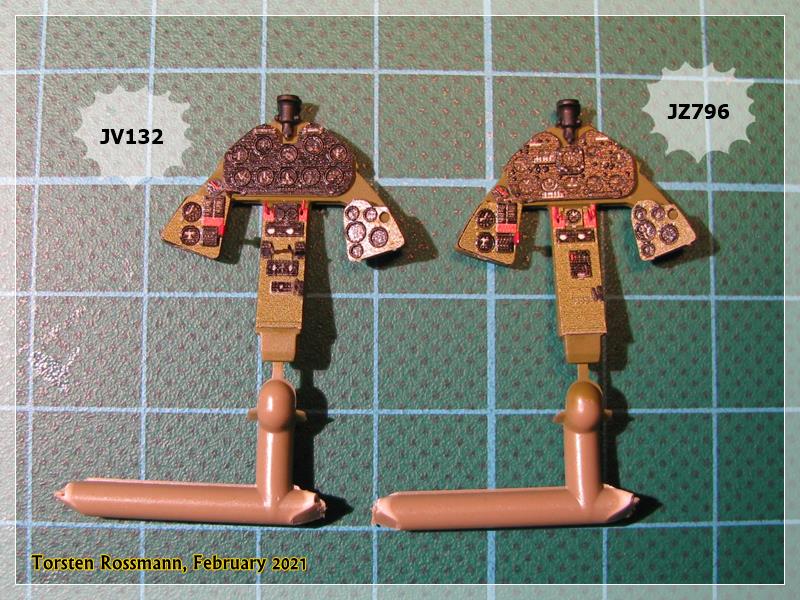
Have started my campaign build earlier this week and both cockpits are more or less done with tons of PE parts …
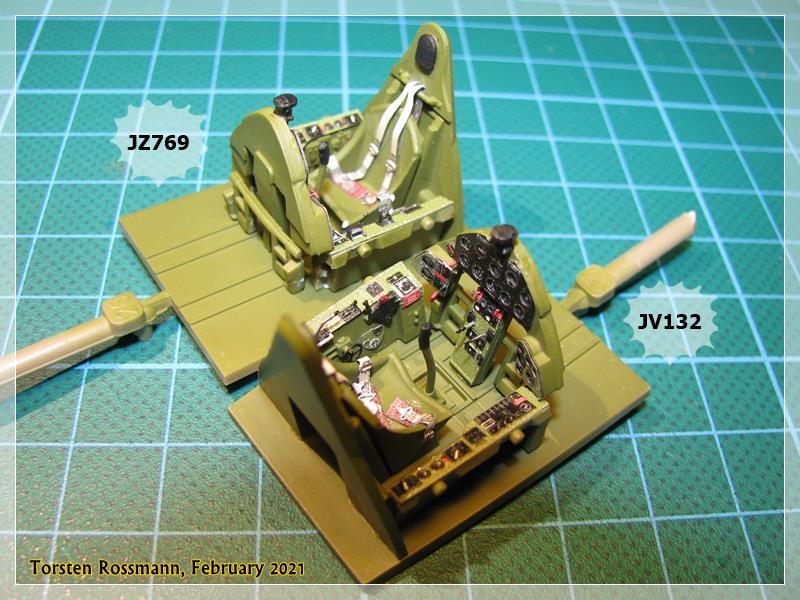
As usual I will have a more intensive build blog at my Bench Works Thread and will show here only the major steps
Good luck for all your builds!
Torsten
1 Like
Hi Torsten
Lovely work on the cockpits!
Yes, the Do 17 is the ICM kit - re-boxed with quite a lot of aftermarket upgrades. Sadly, Eduard haven’t corrected the tail (that would have been the icing on the proverbial cake), but just the amount of extra detail they’ve piled into the cockpit should make this a really enjoyable challenge. I’ll try to post my review in the next few days.
All the best
Rowan
1 Like
Thanks, Rowan!
Have done a bit of work on my RN Hellcats. Fitting of the cockpits in the fuselages could be better. Needed some pressure to get them in place …
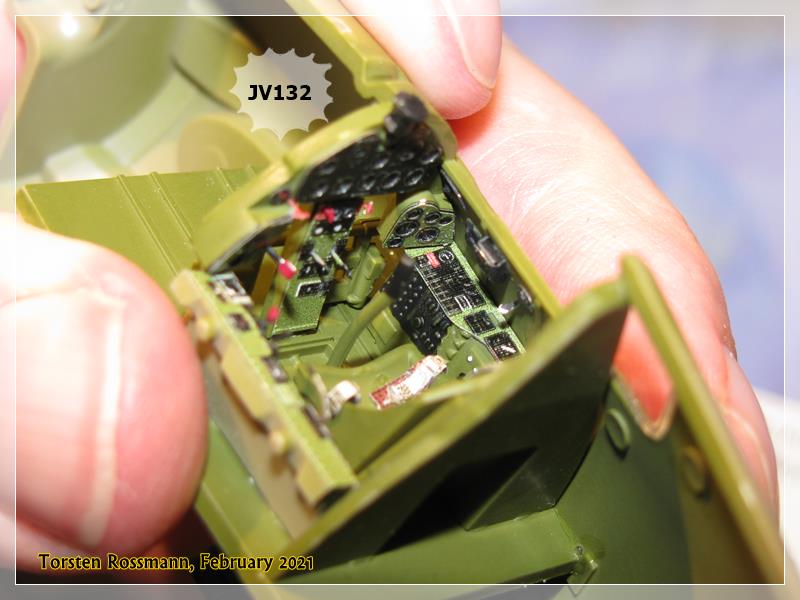
… everything is buttoned up and sanded now …

… next steps are working on the engines and wings. Hope to have done most of the assembly by next weekend …
Torsten
3 Likes
Now that looks very good
1 Like
Great progress Torsten!
It’s years since I built a Hellcat. I really must do another one before too long.
All the best
Rowan
1 Like
Hi again
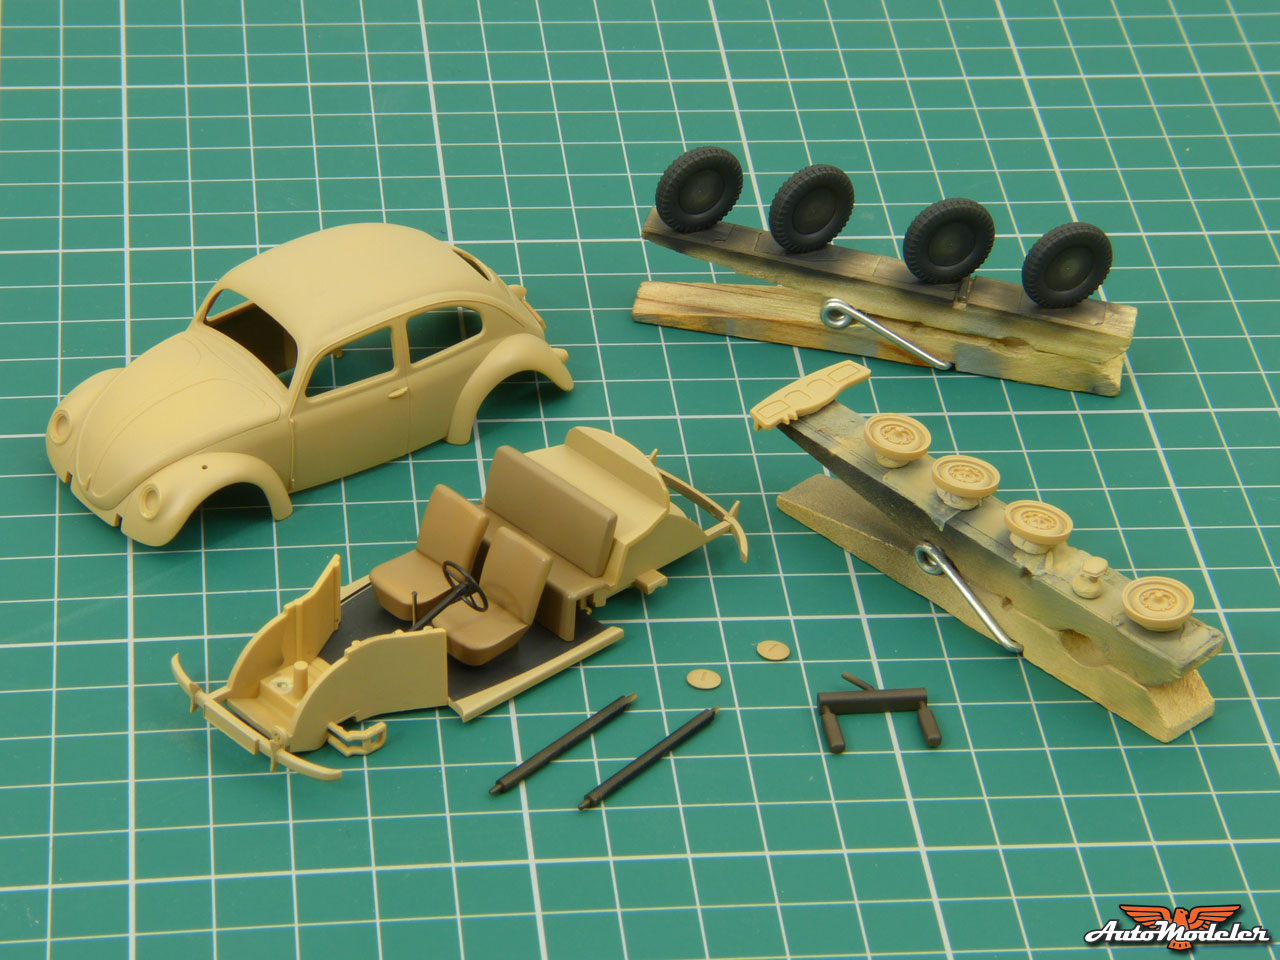
I got underway on my little Beetle today:
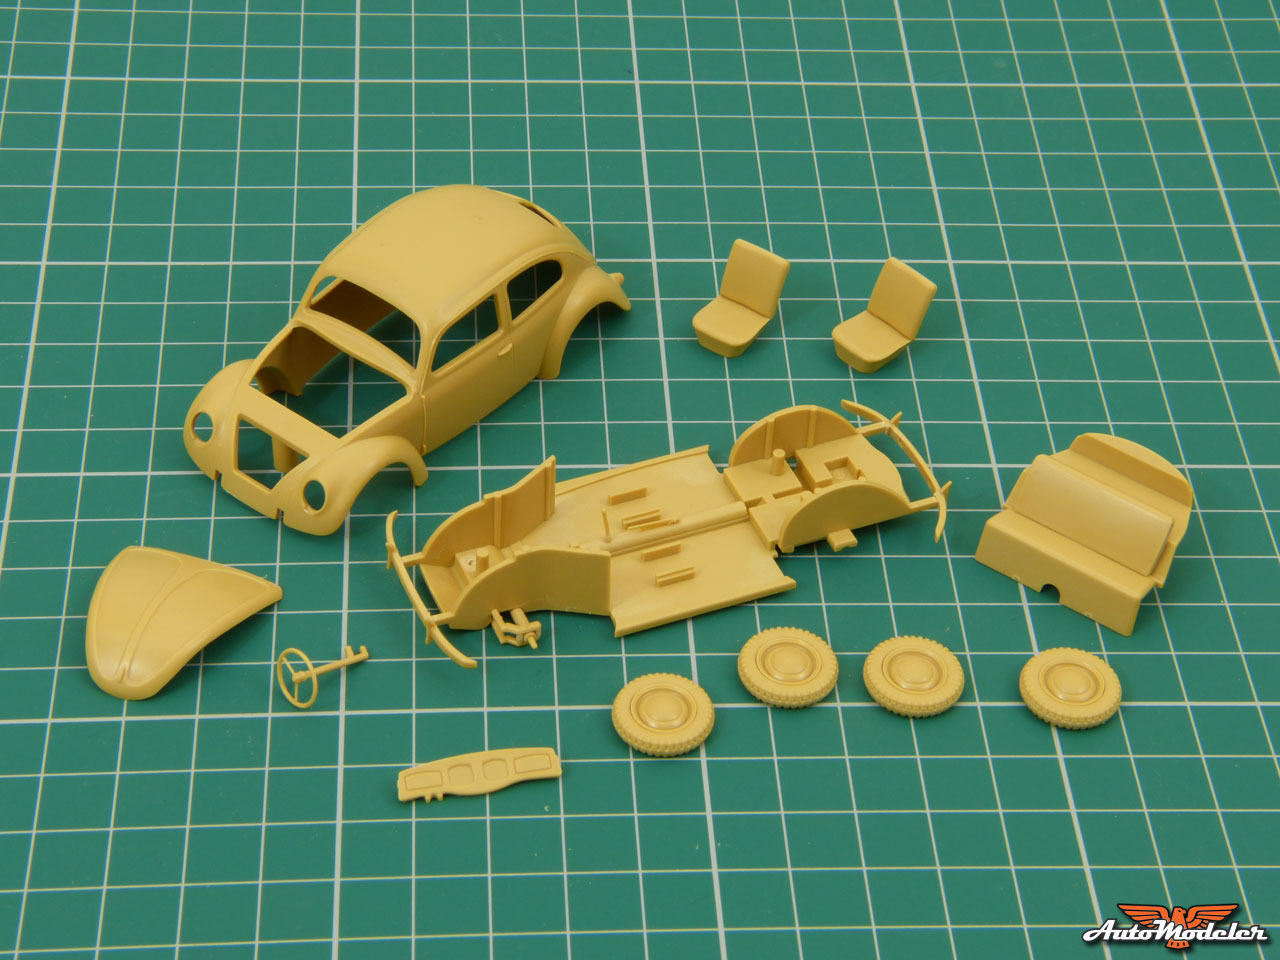
I’ve been trying to make my mind up between a civilian or military paint job (the civilian hub-caps are dry fitted in the wheels in the photo). After finding this walkaround of a beautifully restored Type 82E, I think I’ll use it as the basis for my build: KdF Beetle type 82e, 1943 - World War II VW
So, tomorrow, I’ll wheel out some Dunkelgelb - not a colour I use all that often. ![]()
So… a question: does anyone know if the Luftwaffe used the VW Type 82? I’ve found a number of photos of Wehrmacht vehicles, but none with Luftwaffe license plates yet. It’d be fun to park it next to the Bf 109G later on, so it’d be good to know if that was ever a likely full-size scenario.
All the best
Rowan ![]()
1 Like
Hi again
The VW’s basic colours are on - all looking very squeaky clean at the moment:
I still need to paint the suspension arms and details like the window surrounds, and then I’ll spray a couple of coats of Klear, before letting everything cure for a few days ready for some weathering with oils and pastels.
I’ve also made a start on the Bf 109G-6/AS, so I should have some progress to show on that later in the week.
Take care and stay safe.
All the best
Rowan
2 Likes
Hi again
As promised, a first progress report on the Bf 109G. I jumped out of sequence earlier in the week and began with the wheel wells - which went together without a hitch - but, made a “proper” start today and got the basics of the cockpit done:
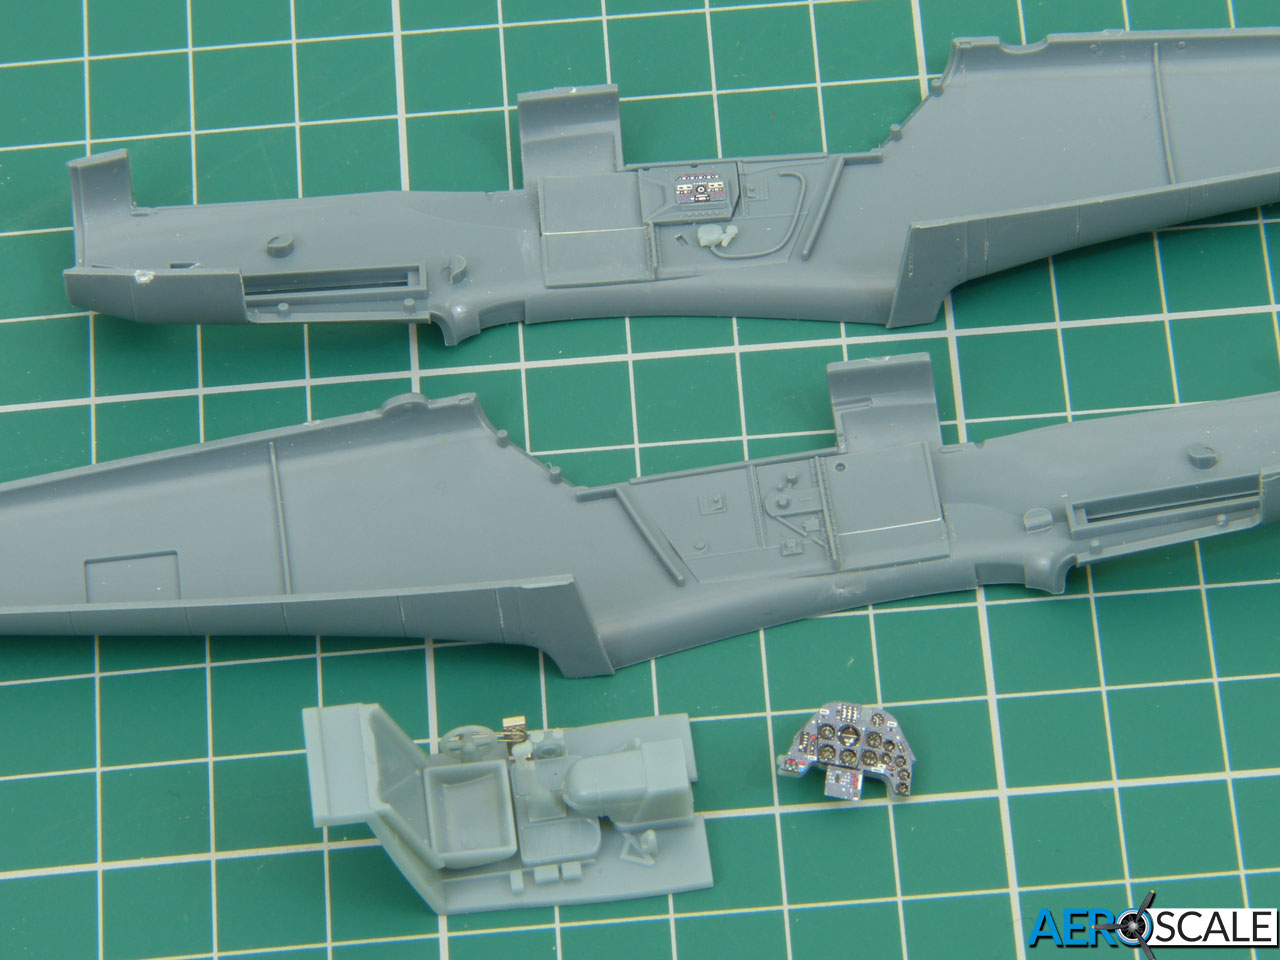
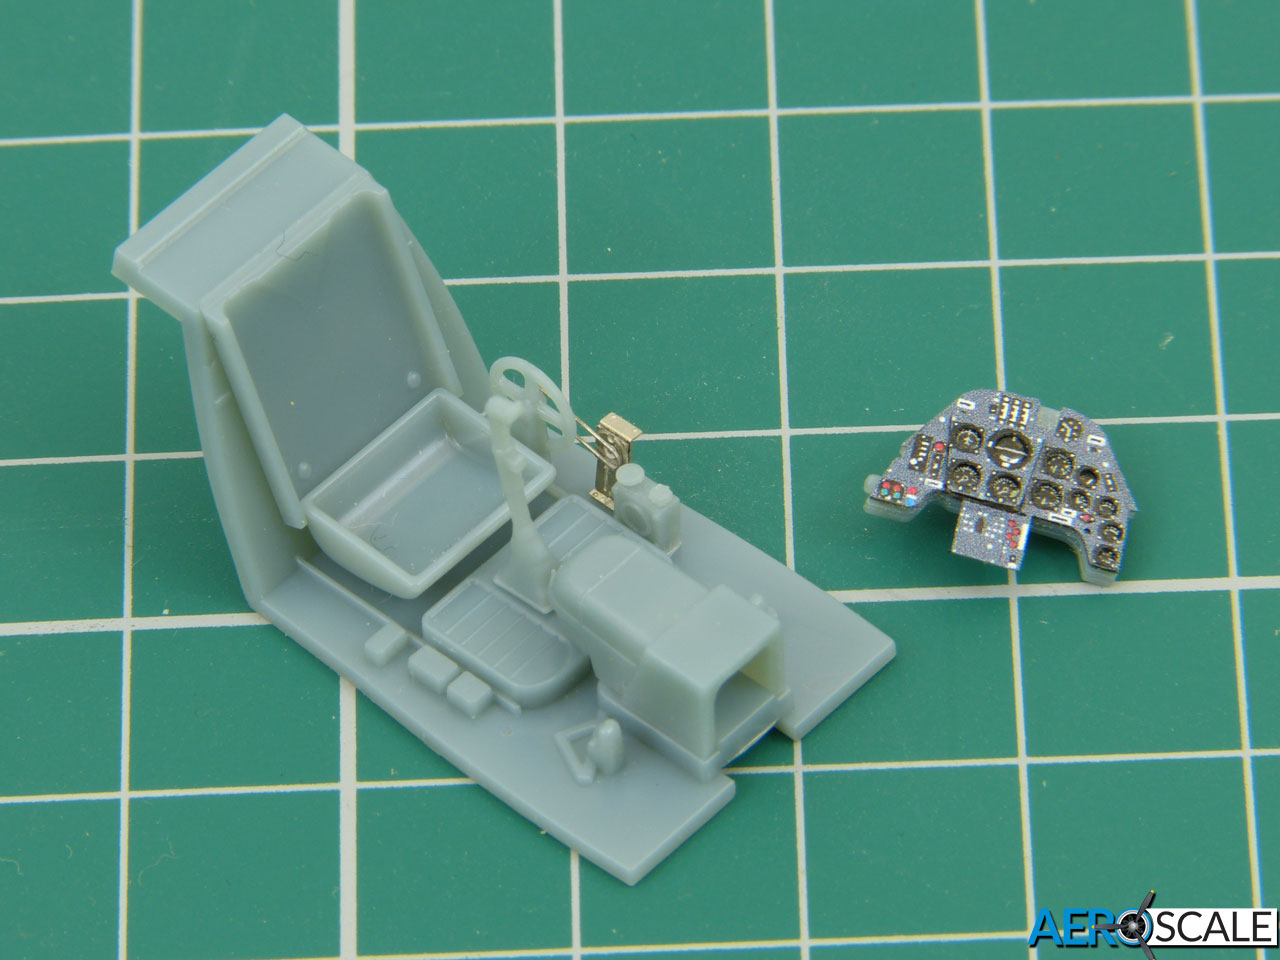
I’m adding Eduard’s etched upgrade to the Weekend series kit, so I trimmed away some of the moulded details for the colour-etched replacements. Everything’s only temporarily in place for the photo - I’ll disassemble it all for painting tomorrow. As usual, the colour etched instrument panel looks a bit speckly at this stage (photos never seem to do them justice), but it’s pretty amazing to the naked eye.
So, tomorrow’s first job will be getting a decent match for Eduard’s interpretation of RLM 66; while it’s perfectly valid to have some variation to reflect different subassemblies and paint batches (particularly with quality control difficulties in the worsening situation towards the end of the war), I still want to tie the plastic and etched parts together reasonably closely before I add some light weathering.
All the best
Rowan
1 Like
It seems like Eduard would do everyone a favor if they published paint equivalents to their photoetched colors. Maybe that’s not possible?
Or some self-sacrificing hobbyist to publish a running list of equivalents somewhere easily accessible to all…
I would like to do an Eduard MiG but hesitant because of finding a match for their turquoise.
Hi Phil
I agree - but the trouble there is that the colour changes; this version of RLM 66 is less blue than I’ve seen in some of their earlier sets (I think it’s better) - but I don’t know whether that’s intentional, or simply down to slight variations in the process.
I built their 1:48 MiG 21 years ago and got pretty close to matching their turquoise - but it took a lot of trial and error, and the paint match they suggested in the instructions was nowhere near! ![]()
All the best
Rowan ![]()