Hi Erwin, that looks like it would be a great little setting! What sort of figures are you looking for British Engineers?
David, per Fine Scale Modeler - workbench-review-ryefield-sturmtiger
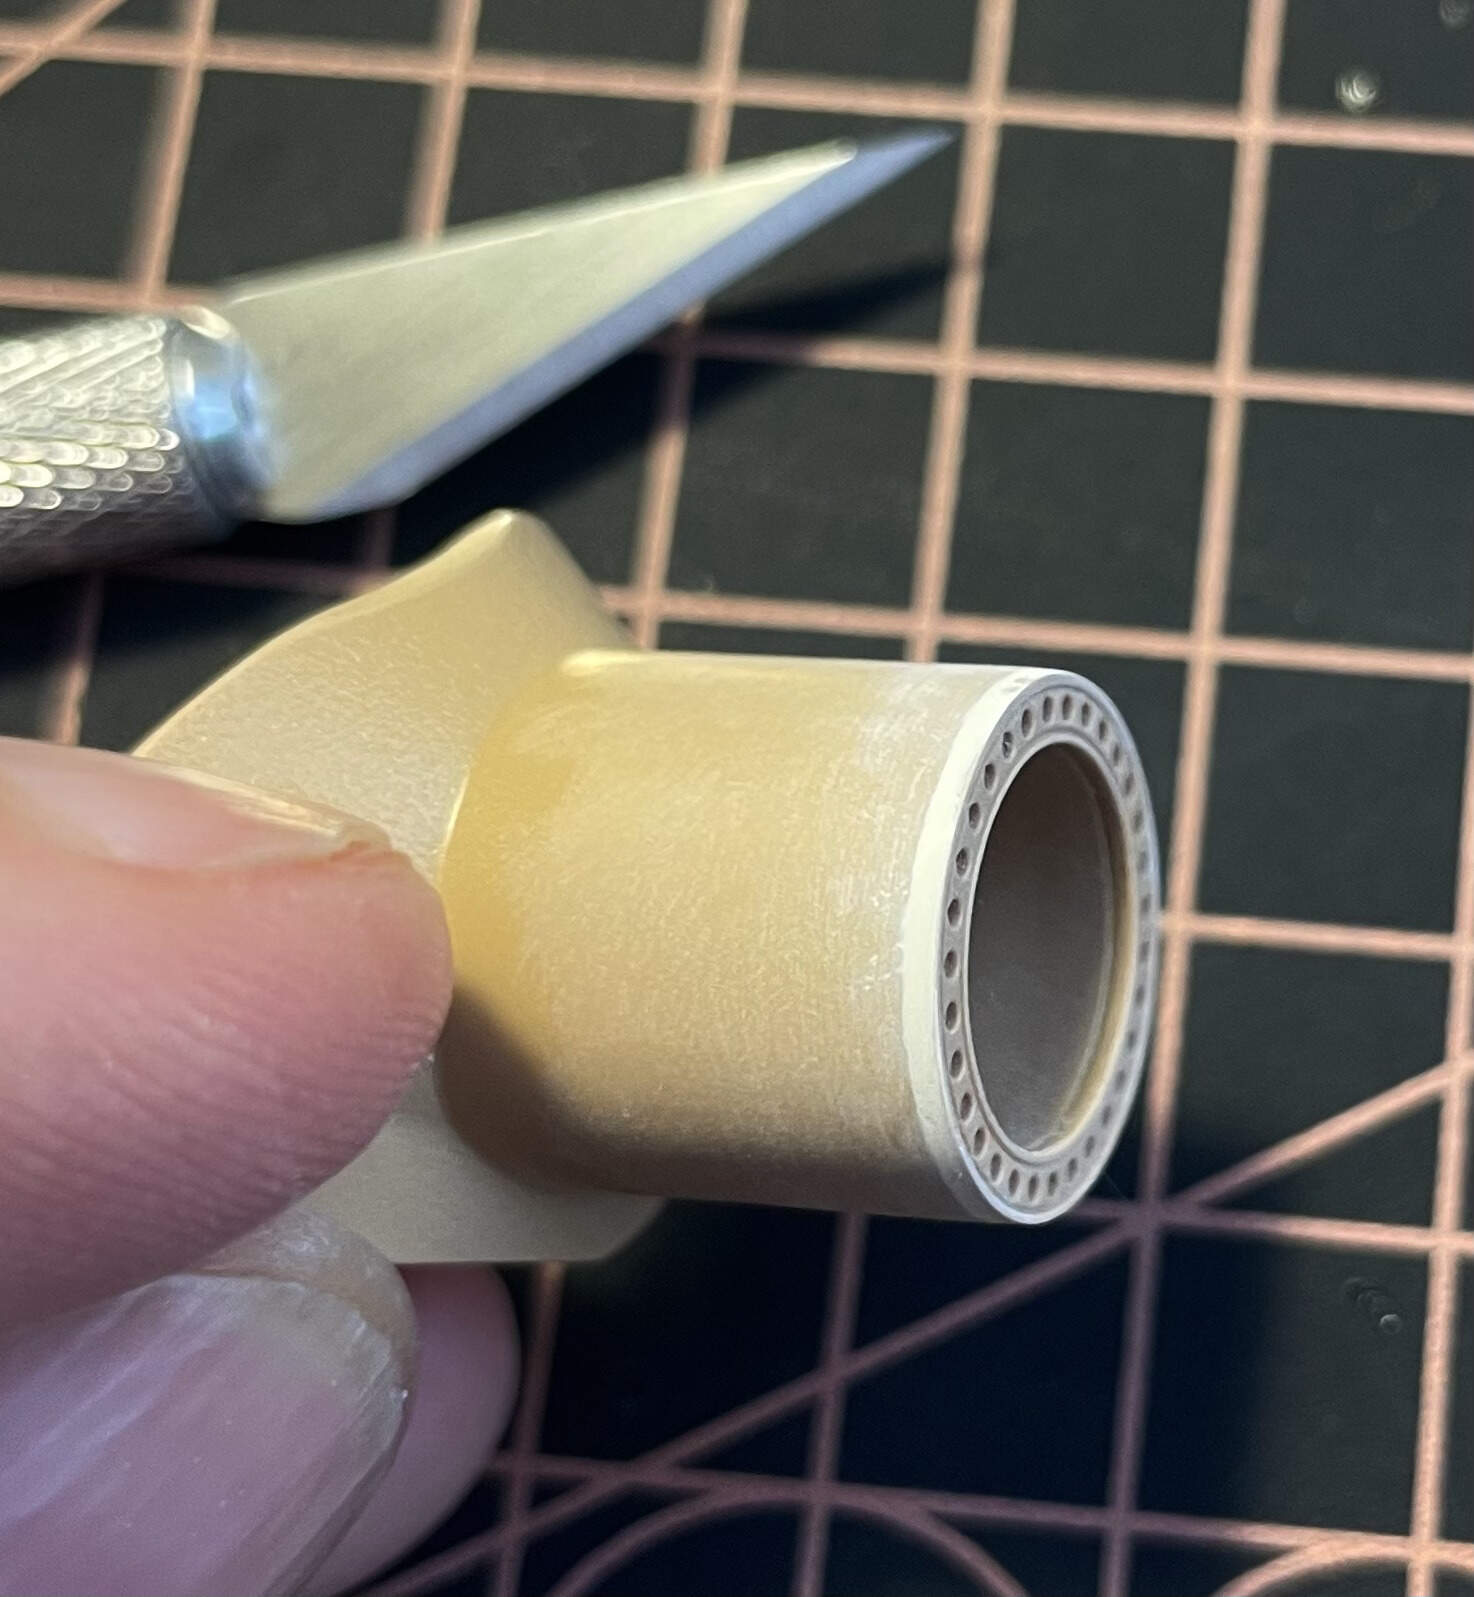
“Installing the PE bore lining is a little tricky because it has to be rolled at an angle. I traced the outline of the part onto thin card stock and practiced rolling it so the ends meet evenly. Remember, the groves in the lining should spiral when it is in the barrel. I sanded the edges slightly for a precise fit.”
In another review, I saw they weren’t able to get the PE lining to fit but I’m not sure if the builder angle rolled as mentioned above.
Hope all goes smoothly.
1 Like
Thanks to everyone who has commented, liked or is following, much appreciated and it all provides that extra incentive to push on forwards.
Deep, Deep down the rabbit hole….
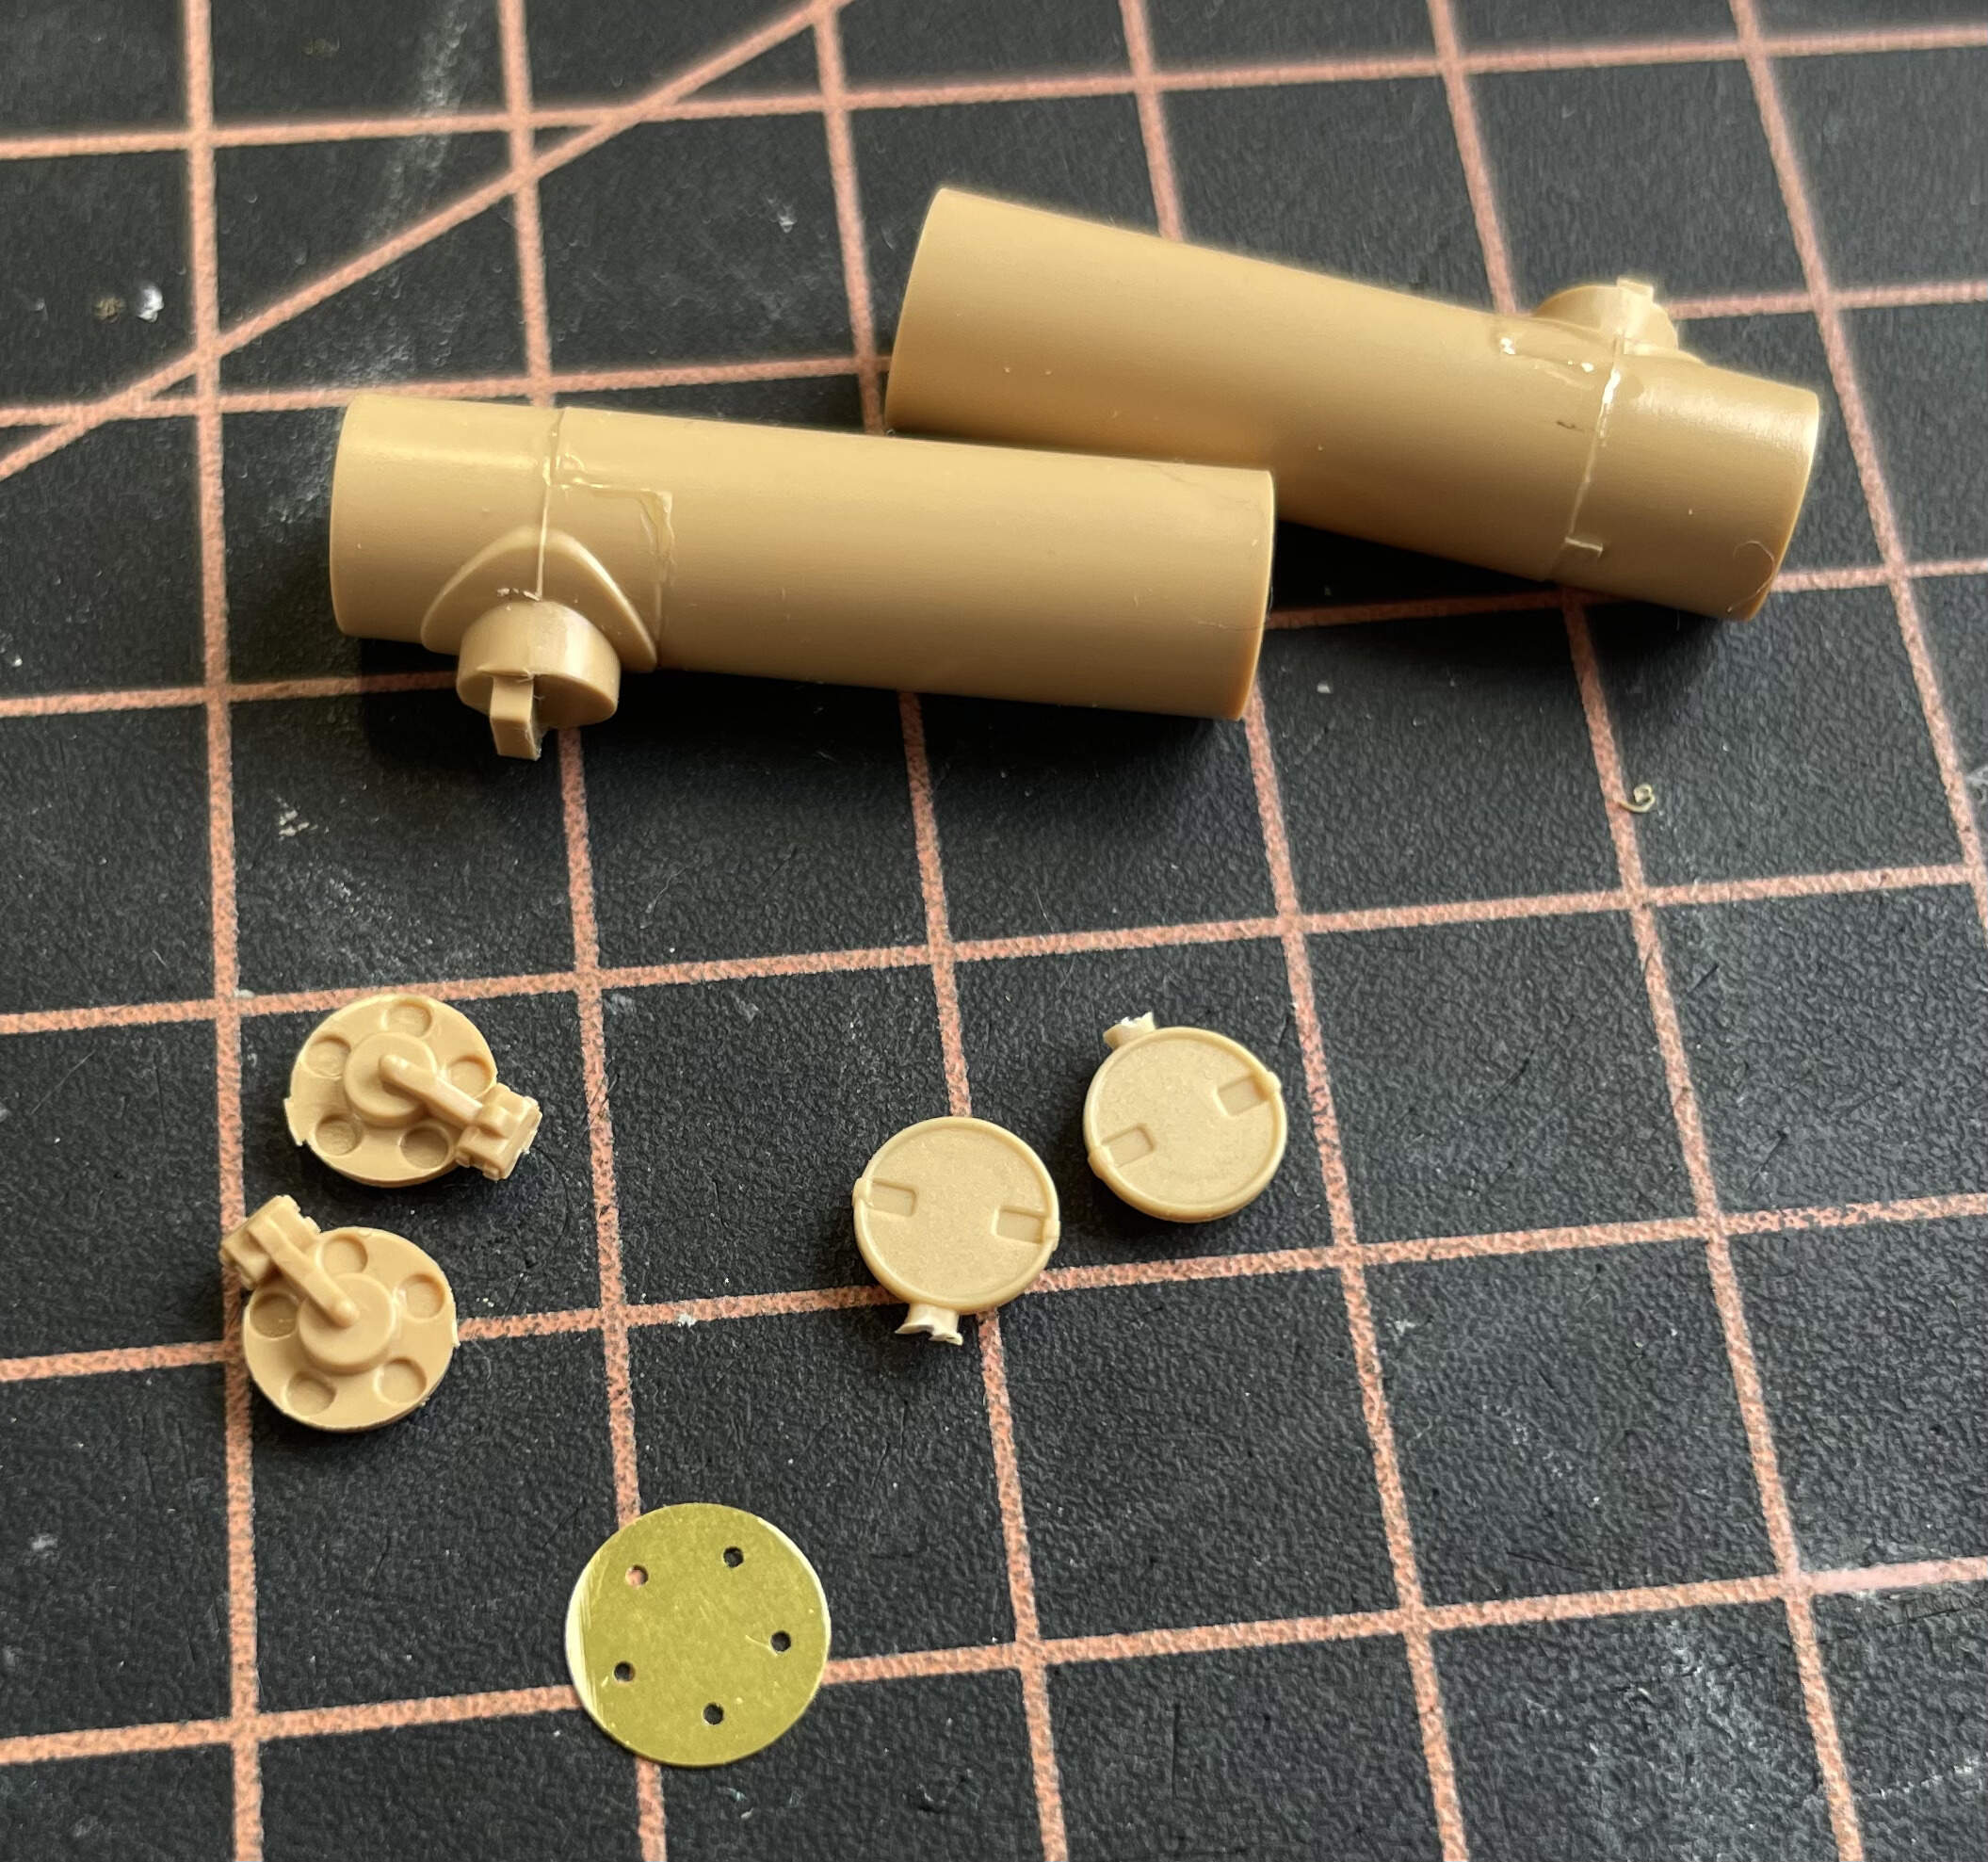
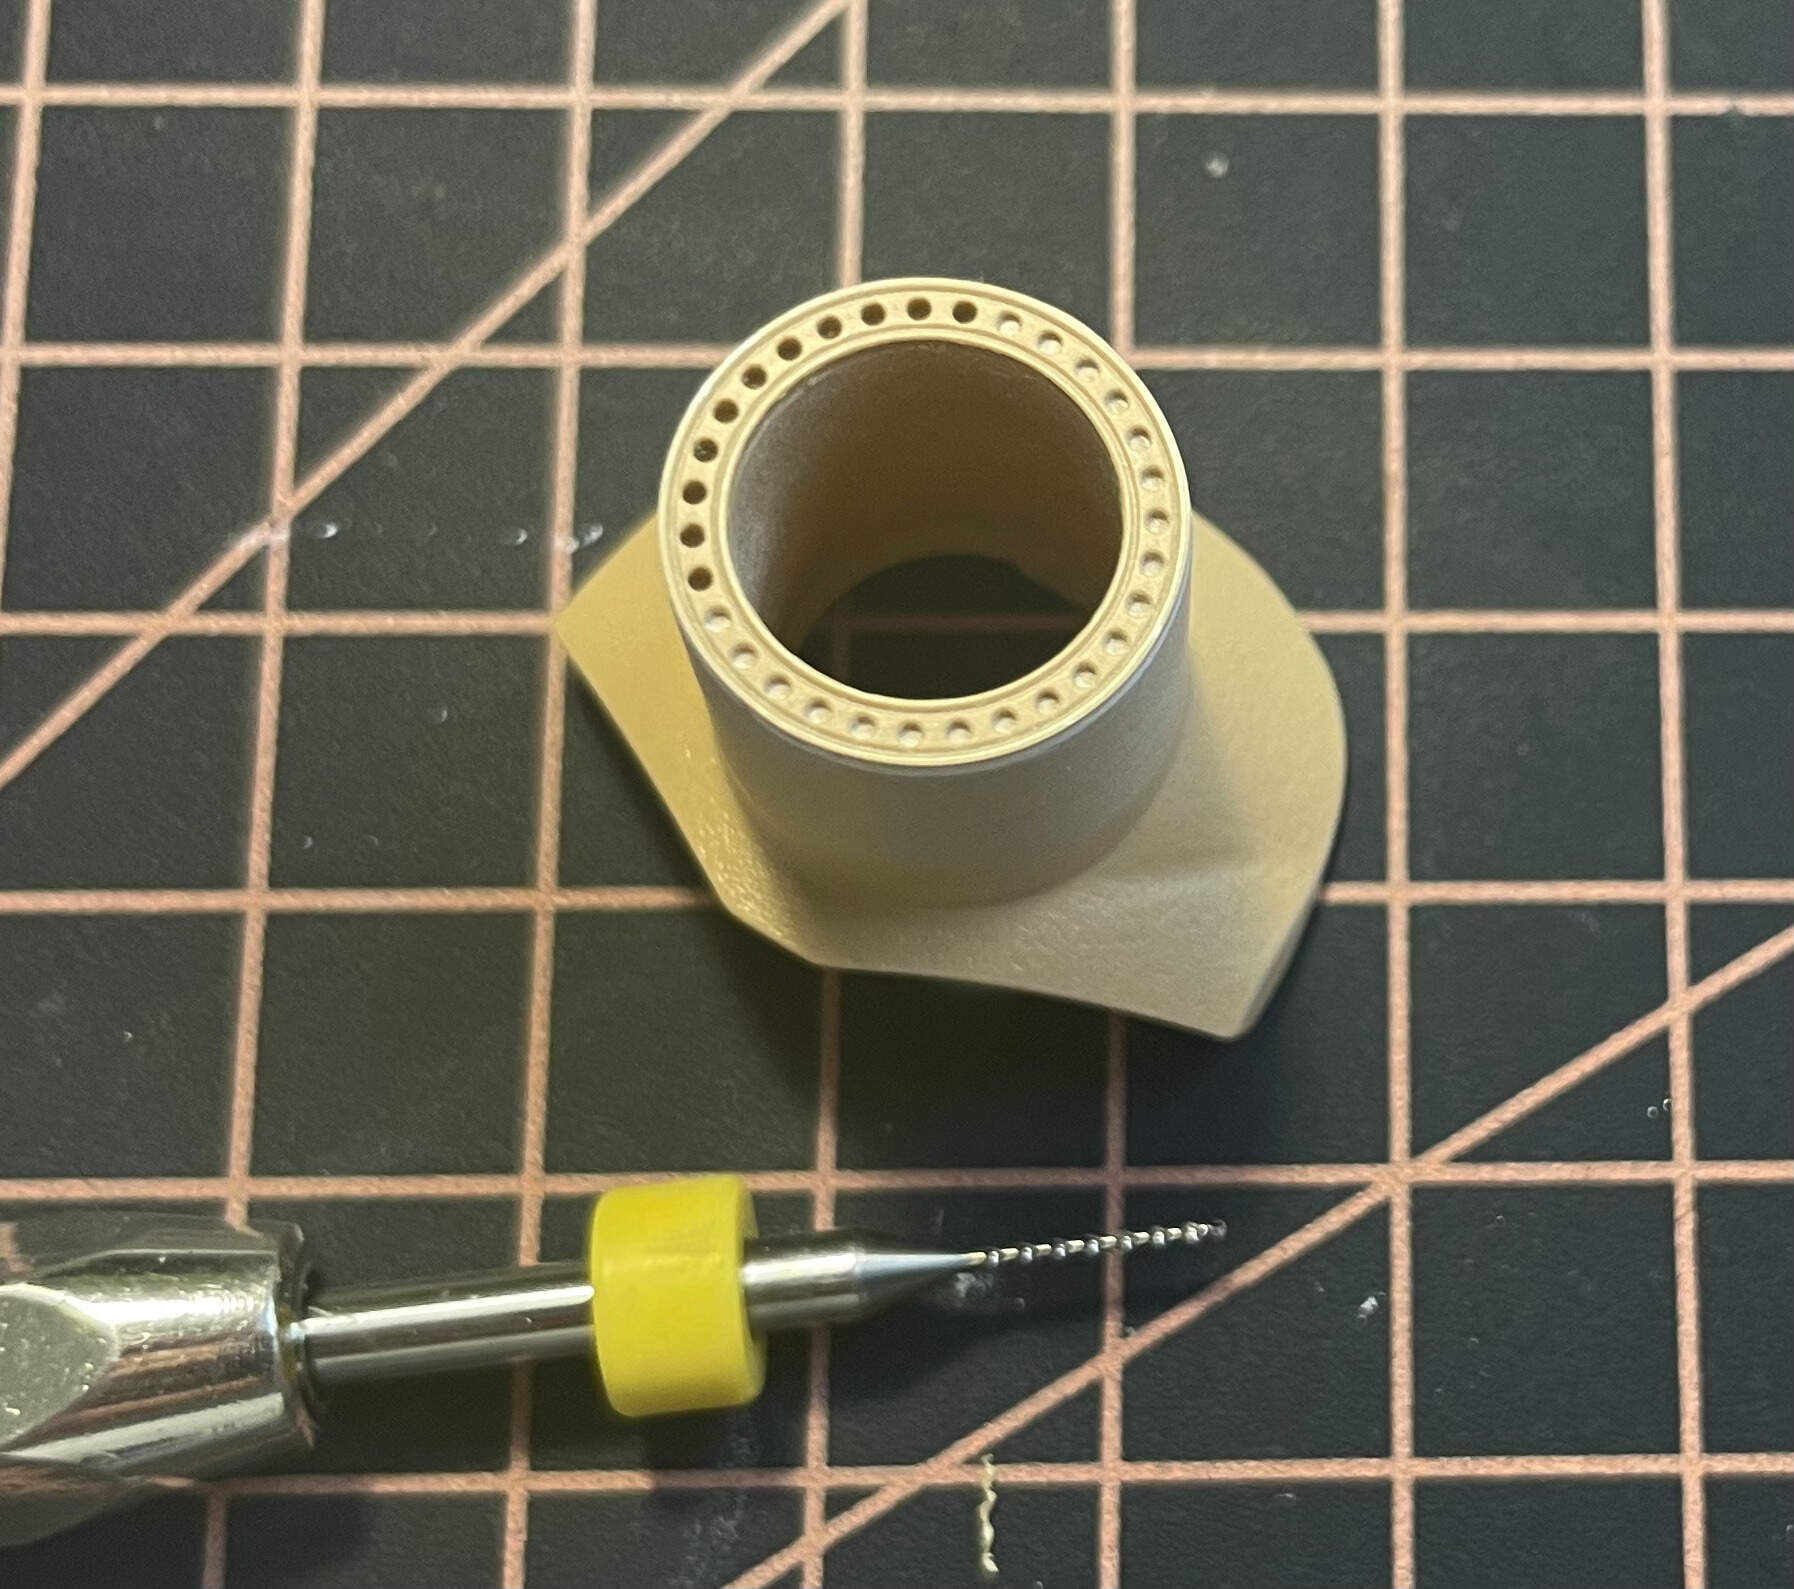
This part of the exhaust system was looking a little clunky to me (I think it’s called the exhaust deflector), and Voyager provides a replacement part so I decided to replace / rebuild it. Reason being two-fold, the 5 x stalks are a bit thick, and the round disc upon the stalks is also too thick…

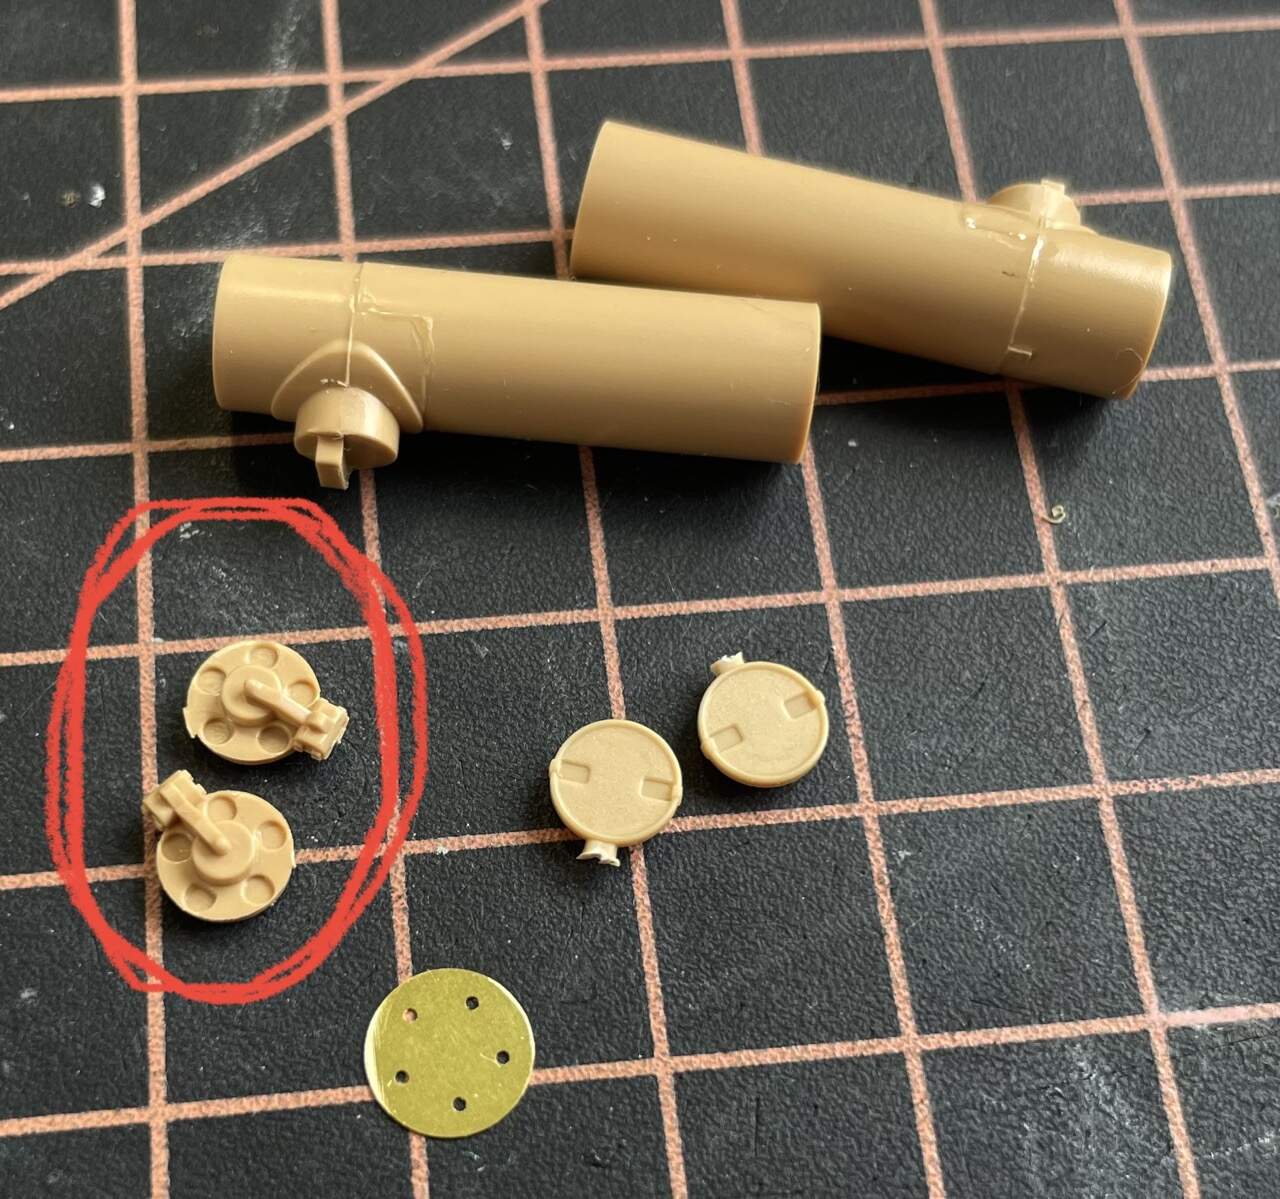
There’s another associated part/s which also end up being sacrificed, which is the two circular parts at the left in the image below, they get sacrificed as the 5 x dimples would also be too big… those parts will be rebuilt using the two discs at the right of the image as donors, these donor parts came from the spares box and are ends from a Panther Aerial / Barrel cleaning tube. Note the big seams present on the partially assembled kit exhausts!
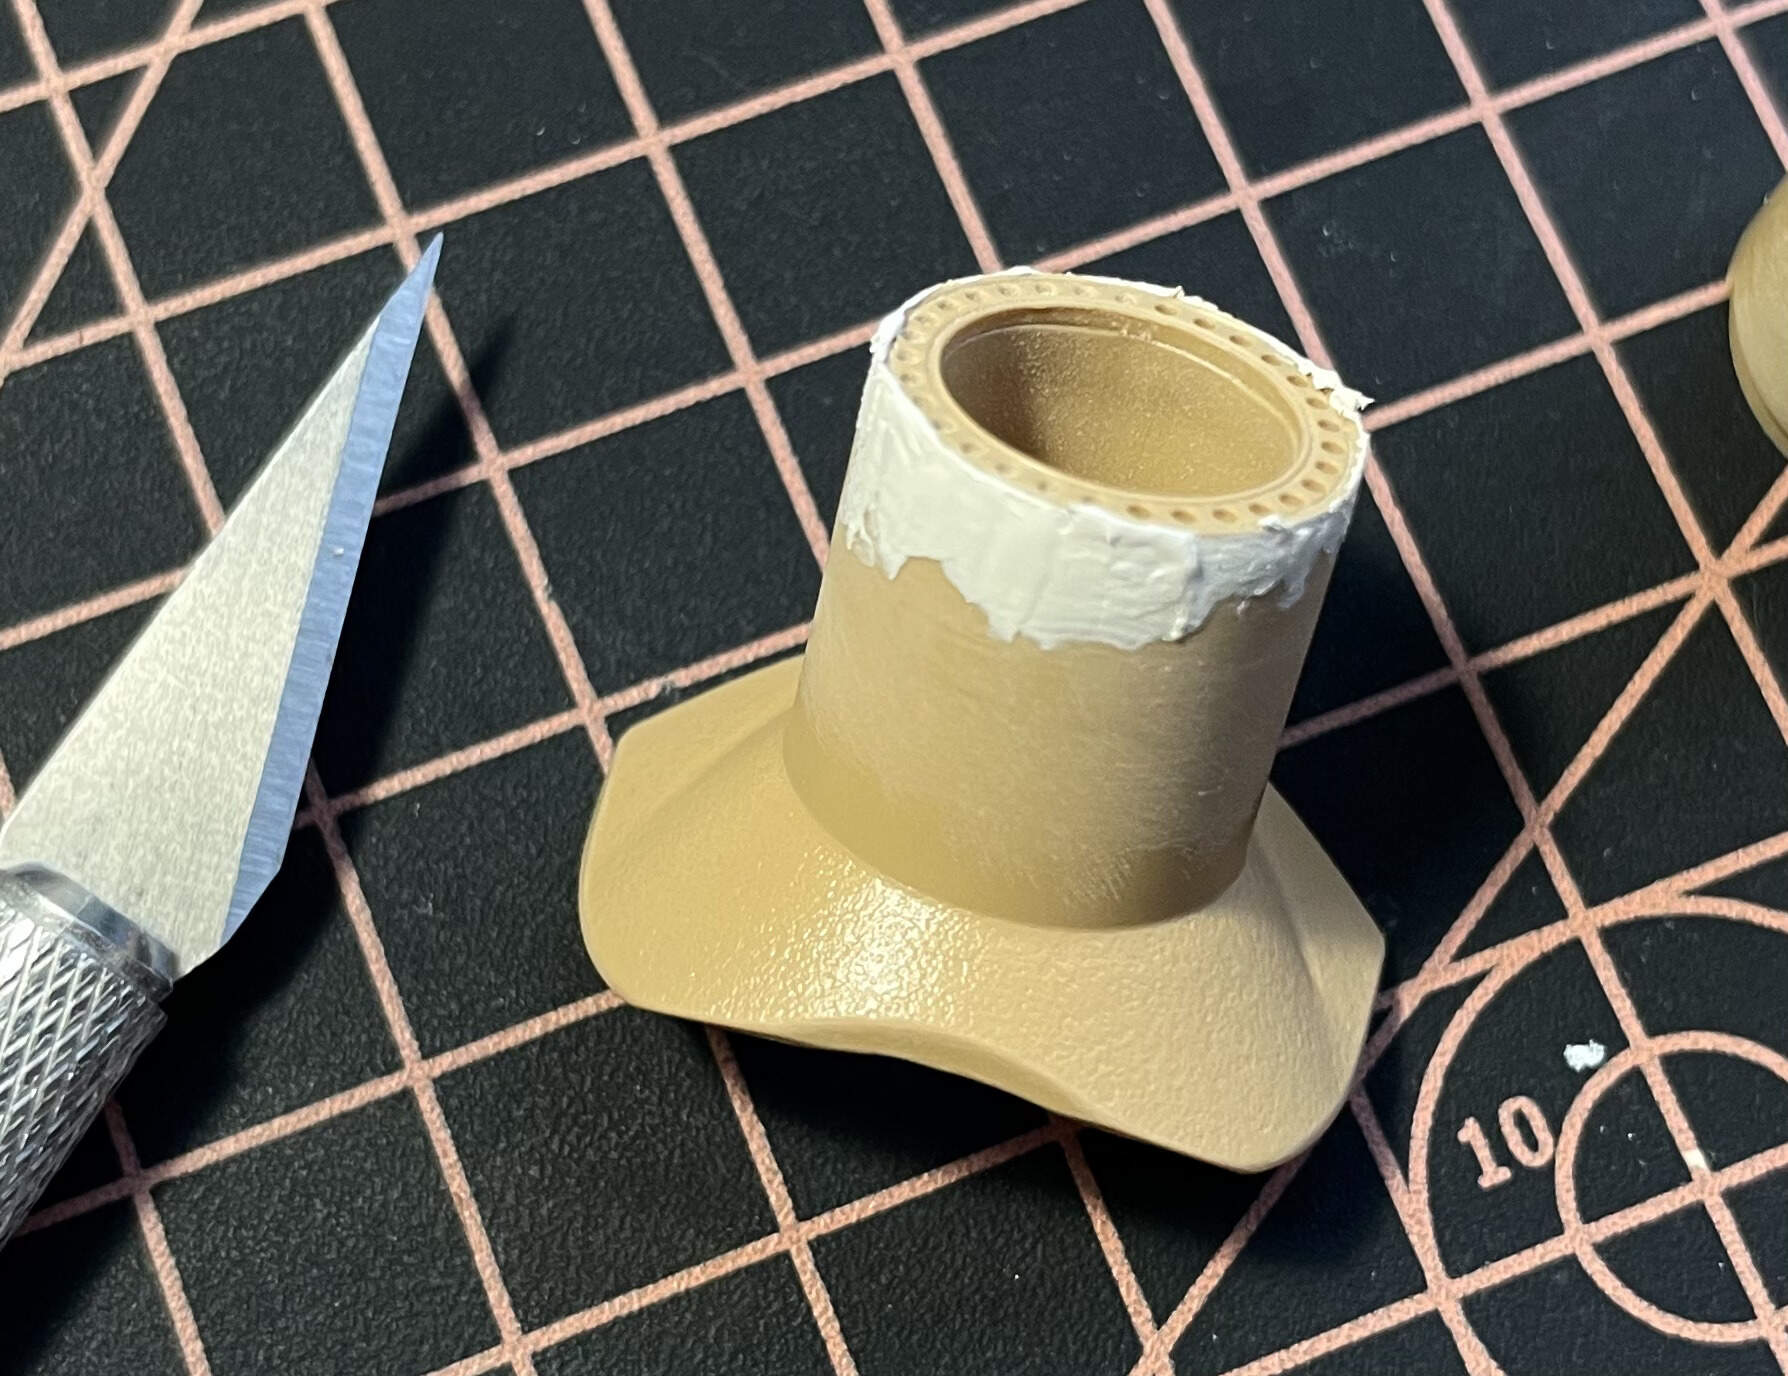
Step 1: Fill the holes in the Panther discs (wedges of evergreen), sand flush, glue to top of exhausts:
Step 2: Temporarily glue the etched voyager parts to the exhausts, using a glue that you can break off later (I used Ammo Ultra Glue):

Step 3: Drill through the etch into the exhaust, using 0.6mm drill from memory, this ensures perfect alignment later, then remove the etch parts:
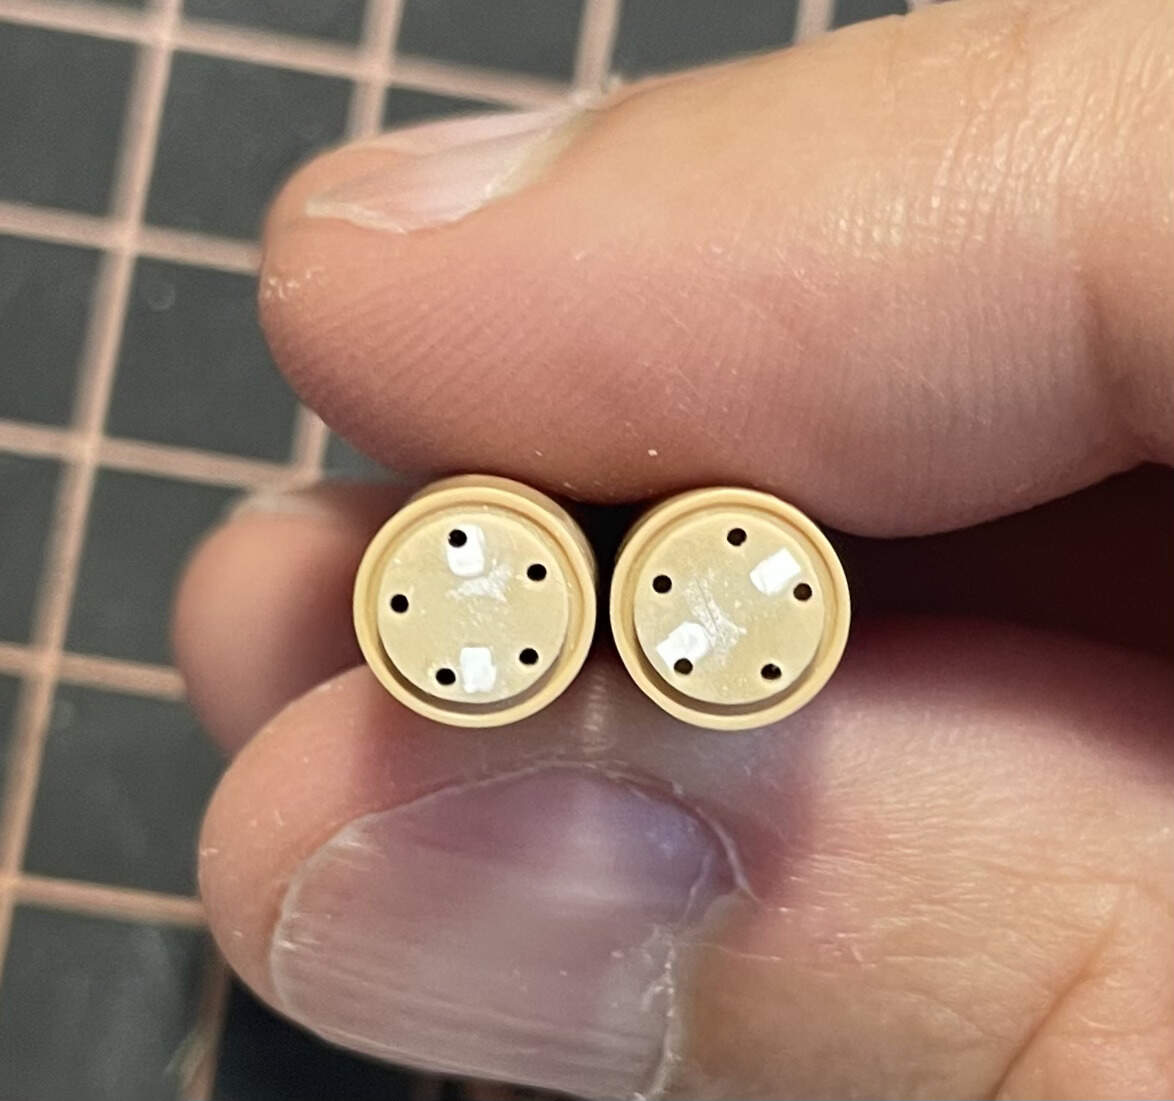
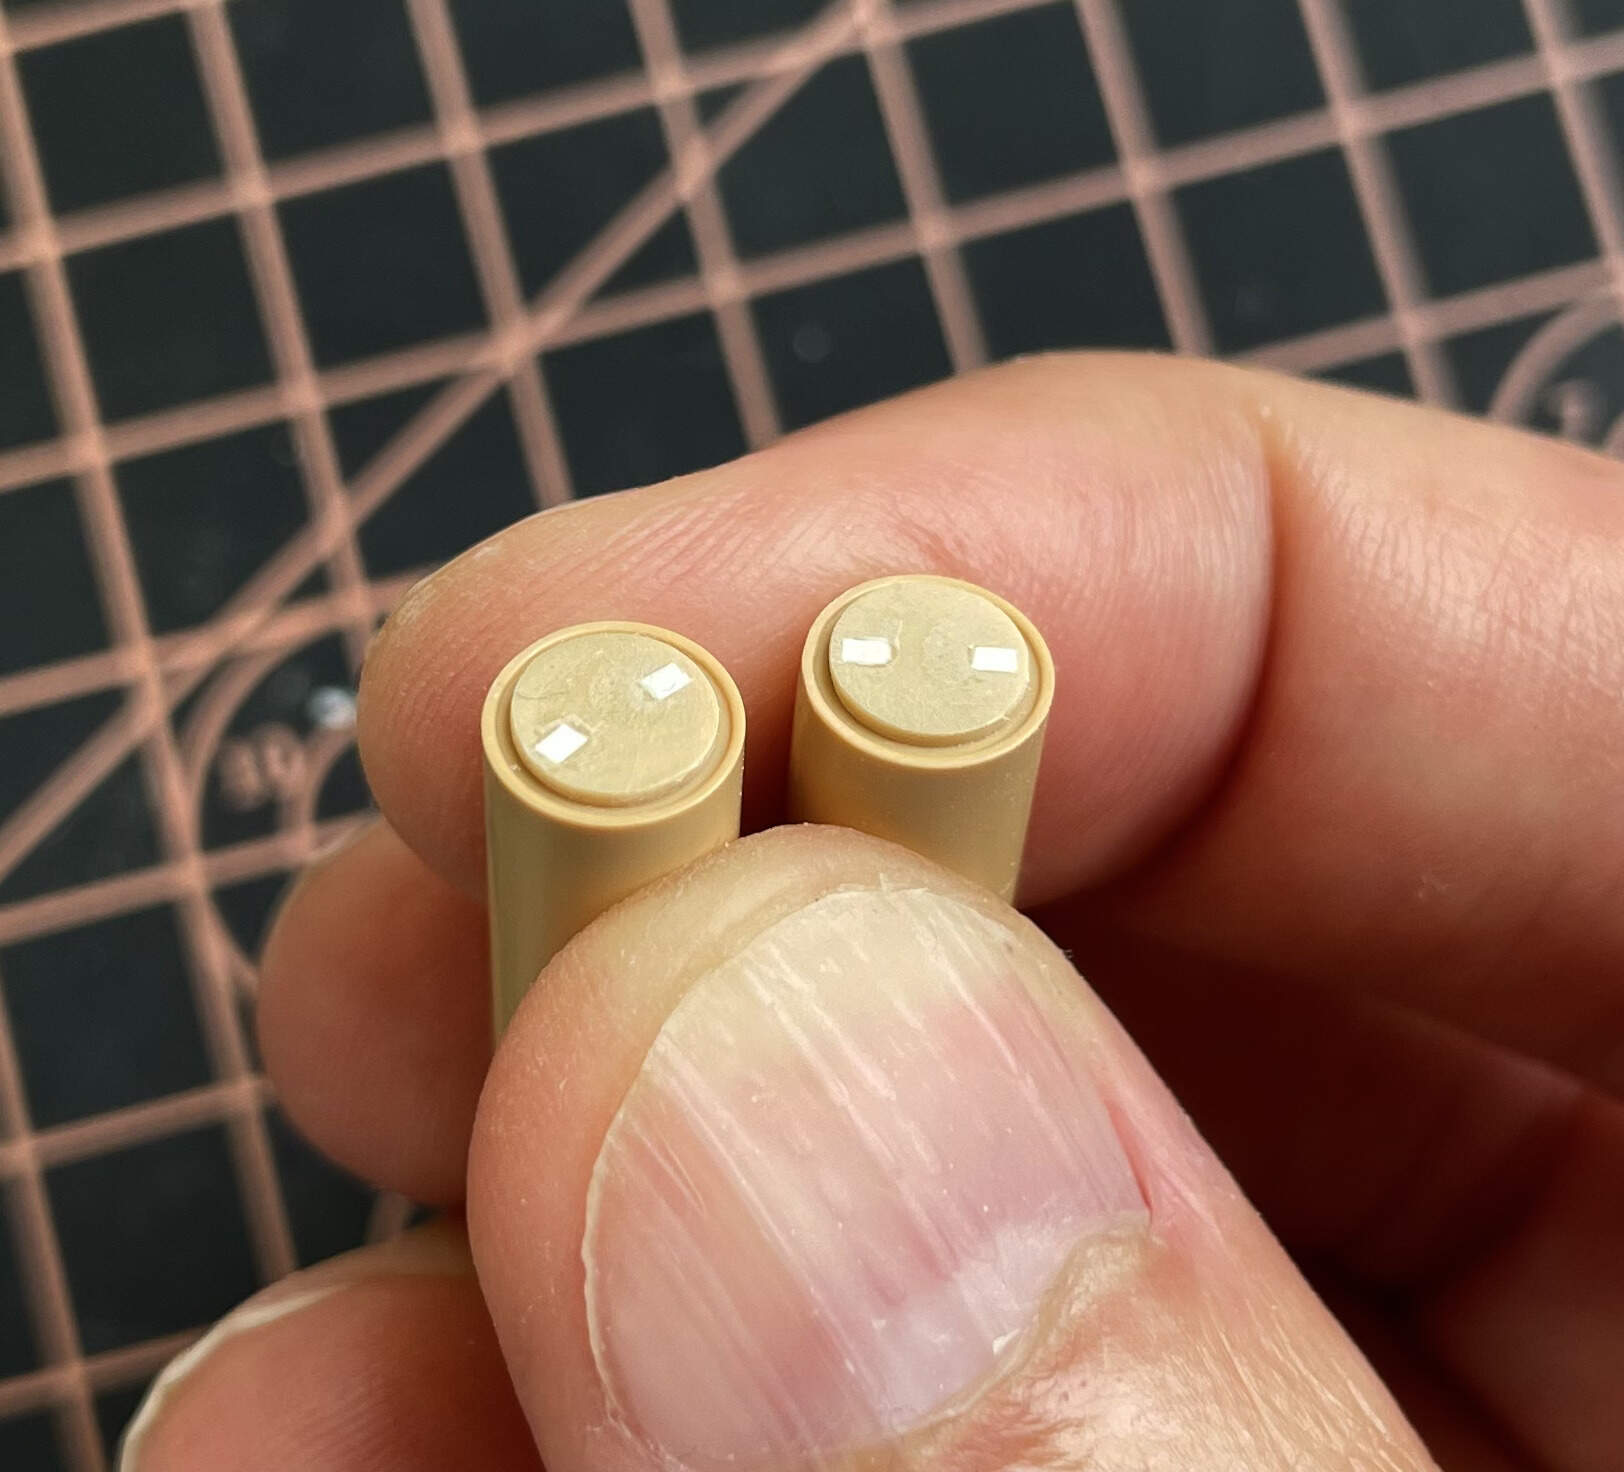
Step 4: Push in some styrene rounds, leaving well over length. Slide over the etch plate, get everything aligned and true, glue it all. I used a combo of Tamiya extra thin, and zap thin ca. Once set, nip the styrene as close as possible to the etch plate, and sand remaining flush to the etch. Lastly I applied some Meng but heads:

Not quite finished, but getting there. Just need to address the flap valve that sits inside the 5 posts.
4 Likes
I solved the PE bore rifling problem by copying the brass insert onto a piece of lead foil and scribing the rifling pattern in the lead with a straight edge and the back side of a X-acto blade. No problem rolling the lead compared to the rigid brass.
I believe the Kubinka Sturmtiger is the prototype too, but possibly cobbled together. It has the straight bottom edge on the barrel shield that only the prototype had, but the barrel is not the original with the 20 vent holes. It also has the asymmetrical counterweight and barrel “horns” which the prototype lacked, so it appears to have had the weapon swapped out. However, the Kubinka vehicle also has the bolted-on 50mm nose armor.
1 Like
A post-event education on exhaust flap valves
One thing I have become exceptionally good at, is doing my homework after I start something.
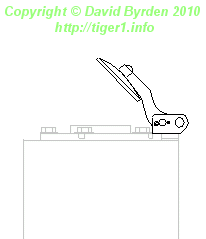
In the old image below, circled in red is the top of the RFM exhaust, which features a flap valve and arm / hinge mechanism in the centre. I had gotten pretty far down the rabbit hole of scratching a replacement when I decided to find something out about it. And I did find two important things out.
Thing #1: Tigers didn’t always have these flap (or non-return) valves, they were standard issue only until around September of 1943… so I could in hindsight have omitted them… which would have been much easier, and preferable! The RFM kit doesn’t give you the option of omitting it, but perhaps they could?
Thing #2: The flap valves in normal operation were locked open with a pin, so they are always canted up, as shown in this sketch found on David Brydens Tiger 1 website (link to actual page, where I learnt all of this is here - Mufflers | TIGER1.INFO). The RFM kit part is shown closed, which would be uncommon. (The purpose of the valve is that when closed, it enables the Tiger to deep water wade).
Now, I really wish I knew these two things before I am where I am now, because i’ve ended up where I have to fit a flap valve, and I have to fit it closed, due to me not drilling a hole for the exhaust but instead gluing a solid round block in the exhaust centre as can be seen in my previous post.
I wish I wasn’t here, because my scratched flap valve is a bit ugly, and a bit oversized:

But now I know for next time at least!
2 Likes
@Paska @Armor_Buff, I have the luxury of having two options with the barrel liner, as the RFM kit has its own, and there’s also one with the Voyager PE set. They differ in size, like Wade says, the RFM one is a little big looking, and the Voyager one is a bit smaller.
I thought i’d quickly roll both, and see which one was going to fit better.
Unfortunately both items don’t really ‘roll’ very nicely. They both ended up like this, due to the grooves in them they both tend to fold at the grooves……
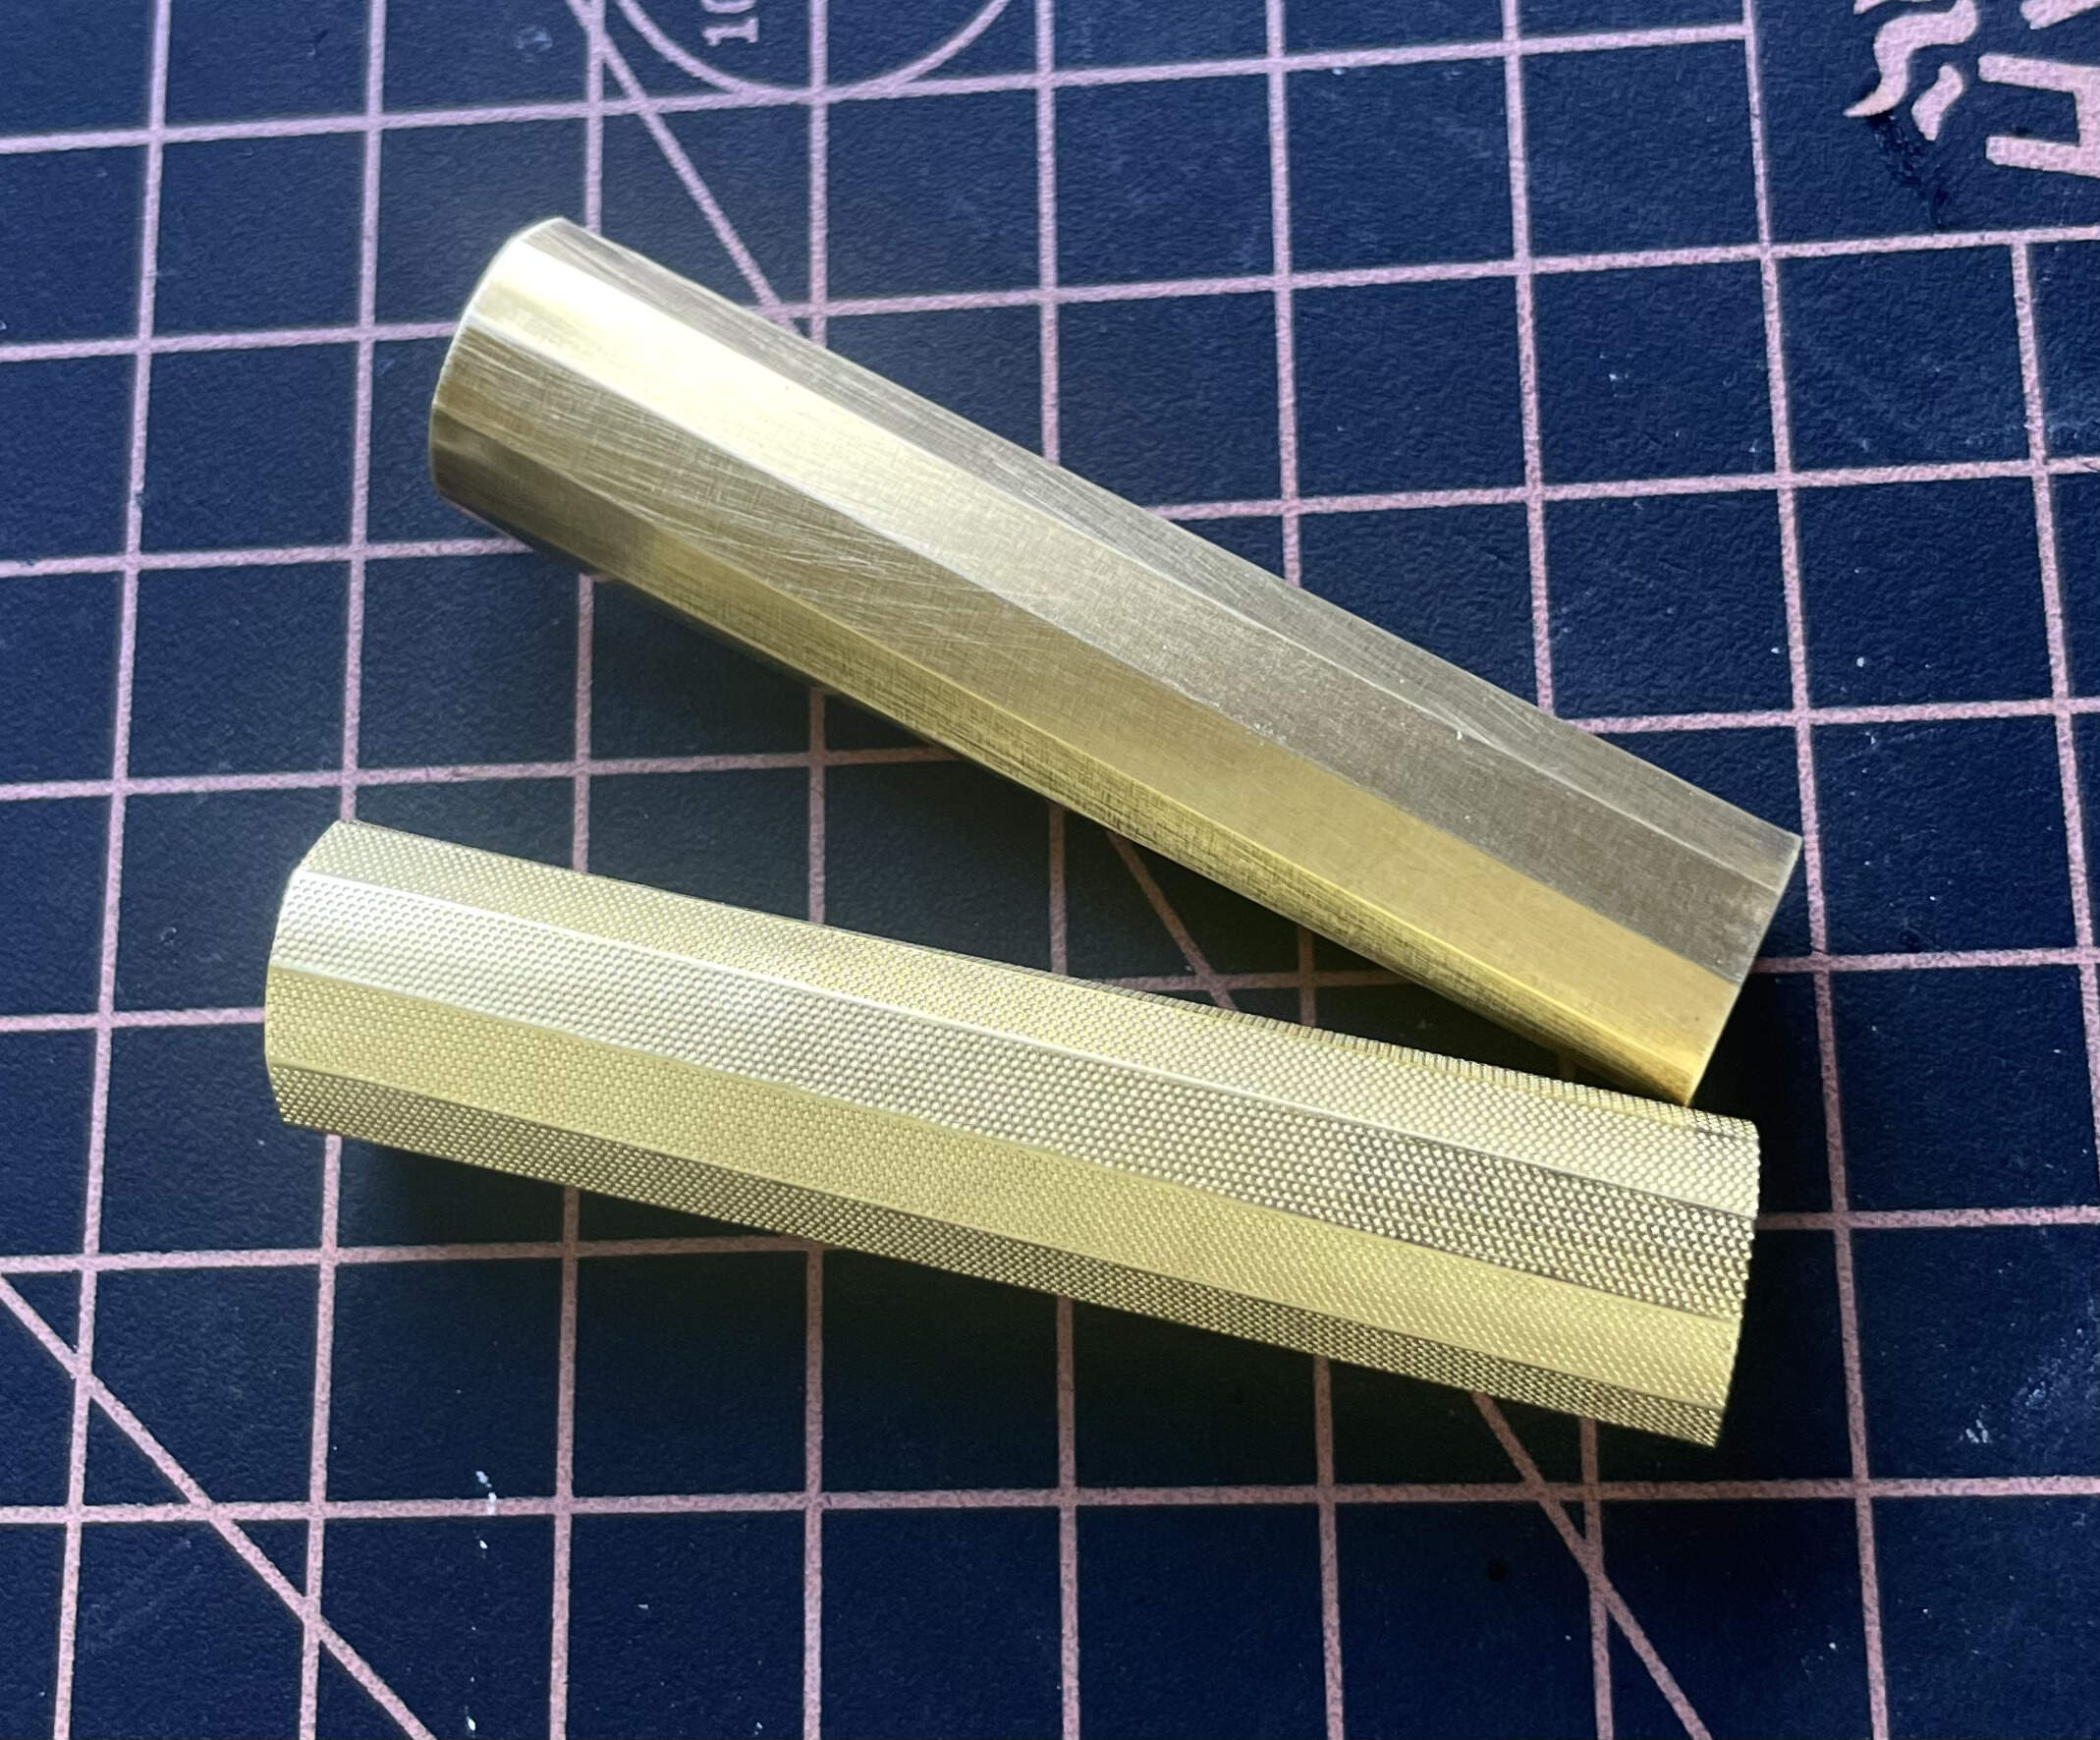
I have left them like this for now to come back to at a later date. Perhaps I could anneal them and try again?
3 Likes
About the spacing of those mounts for the exhaust shields:
Having measured an actual Tiger, and having measurements of other Tigers from other people, I can confidently say that the spacings were 500mm and 300mm.
David
3 Likes
Good question. I am not good at figure sculpture. A minor conversion is ok, but not much, so they have to look similar to the ones on the pic…
1 Like
David, annealing seems reasonable to try to me as long as the PE isn’t thin and fragile.
That looks like a challenging part to roll, one of The Small Shops photo-etch-rolling-and-forming-tools might really help with that part.
3 Likes
Nice save.
I could see this being made in 3D.
1 Like
Good idea! When I built my AFV Club Sturmy, there was a resin AM barrel with nice lands and groves in it.
I’m surprised there isn’t one for this kit.
Yes, try annealing them.
2 Likes
Wade, Dan, regards the barrel liner, I will try and anneal it when i’m feeling a little braver…. Plan A is annealing. Plan B is to possibly cut a sheet of styrene, scribe in some rifling grooves and use that in lieu of etch. Advantage being it should be easier to roll, and I could glue it in progressively, rather than the one crack you get with PE and CA! Plan B was something I would also strongly consider if I was wanting to make the prototype Sturmtiger, as the PE lining provided is not correct for the prototype - it has far many more grooves.
An iconic part of the Sturmtiger - its barrel
Arguably one of the most iconic features of this vehicle, is its barrel. So that being the case, it deserves a little bit more TLC than usual.
RFM providers 3 faces for the barrel, each with a different number of vents. I have chosen the more common option, with 31 vents, which i’m also drilling out to give some more depth:
There is a bit of an ugly seam at the joint of the face to the barrel, nothing some Tamiya White putty won’t solve:
Drilling finished, and seam gone (took 2 goes to fill the seam):

Lugs mounted to the barrel, which takes a bit of getting right, as there’s no alignment guides, I pencilled on some lines myself at 90 degree intervals. I’m not exactly sure the purpose of these items? To aid casting? to aid handling? some sort of counterweight?

Lastly, i’ve added a casting mark to the underside. The casting mark is simply a number from another kits sprue which I shaved off with a sharp blade.
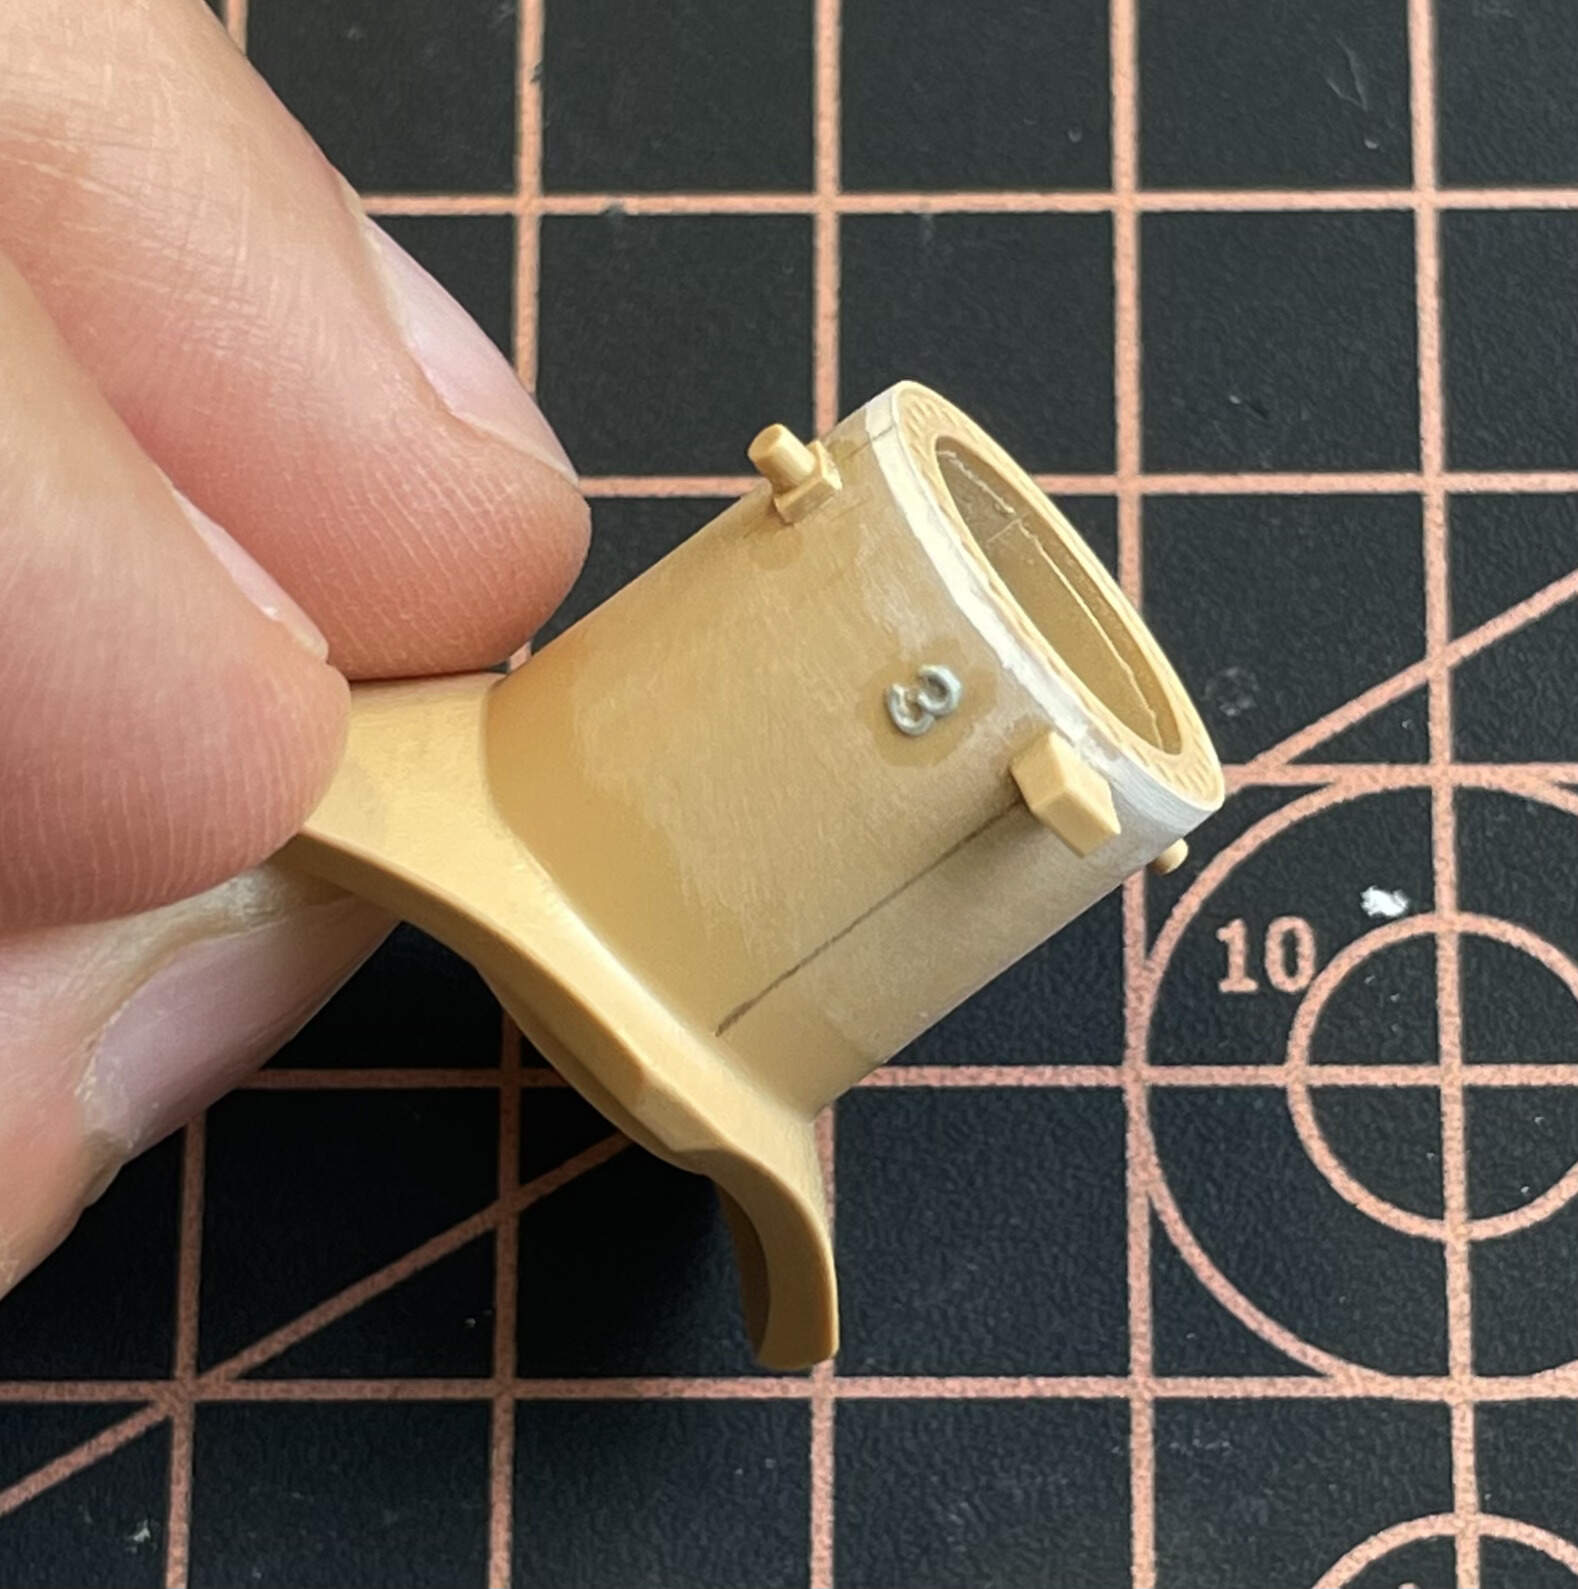
I’ll have to address the pesky barrel liner soon!
10 Likes
Coming along really well…
1 Like
Slow progress on this one the last week or so. Spent too many hours at work, battling a shoulder injury, and a few days away from home has meant limited bench time.
RFM moulds the running gear with 4 x attachment points per wheel ![]() ……
……
So it is with great relief that I can say I have now cleaned up all the gazillion sprue attachment points and seams on the running gear! well, still a few seams to tidy on the drive sprockets… but basically done. Phew!!
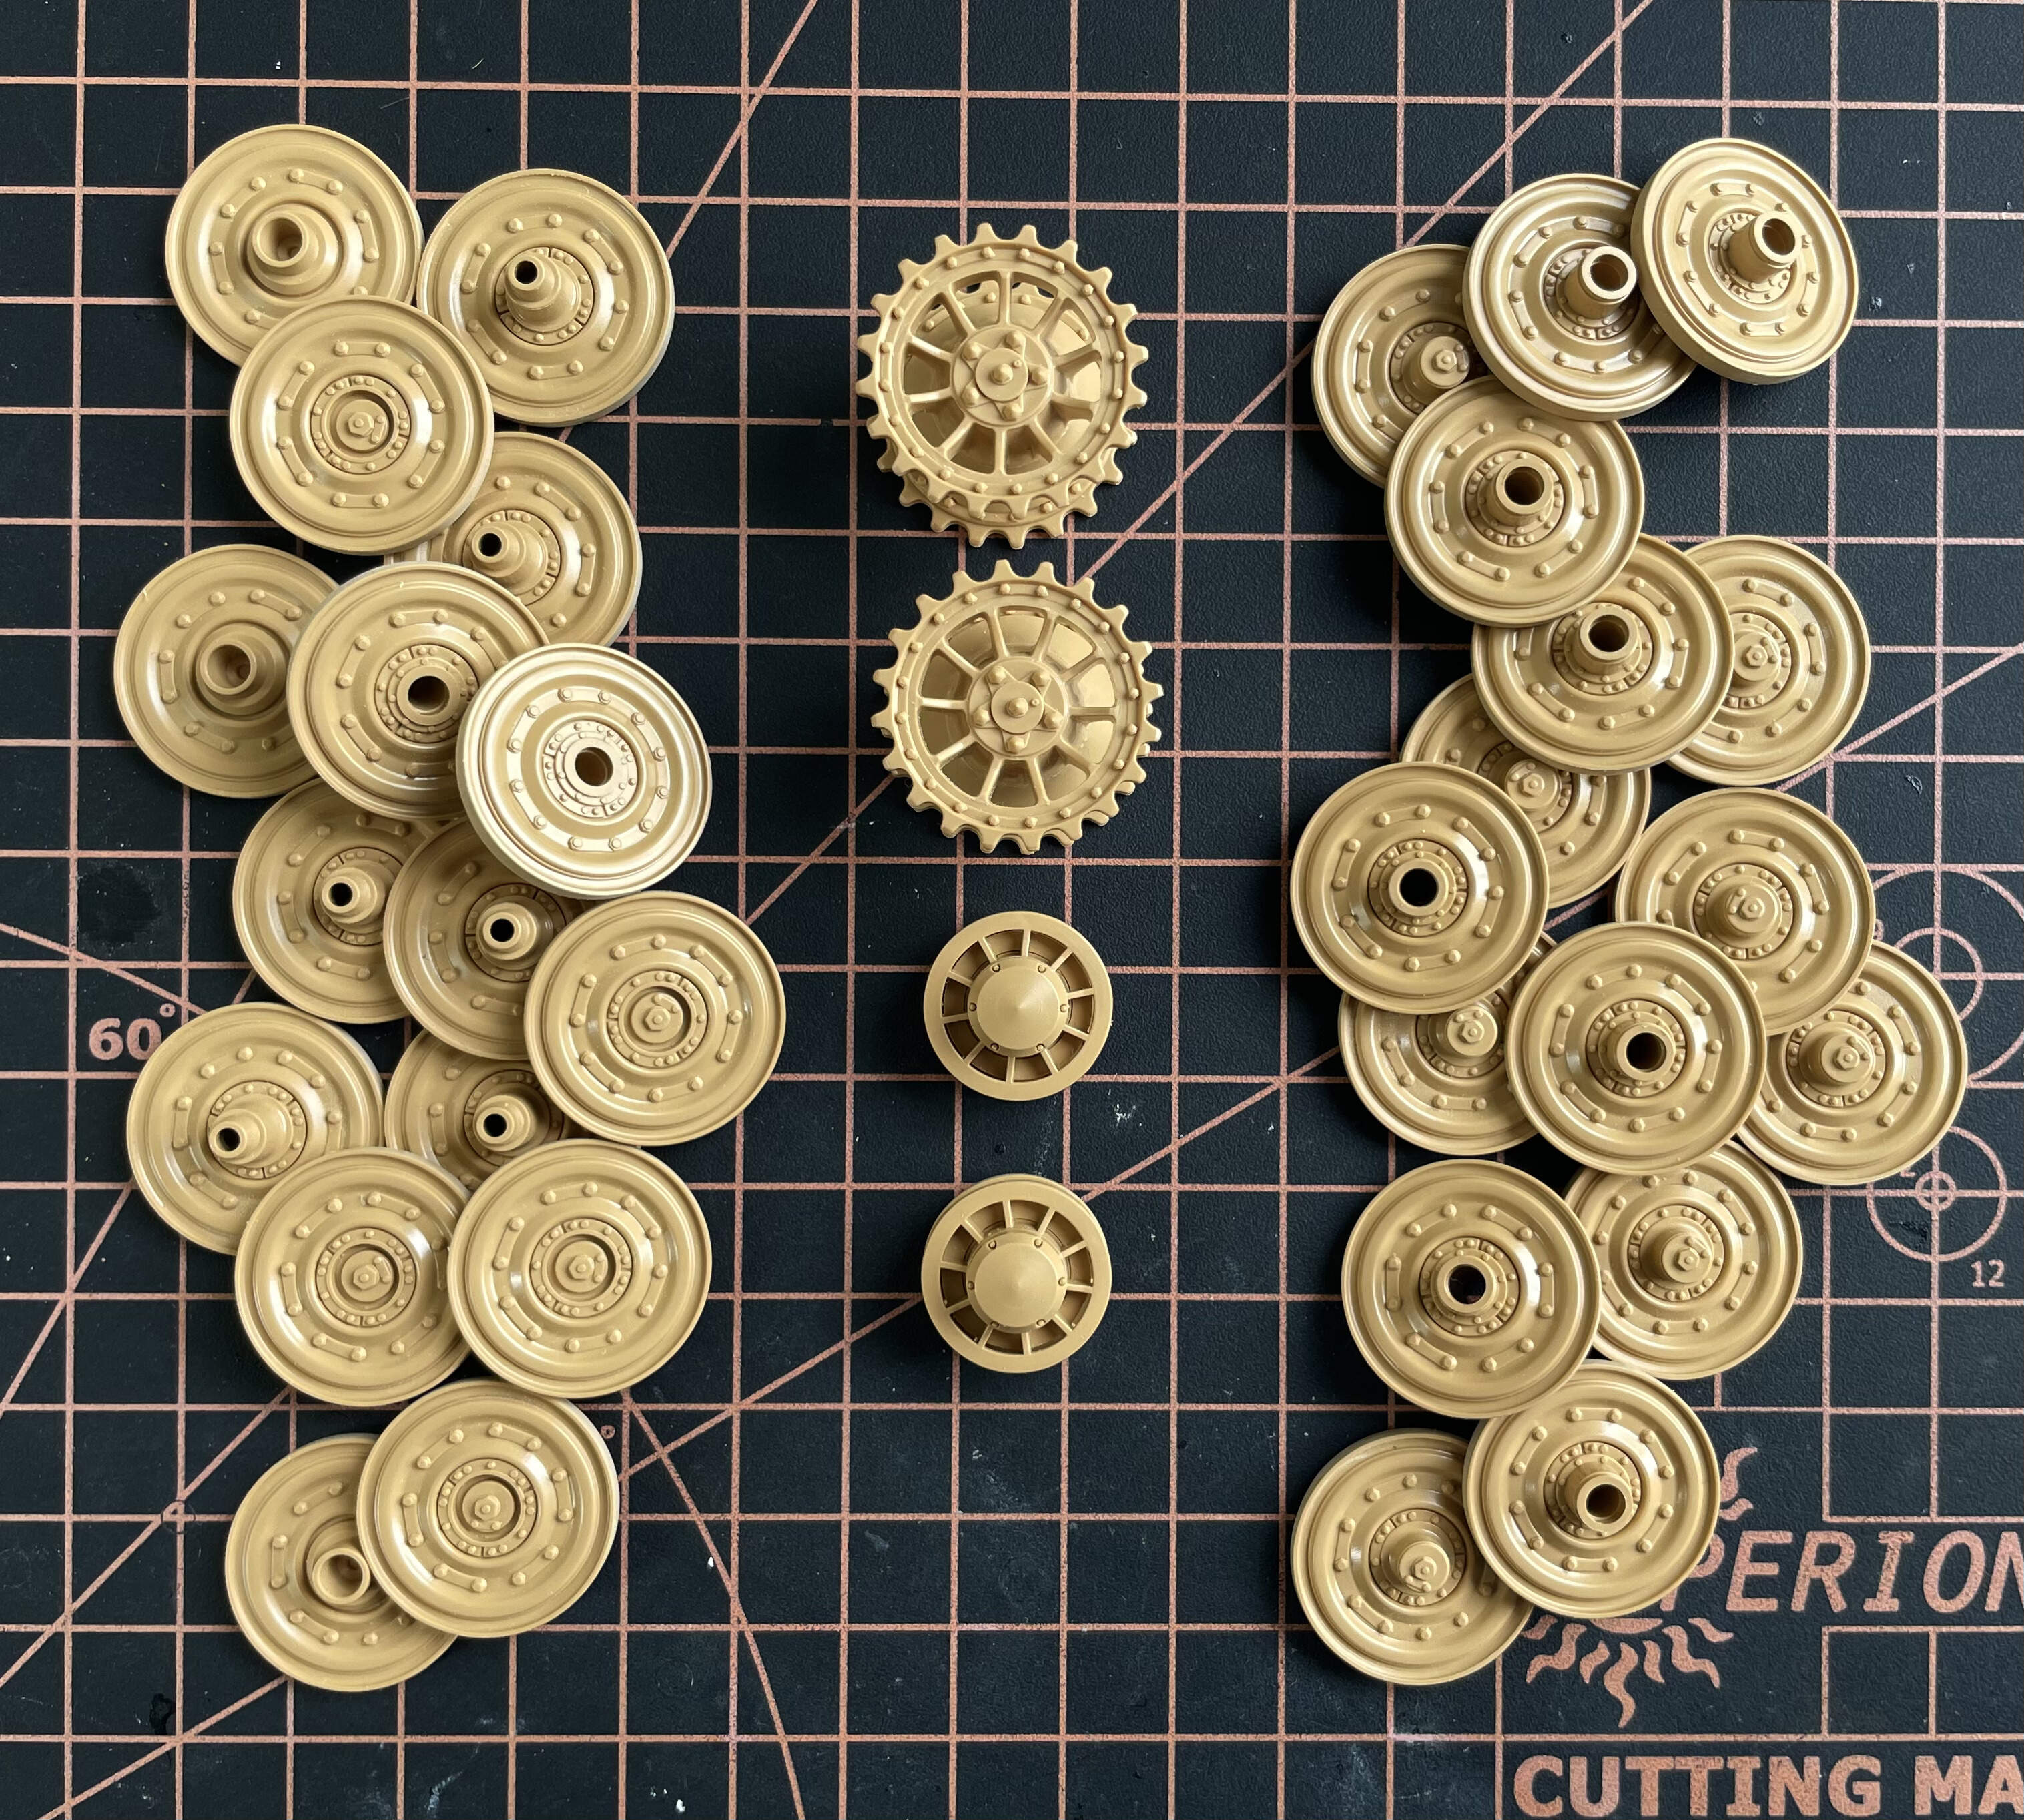
8 Likes
I love building Tigers and Panthers, except for all those friggin wheels!
5 Likes
No rubber to paint here!
2 Likes
So so true …
1 Like
Um yeah so I guess it’s been a few moments since my last post, a few days after (Feb 14th) we had the mother of all floods in my hometown. Absolute chaos and devastation.
Anyhow, I got back on the bench yesterday for the first time, of which i’m very happy about!
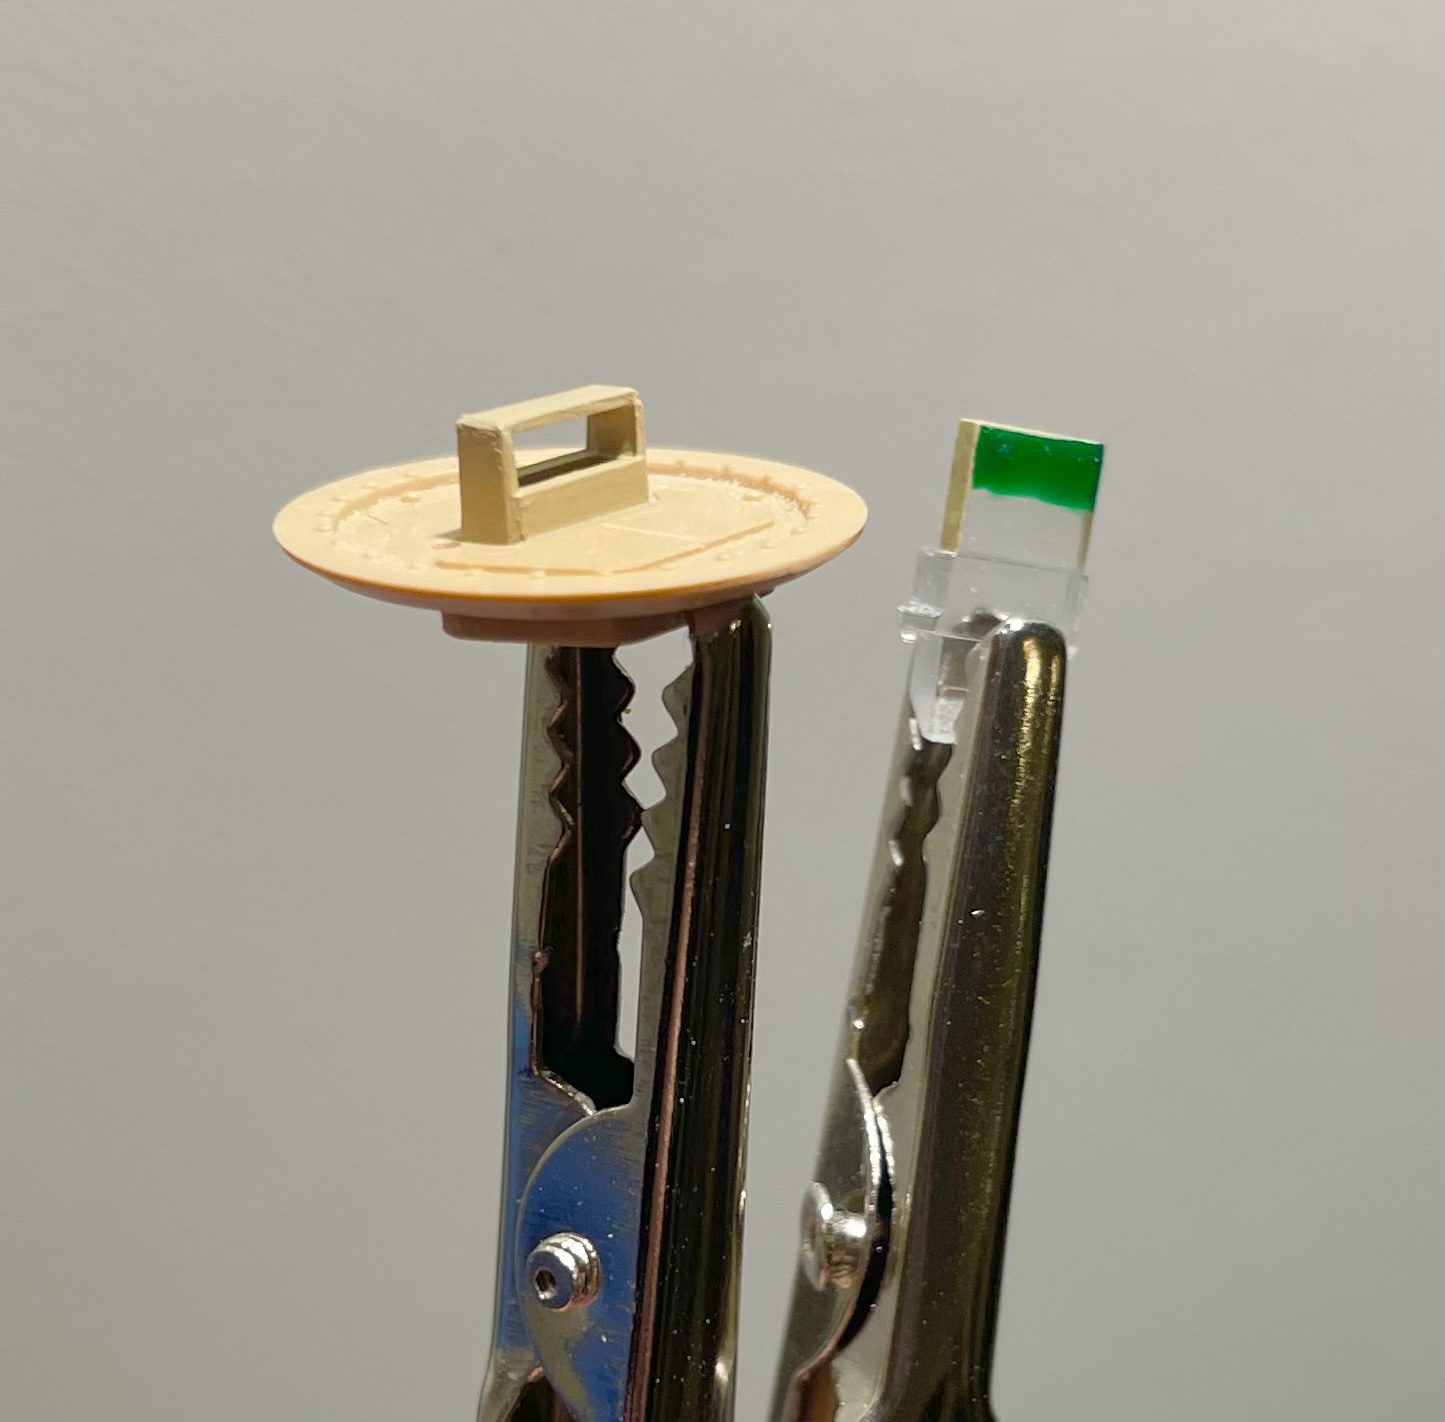
Question…… image below is of a periscope that belongs on the sturmtiger roof. I painted both the front and back sides a clear green? before I insert into the housing on the left… is this correct? would both sides be clear green or just the front and perhaps the back should be dunkelgelb
TIA!!
1 Like
I’ve written about these vertical periscopes.
There was no use of tinted glass in German view blocks. You were simply looking into the vehicle when you looked into one.
David
2 Likes