
Just posted a review of Special Hobby’s 1/72 scale Short Sunderland Mk.III. I will be doing a build log here over the next few weeks.
2 Likes
Looking forward to this Tim.
Should be a great build, are you going to use the Eduard sets with it?
Andy 
Hi Andy, yes I purchased the Eduard cockpit zoom set and some paint masks. I would normally create my own masks, but making masks for those port holes would have been difficult 
Getting here early to make sure I see the start, Tim 
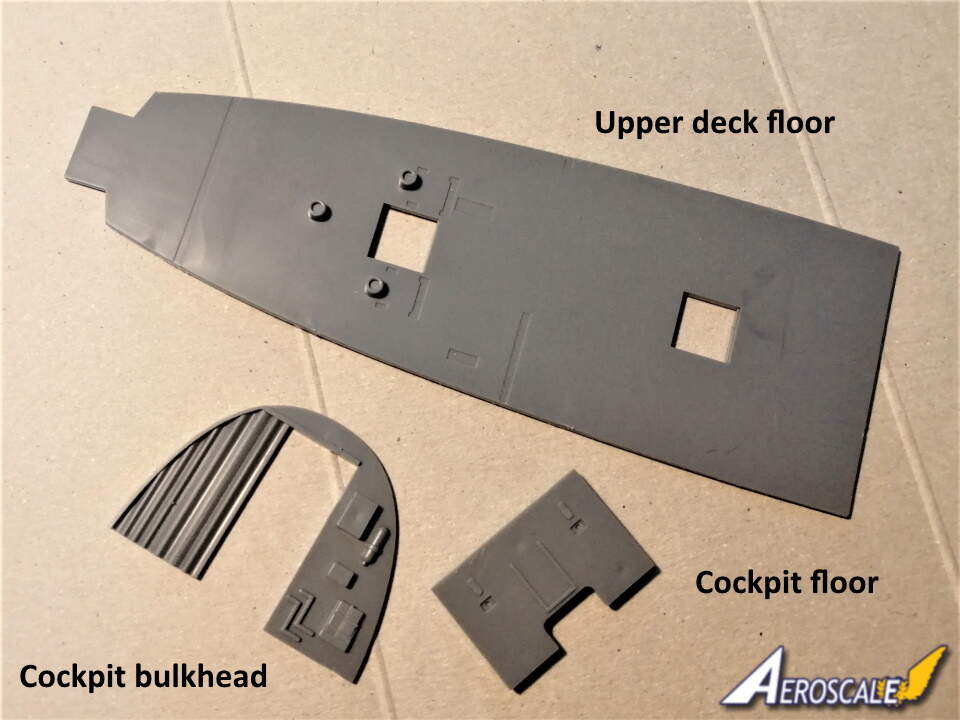
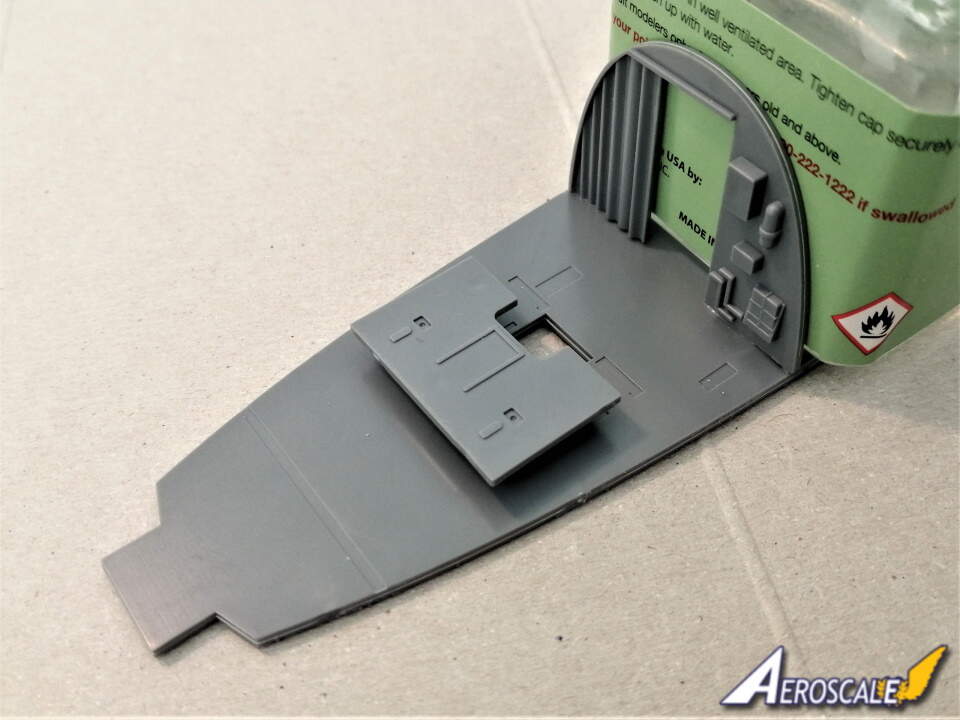
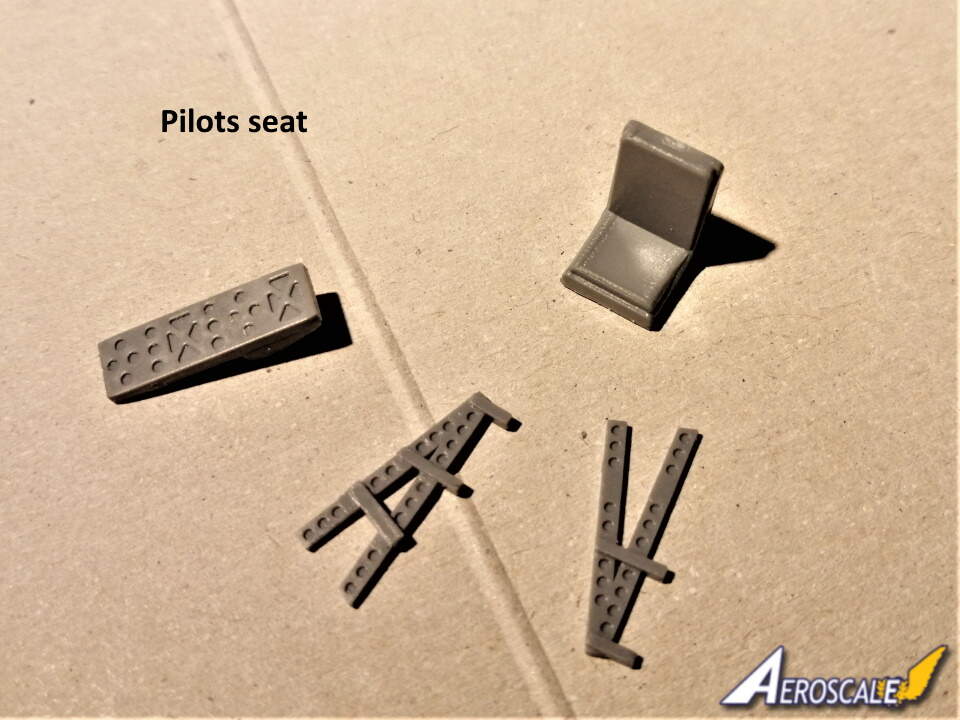
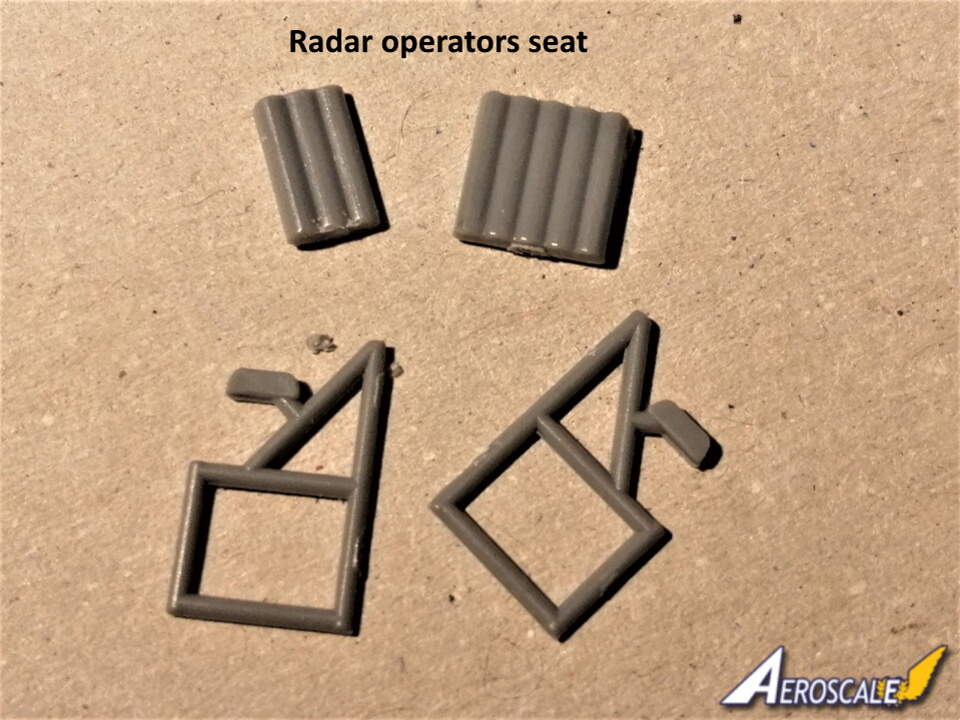
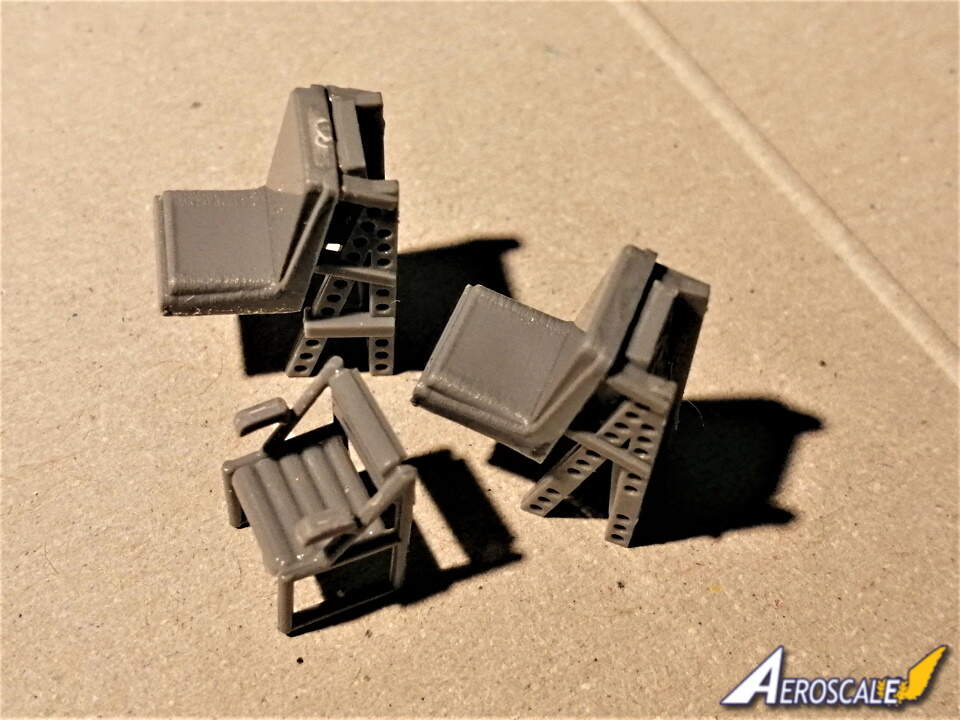
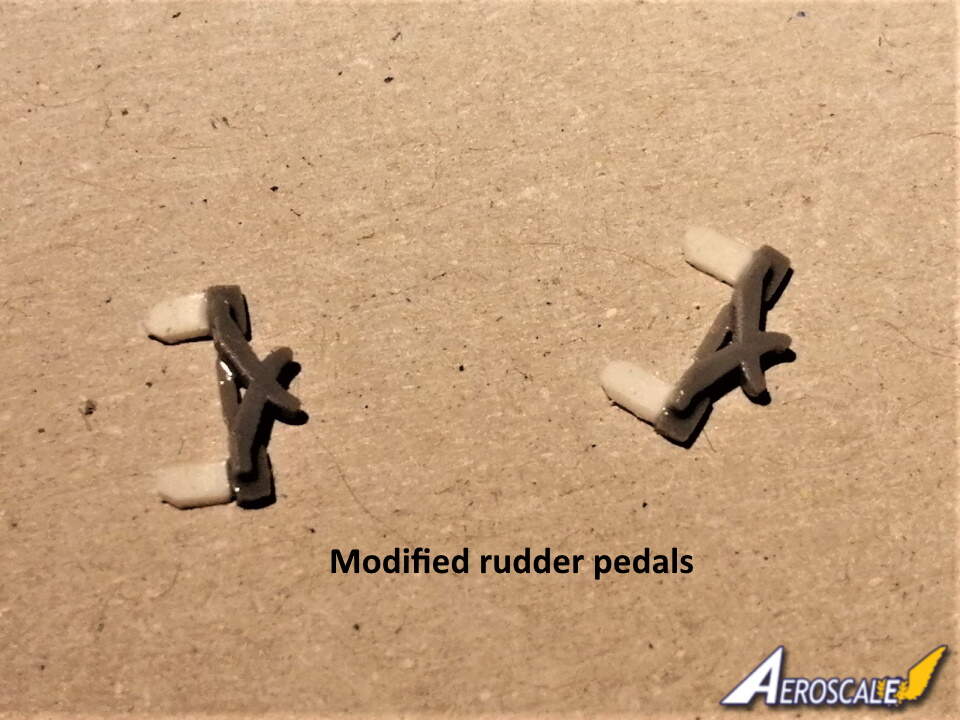
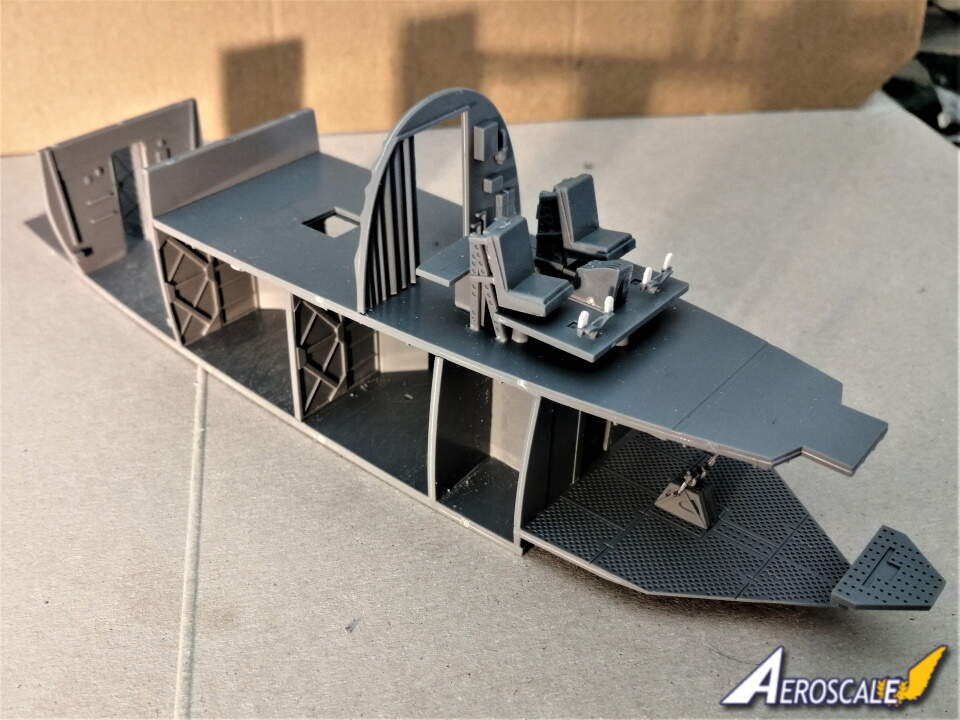
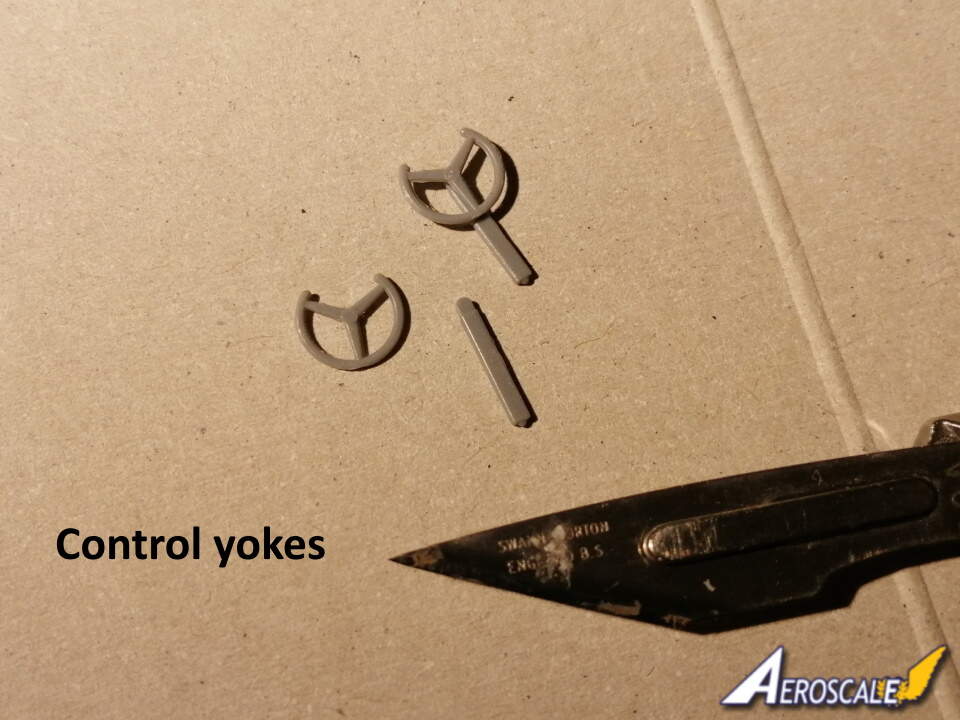
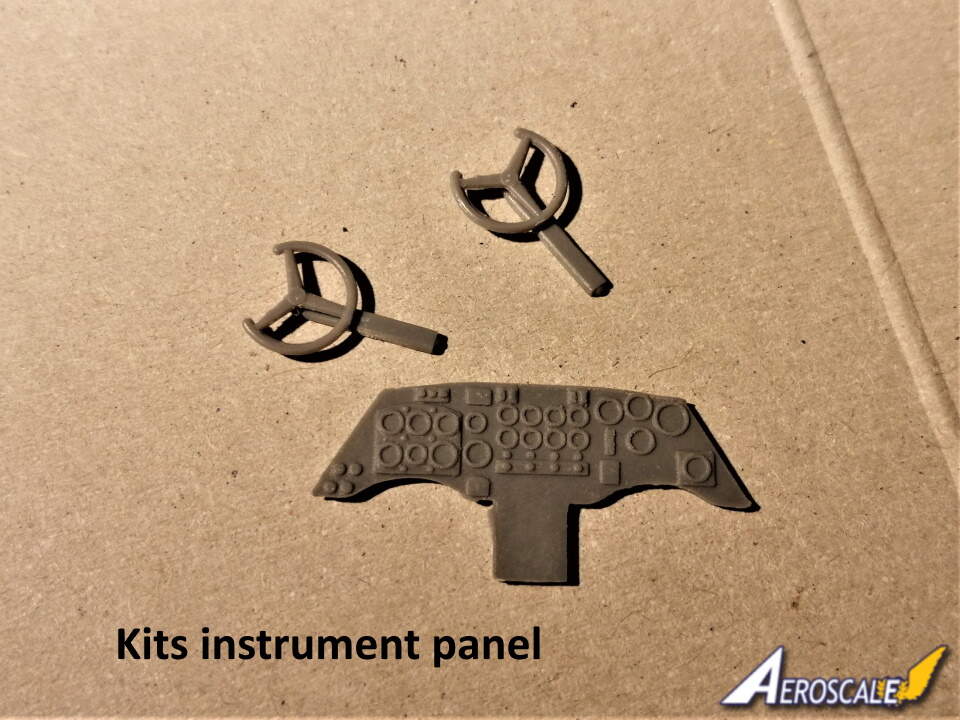
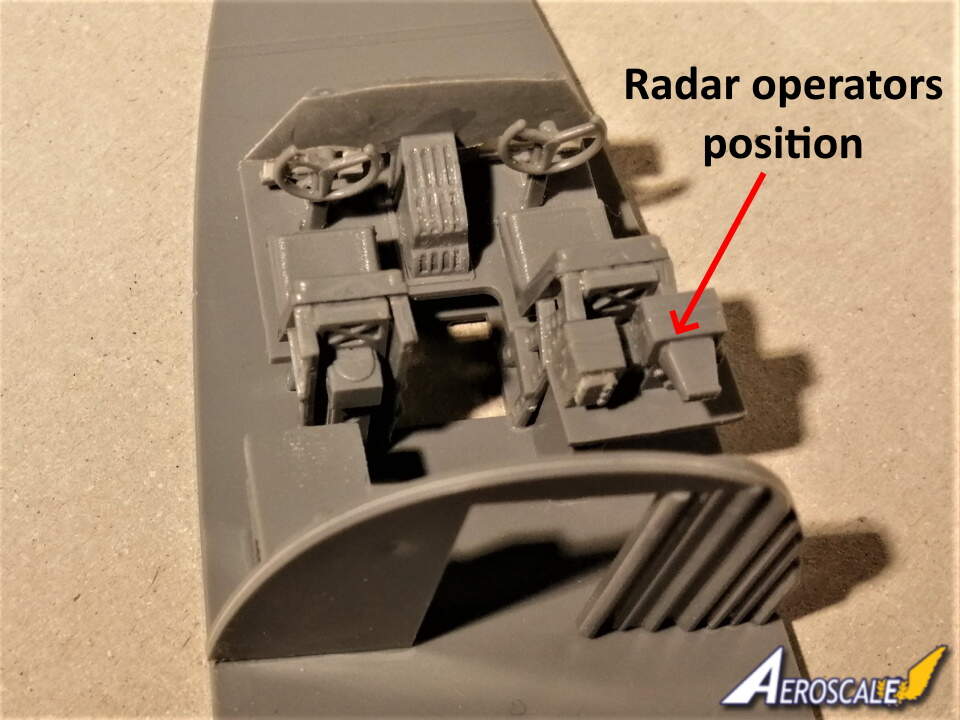
As promised, I am going to make a start building the Special Hobby 1/72 scale Sunderland Mk.III. First task is building up the interior. Special Hobby’s Sunderland has plenty of detail inside the fuselage. It will provide a huge amount of strength for the fuselage as well. Starting off with the cockpit area on the upper deck. The seats went together really well. I thought I had inadvertently cut of the pedals for the rudder controls. I made some alternate pedals from plastic card. Looking at the kits plastic I am now wondering whether they are rudder bars rather than pedals. I will leave out the radar operators chair until I have painted the interior. The chair will get in the way of painting the doors blackout curtain. There is some great detail on the bulkhead.
2 Likes
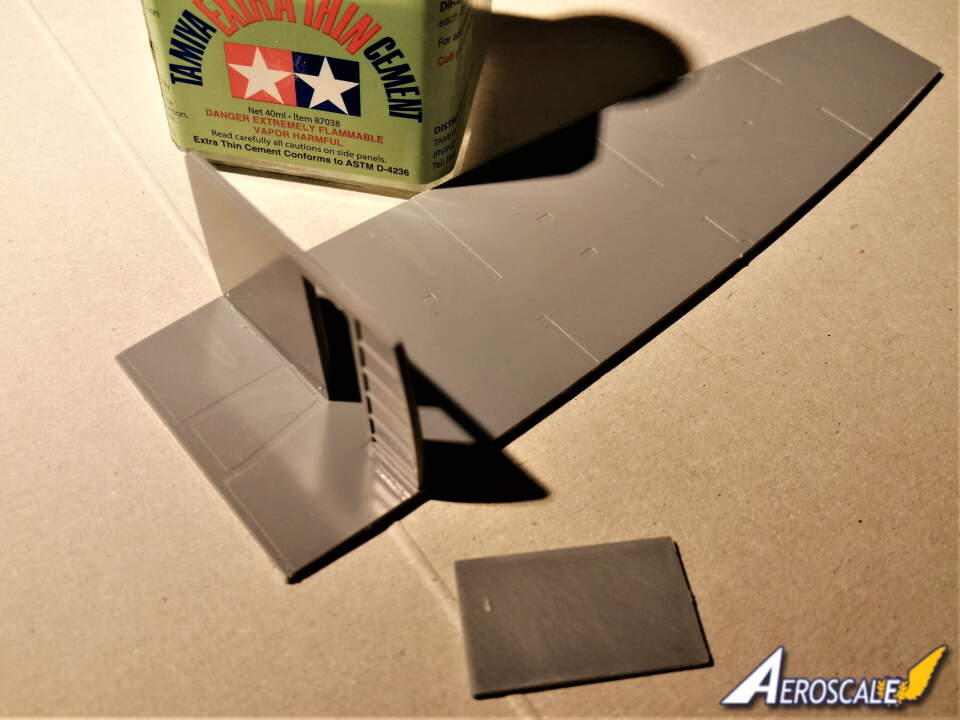
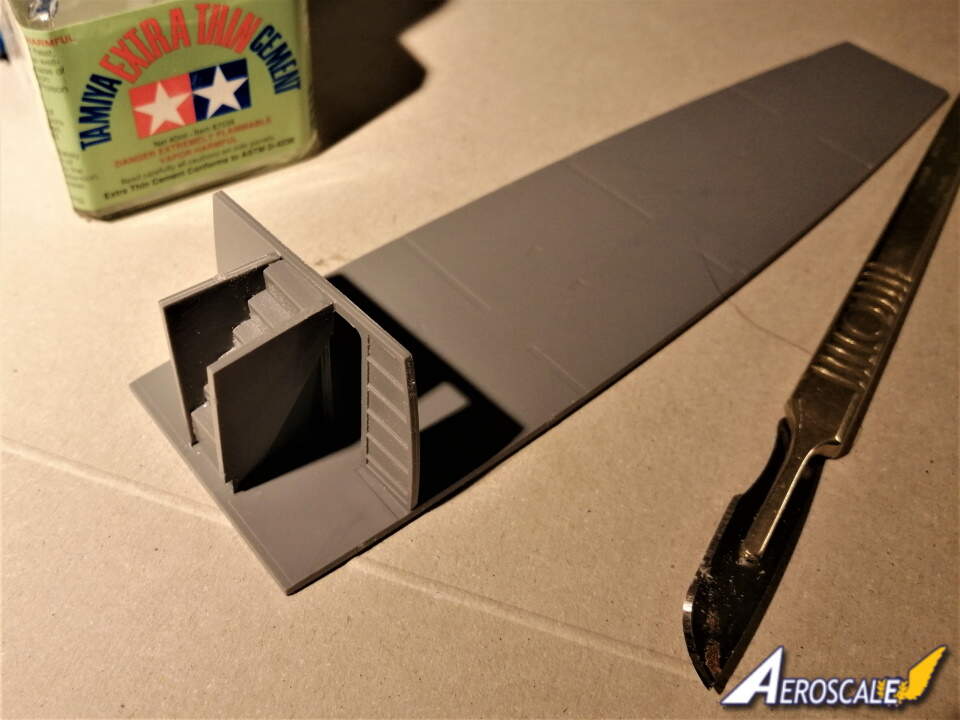
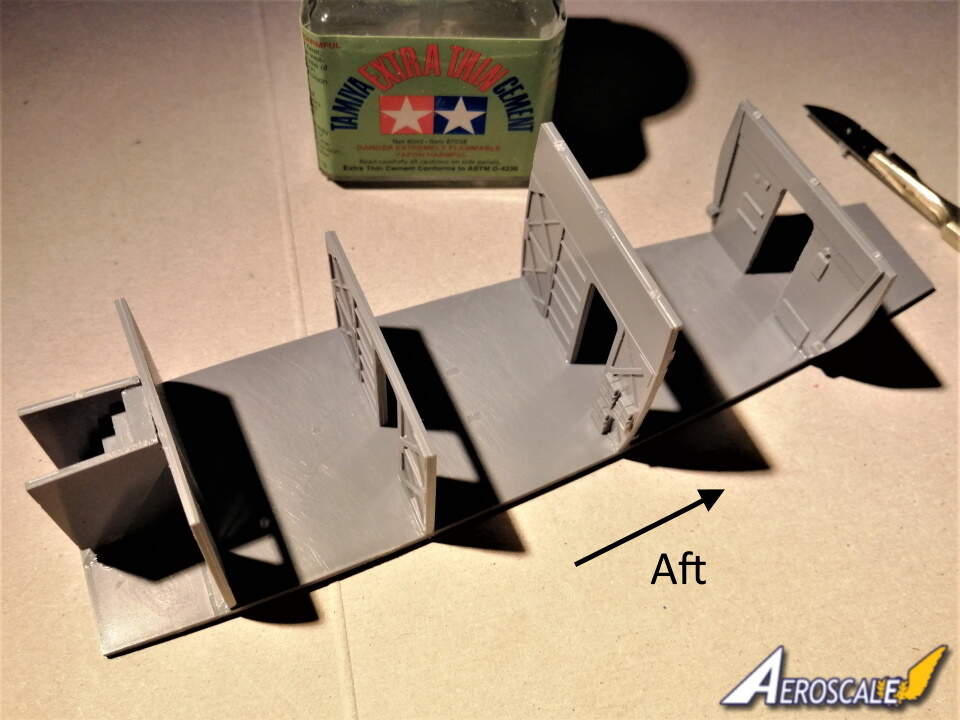
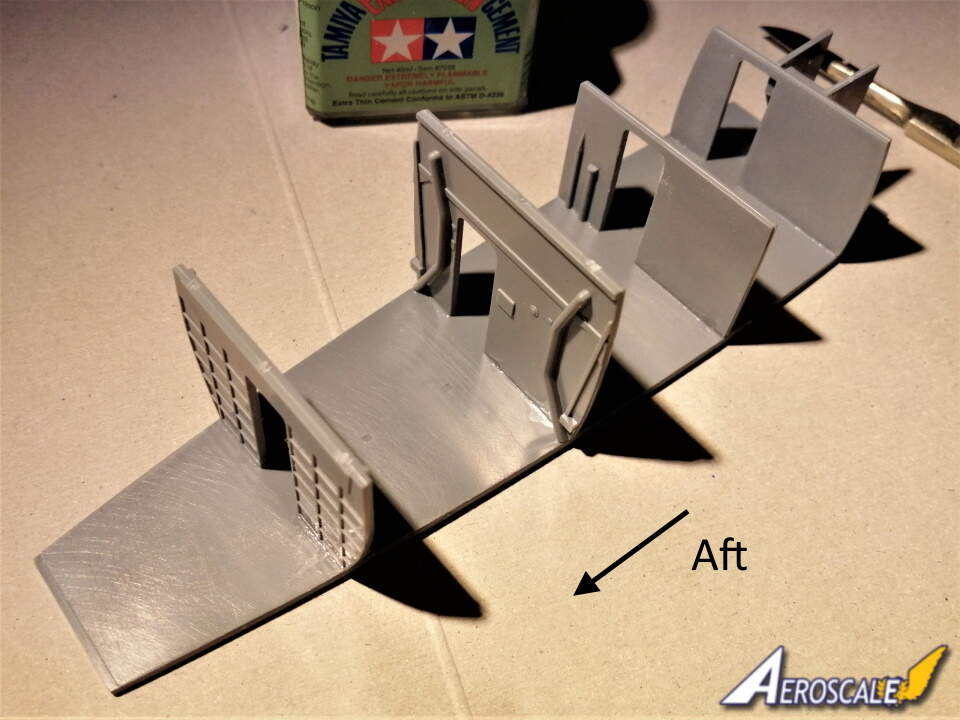
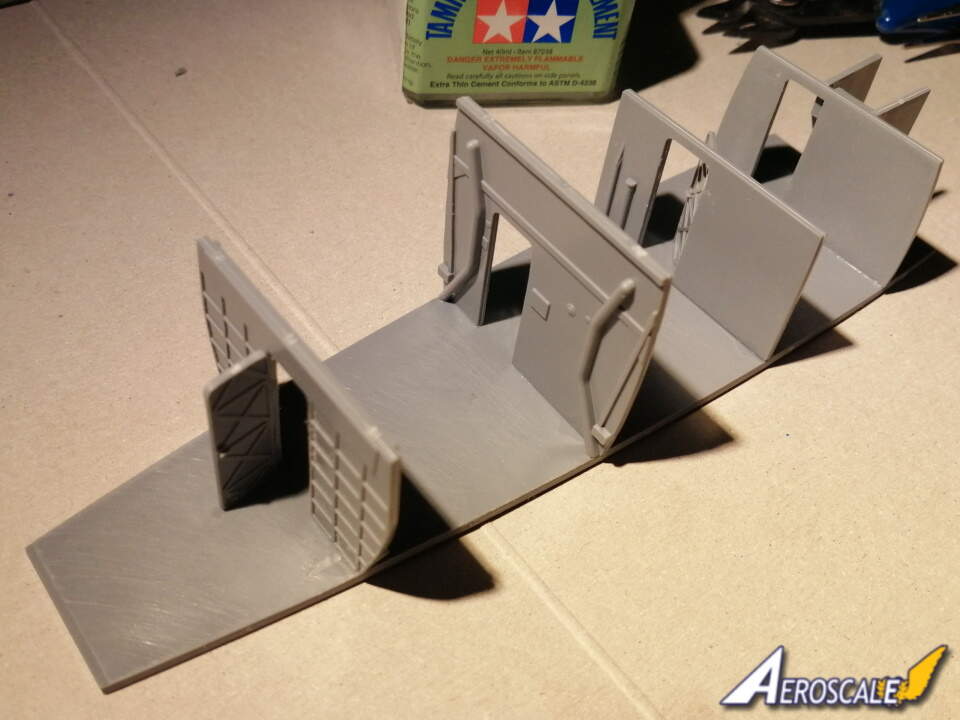
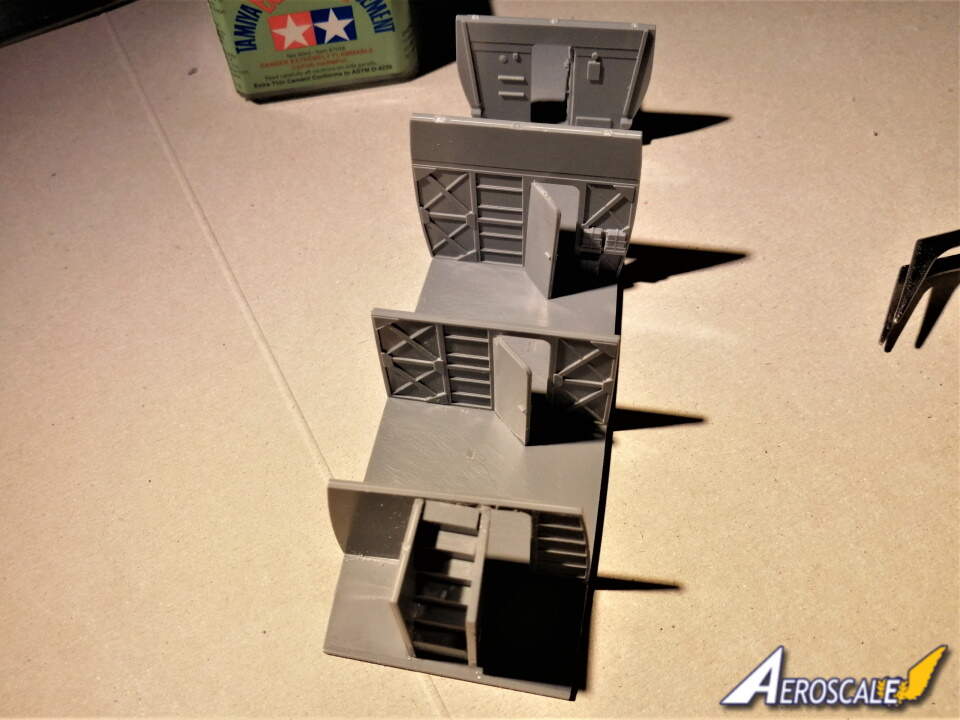
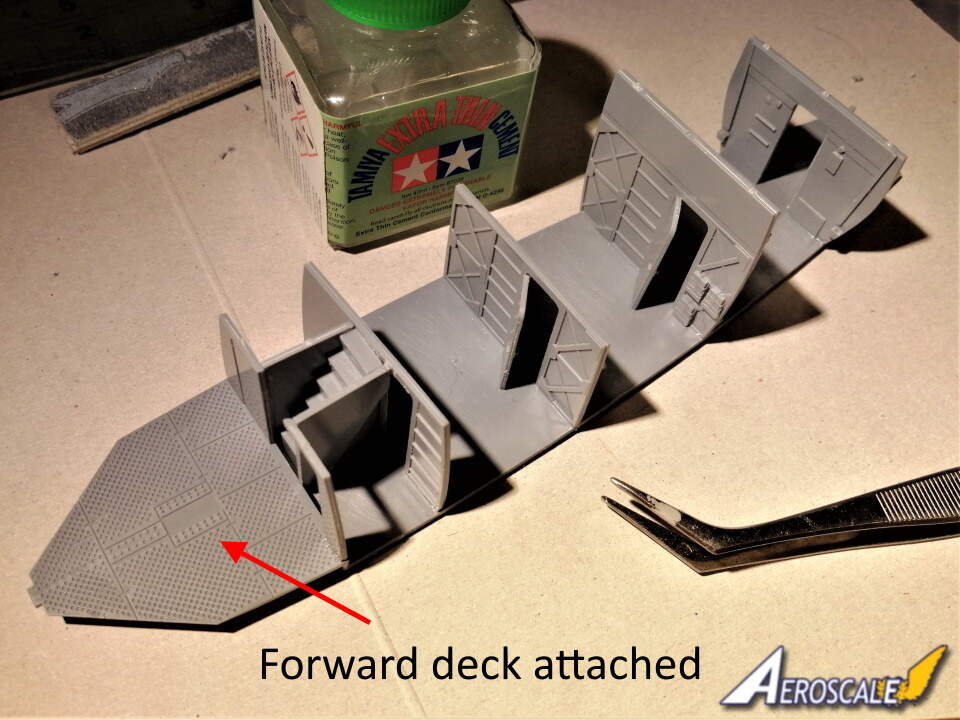
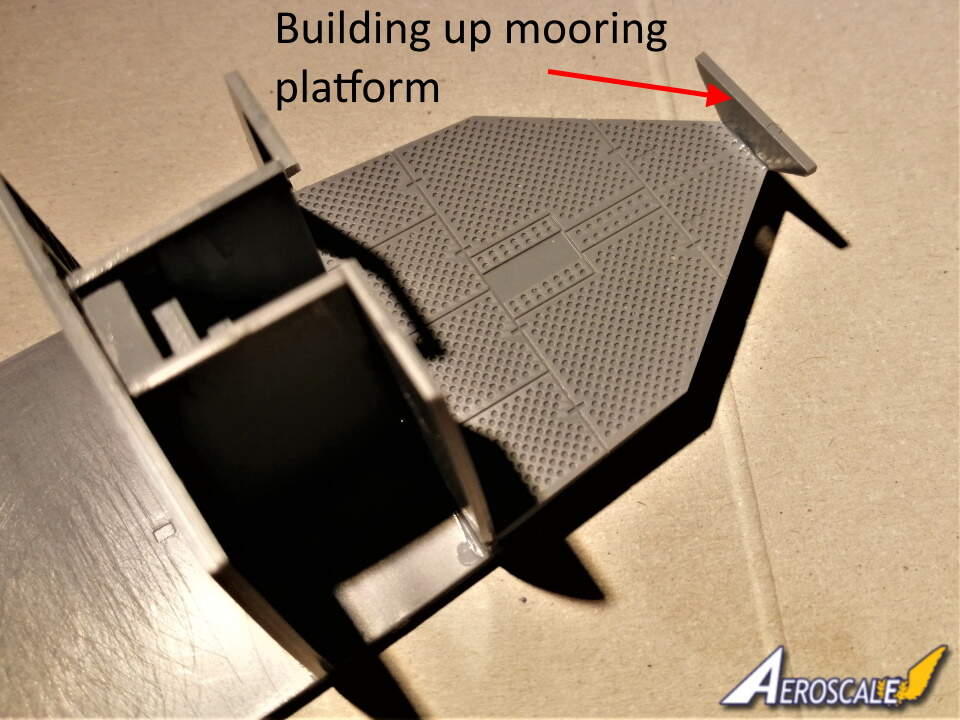
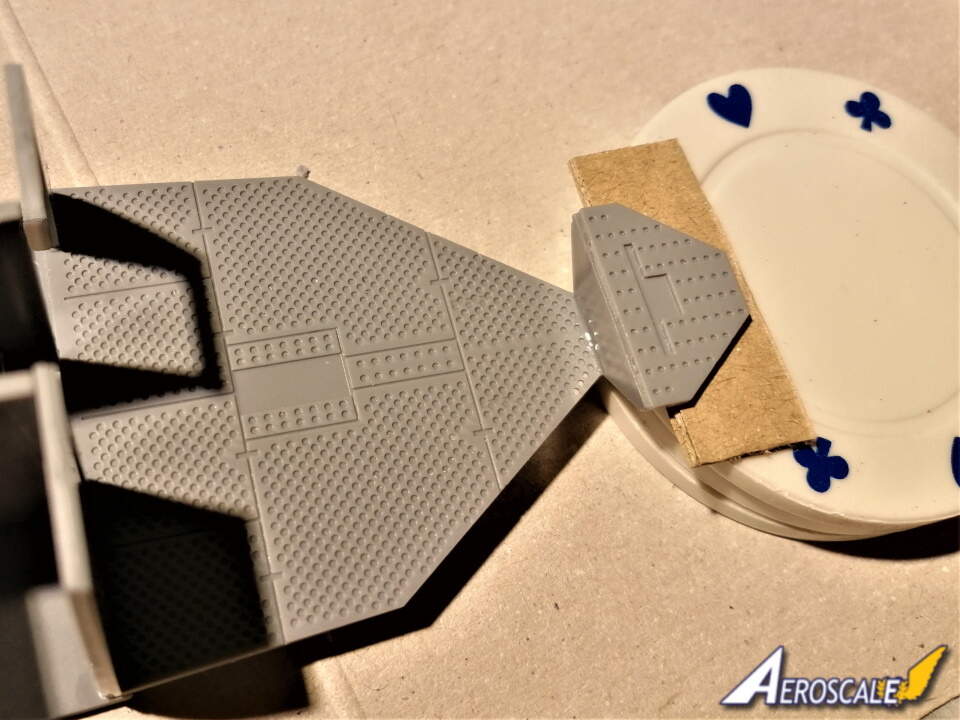
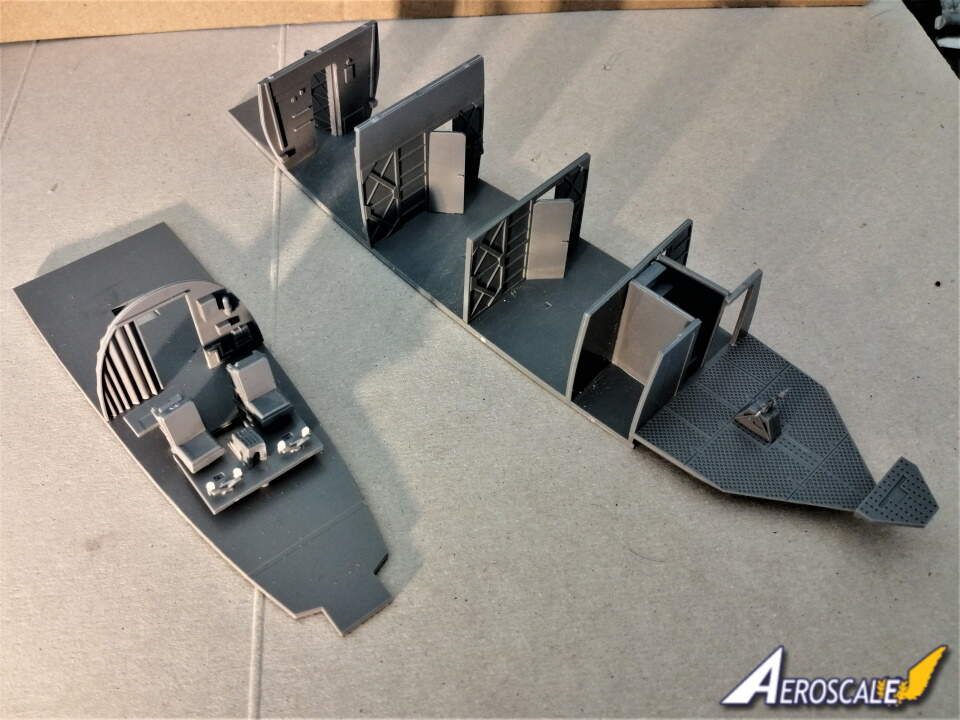
I’ve done some work on the lower deck of the Sunderland. The various walls, doors and stairs have been assembled. Special Hobby has designed slight indentations in the deck to help with the location of the walls. A separate section of flooring for the bow was also fitted. Detail included on the parts is very pleasing.


2 Likes
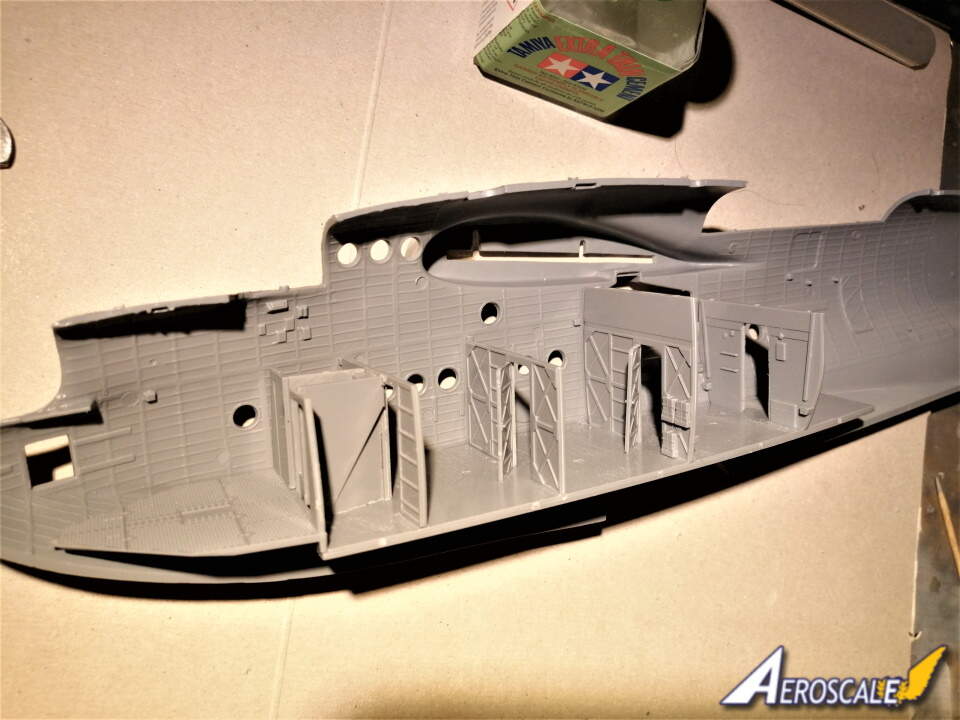
Hi all. I couldn’t resist trying the fit of the lower deck on the starboard hull half. It seems fine and did try offering up the port side to see what the fit would be like with both sides. Its difficult to asses as parts need to be glued in place.
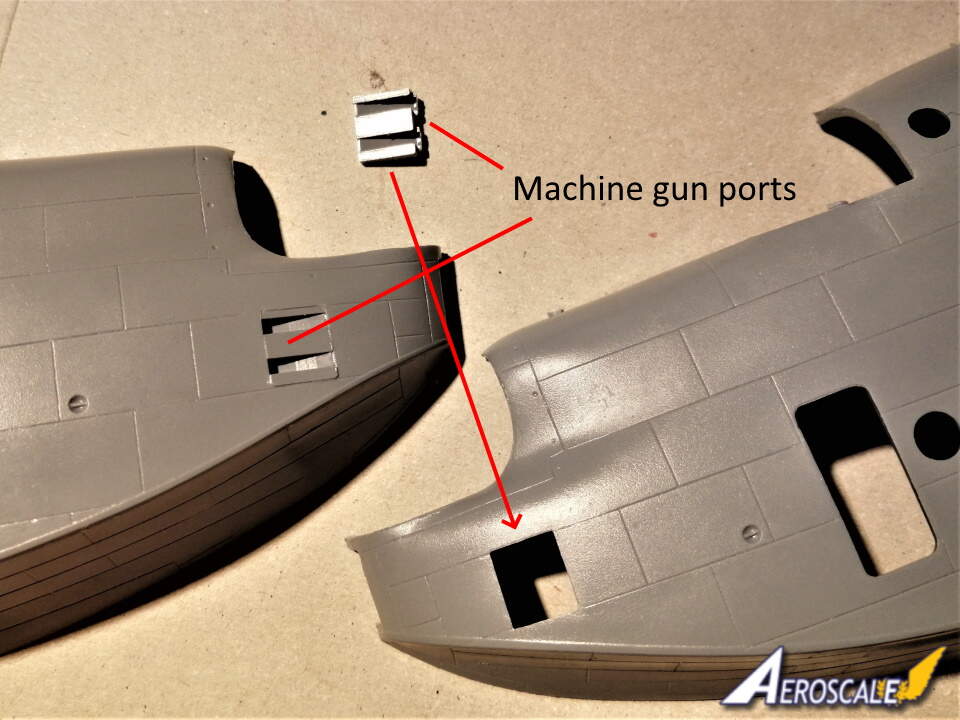
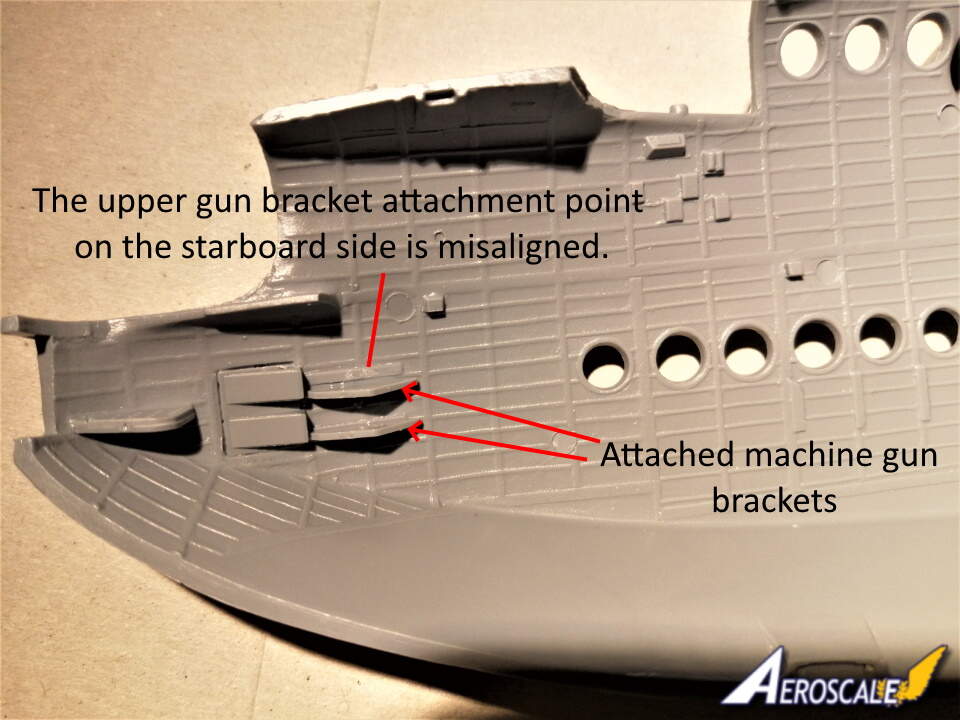
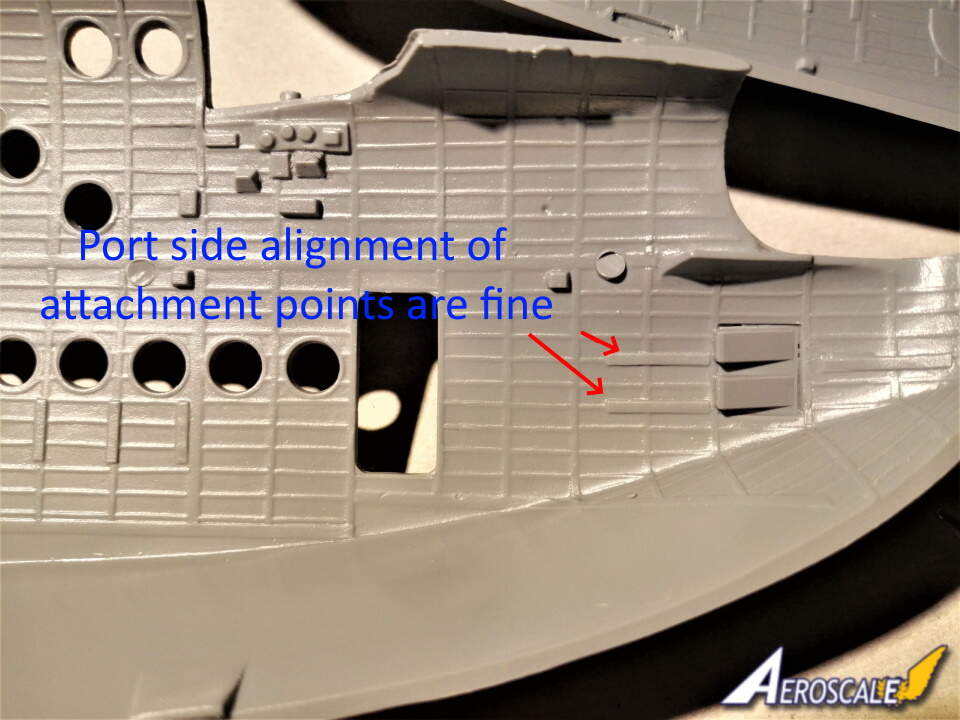
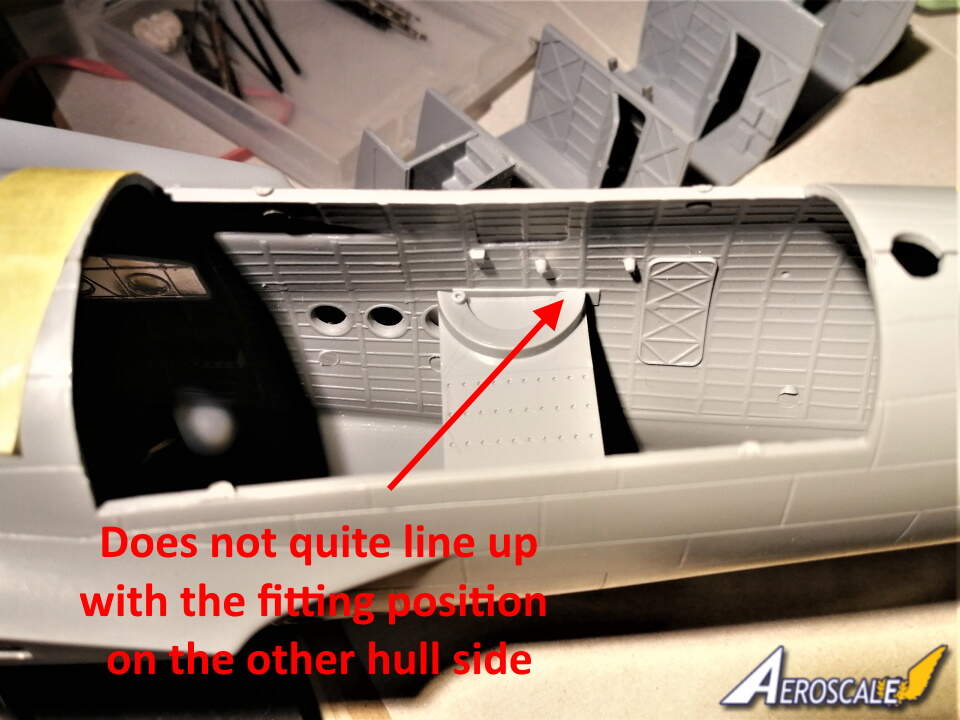
Attached the brackets that hold the forward firing machine guns. The area where the upper starboard gun bracket should fit doesn’t line up with the gun port so some readjustment is necessary. The gun ports have also been fitted.
4 Likes
Looking good Tim!
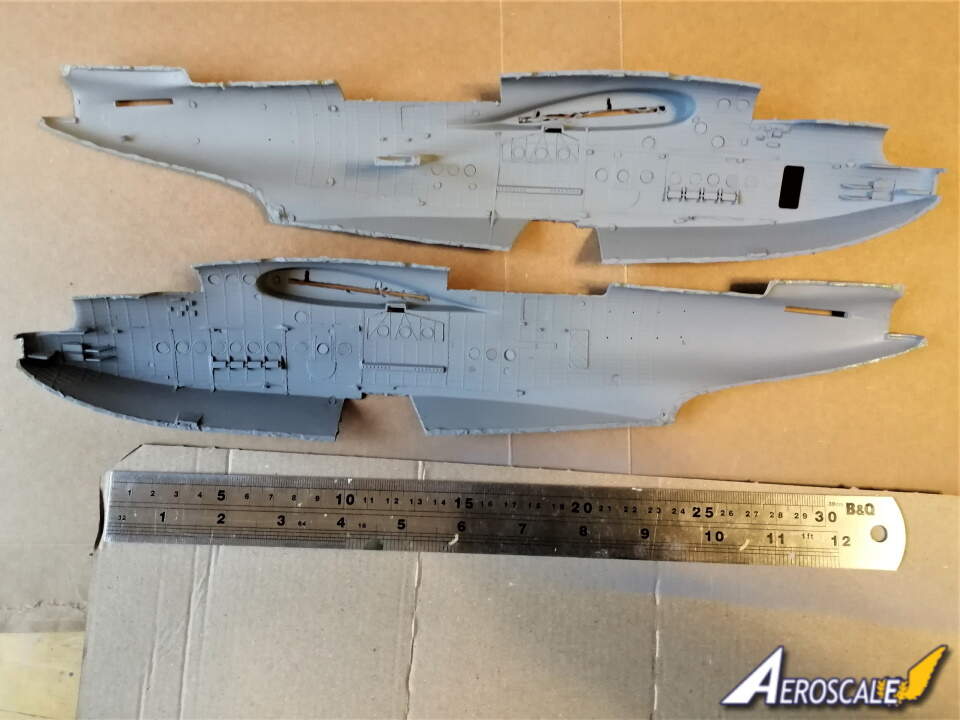
This looks like it’s gonna build up into a very large plane… Can we get a pic against a ruler or such for a sense of the scale please? 
Will do Russell 
1 Like
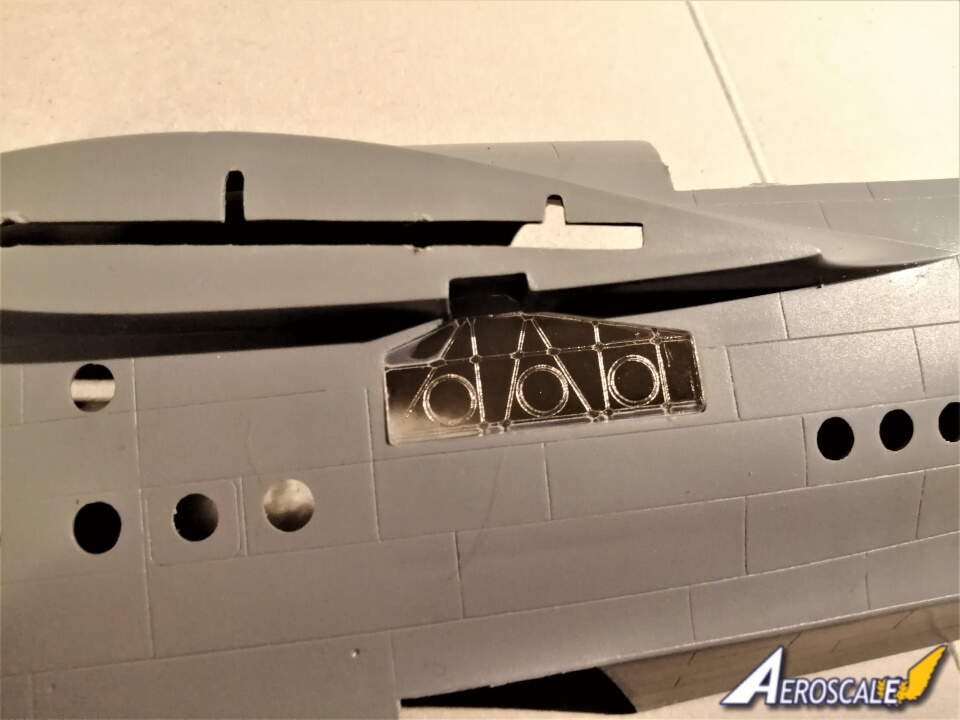
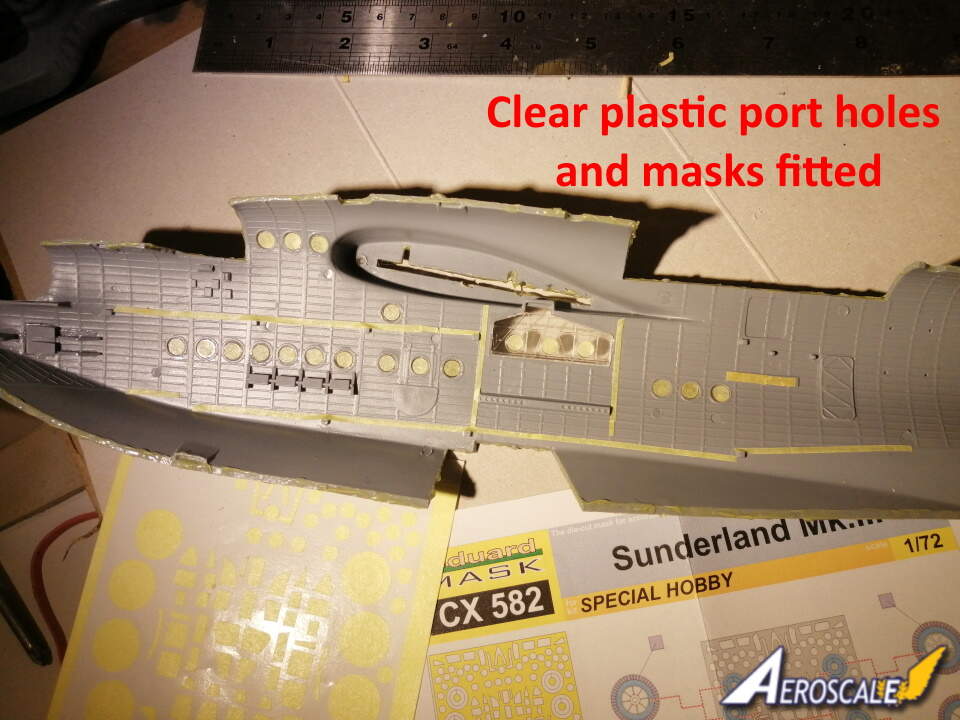
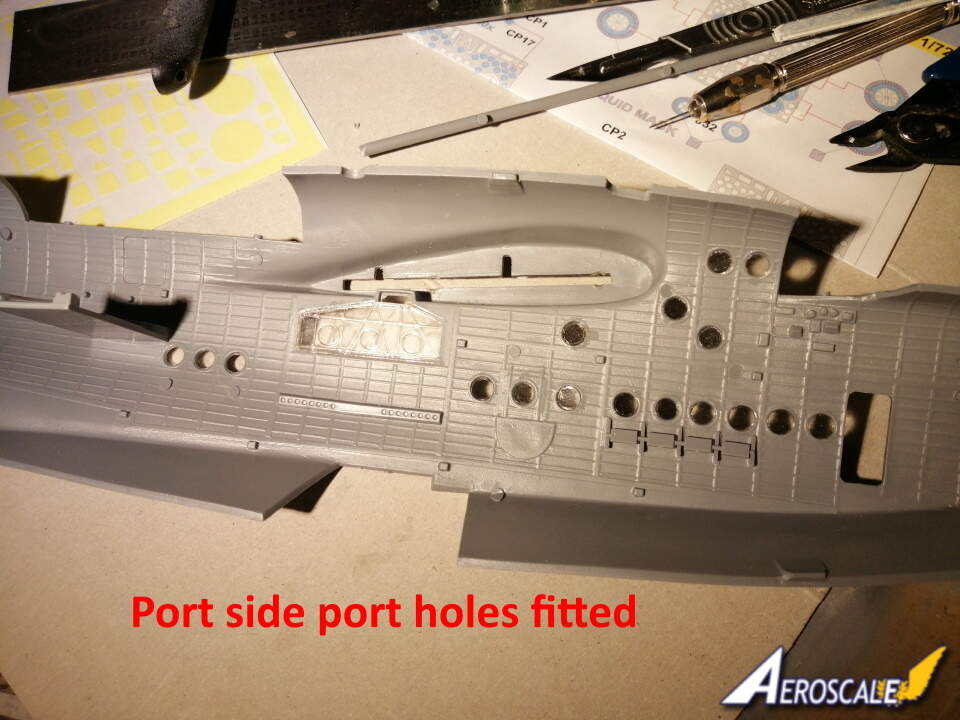
Hi all. Added the clear parts: port holes and bomb bay doors. I used carefully applied Tamiya’s extra thin glue. The fit of the port holes is generally good although the curved nature of the six window openings [3 x each side] does make the fitting a little more difficult. The bomb bay door fitted really well. I used Eduard paint masks [CX582] mainly because of the difficulty of producing circular masks for the port holes. I have also masked of much of the contact/gluing points for the decks and walls and also the hull halves. The latter I used liquid mask.
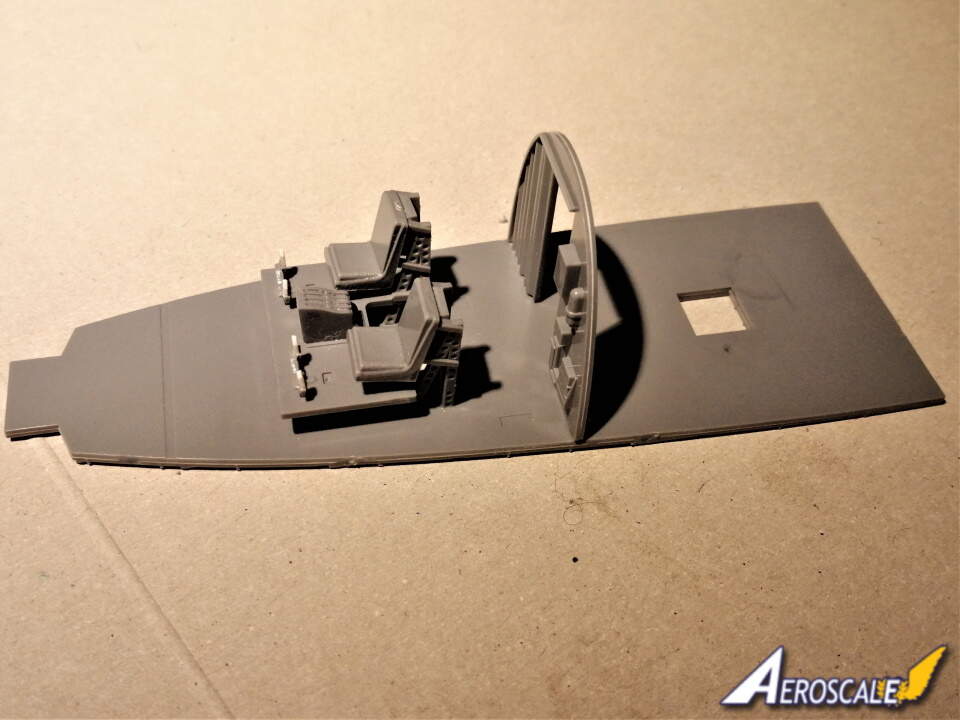
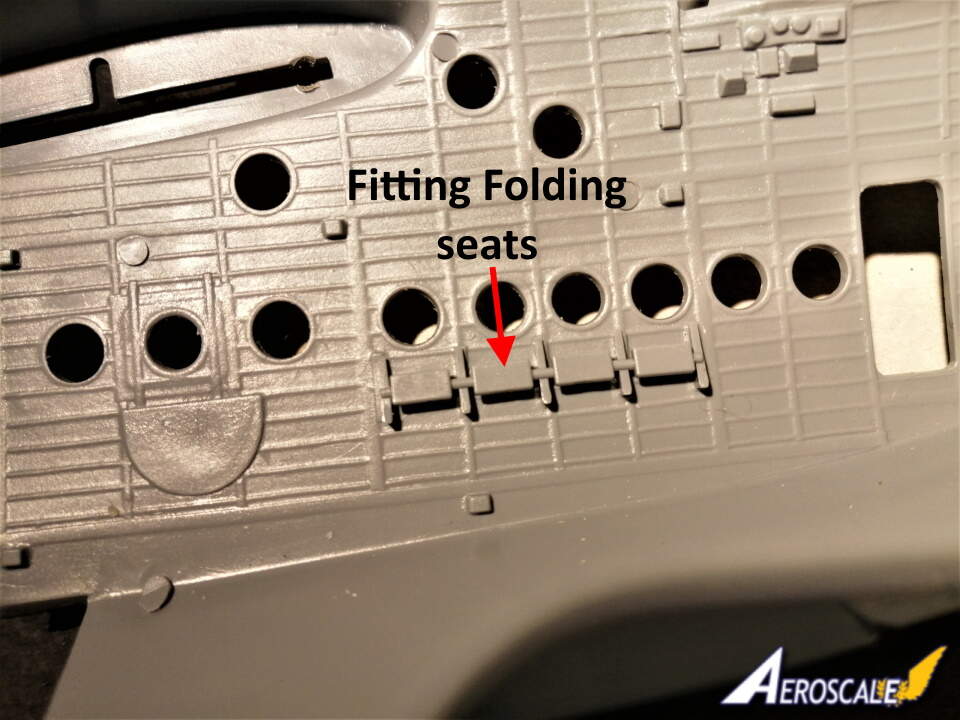
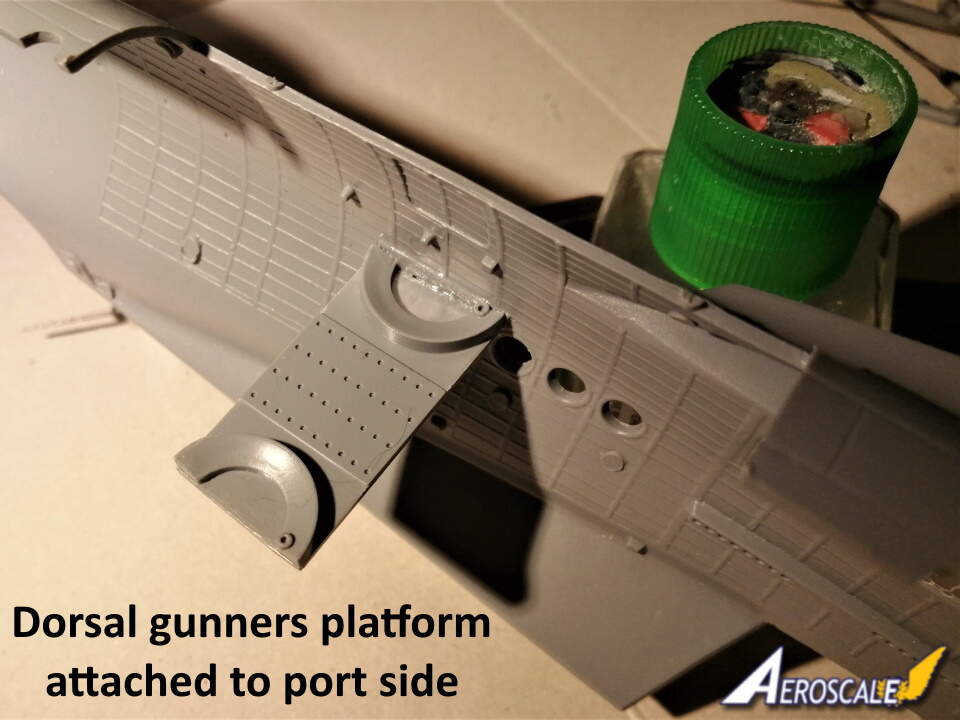
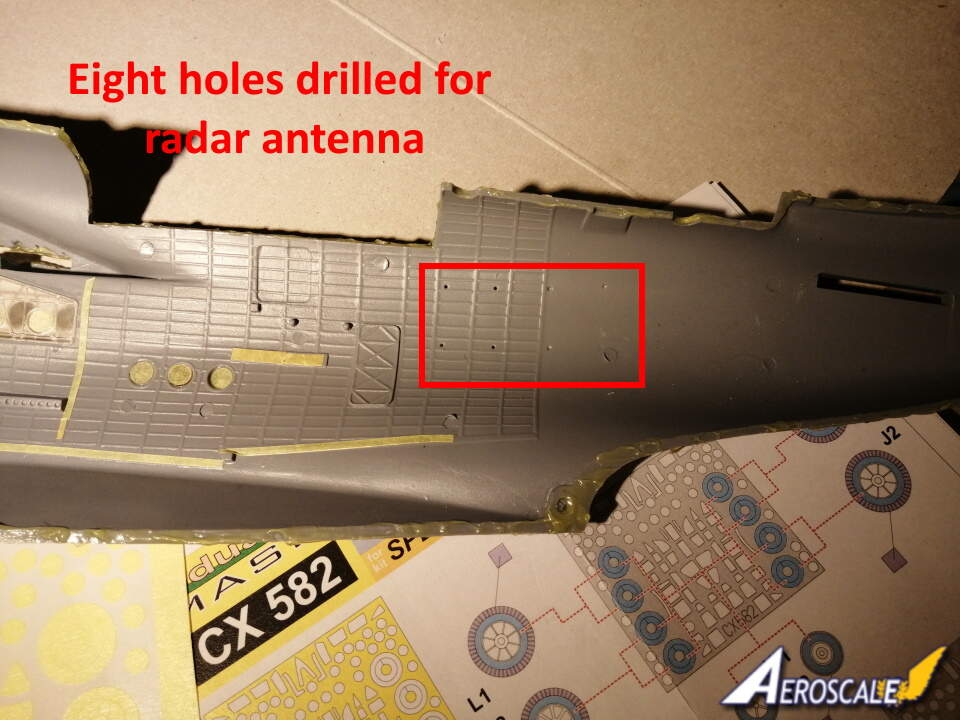
The two sets of swivel seats were fitted as was the dorsal gunners’ position. Not sure the latter is relevant to the Mk.III with the dorsal turret, but fitted it anyway. The holes for the hull side radar antennae were drilled out. Disregard the instructions as it suggest drilling out the holes from the exterior. There are no markers on the outside of the fuselage, but there are on the inside.
Finally, for this installment I applied primer [Halfords grey auto primer] to the interior.
tim

3 Likes
Look at the size of that thing
Wow, that really is BIG!
Great work Tim! I like that you’ve masked where you expect to be glueing in flooring and bulk head later on. I find it works really well in my own builds: the fit is better and the glue works better too
Hi Tim you might find Massimo Santarossa’s build/review of this kit (plus a photo refs section) in Airfix Model World magazine’s July 2020 issue useful if you didn’t know about it already. Various bad fits including the wing halves not matching up & too many butt-joints, but overall seems like a good production. Good luck with it 
Thanks Martin for the info, just checked ou Massimo Santarossa’s build/review and it makes for an interesting read. Its not put me off and the results of his hard work looks fantastic. I was thinking of getting some extra clamps as a trial fit of the fuselage halves does reveal some fit issues…
tim
It looks like its going to be a real beast Tim. They always look impressive when you see a pic, big and chunky with a real purpose. A quick Q slightlyoff topic about the white finish. I recently did the Phantom campaign and mine had a white finish on the underside. I wasnt really happy with it as it was patchy / thin in some areas and nothing I was doing was making any real difference. How do you guys achieve such good results when you do your overall white finishes to make them so uniform ? and what do think in your opinions as to being the best flat white paint to use ? john
Progressing very nicely Tim, I will be following along on this journey!
John, from my experience the best method is to use a light grey primer and then a light shot of white primer before paint. I have used Tamiya acrylic white thinned with MLT, then Dullcote to flatten it off.
Cheers, D
1 Like
How do you guys achieve such good results when you do your overall white finishes to make them so uniform ? and what do think in your opinions as to being the best flat white paint to use ? john
I tend to go for a light grey primer for pre-shading first followed by a thinned down white primer John. I find the white primer flows better through the airbrush compared to Tamiya and Vallejo white paint. Apply a few coats of the white primer over time… Hope that helps
tim
1 Like
Progressing very nicely Tim, I will be following along on this journey!
Thanks Damian. Its certainly going to be an interesting project compared to the quickie Eduard kits I have built recently ![]()


Coming along nicely, Pete.
2 levels inside… Must have been a pretty spacious ride compared to some…
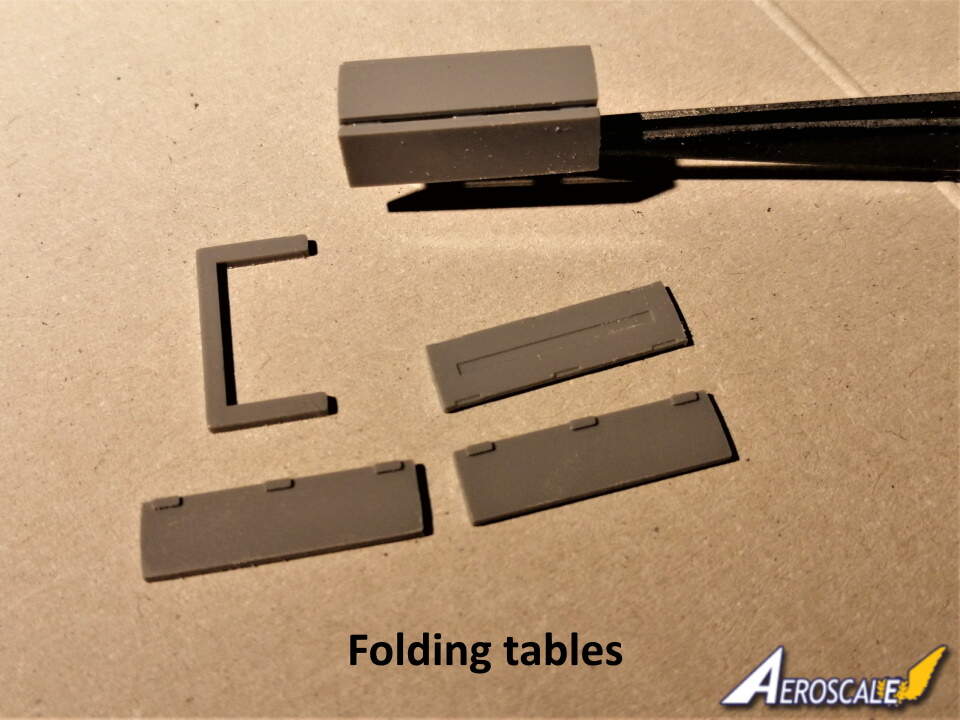
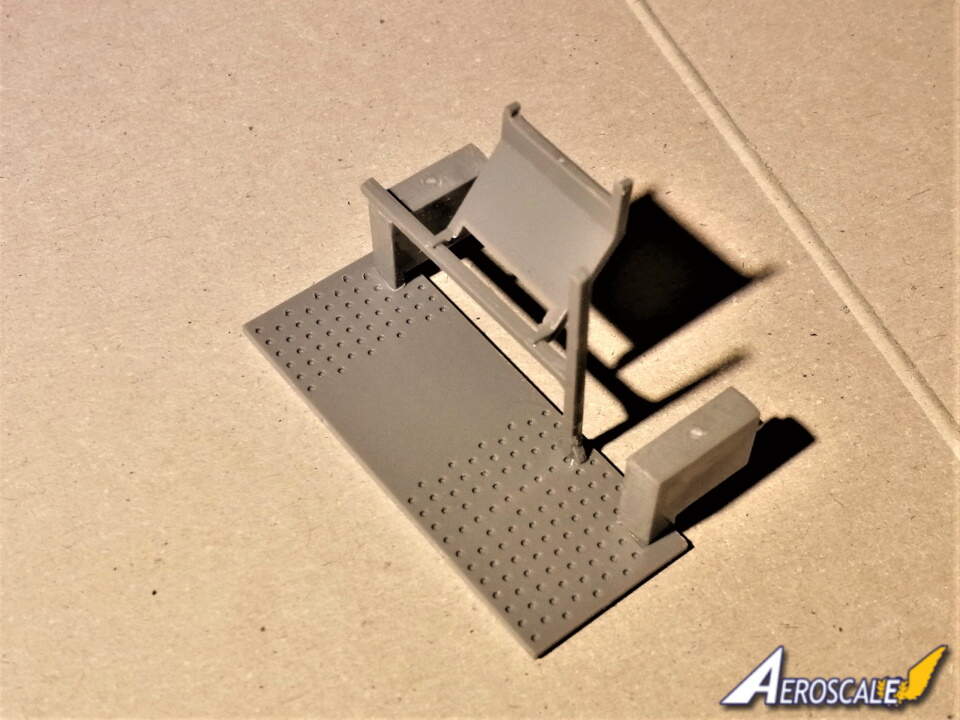
There is so much interior detail included for the belly of this particular beast. So much so is turning into a bit of a saga. The saga goes on with the a bit more work on the cockpit and around the dorsal turret, Also put together the folding tables and the bed/seats. Special Hobby has really excelled itself with the interior detail. There’s room for so much more of course… Just the bomb bay roof to do and hopefully it will be time for some primer…
tim


2 Likes